Make Welt Zipper Pockets with the Skye Joggers

Skye joggers by Love You Sew

When joggers hit the market a few years ago. I was definitely into the look. They had the feel of my old Champion sweats from back in the day. (You know, the ones with the elastic ankle and all!) However, it seemed that the trend was not really feeling me. I tried on a few RTW pairs and have even sewn a few patterns. But, I didn’t like how they clung to my thighs and calves. I mean if I want leggings, I’ll just wear leggings….and that’s what I did.
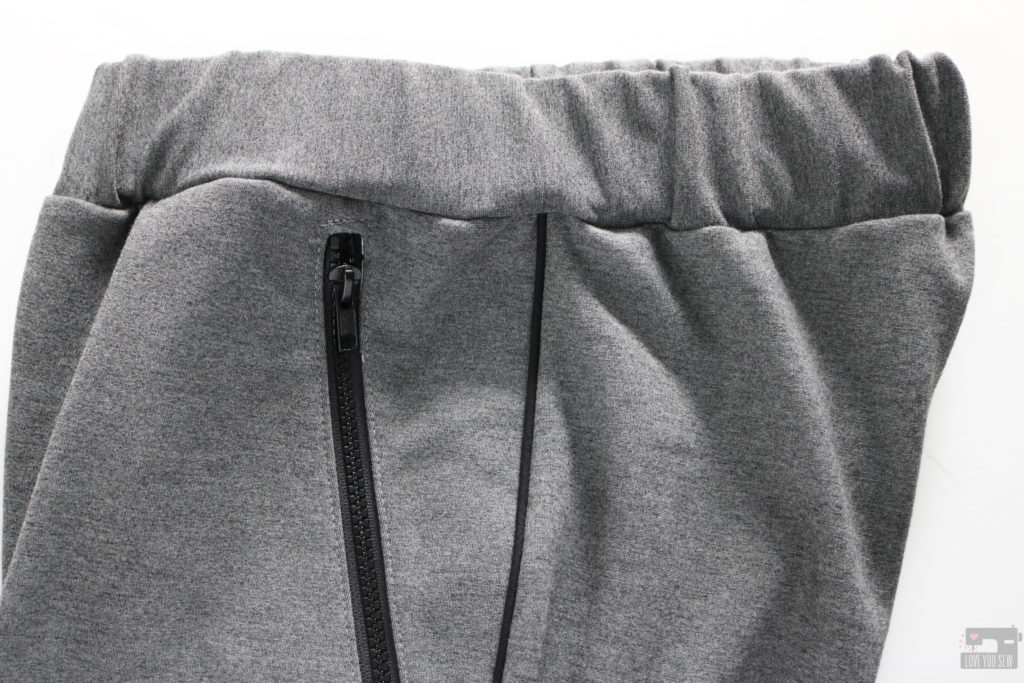
Skye joggers by Love You Sew

Since then, I’ve seen so many more joggers on the street and figured out I was into the more menswear style – which are a little looser and fit that ol’ sweatpant nostalgia, I remember. Fortunately, I’ve made the Skye Joggers by Blank Slate Patterns before and knew exactly the changes I wanted to make to get my perfect pants.
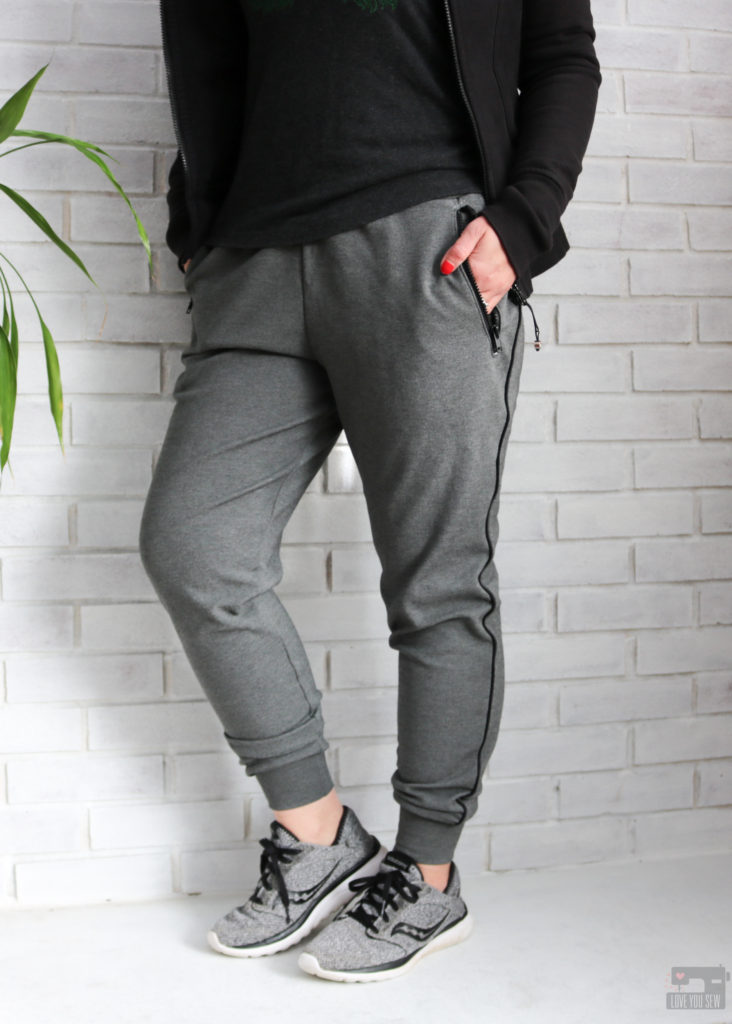
Skye joggers by Love You Sew

Fabric

Skye joggers by Love You Sew

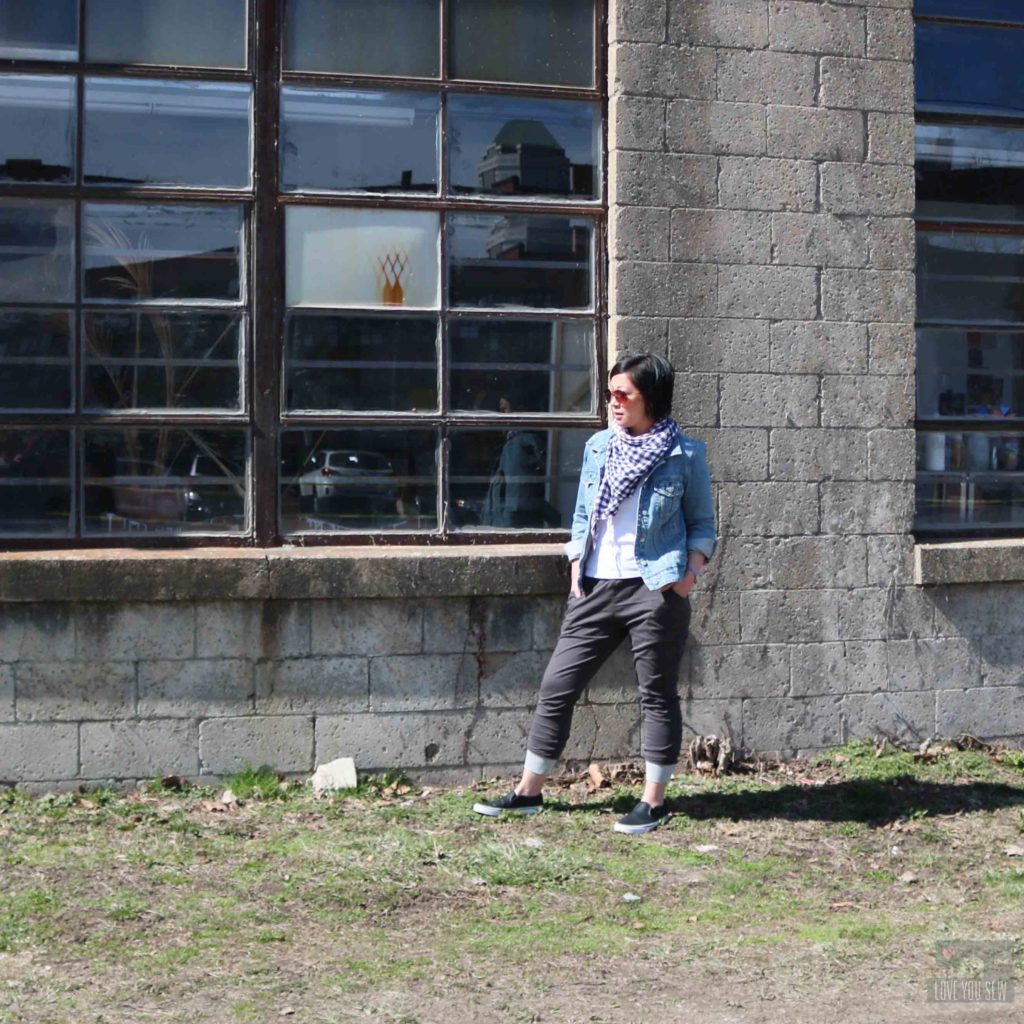
When I made my very first Skye Joggers, I knew they were going to be a wearable muslin. So, I used whatever knit I had on-hand…which was a lightweight modal (definitely not on the recommended fabrics list.) They stretch out so much around the knees that I just wear them at home.
Skye joggers by Love You Sew
I tried to push the ankles up to hide the knees…Ha!

As with any muslin, lessons are learned. I knew I wanted a heavier knit and “athletic” fabric that looked like the RTW versions on my Pinterest board here. Either a ponte or scuba would work and I decided on ponte. I’ve worked with it before like on this Denver Tunic and love the weight and recovery. I grabbed this great dark grey Ponte de Roma Viscose Blend from Imagine Gnats awhile ago and the Arietta Navy Ponte from Craft South while on a trip. But you can still grab some of the Arietta from Etsy here.

Sizing

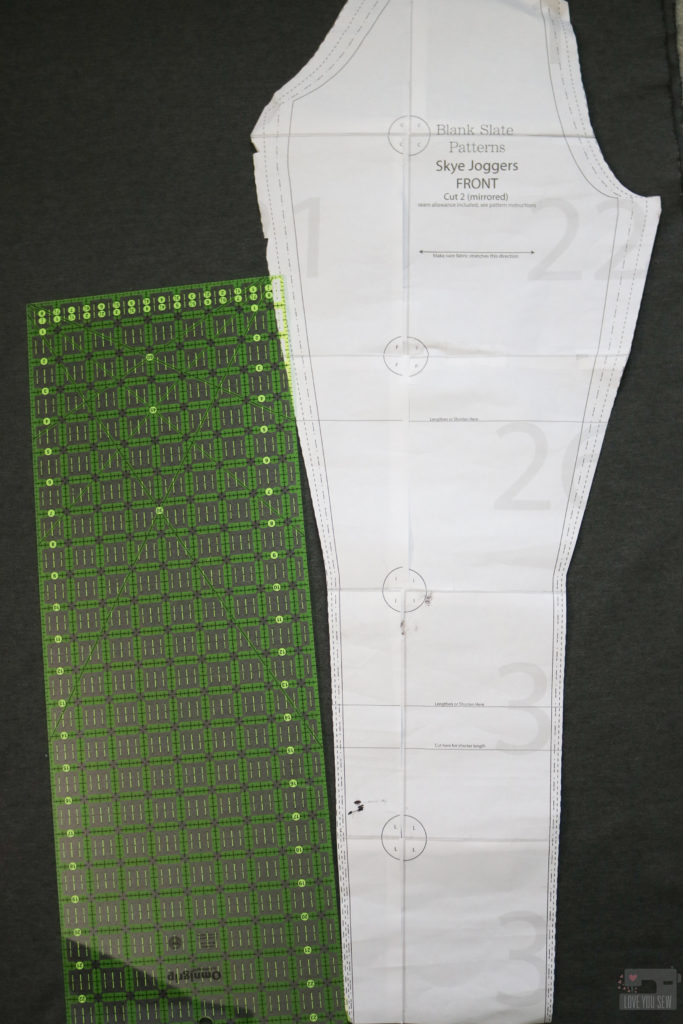
Based on the muslin, I wanted just a bit more ease and sized up a step. I coach sports for my boys and want a bit more movement (aka air circulation) with my joggers. One can only wear leggings for so long!
Skye joggers by Love You Sew

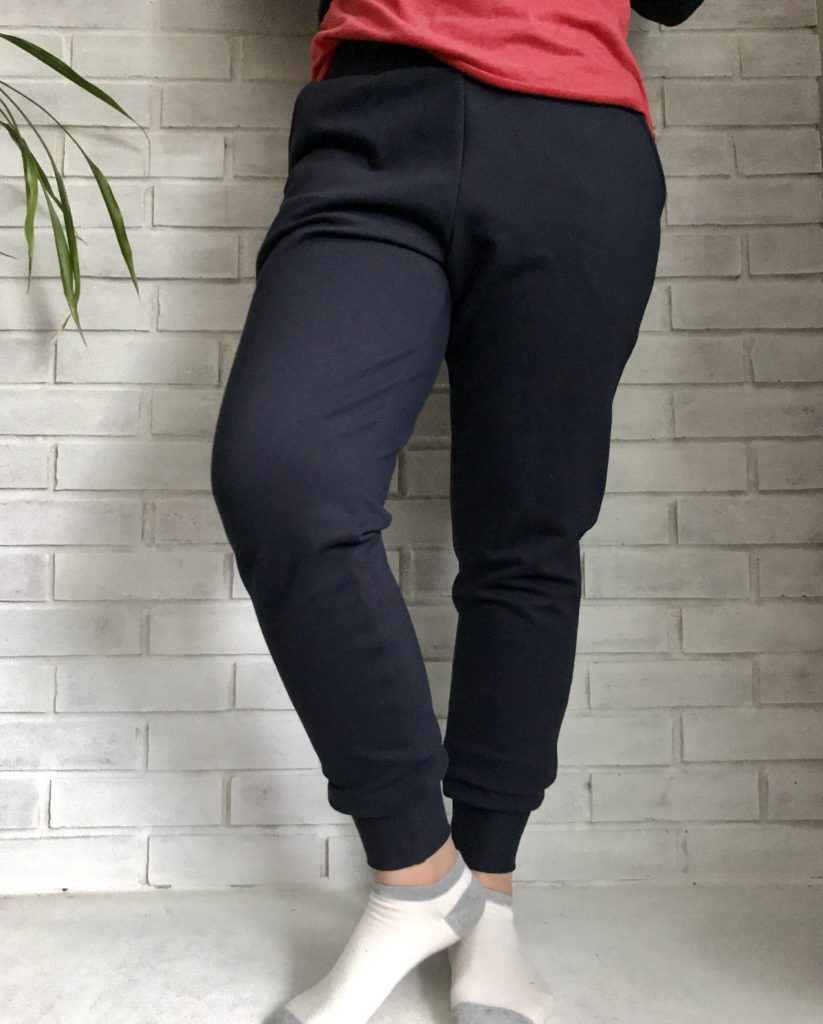
Additionally, I widened the knee and calves by drawing a straight line front the shorten/lengthen line all the way down to the ankle. I have heavy calves (and don’t fit into most boots as a result,) but I know I can adjust when I sew. I almost always have to make this adjustment on pants patterns, but left it pretty simple since I was working with this heavy ponte.
Skye joggers by Love You Sew

These are another pair of Skye Joggers I made with the same sizing adjustments. You can see the extra ease allover, and especially in the knees and calves where the fabric is not pulled.

I happen to make these before the #SewFancyPants challenge and felt like they were a bit too safe and boring (perfect for coaching basketball though!)

Welt Pocket Tutorial
Skye joggers by Love You Sew

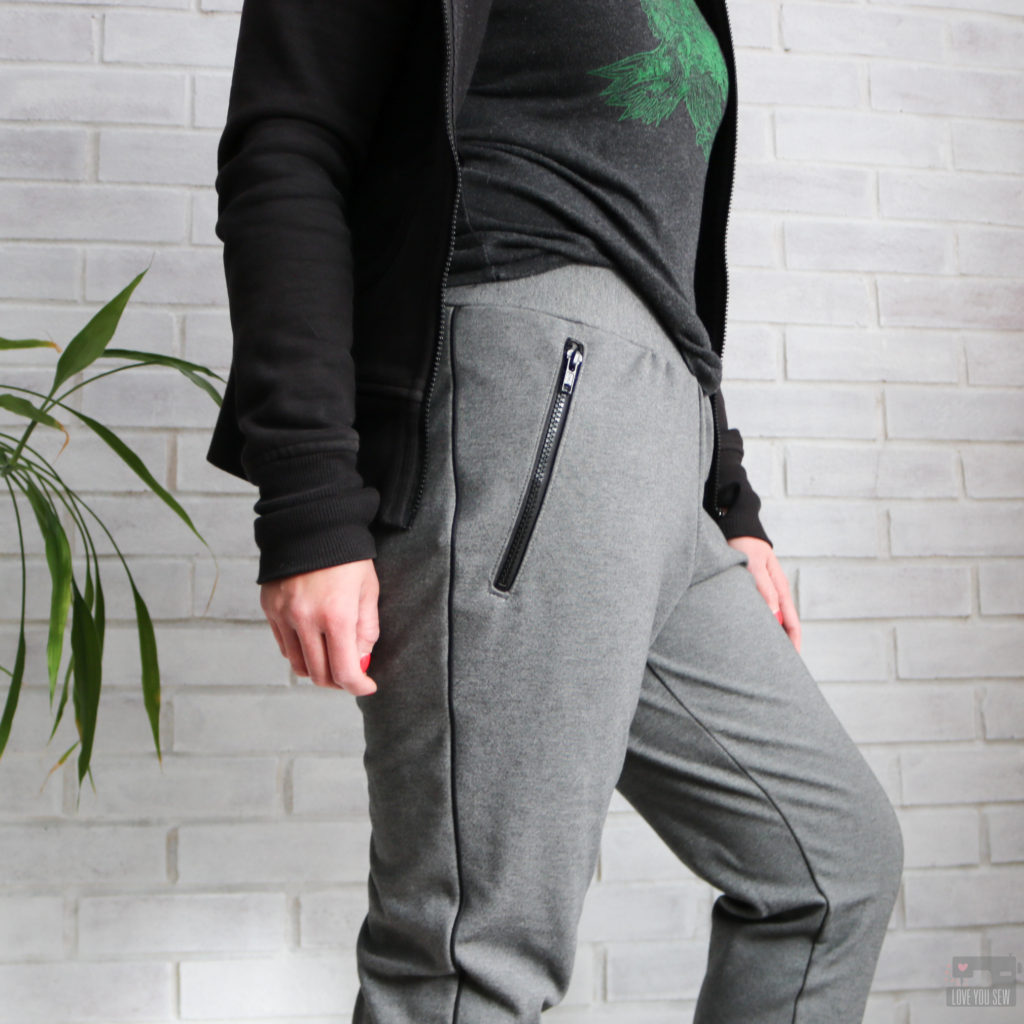
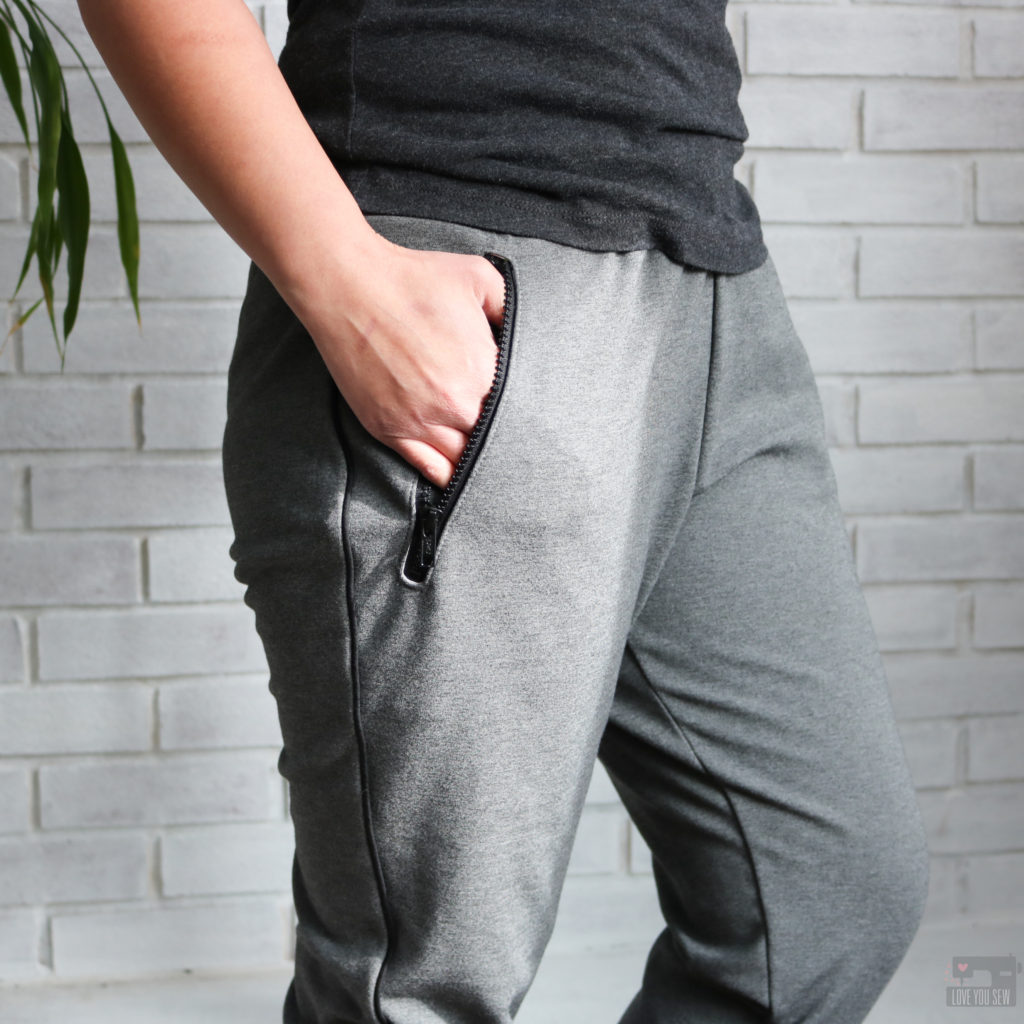
With the new year and planning out my projects, these were the only additional pants on my docket. But when the #SewFancyPants challenge came across my Instagram, I knew I wanted to participate somehow. I decided to stick to my plans since I already had all of my fabric. With the ease I added into my joggers, they were definitely looking more like the men’s versions I’ve seen (and absolutely love!) I figured I would go all the way and make these even more masculine by hacking the slash pockets to make some pretty dope welt zipper ones.
Welt pocket Tutorial by Love You Sew

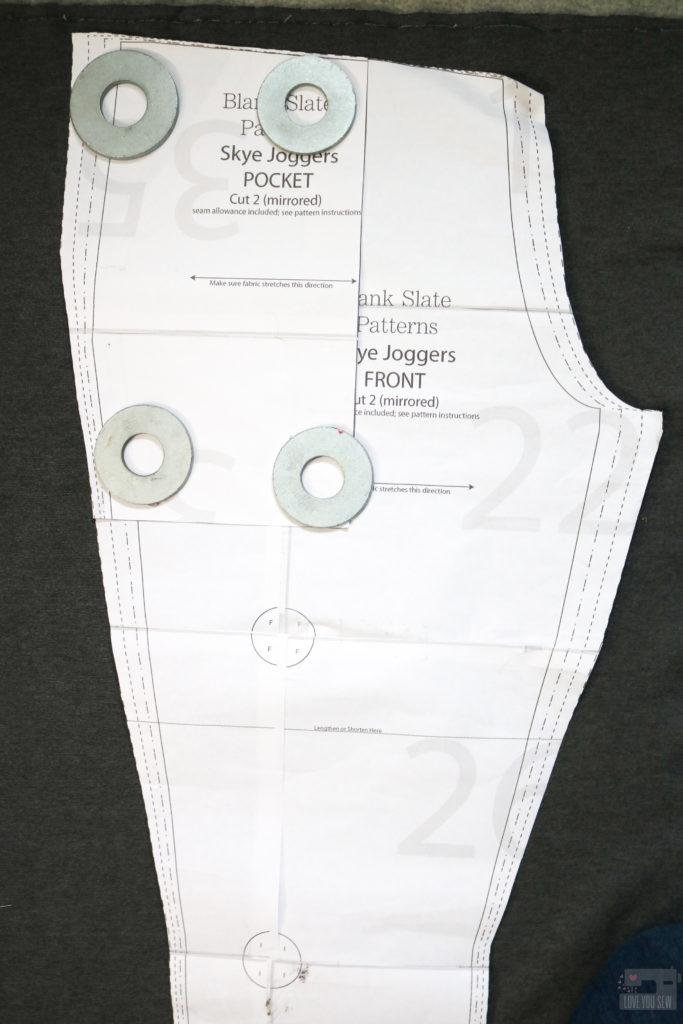
To make welt pockets, you first have to bring up the lines of the front pant pattern’s pocket area to match the side seam and waistline. To do this, lay the pocket pattern right on top of the front leg (as shown) and cut out the fabric following your new combined pattern.

With this change, you will no longer need the front facing pattern piece and instead, will need four of the pockets. To make things much easier on myself (and after some tough lessons learned before,) I used a quilt cotton to make the welt pocket opening. This allows for more stability and less bulk…especially when working with a heavy knit. For the back of the pockets, I then went back to the ponte.
Welt pocket Tutorial by Love You Sew

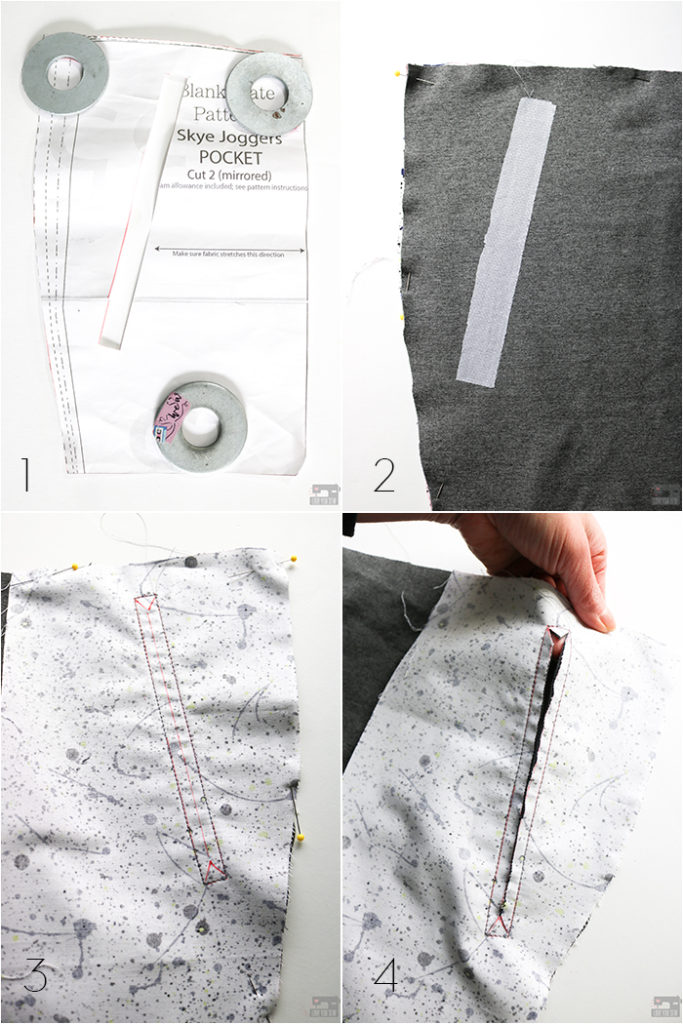
1. For the zipper opening, I used a 7″ sport style nylon zipper like this one. The pockets are very generous with the Skyes and I wanted to make sure my hands and phone could fit through easily. (No one likes those little zip pockets that can only fit a tube of Chapstick!) For the placement, I literally clipped the pocket pattern to pants I was already wearing to see where my hand naturally would go. I made sure to place it far enough down to account for seam allowance. Then I drew and cut out a 7″ x 1/2″ rectangle exactly where I wanted the zipper to go.

2. On the wrong side of the front pant leg, I marked the zipper box using the pocket pattern and then fused a 8″ x 1″ pieces of knit interfacing overtop of the zipper markings.

3. With right sides facing together, lay the front pocket lining against the front pant. Pin in place. Mark the zipper opening to the wrong side of the pocket lining and stitch around the entire rectangle. Draw a line down the center of the rectangle (as shown) leaving 1/2″ at the beginning and end between the line and the sewn box. Draw two V’s to connect each corner to the center line (as shown.)

4. Cut along the red lines and use small scissors to get as close into the corners as possible without cutting any threads.

Welt pocket Tutorial by Love You Sew

5. Remove pins. Take the pocket and push it all through the zipper opening and finger-press the seams down.

6. Press the inside of the zipper opening while rolling a bit of the ponte inward.

7. Press the outside of the zipper opening making sure you don’t see the lining.

8. Using some Wonder Tape (or a fine line of washable fabric glue,) line the zipper opening as shown on the pocket. Remove the backing from the tape.
Welt pocket Tutorial by Love You Sew

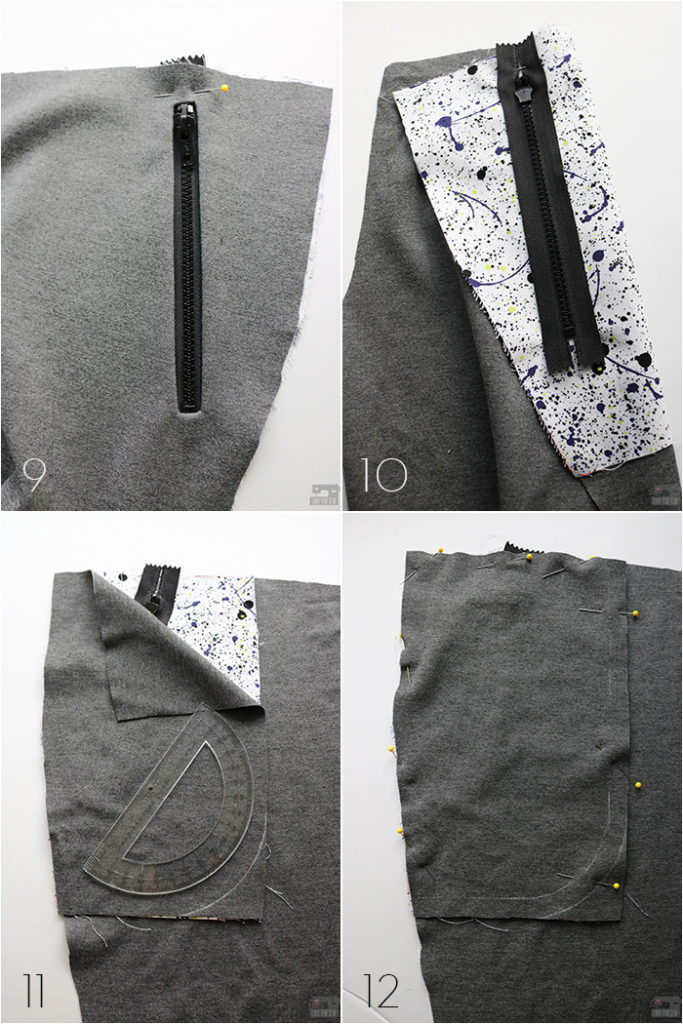
9. With right side of the pant up, center the zipper opening over the zipper. Make sure the zipper opens downward. Finger press around the zipper opening to attach the zipper to the pocket. Use extra pins as needed. Top-stitch 1/8″ around the zipper opening through the pant front, pocket and zipper.

10. Flip joggers to the wrong side to make sure you got through all the layers. Trim threads

11. Line up the back of the pocket lining to the front lining and pin only the pockets together. At this point, I decided to curve the pockets since I was going to serge them together. This would eliminate the extra bulk a corner would give me. I used a ruler to draw the arc, but you could also use a bowl.

12. Since I was using a serger, I measured in my 1/2″ seam allowance to give me a guide as I ran the pocket through my machine. Serge or sew the pocket linings together, making sure to push back the pant front.

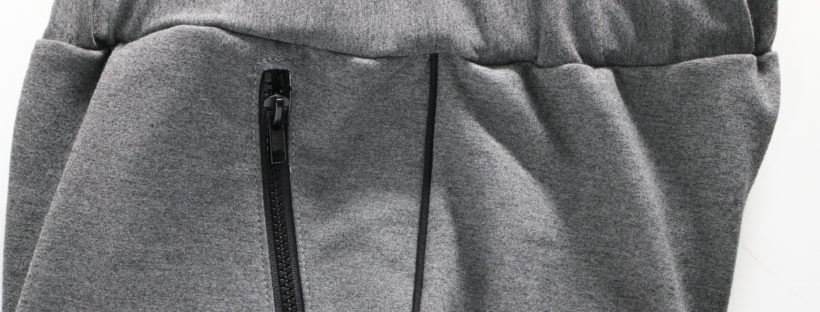
Take a step back and check out the off-the-rack look of that zipper!

Welt pocket Tutorial by Love You Sew

Piping

Welt pocket Tutorial by Love You Sew

If I was gonna add welt pockets with some sporty zippers, I had to keep going and add some contrast piping to these Skyes 😉 Unfortunately, I couldn’t find any black stretch piping under 10 yds that would also deliver within a week. (Why is everything I need overseas???) I could find every other color, except for basic black – go figure. So, instead I used woven bias tape piping straight out of the package like this one. The piping balances out all of the black accents and makes these look so professional….but I did have some help…

Welt pocket Tutorial by Love You Sew

With regular piping, I could use my zipper foot to attach it with a straight stitch, but I wanted a stretch stitch given the ponte. Plus, all of these layers definitely needed to be overlocked. I didn’t have the right foot with any of my machines to do a zig-zag or overlooking stitch with piping, so I got this new foot for my Juki Serger. As seen above, my regular foot is to the left and the piping foot is to the right. There is a channel that allows the piping to move through and now I can serge everything!

Welt pocket Tutorial by Love You Sew

This piping foot was amazing! It allowed for a tight and even application. I’ve sewn piping on garments before like these Laure dresses, but sometimes I have to go in to sew twice for an even seam. This foot was flawless. Guess you’ll be seeing more piping from me!

My Real Inspo

Welt pocket Tutorial by Love You Sew

I didn’t even realize it until my son helped me with taking pictures, but he pretty much has the same jogger that I was trying to create. I must’ve been channeling his pants within my subconscious this whole time! Now we can “twin” in our gear together.


I hope you enjoy the welt pocket tutorial! Please let me know if you have any questions or additional thoughts in the Comments section below.

Happy Sewing!

Cristy


This post contains affiliate links. A small commission maybe earned if you decide to purchase through any of these links. As always, these payments go directly back to fund the website, so I can provide you with an ad-free experience. (I dislike banner ads as much as you do!)
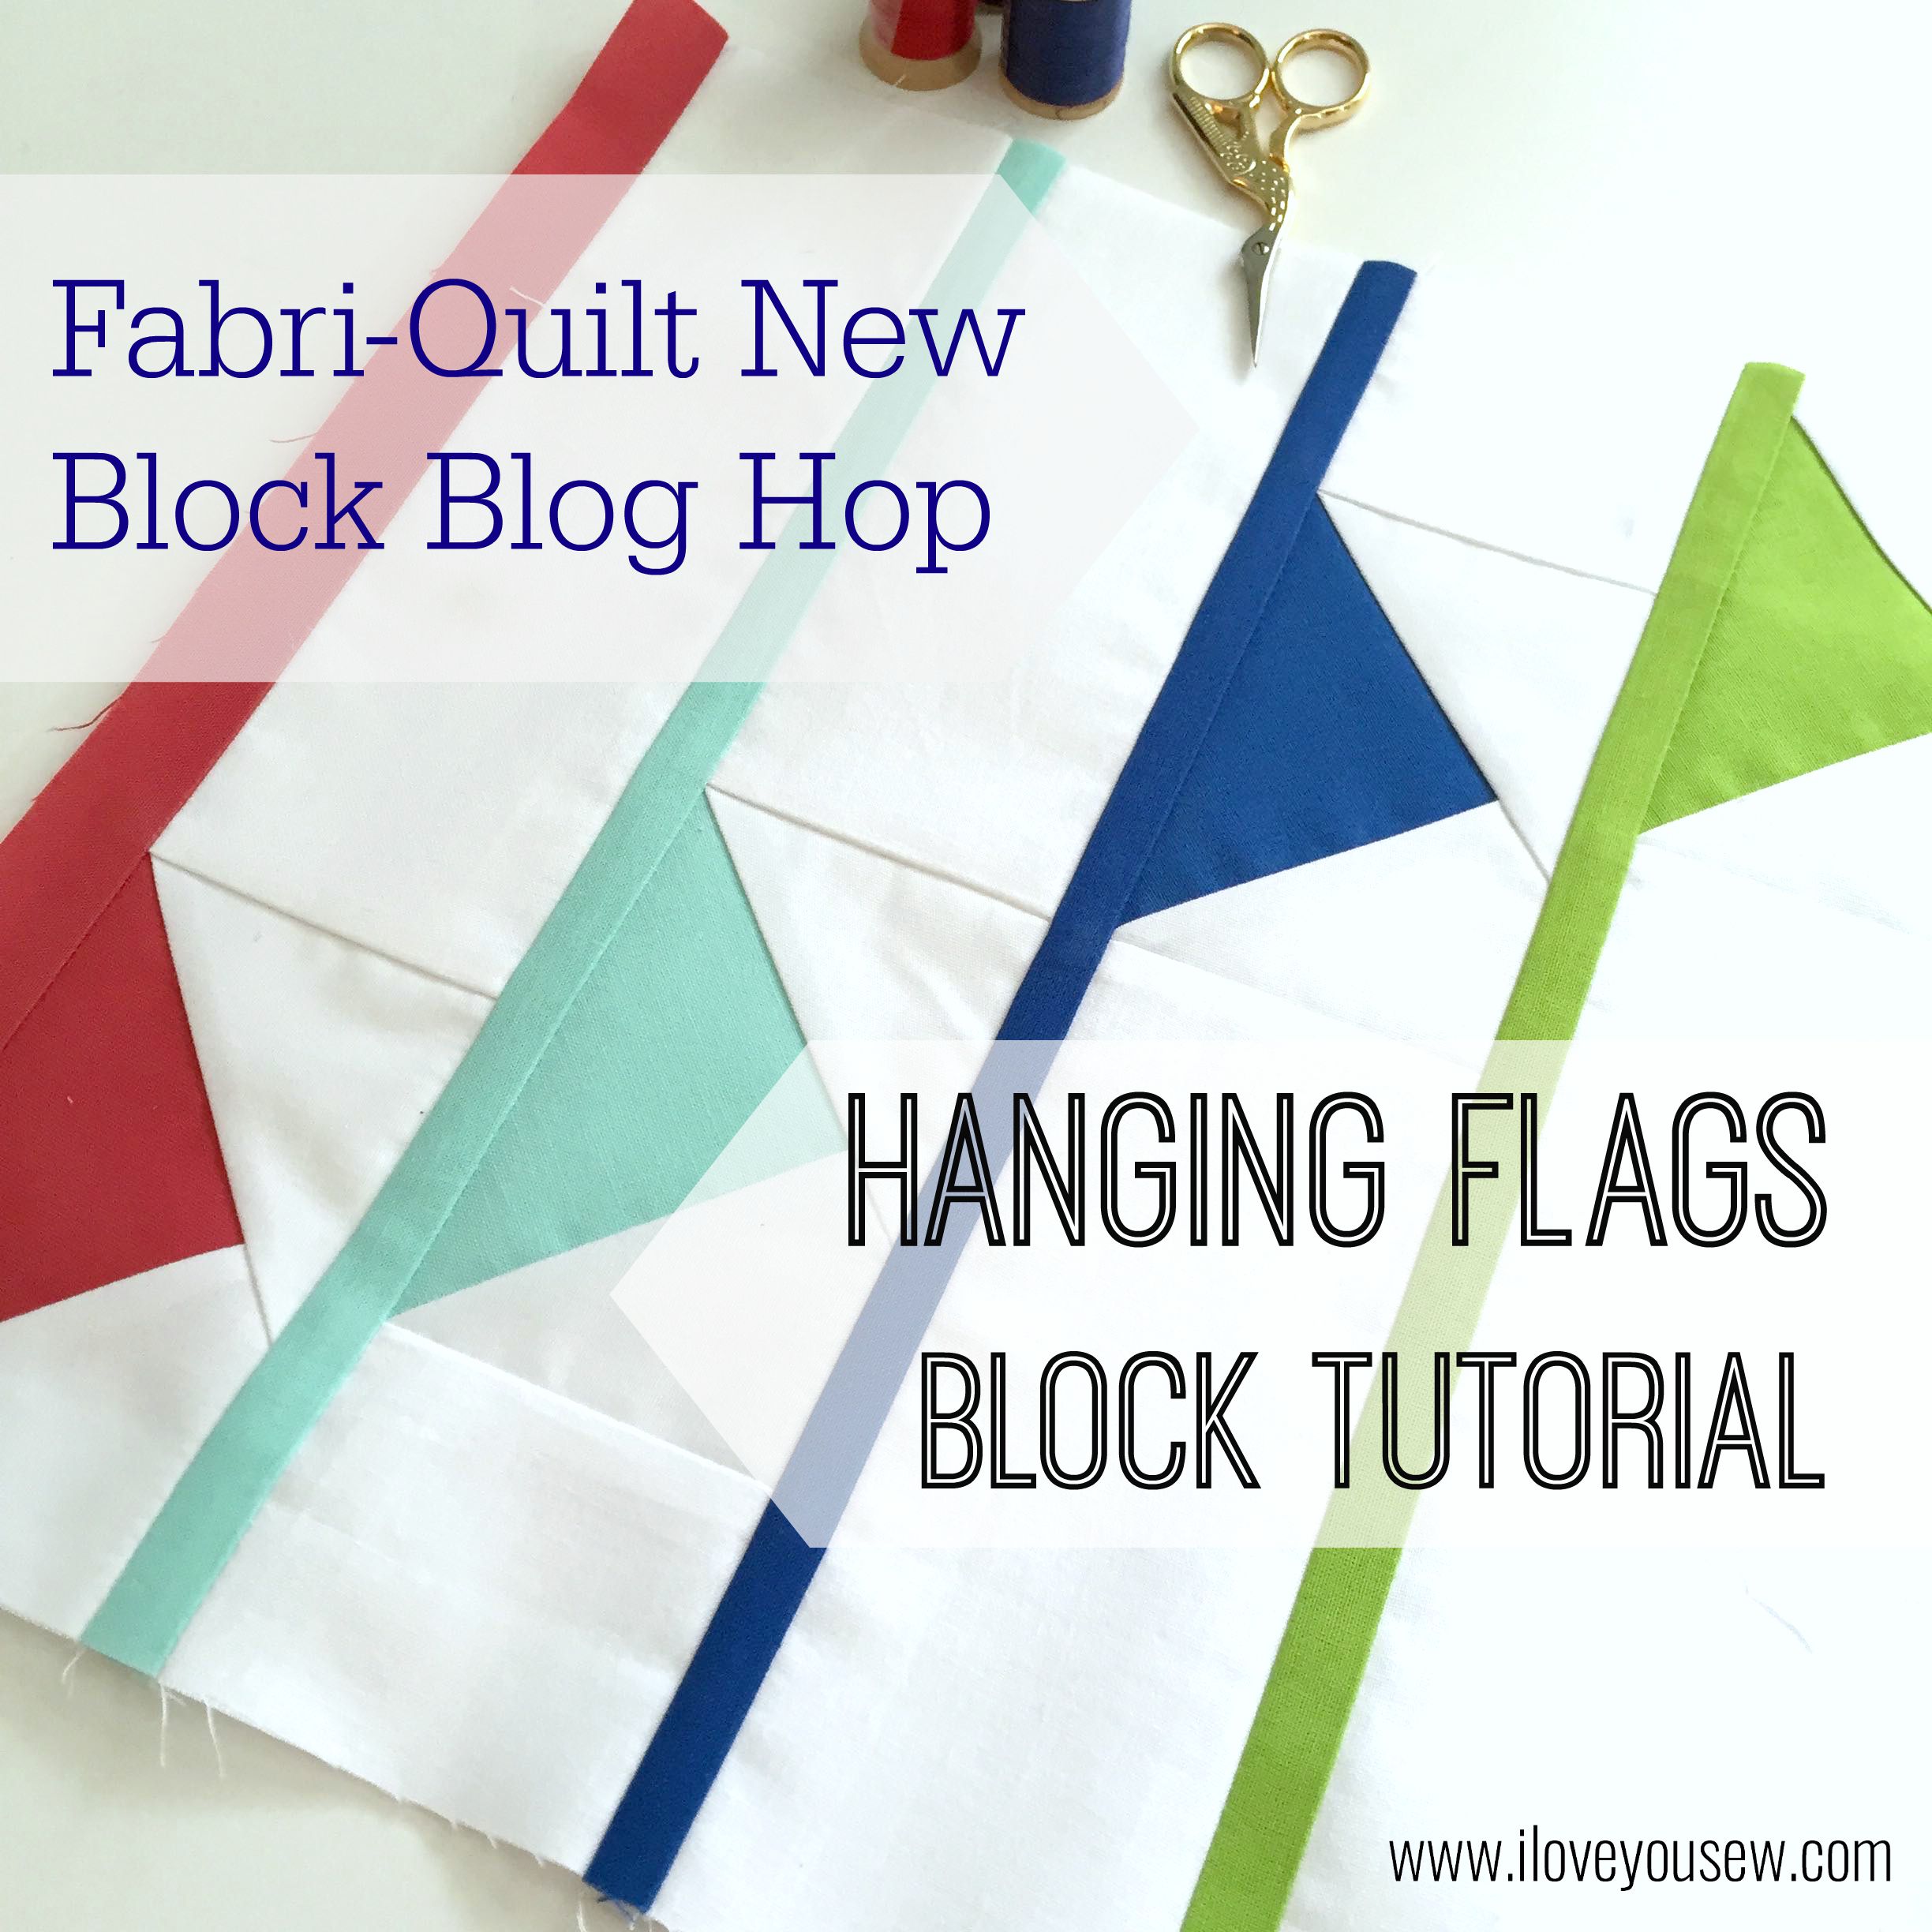
Fabri-Quilt New Block Blog Hop – Hanging Flags Tutorial

18Complete

What’s better than being part of the 2015 New Quilt Bloggers? It’s that, PLUS the chance to play with some beautiful Fabri-Quilt Prairie Cloth Solid Fabrics AND take part in a few charity quilts! There are GIVEAWAYS happening today through Thursday!!! (Scroll down for details.)

IMG_0780_2

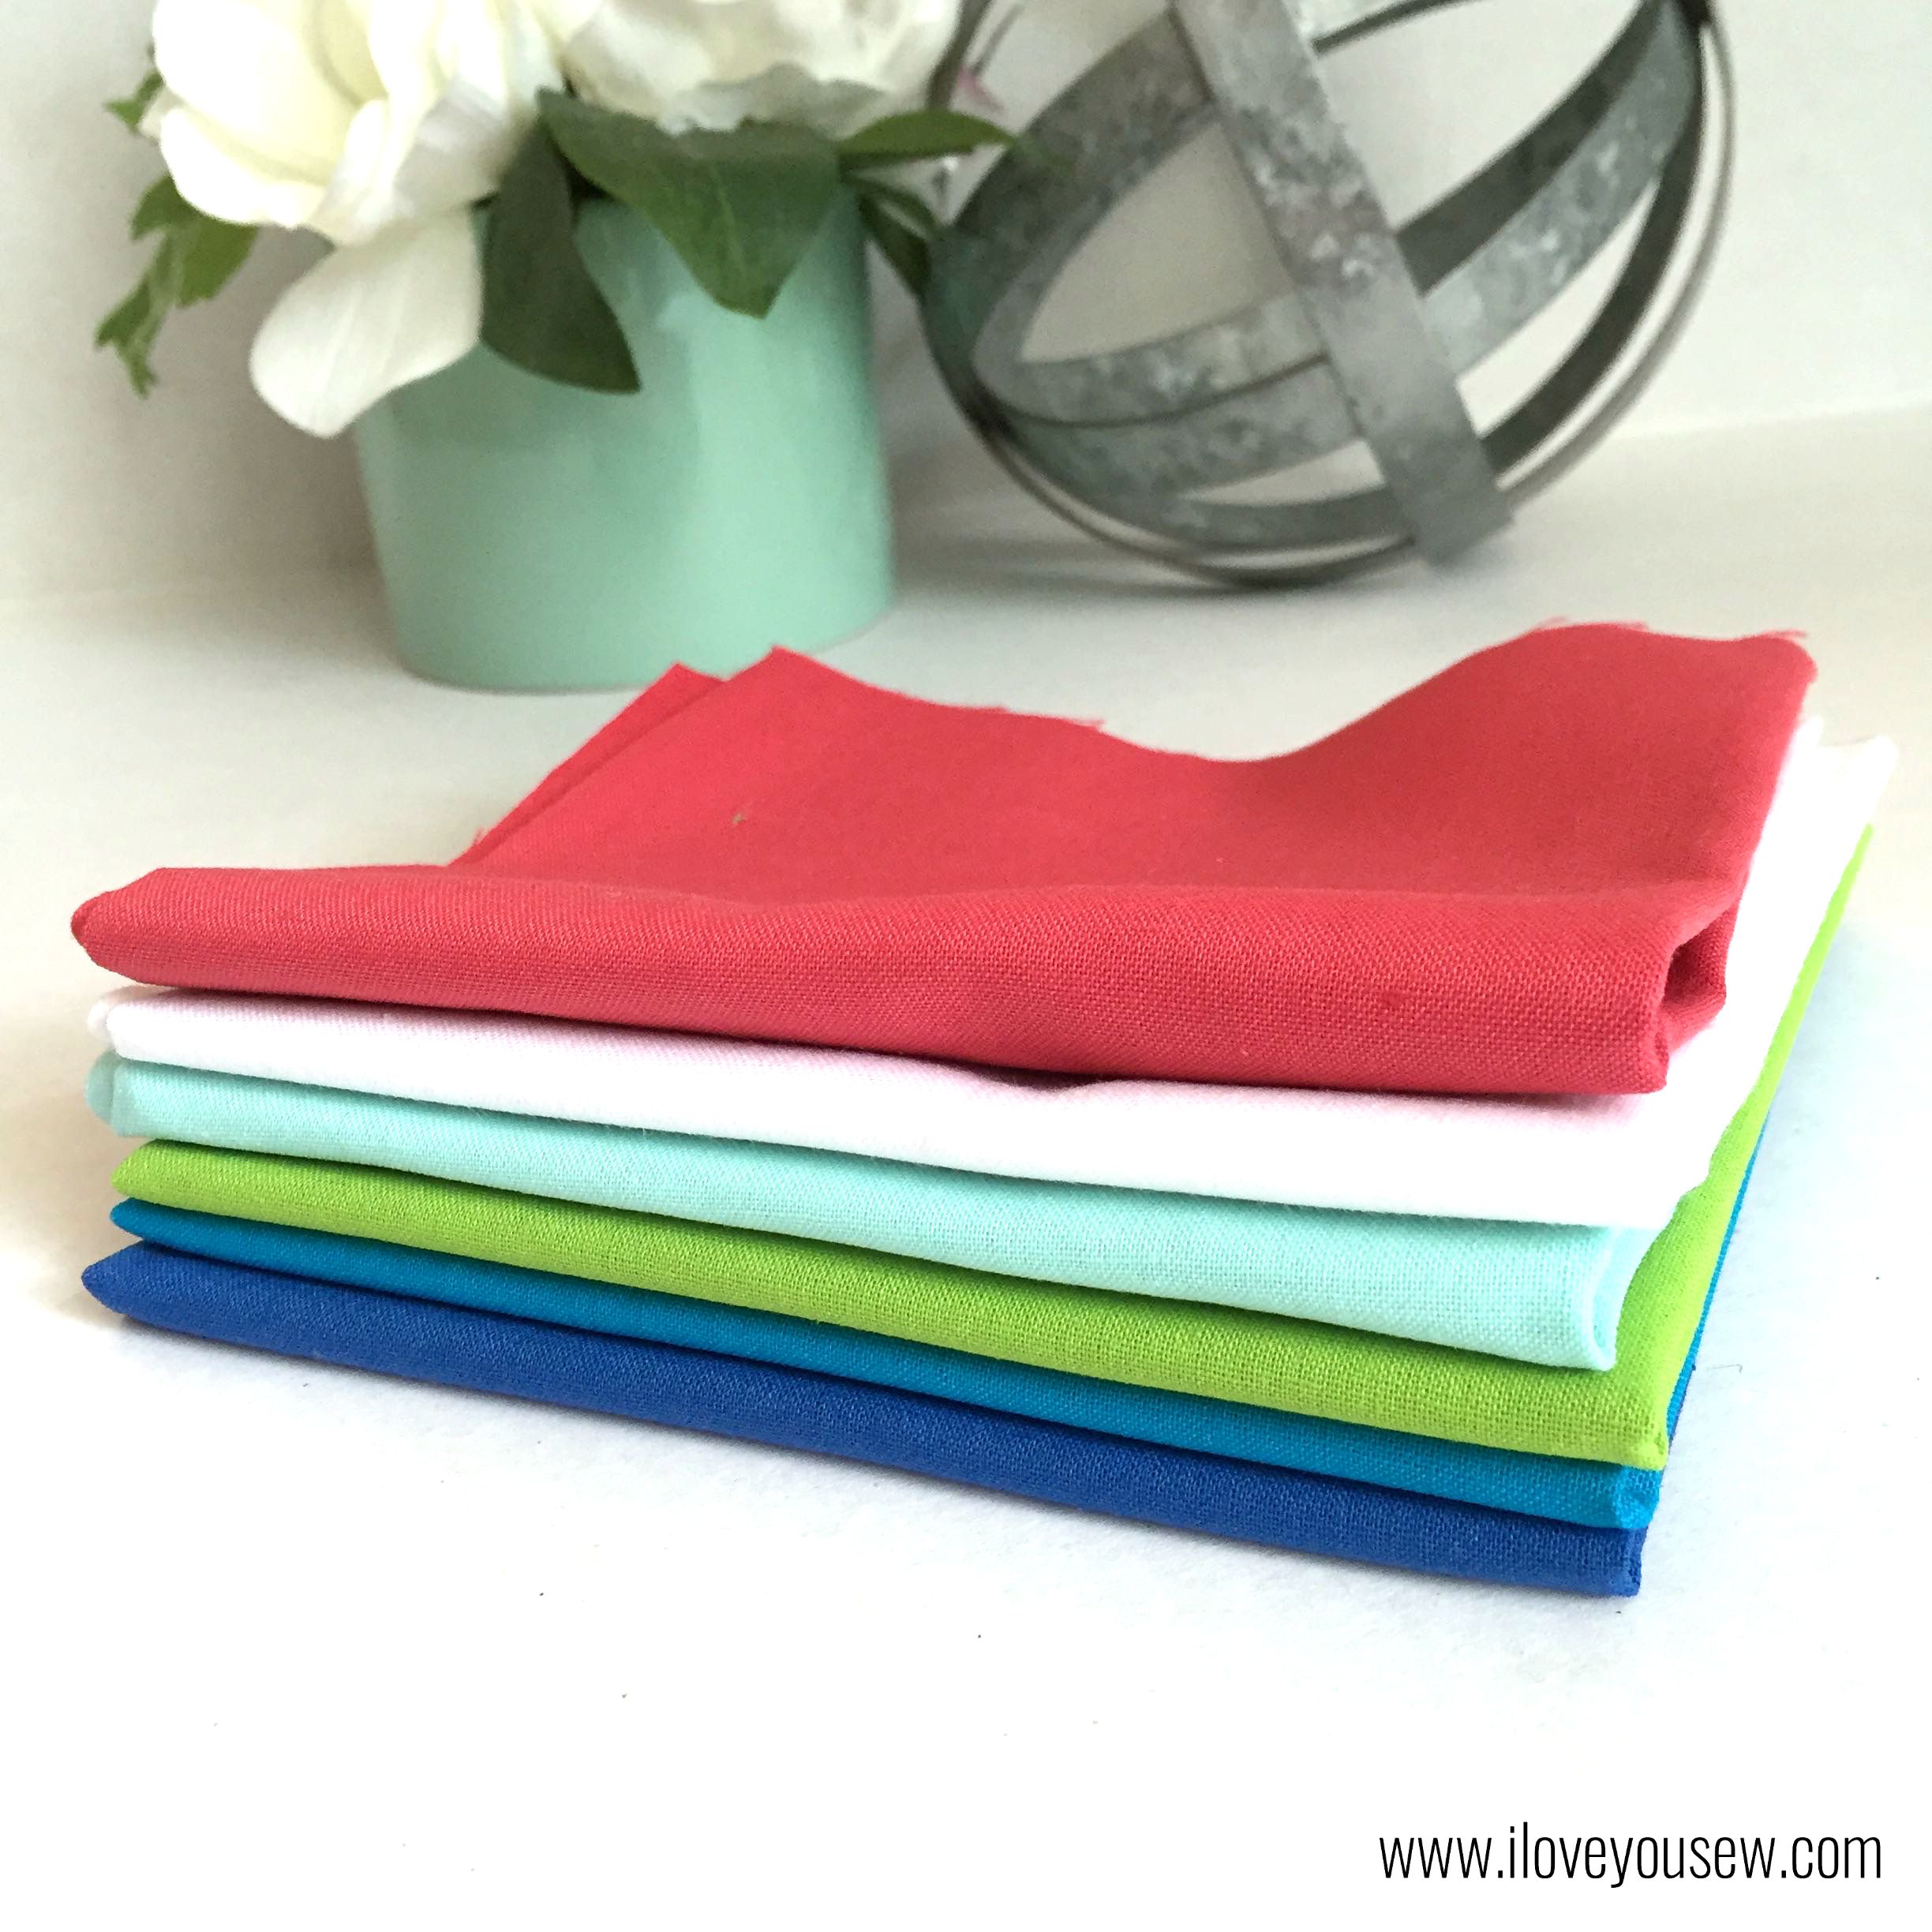
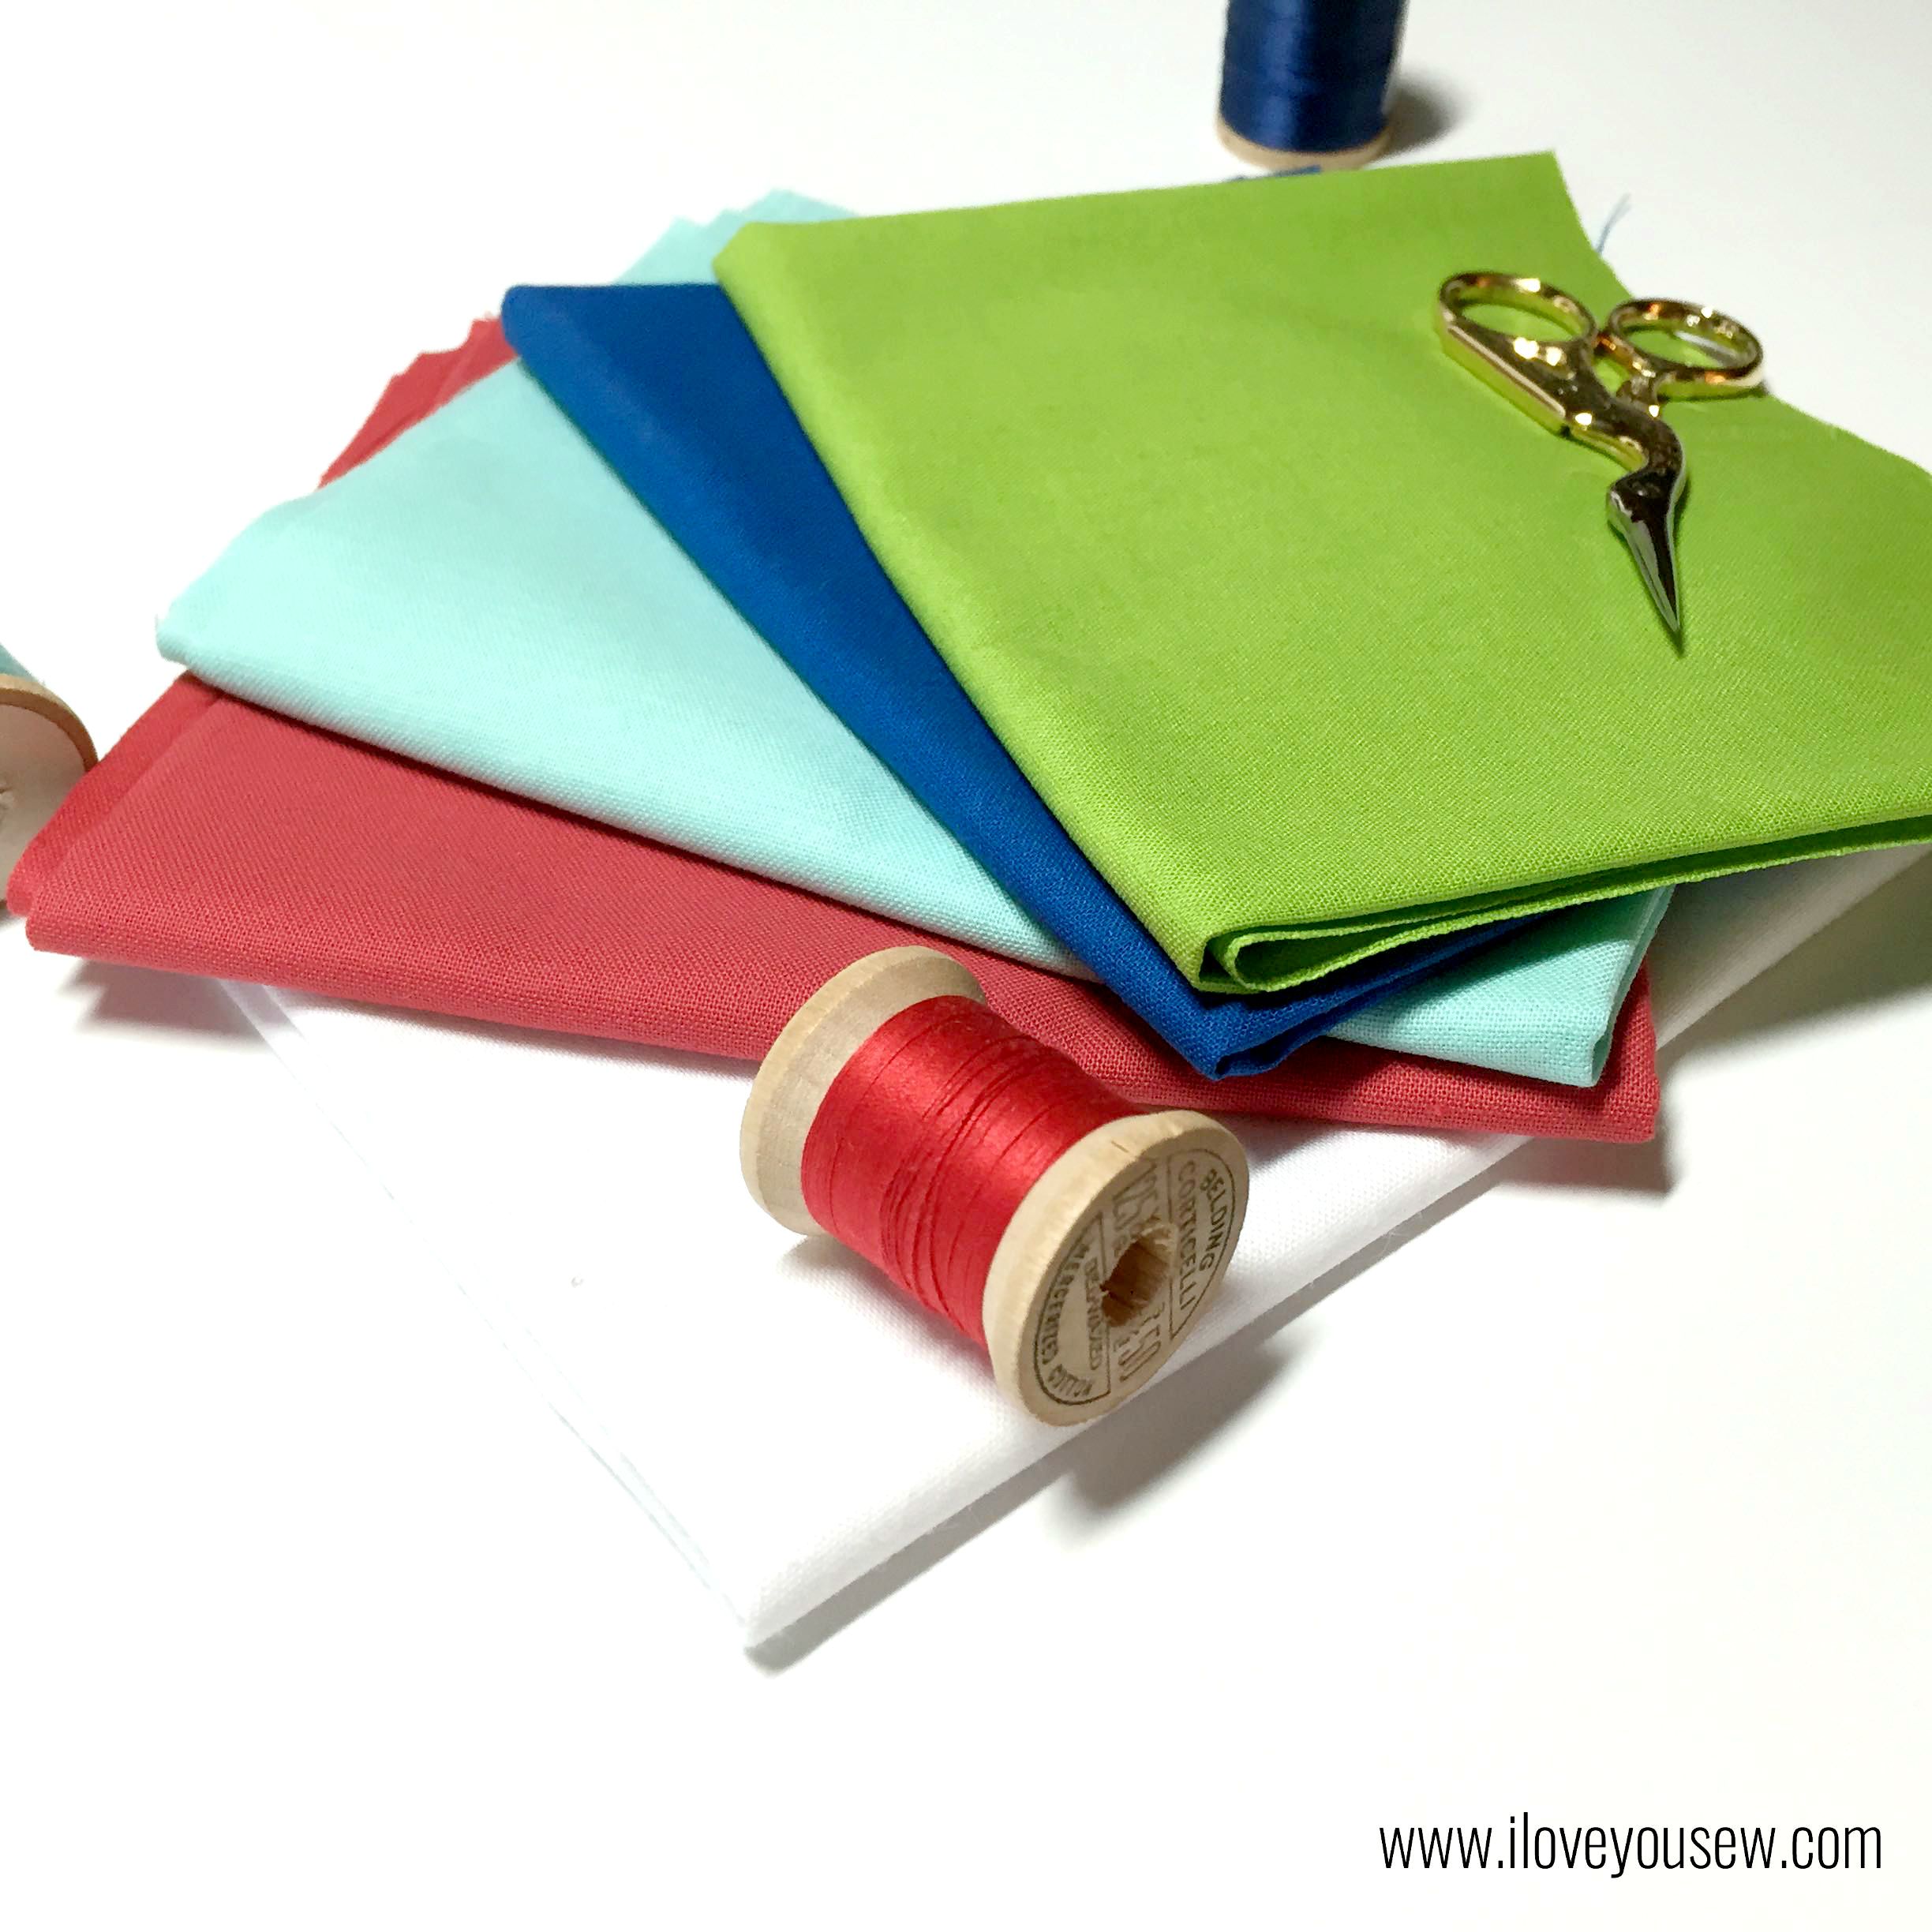
Our gracious hosts, Yvonne @Quilting Jetgirl, Cheryl @Meadow Mist Designs, Stephanie @Late Night Quilter and Terri Ann @Childlike Fascination, along with Fabri-Quilt have provided the opportunity for over 60 of us to develop a custom block with this gorgeous Summer Watermelon bundle of Coral, White, Aqua, Chartreuse, Turquoise, and Lapis Blue.

Fabric Pull

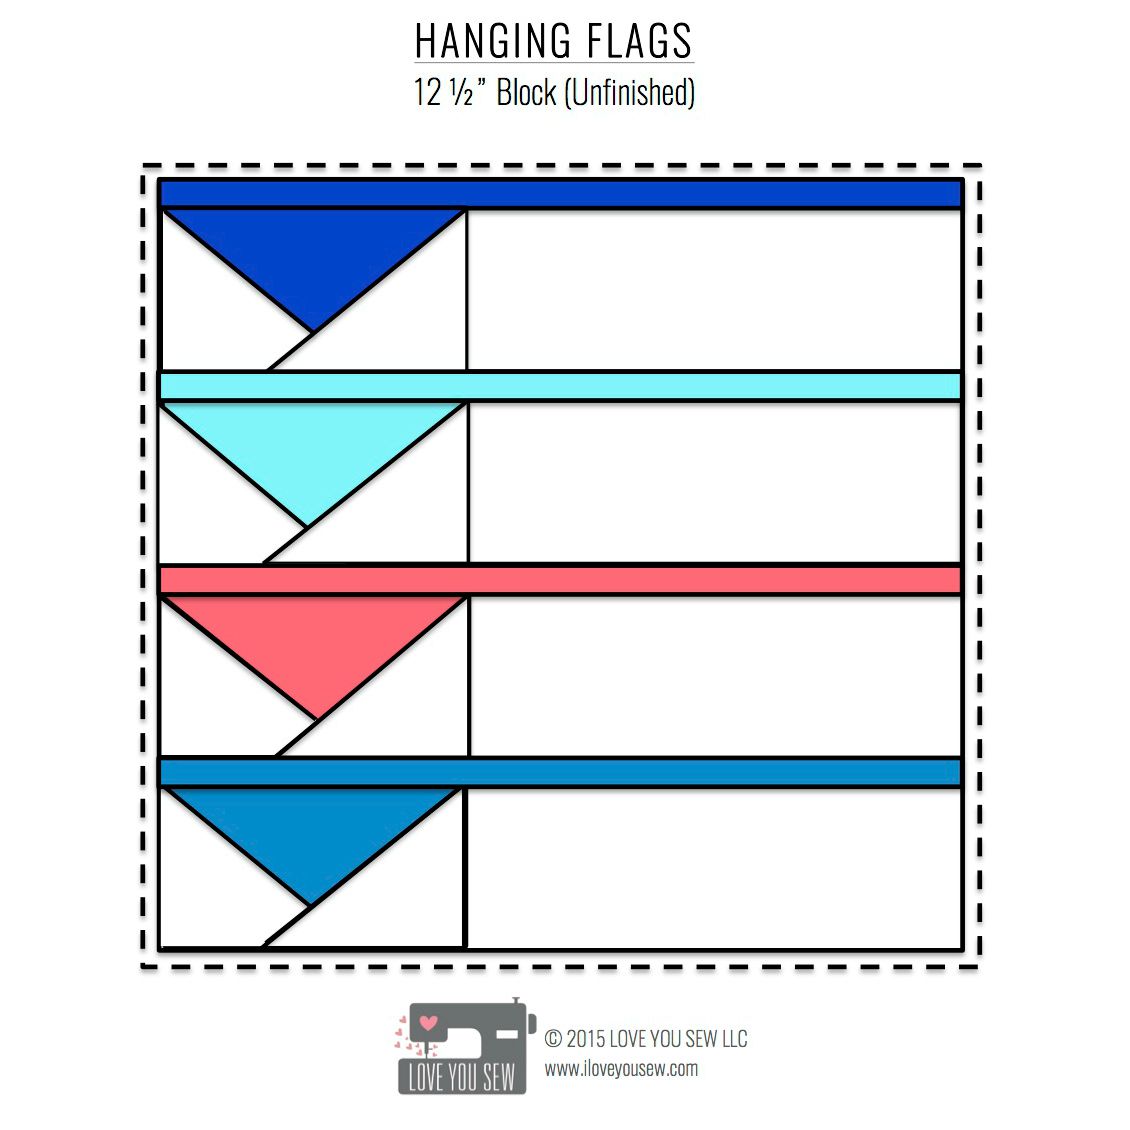
We were all challenged to create a 12″ (12.5″ unfinished) quilt block with only these 6 fat-eighths and use at least 3 colors.  We needed to provide a full tutorial for all of our cyber quilty friends and make them in time for this hop 😉

The task seemed easy enough…until I had to settle down on my plan. Do I go simple or complex? Paper-piece or traditional piecing? Use all of the colors? Maybe not…but which ones then? I had so many ideas but only so much fabric…

Inspiration

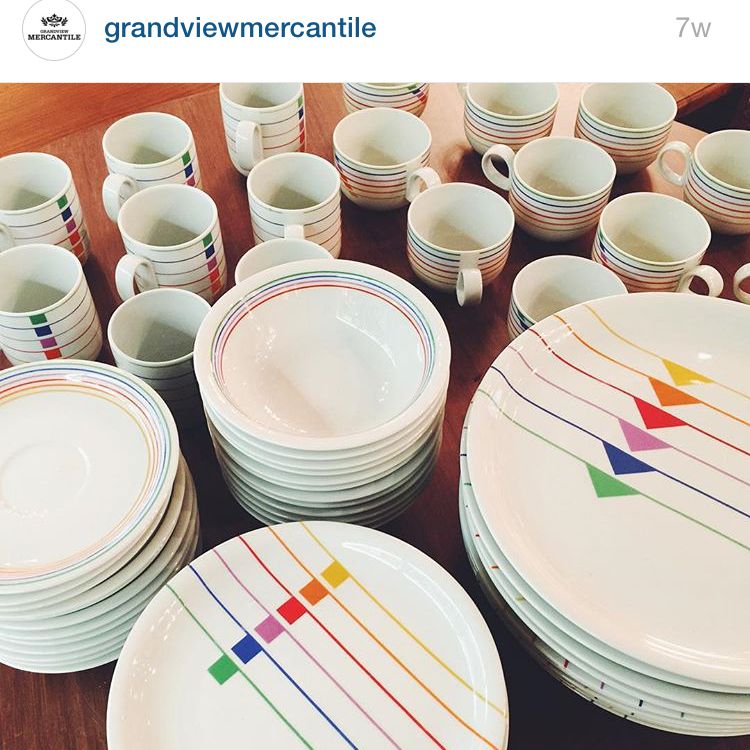
But then I came upon this image of vintage dinnerware from a local upscale thrift shop downtown called Grandview Mercantile.  It was screaming, “Make me into a quilt!” and…I said, “Yes.” 😉  I love the idea of stacking the geese (triangles) right on top of one another with the sashing.  It is a simple design for a beginner (both for quilter and for author!)

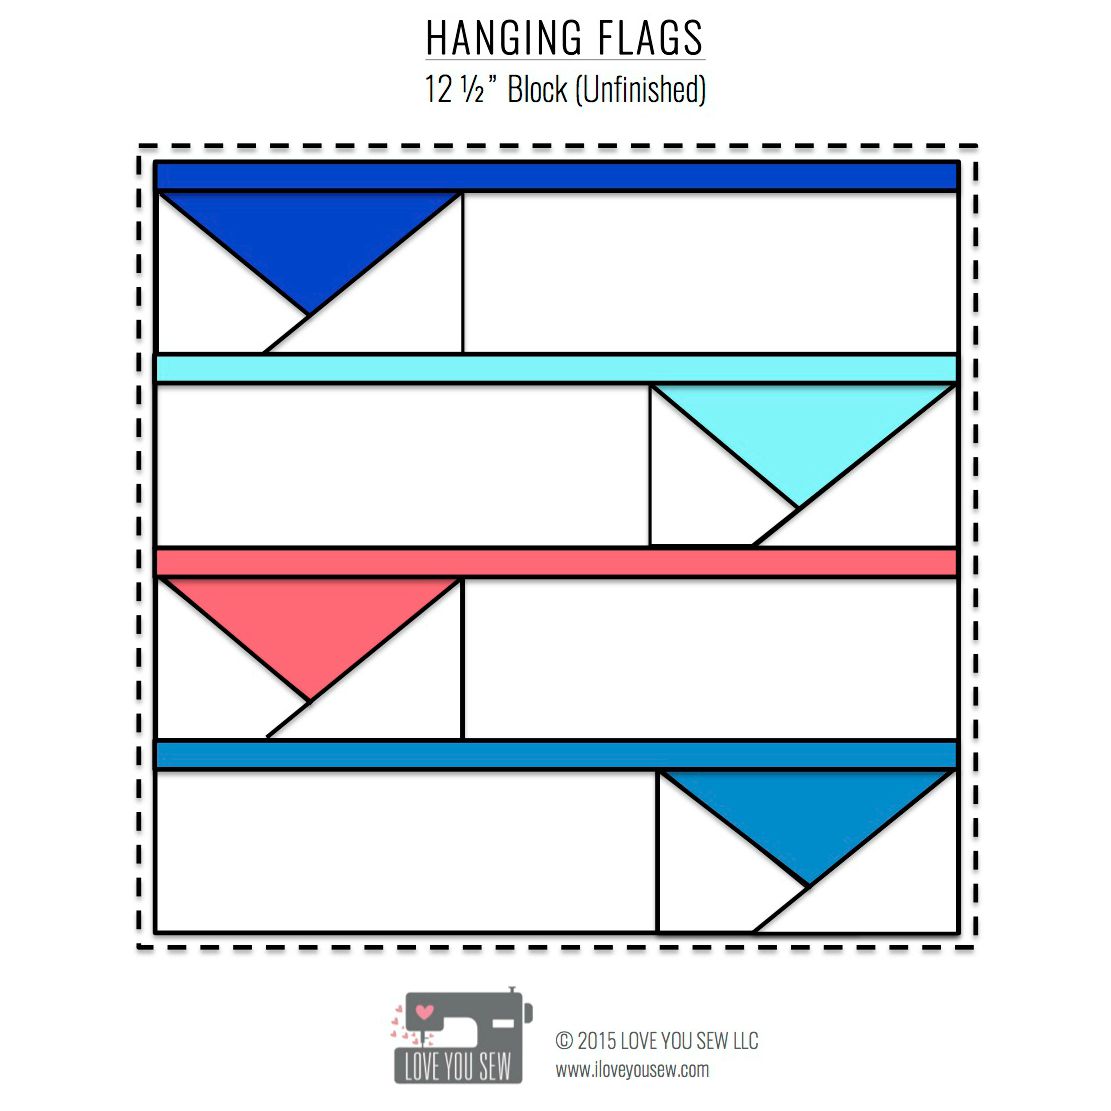
For this exercise, I decided on a diagonal layout  of the geese since this block was going to be one of many in the charity quilts.  The spaced out color would be more versatile than my initial assymetrical idea.  I still plan to make a full quilt like the dinnerware eventually…


Block instructions:

  • Gather the following fat-eighths: Fabri-Quilt White, Coral, Chartreuse, Lapis Blue, & Aqua  ***It is recommended that you launder these fabrics BEFORE cutting to ensure accurate sizing on your block***
  • Print 2 Paper-piecing pattern sheets (4 Flying geese templates total) –> Hanging Flags Bock_Geese Template
  • Use 1/4″ seam allowance

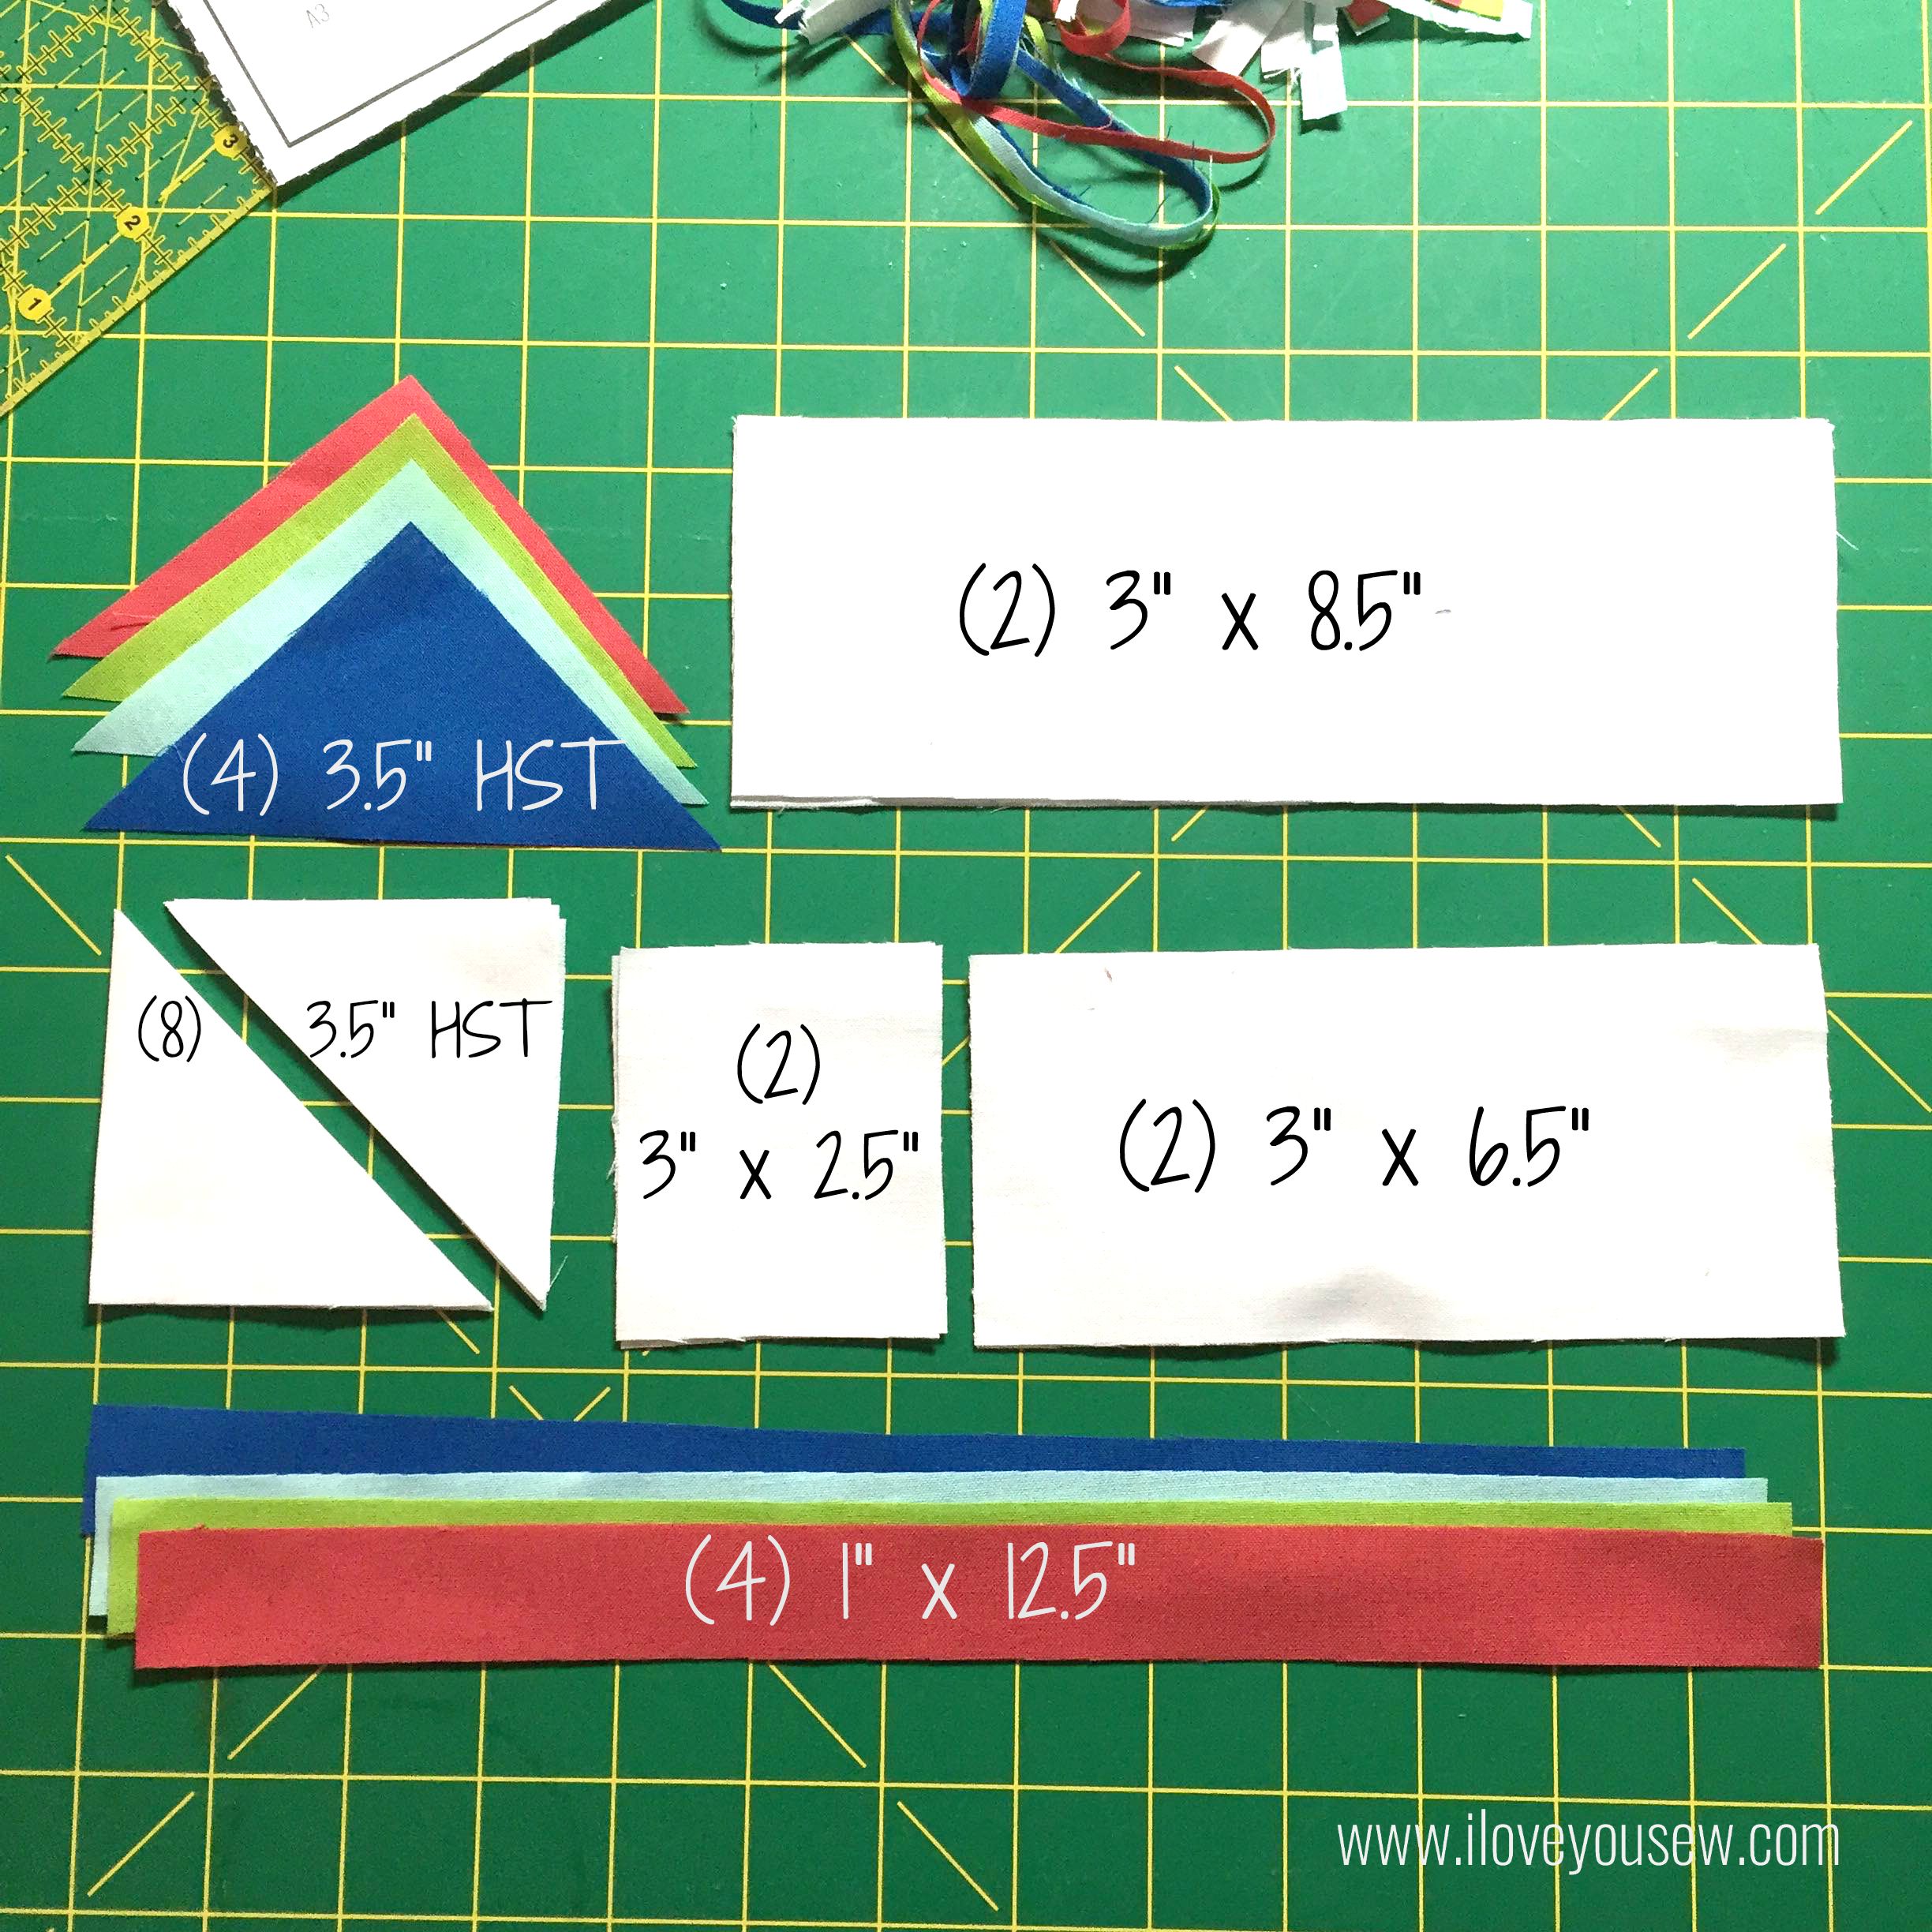
Cut the following:

04AllCuts


  • (1) 3.75″ HSTs of each color (4 total)
  • (2) 3″ x 8.5″ of white
  • (8) 3.5″ Half-Square Triangles (HSTs) of white
  • (2) 3 x 2.5″ of white
  • (2) 3″ x 6.5″  of white
  • (1) 1″ x 12.5″ strip of ea color


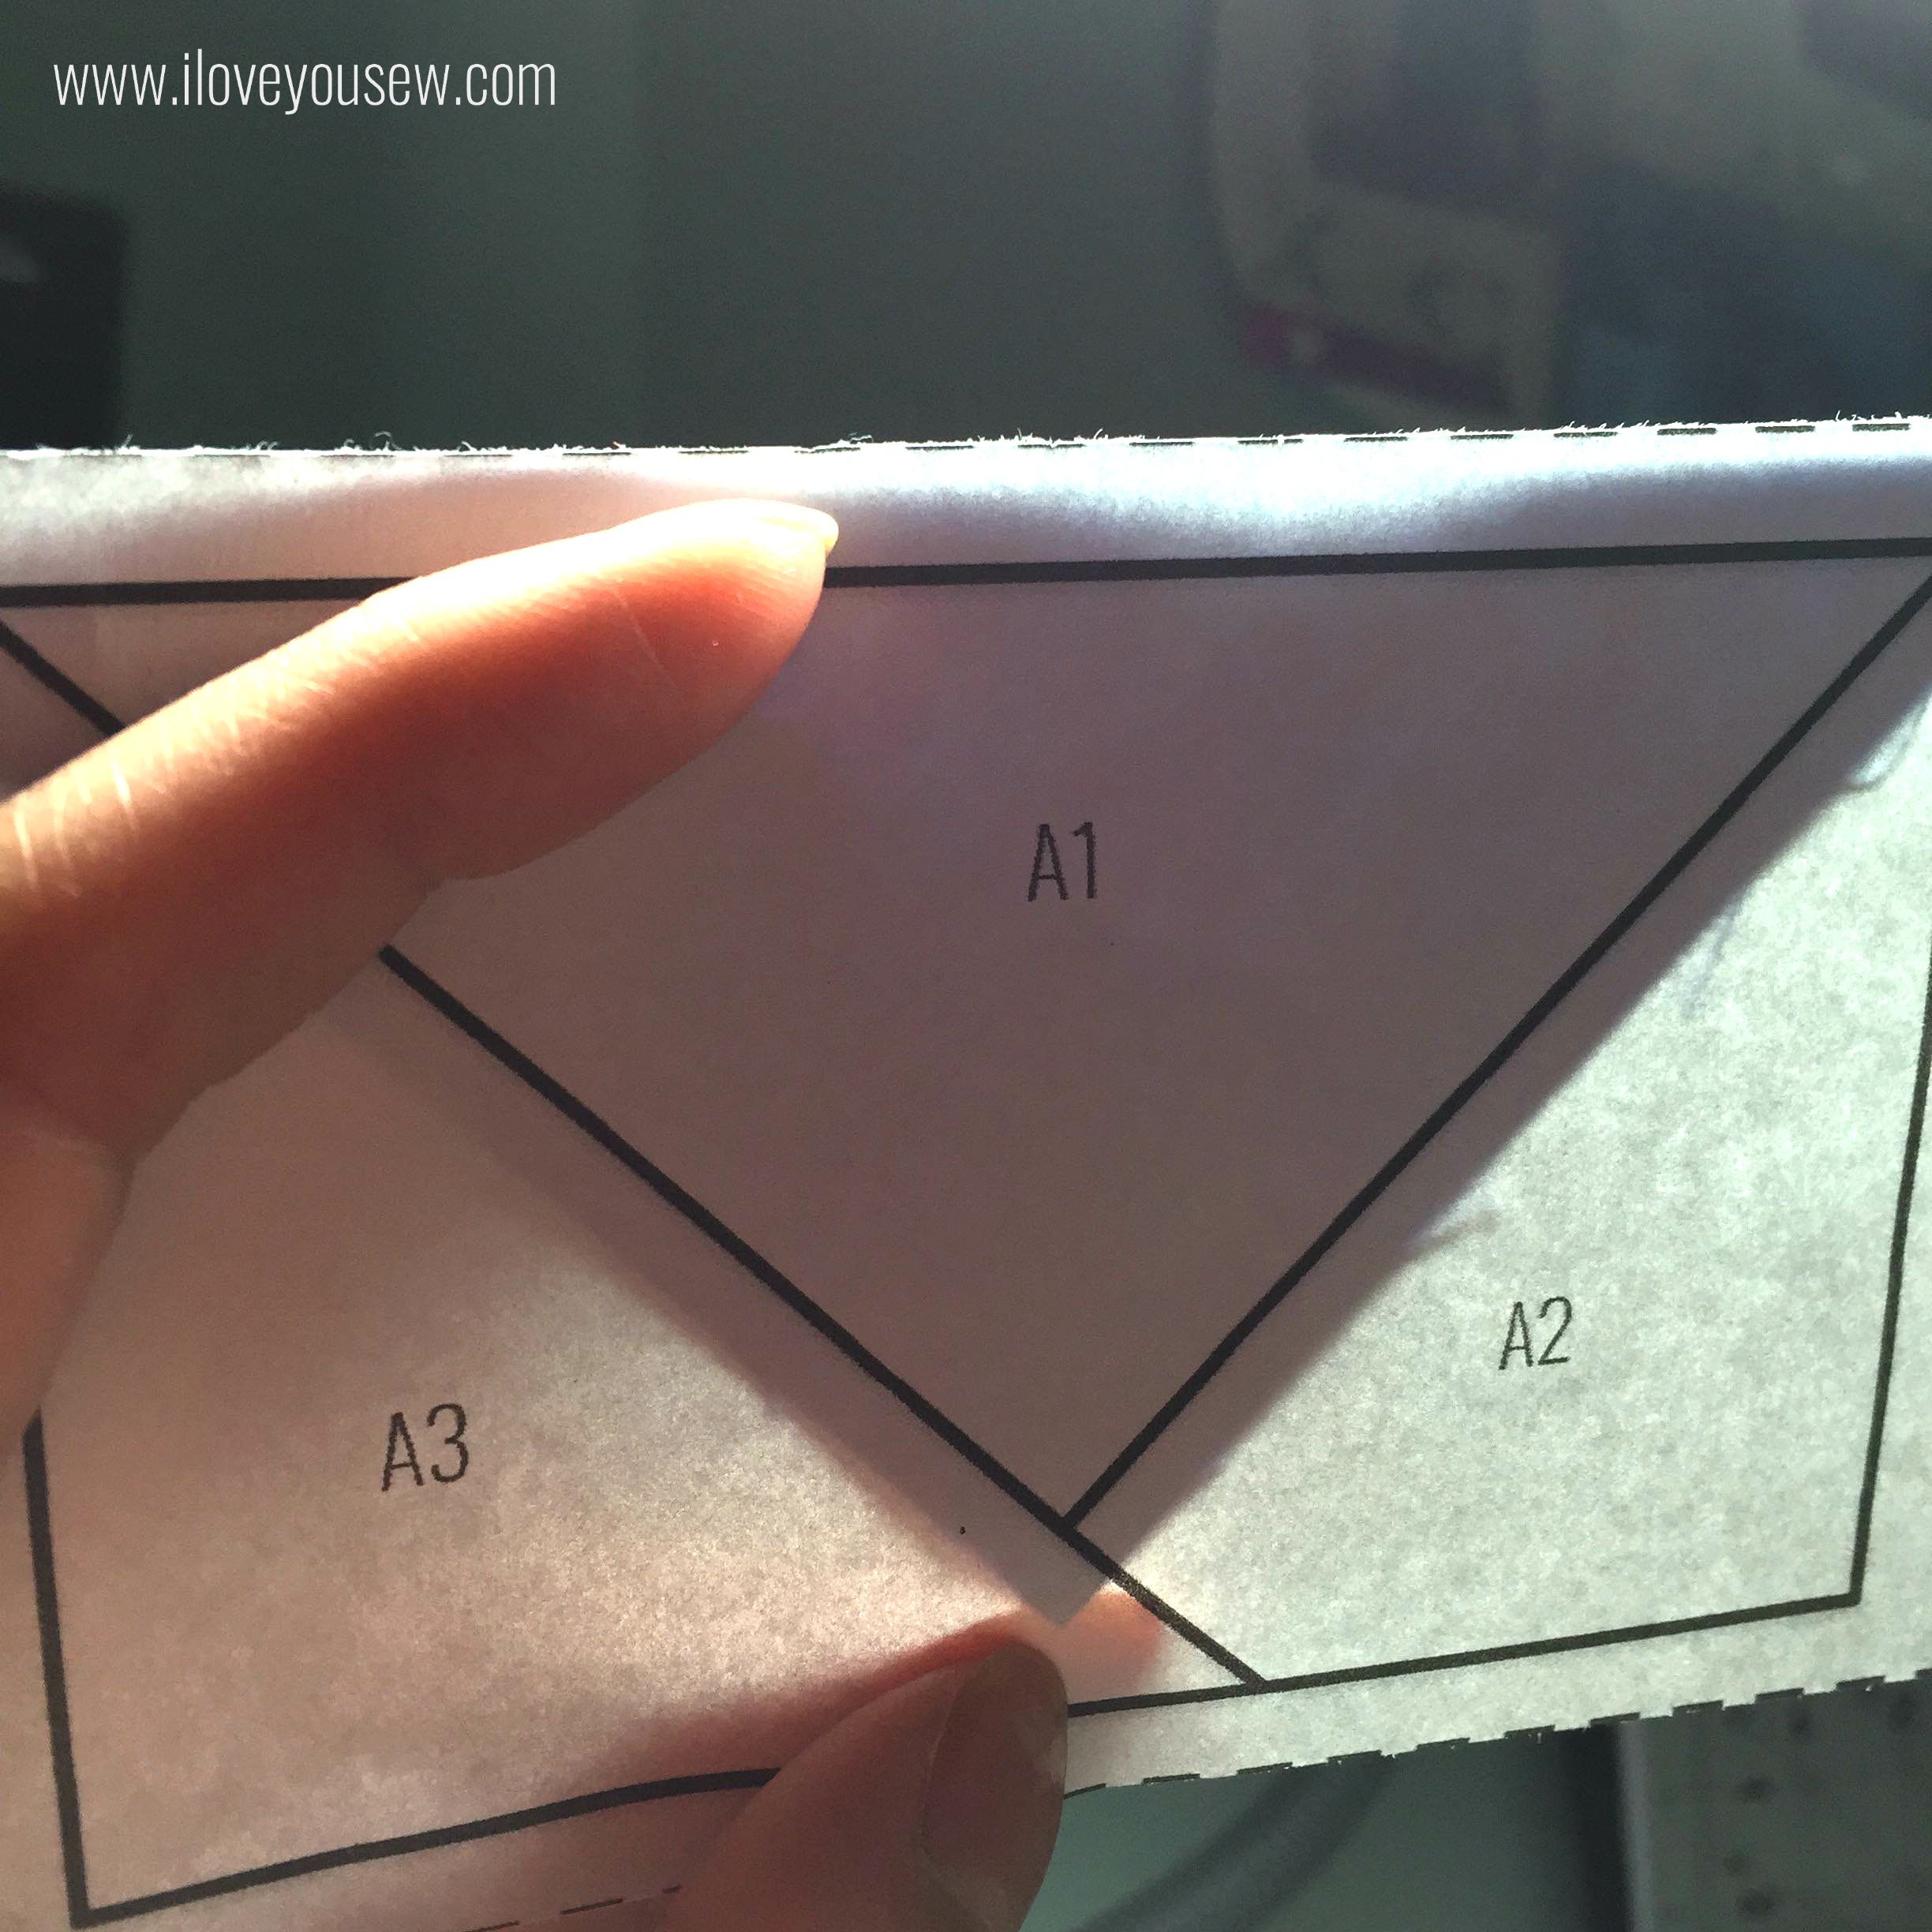
Paper-piece with flying geese template

05PP

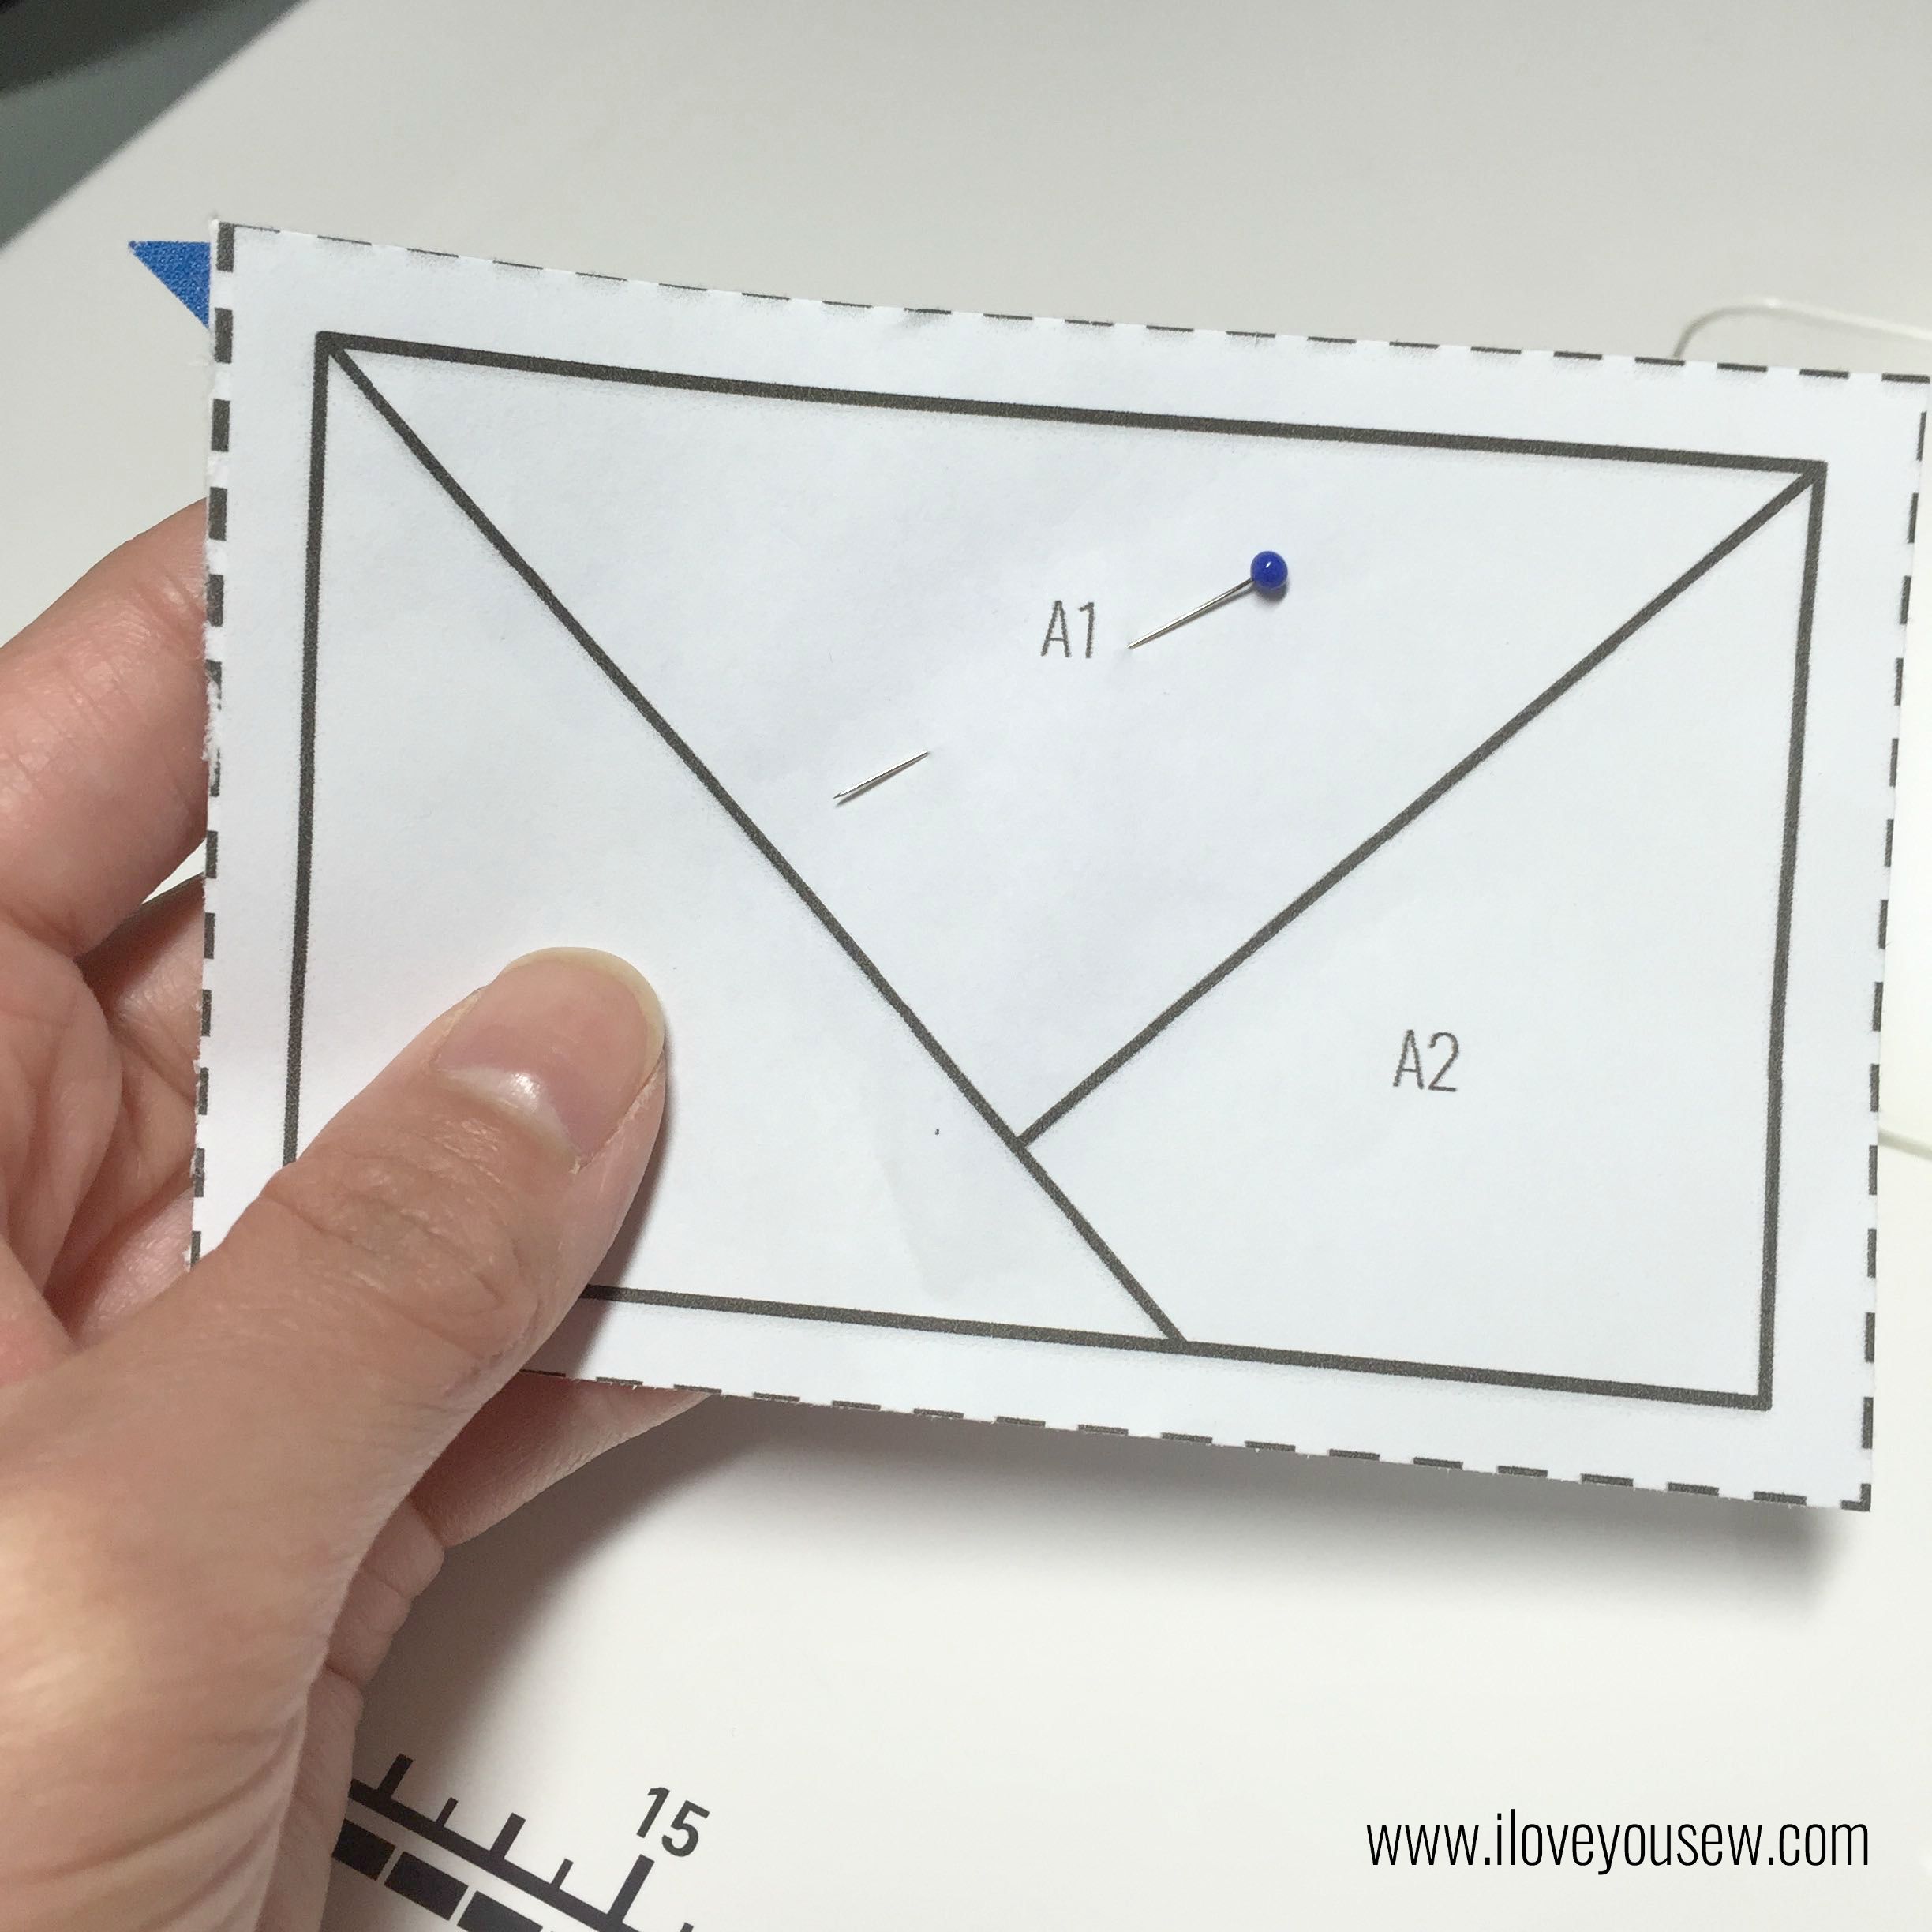
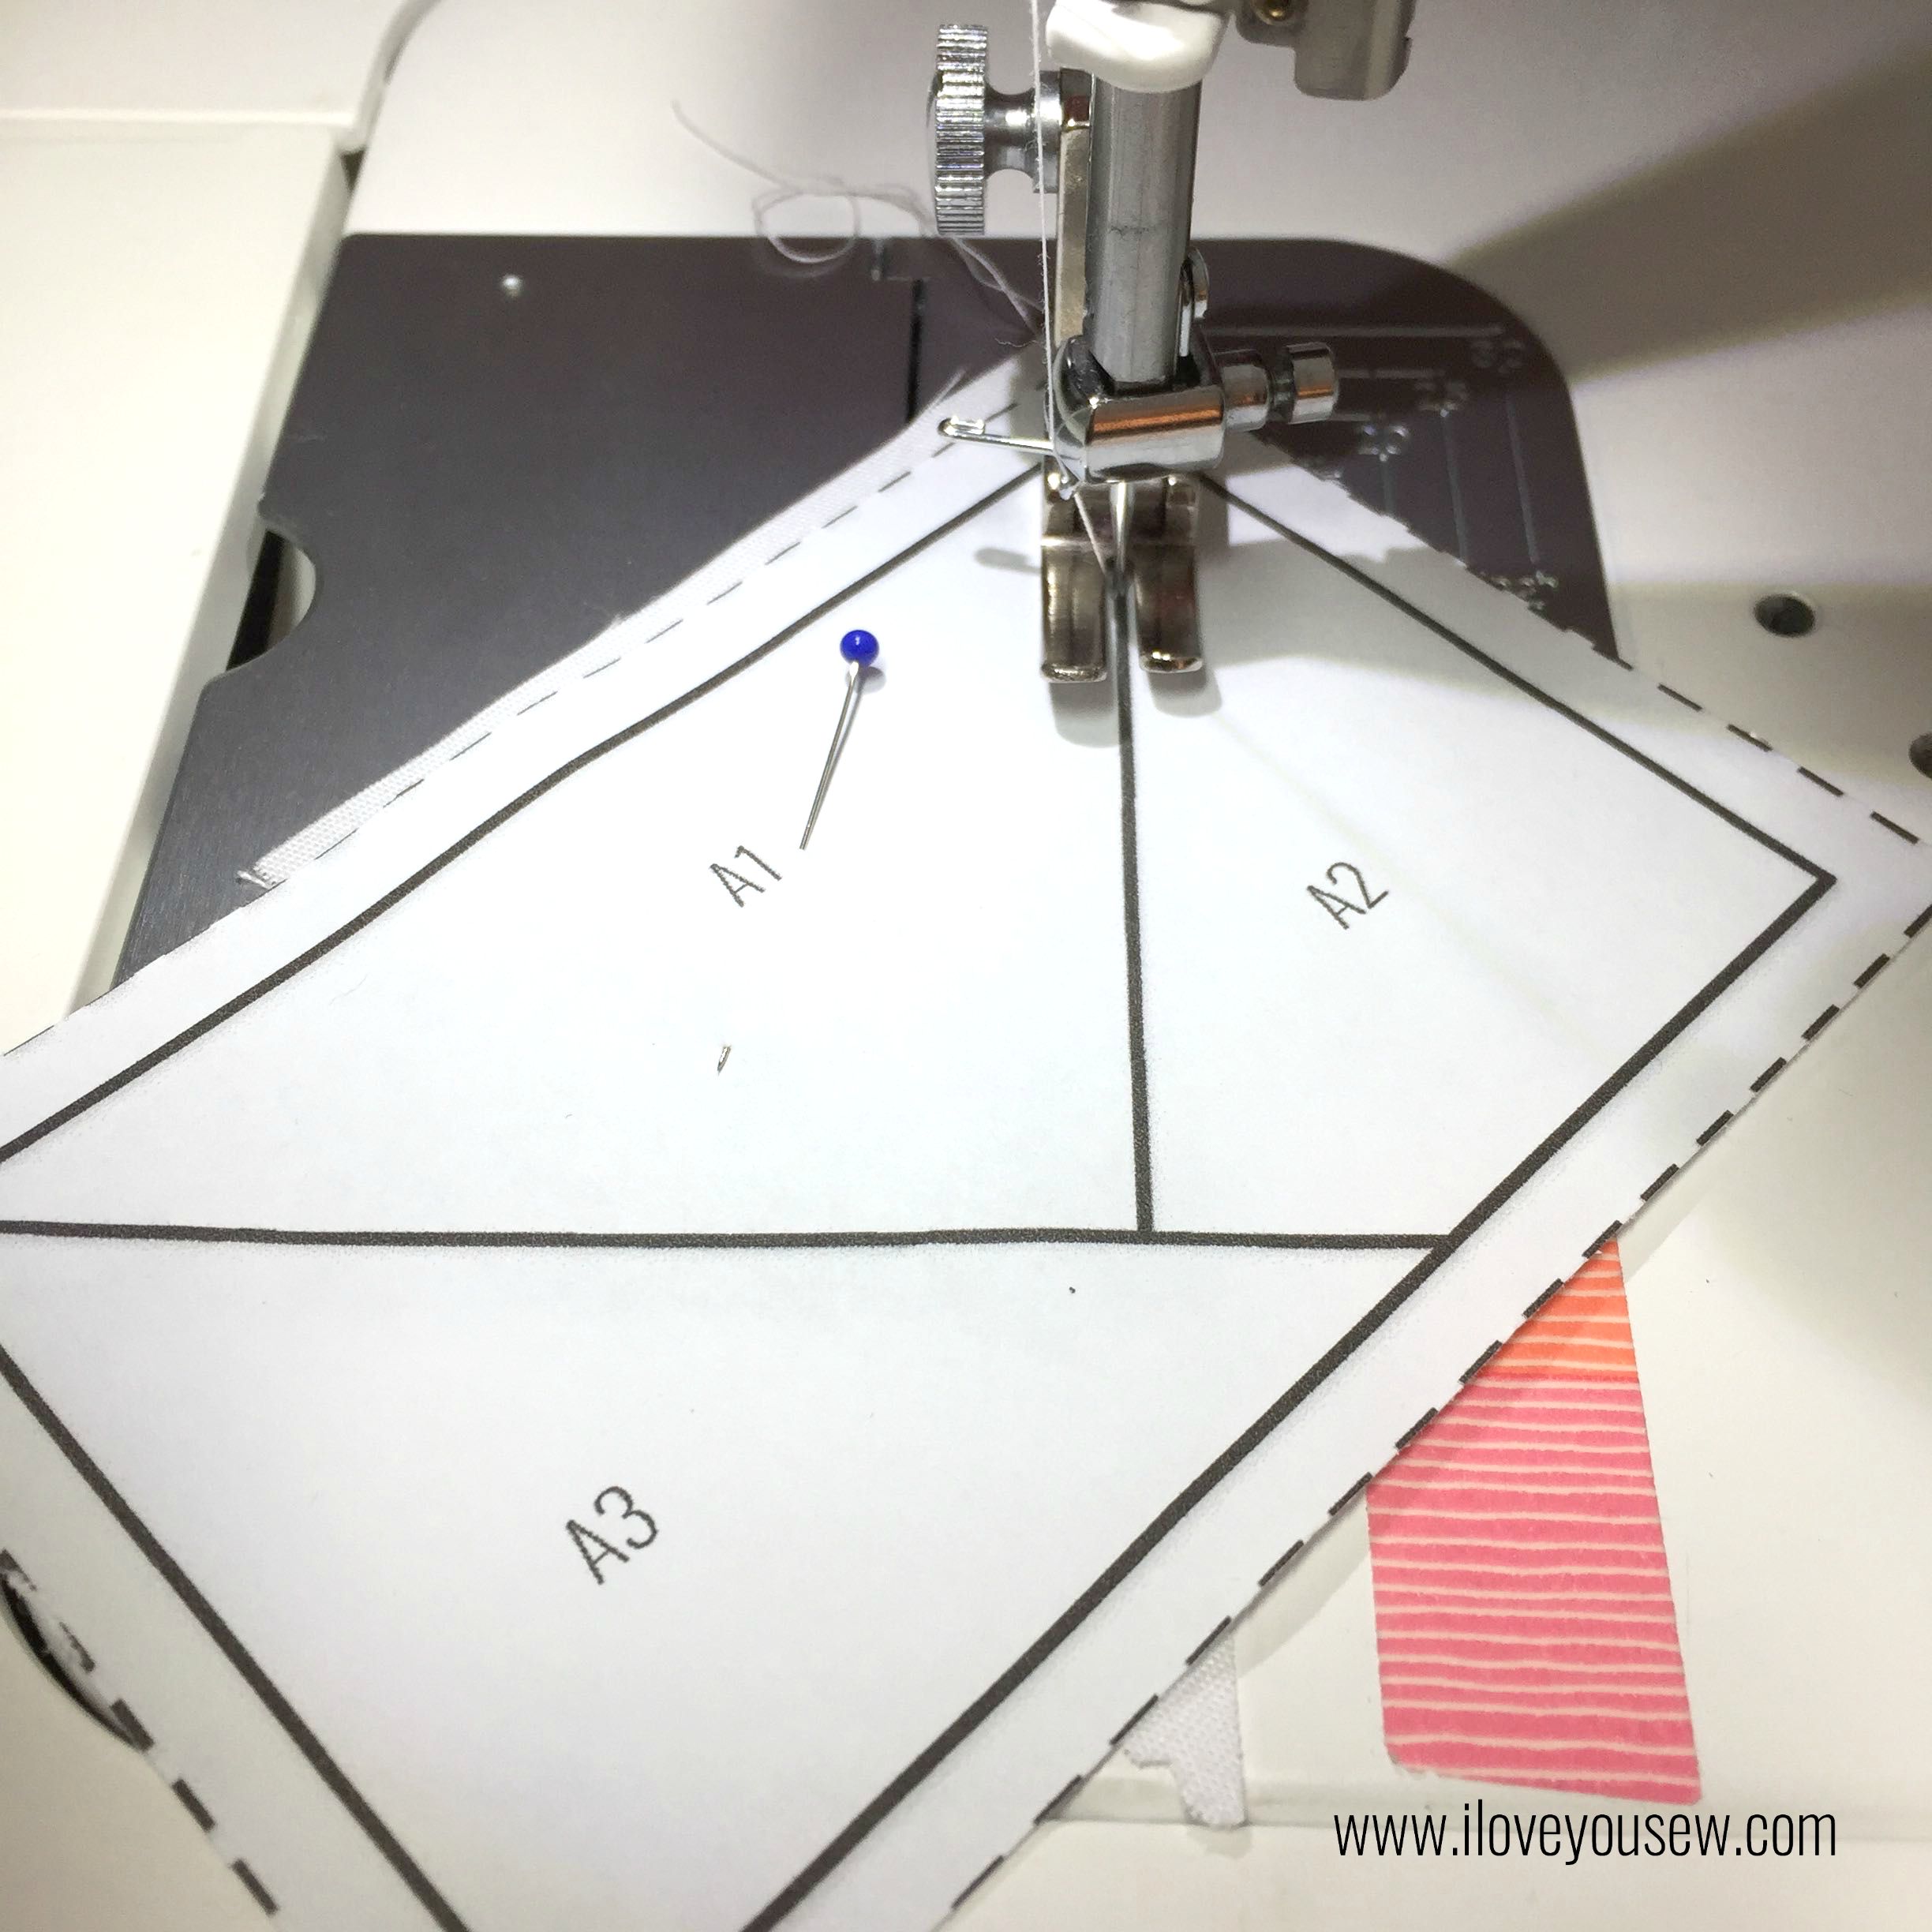
  • Take one color triangle and place it behind the printed “1” so that there is 1/4″ seam allowance all around the triangle. *It’s ok if there extra which hangs beyond the template. It will be trimmed later.

06PP

  • Pin in place (This helps the HST from shifting)

08PPLineUpWhite

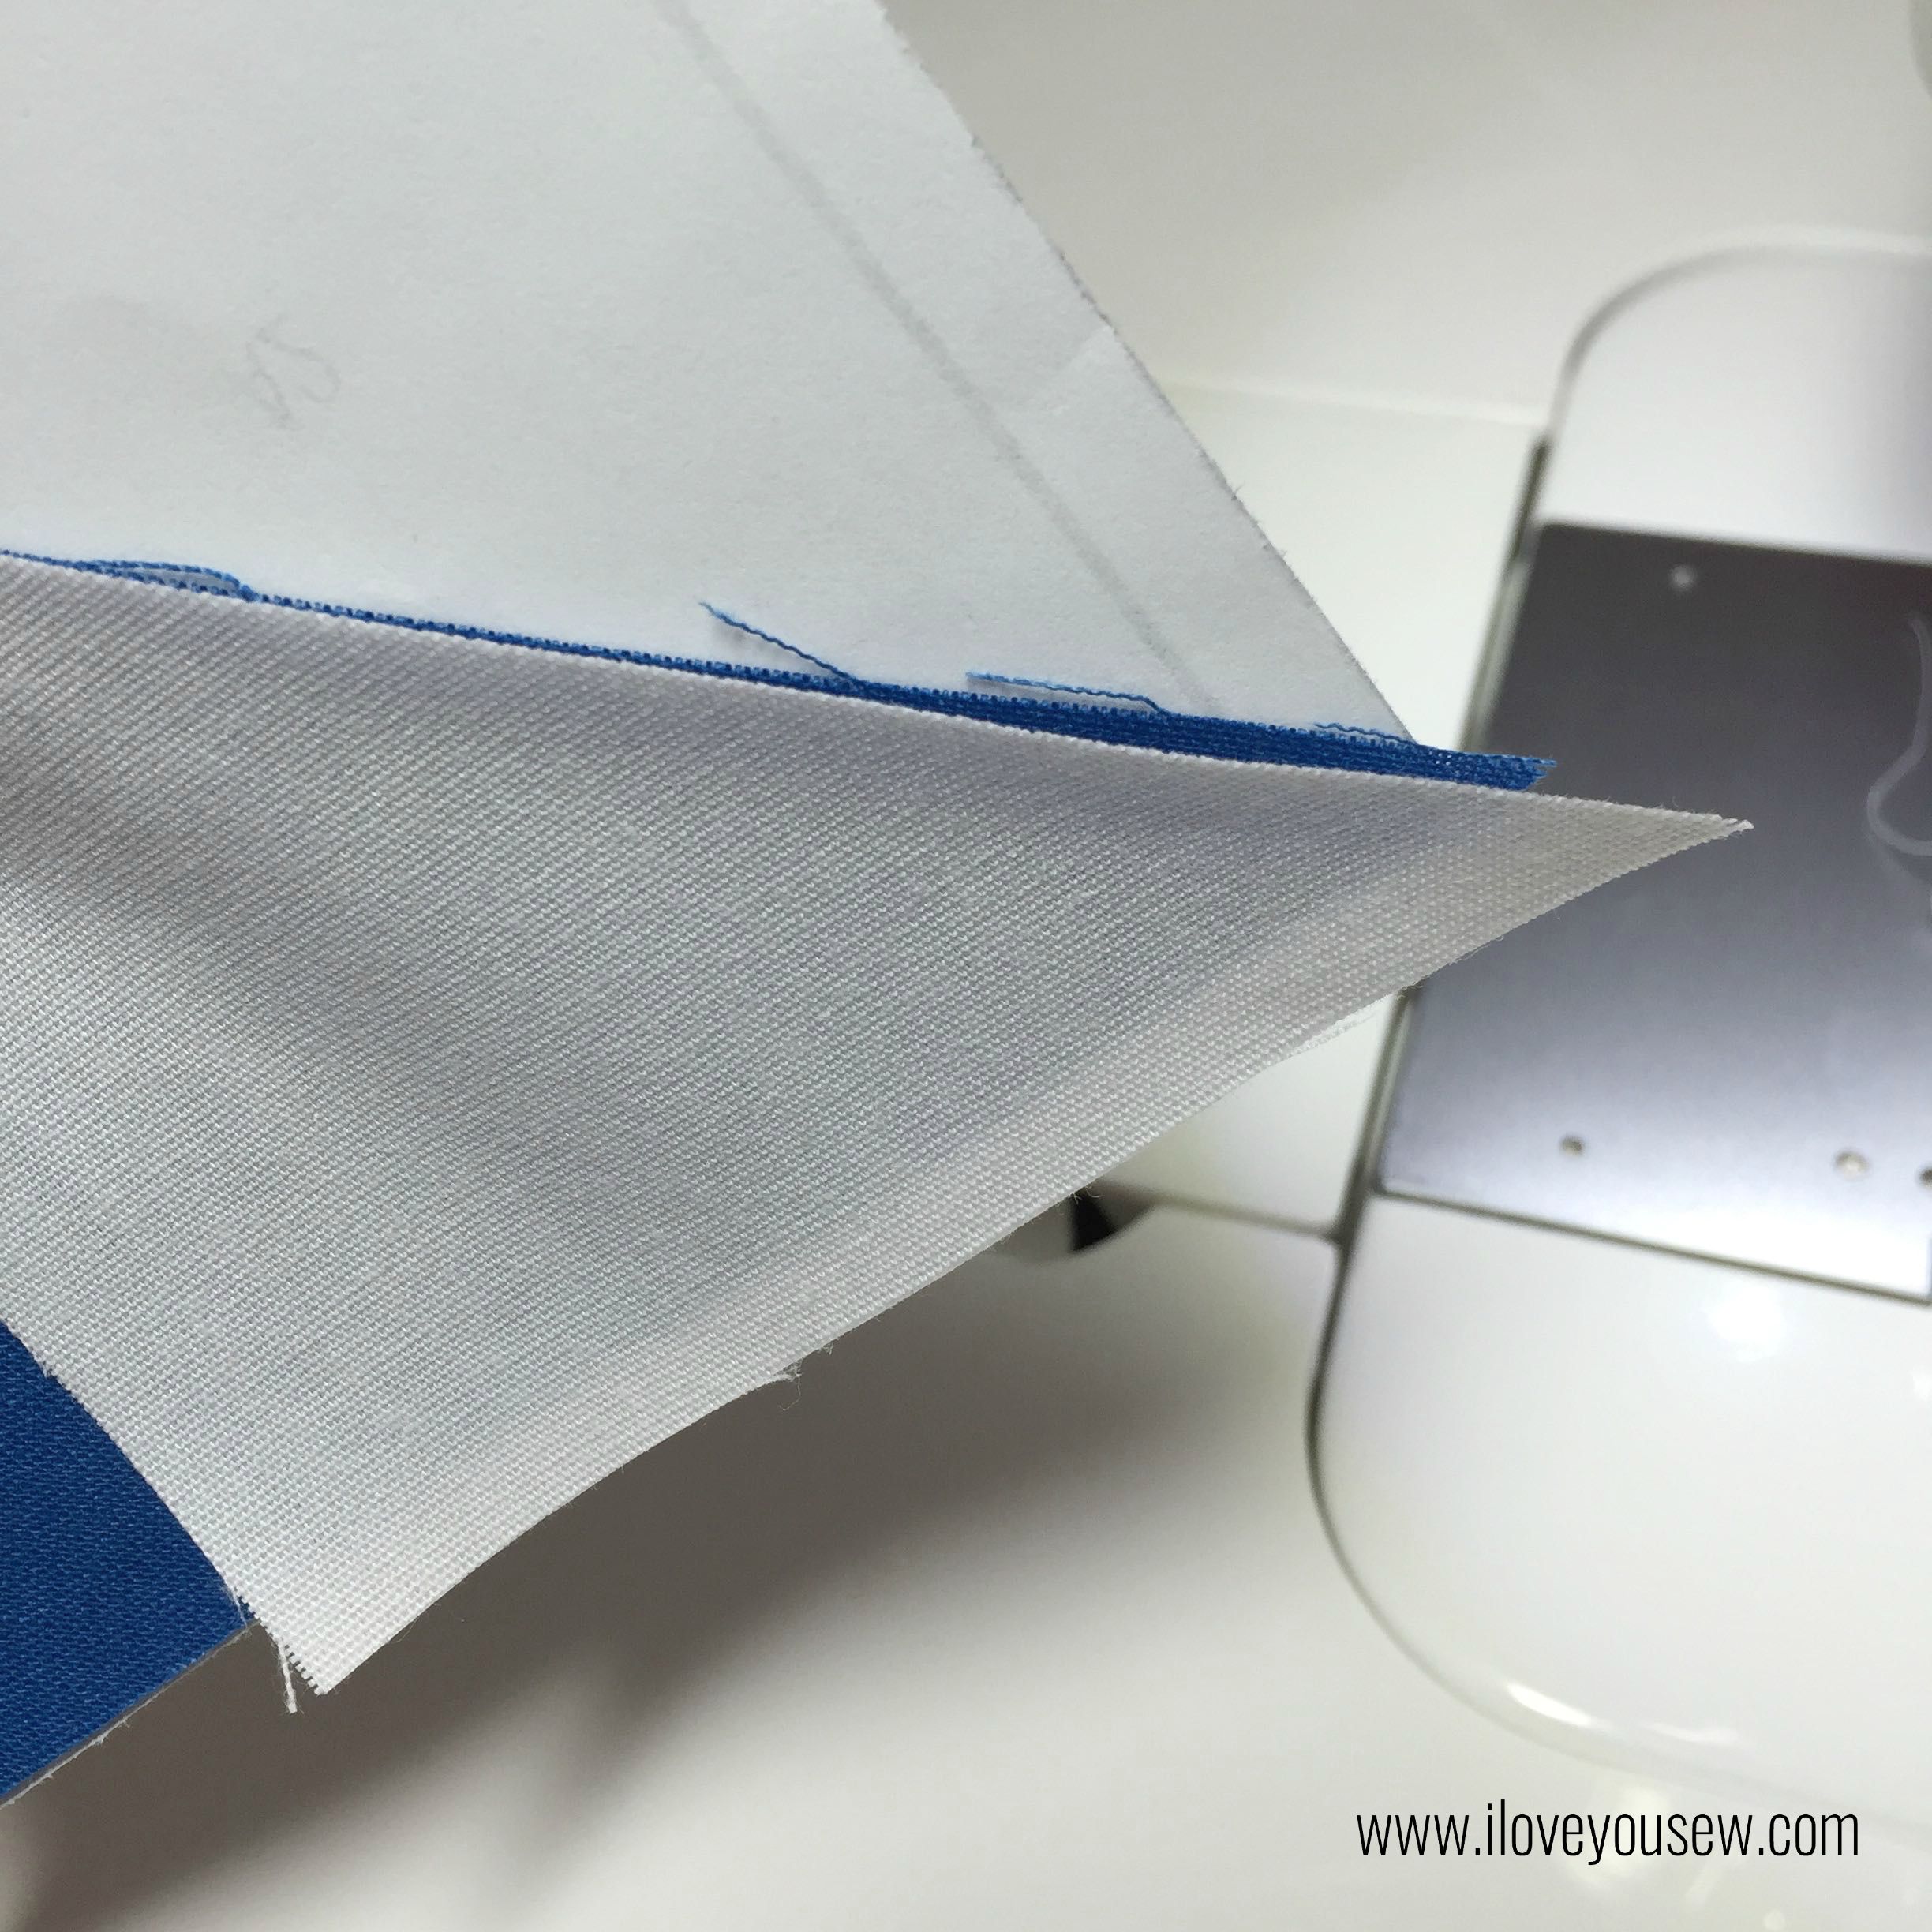
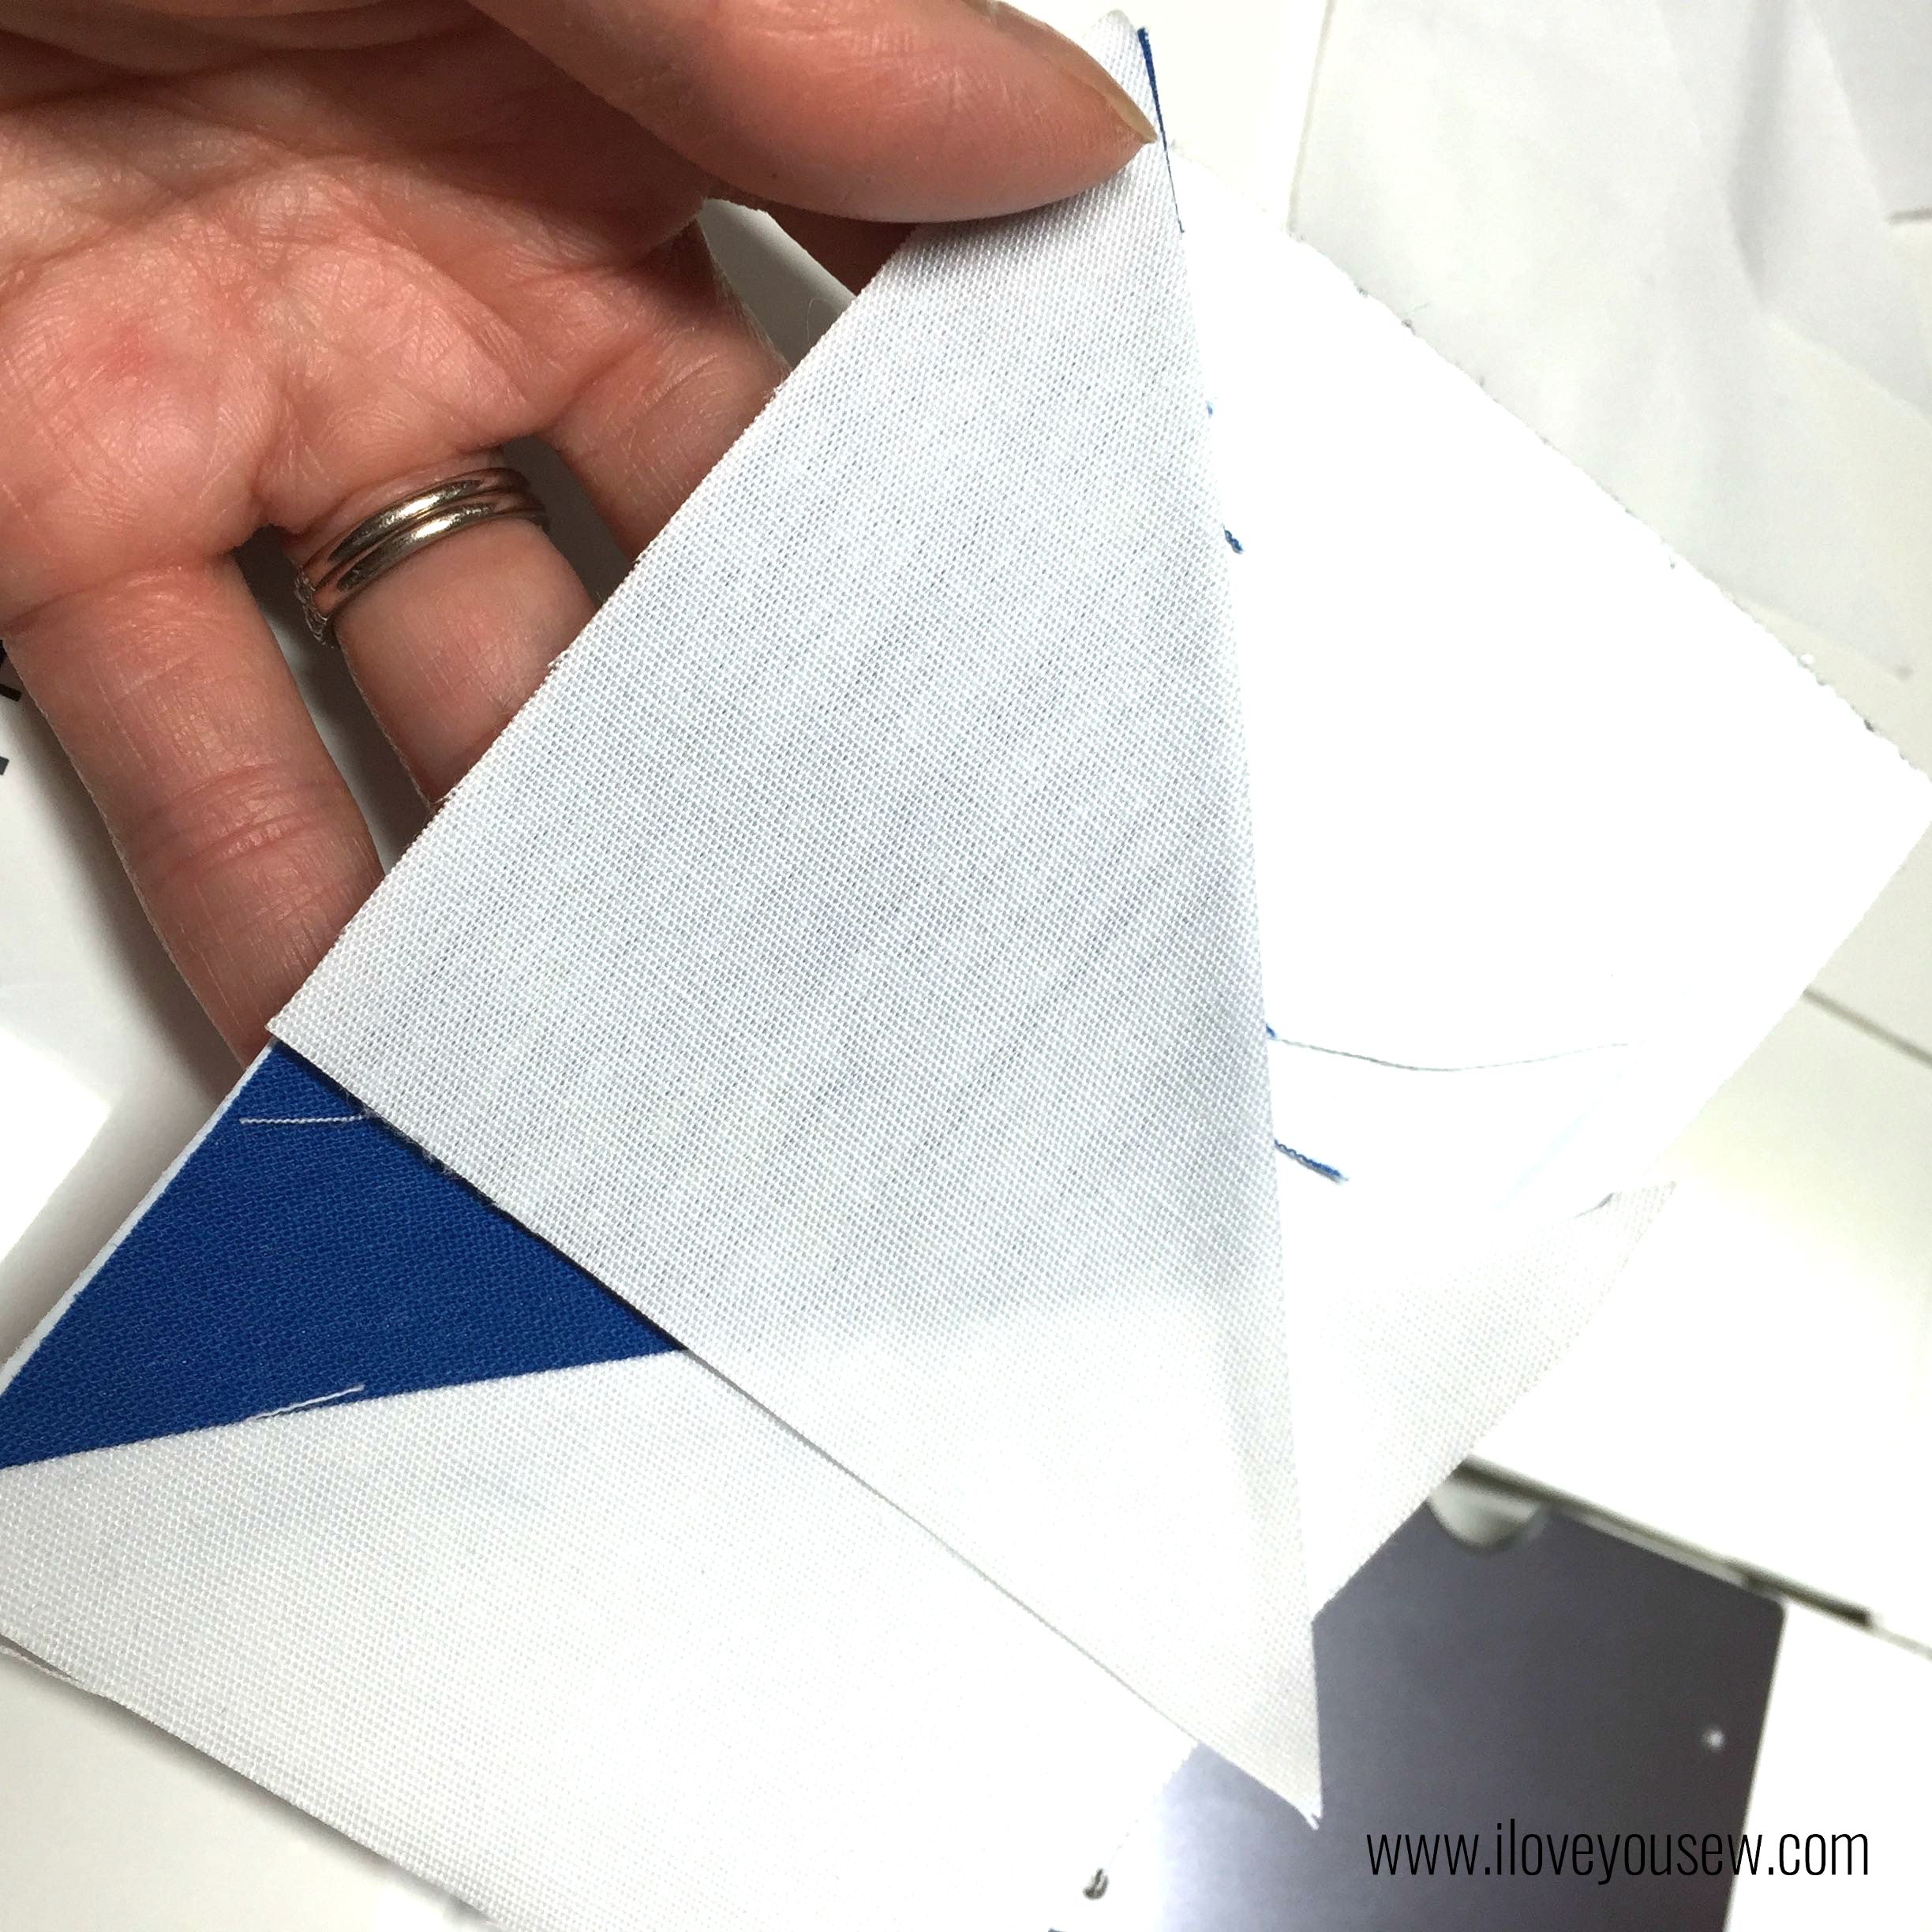
  • Take a white triangle and match up to edge of color fabric. Sew into place on line underneath where fabric overlaps. Flip it out and press.

09PPSew

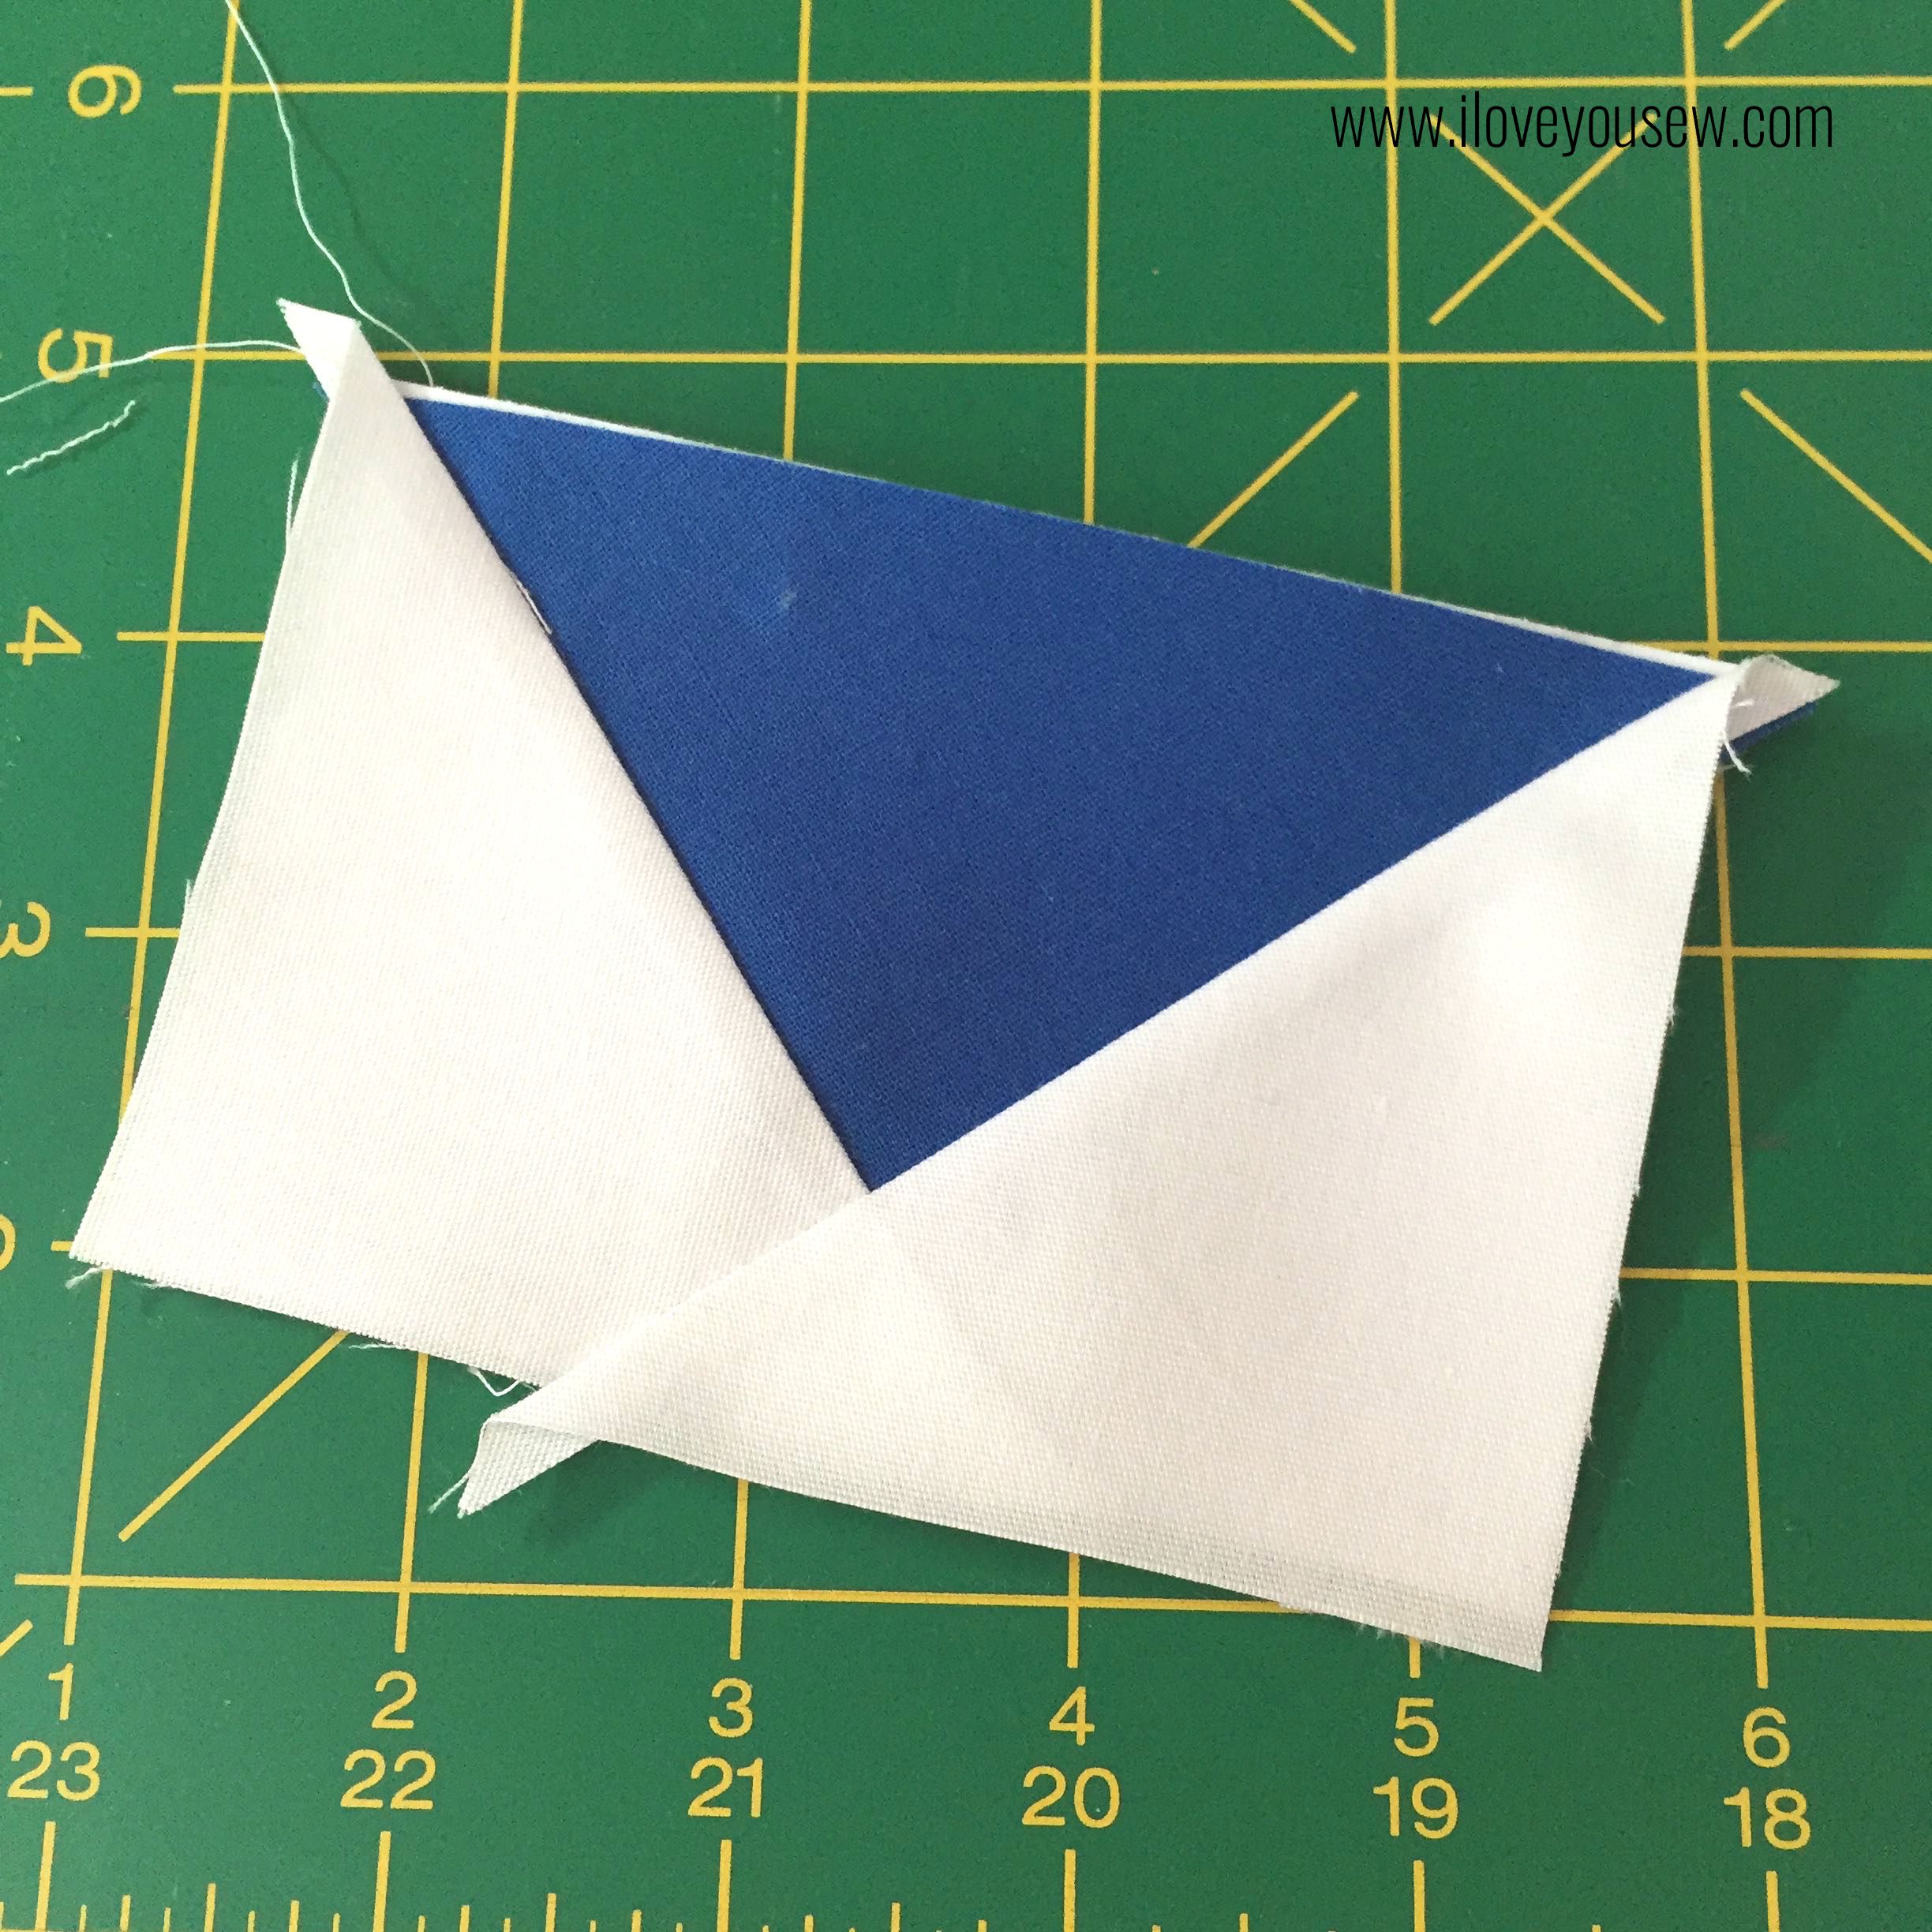
  • Do the same on the other side of the color triangle

10PP2ndWhite

  • Trim excess fabric. Flying Geese should measure 3″ x 4.5″ (including seam allowance)

12PPComplete

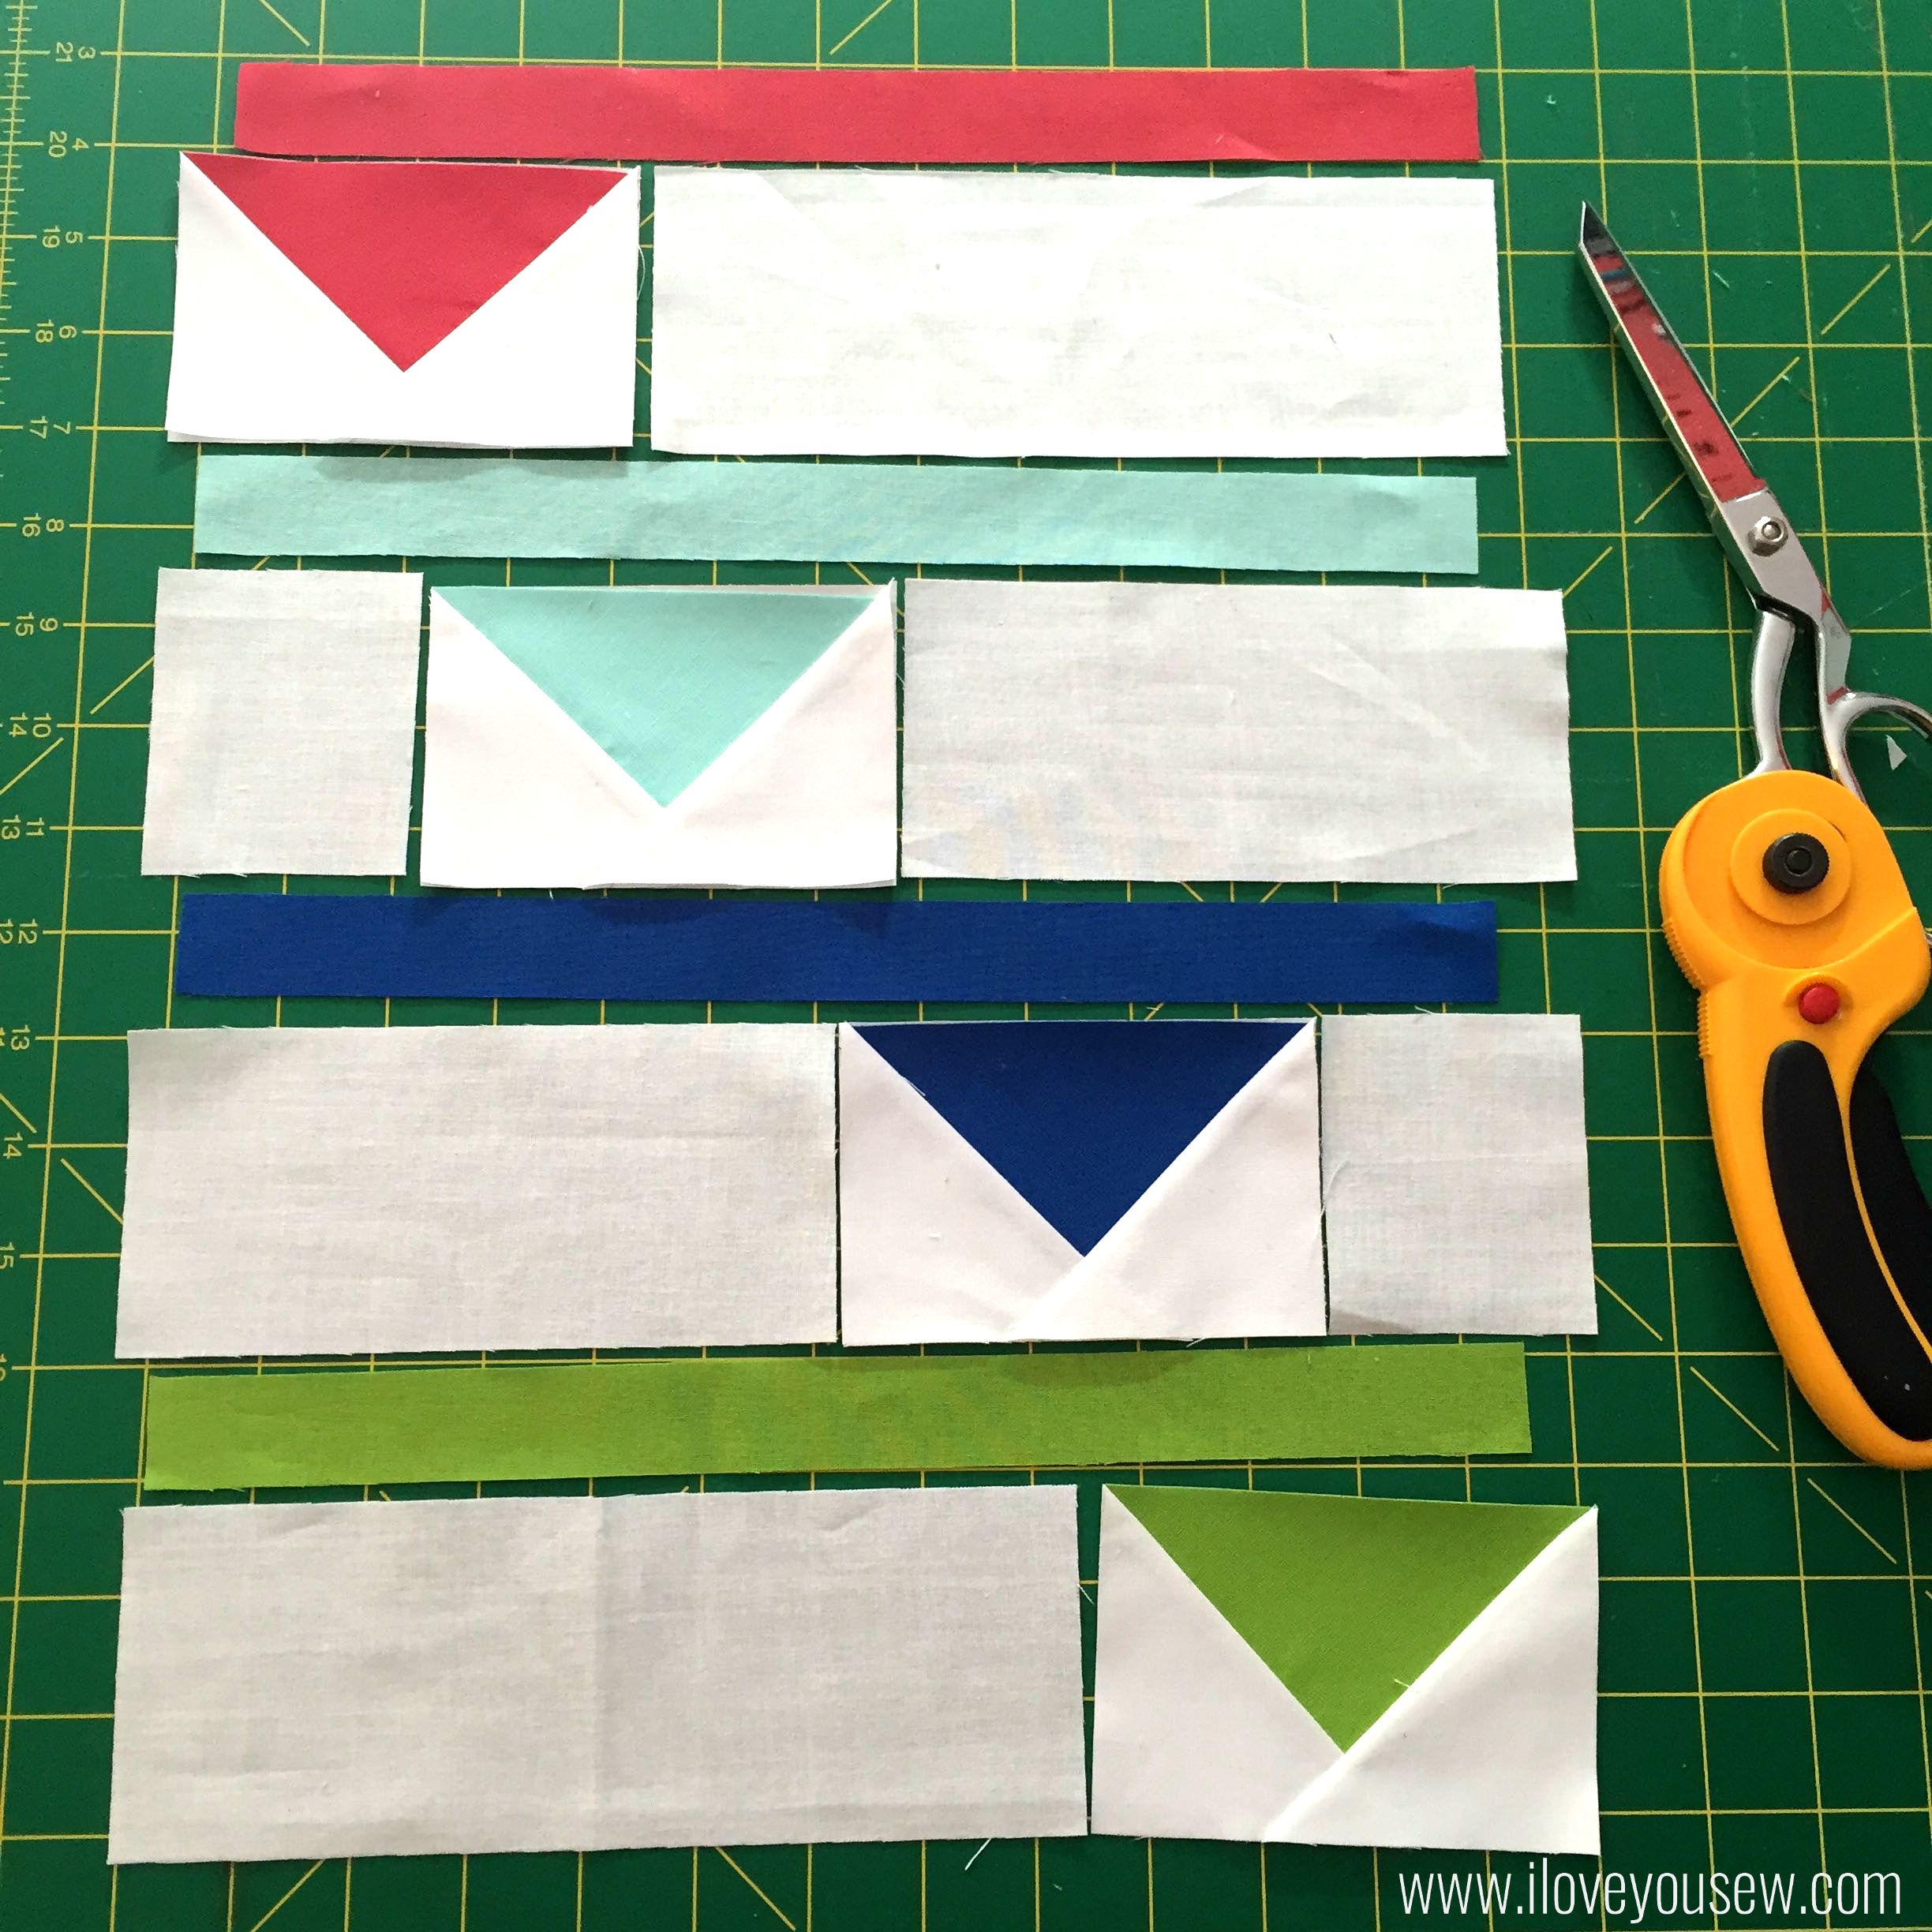
Assemble the block as shown:

14LayOutBlock

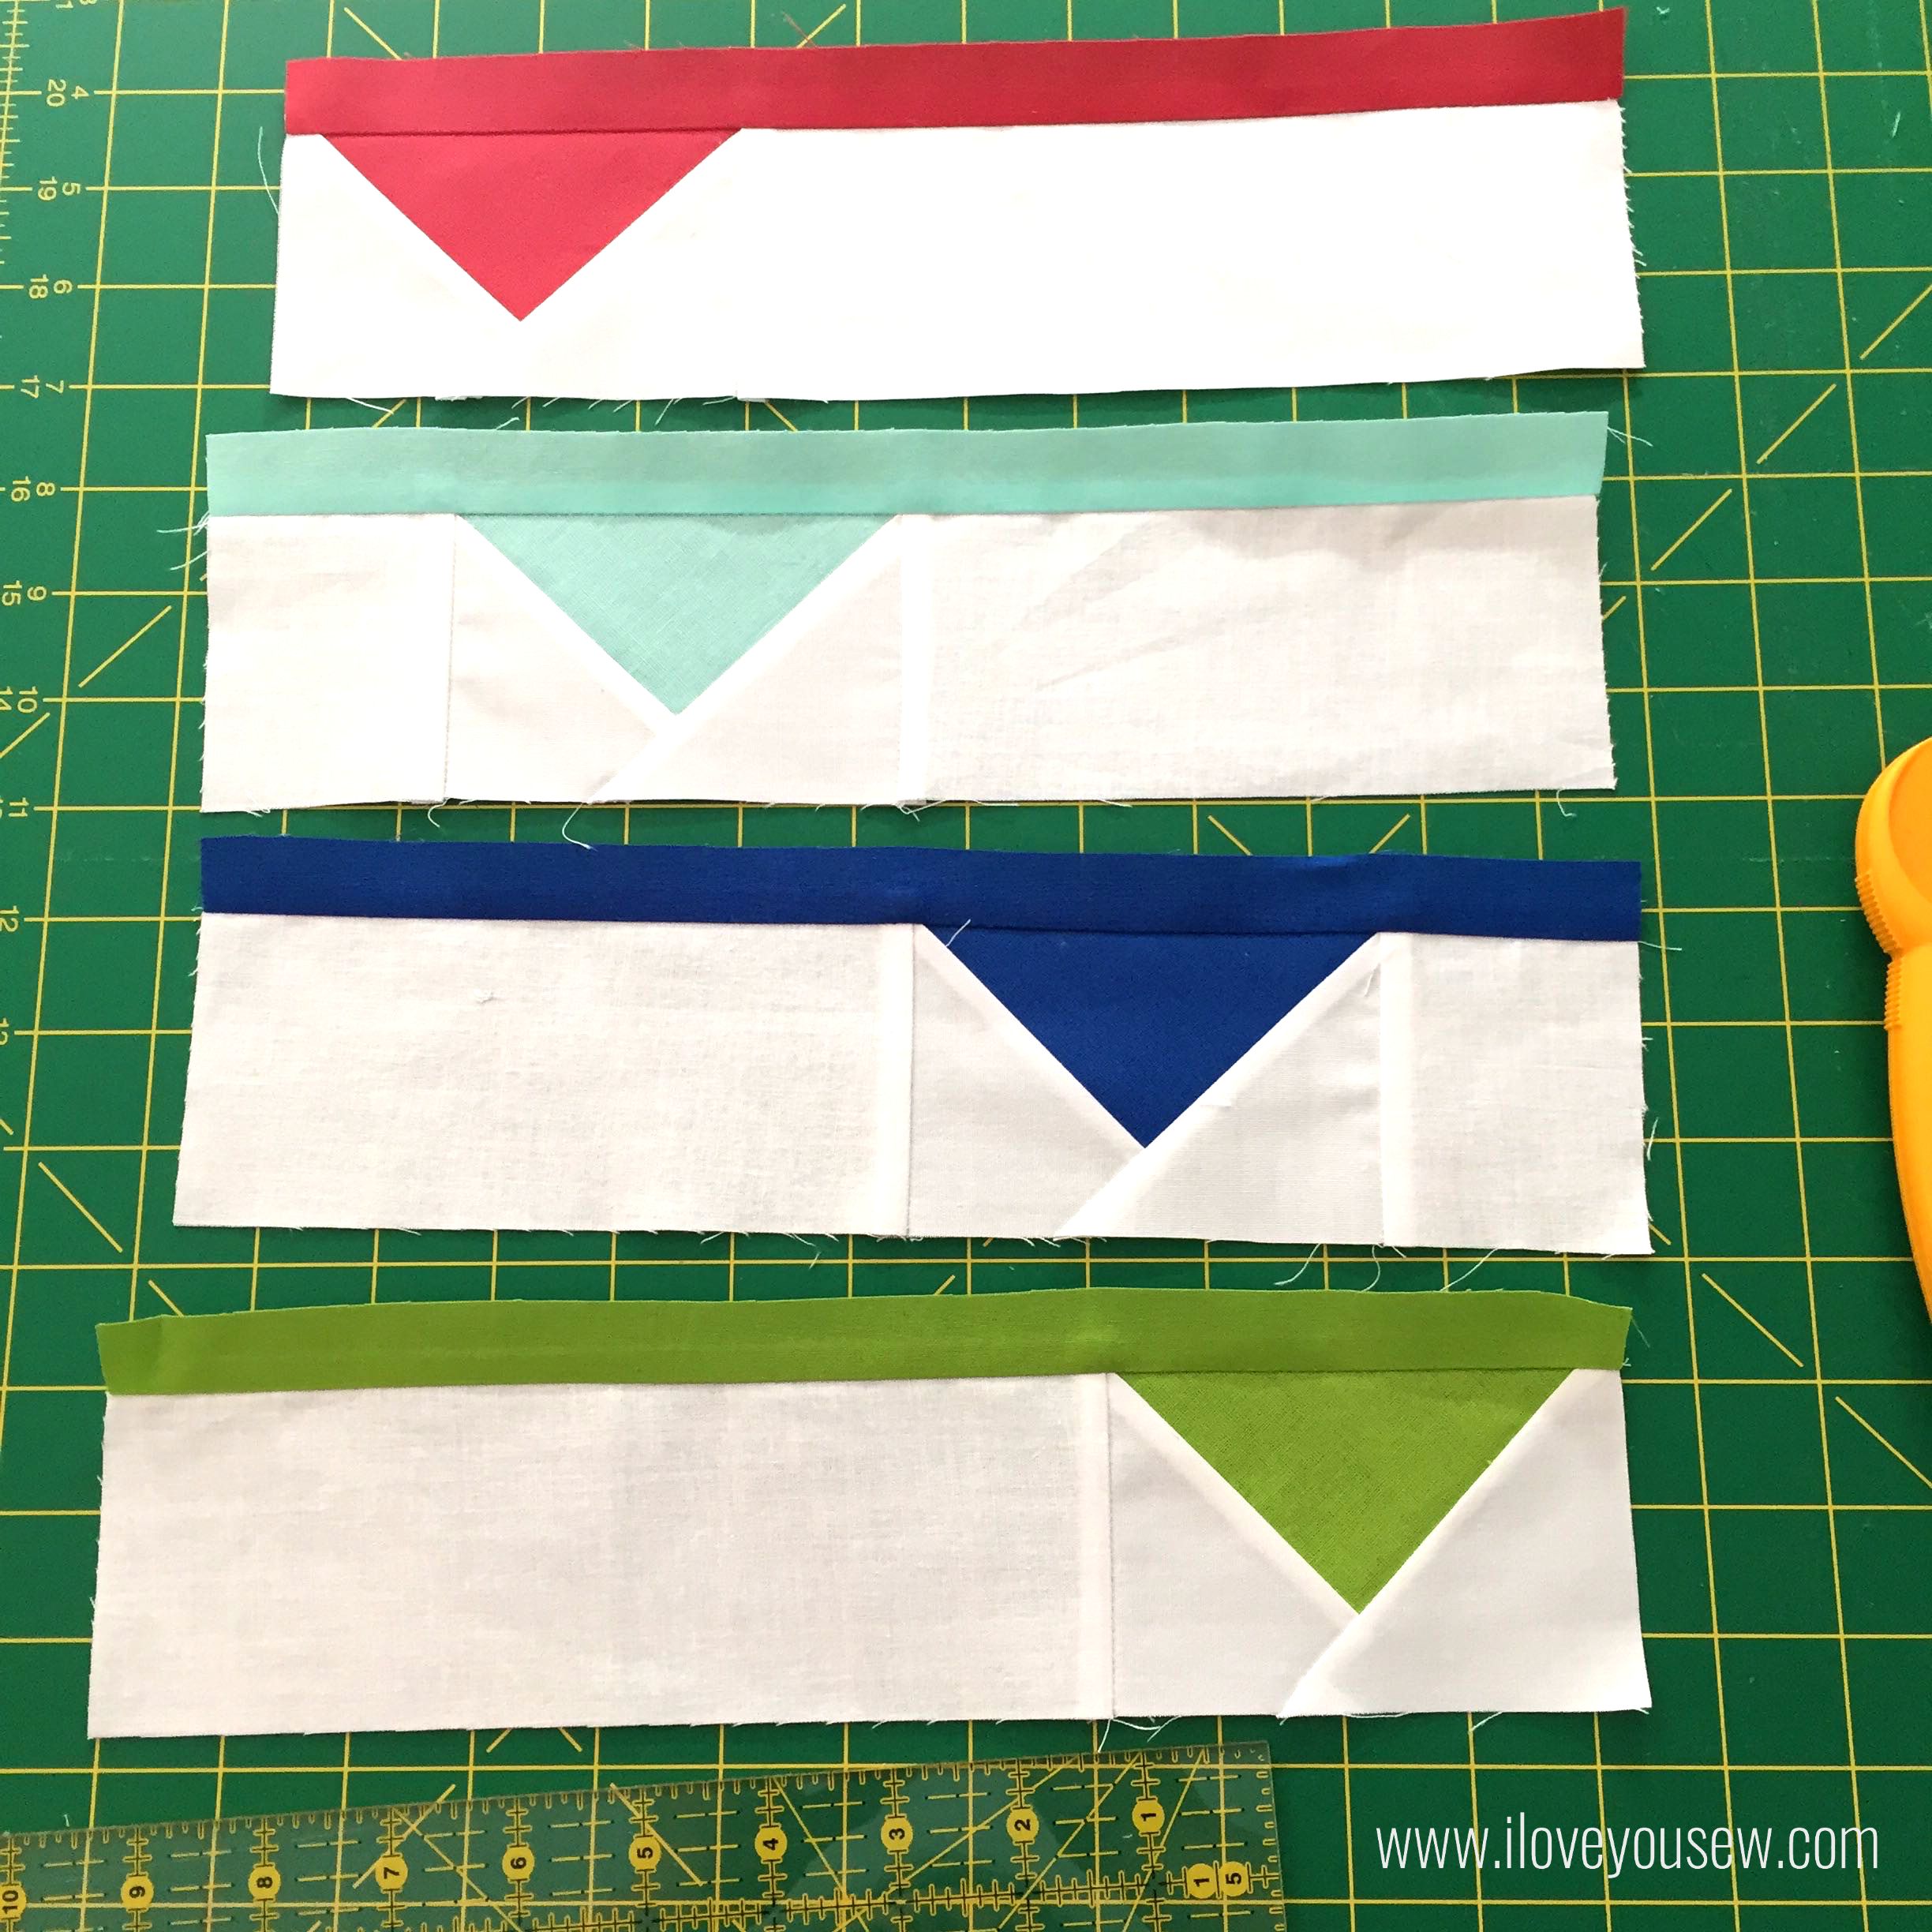
  • Attach the sides to the geese to make (4) 3″ x 12.5″ strips.  I still have the paper intact at this point.  You can remove at anytime, but I kept them on to sew the sides to keep the geese more stable.

15SewSashing

  • Add the matching sashing to geese strips. *Go slow and stead to ensure nice straight lines

17SewStripsTogether

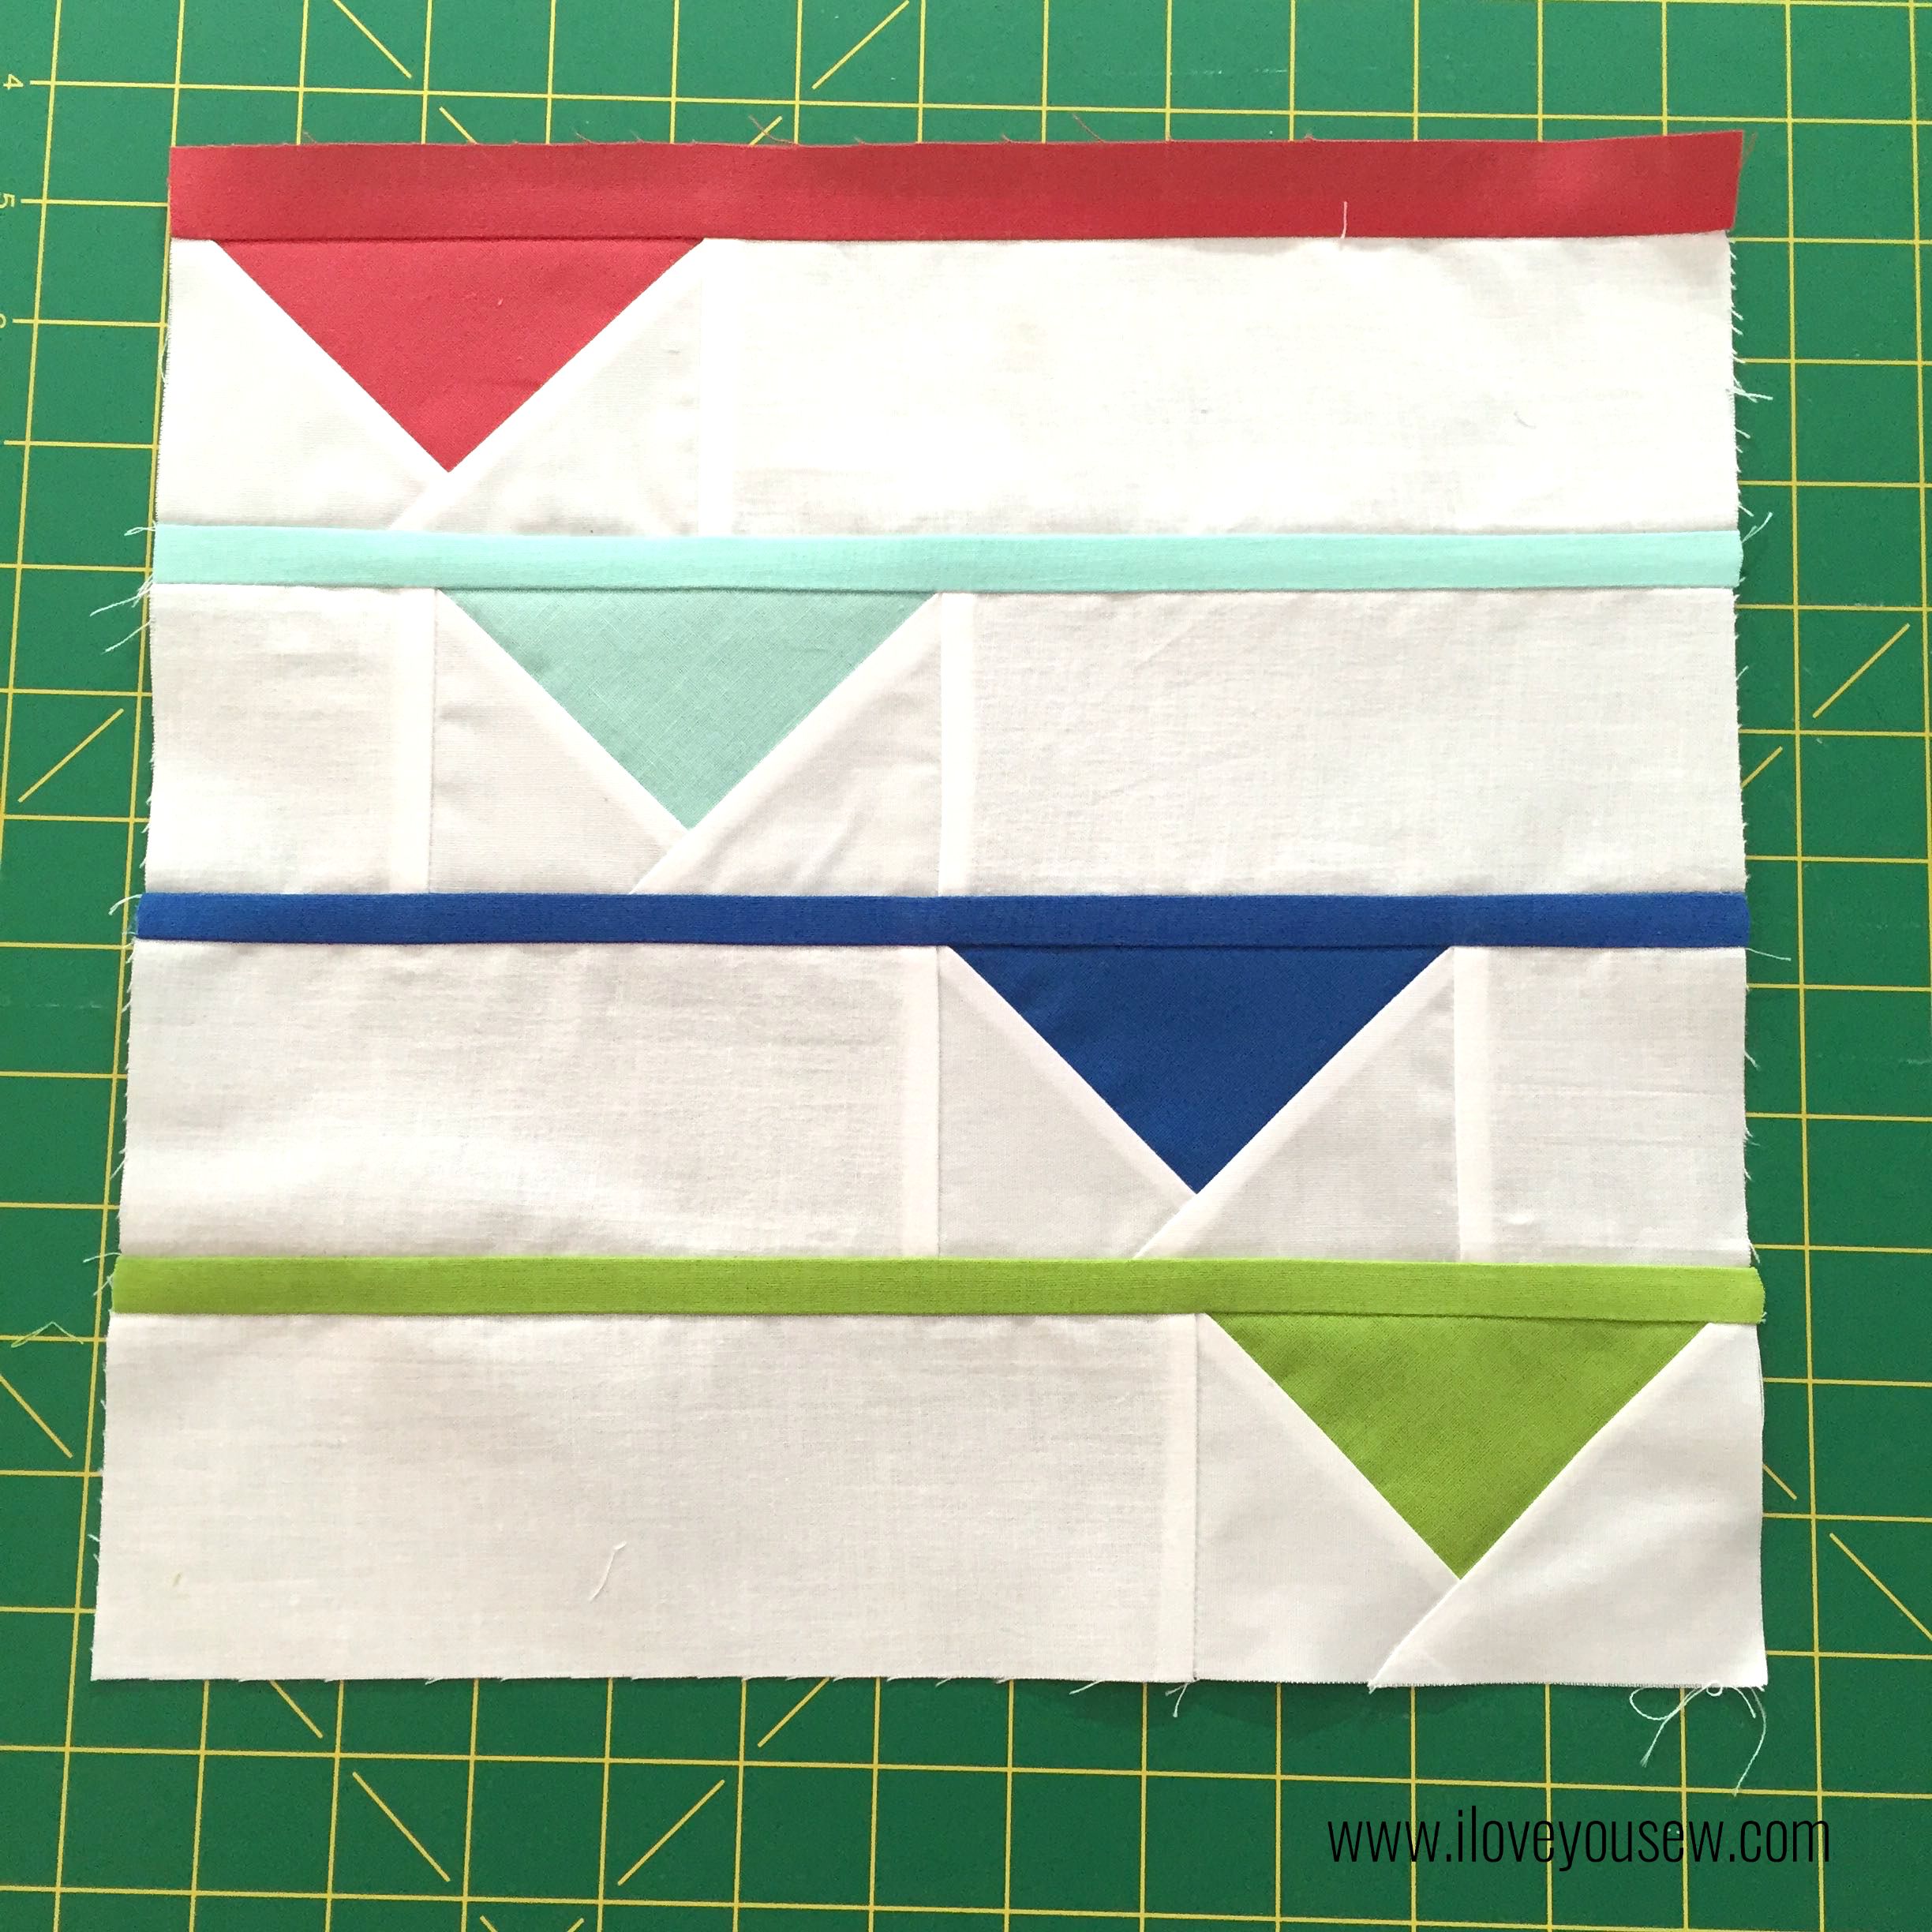
  • Sew all strips together. Iron seams in toward sashing. Give the block a final press.

Voila! You have made the Hanging Flags Block 🙂

vAriations:

HangingFlagsBlockAlt2

HangingFlagsBlockAlt1


For more information on the Fabri-Quilt New Block Hop:

*There is an additional Giveaway on Fabri-Quilt’s block today. Check them out by clicking the image below.

2015 Fabri-Quilt New Block Blog Hop


To see more blocks using this same bundle, head over to the following blogs:

(These are all amazing designs…Enjoy the block hop and the chance to win some of this fabric on Cheryl’s page!)

Host – Cheryl @Meadow Mist Designs

Josi @Avocado Quilts
Stephanie @Quilt’n Party
Cristy @Love You Sew
Sarah @Sarah Goer Quilts
Shelly @The Carpenter’s Daughter Who Quilts
Jayne @Twiggy & Opal
Sharla @Thistle Thicket Studio
Adrian @Making It – Family Food Quilts Crafts
Julie @Pink Doxies
Sarah @123 Quilt
Jane @Jolly and Delilah Quilts
Carrie @The Zen Quilter


***The blog hop was sponsored and fabric was provided by Fabri-Quilts.  All opinions and block design are my own and have not been influenced by outside parties. 

FREE Walking Geese Needlebook Tutorial

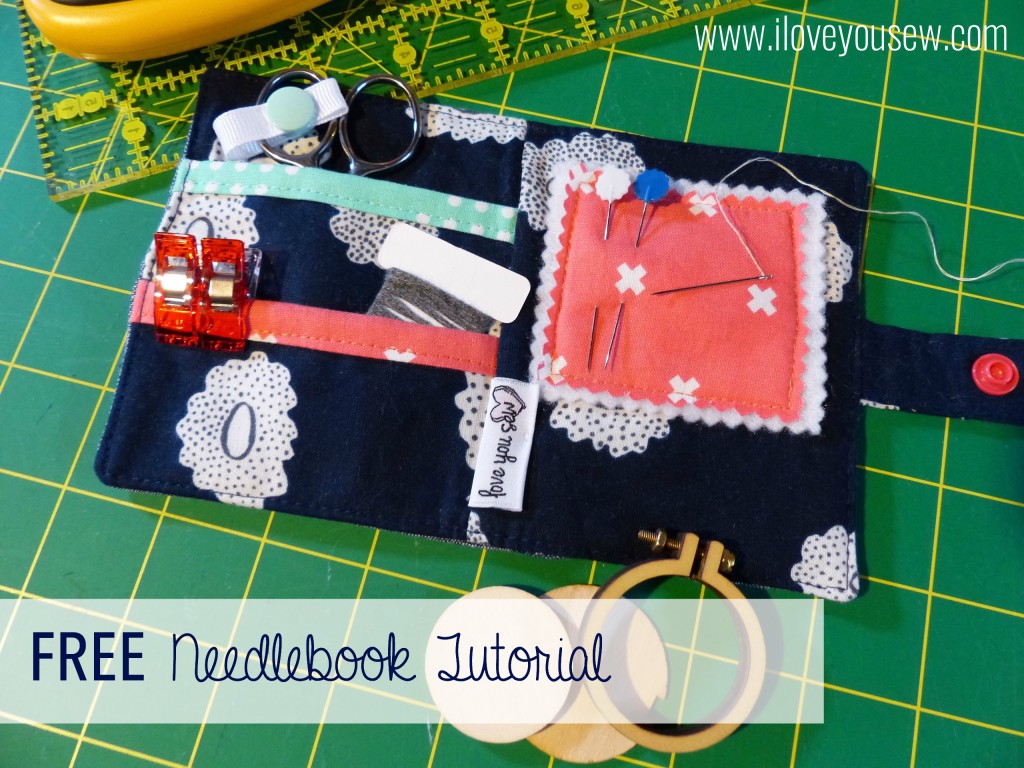
Love You Sew Needlebook Tutorial

I’m new to the world of Swaps.  I’ve seen and followed quite a few through Instagram and finally signed up for a few.  The #IGneedlebookSwap was my second sign-up, but my first which has been sent and received.  After looking at a few online, I wanted to design my own and share it for FREE with you!!!  If you are unfamiliar, these swaps have a theme (in this case, a needle book) and you have to post progress shots on your IG account.  They are usually secret and you have great fun finding out…aka “stalking” your partner’s tastes and preferences.    I like it because you get work on something new and it’s challenging to have some parameters set….including a deadline!

My partner asked for a Needlebook with a pocket to hold a small set of scissors, so I went about designing one myself!  How can I screw up the math on something that finishes at 4.5″ x 7″ (open) and 4.5″ x 3.5″ (closed), right???  My partner also specified using navy, coral and aqua…so I incorporated a design to showcase all of those colors.

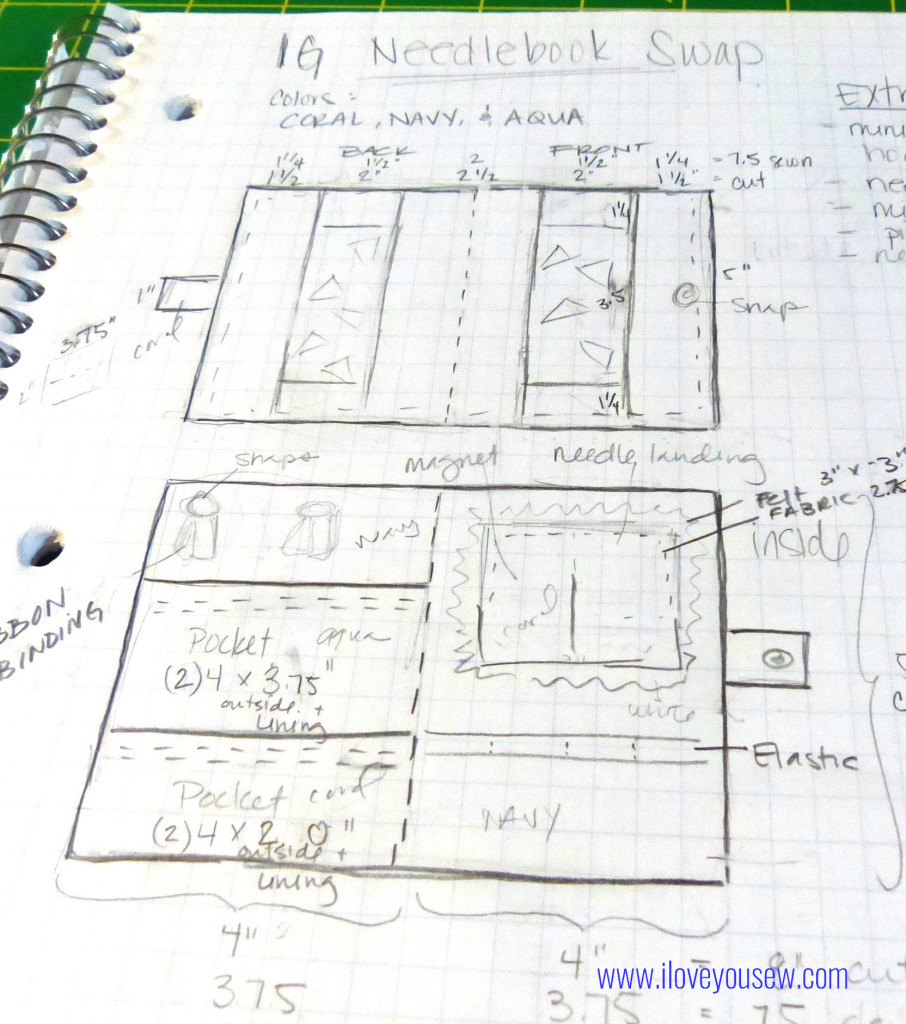
Needlebook Sketch

Needlebook Sketch

==========

Material Requirements:

  • Exterior Fabric (shown in Robert Kaufman IndigoChambray)
    • 1.5″ x 5″ rectangles [cut 2]
    • 2″ x 5″ rectangle [cut 1]
    • 1.25 x 2″ rectangle [cut 4]
    • Goosing Borders [sew 2]
  • Interior Fabric (shown in Cotton + SteelHatbox – Navy Desert Flower)
    • 4″ x 5″ [cut 2]
    • 4″ x 7″ [cut 1 for pocket A]
    • 4″ x 4″ [cut 1 for pocket B]
    • 2″ x 3.75″ [cut 1 for snap closure tab]
  • Accent Fabric 1 (shown in Cotton + Steel Dottie in Bluebird)
    • 2.5″ x 4″ [cut 1 for pocket A]
  • Accent Fabric 2 (shown in Cotton + SteelXOXO in Coral)
    • 2.5″ x 4″ [cut 1 for pocket B]
    • 2.75″ x 2.75″ [cut 1 for needle-landing]
  • Felt for needle-landing
    • 3″ x 3″ [cut 1]
  • Batting
    • 5″ x 8″ [cut 1]
  • KAM Snaps [2 sets]
  • 2″ Grosgrain Ribbon
  • 3/4″ Magnet

Use 1/4″ seam allowance unless noted.

==========

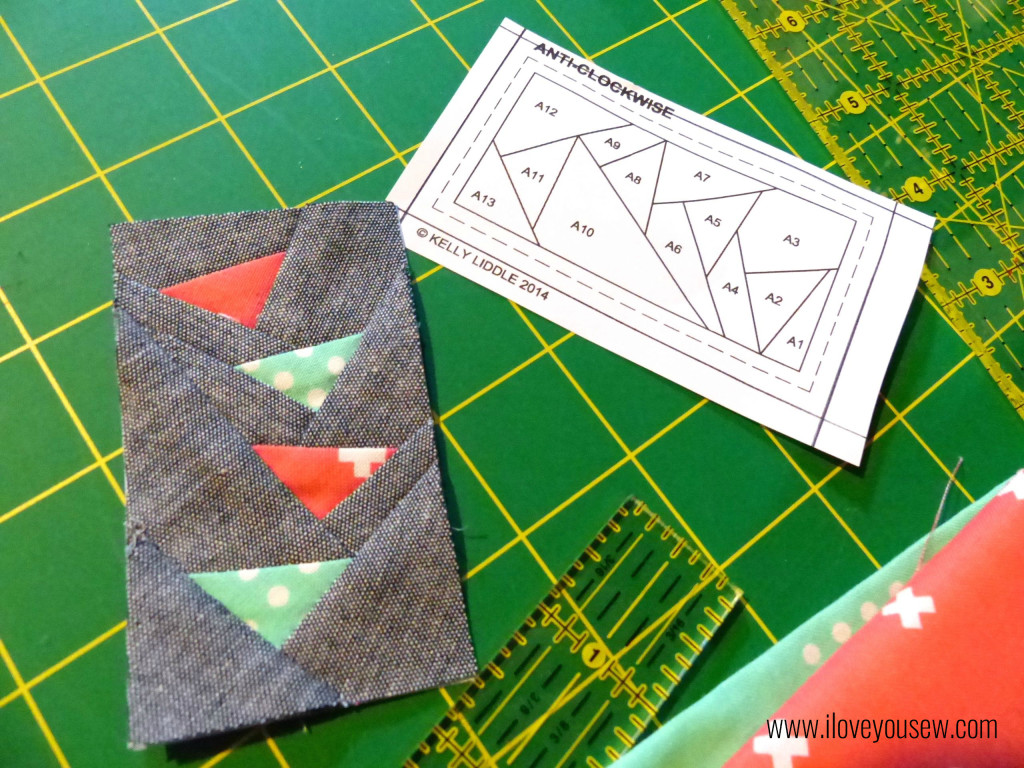
FPP Geese Close-up

FPP Geese Close-up

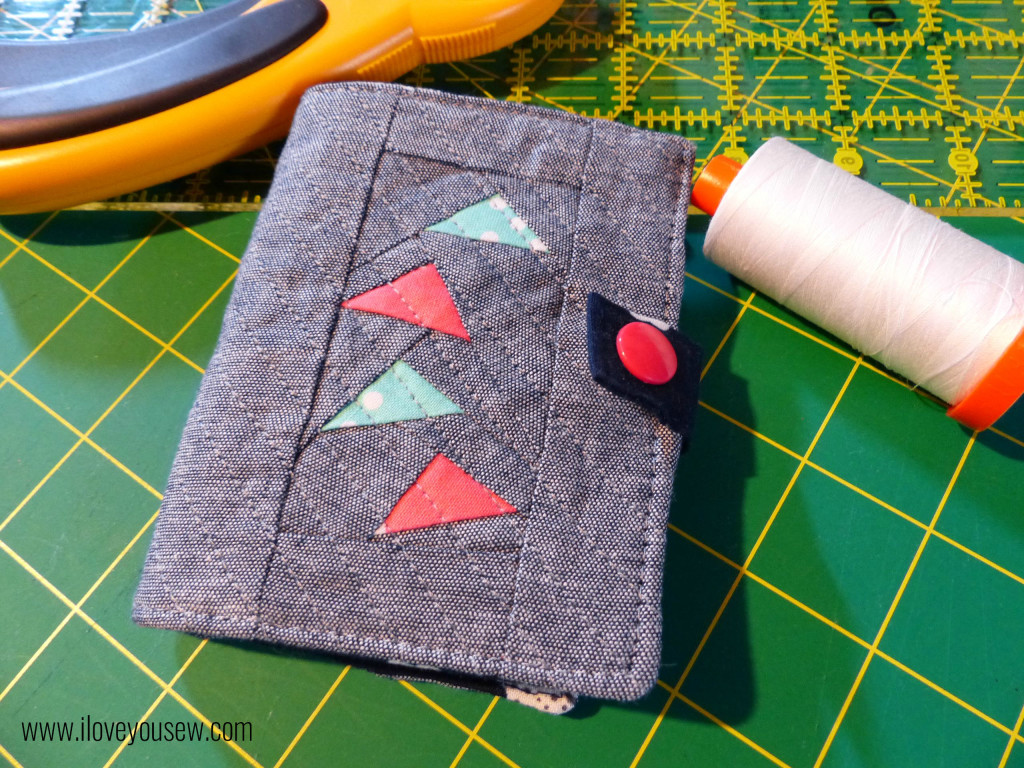
For the outside of the book, I used Jeli Quilts’s (surprise!) Goosing Borders and shrank the design down to 50%.  The geese are Cotton + Steel basics in Bluebird and Coral.  For the background and borders of the exterior, I used Robert Kaufman’s Chambray in Indigo. I love chambray for a clean sophisticated look and the added texture.  It’s definitely one of my go-to fabrics and always keep some in my stash.

For a nice video on Foundation Paper Piecing (FPP) click here.  I watched this to help me wrap my head around the fabric being sewn as a mirror image.  This technique takes some practice but you will quickly become addicted, like me 🙂 The finished Geese blocks should measure 2″ x 3.5″.  Attach the 1.25″ x 2″ rectangles to the short-sides of each Geese Block.  Then attach the 1.5″ x 5″ blocks to one side of each block.  Use the 2.5″ x 5′ rectangle to attach the Geese blocks together.  Quilt the exterior to the batting and trim 5″ x 7.5″.

Interior left with Pockets

Interior left with Pockets

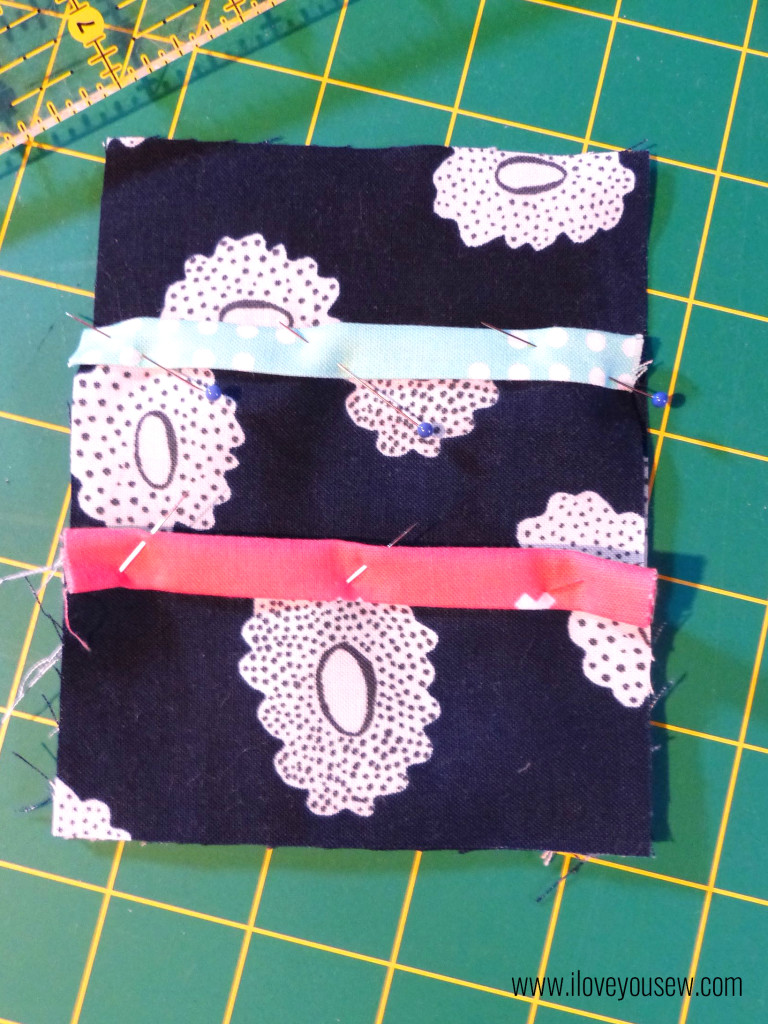
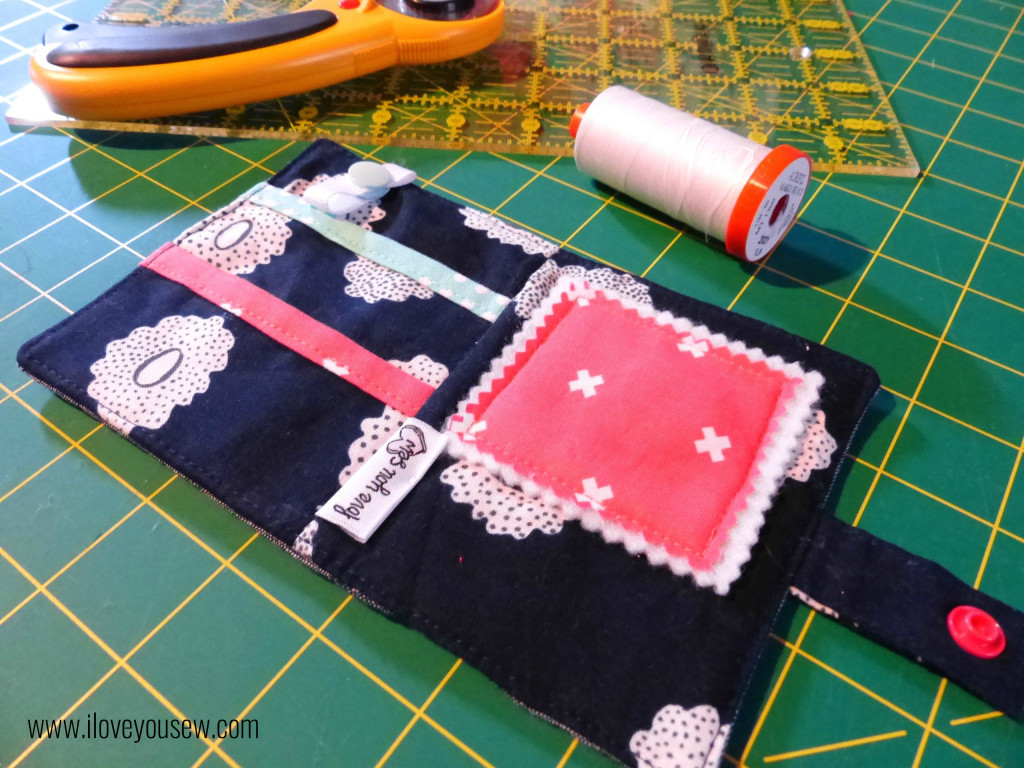
On the inside, I chose another Cotton + Steel fabric.  This time, a navy from Hatbox by Alexia Abegg.  I decided to make two pockets – a larger one for scissors and/or a spool of thread or pen.  The smaller pocket could be used to hold floss, clips, or a spare packet of needles.  The binding helps to grip the pockets and adds some visual appeal.

Iron both pockets in half length-wise so [A] is 3.5″ x 4″ and [B} is 2″ x 2″.  Take each piece of binding and machine-bind down just like you would a quilt.  Lay Pocket [B] on top of Pocket [A] on top of 4″ x 5″ interior fabric, matching up corners at the bottom. Pin all in place.

Right above the Pocket [A], I cut a 2″ piece of grosgrain ribbon, sealed the ends, and made a loop to hold the scissor handles in place.  I am a big fan of KAM Snaps and used them with the ribbon as well as with the closure of the entire Needle-book.

Preparing Needle-landing with built-in Needle-minder

Preparing Needle-landing with built-in Needle-minder

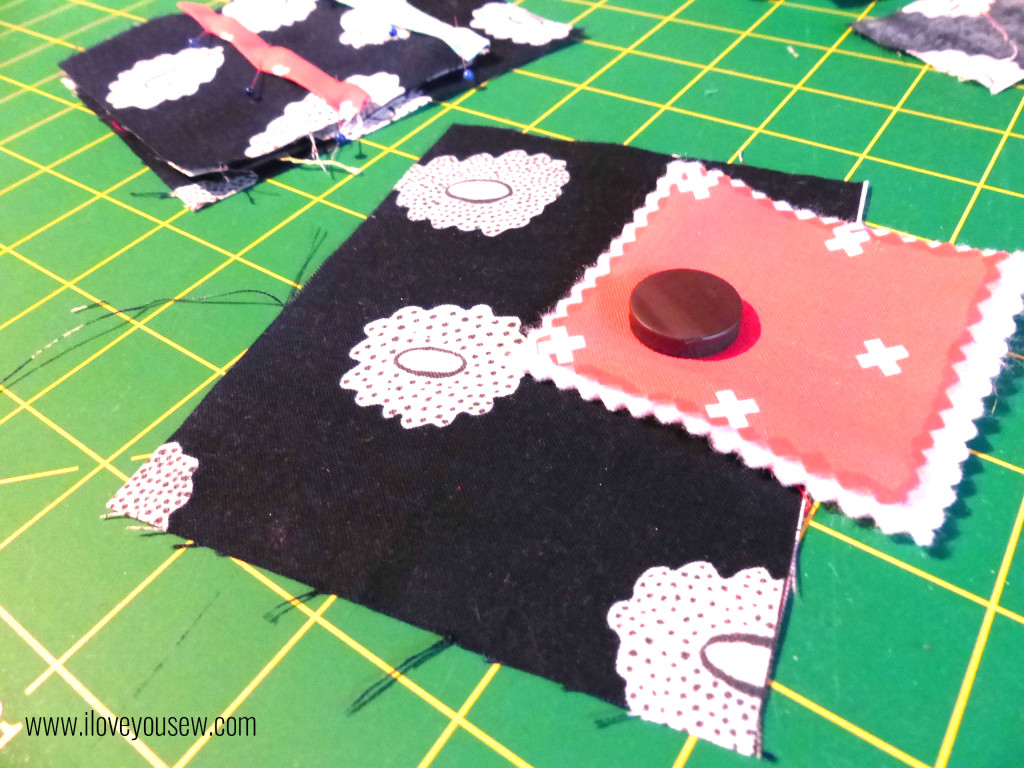
On the right side, there needed to be a needle landing (because it wouldn’t be a needle book, otherwise, right?!?) I just used craft felt and my Gingher serrated scissors to cut out the rectangle.  But I wanted some more color, so I added the same Coral fabric on top as a nice accent.  I sewed 3-sides up with a 1/8″ seam along the Coral and slipped in a small 3/4″ magnet for a built-in needle-minder!  Then I sewed up the last side making sure the magnet was fully enclosed. With right-sides together, sew the two interior panels together to create a center seam.

Needlebook Exterior

Needlebook Exterior

To create a tab, press the fabric lengthwise in half then open.  Press each long-side to match the center fold then fold in half, matching up the short-ends.  Top stitch all around to secure.  Attach KAM Snap at this point. Pin the tab half-way on the right interior panel facing in.

On the exterior panel, mark where the tab will meet and attach your other KAM Snap.  With right sides together, sew the Interior and Exterior  panels to each other leaving a 3” opening to turn. Snip corners, turn the Needlebook right-side out and press.  Top-stitch 1/8″ all around the book to close up the opening.  “Stitch in the ditch” along the center inside seam to allow the book to easily fold.

Completed Interior

Completed Interior

And….that’s it 🙂  This was a nice easy sew that you could use as a “Swap Extra”  or a stocking stuffer for a good sewing friend.  If you are not a snap person or do not have any on-hand, you can alternatively use a button and elastic cord closure or long pieces of ribbon to tie it all together.  If you looked closely at my sketch, I was initially going to add some elastic loops under the landing, but decided to omit them to keep this simple…but it’s a great idea if you want to add an additional feature.

Since I’m not a seasoned tutorial author (yet!), please let me know if you have any questions. Don’t forget to share pictures of any completed projects as well!

I’m linked up to Late Night Quilters Tips and Tutorials Tuesday.  Please visit the page to see some more great sewing and blog related pointers!

#WalkingGeeseNeedlebook #IGNeedlebookSwap #LoveYouSew


Hug and Stitches,

Cristy

Love You Sew