Add Puff Sleeve Drama with a Sheridan Sweater Hack

This post was originally published on the Hey June Handmade Blog in January, 2020.  Edits are in italics and additional pictures have been added (since I love this pattern SO much!)
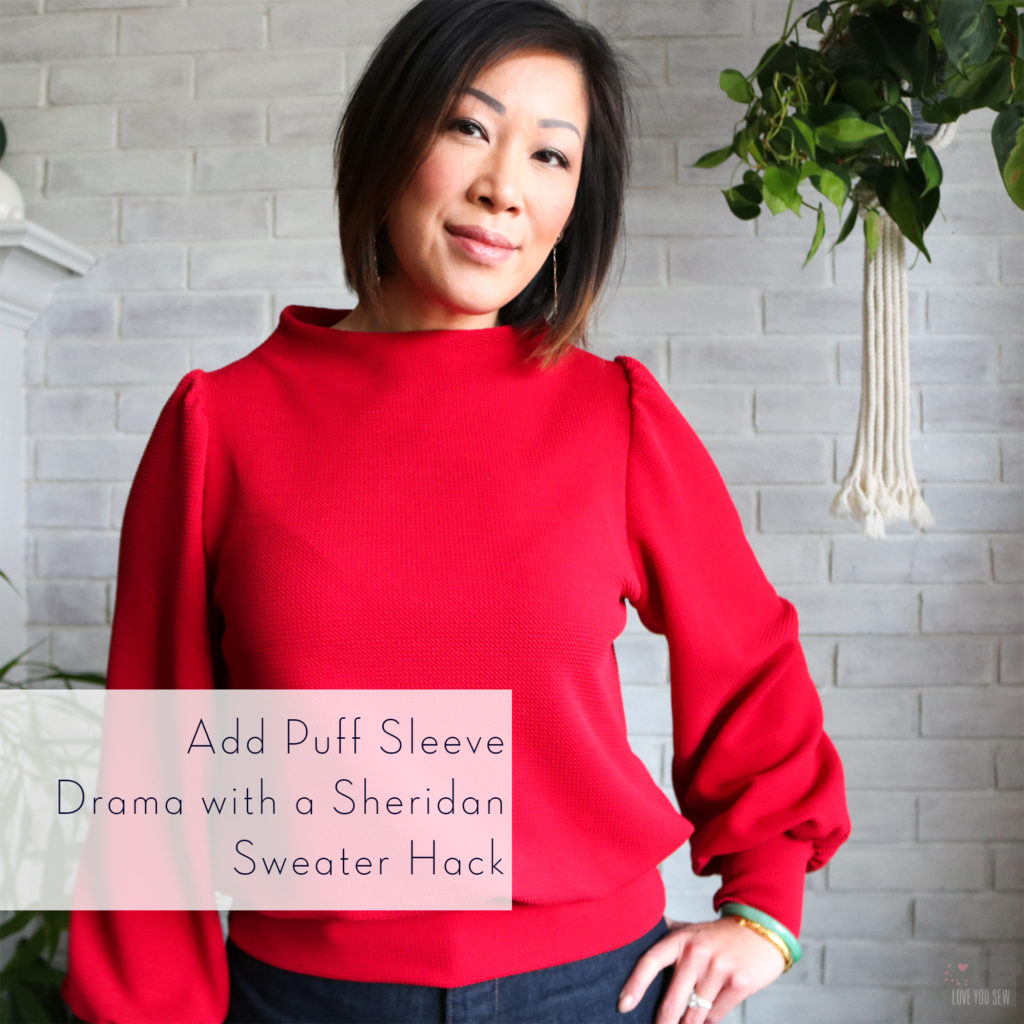
When I first hacked this Sheridan Sweater for the Hey June Handmade Blog, I had no idea it was going to become one of my MOST worn tops. Prior to March, life was pretty normal while we were just starting to hear about the pandemic. My social world was still moving along and was able to wear my Sheridan to Lunar New Year celebrations (as planned!), Galentine’s Day fun with my girls, and was my go-to for a night out.  I knew even back then that I wanted another Sheridan.
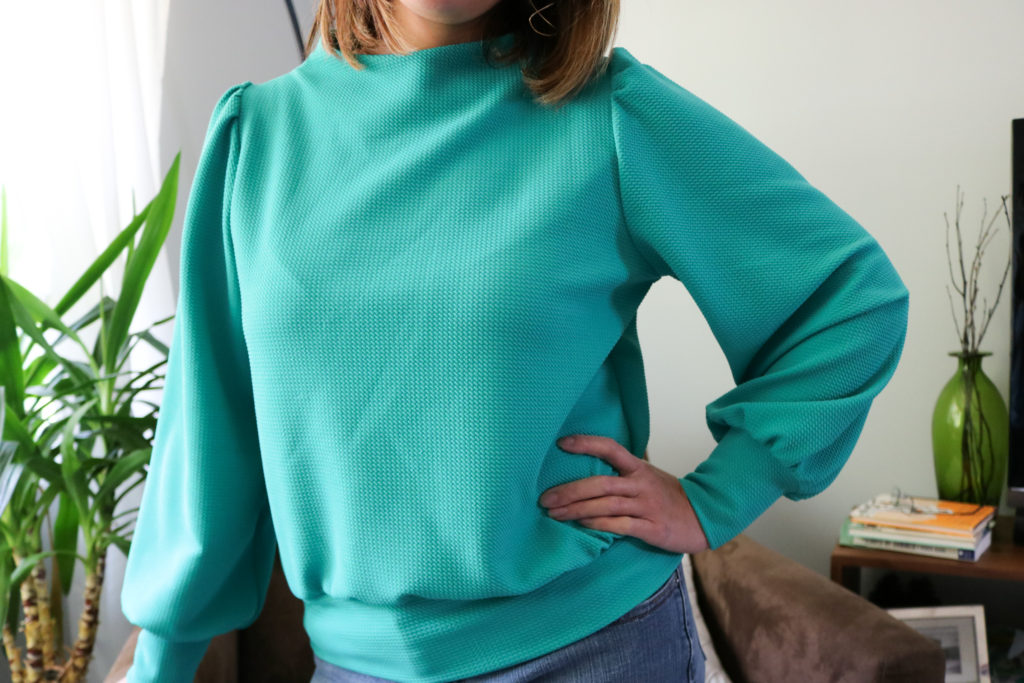
After a #sewingfail with the wrong fabric (it was a red and cream colored stripe that clashed and looked HORRIBLE with my skin tone and hair highlights,) I was ready to make another.  This time I wasn’t going to mess around.  I knew I would ADORE my new Sheridan because I used…the same hack…and the same fabric as my OG…just a different color!
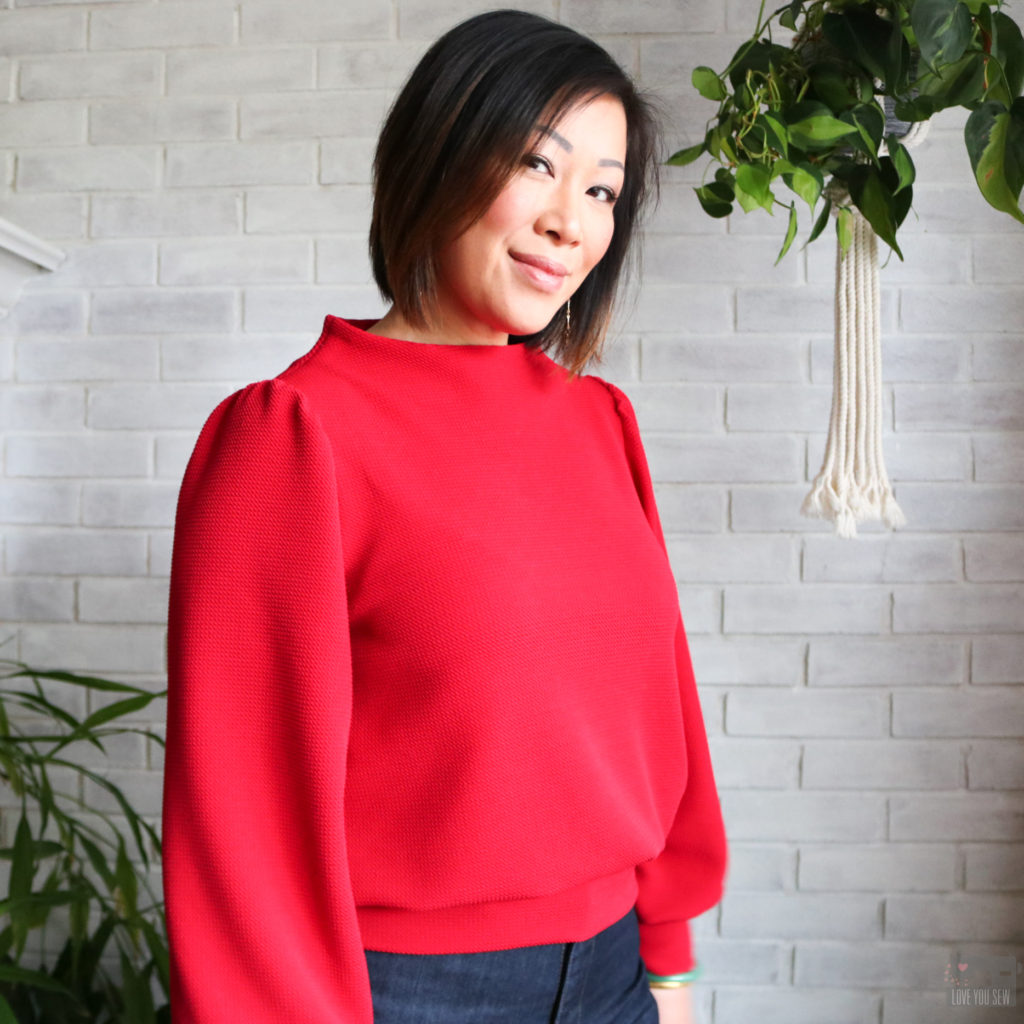


Back in early December, I knew I needed a new red top.  My one cardigan just wasn’t enough for all of the holiday school parties, concerts, church events and even family get-togethers.  I wore that one piece of red clothing OUT and knew I needed something else to add to my festive wardrobe.  But did I really need a new top???  Did I really want to make one??? Then the Sheridan Sweater was launched and my questions were answered.
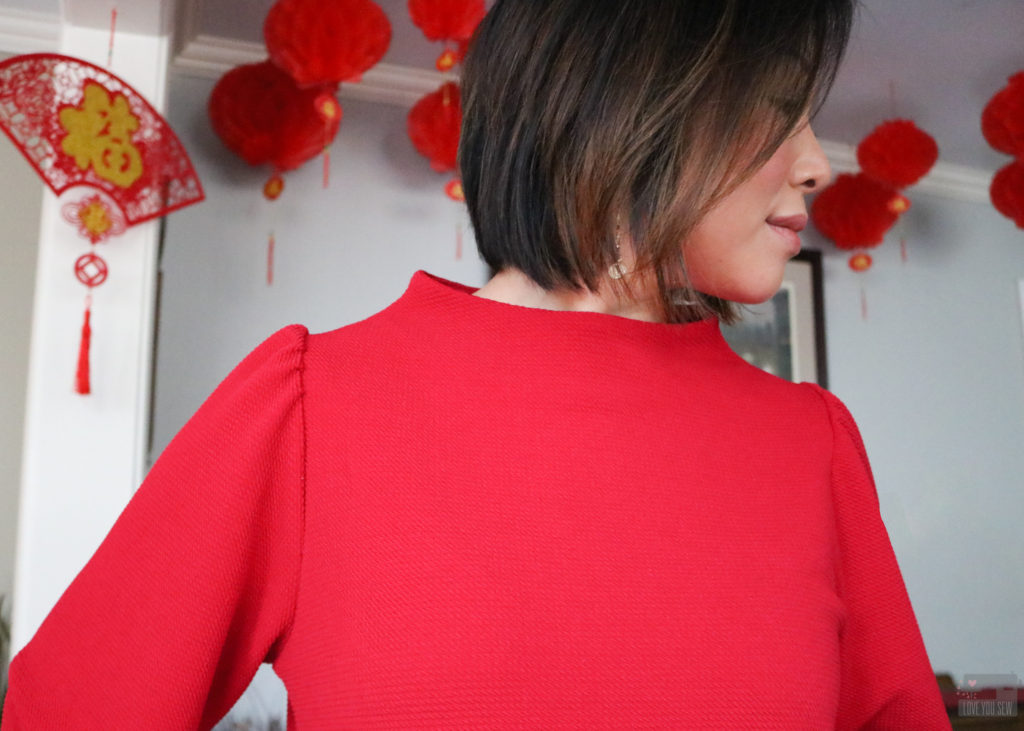
All of my internal fighting against wanting “another” knit top disappeared.  After seeing the Sheridan launch, my mind switched and I bought the pattern right away.  Of course, I need  a new red top!  It WILL work through the holiday season, AND into the Lunar New Year AND be useful for Valentine’s Day school parties!  Why wouldn’t I need the Sheridan Sweater in my life?!?
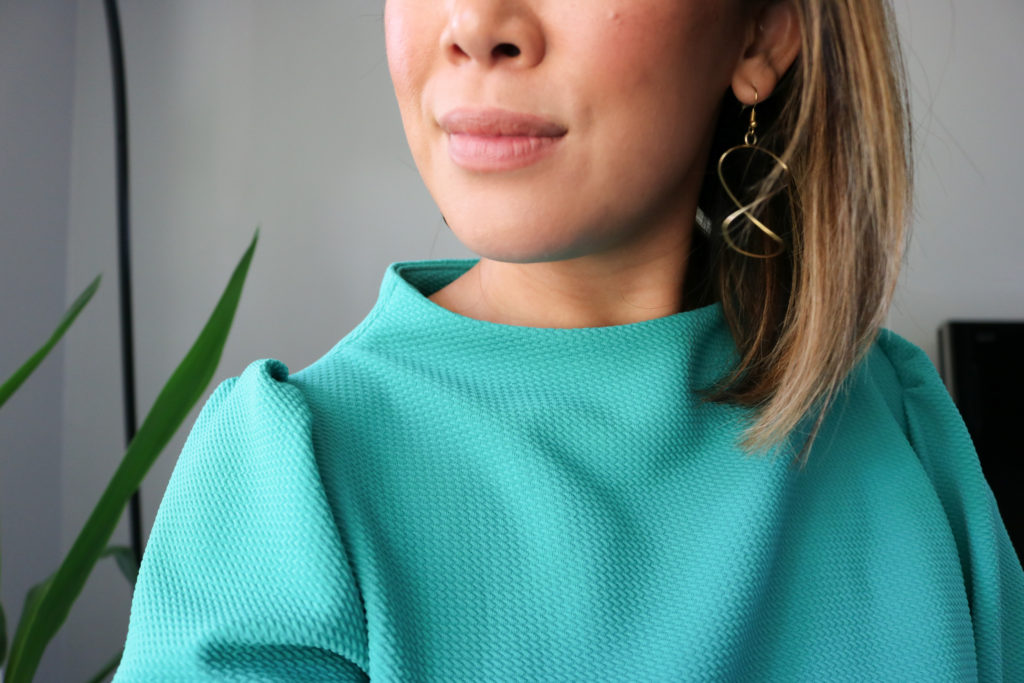
Adrianna did a fantastic job designing the different views and I’m obsessed with the seamless funnel neck, which I haven’t seen in any other DIY pattern.  The Sheridan Sweater also has the big statement sleeves which is on still on trend and I knew both of these features would really stand out in red.  But since this was going to be my all-winter holiday top, I wanted to bring it up juuuuust an extra notch.

FABRIC
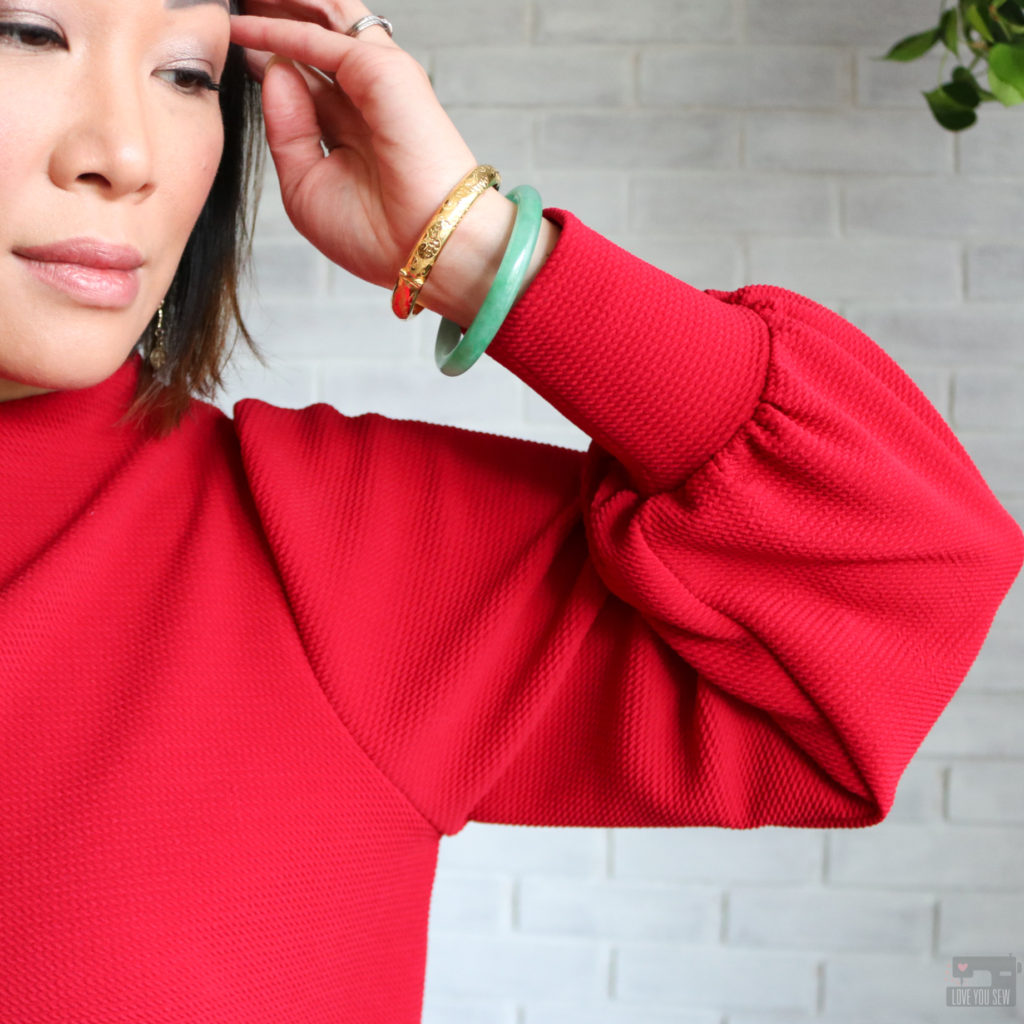
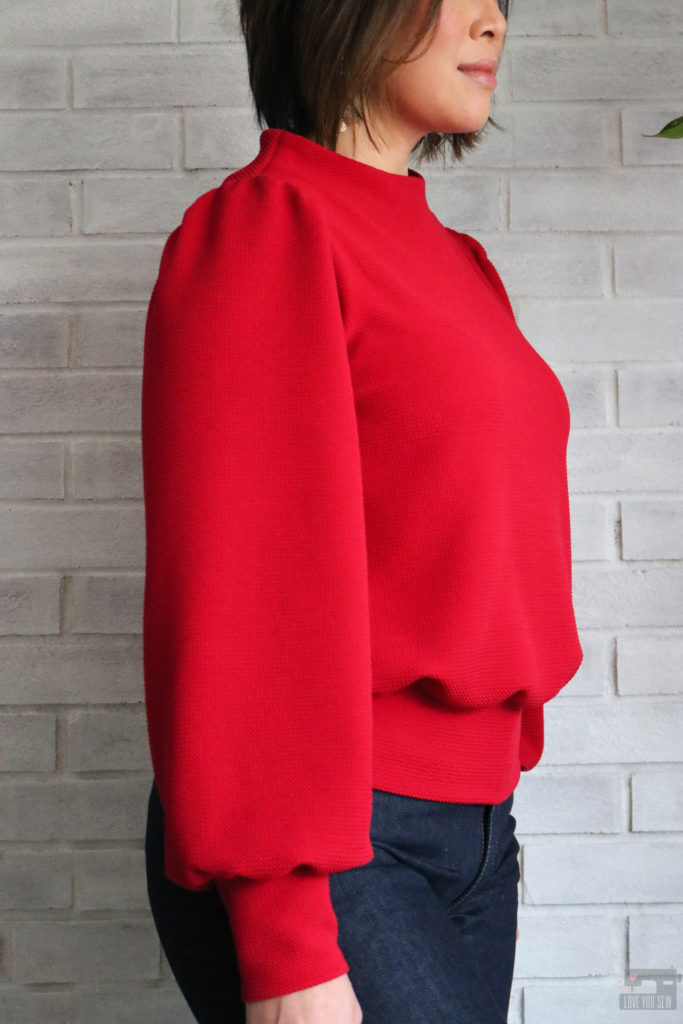
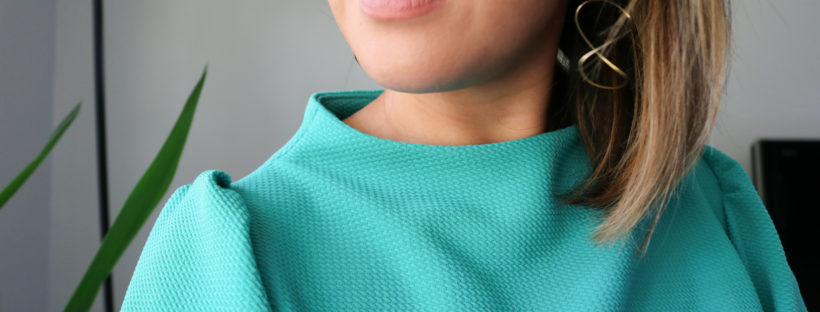
I found this beautiful textured waffle knit from Telio fabrics.  One of the reasons this sweater has been on constant wardrobe repeat is the fabric.  As a poly/spandex blend, the color saturation is on point.  After all of the washing and drying I’ve done, the color still looks as intense as day one.  I was concerned that the texture might be lost over time with dryer heat, but it’s all still there!
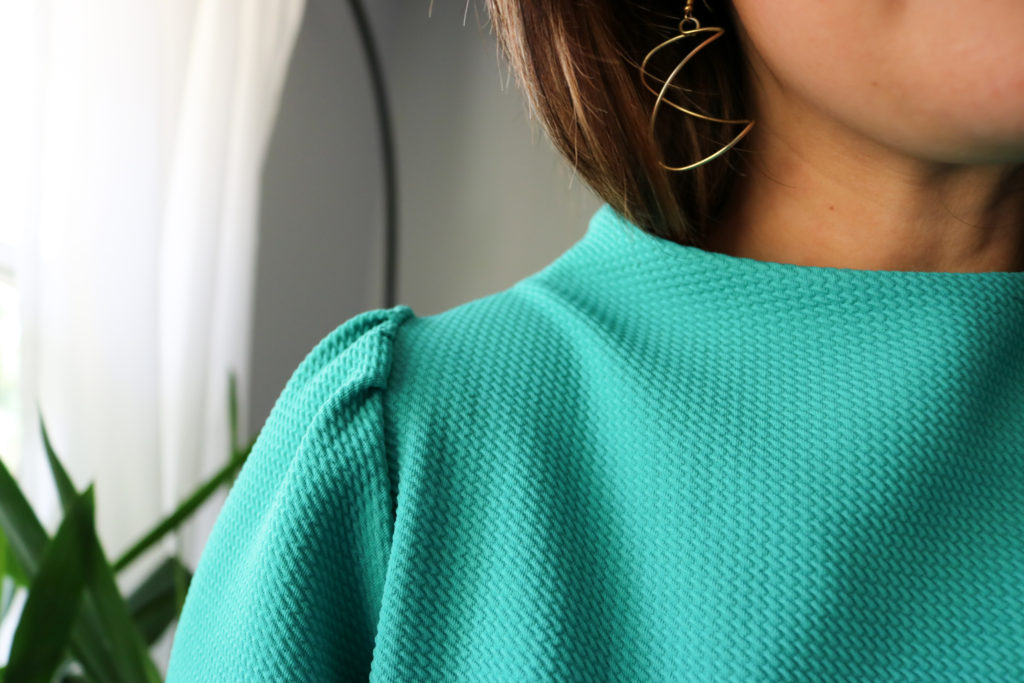
The Paola Pique Liverpool’s medium weight was a perfect complement to this pattern.  It has great body and really shows off the full sleeves.  The stretch and recovery is also very nice.  When I pull up on the sleeves and adjust the waistband, it  holds it’s size well and doesn’t stretch out over the course of the day.  This fabric comes in so many rich jewel tones that I had to have the Emerald.  The pictures come up more teal, but this color swings more to the green side in-person.

TUTORIAL

I figured if I was going red, I wanted to make the sleeves stand out even more. So….I hacked the sleeves to be more voluminous in the sleeve head for All. Of. The. Drama.  Below is my quick and definitely non-technical way to achieve that extra shoulder poof.
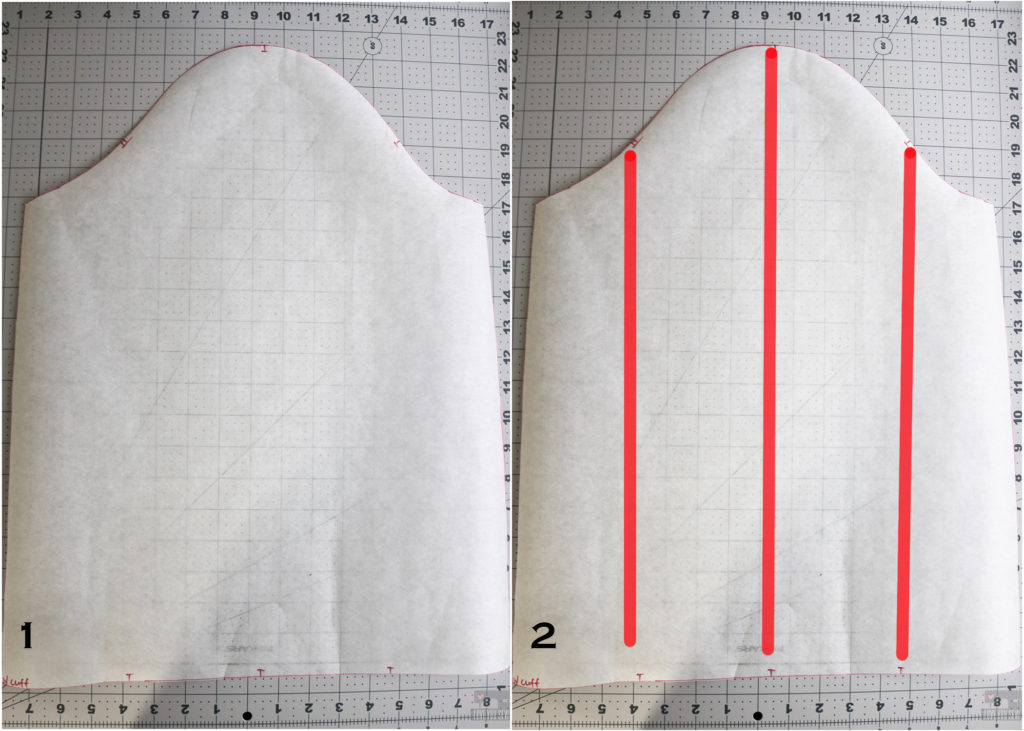
1. Take the sleeve pattern and make a copy.  (I traced the pattern onto some Swedish tracing paper I had on-hand.  I like using this since it’s more pliable than regular paper and can be pinned/sewn without being destroyed.)

2. Divide the sleeve into approximately 4 equal sections by width.  With the nice notch markings already drafted as part of the pattern, I used these as guide when splitting the sleeve.
3. Cut the pattern to separate these sections from the sleeve head all the way down to the cuff, but NOT cutting through.  All of the sections should be hinges and able to move.

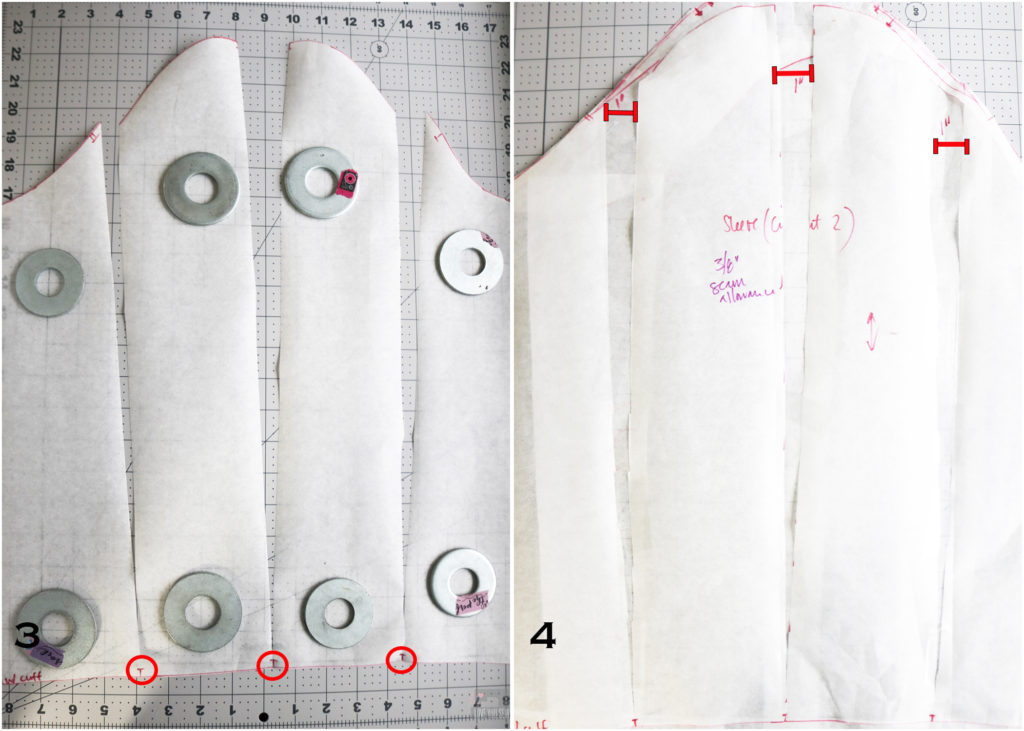
4. To start, I added 1” in between each section.  I placed scrap paper underneath the pattern, and hinged each section out by 1” at the sleeve cap.  Then I taped the pattern onto the scrap.  Repeat 2 more times between the sections.  If you would like more volume, you can increase the hinge widths.
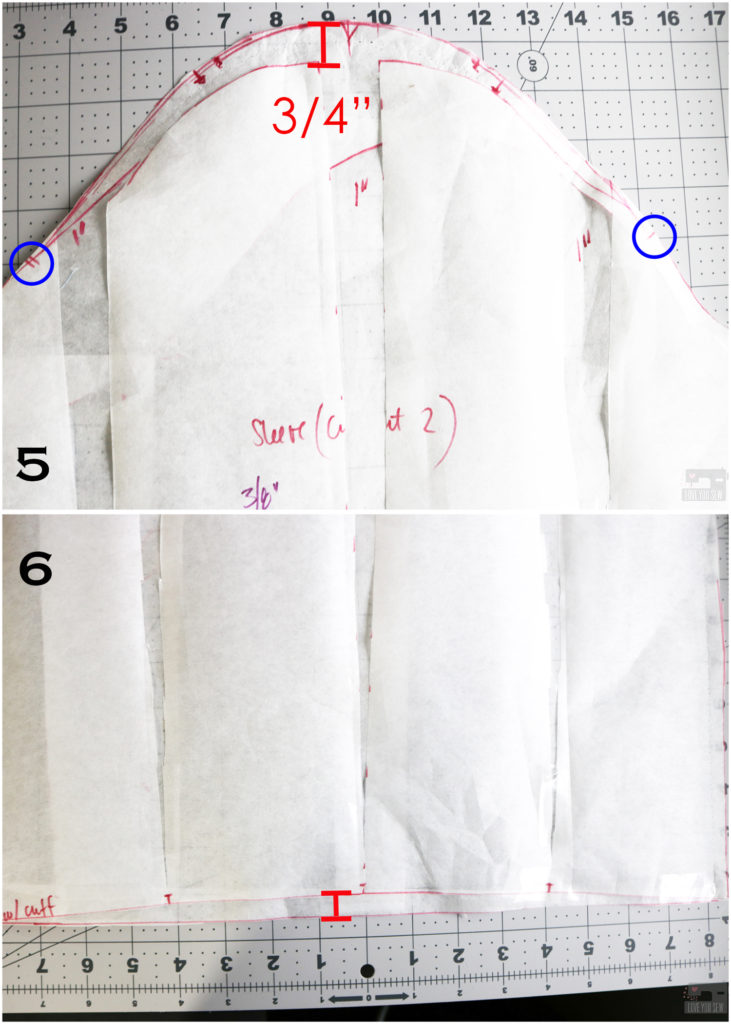
5. To get the extra volume at the top of the cap, I added 3/4” to the top and blended the line back to the notched parts of the cap, all while following its shaping.  Again, if you want a little more puff in the sleeve cap, feel free to add a little more to length to the top.

6. At the cuff line, true up the pattern so it is straight again.
At this point, I cut out the pattern and did make a muslin, but only had quilt cotton on hand.  It gave me an idea of the extra volume and shape added to the sleeve.  I did have to consider the extra weight and stretch with the knit fabric.  But it was still good enough for me and I went ahead to cut into the main fabric.
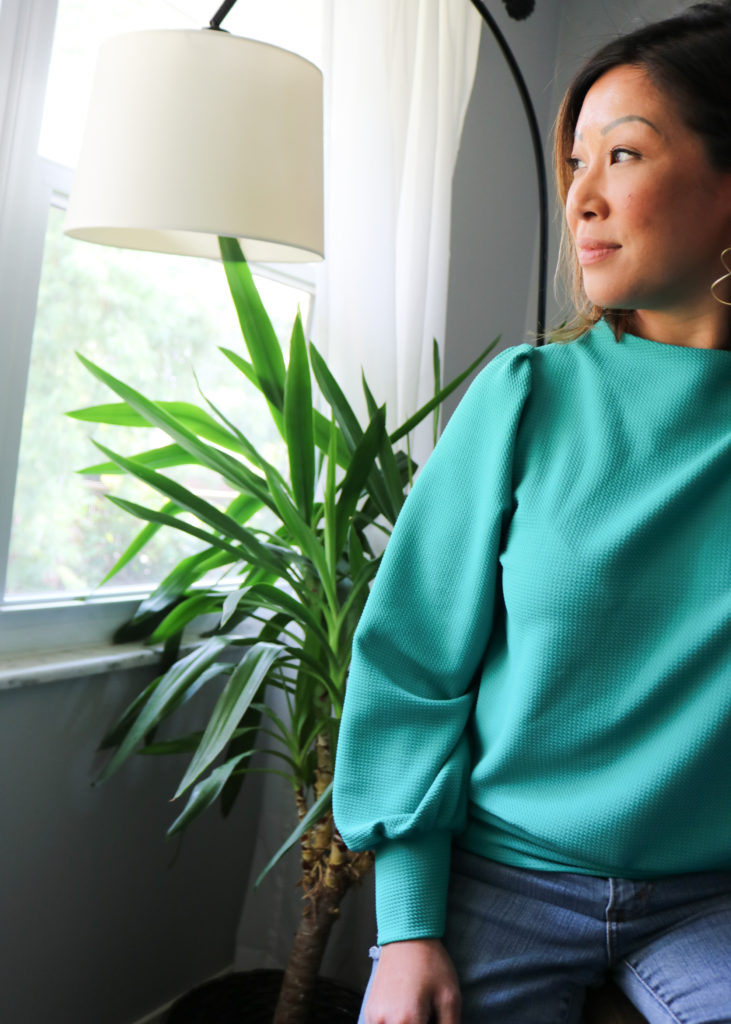
To insert the sleeve, I made gathers between the sleeve notches not exactly knowing how it would all look.  But I ended up marking 3” on either side of the shoulder seam and pushed all the gathers in between those markings.  I basted the sleeve into place and was very happy with the result!  With that, I finished sewing the sweater and have never been more pleased!
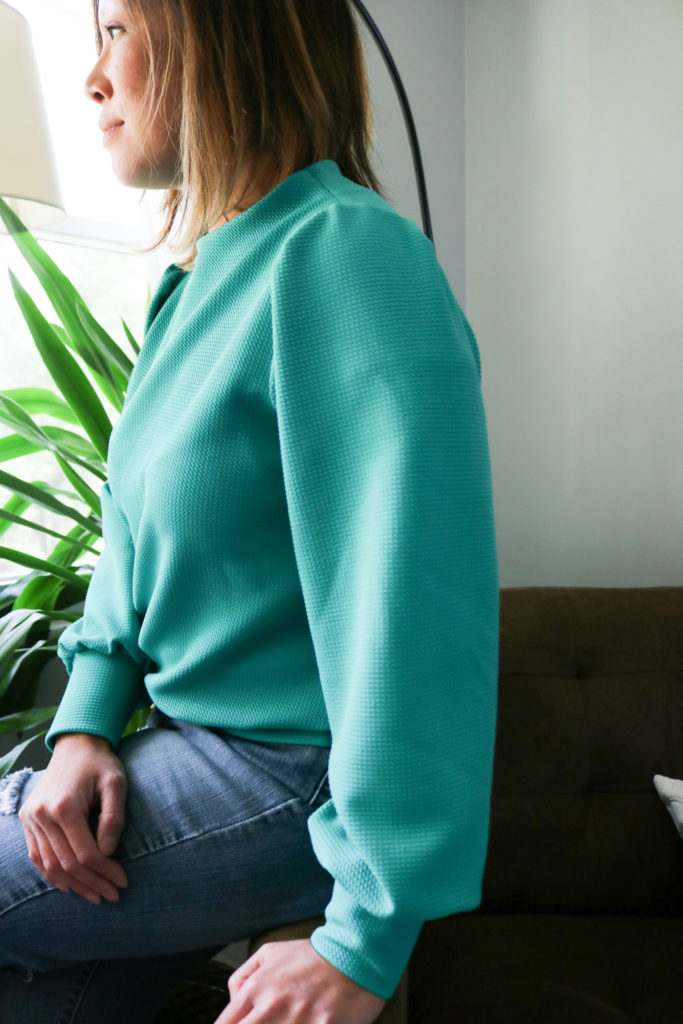
This hack turned out exactly like what I wanted and just love how “extra” the sleeves are.  The additional gathers and volume in the sleeve cap really balance out the overall ease in the sleeve and I love the extra long cuff to show it all off.  This top is pretty fancy and ready for every occasion now.  It’s still comfy in a stretch knit, but also so incredibly unique and special!
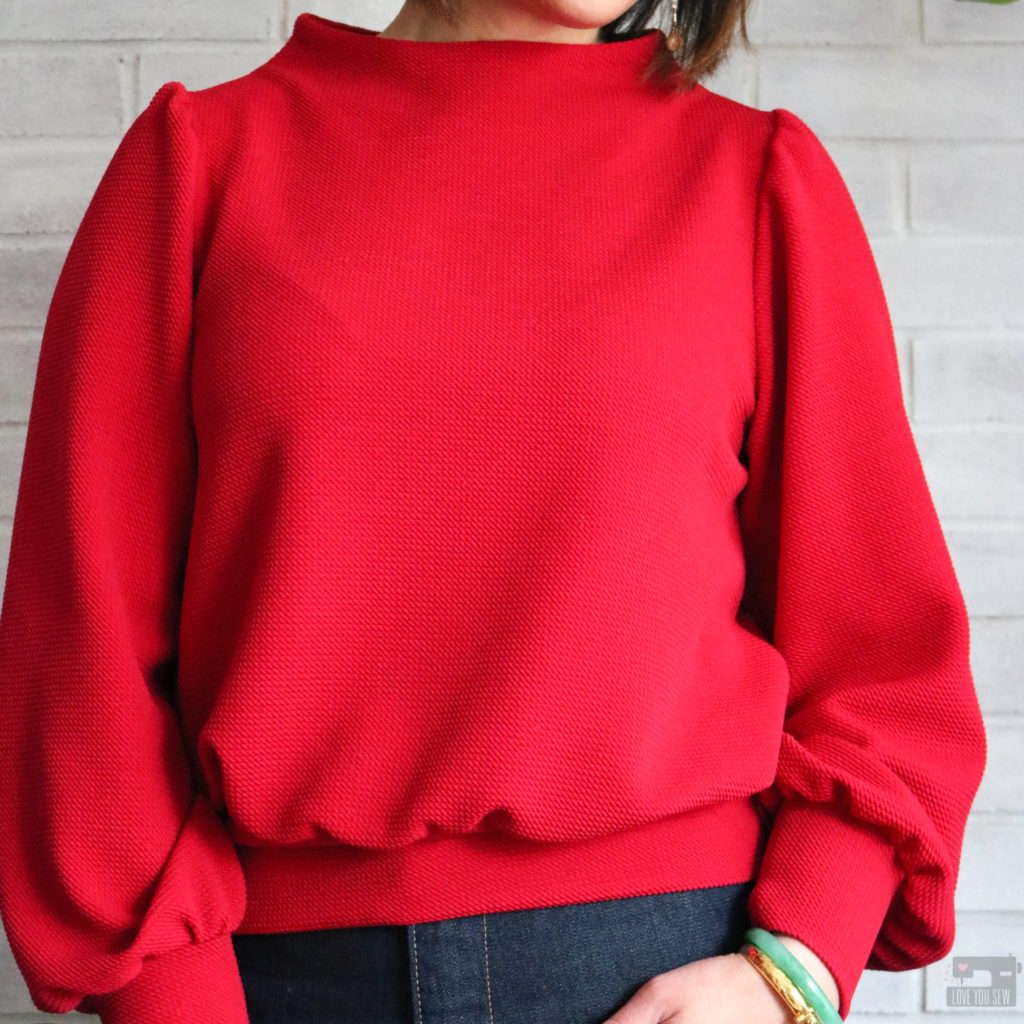
Project Summary

  • Pattern: Sheridan Sweater by Hey June Handmade; View: B; Size 10
  • Mods: Narrowed shoulders by 1/2″ each, increased the cropped length by 1″, used Puff shoulder hack above
  • Fabric: Telio Pique Liverpool Knit from Fabric.com in Hermes Red and Emerald
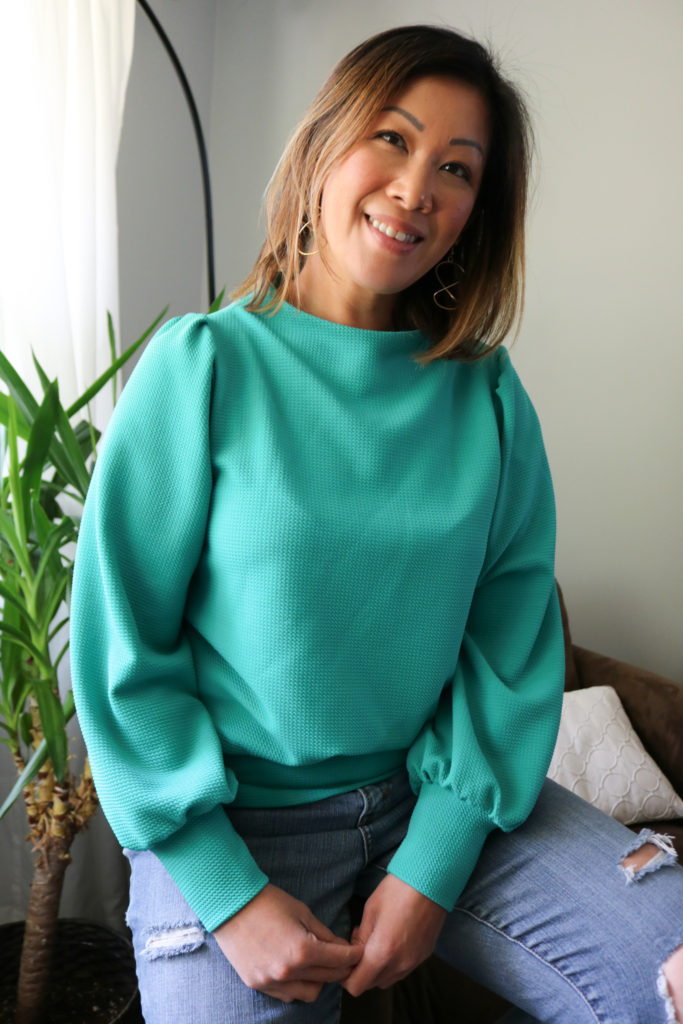
This hack can be used on just about any pattern with a set-in sleeve.  I may have to try it on a woven pattern this fall/winter.  Please let me know in the comments if you use this hack!  I would love to hear what you think!


Hugs and Stitches,

Cristy


This post may contain affiliate links.  You can read my full Disclosure here.
 

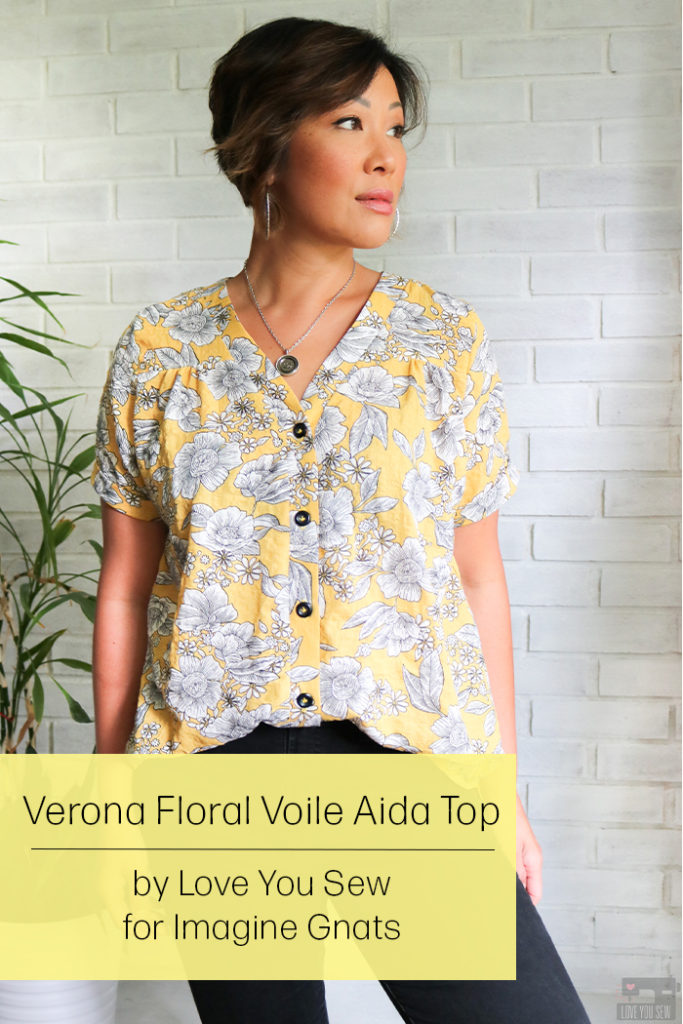
Pattern Review: Aida Top in Verona Voile

This post was originally published August 13, 2019 for the Imagine Gnats Blog.  Since the shop closed in early 2020, I have republished my contributors posts (with permission) to this blog.  I have included some additional thoughts and pictures after some real-life wear and tear.  Enjoy!

In Ohio, we are in the dog days of summer, and this hazy heat is beating down on all of us. It’s at the point of just scorching outside or freezing inside almost all buildings with the air conditioning blasting to compensate for the weather.

So, I’ve been on the hunt for a lightweight woven fabric and a shirt pattern with some nice ease for a loose and breezy top (enter my voile Aida top). I was so happy to see this Verona Voile (aff link) and had to have it!  Then all I could think about was pairing it with the Aida Top by Sew Liberated.

Fabric

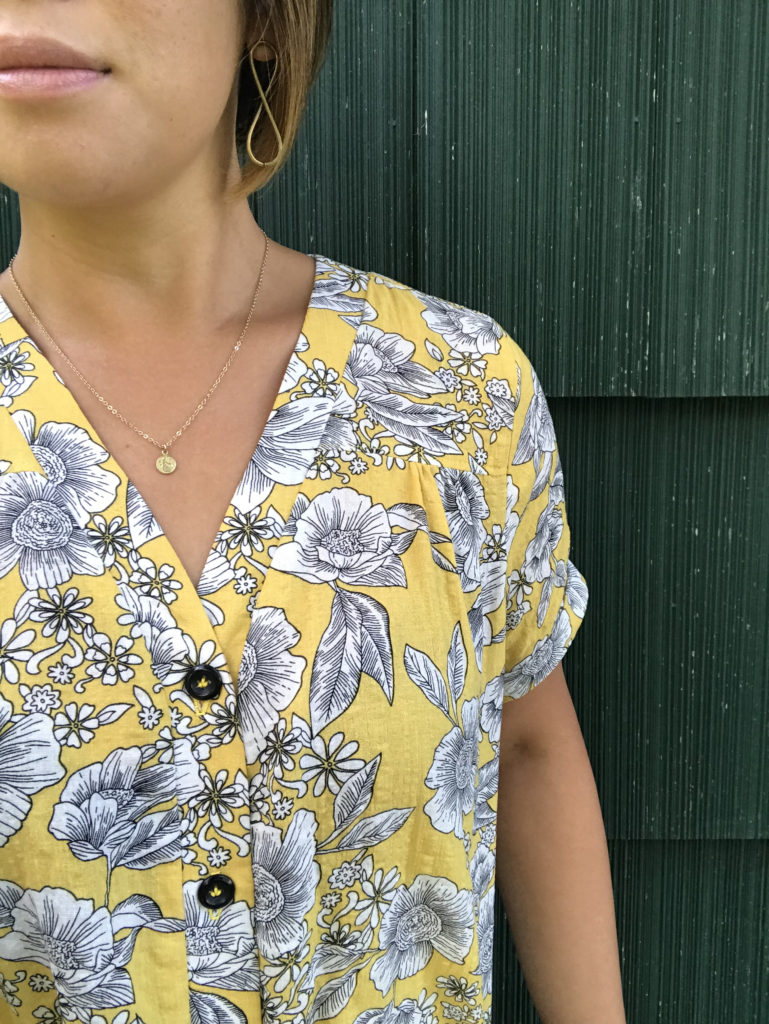
When I first saw the Verona, I loved that it was voile. I love the lightweight characteristics of this type of fabric, but was curious to the fact that it’s a 50/50 of cotton and rayon. Well, now I can say that it’s a great combination because it allows more drape which makes for a great summer fabric.

If you look closely, you’ll be able to see the great puckered texture the Verona Floral Voile has after washing. It’s not like a seer-sucker with the same repeat waffle texture, but it’s like striped puckering which has been woven in. It’s absolutely gorgeous, and I became a quick fan…since I don’t have to worry about wrinkles anymore!

There are two colors of this Verona Voile Floral – navy blue and yellow. Since I just finished a few blue chambray projects, I wanted to add a little color to my wardrobe with the yellow.

It’s not a color I wear a lot, but I figured I’d go big with the yellow and large flowers since it WAS going to be a summer shirt after all 😉

Pattern

The Aida Top is a new addition to the Imagine Gnats pattern library, and I was pretty stoked to sew it up. It had everything I was looking for: lots of ease, shirt-tail hem, v-neck, button placket, AND written for lightweight woven fabrics.

I was mostly drawn to the v-neck button placket because its a popular style I’ve been seeing with strappy tanks lately.

Based on my measurements, I am an 8 in the bust and also in the waist. With my hips (that don’t lie), I clock at a size 12. With all the ease in this top and after reading some other reviews, I felt pretty comfortable sewing a straight size 8.

You can see in the profile shot of the shirt that the voile Aida top still clears my backside with room to spare! Woohoo!

There are two views of the Aida with either a flat-front or with gathering, and I chose the latter. I like the extra shaping and added texture it has. I also sewed the shirt-tail hem as written, but I think a cropped boxy version would also be great in this pattern.

My arms are on the heavier side for a size 8. RTW woven shirts are generally tight around my biceps and were always tough for me to find since I didn’t want to wear something that was then bigger everywhere else.

My arms fit into the sleeves as drafted, but I wanted a little more ease to be consistent with the look of the top. I reduced the seam allowance by 1/4″ for a little extra breathing room. I also added a 1″ cuff on each sleeve for an extra detail and visual interest.

Since I love to use buttons from my MIL’s old stash, I found 5 black ones which were pretty close matches. The pattern calls for 7, but I thought 5 was enough.

Even though I didn’t use the recommended 7, I do wish there was a button template just to know where to place the top button. I had to do a good bit of trial and error to figure out where it should go while keeping a flat neckline, but everything did work out!

The Aida Top in this Verona rayon/cotton voile is just a dream shirt for the summer. I wore it during a heat wave and was so impressed with the airiness and soft feel….making the heat (slightly) more bearable 🙂

I hope you grab some of this fabric and make a voile Aida top of your own soon!!!

{Edited May 2, 2020}

Since making this top in August, I’ve worn it at least another dozen times and have yet to iron it –so the textured voile is definitely a winner!  The fabric washes well and the texture is still perfectly waffled.  I just broke it out for the first time this year since the temperatures jumped about 20*F.  But with Covid-19 quarantine and all the additional baking happening… I need some coverage while still being  breathable, and this is it.  The  Aida is still a winner in a my book!  Below are updated links if you would like to make your own:


Happy Sewing!

Cristy


This post may contain affiliate links.  You can read about my disclosures here.

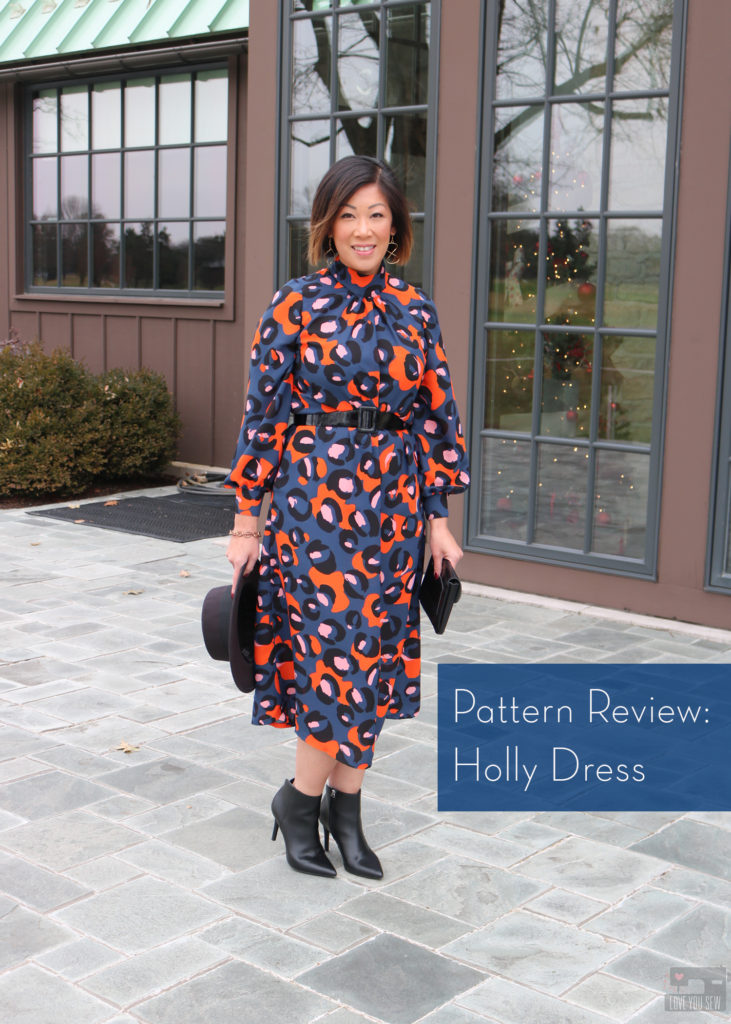
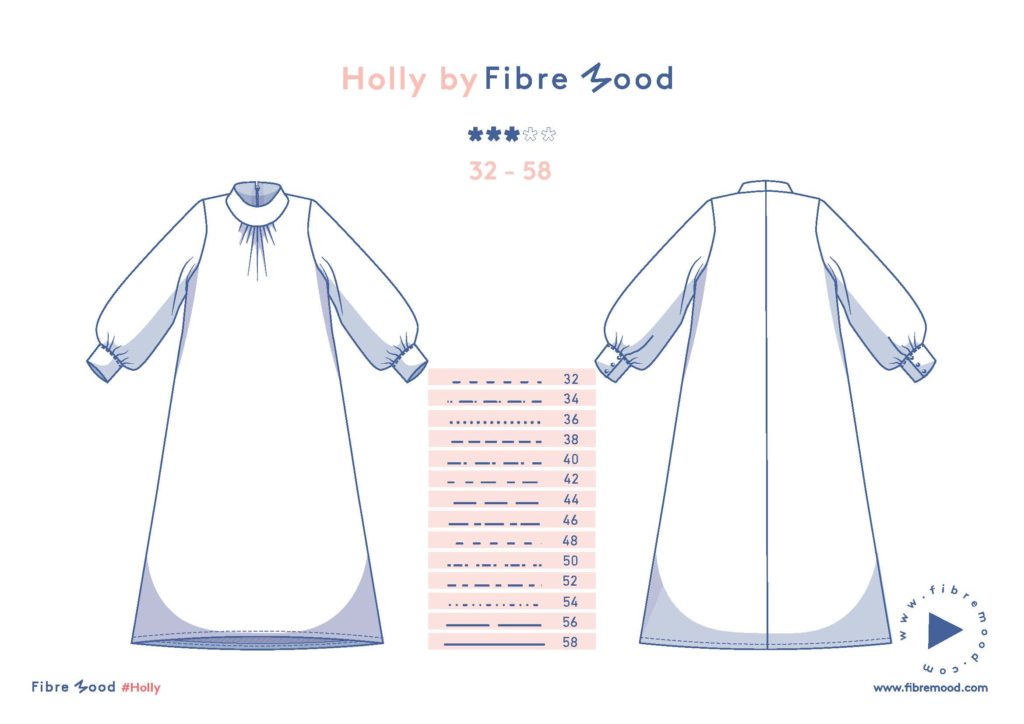
Pattern Review || Fibre Mood Holly Dress

Things got pretty busy around the holidays, so it’s about time I get back to the blog.  I can’t believe it’s March already and I’m just getting around to reviewing the Fibre Mood Holly Dress I made back in November!  We are in the midst of Covid-19 self-quarantine and blogging a bit is helping me deal with the current environment along with feeling some kind of accomplishment for the day.  I hope this post brings some distraction to all of you at this unbelievable time in our world.

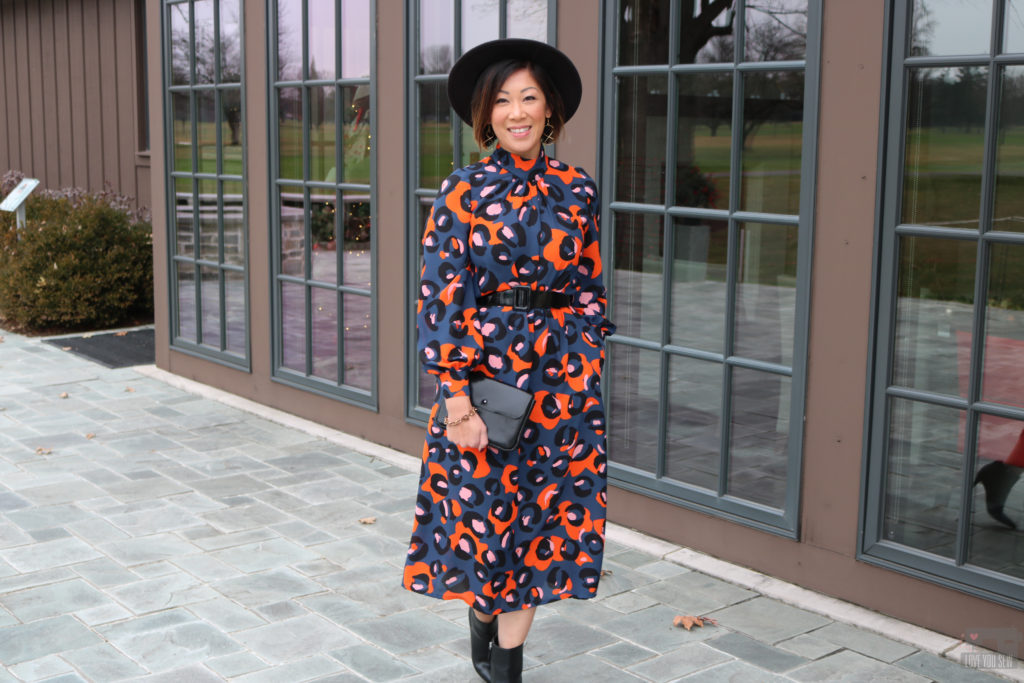
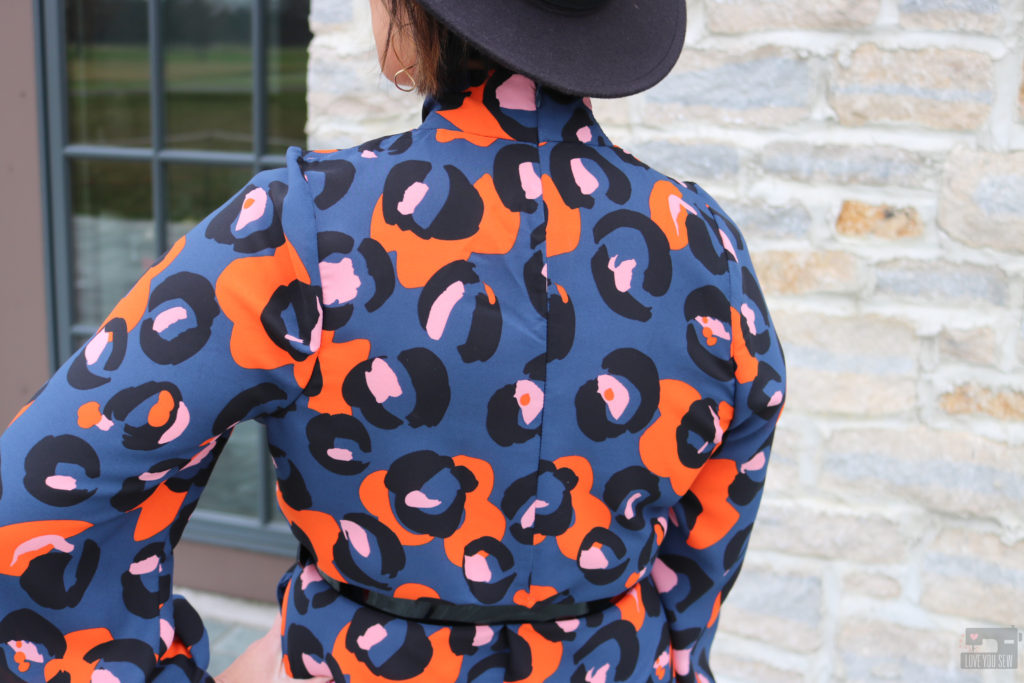
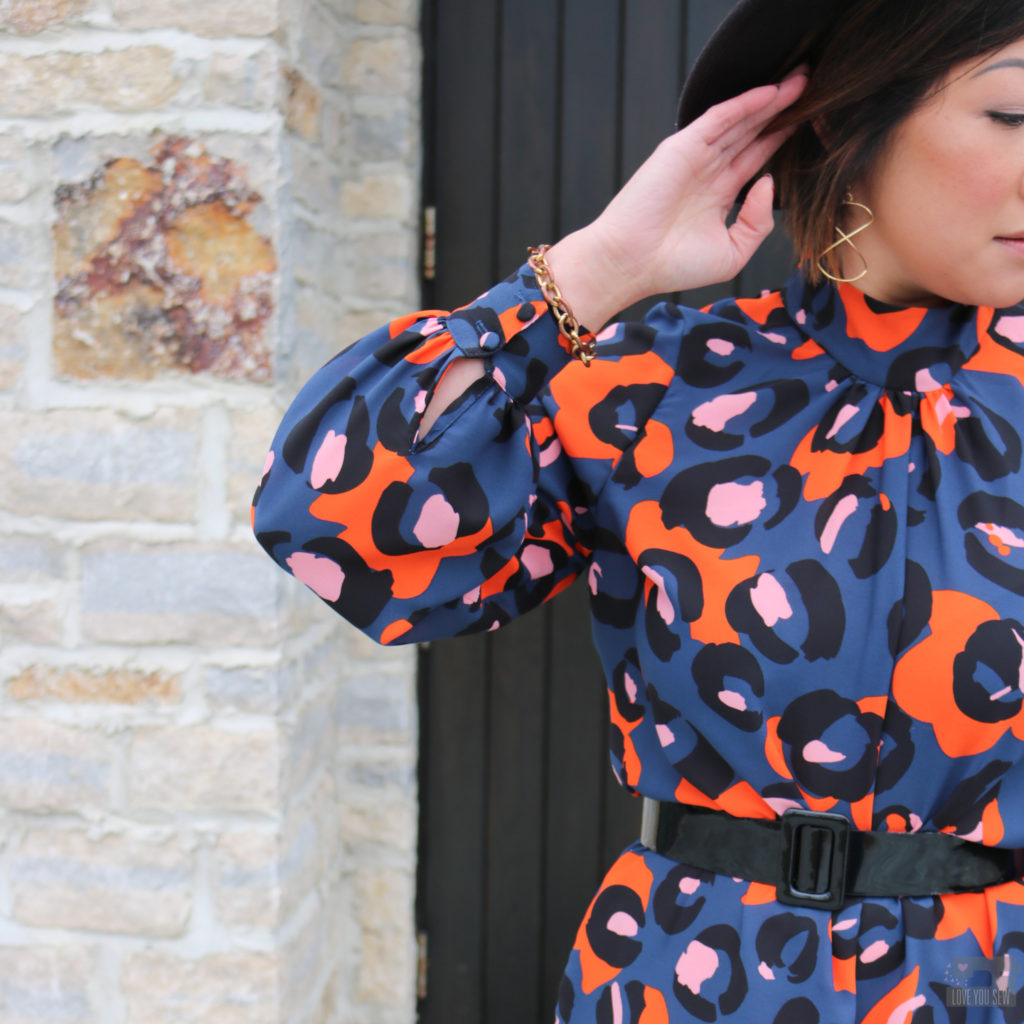
With the 2019 fashion trends bringing “prairie” style along with bold statement sleeves, I was on the hunt for a pattern that was still modern and not full “Laura Ingalls Wilder.”  Then I happen to see a version of the Fibre Mood Holly Dress on Instagram and knew it was for me!  I loved the clean high collar, full sleeves with button placket and the perfect midi length!

Pattern

I had never made a Fibre Mood pattern before.  The company is a European based sewing magazine (available in several different languages) which also sells their digital patterns a la cart here.  When I purchased this pattern in November of 2019, there are a few things to note about the pattern:

  • It  was available only in A4 paper sizing
  • You had to add in your own seam allowances (SA)….to every single pattern piece.  Yikes!  I’m not used to doing that, since I’m accustomed to US patterns which includes the SA already.  But, I still wanted to make the dress badly and was willing to take the extra time
  • Since purchasing this pattern, Fibre Mood has started to add SA to their new pattern launches and has made their digital patterns available in US Letter and AO (copy shop) formats.  This pertains to only the new patterns being released in new magazines, but they might go back to old patterns.  I’m crossing my fingers!

The nice thing about a pattern without SA, is that you can tissue-fit it without having to do all of the math (subtracting the seam allowances) to your body.  The down-side is this process is VERY time intensive…even with the double pencil trick!

Fabric

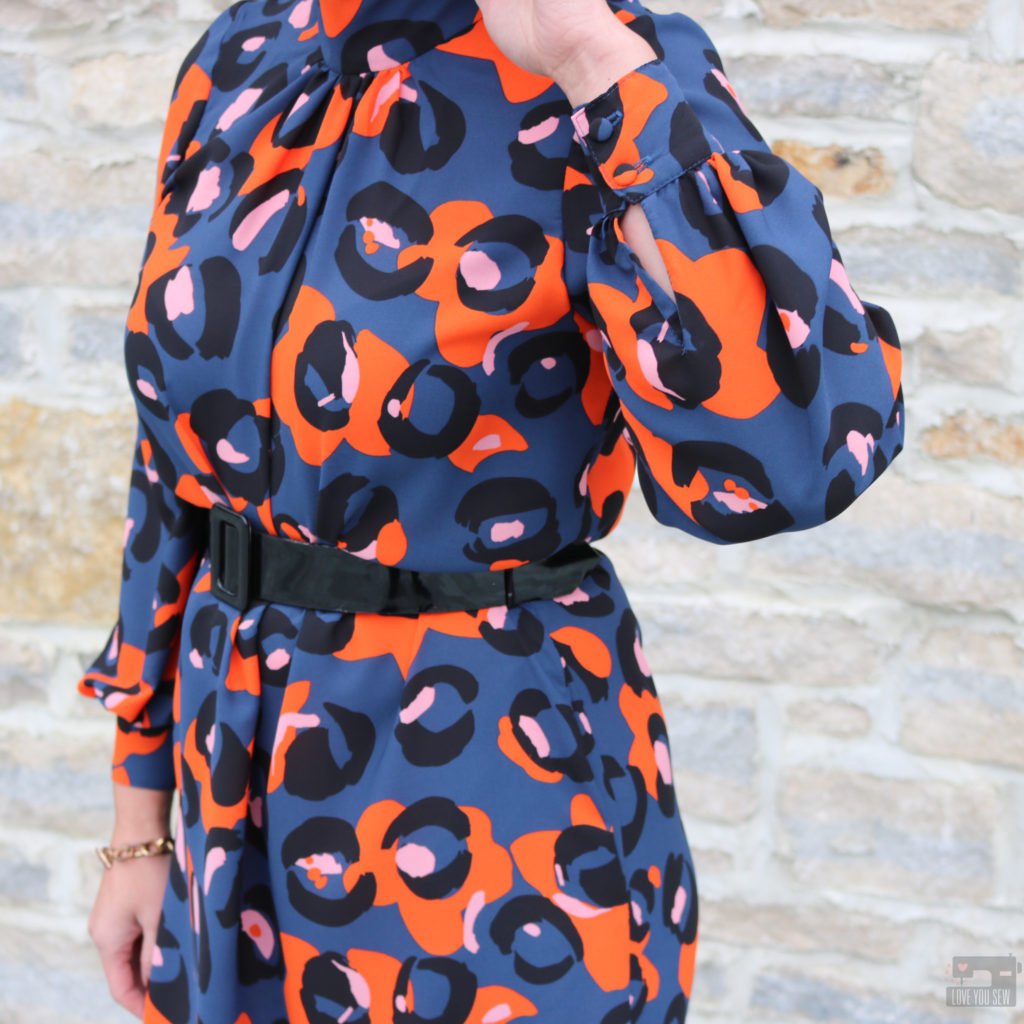
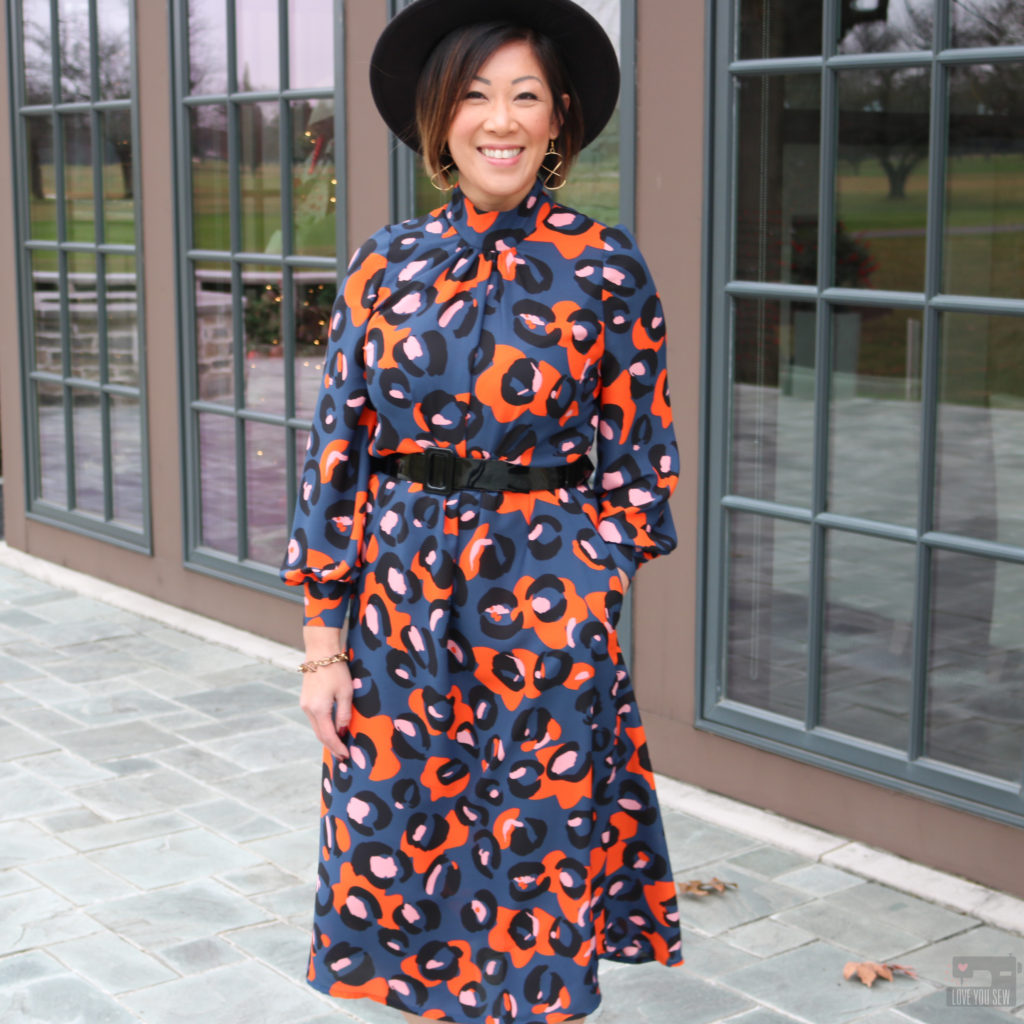
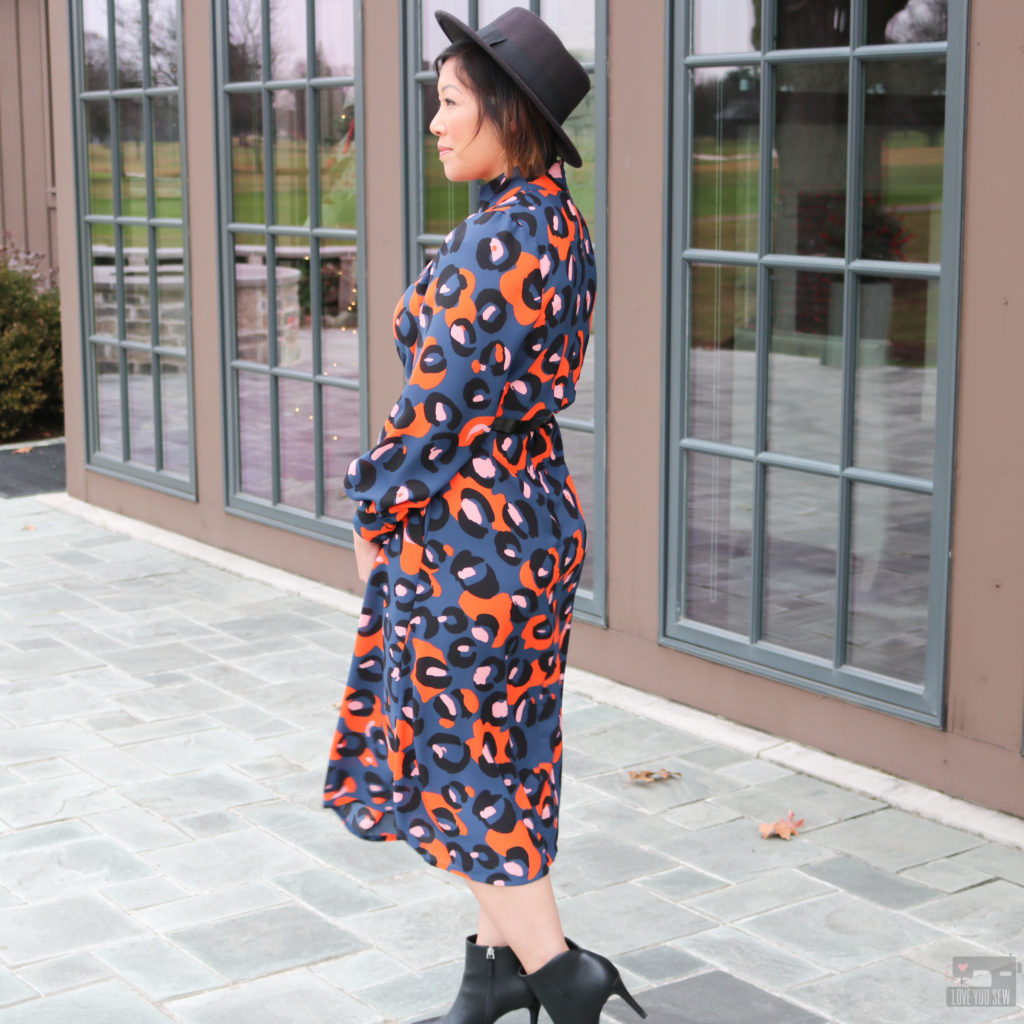
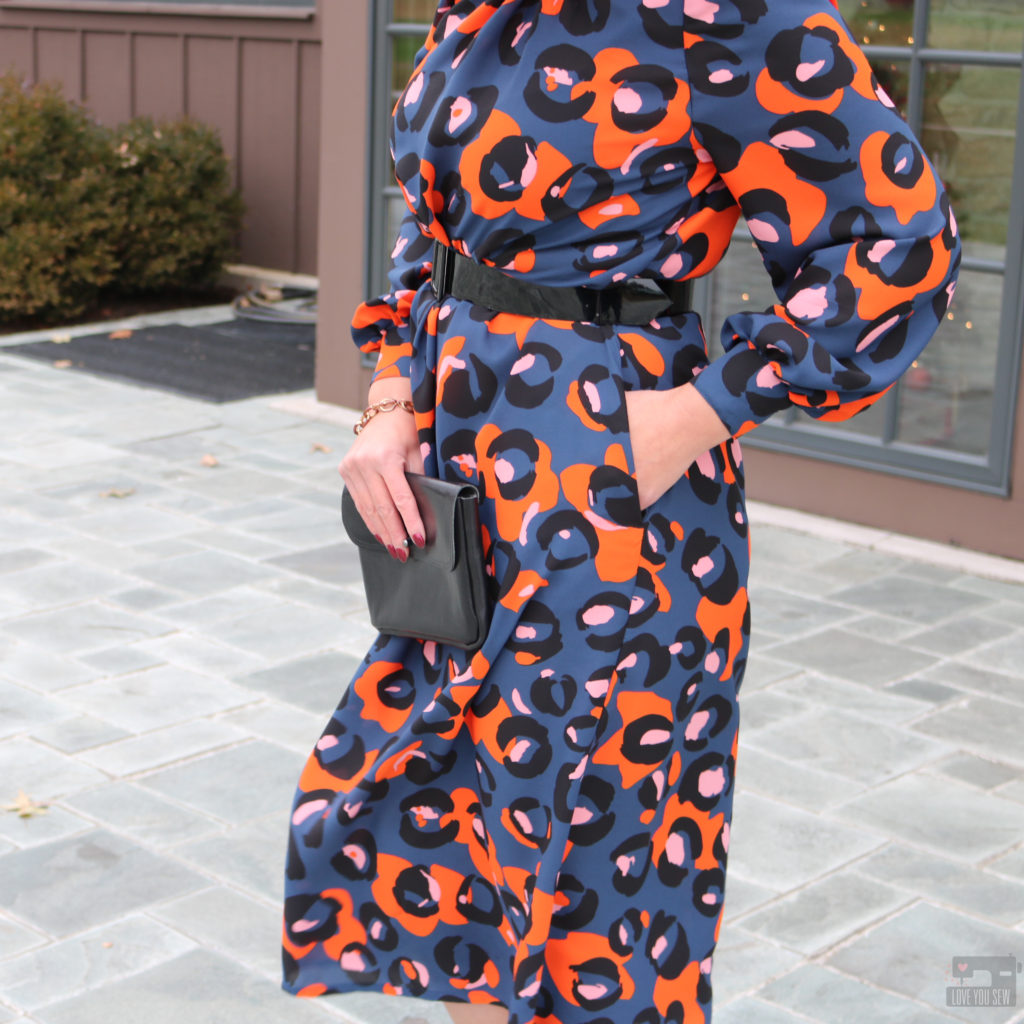
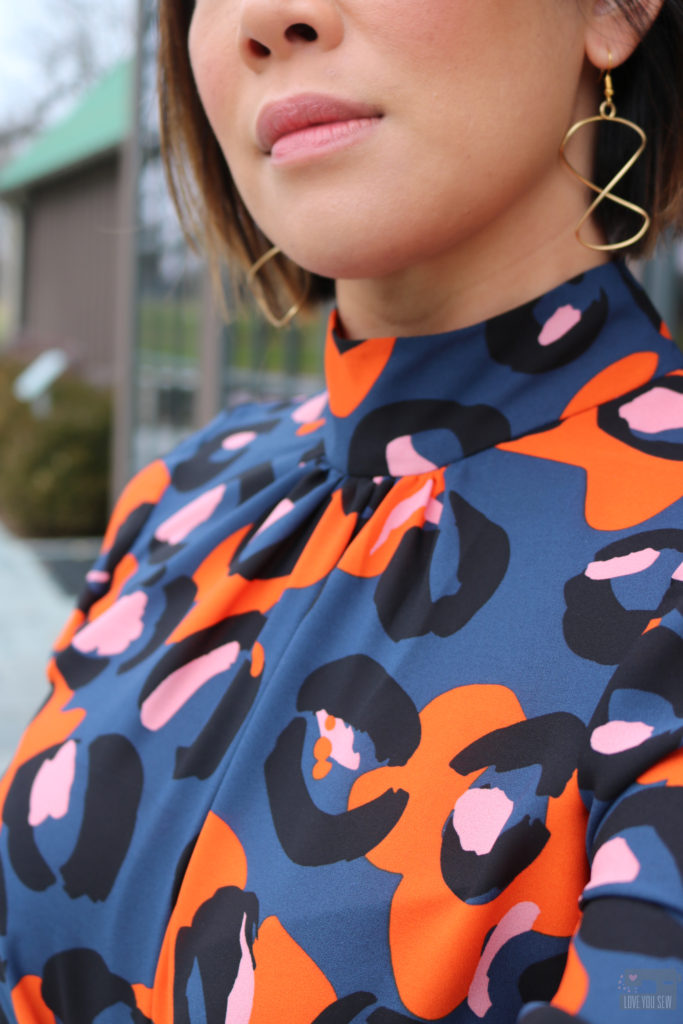
I fell in love with this Telio polyester crepe over the summer with leopard also making its resurgence as the hot print of the moment.  Since everyone and their mother is wearing animal print, I wanted to enjoy the trend but be a little different in this bold orange and blue combo.  I purchased a few yards with no plan in mind until I found the Holly Dress.  I paired this fabric with the pattern to really make the dress more modern to balance to the high neck and more traditional ballon sleeves.

The fabric is lightweight with fluid drape and needed to be cut with care due to it’s shiftiness.  I did not cut on the fold and opted to cut everything out as one layer of fabric.  This crepe is also semi-sheer so you would need a lining, but I opted to just wear a slip underneath the dress afterwards.

Construction

I measured between a 38 and a 40, but opted for the 40 since I needed the clearance over my hips.  Although I made a straight 40, next time I will widen the shoulder and possibly add a little length to the sleeve….which is surprising because I am 5’3″ and usually have to narrow the shoulders with American patterns.  Other modifications included:

  • Omitted belt for a solid RTW one – I knew I wanted to tone down the pattern just a little bit to eventuate the waist and not be completely lost in the print.
  • Used basting stitches to help set in the sleeve (they were not part of the instructions.)
  • Swapped out the 24″ invisible zipper for a 16″ which I had on hand – There was still plenty of clearance to get the dress on and off

  • Hacked in pockets using the Derby Dress pattern pieces – This is my go-to pattern piece when I want in-seam pockets.

  • Narrowed the neckband by 1″ in total by taking out (2) 1/2″ wedges where the band meets the shoulder seams.

  • Made fabric covered buttons for an elevated look using a kit similar to this.

Final Thoughts

Overall, I really love this dress.  The fabric and pattern were a perfect pairing for my style and wardrobe needs.  I’ve worn it out for date nights with my husband and can’t wait to bring it into spring!  I would definitely make this pattern again, just with a slight widening of the shoulders and maybe a different length just for some variety.

What do you think about this dress style?  Are you into leopard print too?


Hugs and Stitches,

Cristy


This post may contain affiliates links.  You can read my full disclosure here.  I bought the fabric and pattern on my own.  But after making this garment, have since become a member of the Fibre Mood ambassador team.

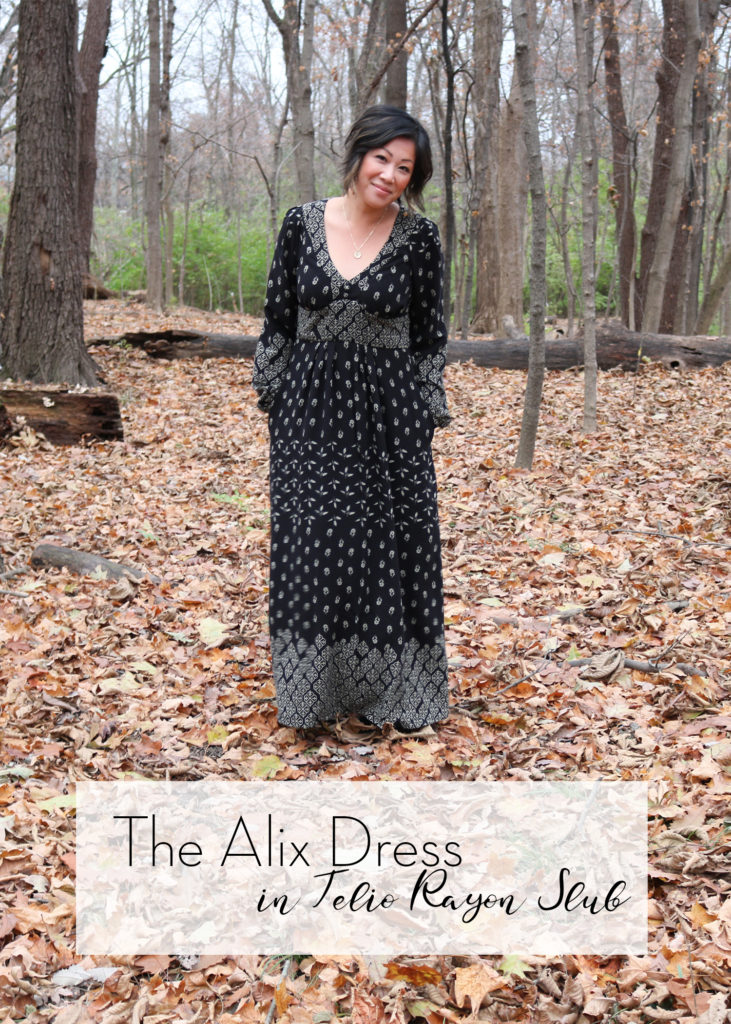
Fall Sewing: Alix Dress in Télio Rayon Slub

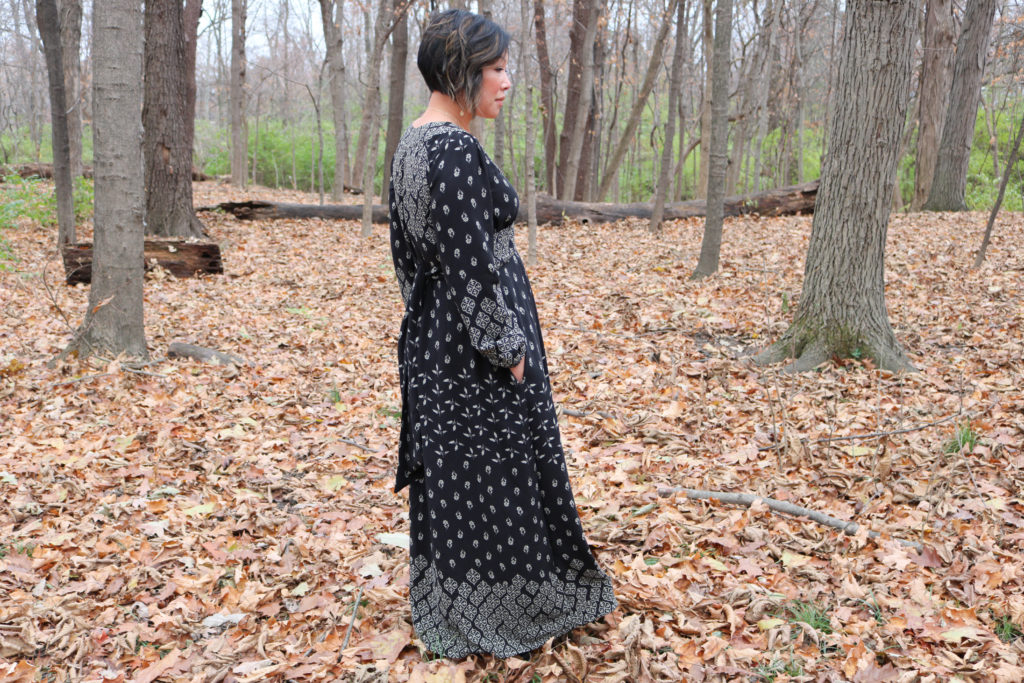
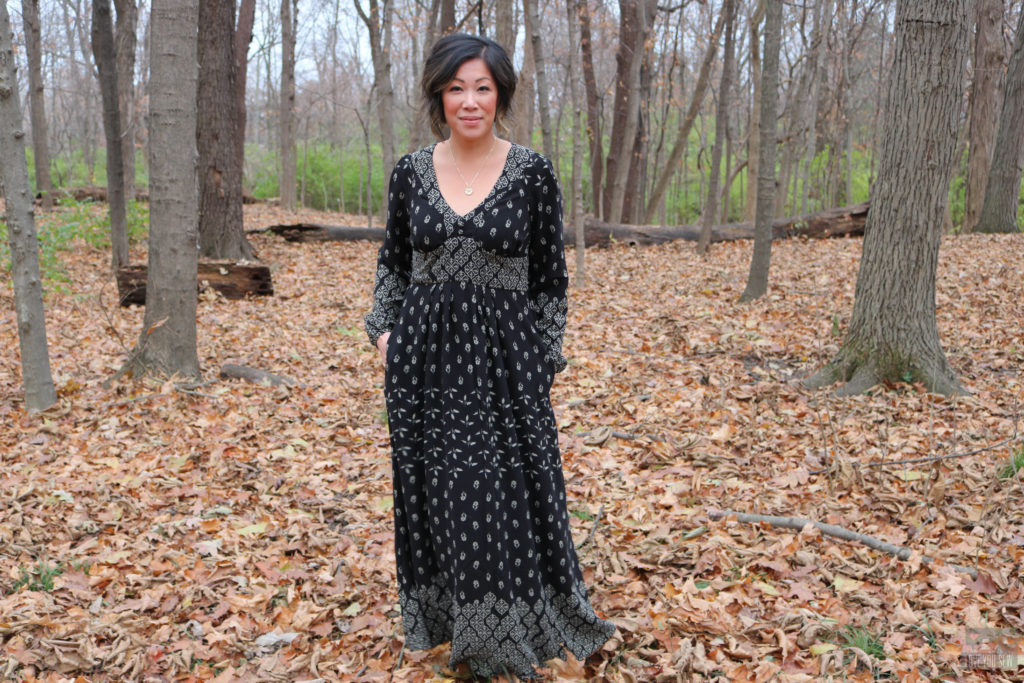
After making a number of practical everyday garments likes jeans and sweatshirts, it feels good to make something that’s a little extra special.  I’ve been dying to make a Boho maxi dress for the days I want some statement style but still have a light relaxed feel.  Then Télio asked me to collaborate and I already adore their fashion-forward garment fabrics.  How could I refuse an opportunity after seeing this gorgeous border print?  The fabric along with By Hand London’s Alix dress pattern were going to be THE perfect match!

Fabric

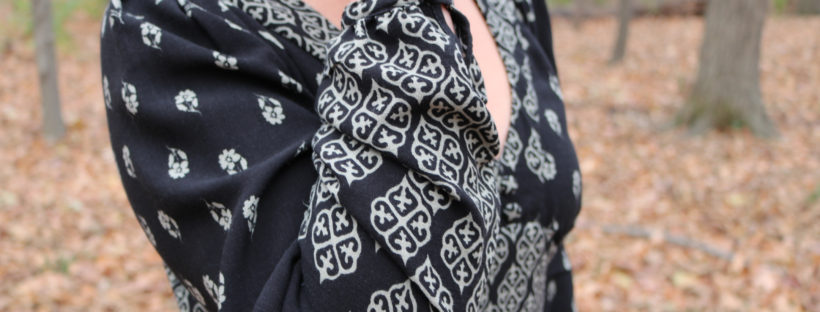
The first time I used Télio fabric was here.  I was impressed with the high quality and how the fabric washes well.  So, it’s no wonder I fell in love with this Télio Kahlo Rayon (#39801) for its gorgeous double-border print.  Look how the three different patterns are layered to give an impression of a tiered dress without having to actually sew one!  It gives so much visual interest and I was able to play with the design with my fussy cuts of the dress pattern.
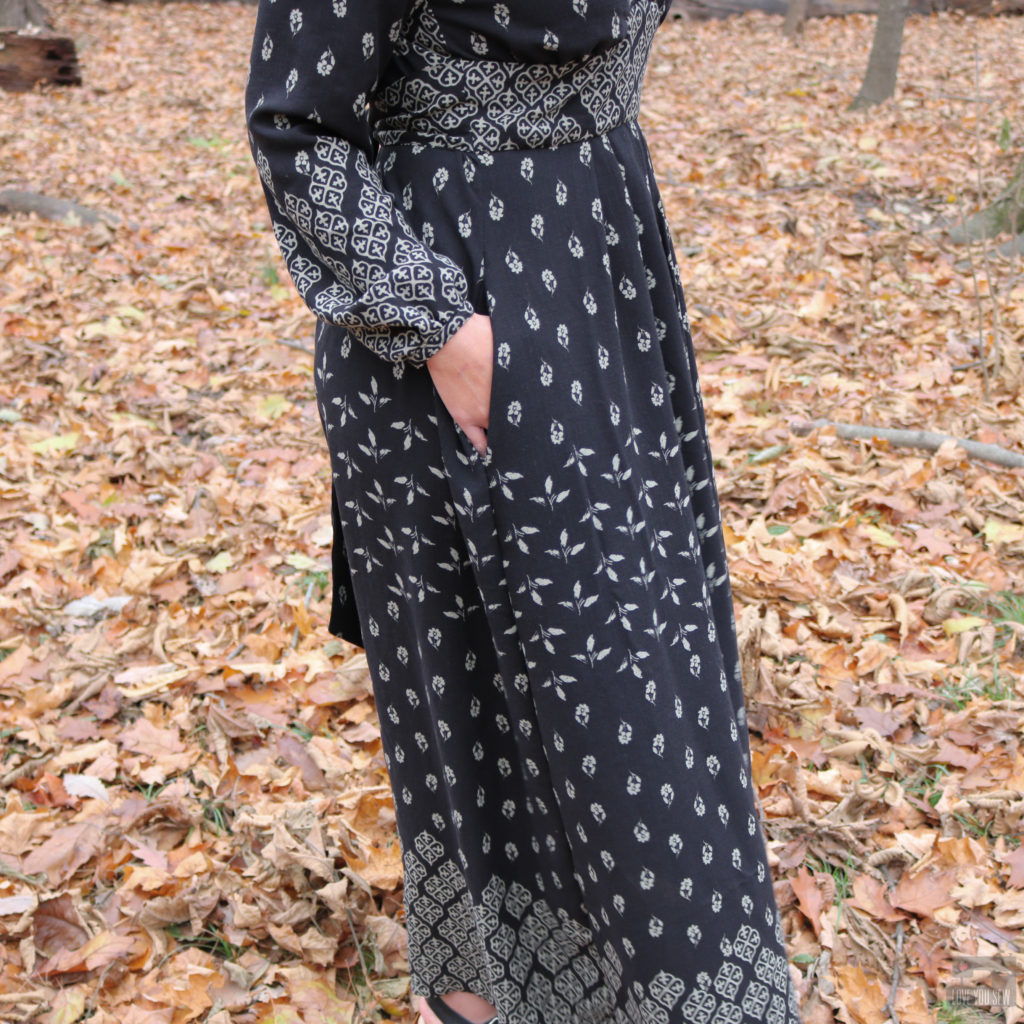
The fabric is 100% rayon with an incredible slub texture.  The feel of the natural fiber knobs adds to the character of the Alix Dress and Boho vibe.  As with all rayon, the fabric is still lightweight with beautiful drape and movement.  It is also completely opaque.  After adding linings to my last few makes, I’m happy to leave that step out!

Pattern

Initially when I chose this fabric, I wanted to make a long shirtdress.  But when I received it, I knew I wanted something else to show off this print.  After going through dozens of other patterns, I remembered how the Alix Dress caught my eye awhile back.  I’ve sewn up the Holly Trousers before and By Hand London writes up a great pattern.

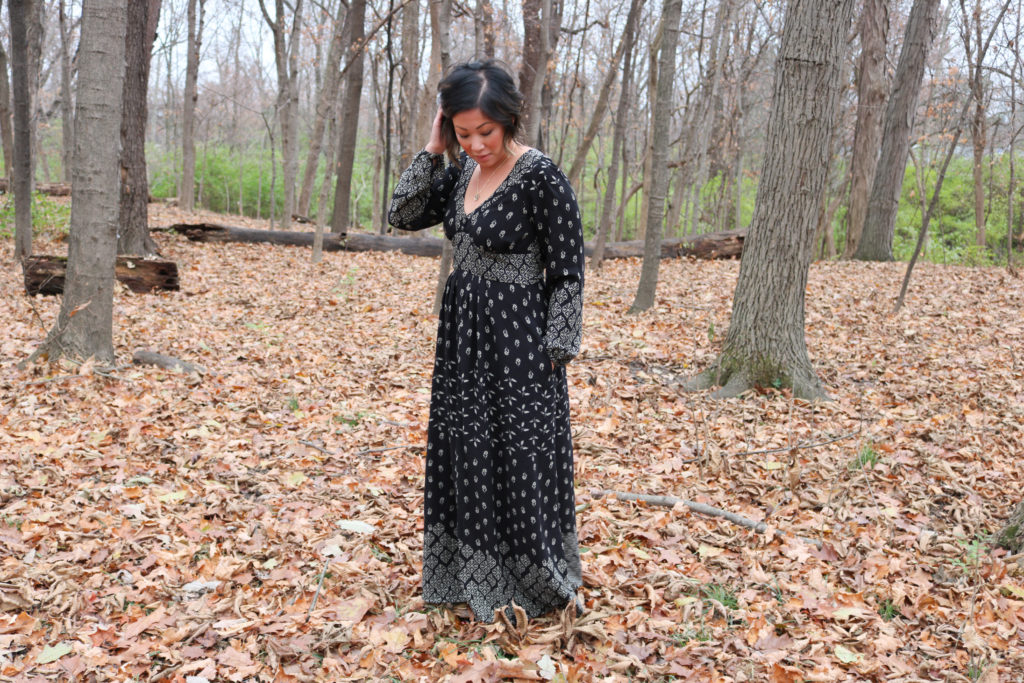
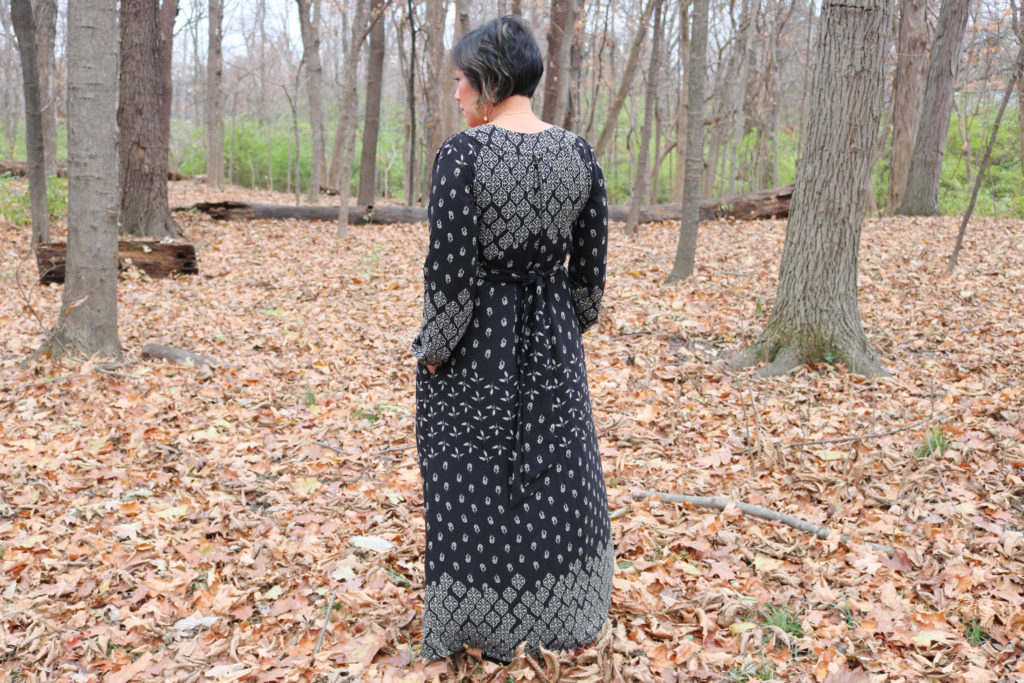
I really love this dress silhouette.  It’s relaxed all over with a beautiful tie-back to show off the waist.  This allows a nice shape without having me look like I’m drowning in fabric….especially, when I’m petite.  The tie-back also allows for weight fluctuations, which is VERY much appreciated in a handmade wardrobe.

One of the features that drew me into this pattern were the peasant sleeves.  I have heavy arms and usually have to make a bicep adjustment with woven patterns, so the ease in the sleeves looked pretty attractive.  I ended up not having to make any adjustments to the sleeve pattern.  The darts at the top of the shoulder allow full range of motion.

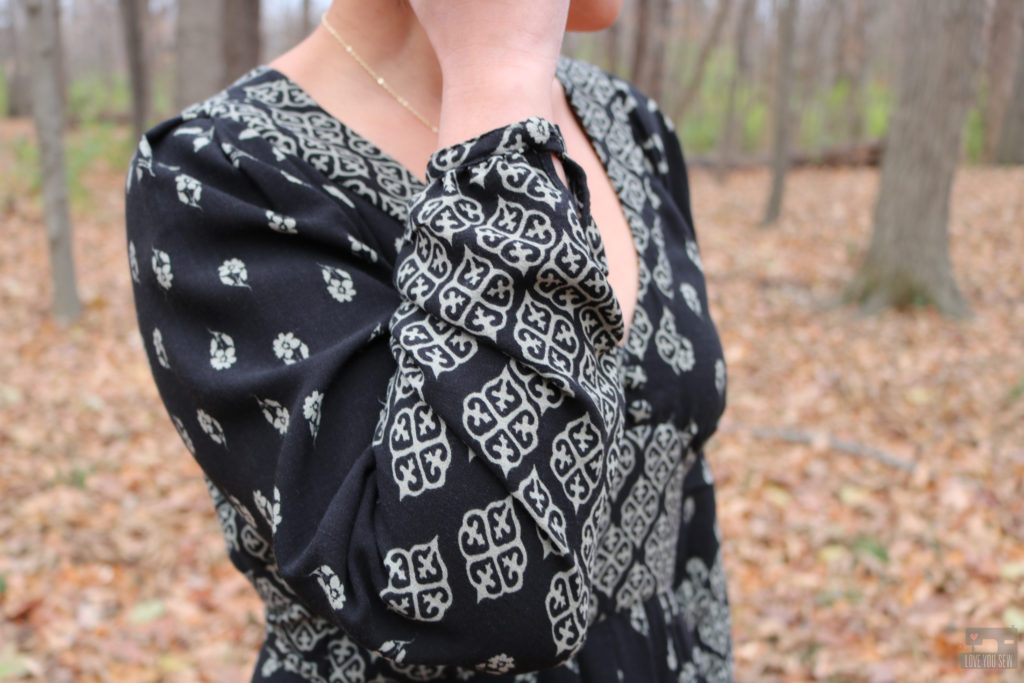
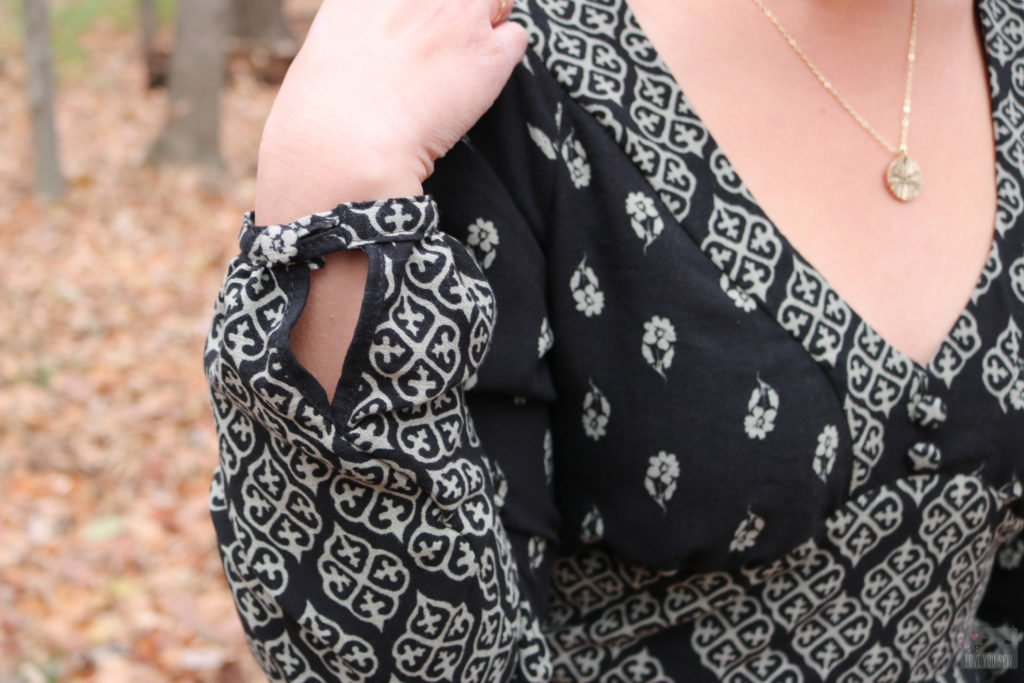
However, I still did hack into the sleeve to change out the elastic casings.  I wanted a clean look and went for a slim button cuff with a 2″ long placket made with 1/4″ bias tape.  Since the cuff is only 1/2″ wide, I didn’t want to make a buttonhole and opted for a loop with my fabric covered button.  This a small detail, but I love being able to make my own custom buttons.

The other change I made to the Alix dress is the addition of pockets….because all dresses need pockets!  Amirite?  I used the in-seam pocket pattern from Christine Hayne’s Derby Dress (it’s my go-to pocket) and marked them about 4″ down from the top of the skirt.  If you ever wonder if you should add pockets, do it!  You won’t regret the extra work 🙂

Since I was working with a border print, I was limited to the 56″ wof and had to cut off 5.5″ from the skirt just to fit the pattern piece onto the fabric.  I was worried this would have to turn into an ankle or midi-length dress, but it was worth the sacrifice to show off the design.  For once, I was thankful for being 5’3″ because the dress turned out to be just long enough!  I created a 1 1/2″ hem and it just hits the top of my foot.  Phew!

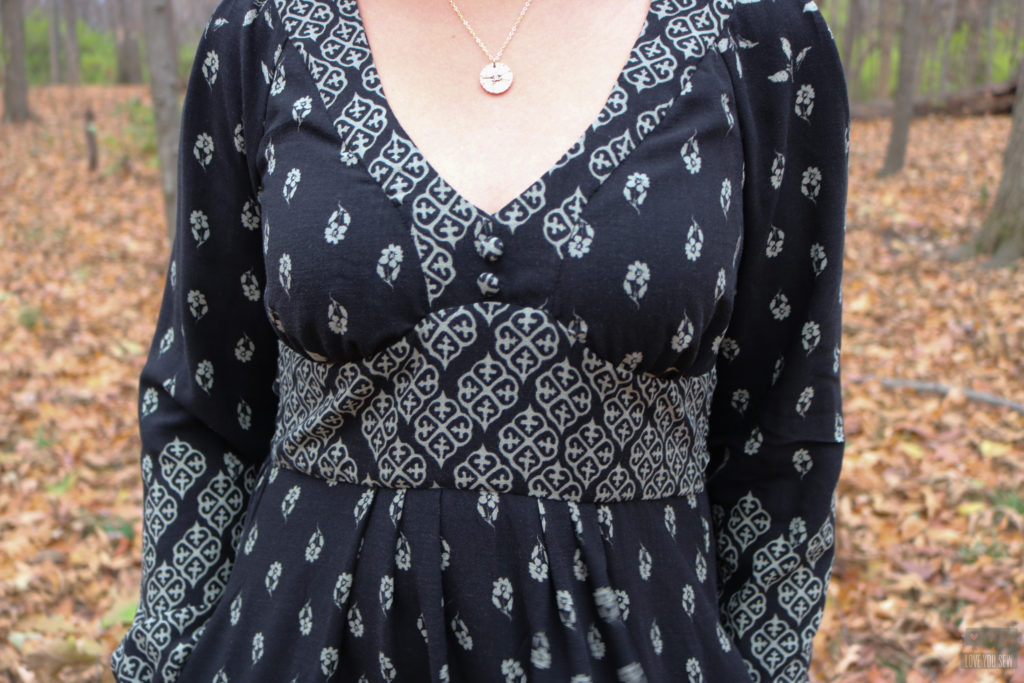
There were two choices to either make a dart or gather the fabric under the bust.  I opted for the gathers and made sure to push them more toward the center of each breast.  This helped eliminate any sagging fabric around the sides into the bodice.

It maybe hard to see (which is good,) but I also added two fabric covered buttons to the front yoke.  My fussy cutting into the border left me with too much negative space right at the bottom of the V-neck.  Unfortunately, I didn’t have much fabric left and couldn’t cut out another piece.  So I made due with what I had and added the buttons to balance out the print a bit more.  Do you think it works?

I’m in LOVE with this make and it’s the perfect relaxed statement dress.  I can wear it with clogs (shown here,) flat booties and then sandals in the spring.  I’m thinking this may come with me to Thanksgiving….

Project Summary:


Happy Sewing Friends!

Cristy


Fabric was provided by Télio Fashion Fabrics for this blog post.  Pattern was purchased by myself and as always, all opinions are my own.  There maybe affiliate links in the post.