Bias Skirt in Printed Rayon

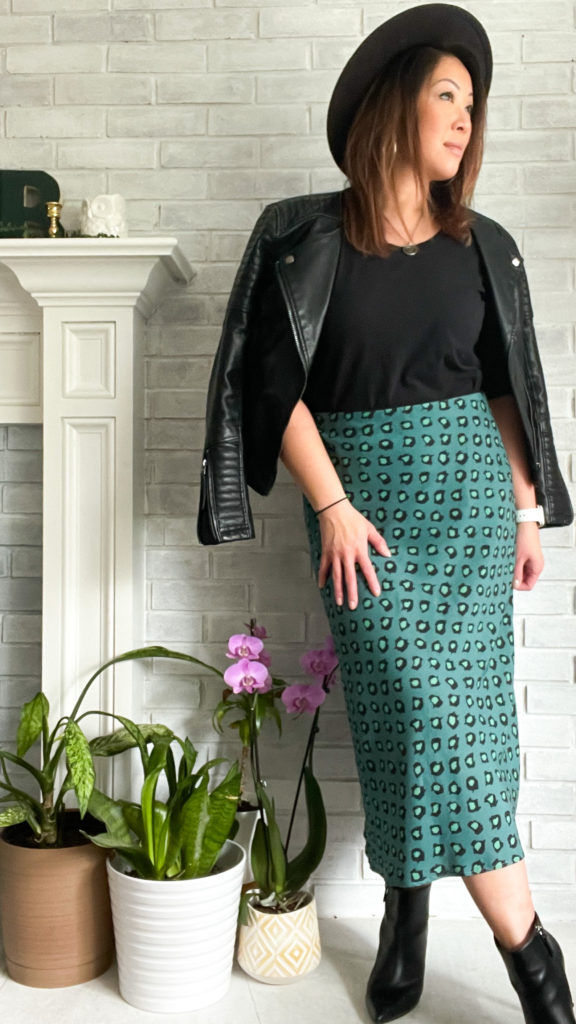
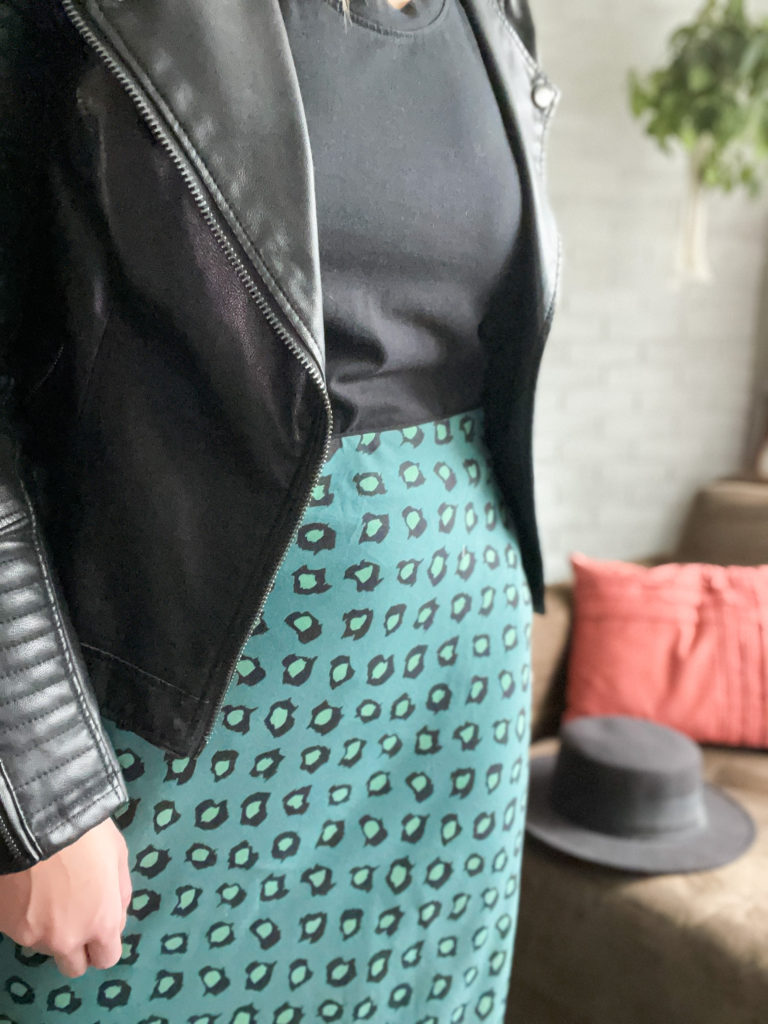
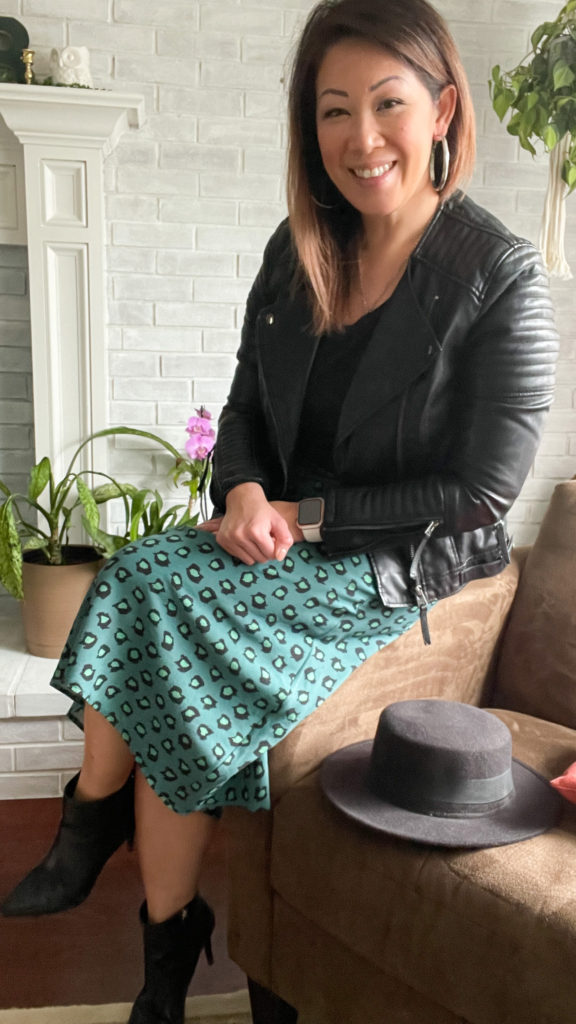
I’ve been wanting to make a bias skirt for awhile now. The simple slip dress has made a comeback from the 90s and is not just a piece of lingerie any longer. The look is more modern layered with big oversized blazers and sweaters. Instead of heels, they are being paired with boots and sneakers for easy streetwear…I’m here for all of it! The bias cut of these dresses are great on any body and provide more fluidity and stretch in woven fabrics. I don’t think I would wear a slinky slip dress as much as a skirt and found the Sati Skirt.
Pattern

This is my very first time sewing a pattern from Russian based designer, Viki Sews. Since I bought the pattern based off a simple Google search (very late at night,) I didn’t realize that she sells her patterns by a SINGLE size and doesn’t include a range! I didn’t even realize it until I was ready to make the skirt and saw there was only one pattern drawing in the file. Of course, it was the wrong size, since I clicked directly through a Google ad….and had to contact the company through Etsy. It took a few days, but customer service was VERY kind and resent me the correct size even though it was completely my own fault for not reading through all of the details. (As an Etsy seller, I’m mad at myself for doing what so many customers do to me! #lessonlearned)
With bottoms, I span about 2 (sometimes 3) different sizes and like to see the drafting lines in order to make the appropriate adjustments for my body. So, I almost always stay away from companies that sell their patterns by a single size (Style Arc is another brand that does this.) Of course, these companies have fantastic patterns I would LOVE to make, but I’m not a formally trained pattern maker and don’t want to make my life harder than I have to! So, it wasn’t surprising to me that I fall into 2 sizes in Viki’s range. Since I already purchased the pattern, I asked for euro size 44 (even though I fell between 42-44.) It’s easier to take in fabric than to add fabric later 😉
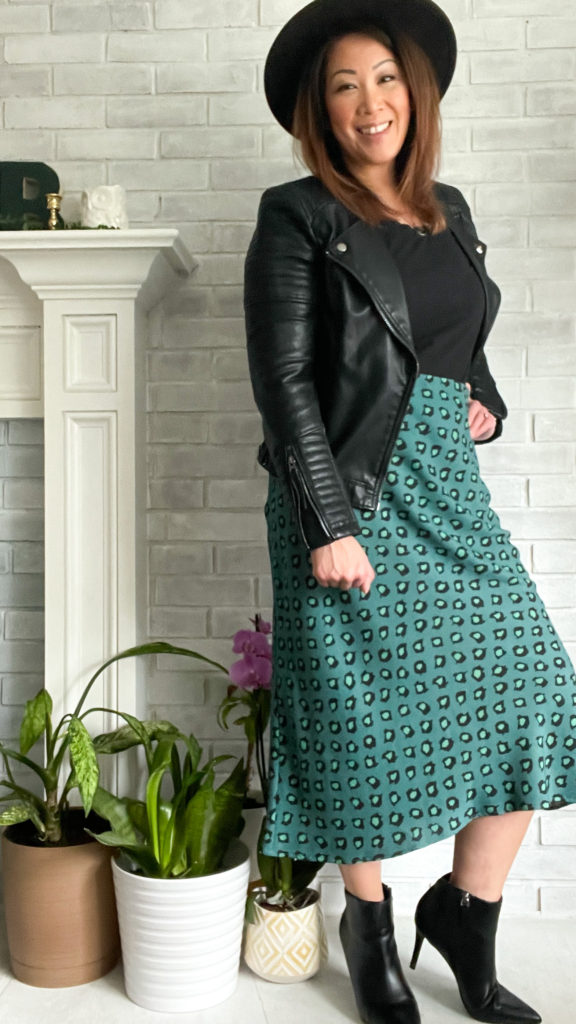
The construction of the skirt was pretty simple. I basted the back darts and side seams for fit and did adjust the waist by pulling it in 3/8″ on each side seam (1.5″ total.) Many times, I have to readjust darts, but I think the bias cut helped to settle them smoothly on my back-side. The most difficult part was all in the cutting of the pattern. Although I have a pretty big cutting table, I made sure to cut on the floor to keep the fabric as flat and properly squared off as possible. This helped to keep the fabric design aligned and get a true 45* bias cut.

For the length, I do like how each size comes with 4 different options. Since I’m 5’3″, I chose the shortest version which brought me to a pretty good midi length. I’m sure all of you taller sewists can appreciate accommodations for being up to 6′ tall.
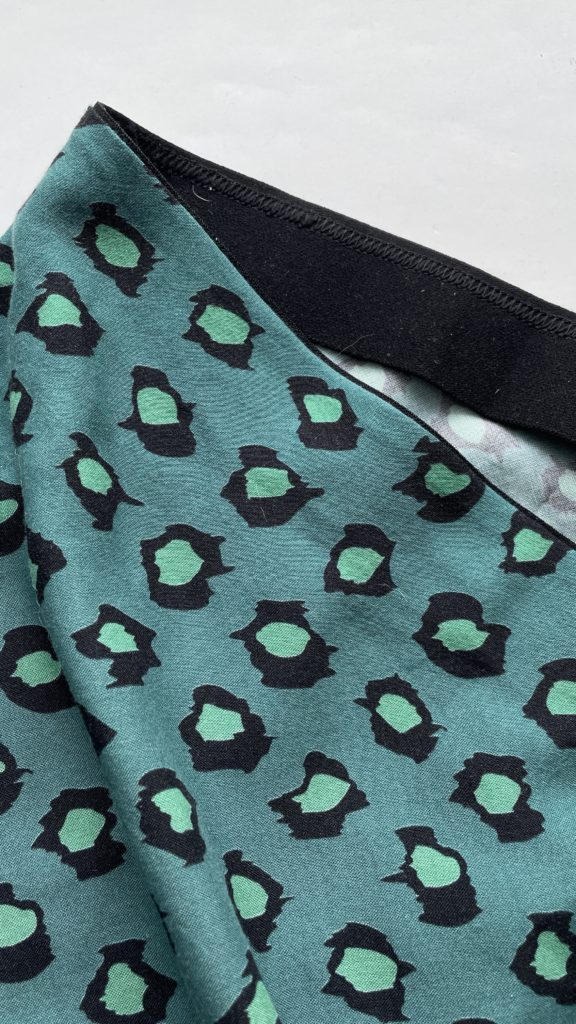
The only real change I made to the pattern was omitting 1 out of the 2 elastics for the waistband. Honestly, I don’t know why the instructions have you sew two together…maybe for more strength? But if you have a good quality waistband knit (that is soft against the skin,) you only need one.
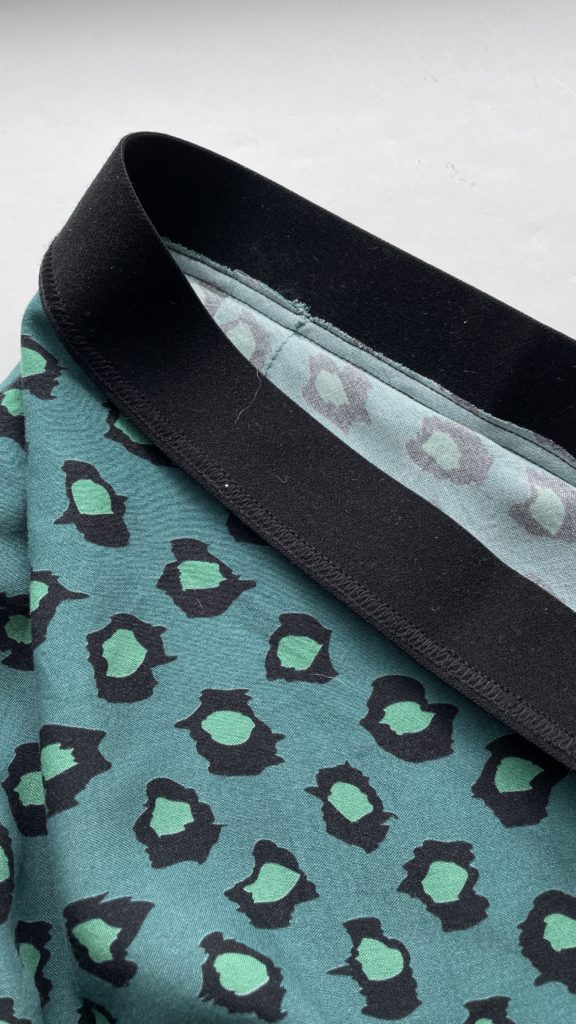
As seen in the pictures, the band is sewn to the right side of the skirt and then folded to the inside where it’s hidden. I used my coverstitch machine, but this could easily be done with just a zig-zag stitch. I adjusted the length on the waistband and also sewed the short ends together on an angle to follow my waistline that goes out rather than just straight.

FABRIC

Speaking of firsts, this is also my first time using rayon from Mimi G for Riley Blake Fabrics. I know RB from quilting and know their woven cotton and jersey knits well. It’s nice that they have expanded out to fashion substrates. With a bias skirt, you want a nice opaque fabric since lining it would defeat a bias skirt’s flowy and body gliding nature. This rayon has a white base cloth with printing on top which definitely works! I purchased this from Melanated Fabrics, but you can always check out Etsy or Amazon for more.

You can check out the skirt’s movement below or on my Instagram here.

As you can see, despite the beginning hurdles, I LOVE my skirt now. The waist adjustments were simple enough that I would recommend this pattern, but I’m hesitant to try out any others from this company which would require more adjustments. The fabric is fantastic and I just love the feel and movement. I just need the weather to warm up a little bit so I can wear it out!

Happy Sewing,

Cristy


I personally bought all of the fabric and patterns for this project. This post may contain affiliate links. You can read about my Disclosures, here.
Tillery Skirt Review

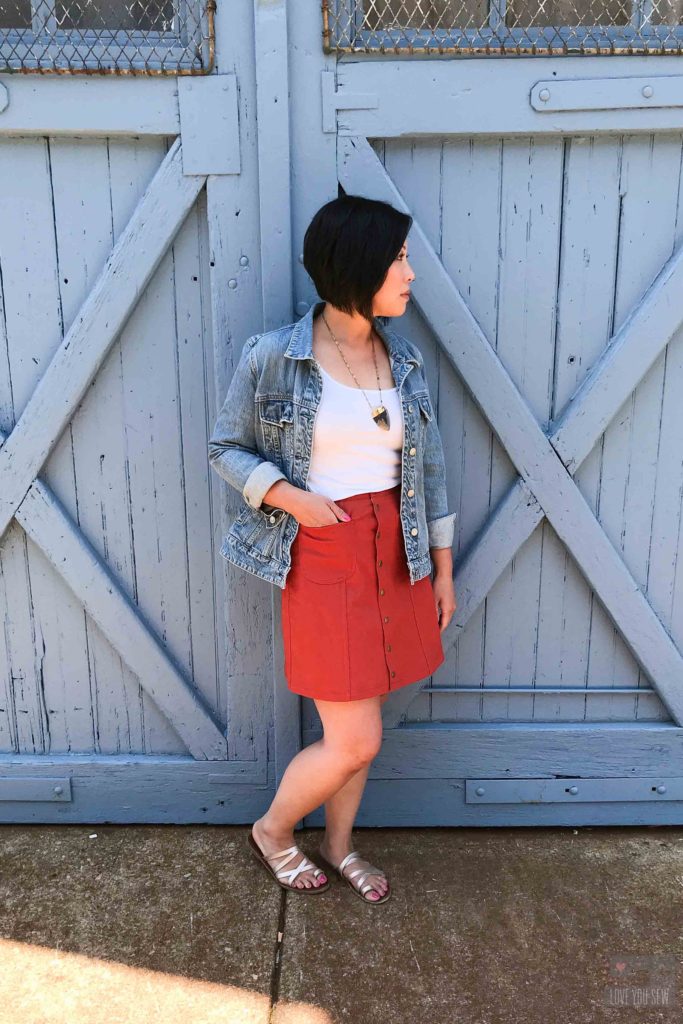
When I went to Texas a month ago, I was hoping to make this Tillery Skirt for the hot weather ahead.  Unfortunately, I ran out of time and did not make it then.  But, I was able to finish this skirt now that central Ohio feels like Texas…at 93*F!  I’m so glad I was able to get this made for our first of many heat waves this summer.

Sometimes shorts just don’t cut it.  My wardrobe was in need of more casual skirts to get me from swim lessons with the kids to date night with the hubs.  So when I saw this digital pattern by Blank Slate Patterns, I knew I had to make it.  The Tillery is a great high waisted skirt with a 70’s vibe making my Boho fashion heart flutter.  Who doesn’t love the look of the flat felled seams?!?

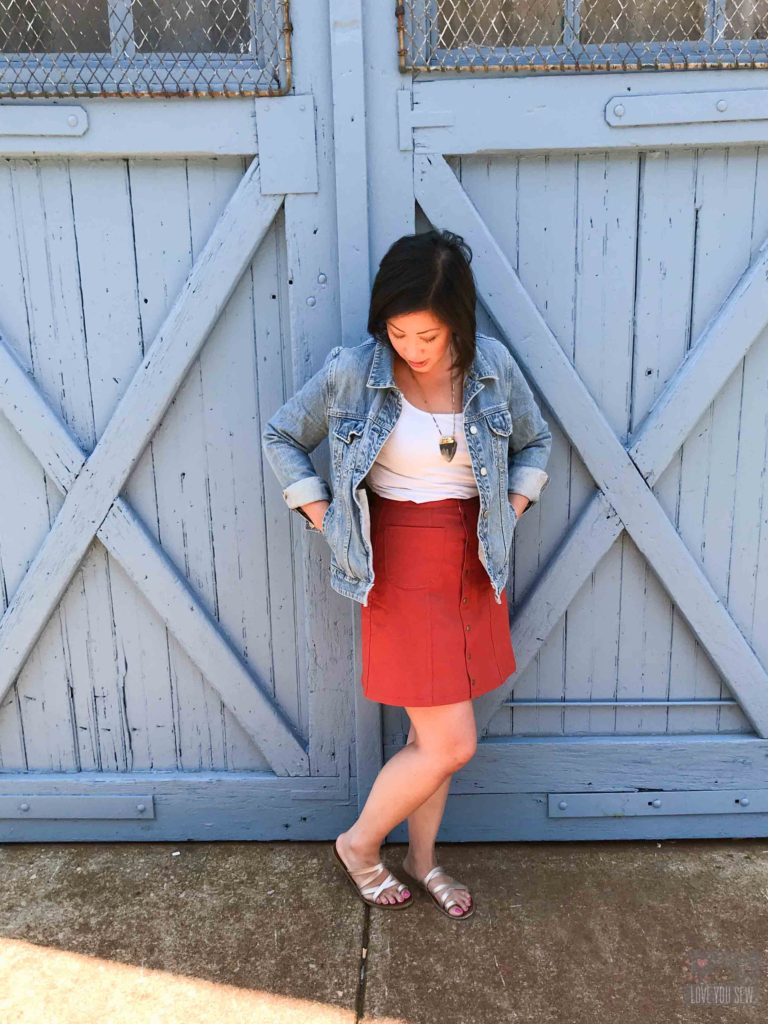
I recently had the opportunity to visit the Imagine Gnats shop and instantly gravitated to this J.Crew overstock stretch twill in Brick.  This rust color is definitely my summer color to go with all the denim <3  It is so rich and complements my coloring.  I can always use the extra comfort of Lycra, so the extra give in the twill makes it perfect for a skirt or pants.

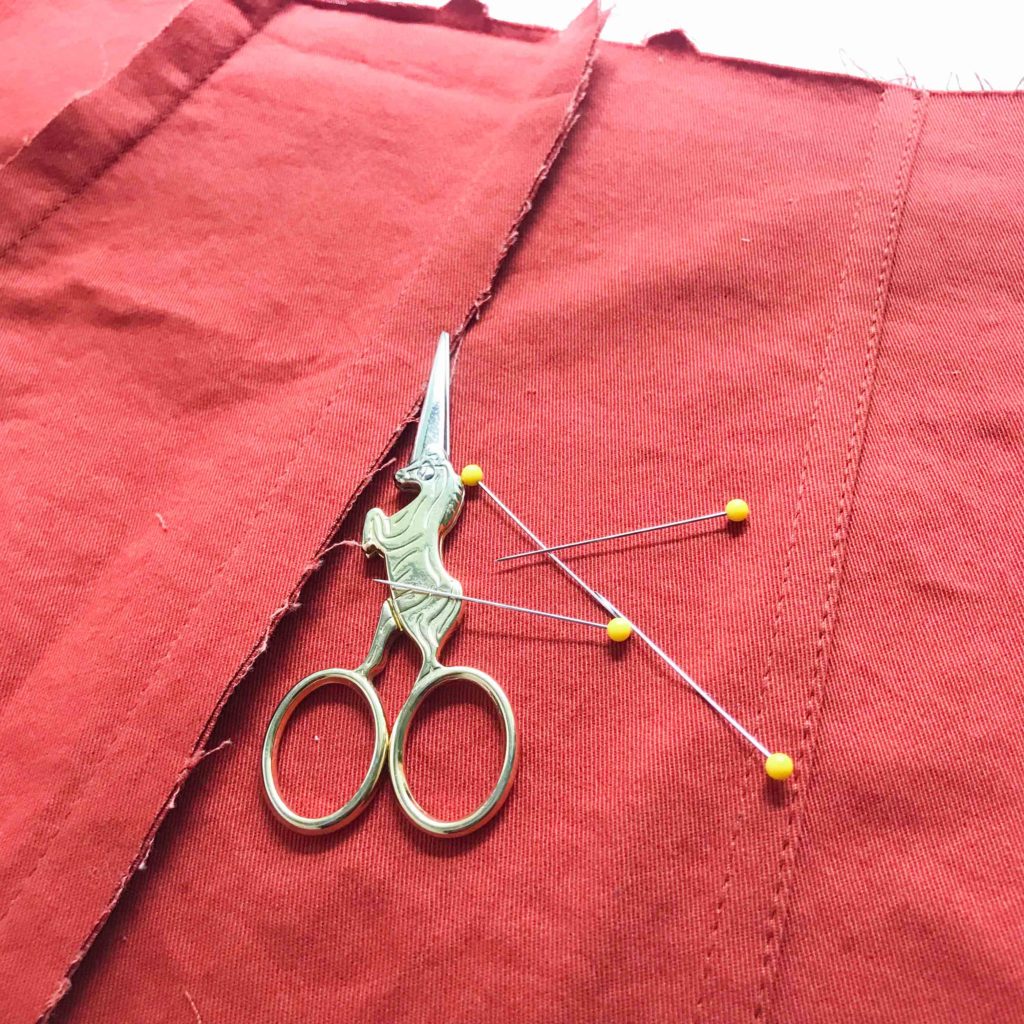
As mentioned earlier, these flat felled seams give the skirt so much design character.  It maybe a little intimidating sewing eight panels to make the Tillery, but it is all worth it.  I never made these kind of seams before, but after watching Melly Sews’ video, the instructions all made sense. TIP:  Baste all panels together to check fit. I ended up grading in a size around the waist.

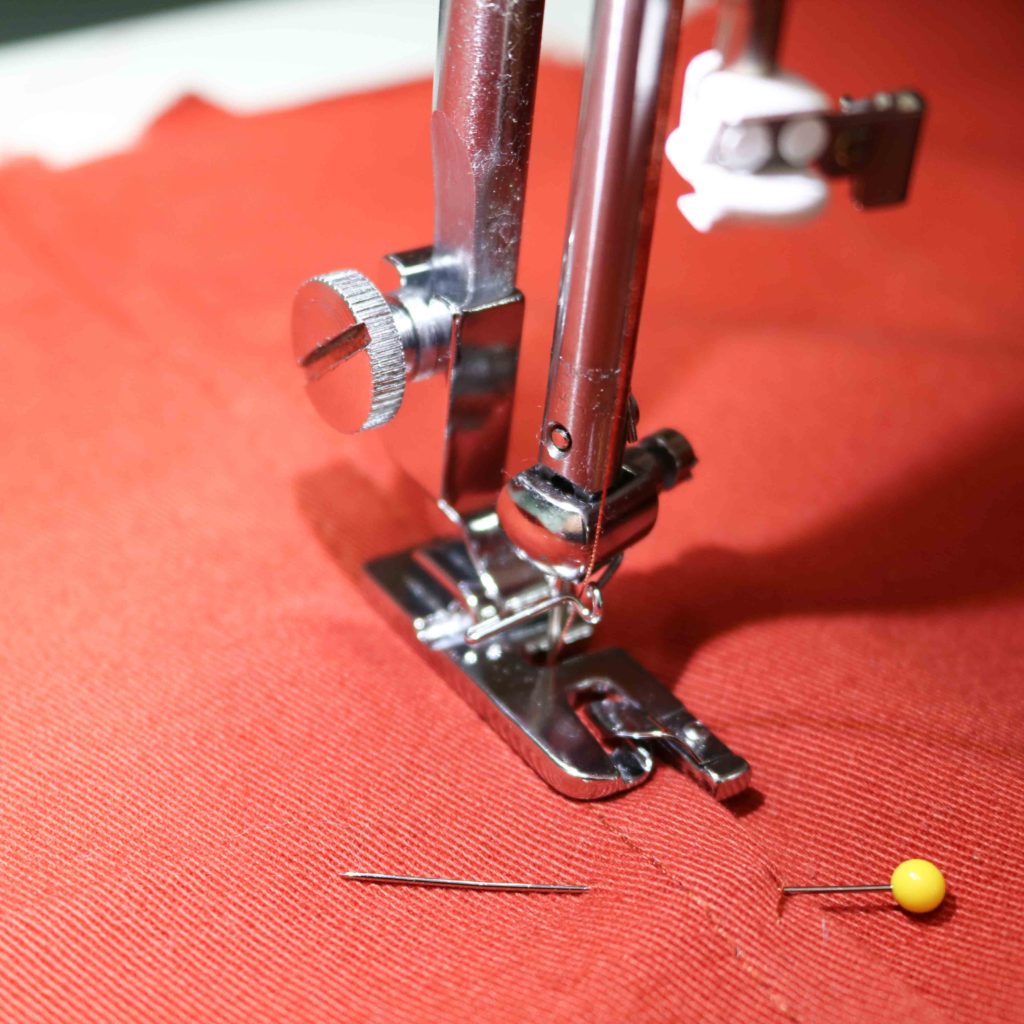
With the seams visible and lots of top-stitching ahead, I used my rolled hem foot to give me an even edge to sew along.  Many machine have an edge or top-stitching foot.  My Juki only came with a few feet and this foot works great to get even spacing.

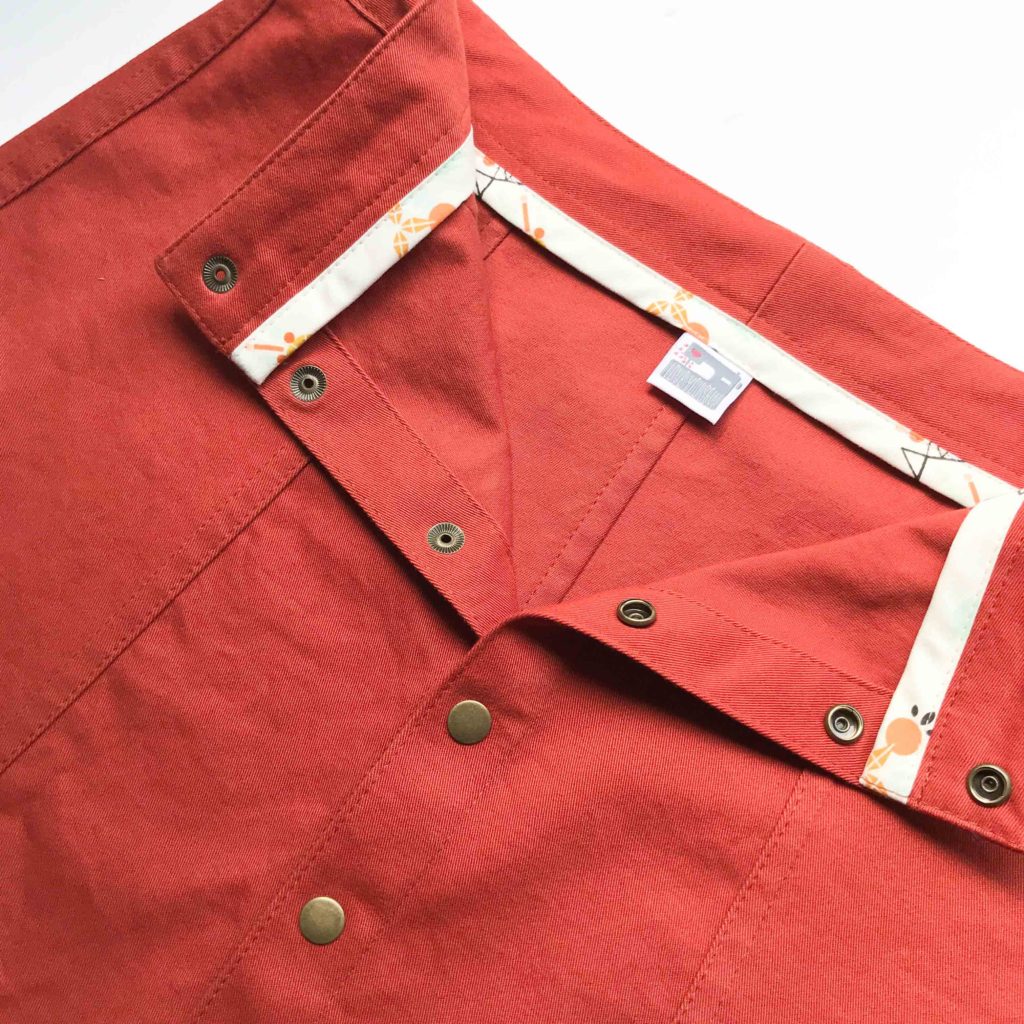
Look at those beautiful skirt guts!  Or maybe lack thereof…  The flat felled seams gives the skirt such a clean inside, so it’s soft and smooth all around.  I used some Wanderer fabric by April Rhodes left in my stash for this extra pop around the waistband.  The little hints of black and mint really bring out the brick color of the fabric.

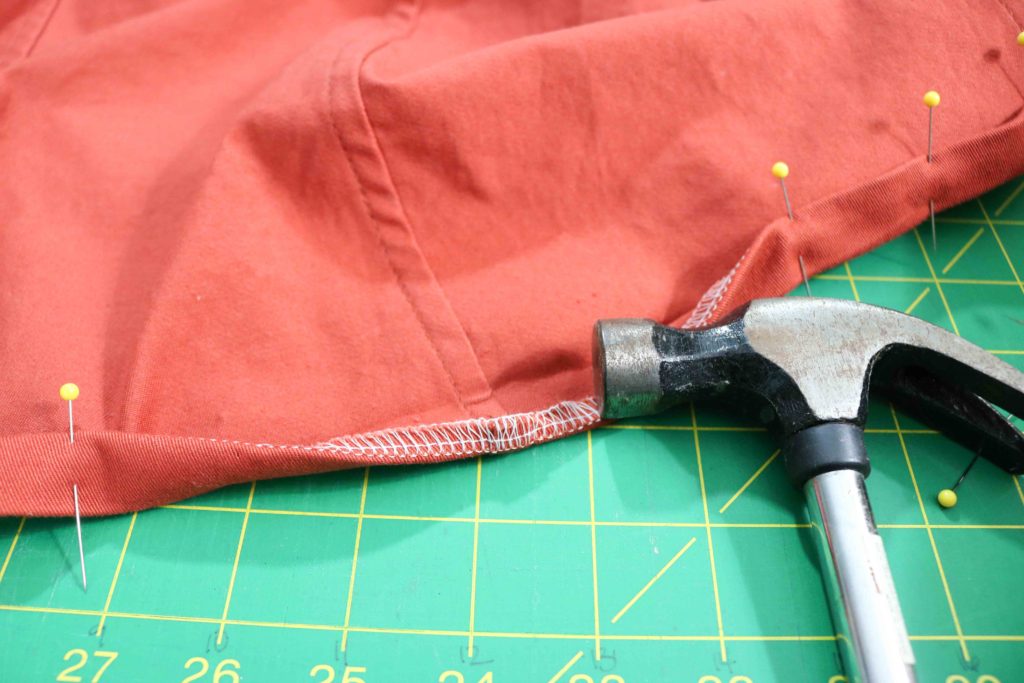
As you can imagine, the hem of the skirt can get pretty thick when doubled over against these flat-felled seams.  My regular foot didn’t even want to go over all of this bulk, so that’s when I broke out my hammer to help flatten them out for stitching.  TIP:  Make sure to test your fabric and hammer to the inside of the hem so you don’t create any “shine” on the front of your skirt.

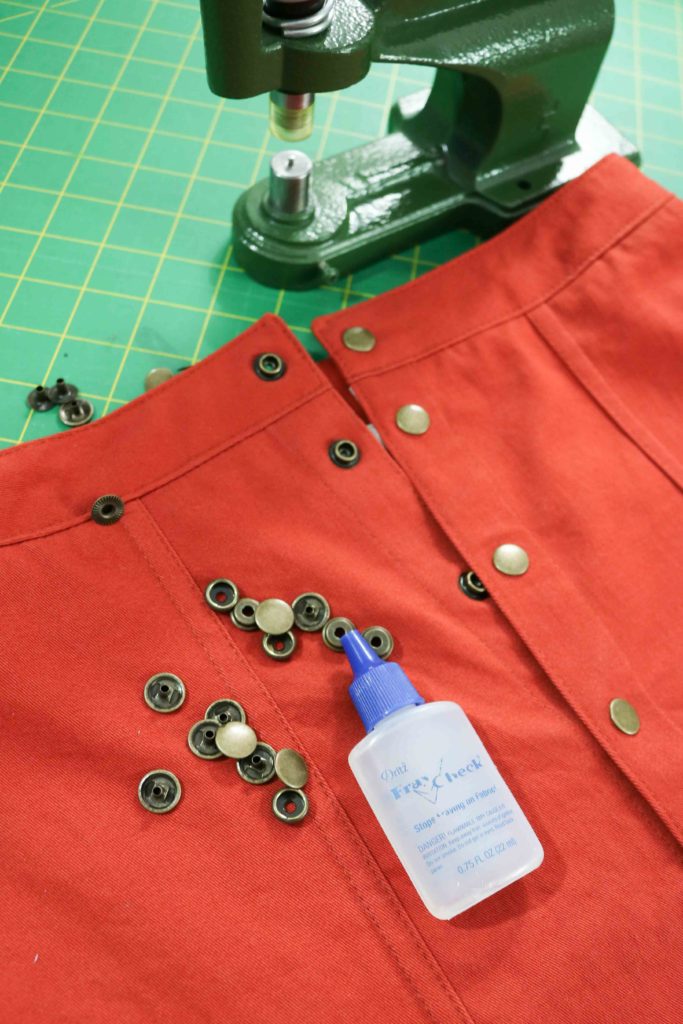
Another beautiful feature of the Tillery are the use of metal snaps.  There are instructions within the pattern with a link to video to help you, if needed.  Fortunately, I already had the snaps and the correct dies for my hardware setter (as the bag-maker you know I am.)  I was able to add these snaps quickly making the skirt look so professional.

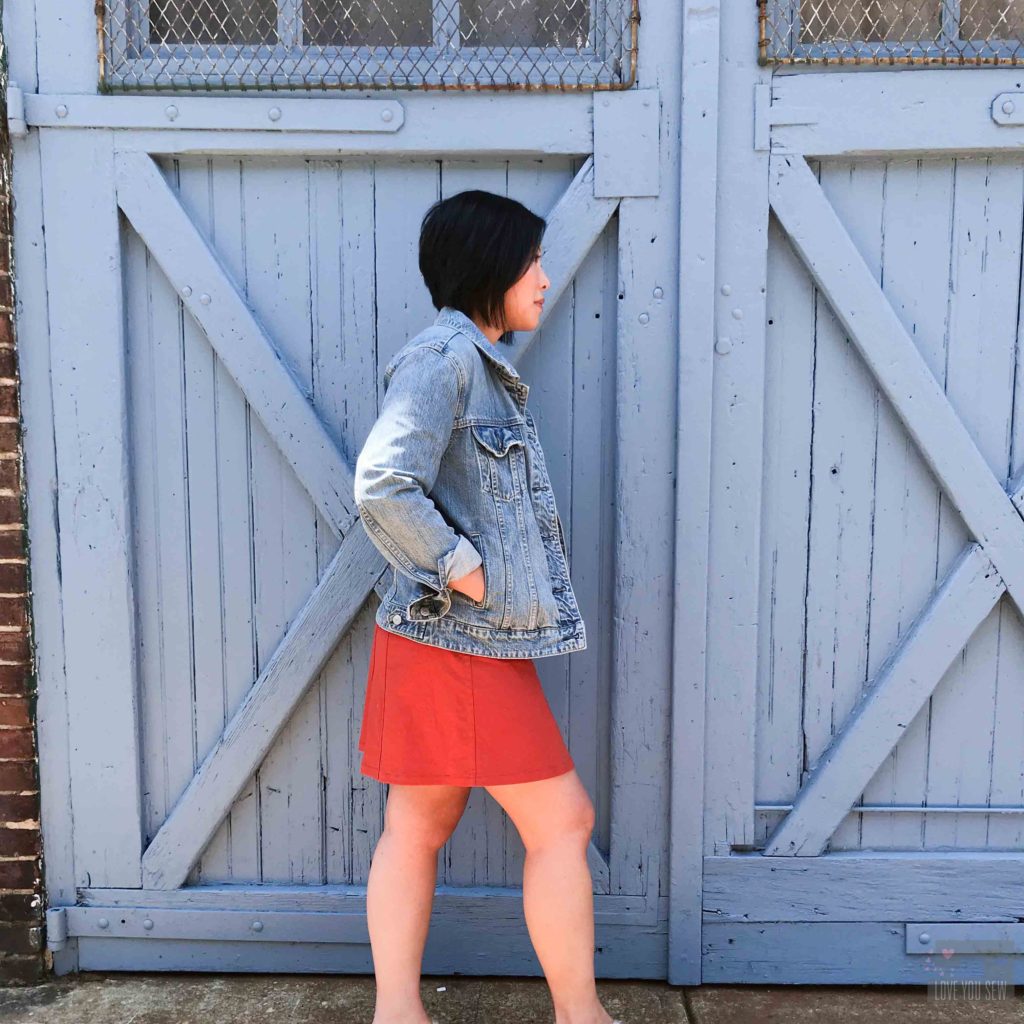
The next time I make this skirt, I think I will grade back in from the hip down.  The waist and hip fit perfectly, but with the A-line cut of this pattern, I feel like I have a little bit too much flare going outwards.  It’s hard to tell in this photo, but the skirt A-lines at every angle (not just the front and back) thanks to some extra booty…

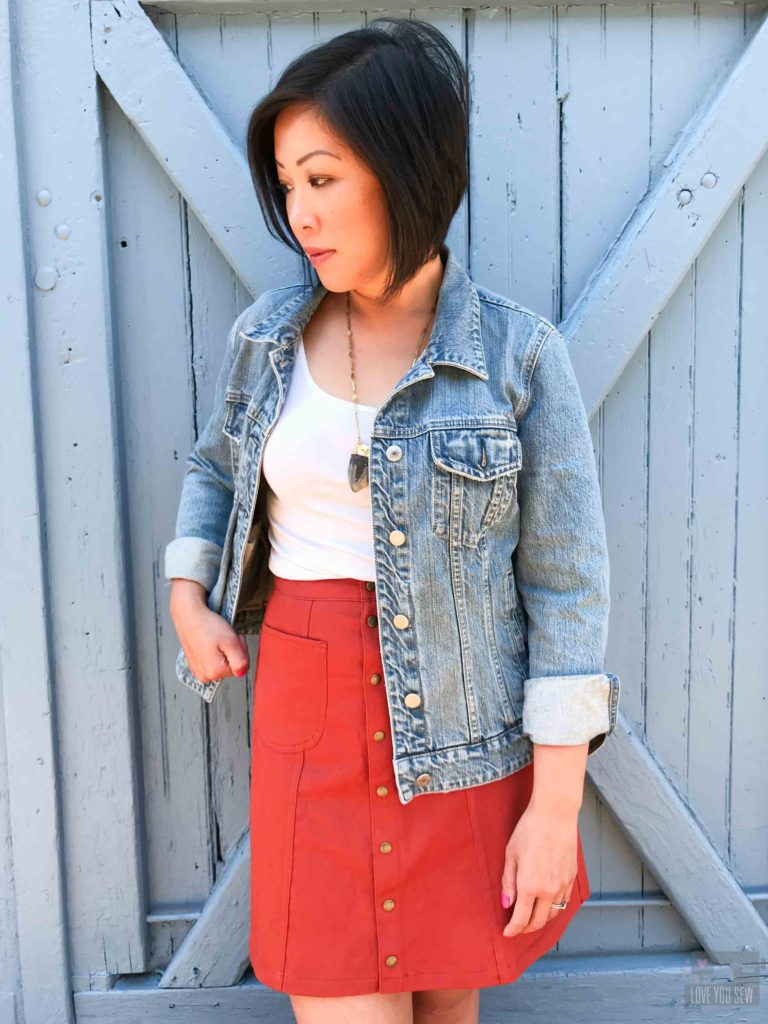
I ended up skipping the belt loops and even contemplated the pockets.  But the pockets really make the skirt and break up the high-waisted silhouette…AKA looking like old school mom/dad jeans!  Who was I really kidding?  Always add pockets.


I’m in love with this skirt and love how it all came together.  The solid fabric really brings out the seams and this brick color is a definite wardrobe staple.  My Tillery will be on repeat all summer long with it’s casual style and it will go with tanks and tees.  This piece will definitely be worn into the fall!

Project Details:

  • Pattern:  Tillery Skirt by Blank Slate Patterns
  • Sizing:  6 in the waist graded out to an 8 in the hip
  • Length: Mini
  • Fabric:  J.Crew Overstock stretch Twill from Imagine Gnats
  • Machine:  Juki TL-2010Q
  • Hardware:  Gold Star Tool Hardware Setter with in-house snaps. Unfortunately, I cannot recommend their snaps.  They bend a little when opening, but not enough to make me remove them all.  Going forward, I’ll only use Tandy Leather Snaps.)


Happy Sewing Friends!

Cristy


This post does include afflilate links for which I would be compensated only if you make a purchase.  All of it goes to keeping this blog as ad-free as possible!

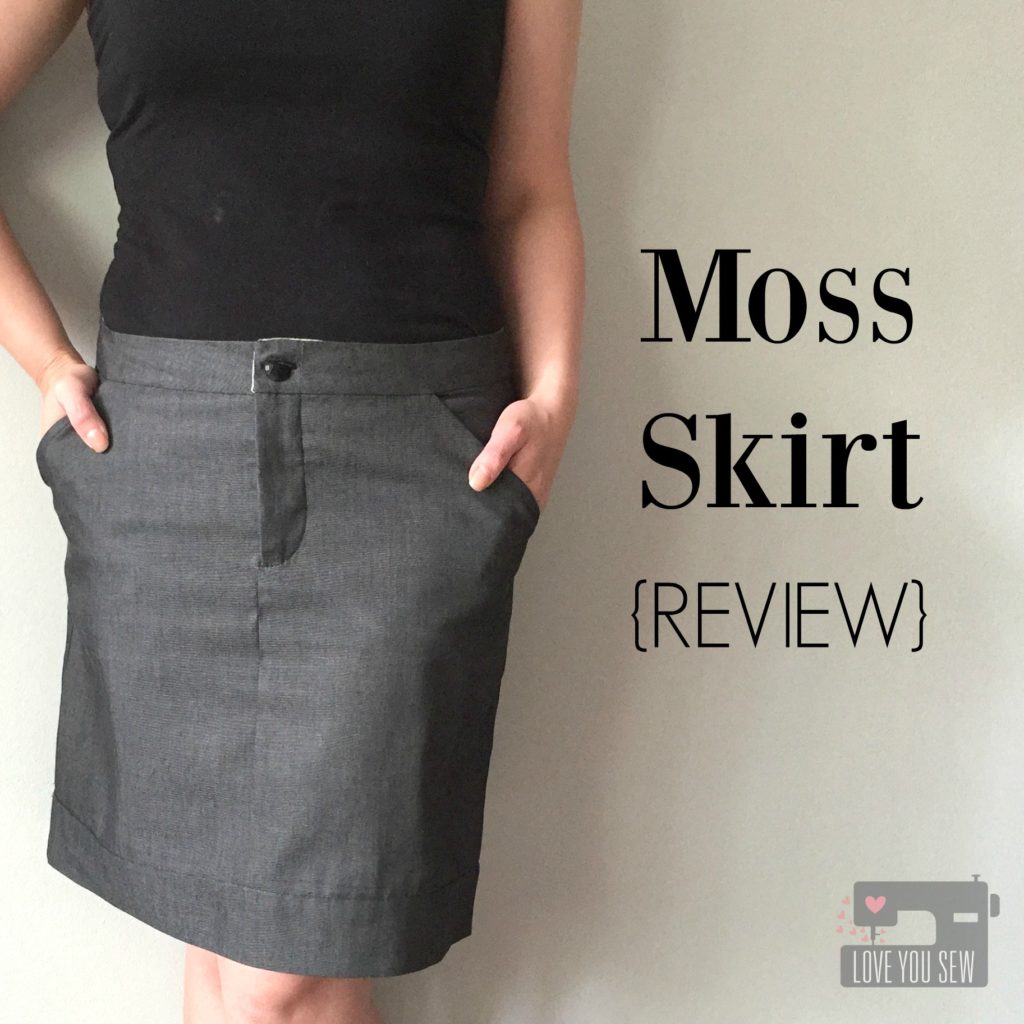
Moss Skirt {Review}

MossSkirtTitle

With all of this great warm weather, I’ve been thinking about adding some new pieces to my wardrobe and skirts are definitely included.  Coincidentally, it is also #MeMadeMay where you show off your handmade clothing on social media all throughout the month.  So…I obviously needed to make one rather than buy one 😉

PatternCover

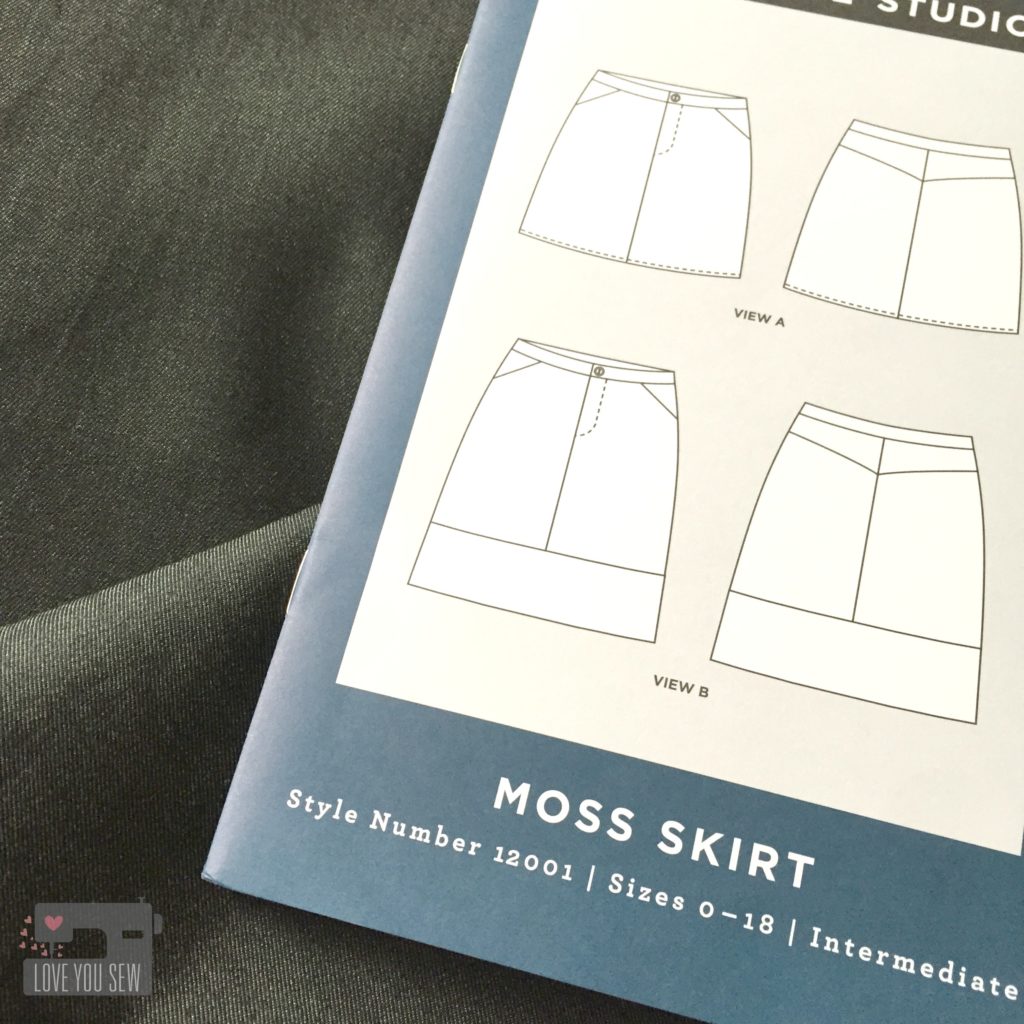
I’ve been casually looking over designs for a few months and wanted a clean silhouette without an elastic waistband.  Although the thought of a zipper scared the bejesus out of me, I still selected Grainline Studio‘s Moss Skirt.  The instructions and pictures are well done and I love how there are great resources on Grainline’s blog in case you get stuck (which of course, I did.)  I also love the two variations with a short mini and knee-length options.

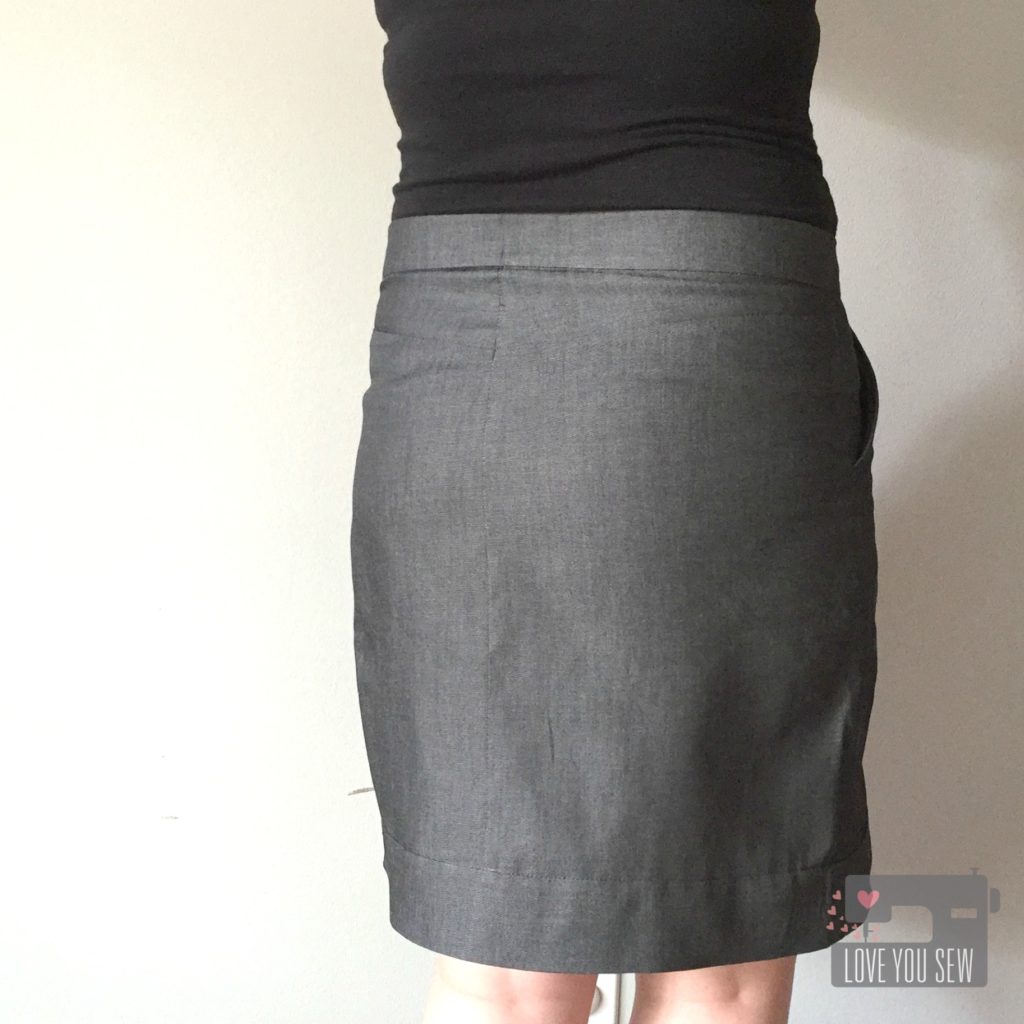
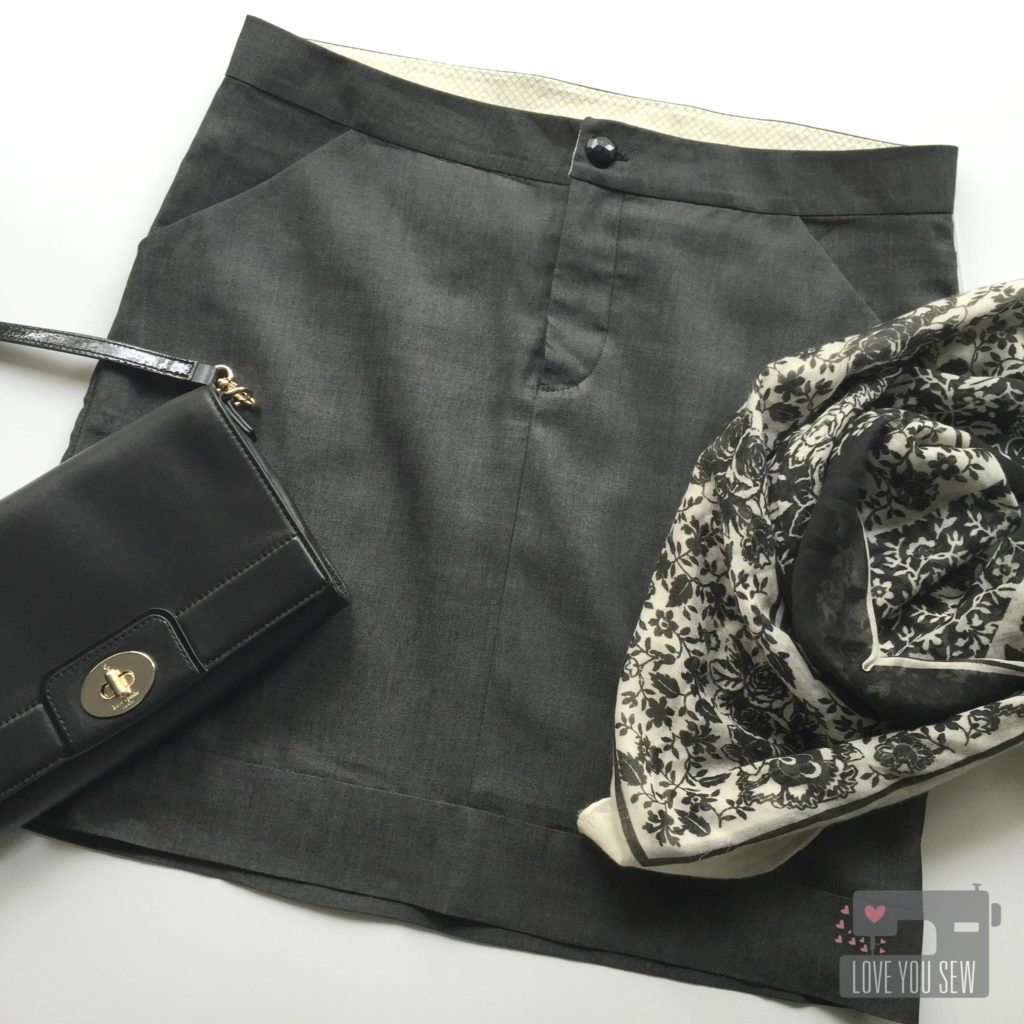
I chose this beautiful Robert Kaufman black denim for my skirt.  It has a lightweight structure and has pretty classy look and feel.  Who can knock the bonus slimming effects of black as well?

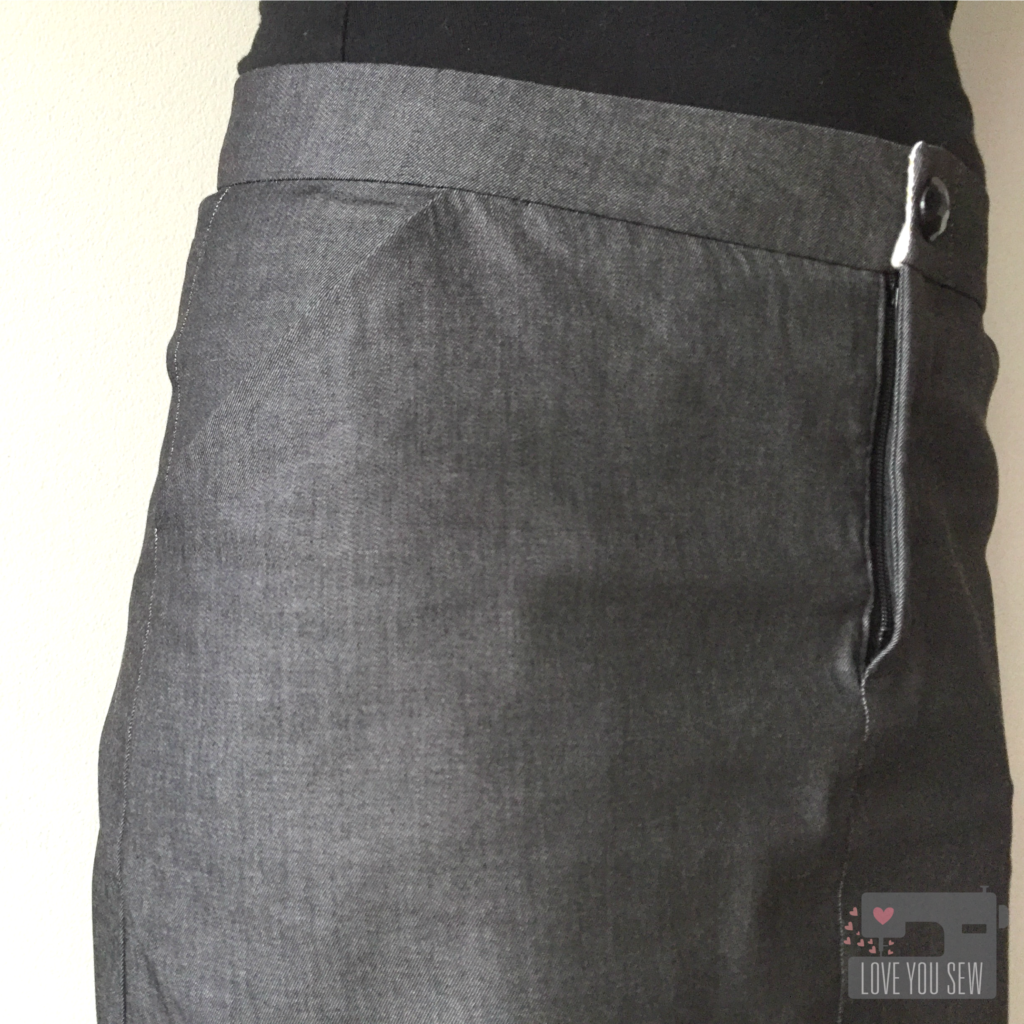
ZipperInsertOpen

The body of the skirt came together pretty quickly.  I used a combination of my Juki TL-2010Q to sew the straight seams and then finished with my Singer 150 Anniversary 14T948DS Serger.  If you make a lot of garments, I highly recommend a serger to really make your seams look professional.

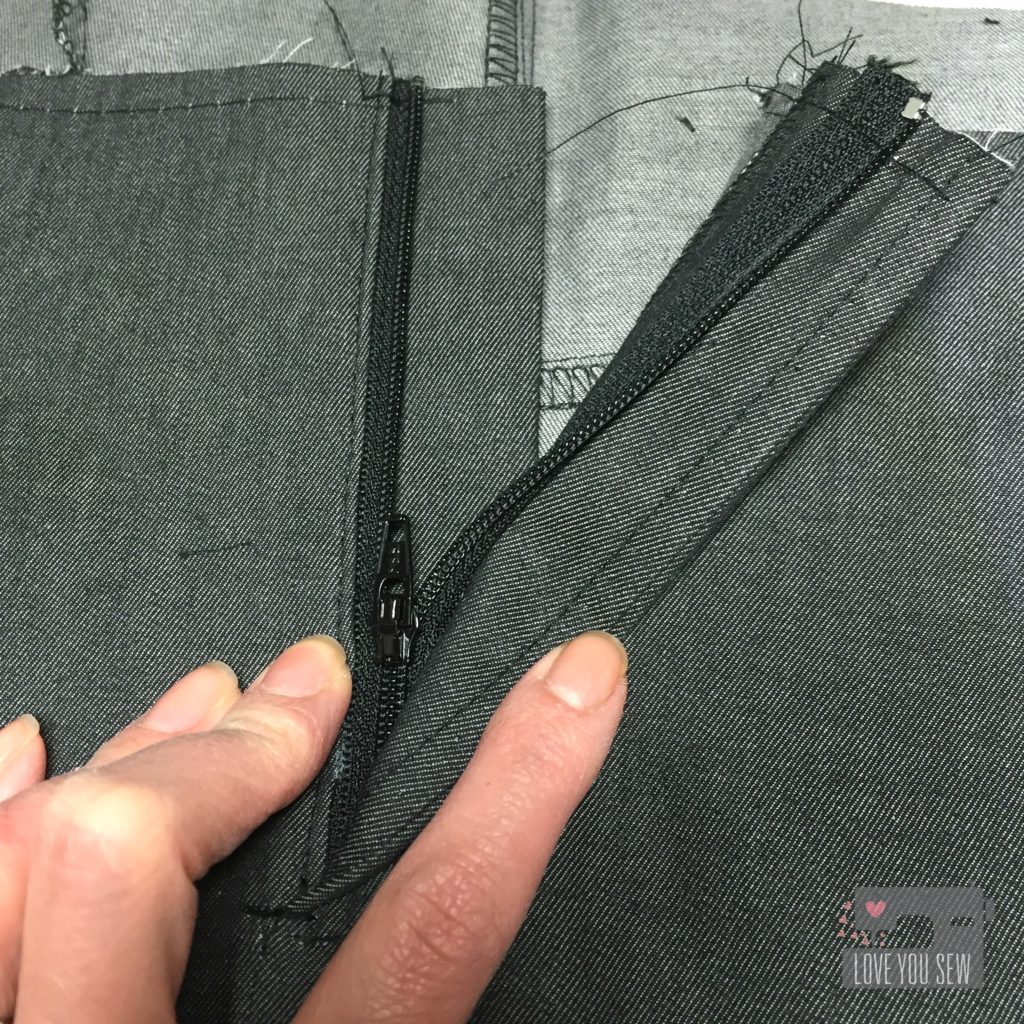
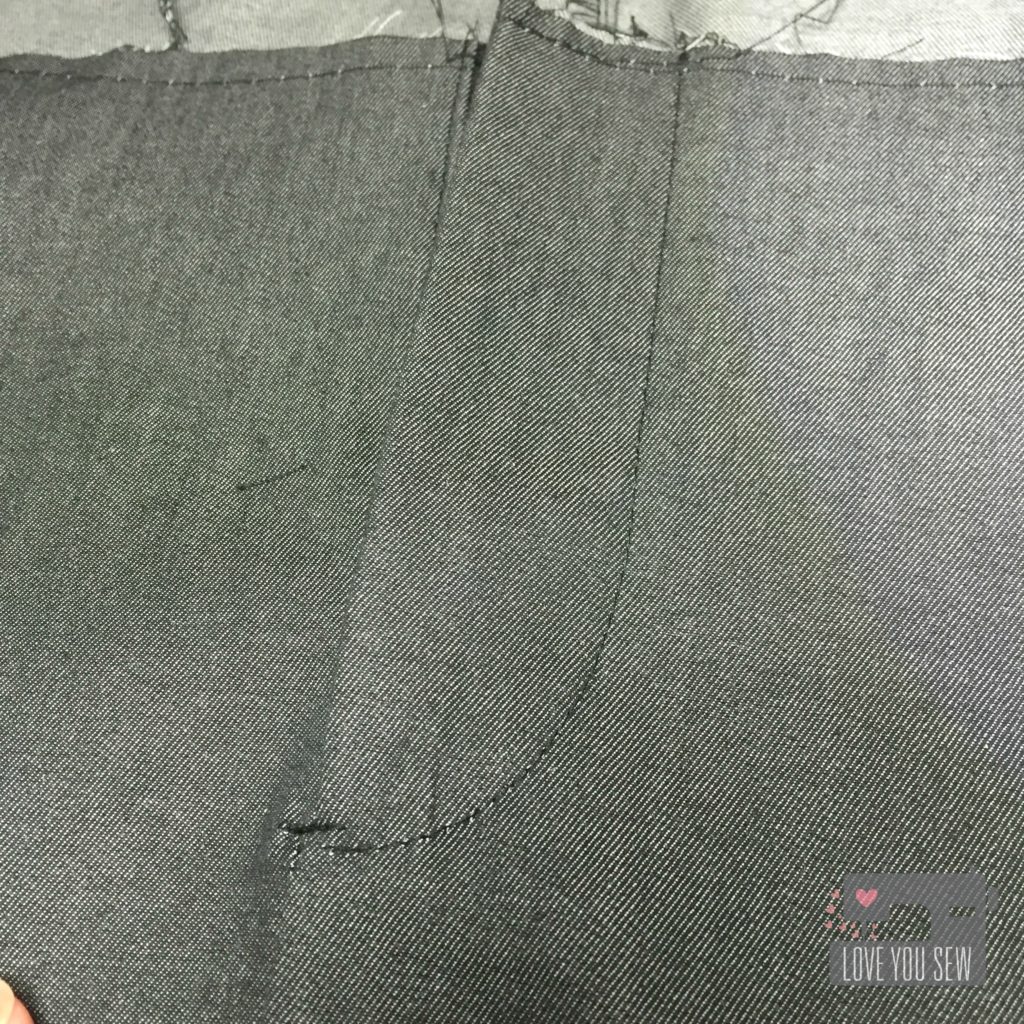
After I got the body and pockets complete, it was onto the zipper insert.  Since this was my first one (ever!) I couldn’t wrap my head around the pattern’s instructions.  Luckily, Grainline has a ton of supplemental resources under “Tutorials”  to help.

ZipperInsertClosed

After looking at the blog’s additional pictures and instructions (about 10 times,) I finally dove in and added the insert.  Instead of basting, I used my favorite Sewline Glue Pen to keep the zipper and fly pieces all in place.  I’m so proud of how this came out…who knew it actually pays off to take your time?  😛

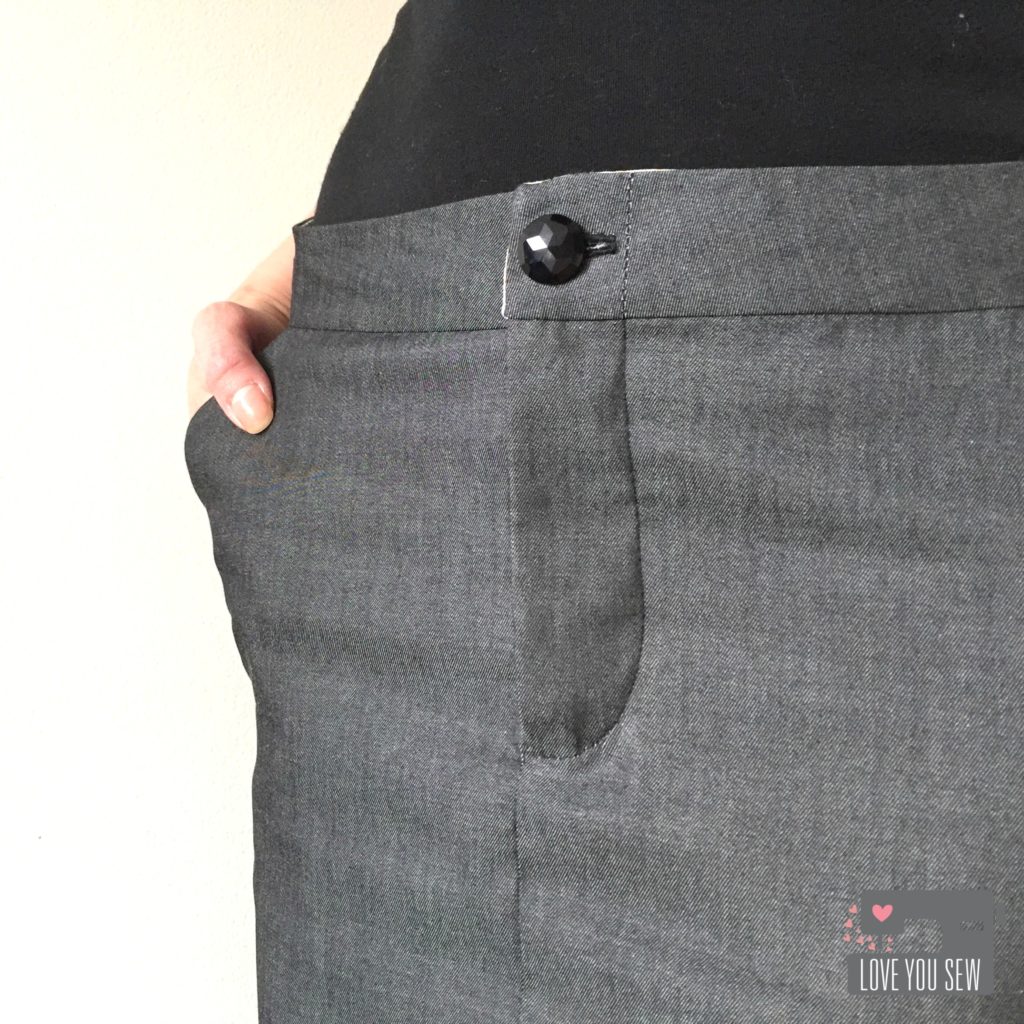
WaistbandButton

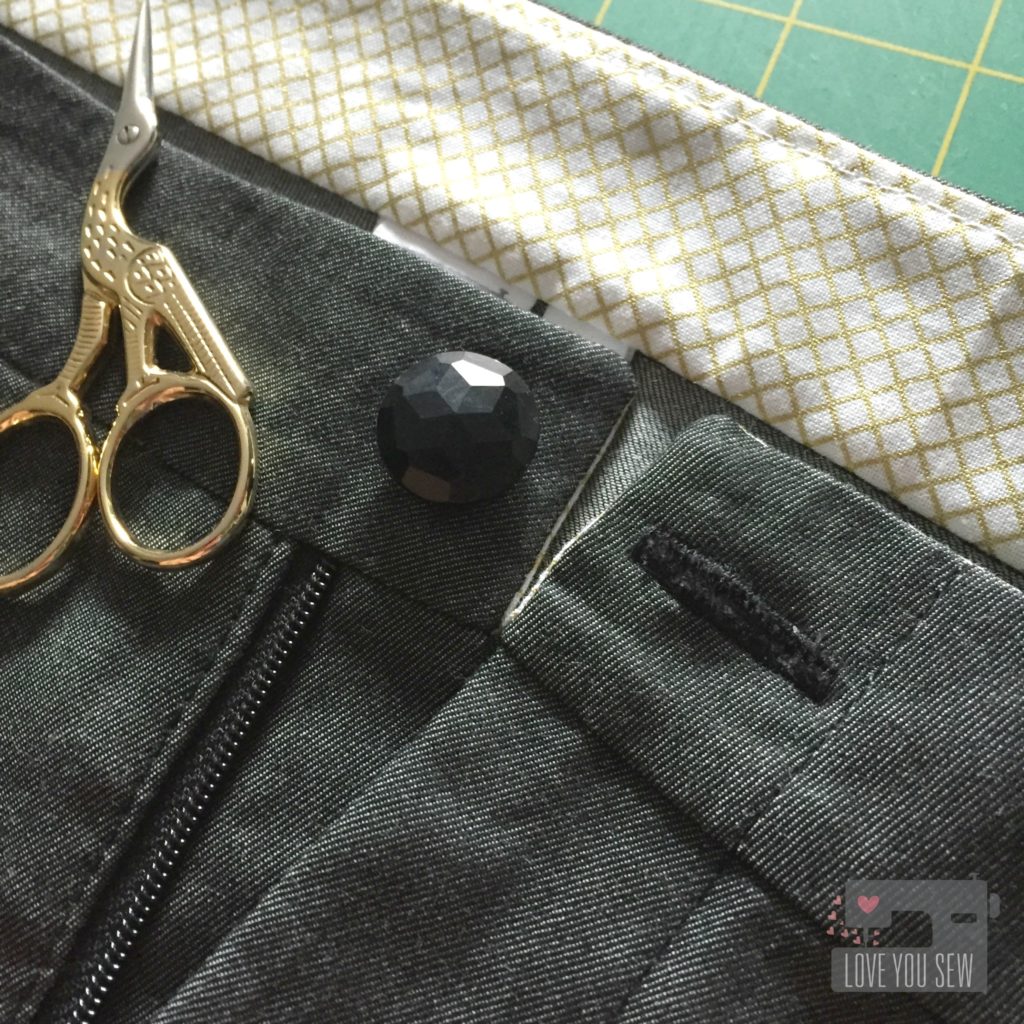
I like fun little details like adding this metallic fabric inside the waistband.  It is Remix by Ann Kelle for Robert Kaufman and really adds some flare.  This button is extra special – It is from my mother-in-law’s stash which was passed to me when she moved to a retirement home.  I wanted to make this skirt for Mother’s Day and it was really nice to have something from my MIL because we couldn’t spend the day together.  I think it maybe from a coat because I have about 5 of these pretty gem-like buttons.

MossSkirtBackview

Before adding the waistband, I adjusted the waist measurement at the back yoke.  (My backside is one size and my waist is another.)  Next time, I’ll wait to serge the center-back seam until after I  tailor it in…just for clean seam.   What I completely forgot to do, was to slightly curve the yoke back down after the adjustment.  You can see the slight fold in the yoke right below the waistband….that should be smooth.

MossSkirtSideview

The other change I made was to decrease my seam allowance to 3/8″ for the waistband to make it slightly wider.  After kids, I enjoy a mid-rise and wider waistbands to keep “everything” in it’s place…hehe.

MossSkirtFrontCloseUp

If you read other reviews, there is a mix of people who are able to use the waistband as written, and others who come up a little short.  I’m still a newbie to garment construction and I fell into the latter group.  Since I adjusted the back yoke, my waistband was only about 1″ too short.  I added the extra length to line up with the fly shield and you would never know there was an issue.  Fortunately, I did not cut my interior waistband facing yet and could adjust to match.

MossSkirtSideCloseUp

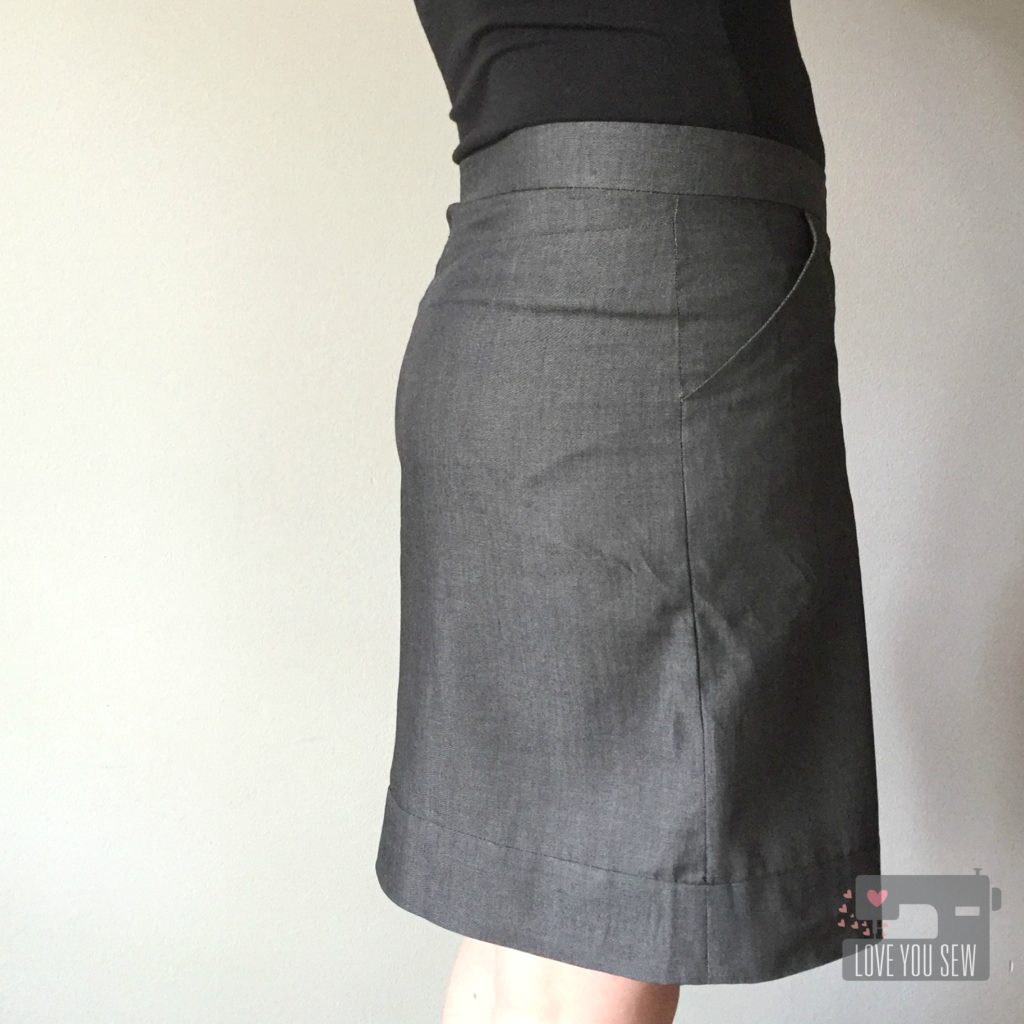
The pockets on this skirt are great.  Since I’m a bit more curvy, ready-to-wear pockets tend to poke out and it looks like little wings are flapping out of my hips.  I would have to sew them shut to look somewhat normal, but then have to sacrifice functionality.  These pockets hug to the body and I’m so glad I can actually use them!

MossSkirtStyled

I opted for View B of the Moss Skirt to wear this out to slightly more conservative places, but changed the band to hang only 2 1/4″ down since I’m a shortie (5’3″.)  There are definite plans for some more casual versions with View A for the summer.  Let’s hope I have the time to get them complete before autumn hits!

I really love the clean look of this skirt.  Since I used denim, I debated top-stitching all of the pieces like a pair of jeans, but I’m glad I held back.  This skirt looks really polished as-is and I highly recommend this pattern if that’s the look you want.

Has anyone made this pattern yet?  What is your favorite skirt pattern?


Happy Stitching,

Cristy