Welcome to the 2016 Paintbrush Studio New Block Blog Hop! During the next three days, you will see a flurry of uniquely designed 12″ x 12″ (finished) quilt blocks. The best part? These are all FREE patterns! For a full list of participants, please visit the host of each day’s hop:
Monday, March 28th – Yvonne @Quilting Jetgirl
Tuesday, March 29th – Cheryl @Meadow Mist Designs
Wednesday, March 30th – Stephanie @Late Night Quilter
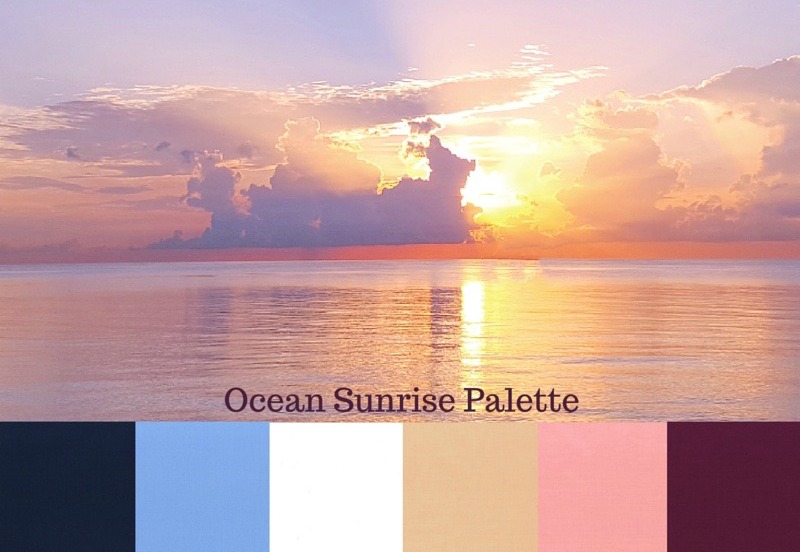
The challenge with this blog hop, was to use at least 3 colors of Painter’s Palette Solids in the Ocean Sunrise bundle. You can find all the details of the chosen colors here. Do you use your quilts on the beach or by the water?
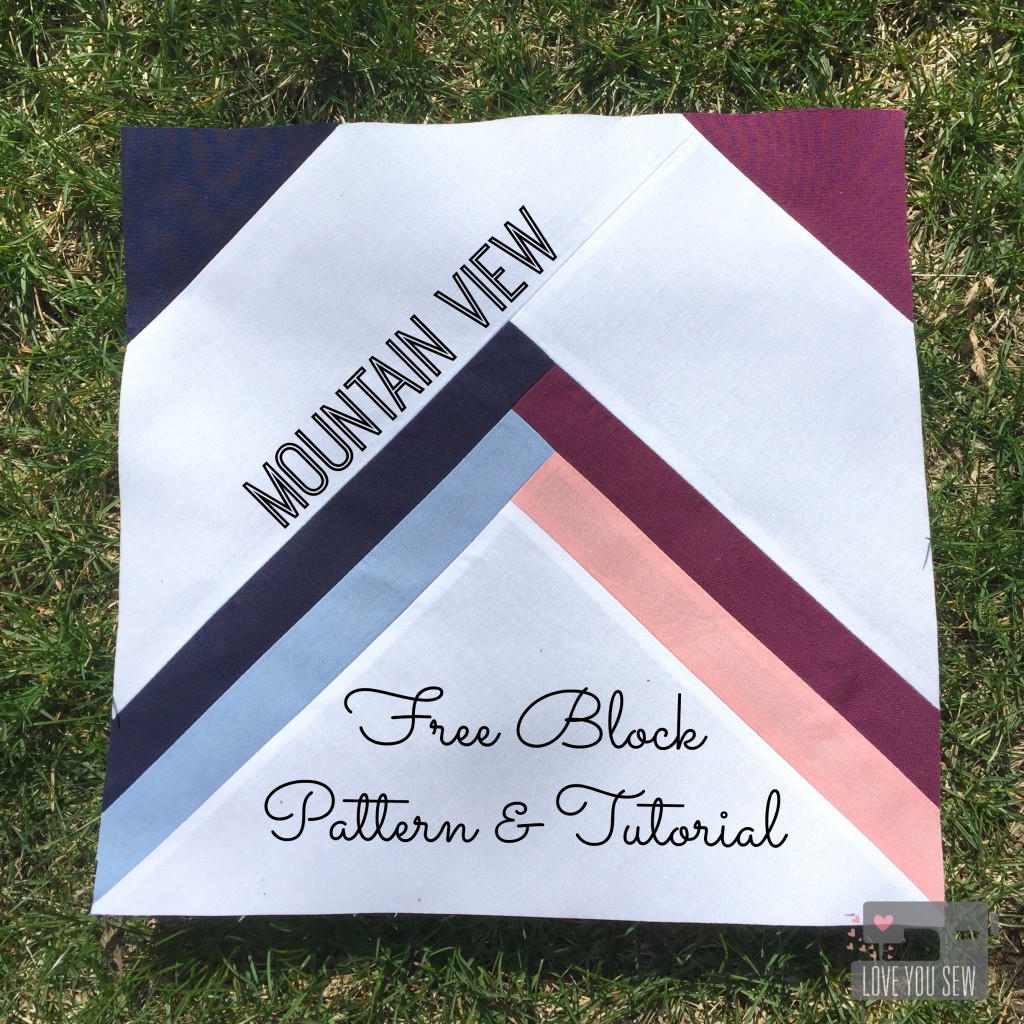
Mountain view Block
This call to design a new block was indeed a challenge for me. I usually always have a design idea that’s been brewing in my head. However, this time I was drawing up blanks. I played with many ideas until I saw a sun catcher with this similar design. It really inspired me with it’s simple lines like ones in Log Cabin style quilts. But this block is set apart by it’s angles and the negative space produces a great chain design.
As with all sewing projects, please read through full instructions before beginning.
Cutting instructions:
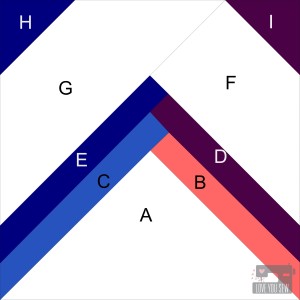
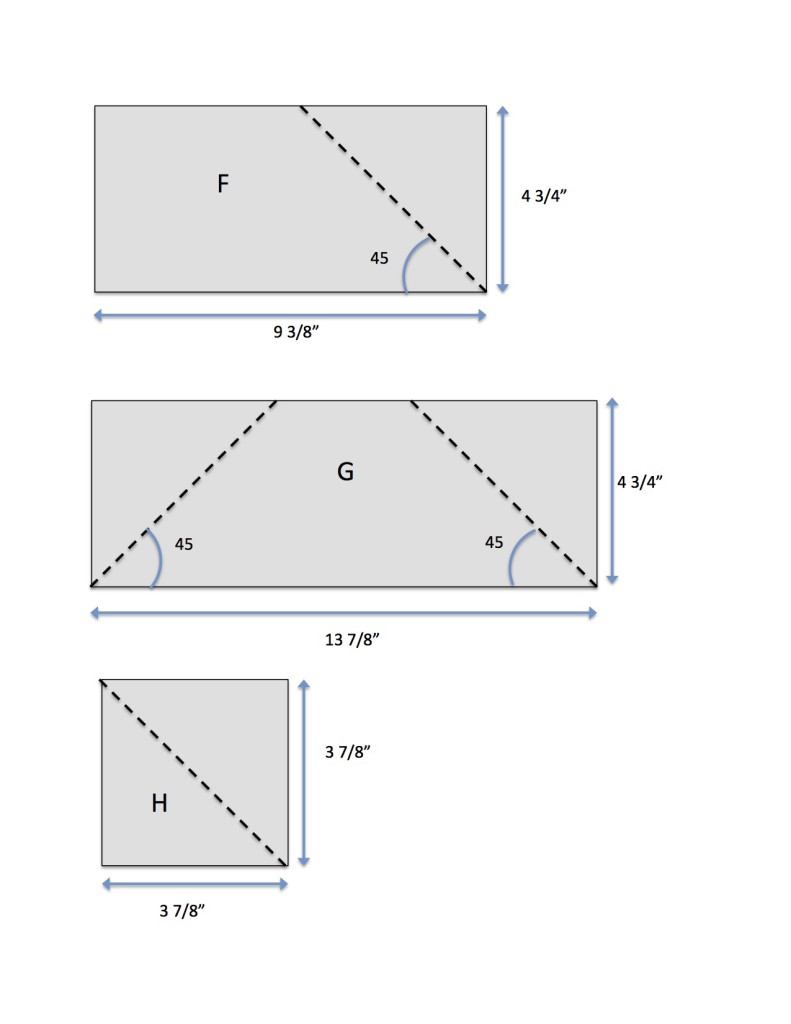
Below are illustrations of every piece of the block. The dotted line represents where you cut. A large quilting rule with 45 degree angles is required. Please see block illustration above for reference. TIP: Check and double-check your angle placement on printed fabric before cutting.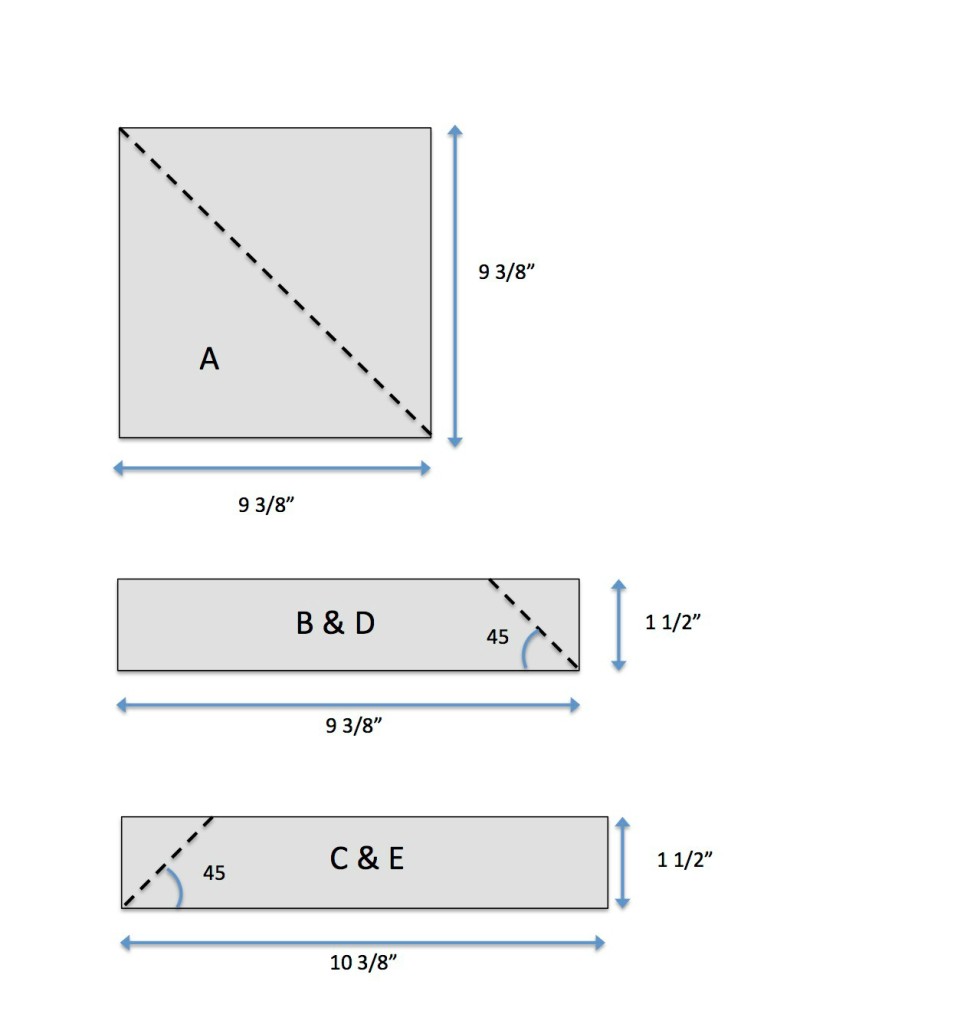
 piecing Instructions
Please note a 1/4″ seam allowance
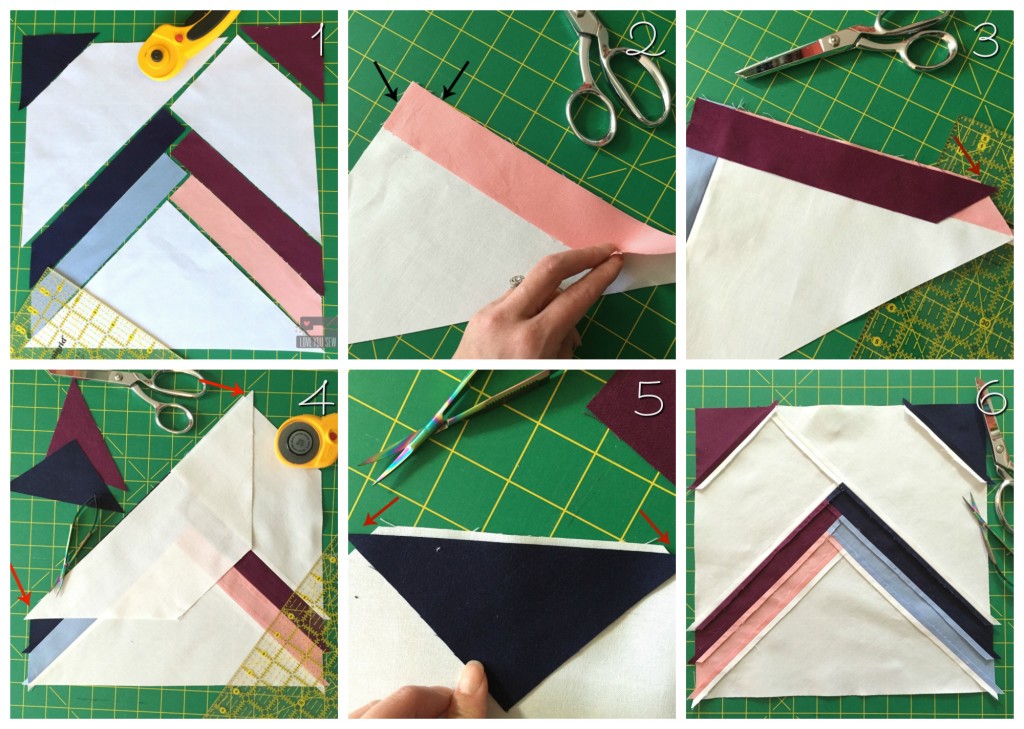
- Layout the block with your intended fabric placement
- Line up the short edge of piece B to piece A right-sides together (RST) and sew down the long side. Repeat for piece C but on the opposite side.
- Line up the short edge of piece D to ABC. You should have a 1/4″ overhang off the block. Repeat for piece E of the opposite side and then add piece F.
- Line up the long-side of piece G to ABCDEF. You will have 1/4″ overhangs on both sides of the trapezoid.
- Line up the long-sides of H to each corner. You will have 1/4″ overhangs on both sides of the triangle.
- Make sure to press all seams out as you go and you will have a nice flat back as shown.
Trim the block to 12 1/2″ square.
Additional Quilt variations:
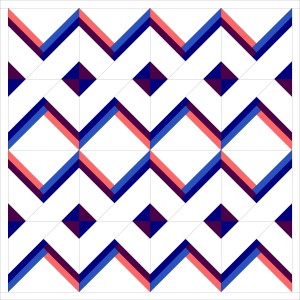
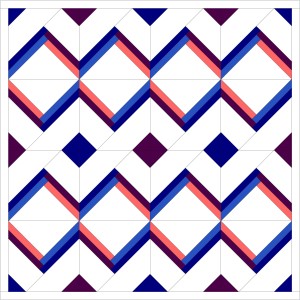
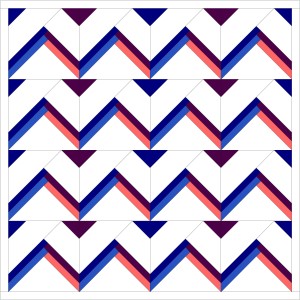
With the play of colors and negative space, there are quite a few different ways you can lay this quilt block. Here a just a few other ideas.
This placement puts the “chain” in the center of the quilt and you can play with the smaller triangle (H) to get solid squares in between.
This variation plays with the chevron you can create. Leave the smaller triangles (H) colored, and you get an arrowhead look or leave them the same color as your background to let the chevron stand on it’s own.
Visit Painter’s Studio’s blog, Inspired by Fabric and/or Quilting Jetgirl (two separate giveaways) to get your chance to win a whole HALF-YARD bundle of Ocean Sunrise!!! {Edit – Giveaway closed}
Don’t forget to get additional FREE quilt block designs and tutorial by visiting the following:
Host: Yvonne @Quilting Jetgirl
Jess @Quilty Habit
Silvia @A Stranger View
Cristy @Love You Sew
Kelly @Quilting It Out
Renee @Quilts of a Feather
Bernie @Needle and Foot
Terri Ann @Childlike Fascination
Chelsea @Patch the Giraffe
Mary @Quilting is in my Blood
Diana @Red Delicious Life
Sarah @123 Quilt
Thank you for visiting and I hope you get to try out this block along with all of the others on the 2016 Painter’s Studio New Block Blog Hop!
Happy Stitching,
Cristy
This blog hop was sponsored by Painter’s Studio. The quilt design, tutorial and all opinions are original and my own.
