Summer Swimsuit with Pinecrest Fabrics

Right before we leave for vacation, what do we, as sewists, always do?  Pack???  Nah, that makes too much sense….we just sew more clothes!  Isn’t there always one more garment we desperately need to have or else it’ll ruin our trip?  😛  Okay, it may not be that dramatic, but I still wanted a new swimsuit for the family vacation this summer.  There was some extra motivation too, since I received my package from Pine Crest Fabrics riiiight before we were about to leave.  Who can leave gorgeous fabric just sitting there!
 

FABRIC
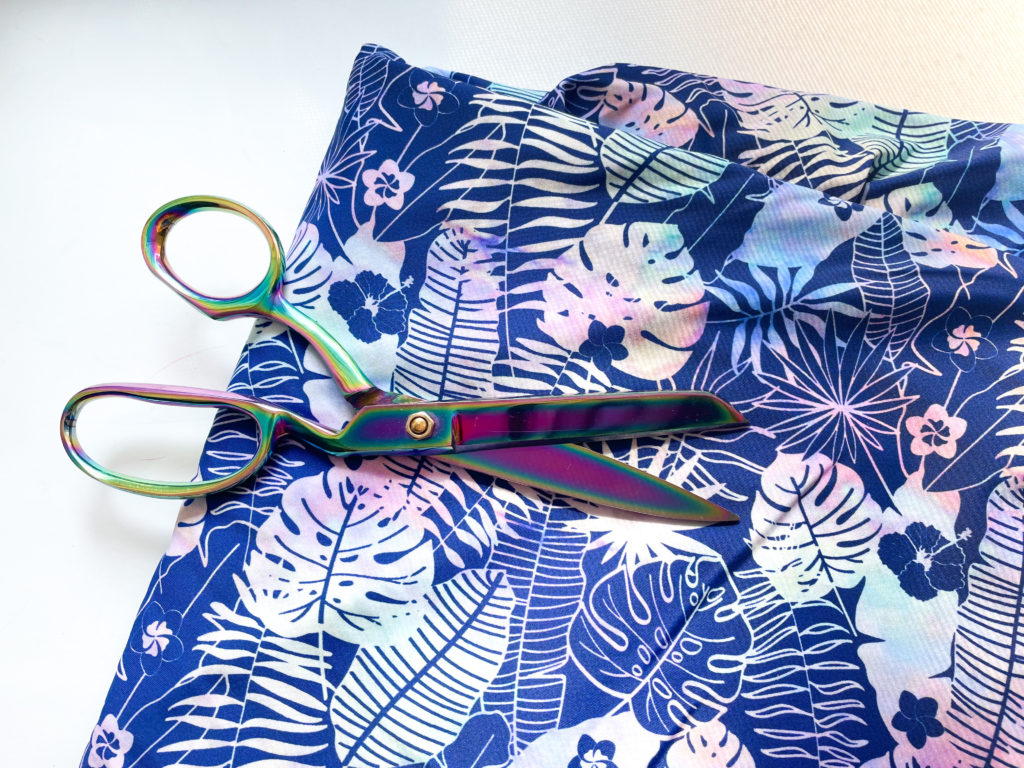
I am very fortunate to have worked with Pine Crest Fabrics before with some Athleisurewear and with other swimwear fabrics.  With every make, I’ve been incredibly impressed with these high-quality stretch fabrics.  They are durable, silky smooth and have great recovery with the stretch.  This Pastel Tie-Dye Jungle print is no exception.  It’s a departure from what I would normally wear, but swimsuits are meant to be fun, right?  PCF has an incredible library of prints and can even do custom prints for wholesalers.  I love this indigo-purple color and that tie-dye is SO on trend right now. The scale of the print is perfect for form-fitting apparel…I absolutely love it and can’t wait to make a few extra separates from the scraps I have!
As a repeat maker, testing the feel of all the different base cloths they manufacture is a special honor, especially those which are more sustainable like with this fabric that uses  80% recycled Greenlon (TM) Nylon.  I love to thrift, upcycle and use sustainable fabrics when I’m making new garments, and knowing that Greenlon (TM) uses recycled plastics using in the fibers is just amazing!  On top of that, PCF also meets the following to be eco-friendly:

  • Global Responsibility Standards (GRS) –  This means recycled materials are verified and the production process meets responsible practices.  You can read more here.
  • OEKO-TEX certified to test for harmful substances to human health.  You can read more here.
  • HIGG Index – This is part of the Sustainable Apparel Coalition for moe standardized measurements in the the textile and apparel industries.  You can read more here.
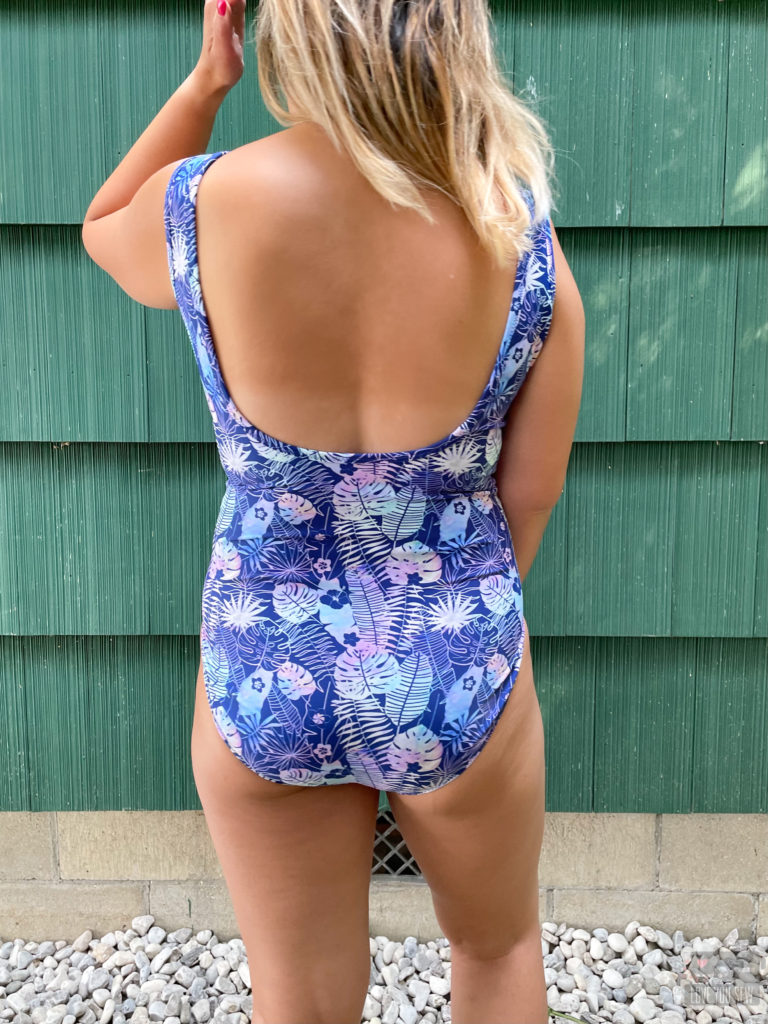
On top of feeling good about all of these certifications, this fabric is STILL absolutely amazing in its weight, hand and feel.  The four-way stretch is strong which allows for full movement, but also has great recovery and compression.  The fabric is completely opaque, so if you wanted to make leggings or bike shorts, they would be squat-proof too.  I like the cool feel from this base cloth and it’s silky enough that I don’t worry about chafing…especially during a long day in a wet suit!
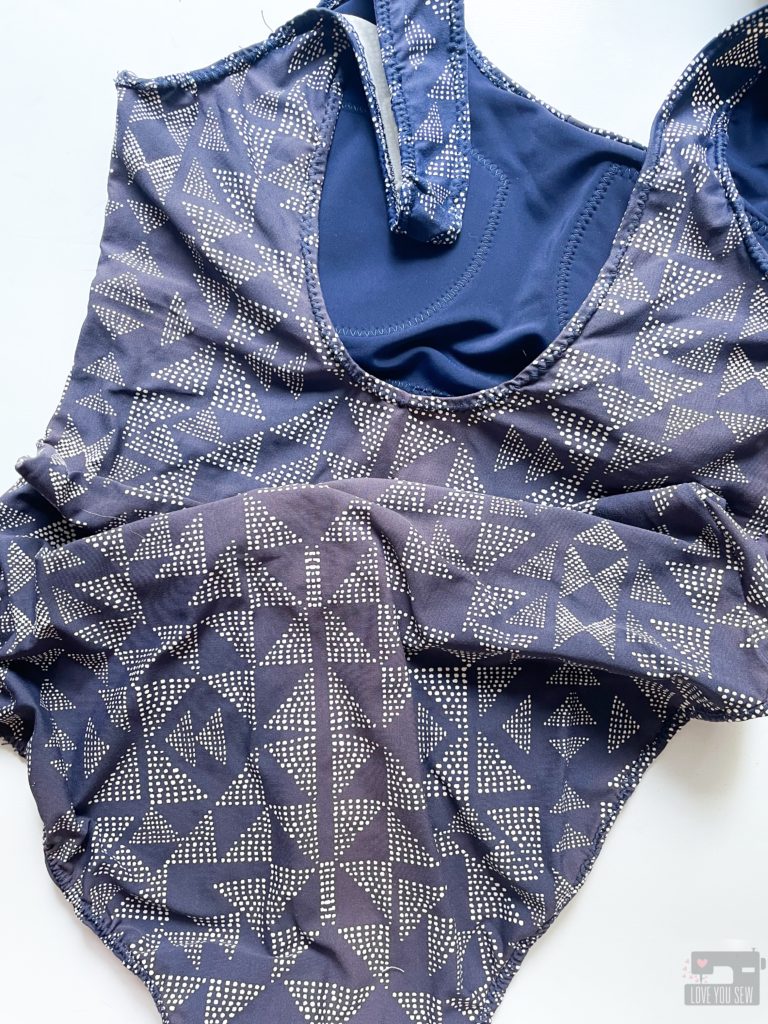
Mystery deadstock fabric with Pine Crest Fabrics solid lining

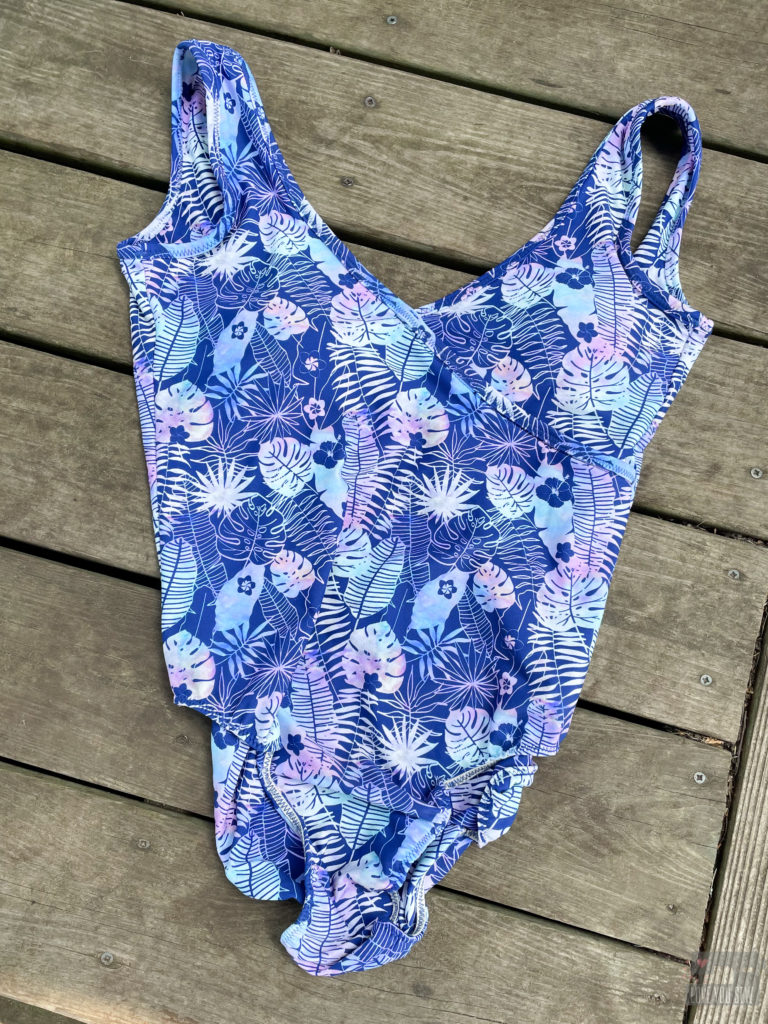
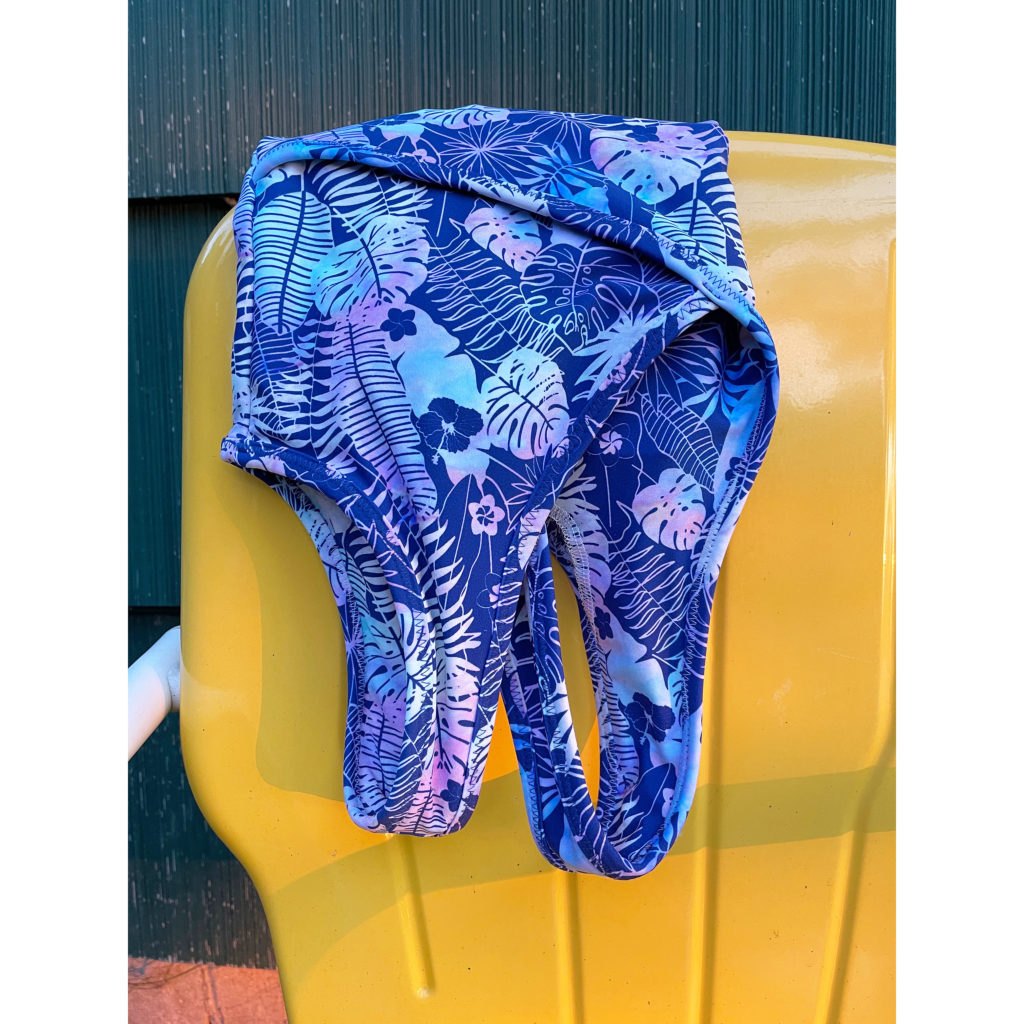
I’ve sewed with a lot of spandex fabrics with good experiences and some that didn’t live up to my expectations.  I made a swimsuit (picture above) using some deadstock fabric I purchased a few years back, so origin and content is a mystery.  I loved the print and was happy to buy something that was overstock from a manufacturer.  However, I did a lot of indoor swimming over the winter and my lap suit was ravaged by the chlorine.  You can see that It went from navy to orange in the center of the print!  But if you check out that solid navy lining — it’s Pine Crest!  The navy blue is still as saturated as day one.  This is a true testament to the quality and high chlorine resistance!  It’s just a bummer that I have to toss this suit before the construction and/or fit deteriorated…


PATTERN
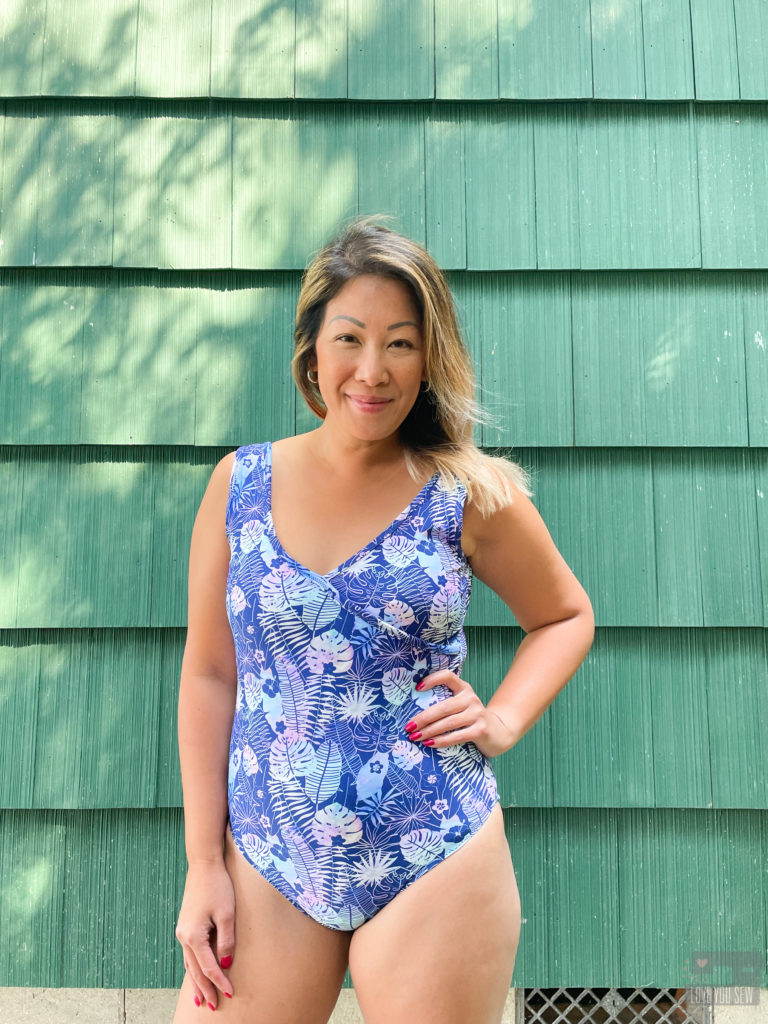
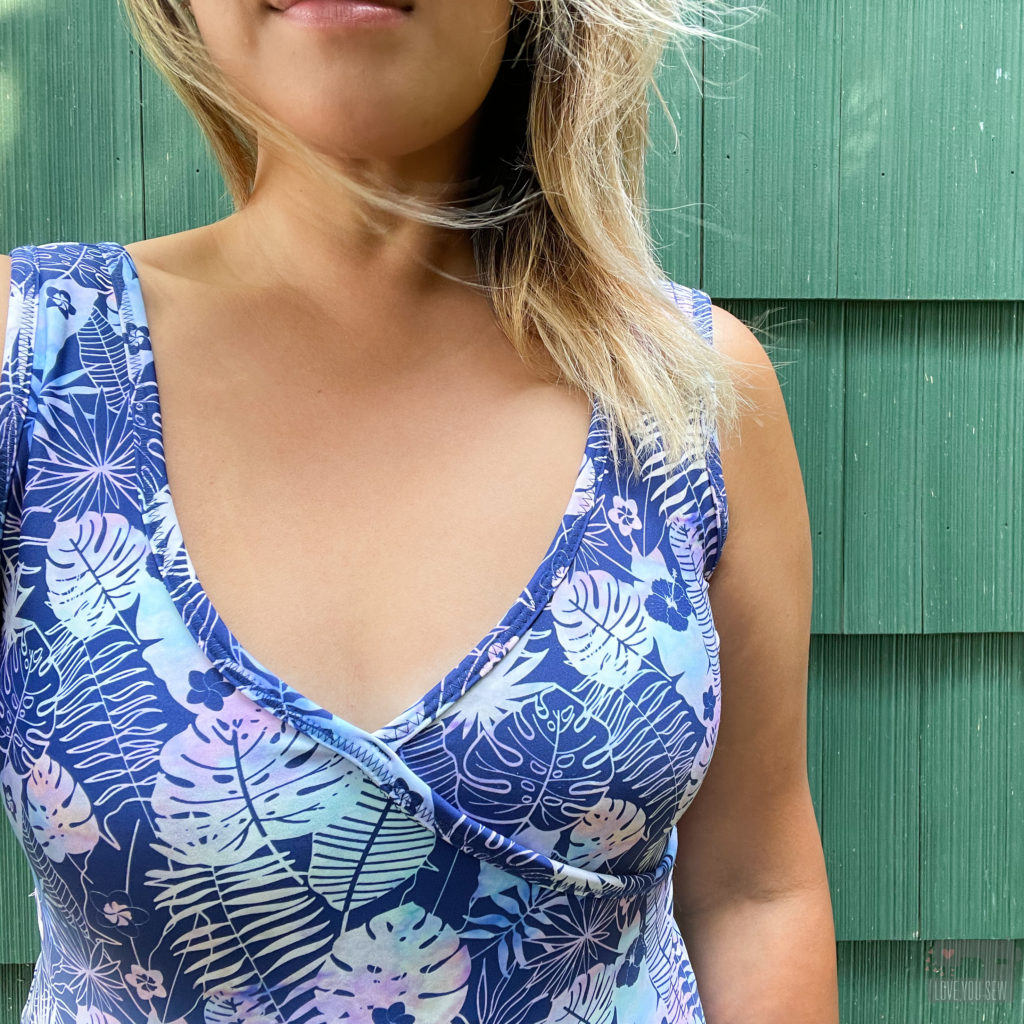
After having my babies, I mostly wear full bathing suits during the hot months.  It keeps me covered where I like to be covered, but still allows me to easily play and swim with my kids.  After finding the Violet Swimsuit by Laela Jeyne Patterns, I knew I wanted to try it out first with the plain V-neck (and then later with a ruffle.)  I used this suit as my wearable muslin/toile while I tried out this pattern for the very first time.
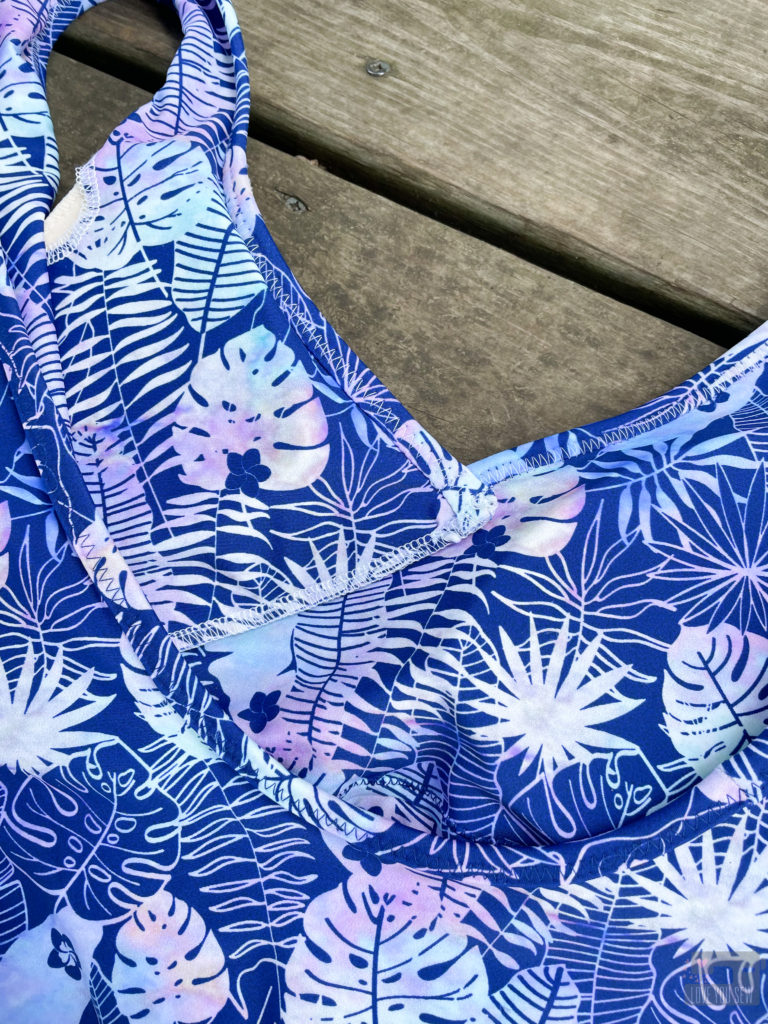
The Violet Swimsuit has two views featuring a faux crossover neckline with and without a ruffle.  There is also a cut out variation at the side of waistline for some extra style.  All edges are bound and the suit is fully lined.  You can select from a high or low scooped back and I opted for the lower style…Can you tell I don’t usually wear one with that tan line???  I love the construction technique for removable pads and love that this suit has different templates going from A-E cups.  The pattern fits up to a 49.5″ bust and up to a 47″ high hip.
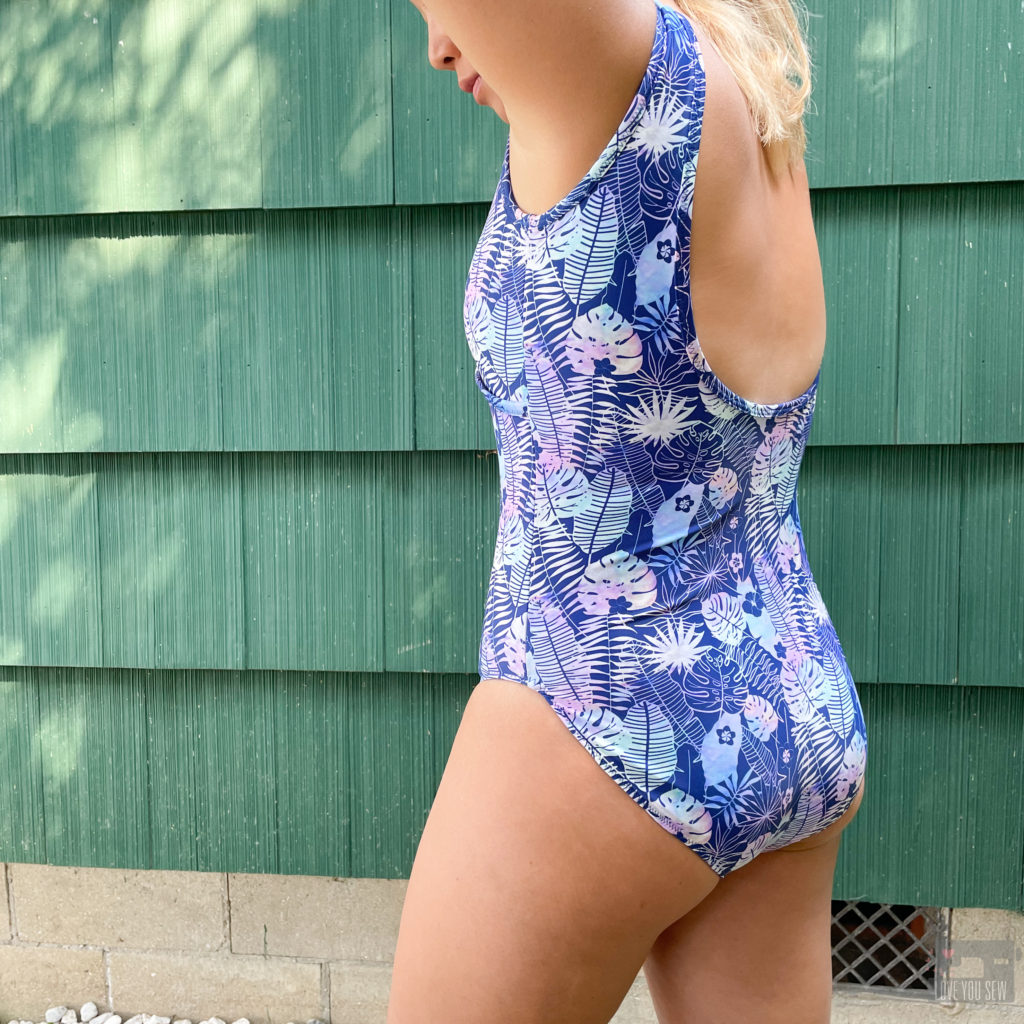
Details and Modifications:

  • I measured 10 in the Bust and Waist; 12 in the Hips – graded out the pattern to fit
  • Used the same fabric as the lining
  • Raised each leg opening by 2″ – Since I’m short, I prefer suits to not cut off my leg at it’s widest point (making me look even shorter.)   So, I prefer a higher leg to give an illusion of extra length.
  • Added 1″ to each leg elastic since the leg opening was now larger
  • Increased the seam allowance  1/8″ at the shoulders and at the crotch for a more secure fit
  • For the binding, I sew it to the lining side of the suit first and then flipped it over to the main fabric so I could better control the placement of the topstitch.
  • You will notice in the flat-lay of the suit that I inserted the elastic the wrong way but didn’t catch it until it was too late.  Instead of picking out the seams I let it be and the suit still wears wonderfully!
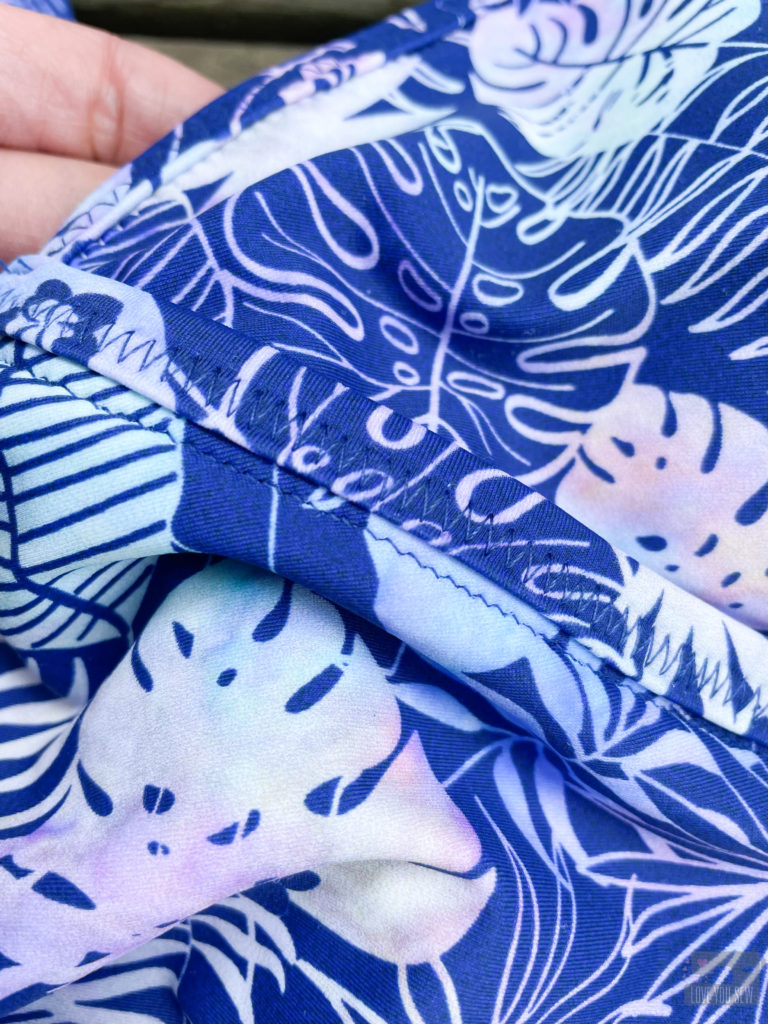
All of the other swimsuits I’ve made before used elastic to secure the edges and I was so happy to try out this binding method.  Like most suits, you do NOT need a coverstitch machine and can sew one with the basic stitches (and a ball-point needle!) on your domestic machine.  I used a zig-zag stitch and some washable Wonder Tape (aff link)  to help hold the binding evenly as sewed.  *’Just remember that you have to then wash the garment prior to the final fit since it inhibits the stretch.

The faux crossover feature of the suit does require top-stitching to hold it in place and I was pretty stoked to use my “lightning” stitch for the first time.  Yes, I do own a coverstitch, but I certainly don’t always want to spend the time setting it up for 8″ of stitching!  This is a great low-profile stretch stitch and I’m so pleased with how it looks and holds up.
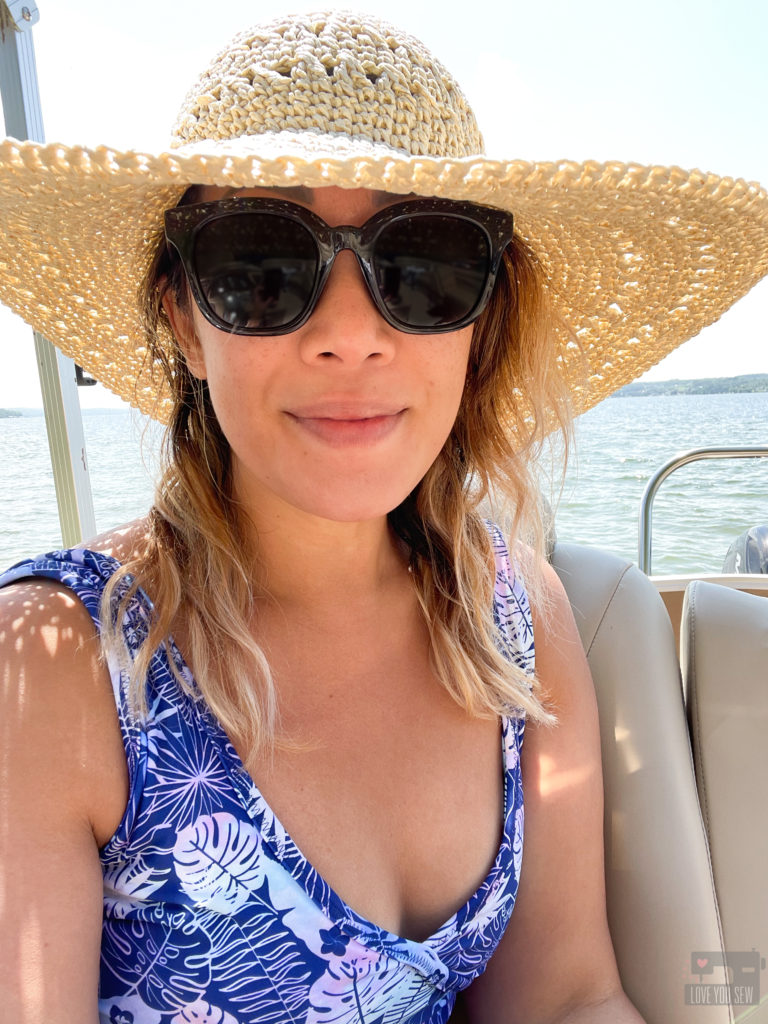
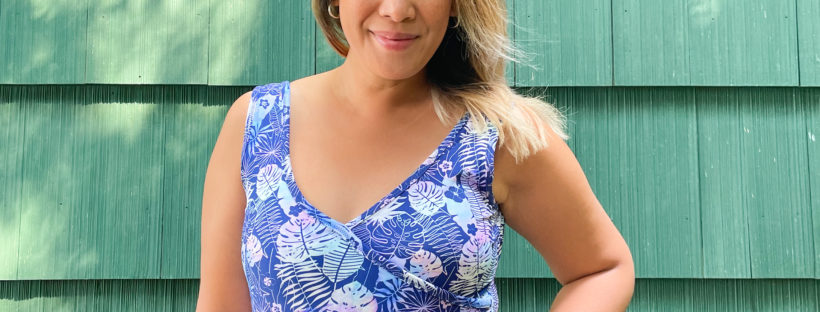
Overall, I’m very pleased with this make.  The fabric and print are phenomenal and I appreciated the cool hand and quick drying after a long day on the lake with my kids.  With new makes, I appreciate lots of notches and that’s the one thing I wish the pattern had….especially with the binding not centered at the back as you would intuitively think would happen.  I also wish the pads sat more evenly in the suit, but once on, it does stay in place.  Buuuut, these little things won’t stop me from making another!  I’ll post up my ruffle version soon!  Have you made any new swimsuits this year?


Happy sewing!

Cristy


These fabrics were gifted to me by Pinecrest Fabrics in exchange for this blog post.  I purchased this pattern to use with the fabric.  All opinions are my own.  

There maybe affiliate links used in this post.  You can read about my disclosures here.


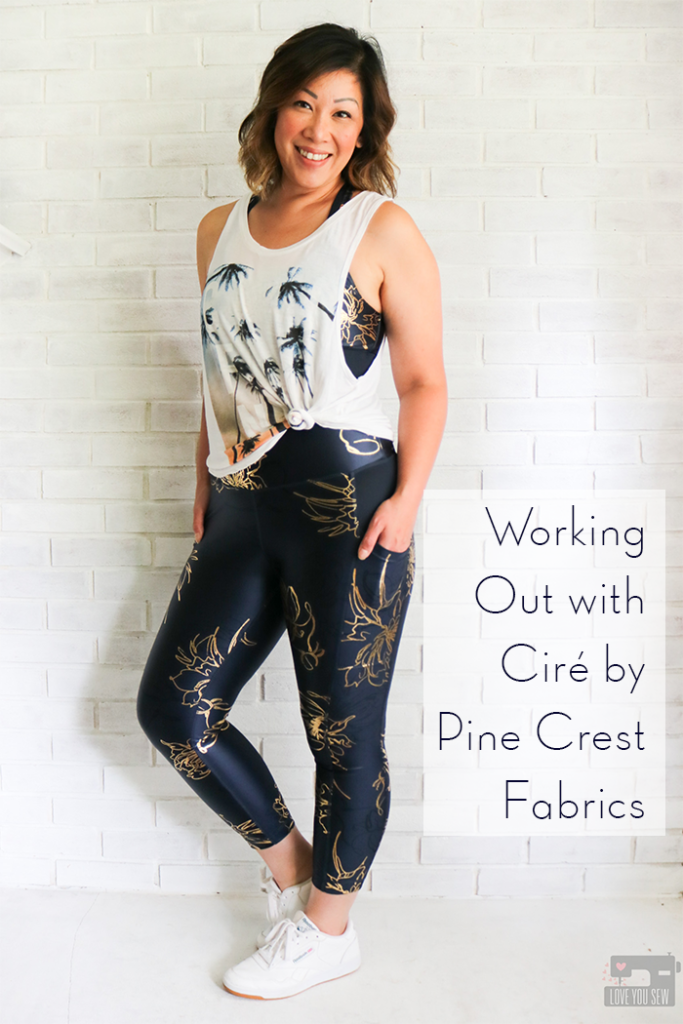
Working Out with Ciré by Pine Crest Fabrics

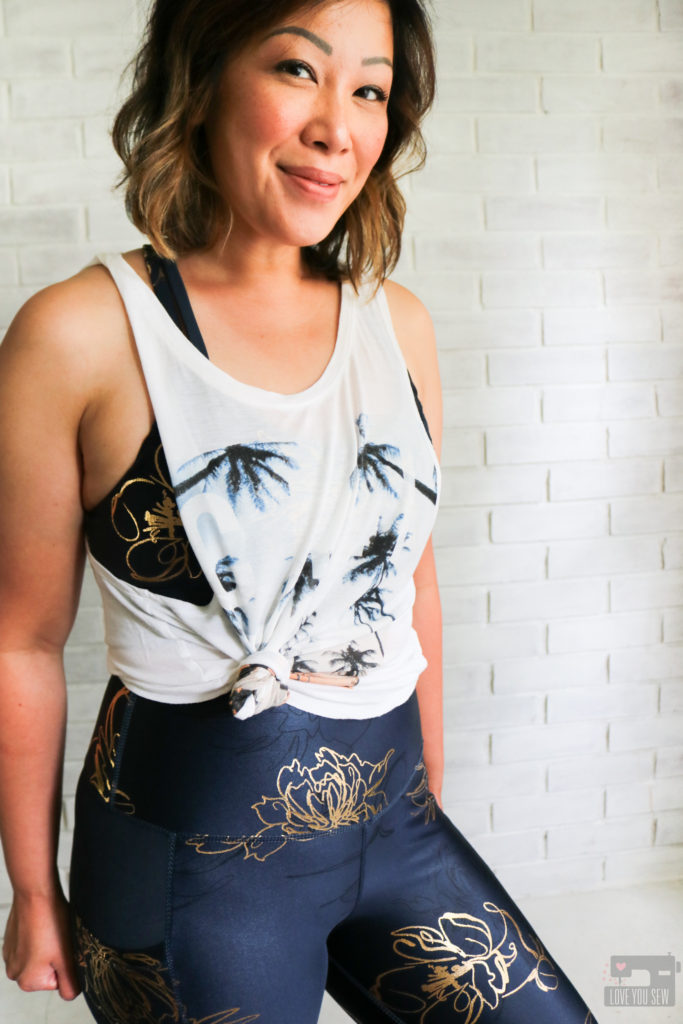
With a short, petite frame and hips two sizes larger than my waist, I’ve struggled to find athletic wear that won’t roll or shift down while I move.  Even with poor luck with the big name athleisure companies, I started making my own work out clothes a few years ago and haven’t turned back since.  The fabric and compression fit are important factors to me and why I am SUCH a big fan of Pine Crest athletic fabrics.  I was pretty stoked when they asked me to work with their gorgeous Blazer Floral Printed Ciré fabric since I was curious to see how it felt and moved with it’s liquid-like look.

You can understand my love for this company by checking out my other makes using Pine Crest fabrics like my Full-Zip Rashguard, Textured Web Athleisure Capsule, and Holiday dress with their Stretch Velvet.


FABRIC

When I was first asked to work with the Blazer Floral Printed Ciré, I honestly admit, I was a little hesitant about how it would look and feel.  Would it be TOO shiny?  I mean, I do like some flash…but I don’t consider my style to be flash-yyy…  Would it have a “plastic” coating to it?  Would I end up sticking to it when I work out?  There were so. many. questions.

Well, I’m so glad I took the plunge because this fabric is A-MAZING!  While there is remarkable shine and sheen to the top of the fabric, the Ciré is not “sticky” at all.  It is smooth to the touch and is completely matte on the reverse, making it SO comfortable and soft.  The fabric is 80% Nylon, 20% Spandex, 195GSM, and has a generous 56/58″ WOF.  There is ~40% four-way stretch with GREAT compression — making this fabric ideal for working out, dancing and even swimwear.  You can check out more the full line of Ciré fabrics including more colors and prints here.

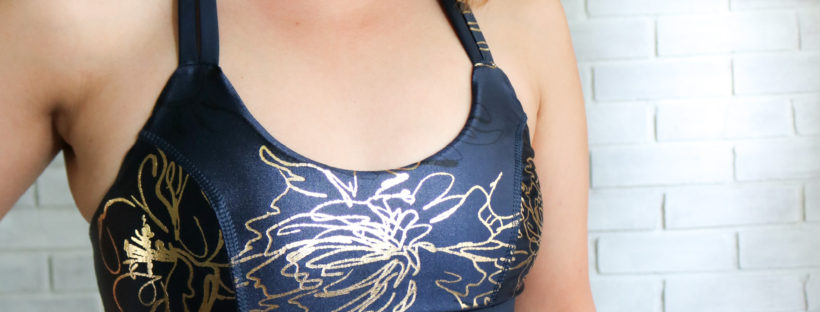
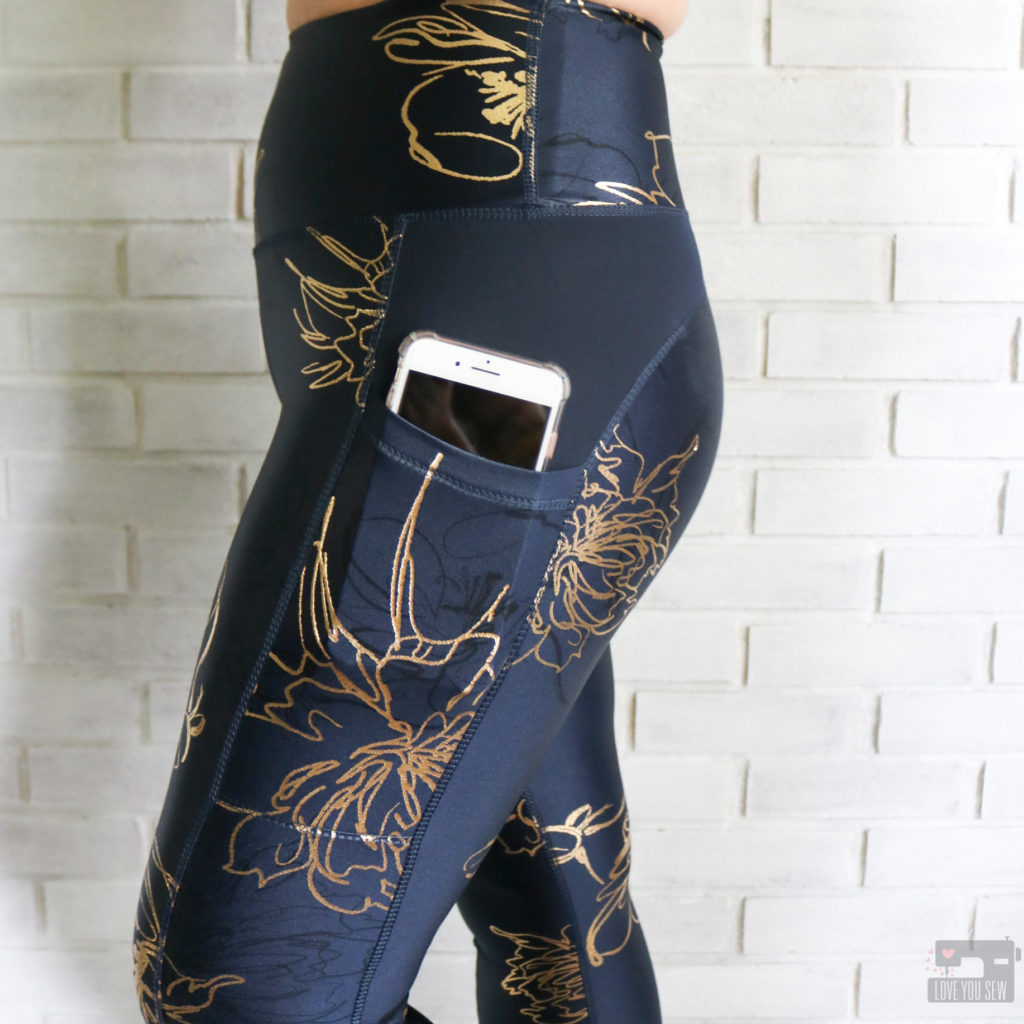
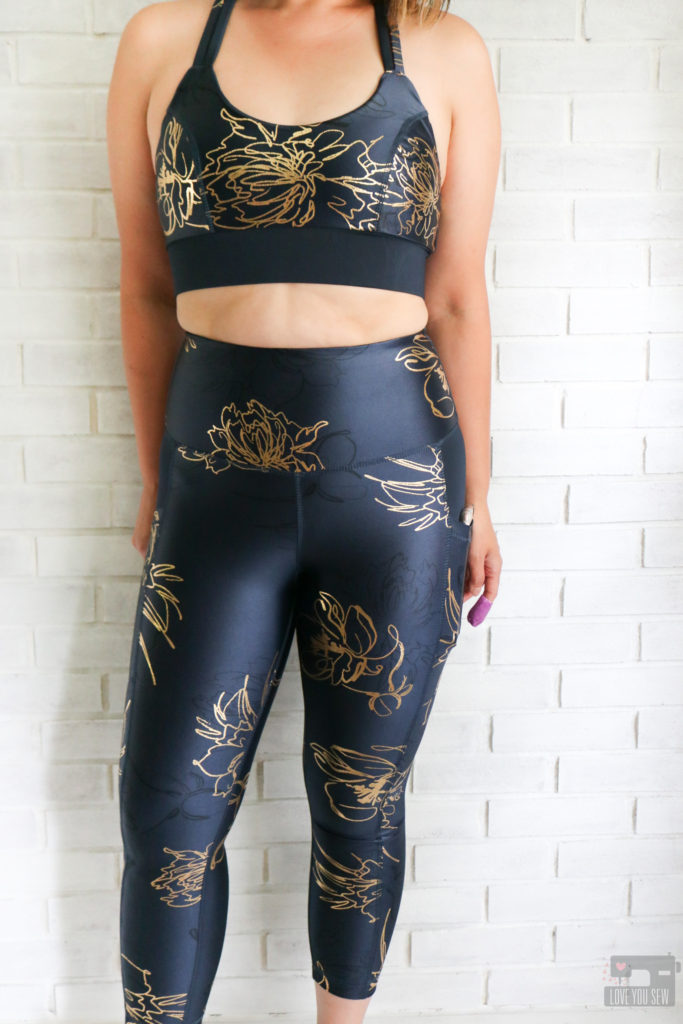
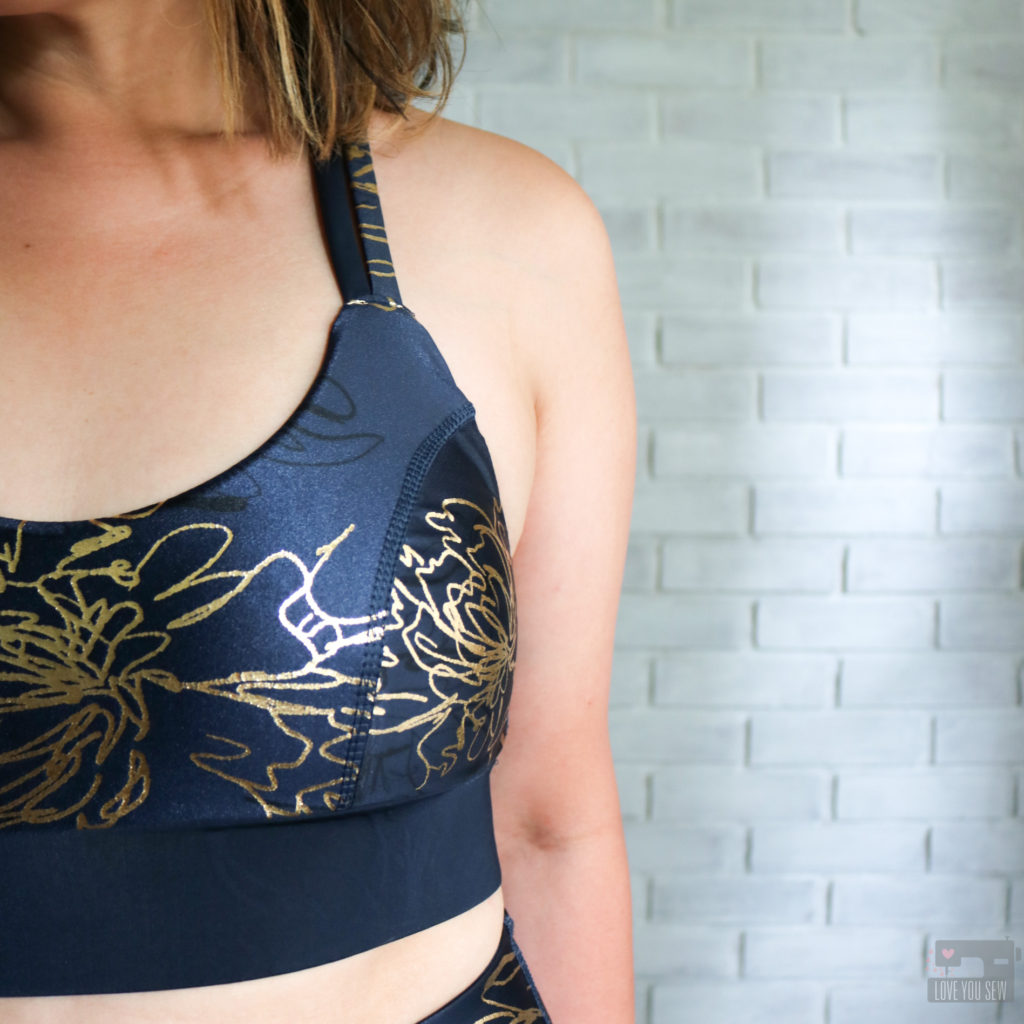
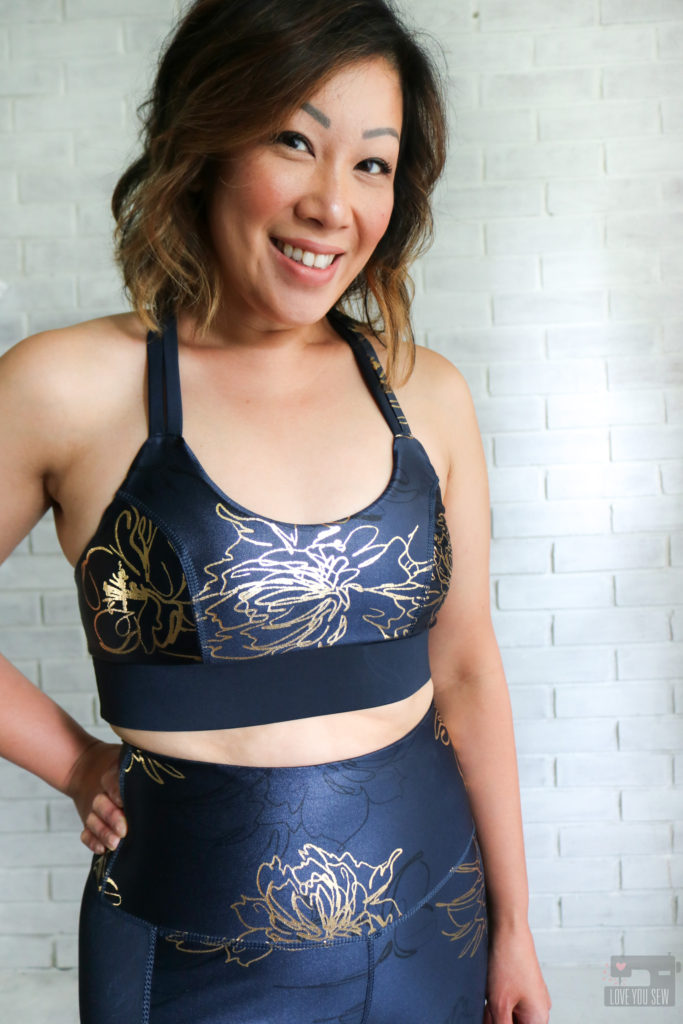
In addition to the amazing base cloth, the Blazer Floral Printed Ciré  has these stunning gold foil flowers that stretch and move beautifully with the fabric.  There are also subtle black printed shadows of the same flowers that give the fabric even more depth and texture.  I’ve washed this fabric twice and even tried to pick at the foil a little bit, and it is not coming off!  The fabric has remained vibrant with that signature sheen and even with all the stretching, the gold foil recovers back to a smooth finish — winner!

PATTERN

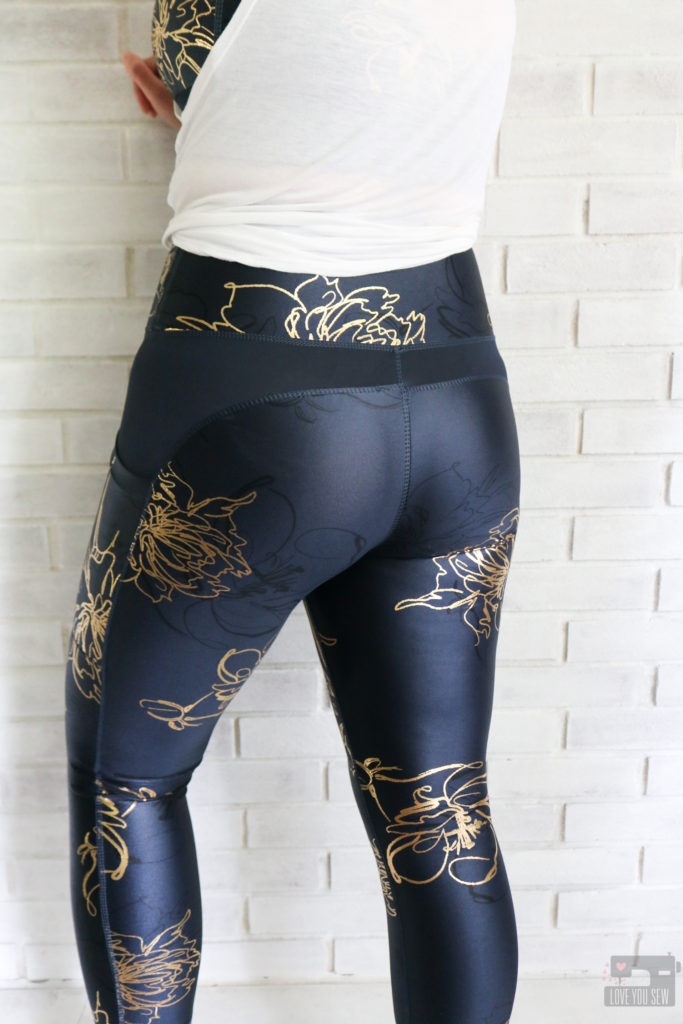
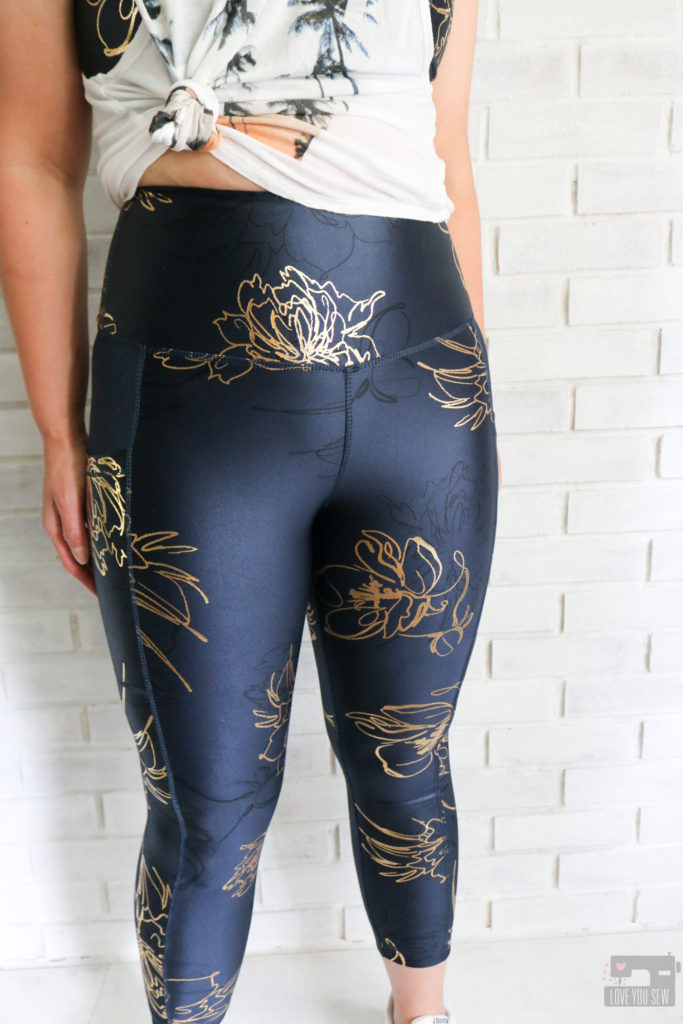
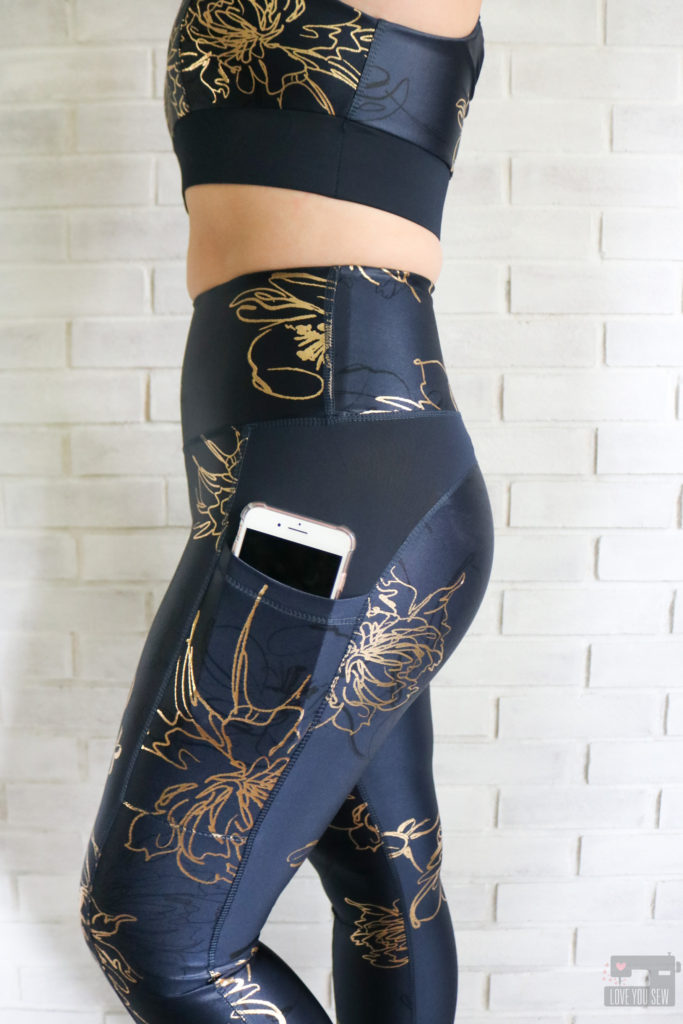
The true test of the Ciré is how it sews up and wears on the body.  So, I chose the Greenstyle Creations Power Sports Bra and Stride Athletic Tights (because…pockets!)  With the floral print, I made sure to take extra care with pattern placement with nothing odd coming out off the crotch and rear areas.  (We’ve all made those mistakes before!)  I LOVE the scale and how the foil flowers look on the body.  There is a nice balance between the gold and the navy base.  Too bad my Zumba studio is still closed, else, I’d be showing this off!

I used both my Juki MO-2000QVP Serger and Juki MCS-1700QVP Coverstitch to make both of these pieces.  It’s been awhile since I last used my Coverstitch machine and I was riding high on my “great” sewing skills on the first pass of the leggings…..until I went to try them on….and heard a series of pops.  Ugh!  I had to remove all of the thread and coverstitch again…only to go back and repeat.  SMH.  Even though I eventually got it right,  the Blazer Floral Printed Ciré took a pounding at the seams with so many additional punctures that were certainly not necessary.  With other stretch fabrics, the area would have been worn down and fuzzed up. But to my surprise, there didn’t seem to be any additional wear! This was kinda shocking since I really beat up the fabric.

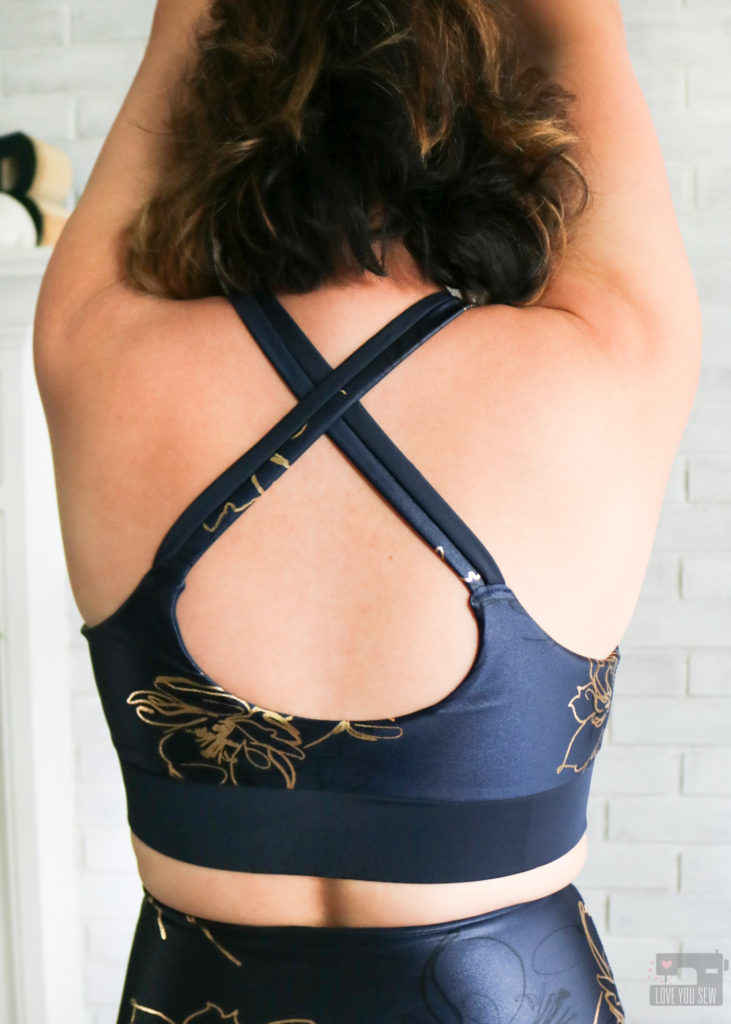
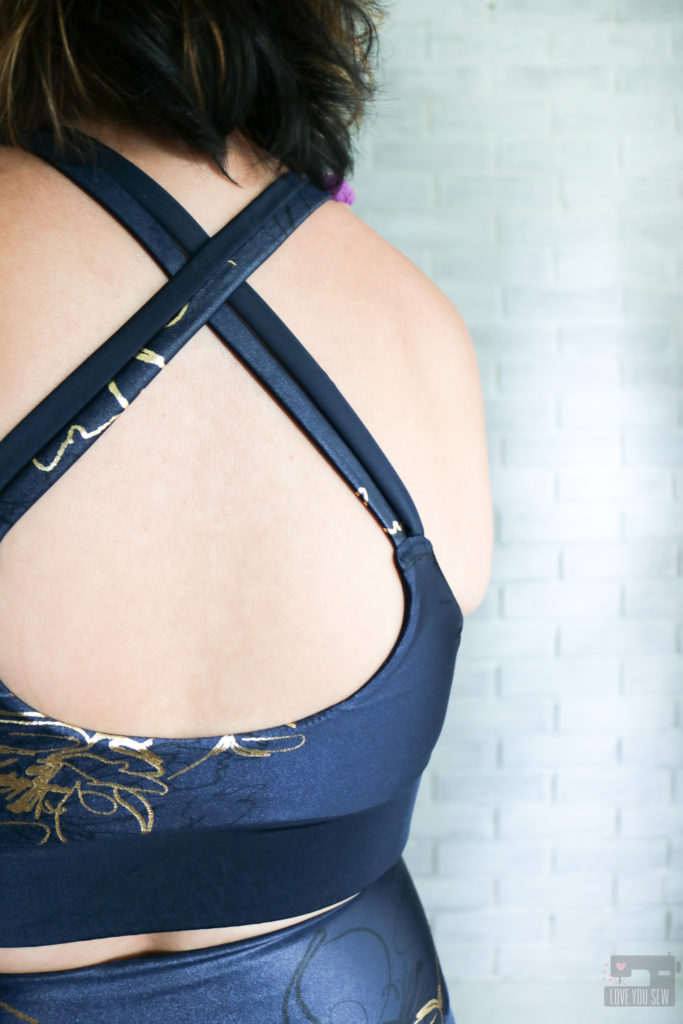
With the reverse of the fabric being matte, I couldn’t help flip it over for a subtle accent.  You can see I used the matte side on the back of the tights and in the band and straps of the Power Sports Bra.  I love the extra use out of the same Blazer Floral Printed Ciré!

Other Pattern Notes:

  • Power Sports Bra
    • Made the  34C U-back with extra wide band
    • Stitched down the sides of band to keep from shifting
    • Used reverse side of fabric for the lining
  • Stride Athletic Tights
    • Made the Medium from hips down
    • Graded to Small in waist using curved add-on waistband
    • Add Power net to waistband along with elastic
    • Shortened pattern by 1.5″
    • Cut the cropped length
    • Added optional gusset for full range movement

PROJECT SUMMARY

I hope you are inspired to try out some new fabric that might not necessarily be your style…you maybe surprised with the results!


Happy Sewing!

Cristy


Fabric for this post was provided by Pine Crest Fabric.  Project conception and all opinions are my own.  

There maybe (noted) affiliate links in this post.  For my full disclosures, click here.

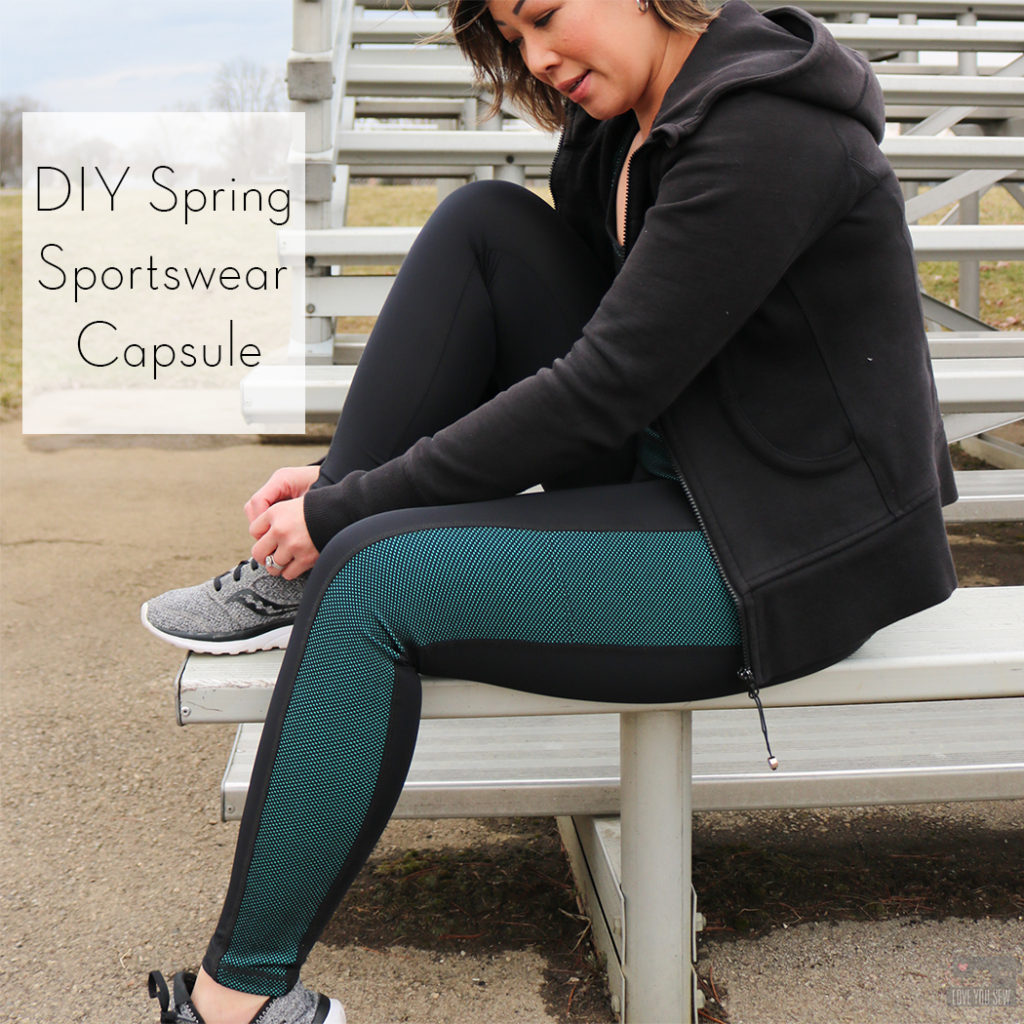
DIY Spring Sportswear Capsule

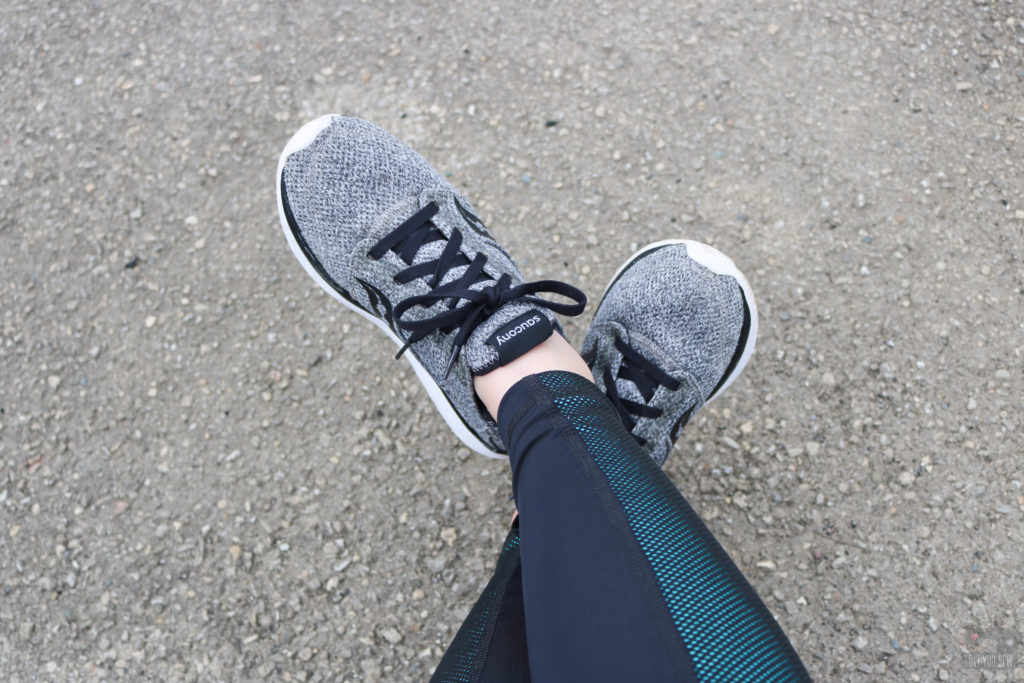
At the beginning of the year, I made a promise to myself to get more physical activity into my life. Working from home is absolutely wonderful for its flexibility and the fact that I could work in my pajamas all day.  However, it can easily become the norm and the motivation to leave really drops low…especially when you sit behind the sewing machine for a good part of the day.  So, I started to take Zumba classes at a local studio and really love the energy of the people and how they keep me motivated to keep coming.  Since I go a few times a week, I’ve quickly realized how dated and worn out my sportswear was.

Fabric

To keep up with all the jumping, squats and salsa moves, I was in desperate need of just about all workout clothing.  I figured I could make a whole capsule to mix and match with my current gear.  I’m fortunate to have my friends at Pine Crest Fabrics help me in my quest.  They just launched several lines of new performance fabrics and I got to try out two of them.

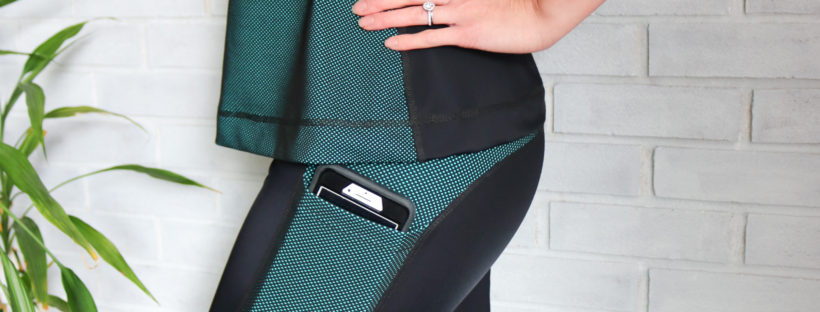
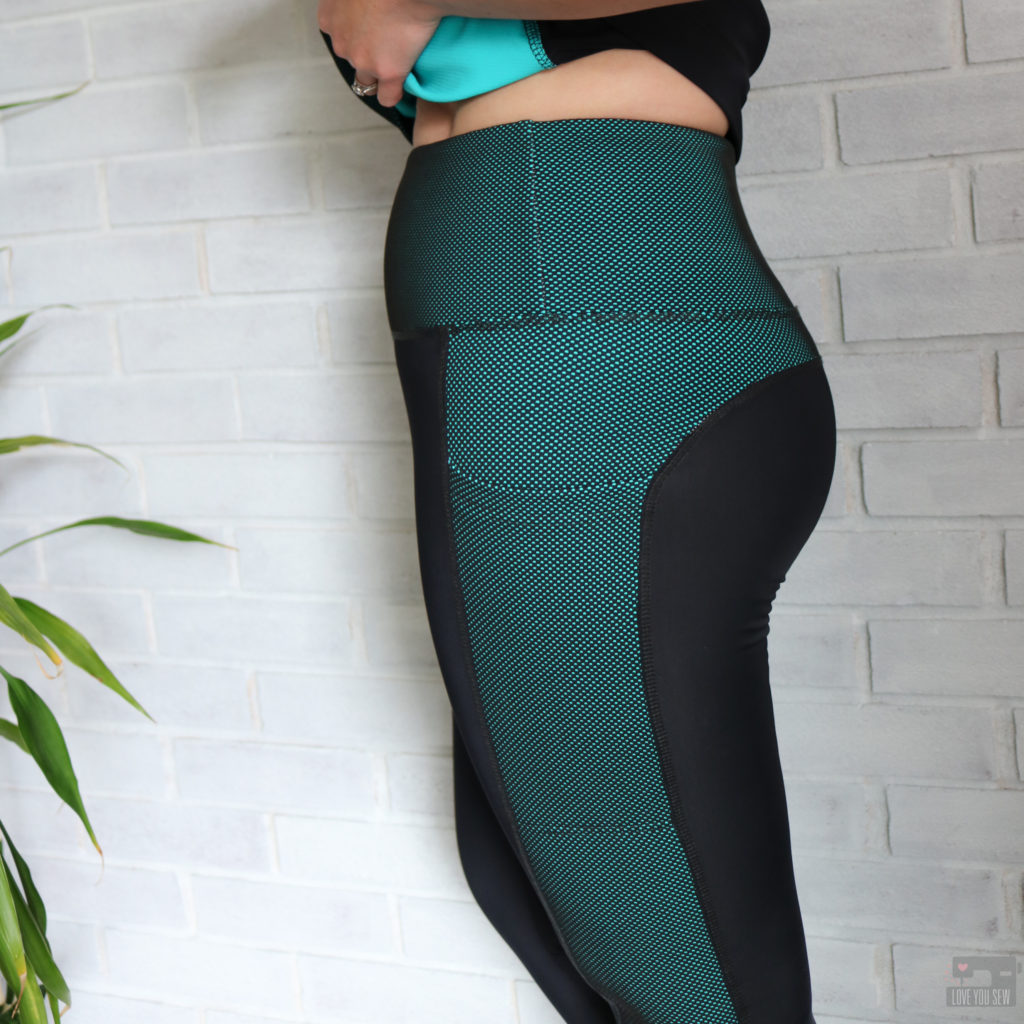
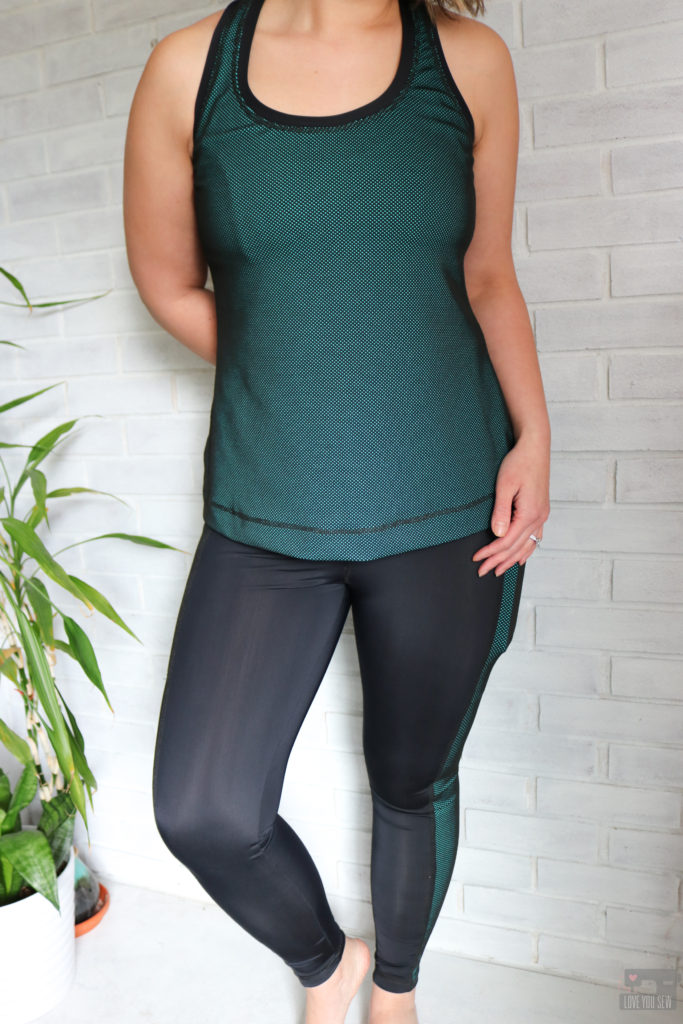
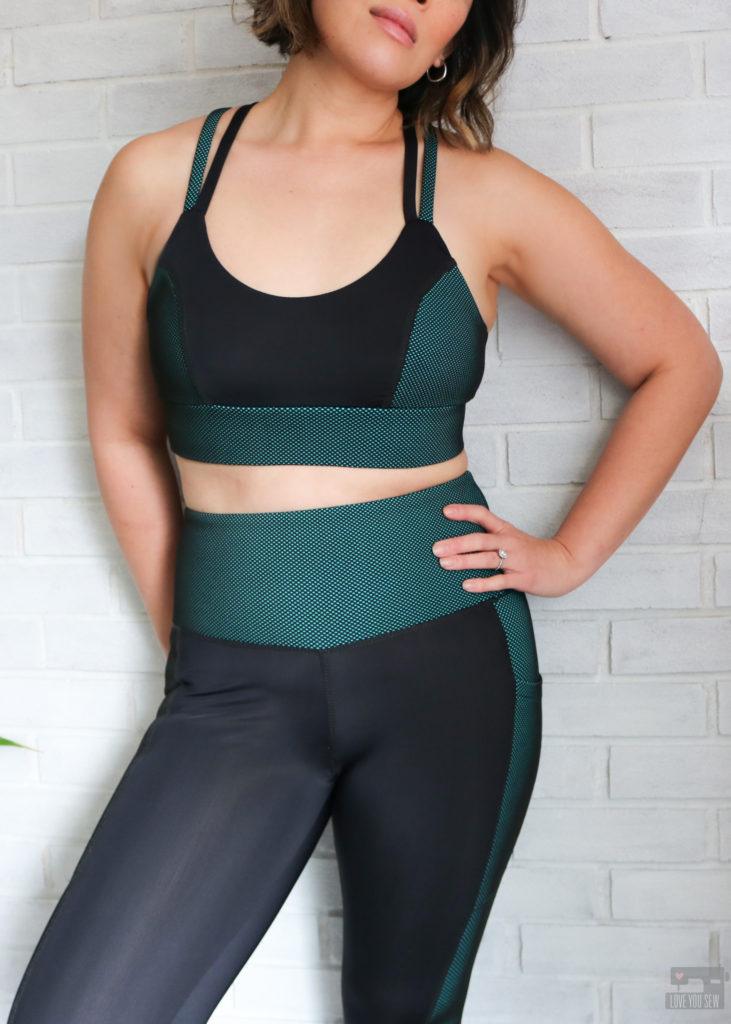
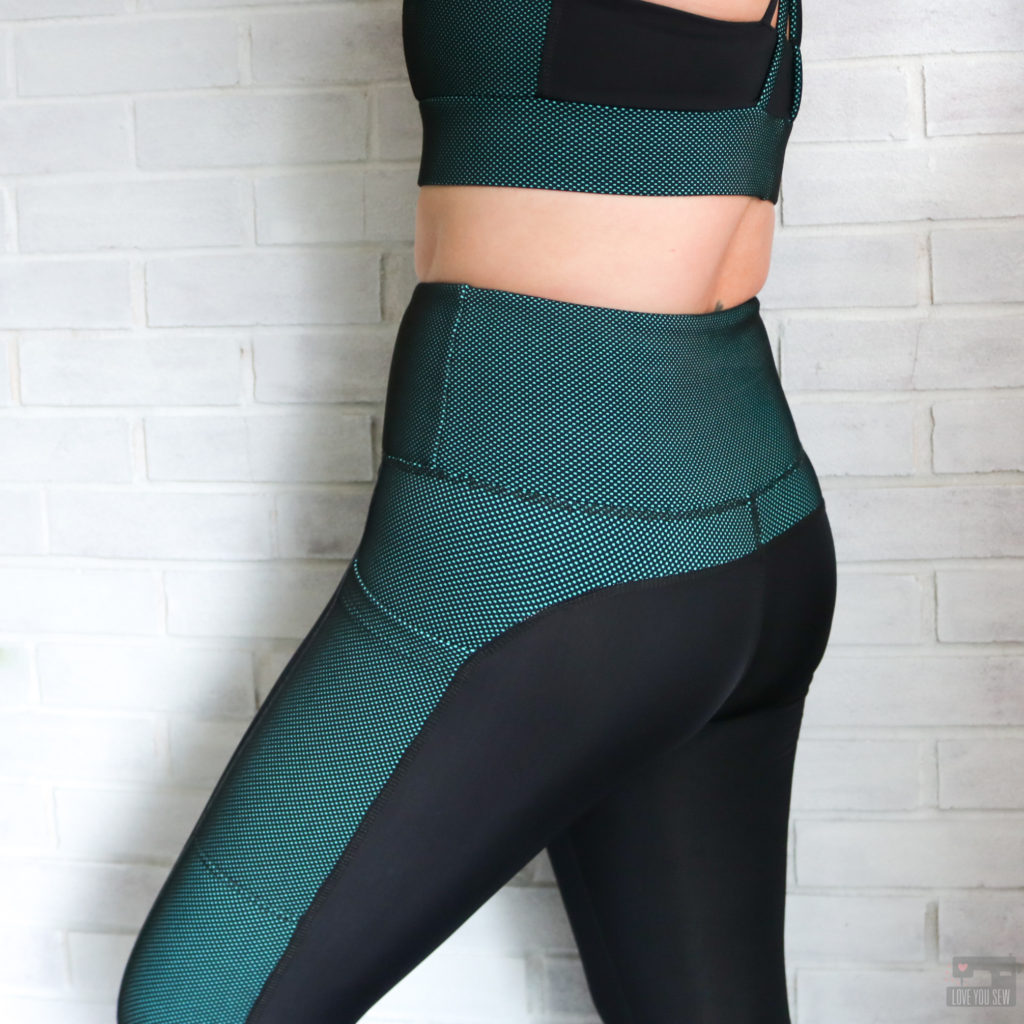
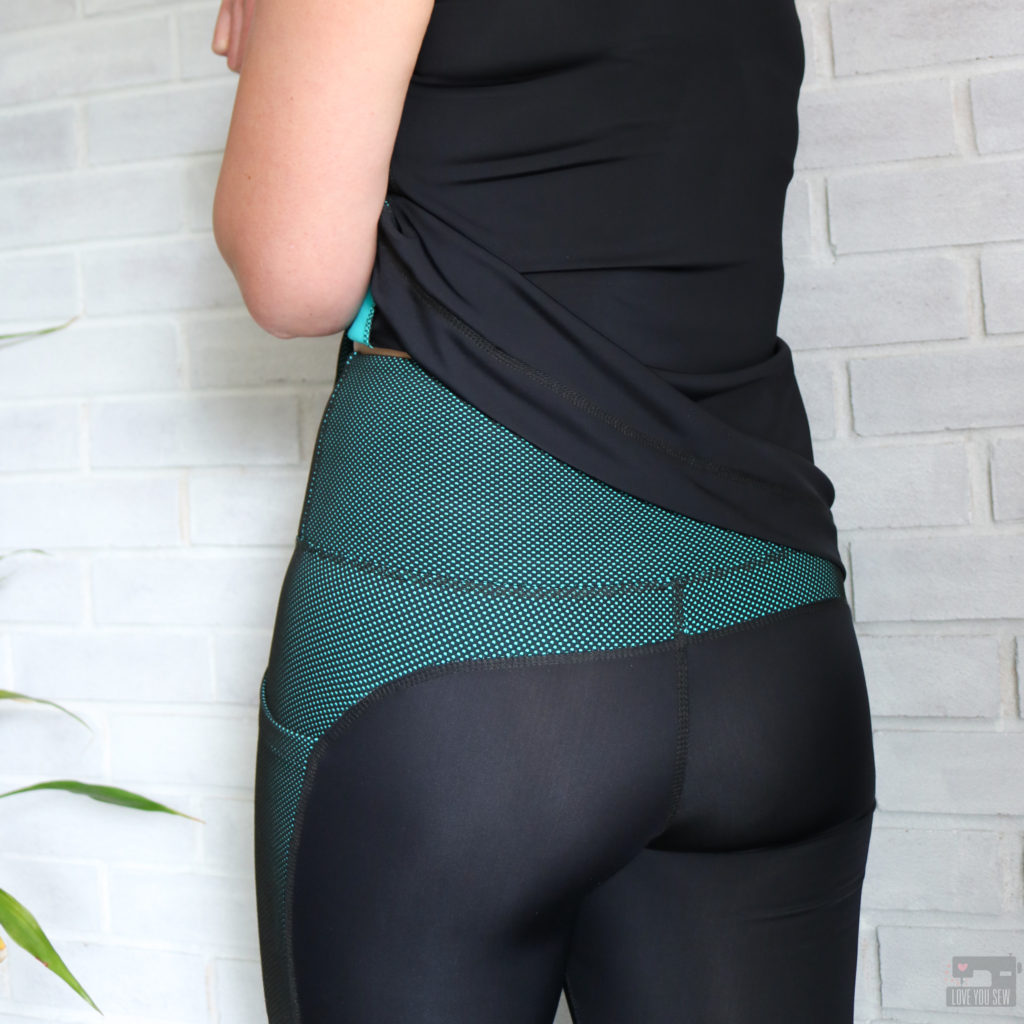
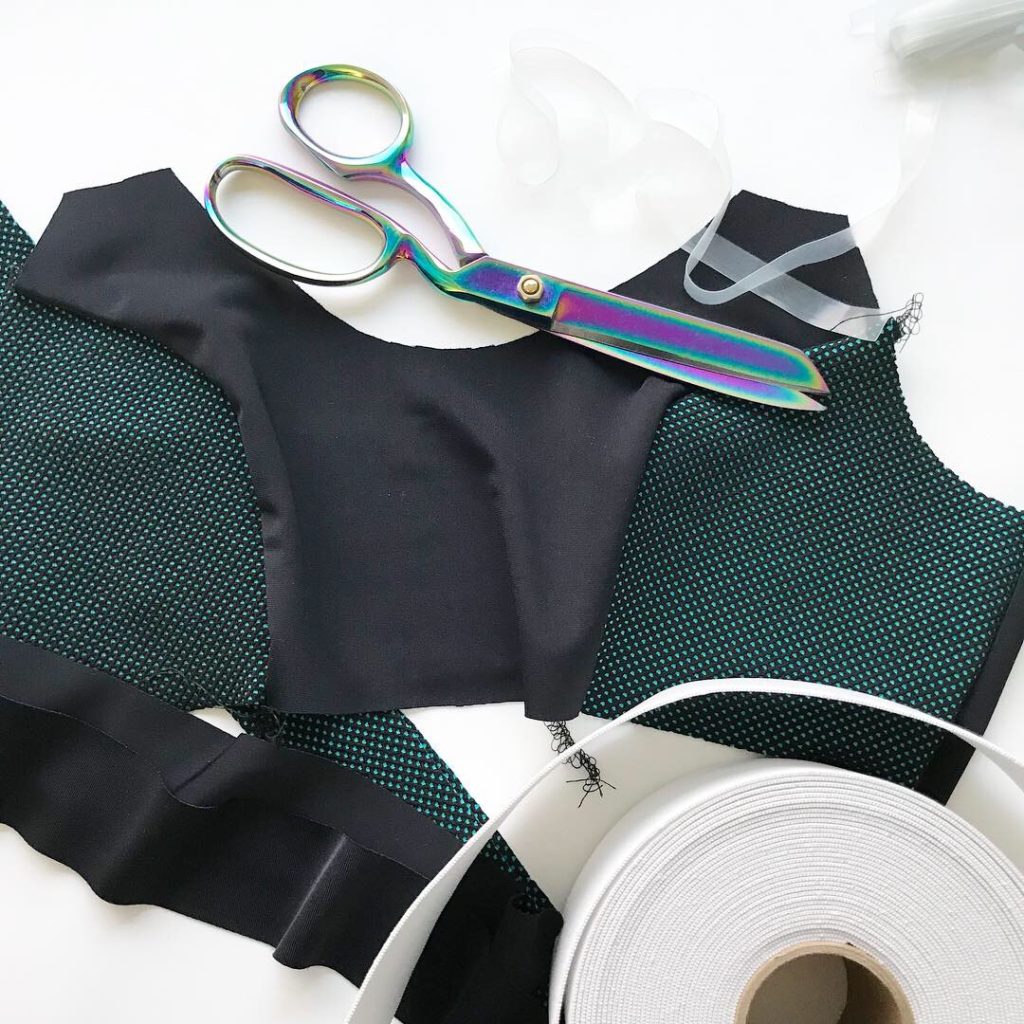
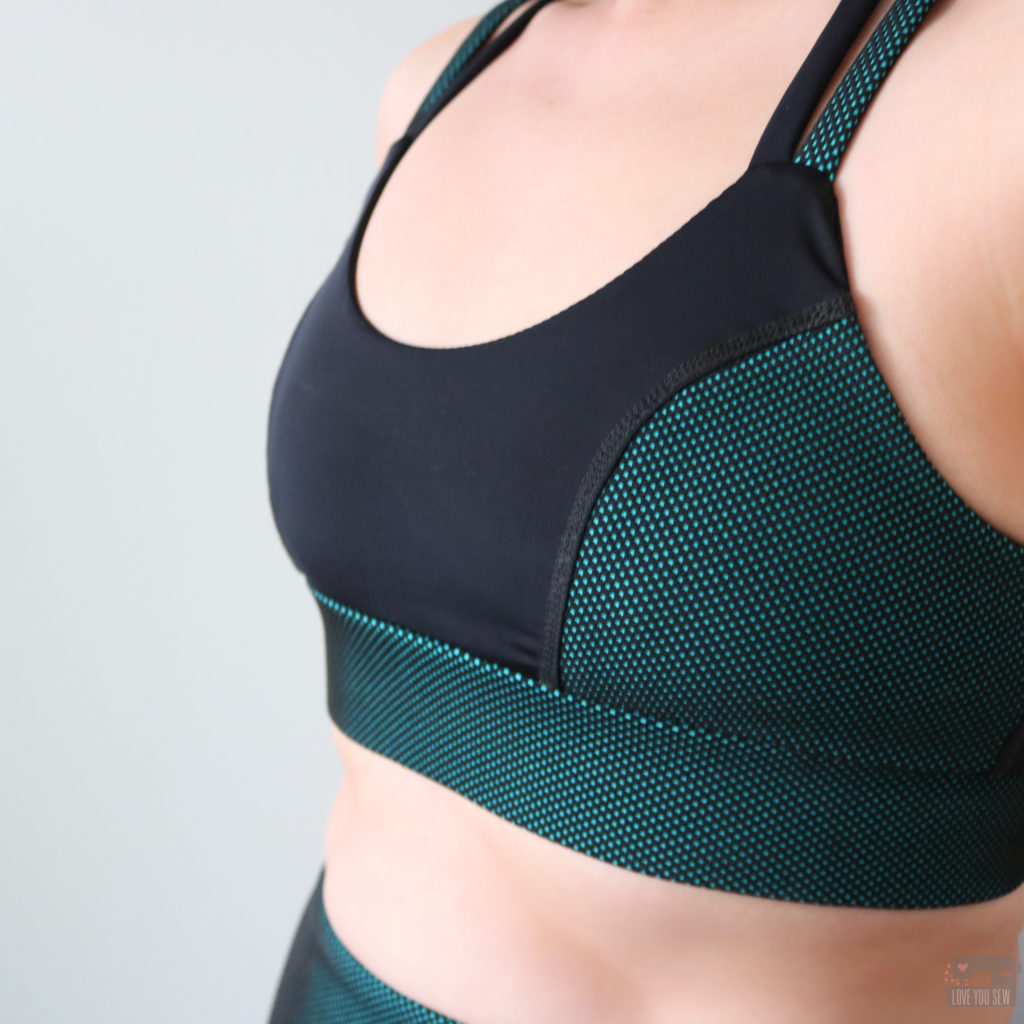
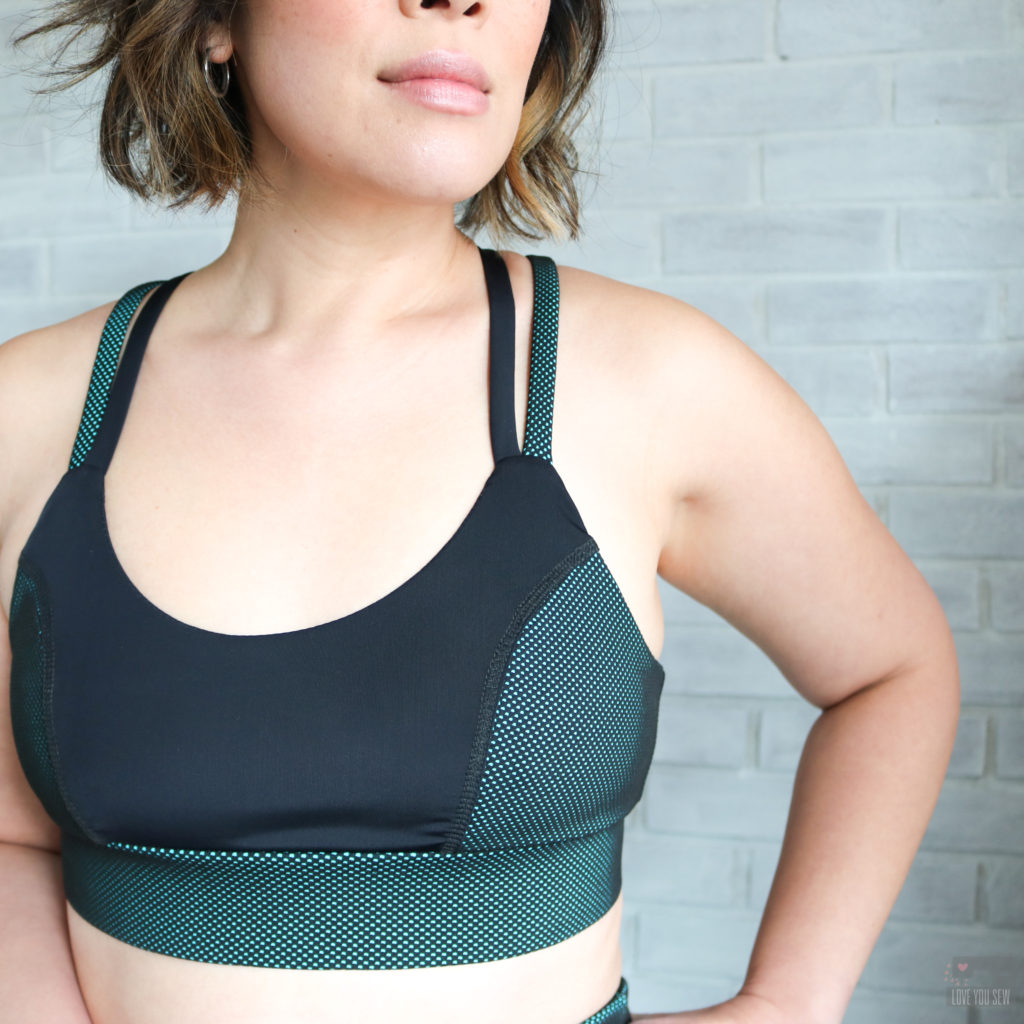
First up is this new luxury line of Textured Web Spandex available in five different colors.  I chose the Mint colorway since I don’t have any green in my workout wear.  (I swear I initially wasn’t drawn to the Philadelphia Eagles’ color combo!)  This nylon/poly/spandex blend consists of a base fabric (you can see that this one is actually turquoise) and then there is another layer of the web netting overtop — which makes it come off much more green.  I was really shocked to see the turquoise on the backside of this fabric!

With the Textured Web Spandex having two layers, its a bit heavier at 350gsm (around 10oz per sq yard) and makes it absolutely perfect for that compression feel.  I want certain things to stay put as I workout 😉  With four-way stretch, this fabric is incredibly comfortable and very soft to the touch.

I paired the Mint Web with Pine Crest’s Valor line of recycled performance fabrics in Black.  What’s really special about this fabric is that it’s made with Repreve fibers — which are created with recycled plastic bottles.  I was surprised to see that 88% of this fabric comes from Repreve.  Many times companies tout how they are using recycled material and it turns out to be a minor component…but 88% is huge!  As I make more sportswear, I’m so happy to see this is an option.

The best part is that it feels just like the other Pine Crest fabrics I’ve used before (Viper and Olympus base cloths.)  It is 260 gsm (around 7.5 oz per sq yard) and is more of your typical weight in performance fabrics.

Patterns

When I was planning out the pieces of my capsule, I knew I wanted some good leggings and a sports bra designed specifically for physical activity and not just for loungewear.  I definitely wanted the “ath” and not the “leisure” when picking out patterns.  I went to Greenstyle Creations for their sewing patterns and became a member of their Facebook group.  After joining, I quickly found out the members were definitely working out in their makes and I felt very comfortable purchasing their products.

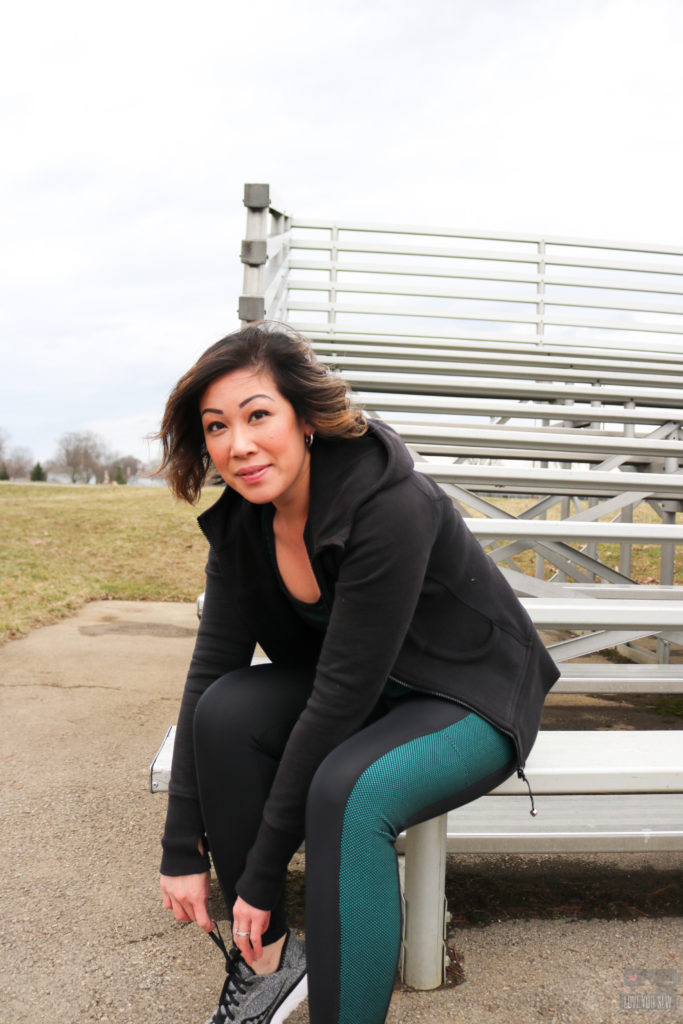
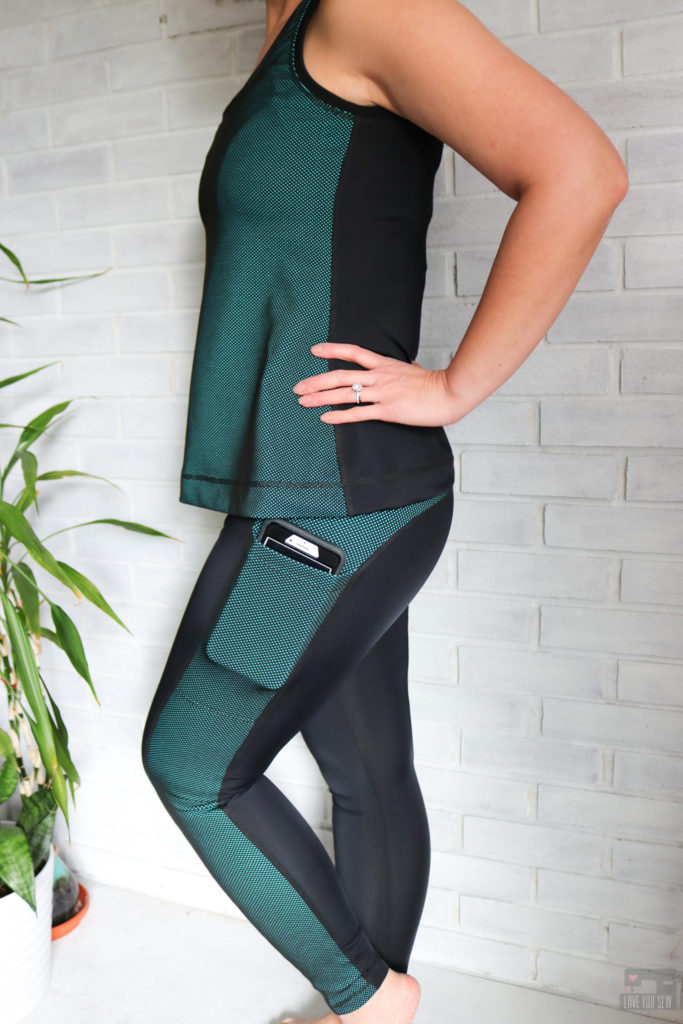
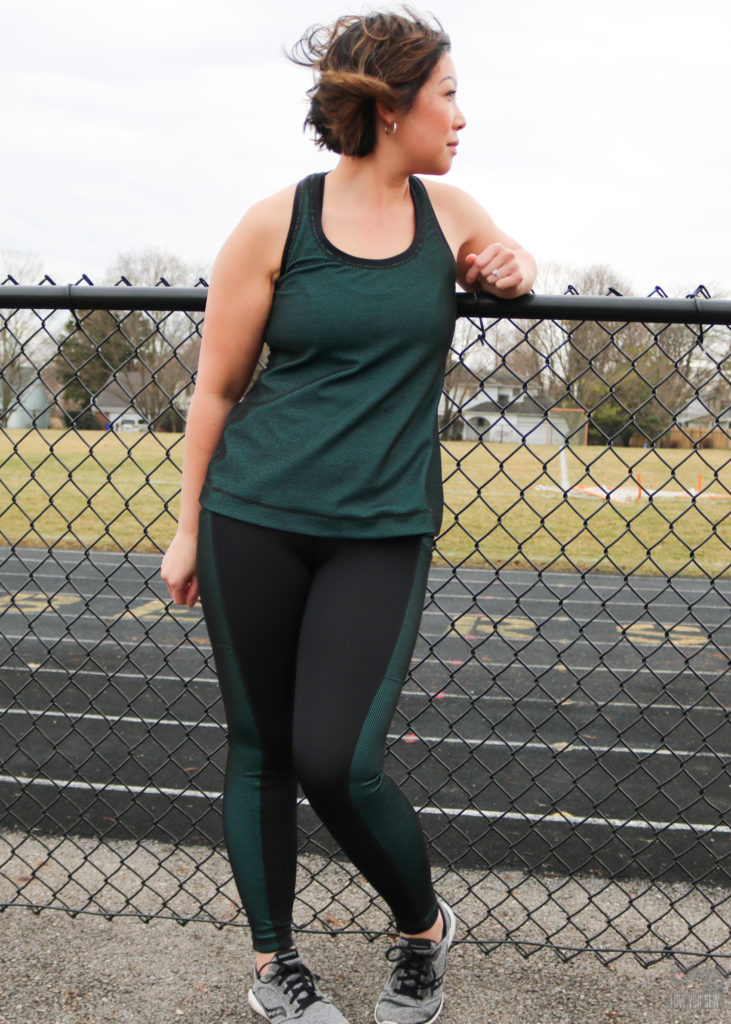
I first sewed up the Stride Athletic Tights with my new Juki coverstitch and serger.  While I love my new leggings, the process to learn my coverstitch machine was loooongggg.  (I’ll save my thoughts on it for a separate post.)  This pattern can be sewn on a regular machine and I highly suggest joining the FB group so you can see all the incredible examples which only use a standard sewing machine — It can be done!

Based on my measurements, I am a medium in the hips (40″)  and fall between a small and medium in the waist (28 1/2″.)  I cut a medium, and then cut the waistband right between the small and medium pattern lines.  Since I made the high-waisted version, I would grade to a small at the top of the waistband since my body narrows out even more there.

With the regular length inseam being 29″ and me being a 5’3″ shortie, I knew I had to shorten the pattern from the start by 1 1/2.”  I like my leggings to hit right above my ankle and just don’t like the bunching from RTW versions that are generally too long for me.  I used the shorten/lengthen line to adjust and then had to hem the tights another 2 1/2″ after finishing them.

Even though I skipped the muslin, I would suggest you make one if you are newer to performance fabrics.  I did switch up the order of assembling the Strides, however, so the last seams sewn would be the inseam and waistband.  I machine basted those seams for fit and saw a little bunching under my backside (and yes, I did pop a few stitches but was still able to see fit.)  The bunching told me to let out a little ease through the inseam and I sewed it at 1/4″ vs 3/8″ as directed.  That little bit helped smooth out the back wrinkles perfectly.

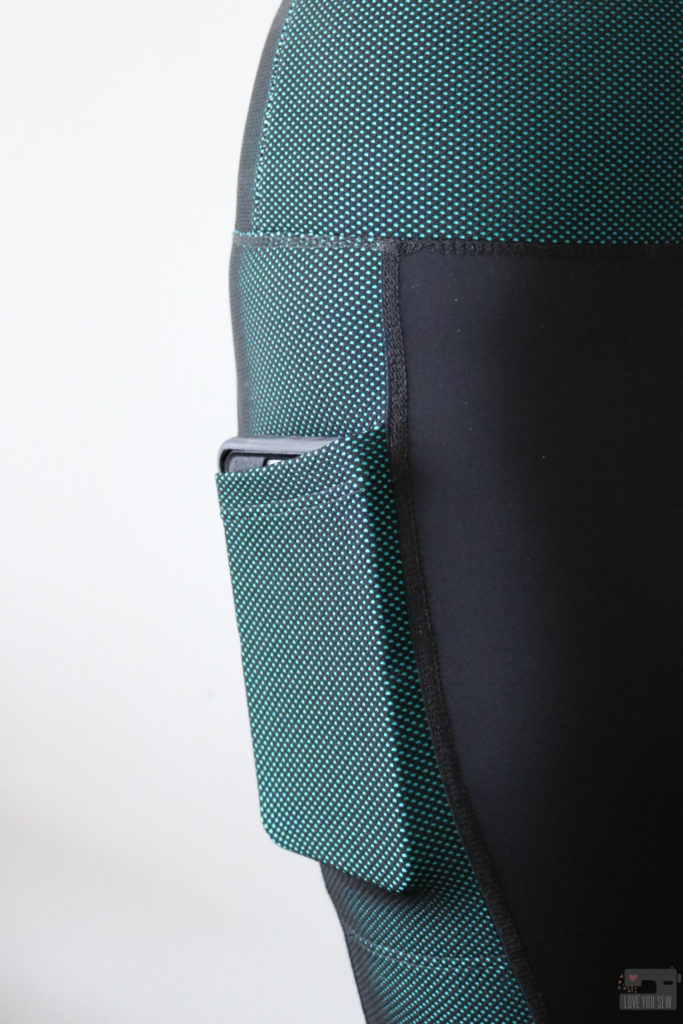
What I love about this pattern are the generous side pockets for your phone/music/keys and the inclusion of extra elastic inside the waistband.  This helps the waistband, and thus the leggings, from falling down.  Some people from the FB group use power mesh inside and that’s something I’d like to try out with the next pair.

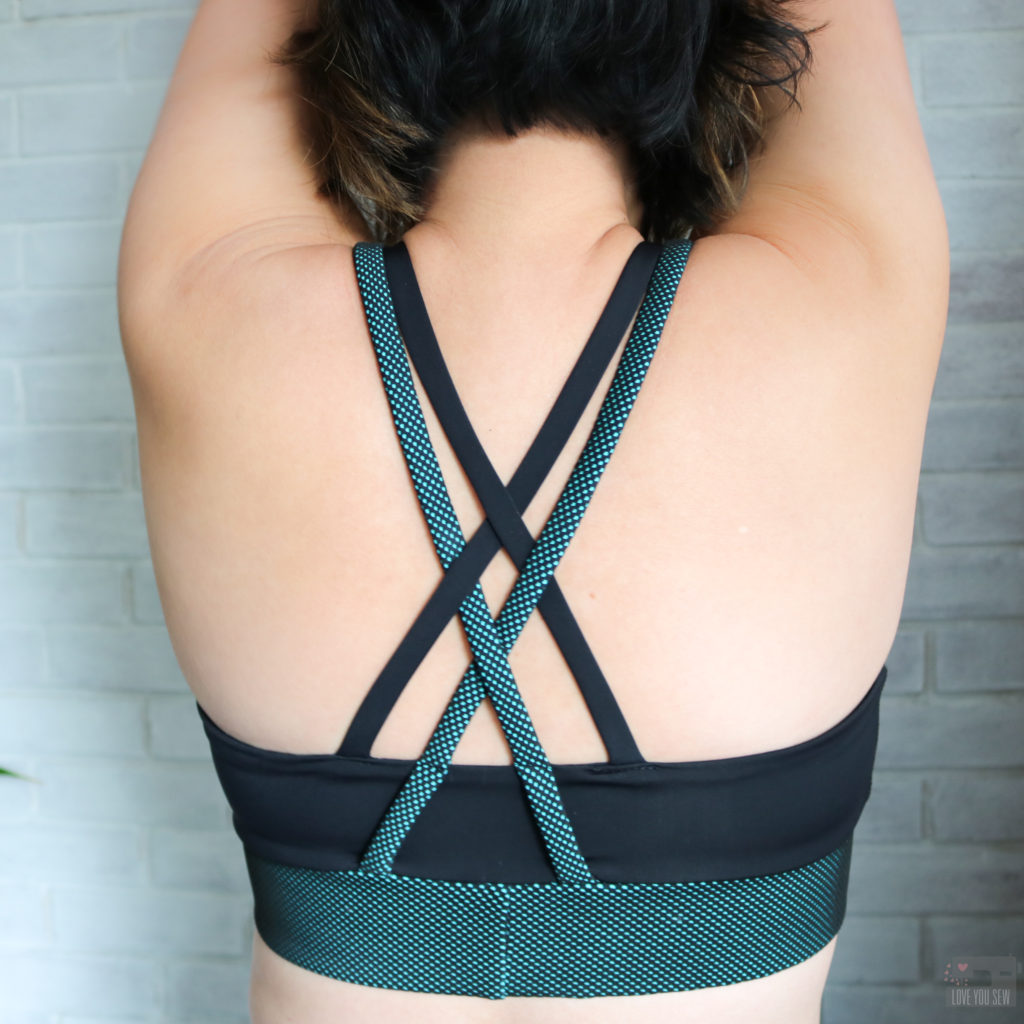
The other pattern I picked up from Greenstyle is the Power Sports Bra.  This is a soft sports bra with a ton of different options, including racerback, adjustable straps, back closure and can be nursing friendly!  I love the double criss-cross back and went with that version along with the 2″ wide elastic band since it’s what I had on-hand.

Normally, I wear 34/36 B in underwire bras but made a 32 band and a C-cup.  Trust me….I read the sizing chart and didn’t think this was right.  I thought I would move more toward an A-cup than a C.  But again, I went back to the FB group to search sizing posts and there was a post about someone else not believing the sizing chart (and she had a 3-4 cup difference!!)  She followed it and had a bra that fit.  So, I put my full trust in the designer and went ahead making the bra (since I wasn’t going to make a muslin….see the bad habit here, friends???)

The only adjustment I made was shortening 1″ off of both longer straps.  The short ones didn’t need it.  This Power Sports Bra has a great fit and it holds well for light-medium activity.  I feel very secure in it, and that may also be due to the heavier Textured Web Spandex.  The FB group did mention that you may want to use power mesh as part of the center if you want more hold.  I’ll try that out to see the difference….since I will definitely be making more of these.  I think the U-back is next 😉

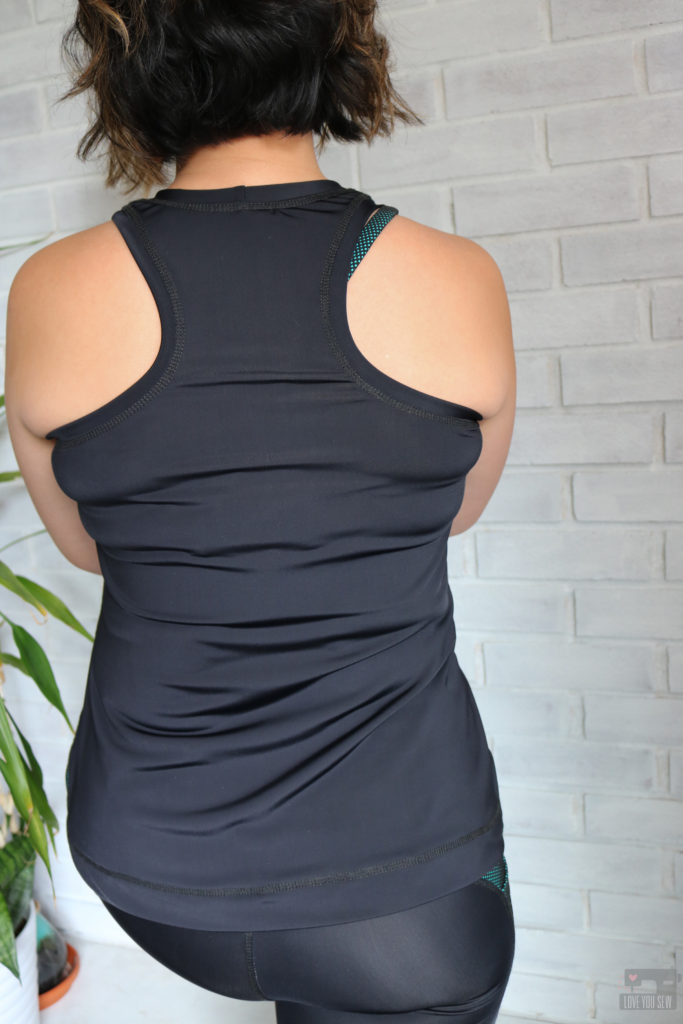
The last piece of the capsule is the Rumi Tank by Christine Haynes.  This is one of my TNT (tried ‘n true) patterns and have been wanting to make a workout version of it with the great racerback.  You can check out my other jersey knit versions here and here.  With this version, however, I used the Textured Web Spandex on the front and then the Valor on the back for a fun color-blocking look.

I made a size 6 and grade out to 8 in the hip and usually use the size 8 length.  Since I have to lift my arms a lot in Zumba class, I extended this length an additional 2 1/4″, but also made a 1.5″ hem (for extra weight to stay down).  I also increased the neckline up by 1/2″ to cover up the ladies as I move through squat and lunging motions.  I’m pleased with these adjustments to keep things a bit more modest and like a good TNT pattern, I love how it turned out!

I hope you are inspired to make some of your own workout wear.  It’s an amazing difference to have something that actually fits through so much activity and you’re not constantly tugging at the waist or having sore breasts.  Fabric that breathes and keeps you comfortable is also key!


Get that workout on!

-Cristy


Project Summary:


Fabric for this post was provided by Pine Crest Fabrics.  All sewing patterns and notions were purchased by myself.  As always, I keep it straight with you.  All comments and opinions are my own.  There are affiliate links in the Project Summary for which your purchases help to maintain this website.  As always, THANK YOU for your support!


M7429 Pine Crest Velvet by Love You Sew

Holiday Dressing with Stretch Velvet

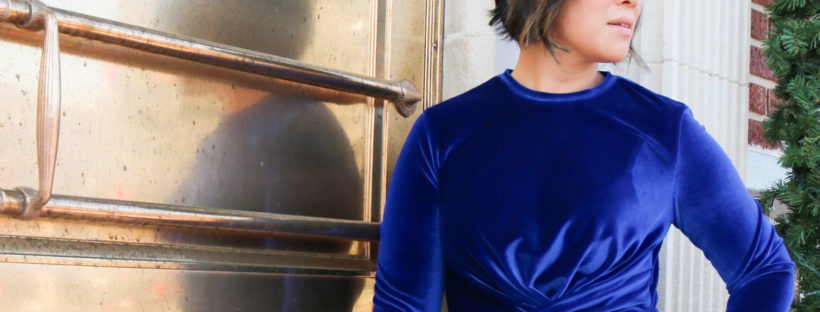
Nothing says “Happy Holidays” more than some velvet. There is just something about this fabric that conjures up feelings of wintertime mixed with luxury…especially in deep royal blue. Luckily, it is also one of the hot fabrics of the minute with odes to the 90s still in full fashion swing.

Fabric

The nap of velvet gives the fabric its trademark characteristic. The soft texture lends some weight, which makes it a great fall/winter substrate. With the popularity of velvet, there are a lot of options currently out in the market. There are non-stretch and stretch varieties which is great based on what you would like to make…whether it be a structured blazer, tights or a dress.

I was able to get this gorgeous Royal Radiance Velvet Spandex from my friends over at Pine Crest Fabrics. When they asked if I wanted to try out one of their velvets, I just couldn’t say no (even with a month full of other sewing commitments.) I knew that this velvet would be special since Pine Crest is a company that specializes in high performance fabrics…and friends, this Royal Radiance did not disappoint. You can find similar fabrics at Fabric.com here.

What makes this fabric incredible is the base cloth. I’ve made a few garments which you can read about here, using other Pine Crest athletic fabrics and I knew the velvet’s “wrong side” would be silky smooth…and it was! The 4-way 10% Spandex stretch made it ideal for a form-fitting dress and it has great recovery – so the dress keeps its shape. Even with the heavier weight of this fabric, it remained cool and breathable which is key when wearing this fabric out to a party.

Velvet Tips

  • Pay attention to the nap. Make sure it feels smooth running down the garment and cut pattern pieces with this in mind…because you know you will want to pet yourself!
  • If you do need to iron, use a towel as a pressing cloth to avoid crushing the pile. (There was hardly any wrinkling with my dress, so I luckily didn’t have to press often.)
  • There is a little mess cutting into velvet. Run a sticky roller on the velvet immediately after your cuts to keep the fuzz at bay.
  • Use a stretch or jersey needle with stretch velvet.

The Pattern

For my holiday dress, I used McCall’s #M7429. Variation B was exactly what I wanted for my stretch velvet. I wanted something more form-fitting, but NOT body-con. (I am not a skin-tight kinda gal.) This front knot and half-wrap design is perfect for camouflaging one of my trouble spots, but is also visually appealing. Only a solid fabric could really show off this design element and using my Royal Radiance just made it SO much better.

No lie…I was definitely tripped up by the knot. I was able to get pretty far with the limited illustrations and instructions known with the Big 4 pattern companies. Luckily, I found this video by Brittany Jones to help guide me through.

These Big 4 patterns also tend to allow more ease into their recommended sizes, so I was a bit concerned on what size to cut. I went with the pattern’s recommendation and feel like I could have probably gone down one size because there is quite a bit of fabric hanging under my arms and into the bust. The shoulders could be cut in 1″ on each side as well. Other modifications I made:

  • Graded out one size in hips down to the hem, including the back pieces
  • Narrowed the sleeves 1″ (folded) at the wrist and graded to the elbow
  • Shorted sleeves by an additional 1″
  • Increased hem by 1.25″
  • Deepened the neckline by an additional 1/4″
  • Tacked the wrap skirt into the knot with a few hand-stitches to keep it straight

What do you think about velvet for this holiday season? There’s still time to make this dress for Christmas or New Year’s!

Happy Holidays!

Cristy


*Fabric for this post was provided by Pinecrest Fabrics. As always, all thoughts and opinions are my own.

Sew Your Own Rashguard

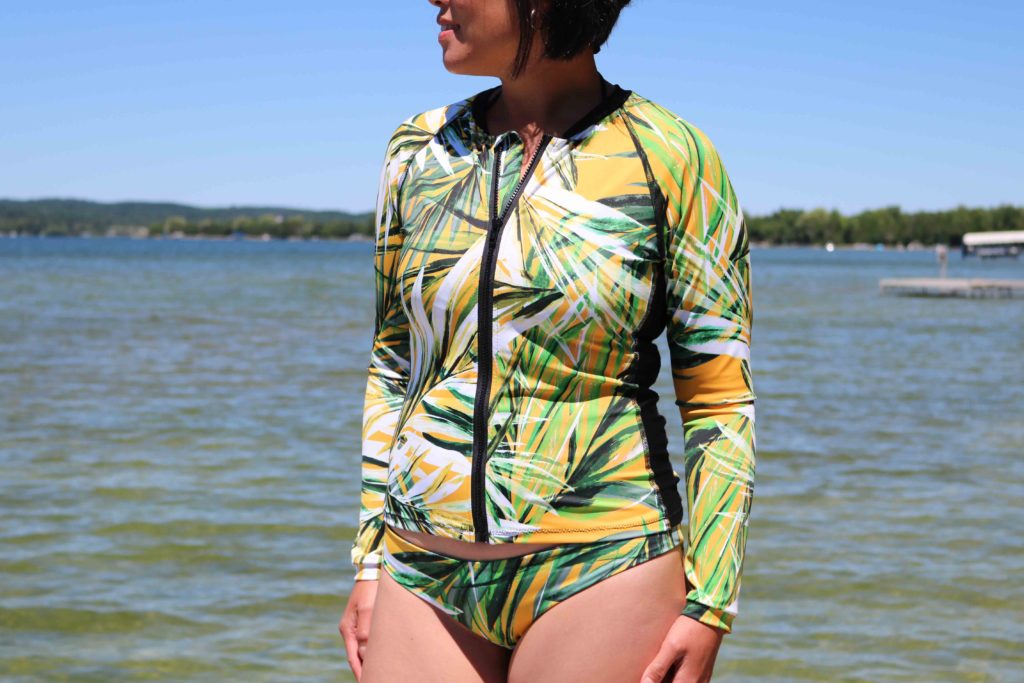
When I first started making my own clothes a few years ago, it was mainly because I was so frustrated with buying ready-to-wear for my new “mom-body.”  All I wanted was just some easy separates that were cute, actually fit me, and worked with my lifestyle.  Fast forward to the present and here I am with my first bathing suit!  I never imagined I would have sewn one….let alone, show you all of my current “mom bod’ in said suit.

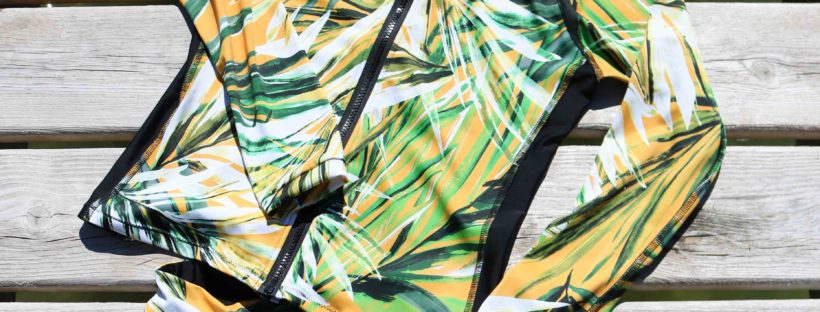
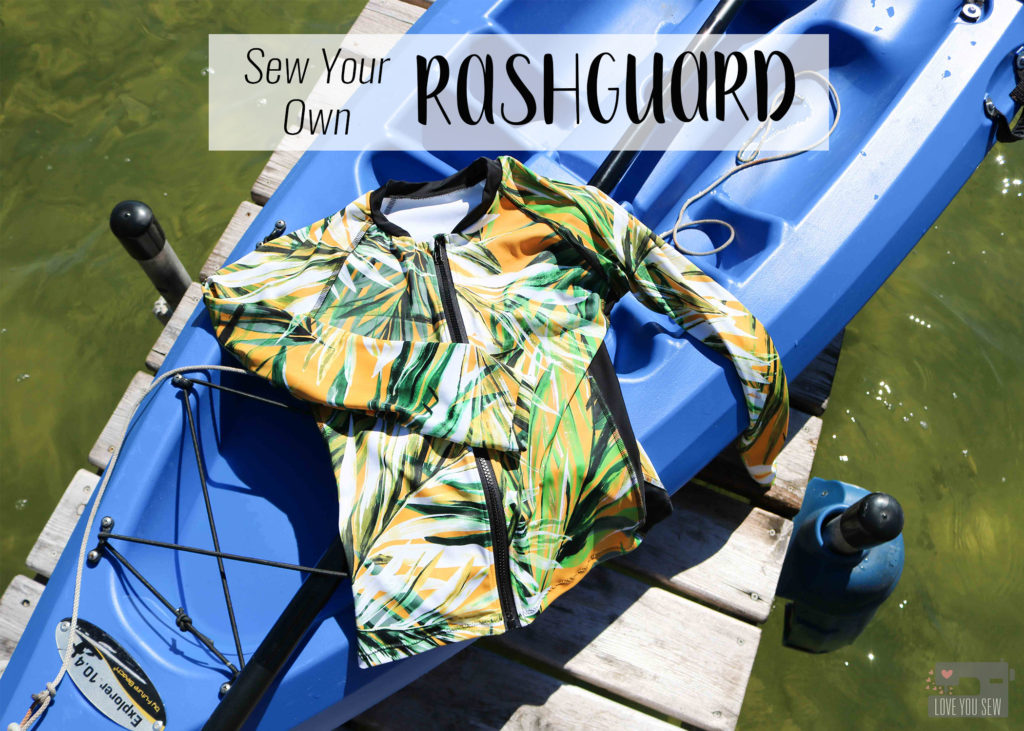
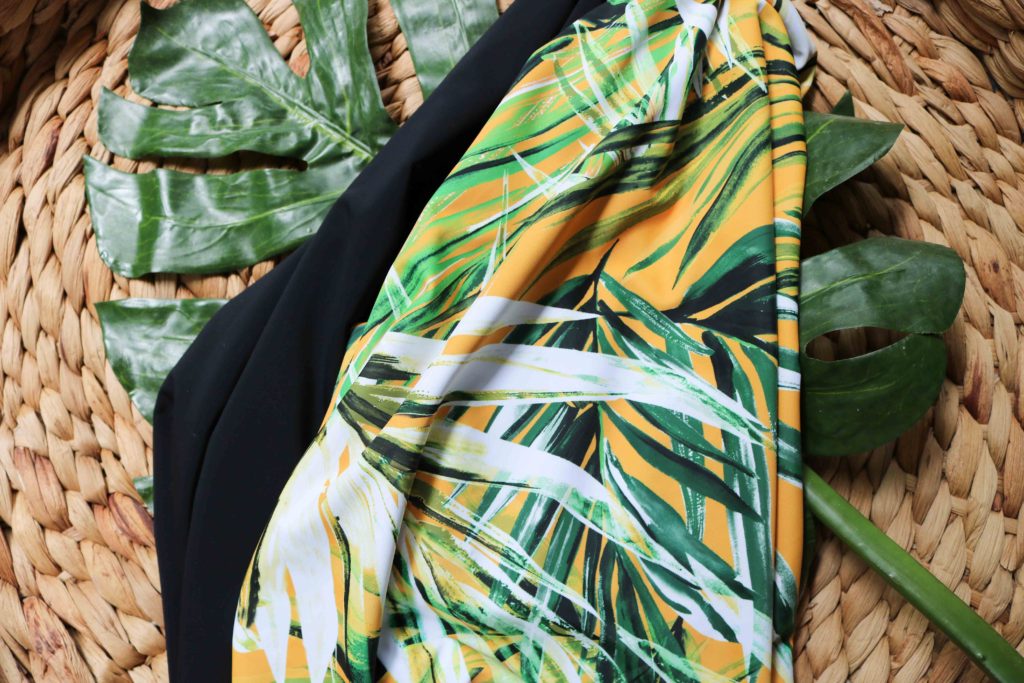
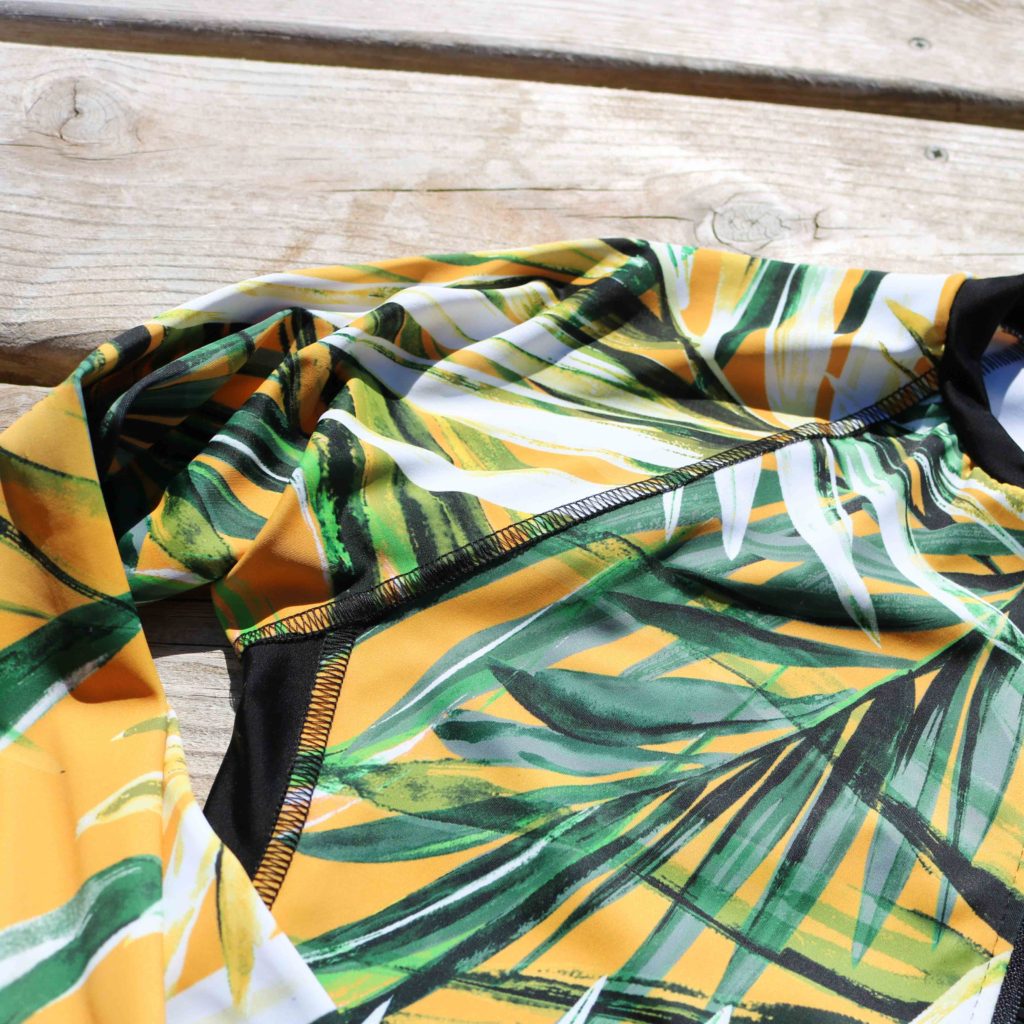
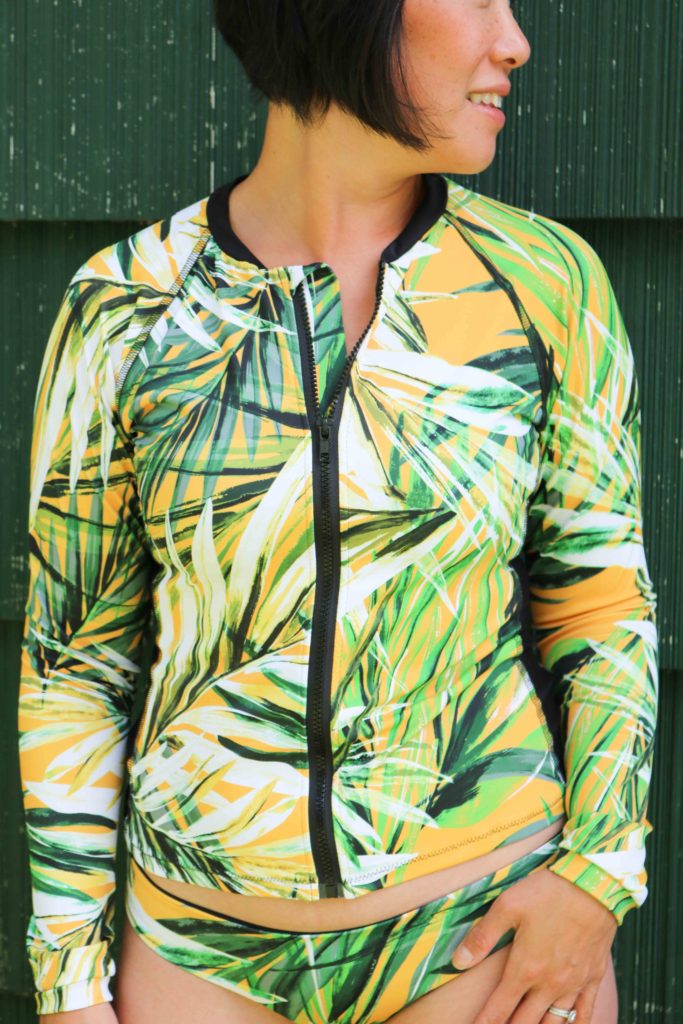
But sometimes, you are so inspired, that you just have to take the challenge and go for it.  I was so impressed with all the DIY swimsuits on social media that I knew I had to eventually make something for myself.  I was given the opportunity to select a print from Pine Crest Fabric’s expansive library of designs and substrates.   I chose this gorgeous palm digital print on Viper Base Cloth that just screamed swimwear.  I never made any type of swimwear but my previous experience making athleisure leggings and a tunic which you can read about here, gave me the confidence to work with performance based fabric.

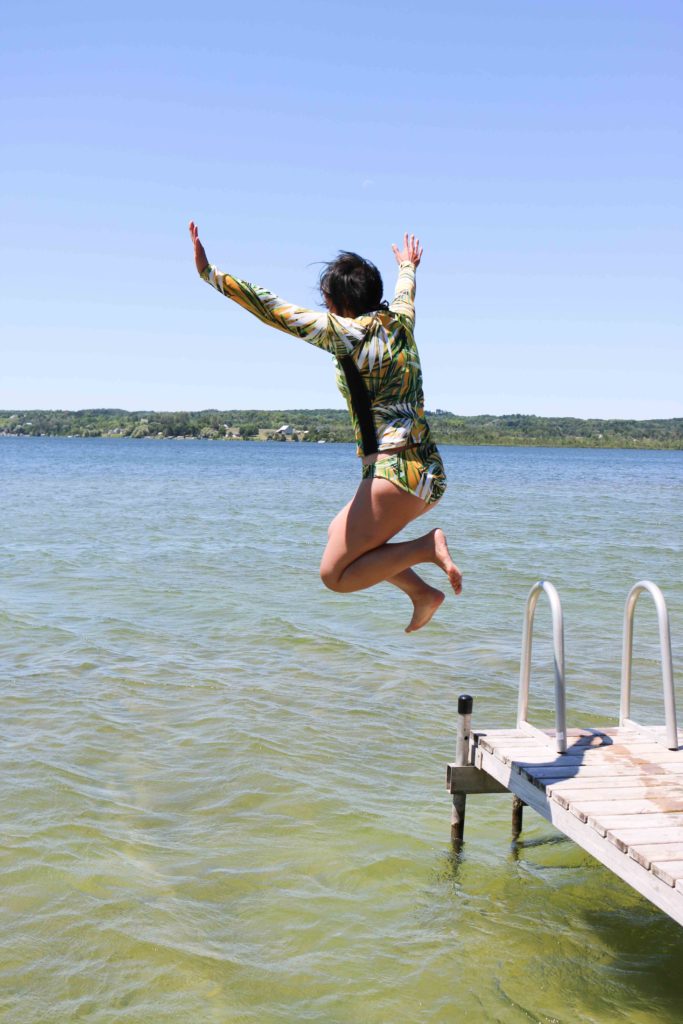
Earlier in the year, my oldest son needed a new rashguard, and was impressed when I saw a half-zip pullover style at a big box store.  That zipper feature was so helpful and made it much easier to pull that wet top off his body.  That’s when I thought I wanted one for myself!  My boys love swimming and we are at the pool quite a bit nowadays and also spend a good bit of time at the family lake house.  I can use it to cover up myself, save my skin from being in the sun so much, and even as a bit of wind protection when on a boat or wave runner.

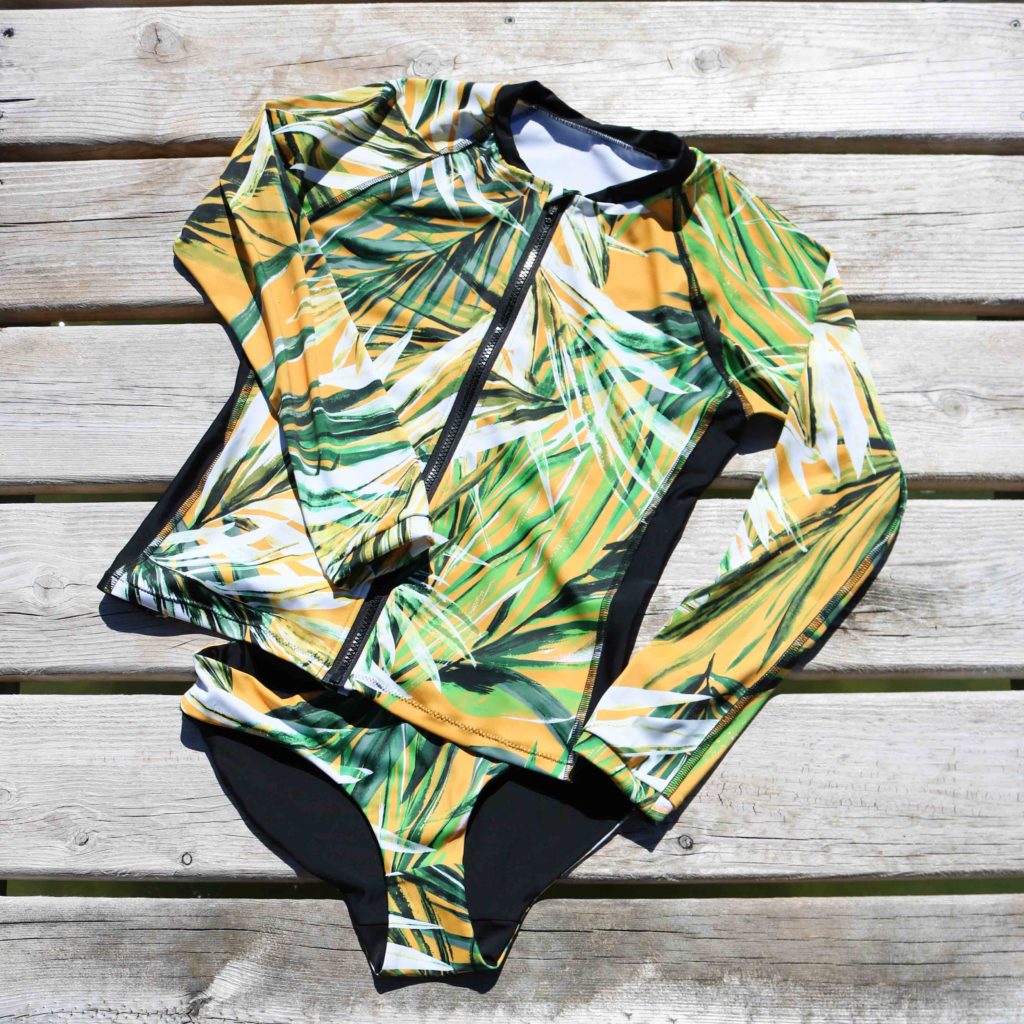
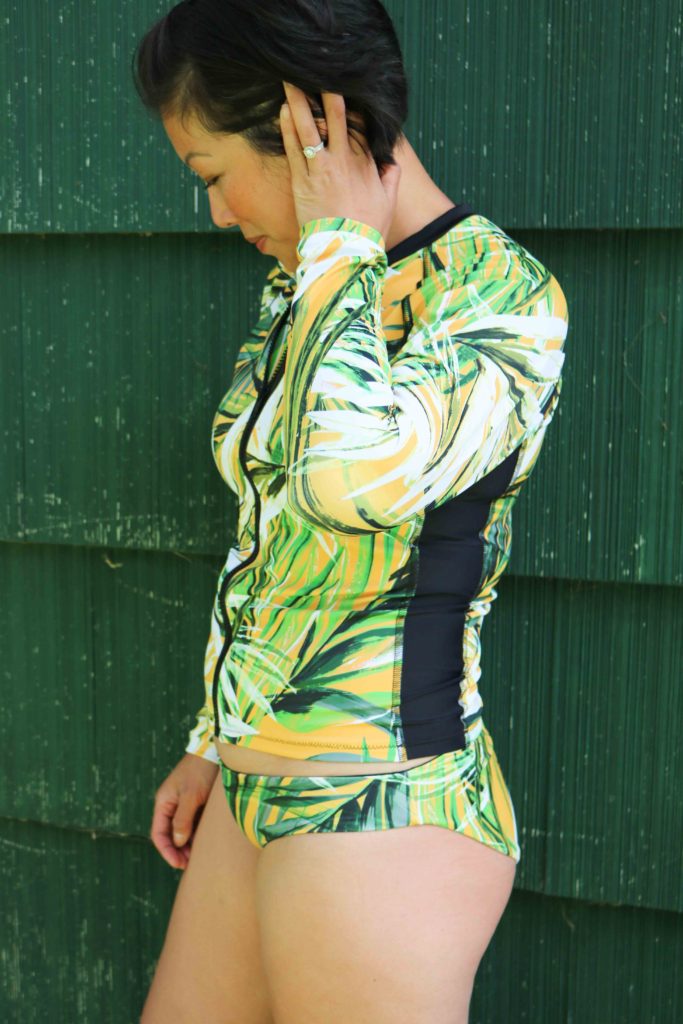
After doing a bit of research (thanks Instagram hashtags!) I found the Grace Swimsuit by Swimstyle.  It wasn’t exactly what I wanted, but definitely the closest out there and I love the sporty look of the side panels and neckband.  The pattern calls for an exposed zipper 3/4 the way down the front of the rashguard, but I hacked it so the zipper would go down all the way creating a jacket for easy removal.  The bottoms were made with Acacia Underwear pattern by Megan Nielsen and hacked to be reversible.

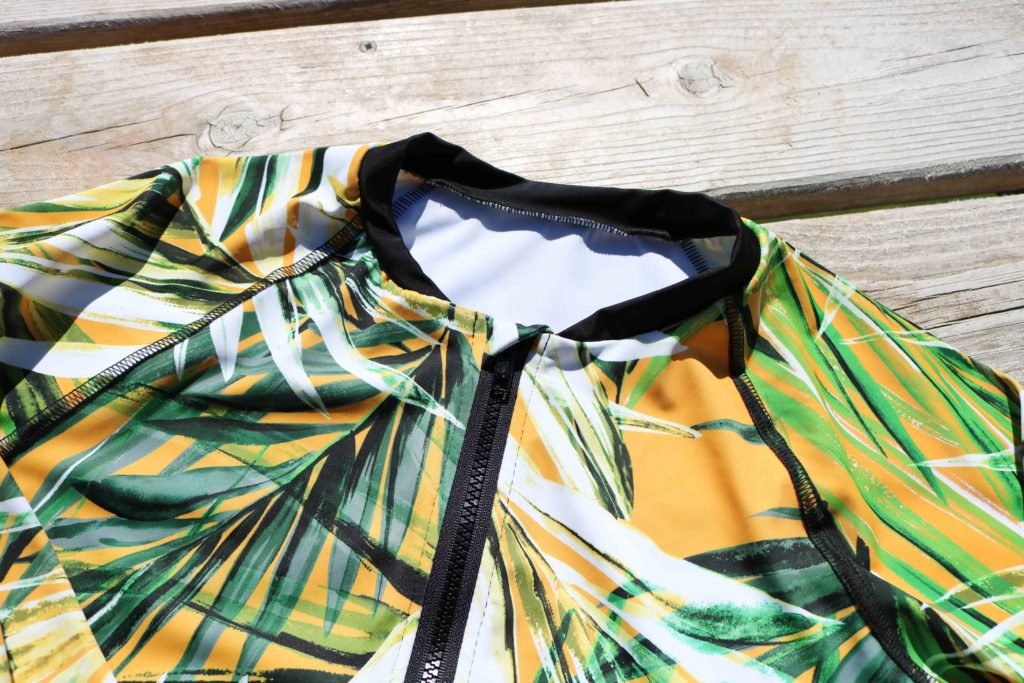
To make the Gracie into a full-zip rashguard, I added 1/4″ along the fold of the front pattern piece and then cut along that fold to create the two sides.  I used an 18″ sport style plastic separating zipper and added a back placket so the zipper would not rub and possibly irritate my skin.  You know I always like a good zipper cover, so I extended the placket to cover the zipper head and keep it secured.

I do not have a coverstitch machine, so I used a combination of the flat-lock seam option of my serger along with the zig-zag capabilities of my old back-up machine.  The raglan style sleeves made the flat-lock possible and I love the sporty look.  The best part is there is no hanging interior seam to irritate the skin.  All the seams are nice and flush against the body, making the rashguardd so incredibly comfortable. TIP: Use stretch needles in all of your machines when dealing with performance fabric.

The neck and wristbands were all serged onto the rashguard but I used a simple sig-zag stitch around the hem and it has held up well.  There has been a bit of tunneling after wear, so maybe a bit of knit stabilizer like this tape could help with that…but I’m okay with the hem as is!
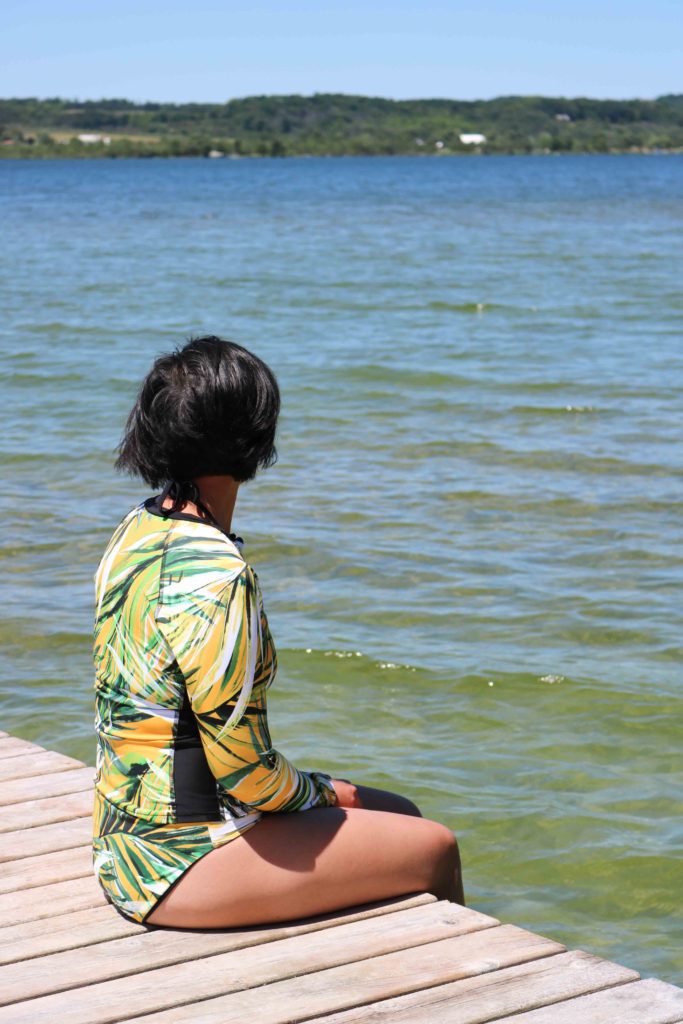
By making the bottoms reversible, I thought the light compression of the Spectrum Pro-Matte with UPF Protection along with the Viper Base Cloth would be enough and omitted the elastic as part of the pattern.  With my wider hips, I definitely need a little extra hold right on the cheeks and need to make sure I add the elastic back in.  The stretch around the waist and front leg is absolutely perfect though.  Unfortunately, I didn’t have enough time to make another pair before our family trip to the lake, so guess what’s back on the sew list?!?

This suit is exactly what I wanted this summer and I can’t begin to tell you how creamy and luxurious these performance fabrics feel.  They are so smooth….and that’s why I have three other garments made from Pine Crest fabrics!  As of the date of publication, this fabric print is available for wholesale only, but you can head to Fabric.com to check out other available Pine Crest prints.

Lake Leelanau, MI

Project Stats:

‘Hope you are enjoying your summer!!!  Have you sewn up any special projects this season?


Happy Sewing Friends,

Cristy


Fabric was provided by Pine Crest Fabrics for this post.  The swimwear project and all opinions are my very own.  The post also contains affiliate links which help to keep this website ticking.  Thank you always for your support.