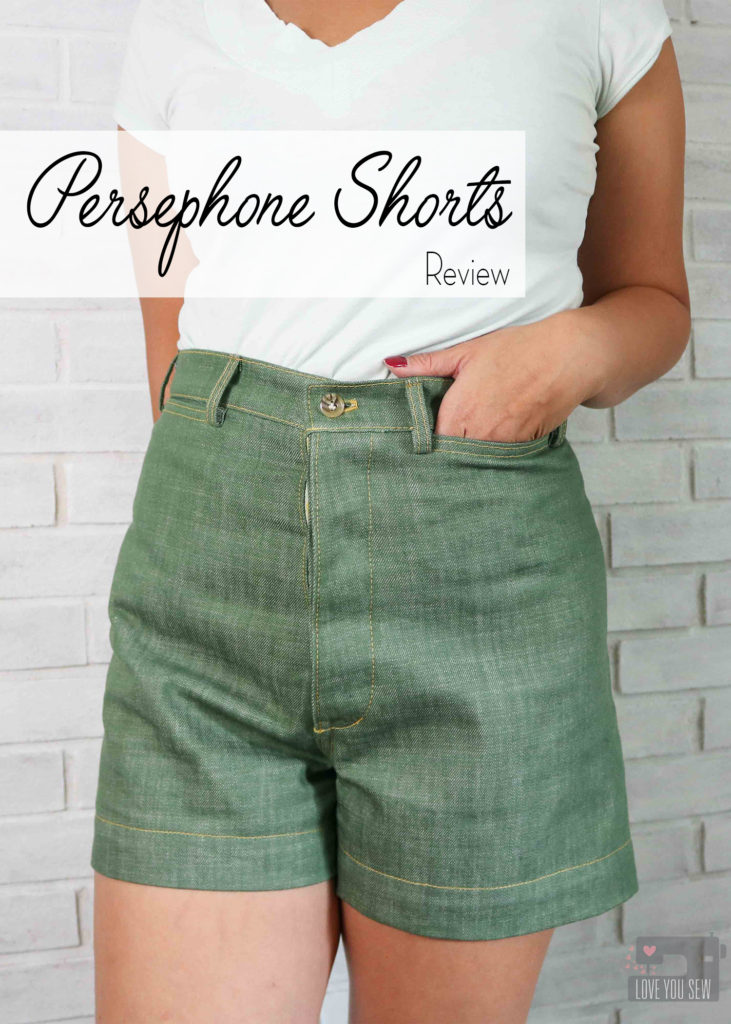
Sewing the Persephone Shorts

Like everyone and their mama, I scooped up the Persephone Pants pattern by Anna Allen Clothing last summer. I made these shorts last summer as well…and even took the pictures…but this post was left on the back burner while I had other blog deadlines to fulfill. While pulling clothes for our spring break trip, I was reminded inspired to finally finish this review — especially for all of you who are heading into shorts season as well!
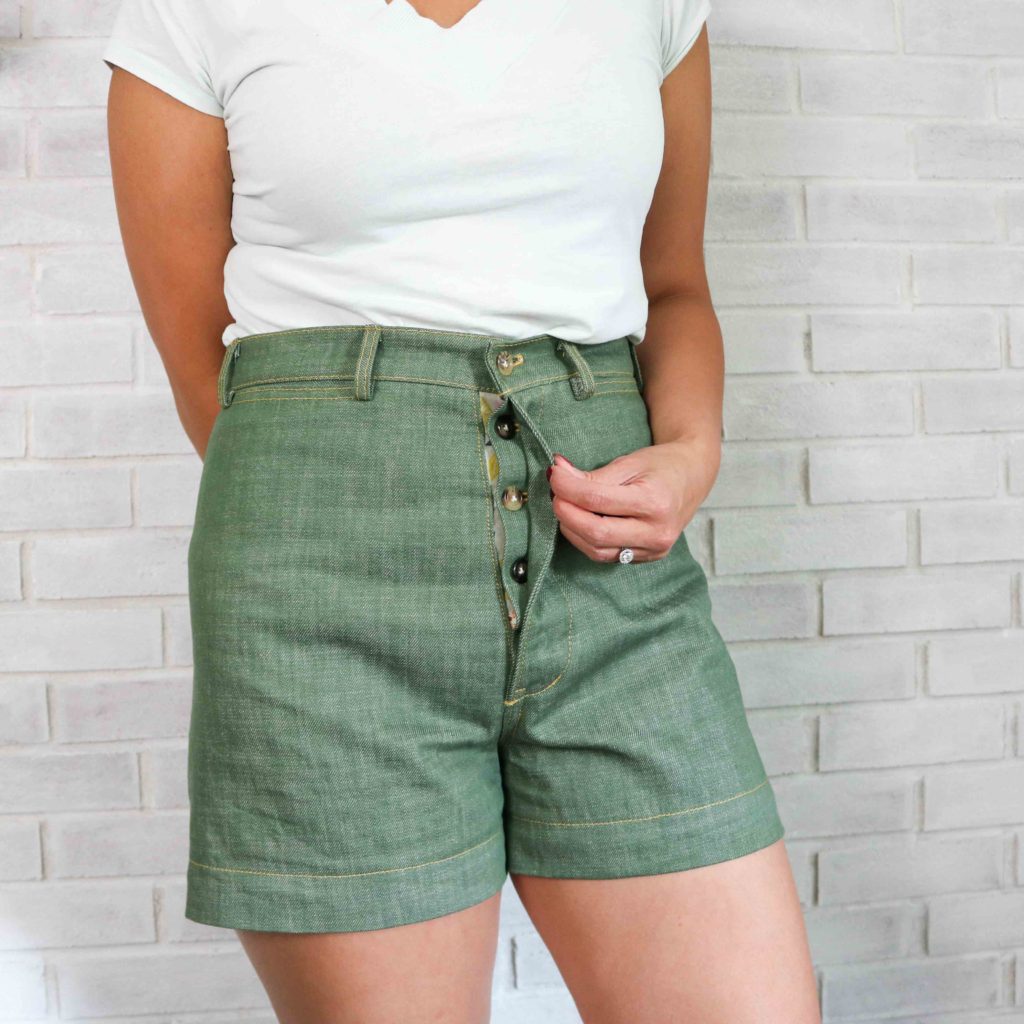
The inspiration behind this pattern were the wide-legged, high-waisted sailor pants from the 20-40s. The Persephone drafting is unique in that there are no side seams which made fitting a little different, but still doable with a muslin. These shorts are my wearable muslin since I could work on the fit around the waist and hips, but save all the fabric from the legs.
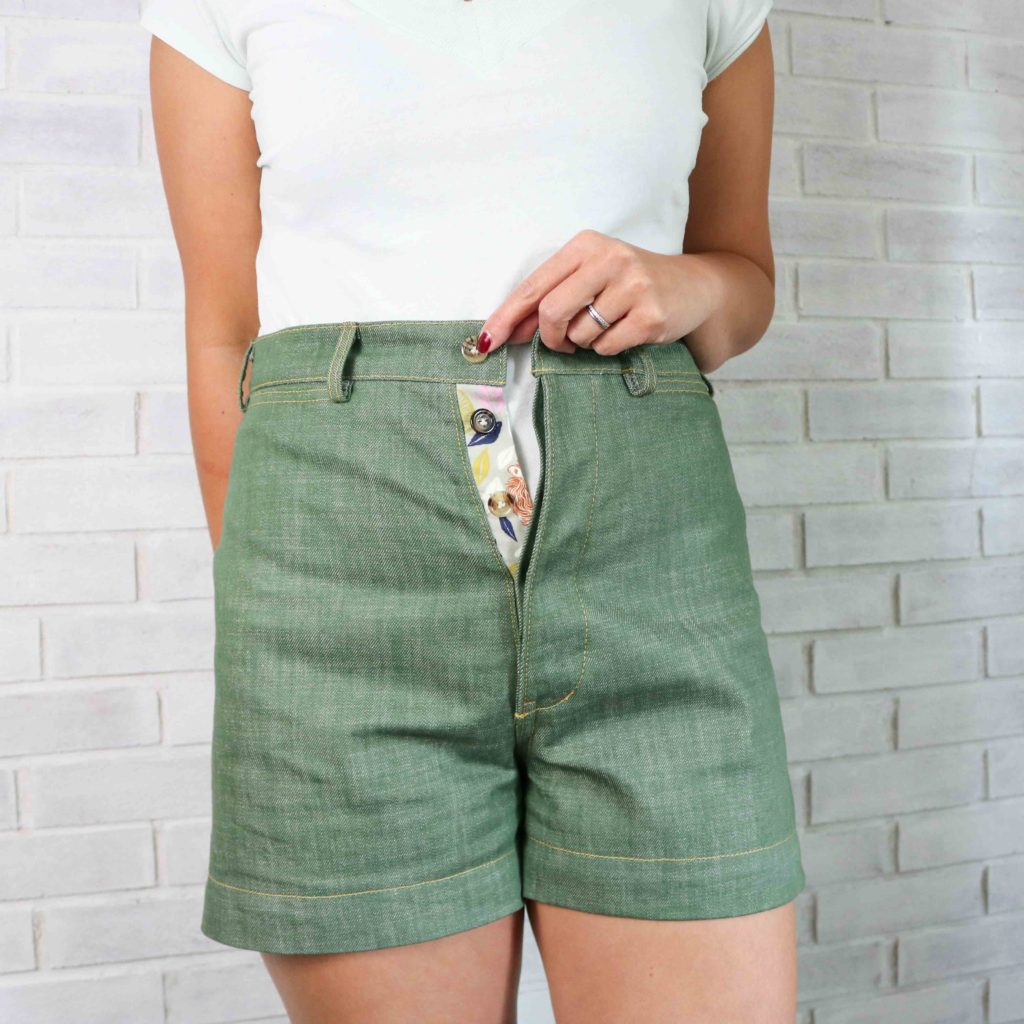
These pants feature a hidden button fly, but Anna released the zip fly expansion pack after I made these. When I make the full pants, I would like to use a zipper to make getting them off and on more easily. Also, I’ve been getting creasing at every space between the buttons, so I think a zipper will help smooth that out.
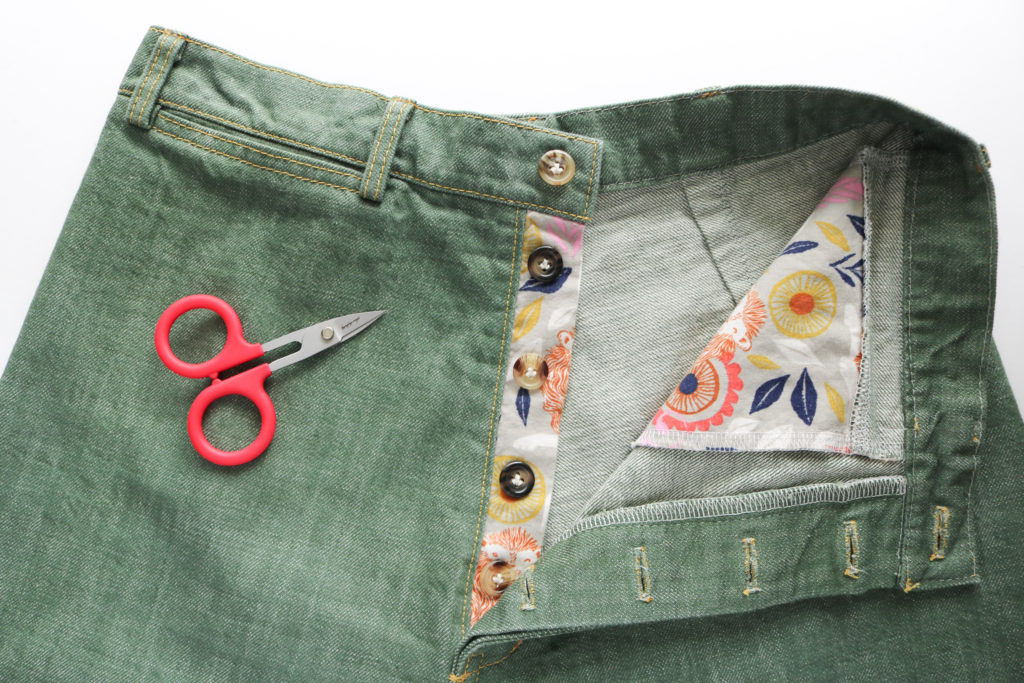
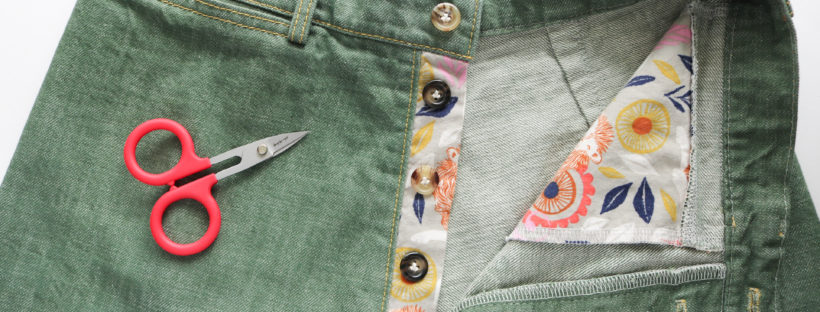
With the hidden button fly, I figured I could also get a bit crazy with the buttons. I’m still working through my MIL’s old stash and couldn’t find five matching colors in the same size. But I did find five with the same size and just alternated the colors.
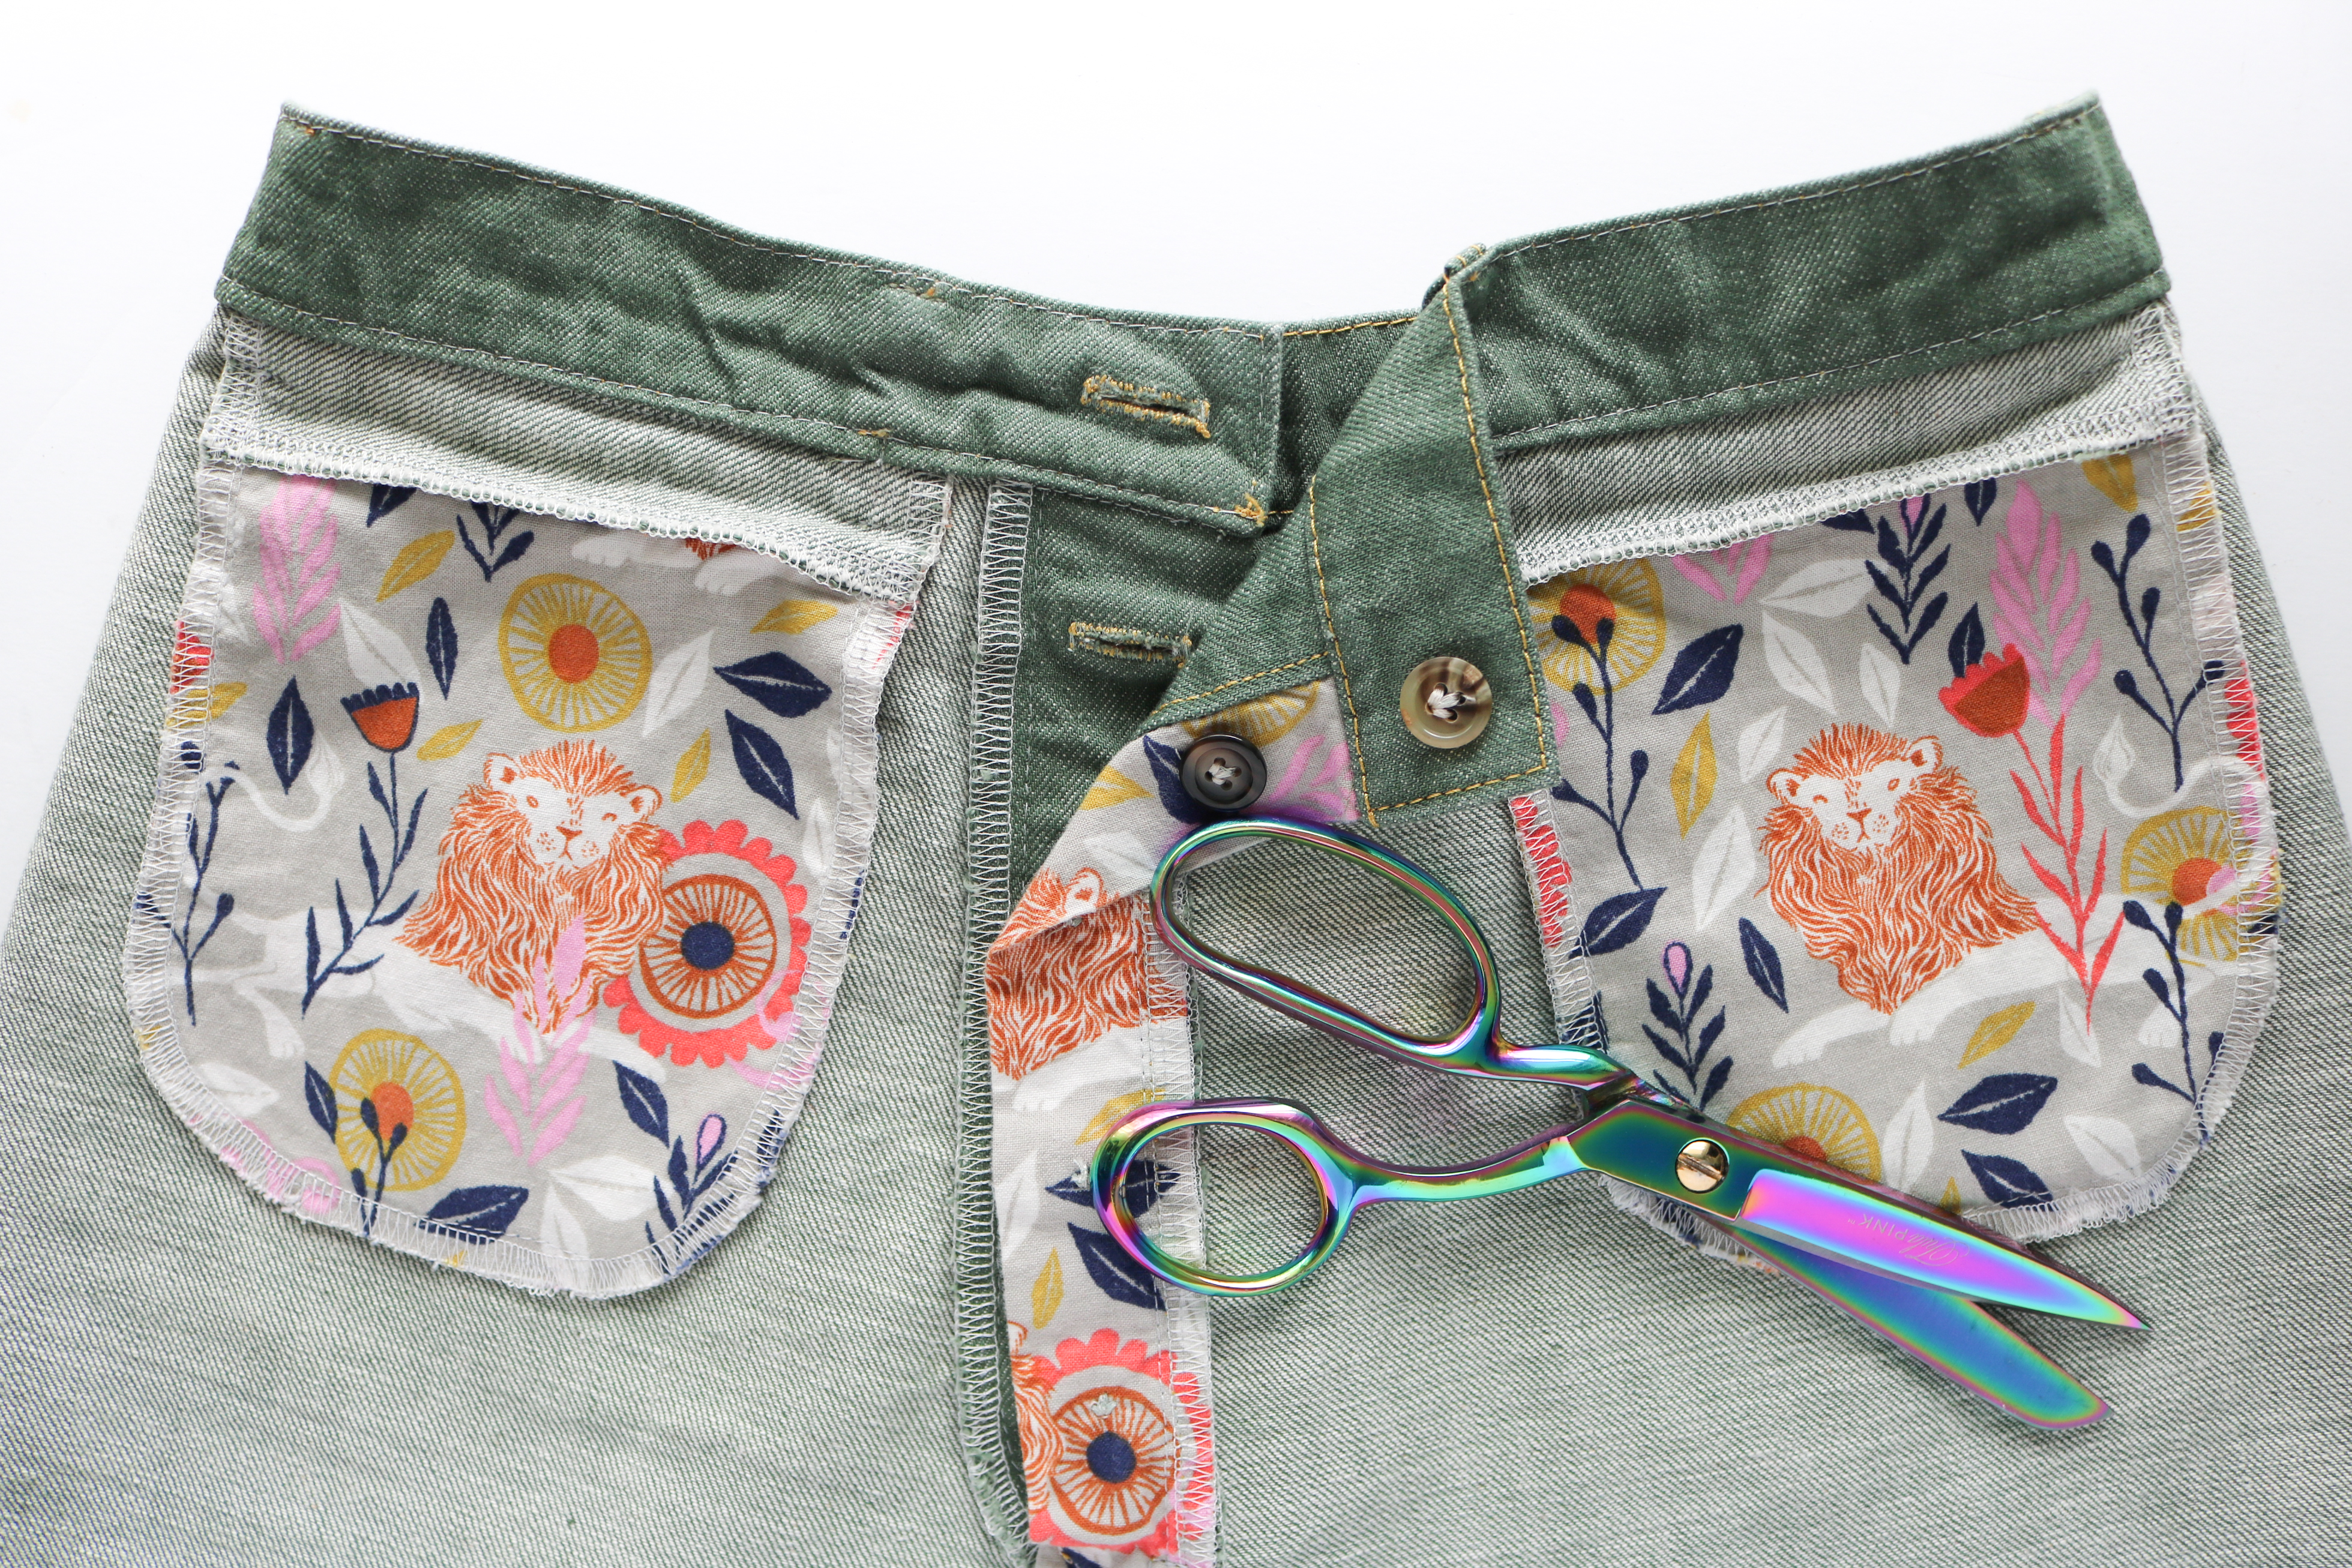
Even though these Persephones were a muslin, I still wanted them to be fun…and you know I love surprise garment guts! With this great Olive Cone Mills denim, I reached into my quilt cotton stash and found this print by Sarah Watts. The colors go so well with the denim and who doesn’t love some lions?
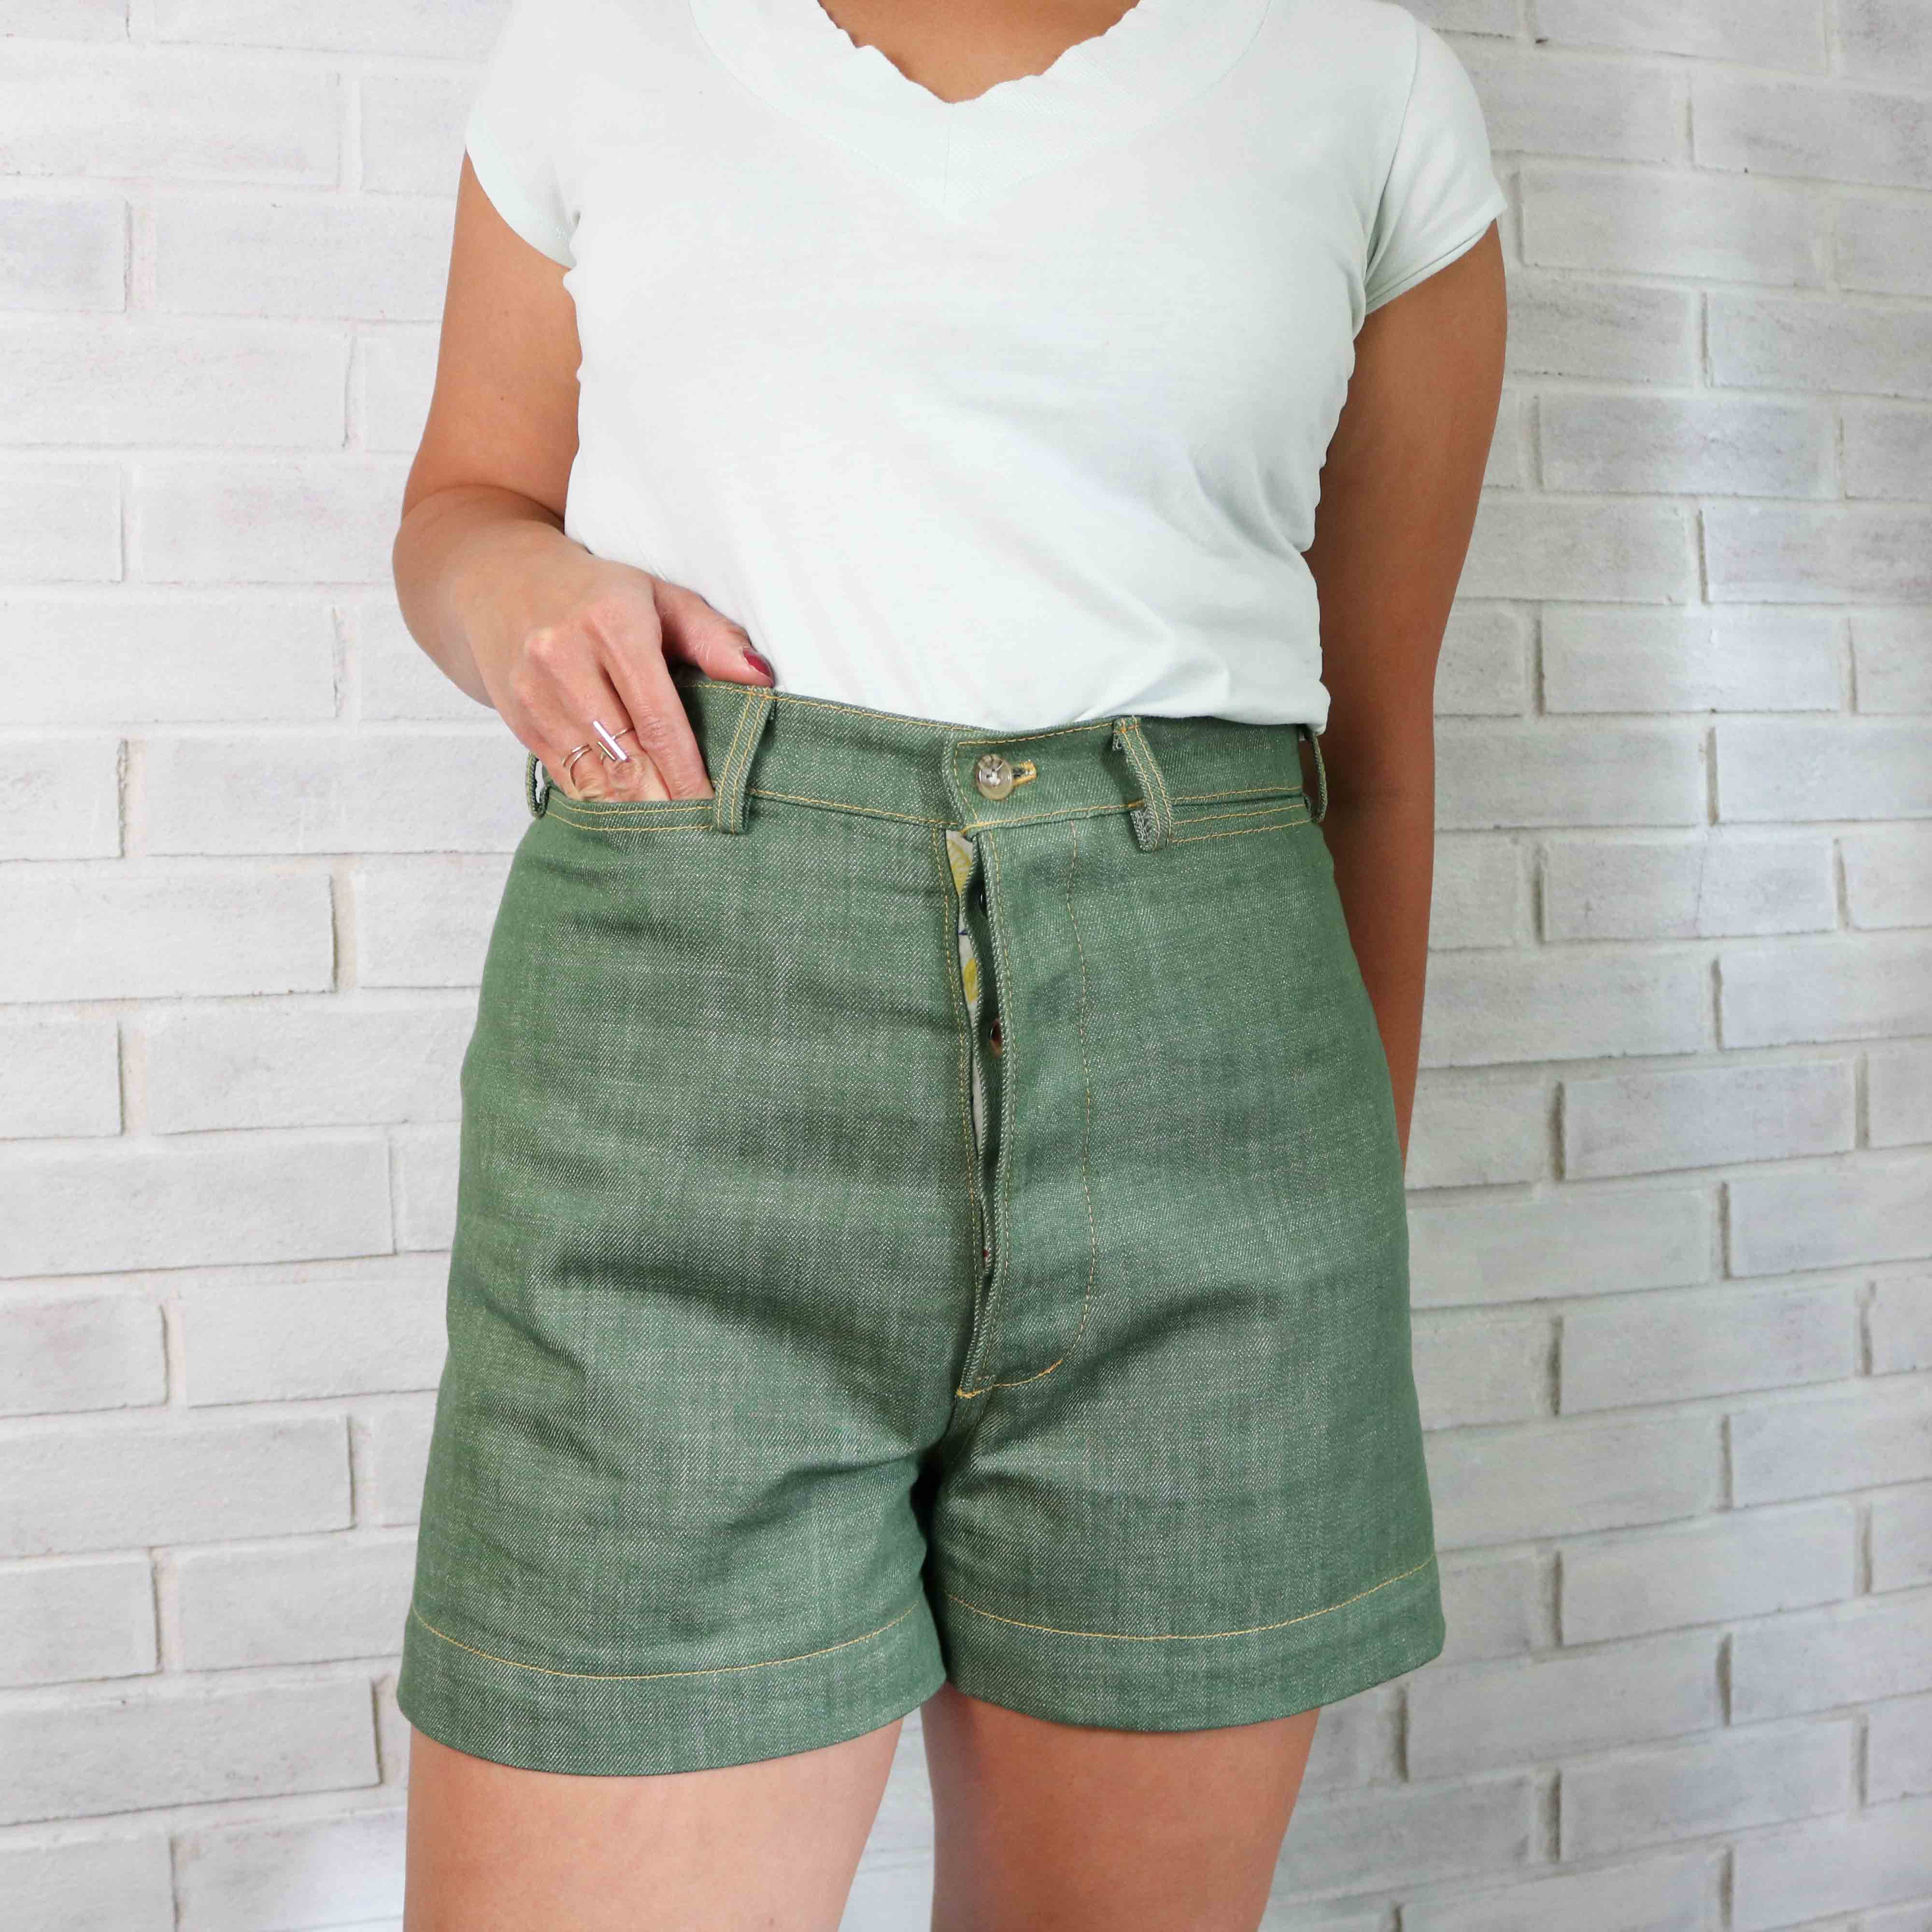
I used the quilt cotton on the fly facing as well as with both in seam pockets. You can see I fussy cut the pockets and love how they turned out. However, these are pretty small pockets and can only hold a small set of keys or some chapstick. I’ll still keep them in my next pair, but will add some back pockets for more storage.
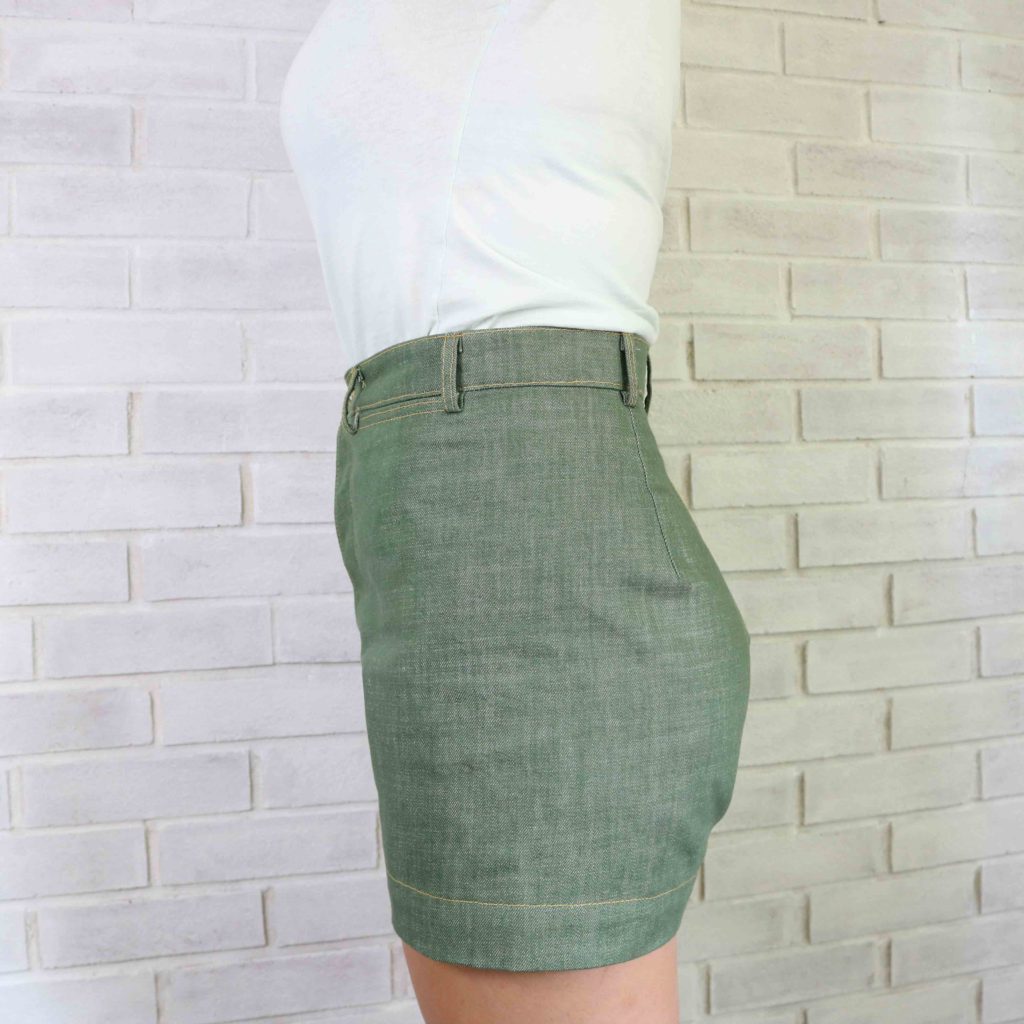
With almost all pants, I know my measurements run between two, if not three sizes. I cut a size 8 in these Persephone shorts and graded the hips out to a 10. I left the rise as it was drafted, but at 5’3″, the top of the waistband sits about 1 1/2″ above my belly button. Although, I love the super high-rise look, the pants push a bit too high when I sit. Next time, I will reduce the rise by ~1″.
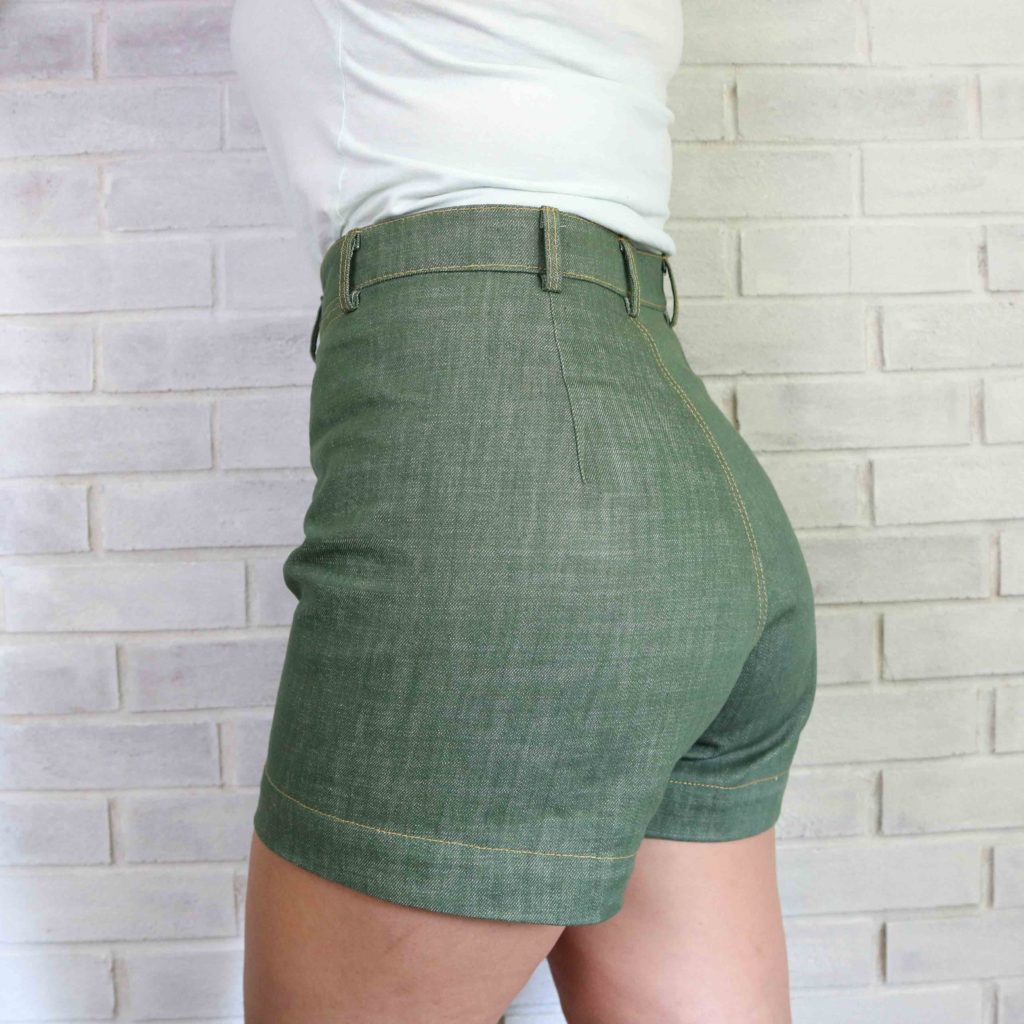
My fit issues are always around my booty. There was lots of back and forth with baste fitting going on, but I was able to work out the following:

  • Increased each dart on the fold by 1/4″ (1/2″ total) which was 1″ taken out of the waist overall.
  • Low buttocks adjustment – Extended each dart by 1 3/8″ to where the curve is extended out the most. I had to do this after seeing the dart poke out rather than sit smoothly on my backside.
  • Took an additional 1/4″ out of the center back (1/2″ overall)
  • Scooped out the seat by 1/4″ to reduce wrinkling around the back thighs. But since I already cut the fabric, I couldn’t compensate and add 1/2″ to the crotch length. You can see there is a slight “wedgie” effect since I didn’t lengthen the seat. But after a year’s worth of wear, this non-stretch denim has really molded to my shape. The fabric has actually relaxed more in the seat and I’m not seeing (or feeling) that wedgie anymore! Not all fabric is as forgiving, so I’ll definitely make sure I add in the extra fabric with my next make.
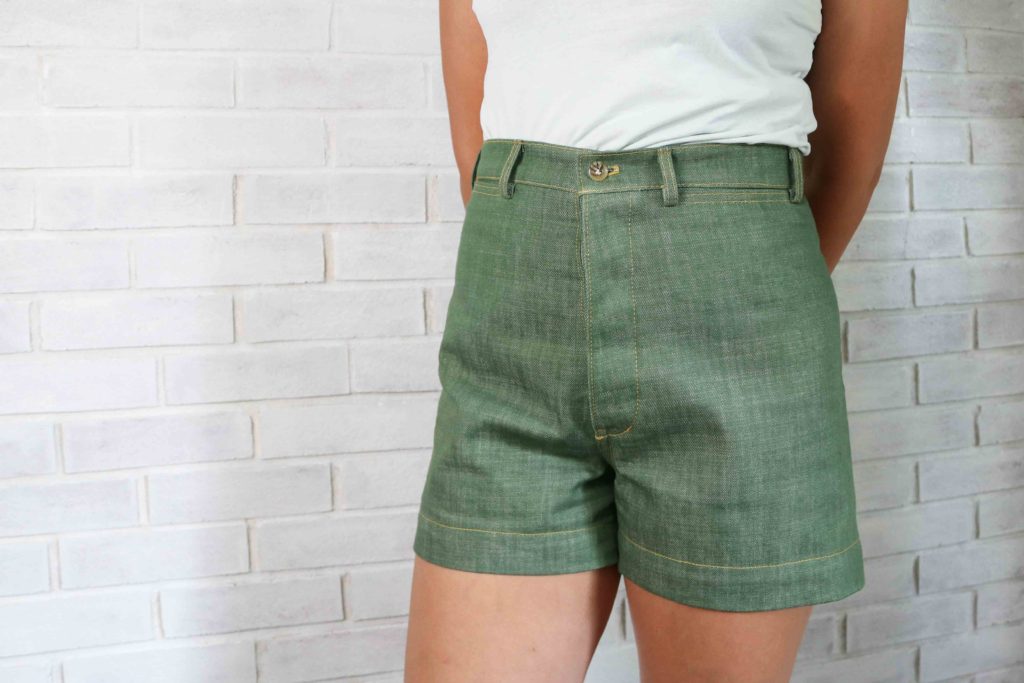
Overall, I LOVE the fit of these Persephone shorts. I have always had a hard time finding RTW shorts with room for my thicker thighs…especially when seated. The wide cut gives me so much ease around my thighs while the high-waist provides such beautiful shaping.

I have a whole winter’s worth of bottom weight scraps and can’t wait to make a few more pairs of these shorts for the summer ahead! Are these in your summer sewing queue?

Happy Sewing!

Cristy


Project Summary:

  • Pattern: Persephone Pants by Anna Allen Clothing; Shorts View
  • Fabric: Olive Cone Mills Denim from Imagine Gnats
  • Lining: From the August fabric collection by Sarah Watts for Cotton + Steel
  • Thread: Gutermann Denim for Top-stitching and Gutermann all-purpose poly for piecing and tacking the carriers.
  • Machines: Juki TL-2010Q, Singer Quantum Stylist (for buttonholes), and Juki MO-2000QVP

This post may contain affiliate links for which I may receive a very compensation. These payments help to keep the website up and running. Thank you for your support!
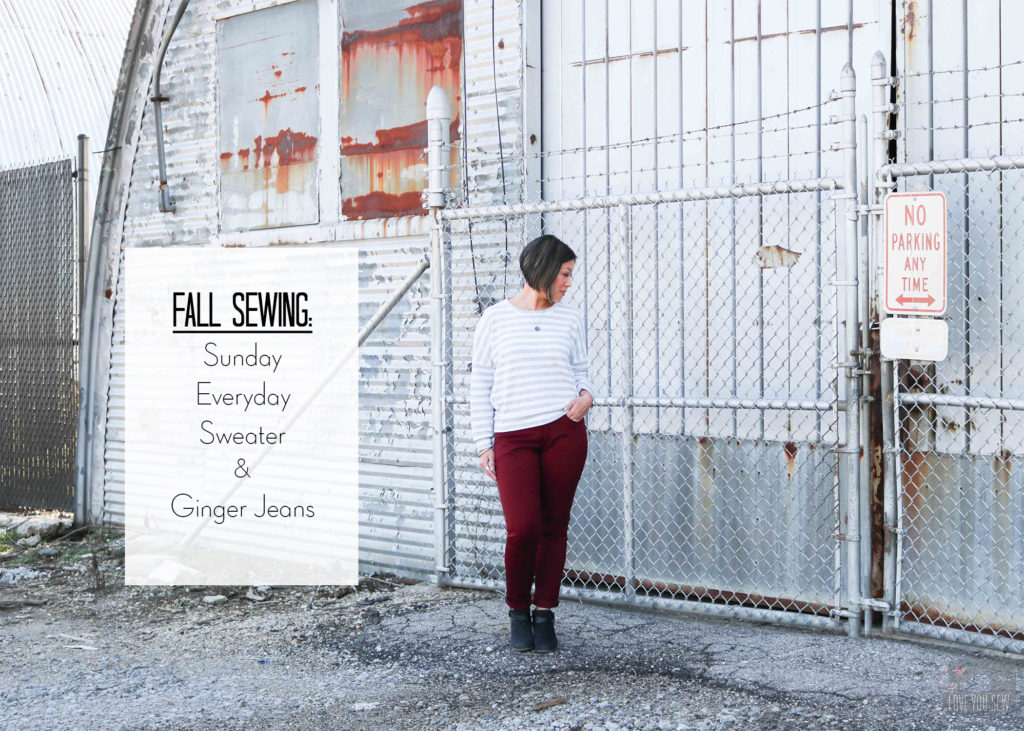
Fall Sewing :: Sunday Everyday Sweater and Ginger Jeans with Stylemaker Fabrics

Fall is my very favorite garment-making time.  I love being able to sew comfy clothes to go along with my favorite autumn activities like having bonfires and heading out to the pumpkin patch. Stylemaker Fabrics is an amazing resource to make all of that sewing happen.  Michelle, the owner, does her trend research and sources beautiful garment substrates.  Most often, these are deadstock fabrics, which are leftover from other manufacturer’s products.  I love being able to use these types of fabric as a small step to keep them out of our landfills.

Stylemaker Fabrics new fall release includes over 150 new fabrics and it was SO hard to narrow down what I wanted to make with these lovelies.  I battled between something fun with a lot of personality, like a large print maxi dress.  But I know I’ll get the most wear out of my “mom uniform” — a loose-stretchy top with a pair of jeans.  It sounds boring, but I knew I could take it all up a notch with my fabrics!
ginger Jeans

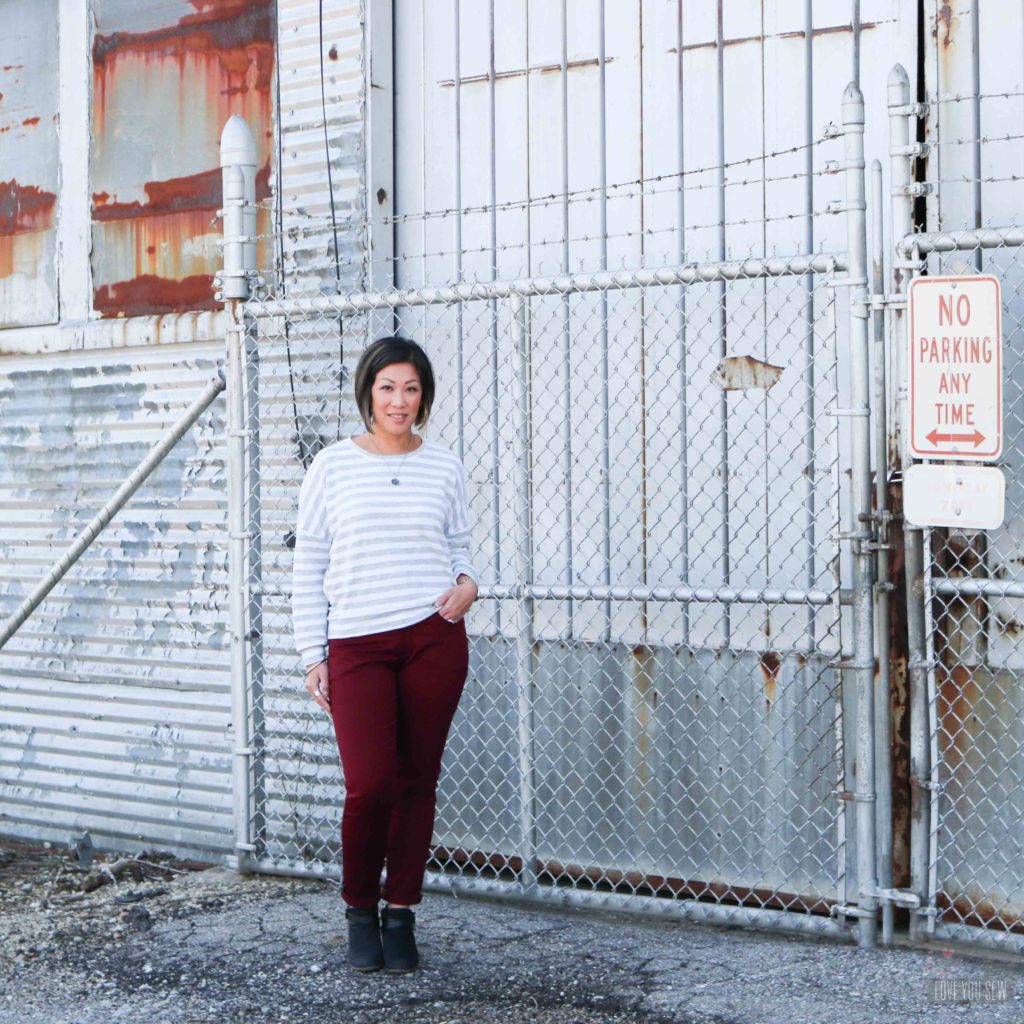
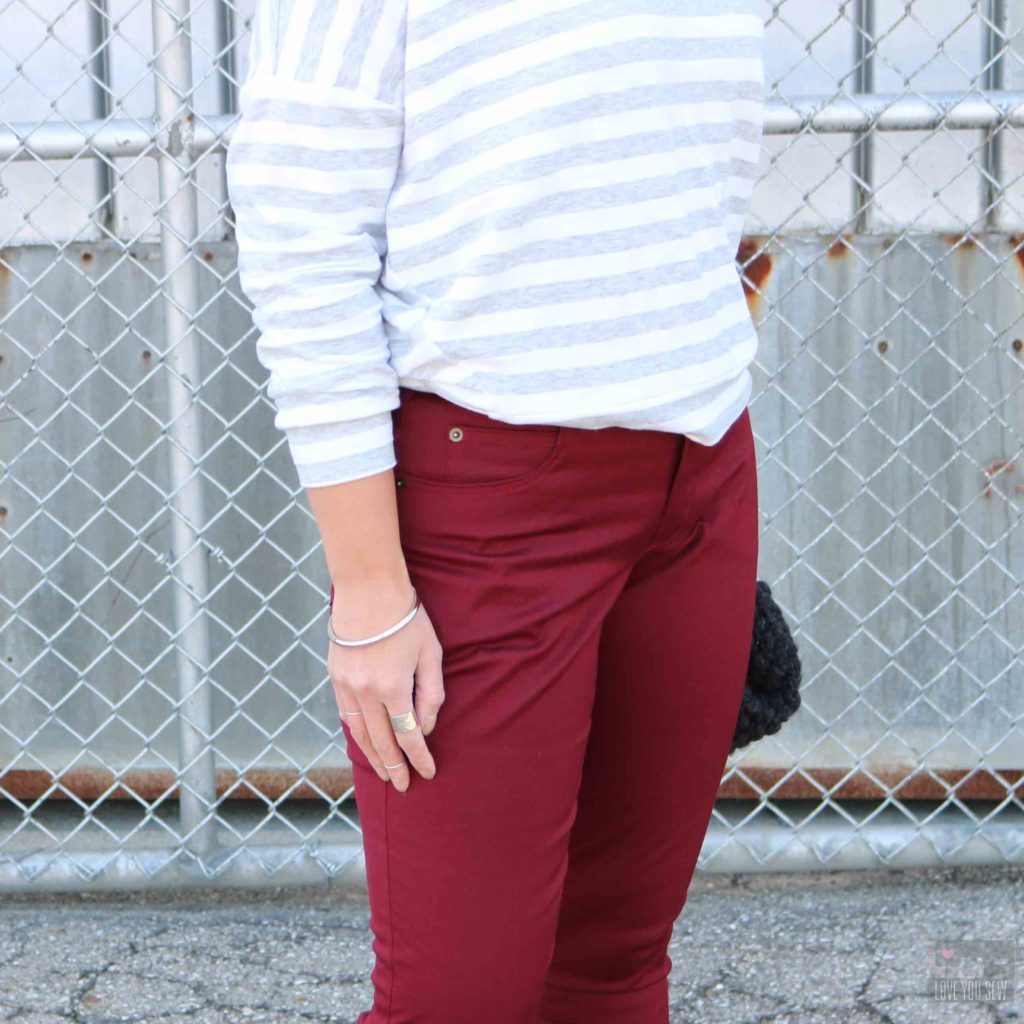
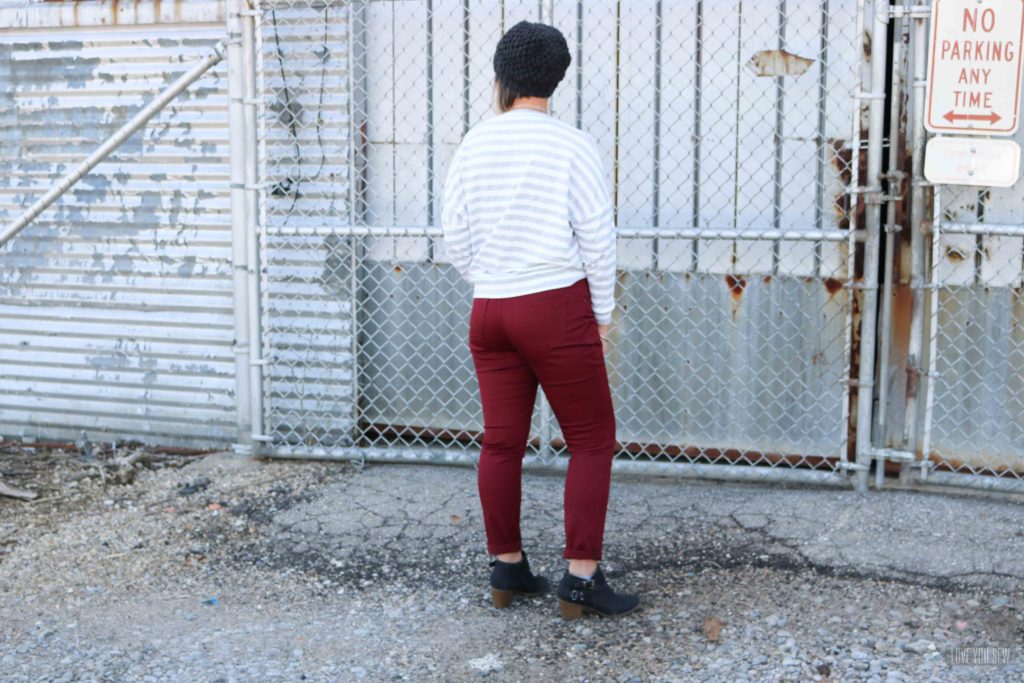
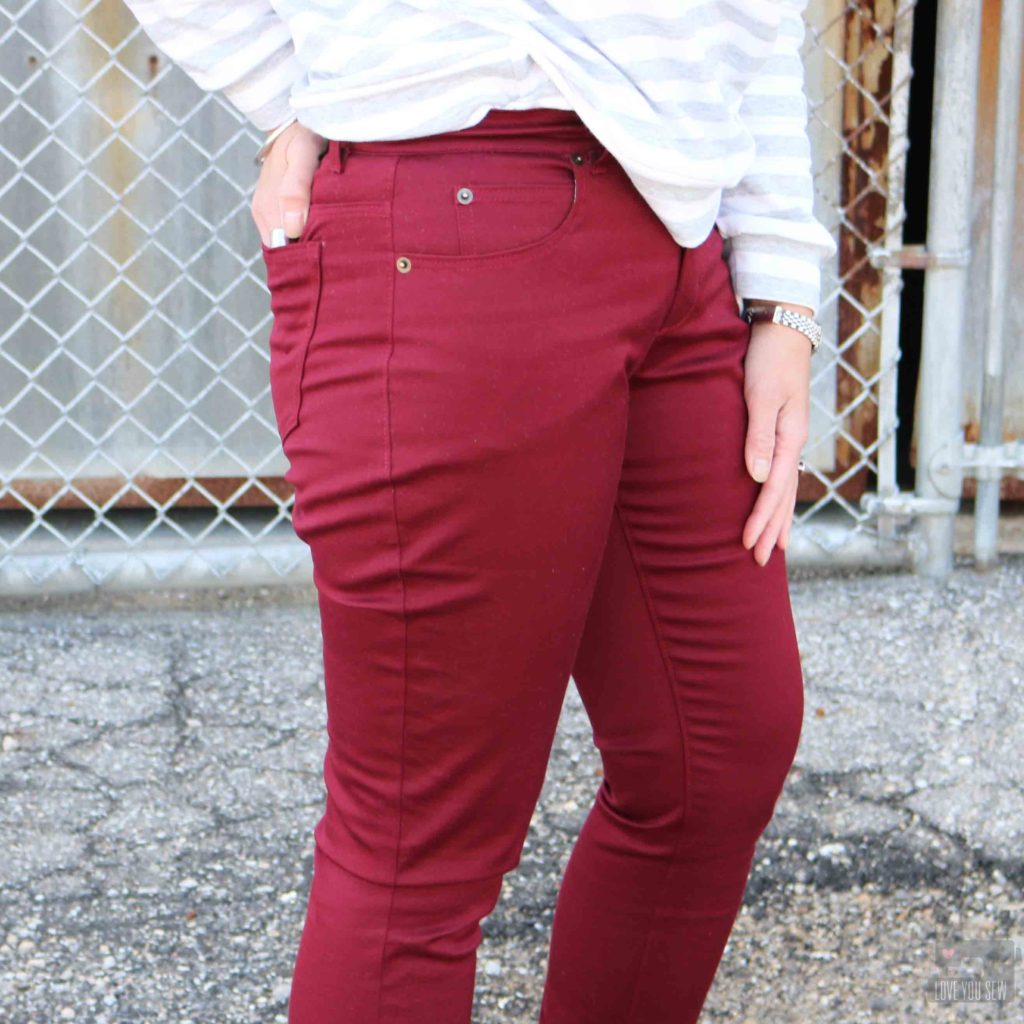
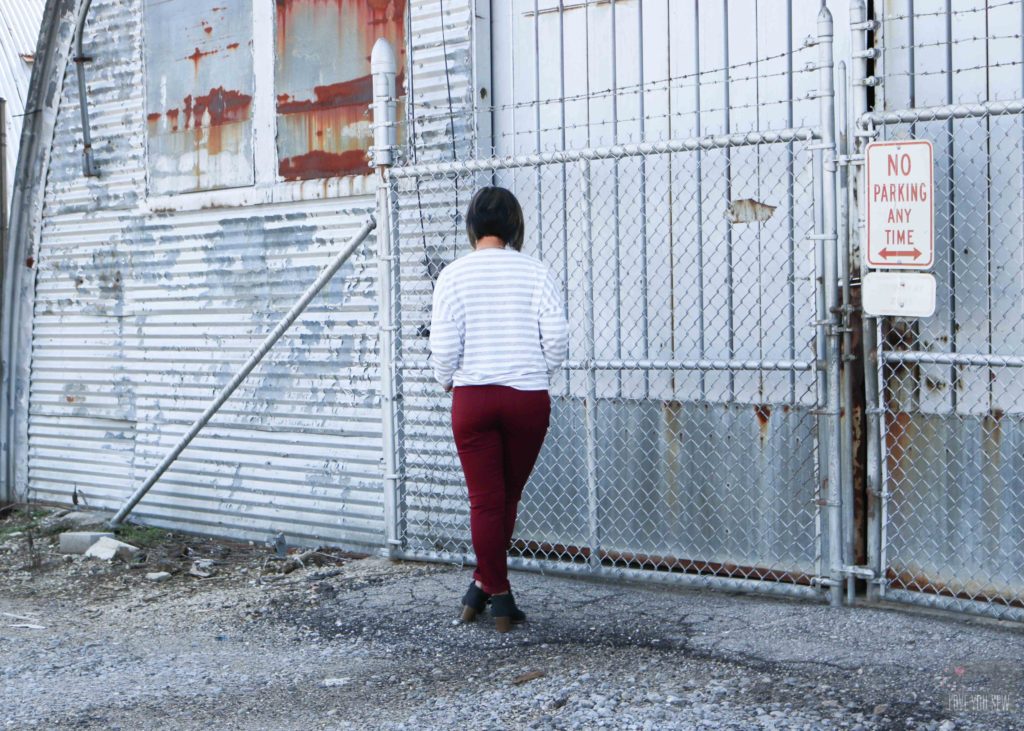
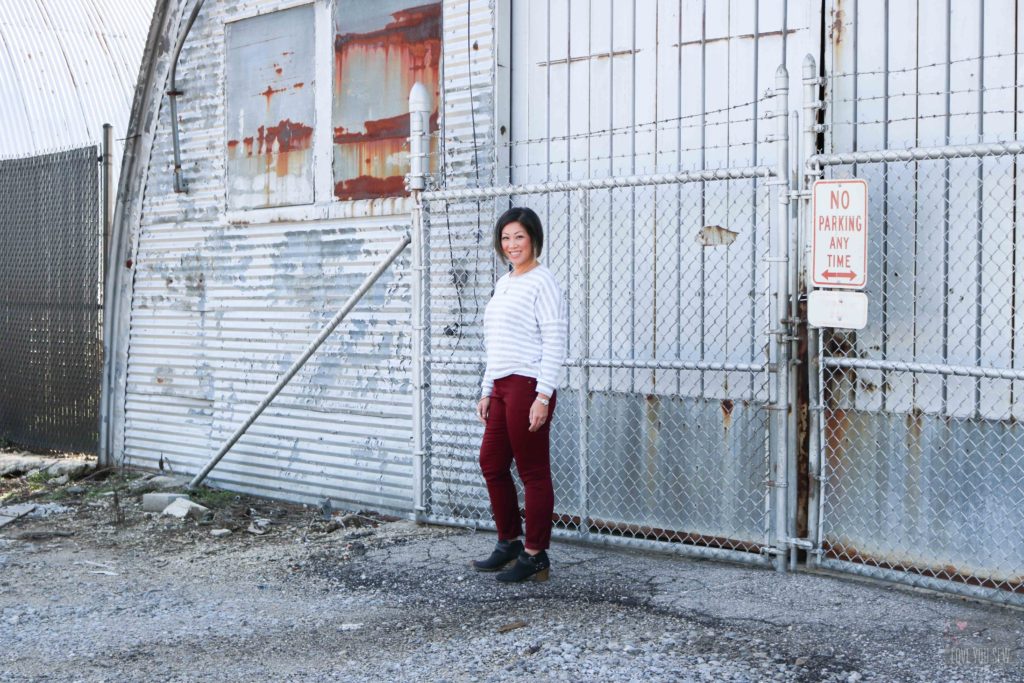
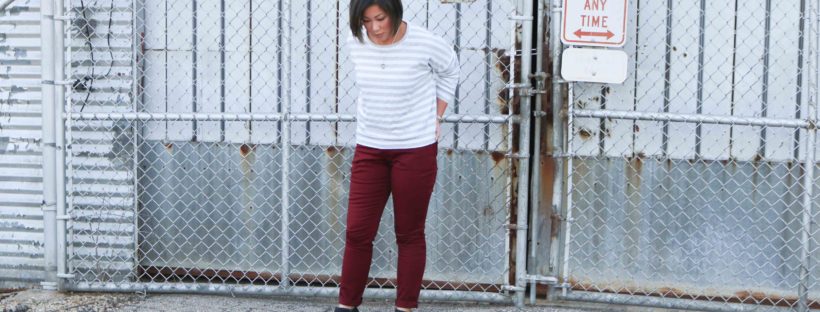
If I’m forced out of athleisure clothing, I only wear blue or black jeans…with the occasional olive twill pants thrown in.  So, I thought a pair of statement pants would help me elevate my fall wardrobe with color alone.  I could have a pair of comfort-zone skinny jeans made of this Stretch Cotton Sateen in solid Cranberry for a pair of Ginger Jeans AND have an interesting garment to bring life into my wardrobe.  This deep saturated gem tone is a great color that is a lot of fun, but  dark enough to be everyday chic.

I’ve made a few pairs of pants before like these Chi-town Chinos and have altered quite a few ready-to-wear pants, so I know the modifications I have to generally make.  It sounds like a lot to do, but you will get the hang of it as you test and see what works with your body shape.

With the Ginger Jeans, I made the following adjustments to the pattern:

  • Shortened length by 3 3/8″
  • Graded from an 8 waist to a 10 hip and back to 8 legs
  • Removed additional 1/2″ out of back yoke
  • Deepened crotch curve by 1/2″ to remove bagginess below the seat
  • Extended crotch curve by 1/2″ to eliminate the wedgie look
  • Made a 1/4″ calf extension to remove bagginess around the knees

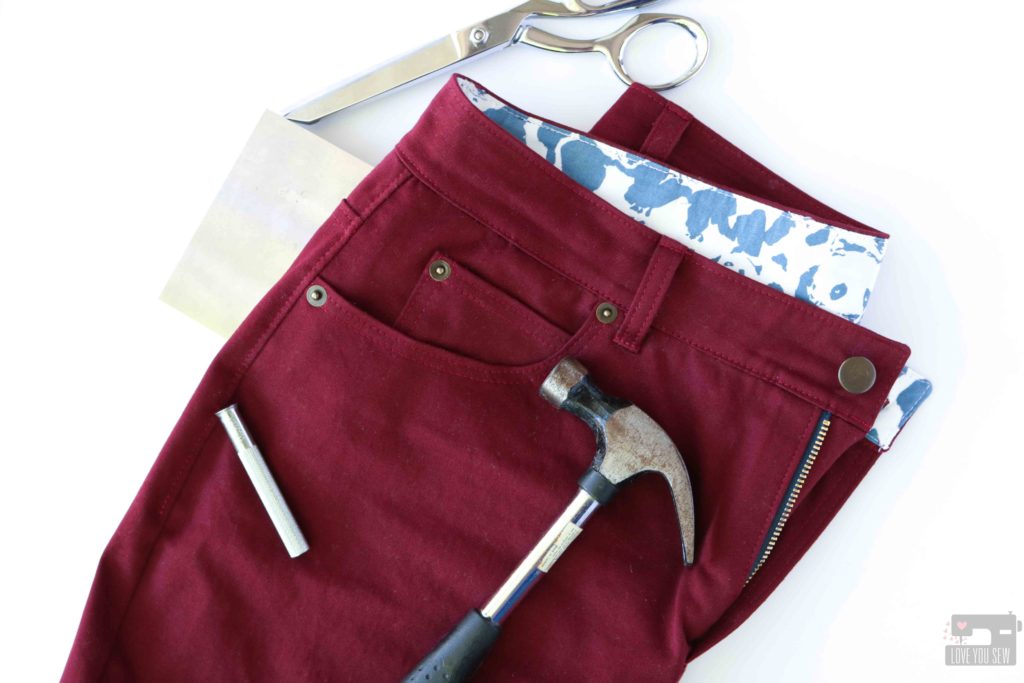
If you are looking for hardware, Stylemaker fabrics carries plenty of kits you can find here.  I mixed up the zipper from a kit along with some hardware I already had in my own stash.

I’ve been wearing these pants around town to truly get a feel for them, and I’m impressed with both the stretch AND recovery from this fabric.  There is great movement without it being too constricting.  The Stretch Cotton Sateen in solid Cranberry  also doesn’t leave deep wrinkles like with 100% cotton fabrics, so that’s a huge perk for this Uber-mom driver!

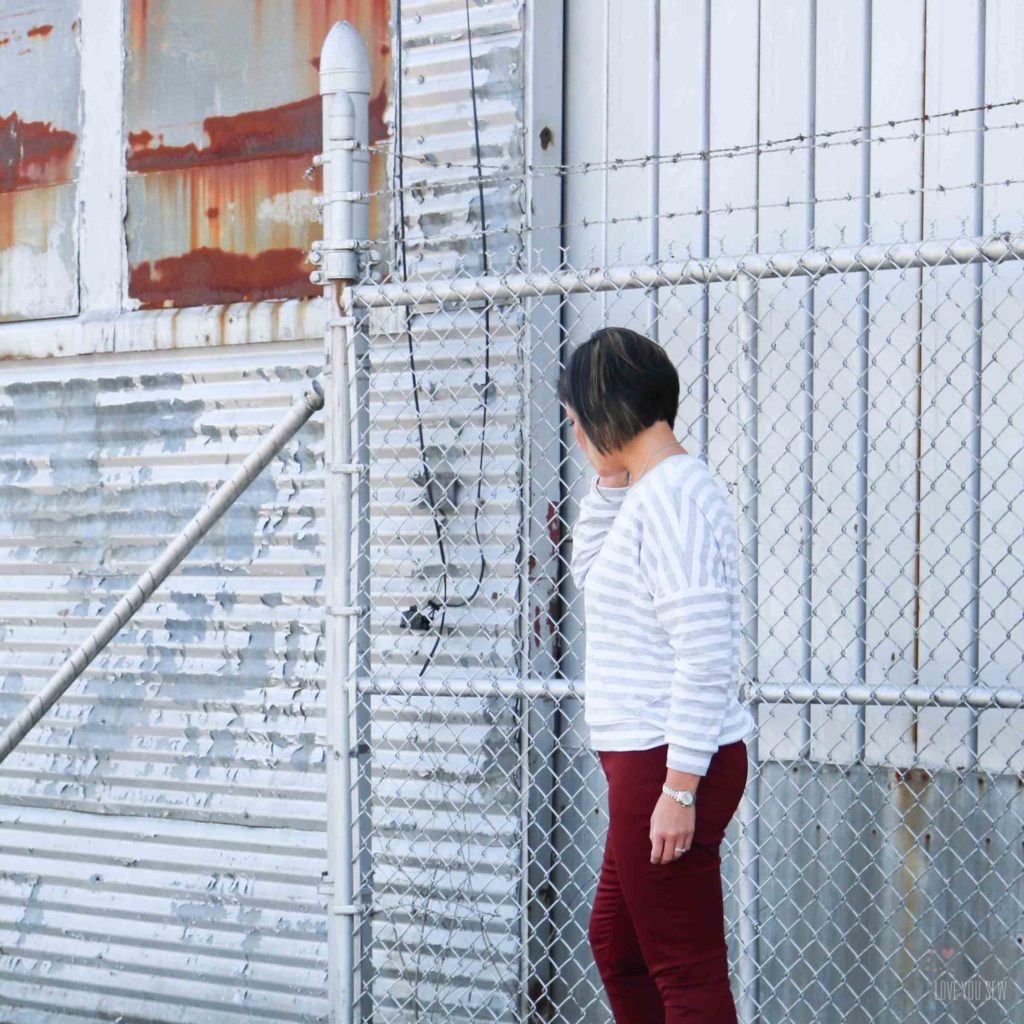
Sunday Everyday Sweater

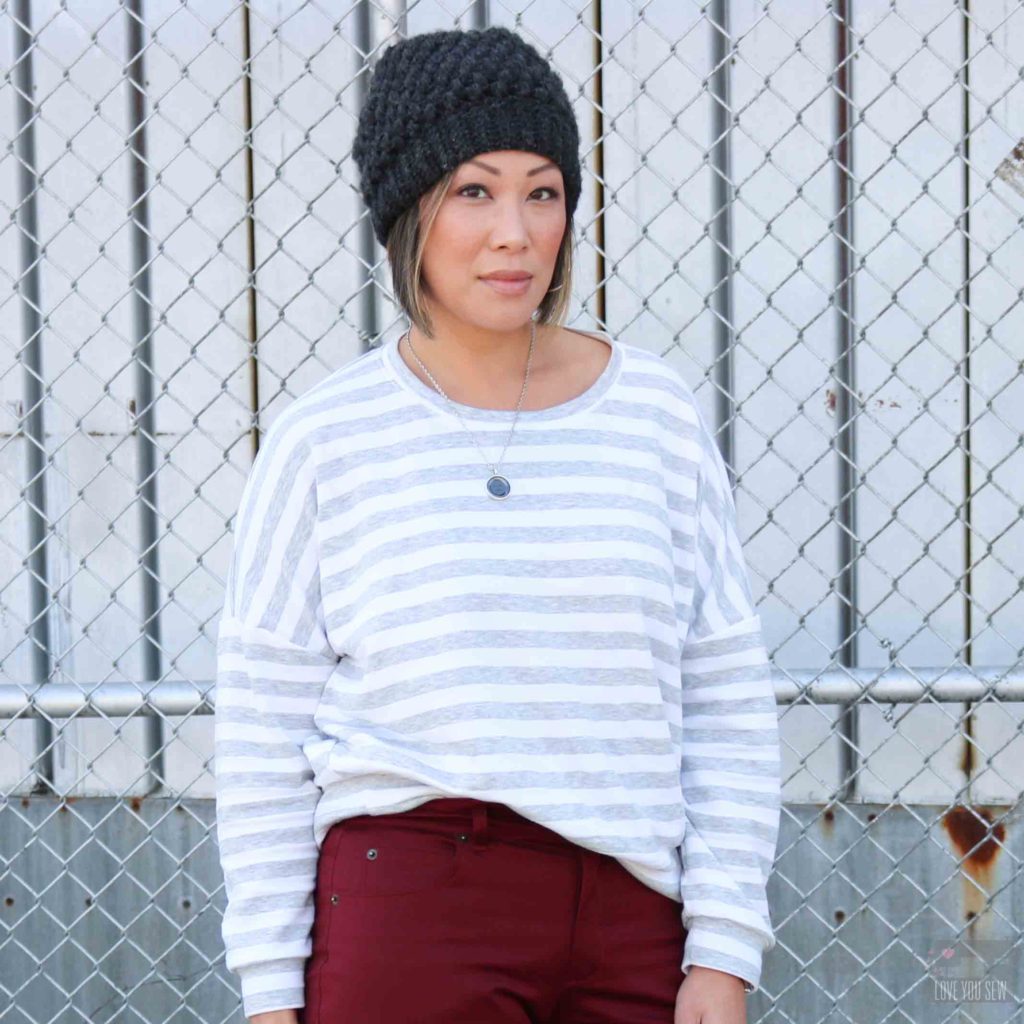
With the 90s on trend and athleisure still full swing, sweatshirts are either oversized (which looks ridiculous on 5’3″ me) or cropped,  which doesn’t work with my modesty level at all…I’m keeping this belly under wraps!   But, I figured I could work the short, boxy sweatshirt look , but still be covered with the cropped version of the Sunday Everyday Sweater by Ensemble Patterns.  This pattern has a generous fit with dropped shoulders and dolman-esque sleeves, but provides a slight cocoon shape with a hem band to keep everything at bay 😉

I made the Basic version before, which you can find here, and knew I could size down and still get the oversized look and feel I was going for.  My modifications are as follows:

  • sized down based on measurements to a 6
  • shortened sleeves by 2″
  • narrowed cuffs by 1/2″
  • shortened hem band by 3″ to maintain the cropped length

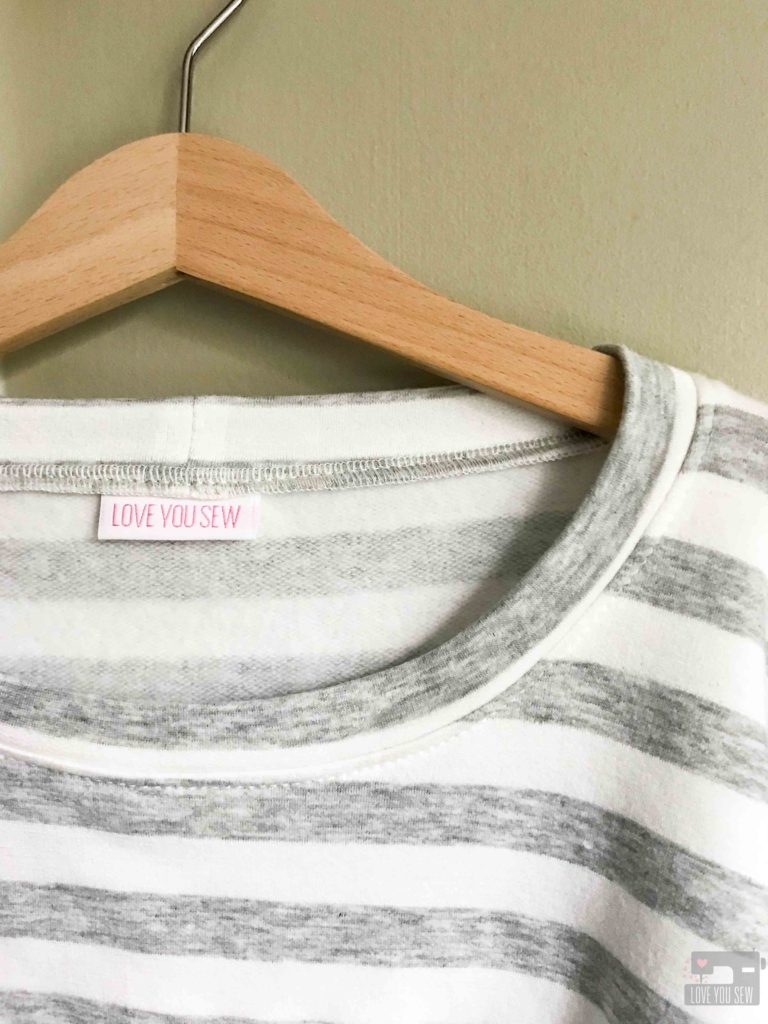
This Cozy Stripe Sweatshirt Fleece is such a dream!  It was the perfect weight for this pattern and the fleece on the wrong side of the fabric is just so incredibly soft.  I think the heather gray stripes must make it extra cozy 😉  This sweatshirt will definitely  be a wardrobe staple in the car-pool line.  I already want to wear it everyday!

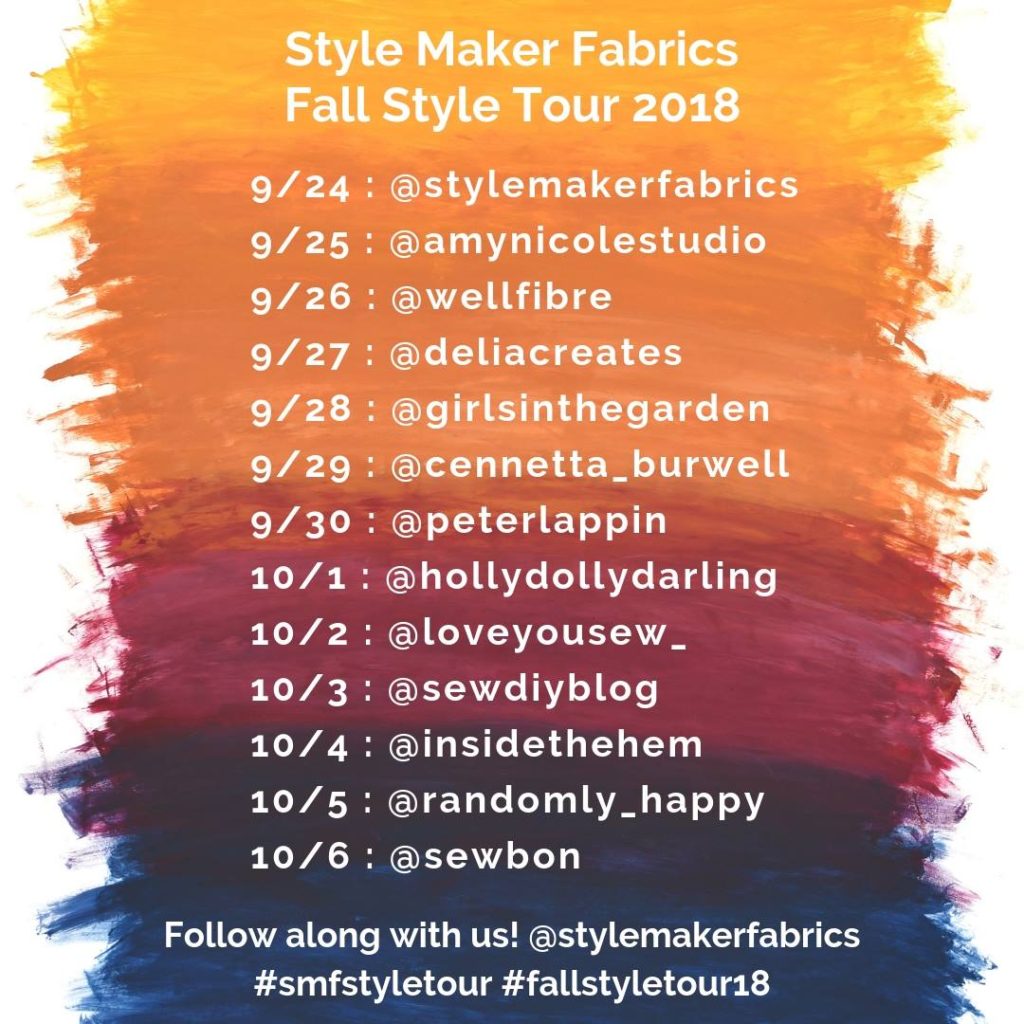
Don’t forget to check out the rest of the Stylemaker Fall Tour inspiration and links here!  Tomorrow, Beth with Sew DIY will reveal her make.  Below is the entire tour card if you would like to follow along via Instagram as well.

What are you making this fall???

Happy Sewing Friends!

Cristy


Fabric was provided by Stylemaker Fabrics for this post.  All opinions are genuinely my own. 


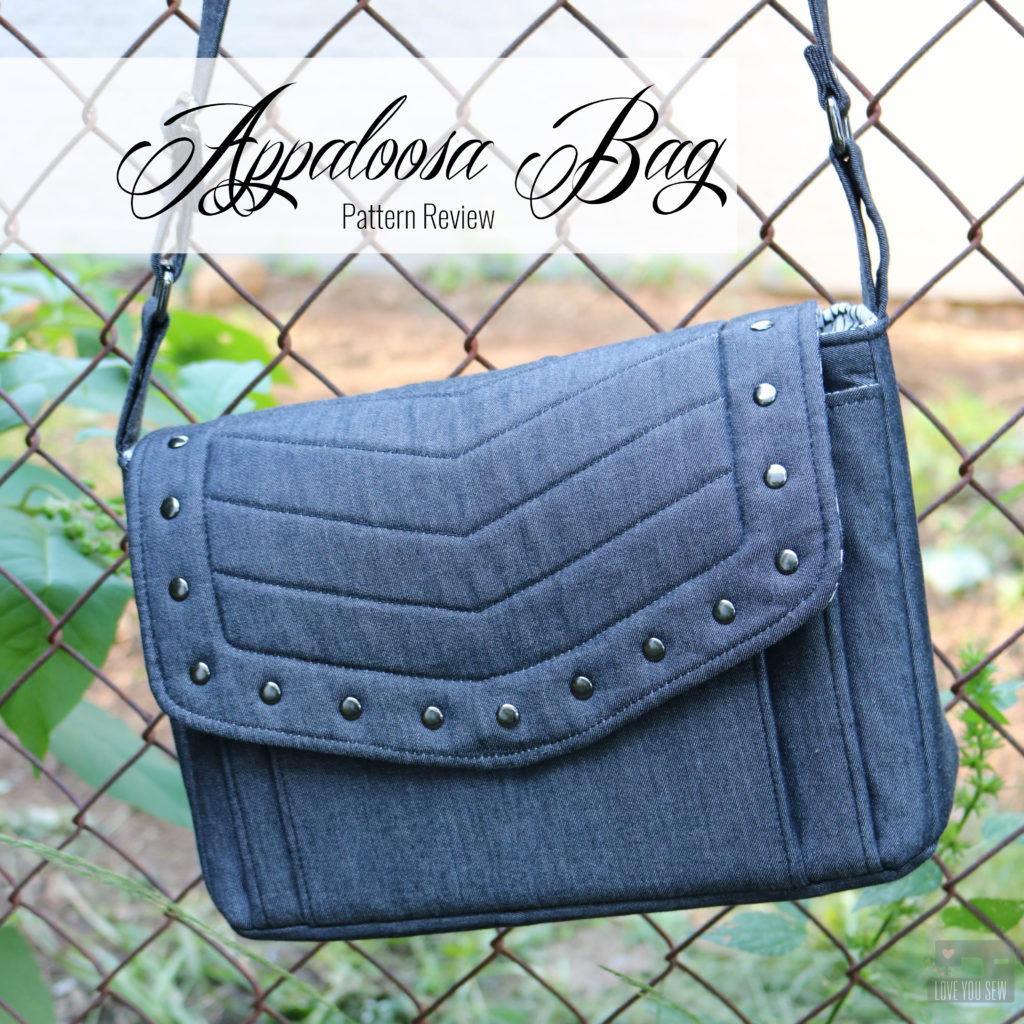
Appaloosa Bag – Pattern Review

A few months ago, I had the amazing opportunity of taking one of Sara Lawson’s bag-making classes…at my local quilt shop!  I’ve been trying to attend one of her retreats for awhile and was so glad she came to Columbus. Sara designs some pretty fantastic bags and accessories through her business, Sew Sweetness.  The Aeroplane bag was one of my first names and you can read about it here.

We have worked together in the past and I have a few guest posts on her blog.  There is one from Purse-Palooza which you can read about here.  I also wrote a review on a Craftsy Tailoring class which you can read about here. Sara is such a sweet and humble person but she’s such a rockstar to us bagineers!

I have to admit, the Appaloosa bag (aff link) would not have been my choice for a class with Sara.  But I completely understand the bag we make has to be done in the time allotted, which was about 6 hrs.  However, I found it as my own personal challenge to try to make this pattern, more “me.”

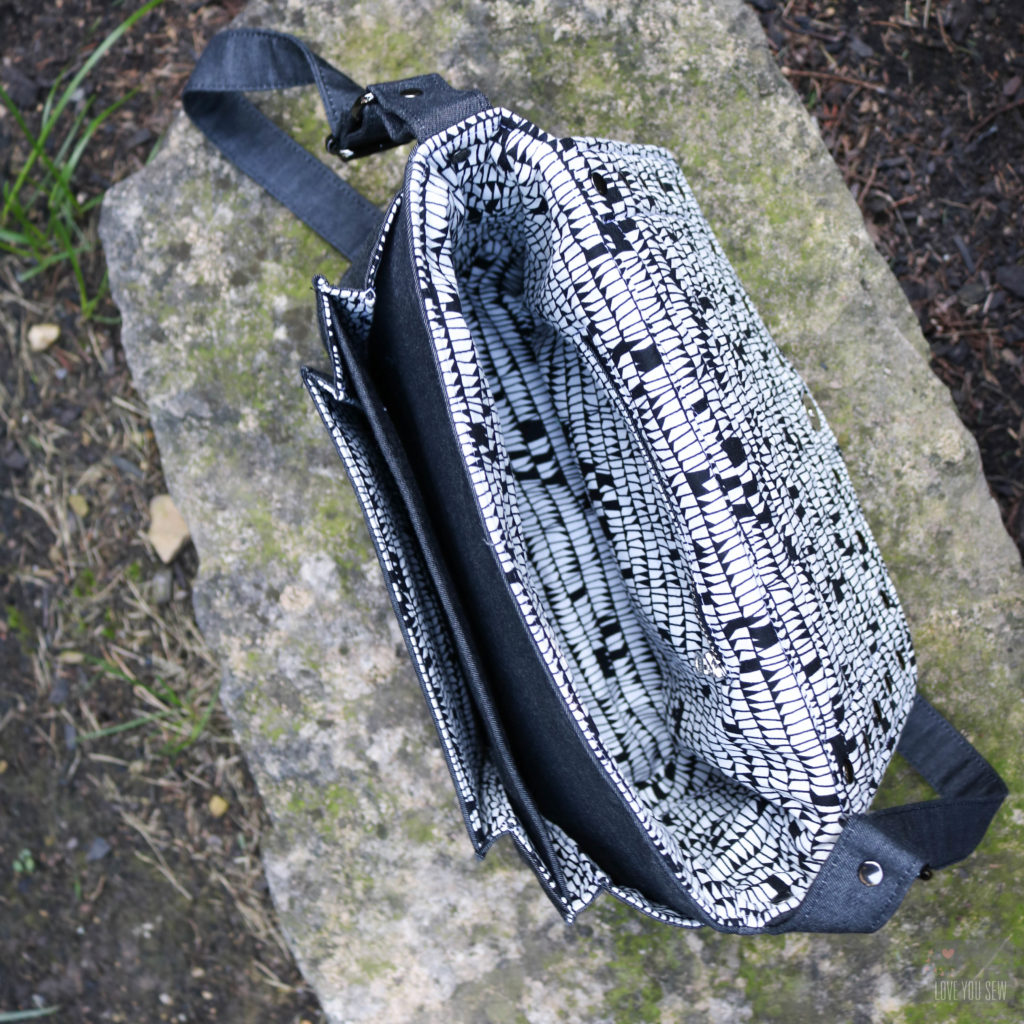
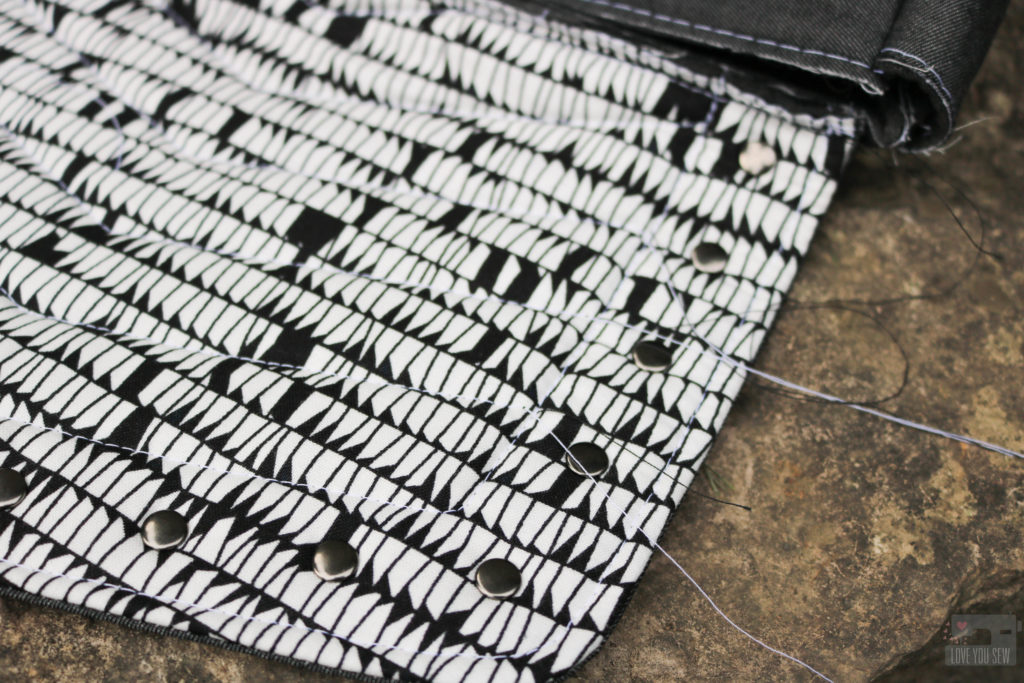
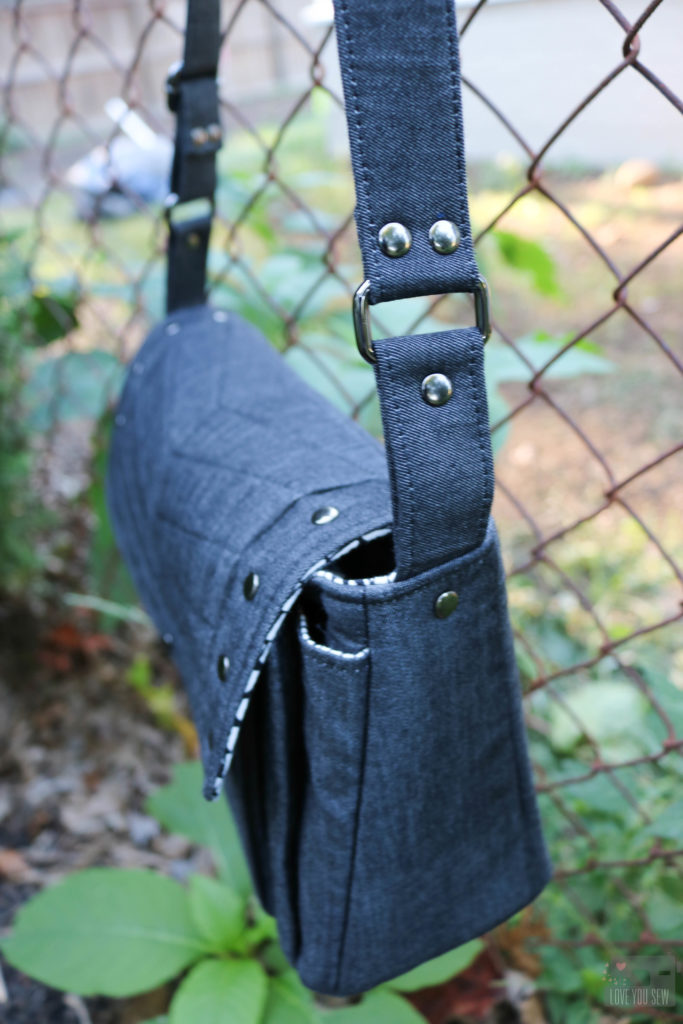
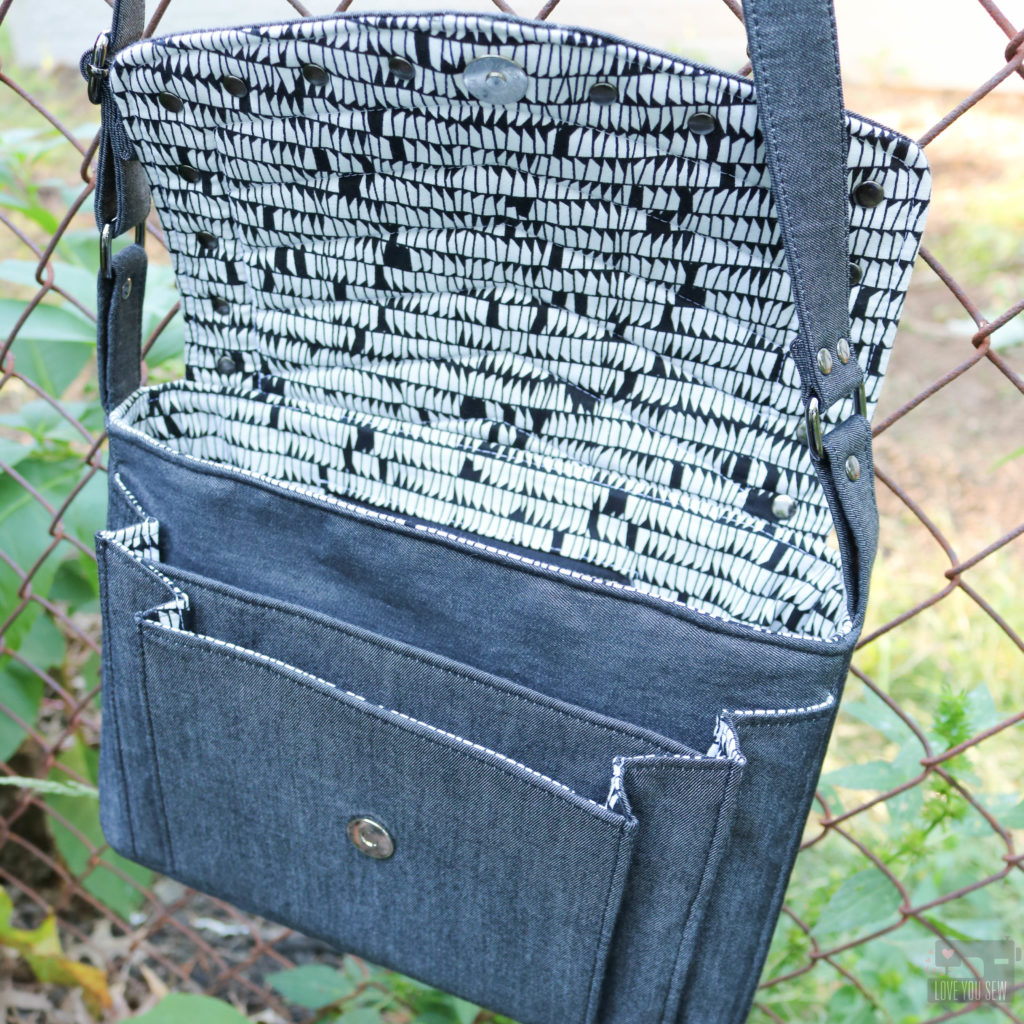
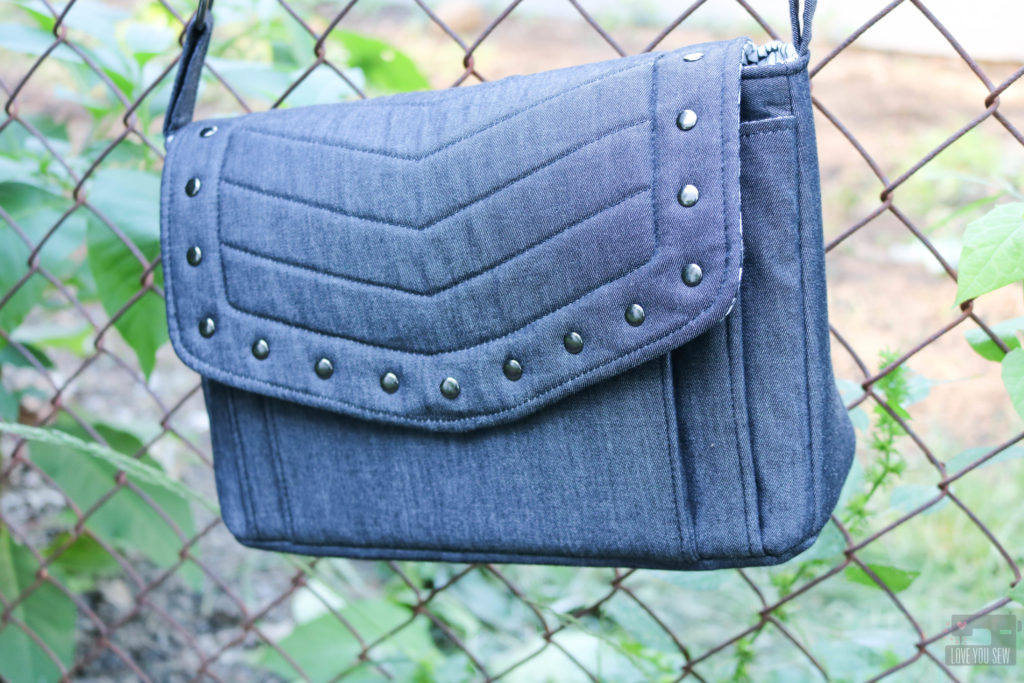
I used a light weight black denim by Robert Kaufman as my main fabric with Carolyn Friedlander’s Euclid as the lining.  This would keep the bag modern and pretty versatile with any wardrobe.  And since I was using the black denim, I made sure to use black Soft and Stable in the construction of the bag.  Otherwise, you run the risk of the natural colored foam peeking though the needle holes.

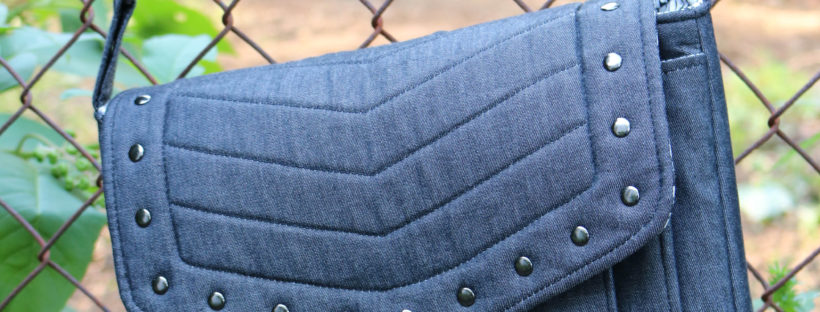
With the black denim being pretty plain, I just had to do a little bag quilting. (You know me!) I took some inspiration from current Rebecca Minkoff bags to try to pull off something very modern and on-trend.  With the pattern calling for all of the Soft and Stable, I knew the texture would be perfect on this bag.  I made a simple herringbone design using my favorite Chalk-pencil.  You can still see the marks on the picture above.  The lines just erase right off when you are finished.

Like most other quilting, I made sure to use my walking foot and created long thread tails to hide later on.  I used all Gutermann polyester thread.

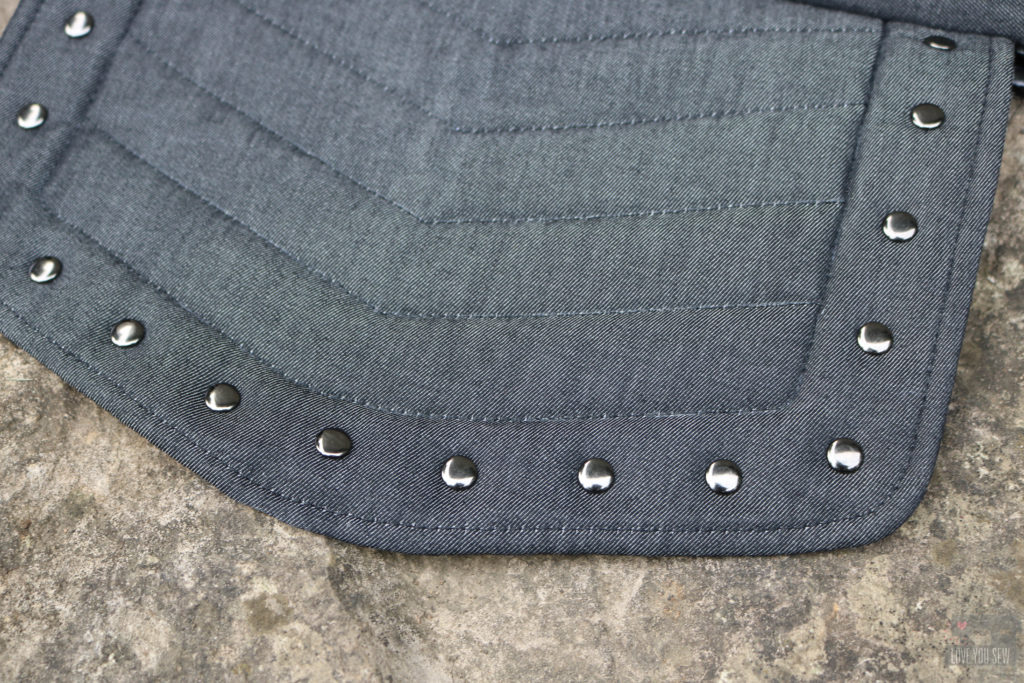
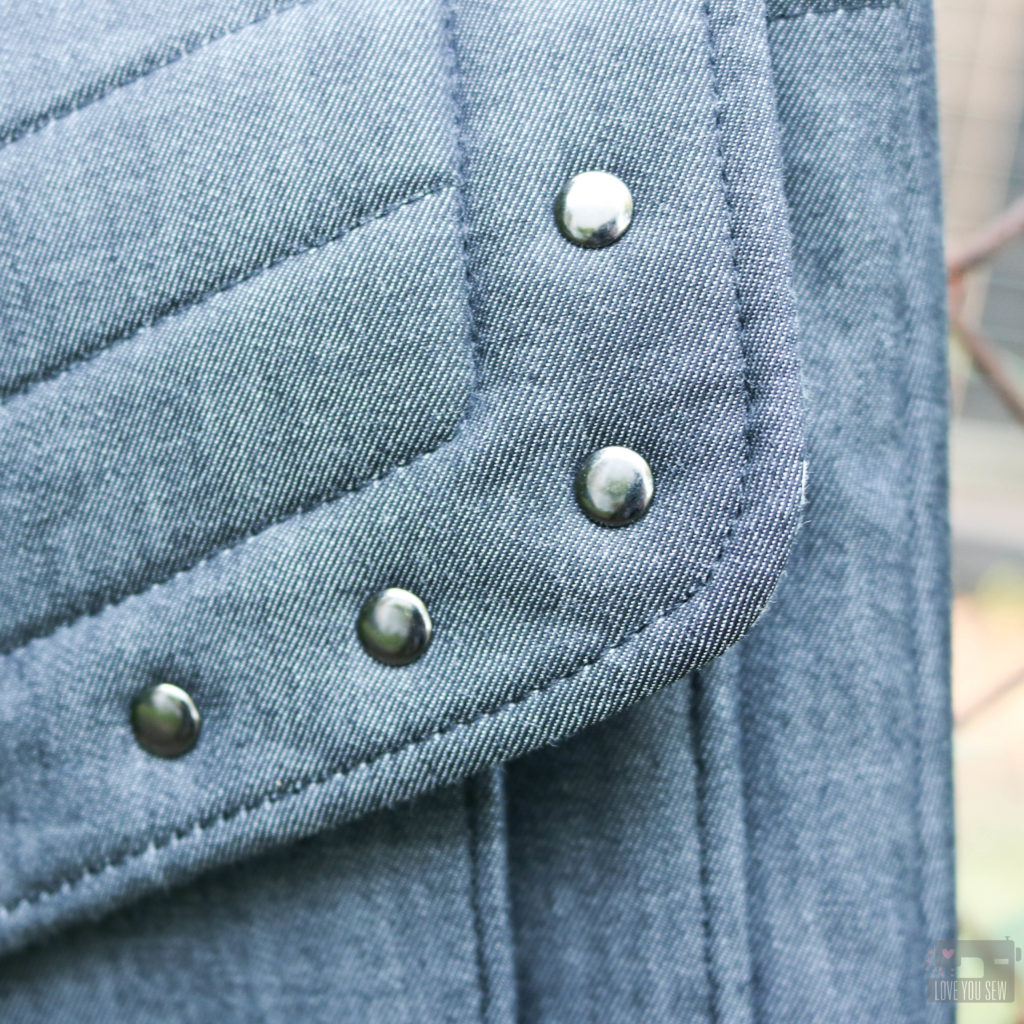
I used rivets all around the border of the flap to add the extra “edge” on this bag.  Initially, I was going to use nickel hardware (because that’s what I had on-hand,) but Sara helped me decide on the gunmetal and just wait to finish my bag later.  Yeah…that was a pretty good decision.

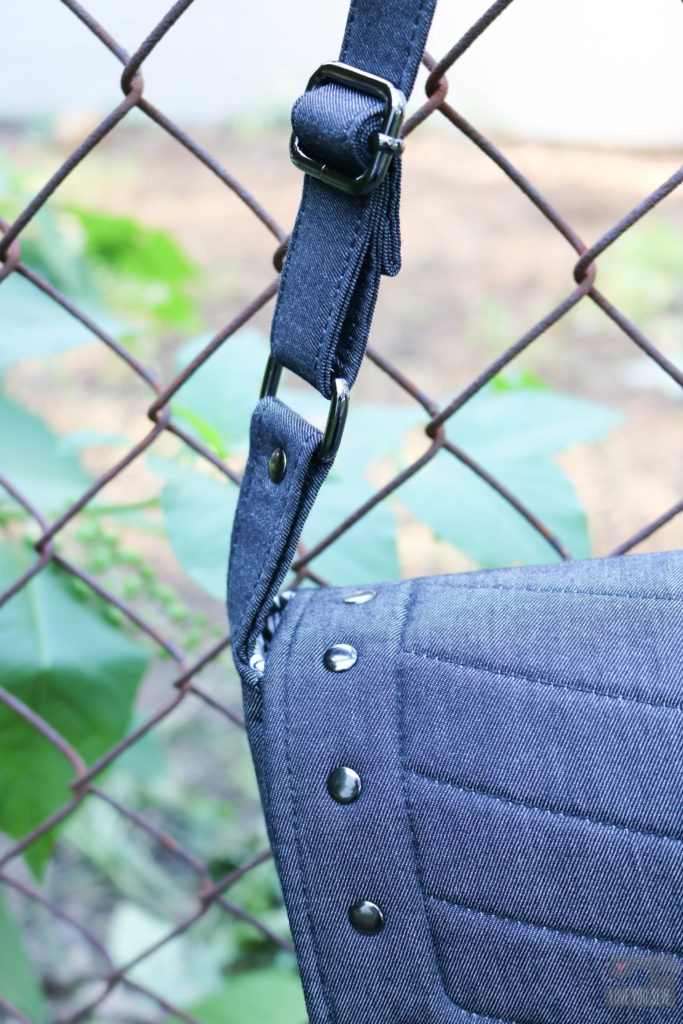
The slider and rectangle rings were quickly ordered and boy…do they make the bag.  🙂  The gunmetal really works with the feel I was going for with this bag.

So….of course, I added a few extra rivets around to balance out the front flap.  Also, I made two strap extenders instead of just one.  After having the bag sit around waiting for the hardware, I thought I would use this more as a cross-body than an under-the-arm bag.  It just works more with my lifestyle with active young kids.

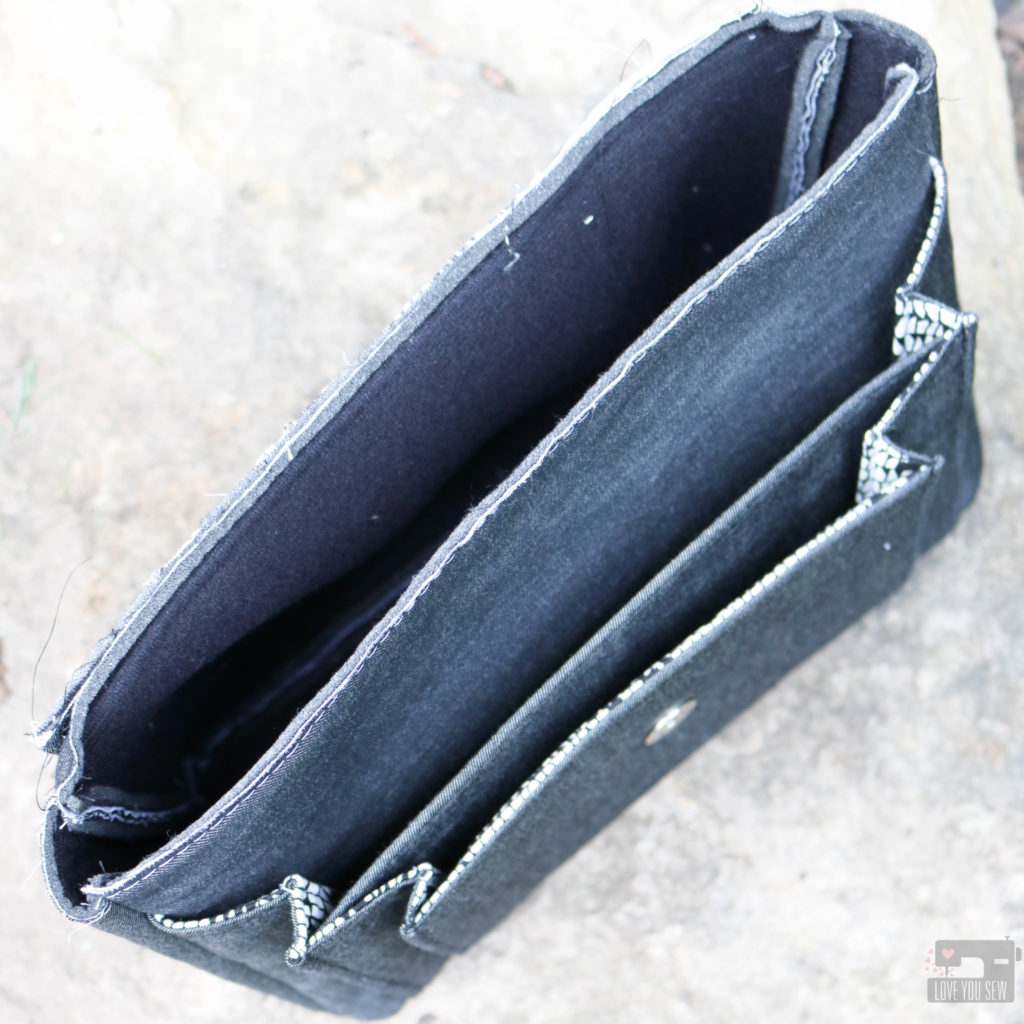
Having Sara around to instruct and so many nice bagineers to assist, the Appaloosa came together so quickly.  We definitely didn’t need the full 6 hours at all.  The most challenging part was just sewing through all the layers of the front accordion pockets to the sides of the bag.  I would definitely recommend some large needles and to hand-crank it if needed.

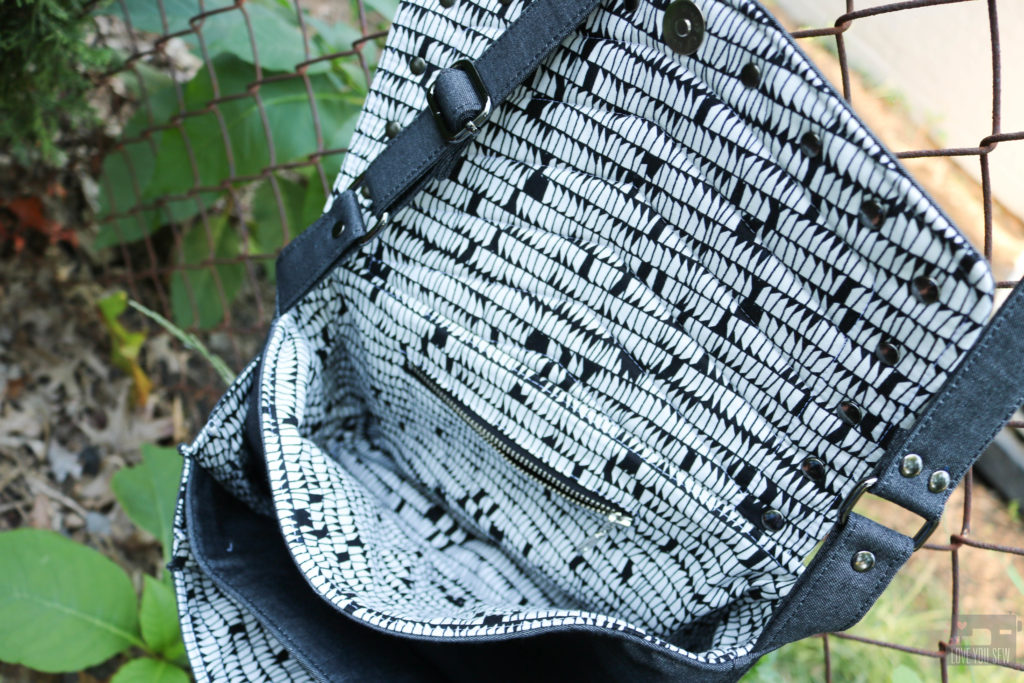
I love the multiple pockets in the front of the bag…and there is still another zip pocket in the main compartment.  Since I used a metal zipper, I did run into the issue of having to shorten and adjust the one had even though it was a 9″ as called for in the pattern.

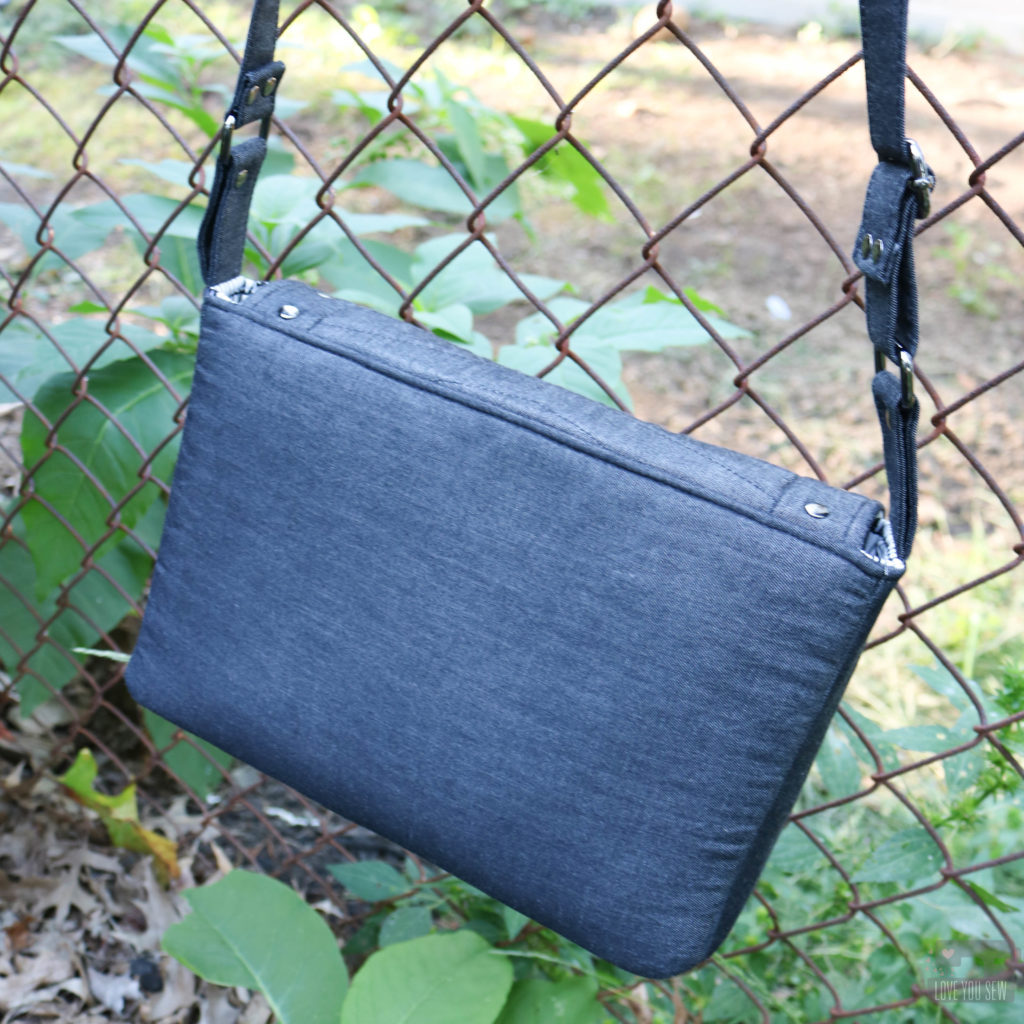
The back of the Appaloosa is nice and smooth.  With all the pockets on the front, you really don’t need anything on the back.  Although….once I get my new black leather labels, this bag will definitely get one toward the top-center of the back.

Verdict – I love this design!  Initially, it wasn’t for me, but I made it my own.  It made me think out of the box a little bit and now I want to go through all the patterns I own and take a look at each one differently and how I can own each one.  It’s amazing what the fabric and some hardware can do to completely change up a bag.

For the Appaloosa bag, you can purchase the pattern and/or the instructional video here.


Please note there are affiliate links in this post.  I will only ever link to products I have used myself  and as always give you the real deal in my opinions and experiences.

Heritage and Arizona After Fabrics :: Portside Duffle

April Rhodes has done it again.  She has just dropped not one, but TWO new fabric collections with Art Gallery Fabrics.  Arizona After is a gorgeous extension of April’s inaugural Arizona line with some new prints and some recolored with soft dusty pink and blues along with some deep rust and mustard.  The color combos she puts together are always so striking.  Heritage fabrics consists of garment focused substrates…including the new RAYON.  With April’s clothing patterns, she has always been a designer who knows scale for the quilters and the garment sewist alike.  It’s the perfect collection for the me-made makers!

Beyond the fabrics, April’s inspiration for the collections is just so touching.  The way she talks about her family and memories of her father and grandmother is just pure love.  Truly awesome. I love how a lot of the designs were just a part of April’s everyday life and over time, have been permanently imprinted in her head.  To bring these images to life brings so much light to her eyes and it’s been amazing to witness it all. These fabrics are just gorgeous and I’m happy she’s shared them with all of us….because whoa, right?!?

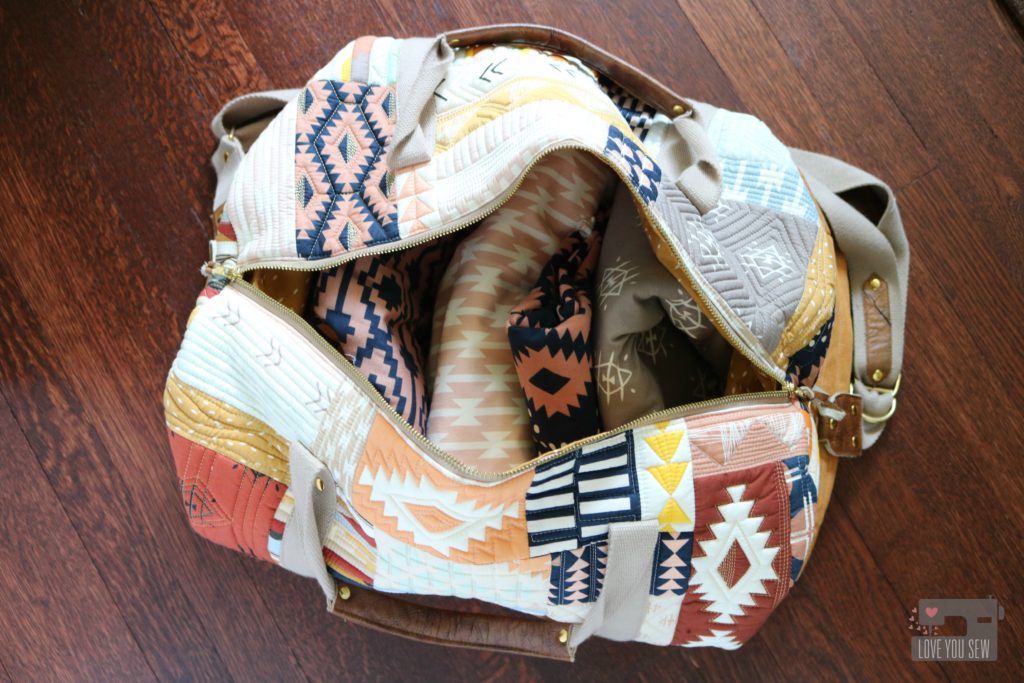
When I was asked to make a bag for April’s Spring Quilt Market Booth, I (of course) agreed.  She has become a dear friend and I will always help her, as she has helped me in so many ways.  April asked me to make a larger duffle and suggested a quilt-as-you-go method for easy patchwork because with Market…comes some tight deadlines.  I got to immediate work, but quickly realized I had to Turn. It. Up.

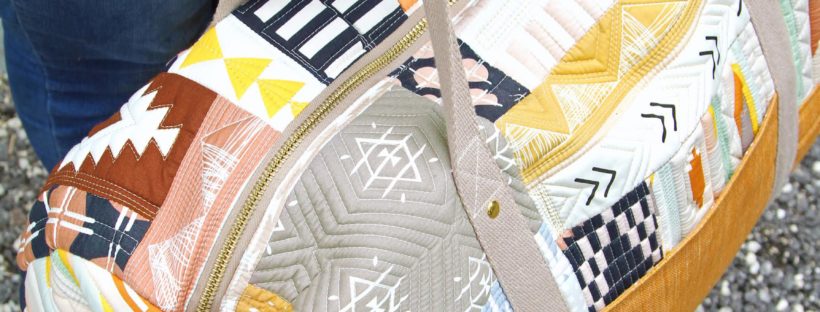
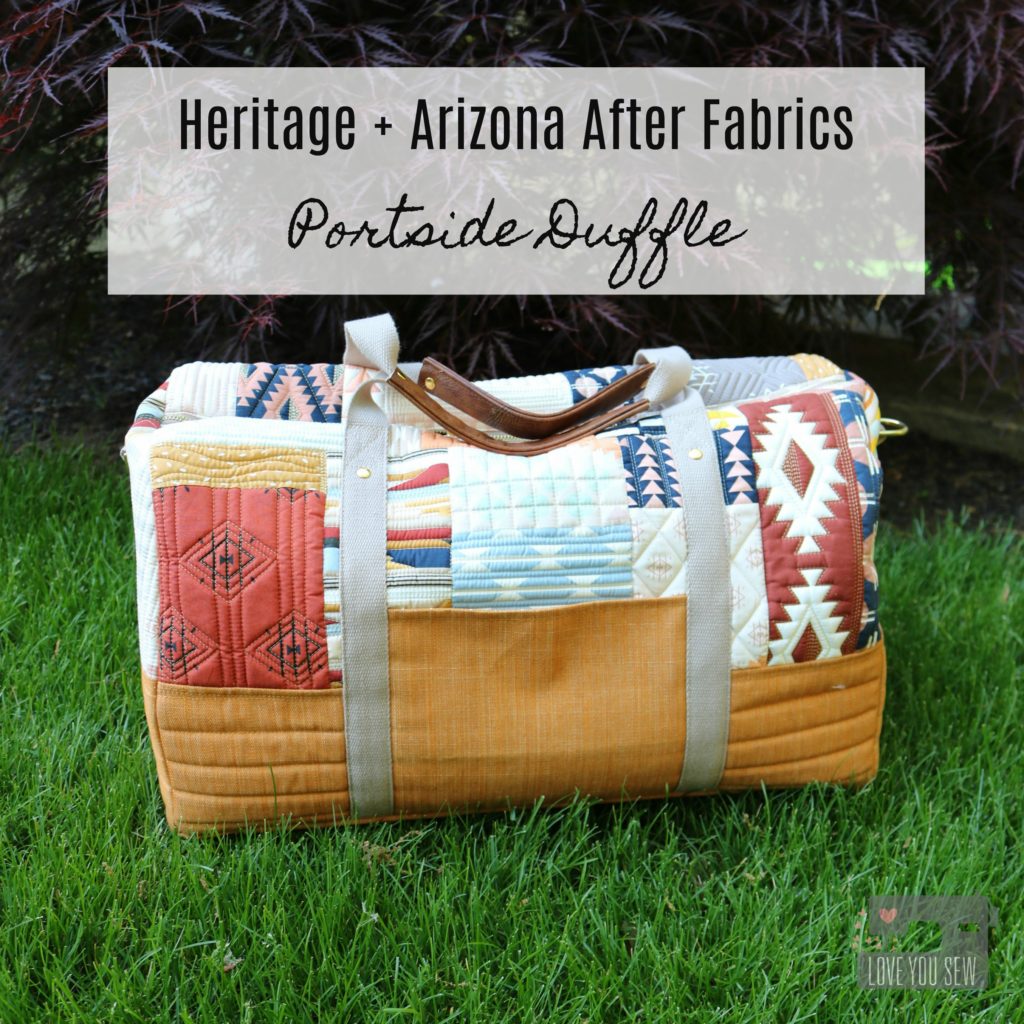
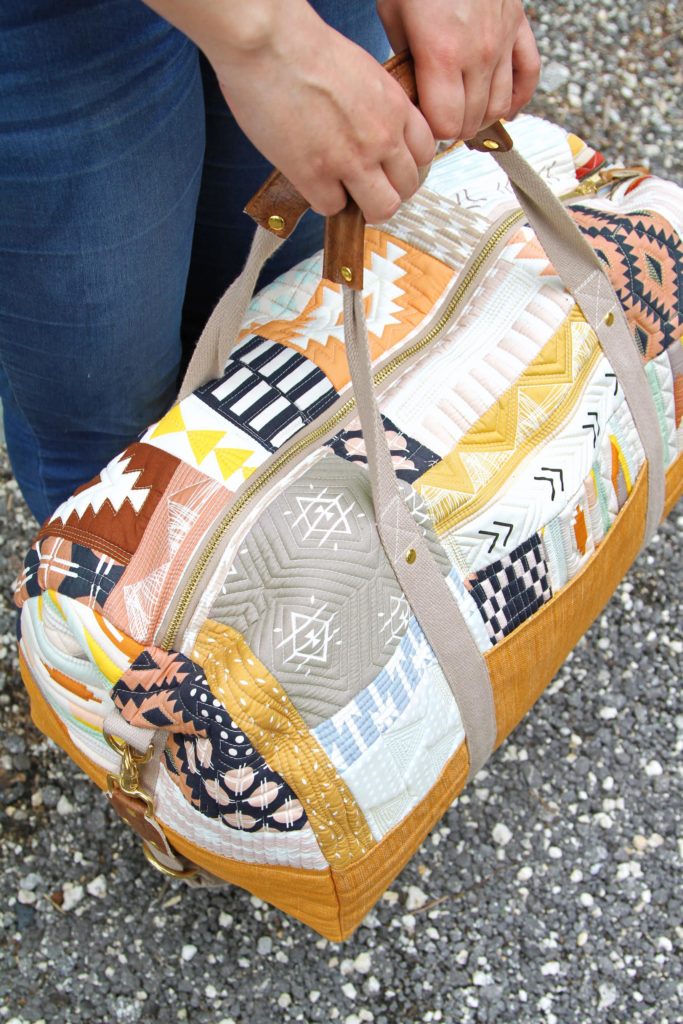
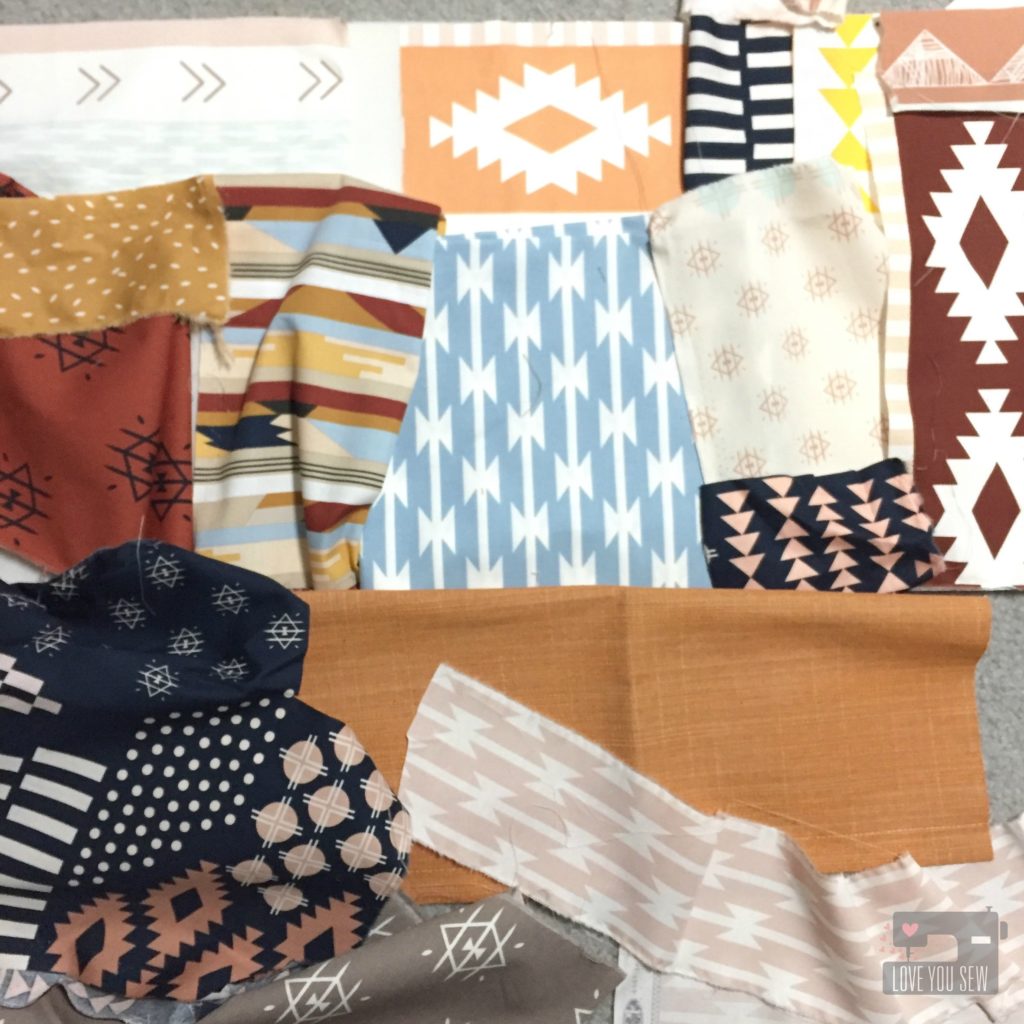
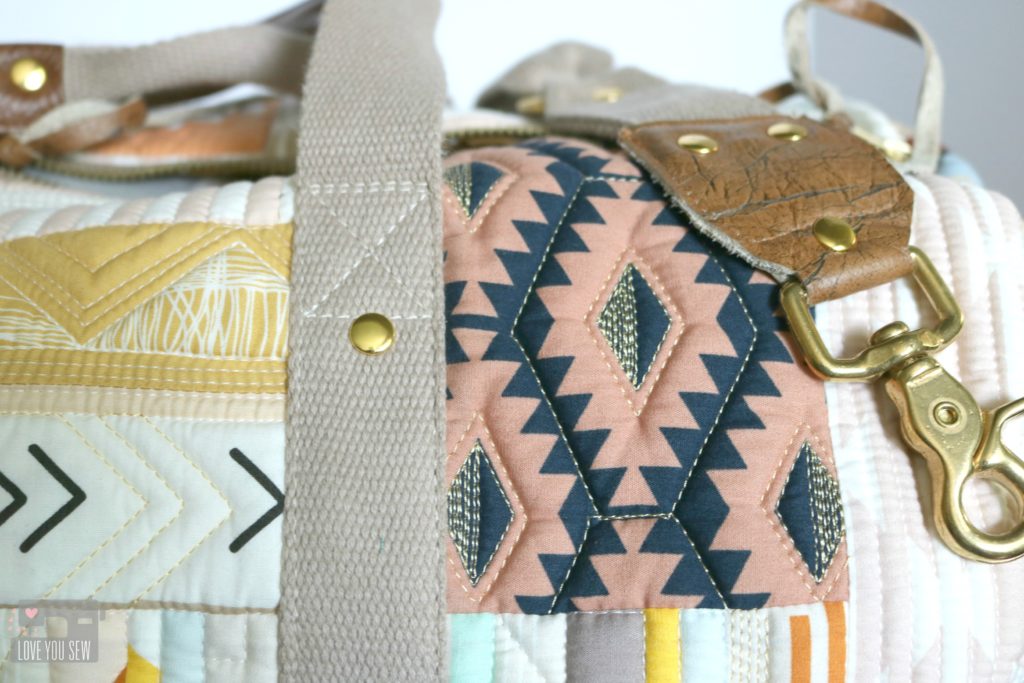
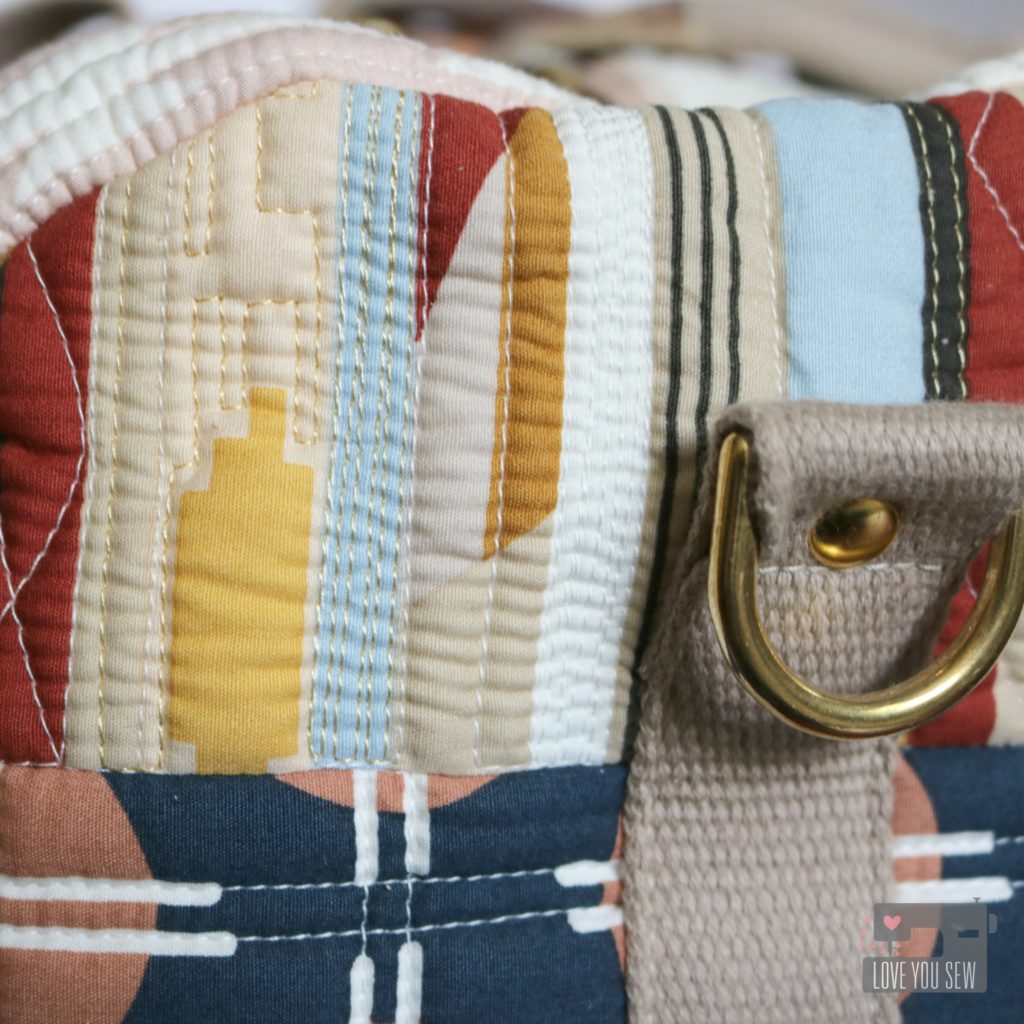
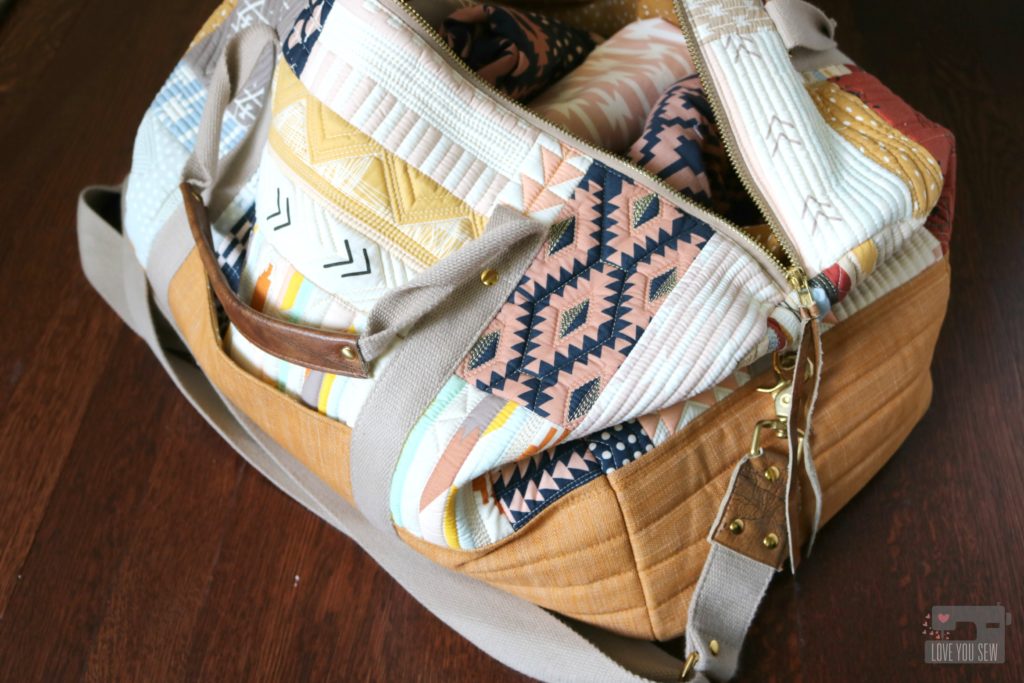
All 14 quilt cottons in the Arizona After collection was used to make the Portside Duffle Bag by Grainline Studios.  It’s the perfect bag to showcase these fabrics with all that surface area.  I loved playing with all the color combos while mixing and even deconstructing, some of the prints.

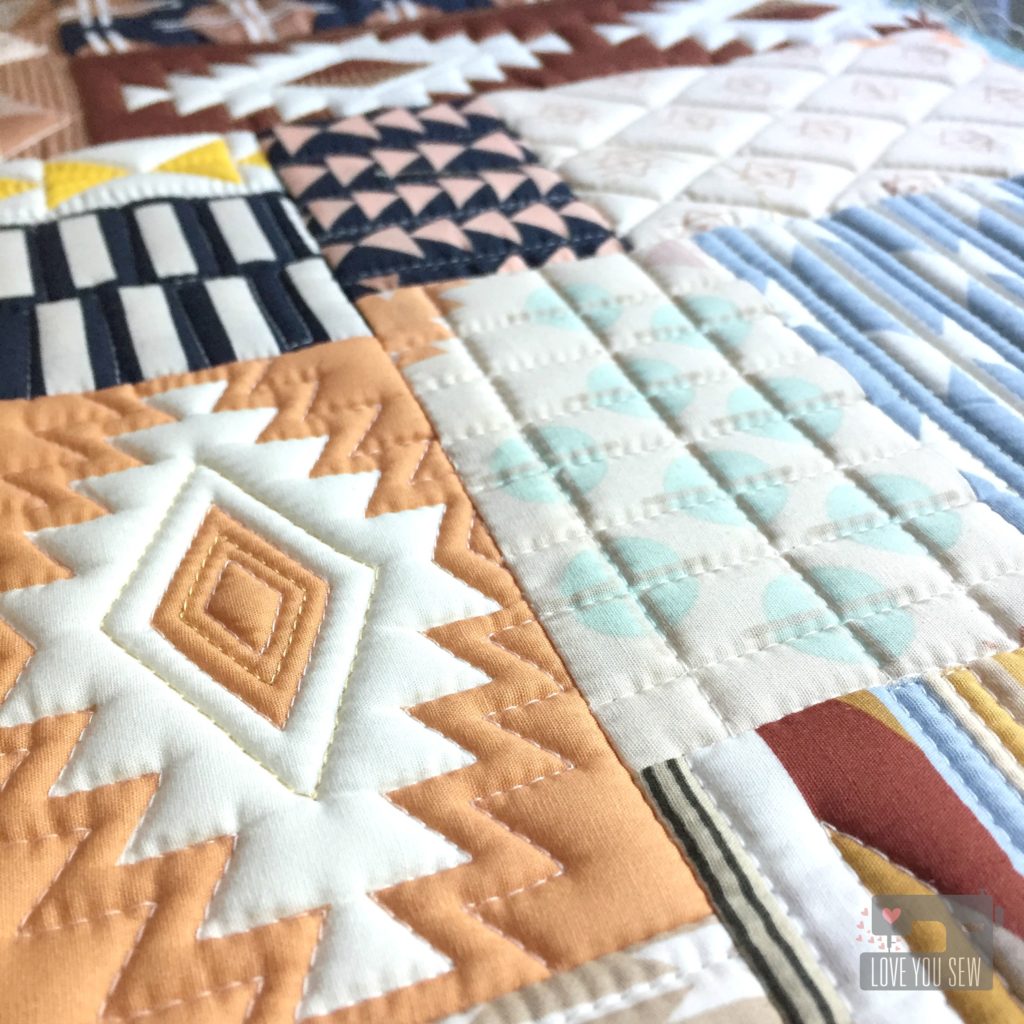
Once I started to quilt with my walking-foot on the Soft and Stable, that texture just got me.  I knew I had to add more and more quilting…and change up the designs with each print. Then it dawned on me….ooooh, metallic thread would be A-mazing with this palette.  The gold really brings out the colors and I’m so happy with how it turned out. TIP: Cut a larger piece of soft and stable than the pattern requires. Quilt and then cut to size. Don’t forget to baste those edges!

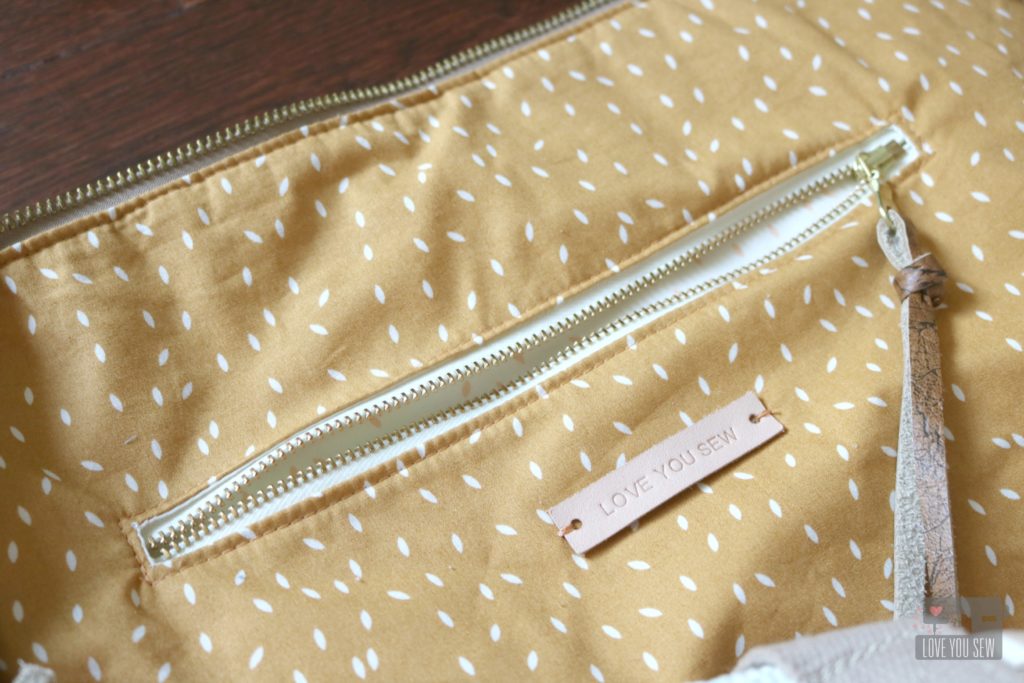
Art Gallery’s textured denim in Canyon Sunset was the perfect complement to Arizona After and is a nice durable fabric for the bottom accent of the duffle bag.  On the inside, I used the Scattered Wood print and added an additional zip pocket…because we can always use some extra pockets.  I love the look of brass zippers and with the gold thread, this combo obviously had to happen.

For more texture and to turn this bag up another notch, I used hardware from ARmercantile combined with some leather from my sacred stash.  Guitar-inspired bag straps are popping up all-over the place and I just had to add that look to this duffle.  The added rivets bring out more of the brass and help round out the look.  Who says a quilted bag can’t be modern and on-trend?  I love being able to combine my love of quilting with my love of bag-making….and the gorgeous fabric definitely helps.  Thank you Arizona After for the inspo!

Make sure to check back on April’s blog and Instagram all throughout July for the up-to-date info on the Blog Tour.  Next up will be an Instagram loop on July 5th and I heard there maybe prizes involved 😉

Last, but not least, don’t forget to tag #heritagefabrics and #arizonaafterfabrics with all of your makes.  I can’t wait to see all of them!

Project Summary:


Fabric and pattern for the Arizona After + Heritage Blog Tour was provided.  There are affiliate links in the Project Summary.


Something Old Something New – Festival Bag Upcycle

I’m a fan of fashion.  But as a mom (and as a work-at-home one,) there isn’t much motivation to step past the yoga pants and a clean (smelling) tee most days.  I do admit, when I can get my act together, it does make me feel good to step out of my slip-on Vans.  Now that both my kids are in school,  I’ve been making a conscientious effort to bring my fashion game back – nothing crazy, but pulled together looks using cues from today’s trends.  Like Boho.

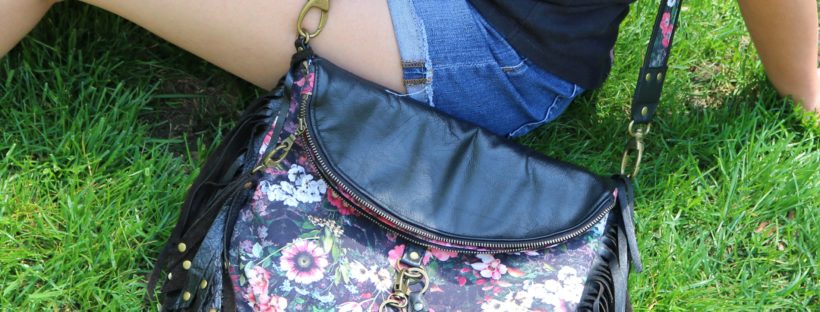
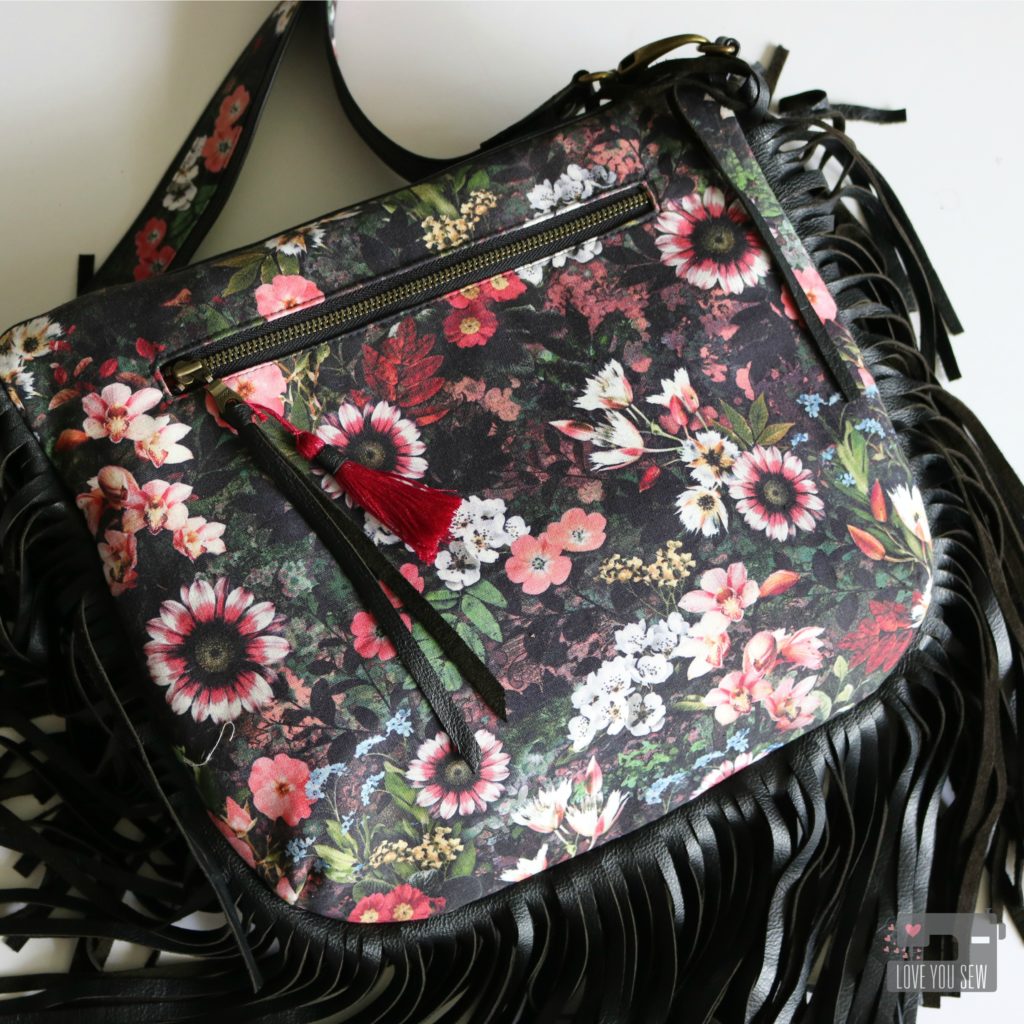
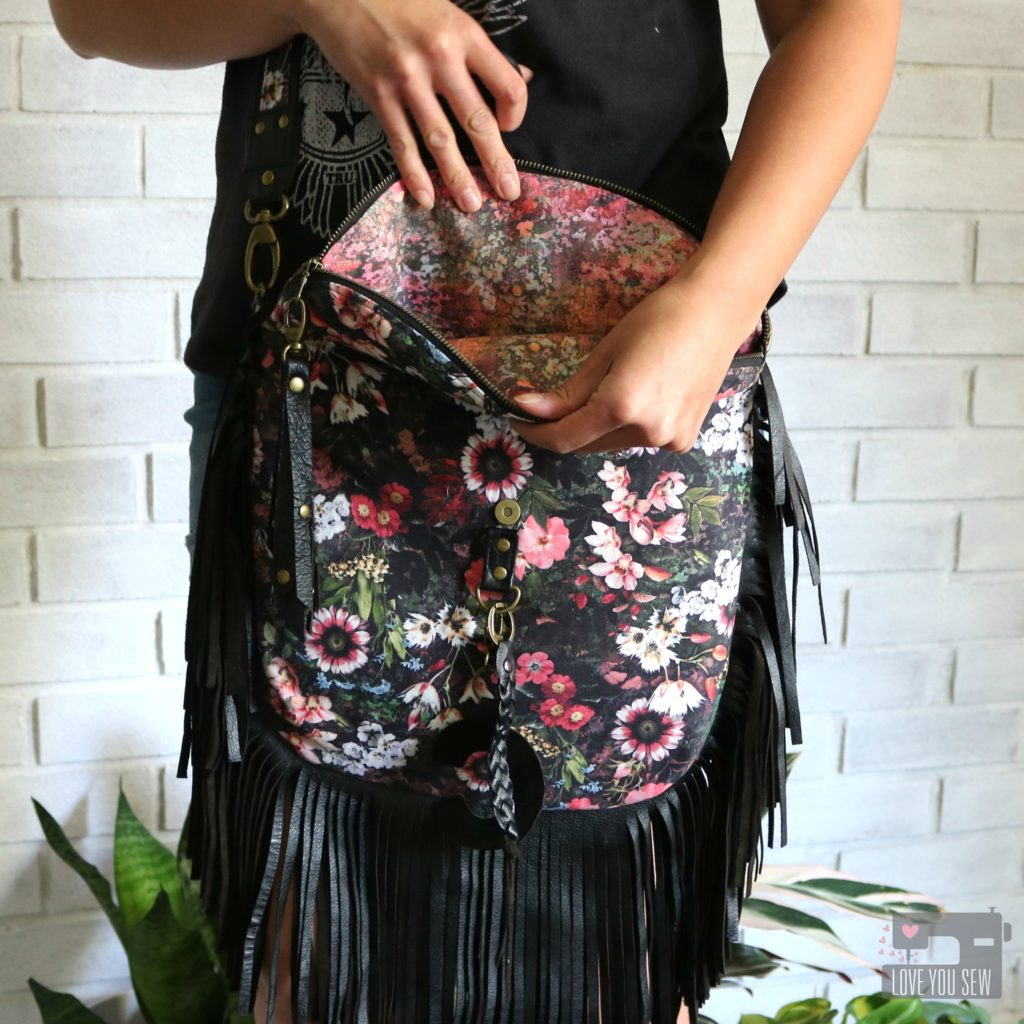
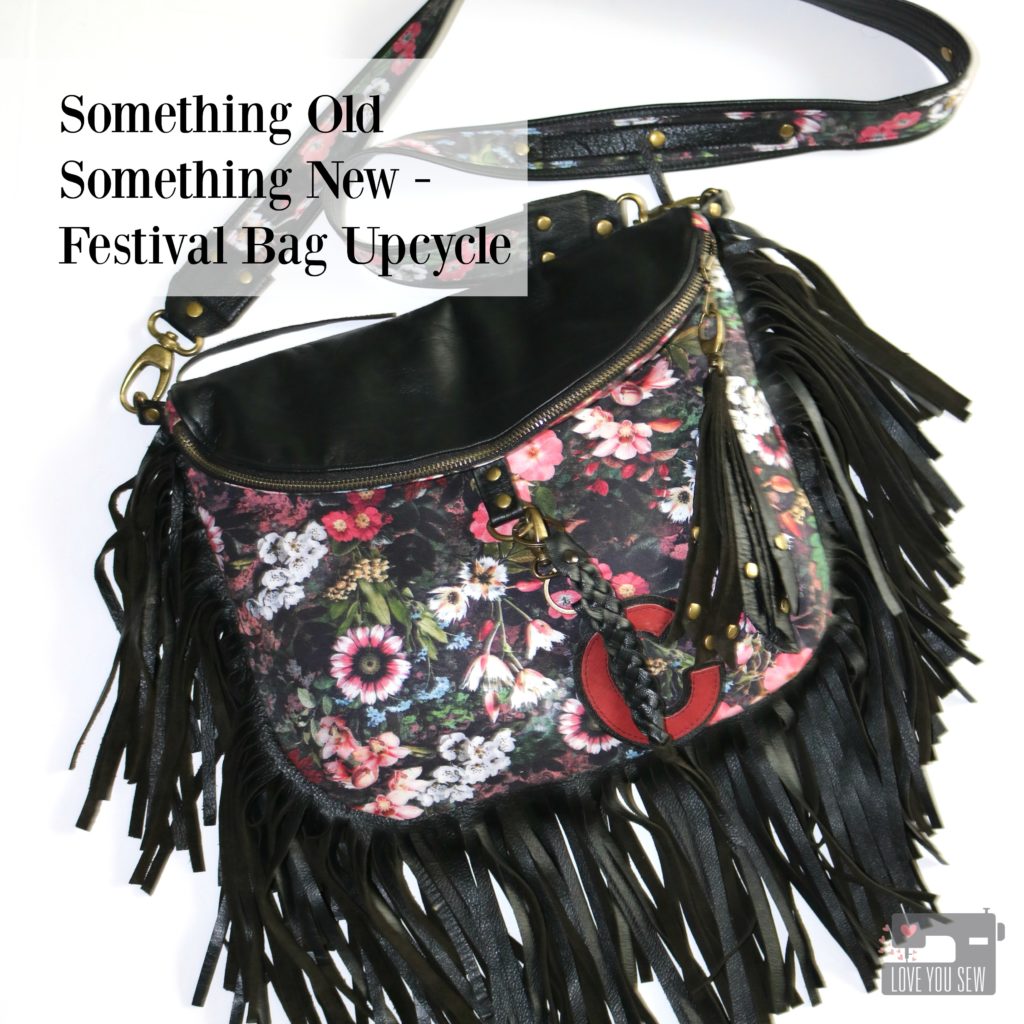
I love the relaxed (aka loose fitting) style of Bohemian fashion.  I grew up near the Philadelphia Folk Festival so I saw a lot of 70’s hippie clothes and I love the laid back vibe.  Pair that with my urban life in the city for 10+ years and the result is this “Festival Bag.”  It’s an edgier take on Boho with the dark floral, leather and antique brass hardware.

When RJR Fabrics asked me to work with some of their new fabrics, this Reverie line pretty much blew my mind.  I tend to work with more graphic prints, but the photo-realistic imagery in these Digiprints are amazing.  The best part, is that these fabrics feel JUST like their other high quality quilt cottons so you know you are working with the good stuff.

This Floral Fantasy print with the the dark background is just gorgeous. I love the style contrast of soft flowers with the intense black (which is how I like to mix up my own closet.)  I like combining hard elements with something very soft and feminine. I also like a mix of textures. So this soft quilt cotton HAD to be paired with some leather and lots of hardware, right?

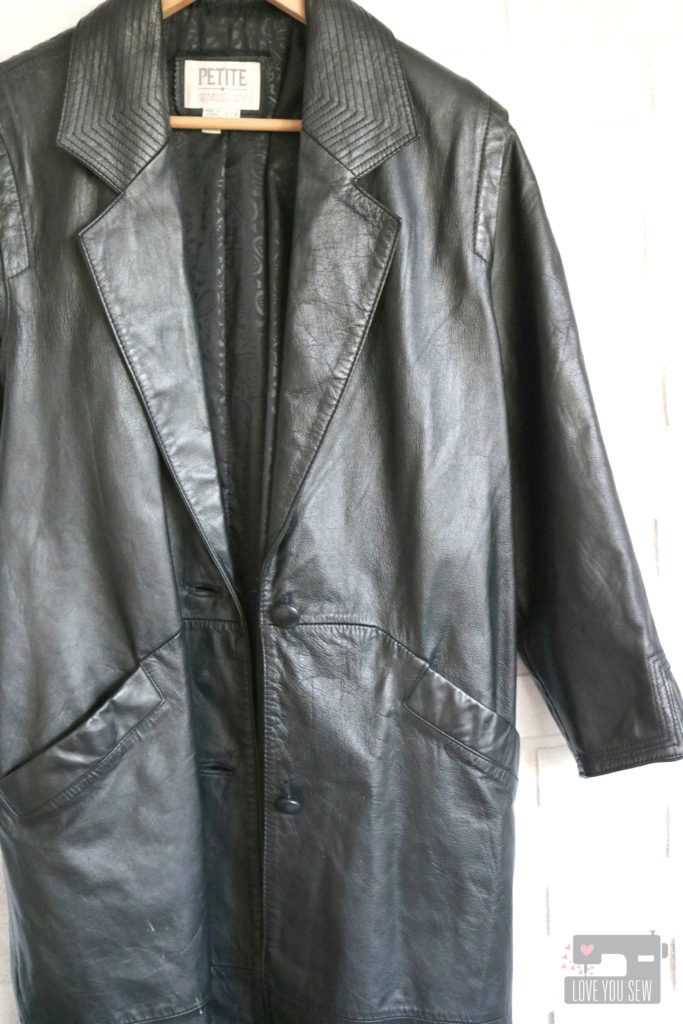
My mom knew I was upcycling old leather coats and gave me this great long duster about a year ago. I’m happy to finally use it.  This coat is such a great upcycle coat because of its size and the design. Too bad the shape…errr…lack of….just doesn’t work now. There are so many large pieces of leather to use in any project.  I used about 70% of this coat and I might use the rest on a future clutch…

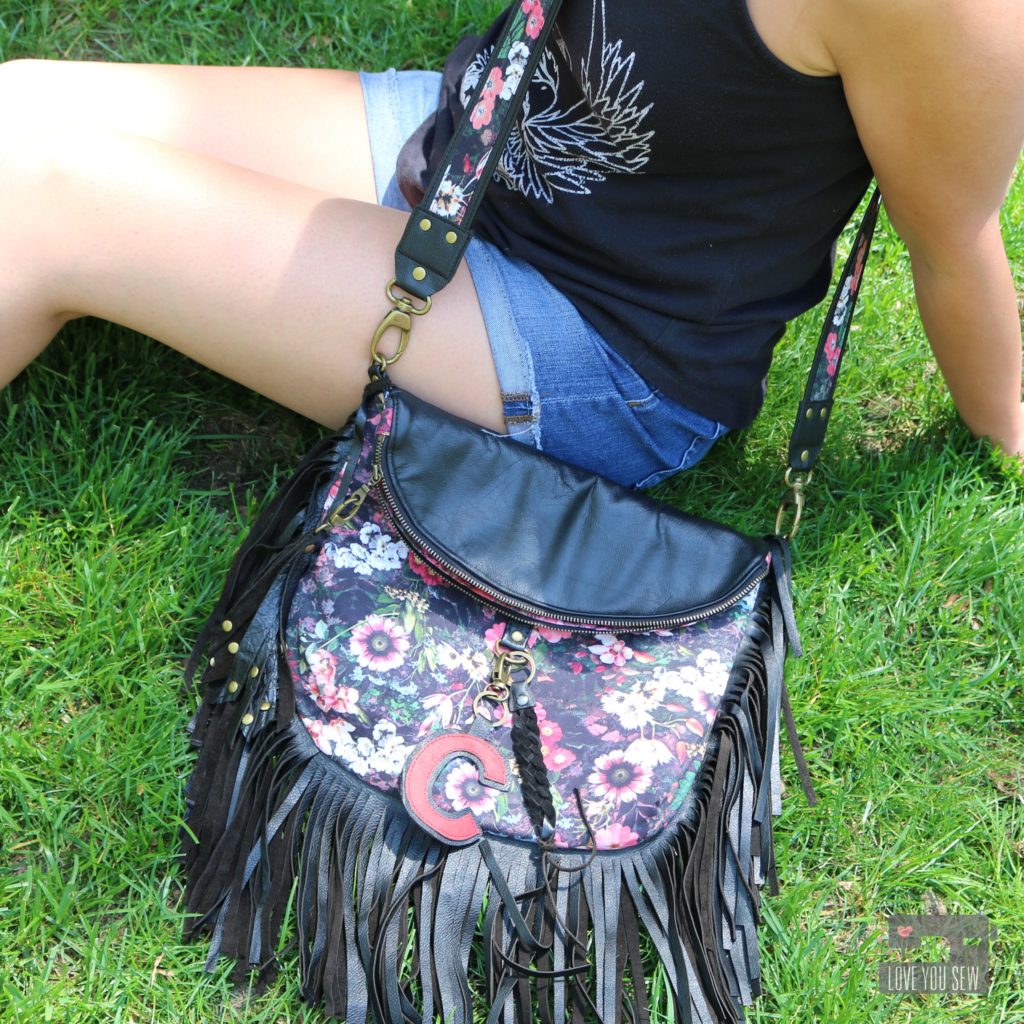
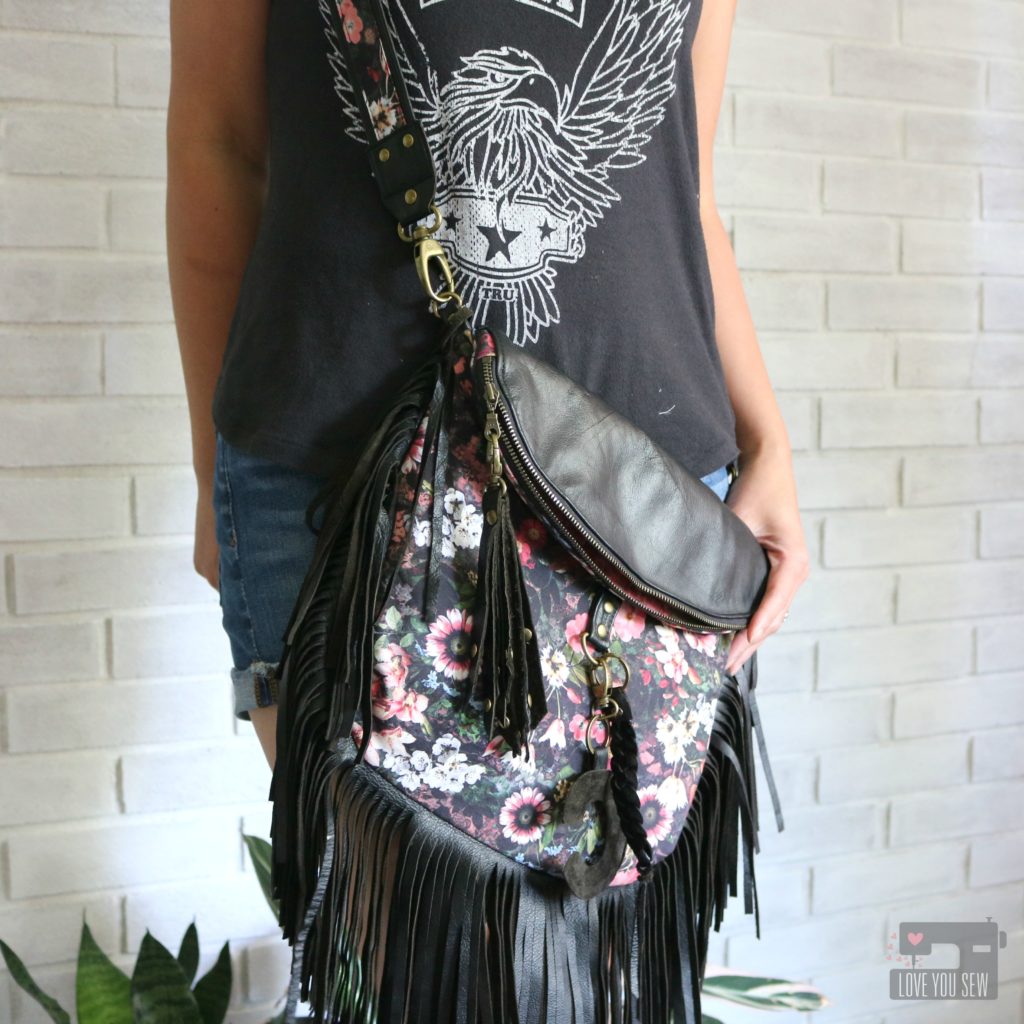
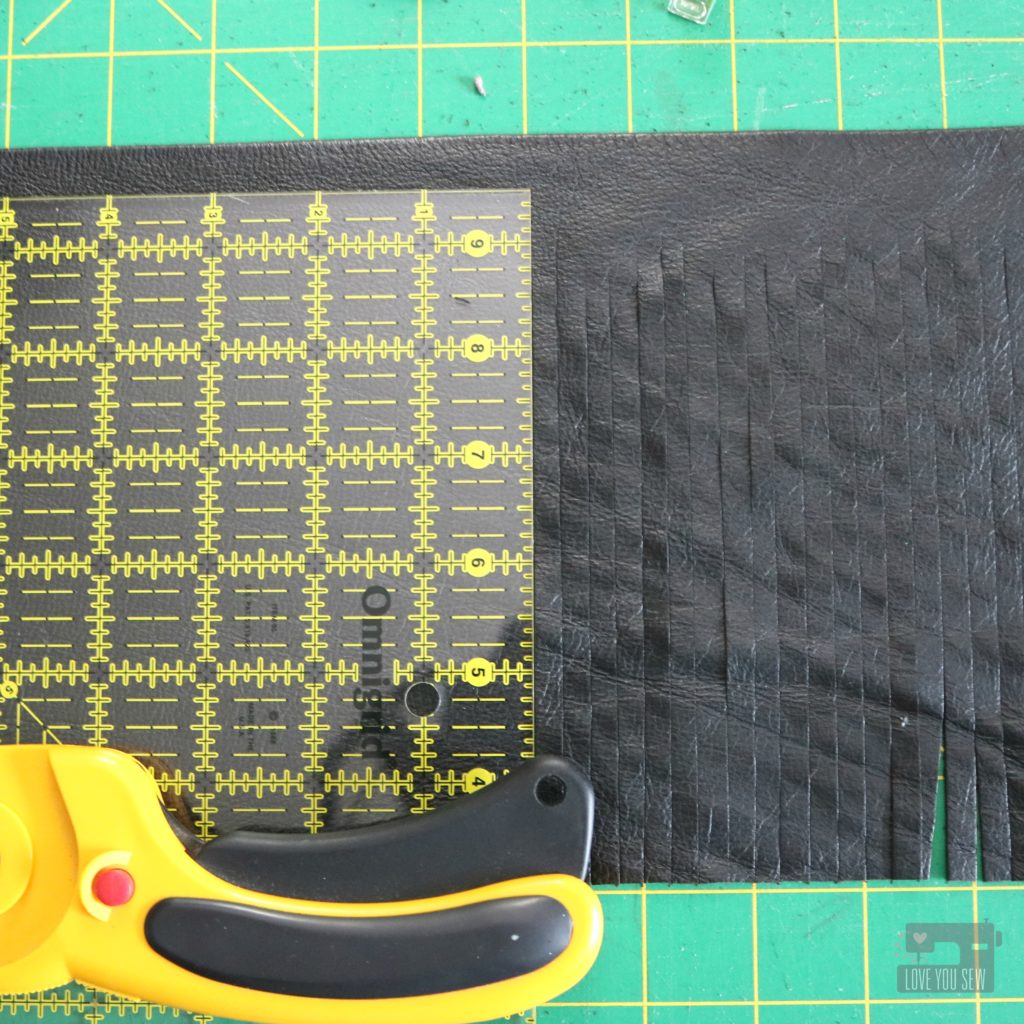
The larger pieces were all cut into 1/4″ fringe and double-layered all around the bag. Fringe is one of my favorite things in a bag.  It’s so much fun to walk and feel the swing of the leather. The pieces add movement and life to everyday running around.

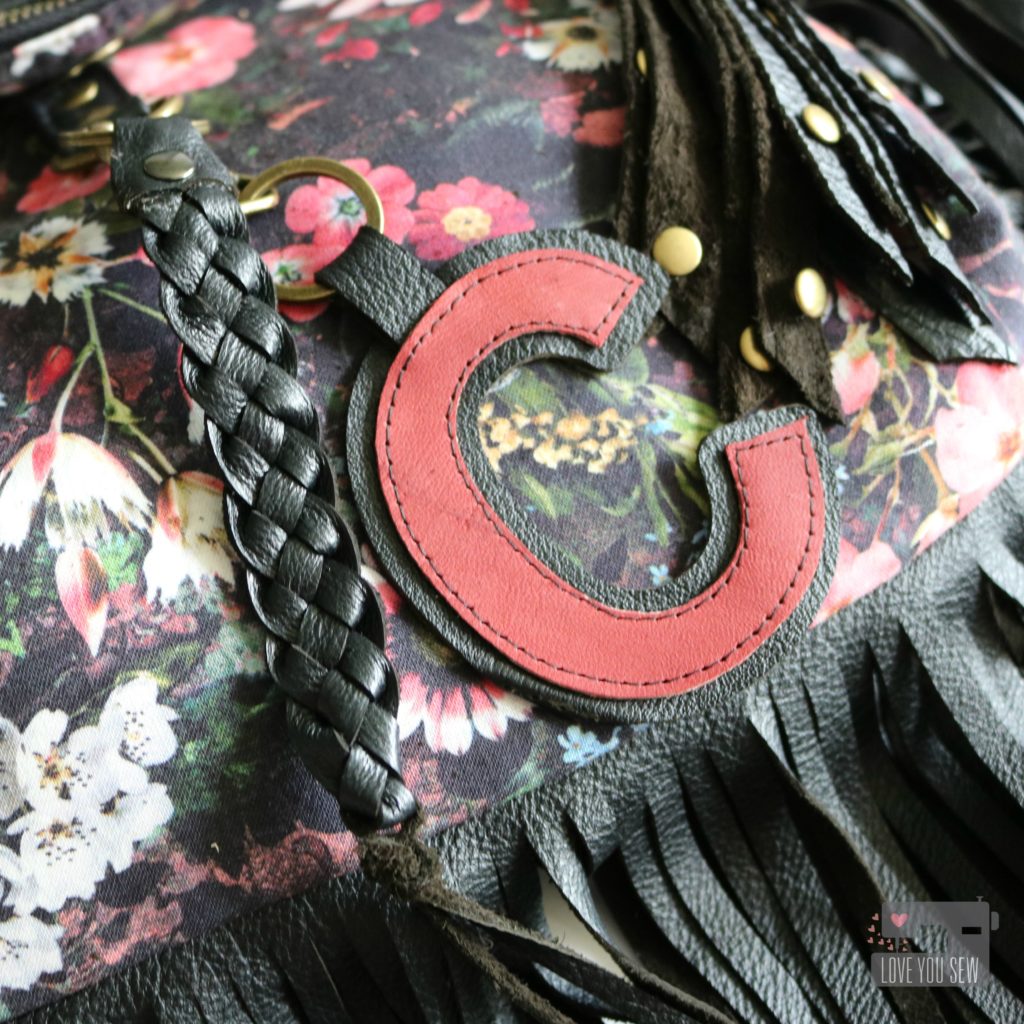
More leather was added to the top flap and I saved all the scraps. They are great to use in zipper pulls and bag charms. You can see I made some tassels and added lots of rivets. I also used my Silhouette Cameo to cut out my intials. Long skinny scraps can be turned into beautiful braids like this one as well.

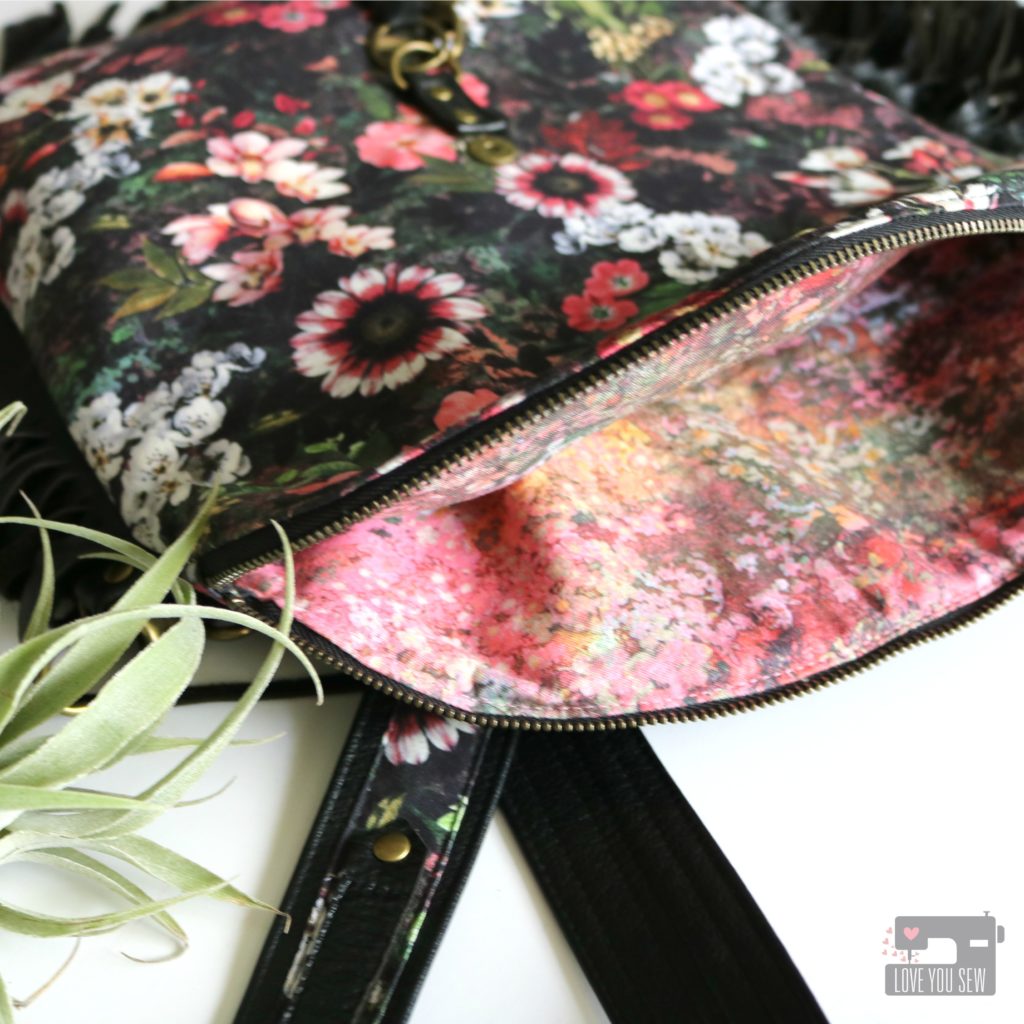
On the inside of the bag, there is more Reverie with the Mirage in Bloom print. It is the perfect complement to this style bag. It is a mottled floral which gives a very contemporary feel with the more muted tones.

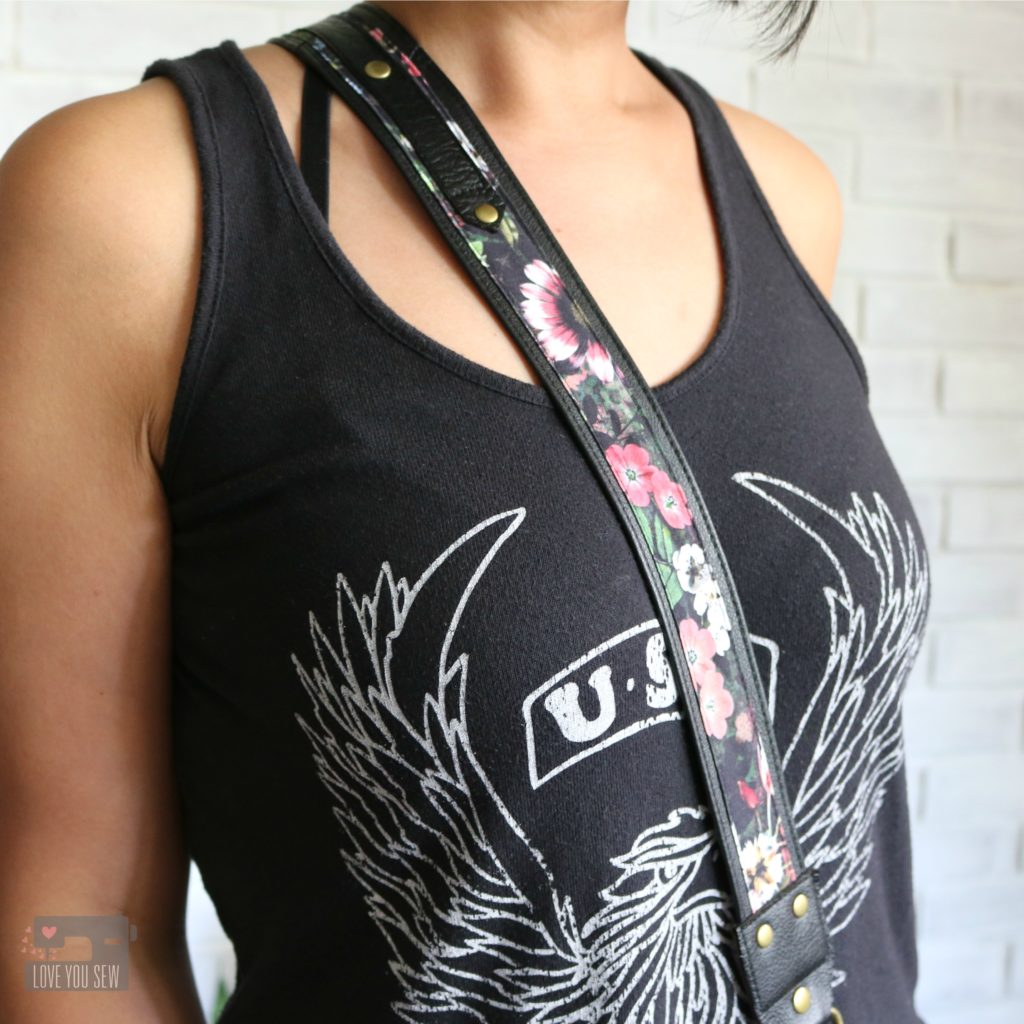
With spring music festivals in the news, I decided to make the bag strap differently than I usually would. Taking inspiration from the bands themselves, I modeled the strap after guitar ones. The leather strap is about 1 1/2″ wide with Floral Fantasy on top and another layer of leather all stitched in place with added rivet accents.

I am so in love with how this strap and bag turned out. I can’t wait to “rock” it all summer long.


Project Details:


This post may contain affiliate links.  Any compensation received helps to keep this blog running.