Holly Jumpsuit by Love You Sew

Holly Jumpsuit Review

Holly Jumpsuit by Love You Sew

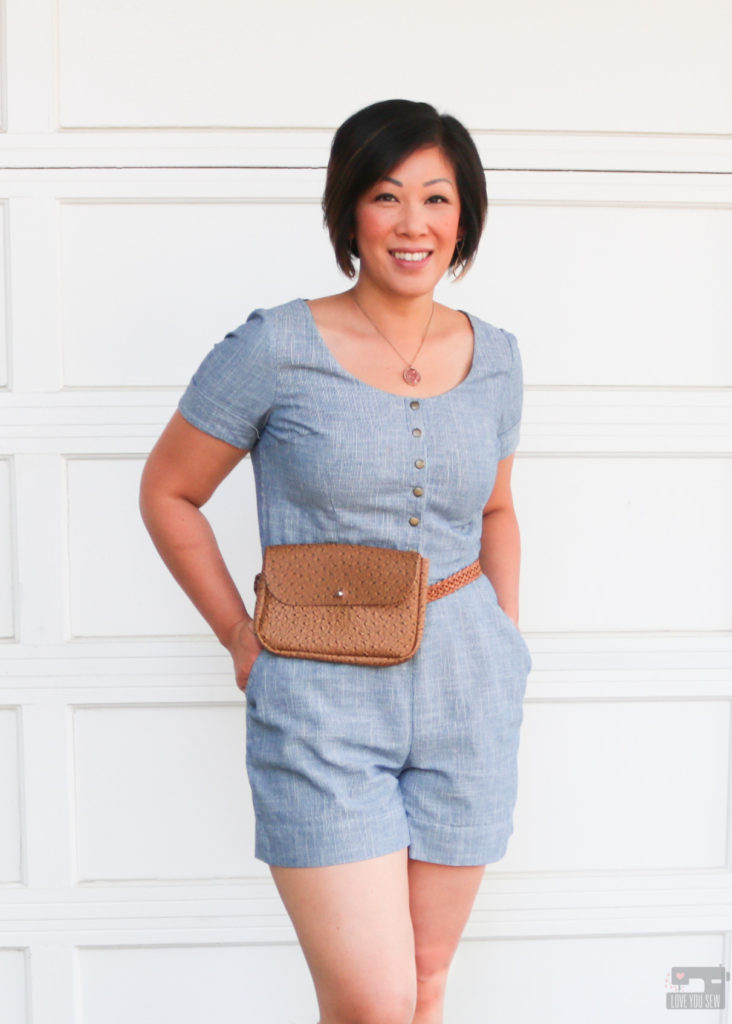
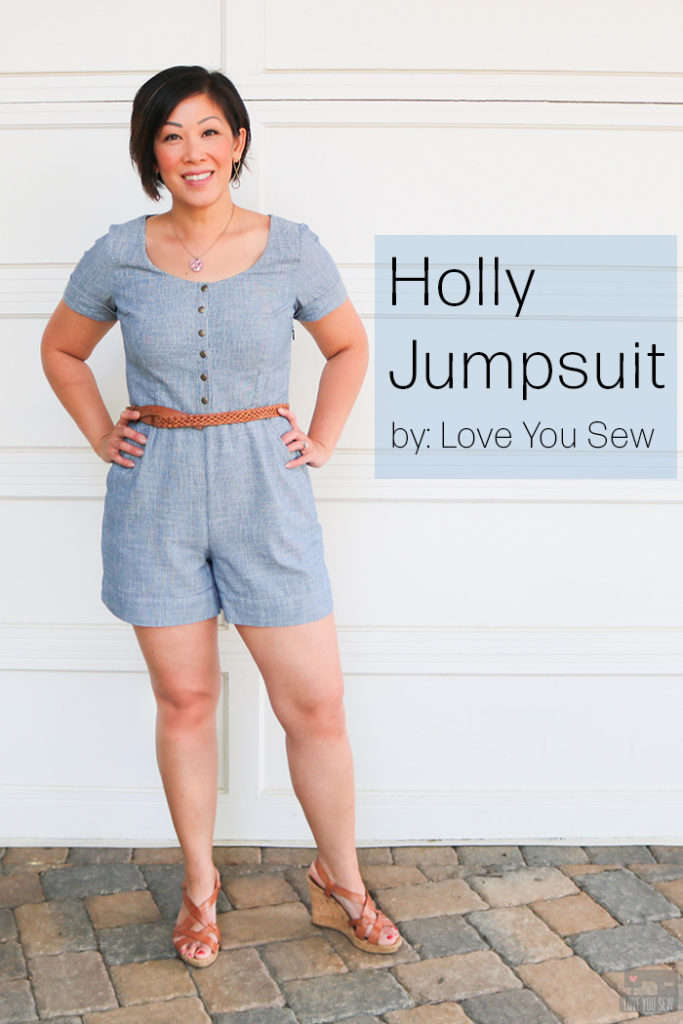
When I sew my own clothes, I like to know they will last for awhile.  So when the jumpsuit and romper trend came out, I was very hesitant to make one.  I wasn’t sure the one-piece look would be right on me.  Oh, and there IS that issue of completely undressing when using the restroom! But alas, after a couple of years seeing so many different versions of a romper, I finally took the plunge with the By Hand London Holly Jumpsuit.
Holly Jumpsuit by Love You Sew

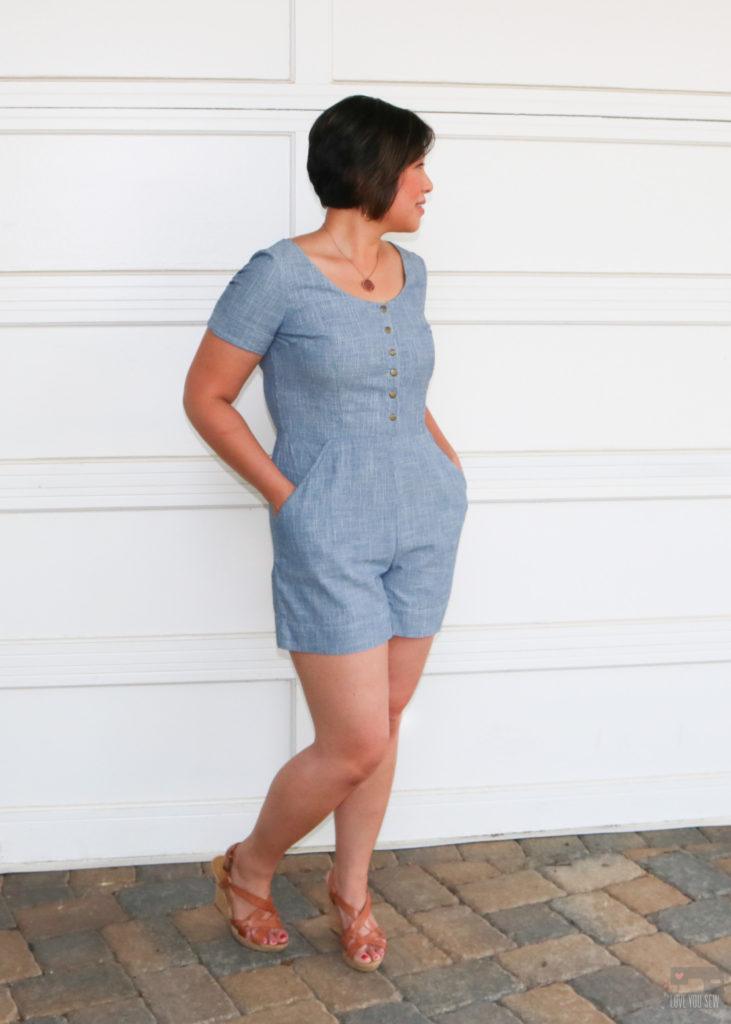
With many of the RTW rompers I’ve seen, they either have a very loose low v-neck wrap (probably for easier bathroom breaks) or the bottoms are way too short for my age bracket.  I fell for the Holly Jumpsuit with the nice open scoop neck (while still being modest,) the tailored waist and the 4″ inseam which is long enough for me, but could be a little too short for all of you  over 5’3″.
Holly Jumpsuit by Love You Sew

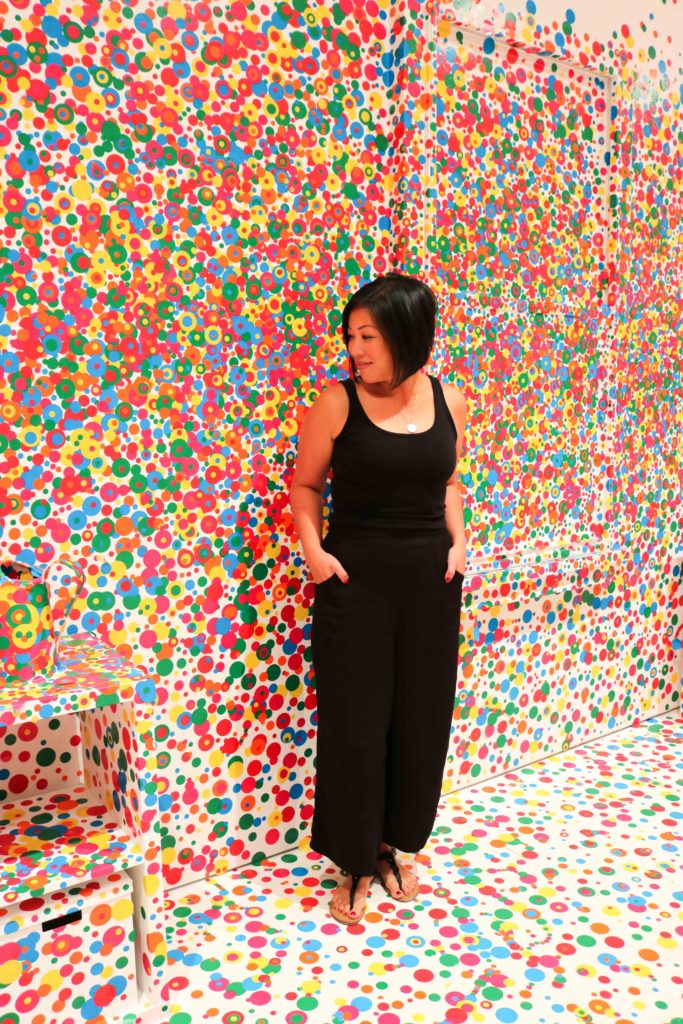
I initially bought the Holly Jumpsuit for the trouser view to help make a traditional Vietnamese Áo Dài.  I loved the wide leg, high rise, and the clean waistband which was perfect. However, it’s now been a few years and the Áo Dà has yet to be sewn…I know, I know…it will eventually happen!  However, I have made a pair of culottes using some rayon twill seen above.  These are such a great summer make.
Holly Jumpsuit by Love You Sew

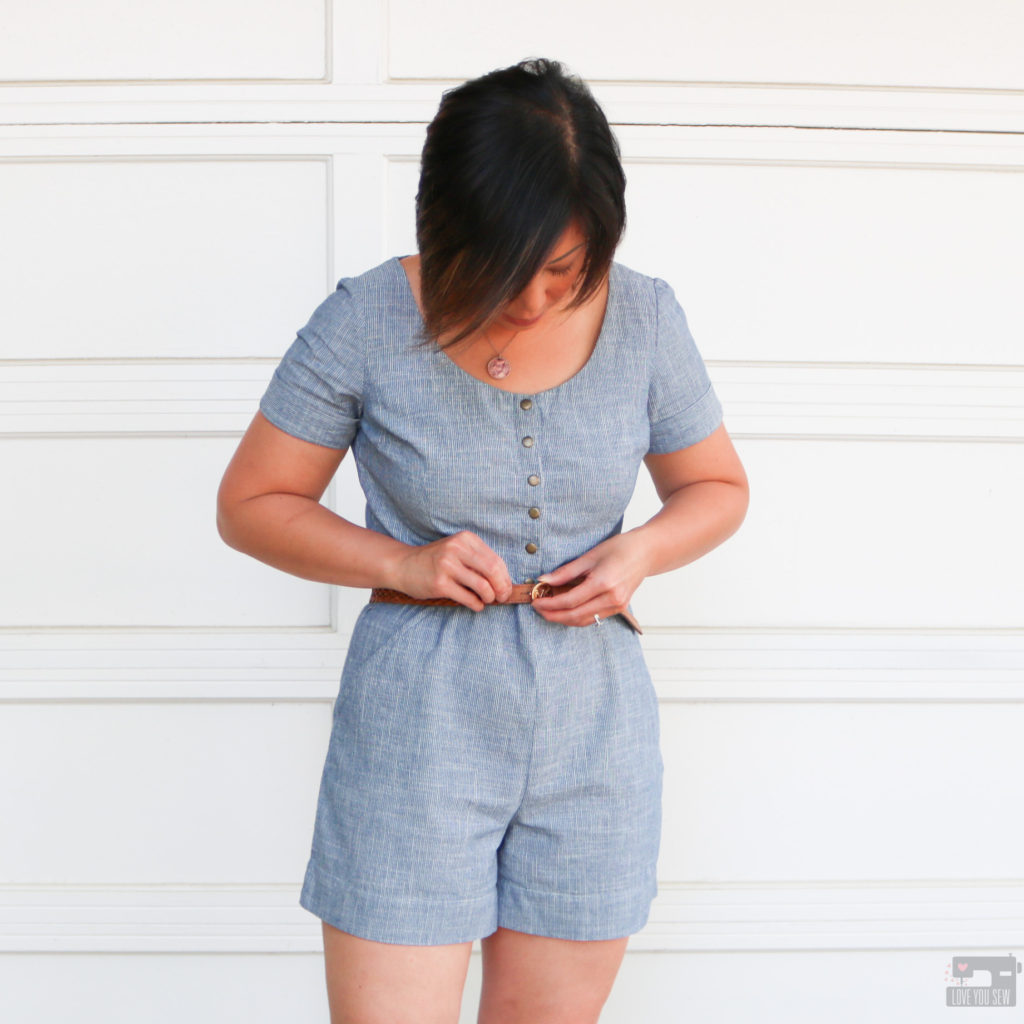
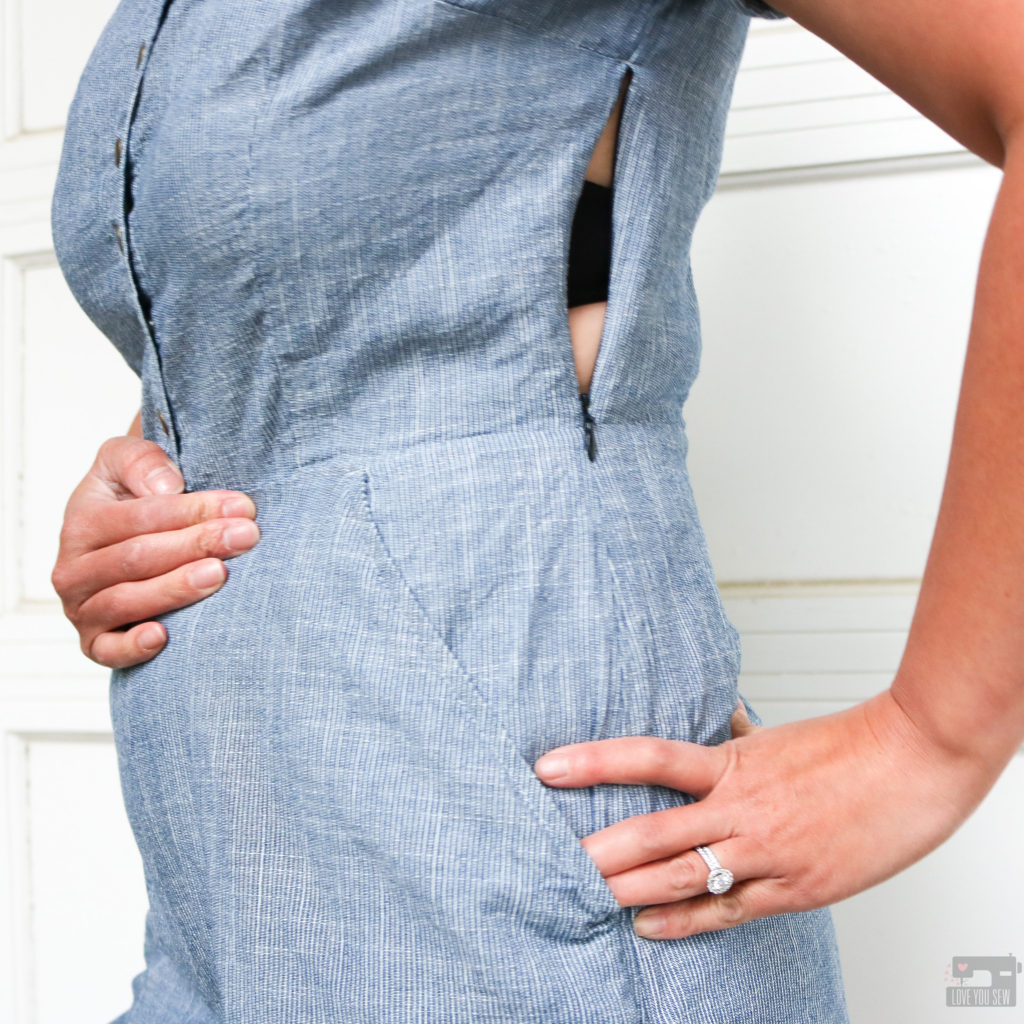
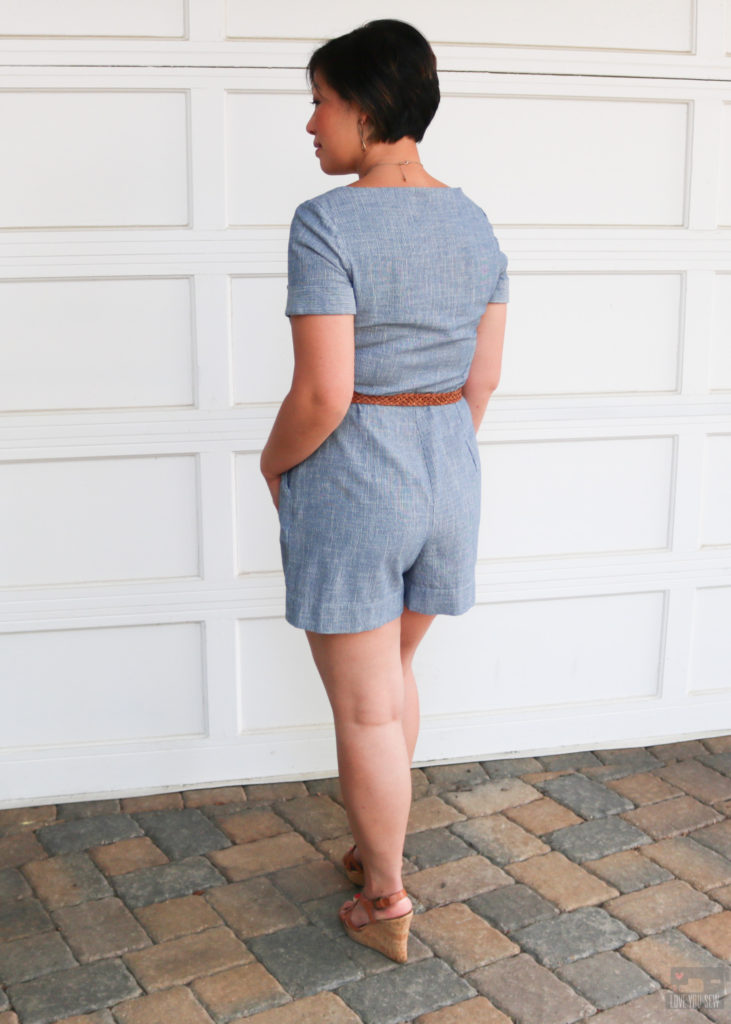
I know what you’re thinking….The big question with all rompers and jumpsuits is always, “How do you pee?”  There is a nice long invisible zipper which extends from the side dart down to the hip.  This allows you to slip the romper on and off in combination with unbuttoning the placket.  I wish I had a blue zipper to match my Holly when I was making this in time for a party, but I went with the only invisible zipper I had on-hand — black.  With the smart placement of the zipper, you can only see the pull when I have my arm up…and it’s still very discreet.
Holly Jumpsuit by Love You Sew

Fabric

When I was looking for fabric, I wanted something light enough to wear during warm weather, but structured enough to hold it’s shape and not wrinkle easily. Since this was my first romper, I also was looking for a simple print that could help camouflage any imperfections.
Holly Jumpsuit by Love You Sew

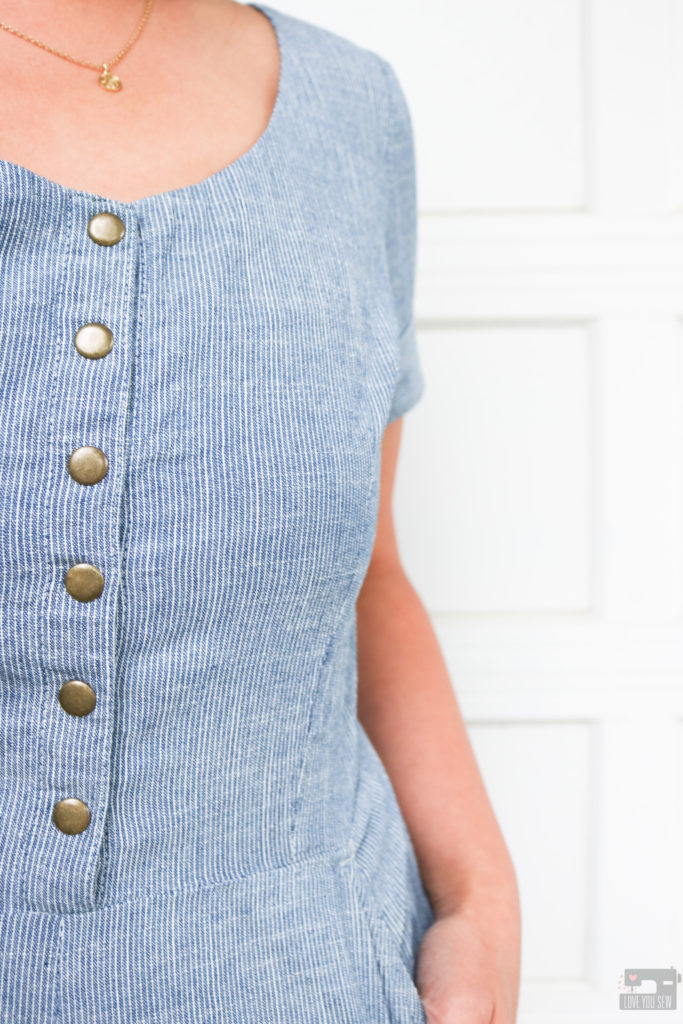
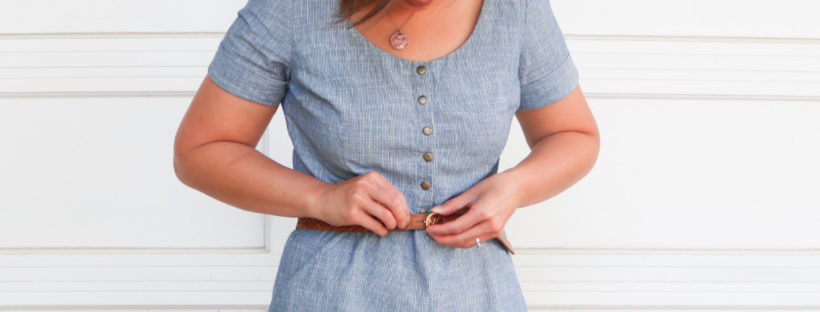
I was happy to find this great Vintage Chambray Stripes at Imagine Gnats. It’s a classic micro stripe with that railroad-esque feel.  I love the blue and how neutral it is for any occasion.  I can just switch up accessories to give it a different feel.  At 4.5 oz this is still light enough with a soft hand and the 100% cotton content makes it breathable for the summer.

Pattern
Holly Jumpsuit by Love You Sew

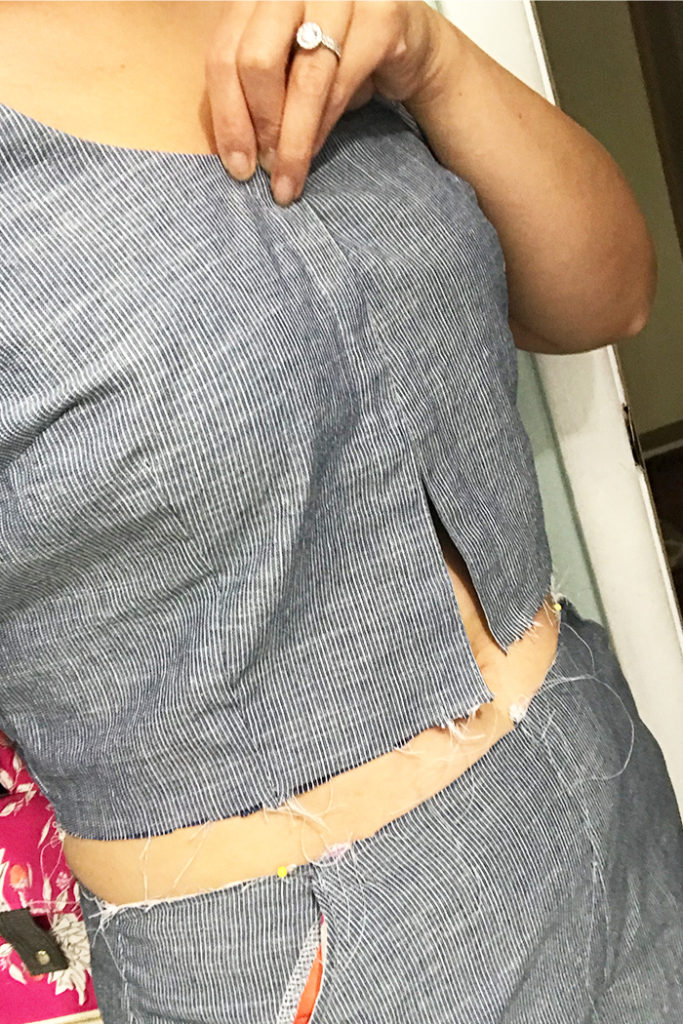
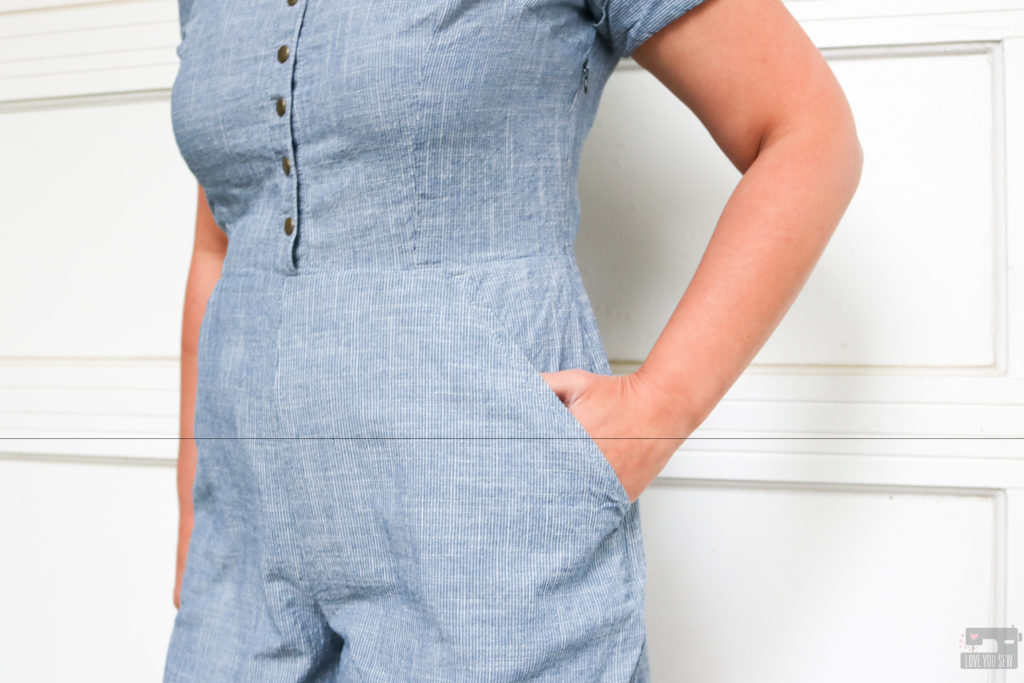
For the romper, I used view A and made a size UK10/US12 for both the bodice and bottoms based on my measurements. Since I already made the culottes, I knew I wouldn’t need any adjustments on the bottoms, but I did forget to take into account that I shortened the rise on them previously.  So, my romper ended up being too short! *Cue head-slap* Fortunately, I had enough fabric (thanks to the extra wide WOF) left to remake the bottoms.  Since there is no fly, it wasn’t too much of a set-back.  I’ll turn the first set with the lower rise into shorts by adding on the waistband found in View C.  Phew!
Holly Jumpsuit by Love You Sew

These are the additional modifications I made to the Holly:

  • Added lightweight woven interfacing in the placket to hold the snaps, but I would add it even if I used buttons for more stability
  • Used metal snaps instead of buttons for faster bathroom breaks 😉
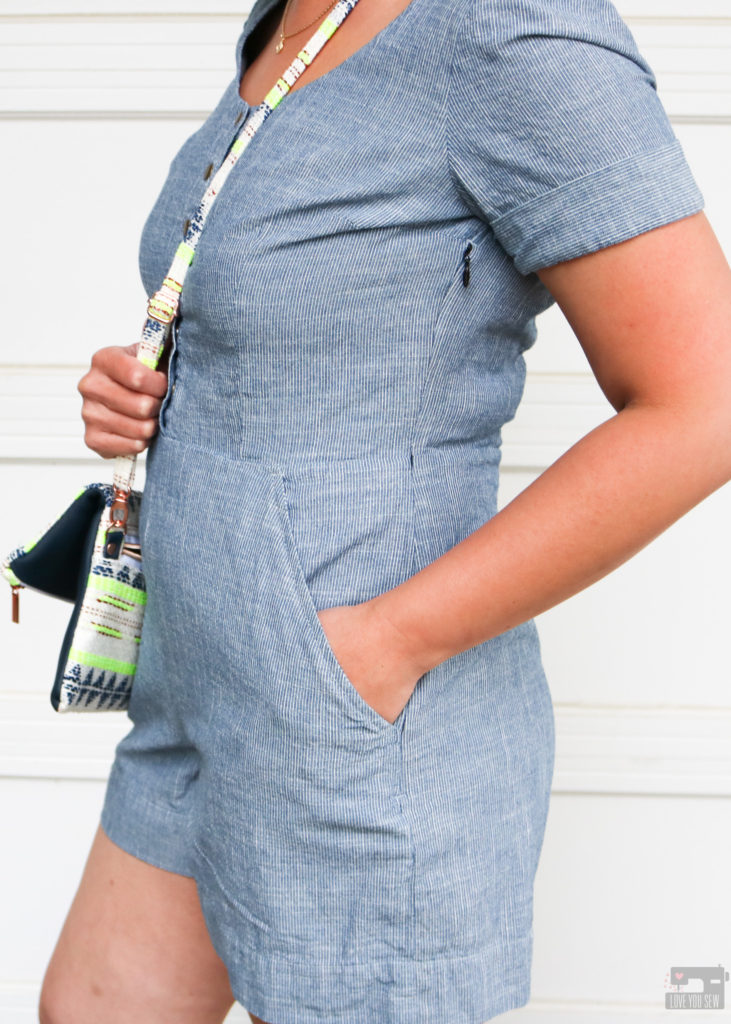
  • Added slash pockets by drafting a pocket and the facing  (the one thing missing with the pattern)
  • Decreased the seam allowance for the sleeve and increased the armscye to match
  • Reduced seam allowance to 3/8″ between the bodice and shorts for more crotch room
Holly Jumpsuit by Love You Sew

When I make this again, I would consider the following modifications:

  • Slight broadback adjustment – There is a little bit of tightness across my shoulder blades.
  • Bicep adjustment for even more ease – After wearing this to an event (with lots of sweating!) I think adding in more arm ease would allow more air flow and an easier time getting the romper off and on.
  • Increase the bodice length by 1/2″ – I’m only 5’3″ but if I raise my arms all the way up, I get some cameltoe, which is surprising. Most patterns are drafted for 5’5″-5’8″ that I’ve seen, and usually I have to shorten the bodice on a pattern.
  • Lower the side darts by ~1/2″ – Everything looked good when I was finished, but after an additional washing, the darts look a little too high.

Holly Jumpsuit by Love You Sew

Final Thoughts:

For my first romper, I am SO pleased with this make. I love the slim fit around the waist and the ample ease around the buttocks and thighs.  This is a great pattern for my fellow pear shapes! But it is certainly still great for other body shapes as well with just simple changes to the darts. This fabric was great for the pattern but I may use a woven with just a little stretch next time and probably won’t need those broadback and bicep adjustments.
Holly Jumpsuit by Love You Sew

Project Summary:

Now that I’m done with my very first romper, I think I’m ready for another.  Do you have any good romper/jumpsuit patterns to recommend?  Let me know in the comments.  I would love to hear your thoughts!


Happy Sewing,

Cristy


This post may contain affiliate links for which I may receive compensation.  This helps keep ads off the blog and helps me to keep this website afloat.  Thank you for your support.
Highlands Wrap Dress

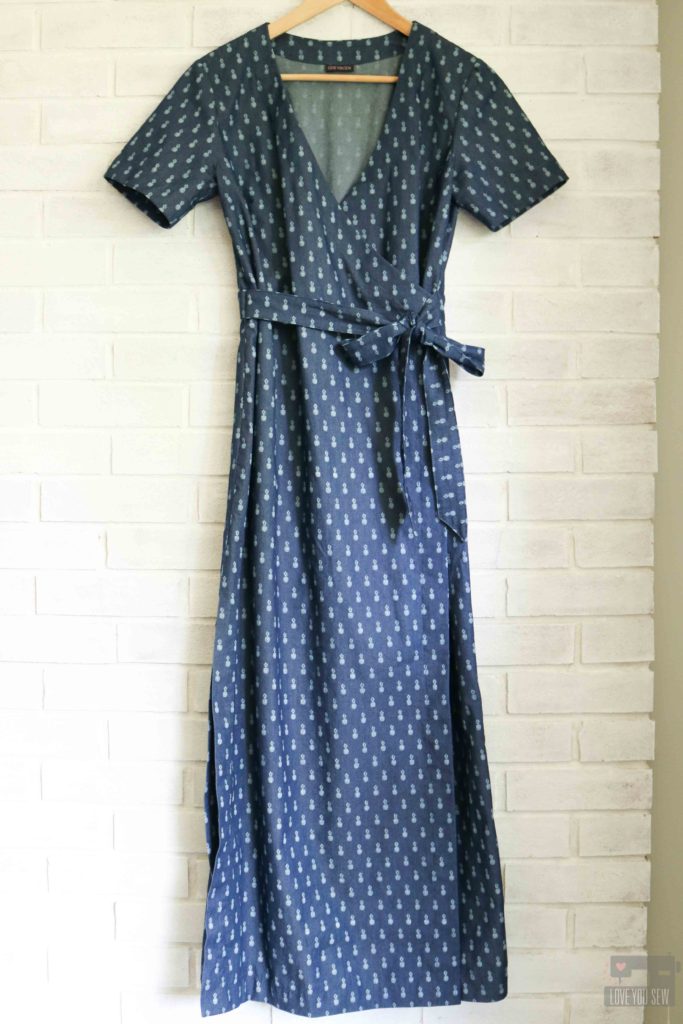
Yay!!!  I knocked off one of my 2018 “Make Nine” goals with this Highlands Wrap Dress by Allie Olson.  I haven’t blogged about all my completed projects, but I’ve sewn 6 out of the 9 patterns I selected the beginning of the year.  With just under five months left, I think I’ll be able to make everything on my list!  You can read all about my 2018 garment goals here.

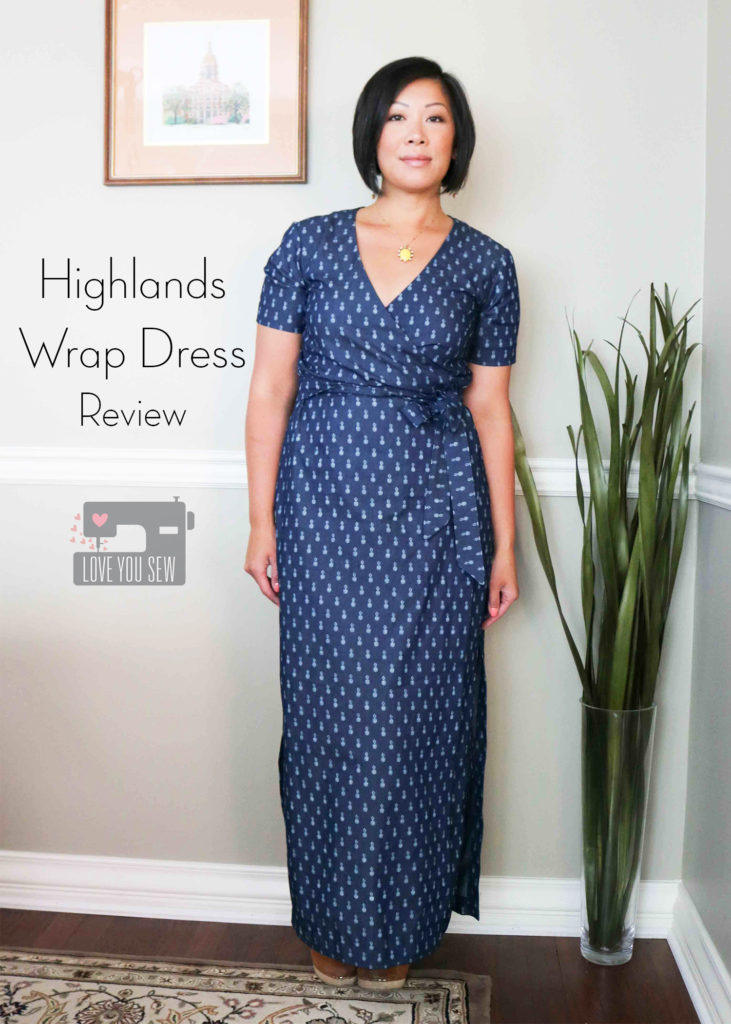
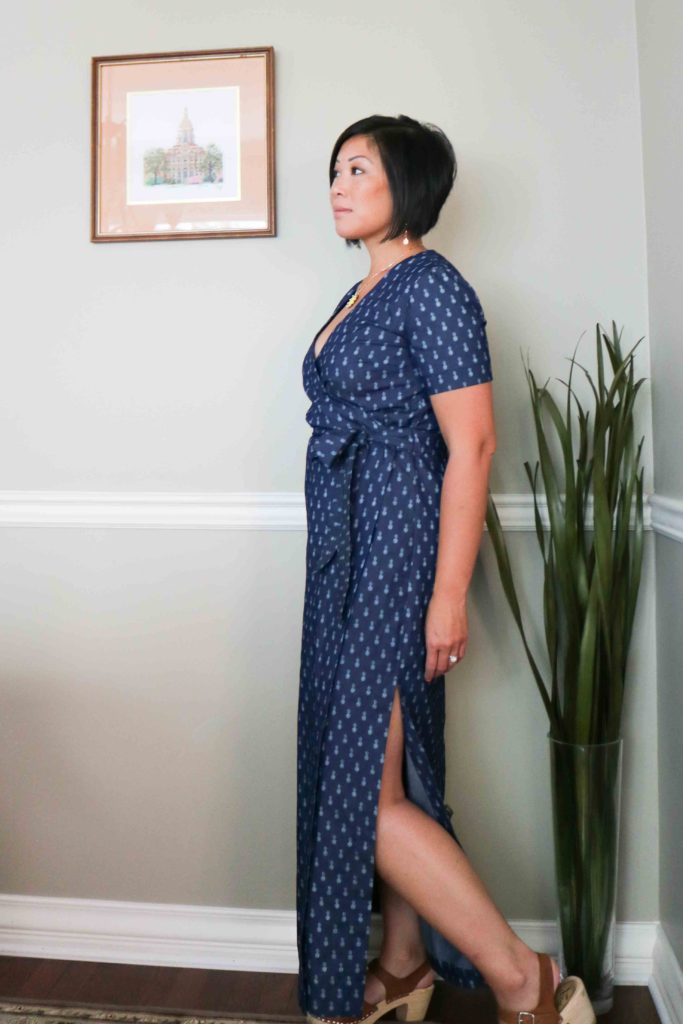
I made the Highlands dress earlier in the spring, but just haven’t had a chance to blog about it until now (blame it on my kids and other sewing commitments!)  This dress has been worn on so many occasions already and has lived up to my expectations for sure.  The slim column silhouette makes my 5’3″ frame look so tall and the length adds to the sophistication.  I love how the Highlands dress covers the body, but still has a bit of sass with the high slit skirt and deep v-neck.

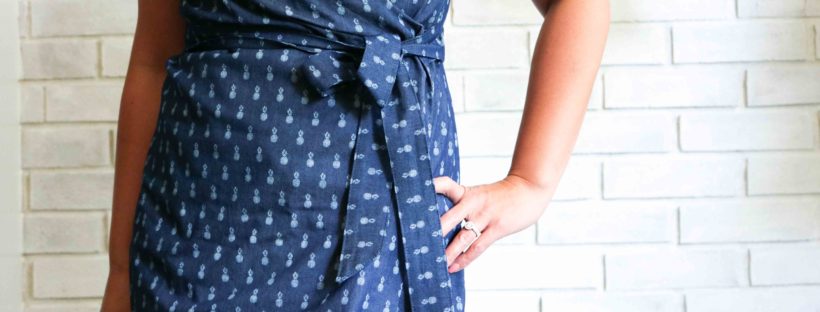
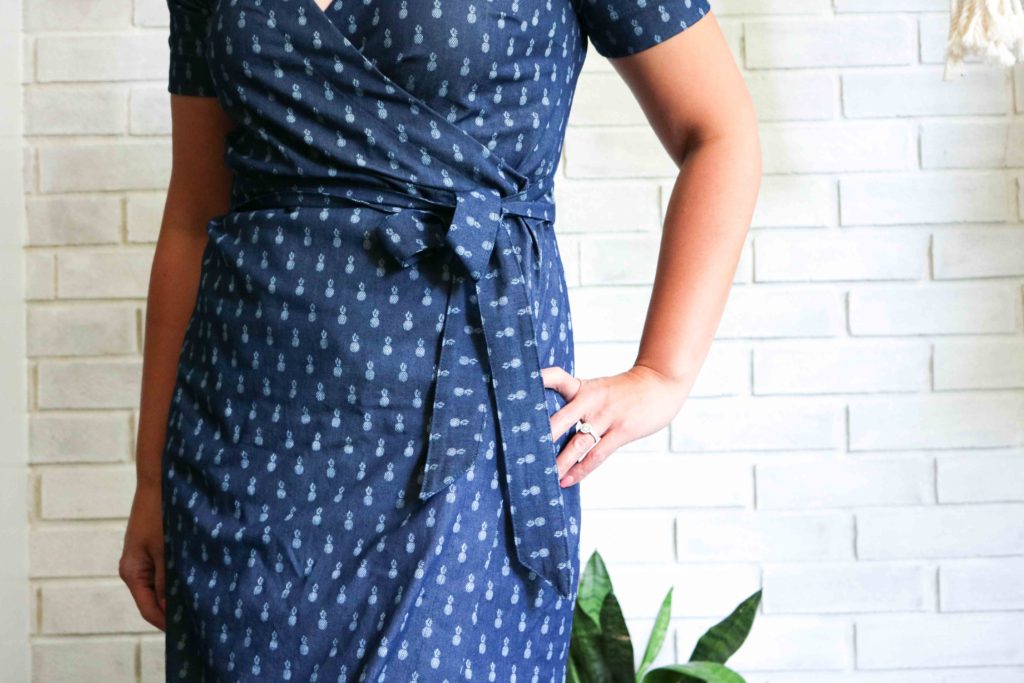
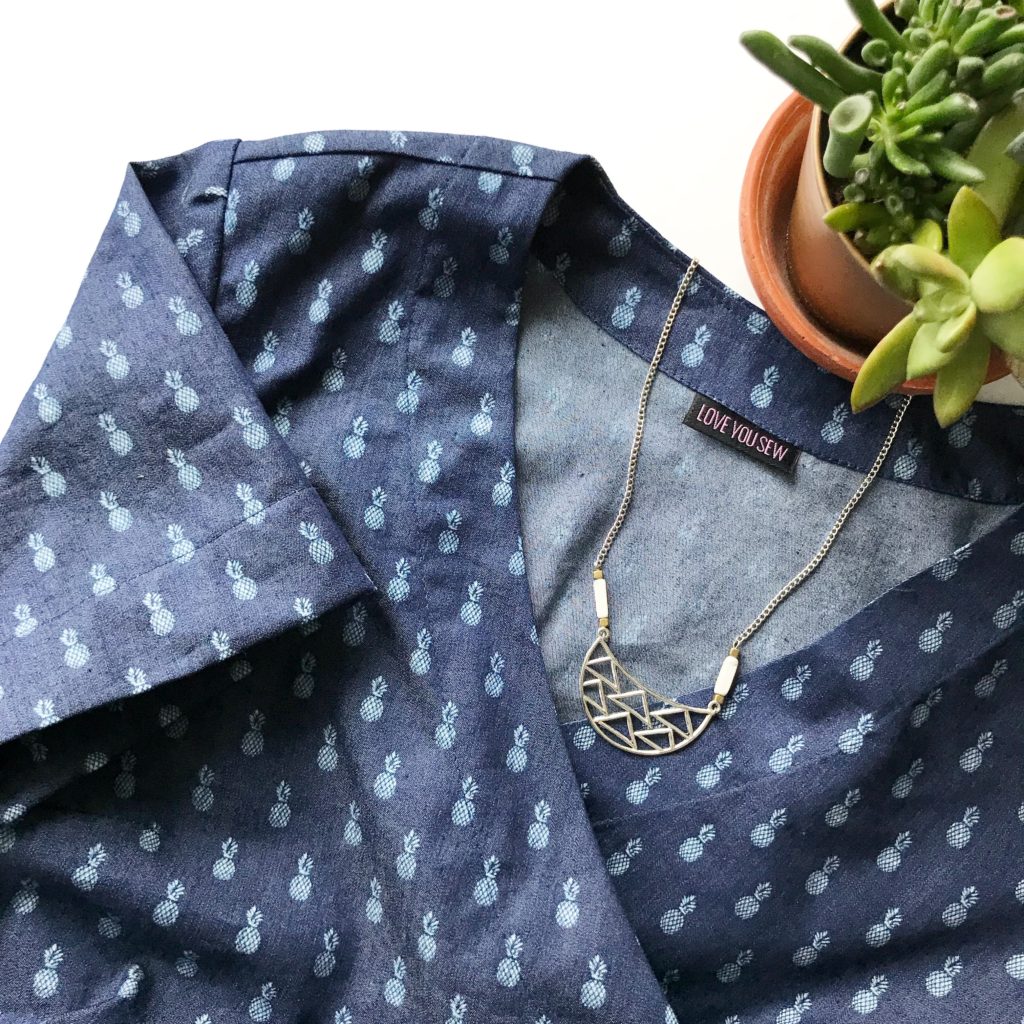
For the fabric, I chose this Telio stretch chambray with a crazy cute pineapple (!!!) print from Fabric.com.  You can see this dress, plus read up about this substrate on the original Fabric.com blog post I wrote for them here.  After a few months of wear, I can say the fabric still feels great and still has nice stretch and recovery.  However, I did have to wash it twice to get all of the extra dye out of it.

My wardrobe doesn’t have many short-sleeved dresses.  They are mainly long or sleeveless altogether.  So, I wanted to make the sleeved version so I don’t necessarily have to bring a cardigan with me everywhere!

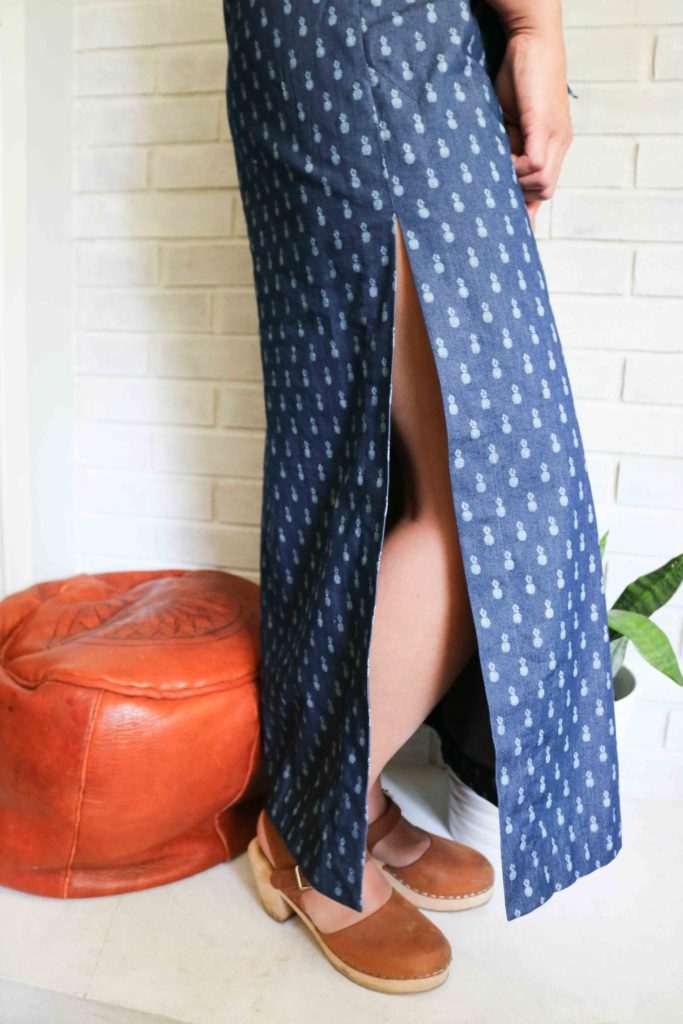
I’m heavy in the calve area and I don’t like dress hems to hit me at one of the widest parts of my legs, so I’m not a “midi” length lady.  That’s why I also chose the maxi length.  After following a few people on IG who made this dress, it was safe to say I would need to shorten it by 5″.  But beware – There are two shorten/lengthen points on the skirt (one for the rise and one for the leg length.)  Make sure to shorten at the lower of the two lines or you end up raising the slit like I did. (Doh!)  That was one mistake I made which I didn’t realize until I had a slit high up my thigh!  Since I already sewed on the facings, I had to hand-stitch the slits together a few inches.  That was a hard lesson learned!

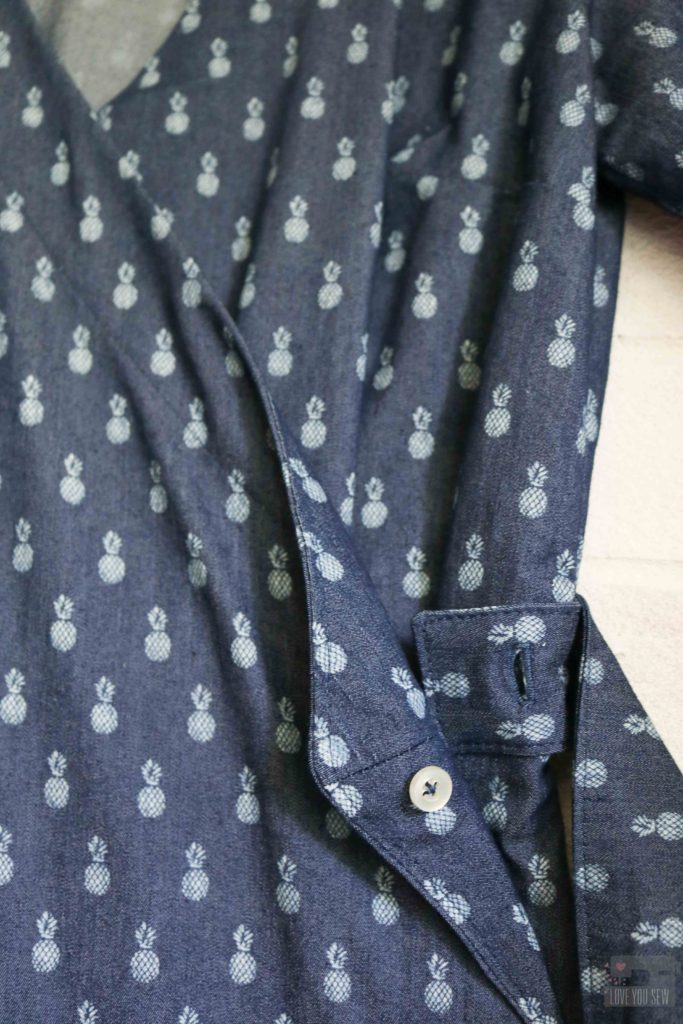
What I love about this wrap dress pattern are the two button tabs (one inside and one right under the ties) to keep the bodice secured.  If you have ever worn a RTW dress that just uses ties, you know that they will end up untying at the most inconvenient…er..most embarrassing times…even when you double-tie.  I know I’m not alone here, right?  With the two tabs AND the tie, this wrap dress feels VERY secure.

Project Details:

  • Pattern:  Highlands Wrap Dress by Allie Olson
  • Fabric:  Telio stretch chambray
  • Sizing: I measured 6 in the bust and 8 in the waist/hip, but made a straight 6 so there wouldn’t be as much bunching around the back elastic.  I also used a 10% stretch fabric.
  • Alterations:  Shortened skirt by 5″
  • Thread: Gutermann Polyester
  • Machine: Juki TL-2010Q


Happy Sewing!

Cristy


This post may contain affiliate links.  If you make a purchase, I could receive a small commission which helps to keep this website going.

FREE Walking Geese Needlebook Tutorial

Love You Sew Needlebook Tutorial

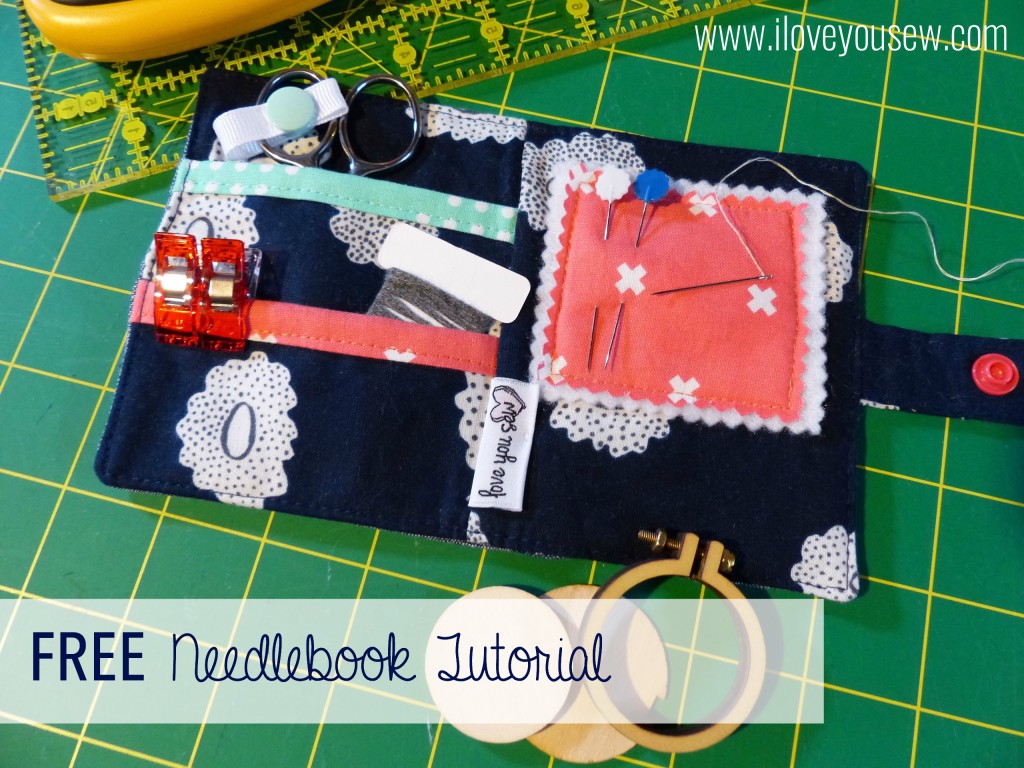
I’m new to the world of Swaps.  I’ve seen and followed quite a few through Instagram and finally signed up for a few.  The #IGneedlebookSwap was my second sign-up, but my first which has been sent and received.  After looking at a few online, I wanted to design my own and share it for FREE with you!!!  If you are unfamiliar, these swaps have a theme (in this case, a needle book) and you have to post progress shots on your IG account.  They are usually secret and you have great fun finding out…aka “stalking” your partner’s tastes and preferences.    I like it because you get work on something new and it’s challenging to have some parameters set….including a deadline!

My partner asked for a Needlebook with a pocket to hold a small set of scissors, so I went about designing one myself!  How can I screw up the math on something that finishes at 4.5″ x 7″ (open) and 4.5″ x 3.5″ (closed), right???  My partner also specified using navy, coral and aqua…so I incorporated a design to showcase all of those colors.

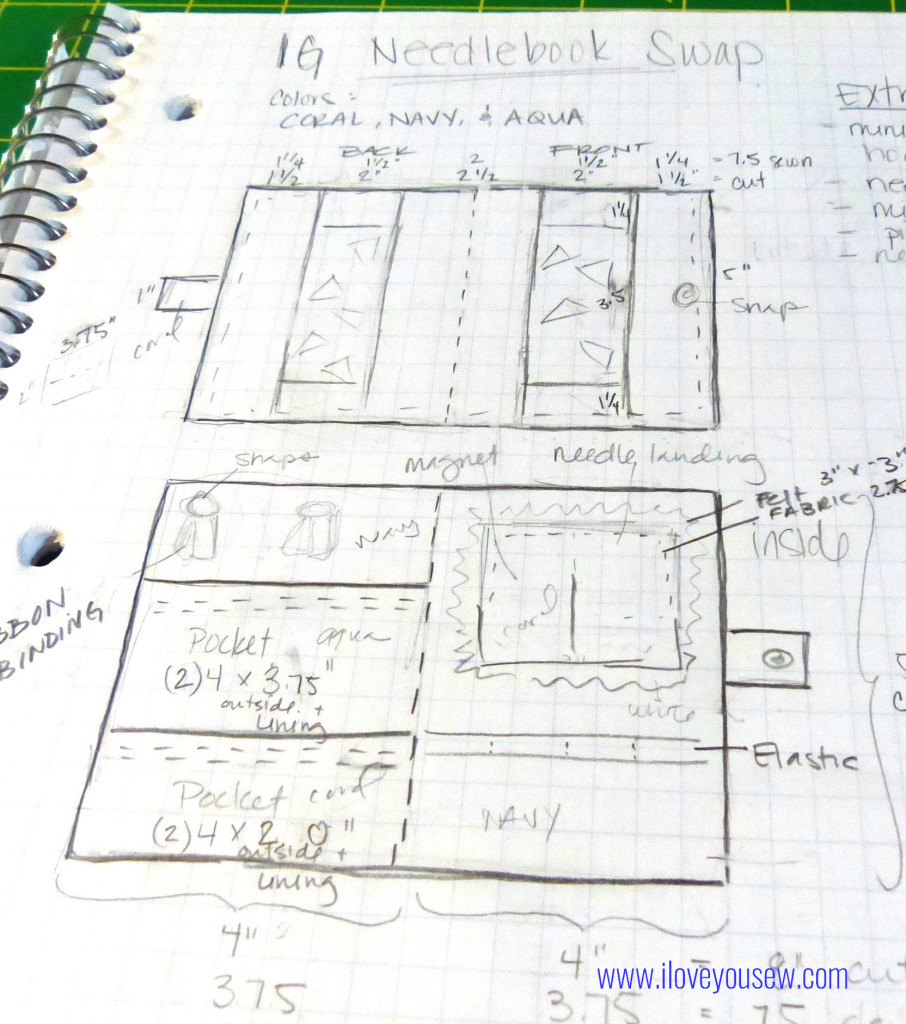
Needlebook Sketch

Needlebook Sketch

==========

Material Requirements:

  • Exterior Fabric (shown in Robert Kaufman IndigoChambray)
    • 1.5″ x 5″ rectangles [cut 2]
    • 2″ x 5″ rectangle [cut 1]
    • 1.25 x 2″ rectangle [cut 4]
    • Goosing Borders [sew 2]
  • Interior Fabric (shown in Cotton + SteelHatbox – Navy Desert Flower)
    • 4″ x 5″ [cut 2]
    • 4″ x 7″ [cut 1 for pocket A]
    • 4″ x 4″ [cut 1 for pocket B]
    • 2″ x 3.75″ [cut 1 for snap closure tab]
  • Accent Fabric 1 (shown in Cotton + Steel Dottie in Bluebird)
    • 2.5″ x 4″ [cut 1 for pocket A]
  • Accent Fabric 2 (shown in Cotton + SteelXOXO in Coral)
    • 2.5″ x 4″ [cut 1 for pocket B]
    • 2.75″ x 2.75″ [cut 1 for needle-landing]
  • Felt for needle-landing
    • 3″ x 3″ [cut 1]
  • Batting
    • 5″ x 8″ [cut 1]
  • KAM Snaps [2 sets]
  • 2″ Grosgrain Ribbon
  • 3/4″ Magnet

Use 1/4″ seam allowance unless noted.

==========

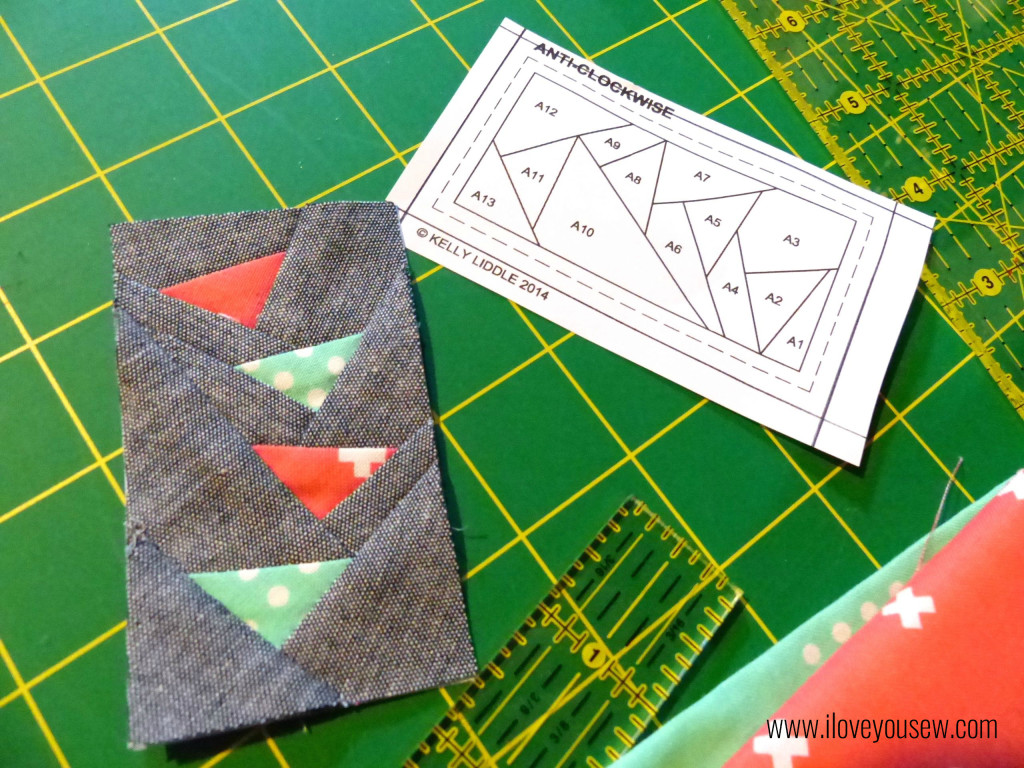
FPP Geese Close-up

FPP Geese Close-up

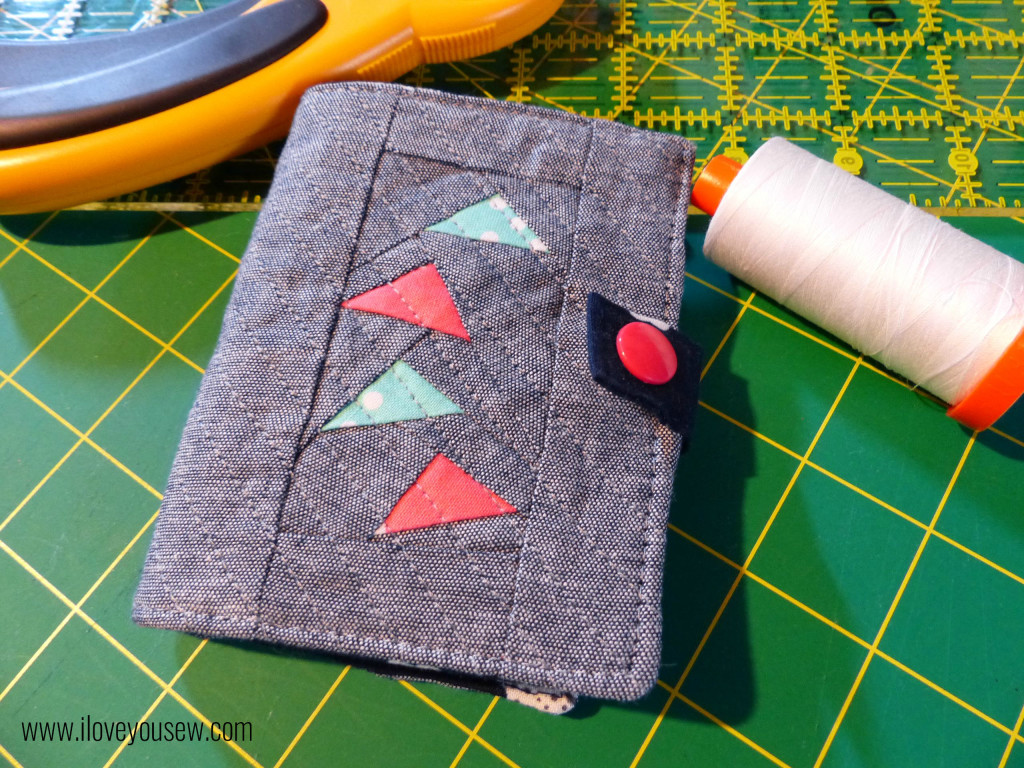
For the outside of the book, I used Jeli Quilts’s (surprise!) Goosing Borders and shrank the design down to 50%.  The geese are Cotton + Steel basics in Bluebird and Coral.  For the background and borders of the exterior, I used Robert Kaufman’s Chambray in Indigo. I love chambray for a clean sophisticated look and the added texture.  It’s definitely one of my go-to fabrics and always keep some in my stash.

For a nice video on Foundation Paper Piecing (FPP) click here.  I watched this to help me wrap my head around the fabric being sewn as a mirror image.  This technique takes some practice but you will quickly become addicted, like me 🙂 The finished Geese blocks should measure 2″ x 3.5″.  Attach the 1.25″ x 2″ rectangles to the short-sides of each Geese Block.  Then attach the 1.5″ x 5″ blocks to one side of each block.  Use the 2.5″ x 5′ rectangle to attach the Geese blocks together.  Quilt the exterior to the batting and trim 5″ x 7.5″.

Interior left with Pockets

Interior left with Pockets

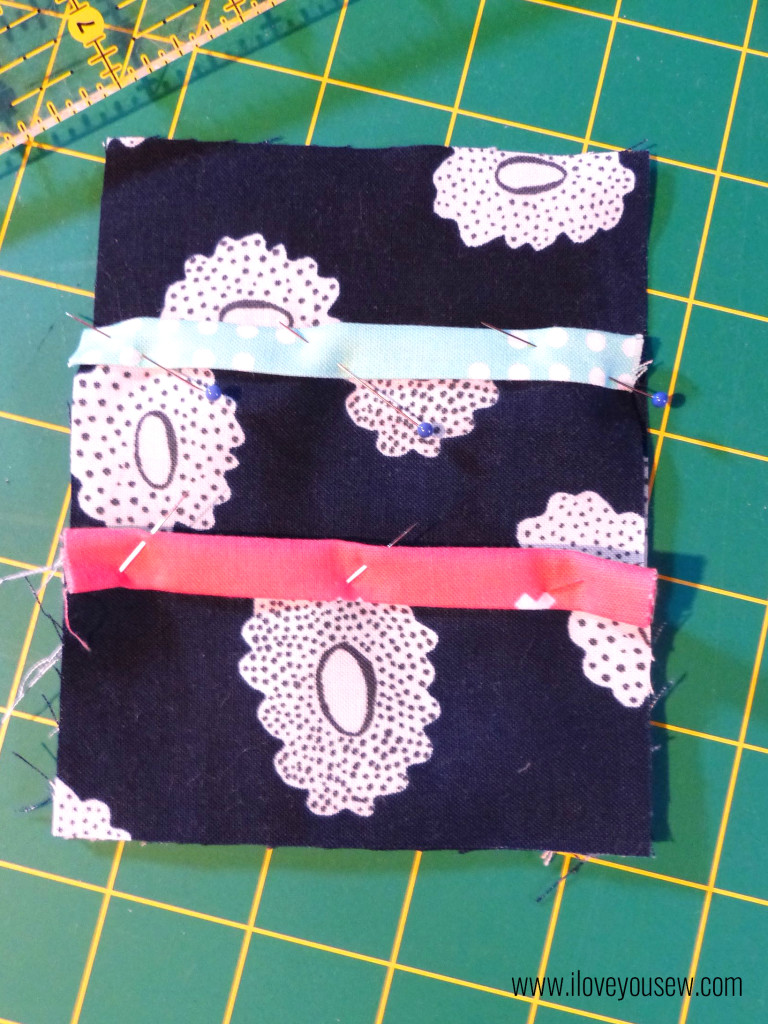
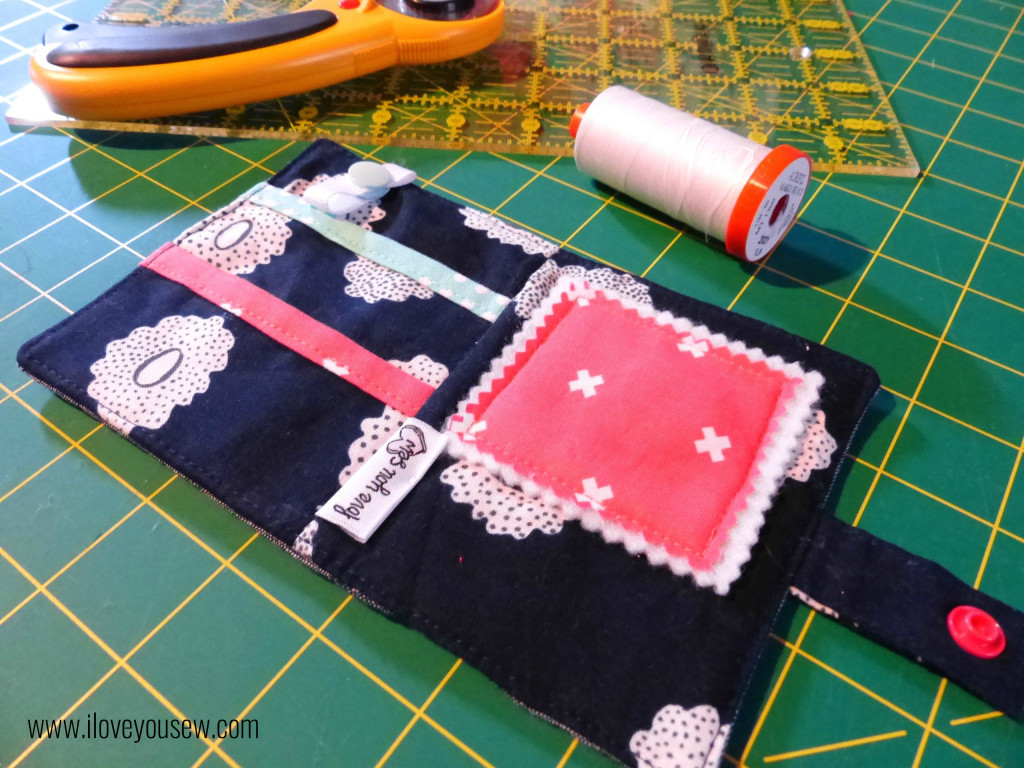
On the inside, I chose another Cotton + Steel fabric.  This time, a navy from Hatbox by Alexia Abegg.  I decided to make two pockets – a larger one for scissors and/or a spool of thread or pen.  The smaller pocket could be used to hold floss, clips, or a spare packet of needles.  The binding helps to grip the pockets and adds some visual appeal.

Iron both pockets in half length-wise so [A] is 3.5″ x 4″ and [B} is 2″ x 2″.  Take each piece of binding and machine-bind down just like you would a quilt.  Lay Pocket [B] on top of Pocket [A] on top of 4″ x 5″ interior fabric, matching up corners at the bottom. Pin all in place.

Right above the Pocket [A], I cut a 2″ piece of grosgrain ribbon, sealed the ends, and made a loop to hold the scissor handles in place.  I am a big fan of KAM Snaps and used them with the ribbon as well as with the closure of the entire Needle-book.

Preparing Needle-landing with built-in Needle-minder

Preparing Needle-landing with built-in Needle-minder

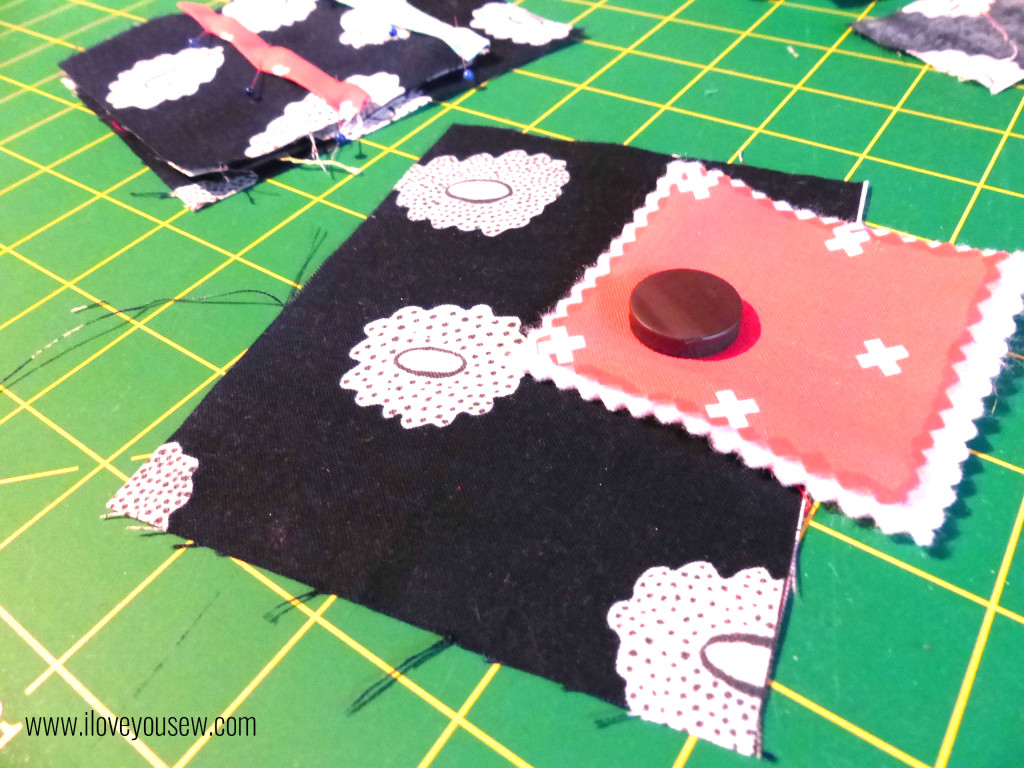
On the right side, there needed to be a needle landing (because it wouldn’t be a needle book, otherwise, right?!?) I just used craft felt and my Gingher serrated scissors to cut out the rectangle.  But I wanted some more color, so I added the same Coral fabric on top as a nice accent.  I sewed 3-sides up with a 1/8″ seam along the Coral and slipped in a small 3/4″ magnet for a built-in needle-minder!  Then I sewed up the last side making sure the magnet was fully enclosed. With right-sides together, sew the two interior panels together to create a center seam.

Needlebook Exterior

Needlebook Exterior

To create a tab, press the fabric lengthwise in half then open.  Press each long-side to match the center fold then fold in half, matching up the short-ends.  Top stitch all around to secure.  Attach KAM Snap at this point. Pin the tab half-way on the right interior panel facing in.

On the exterior panel, mark where the tab will meet and attach your other KAM Snap.  With right sides together, sew the Interior and Exterior  panels to each other leaving a 3” opening to turn. Snip corners, turn the Needlebook right-side out and press.  Top-stitch 1/8″ all around the book to close up the opening.  “Stitch in the ditch” along the center inside seam to allow the book to easily fold.

Completed Interior

Completed Interior

And….that’s it 🙂  This was a nice easy sew that you could use as a “Swap Extra”  or a stocking stuffer for a good sewing friend.  If you are not a snap person or do not have any on-hand, you can alternatively use a button and elastic cord closure or long pieces of ribbon to tie it all together.  If you looked closely at my sketch, I was initially going to add some elastic loops under the landing, but decided to omit them to keep this simple…but it’s a great idea if you want to add an additional feature.

Since I’m not a seasoned tutorial author (yet!), please let me know if you have any questions. Don’t forget to share pictures of any completed projects as well!

I’m linked up to Late Night Quilters Tips and Tutorials Tuesday.  Please visit the page to see some more great sewing and blog related pointers!

#WalkingGeeseNeedlebook #IGNeedlebookSwap #LoveYouSew


Hug and Stitches,

Cristy

Love You Sew

Louisa Bag Tour

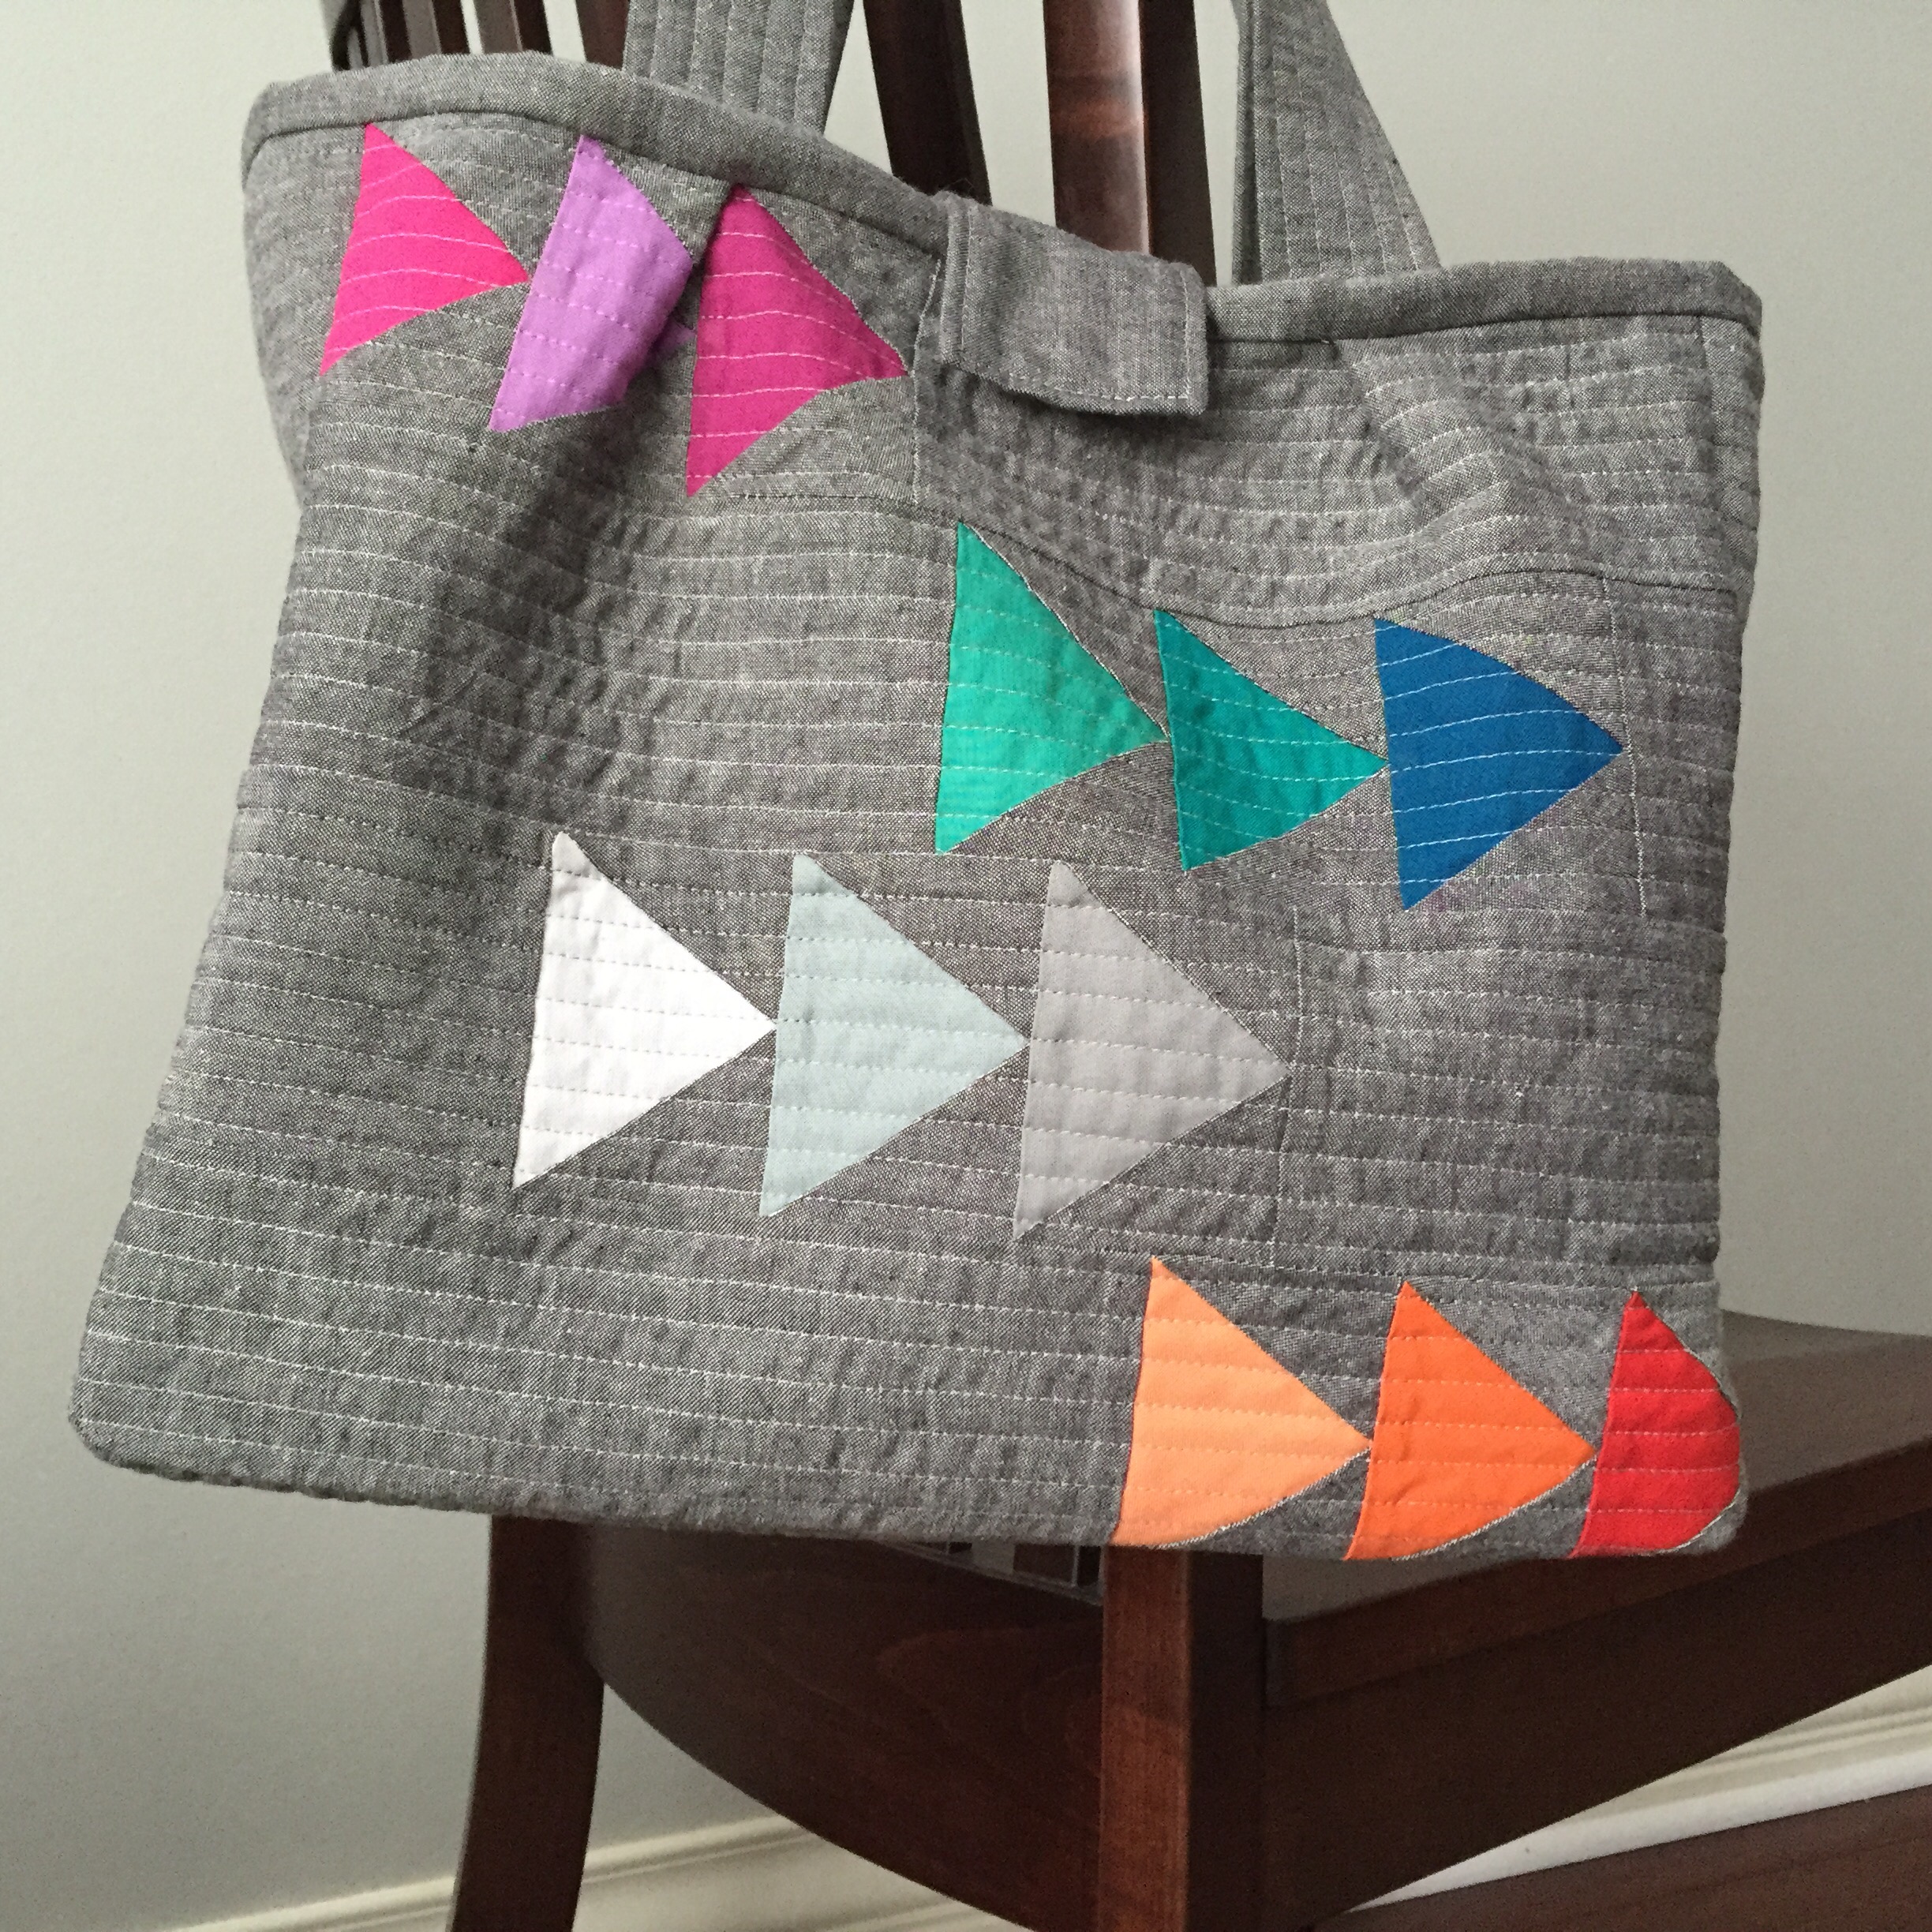
Front View Louisa Bag

I had the distinct pleasure of being a part of Clover & Violet’s Louisa Bag IG Tour.

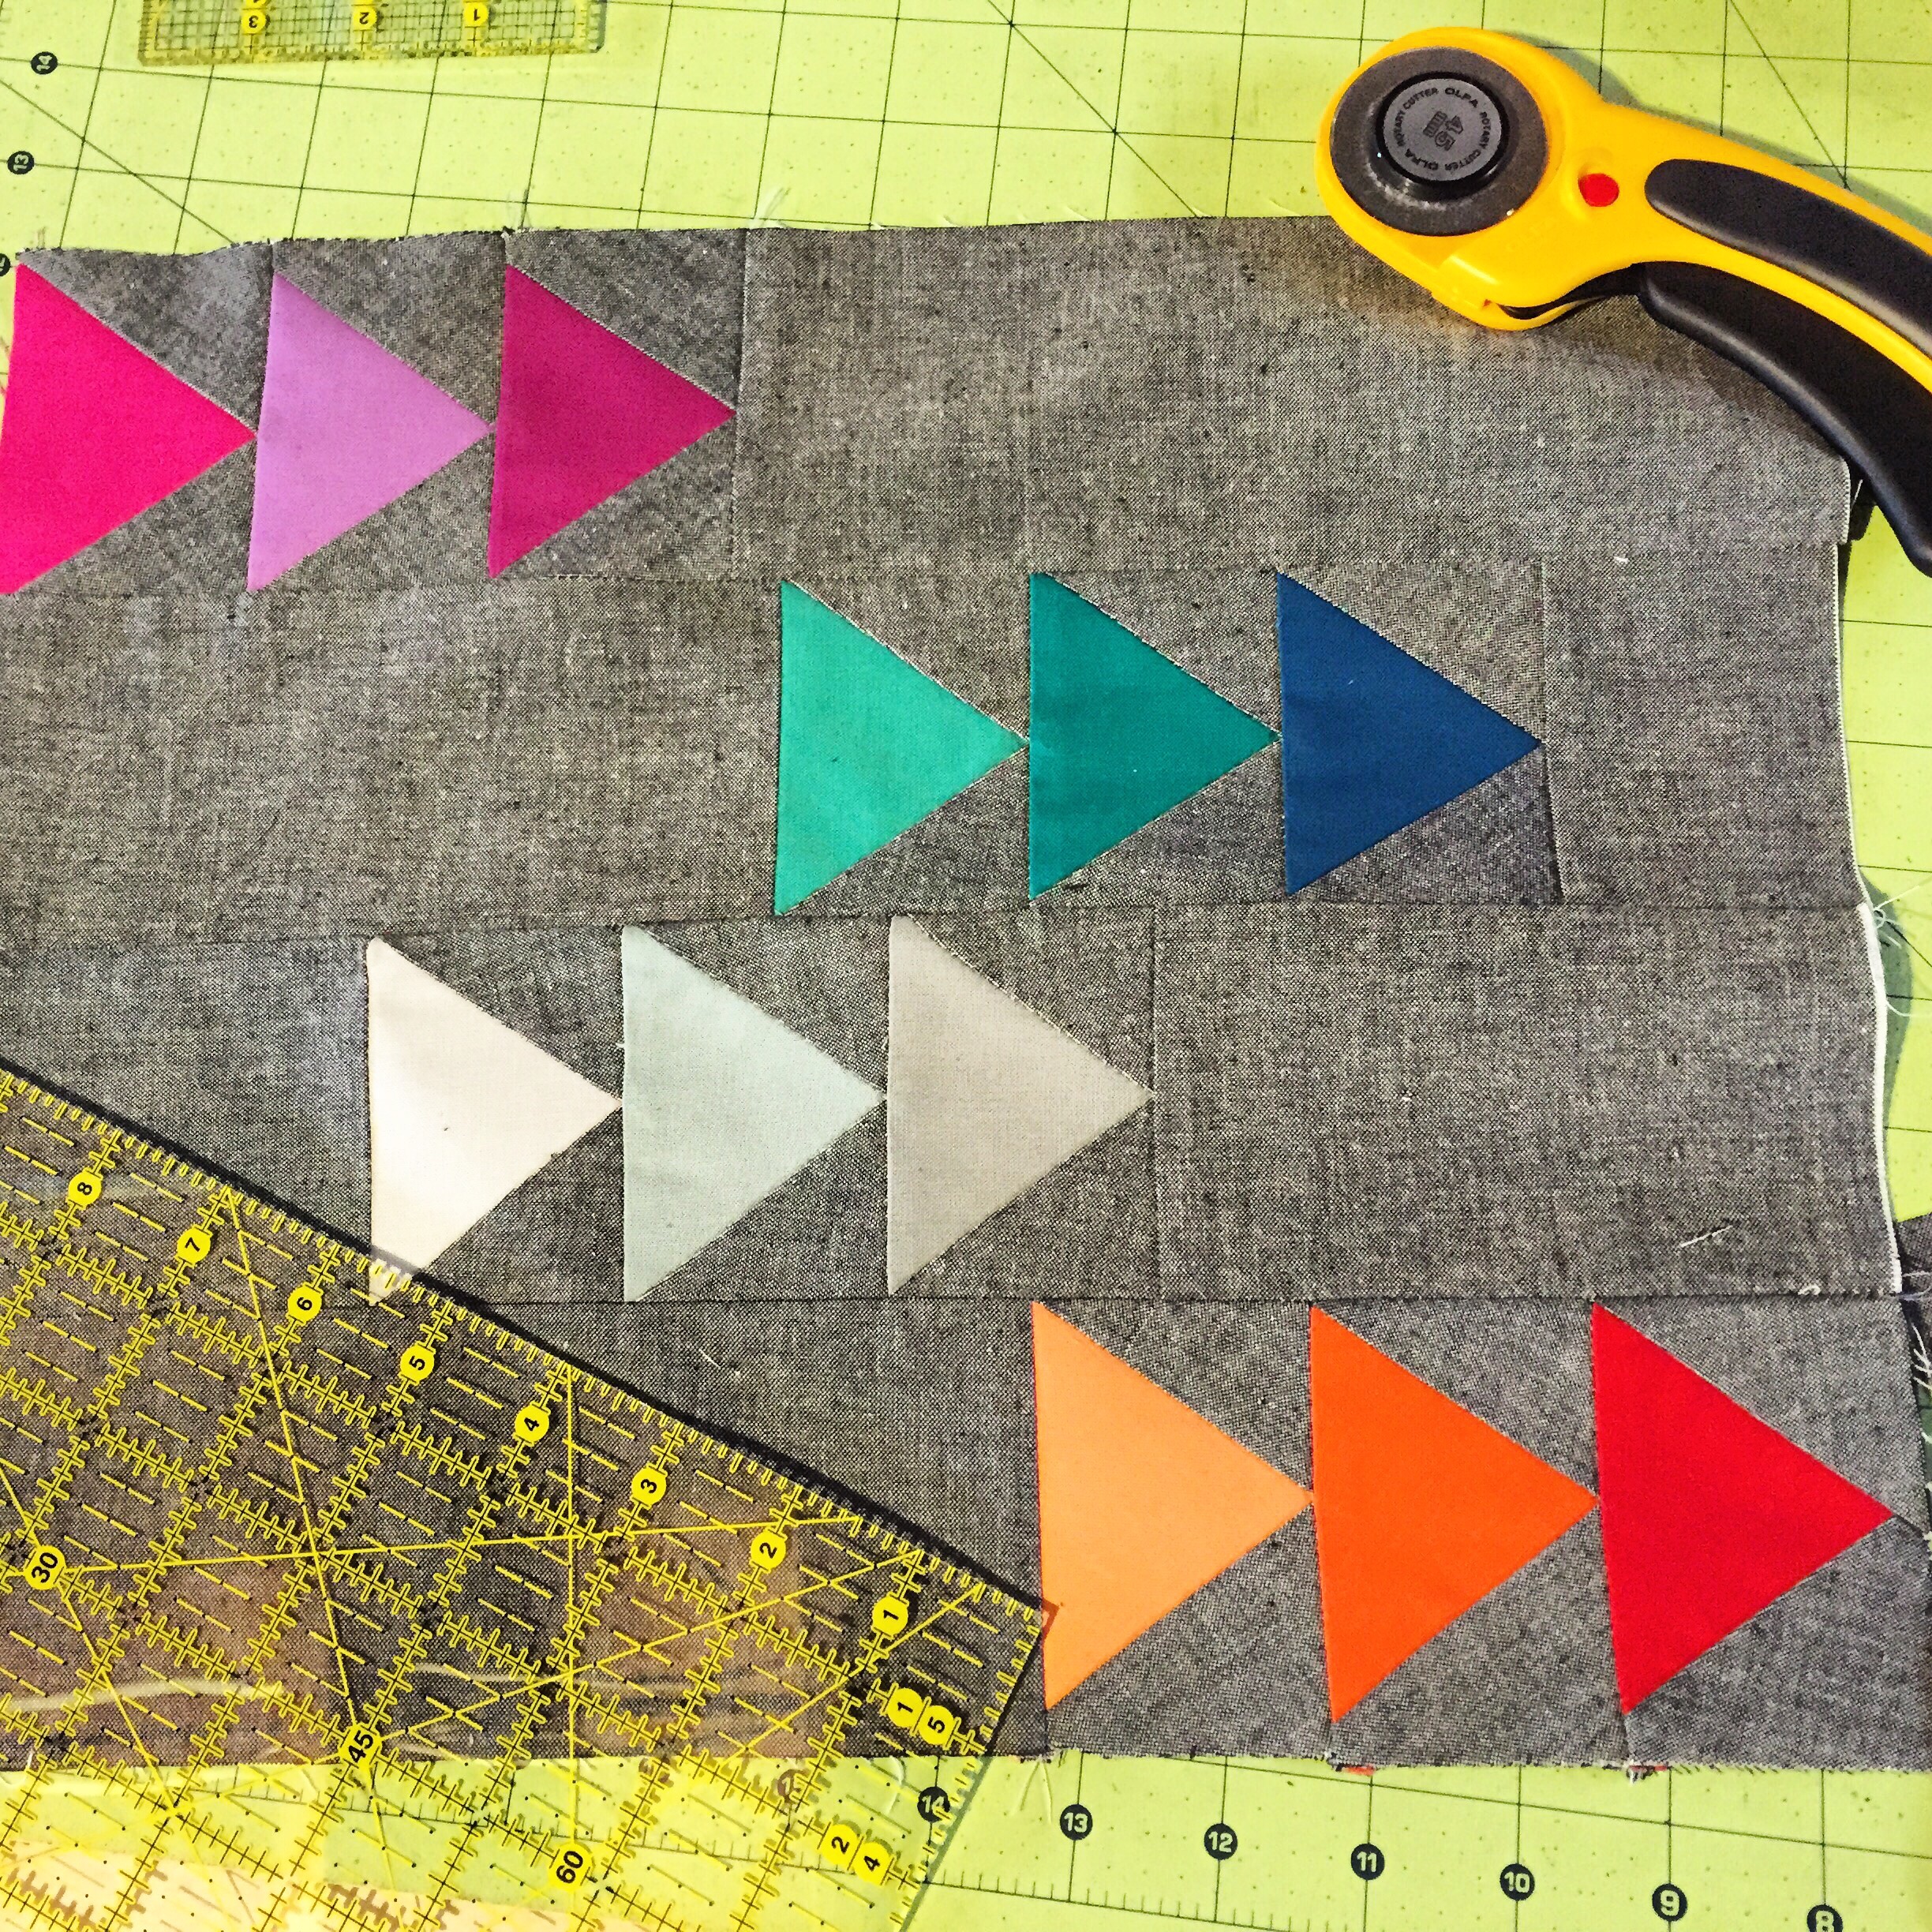
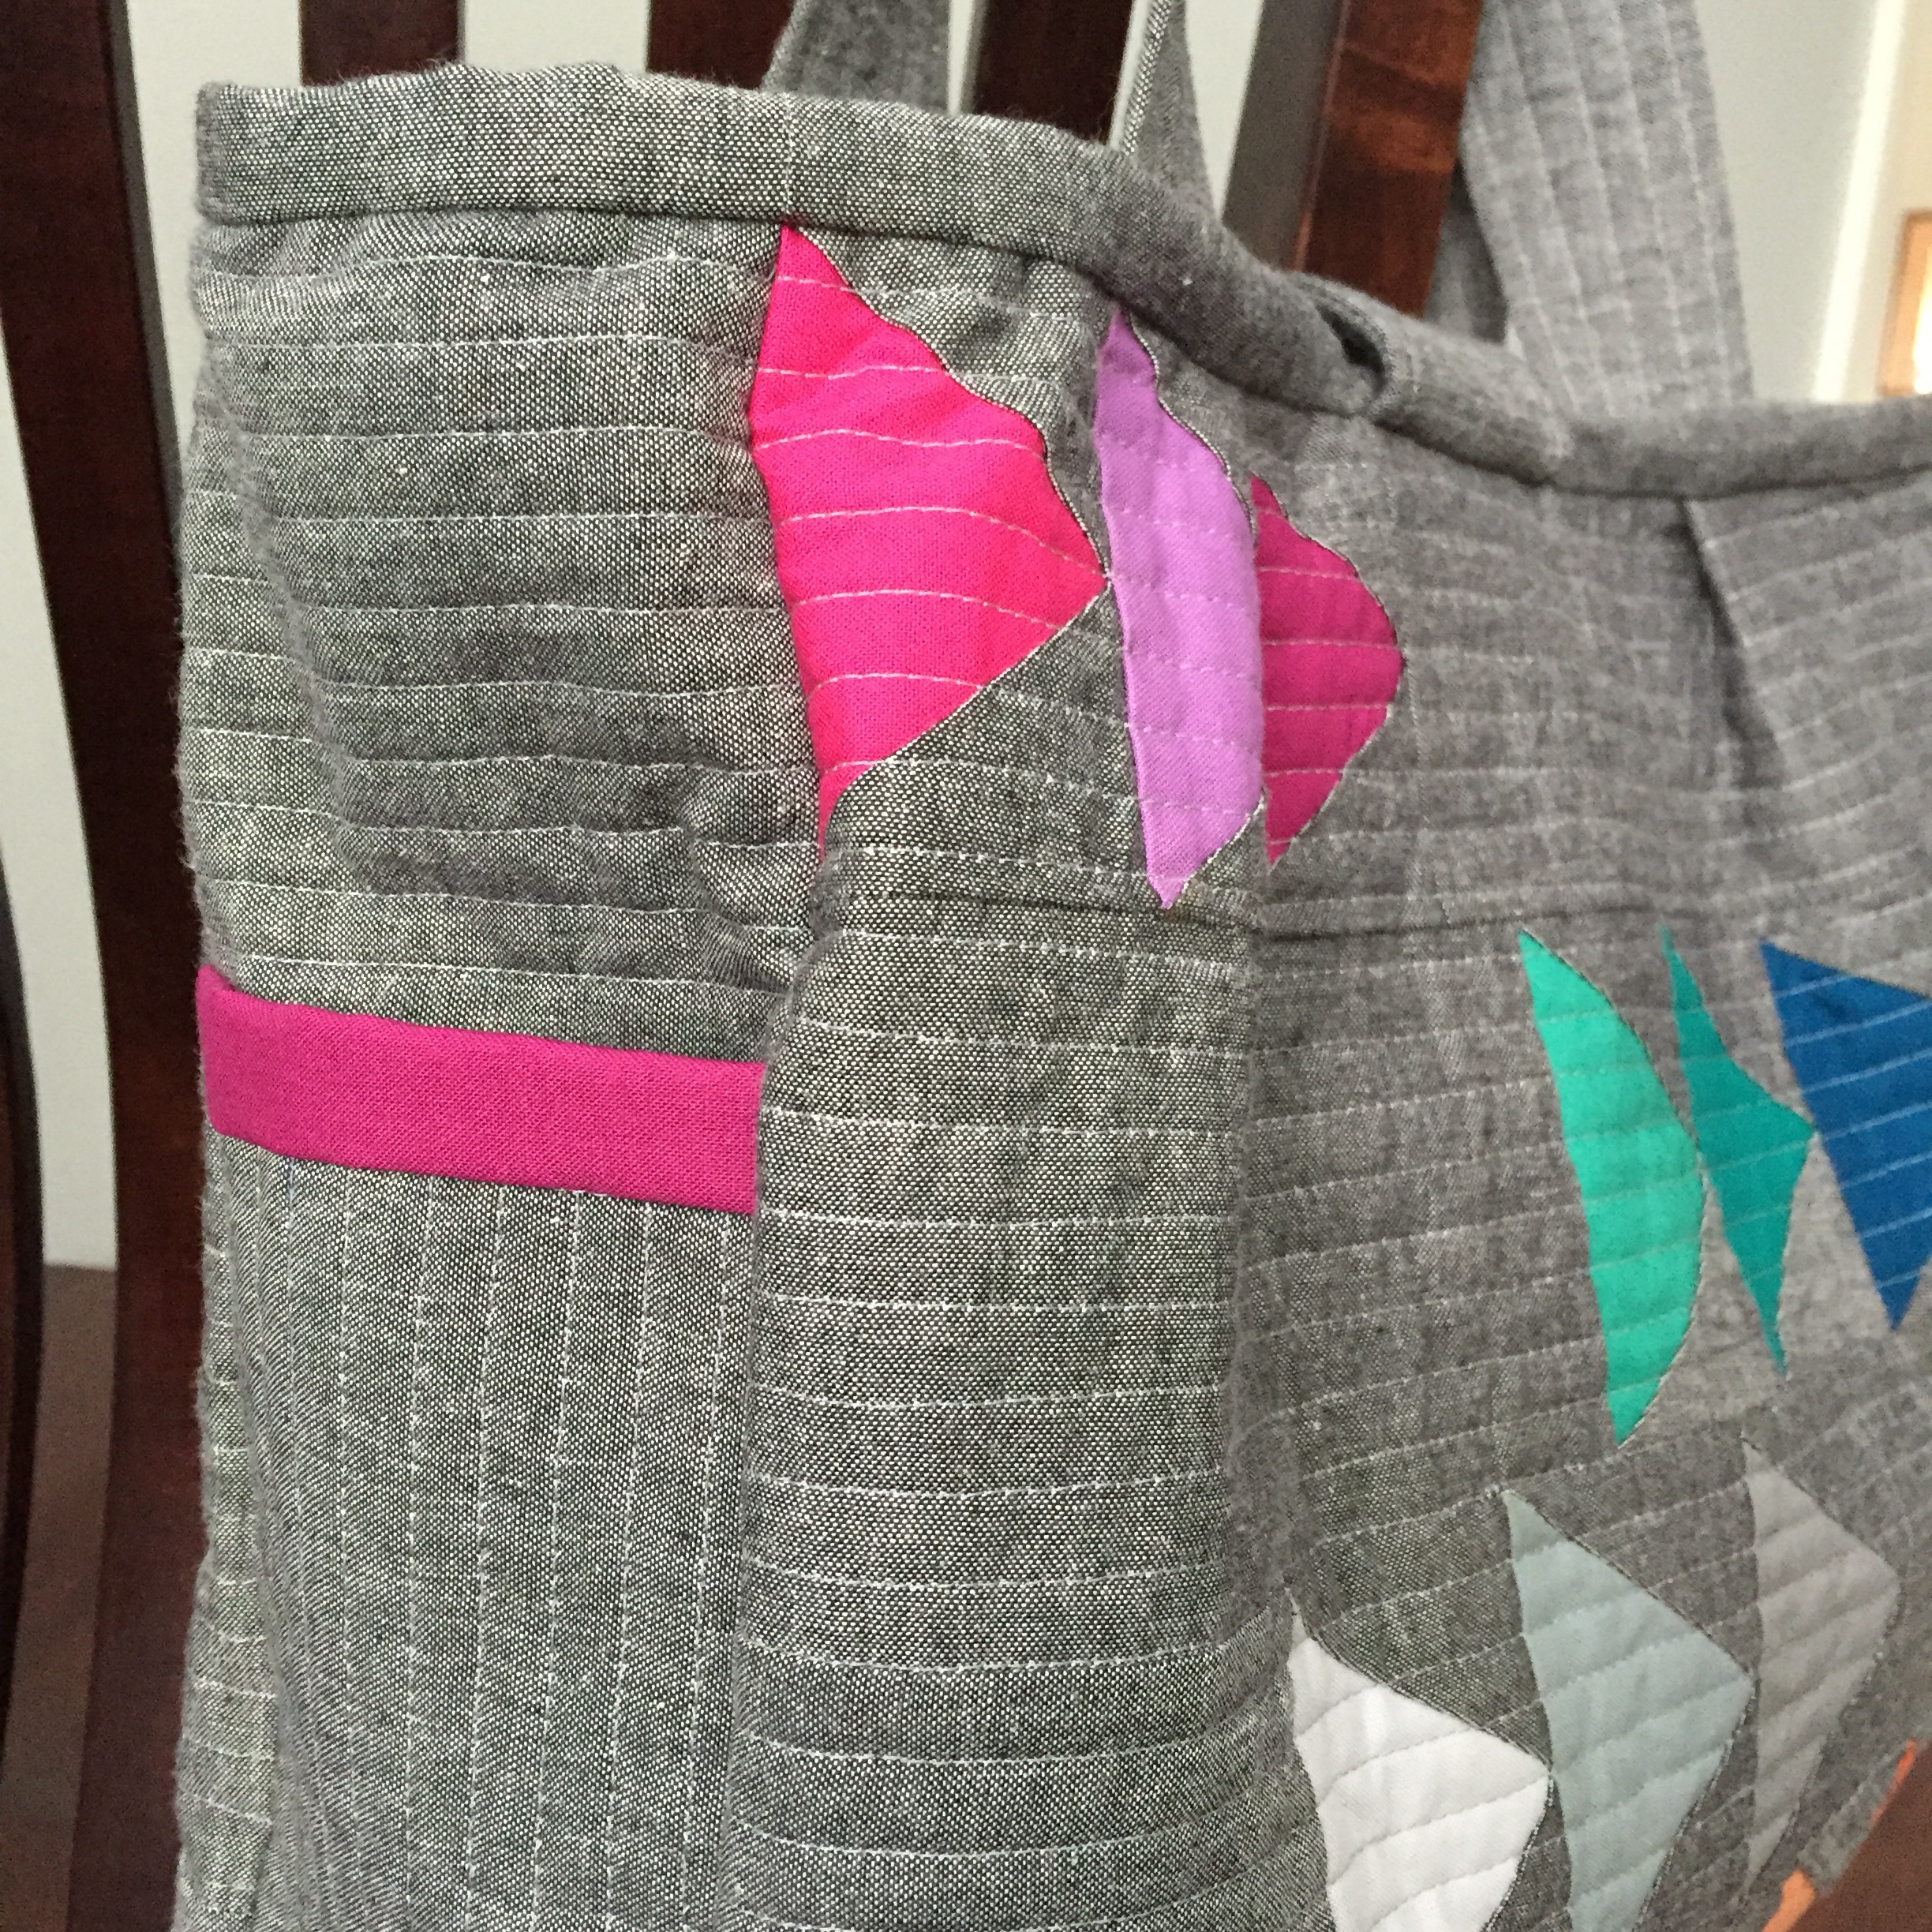
As with the majority of C & V’s patterns, they are all “quilty” in style. I wanted to stay true to their design but add my own modern touch 😉 I thought flying geese would be perfect…especially in bright Kona cotton solids! To make sure the colors would pop, I paired the solids with my trusty friend, Andover Black Chambray for a clean, chic look.

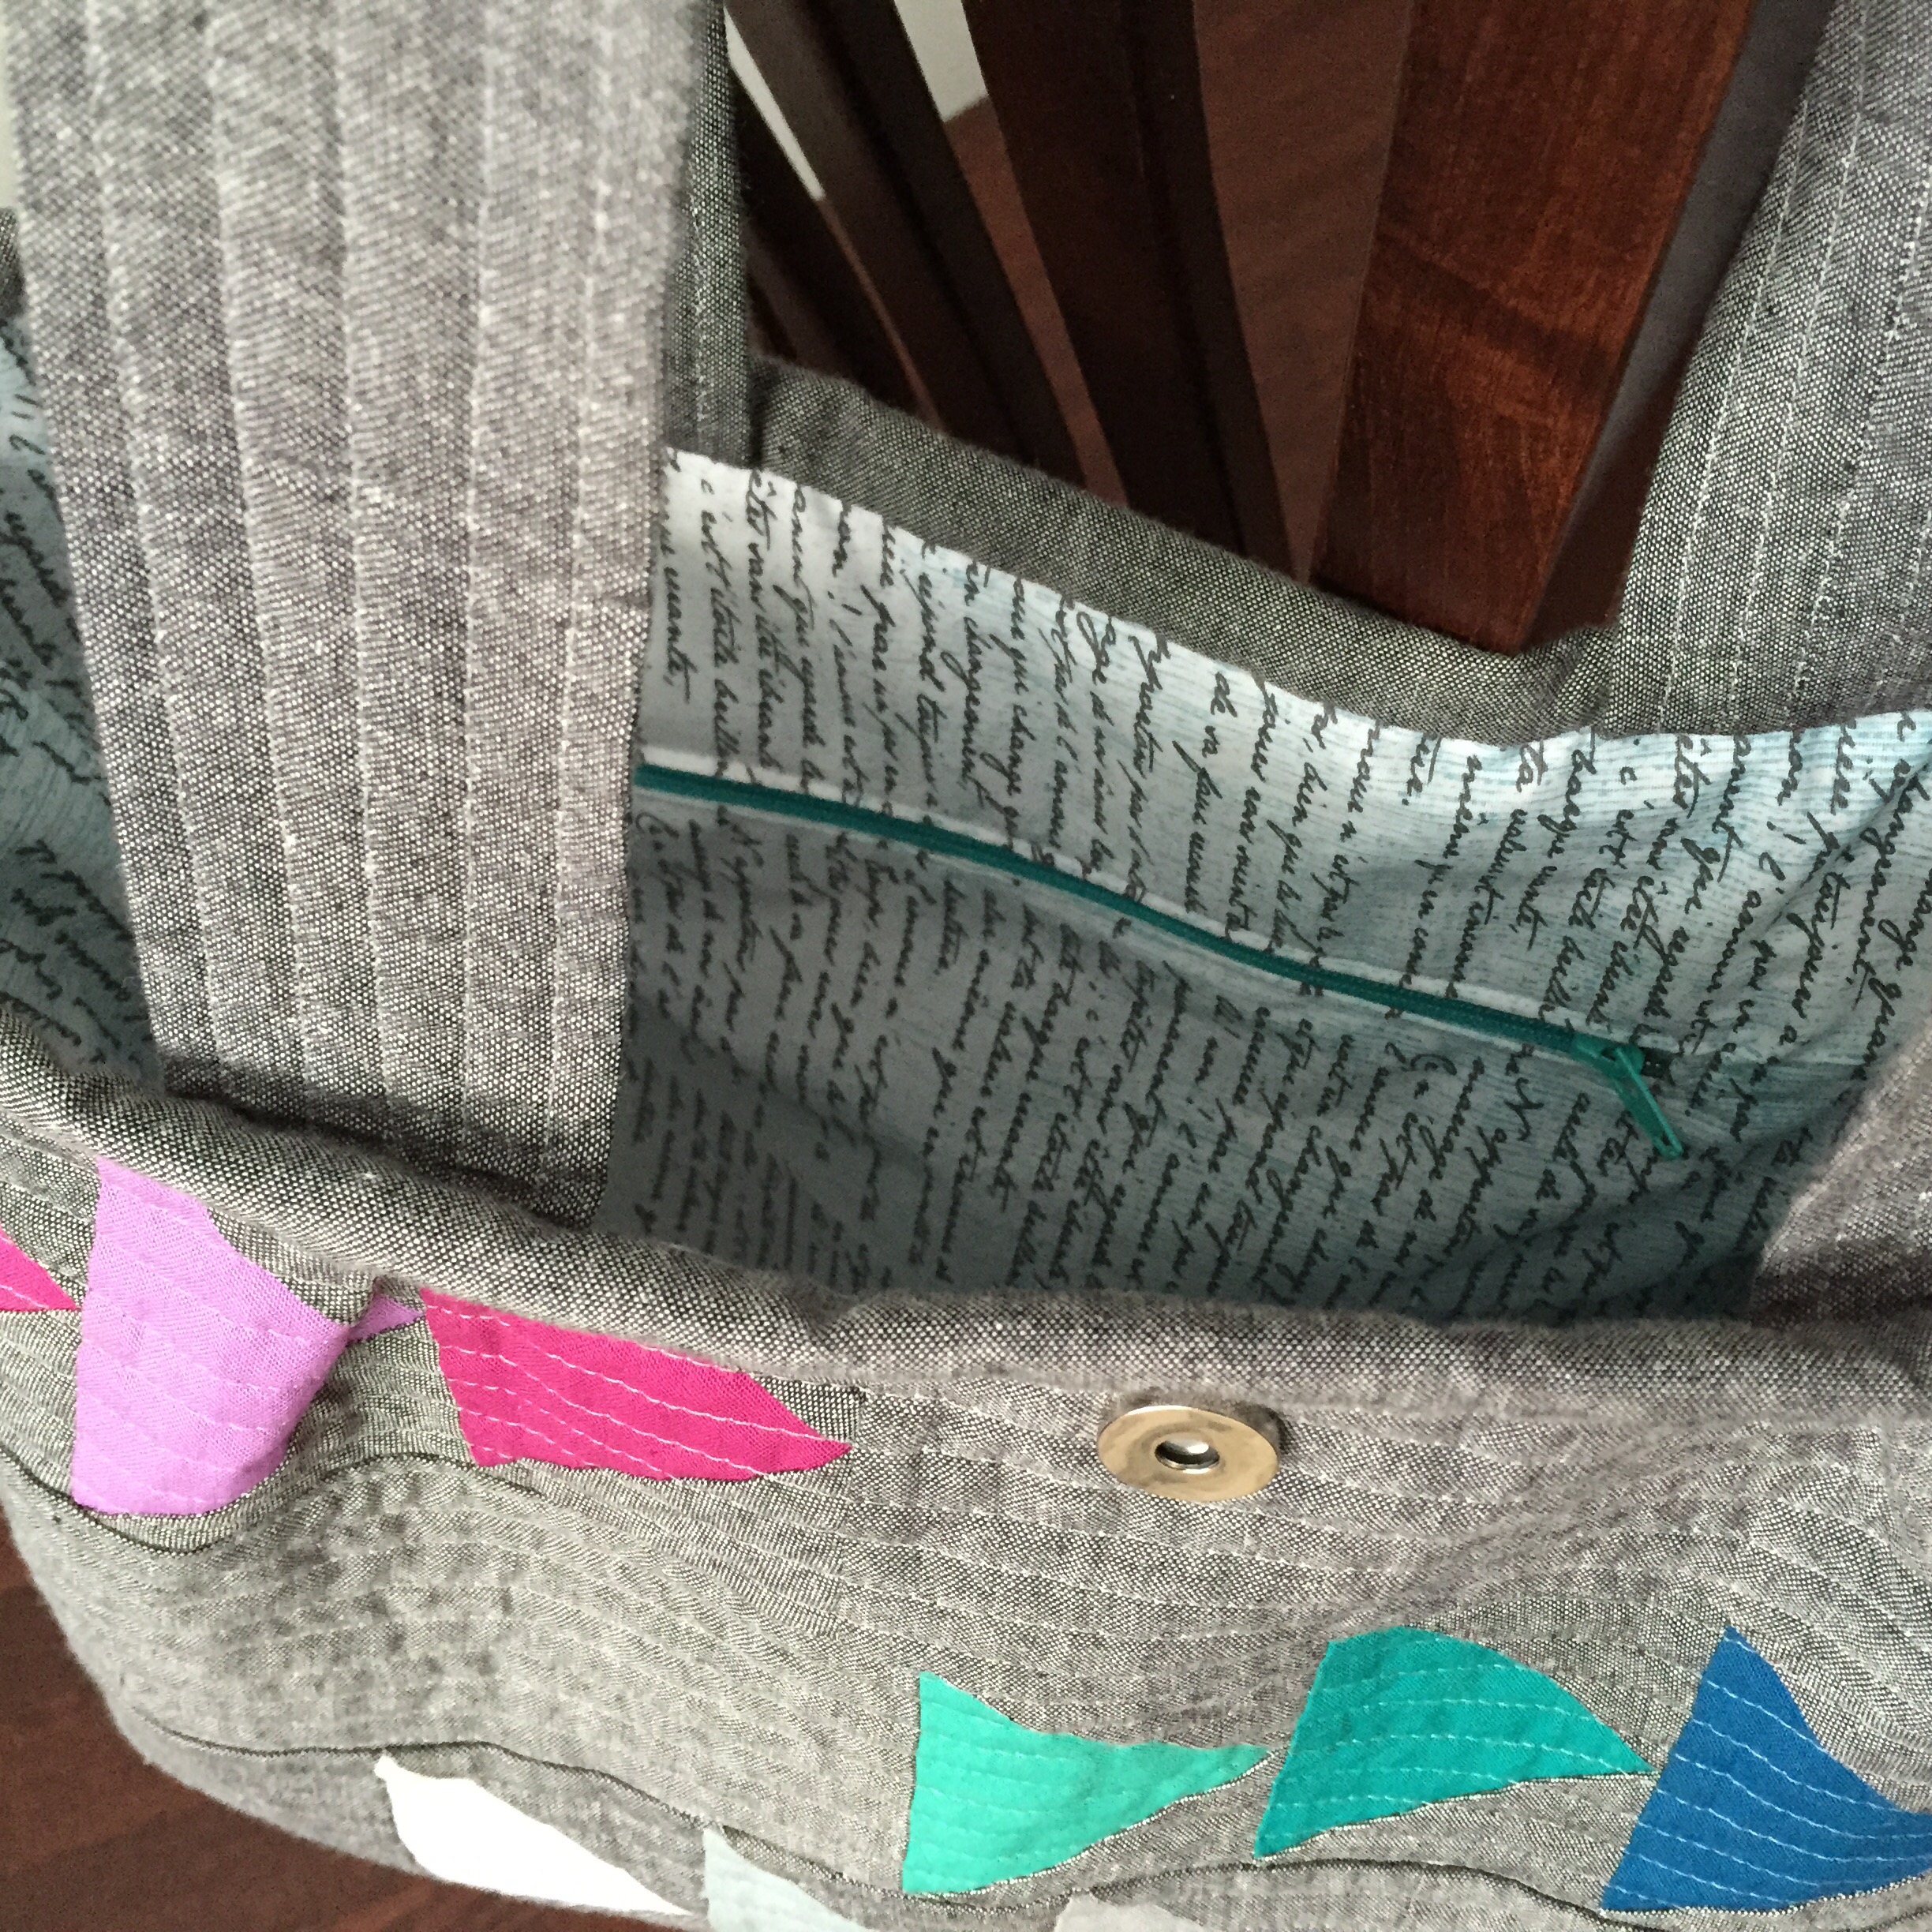
 The inside fabric was simple low-volume Telegrammes Ciel from the collection, Cherie, designed by Frances Newcombe for Art Gallery Fabrics.

Side view

I stayed pretty true to the pattern. The only adjustments made were the placement of the Geese blocks so they would be a bit more scattered and even. The side ties were omitted and extra was used Kona on the side pockets for some more color. The panels were straight-line quilted with Aurifil 2605 gray to blend through the chambray and solids.

You can see other versions of this bag here and on Instagram with #louisabag and @cloverandviolet.

Hugs and Stitches,

Cristy

Love You Sew
The pattern was provided by C&V for the IG bag tour. All material was purchased and selected by myself. All opinions and comments are my own and have not been influenced by 3rd parties.