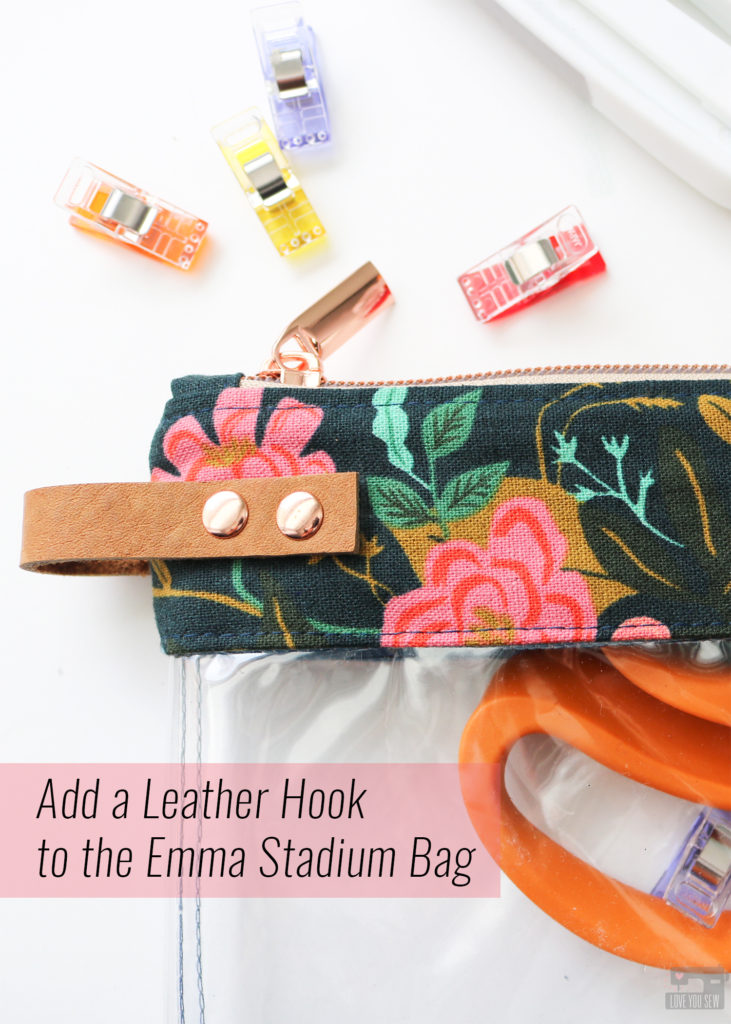
Add a Leather Hook to the Emma Stadium Bag

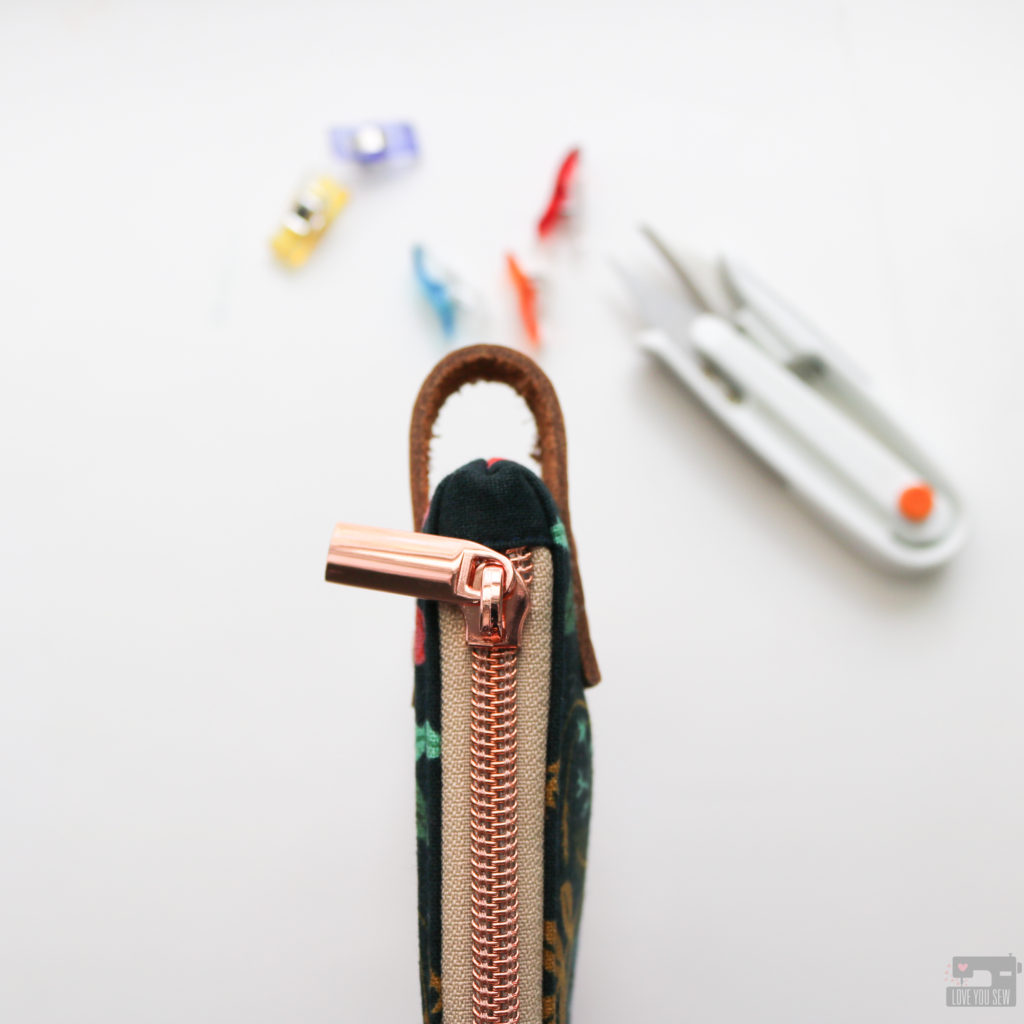
When I first designed the Emma Stadium bag, it was solely for attending football games.  I remember making the bag the night before we had to go out of town and was trying to save as much time (and money – in eliminating hardware) by adding in these leather hooks in lieu of D-rings.  But it turns out, you loved my time saving feature when I showed this bag on Instagram.  I wanted to make sure I shared the tutorial with you!
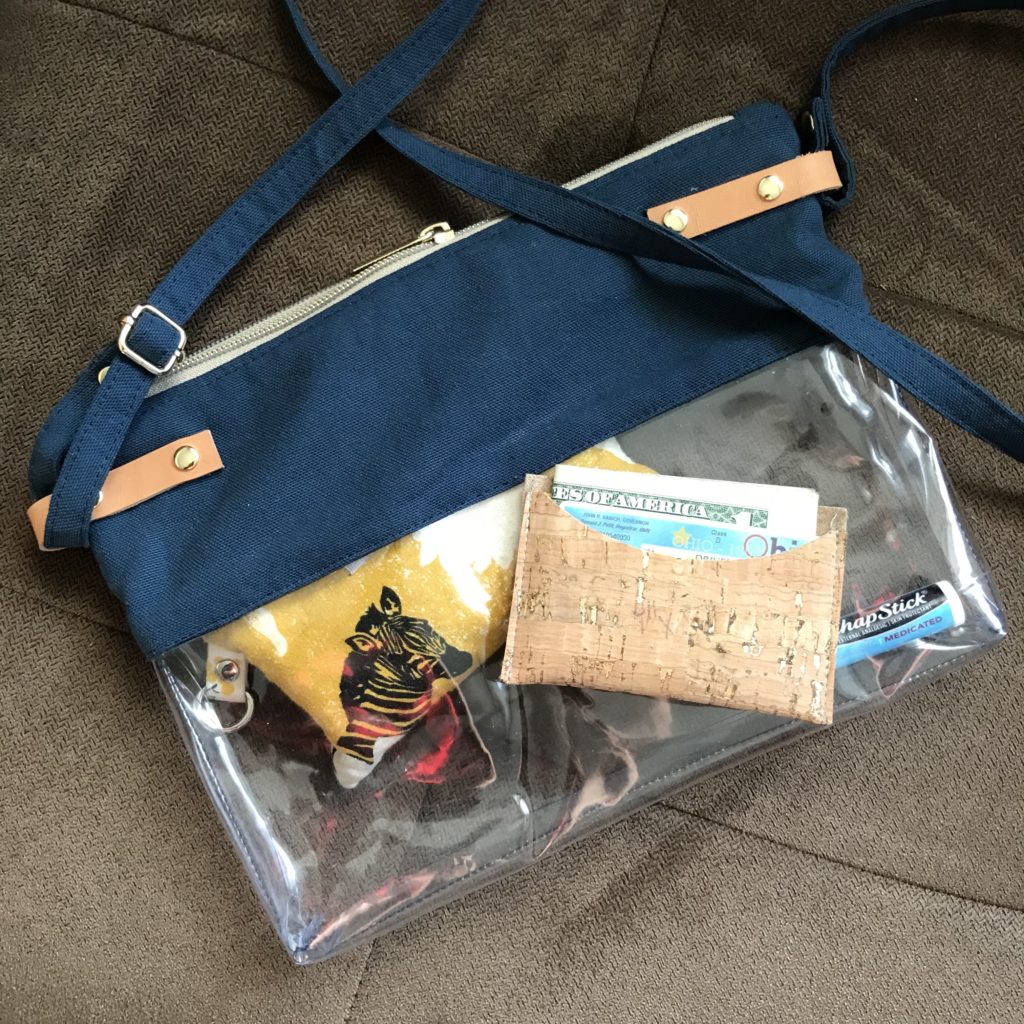
After making more of these Emma Stadium Bags during the pattern writing process, I knew these were going to be my handmade gifts of the season –as cosmetic bags!  These are so quick and easy to make especially when you leave off the D-ring tabs since there isn’t a strap.  You can read more about the Emma here and get some vinyl sewing tips here.
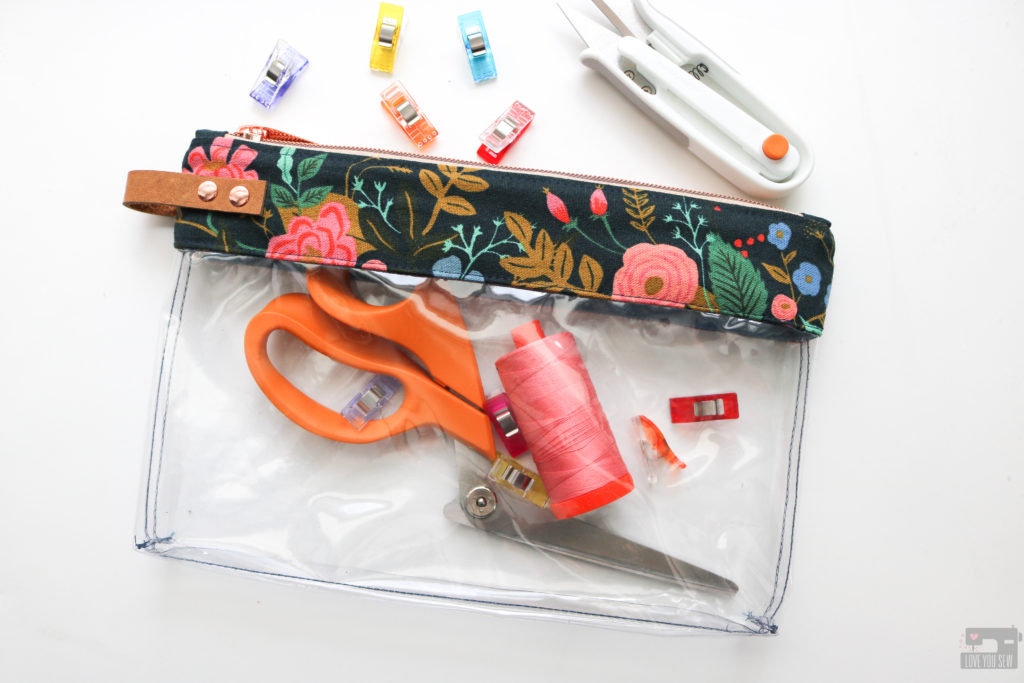
Make the Hook

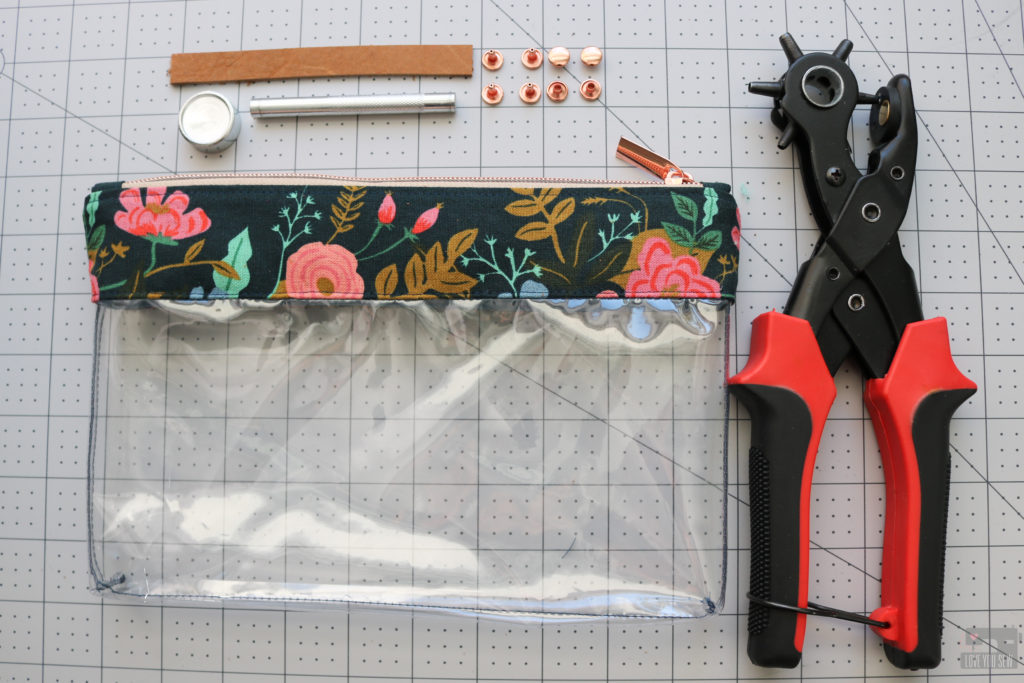
To use the Emma as just a cosmetic/travel pouch, you will need the  small version of the pattern which you can buy here and the following supplies (aff links): 

1. With the leather hook, measure from the short end and mark at 3/8″ and again at 7/8″ (There should be 1/2″ between marks.)  Repeat on the other short end.
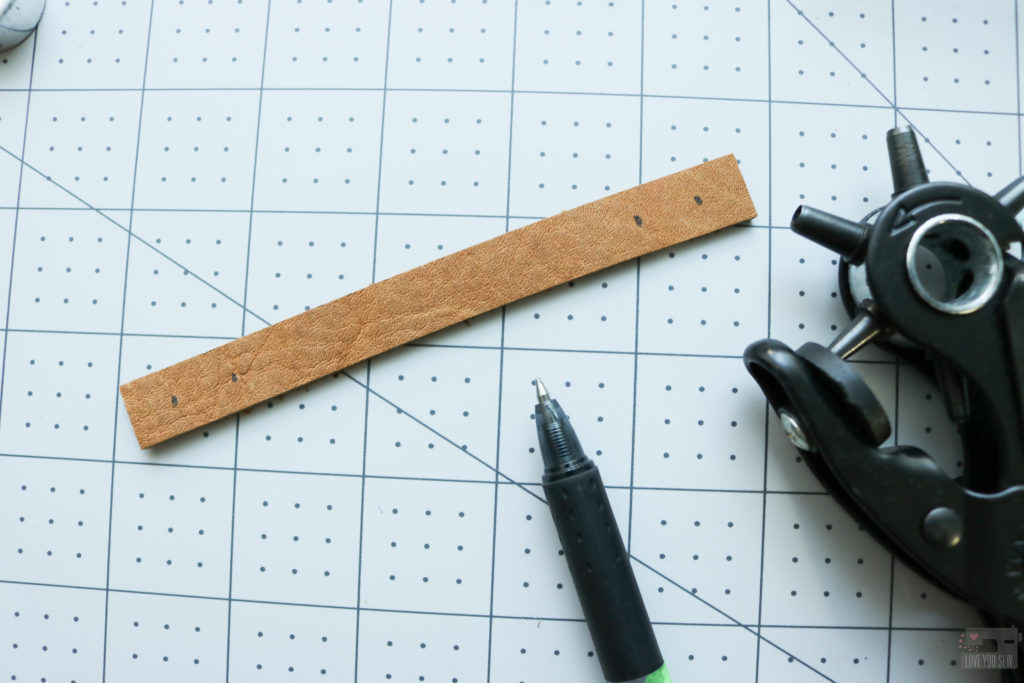
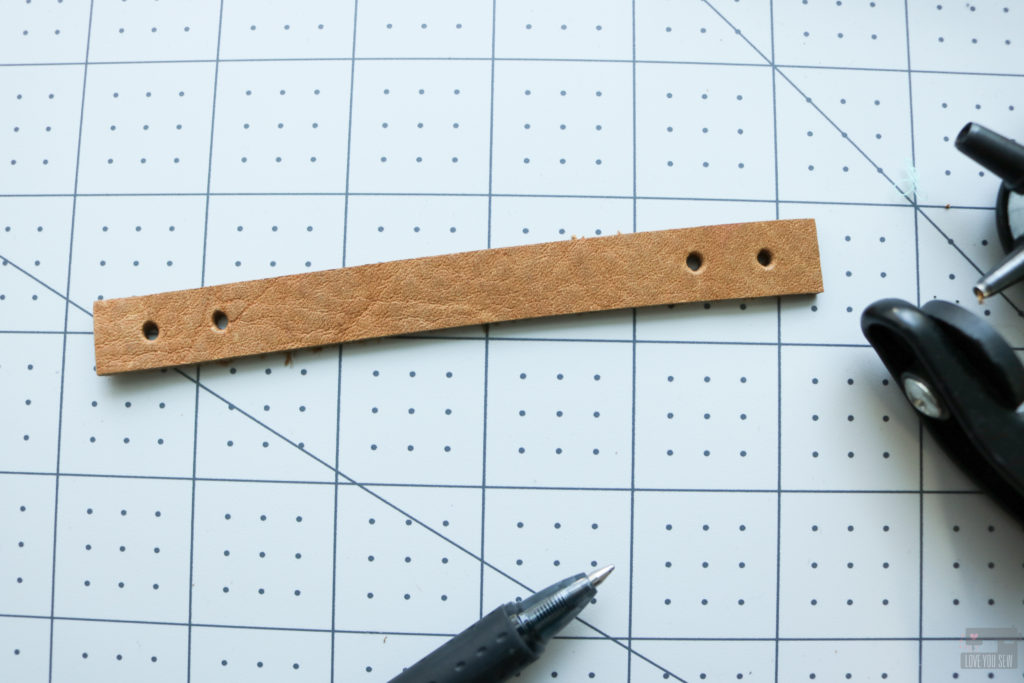
2.  Use your hole punch to cut 4 holes at every mark making sure you are centered width-wise.
3.  With your completed Emma Stadium Bag (with all tabs omitted,) mark 1 1/2″ in from the side seam.  Make another mark centered width-wise on the fabric accent.  (This is approximately 3/4″ down from the zipper.) Repeat on the opposite side of the bag.
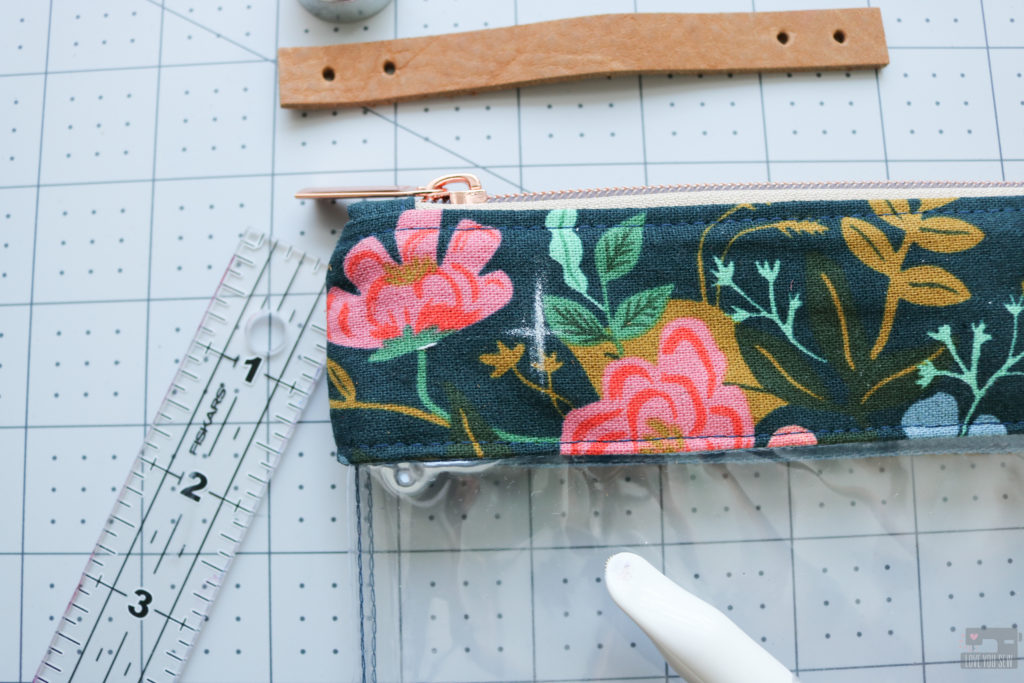
4.  With the fabric glue, add a sparing amount to the wrong side of the leather hook around the holes punched.
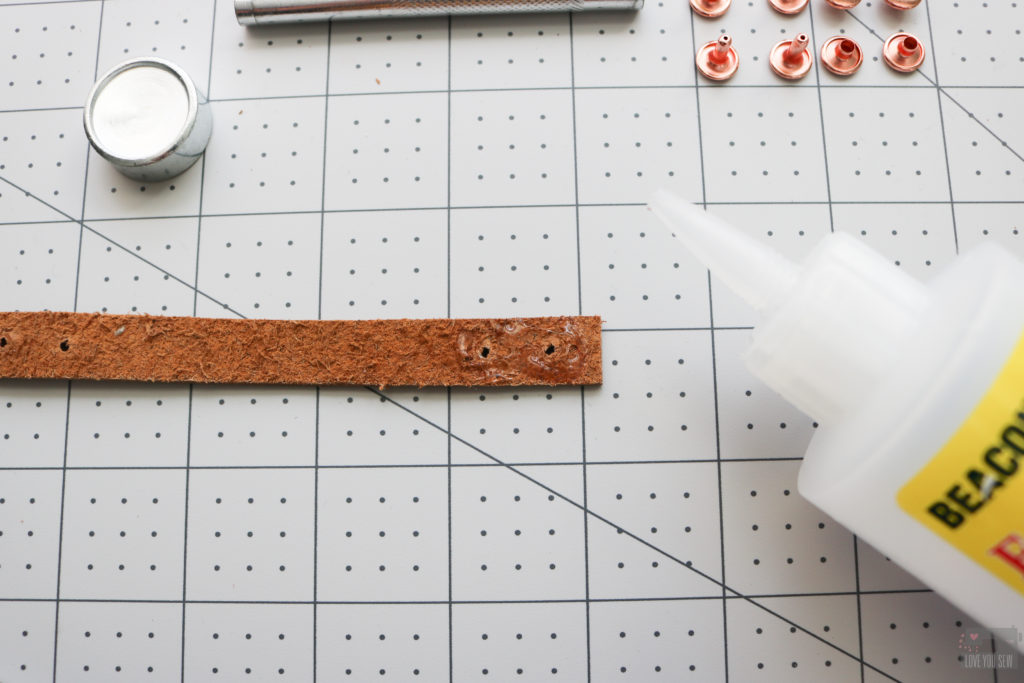
5.  Lay the leather hook against the fabric aligning the short edge to the vertical mark and the holes with the horizontal mark.
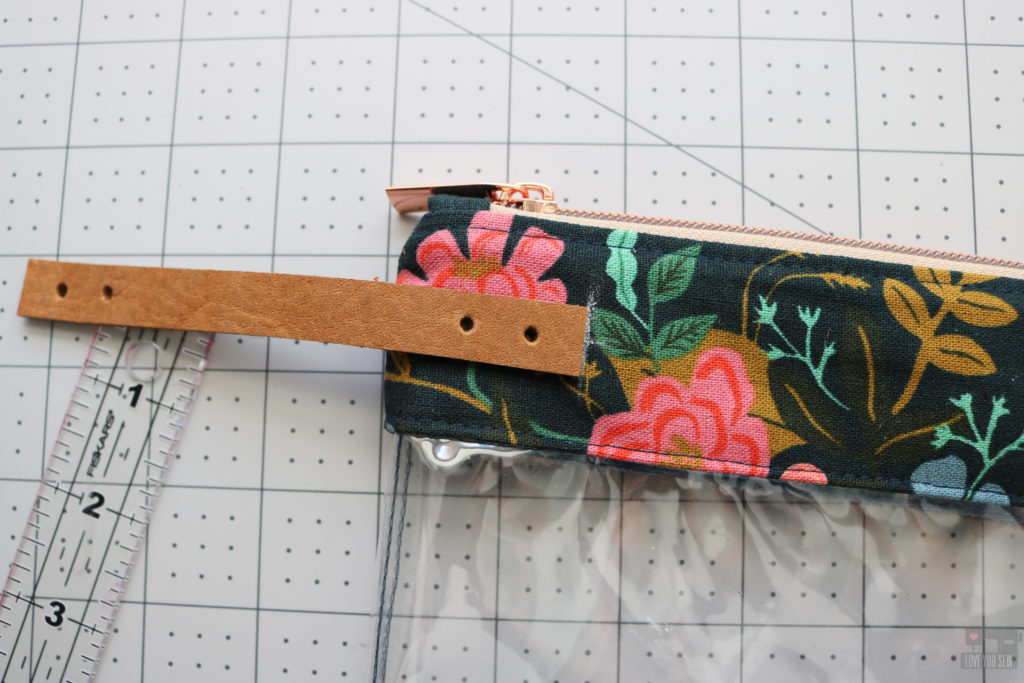
6.  Repeat on the opposite side of the bag and hold in place until the glue is completely dry.
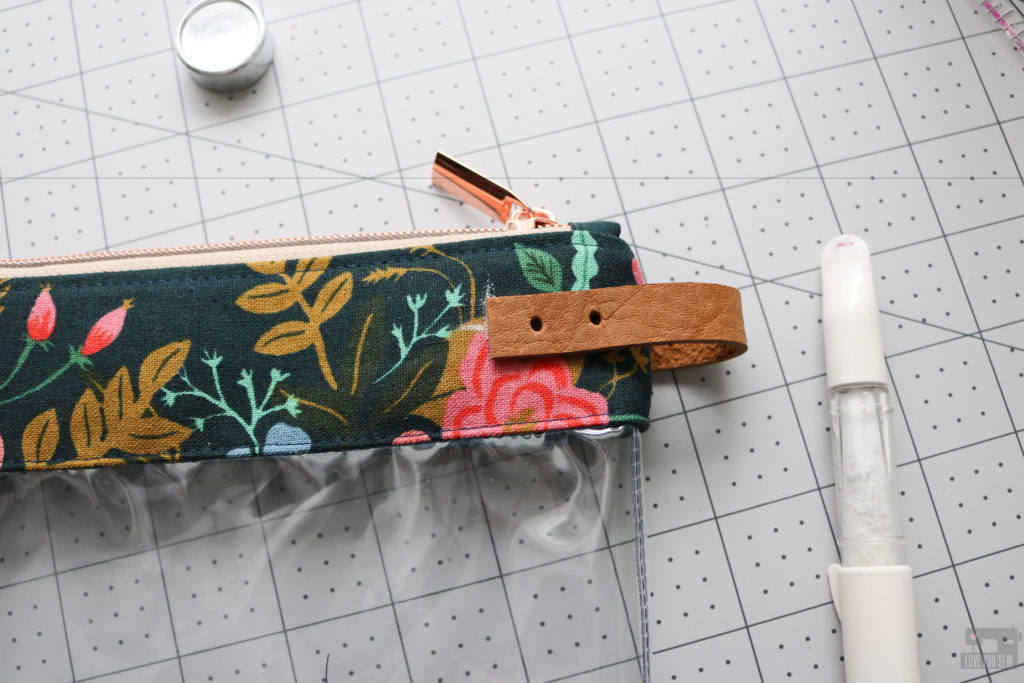
7.  Using the holes cut out of the leather hook, punch a hole through one layer of fabric and one layer of lining.  Repeat for the remaining three holes.  If you are using manual hole punches, make sure you have cutting board inside the Emma to prevent you from cutting to the other side of the bag.  
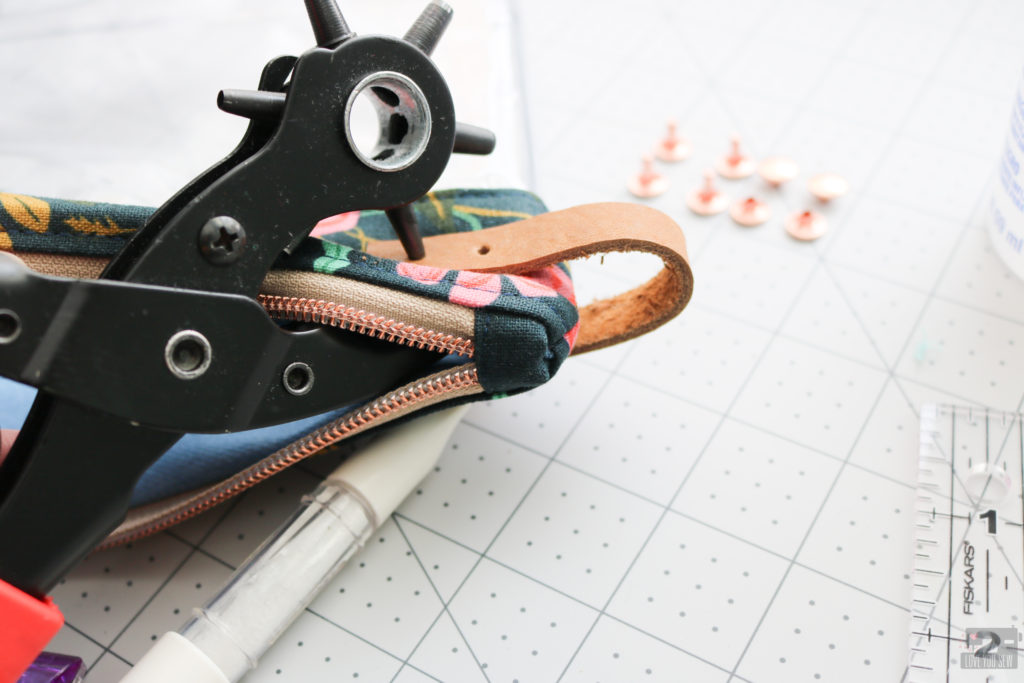
8.  Add each set of rivet through only one layer of fabric and one layer of lining.  Repeat for the remaining three sets of rivets.
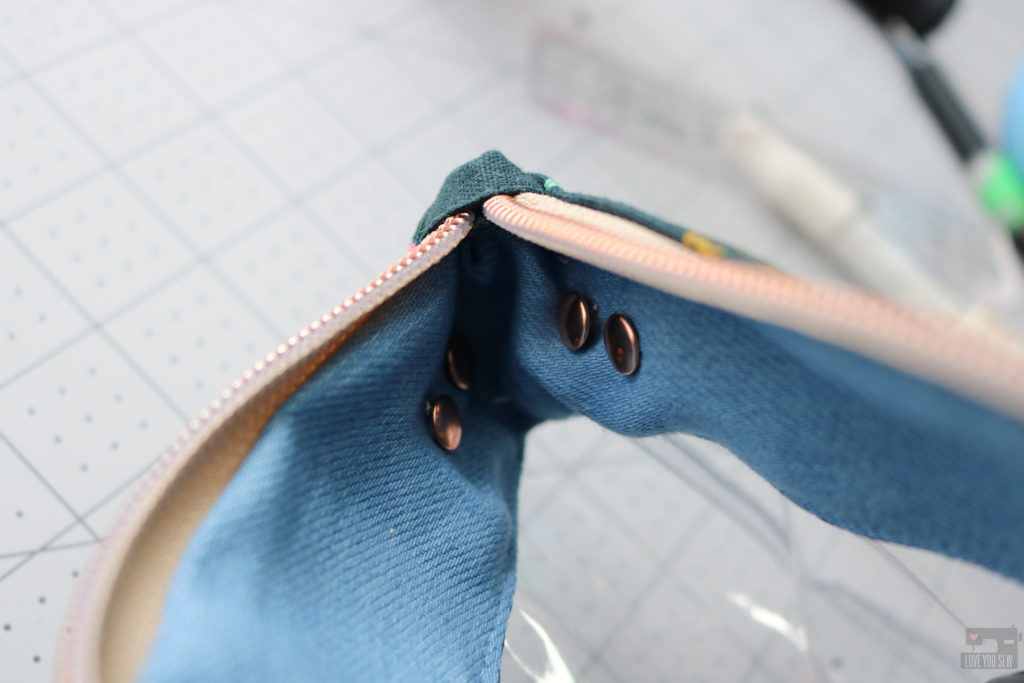
9.  Use setting tools to affix the rivets together.
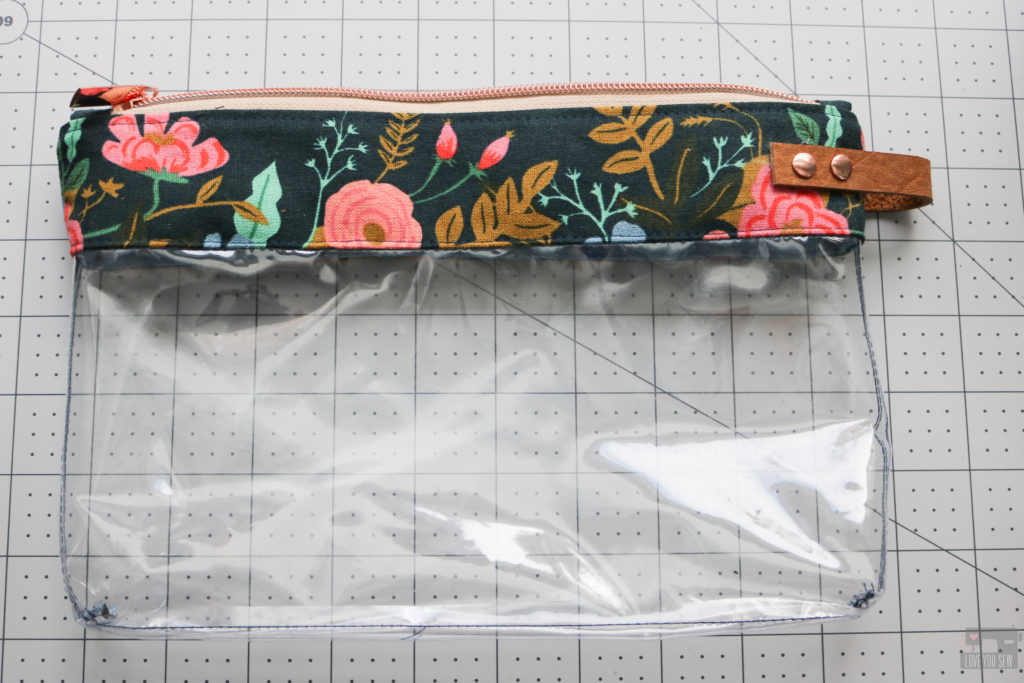
Congrats on your chic new travel cosmetic pouch!!!
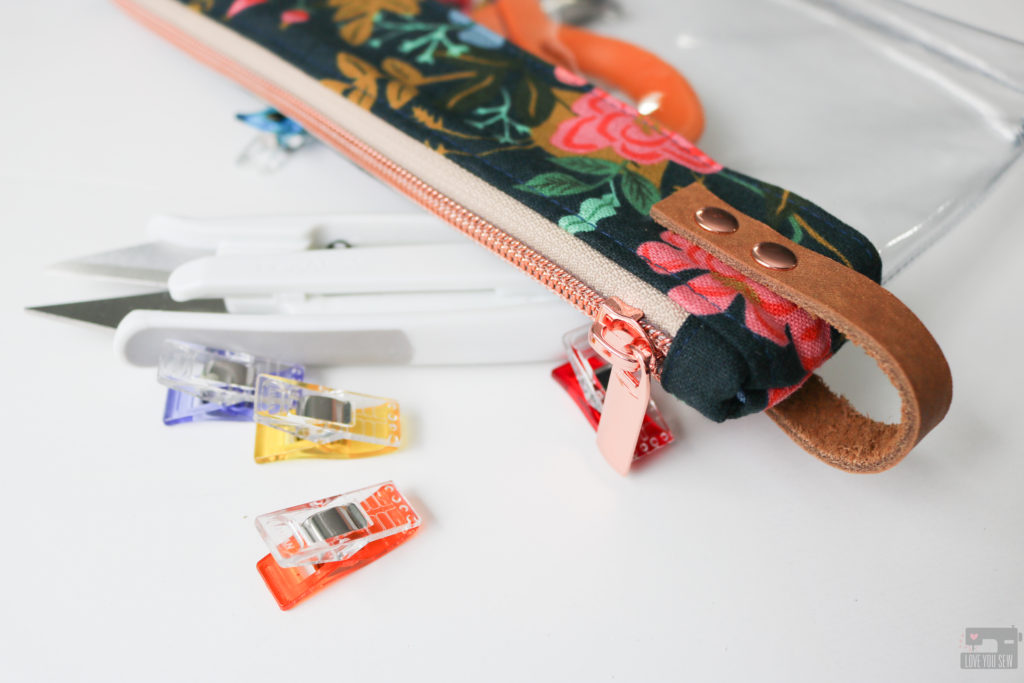
Project Summary

I hope you enjoy making these quick and easy travel cosmetic bags!  These have definitely been a huge hit among my family and friends…I’m having a hard time keeping up with the demand!

Don’t forget to share your makes on social media with #emmastadiumbag and #loveyousewpatterns so I can see all of your fabulous creations!

Hugs and Stitches,

Cristy


This post may contain affiliate links which helps to keep this website ticking.  Please visit my Disclosures page to learn more.
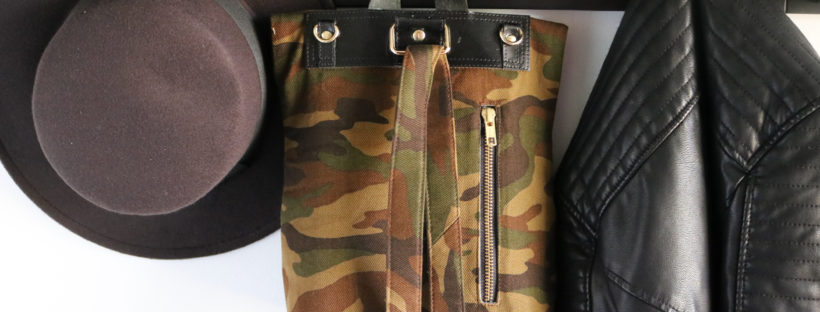
Add a Phone Zipper Pocket to the Abbey Convertible Backpack

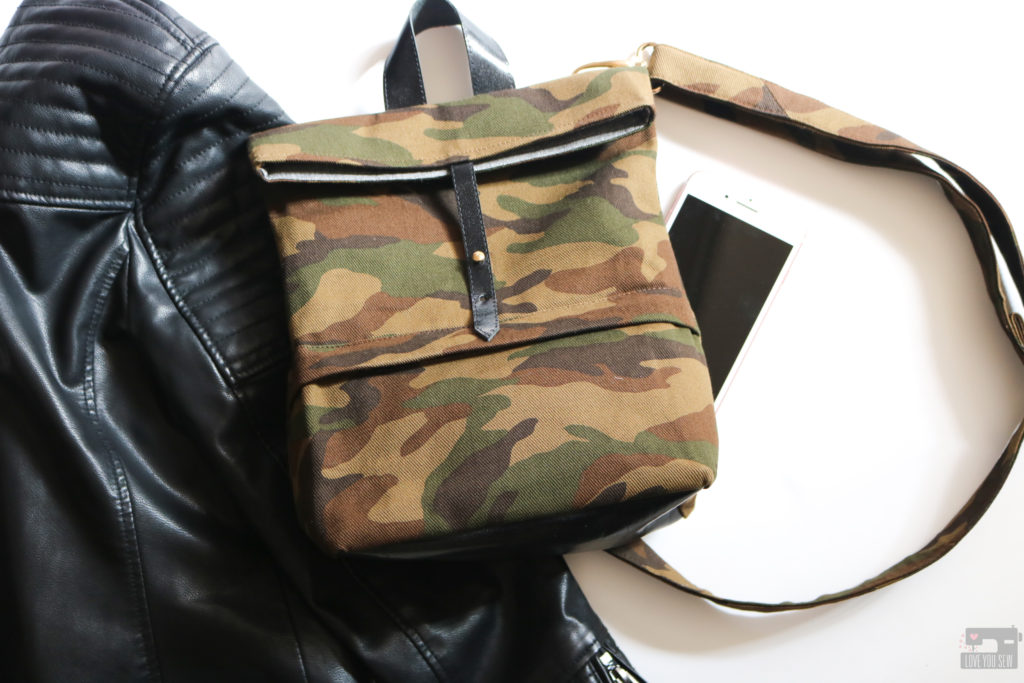
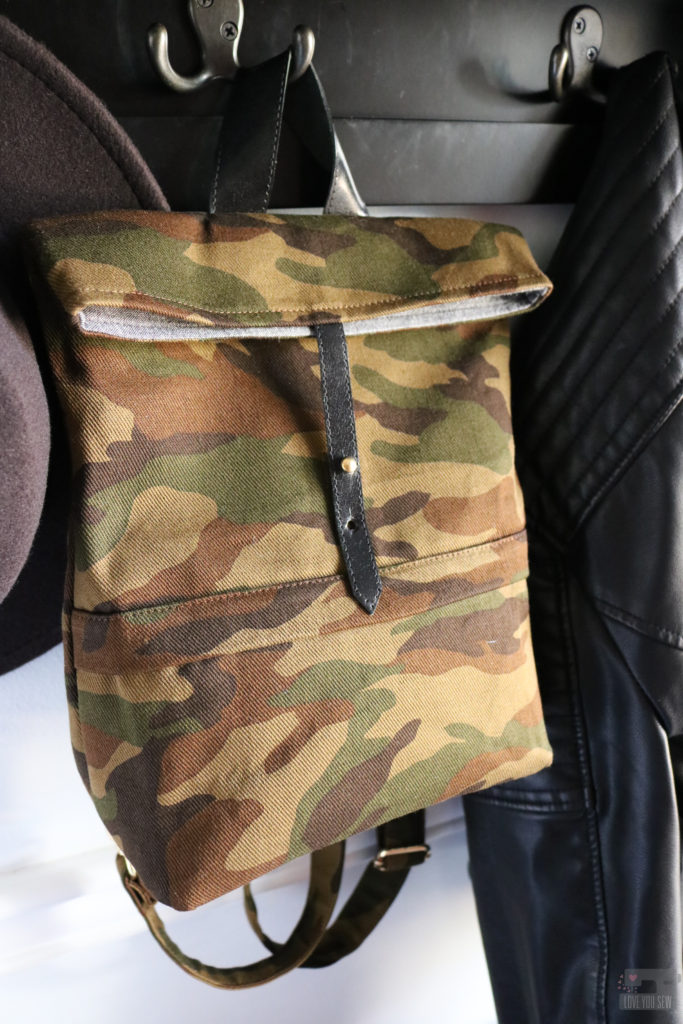
The Abbey Convertible Backpack is my go-to bag when taking day-trips with my kids. I like having it out of the way but still being able to hold the essentials. But being a designer, I constantly have new ideas and wish there were different features with every bag I own.

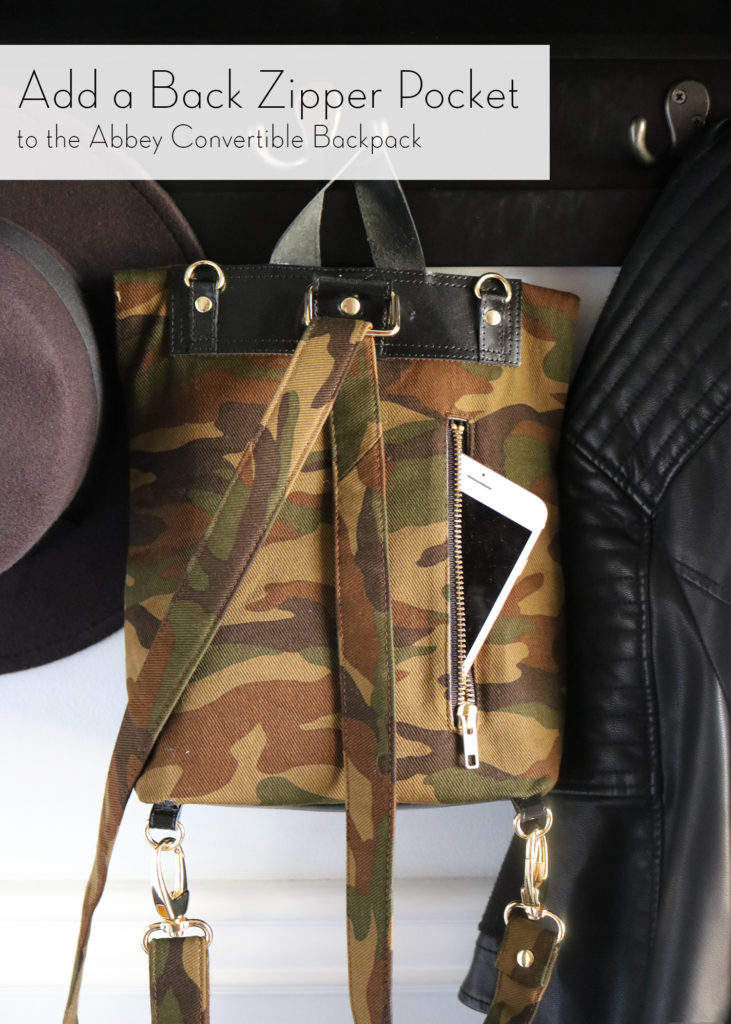
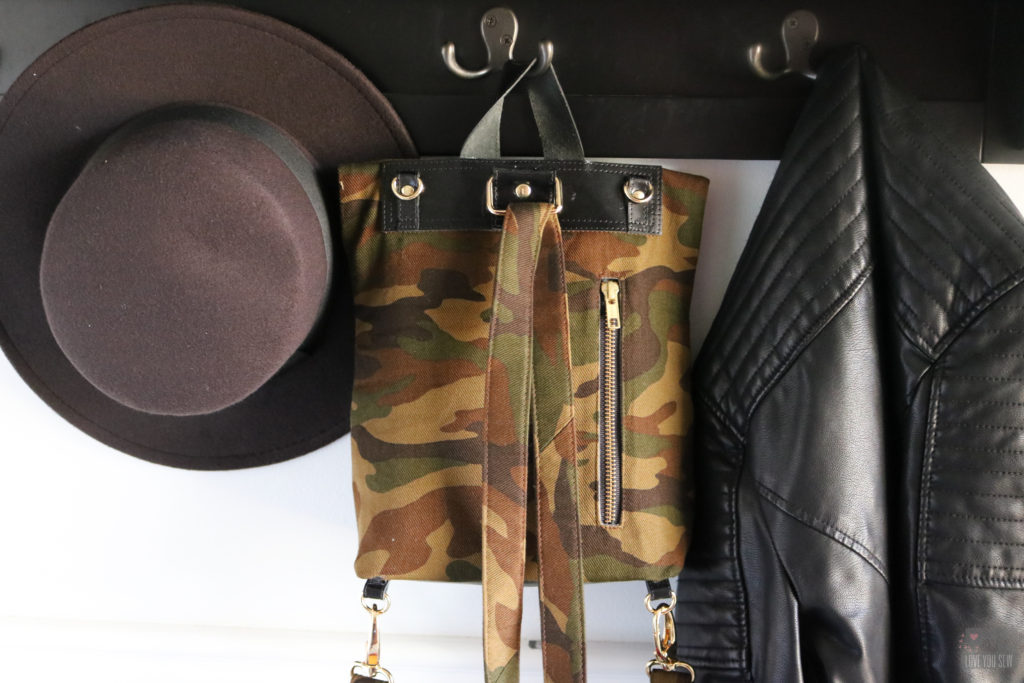
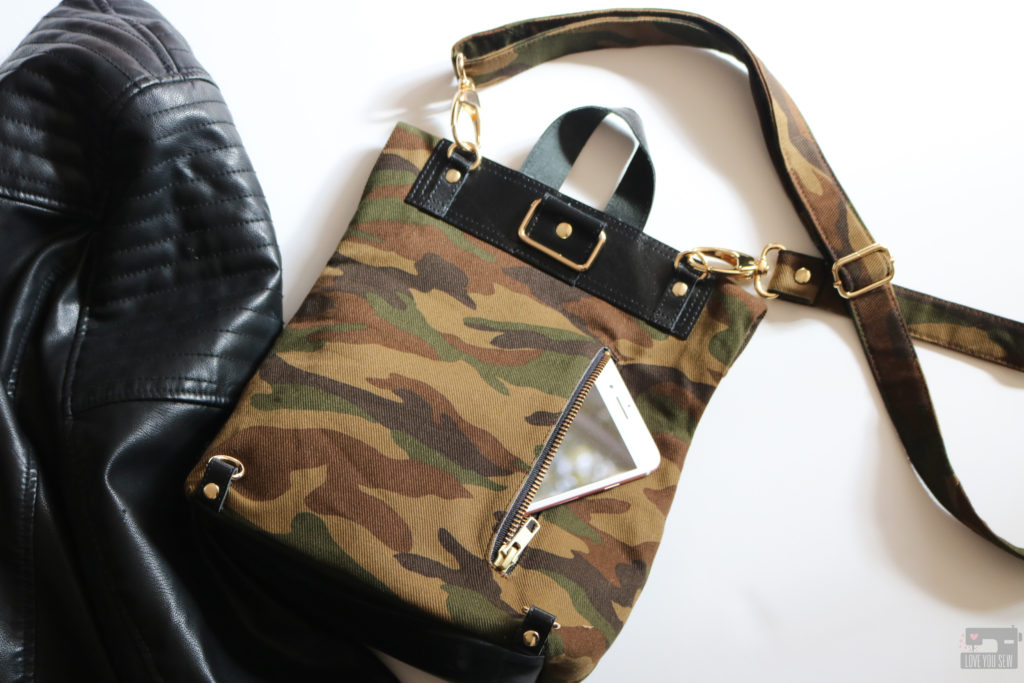
On the back of the Abbey, there is a slip pocket. I added the feature with the intention that it would be a quick spot to hold your phone or keys without having to open the main compartment as frequently. But since I happen to wear my bag more as a backpack, I have to swing it around to access the pocket and felt that a slip pocket just isn’t as secure for an expensive smartphone — and BOOM, I have the idea for the back welt pocket hack.

Back Welt Pocket Tutorial

You will need the original instructions and templates for the Abbey Convertible Backpack which you can find here. Additionally you will need:

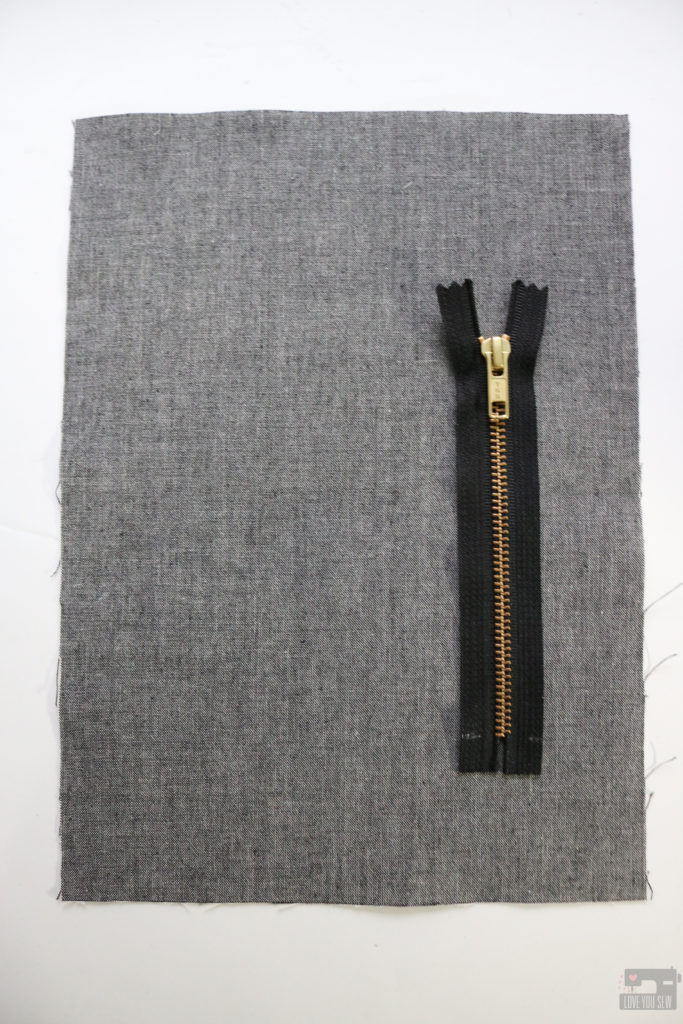
  • 6″ Zipper
  • 8 3/4″ x 12″ Lining Fabric + Interfacing (this is large enough to fit an iPhone 7+ with a thick Otterbox case.)

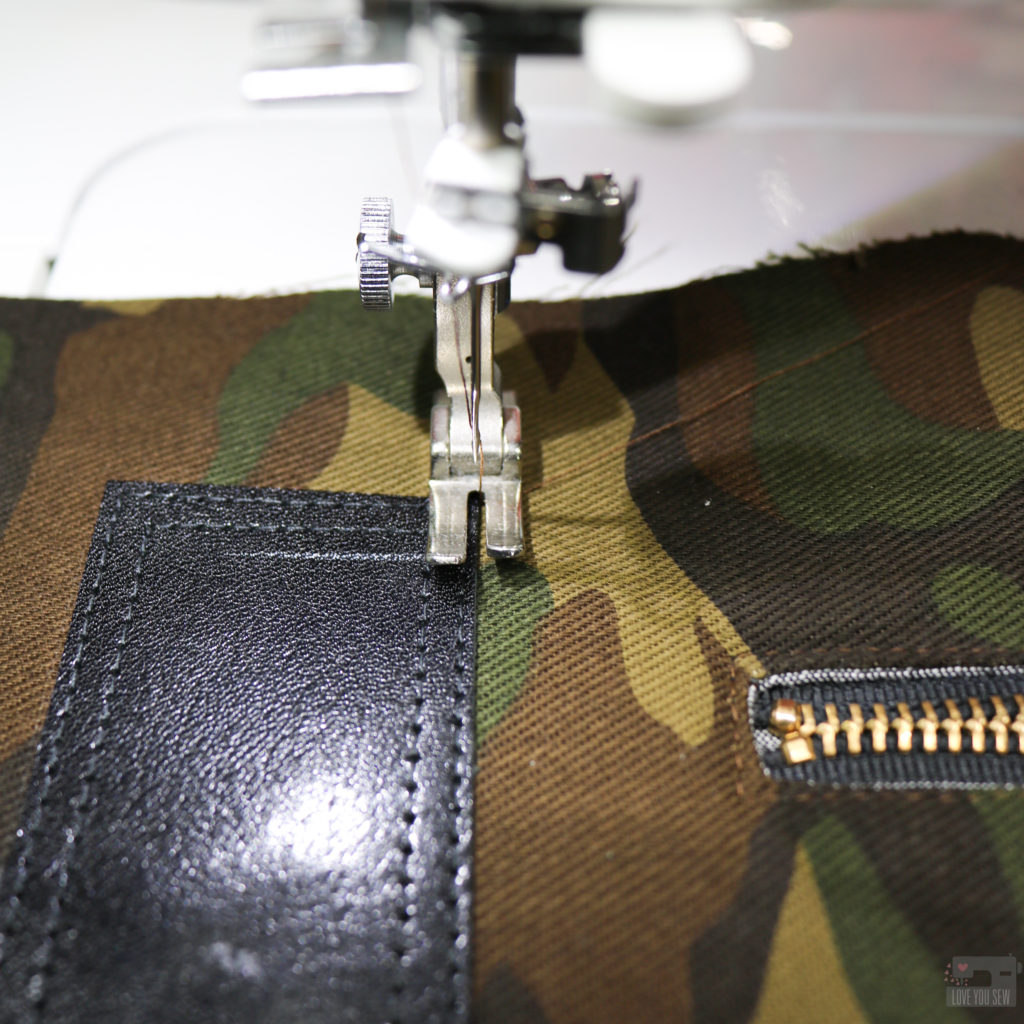
To make the Back Zipper pocket, you will omit all of the fabric and interfacing for the Slip Pocket and move through Step #41. (Please note I don’t have connectors added to my handle base at this point since I used leather and added them later.)

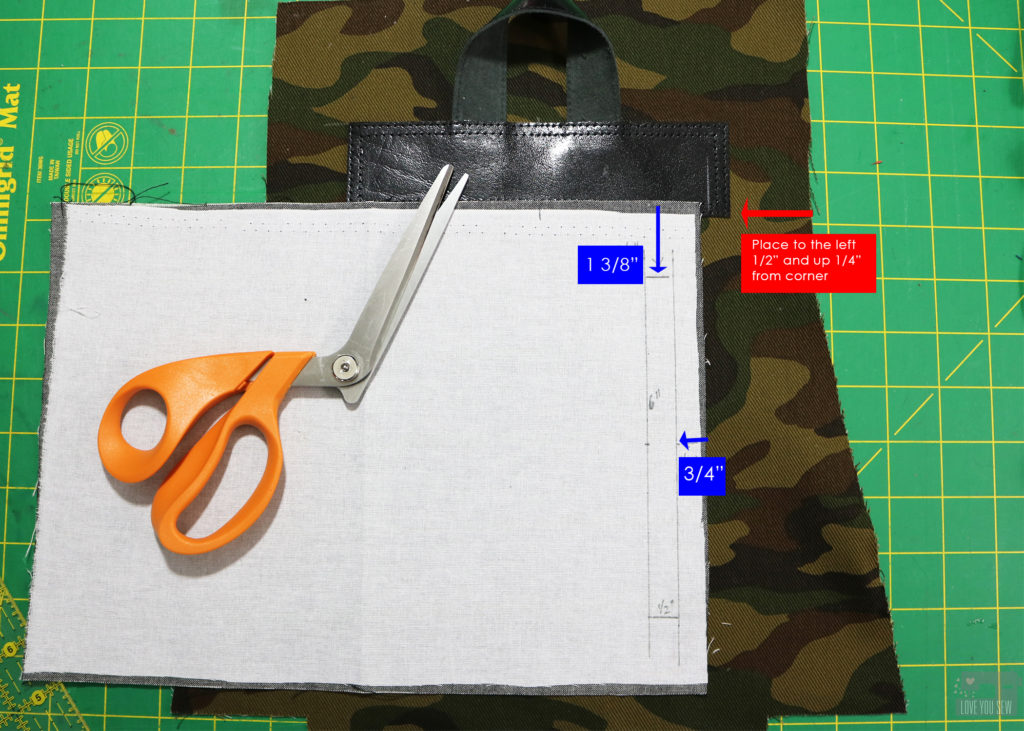
Draw a rectangle measuring 6″ x 1/2″on the wrong side of the Pocket Lining centered and parallel to the short side as shown. The Zipper will run vertically.  There should be 1 3/8″ above and below the rectangle and 3/4″ space to the right. 

Line up the Pocket Lining as shown with the right edge 1/2″ in and up 1/4″ from the sides of the Handle Base. Pin the Pocket Lining in place. Go back and follow Steps #21-28 to finish the pocket! Voila – a chic looking vertical zipper pocket to keep your phone or other valuables a little more safe as you sling the backpack around.

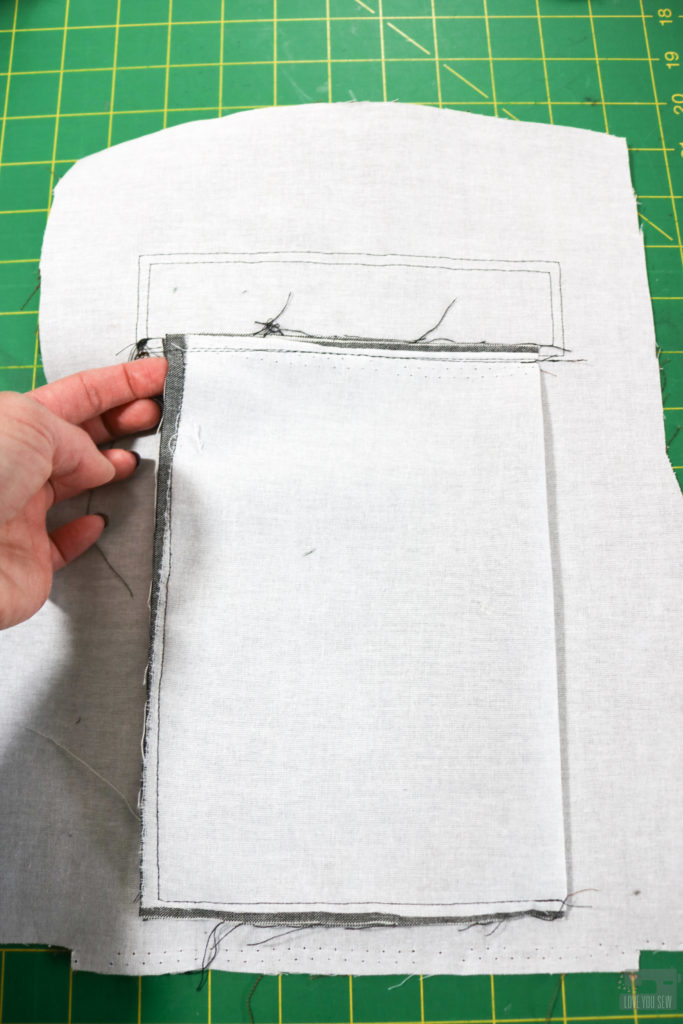
Since the Pocket Lining hangs vertically instead of horizontally, the weight of a phone would make it drag awkwardly and pull on the zipper.  So, the Pocket Lining needs to be anchored horizontally so the weight can hang straight down naturally.  To do this, flip the back of the bag right side up and sew directly below the Handle Base from corner to corner catching the Pocket Lining.  Back-stitch well.

This is the wrong side after securing the Pocket Lining.  The weight of the phone is evenly distributed and won’t distort the structure of the bag.

Additional Modifications

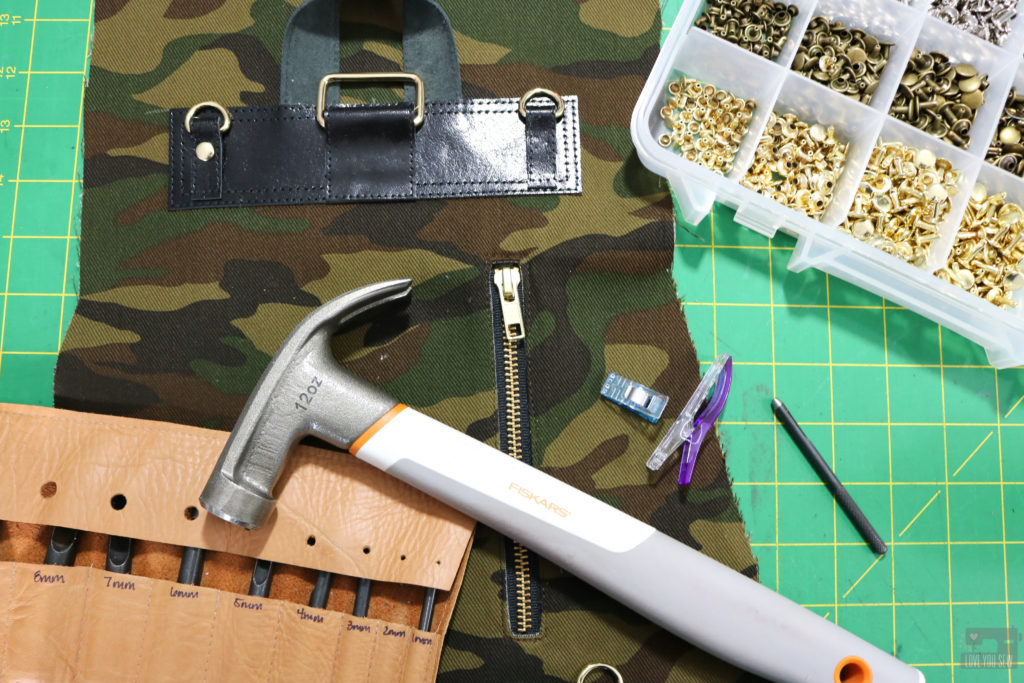
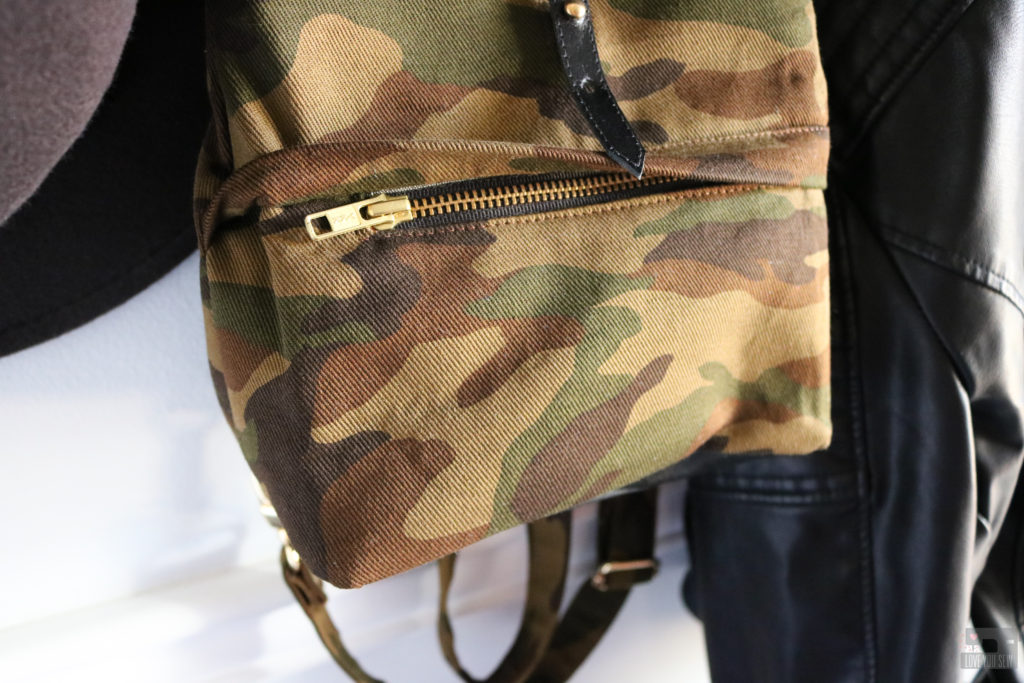
You know I cannot resist using leather in my personal bags!  I had this great glazed black upholstery leather I got from Tandy which I used to make a few Kelly Waist Bags.  The scraps are great for all of Abbey’s accents like the connectors, handle and closure tab.

I also used my other Abbey Backpack Zipper Cover and Button Stud Hacks which you can find here.  I like the clean look from the front and just love using button studs with leather.

Project Details

I hope you enjoy this hack and even use it for other projects!  Don’t forget to use #abbeyconvertiblebackpack and #loveyousewpatterns on social media so everyone can see your fabulous makes!

Hugs and Stitches,

Cristy


This post may contain affiliate links which I use to keep this website pumping along.  Please visit my Disclosures page for all  the info on my affiliate relationships.

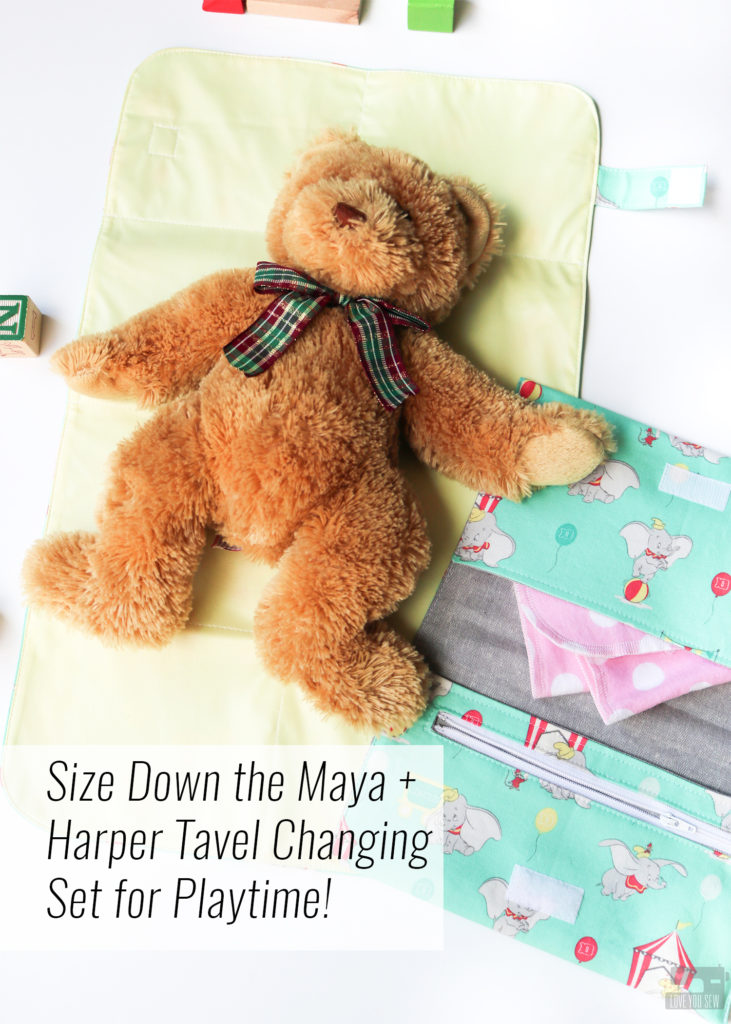
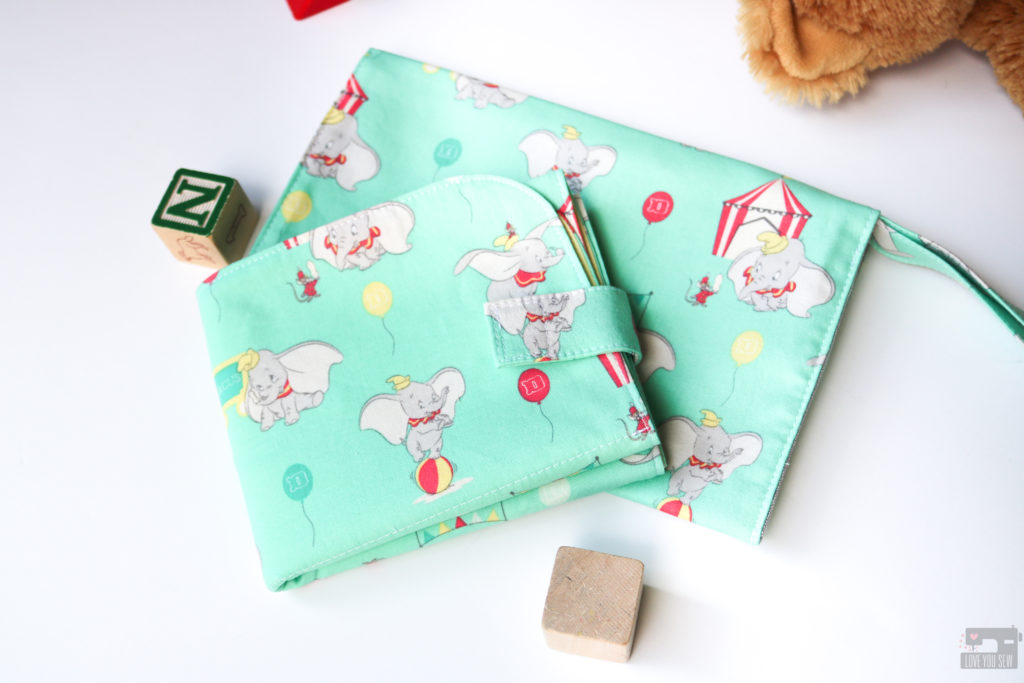
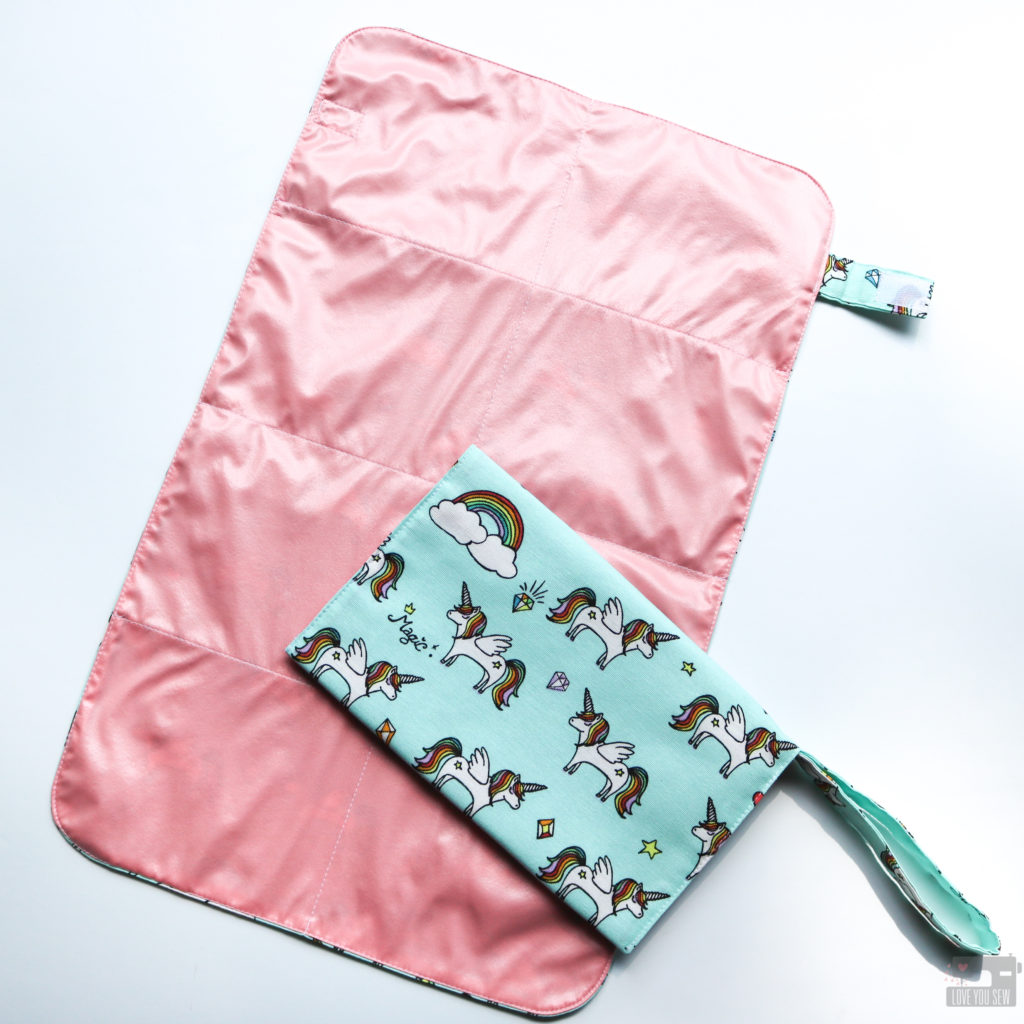
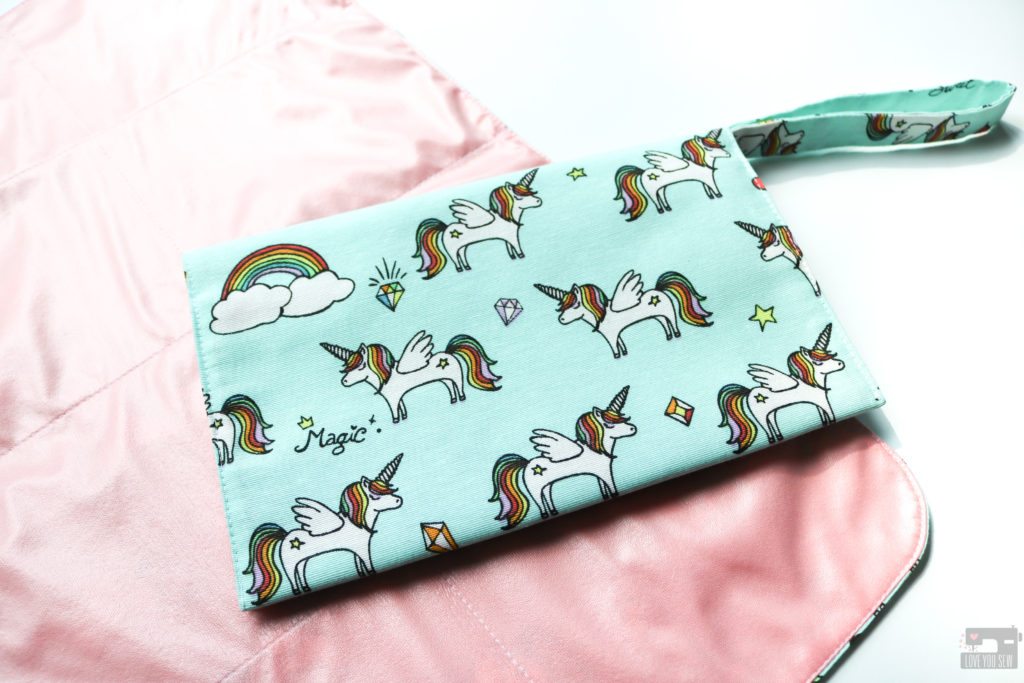
Size Down the Maya + Harper Travel Changing Set for Playtime!

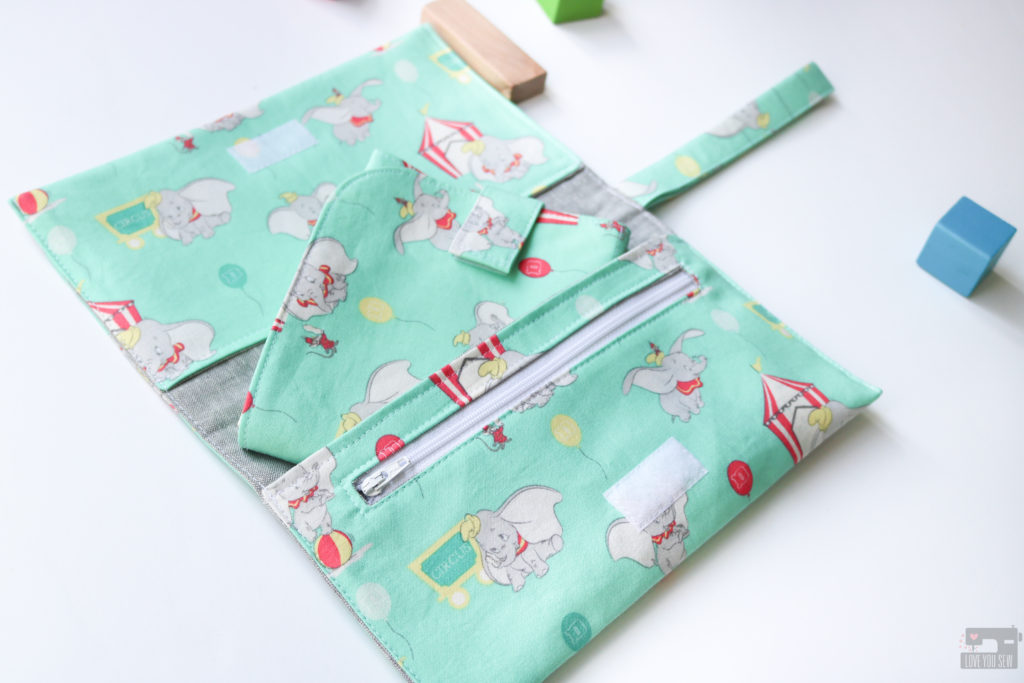
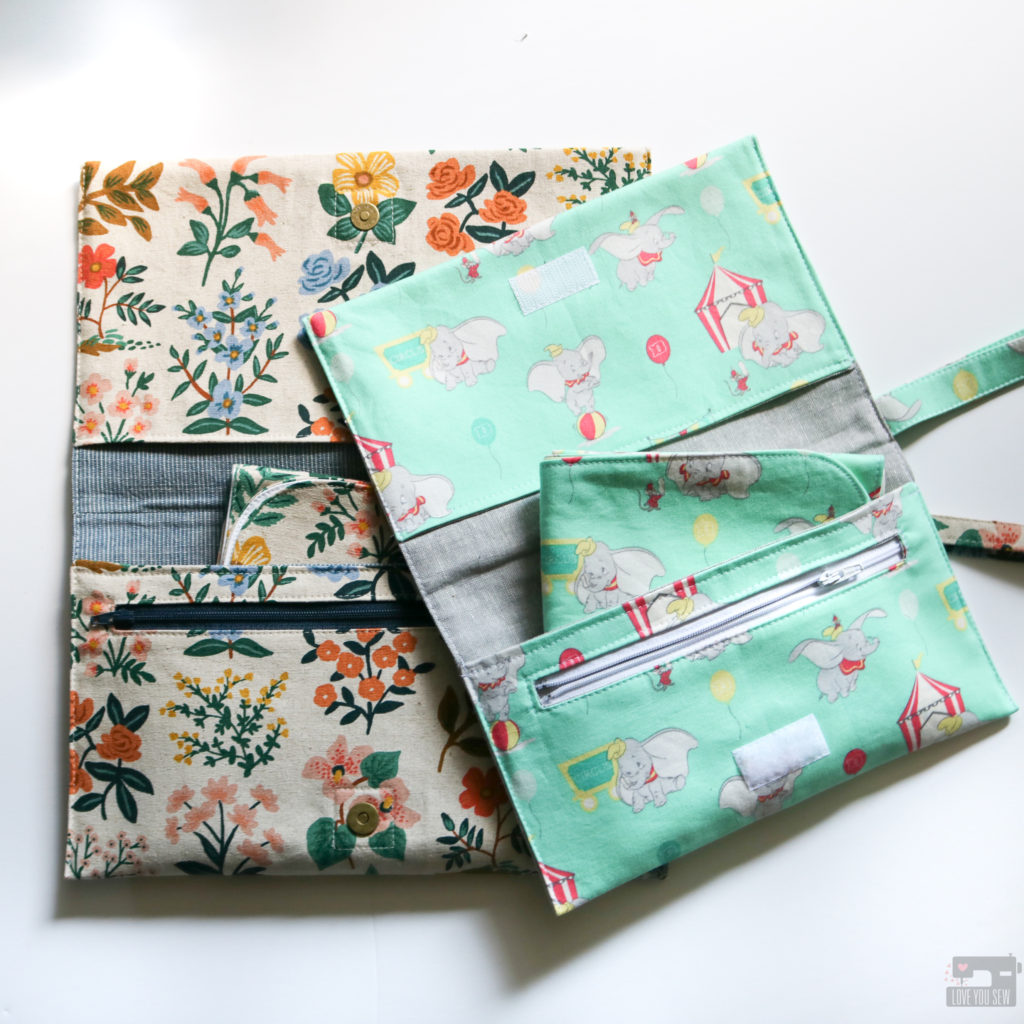
All of my sewing patterns are named after my nieces. Once a pattern releases, the namesake always gets a complimentary bag of her very own. But then, I was in a bit of a predicament when I named the Maya + Harper Travel Changing Set after my 4 and 2 year old nieces. What were were they going to do with full-size diaper changing sets???

I checked with my sister and she assured me there would not be a need for additional sets for her personal use. (Haha – Wishful thinking on my behalf!) But shortly after the pattern’s release, my nieces got their first Bitty Babies and the light bulb went off. I would make Maya and Harper “play” versions for their little babies!

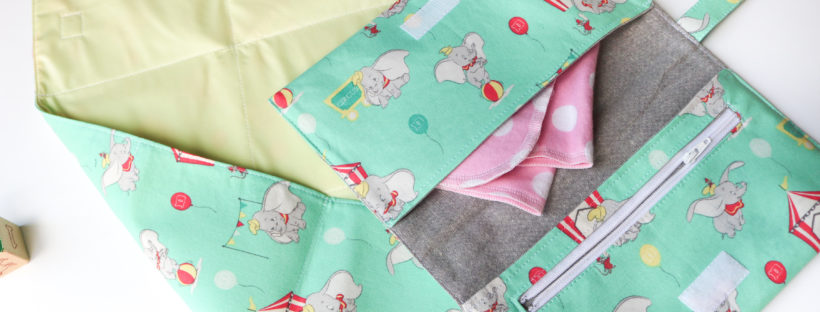
First, you will need the Maya + Harper Travel Changing Set found in my pattern shop here. You will need the instructions for reference and the pattern templates. I highly suggest you make a full Changing Set first to understand the construction and assembly of the Pad and Clutch. Once you get comfortable, you can make the following changes to make this pattern kid-friendly.

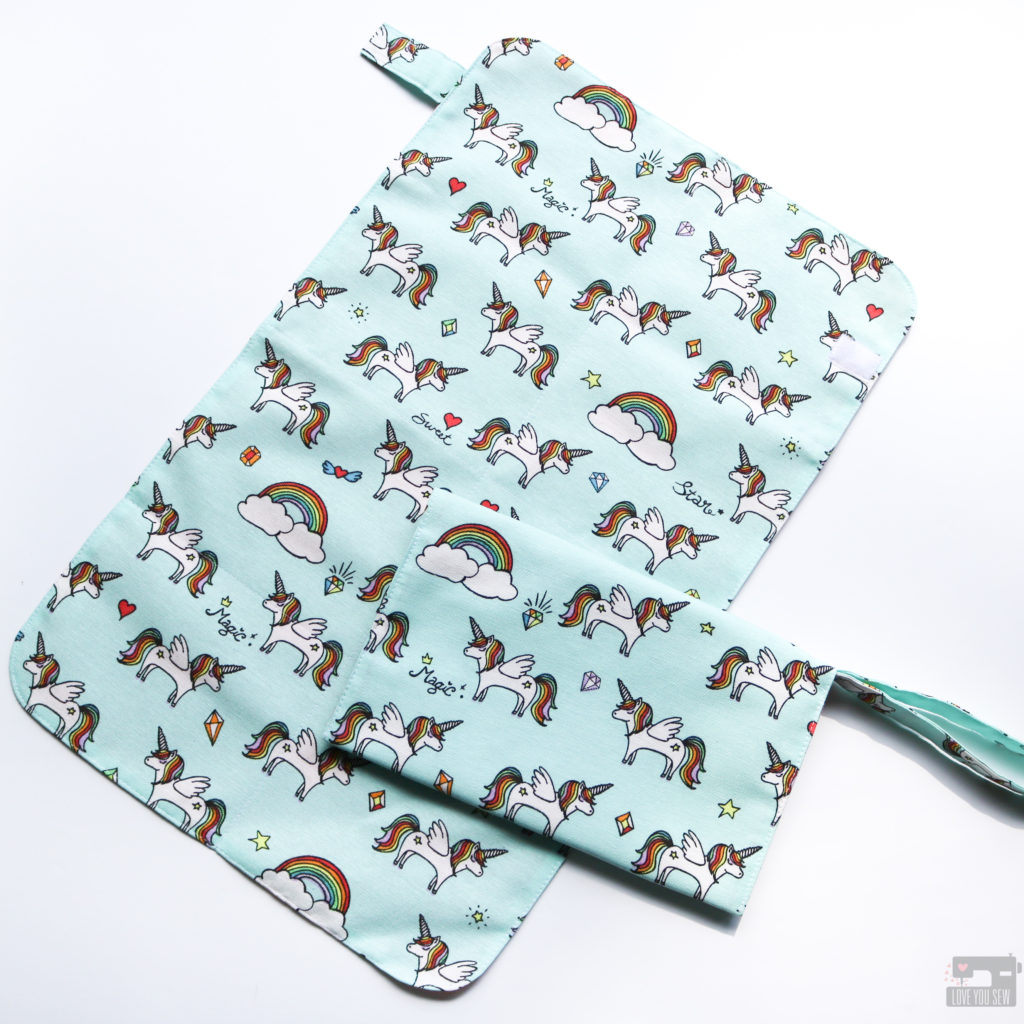
Make the “Play” Changing Pad

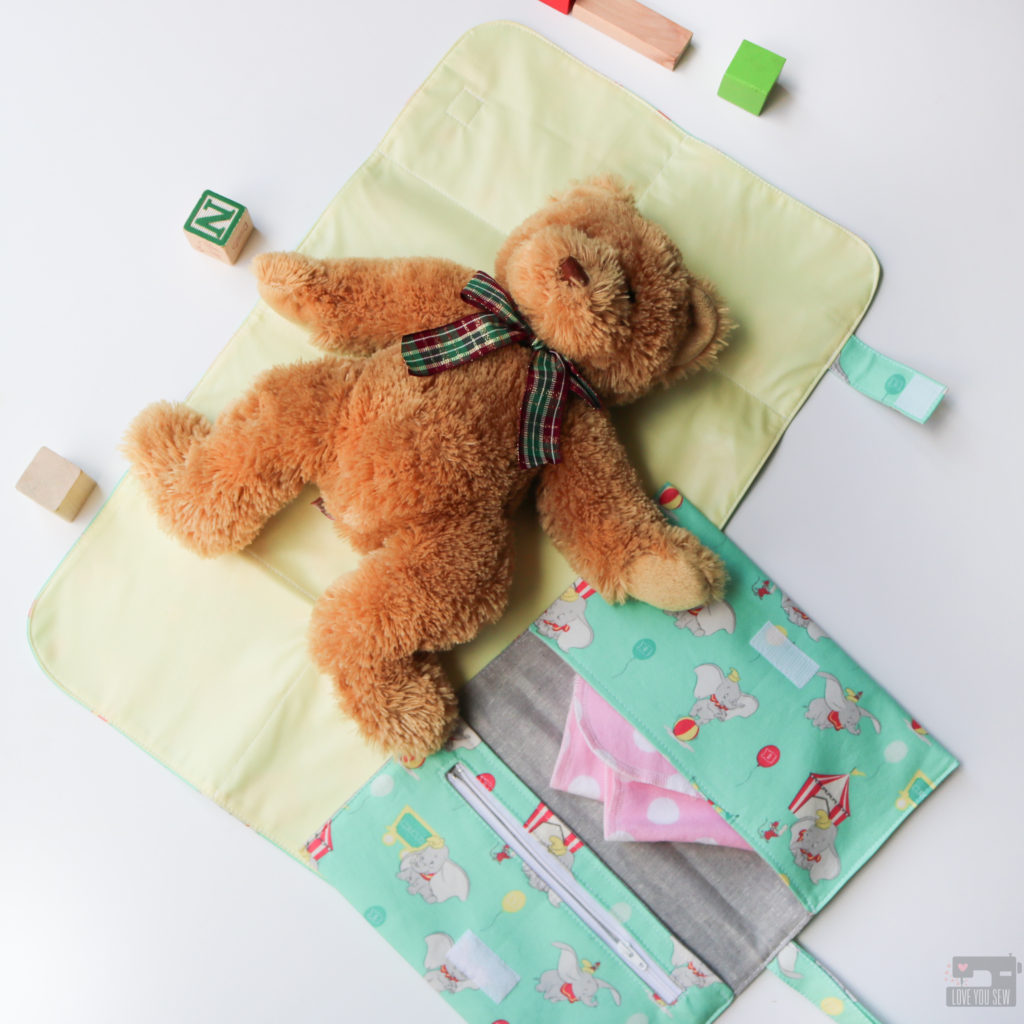
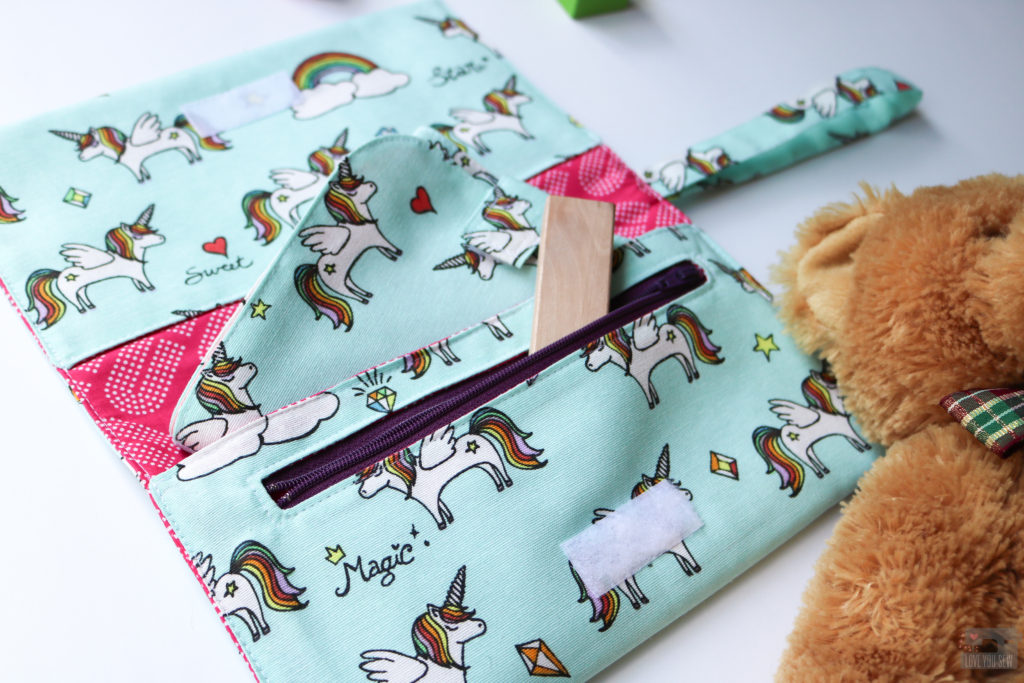
First thing’s first. You will need to print out the pattern templates at 85%. This will shrink down the pattern enough for most typical baby dolls. Unfortunately, my kids were more into stuffies than dolls, so this 12″ bear will need all the diaper changing 😉

All construction steps remain the same. You will align the closure to the bottom line of the “Tab Placement” and cut your hook and loop fastener to match the Tab width. The finished measurements of the Pad should be approximately 20″ x 12″.

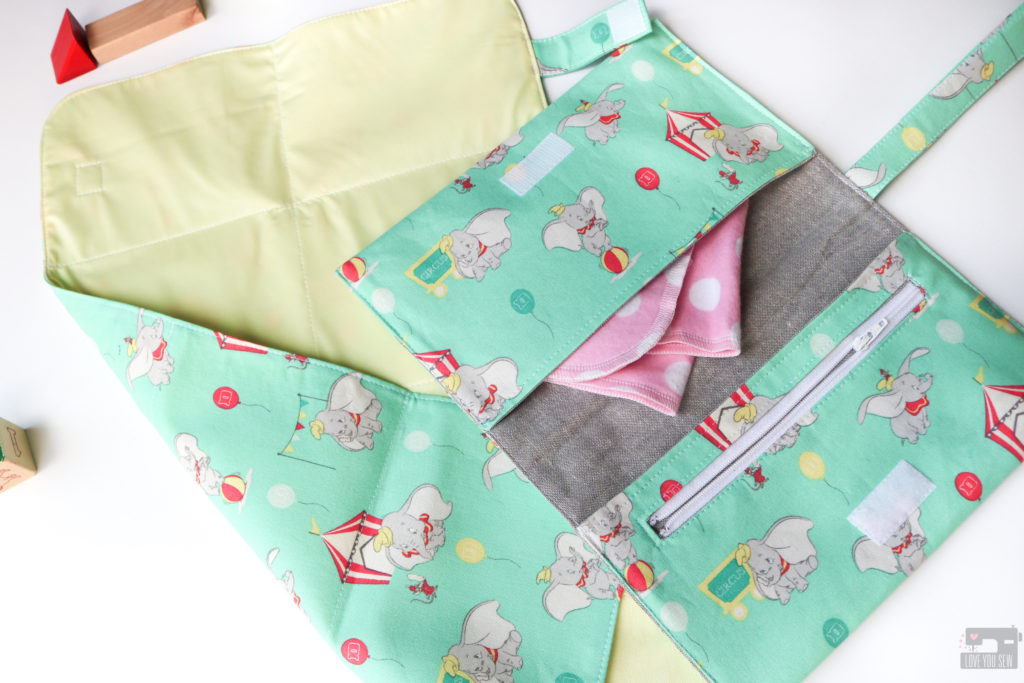
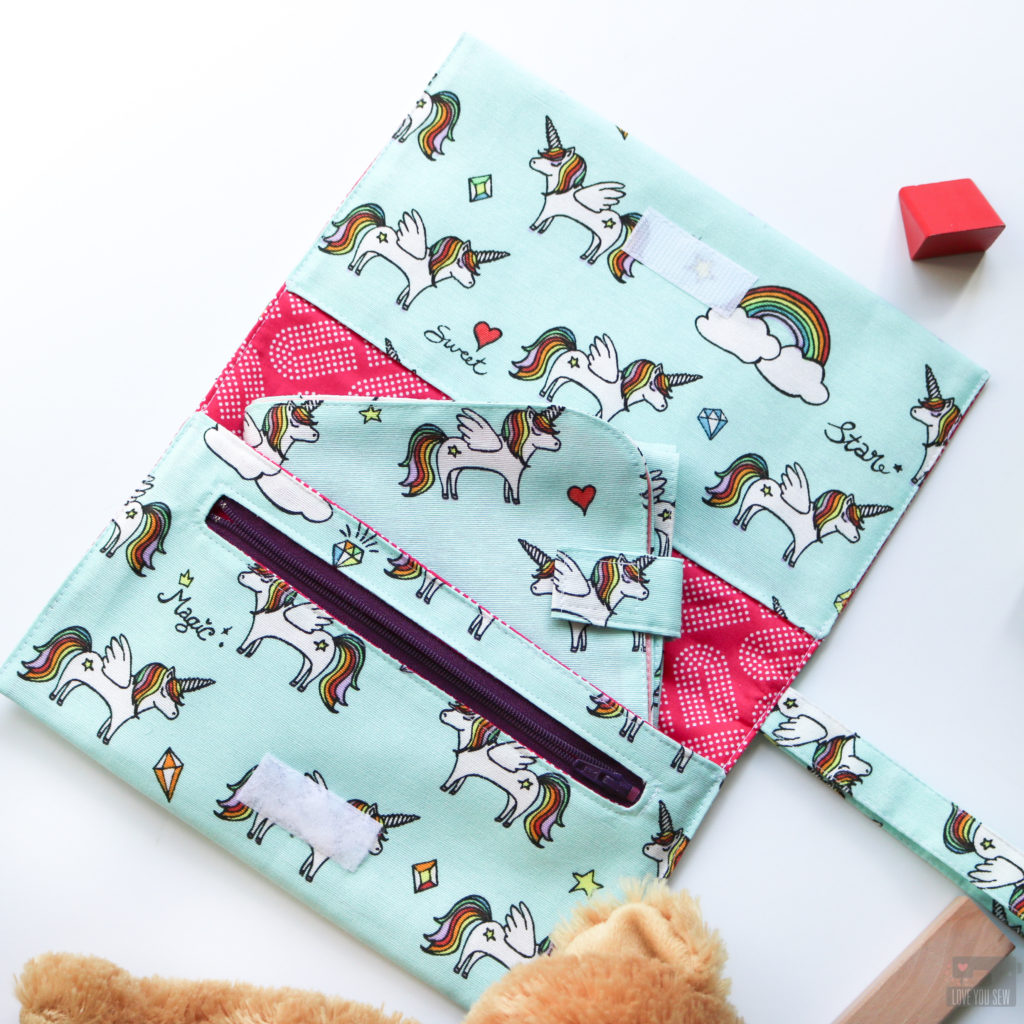
Make the “Play” Diaper Clutch

As with the Changing Pad, you will print out the pattern templates at 85% and cut out all the pieces except for the Strap (you will cut an entirely new piece.)

For Supplies:

  • Use a 7″ Zipper (at least 8″ overall) and omit the 9″ Zipper
  • Omit the D-Ring, Swivel Clasp, and Magnetic Snap (for a less fussy look, but feel free to add them back in for a fancier set!)
  • Add 2″ piece of hook and loop fastener
  • Cut 13″ x 3″ fabric and interfacing for a sew-in Strap

To make the Strap, follow steps #1-5 to double-fold and top-stitch it. Fold it in half with raw edges aligned. Baste ends together at 1/8″ and set aside.

Starting at step #12, make the Welt Pocket as instructed with a 7″ x 1/2″ Zipper opening and use the 7″ Zipper.

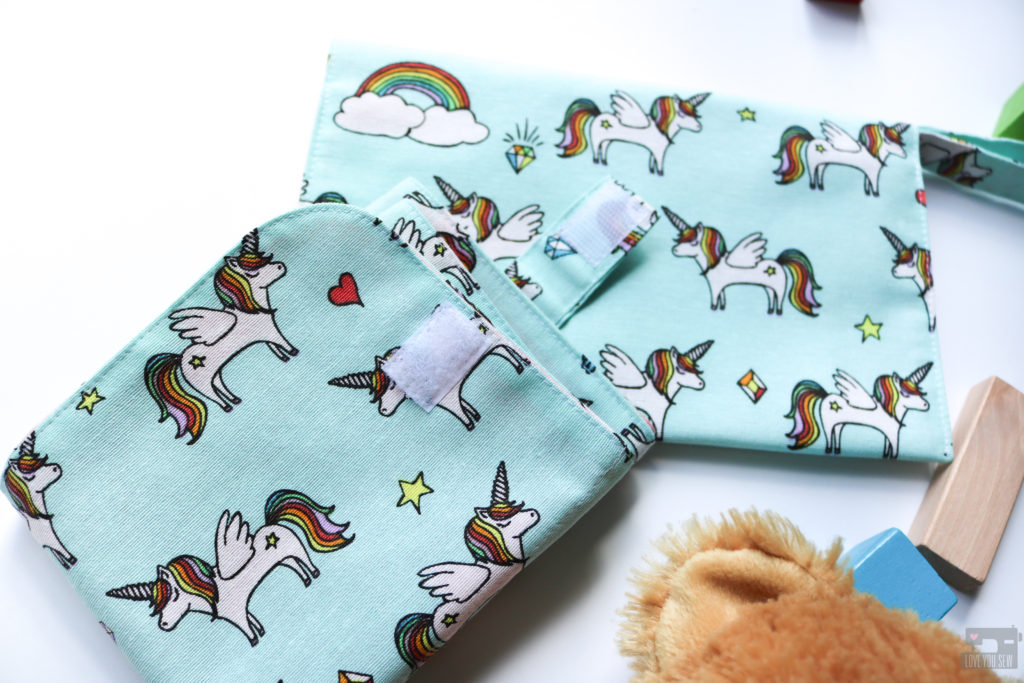
Since the Magnetic Snaps have been omitted, start at step #22 to center the hook and loop fasteners at the snap placement points with the length running parallel to the Zipper. Sew 1/16″ all-around the fasteners.

At step #26, replace the Strap with the D-Ring Tab. Keep the raw edges aligned so the Strap will be completely sewn-in later.

Finish the rest of the clutch by folding up each pocket by 4 1/2″ instead of 5 3/4”. Top-stitch, press and you’re little one is ready to practice parental duties!

Although my sister didn’t need another Travel Changing Set, I think this would be a great Mommy and Me set for yourself or for a friend who is expecting her 2nd+ child! I hope you enjoy making Maya and Harper Changing sets for all the kids (and parents) in your life!

Hugs and Stitches,

Cristy


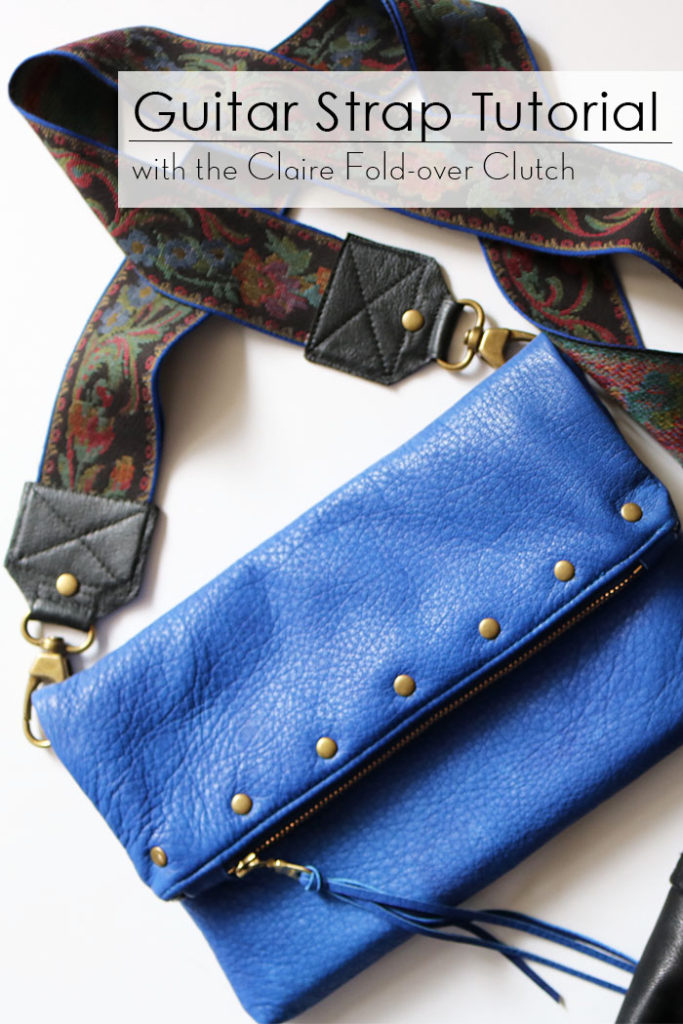
Guitar Strap Tutorial with the Claire Fold-over Clutch

Guitar Strap Tutorial by Love You Sew
The Claire Fold-over Clutch was my very first published pattern just over a year ago.  I can’t believe it’s been that long already.  I put my own twist on the popular bag style with a large easy access pocket on the back and the simple use of leather one side of the bag – making it easier to sew.  You can read more about my design here and see lots of different versions with #clairefoldoverclutch on Instagram.
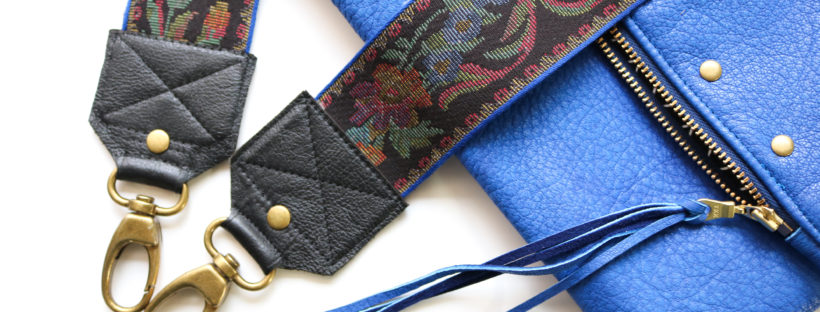
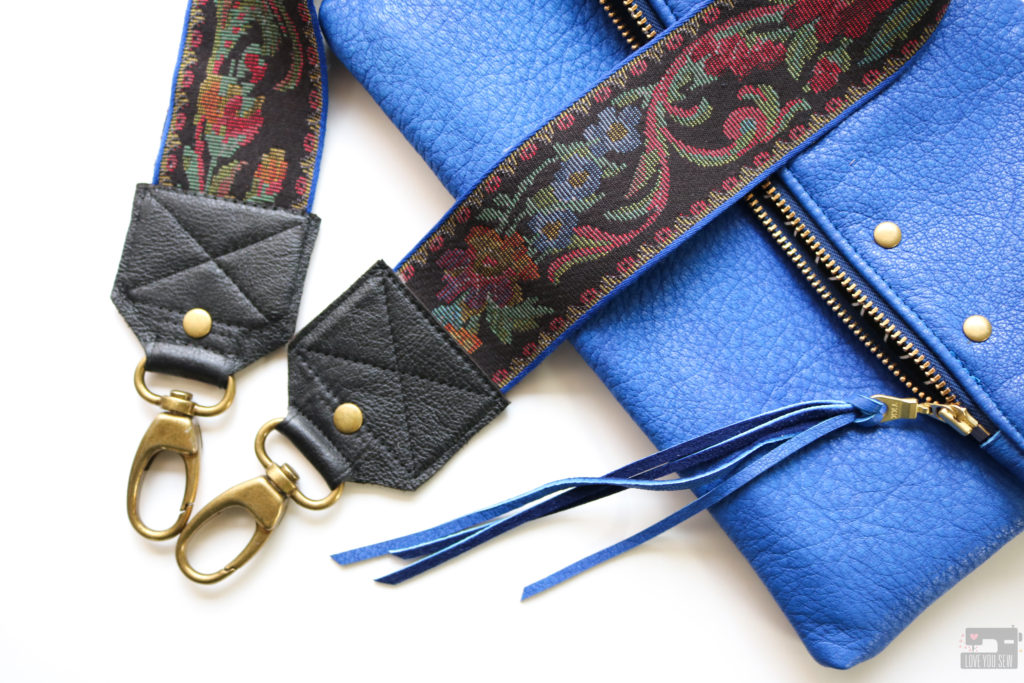
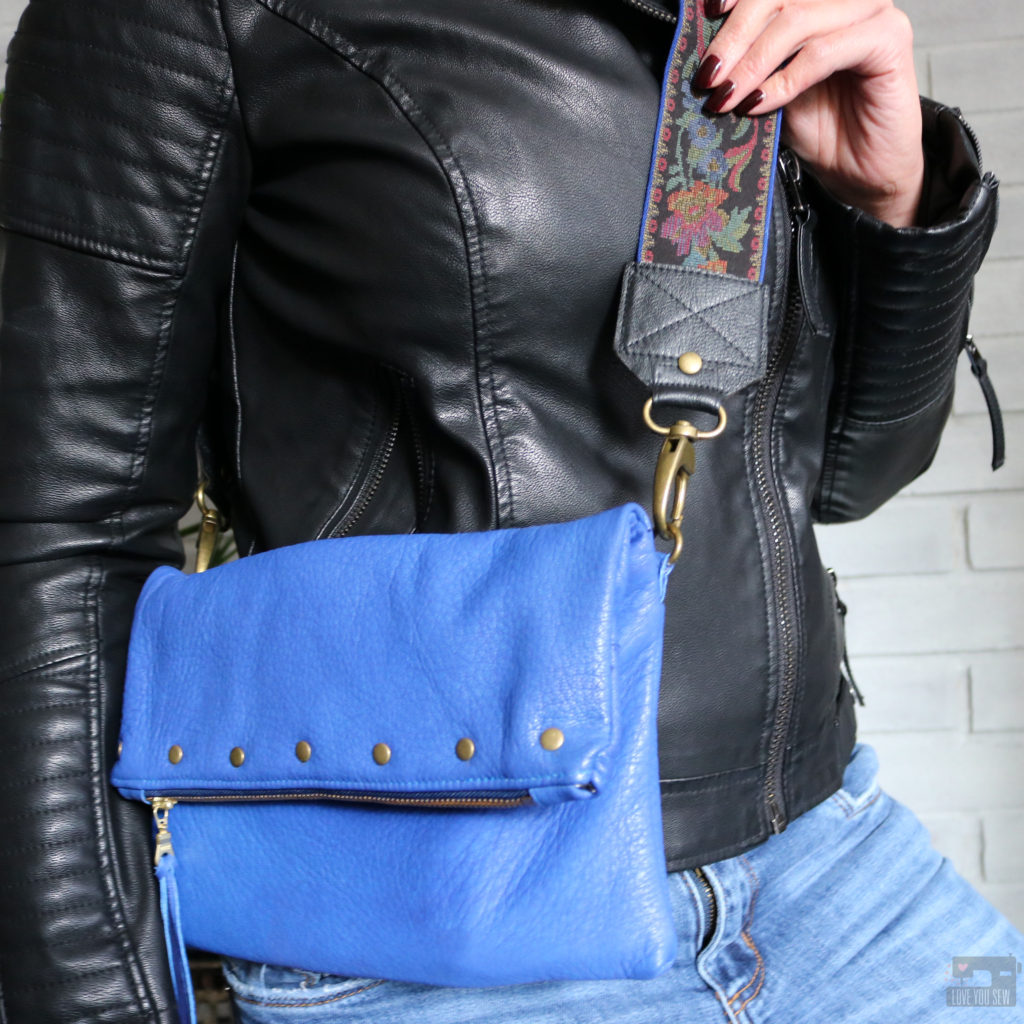
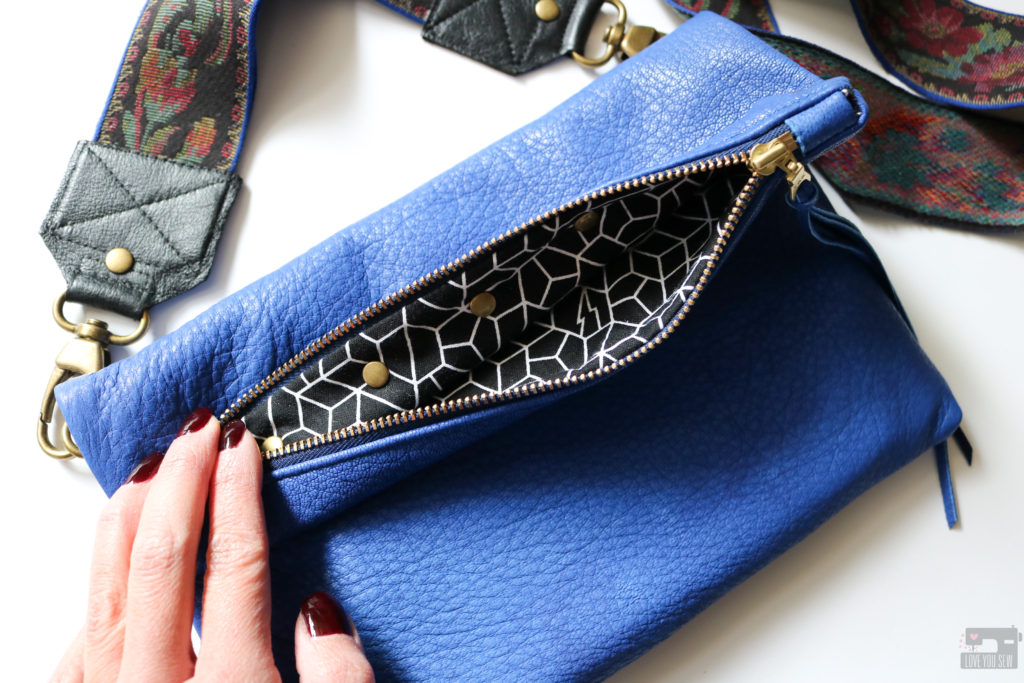
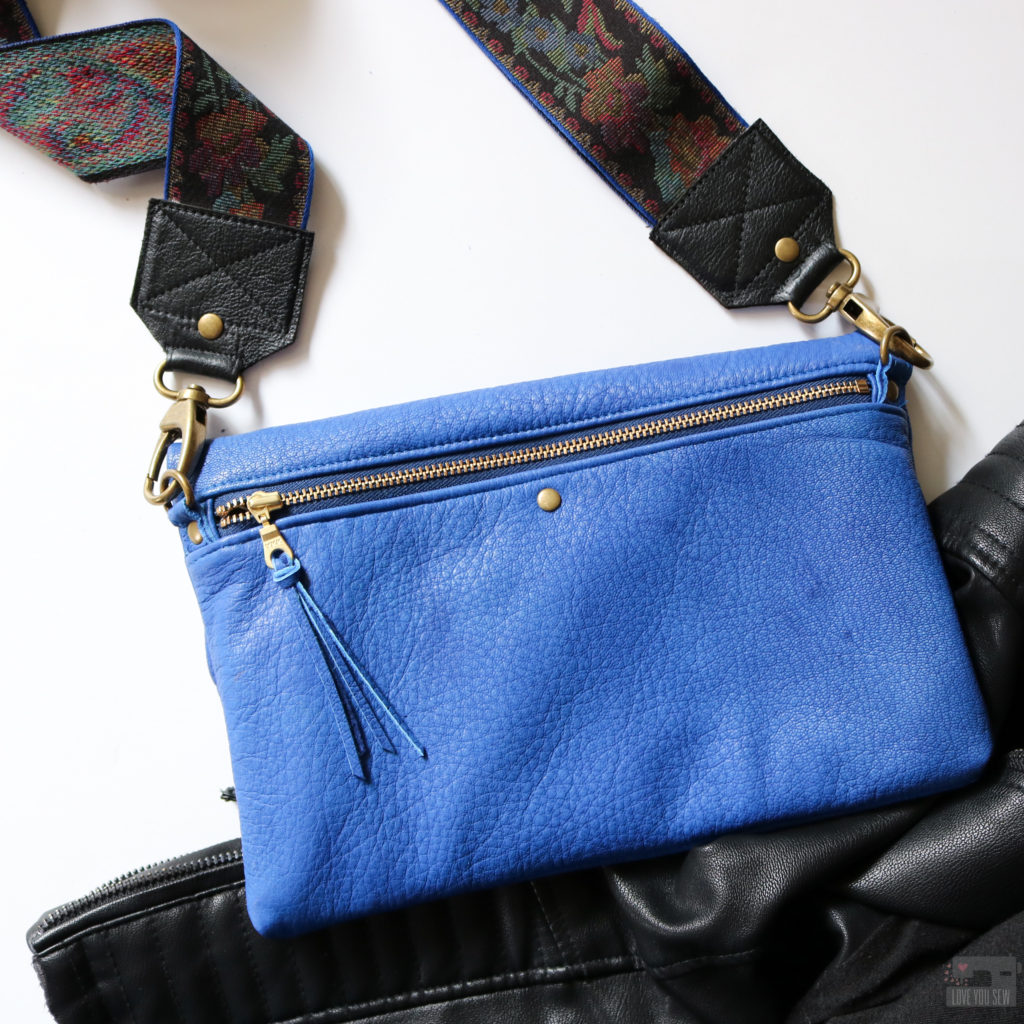
My designs are meant to be practical, but also chic enough to work with new trends and fashion with just a change of fabric.  This is the case with the Claire.  Although it was written to use both fabric and leather, I thought it would be fun to make a full leather version — in cobalt blue for a real statement bag.  This blue leather is pretty edgy and gave me rock ‘n roll vibes right away.  So, I thought a guitar strap would give the bag a new look all on it’s own…even after making dozens of other Claire Fold-over Clutches!
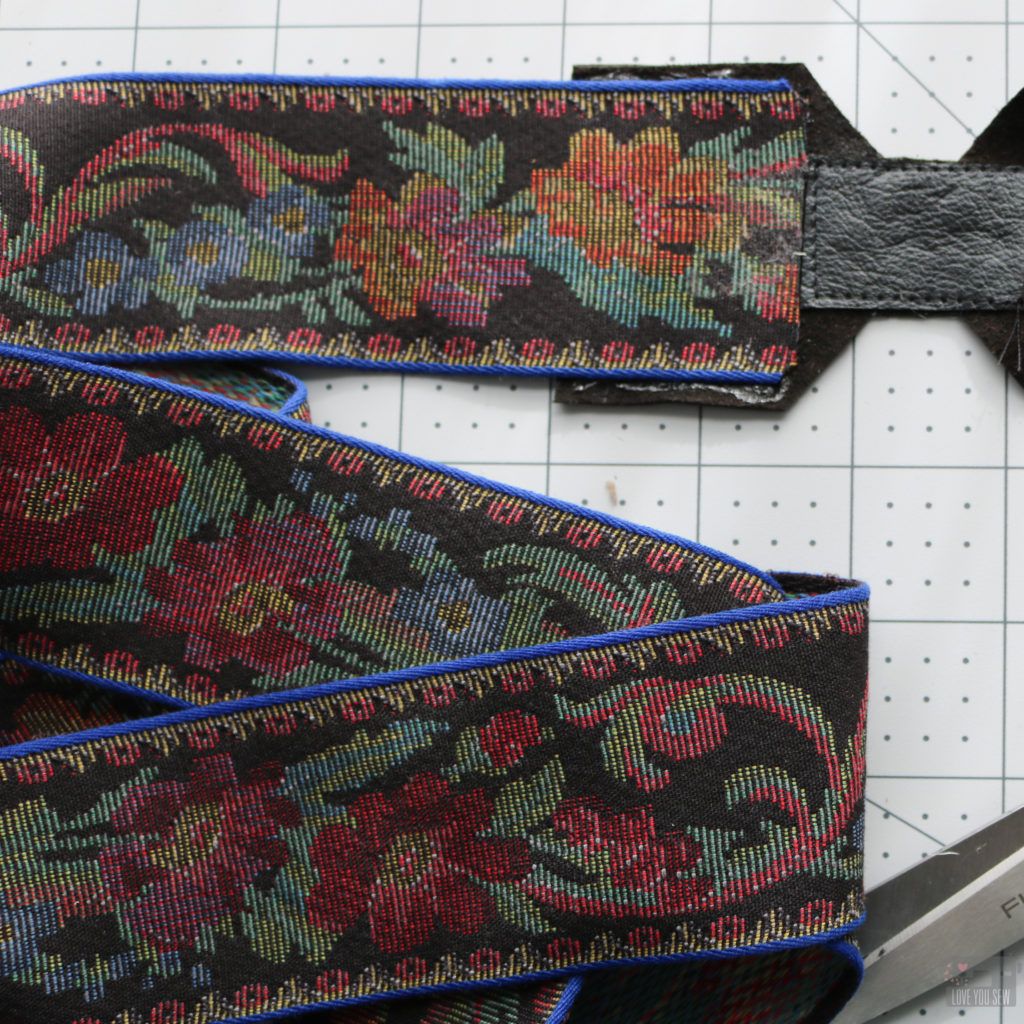
This amazing woven tapestry-like ribbon was found at a yard sale a few years ago.  I think I bought it for $1-2 and was drawn to the bright blue edges contrasting against that moody floral motif.  I like mixing up new and old looks, so this trim was definitely all me.  The leather was picked up from a destash group and so I was able to grab an amazing deal.  The seller was getting out of her baby shower business and had so many pretty pieces of leather to get rid of.  Her loss was definitely my gain!

Make the Claire Fold-over Clutch

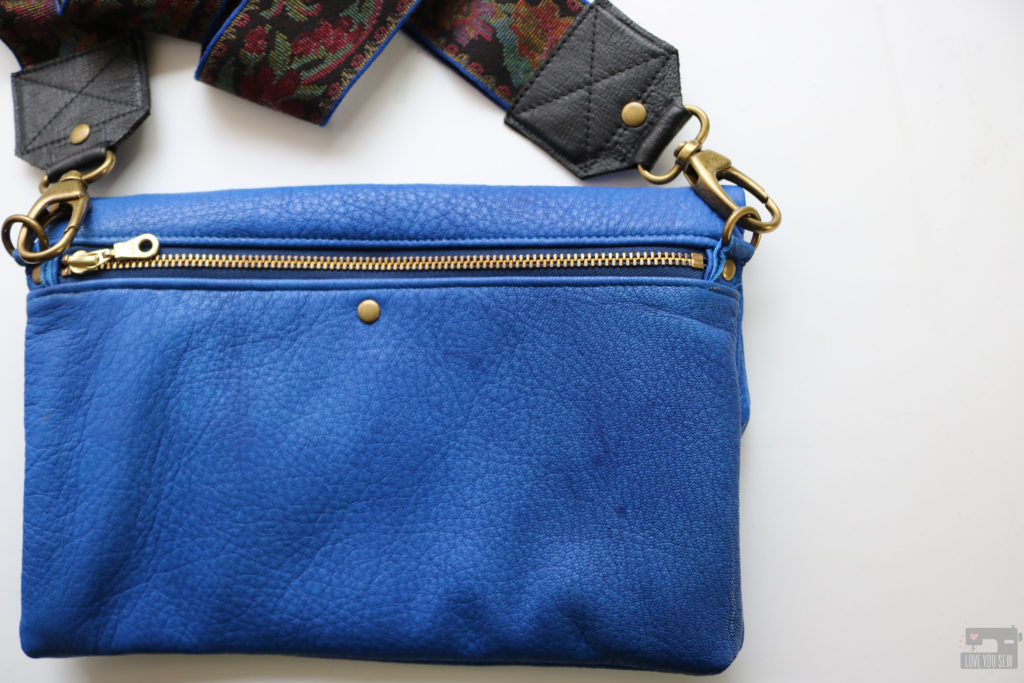
To make the bag itself, you will need the pattern and instructions from my shop here.  The main modification I made was to use leather on both sides of the exterior, instead of just one.  (I would only recommend this ONLY if you have a machine strong enough to handle all of the layers.) But if you are just beginning, try out an all fabric version or one with very thin leather/vinyl.
Since the bag is made of solid color all around, I made sure to add in some accents and interest with metal. I used metal zippers (which I actually installed at the wrong places — I should definitely remember to read my own instructions…but I thought going from memory was good enough. Wrong!)  If I was using fabric, I would have swapped out the zippers, but with leather, the needle holes are permanent and I didn’t want to mess with all of that and just moved on! In light of my zipper faux pas, I added a line of rivets along the top zipper (through the lining) to play with the same edgy feel of the cobalt leather.  What do you think?

Make the Guitar Strap

For the strap, you will need the pattern pieces below.  I drafted the ends for 1 1/2″ or 2″ wide straps.  Anything else more narrow won’t give you that guitar-strap, but feel free to widen/narrow the pattern for your own look!

Click here for Strap End Templates

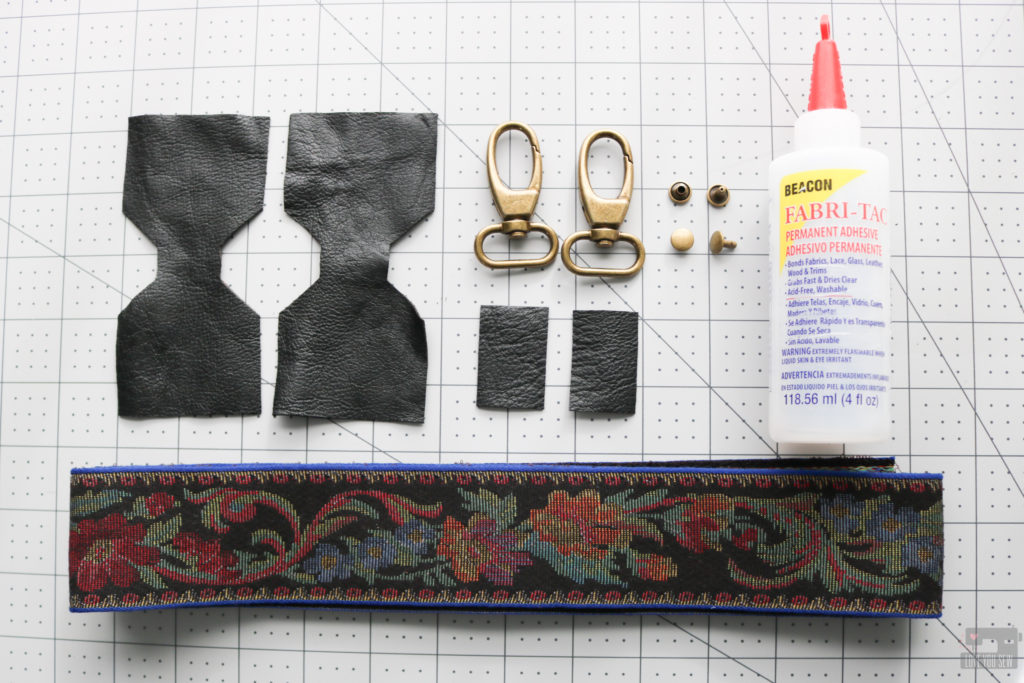
In addition to basic sewing notions, you will also need:
  • 1 1/2″ or 2″ wide ribbon/finished strap, cut to desired length
  • approximately 8″ x 5″ leather scrap
  • Leather Needle
  • (2) 1″ Swivel Clasps
  • Zipper Foot
  • Walking or Telflon Foot
  • Clover Clips or Fabric Glue (aff link)
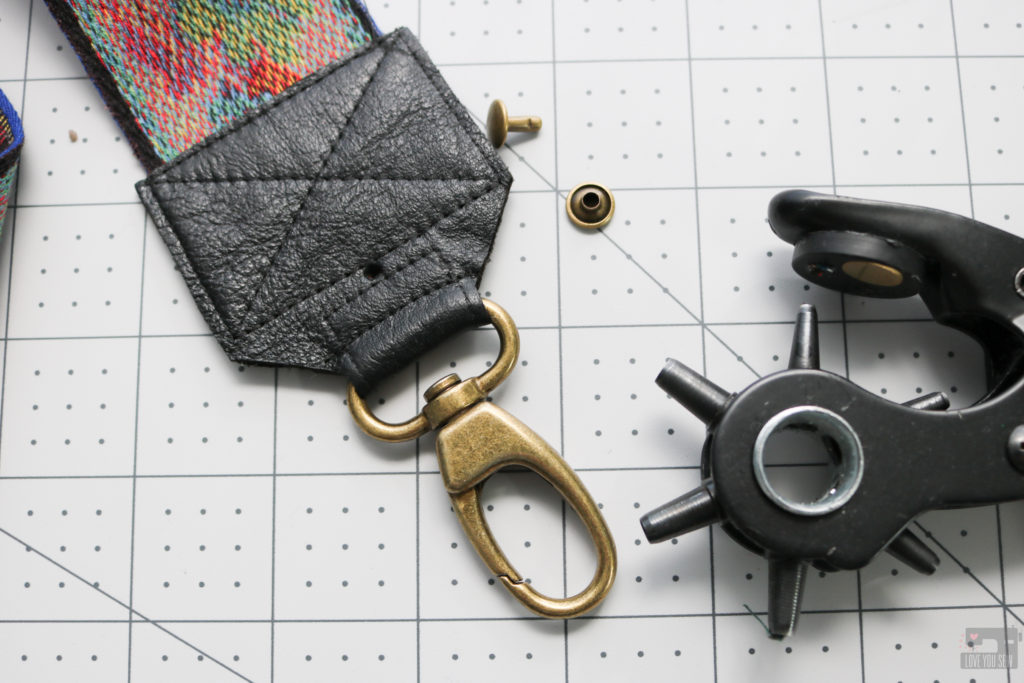
  • (2) Sets of Rivets (optional) + Setting Tools
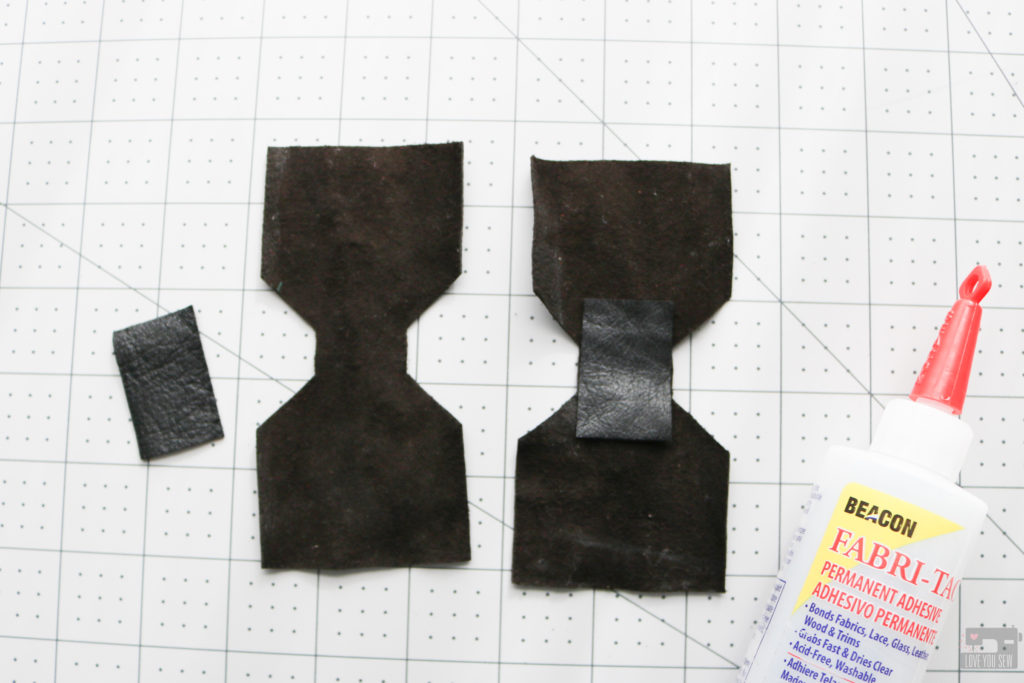
Instructions: 1. Use the templates to cut out pattern pieces based on whether you have 1 1/2″ wide or 2″ wide strap.  You will have (2) Strap ends and (2) Reinforcements.
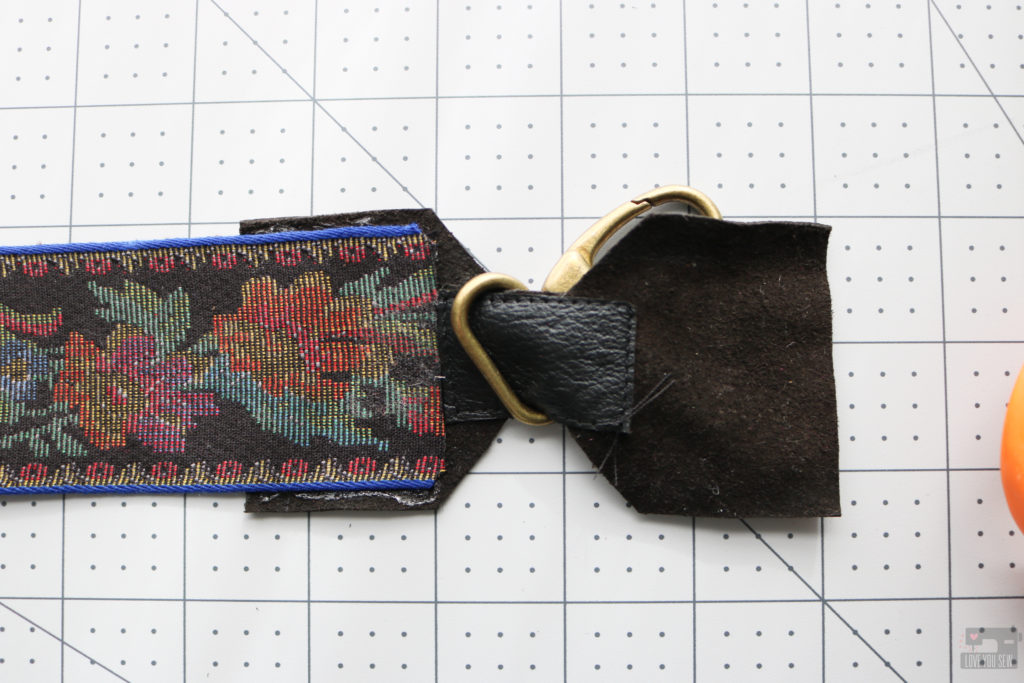
2. With each Strap End wrong-side facing up, center a Reinforcement as shown with wrong sides together.  Glue baste in place.  It’s tempting to skip this step, but this will help your leather from stretching and distorting with time and wear.
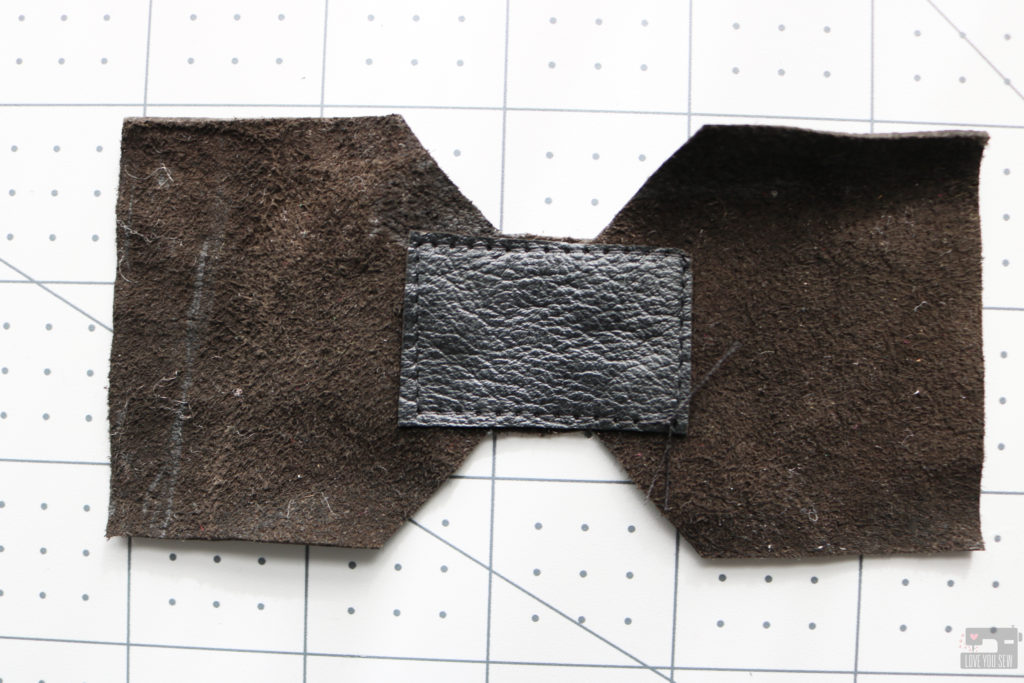
3. With the leather needle installed, stitch 1/16″ around all four sides of the Reinforcement. Repeat with other Strap End.
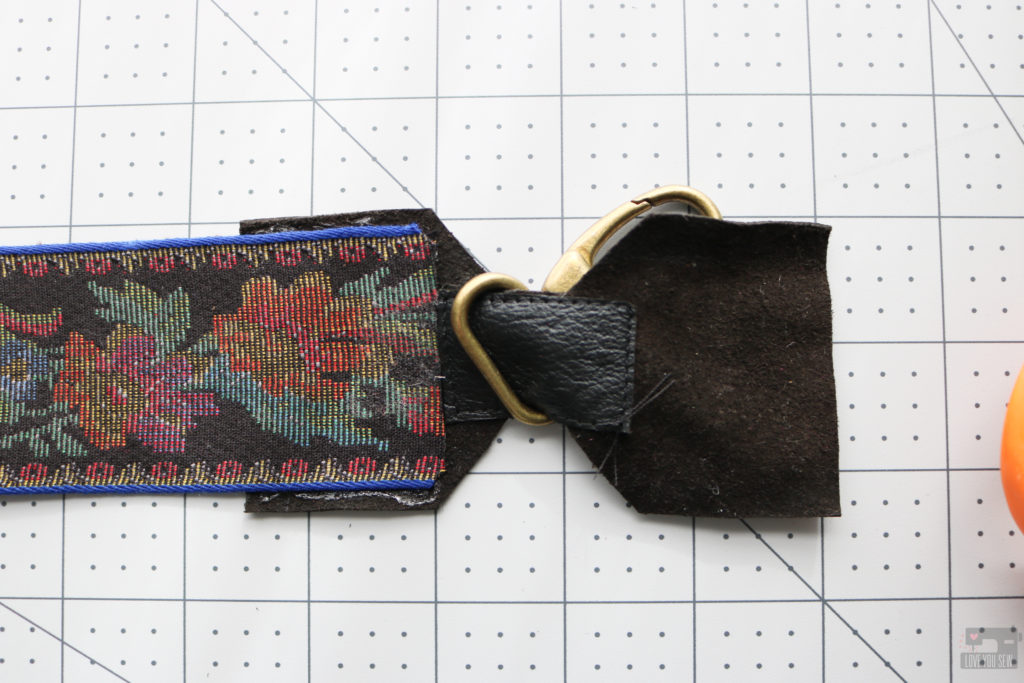
4. Take Ribbon and center it on one half of the Strap End with wrong sides together, aligning it to the Reinforcement. (You may need to cut off the ribbon’s corners so they don’t hang out of the Strap Ends.)  Clip or glue into place. Repeat with other Strap End.
5. Slide one Swivel Clasp onto the Strap End. Repeat with other Strap End.
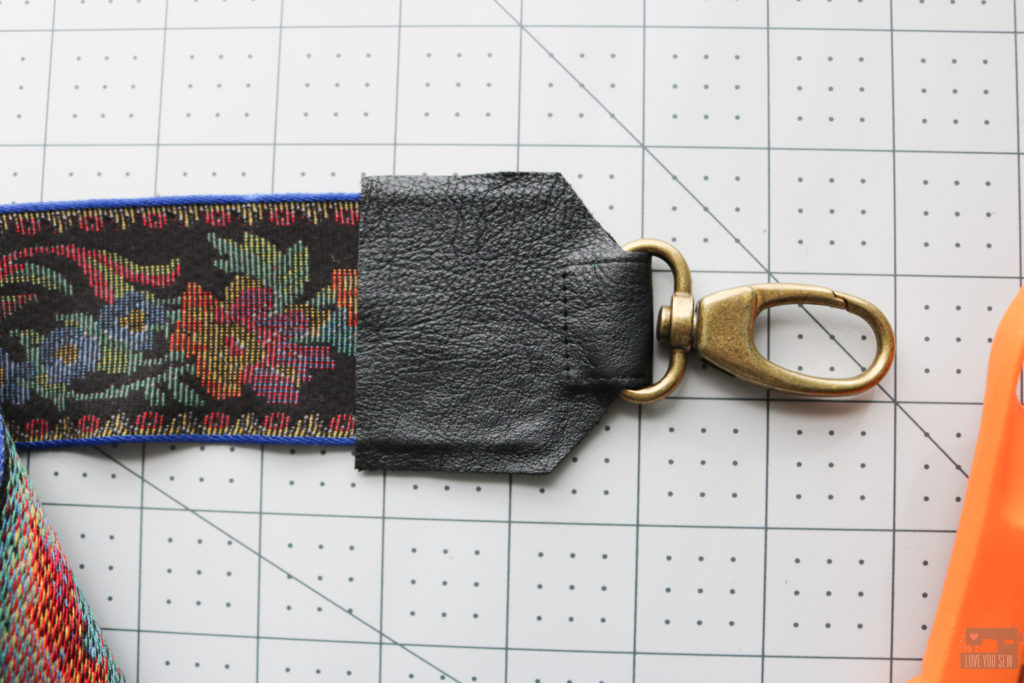
5. Flip the other side of the Strap End up so it is folded in half with wrong sides together, encasing the clasp.  Clip or glue together. Repeat with other Strap End.
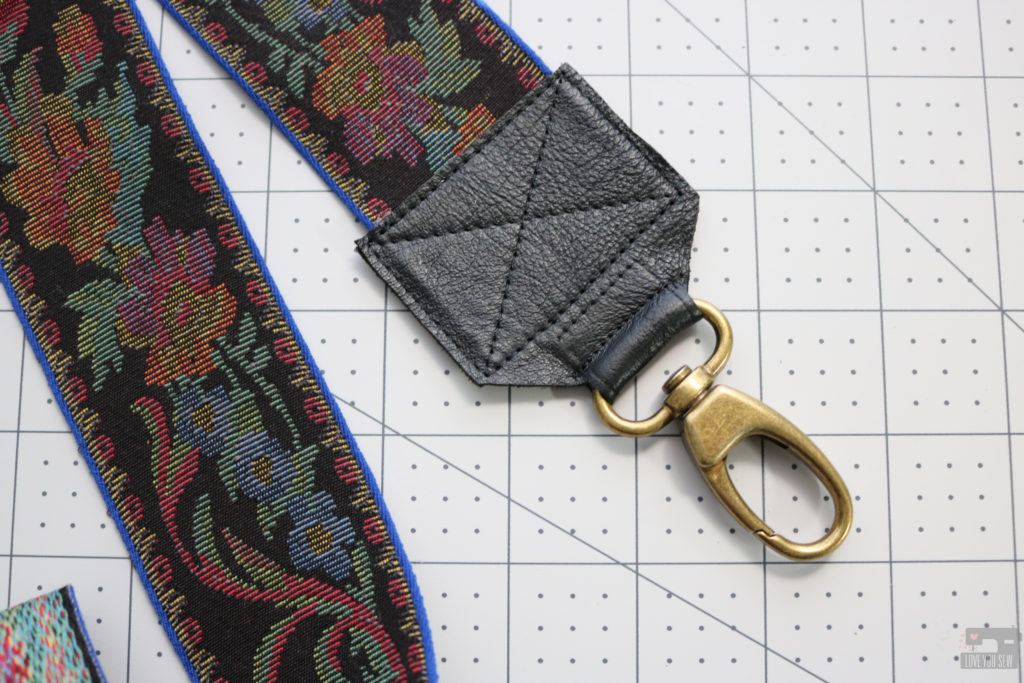
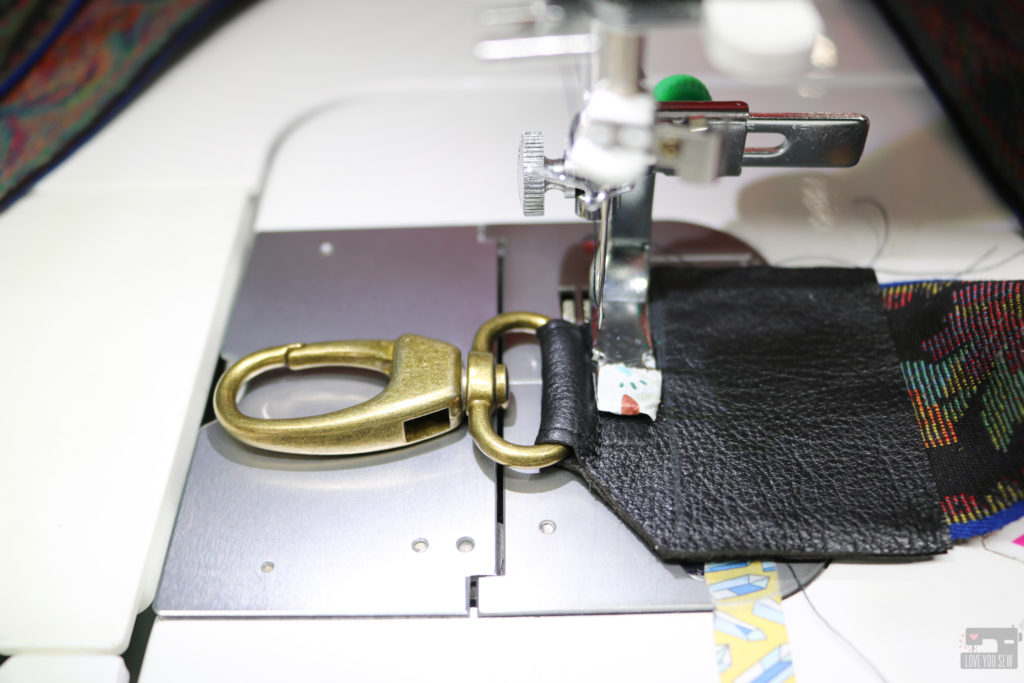
6. Use your Zipper Foot to sew a seam to secure the Strap End onto the Swivel Clasp, sewing as close to the clasp as possible.  Back-stitch well. Repeat for the other Strap End. TIP: Add washi tape under the foot if you don’t have a Teflon Zipper Foot like me.
7. Switch to a Teflon or Walking Foot and top-stitch each Strap End together with the Ribbon using the stitch guide on the template. Repeat with other Strap End.
8. Finish with rivets, if desired.  Congratulations on your new guitar strap!
It doesn’t stop here!  I’ve been seeing beautiful striped belt strappings used on designer bags like here on my Pinterest page.  I’m already planning out my spring bags with these looks!  You can use this same method to easily update any bag for the changing seasons or add new life to a great hand-me-down or thrifted find.  The options are really endless.  Enjoy and let me know how you like the tutorial!!!
Happy Sewing Friends! Cristy
This post may contain affiliate links.  Please visit my Disclosures page for all details.

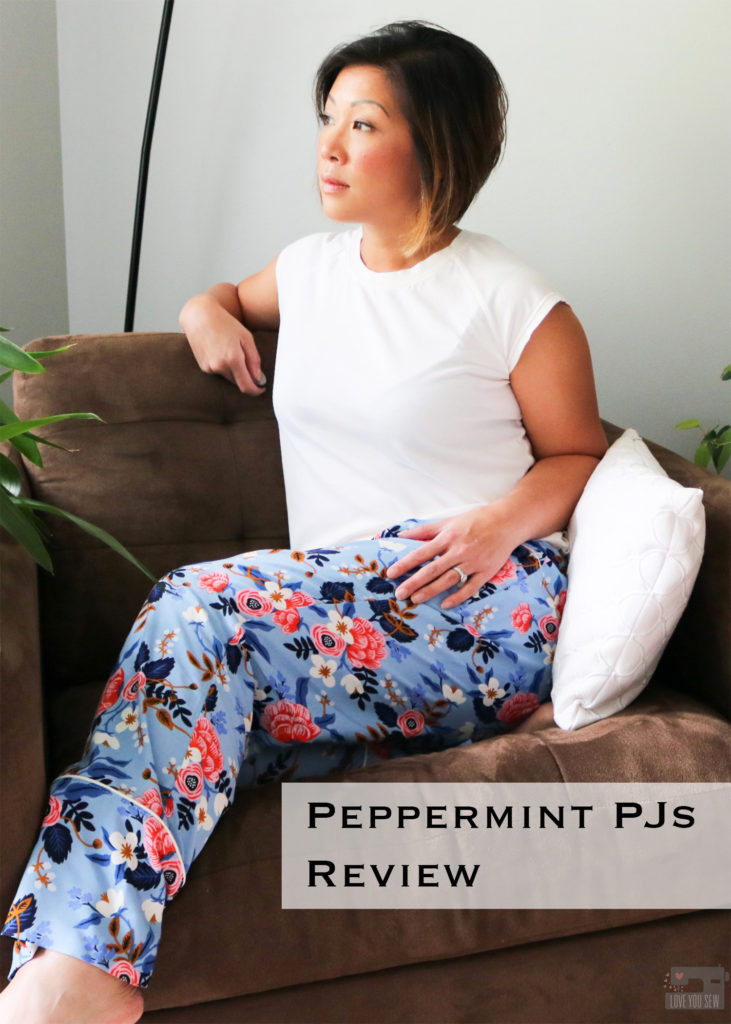
Peppermint PJs Review

What great timing on the launch of these Peppermint Pajamas by Blank Slate Patterns. We’re heading into holiday season and I’ve always sewn family PJs for Christmas Eve. I’ve also always drafted my own (making different tweeks every year) and have yet to add pockets. Well, now I actually have a pattern (that fits!) and won’t have to spend as much time making my holiday pajamas!

Pattern

The Peppermint Pajamas comes with patterns for BOTH the woven pants and the knit top. This is like a 2-for-1 pattern with sizes ranging from XXS-3X (bust 30″ – 53″ and hips 33″ – 55″.)

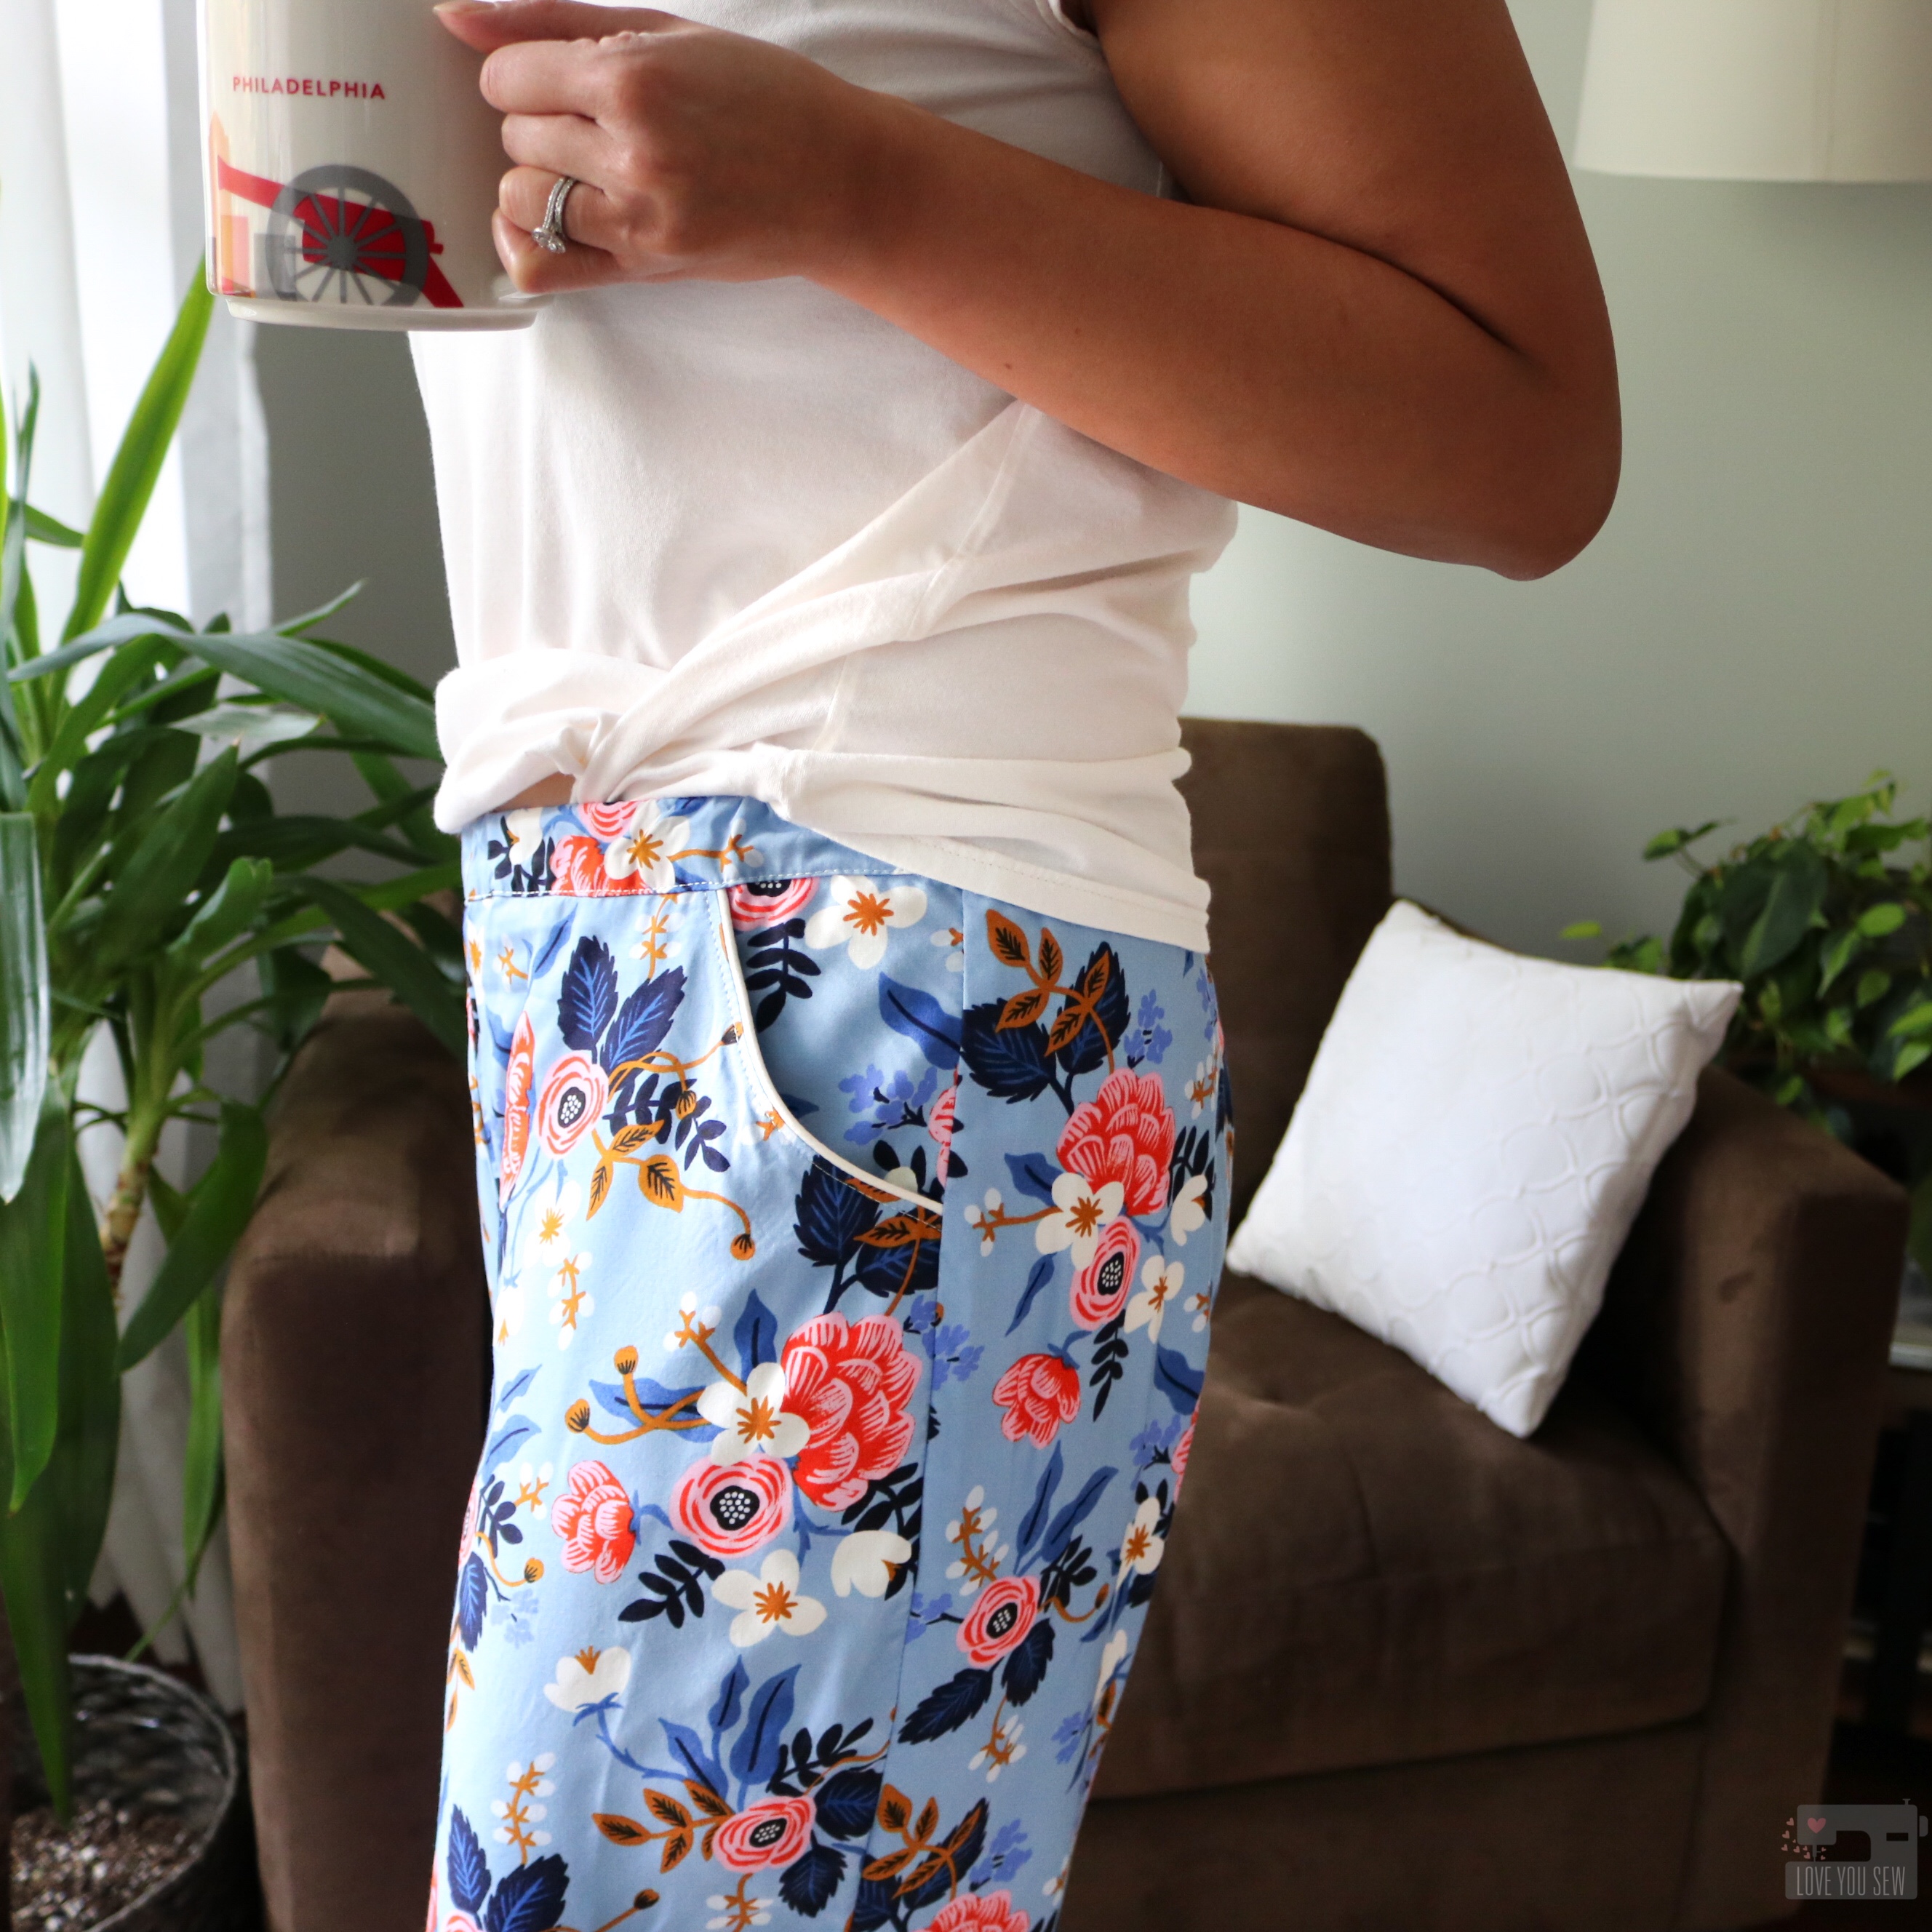
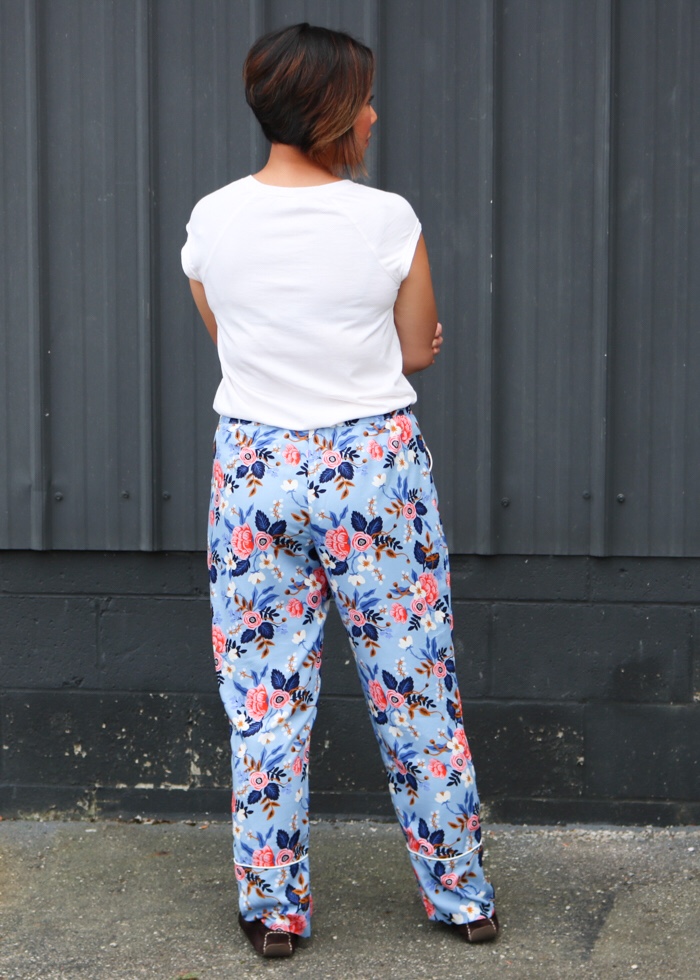
The pants feature an elastic waist, roomy slash pockets, and a separate cuff. The bottoms can be made into shorts, capris (by leaving off the cuffs) and full-length pants.

For the knit top, it features a crew-neck with raglan sleeves. You can make cap sleeves like I did, or use the long sleeve option. It has a nice relaxed slim fit for shaping, but not body-con tight.

Fabric

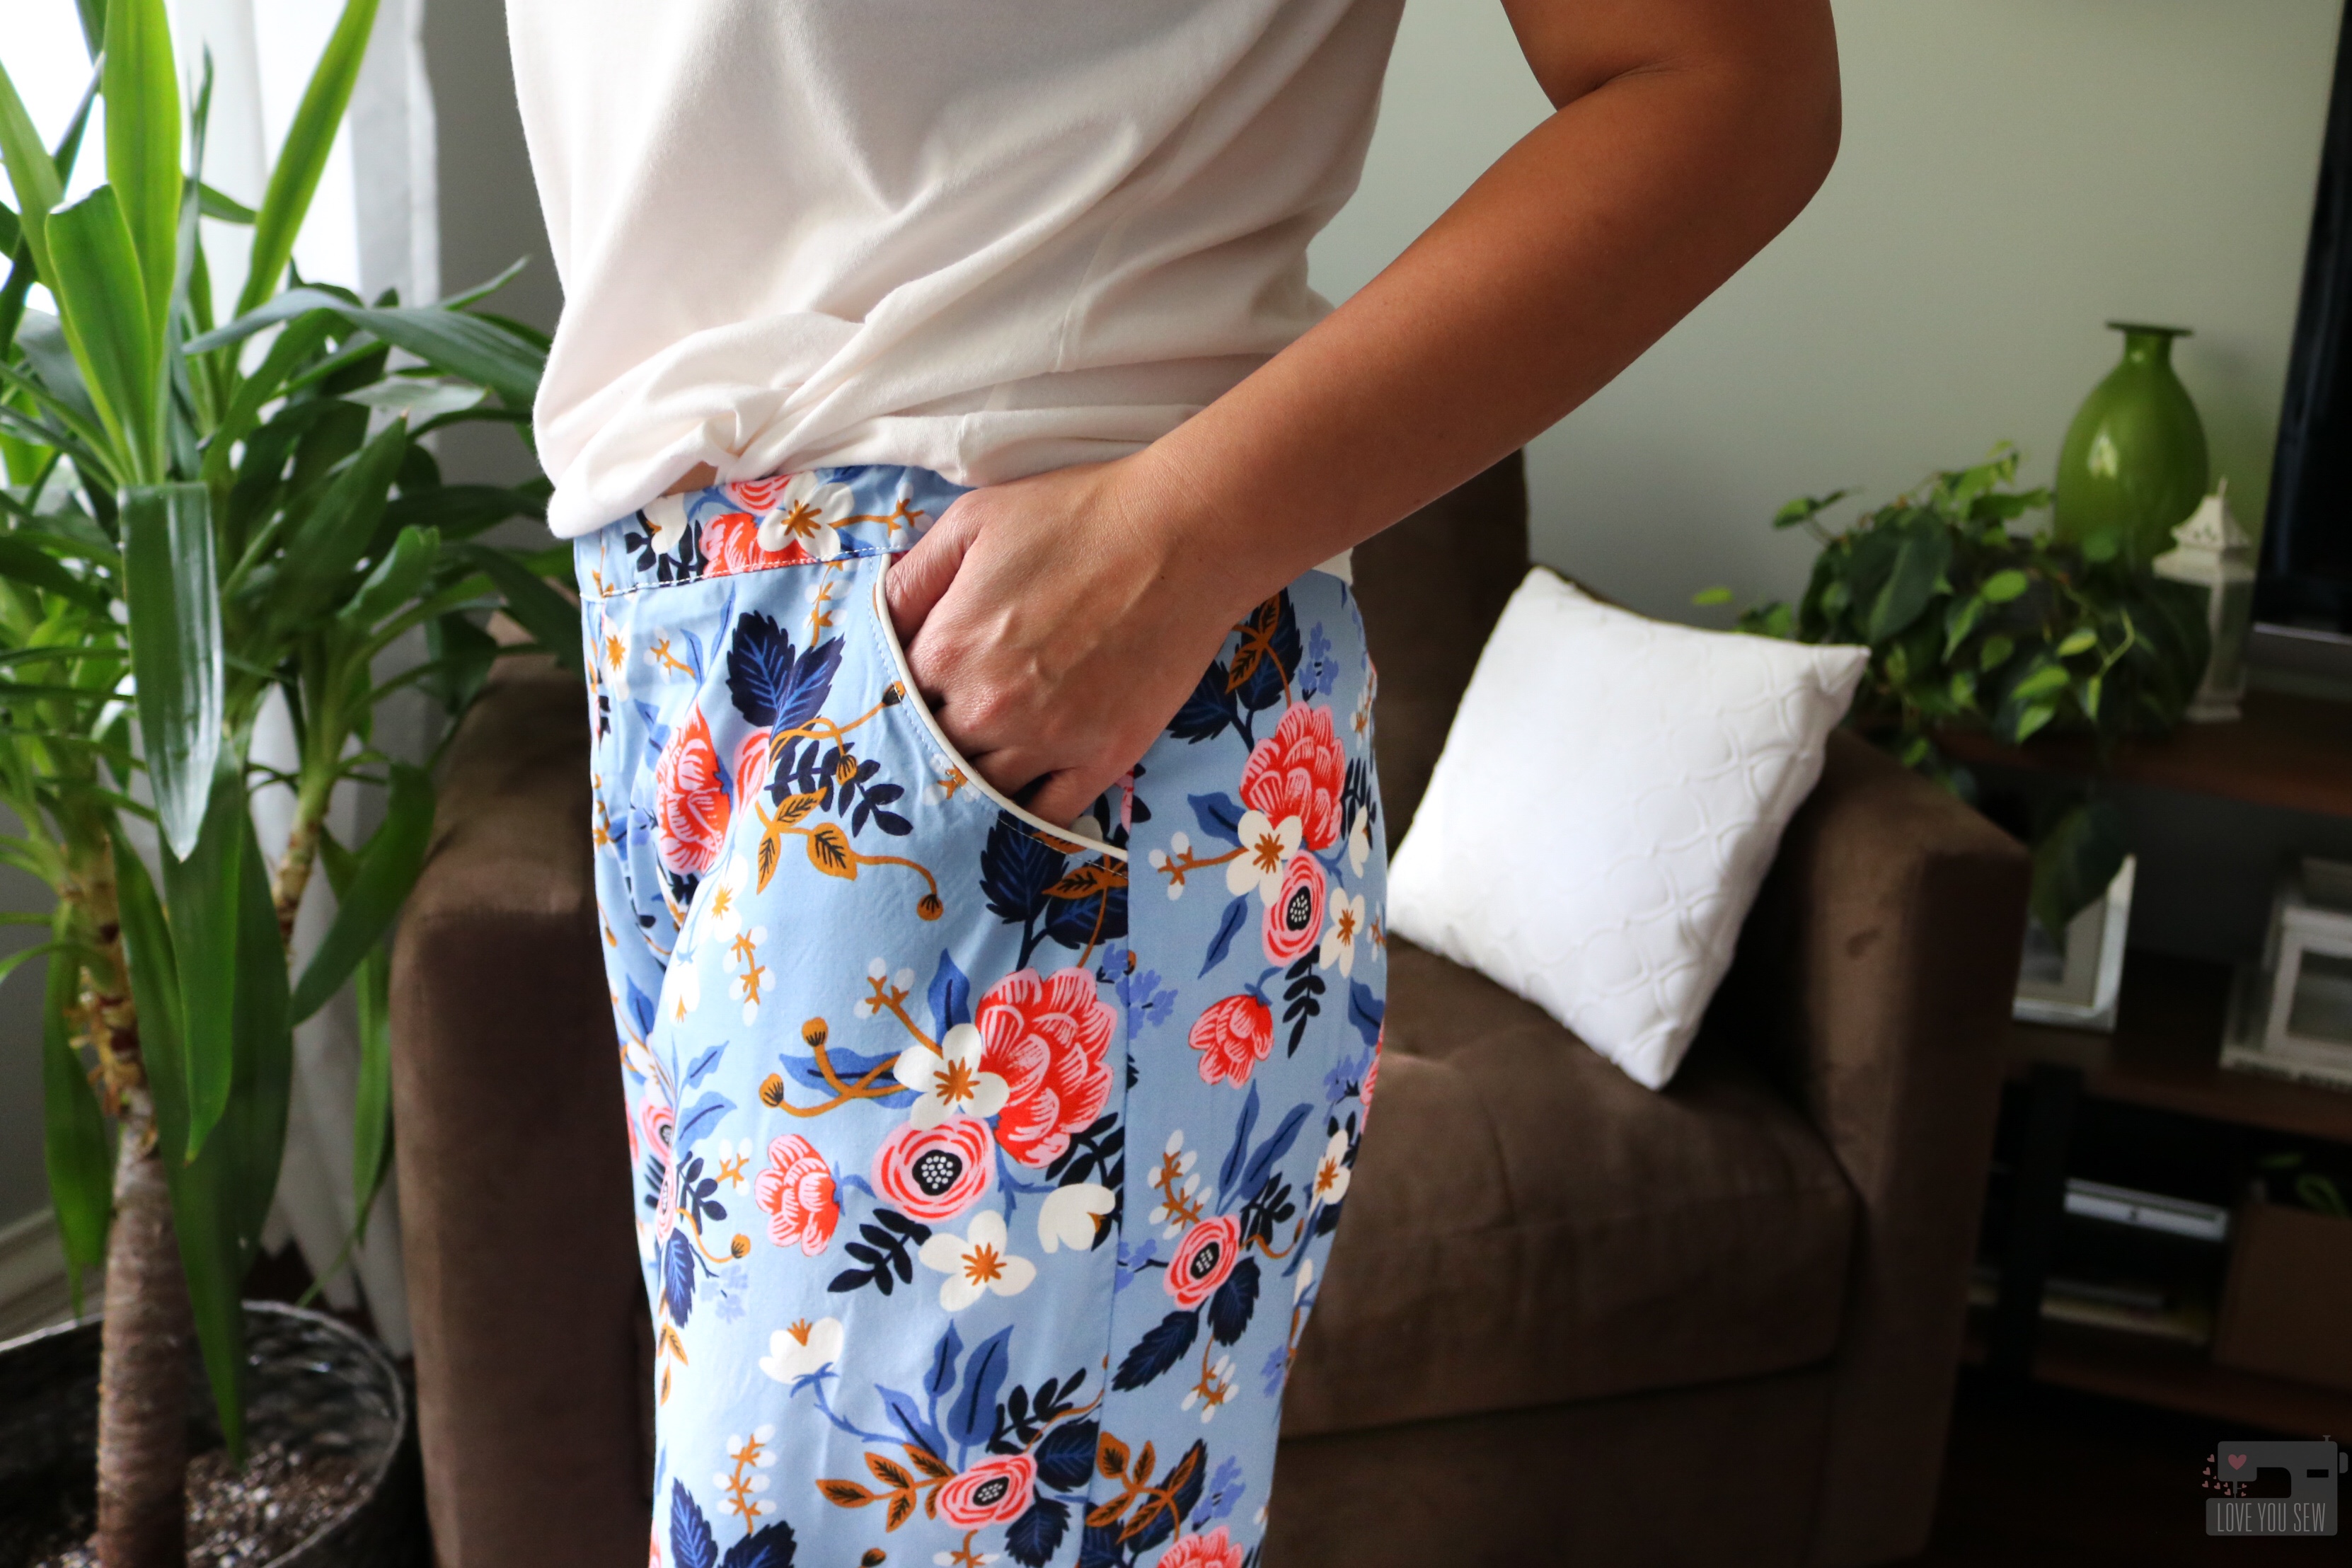
I knew I wanted something luxurious for my first pair of Peppermint pants. I am usually a boxers gal and wear all of my old flannel Xmas ones in colder months. I’ve been very conscious lately of my fabric consumption and was happy to find this Rifle Paper Co floral already in my stash. It is a Rayon Challis and feels incredible!. It has a soft hand, wonderful drape and feels silky to the touch. However, with these features, it can be very slippery to handle. With Rayon, I always use twice as many pins I usually do and I try not to pick a design which requires fabric matching – it is already hard enough to sew a new pattern!

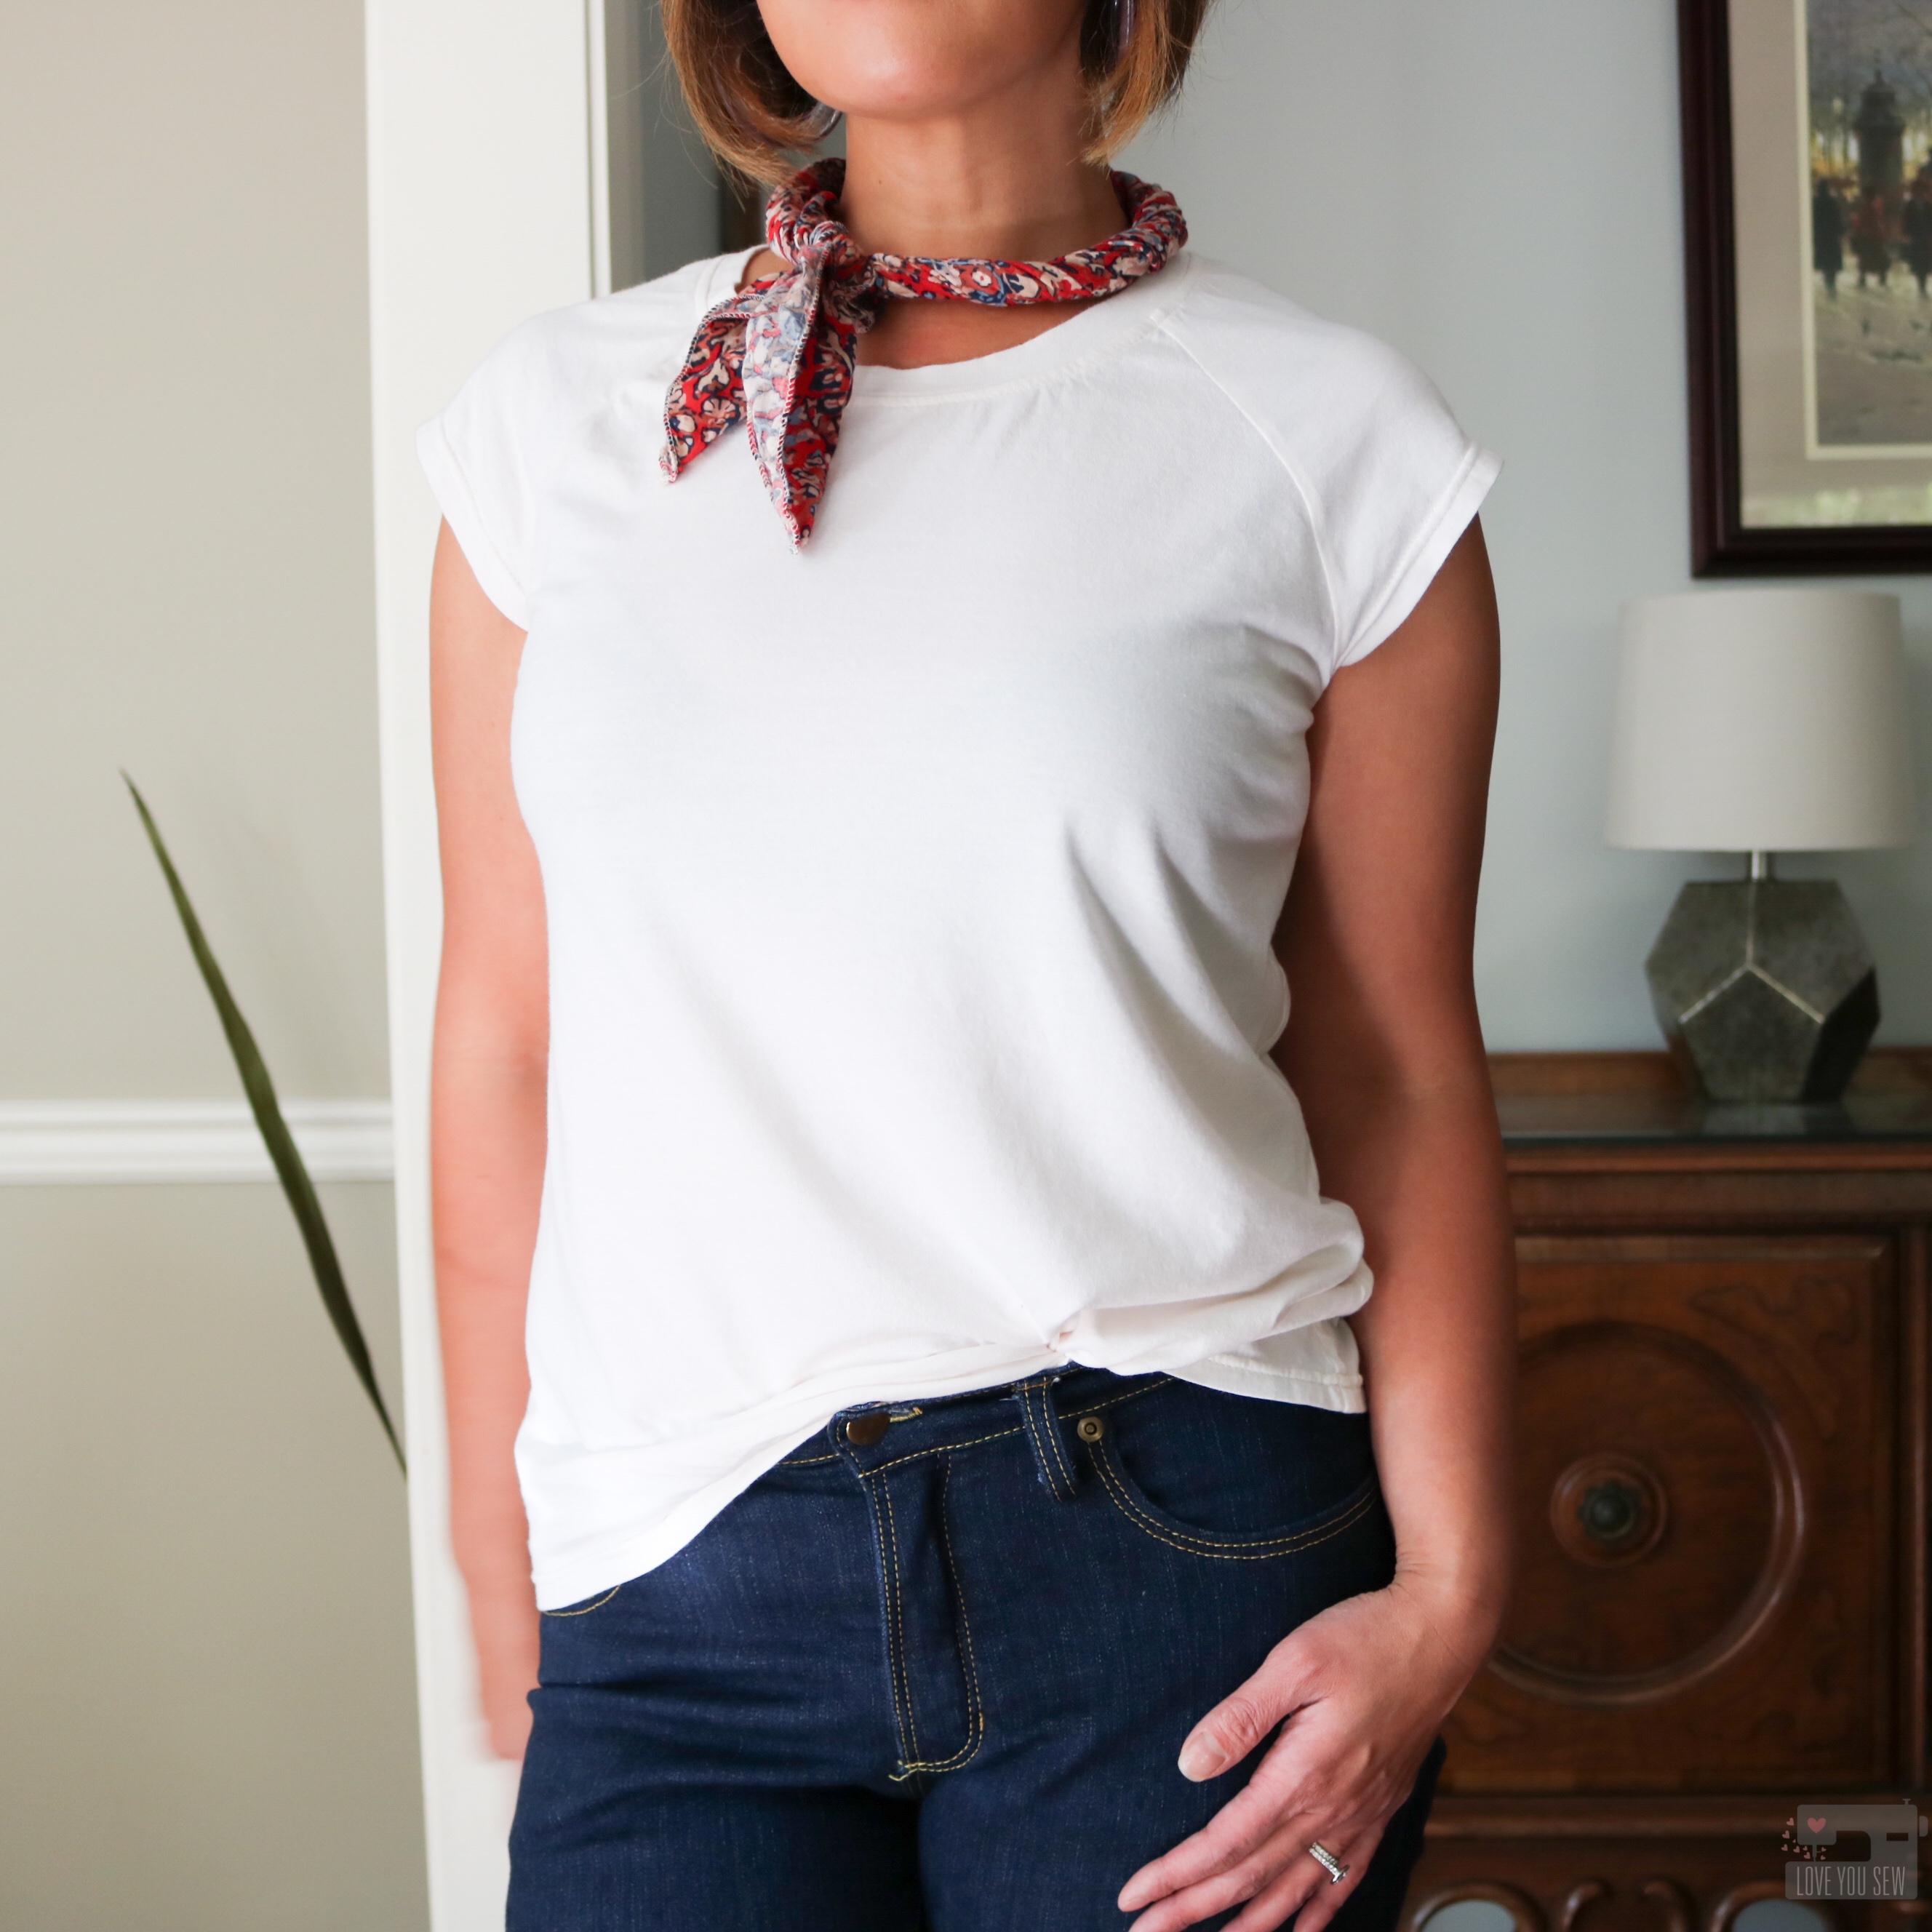
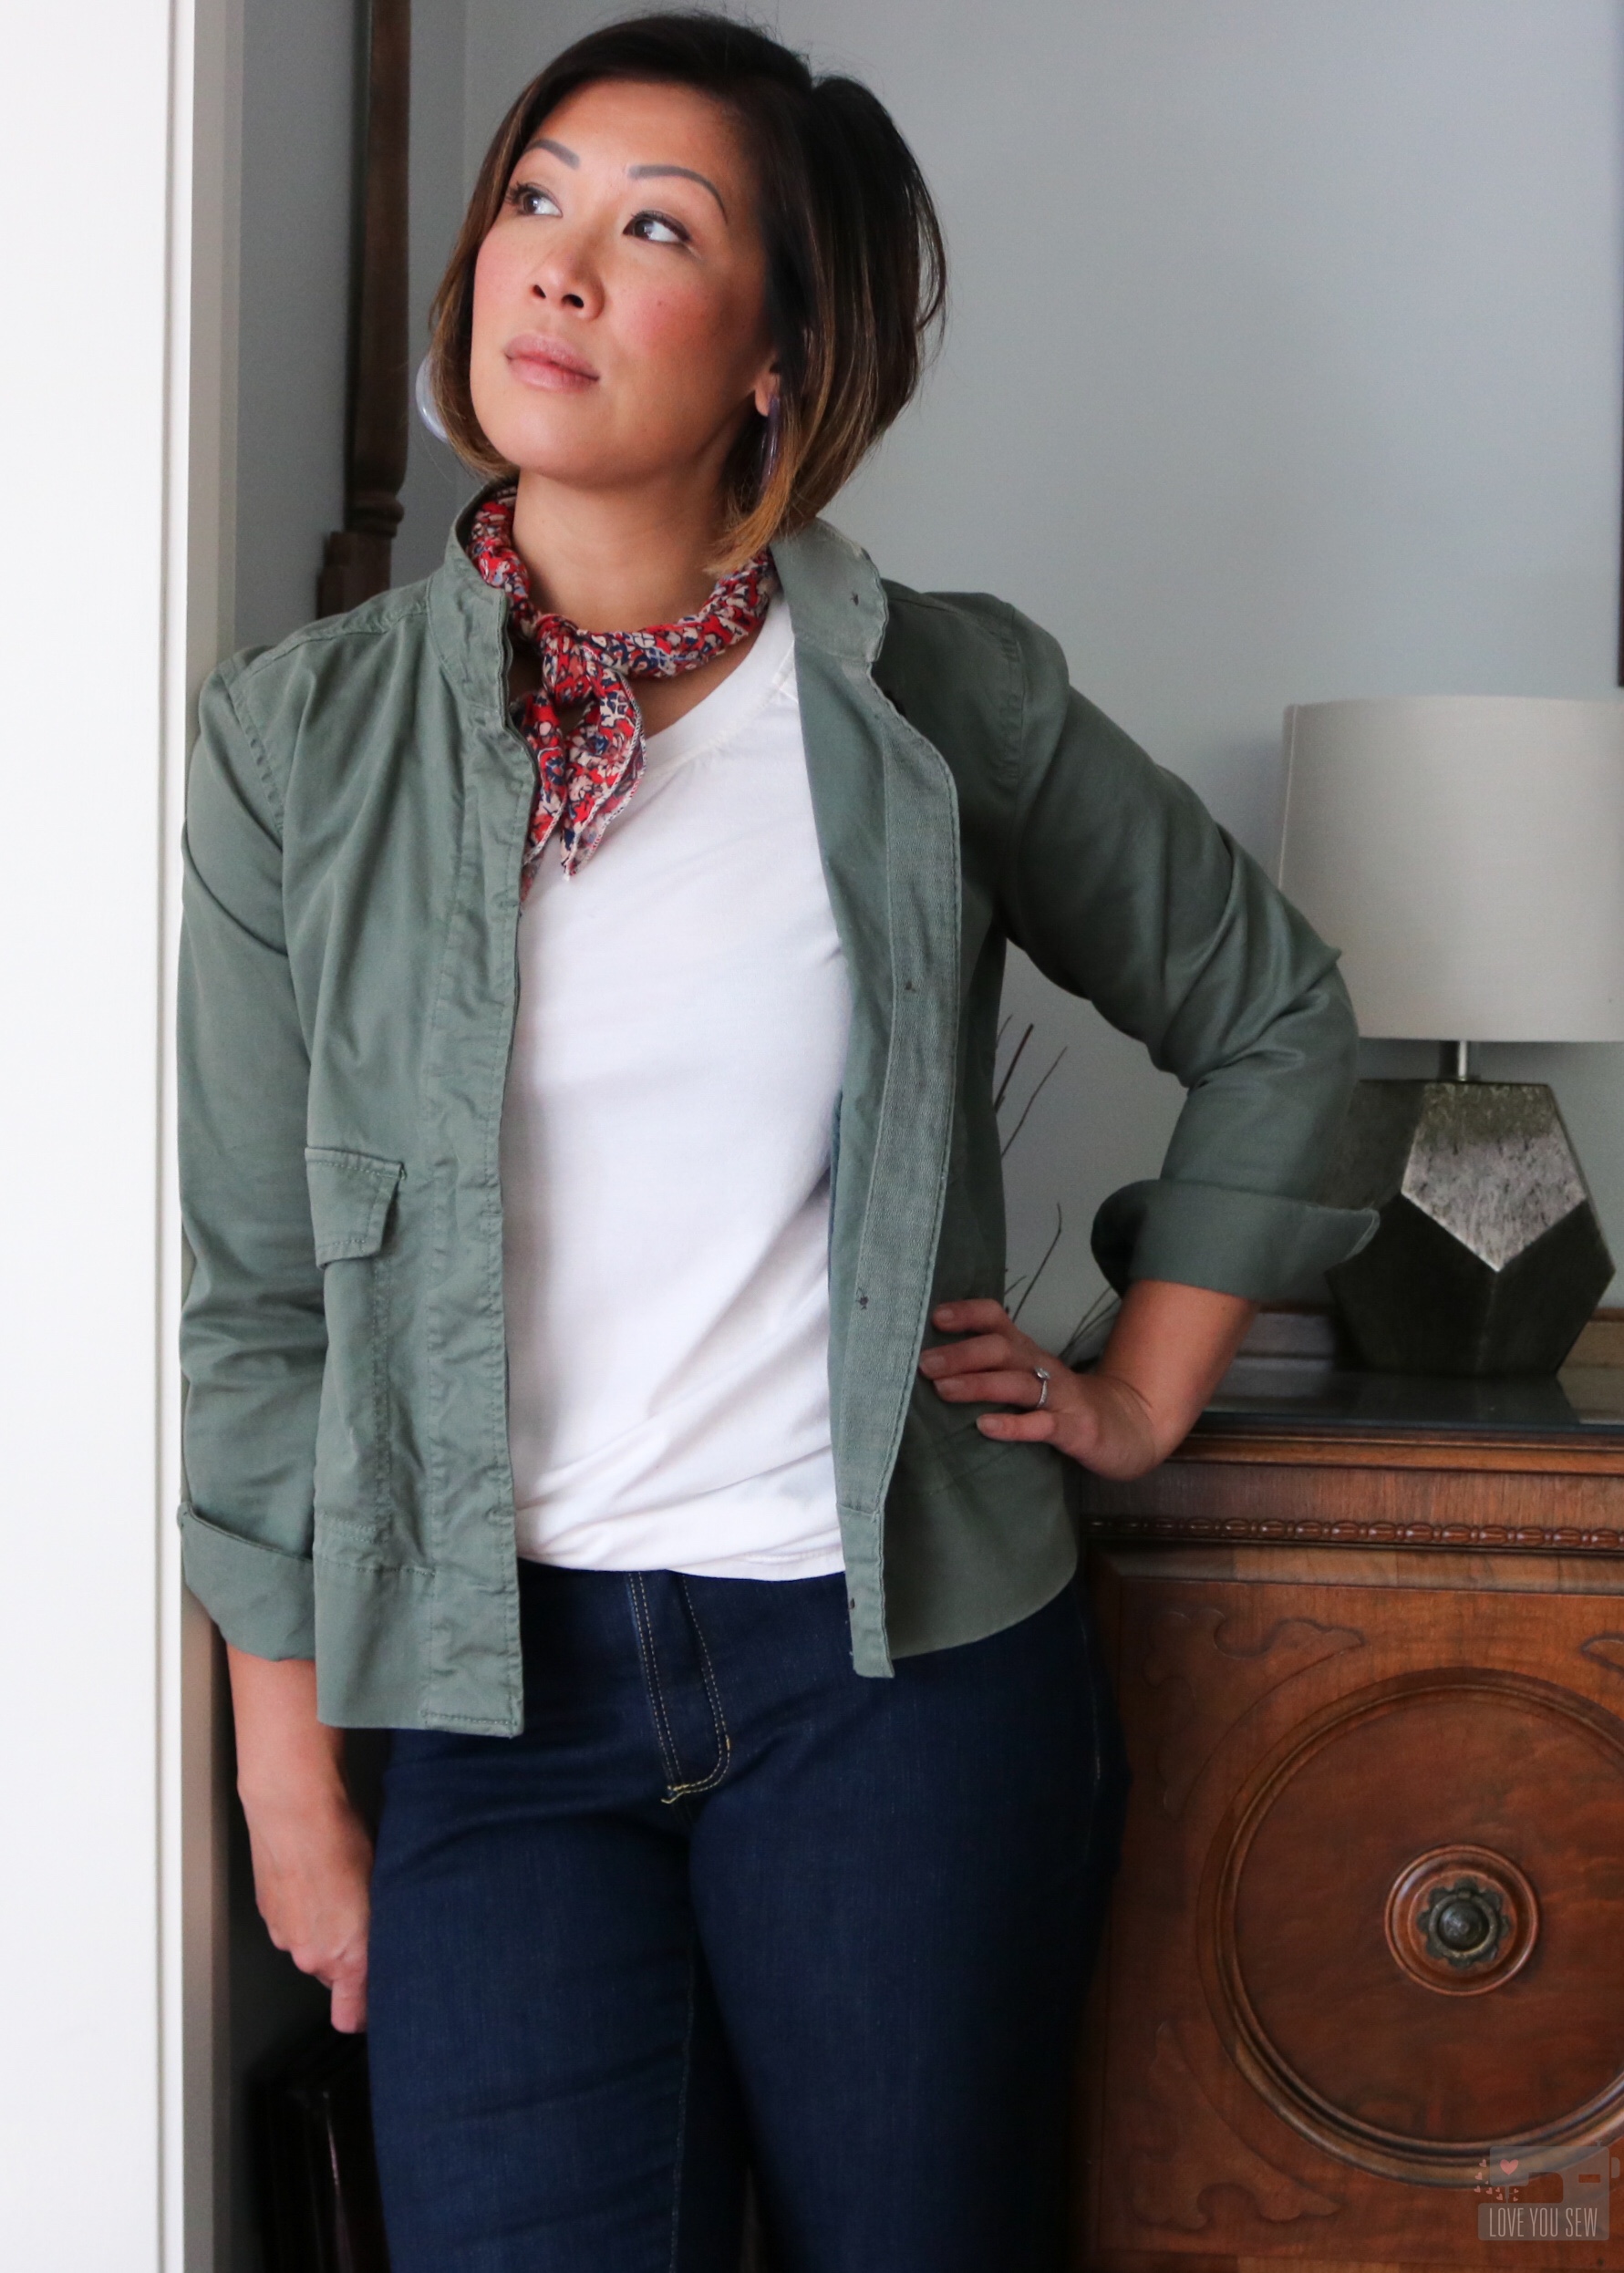
For the top, I dug into my stash again and found just enough of this Robert Kaufman Dana modal knit to make the cap-sleeve version. It’s a nice off-white cream color and so soft. The knit is a bit lighter and slightly sheer, but is perfect if you are looking for a tissue tee or for some great drape. I purchased this from Imagine Gnats, but this is a staple from RK and you can find it also at Fabric.com, here.

Modifications

With pants, I always measure all across the board. I’m a small in the waist and am in-between a medium and large in the hips. But since the Peppermint PJs are meant for lounging, I sized up to the large and then graded the waist to a medium since the elastic would pull the sides in more. I love the extra room – perfect for laying on the couch for family movie night! I also made my regular pants adjustments of extending the crotch by 1/2″ and deepening the seat by 3/8″.
Since I was working within my stash, I did not have a contrasting rayon that would work with my floral print. So I added piping where the cuffs attached to help keep the look cohesive. I also added piping at the pockets to balance out the look.
As you know, I’m also a shortie at 5’3″. I used the shorten/lengthen line to reduce the front and back legs by 2″. On the cuff, I took another 2″ off the total length because I didn’t want this delicate fabric to drag on the floor at all. So overall, I took 4″ off each leg.

With the top, I made a straight medium with the cap sleeve and didn’t make any additional adjustments. The length is great for a PJ tee and I think this is great pattern for any basic tee. It’s a great neutral to wear with jeans and a light jacket for fall!

Final thoughts

The Peppermint PJs were great basics to sew and I love the video on Melly Sews YouTube channel on making the waistband. It’s always great to get that double-check while sewing to ensure the correct construction! I think this is beginner-friendly and a great value with two patterns for the price of one! I hope you enjoy making this set as much as I did!!!

Hugs and Stitches,

Cristy


The pattern was gifted to me by Blank Slate Patterns, but I was not required to write a blog post. All thoughts and opinions are my own. Also, this post may contain affiliate links. You can read about all of my disclosures, here.