Schedule:
Fabric was provided for this blog post. All thoughts and opinions are my own – I really do adore Sarah.


Fabric was provided for this blog post. All thoughts and opinions are my own – I really do adore Sarah.
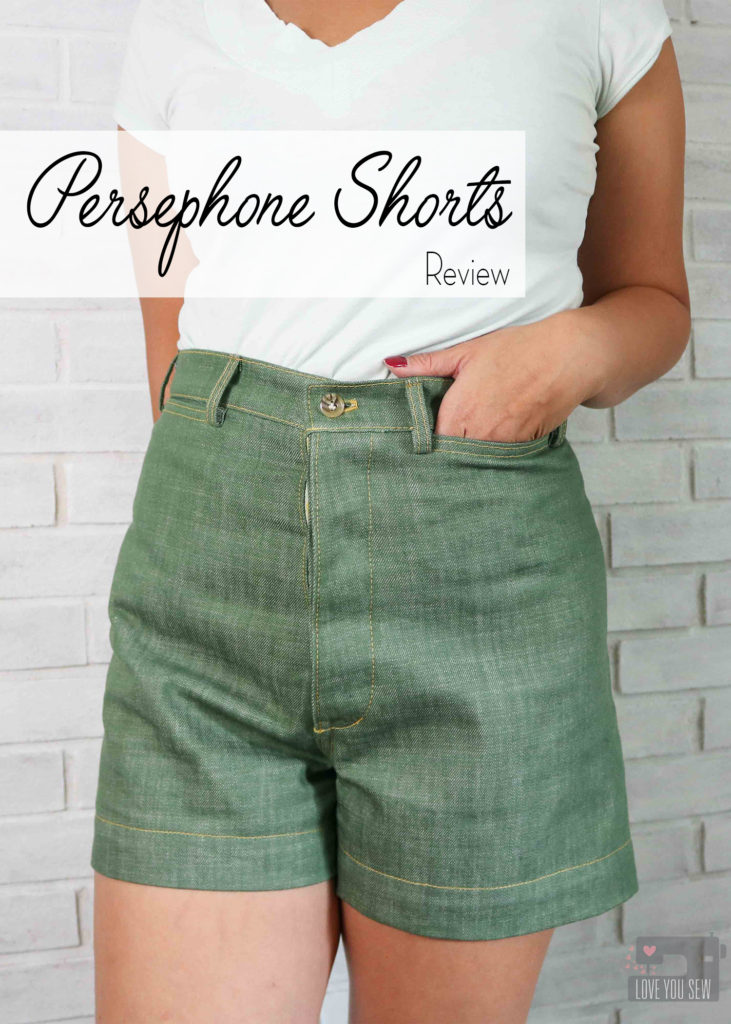
Like everyone and their mama, I scooped up the Persephone Pants pattern by Anna Allen Clothing last summer. I made these shorts last summer as well…and even took the pictures…but this post was left on the back burner while I had other blog deadlines to fulfill. While pulling clothes for our spring break trip, I was reminded inspired to finally finish this review — especially for all of you who are heading into shorts season as well!
The inspiration behind this pattern were the wide-legged, high-waisted sailor pants from the 20-40s. The Persephone drafting is unique in that there are no side seams which made fitting a little different, but still doable with a muslin. These shorts are my wearable muslin since I could work on the fit around the waist and hips, but save all the fabric from the legs.
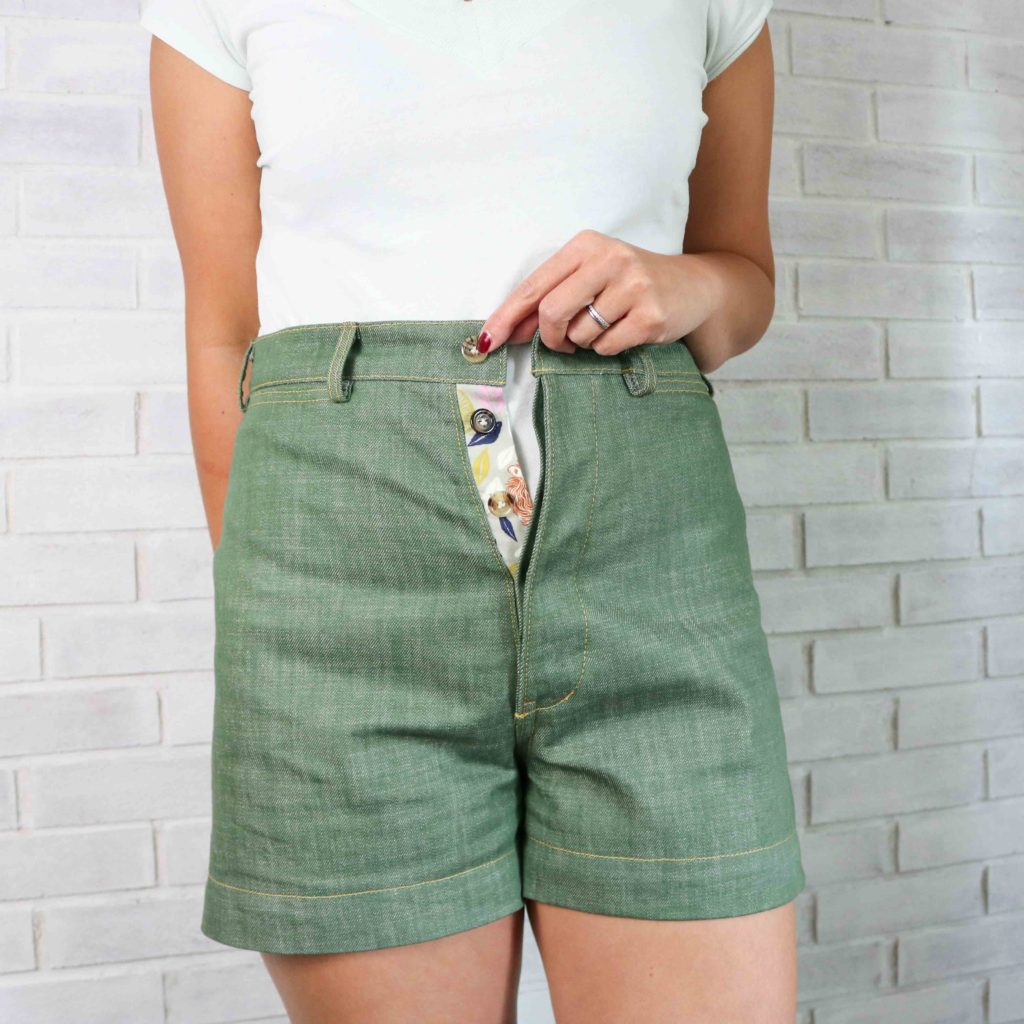
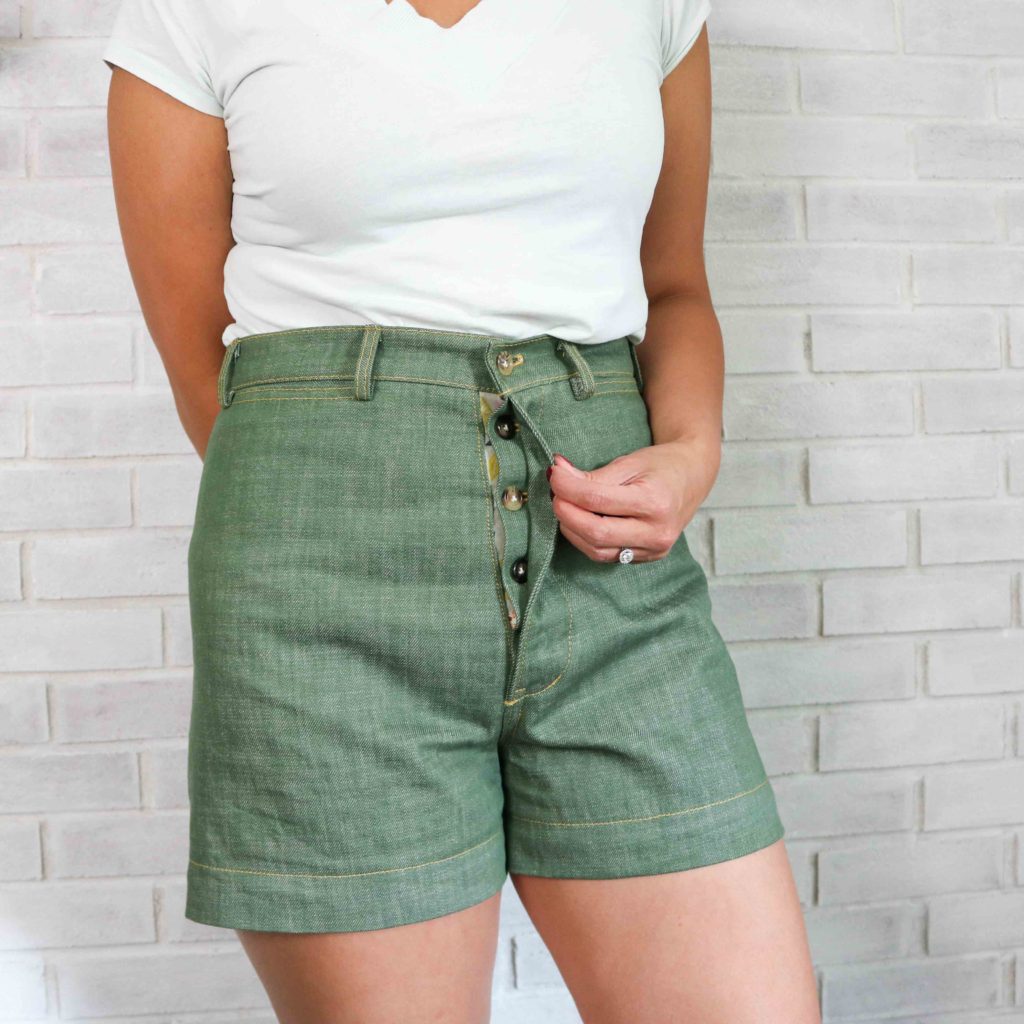
These pants feature a hidden button fly, but Anna released the zip fly expansion pack after I made these. When I make the full pants, I would like to use a zipper to make getting them off and on more easily. Also, I’ve been getting creasing at every space between the buttons, so I think a zipper will help smooth that out.
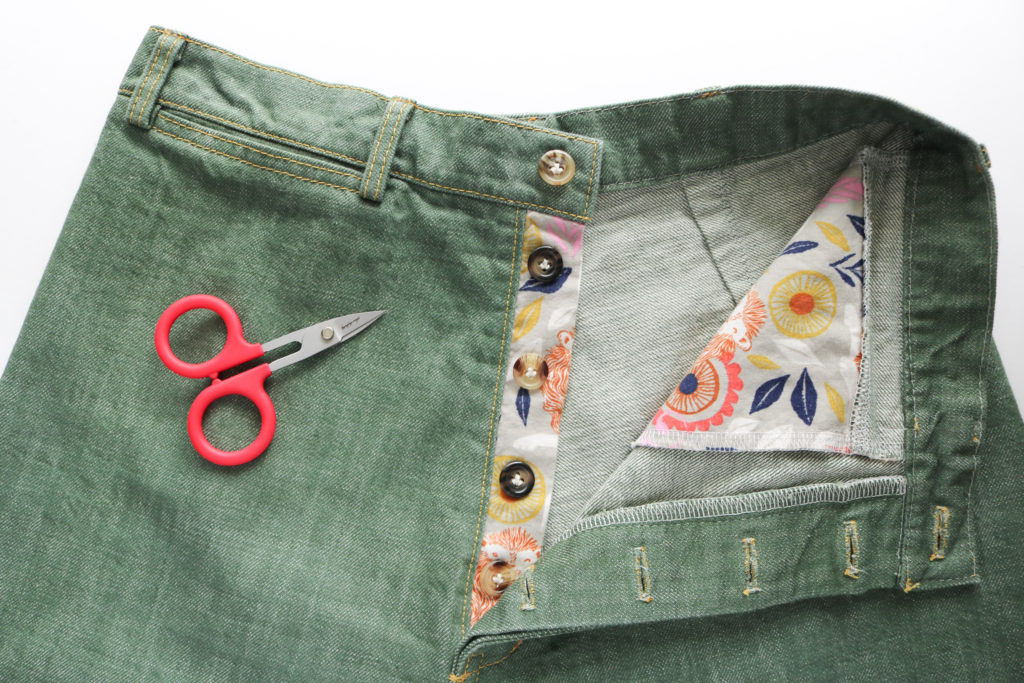
With the hidden button fly, I figured I could also get a bit crazy with the buttons. I’m still working through my MIL’s old stash and couldn’t find five matching colors in the same size. But I did find five with the same size and just alternated the colors.
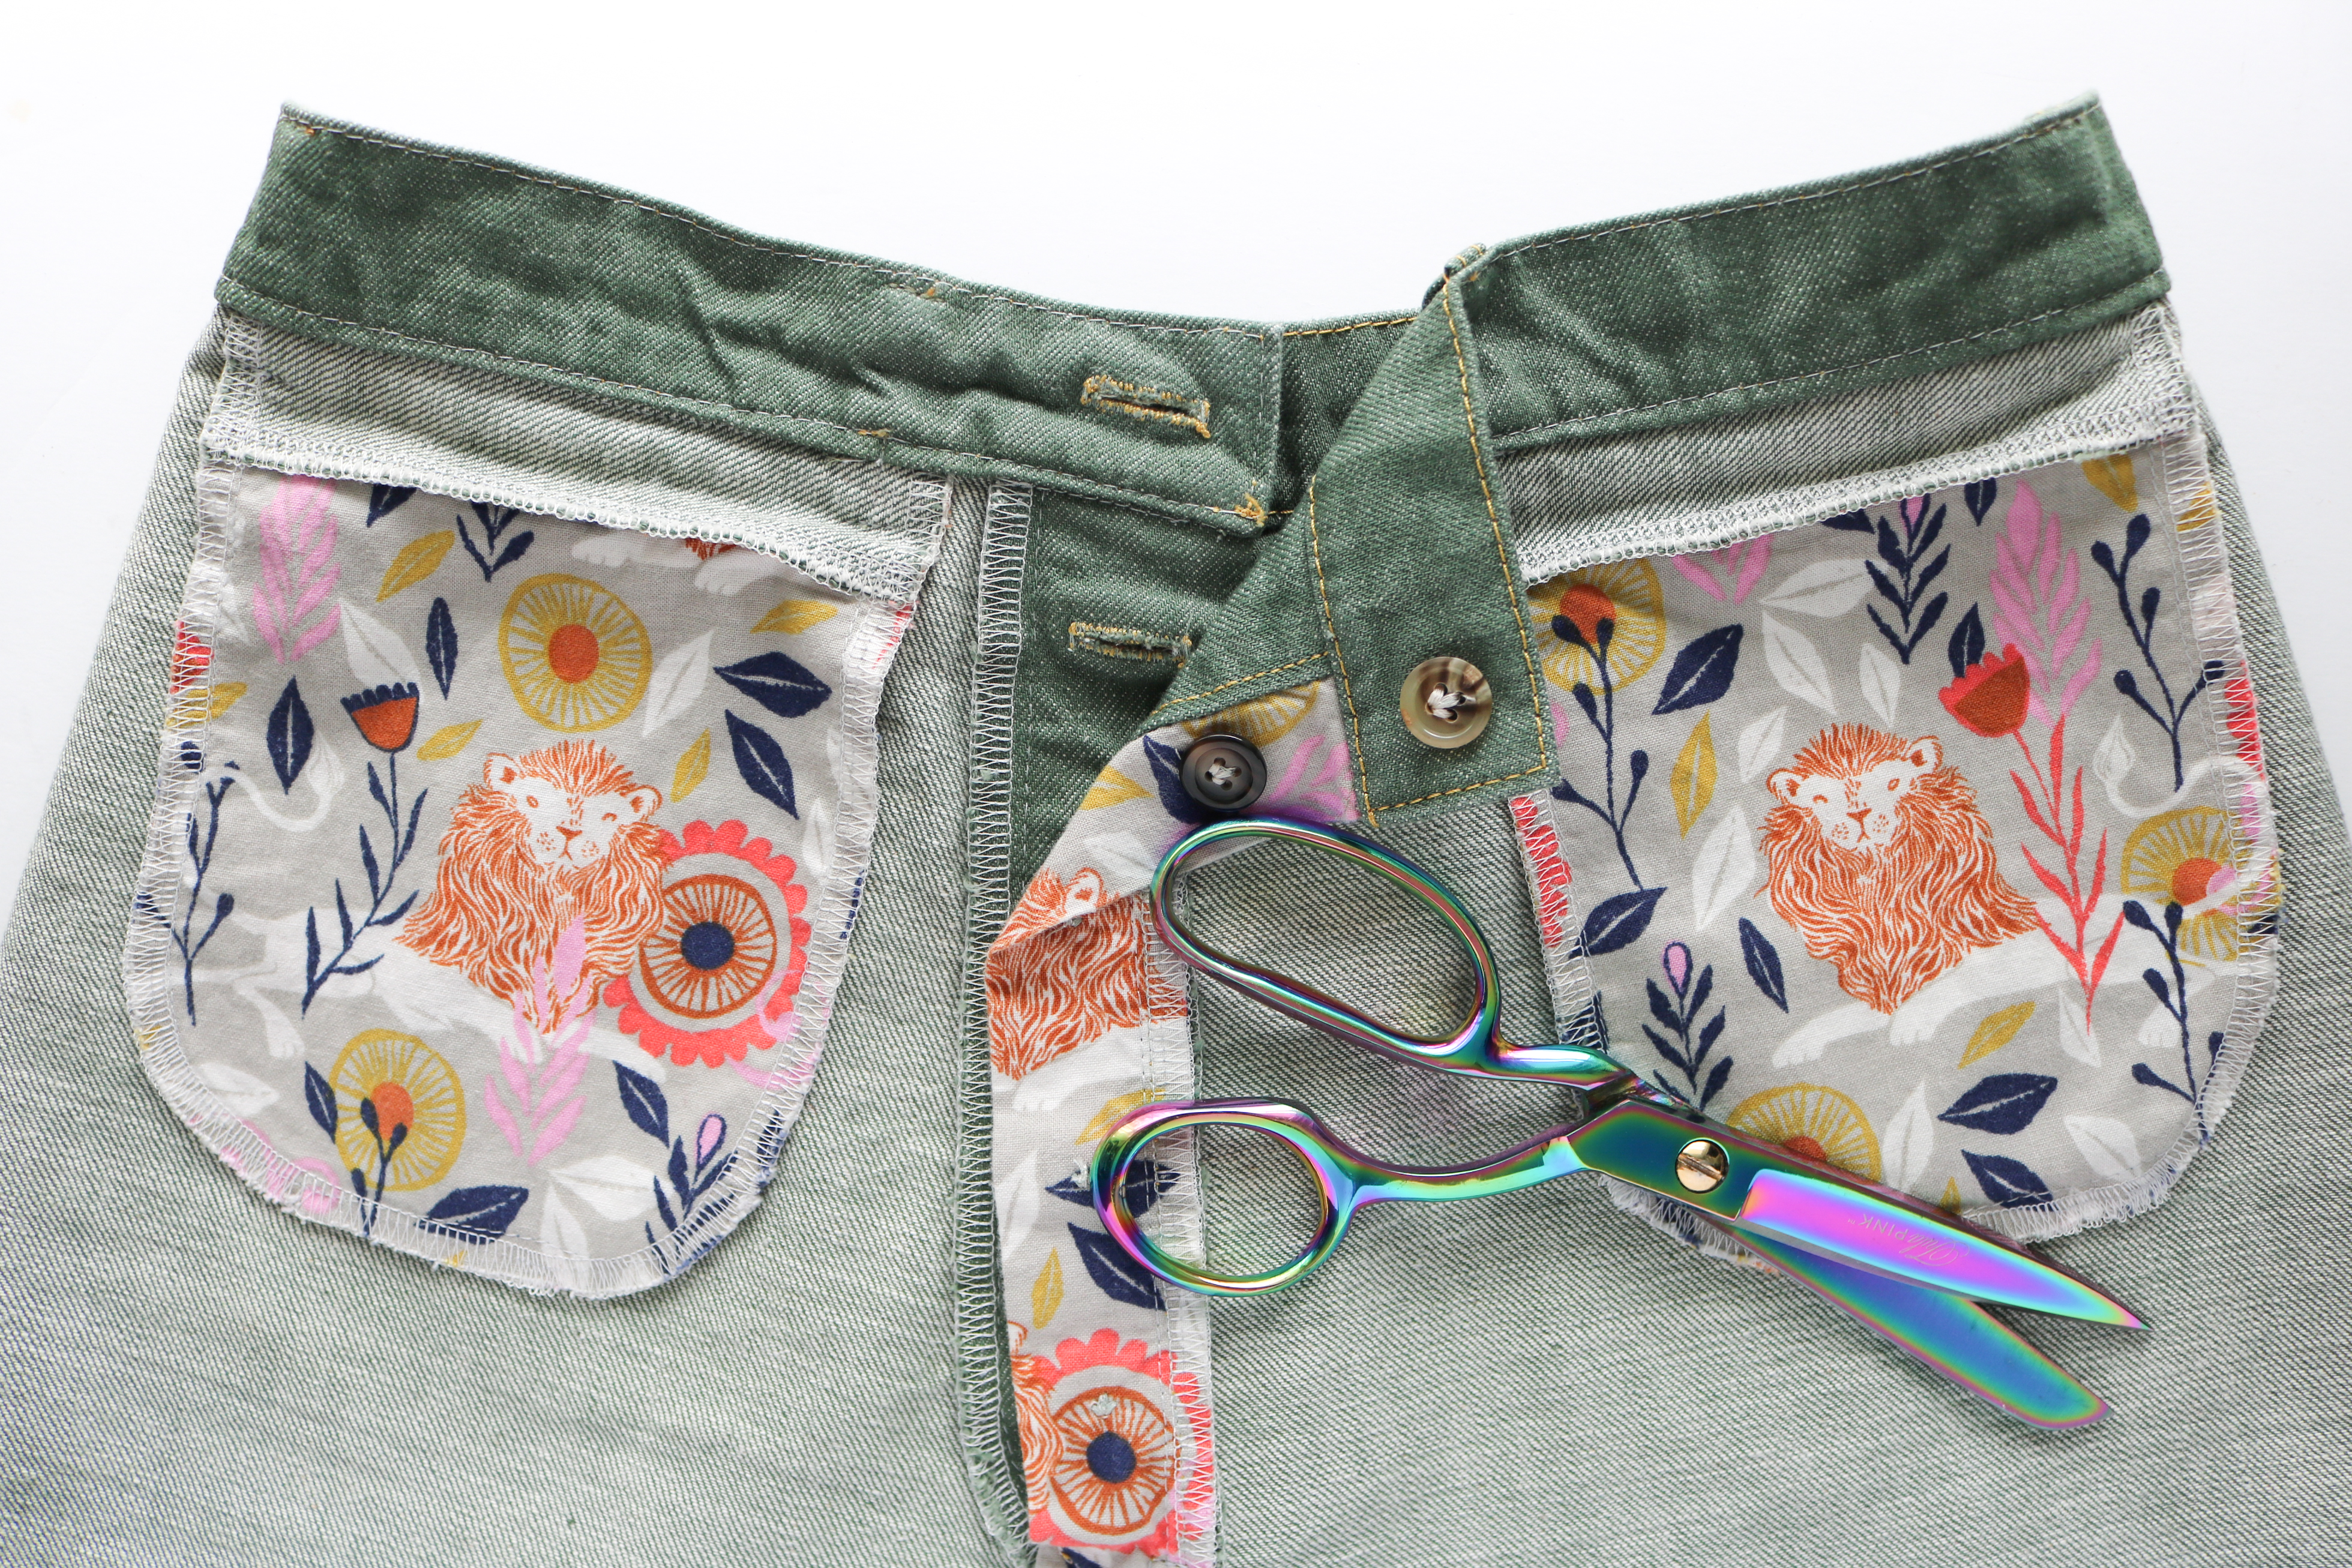
Even though these Persephones were a muslin, I still wanted them to be fun…and you know I love surprise garment guts! With this great Olive Cone Mills denim, I reached into my quilt cotton stash and found this print by Sarah Watts. The colors go so well with the denim and who doesn’t love some lions?
I used the quilt cotton on the fly facing as well as with both in seam pockets. You can see I fussy cut the pockets and love how they turned out. However, these are pretty small pockets and can only hold a small set of keys or some chapstick. I’ll still keep them in my next pair, but will add some back pockets for more storage.
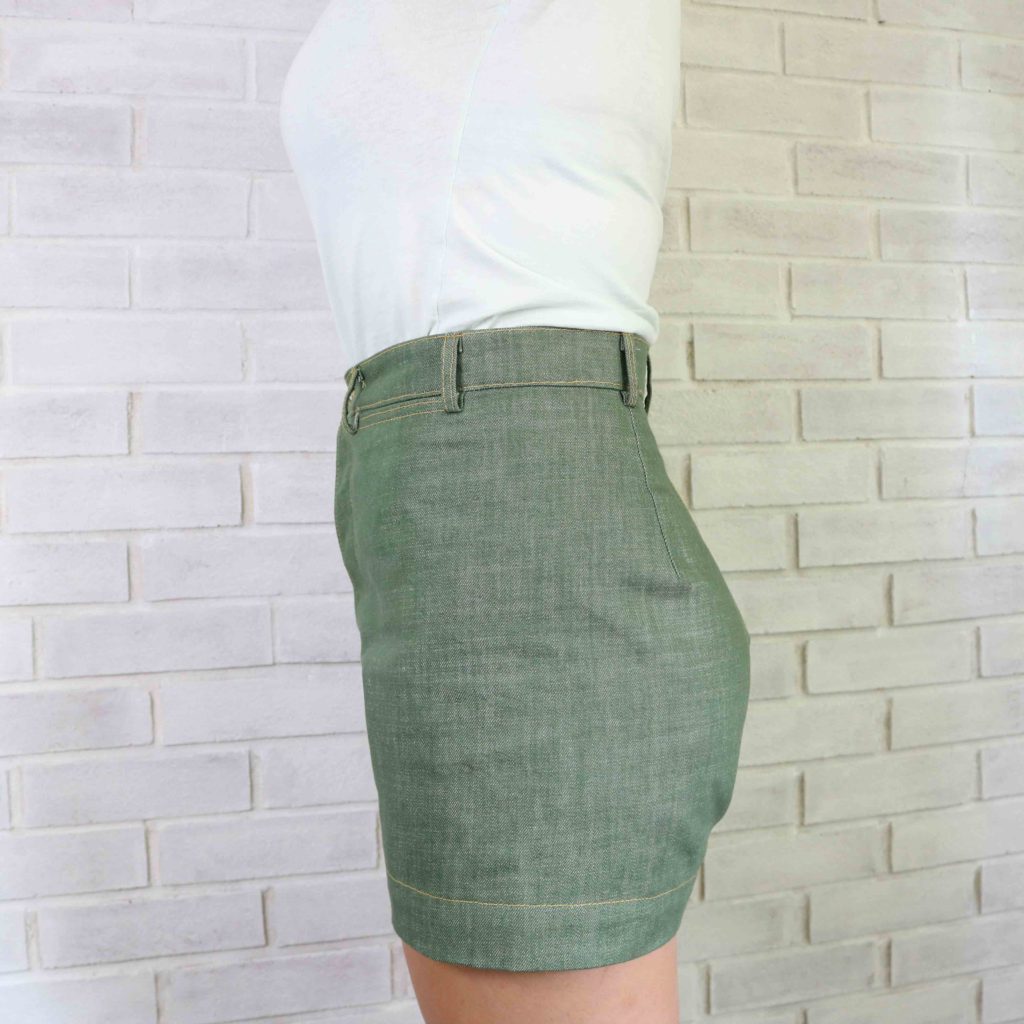
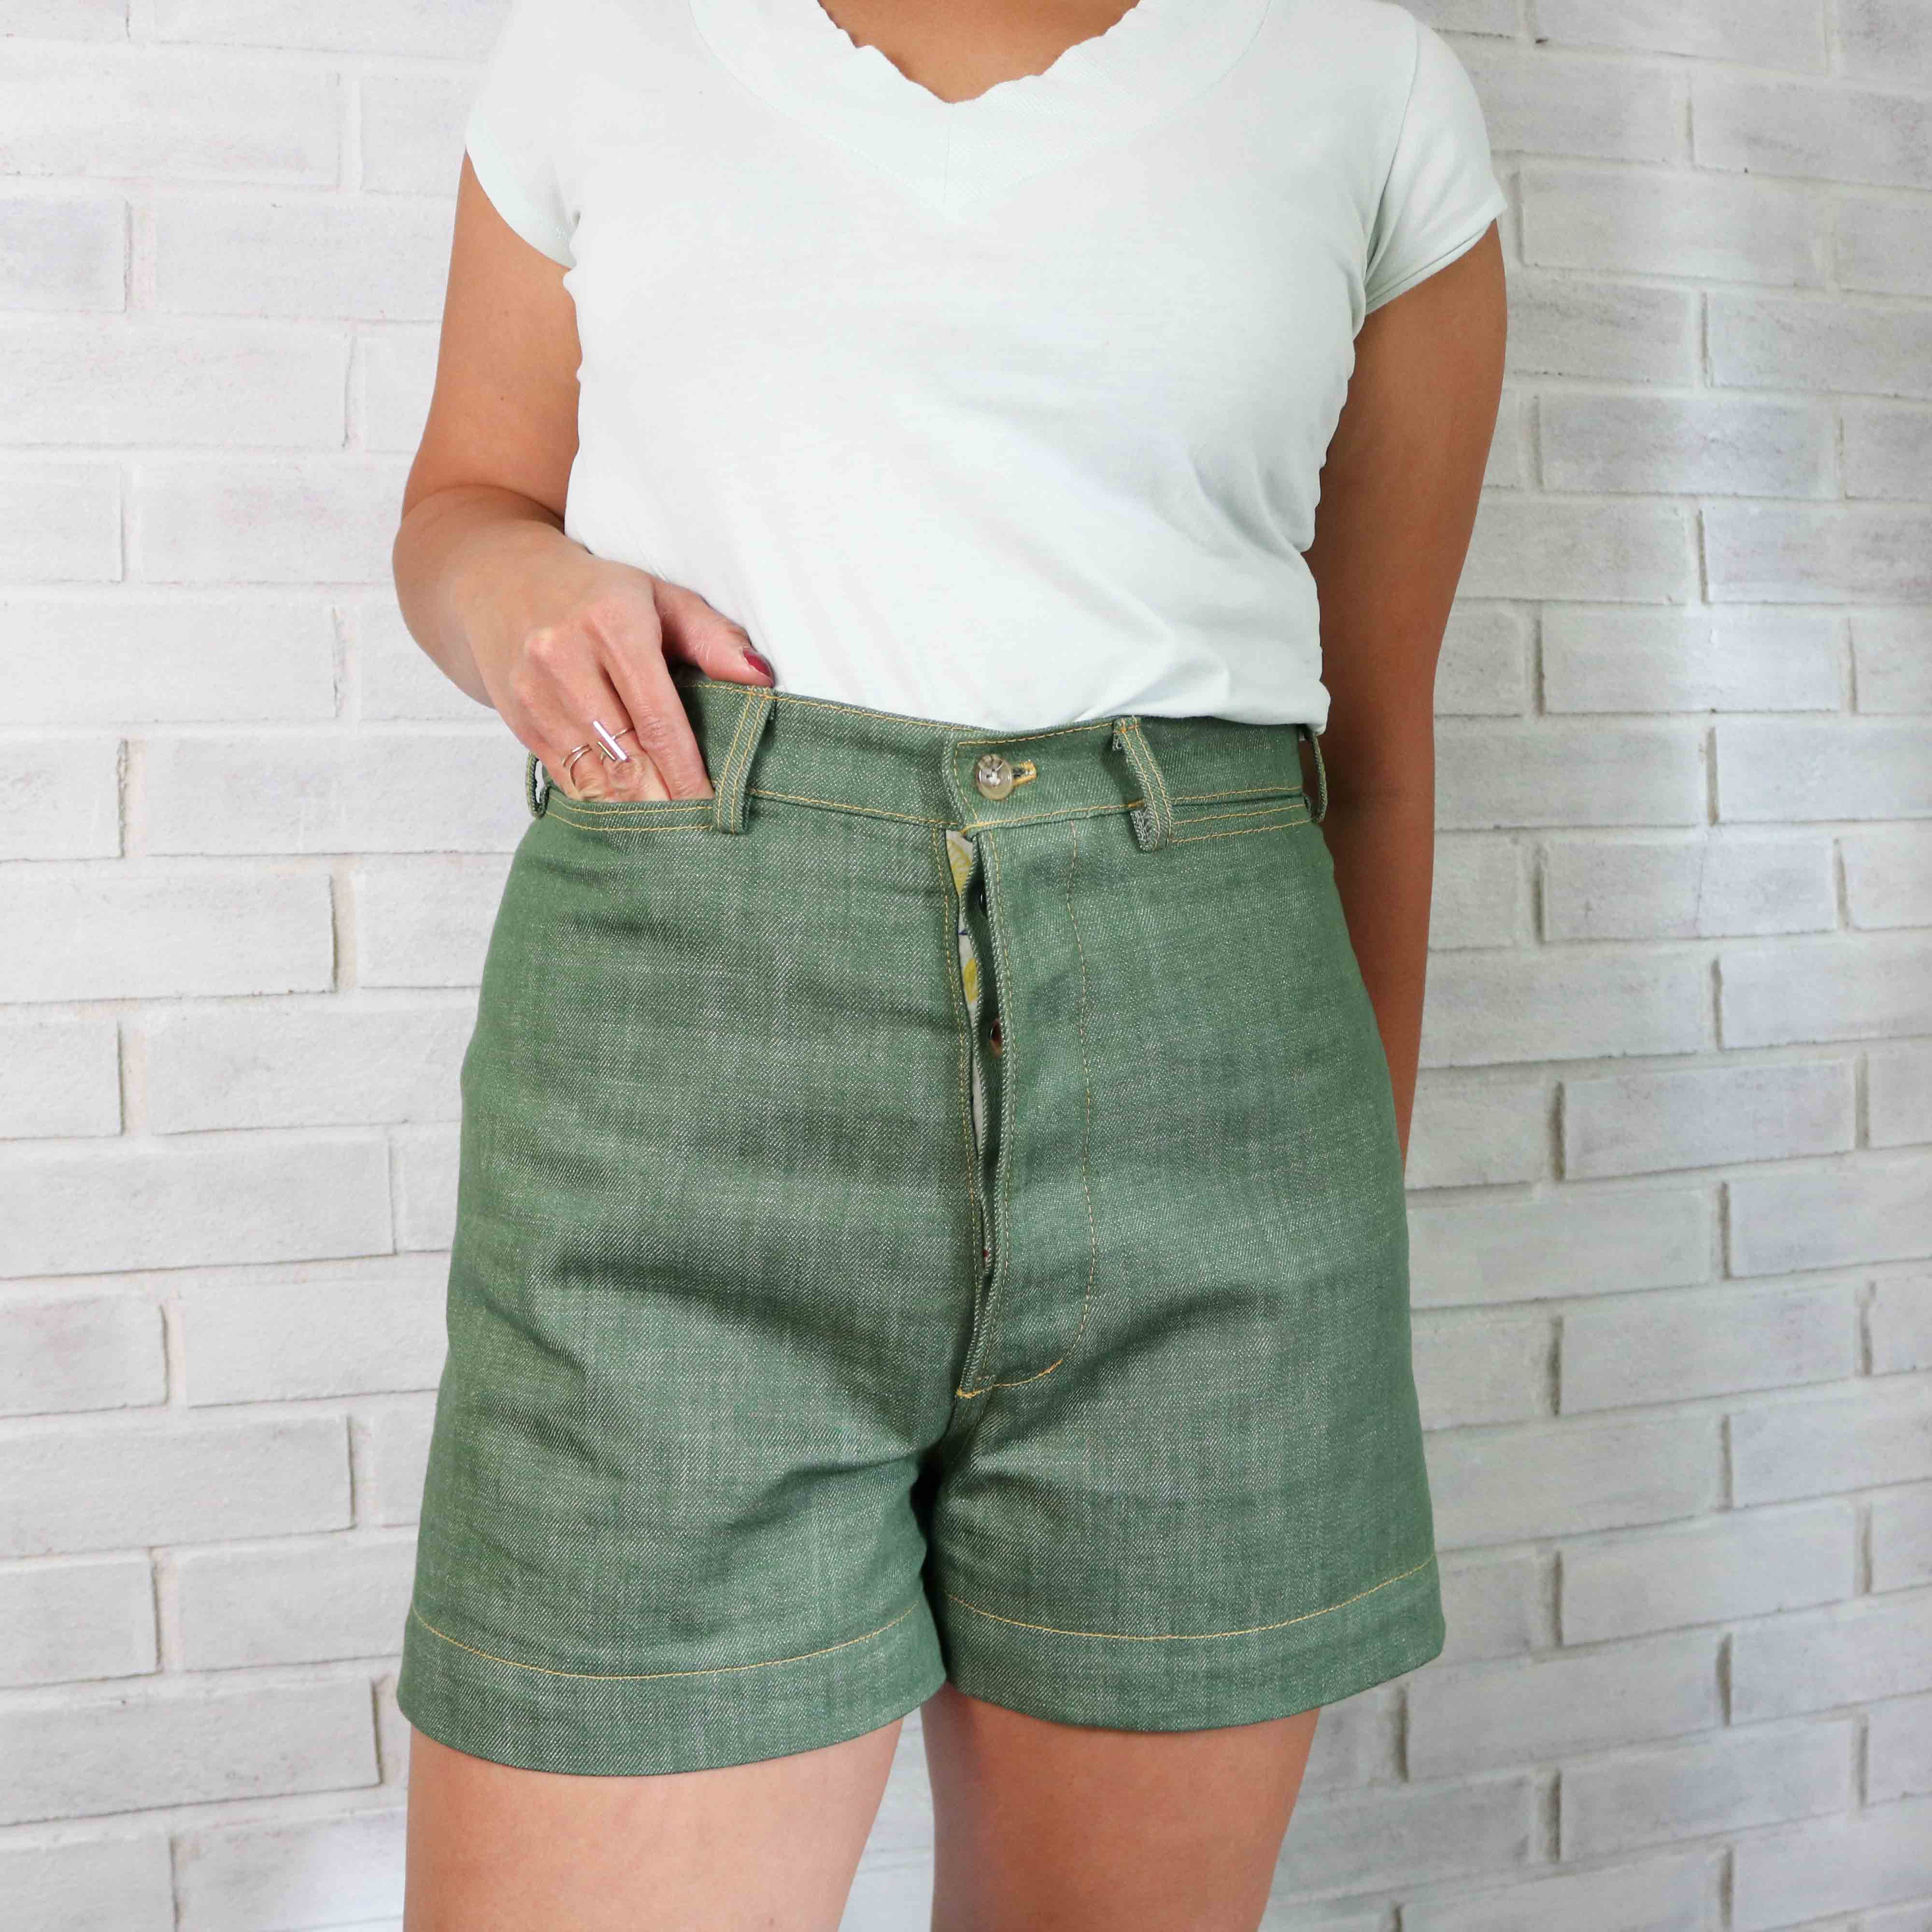
With almost all pants, I know my measurements run between two, if not three sizes. I cut a size 8 in these Persephone shorts and graded the hips out to a 10. I left the rise as it was drafted, but at 5’3″, the top of the waistband sits about 1 1/2″ above my belly button. Although, I love the super high-rise look, the pants push a bit too high when I sit. Next time, I will reduce the rise by ~1″.
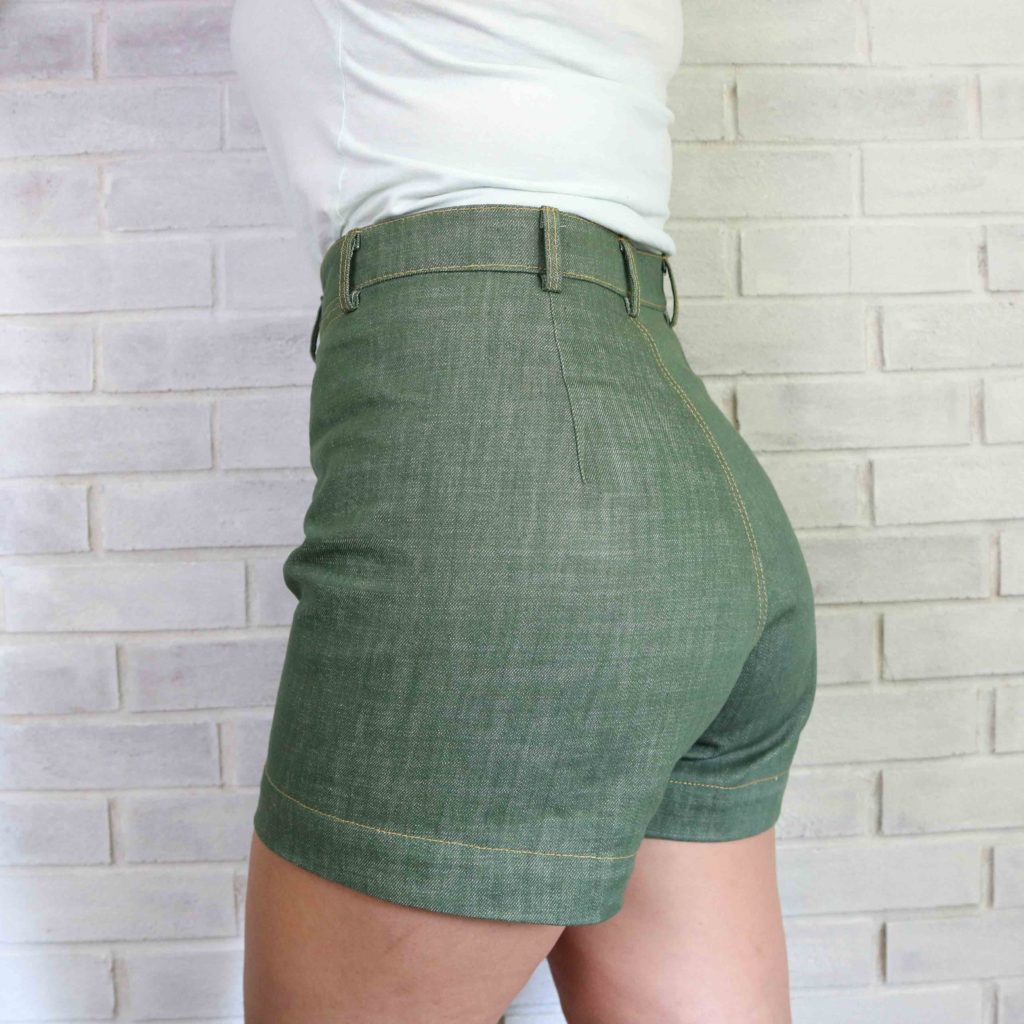
My fit issues are always around my booty. There was lots of back and forth with baste fitting going on, but I was able to work out the following:
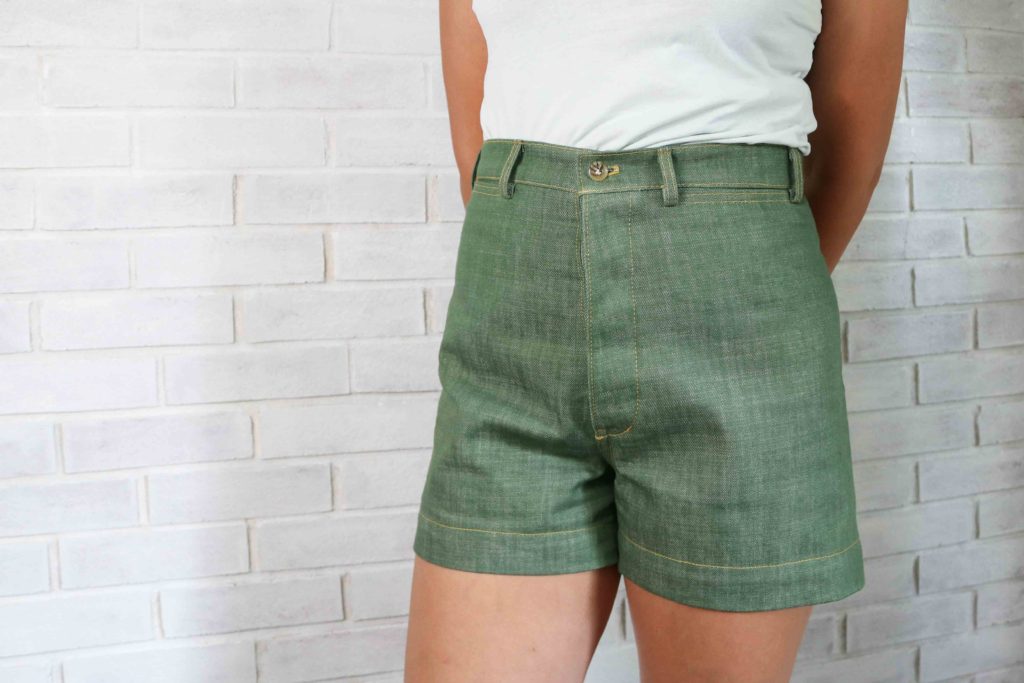
Overall, I LOVE the fit of these Persephone shorts. I have always had a hard time finding RTW shorts with room for my thicker thighs…especially when seated. The wide cut gives me so much ease around my thighs while the high-waist provides such beautiful shaping.
I have a whole winter’s worth of bottom weight scraps and can’t wait to make a few more pairs of these shorts for the summer ahead! Are these in your summer sewing queue?
Happy Sewing!
Cristy
This post may contain affiliate links for which I may receive a very compensation. These payments help to keep the website up and running. Thank you for your support!
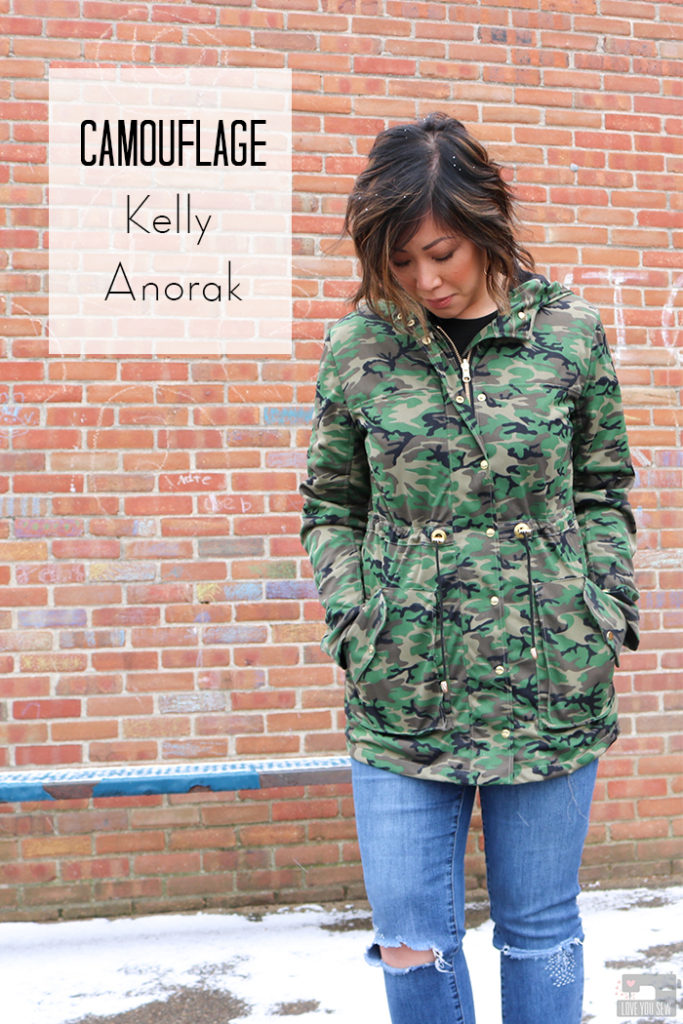
Camouflage prints are not just for combat. This fabric print is heavy in current street style and I love it!!! The print we know as camo has been around for decades and goes in and out of fashion. But with notable fashion houses, like Valentino and Tom Ford, bringing the print into recent collections with either changes from the traditional color palette to the shapes of the pools, camouflage seems to be even more popular in recent years.
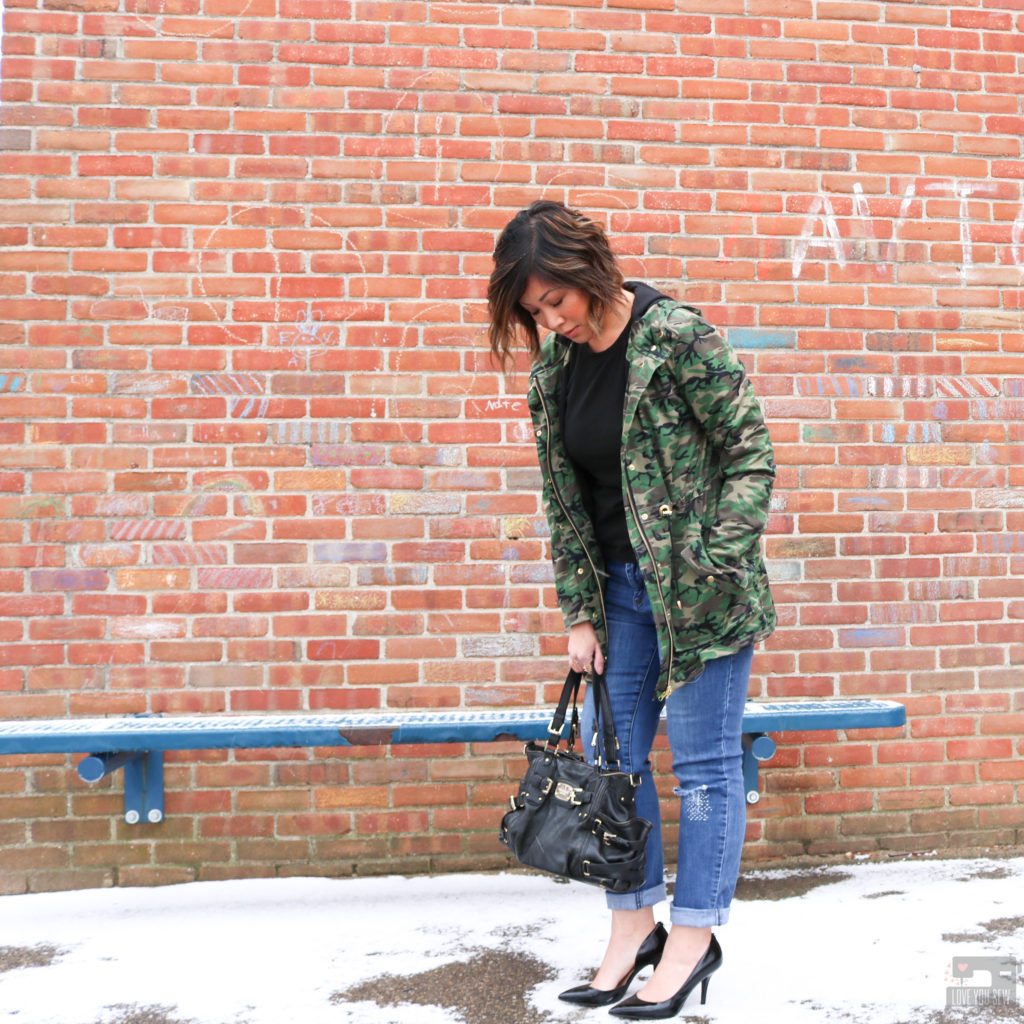
I’ve always loved camouflage print and am a big fan of mixing femme and masculine looks together. At first, I tried to find old military jackets from the thrift shops to tailor down to my sizing, but it proved much harder than I thought it would. Most of the camouflage from the shops were the newer pixelated prints like this (Marine 2002), whereas I was looking for the more traditional woodland pools of color.
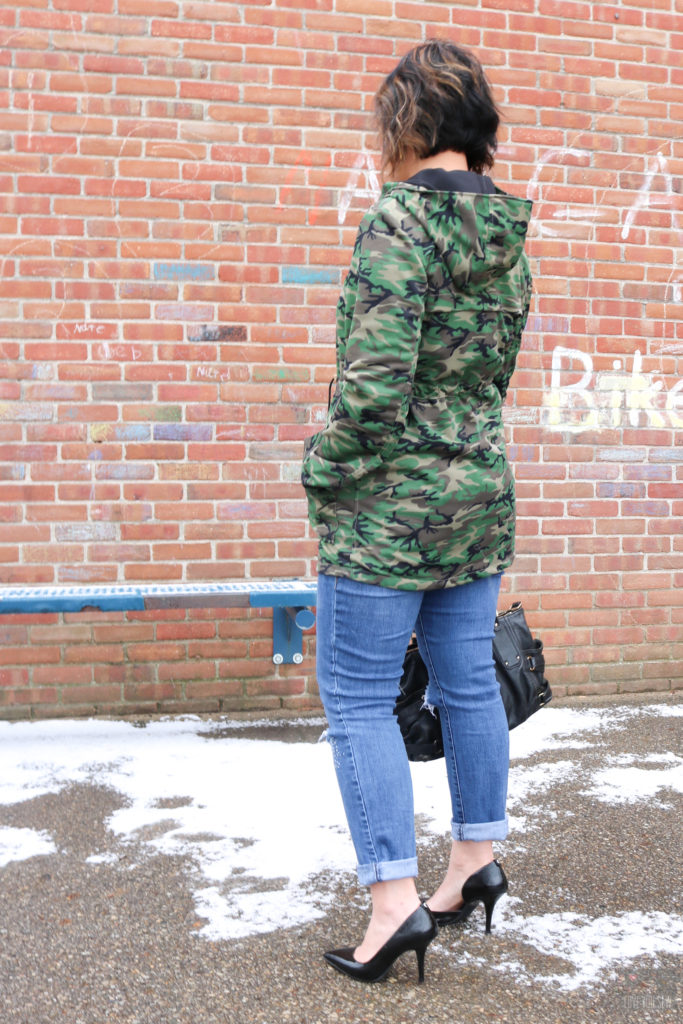
Then Stylish Fabrics asked me to work with some of their fabric and I couldn’t say no. Since my quest for a second-hand jacket was coming up short, I looked into Stylish Fabric’s selection and was so happy…ok, estactic…to find this Olive Camouflage stretch poly. (Unfortunately, this fabric no longer available on their site. But they do have other camo prints here.) I knew this fabric along with the Kelly Anorak pattern were going to be exactly what I’ve been wanting needing in my wardrobe.
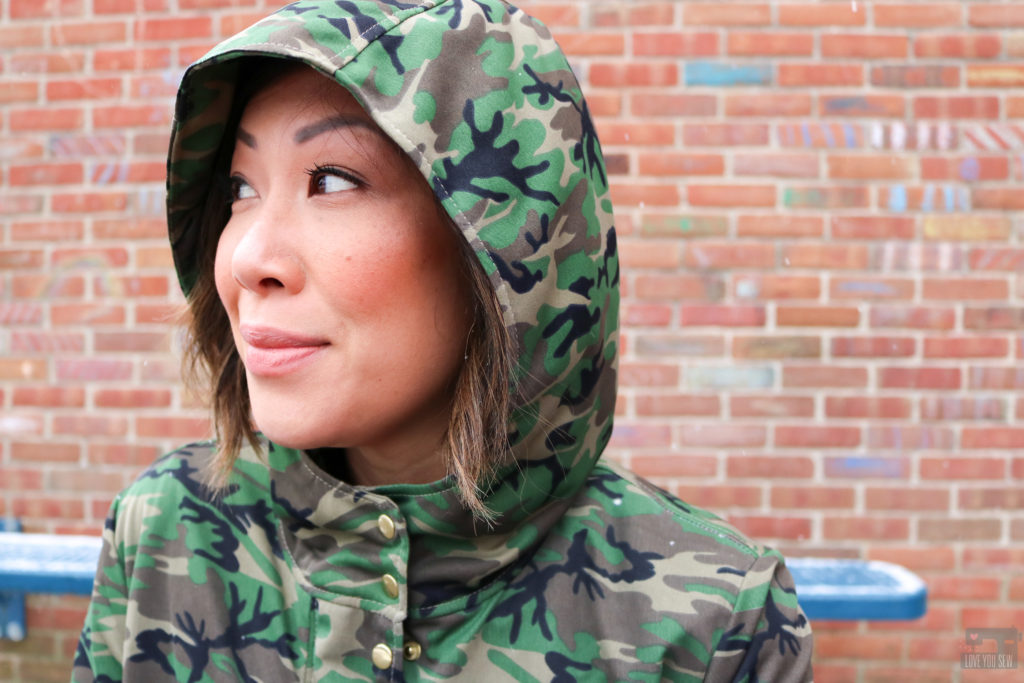
This Olive Camouflage is a screen printed design over polyester fabric with a slight two-way stretch which is great for movement. I wasn’t sure this would be heavy enough for a jacket. But paired with this Black Crepe, it’s the perfect combo for a light jacket. The polyester shell is nice and smooth and I have a feeling it will be great against stains. When working with this fabric, I did have to use spray starch to help with pressing since the poly content doesn’t give a crisp finish like a natural fiber would.
The Black Crepe fabric has a nice hand and is completely opaque. There is even a little bit of spandex in this fabric for movement as well. I don’t think I have to worry about seams popping with all the extra give in these fabrics! With camouflage being a busy print, I though about a bolder pink or red lining. Since you can see the lining on the hood, I figured neutral was the safer bet so it could be worn anytime…I think I made the right decision!
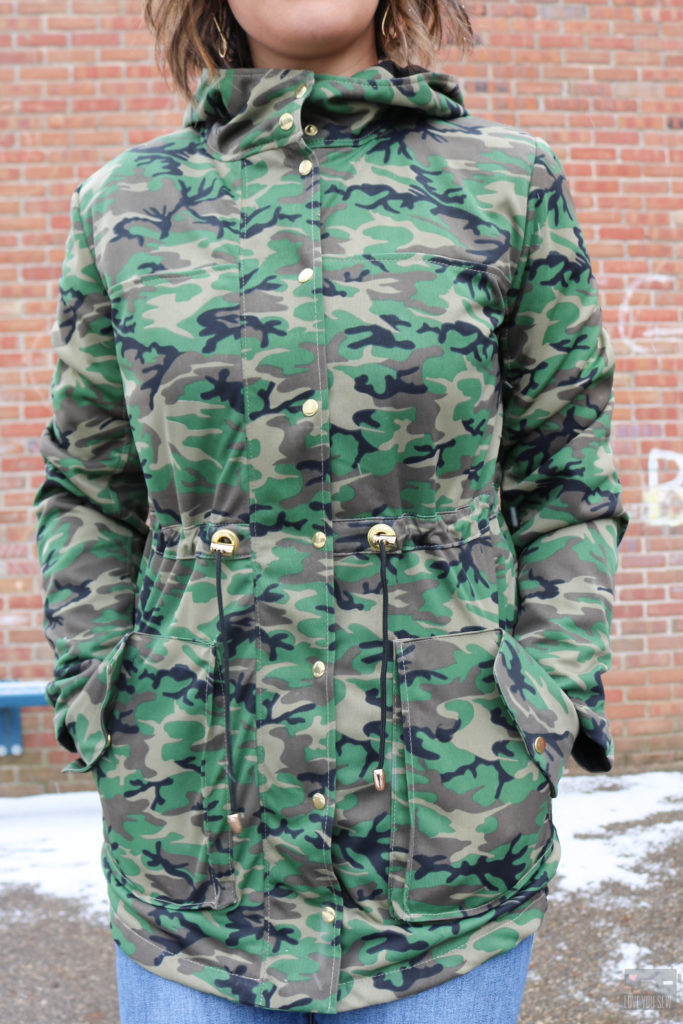
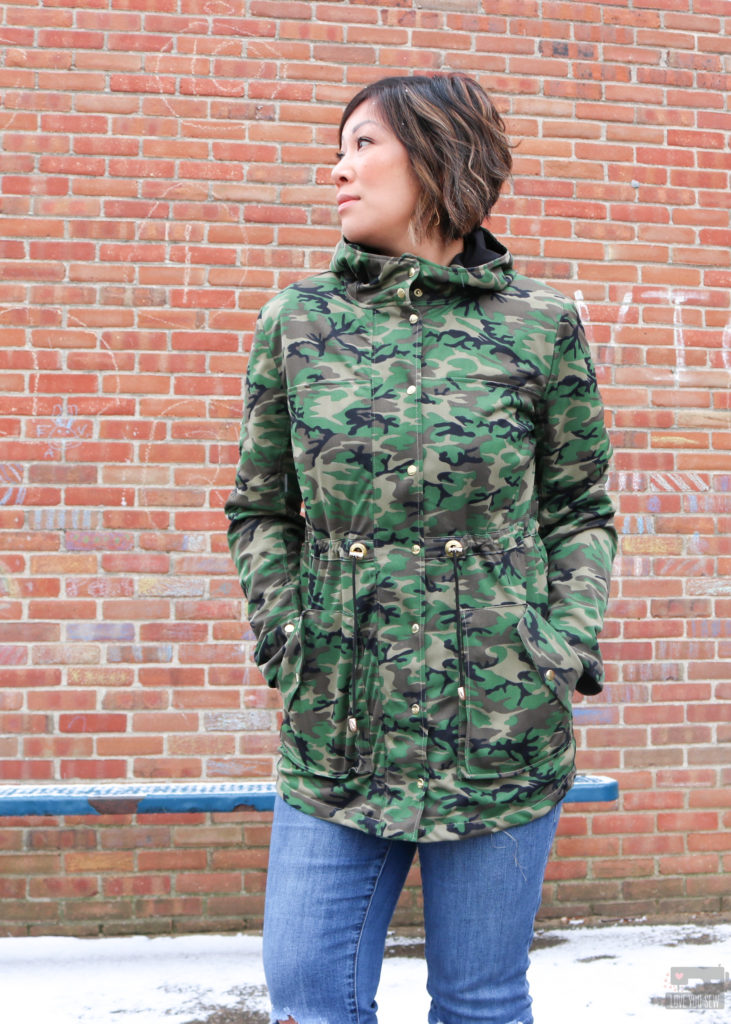
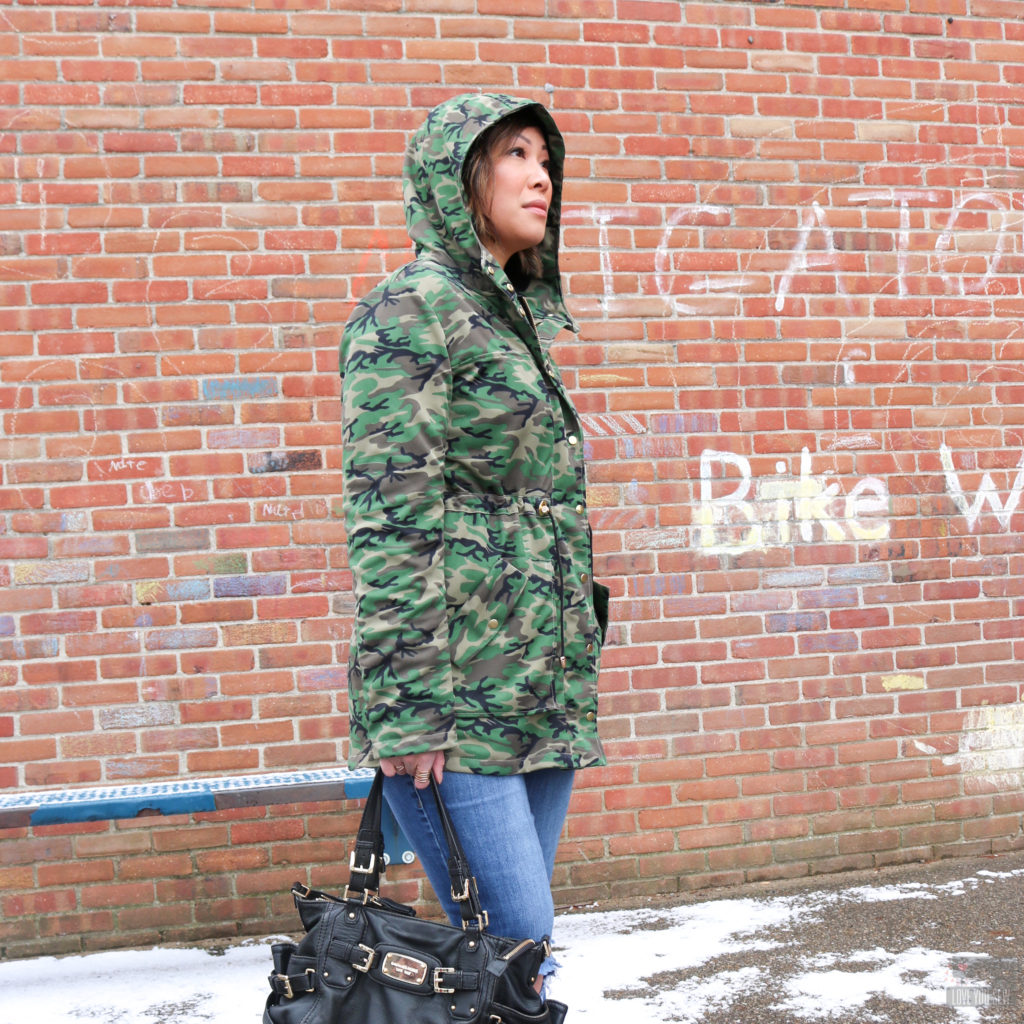
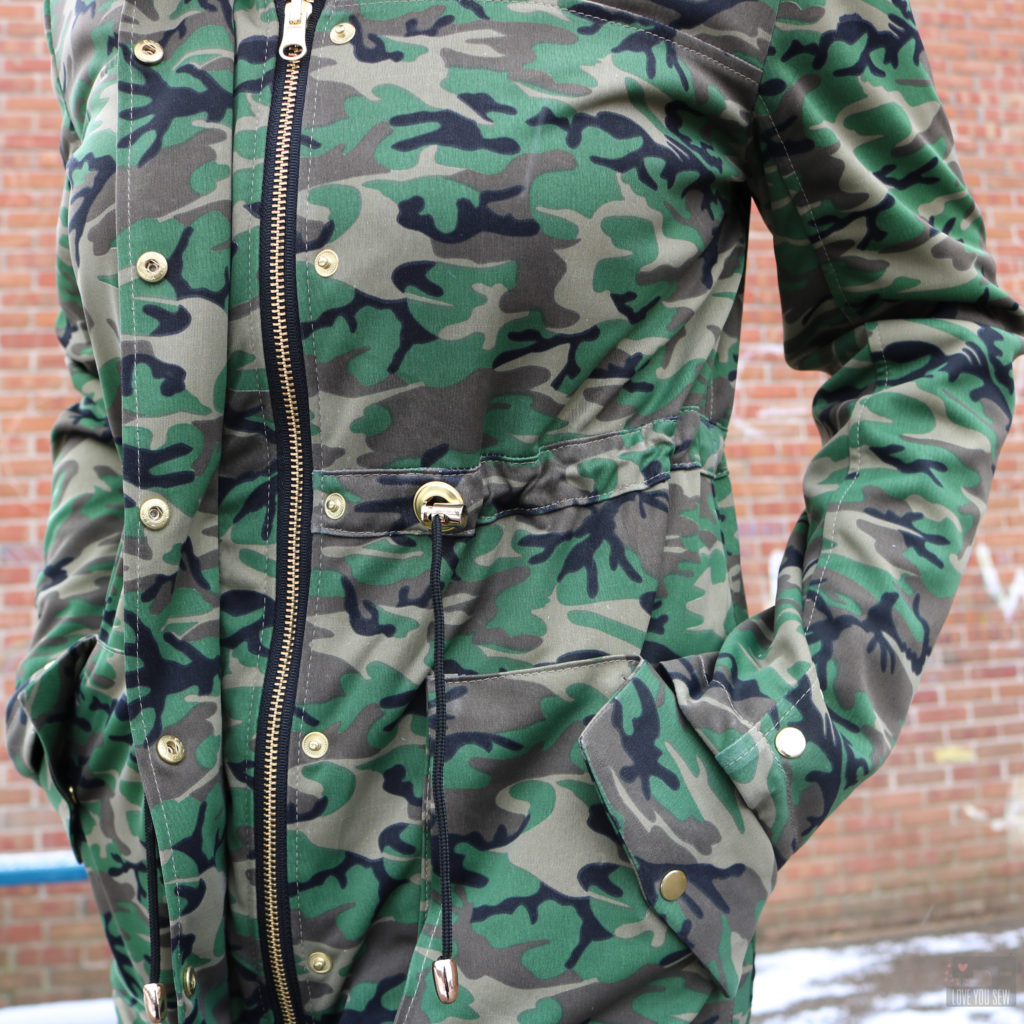
There are a few indie anorak style jacket patterns out there and I ended up going for the Kelly Anorak based on the length (to fully cover my backside) and for the number of snaps. I also wanted to make the camouflage more femme with lots of gold hardware – and with 11 snaps plus 2 grommets, I was excited about the possibilities!
The original pattern is unlined, but there is an add-on for the lining. If you make the anorak WITH a lining, be sure to use those instructions. You will omit some of the pattern pieces from the original pattern and/or swap them out for different ones with the lining. Don’t make my mistake and end up with wasted fabric from cutting out all of the original pattern pieces first!
After sorting out my pattern pieces, I was ready to go and loved having the Closet Case Sew-Along in conjunction with the actual instructions. It’s so nice to have the extra pictures and different angles to make sure the jacket is being sewn properly.
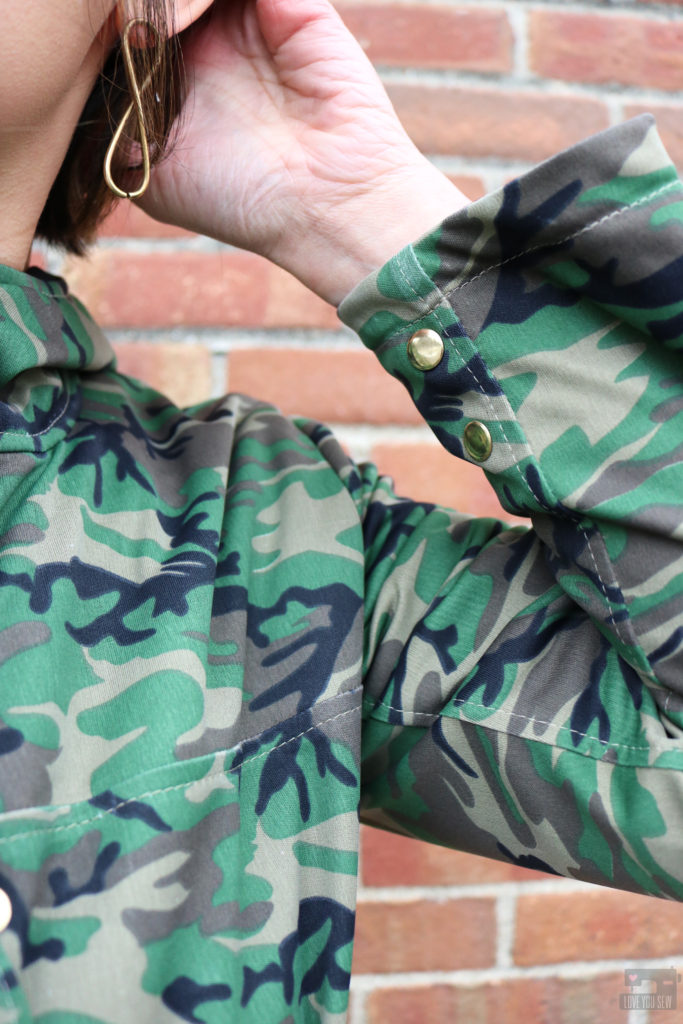
One of the major changes making the lined version of the Kelly Anorak is the cuff — or more so, the lack of. In the original version, there is a cuff with snaps. But in the lined version, you just sew the sleeves together. To give a little bit of the look, I added two snaps for the extra accents. If I make this jacket again, I will definitely hack the lined version for the cuffs!
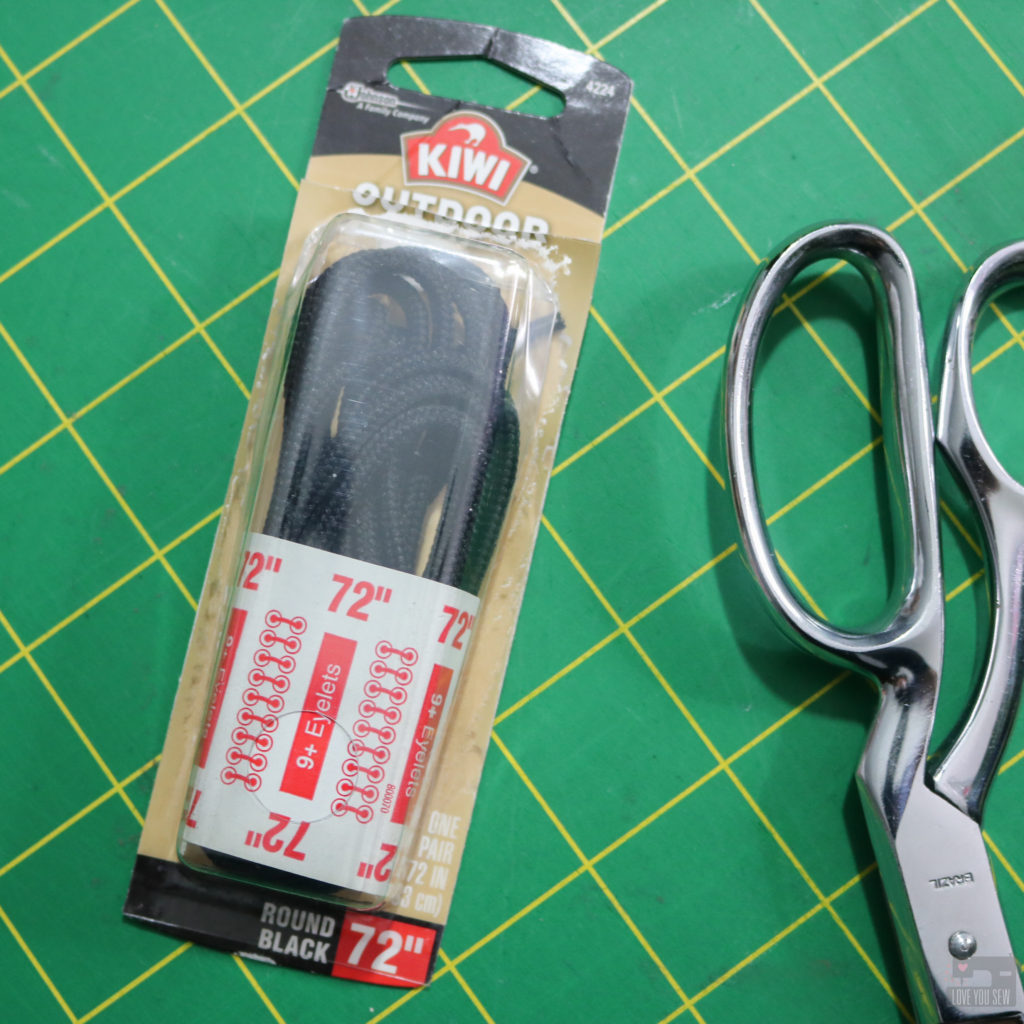
Closet Case Patterns has a great kit on their website with all the extra hardware, zipper and drawstring for the project. I decided to go my own route for chunkier brass accents and used the following:
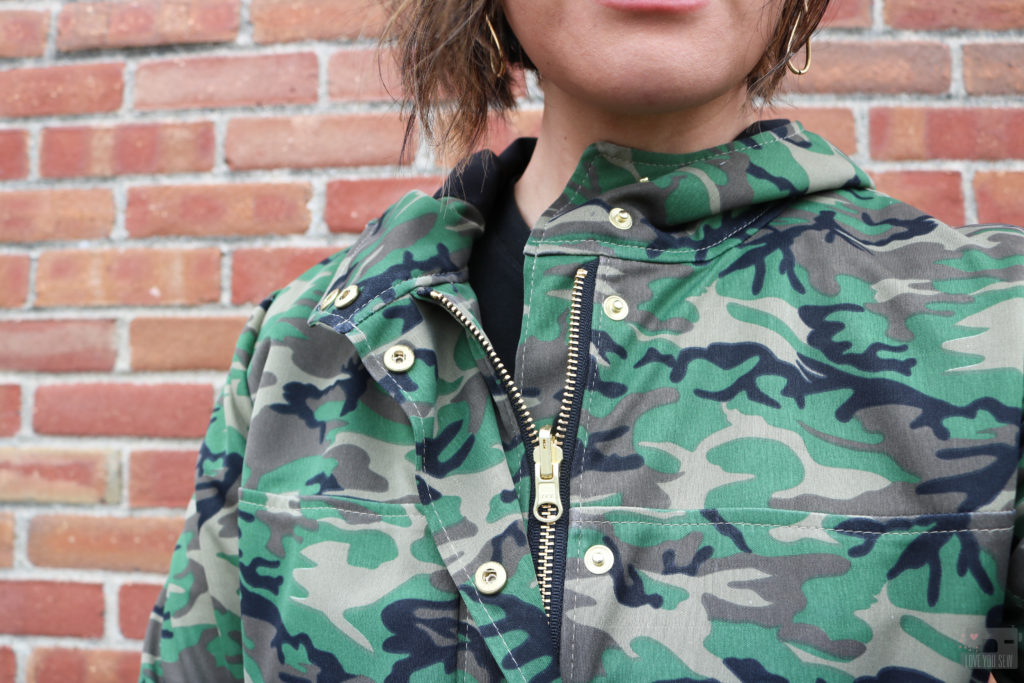
Initially, I was pretty overwhelmed with this pattern due to just the number of pattern pieces I had to cut out. But I paced myself and sewed it slowly step-by-step so I could have this jacket for years to come. I’m happy I took my time and sewed the Kelly Anorak in digestible chunks so I wouldn’t be discouraged. So don’t be scared! I hope you try out the pattern….and extra points if you go camo like I did!!!
Well, Stylish Fabrics has generously offered 20% off the entire site from now until Sunday, March 10, 2019. Use the code: STYLISHXCRISTY at checkout.
Happy Sewing!
Cristy
This post was sponsored by Stylist Fabrics and all fabric used was provided by the company. Pattern and notions were all purchased by me. This post may also contain affiliate links for which I may receive a small compensation to keep this website running. Thank you for your support 🙂
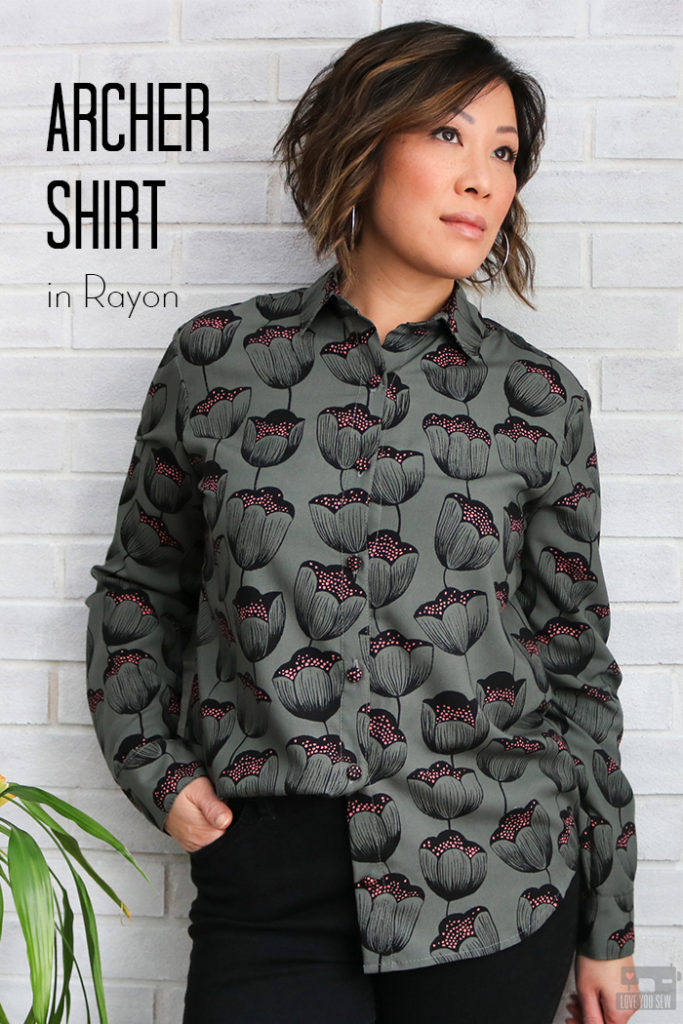
Everyone knows the versatility of a button-up shirt. It’s an absolute classic silhouette with ease all around the torso but a crisp collar keeps the style elevated. The button-up shirt works well in so many different fabrics. After making my first flannel Archer Shirt with it’s casual feel here, I knew I wanted to flip the script and sew a “fancier” one for going out.
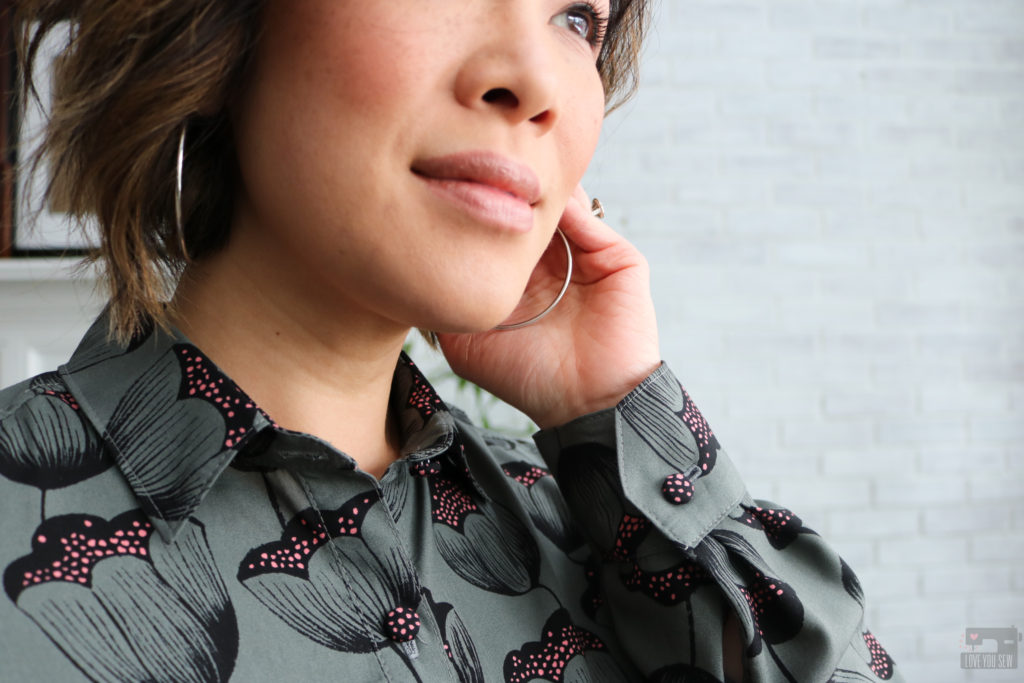
Because of other blogger commitments I have with other companies, it’s sometimes hard to find time to sew projects with my own fabrics without any constraints. So when I saw Indiesew was hosting #ShirtMonth again, I knew this would be the time to sew my button-up….This is exactly the motivation I needed! This month is dedicated to highlighting fabrics, patterns and techniques for all shirts with a placket. You can read more about the month here. I’ve really enjoyed joining in on so many of these sewing challenges on Instagram and hope you do too!
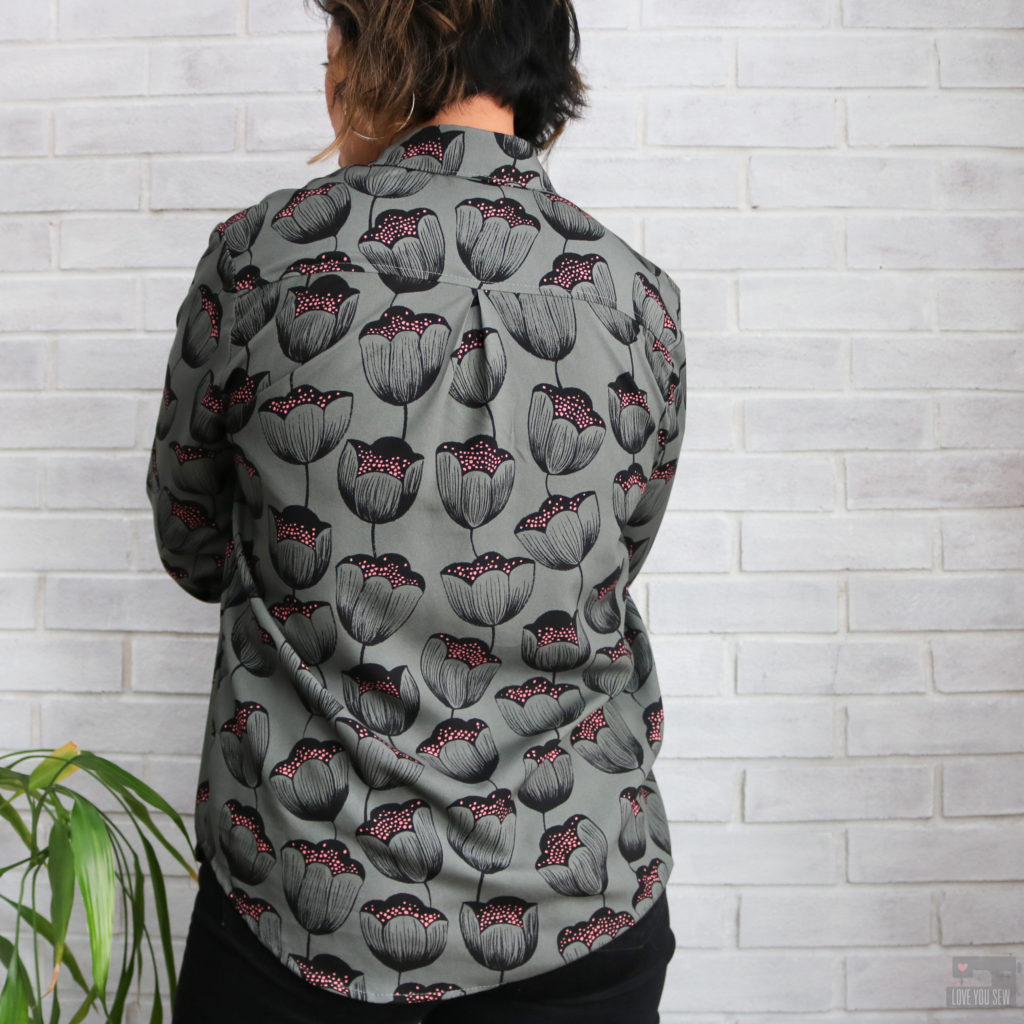
This Cotton + Steel rayon designed by Sarah Watts caught my eye the first time I saw it. I’m very fond of my dark neutrals and love the extra pops of pink over this moody floral print. And if you’ve ever felt C+S rayon challis, you know it’s incredibly soft and silky. The drape is fantastic and makes for beautiful dresses and tops. I’m a big fan and have quite a bit of their rayon in various prints in my wardrobe. When this print went on sale at Fabric.com awhile ago (it’s since sold out,) I knew I had to grab 2 1/2 yards of it. It been sitting in my stash for well over a year and I knew this would make a sharp looking Archer Shirt.
Tips:
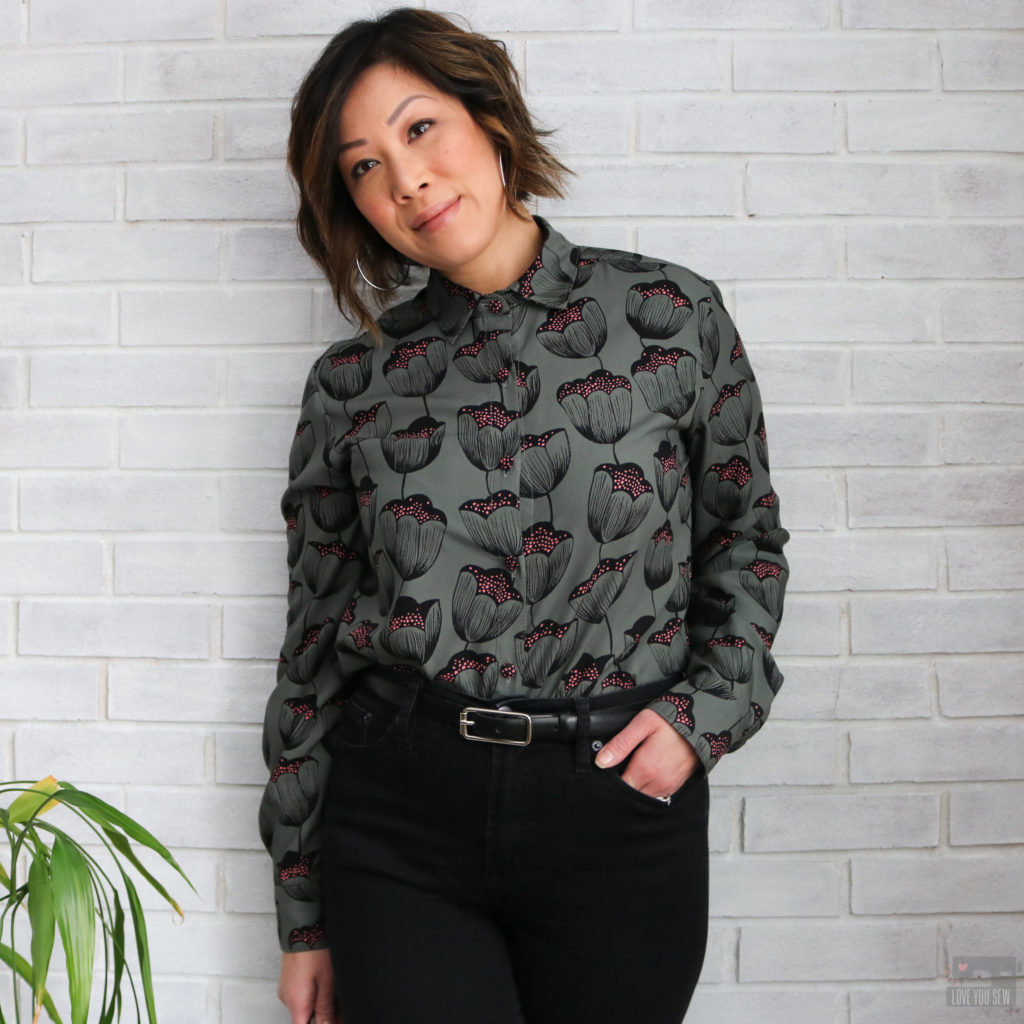
I first made the Archer Shirt (pattern by Grainline Studio) in a soft cotton flannel which you can read about here on the Imagine Gnats blog. It was such a great casual relaxed shirt that I could wear with jeans or leggings. I wanted the same ease of getting dressed, but knew a rayon Archer would just be so much more sophisticated for the days I need to be dressed up.
Although the thought of making a button-up can seem pretty daunting, there is so much help out there! Grainline has a full sew-along that has been broken up into very digestible chunks. since this is also an older pattern, you can find plenty of inspiration on social media with a quick call to our bestie, Google 😉
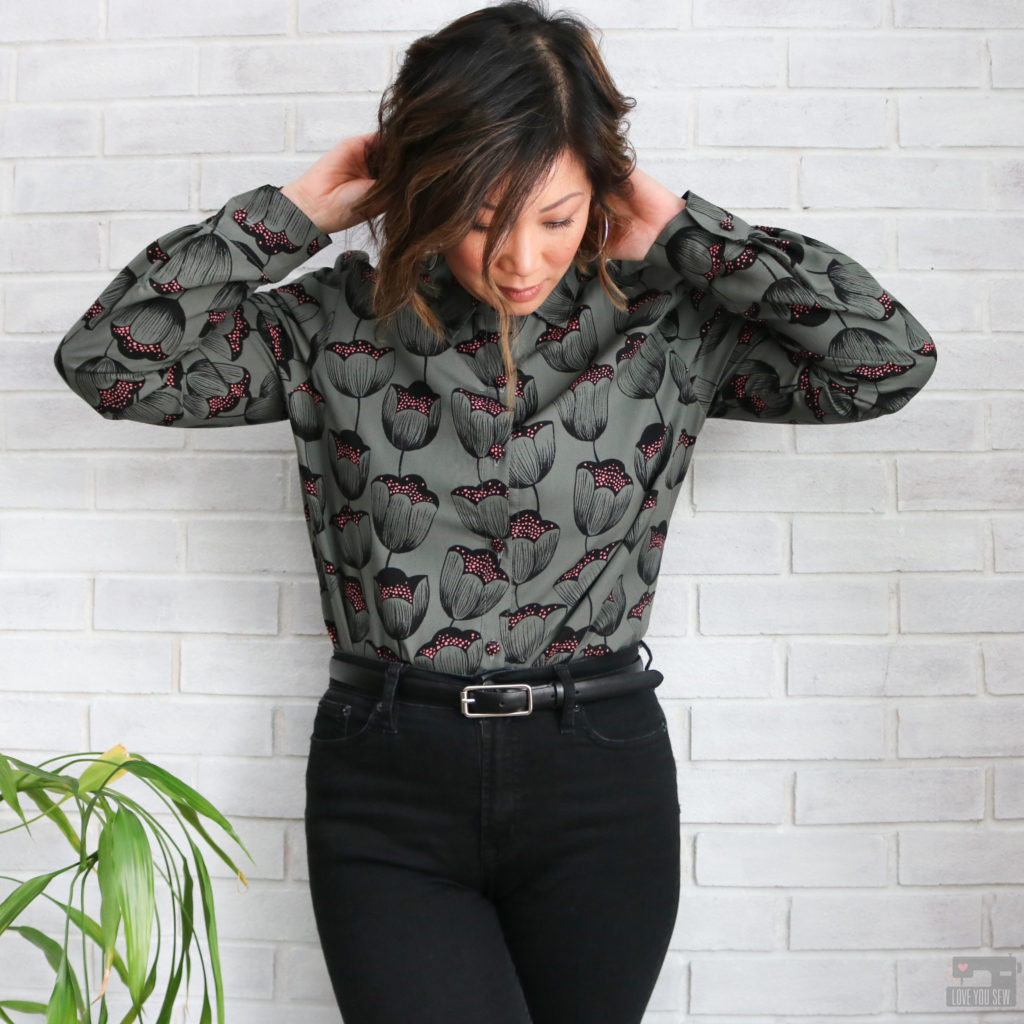
I made a size 8 according to my measurements and graded out a size in the hip like a usually have to do with a woven top (my hips measure two sizes larger than my waist.) There were no other adjustments made. Although, I would shorten the sleeves on a dressier version by 1/2″ to have it look more polished. (I like the longer sleeve on my flannel version since it helps keep my hards warm in these colder months.)
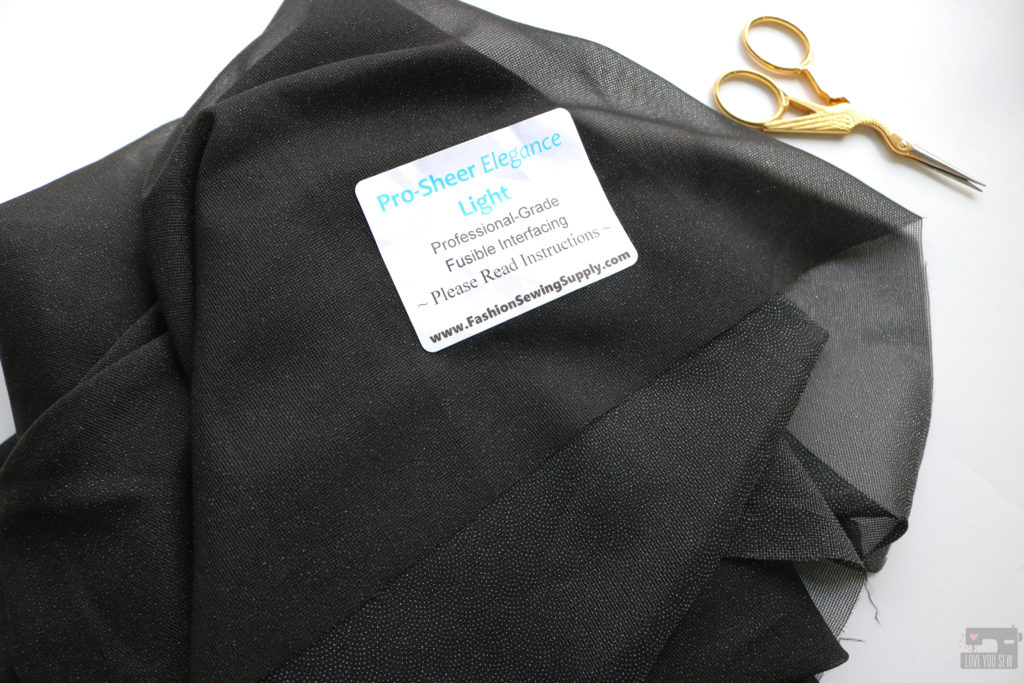
What’s very different for me with this rayon project is the interfacing. Awhile back, I used Pellon Lightweight Apparel interfacing with this rayon jacket and it has bubbled with use (ugh!) I have to pretty much re-iron the jacket every time I want to wear it since the bubbling all over the front and back yokes. What a drag, right??? Thanks to all of you smarties on Instagram, I learned about FashionSewlingSupply.com and purchased a few different garment interfacing like this ProSheer Elegance in black. Not only did it fuse well, it still allows for some drape. I was able to sew the entire shirt while flipping the collar and cuffs inside out…and there was NO bubbling! I’m completely sold on this stuff and won’t buy my apparel interfacing from the big box stores anymore. These interfacings definitely costs more, but it’s well worth it to save all of my sewing time!
Based on how lightweight this interfacing is, I used it on both sides of the collar stand. The patterns calls for it only on the inside, but I wanted to make sure the collar stands up nicely and doesn’t just flop over. I’m happy with how it turned out and would recommend this if you are using other lightweight fabrics like lawn, voile, crepe de chine, silk and gauze.
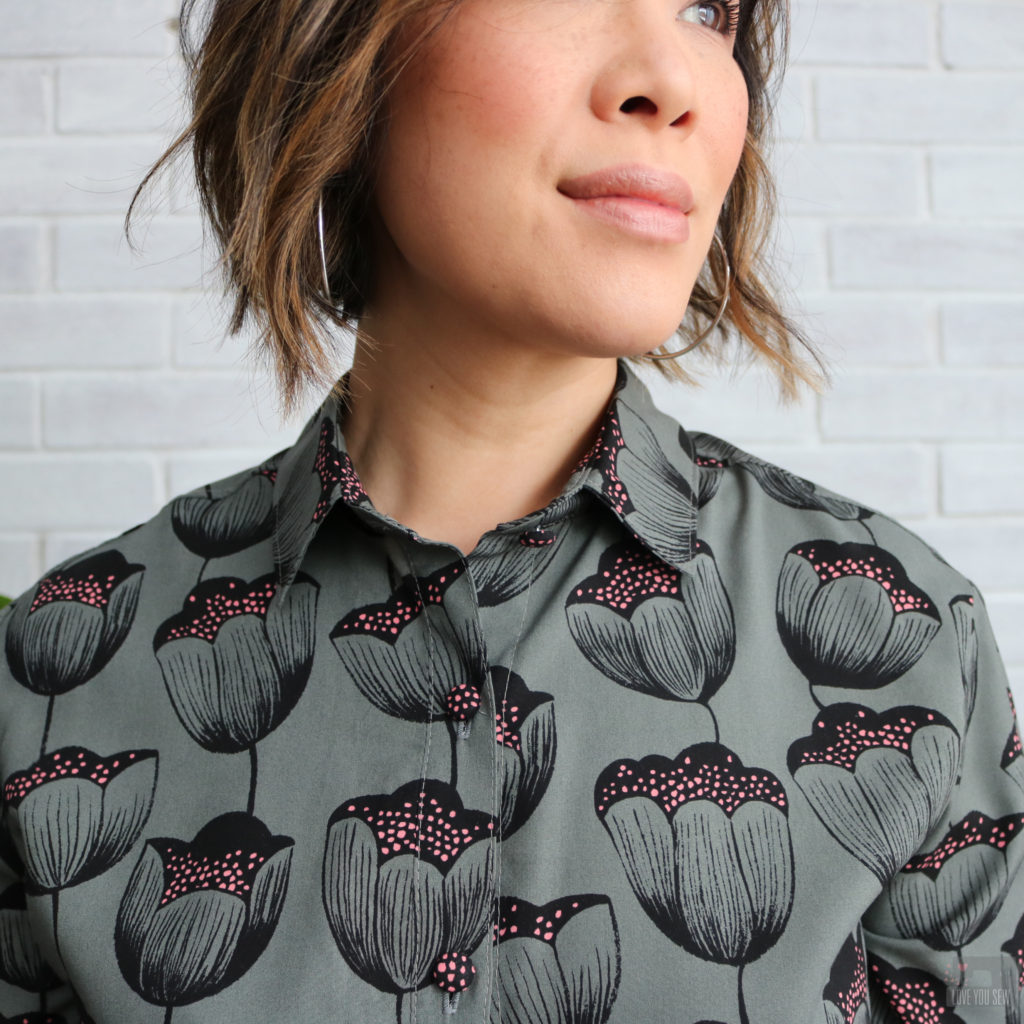
I love being able to use up my MIL’s button stash as much as I can, but I couldn’t find enough plain black buttons for this shirt. Fortunately, I bought these 1/2″ buttons years ago, which can be covered in just about any fabric. I was able to use all the scraps to make these buttons. It’s such a fun and easy way to add special details to a garments which are uniquely my own. You can see how I used them on this Felix Dress and how I used them on my Alix Dress to cover up some negative space on the yoke.
After investing all this time making the Archer and in the effort to be more sustainable, I want to make sure I can wear all my makes over-and-over again. I like following other fashion influencers and RTW companies for inspiration. Below are three ways to wear a button-up for me.
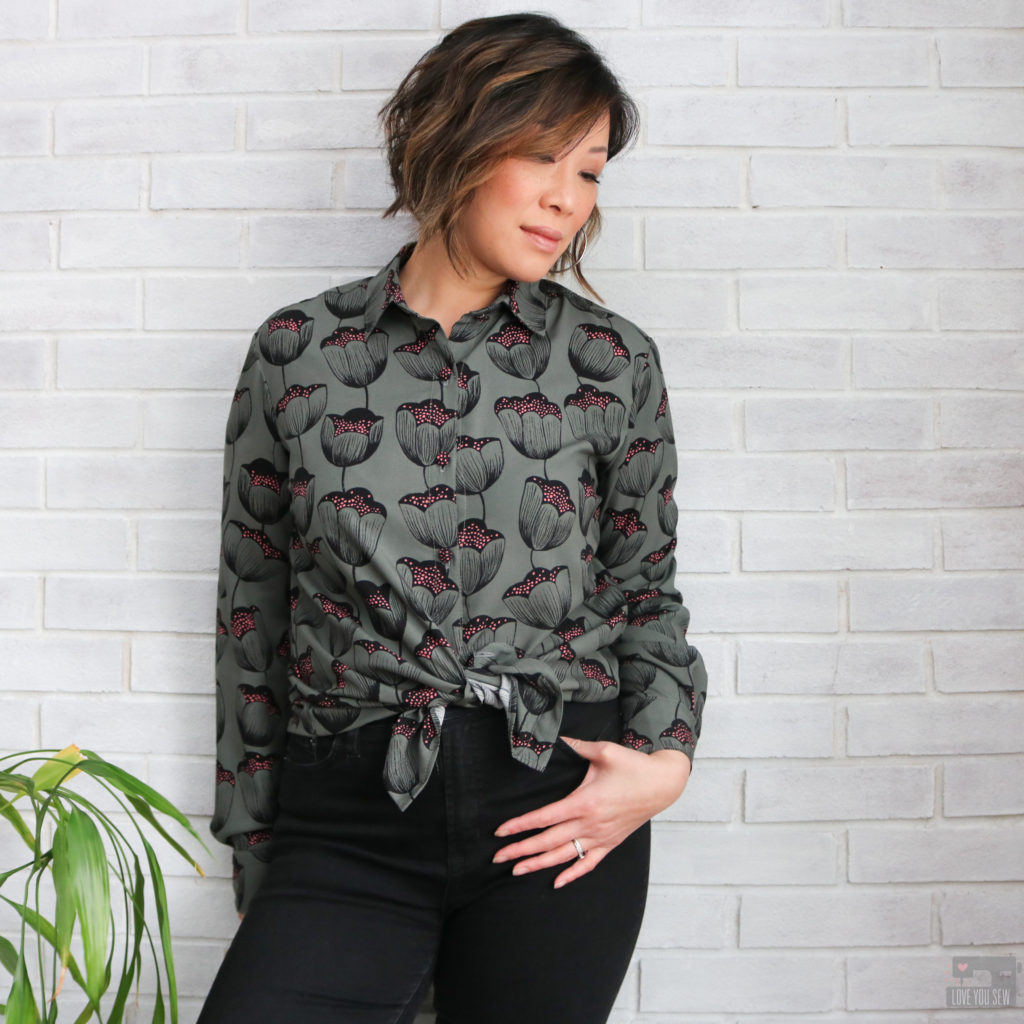
1. With high-waisted pants on trend, I like being able to tie a button up. It still can camouflage my mid-section but looks so stylish and playful as well. Plus, you can conceal a lost button in case that ever happens 😉 I think a flannel button-up tied up over shorts is such a classic summer look too.
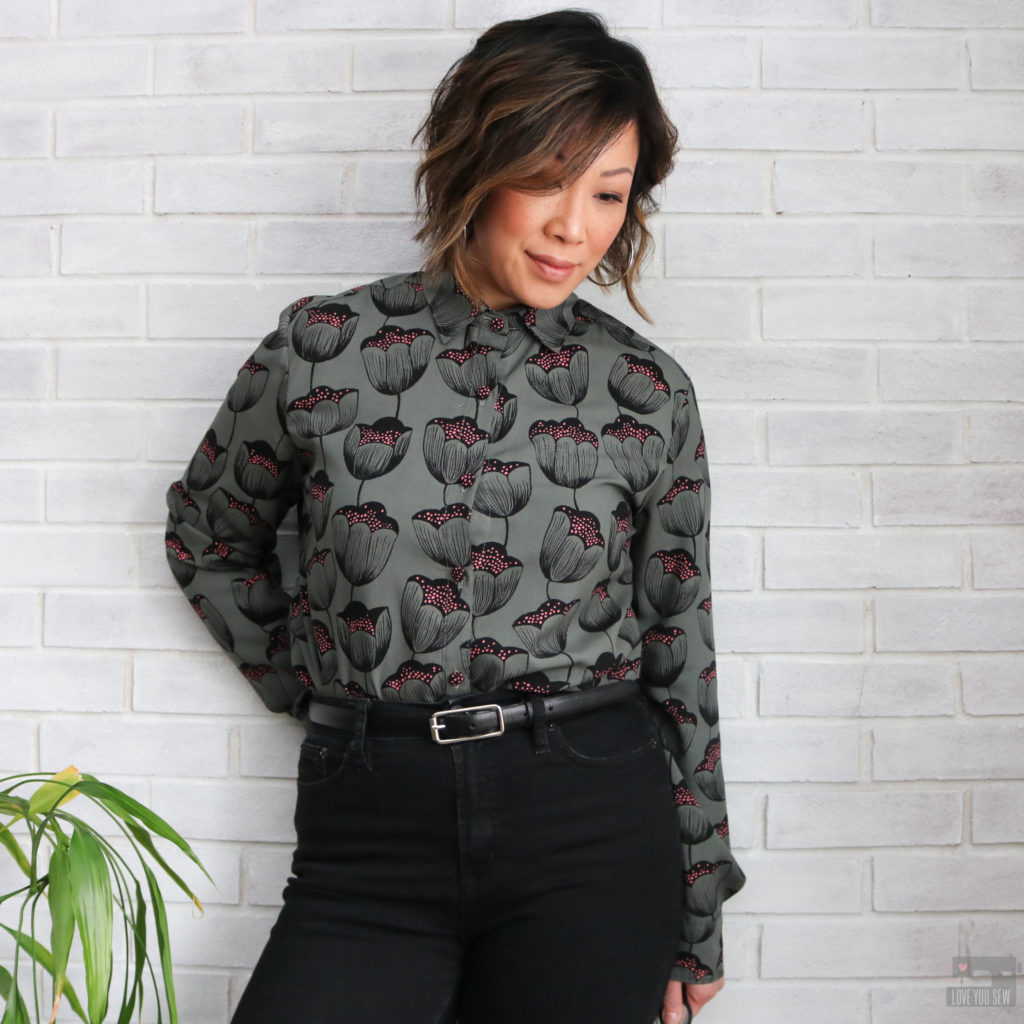
2. For the hipster look, I like to fasten all the buttons up through the collar. This along with tucking in the shirt with high waisted jeans (as shown) keeps the outfit polished. Pair it with a sleek belt and I’m ready for drinks with the ladies downtown!
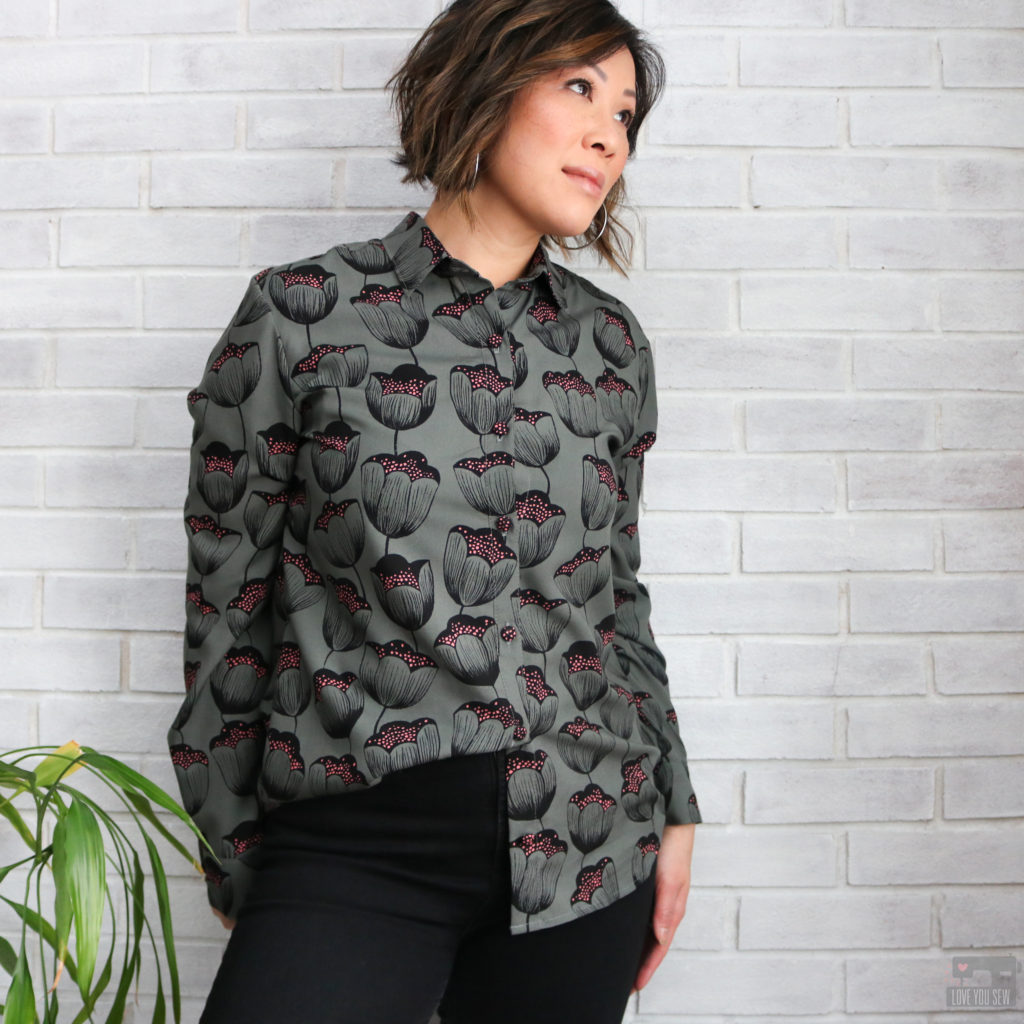
3. Finally, I have the half-tuck (also known as the French tuck.) This is definitely another on-trend way to wear any top…whether it be a tee or even a heavy sweater. I like how it’s more casual and breaks up the hem line for more visual interest.
Which way would you wear your #MeMade button-up shirt? I hope you enjoyed this post and join in on #ShirtMonth whether it be this year or next!
Happy Sewing!
Cristy
This post may contain affiliate links for which I may receive a small commission only if you make a purchase. Thanks for support, friends!
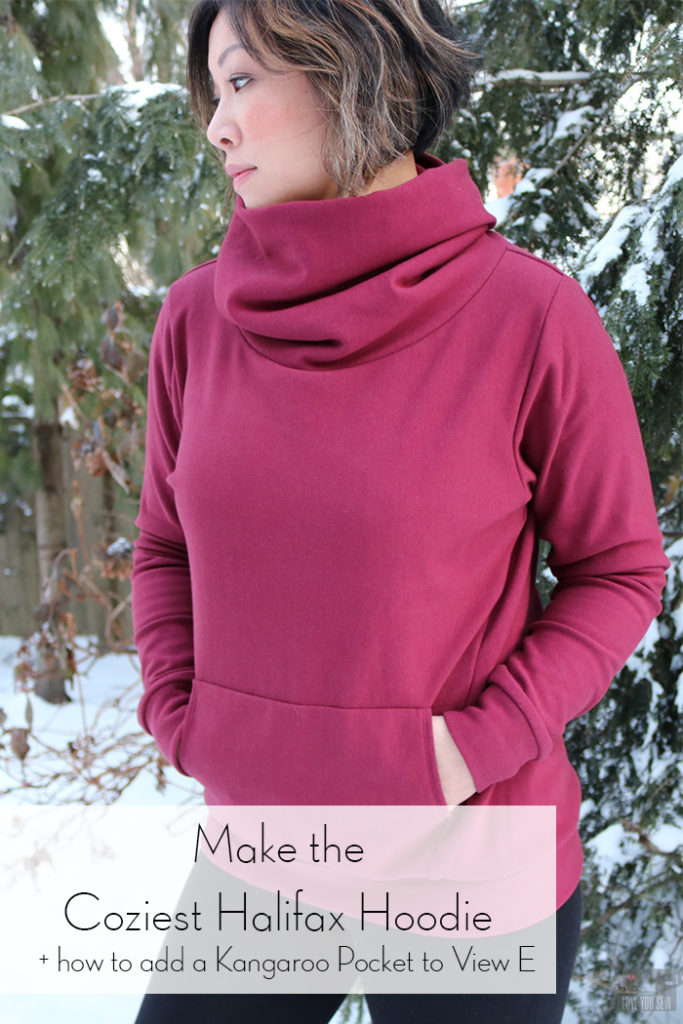
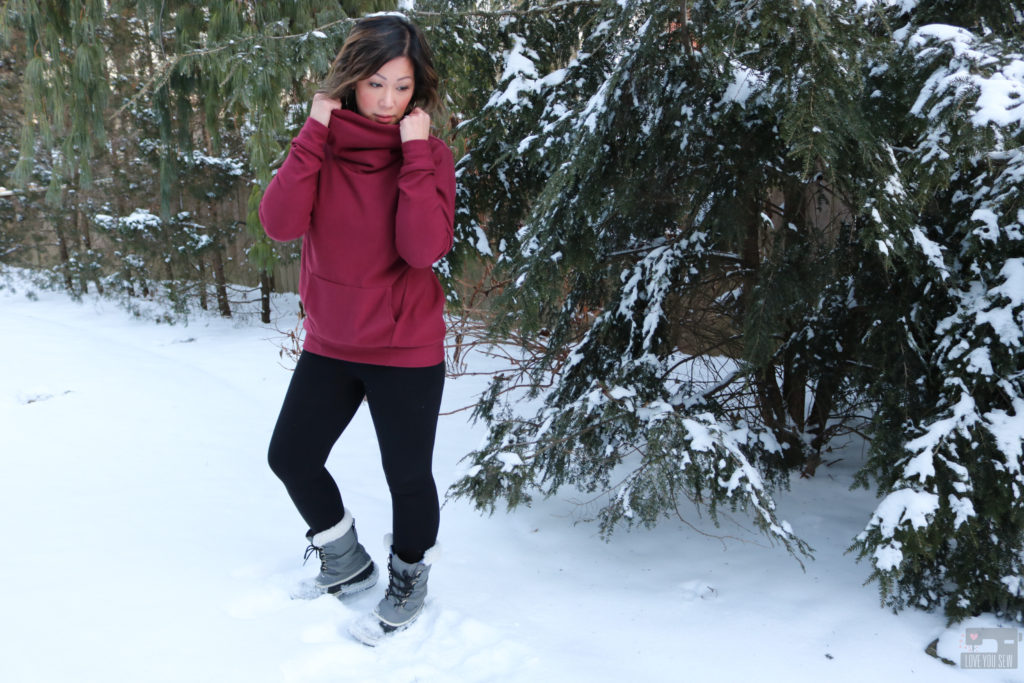
After the holidays, January is such a drag. Then, throw in the Polar Vortex that hit the Midwest this week and it’s just downright depressing. We can’t go anywhere, school had been cancelled two-days in a row, I can’t send the kids to go out and play….plus, it’s just so friggin’ COLD! I am thankful, however, to have made this Halifax Hoodie the other week. The plush softness of this fabric combined with a comfy cozy sweatshirt design is keeping me pretty warm through this cold spell.
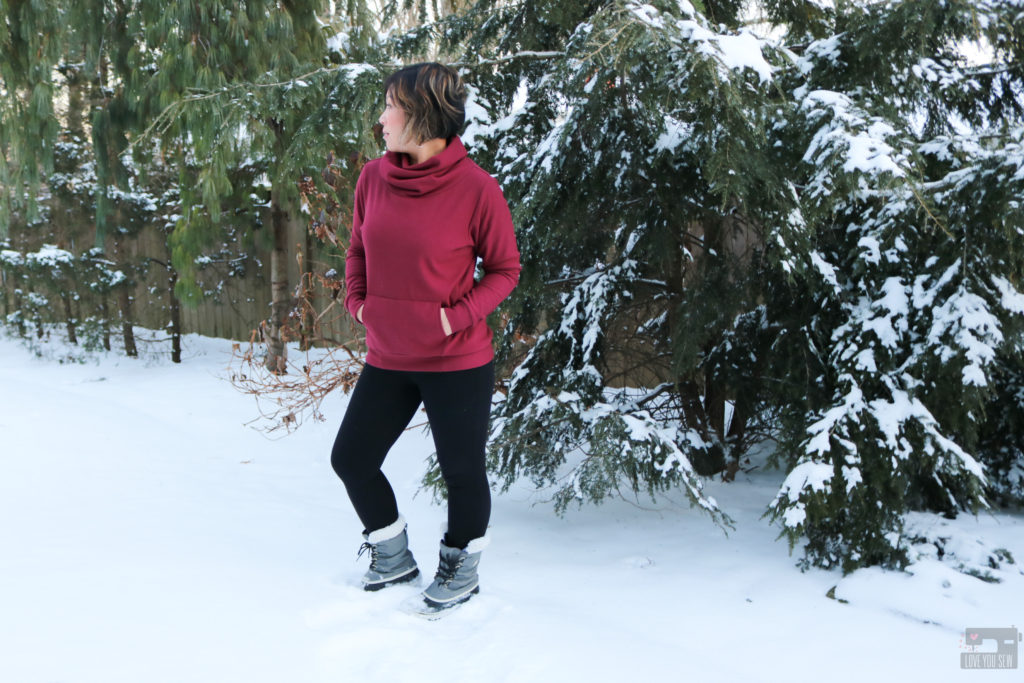
I picked up this heavyweight bamboo/cotton sweatshirting in Heretic from Imagine Gnats. Right now, the shop carries a number of different colors of this fabric, as well as matching ribbing! When I bought my fabric, they were sold out of the ribbing (which was a bummer,) but the 25% four-way stretch in this sweatshirting is more than enough for the cuffs and waistband. I love how soft the fleeced inside of this fabric is from the bamboo…even after multiple washings.
The Halifax Hoodie by Hey June Handmade is a very popular pattern with it’s classic casual design and multiple features. This is a great pattern for knits and allows for so many different styles and combinations….whether you want a full zip-up hoodie or just a crew-neck sweatshirt.
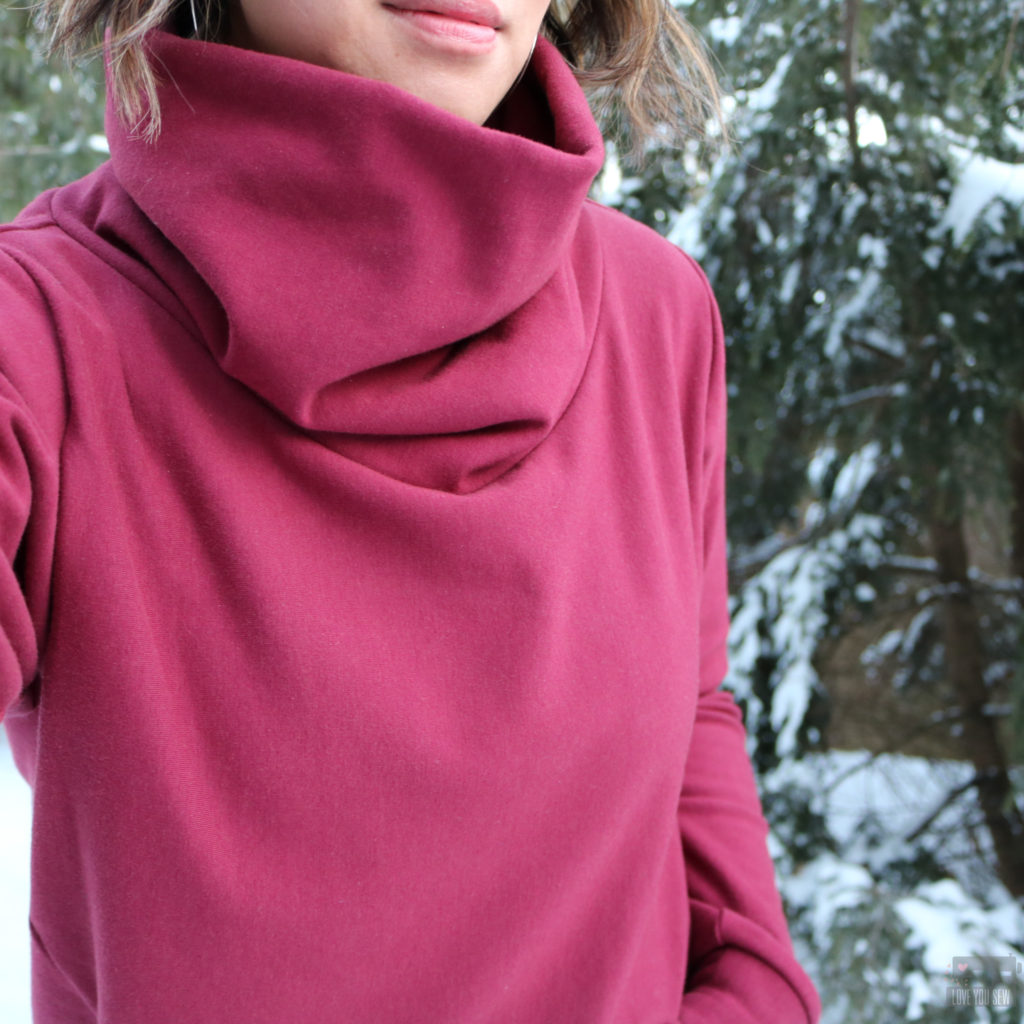
I opted for View E with the angled side seams this awesome funnel neck. I’m a big fan of Lululemon athleisure-wear and they tend to have higher necks in many of their jackets and tops. I love this feature since I’m always cold and can’t say no to a built-in scarf 😉 I even raised the funned neck an additional 1.5″ on the fold (3″ overall,) to add even more of the cozy factor. The thickness of the sweatshirting helps the funnel neck stand up and provide volume. If you are using a regular weight knit, you may end up with more of a cowl look instead.
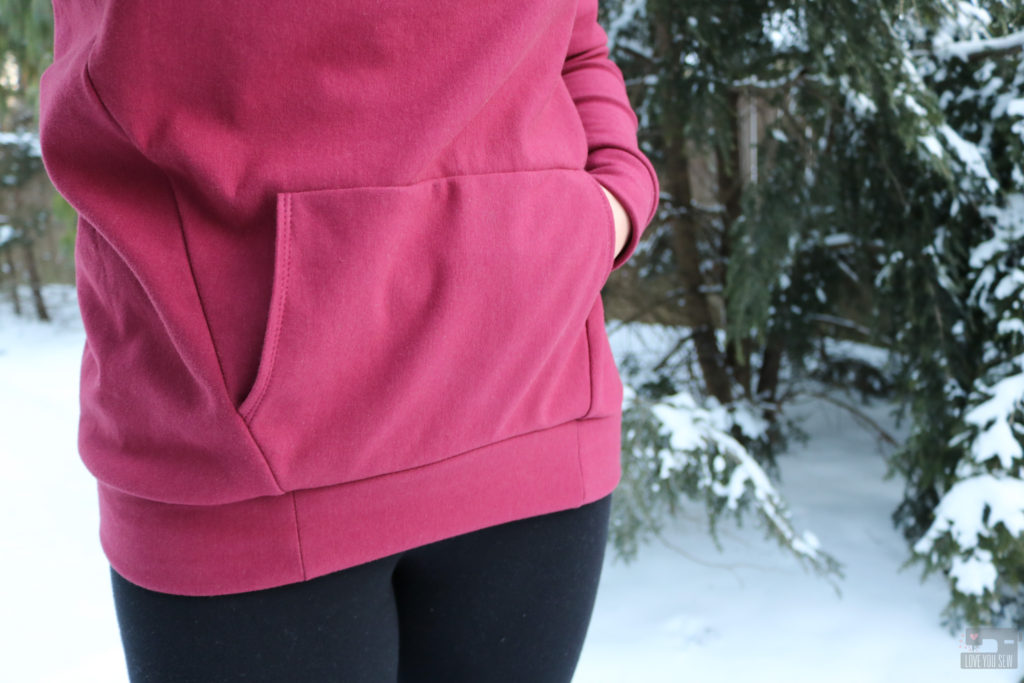
While the other views of the Halifax had pockets, View E did not. When I was planning this too, I just wanted the extended neck, but I happened to be wearing a regular crewneck sweatshirt while cutting out the pattern pieces. I realized how many times I was reaching for my stomach to warm up my hands, just like when I wear my hoodies. I decided I definitely needed a kangaroo pocket and you can follow how I made one below.
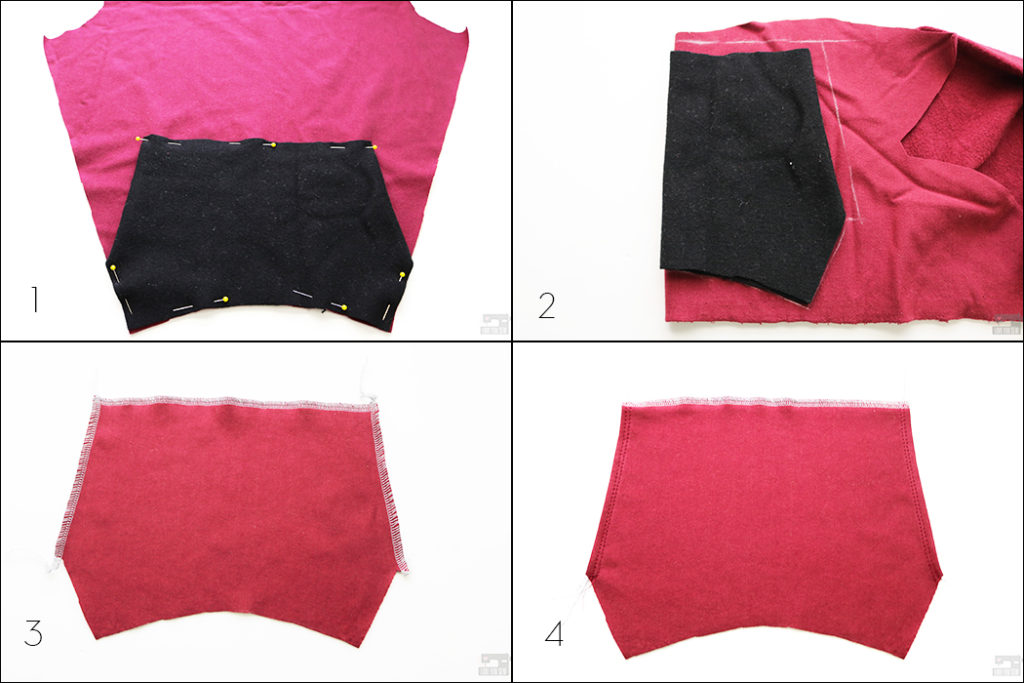
1. With the angled side seams. I wanted to make sure the pocket followed the same sharp lines and thus, didn’t use the pocket pattern included (which has rounded openings for the hands.) I used a scrap piece of knit fabric to create a new pocket. The scrap was laid down and I played with the sizing by folding the scrap until it looked right. I used my own hands to make sure the opening was big enough for me to easily access the pockets. Then I trimmed up the scrap to match the lines of the front sweatshirt hem and side seams.
2. Folding the new template in half, transfer the design to my fabric and added 1/2″ seam allowance at the top and side hand openings.
3. Open up the pocket and finish the top and side hand openings by serging or by using a zig-zag stitch.
4. Fold under the side pocket openings by 1/2″ and top-stitch. I stitched at 1/8″ and at 1/4″.
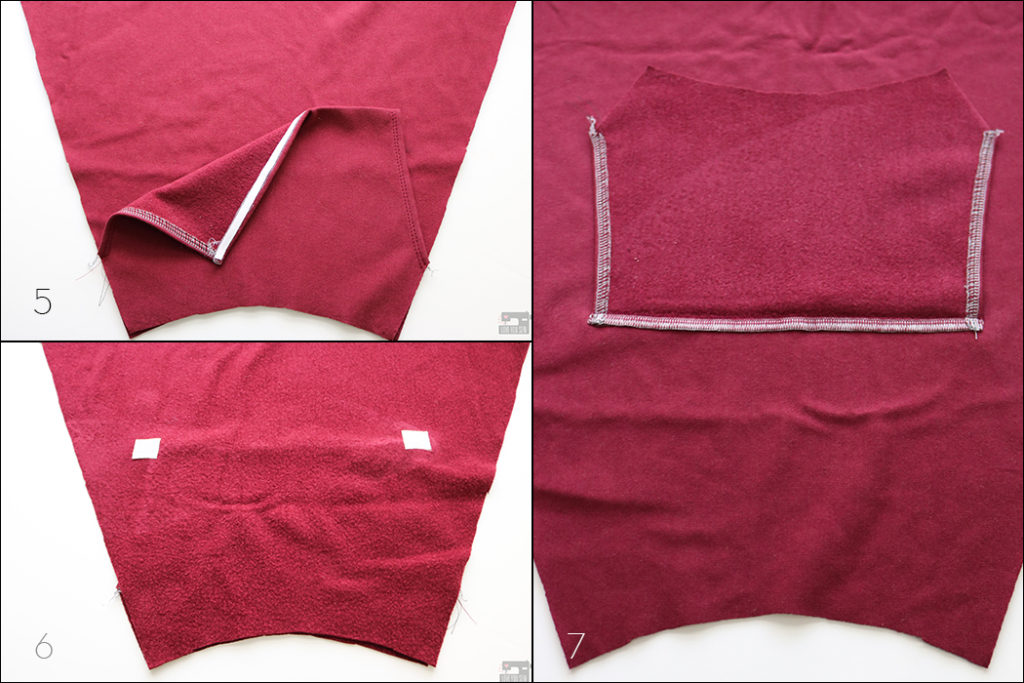
5. Press under the top of the pocket by 1/2″. Add some Wonder Tape along the seam allowance and remove the backing. Press the pocket into place centered on the front to prevent the pocket from shifting.
6. On the wrong side of the front, fuse small scrap pieces of interface at the top corners of the pocket. You can feel the corners through the fabric.
7. With the right side of the front facing up, flip up the pocket and sew along the top of the pocket. Backstitch well at the beginning and end
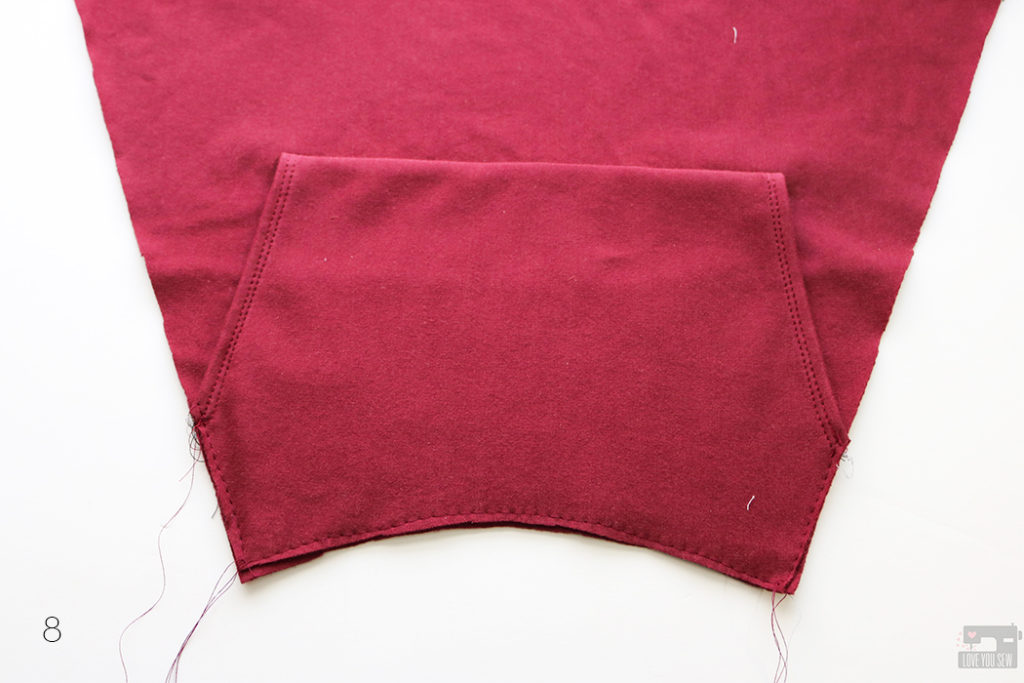
8. Flip the pocket back down and baste the sides and bottom of the pocket to the front. After I took these pictures, I went an extra step and tacked down the top corners of the pockets for extra strength.
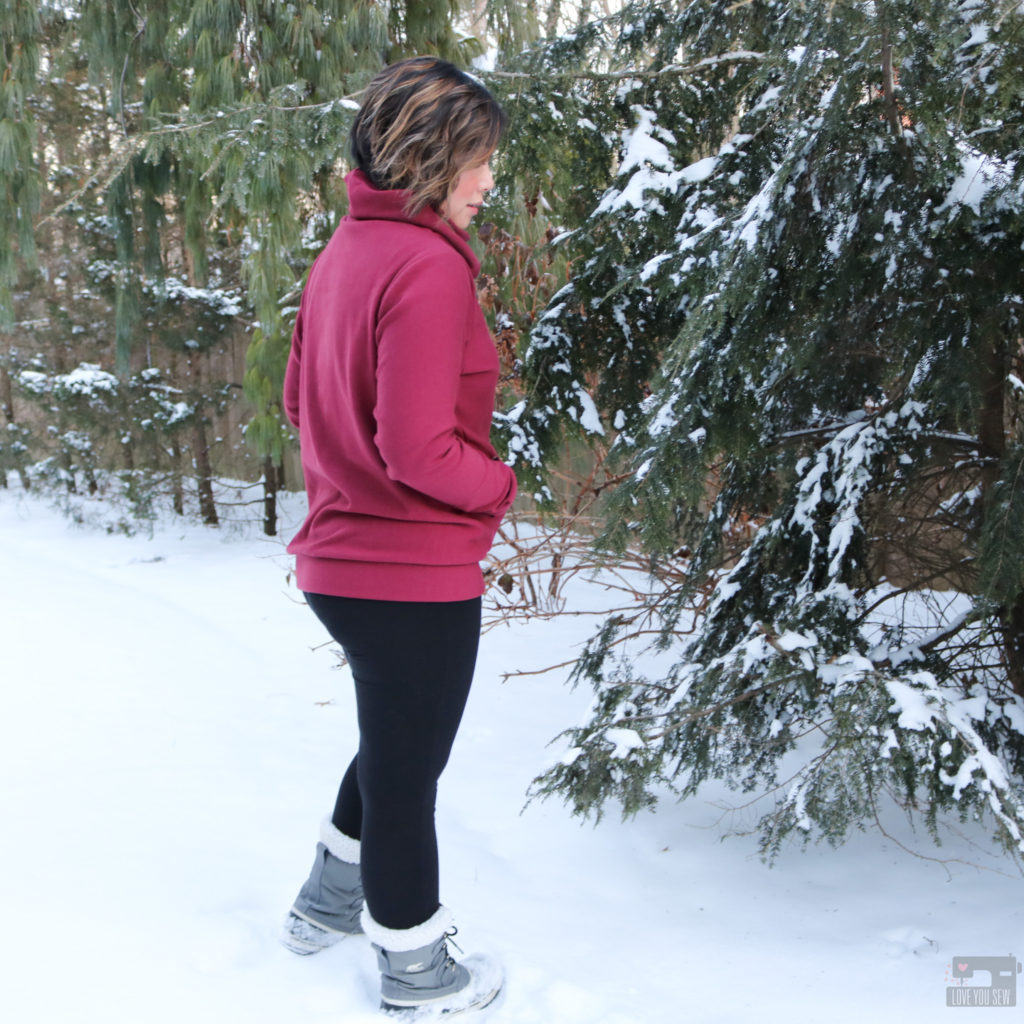
I’m a 36″ bust, 40.5″ around the hips and made a straight medium. Being 5’3″, I usually have to make a sleeve length adjustment, but left it all the same to keep the slouch and ease. I love this generous fit and the stretch in this fabric allows for great movement. I probably won’t make any adjustments when I make my next Halifax.
I hope you are all staying warm or have fled to warmer climates! In the meantime, I hope you checkout the Halifax Hoodie and this tutorial to add a pocket to View E.
Happy cold-weather sewing!
Cristy