Quilted Envelope Clutch :: Free Tutorial

quilted-envelope-clutch_title

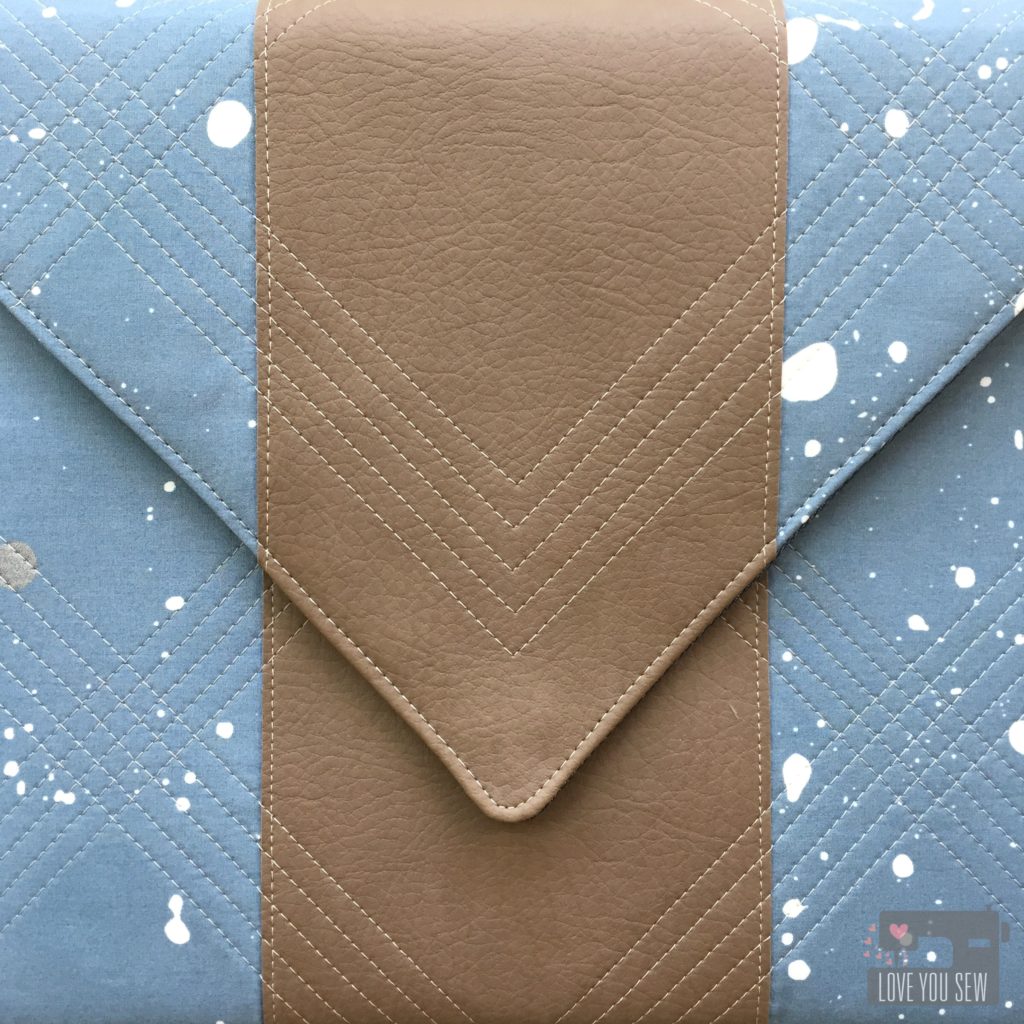
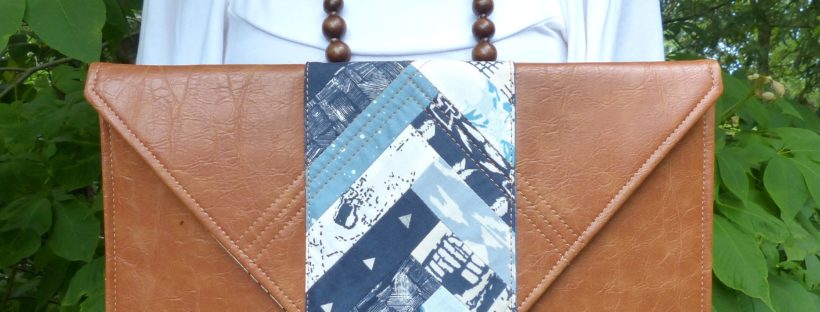
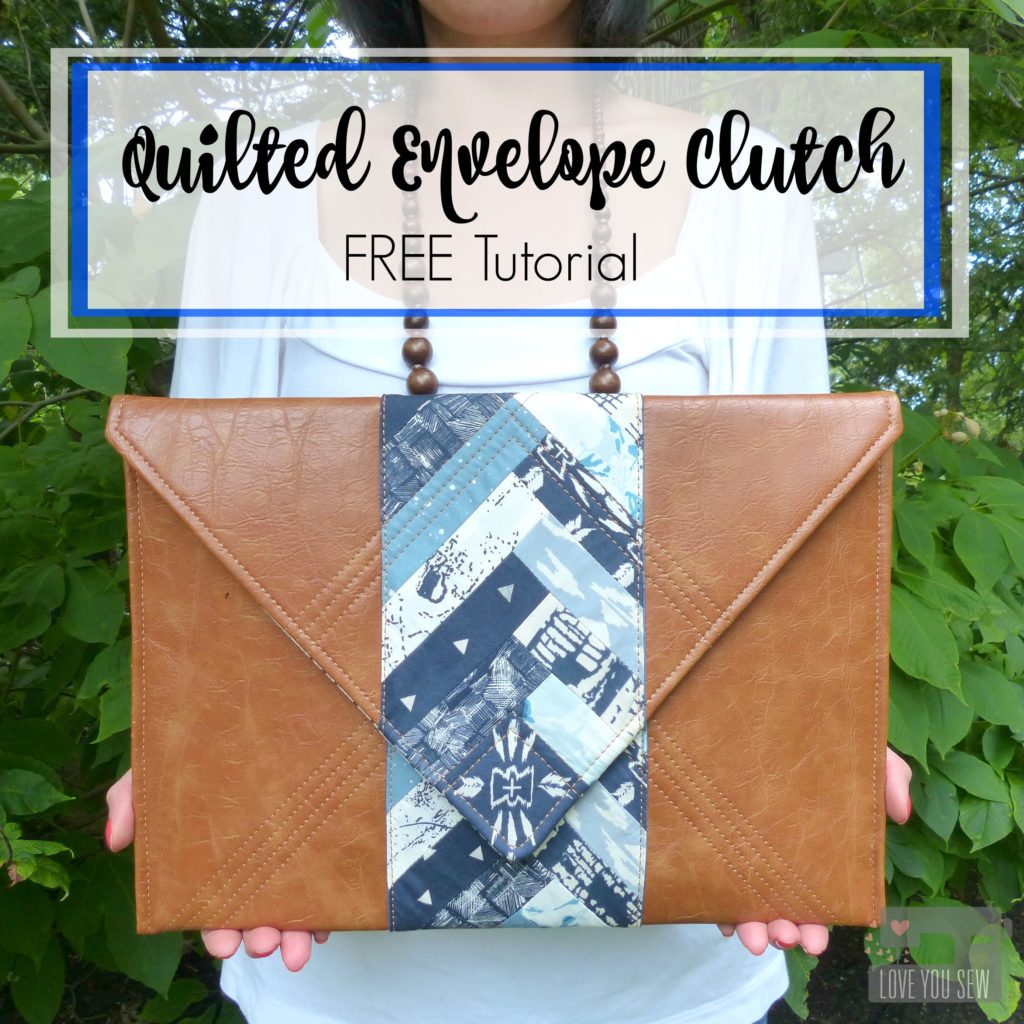
Envelope Clutches are everywhere right now and I was inspired by it simple and timeless shape.  This Quilted Envelope Clutch design is over-sized to give you ample room for all of your essentials, but still is nice  enough to go from day to night.  It’s a sleek bag when paired with the right faux (or real) leather.  Coincidentally, this clutch design also fits a MacBook Pro perfectly, so its versatile and you can change up the fabrics to make it as laptop holders.

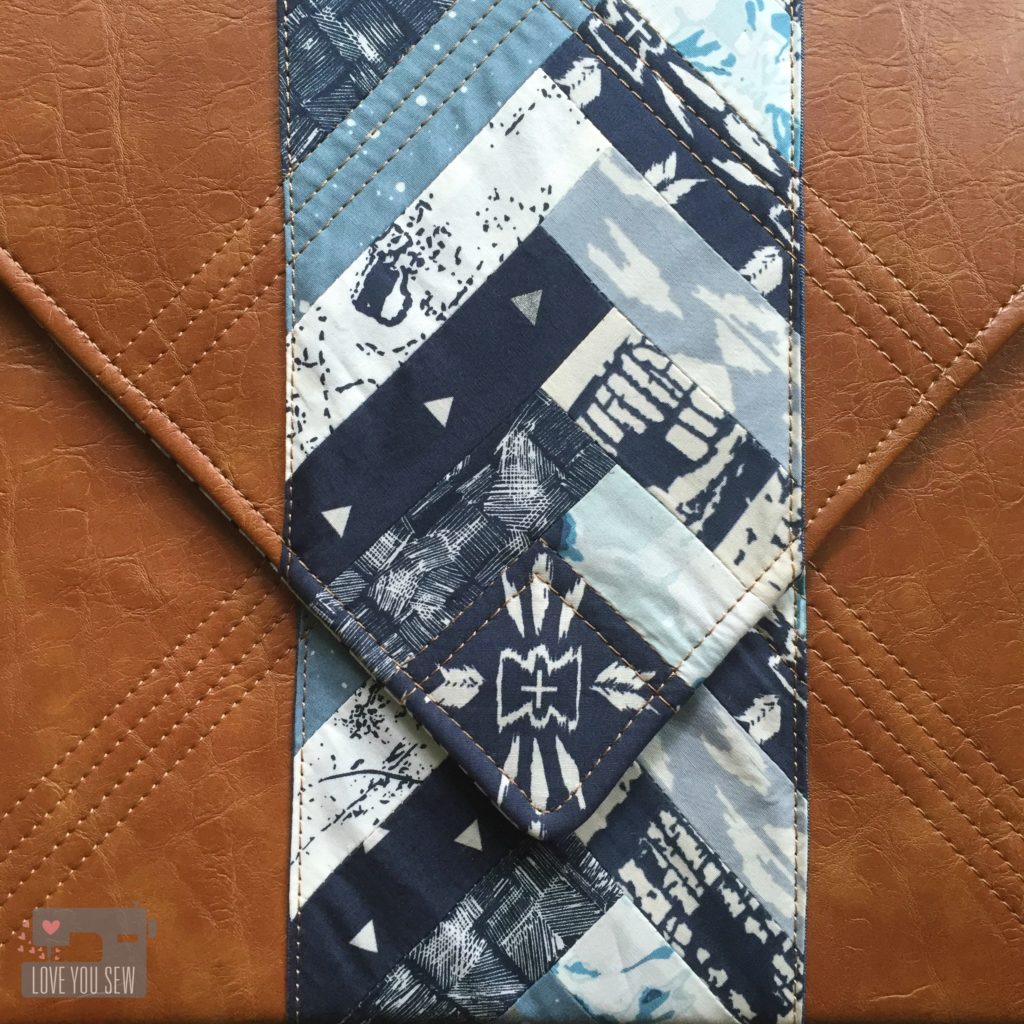
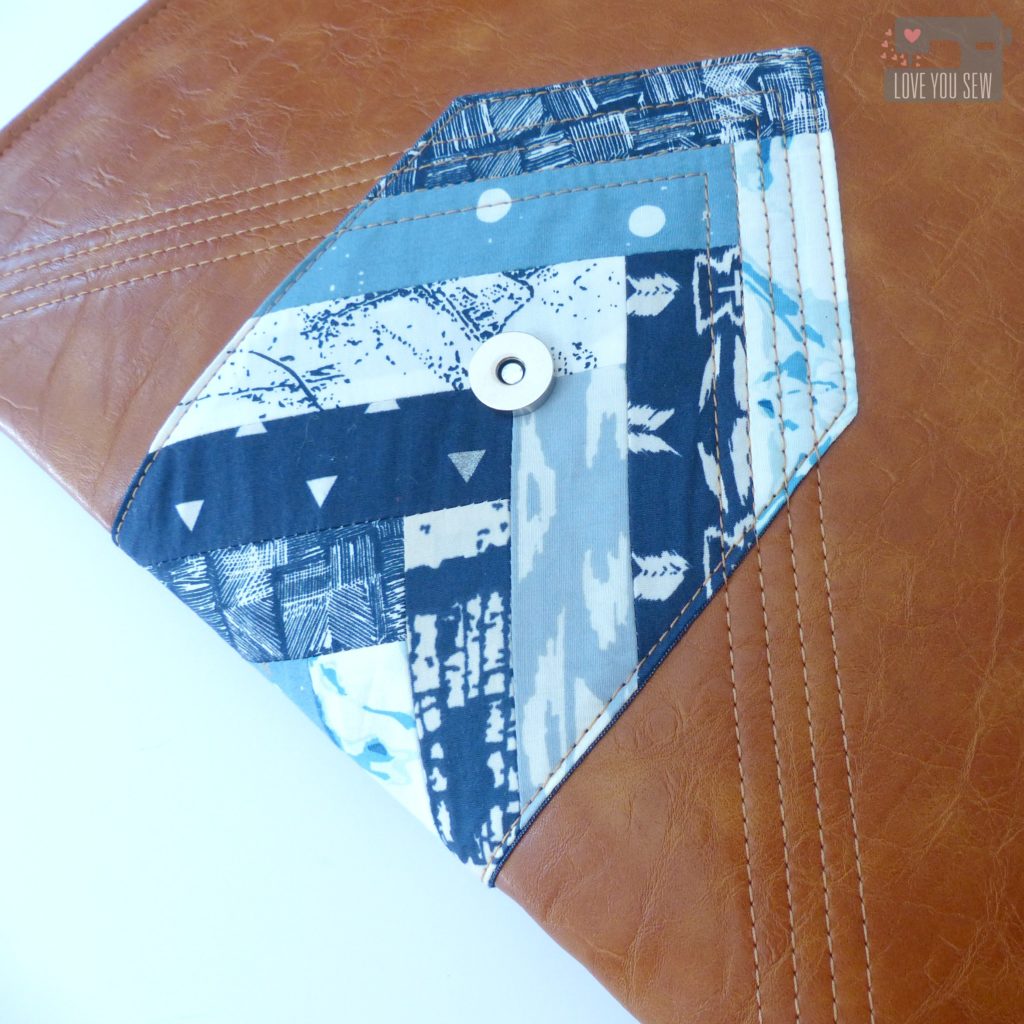
As I wrote in last week’s post from the Observer blog tour here, I like to show how hip and modern quilting can be.  I love how the piecing of a half log-cabin accentuates the envelope shape and the monotone palette keeps it chic.  Simple quilting adds enough texture and detail without being over-the-top…or over-worked.

This tutorial is for the faux leather version and finishes at approximately 14 3/4″ x 10 1/2″.  As with all patterns, don’t jump the gun…please ready through the instructions in their entirety.  Shoot me an email and/or leave me a comment if you have any questions.  Enjoy!

Materials Required:

  • Faux leather/ Vegan leather / Vinyl (1/2 yd)
  • Lining & Pocket Fabric (1 yd)
  • Pieced Panel scraps (1/4 yd)
  • Pieced Panel Lining Fabric (1/4 yd)
  • Woven Fusible Interfacing [Pellon SF101] (2 1/2 yds)
  • Ultra-firm Sew-In Interfacing [Pellon 70 Peltex] (1 yd)
  • 9″ Zipper
  • Magnetic Snap
  • Coordinating Thread(s)
  • Poster Board (optional for cutting pattern templates)
  • Spray Baste or Fabric Glue Pen (optional)
  • Clover Clips

 Cutting Instructions: 

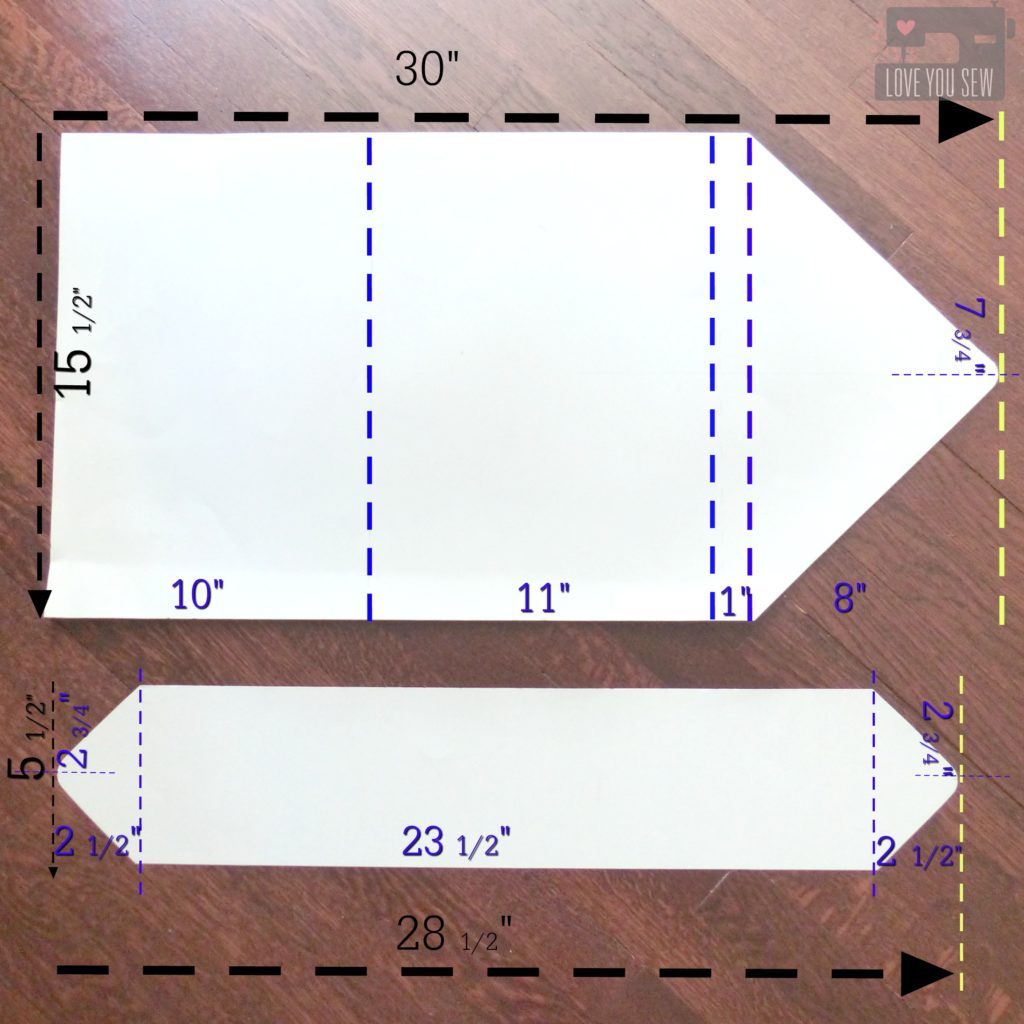
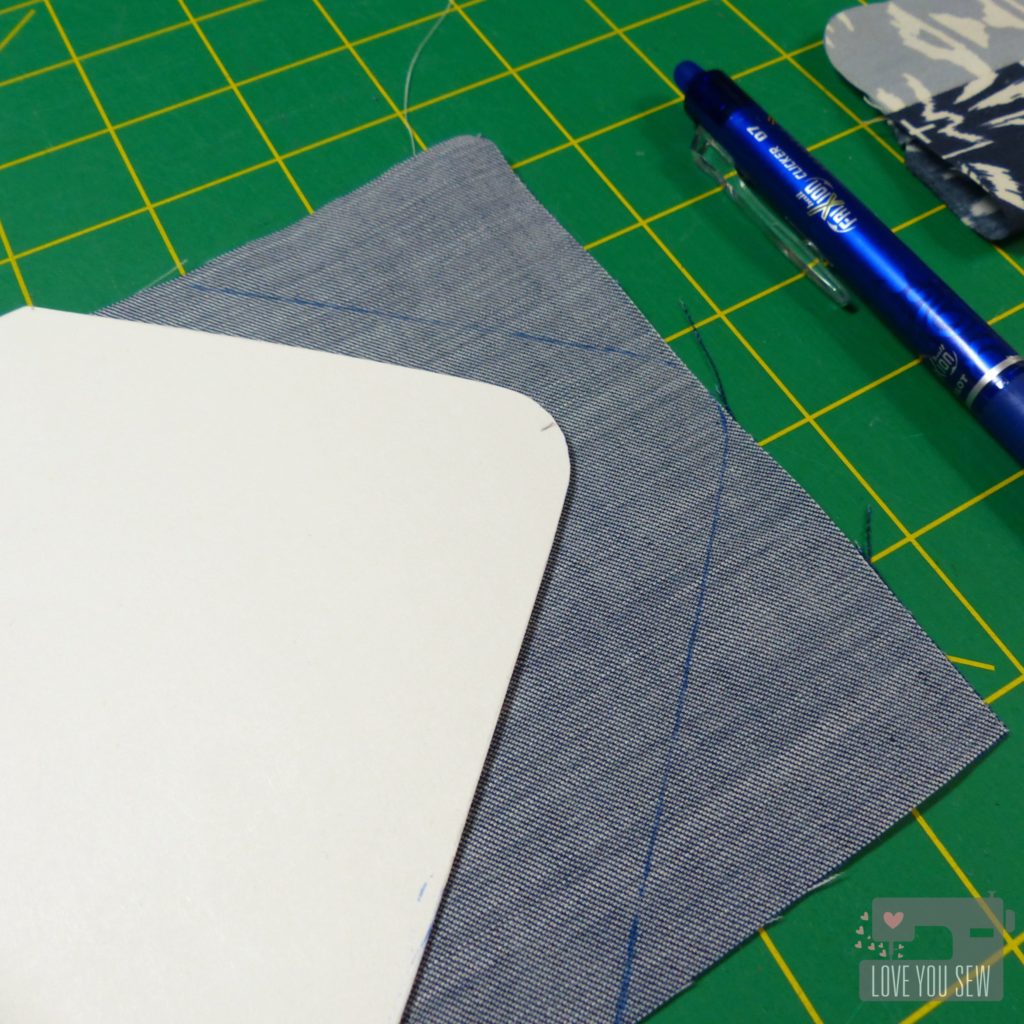
  1. Create the body and center panel cutting templates following the black numbers.  Make markings for the numbers and lines in purple.
    • Cut the angles by finding the mid-point of the short-sides of each template.  cutting-template
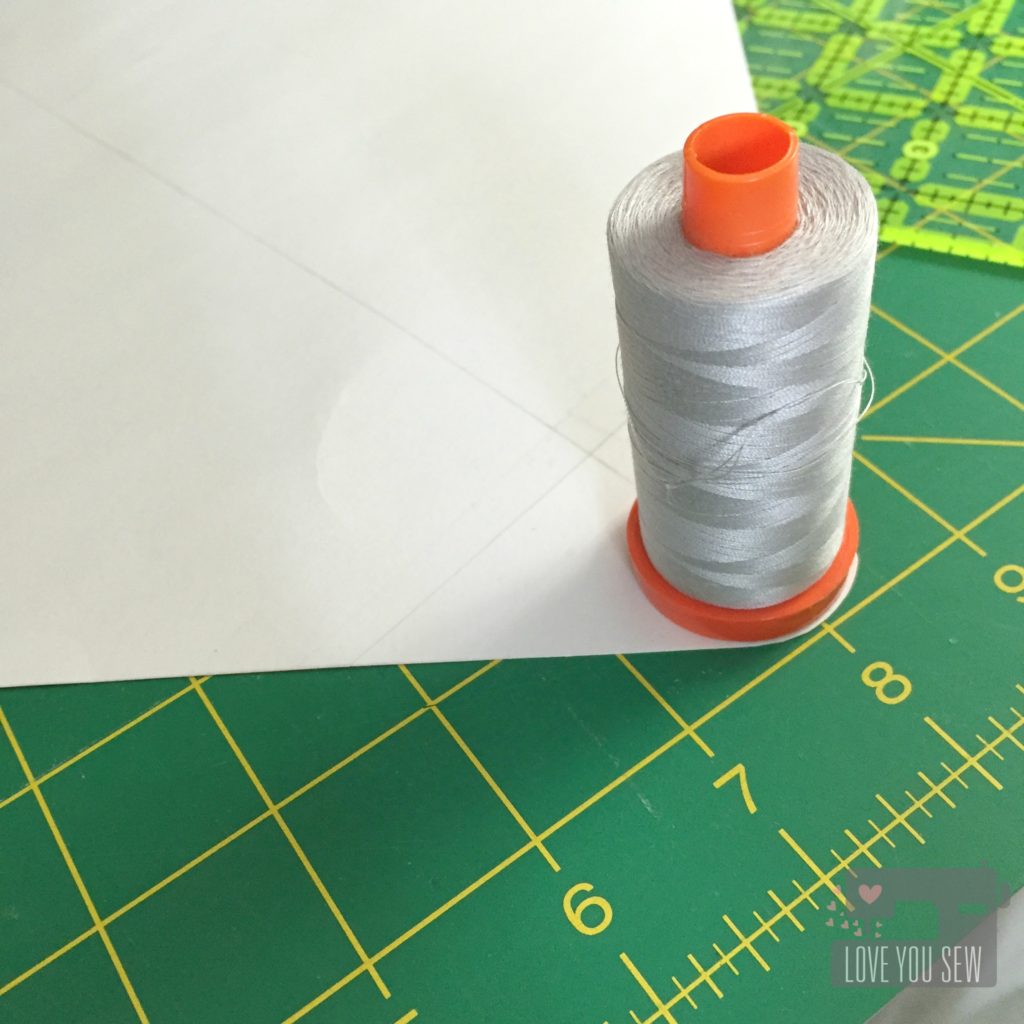
    • Round out each of the “envelope points” using a large spool of threadimg_7001
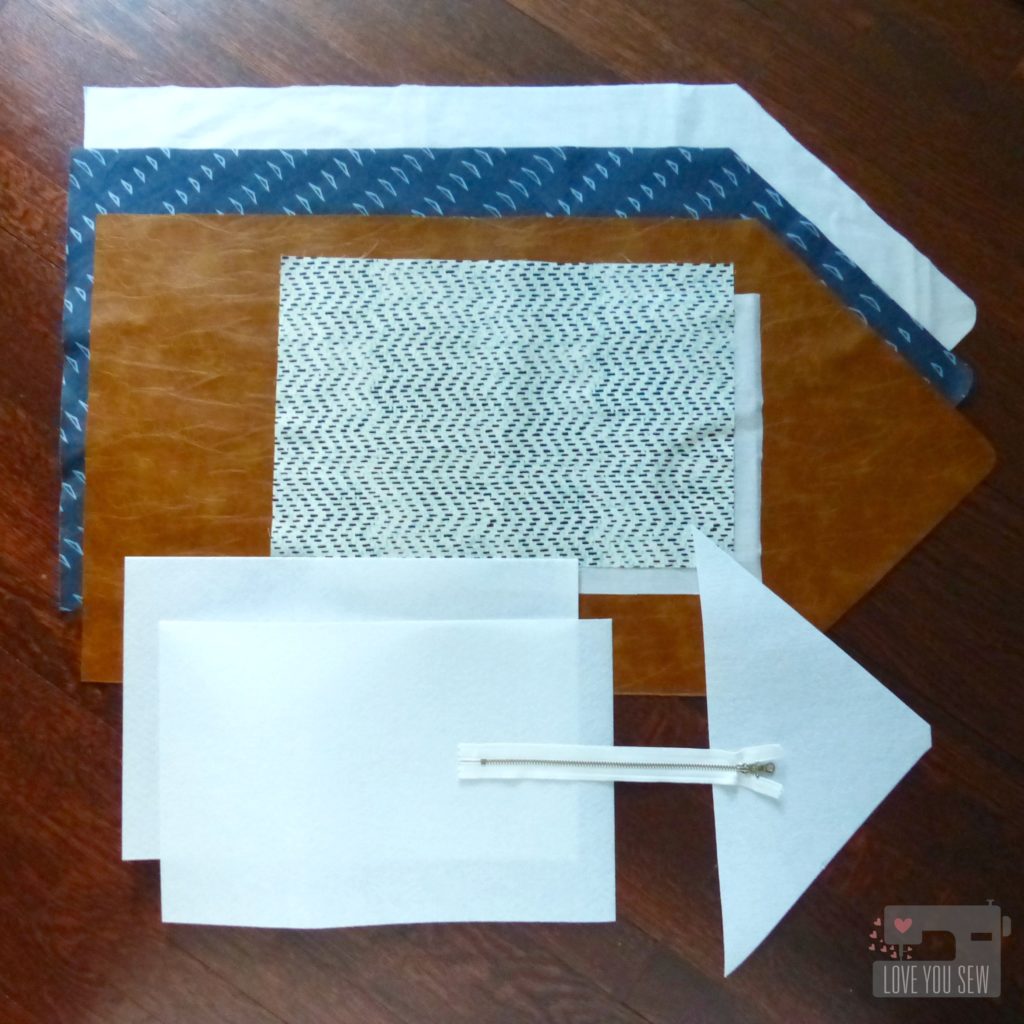
  2. Use your larger template to cut:
    • (1) Body with faux leather
    • (1) Lining
    • (2) Woven Fusible Interfacingsp1060660
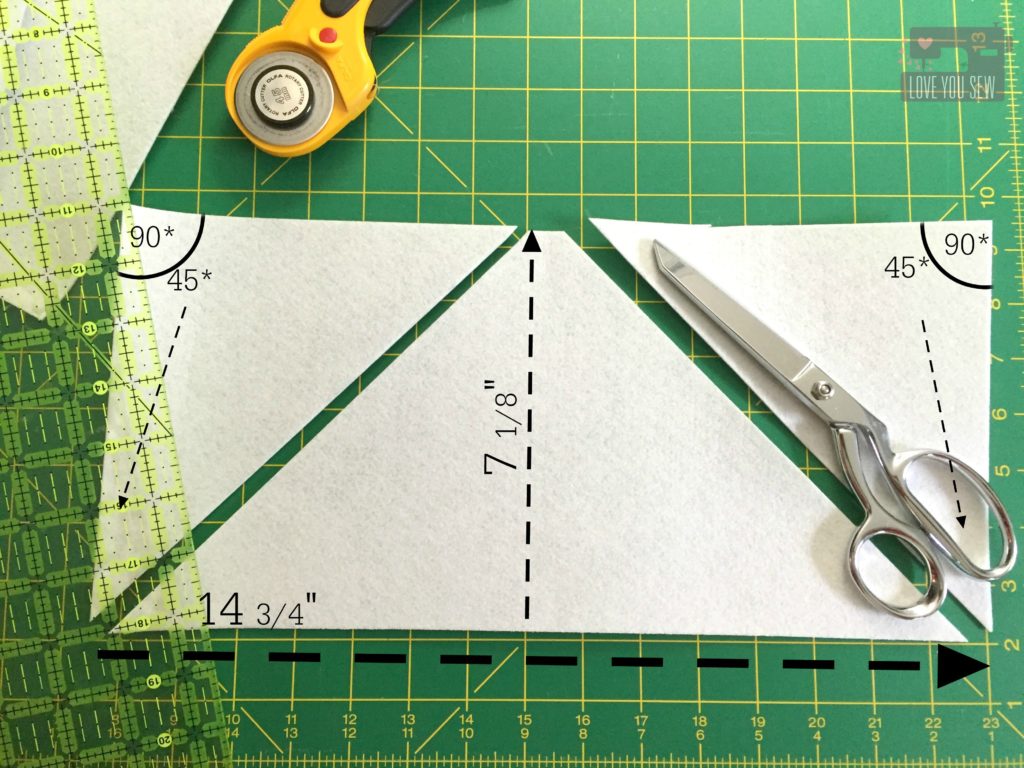
  3. With the Firm Sew-In Interfacing, cut:
    • (2) 14 3/4″ x 9 3/4″ rectangles
    • (1) Triangle per the following photo:img_7014a
  4. For pieced Center Panel (as a half log-cabin), cut:
    • (1) 2 1/2″ x 2 1/2″ square
    • (34) 5″ x 1 1/2″ strips
    • Use smaller template to cut (1) Center Panel liningp1060674
  5. For Lining Pockets, cut:
    • (1) 16″ x 11″ rectangle with the lining fabric
    • (1) 16″ x 11″ rectangle with fusible woven interfacing
    • (1) 9″ x 4 1/2″ rectangle with faux leather

Construction:

(1/4″ seam allowance unless otherwise noted)

  1. Interface the body.  *Please check and test the heat settings beforehand.  Not all vinyl/faux leather is created equal.

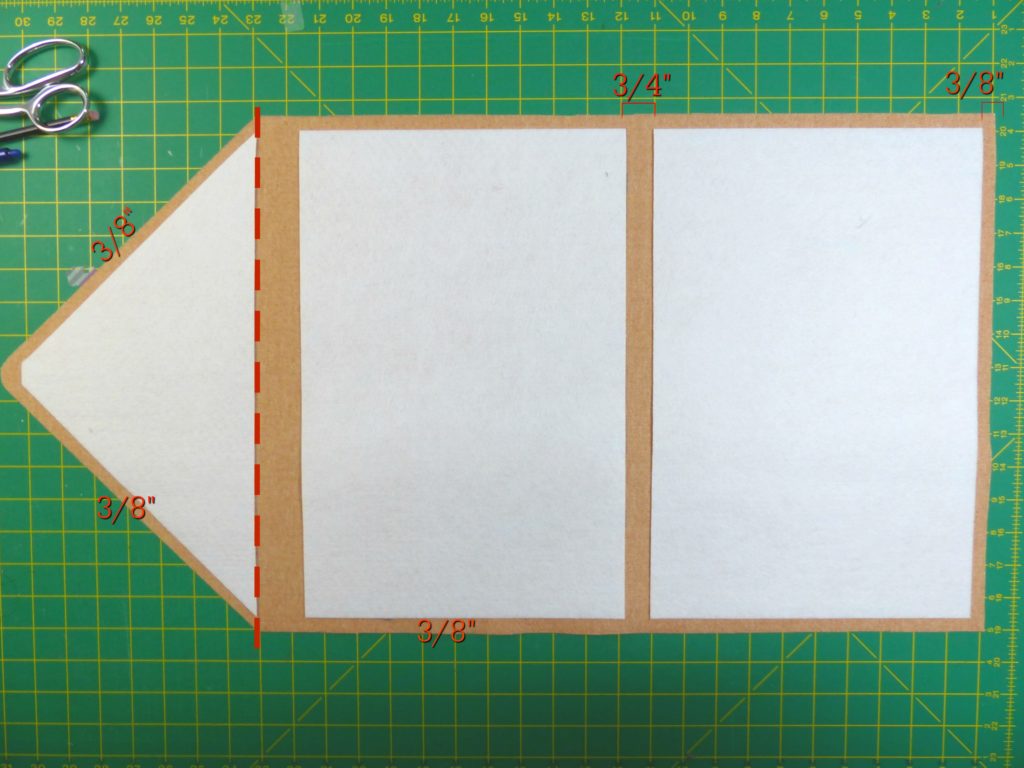
    • Place the Peltex pieces per the following photo.  Leave 3/8″ allowance all around the edge of the vinyl.  Keep 3/4″ in between the (2) 14 3/4″ x 9 3/4″ pieces.  Make sure you align the Peltex triangle long edge with the top corners of the vinyl.  You can can secure them in place with a little spray baste or with Sewline glue pen.  *It’s important to have the Peltex split into 3 pieces to give the ease and flexibility where the clutch will fold.  It will also alleviate some of the “cracking” appearance that can happen with interfacings that are forced to moved a lot.p1060663
    • Use one of the fusible woven interfacing pieces and fuse on top of the firm sew-in interfacing.  You may need to work the edges of the SF101 around the Peltex with your iron. Set aside.interface-vinyl
  2. Fuse the 2nd piece of fusible woven interfacing to your lining.  Set aside
  3. Fuse the pocket fusible woven interfacing to the pocket lining fabric.  Set aside
  4. Prepare Center Panelp1060670
    • Piece as desired.  I used a traditional half log-cabin design, but you can use anything that you like as long as it can be trimmed to the Center Panel template you created earlier.
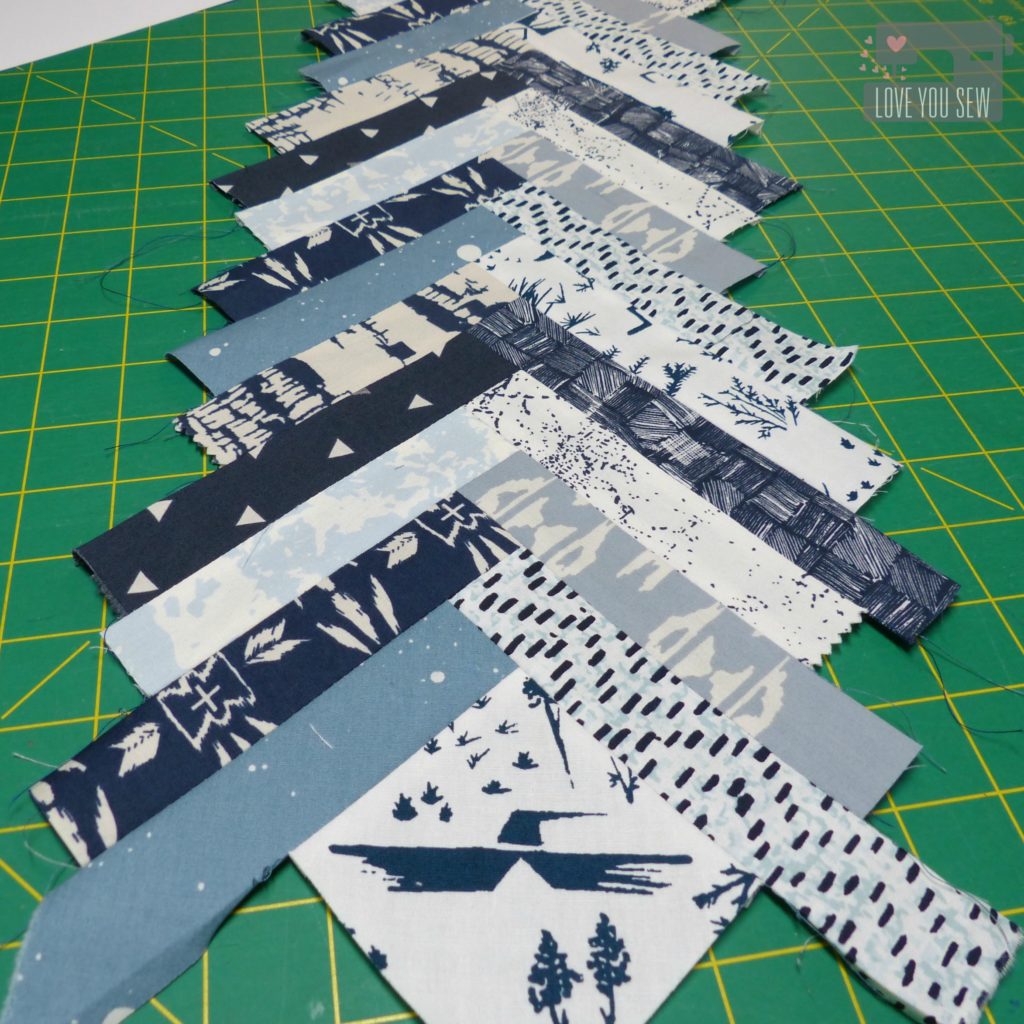
      • Line up the short-end of the first strip (gray-blue speck) with the edge of the square (eagle) and sew with 1/4″ seam allowance.  Press open
      • Line up the short end of another strip (navy dashes) with the opposite edge of the square (eagle) and sew.  Alternate sides until you have used all 34 strips.
      • Use Center Panel template and trim to fit.
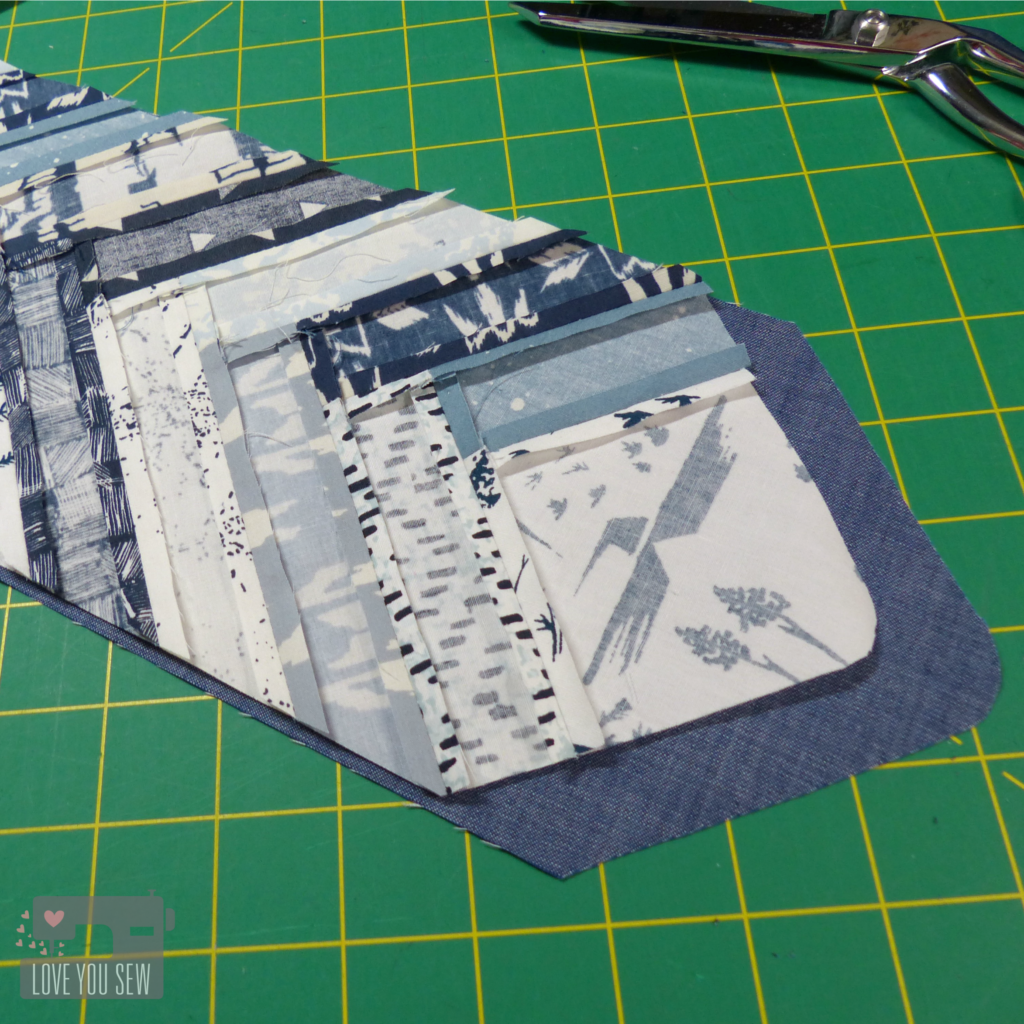
    • Assemble the Center Panel by placing the right-sides of the center piecing with the center panel lining.p1060675
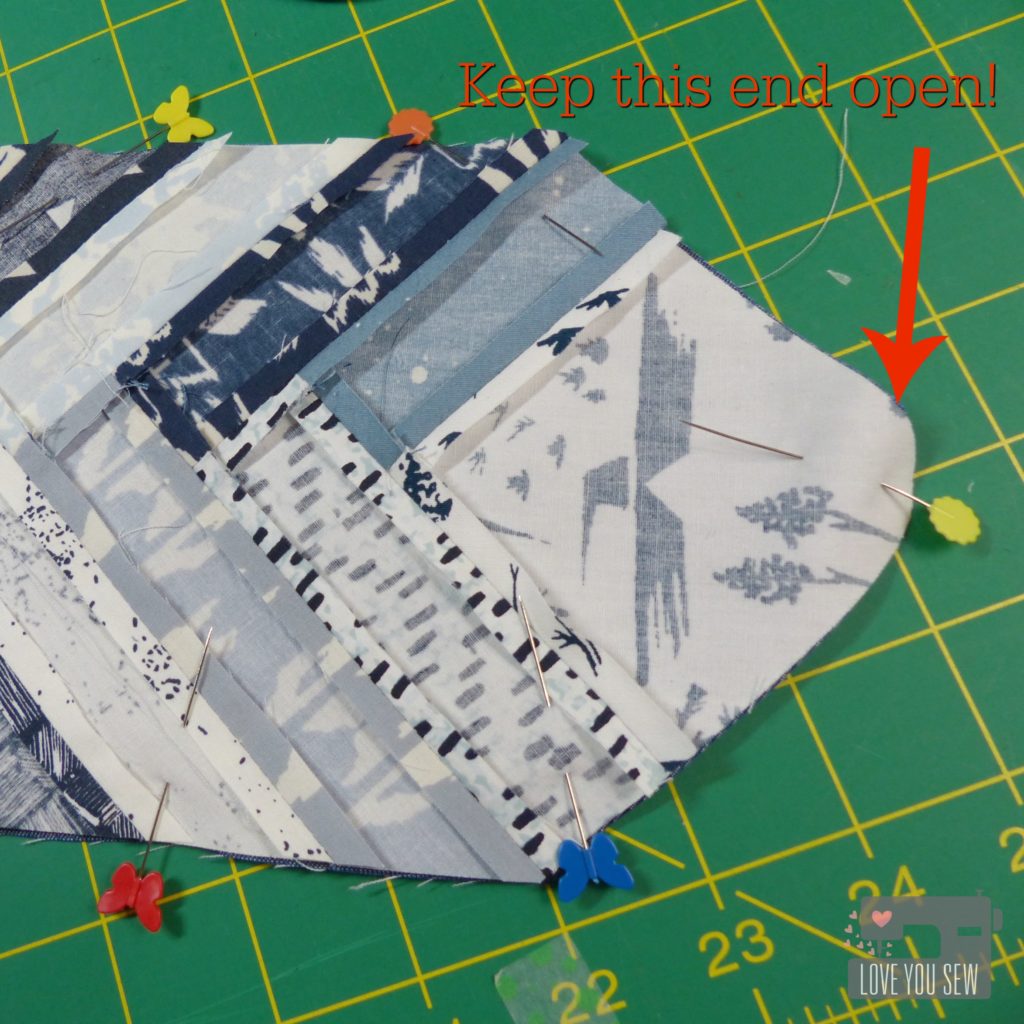
    • Sew all around leaving an opening at the TOP to turn.p1060676
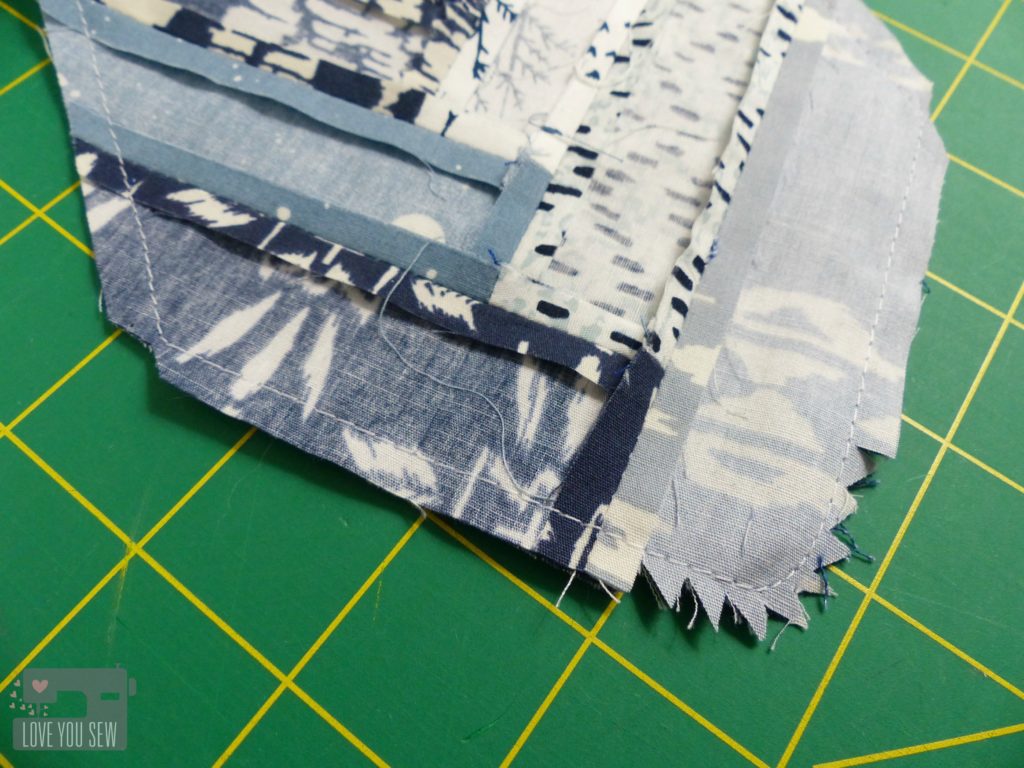
    • Notch out the BOTTOM and all cornersp1060678
    • Pull right-side out and press
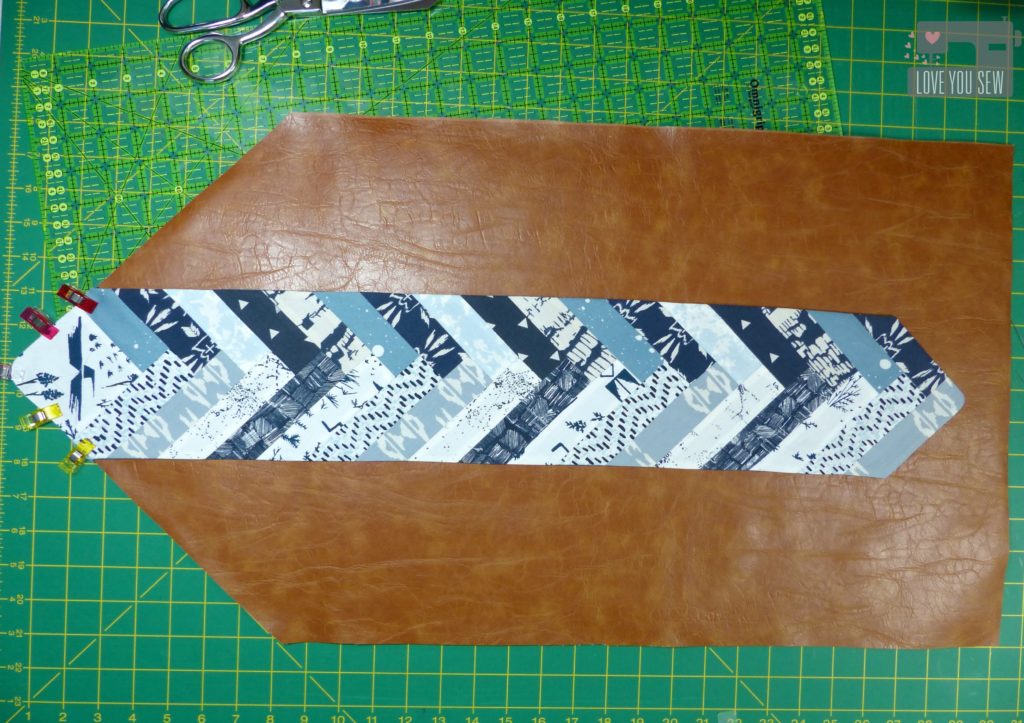
  5. Line up the center panel on top of the right-side of the faux leather.  Make sure it’s even on both sides of the panel.  You can secure it into place using pins since you don’t see the faux leather.p1060680
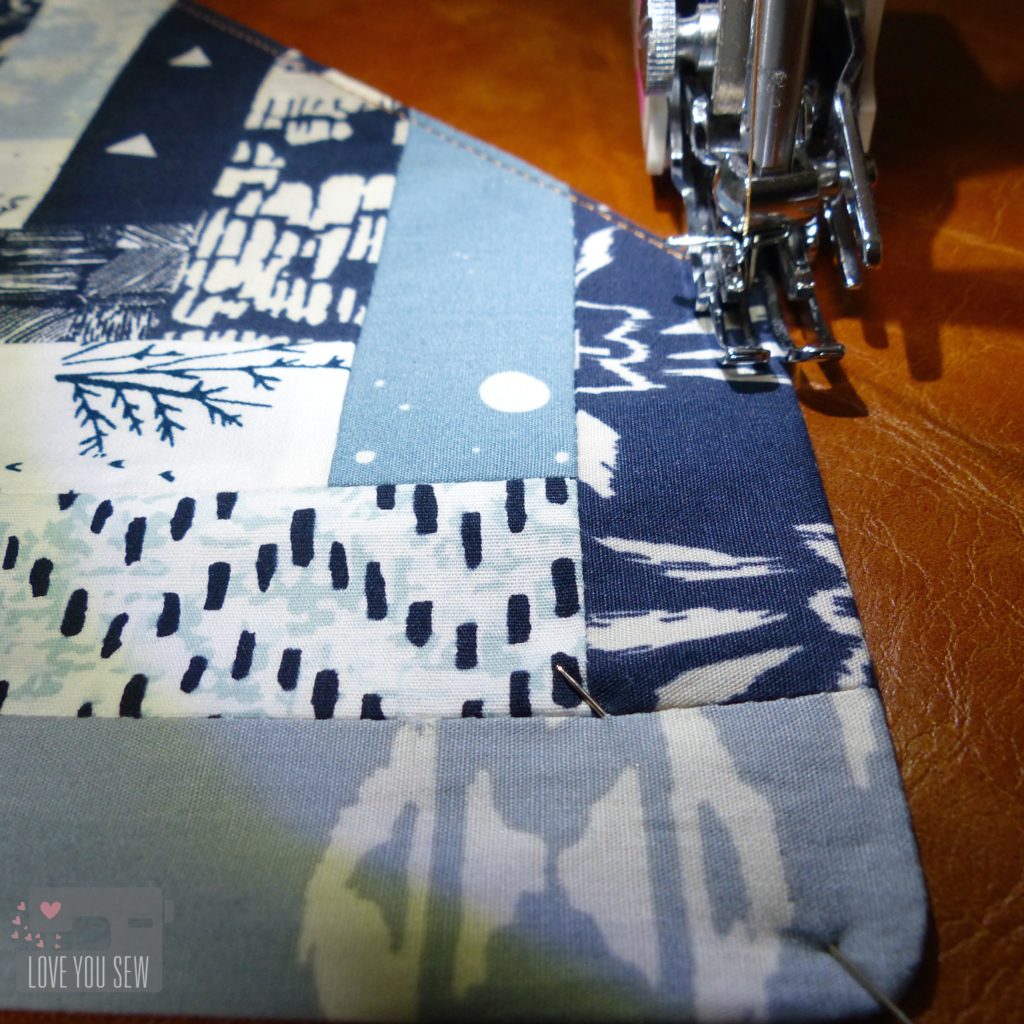
  6. Topstitch into place.  It may seem easier to have sewn this panel onto the vinyl before all of the interfacing, but this is how you will secure all of the Peltex into place and prevent any shifting with use.p1060683TIPS:
    • Use upholstery thread or any other nylon/polyester thread.  I like the upholstery for the heavier weight, the sheen, and it glides well through all of the layers.
    • Increase your stitch-length to at least 3.0 for a nice look
    • Use a walking foot for even stitches
    • You may need to increase your needle size if the thread is not pulling through and/or you are getting skipped stitches
    • Keep matching all-purpose polyester thread in the bobbin.  It helps with skipped stitches.
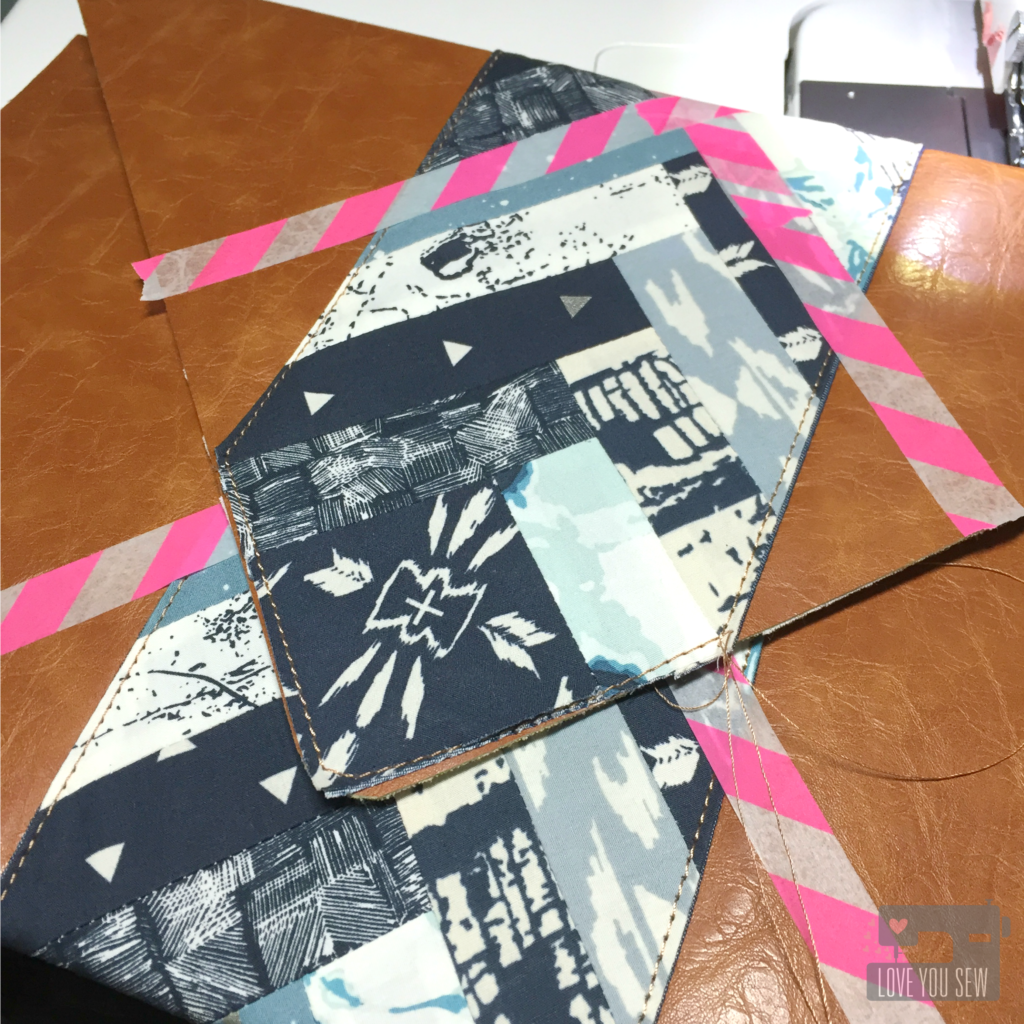
  7. At this point, you can quilt the vinyl, if desired.  Set the body aside.IMG_6780 IMG_6880
    • TIP:  Use washi tape for your guidelines. Chalk and pen will easily smear off the faux leather.IMG_6772
  8. Attach pockets onto lining
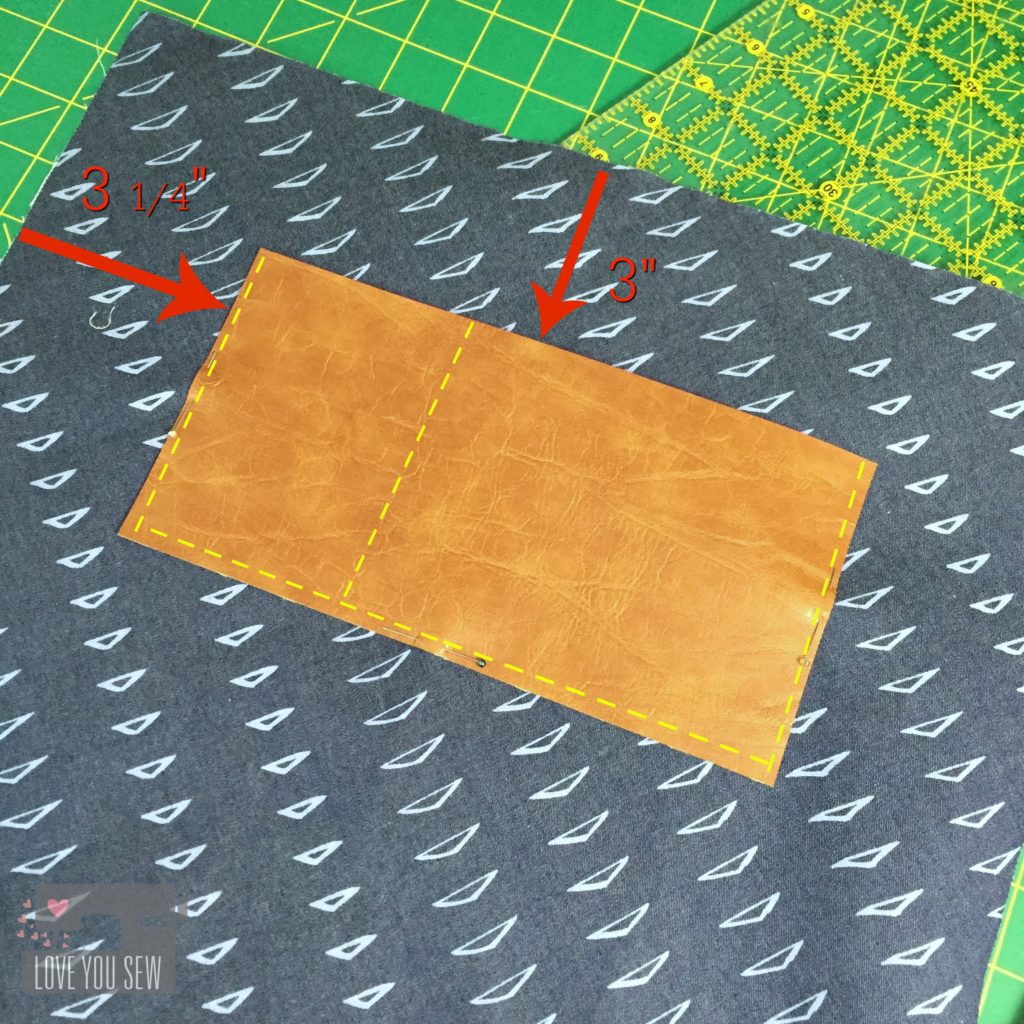
    • With the flat edge of the lining on top and right side facing you, measure 3″ down from the straight edge and 3 1/4″ in on either side.  Pin (where you will sew) the faux leather into place 1/8″ from the edges (marked in yellow.)  You can leave this as a large slip pocket or you can divide it for your cell phone.  I marked mine 3 1/2″ in from the edge to hold an iPhone 6. Sew the three edges into place and then the dividing seam (marked by yellow.)img_7026
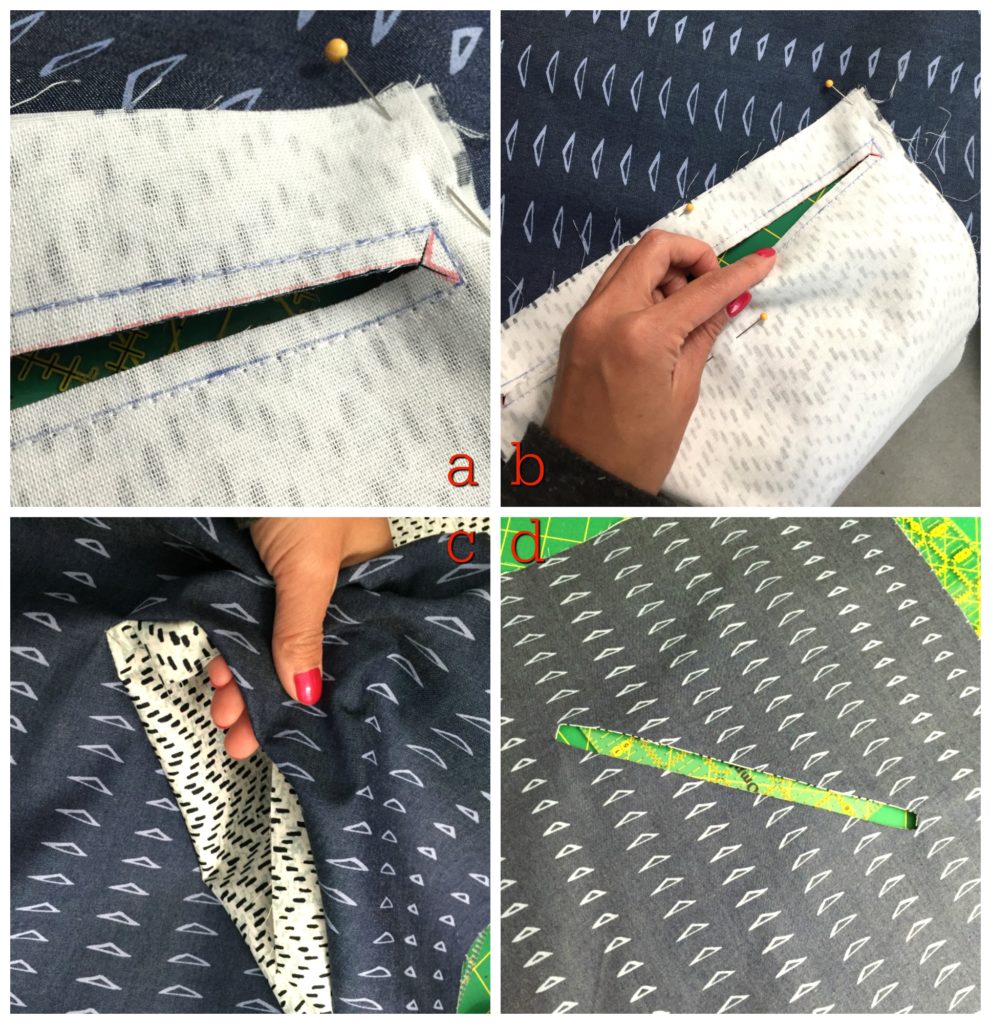
  9. Turn the lining 180 degrees.  With the right-side facing you, mark 10 1/2″ down from the top of the lining and pin the short-side of the  pocket lining fabric there.  Mark a rectangle 1″ down from the top and sides of the pocket that is 9″ x 3/8″ (blue pen.)  p1060690
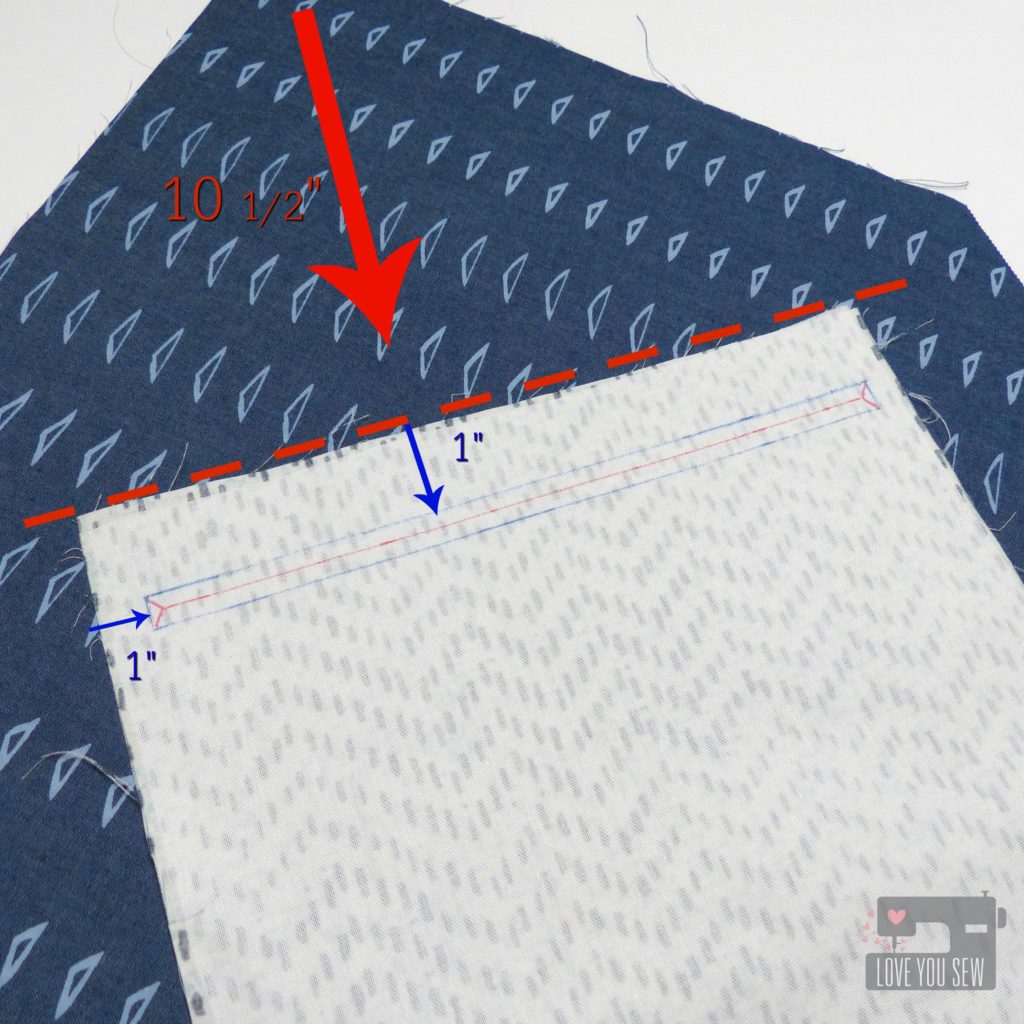
  10. Sew all-around the 9″ x 3/8″ rectangle on the marks you made.  Cut through the rectangle as shown, stopping about 1/4″ from the end (red pen lines.) [Image a]. Make small cuts from the middle out to each corner, getting close to the stitches, but not cutting directly through.  Push pocket through the hole [images b & c] and press [image d].lining-pocket-collage
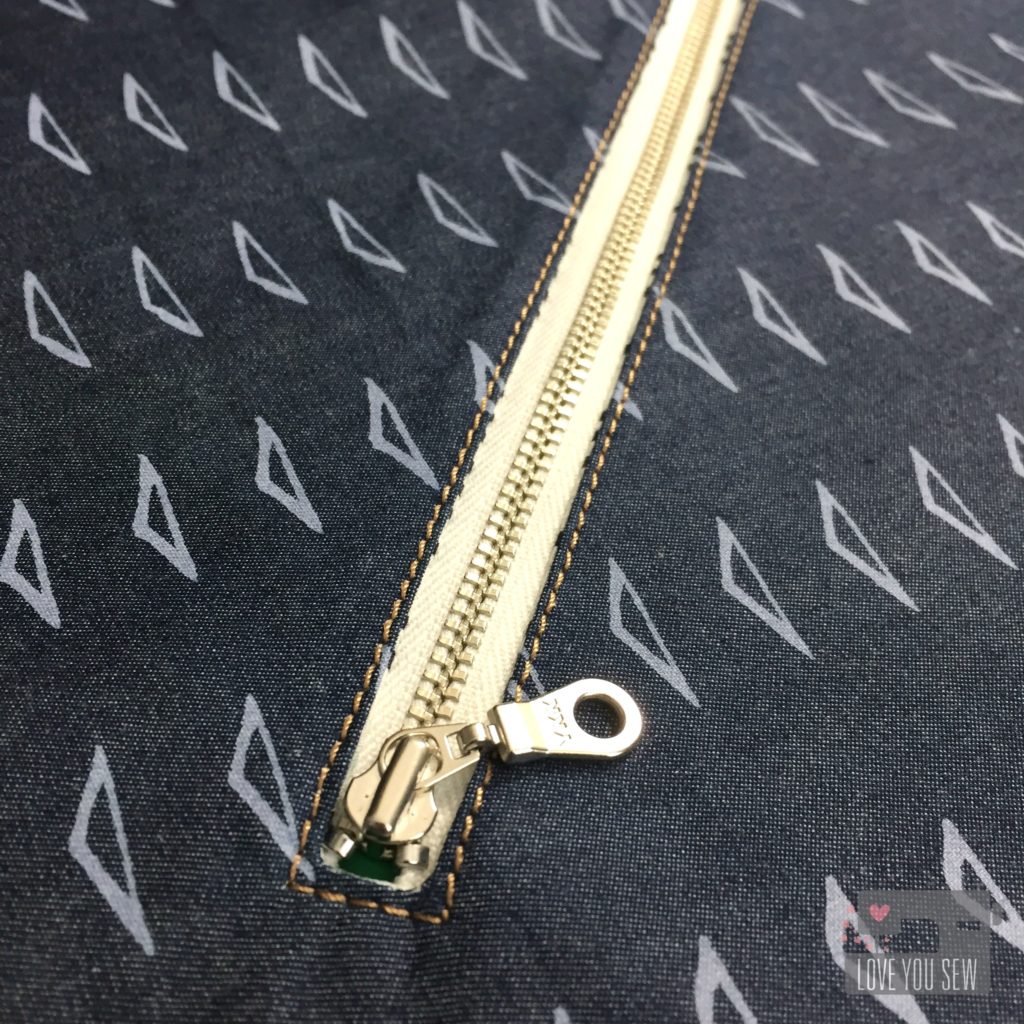
  11. With the right side of the lining facing you, line up the zipper in the opening just created.  Either pin in place or use Sewline glue pen.  Sew 1/8″ all around the opening.img_7024
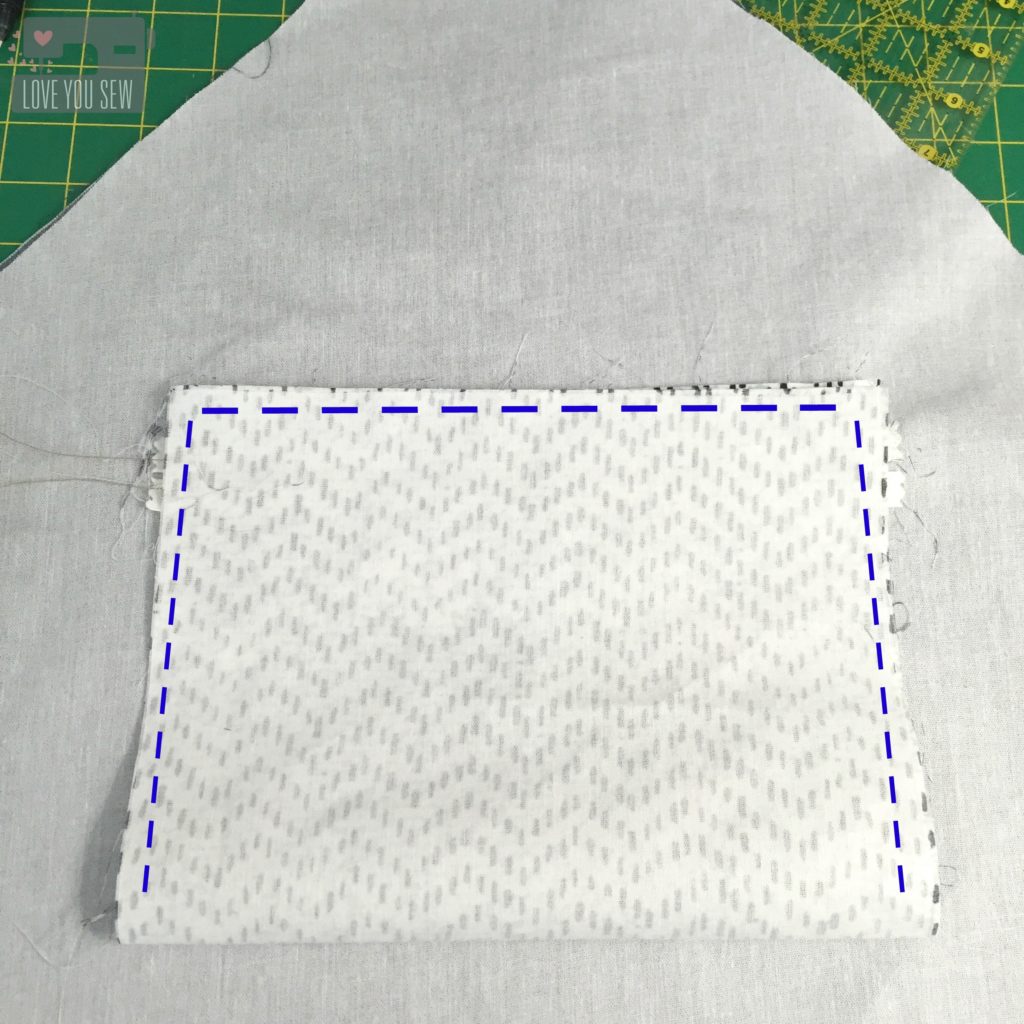
  12. With the wrong-side of the lining facing you, fold up the pocket so the short-sides match.  Press on the fold.  Pin all around the pocket, but not including the lining. Sew pocket shut (following blue dashed lines in pictures.)  Make sure you move the lining out-of-the-way as you sew.img_7025

Assembly:

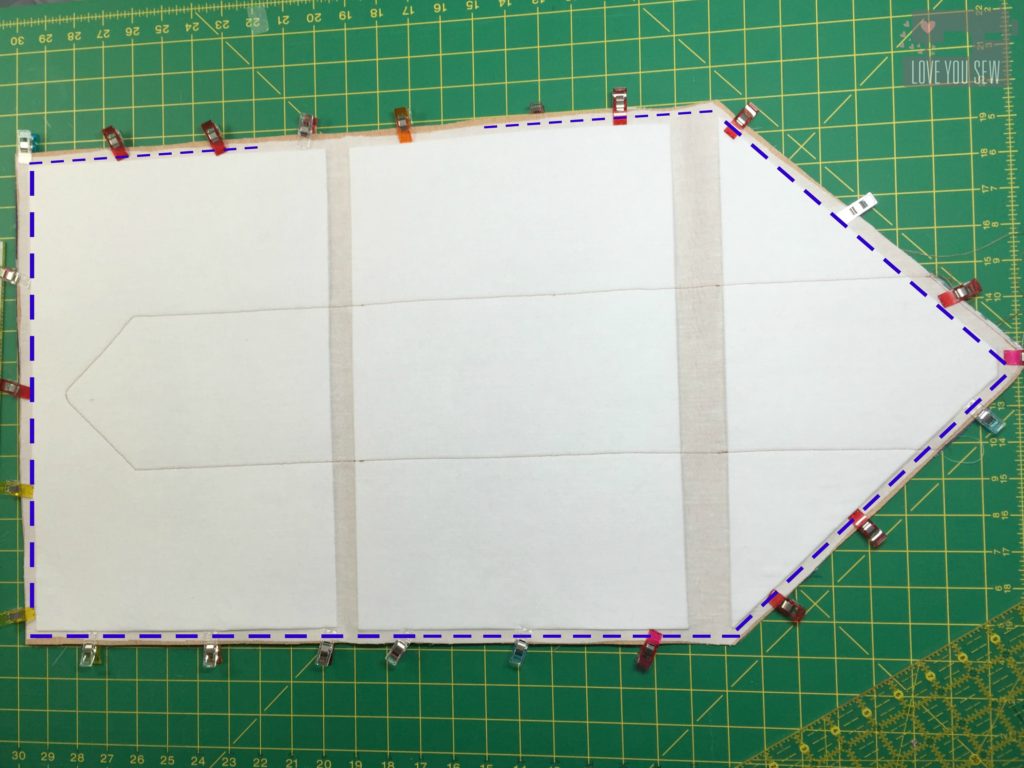
  1. Now match the right-sides of the lining and body together.  Clip in place and sew all around the edge (marked in blue) with a 3/8″ seam allowance.  Back-stitch when you start and end leaving a 5″ opening to turn. Notch out corners and the top of the clutch.  Be very careful not to cut through any stitches.img_7032
    • TIP:  Use a compensating foot or a zipper foot since the Peltex give you can uneven surface. img_7034
  2. With wrong sides together, make markings for your magnetic snap and install per manufacturer’s instructions.  With the point being so narrow at the top of the clutch, you may need to move your snap up or down to make sure there is enough clearance for all parts of the clasp.  For the male part, I marked mine 1 1/4″ down from the top edge of the lining and marked the female where it hit the body (approx. 7″ from straight short side.)
    • TIP: Before you install, reinforce where you will cut with a scrap piece of interfacing.p1060602
  3. Turn the body right-side out and press with the lining facing up.  Be careful not to press the faux leather directly with your iron.
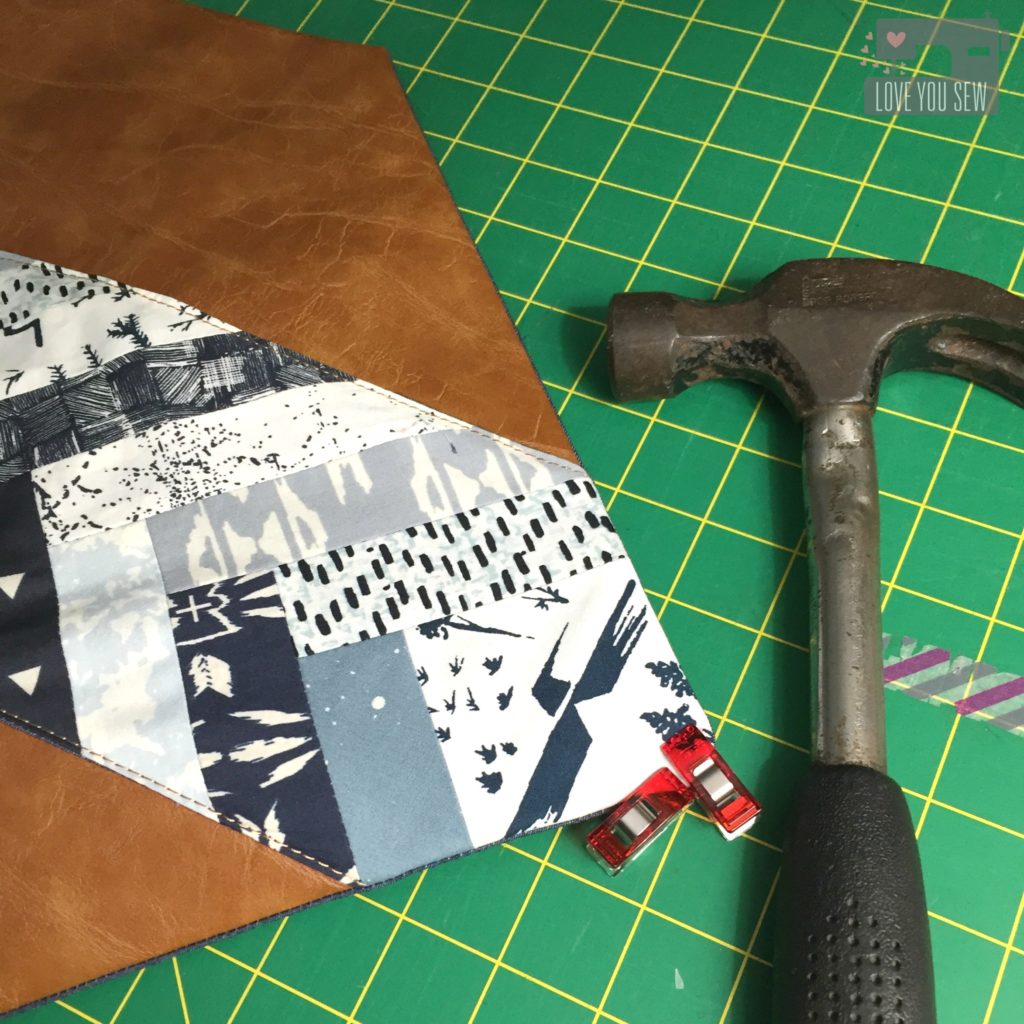
    • TIP:  Use Clover Clips on the edges to help them stay flat and/or hammer them as well.  Hammering helps to flatten the edges so top-stitching will be easier in the next step.  Test the hammer method on scrap to make sure the hammer doesn’t leave marks.
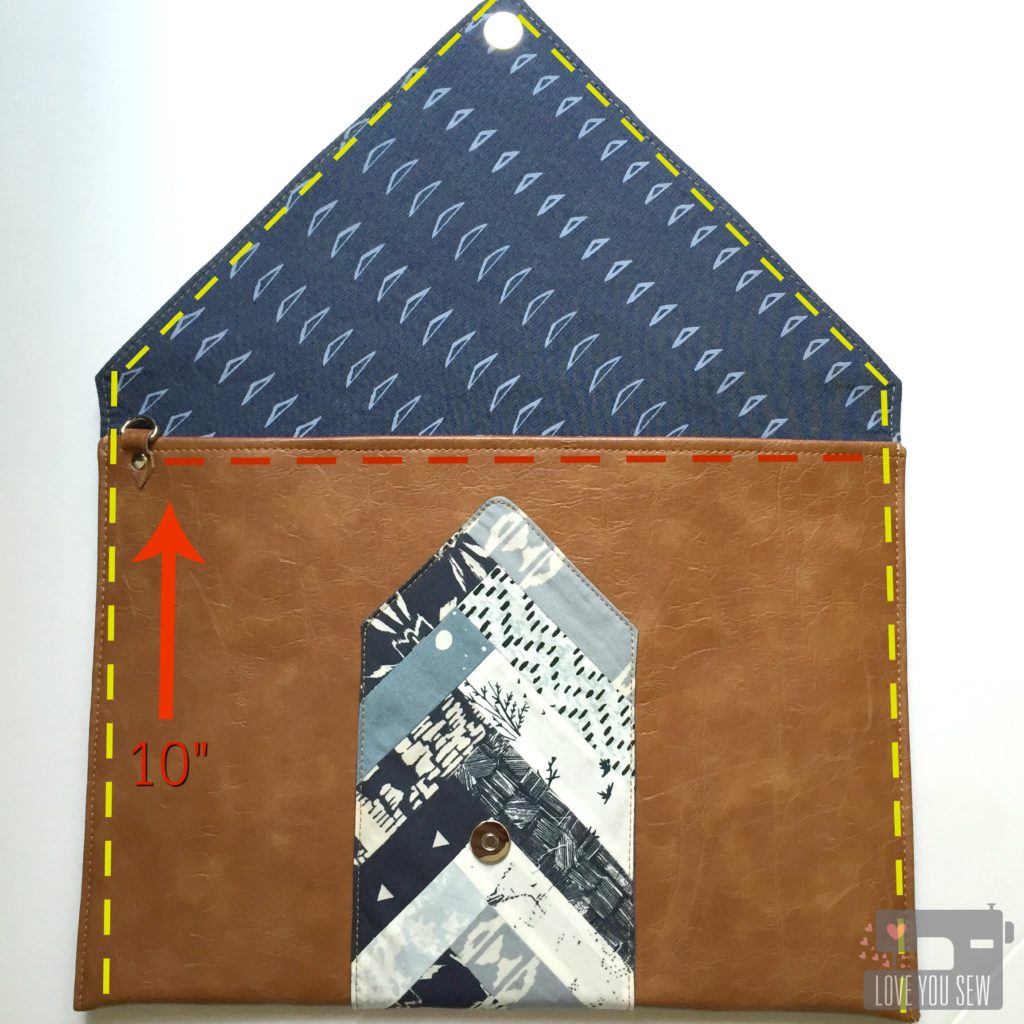
  4. img_7036Time to {finally} make the envelope!
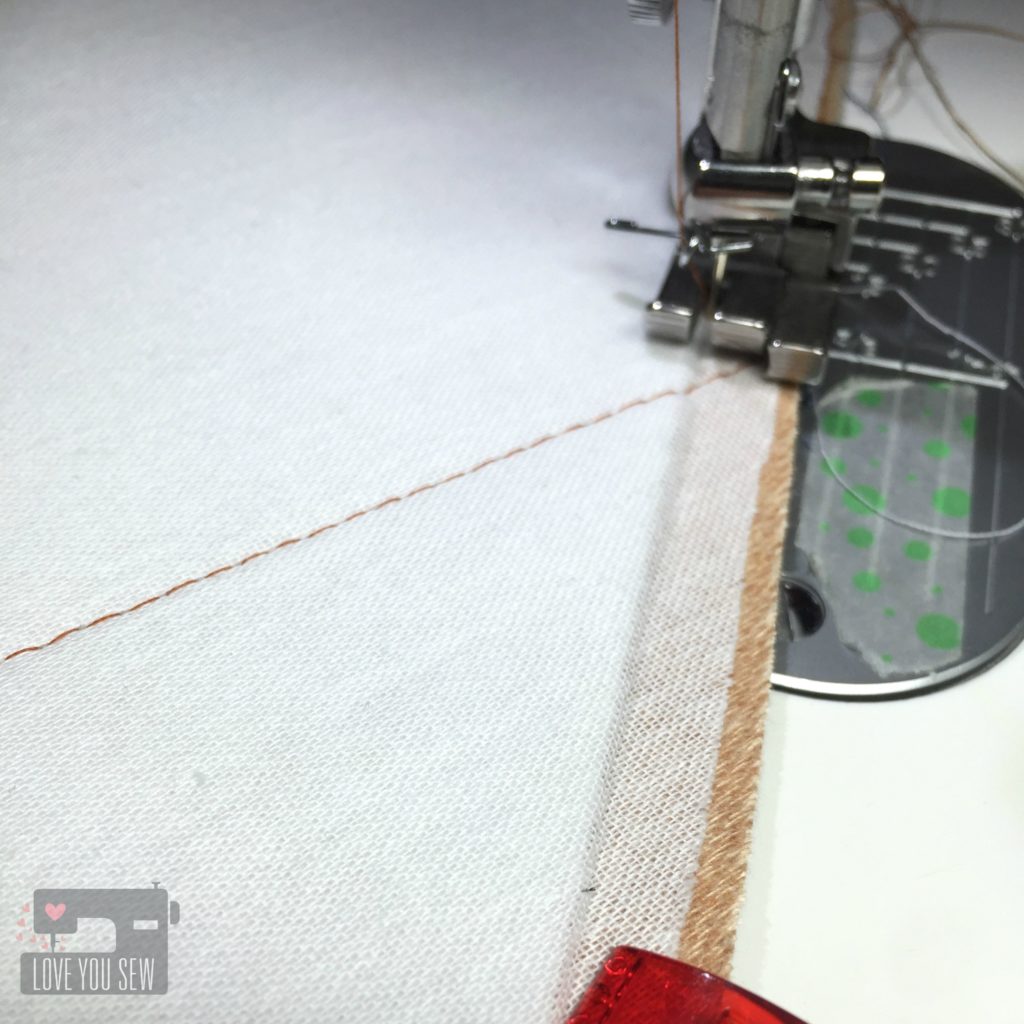
    • Top-stitch along the straight short-end of the body (red dashed line)
    • Fold the front of the clutch up 10″ to create the main pocket and secure the sides into place with Clover Clips
    • Top-stitch all along the clutch (following the yellow dashed line)
      • TIPS:
        • Use a large 16 or 18 needle to get through all the layers
        • Increase stitch-length to 3.5-4.0 and use your walking foot to achieve even stitches
        • GO SLOW so that you do not skip stitches
        • Hammer the edges again, if needed
        • Leave long thread tails so you can pull them through the lining and hide for a cleaner finish
    • Hide thread tails by pulling them toward the lining, knot, then bury.
    • Press the lining

img_7063

If you want to get extra fancy, you can add some additional finishes.  Some examples are:

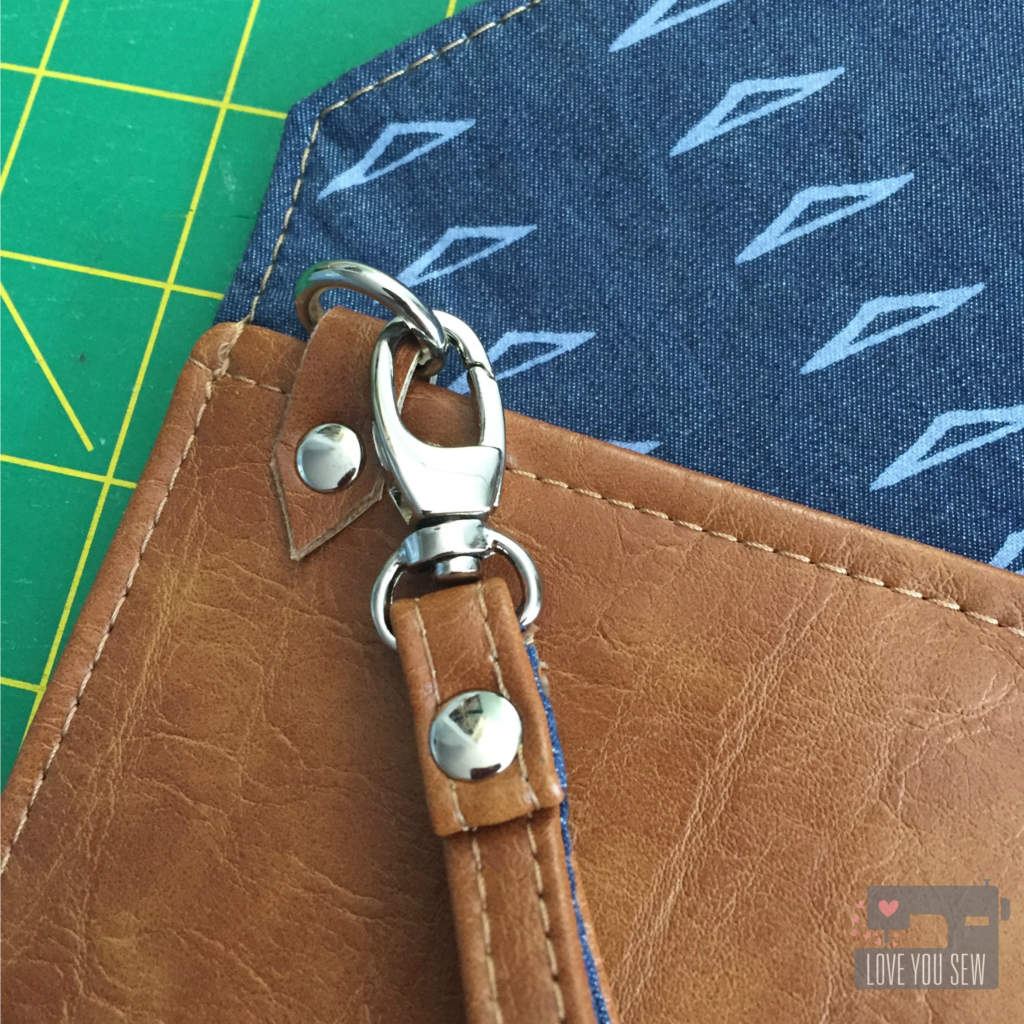
  • Sew a wristlet handle with hardware (as shown)
  • Just add the D-ring so you can attach some fun tassels.
  • Include a key fob on the inside
  • Attach rivets and grommets

img_7042


CONGRATS!!!  You have made a #LYSquiltedenvelopeclutch!  Please, please share your creations.  I would love to see them all!

As long as you credit Love You Sew with the pattern (because it took me a long time to write this all up,) you are free to sell the finished clutch.

Product Details (Sources in Links):

Simple Zipper Bag Sew-Along

Zipper Pouch Sew Along

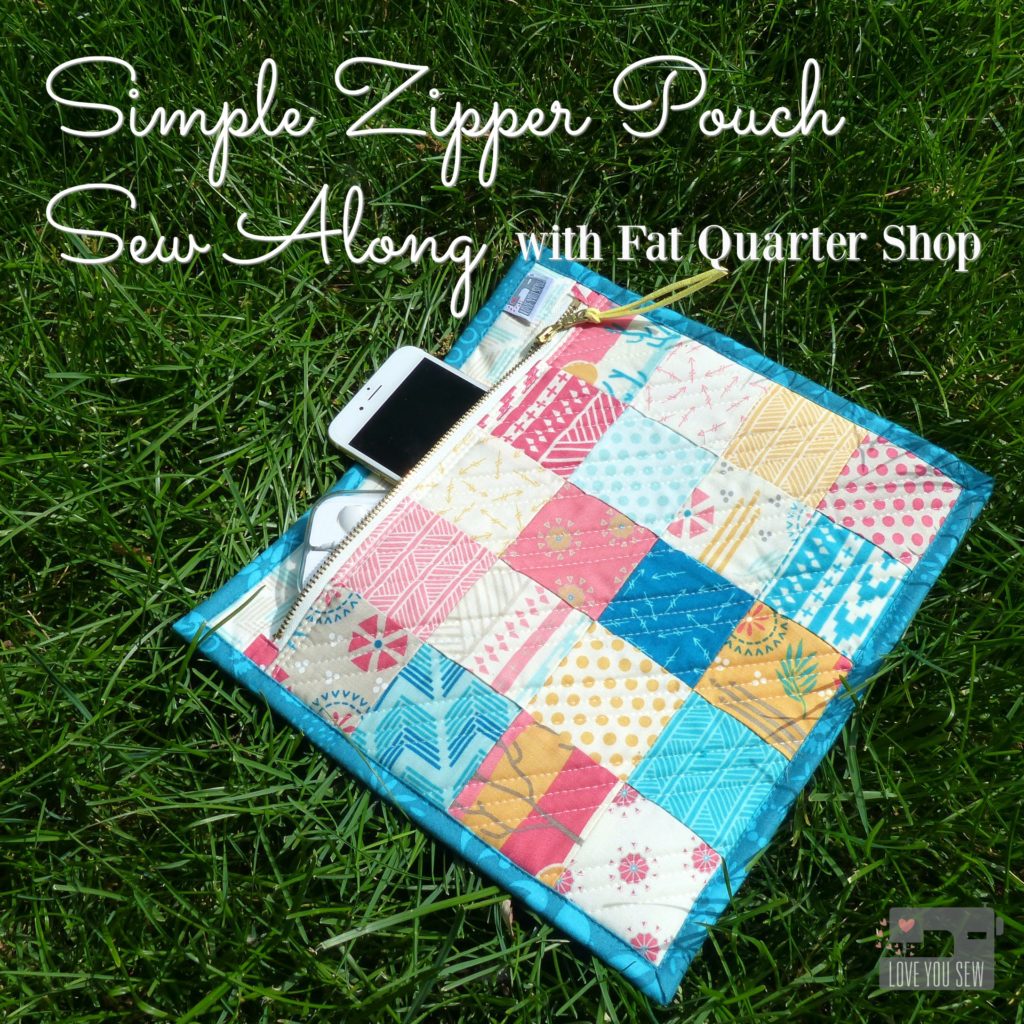
Who loves a great stash-busting project?  Well, Kimberly Jolly of Fat Quarter Shop, along with Sherri McConnell of A Quilting Life, have a great new tutorial of a super simple patchwork zipper pouch.  This project is also mini-charm friendly which makes it even easier.  Check out their easy to follow video below.

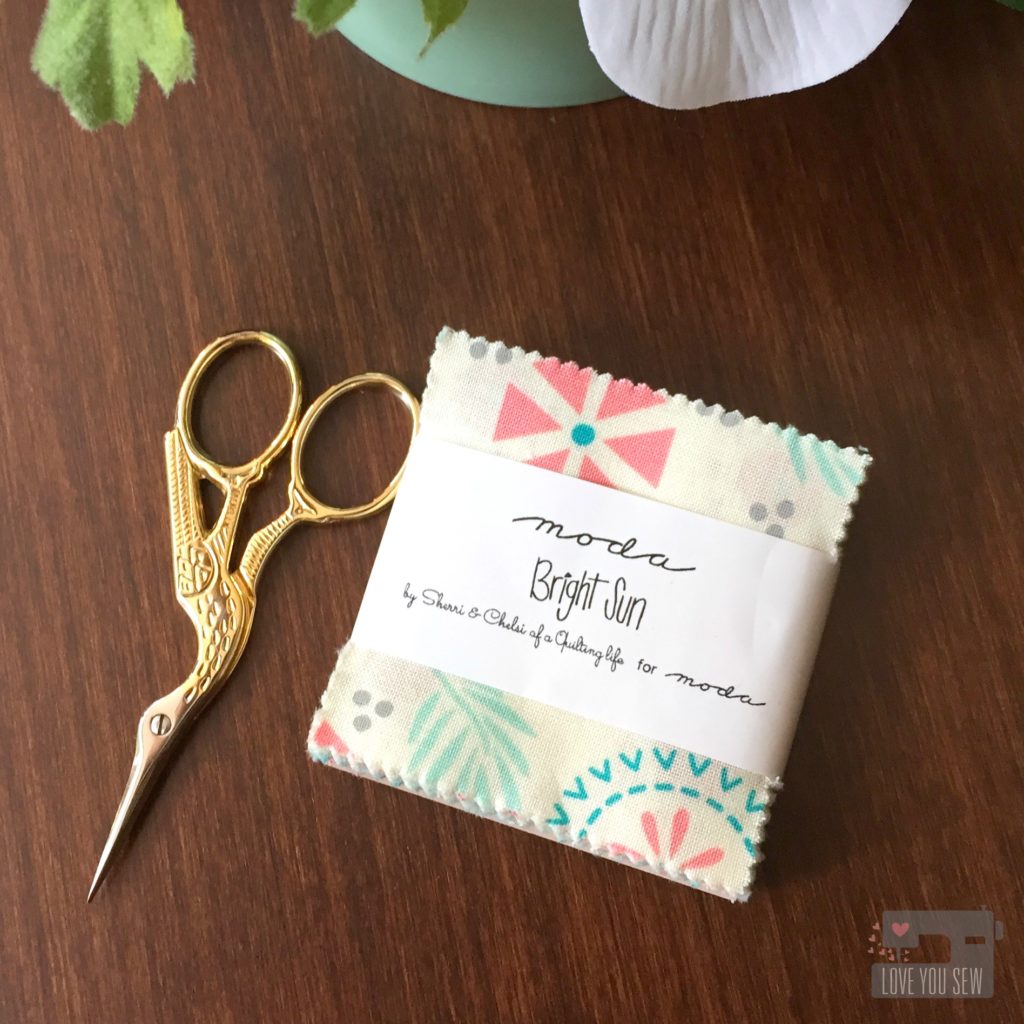
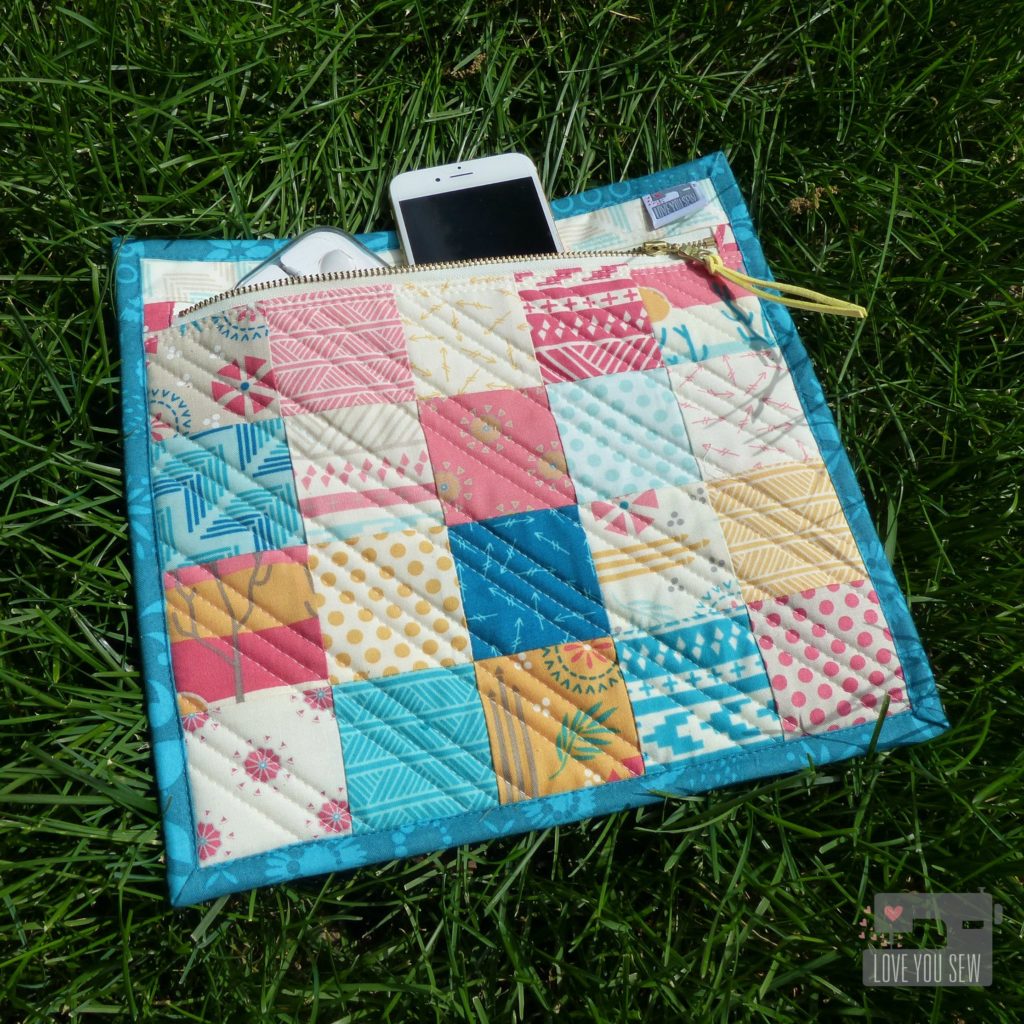
I went the mini-charm route and used Bright Sun, also by Sherri, for Moda Fabrics.  With the unofficial start of summer this week, I thought these fun and cheery fabrics were perfect for the pouch.

Charmpack

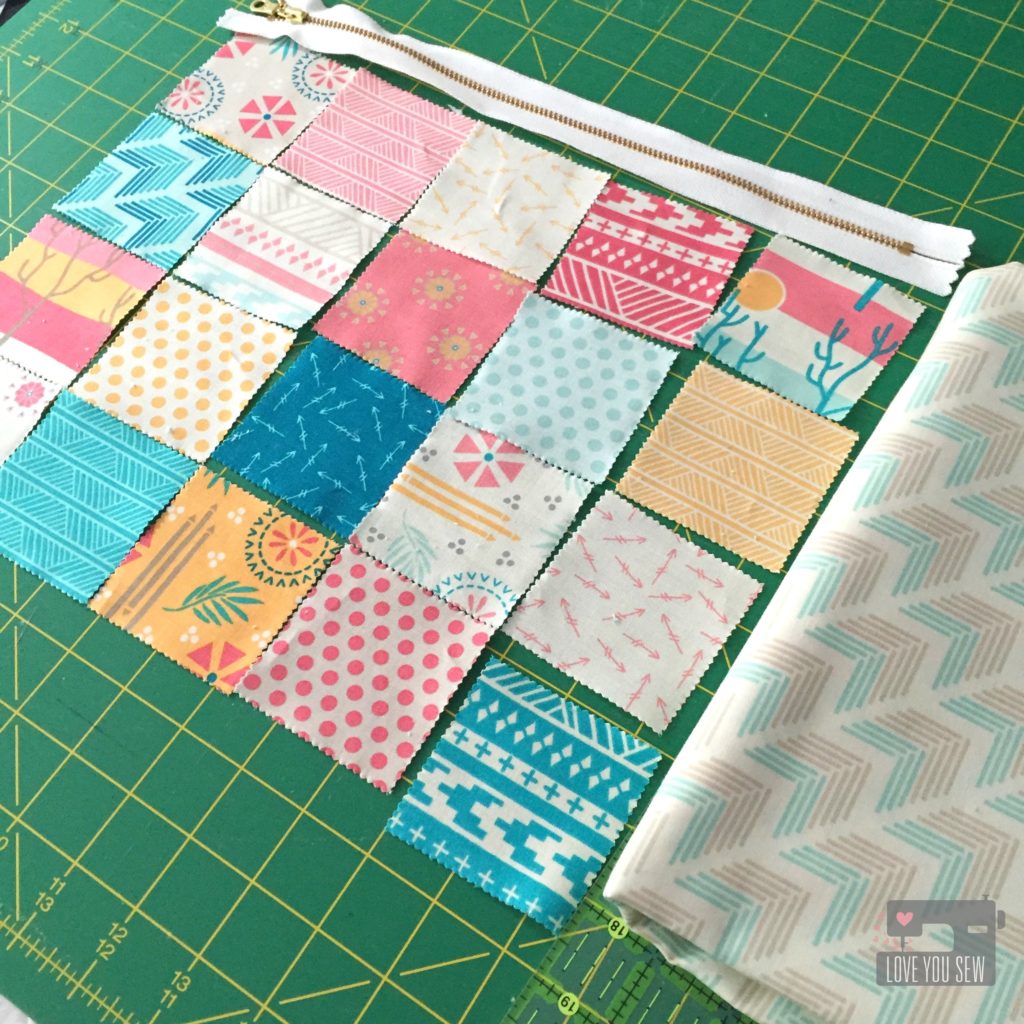
This charm pack had 42 prints which is more than enough for two large pouches.  (I have plans to make a second one as a future gift!)  After a little playtime, I settled on this arrangement and had the Dusk on Bisque print already in my stash.  So I used that for my backing, linings, and zipper top.

Layout

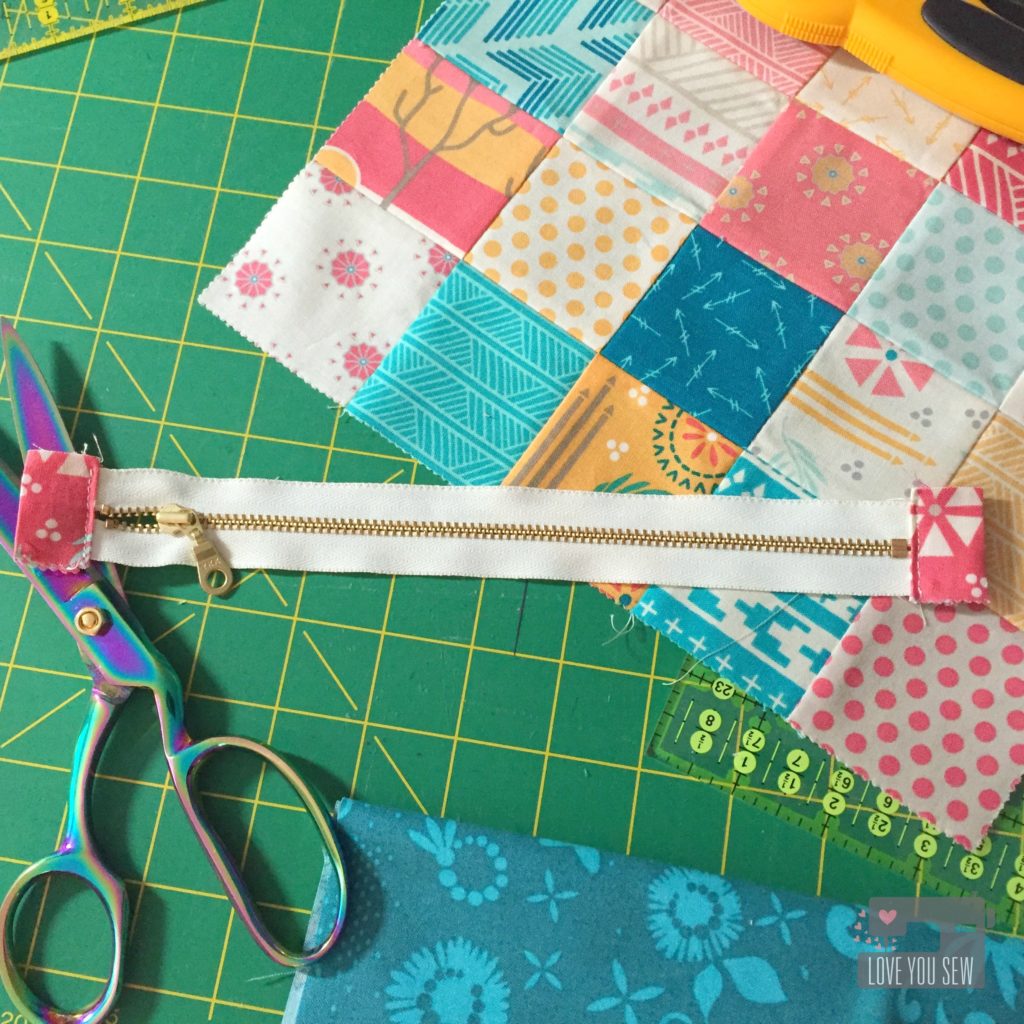
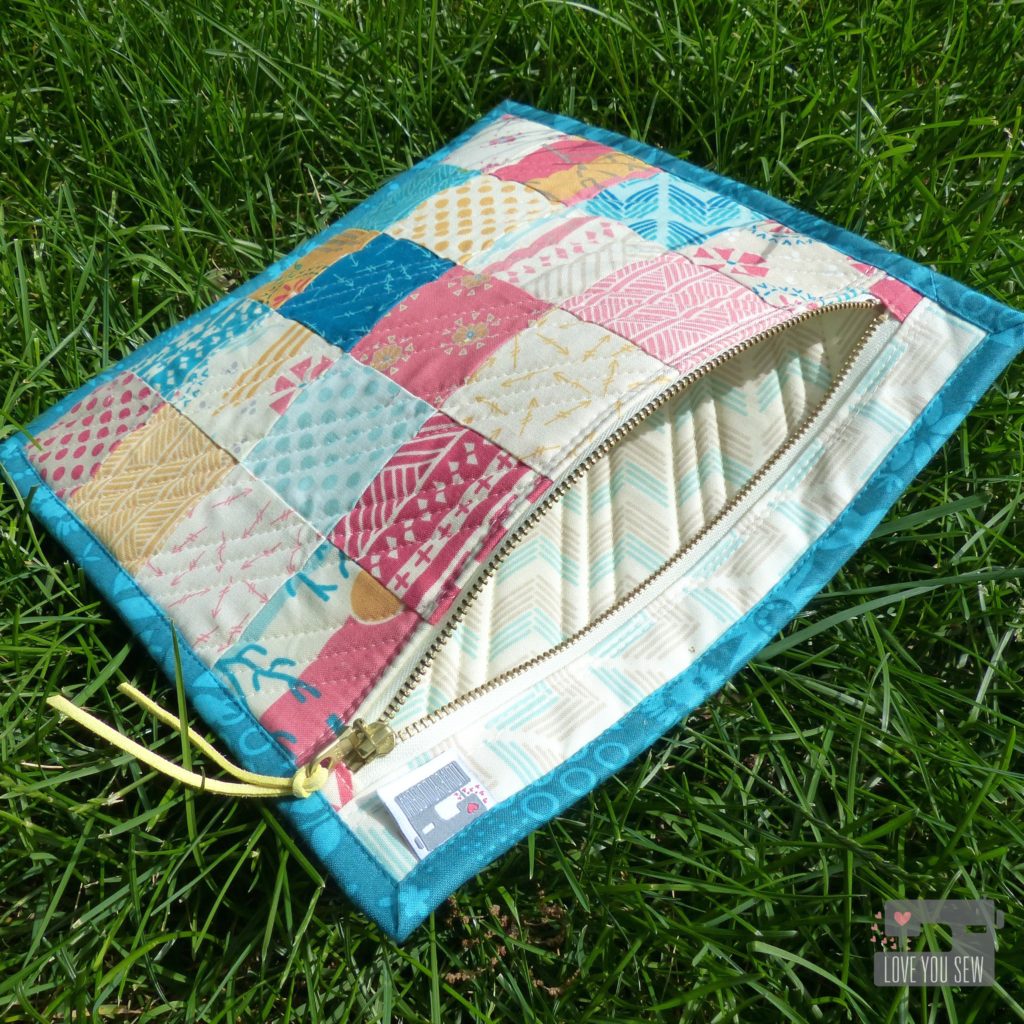
For this pouch, I thought I would have a little fun and add a metal brass zipper for some flare.  I used a 10″ metal one.  This length is a little short for the pouch, so I needed to add tabs on both ends to account for it.   I cut a mini-charm square in half to make each tab.

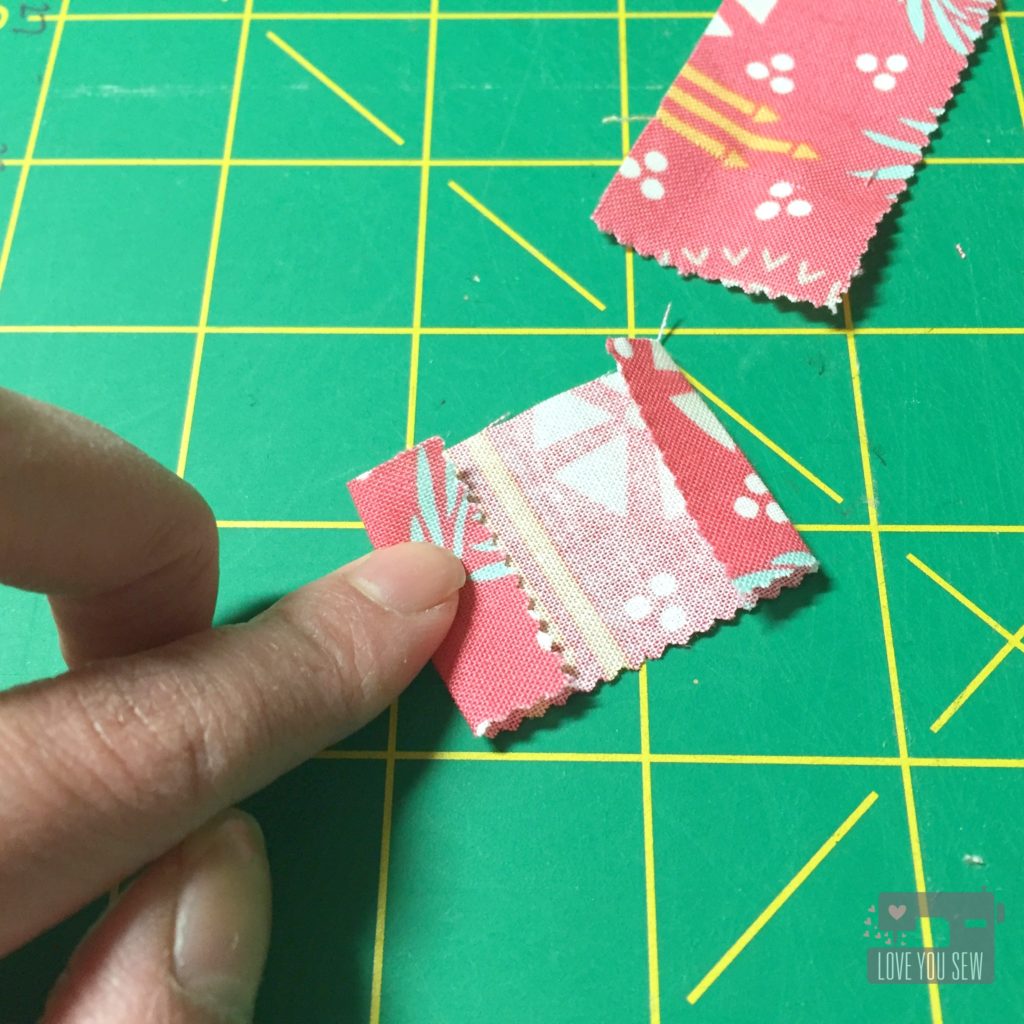
Zipper Tabs

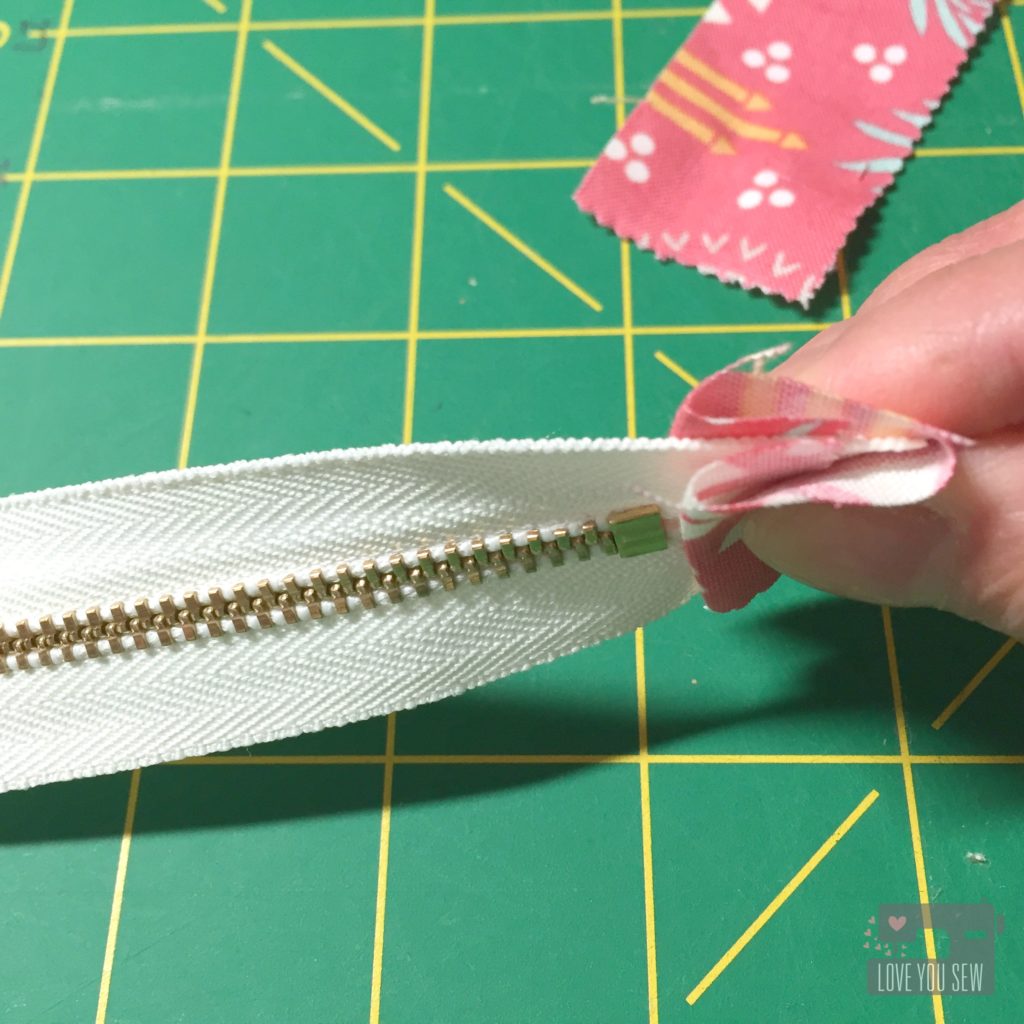
With each half charm, I folded down both short-ends of the tabs by 3/8″ and then in half to sandwich around the zipper.

Zipper End

I sewed on the tabs with a zipper foot, making sure to get both the top and bottom of the tab sandwich.

Zipper Tabs Complete

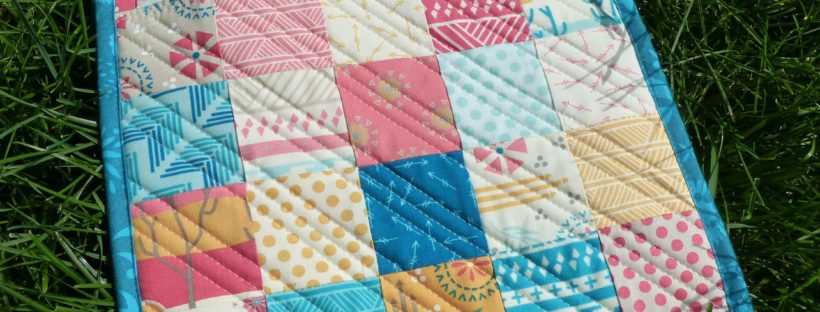
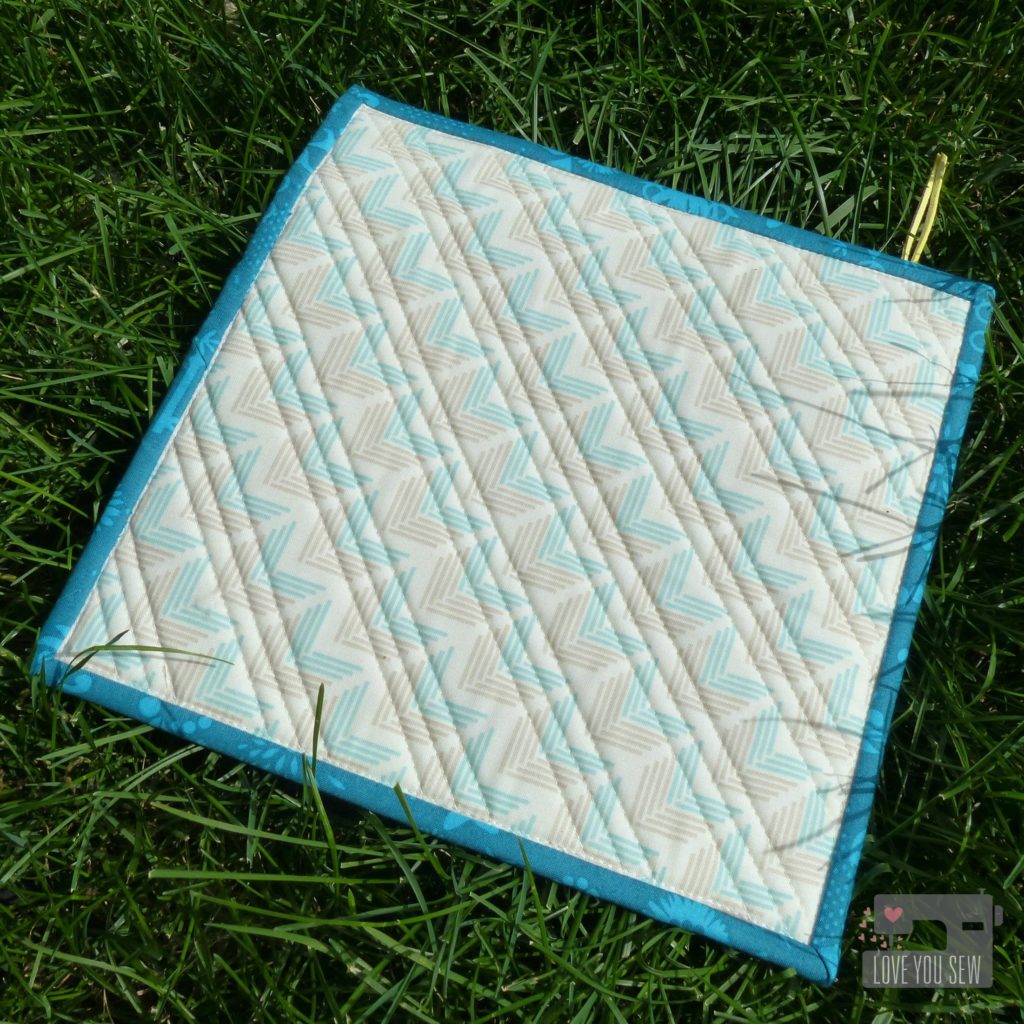
For the quilting, I used trusty Aurifil 2021 to sew straight diagonal lines on the front patchwork and on the backing.  The simple straight lines keep with the fun modern fabrics.  With such a small piece of quilting, I used some basting spray to keep all the layers from shifting.  It makes for faster work than pinning 😉

Back Profile

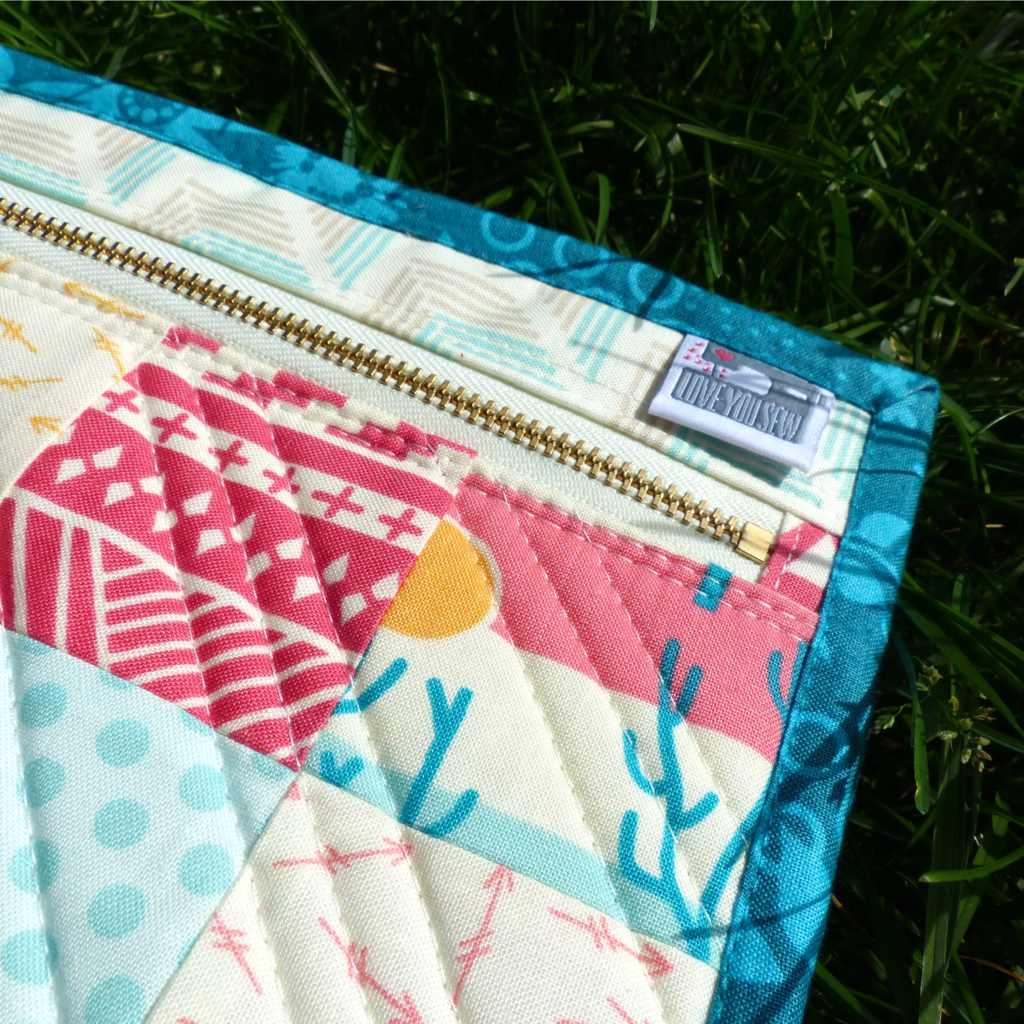
As I machine bound the pouch with Alison Glass‘s Corsage fabric, I added one of my labels in the front which can double as a key ring fob for more versatility.

Label Close Up

On the zipper, I omitted the fabric pull and instead, used some faux suede cording I had on-hand.  I thought the additional punch of yellow worked with the pouch better than more of the same background and interior fabric.

Interior

I love the structure and feel of the quilted Soft and Stable which make for a nice durable pouch.  It is perfect for personal electronics and/or for books you want to carefully protect.

Front Profile

The simplicity of this project and use of scraps makes it a MUST sew for any traveler this summer!  Do you have any fun vacation destination(s) coming up?

Don’t forget to visit all of the Simple Zipper Pouch Sew-Along bloggers below for more ideas:

Tina from Emily Ann’s Kloset
Jessee from An Art School Dropout’s Life
Erin from Why Not Sew?
Kitty from Night Quilter
Leanne from She Can Quilt
Vanessa from Lella Boutique
Amanda from Jedi Craft Girl
Sherri from A Quilting Life
Cristy from Love You Sew (you are here)
Leslie from Seasoned Homemaker
Tiffany from Tiny Seamstress


Happy Sew Along,

Cristy


This post was sponsored by Fat Quarter Shop and I was compensated for time and materials.

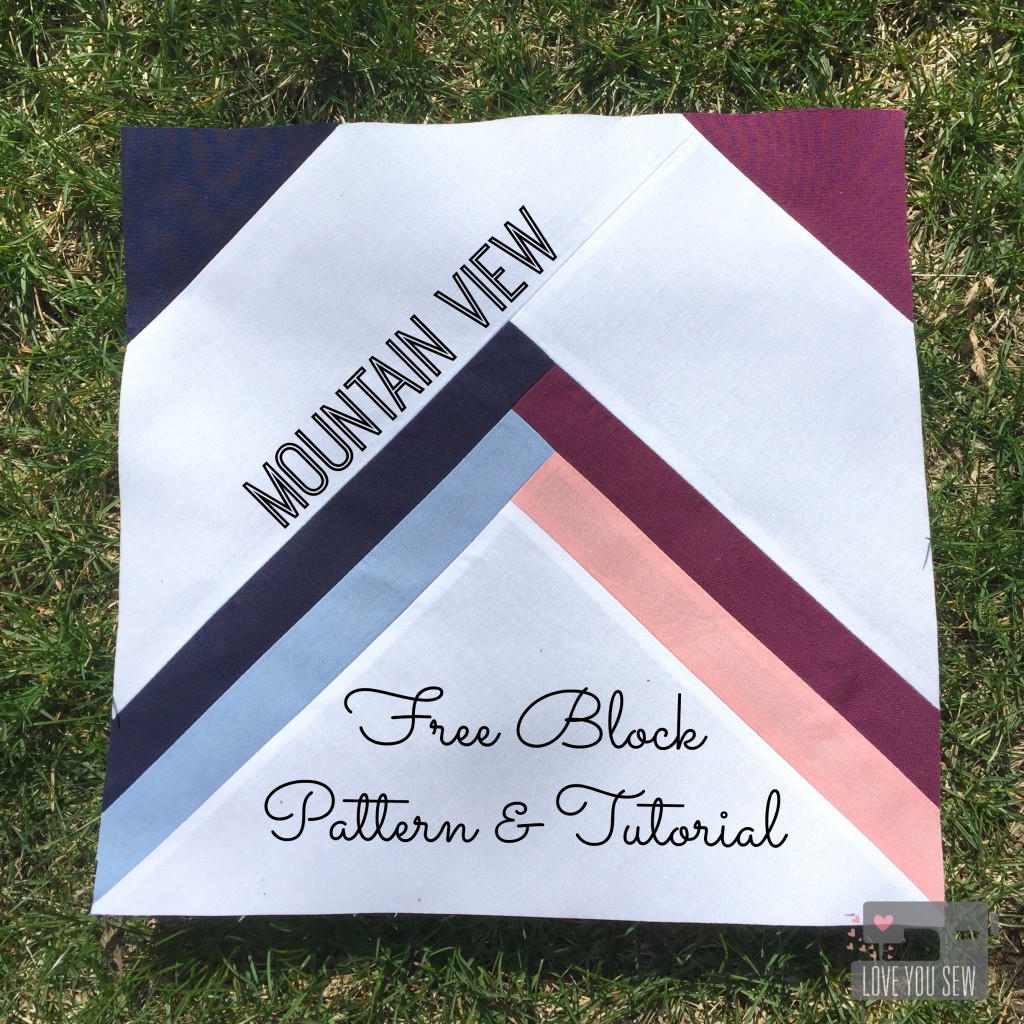
Mountain View – 2016 Paintbrush Studio New Block Blog Hop

Mountain View Title

Welcome to the 2016 Paintbrush Studio New Block Blog Hop!  During the next three days, you will see a flurry of uniquely designed 12″ x 12″ (finished) quilt blocks.  The best part?  These are all FREE patterns!  For a full list of participants, please visit the host of each day’s hop:

Monday, March 28th – Yvonne @Quilting Jetgirl

Tuesday, March 29th – Cheryl @Meadow Mist Designs

Wednesday, March 30th – Stephanie @Late Night Quilter

Ocean Sunrise Palette

The challenge with this blog hop, was to use at least 3 colors of Painter’s Palette Solids in the Ocean Sunrise bundle.  You can find all the details of the chosen colors here.  Do you use your quilts on the beach or by the water?


Mountain view Block

This call to design a new block was indeed a challenge for me.  I usually always have a design idea that’s been brewing in my head.  However, this time I was drawing up blanks.  I played with many ideas until I saw a sun catcher with this similar design.  It really inspired me with it’s simple lines like ones in Log Cabin style quilts.  But this block is set apart by it’s angles and the negative space produces a great chain design.

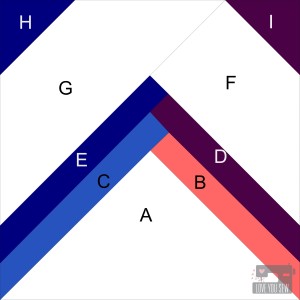
Mountain View Block Labeled

v2

As with all sewing projects, please read through full instructions before beginning. 

Cutting instructions:

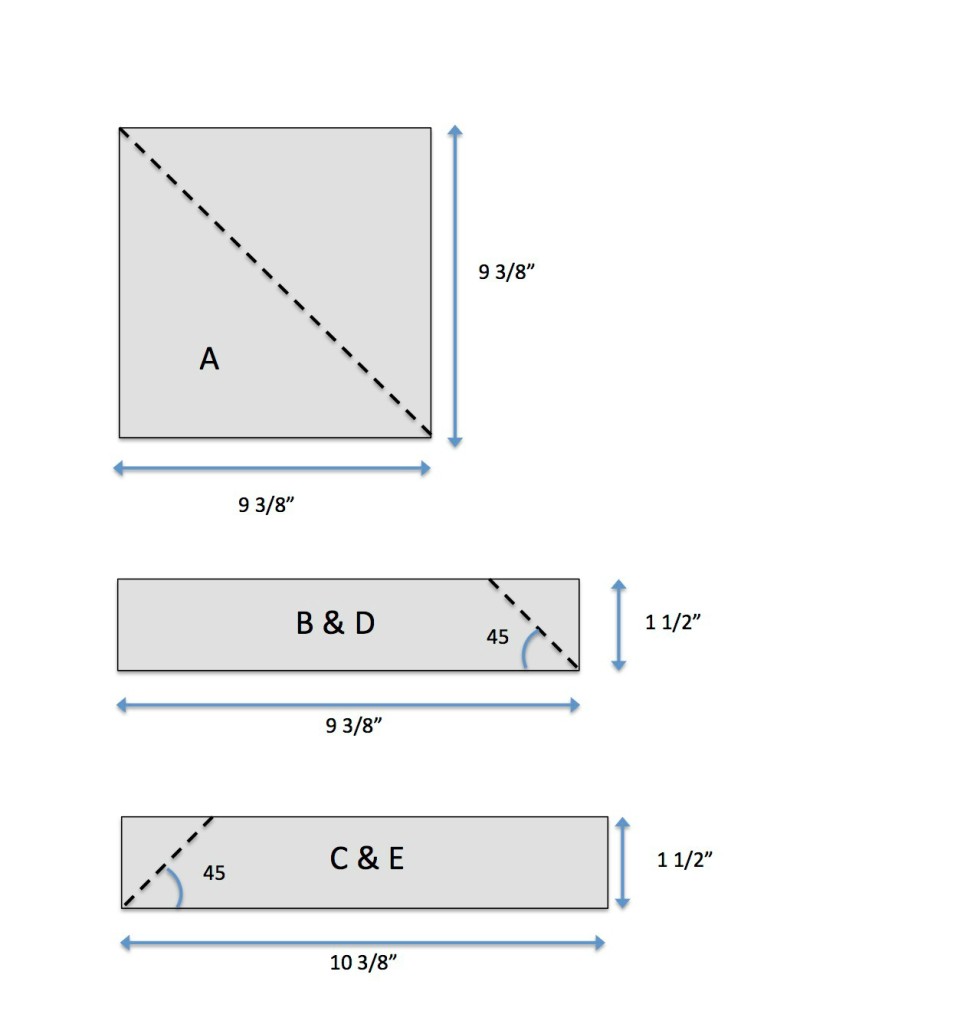
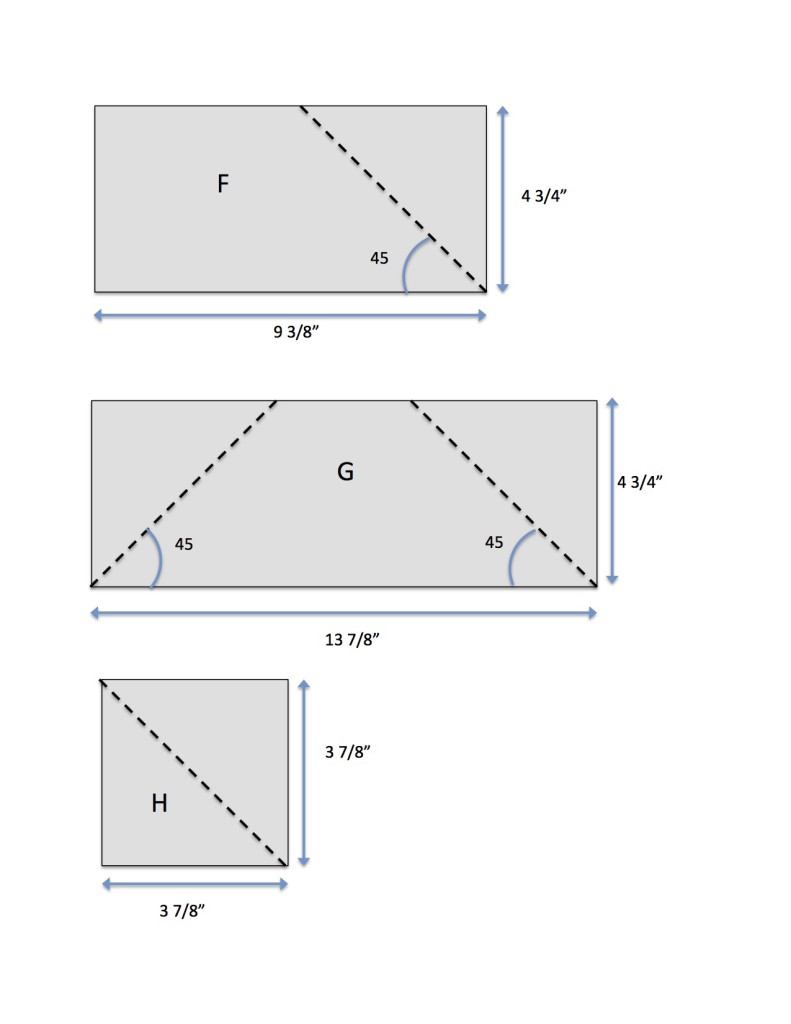
Below are illustrations of every piece of the block.  The dotted line represents where you cut.  A large quilting rule with 45 degree angles is required.  Please see block illustration above for reference.  TIP:  Check and double-check your angle placement on printed fabric before cutting.a


MV cuttingpiecing Instructions

Please note a 1/4″ seam allowance

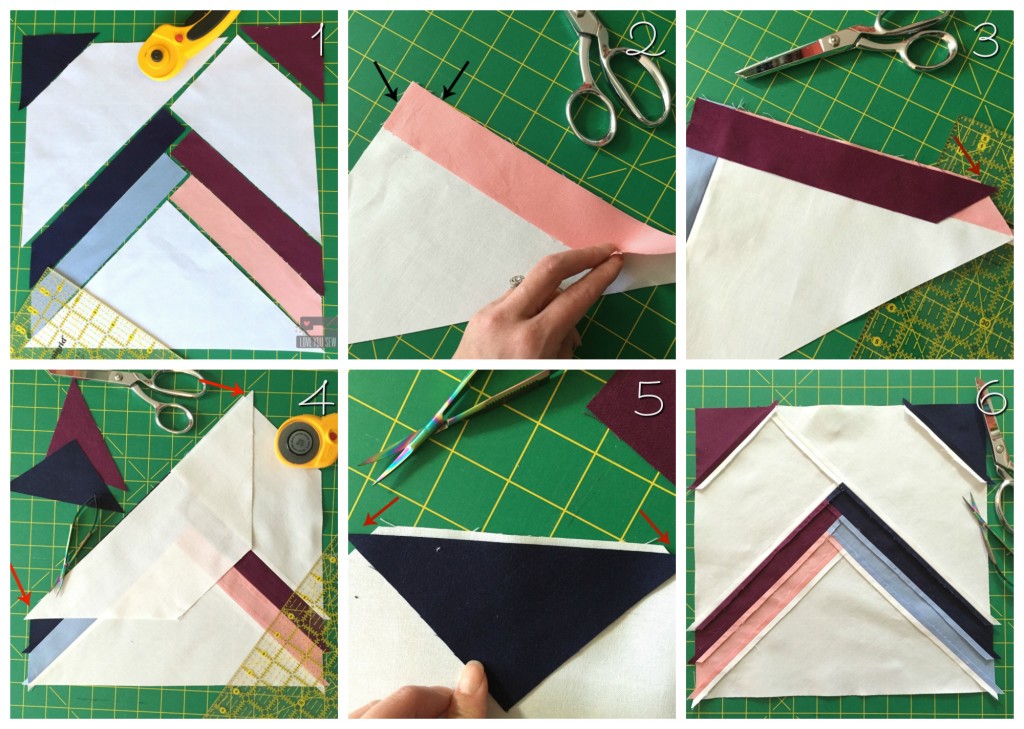
Mountain View Piecing Collage

  1. Layout the block with your intended fabric placement
  2. Line up the short edge of piece B to piece A right-sides together (RST) and sew down the long side. Repeat for piece C but on the opposite side.
  3. Line up the short edge of piece D to ABC.  You should have a 1/4″ overhang off the block. Repeat for piece E of the opposite side and then add piece F.
  4. Line up the long-side of piece G to ABCDEF.  You will have 1/4″ overhangs on both sides of the trapezoid.
  5. Line up the long-sides of H to each corner.  You will have 1/4″ overhangs on both sides of the triangle.
  6. Make sure to press all seams out as you go and you will have a nice flat back as shown.

Trim the block to 12 1/2″ square.

Additional Quilt variations:

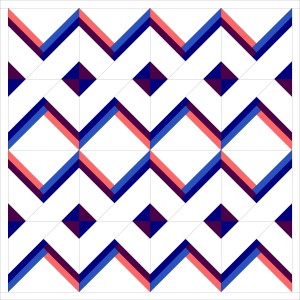
With the play of colors and negative space, there are quite a few different ways you can lay this quilt block.  Here a just a few other ideas.

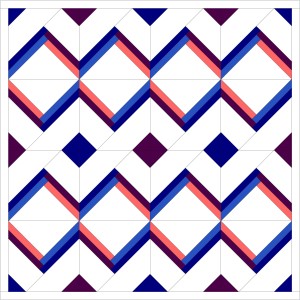
v5

This placement puts the “chain” in the center of the quilt and you can play with the smaller triangle (H) to get solid squares in between.

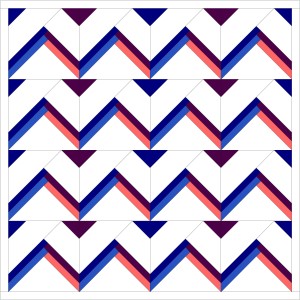
v4

This variation plays with the chevron you can create.  Leave the smaller triangles (H) colored, and you get an arrowhead look or leave them the same color as your background to let the chevron stand on it’s own.


Visit Painter’s Studio’s blog, Inspired by Fabric and/or Quilting Jetgirl (two separate giveaways) to get your chance to win a whole HALF-YARD bundle of Ocean Sunrise!!! {Edit – Giveaway closed}

IMG_4386

 Don’t forget to get additional FREE quilt block designs and tutorial by visiting the following:

Host: Yvonne @Quilting Jetgirl

Jess @Quilty Habit

Silvia @A Stranger View

Cristy @Love You Sew

Kelly @Quilting It Out

Renee @Quilts of a Feather

Bernie @Needle and Foot

Terri Ann @Childlike Fascination
Chelsea @Patch the Giraffe

Mary @Quilting is in my Blood

Diana @Red Delicious Life

Sarah @123 Quilt

Thank you for visiting and I hope you get to try out this block along with all of the others on the 2016 Painter’s Studio New Block Blog Hop!

Happy Stitching,

Cristy


This blog hop was sponsored by Painter’s Studio.  The quilt design, tutorial and all opinions are original and my own.

Hawthorne Threads Roam Fabric Blog Hop

blog hopWhen Hawthorne Threads asked me to participate in this blog hop for Roam, I just about jumped out of my seat!  I had the pleasure of working with some of their digitally printed fabric for my niece’s nursery bedding so I already knew just how lovely this fabric would be.

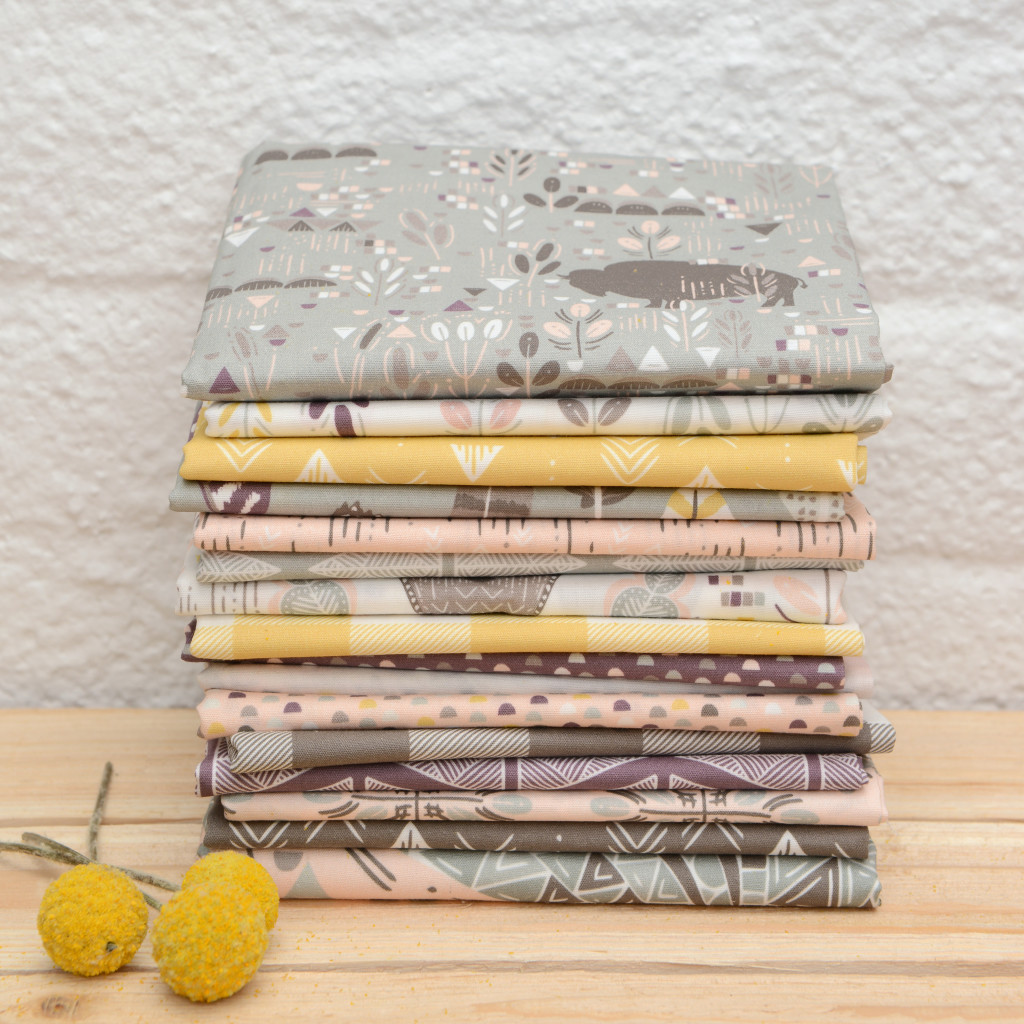
Roam is a soft, dreamy rustic collection in both a Dawn and Dusk palette.  I tend to lean toward blues when I select fabric, but for some reason I couldn’t resist playing with the Dusk fabrics.  There is something about the earthly yellows, purples and pinks that is just so incredibly soothing…

I Love You Sew-4

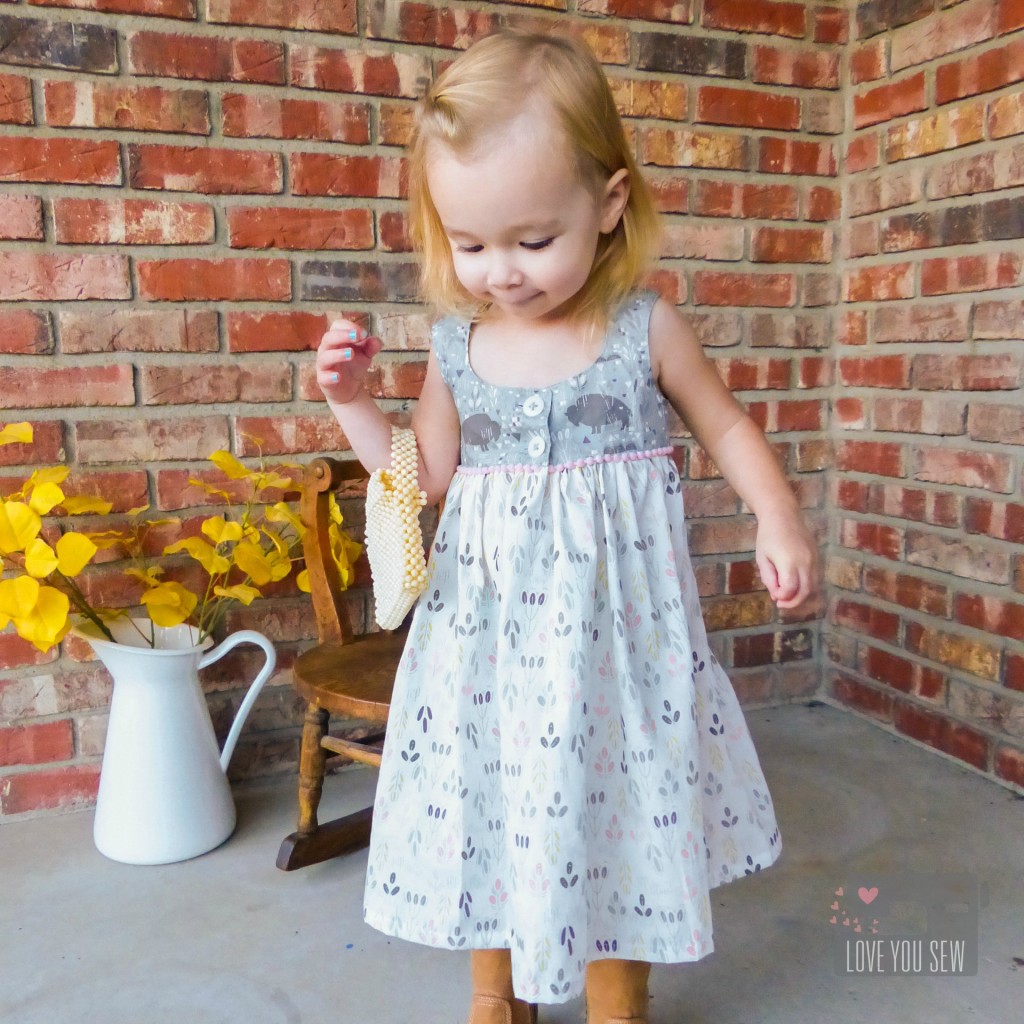
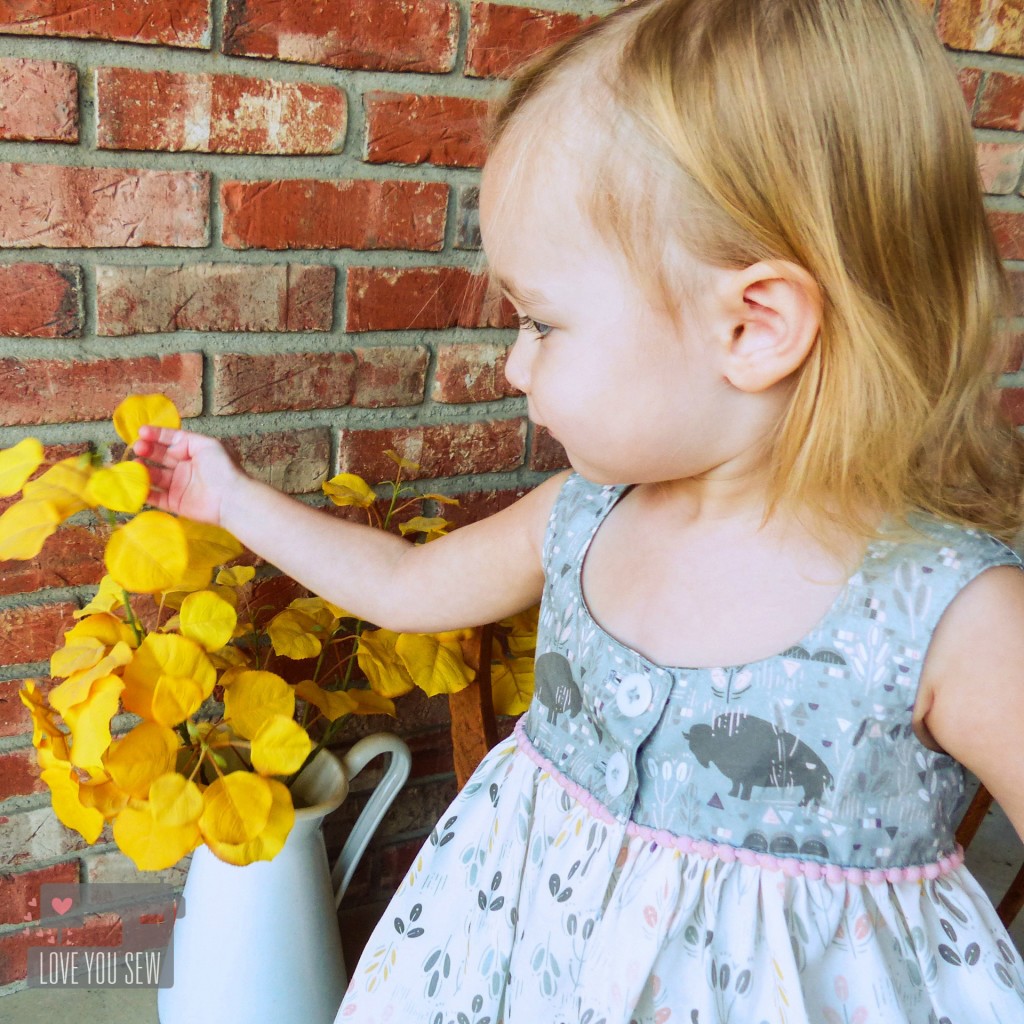
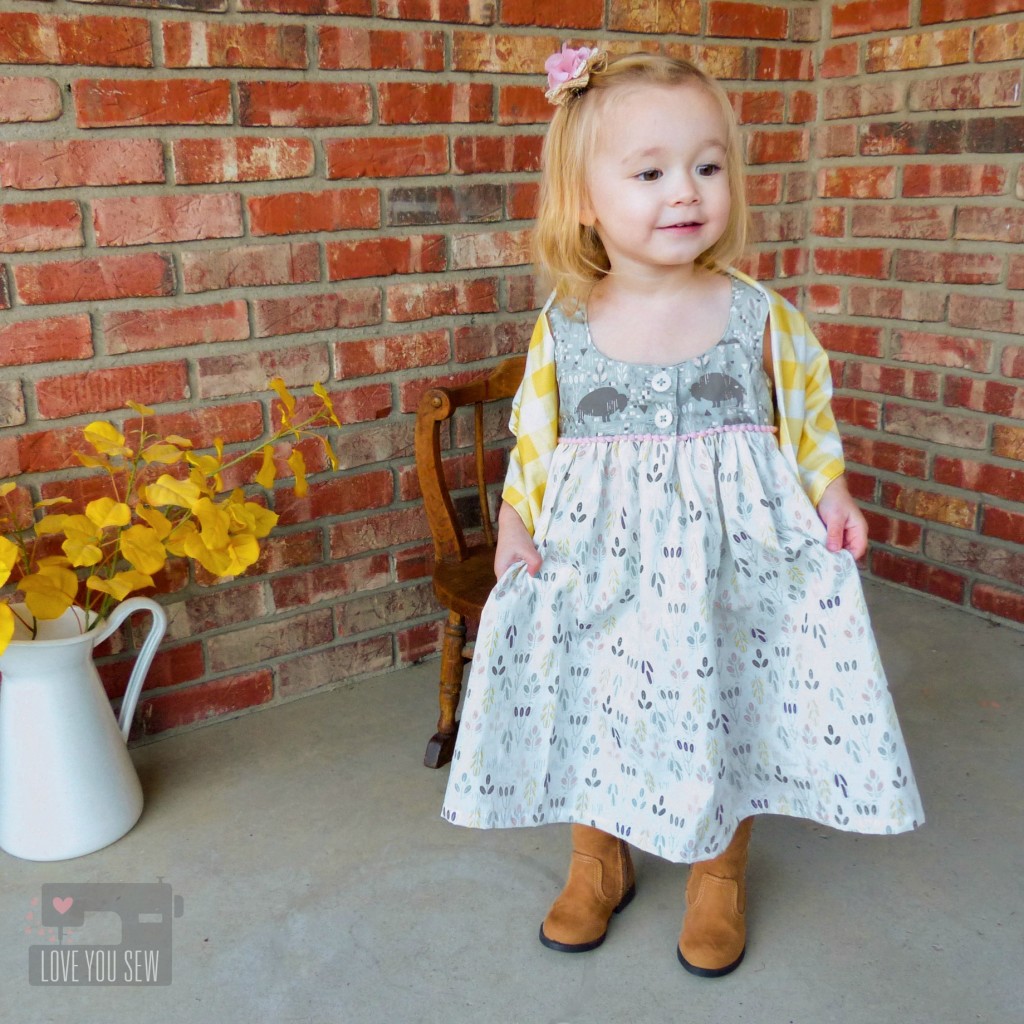
I selected The Plains in Sage and Prairie Flowers in Dusk to make the Desert Rose Dress by Caila Made.  This is such a cute dress pattern for toddlers and the Roam fabric was just a perfect playful fit for the design.

I Love You Sew-1

With the contrasting top and skirt, I couldn’t help but add a little extra pink pom-pom action….because…who can resist, right?!?  If you have not worked with pom-pom trim before, I suggest basting it in before you attached the top to the skirt.  It makes it MUCH easier to attach and stay even as you sew!

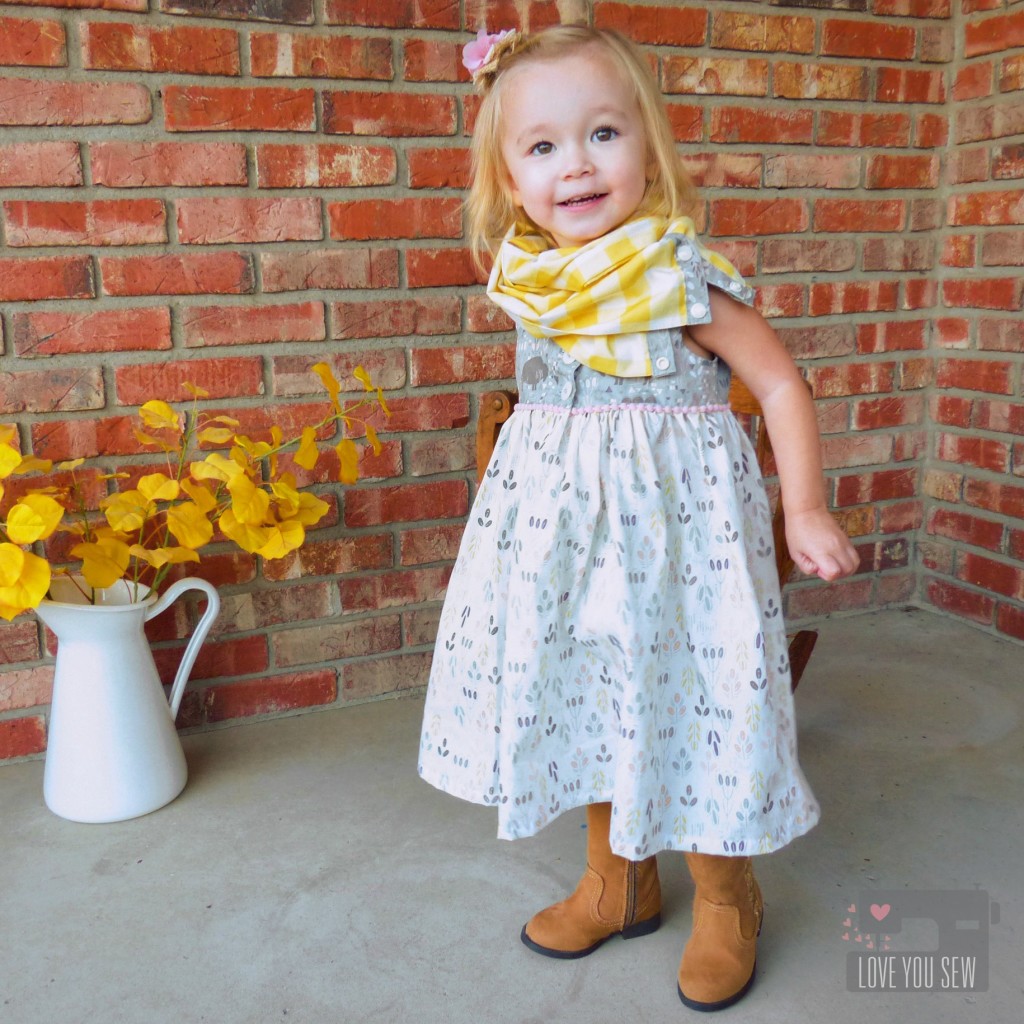
I Love You Sew-2Along with the dress, I made a Side-Snap Infinity Scarf.  The Buffalo Plaid in Honey is such a gorgeous coordinate.  I love how it picks up the yellow from the skirt and adds a hip stylish look for a little one.  The best part is the side snap placket which allows you to wrap the scarf without having to slip it over those big heads 😉

I Love You Sew-3You can also play with how you attach the scarf to change the look.  Snap it right in the middle and fold it over allows the scarf to work as a caplet.  If you use all the snaps, the scarf can stand up better to ensure full neck coverage on chilly days.  If you leave the snaps undone, you get a cute little shawl as shown.  Now who doesn’t love a multi-tasking accessory?!?

SideSnapScarfTutorial

To make the Side-Snap Infinity Scarf:

  • Use 1/3 – 1/2 yards of 42-44″ wide main fabric (depending on how much volume you would like.)
  • Fold the fabric with right sides together and sew down the length creating a long tube.
  • Pull the fabric so right sides are facing out and press
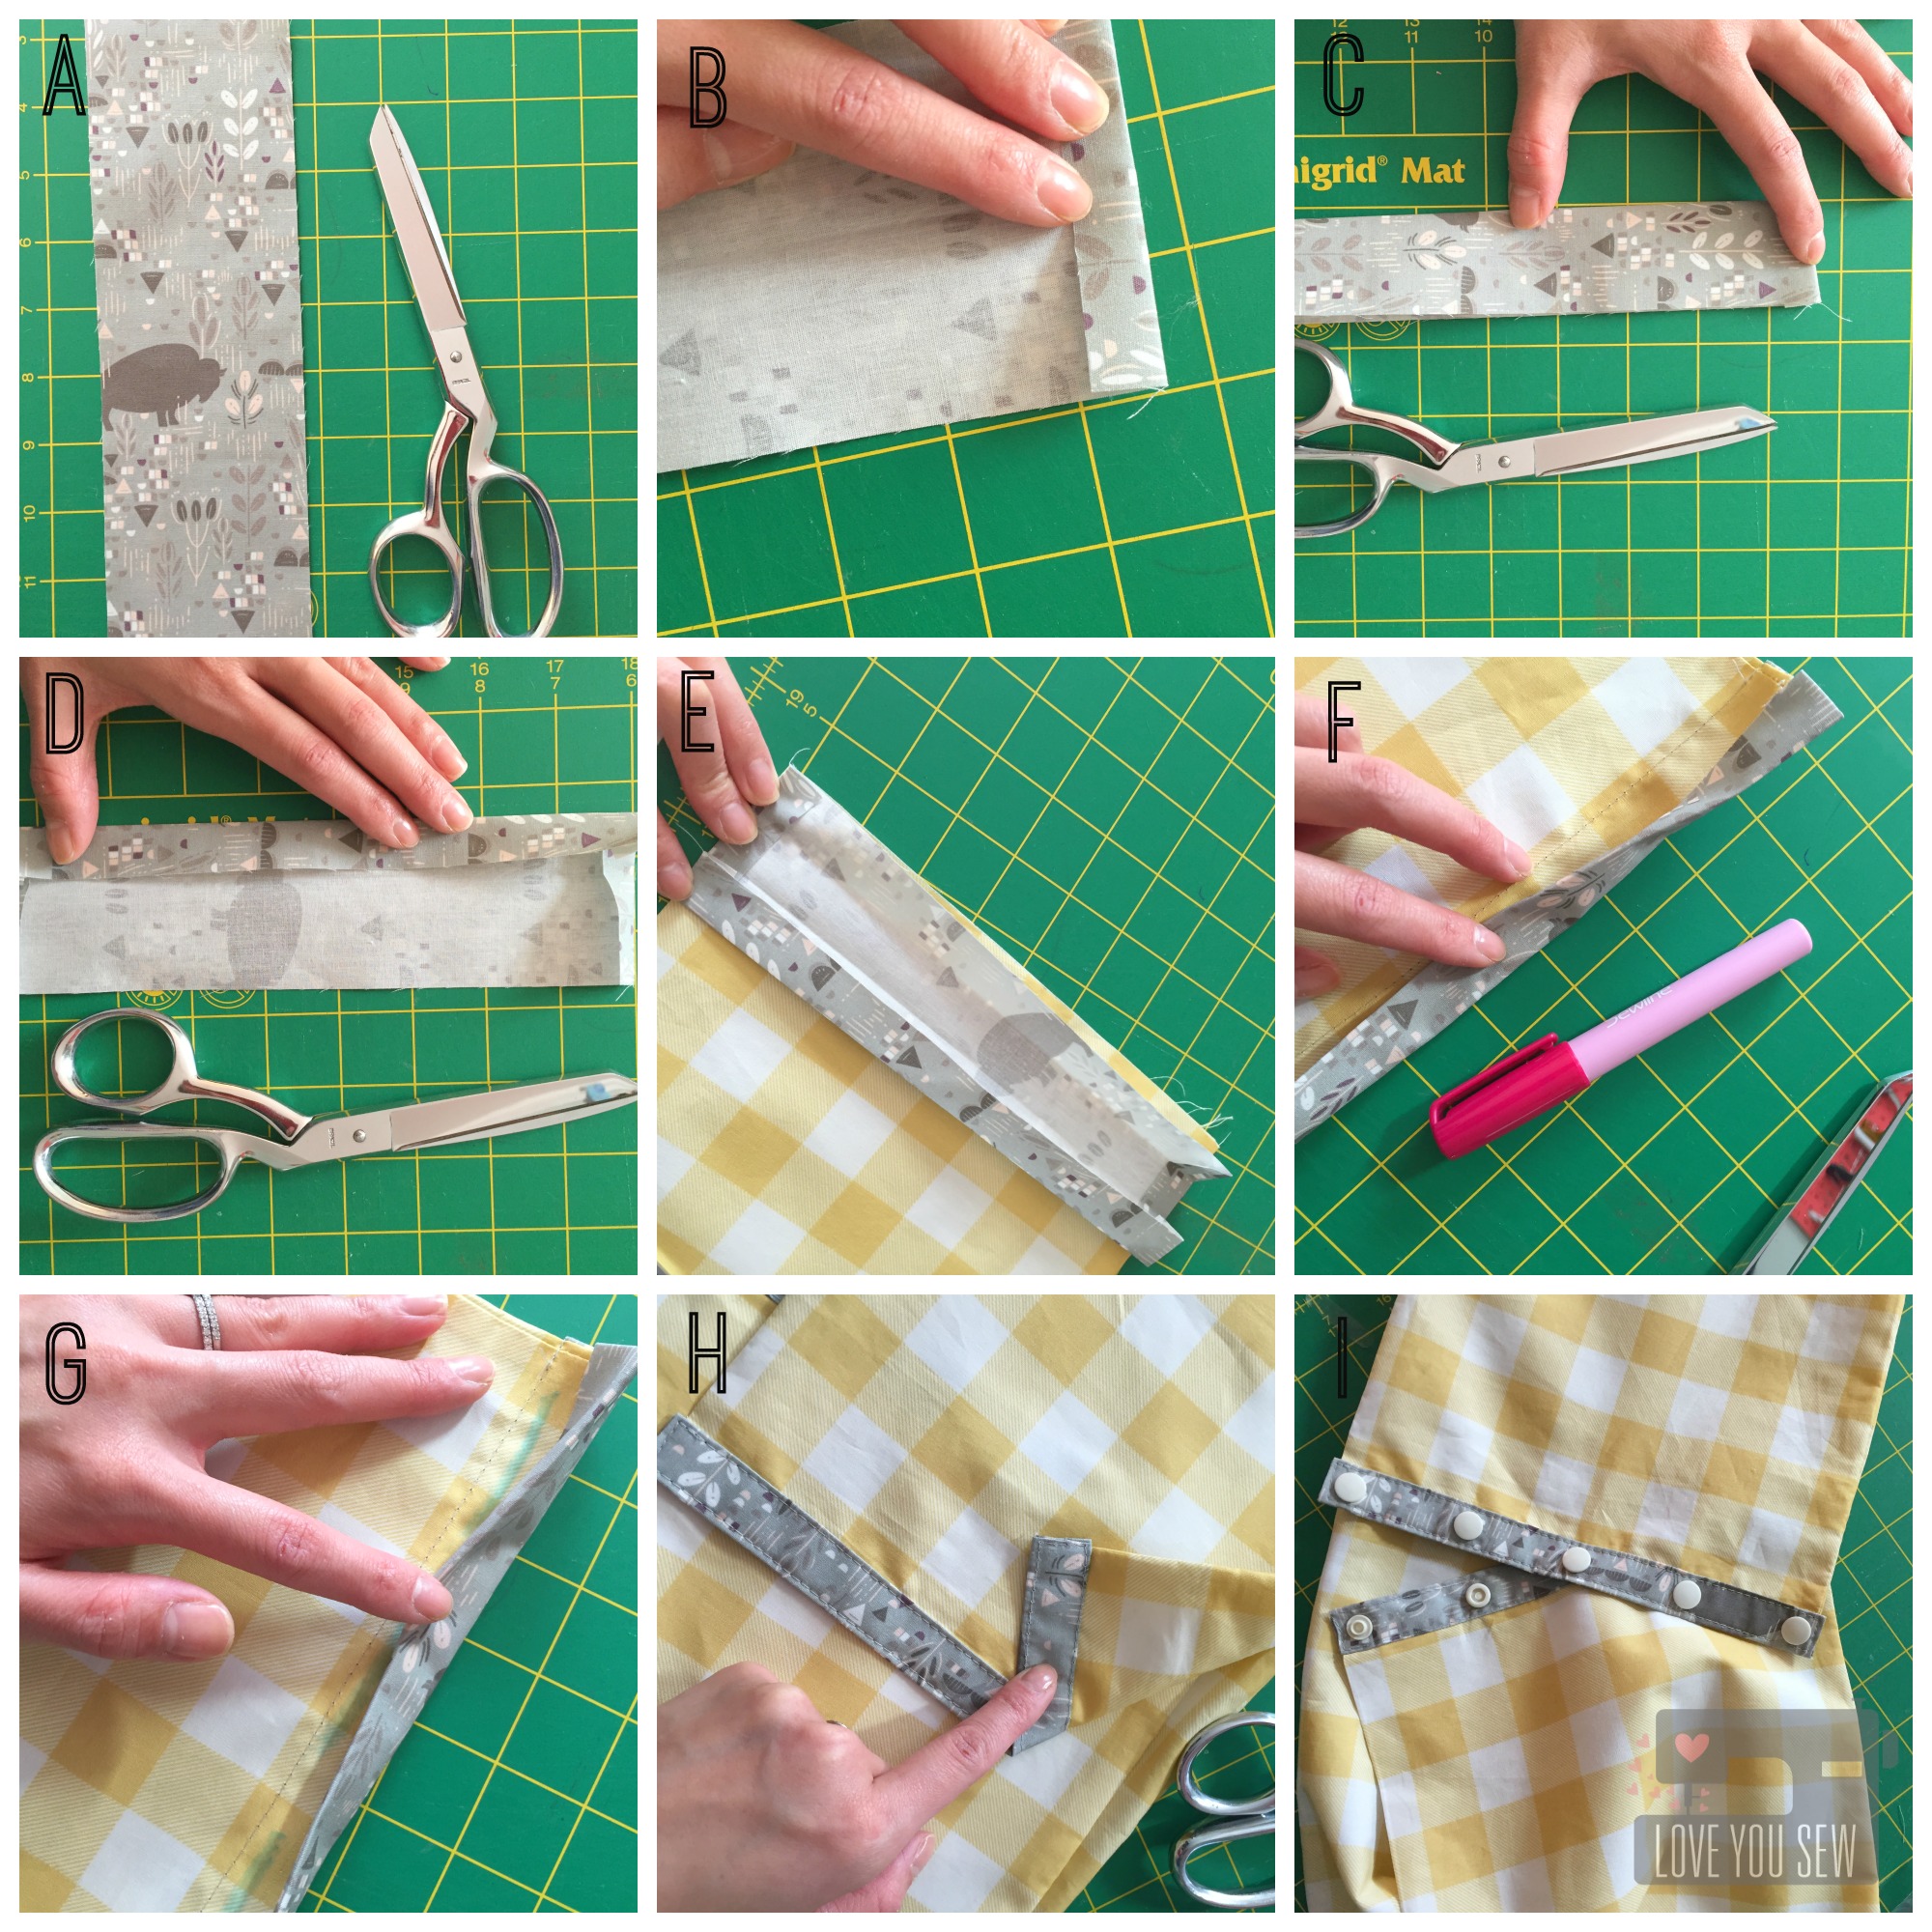
  • For the placket – {A} Take the accent fabric, cut (2) 3″ x 10″ strips (if using 1/2 yd for main fabric) OR cut (2) 3″ x 7″ strips (if using 1/3 yd for main fabric)
  • {B} On the short sides of the accent strips, fold a 1/2″ hem and press on both sides
  • {C} Fold in half length-wise and press.  {D} Open and fold lengthwise again but match the sides to the center line.  Press and make sure you keep a nice rectangle shape with sharp corners.
  • {E} Attach the placket by sewing in the the first crease of the placket closest to the end of the scarf tube.
  • {F} Flip the scarf over and sandwich the open end of the main fabric tube in-between the opening of the placket.  Top-stitch all around with a 1/8″ seam allowance {H.}  Repeat for the other side of the scarf. TIP: Use some washable fabric glue to keep the placket in place as you top-stitch
  • {I} Add plastic snaps such as these KAM ones by marking 5 sets approximately 2 1/4″ apart (for 1/2 yd scarf.) *Yes, I know that one left snap was incorrectly attached, but I didn’t realize it until all the pictures were already taken. It’s been fixed since 😉

Dusk Giveaway Bundle Image

***Giveaway is closed***  Now who’s ready for the giveaway??? Comment with how you would like to use this Dusk color-way for a chance to win the entire fat quarter bundle!  This is open internationally and a winner will be announced once the blog hop is complete.  Make sure to visit everyone on the hop for beautiful ideas and additional chances to win this gorgeous fabric!!!

The complete Hawthorne Threads Roam Blog Hop Schedule:
Tuesday, December 1st – Fabric Mutt
Wednesday, December 2nd – Coffee + Thread
Thursday, December 3rd – Love You Sew
Friday, December 4th – Olivia Jane Handcrafted
Saturday, December 5th – Hawthorne Threads


12/15/2015 Update – Randomly Selected Winner is  Veronique Oudard!  Congratulations!!!


Hugs & Stitches,

Cristy


***The blog hop was sponsored and fabric was provided by Hawthorne Threads.  All opinions  are my own and have not been influenced by outside parties.

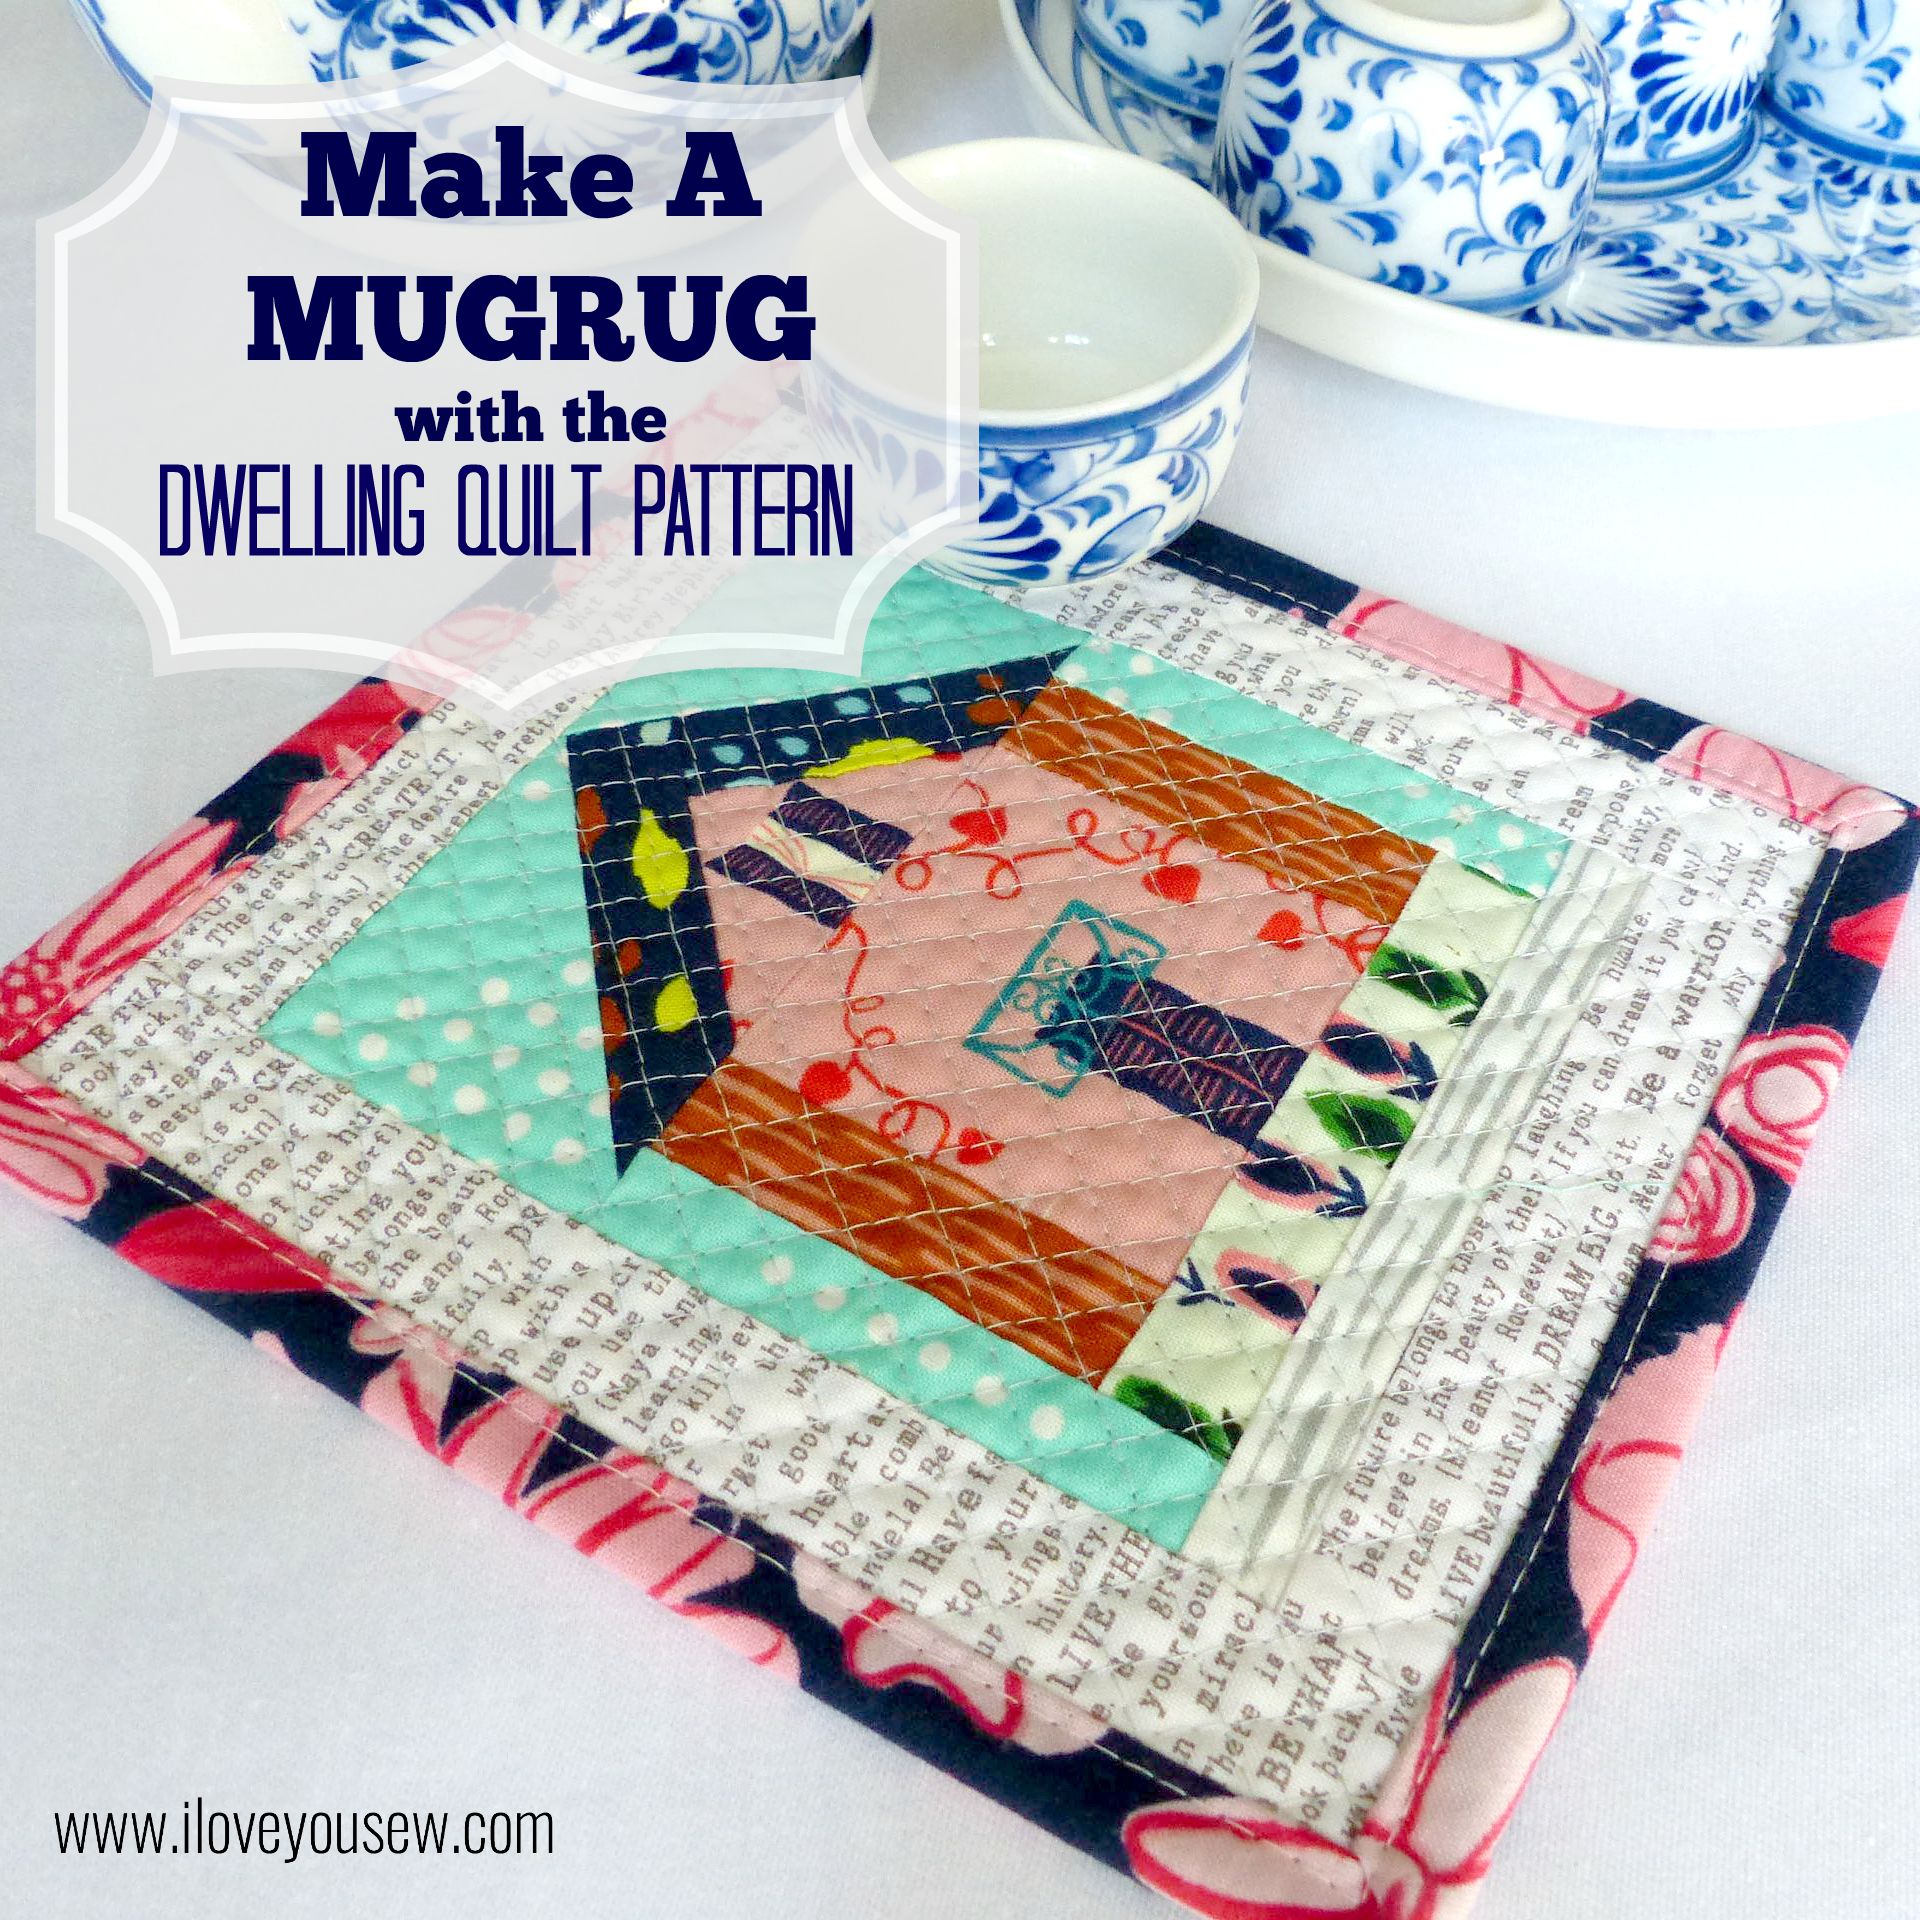
Make a Mugrug from the Dwelling Quilt Pattern

P1050776

When Holly Gets Quilty asked for pattern testers for her newest Dwelling Quilt pattern, I couldn’t help but get involved.  I first became familiar with Holly’s patterns through her Squash Blossom pattern I used in the Squash Blossom Bouquet mini.  She makes the most gorgeous quilts and I love how her patterns are so nice and clean…as well as beginner friendly. And this paper-piecing pattern does not disappoint!

IMG_1141

When I received the pattern, I decided to first make the smaller of the two blocks offered.  It measures 4 3/4″ x 5 3/4″ unfinished and I thought it would make for the cutest little mugrug.

IMG_1153

As a single block on its own, I wanted to fussy cut all of the pieces and bring out the literal design to resemble a home.  I dug back into the Cotton + Steel archives and pulled out some Homebody and Hatbox.  These fabrics created the most ideal walls, roof, street and even a little garden!

IMG_1155

1 1/4″ strips were added all around  the block to give a little more area to the block.  I wanted enough room for my larger mugs and even for a little snack 😉  Riley Blake’s newsprint is my favorite text print (out of print, of course…but if someone wants to share any, let me know!) and it goes with the whole house theme, right?

IMG_1156

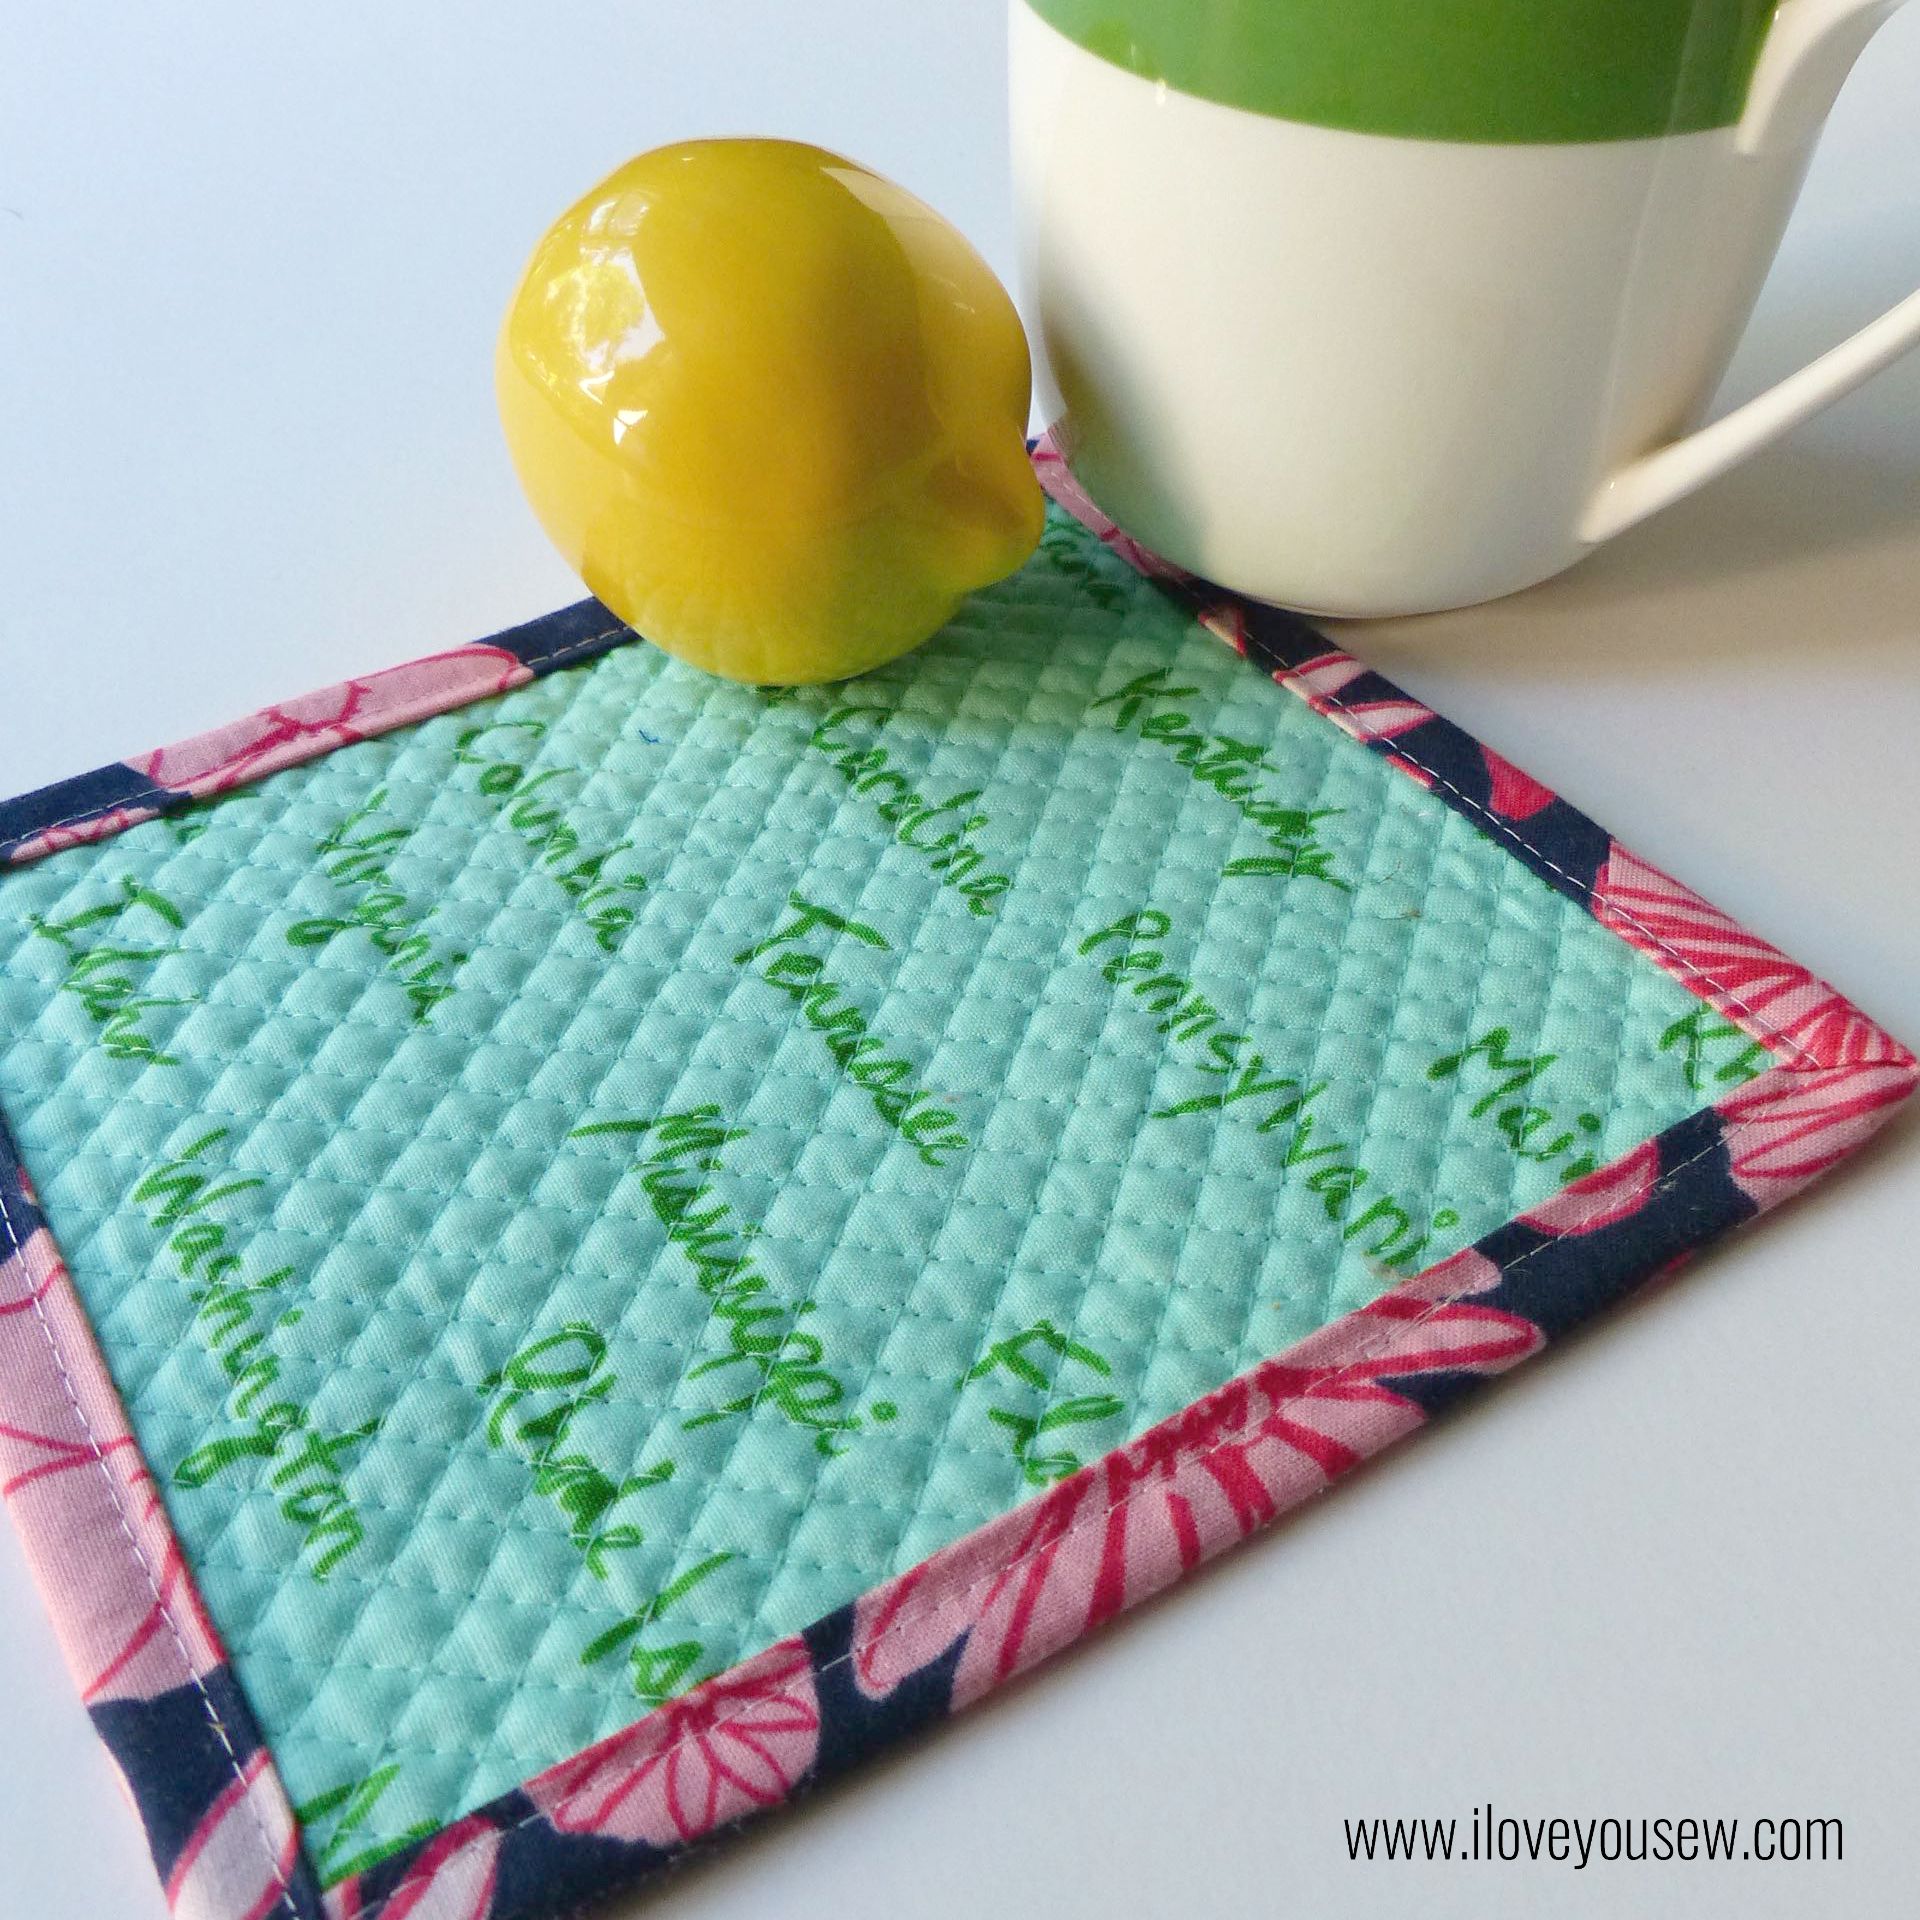
I used a scrap of cotton batting and more Cotton + Steel for the back to complete the quilt sandwich.  Since you know I’m a straight line quilter, I just cross-hatched the mugrug a 1/4″ apart in a diamond pattern with Auriful 2030 and ….

P1050818

To finish, you know C + S had to be using in the binding too.  Since this was such a small project, I used Cut to Pieces glue binding method to secure the binding into place without the use of Wonder Clips.  It was fast and I top-stitched the binding all around.  I can never get even amounts of the back binding with “stitch-in-the ditch” method, so I sewed about 1/8″ inward to help me with my OCD…

This was a nice quick project you could have completed in an afternoon.  Holly’s Dwelling Quilt pattern is simple and pre-cutting the pieces (measurements provided!) will help cut down on quilt time.  Are you ready to make your mug rug?!?

Check out these Instagram hashtags for more inspiration: #DwellingQuilt #HollyGetsQuiltyPatterns


Hugs and Stitches,

Cristy