M7429 Pine Crest Velvet by Love You Sew

Holiday Dressing with Stretch Velvet

Nothing says “Happy Holidays” more than some velvet. There is just something about this fabric that conjures up feelings of wintertime mixed with luxury…especially in deep royal blue. Luckily, it is also one of the hot fabrics of the minute with odes to the 90s still in full fashion swing.

Fabric

The nap of velvet gives the fabric its trademark characteristic. The soft texture lends some weight, which makes it a great fall/winter substrate. With the popularity of velvet, there are a lot of options currently out in the market. There are non-stretch and stretch varieties which is great based on what you would like to make…whether it be a structured blazer, tights or a dress.

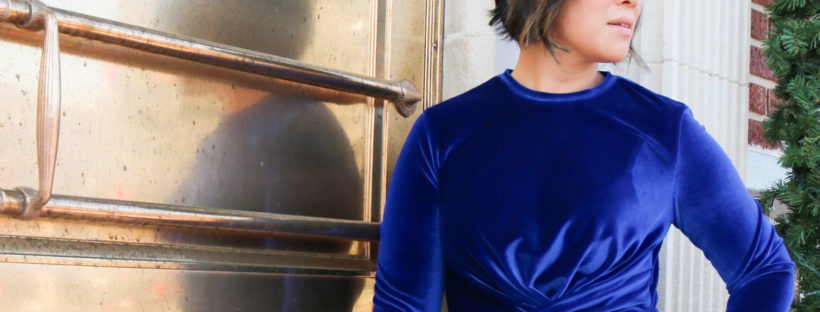
I was able to get this gorgeous Royal Radiance Velvet Spandex from my friends over at Pine Crest Fabrics. When they asked if I wanted to try out one of their velvets, I just couldn’t say no (even with a month full of other sewing commitments.) I knew that this velvet would be special since Pine Crest is a company that specializes in high performance fabrics…and friends, this Royal Radiance did not disappoint. You can find similar fabrics at Fabric.com here.

What makes this fabric incredible is the base cloth. I’ve made a few garments which you can read about here, using other Pine Crest athletic fabrics and I knew the velvet’s “wrong side” would be silky smooth…and it was! The 4-way 10% Spandex stretch made it ideal for a form-fitting dress and it has great recovery – so the dress keeps its shape. Even with the heavier weight of this fabric, it remained cool and breathable which is key when wearing this fabric out to a party.

Velvet Tips

  • Pay attention to the nap. Make sure it feels smooth running down the garment and cut pattern pieces with this in mind…because you know you will want to pet yourself!
  • If you do need to iron, use a towel as a pressing cloth to avoid crushing the pile. (There was hardly any wrinkling with my dress, so I luckily didn’t have to press often.)
  • There is a little mess cutting into velvet. Run a sticky roller on the velvet immediately after your cuts to keep the fuzz at bay.
  • Use a stretch or jersey needle with stretch velvet.

The Pattern

For my holiday dress, I used McCall’s #M7429. Variation B was exactly what I wanted for my stretch velvet. I wanted something more form-fitting, but NOT body-con. (I am not a skin-tight kinda gal.) This front knot and half-wrap design is perfect for camouflaging one of my trouble spots, but is also visually appealing. Only a solid fabric could really show off this design element and using my Royal Radiance just made it SO much better.

No lie…I was definitely tripped up by the knot. I was able to get pretty far with the limited illustrations and instructions known with the Big 4 pattern companies. Luckily, I found this video by Brittany Jones to help guide me through.

These Big 4 patterns also tend to allow more ease into their recommended sizes, so I was a bit concerned on what size to cut. I went with the pattern’s recommendation and feel like I could have probably gone down one size because there is quite a bit of fabric hanging under my arms and into the bust. The shoulders could be cut in 1″ on each side as well. Other modifications I made:

  • Graded out one size in hips down to the hem, including the back pieces
  • Narrowed the sleeves 1″ (folded) at the wrist and graded to the elbow
  • Shorted sleeves by an additional 1″
  • Increased hem by 1.25″
  • Deepened the neckline by an additional 1/4″
  • Tacked the wrap skirt into the knot with a few hand-stitches to keep it straight

What do you think about velvet for this holiday season? There’s still time to make this dress for Christmas or New Year’s!

Happy Holidays!

Cristy


*Fabric for this post was provided by Pinecrest Fabrics. As always, all thoughts and opinions are my own.
Disco Double Zip by Love You Sew

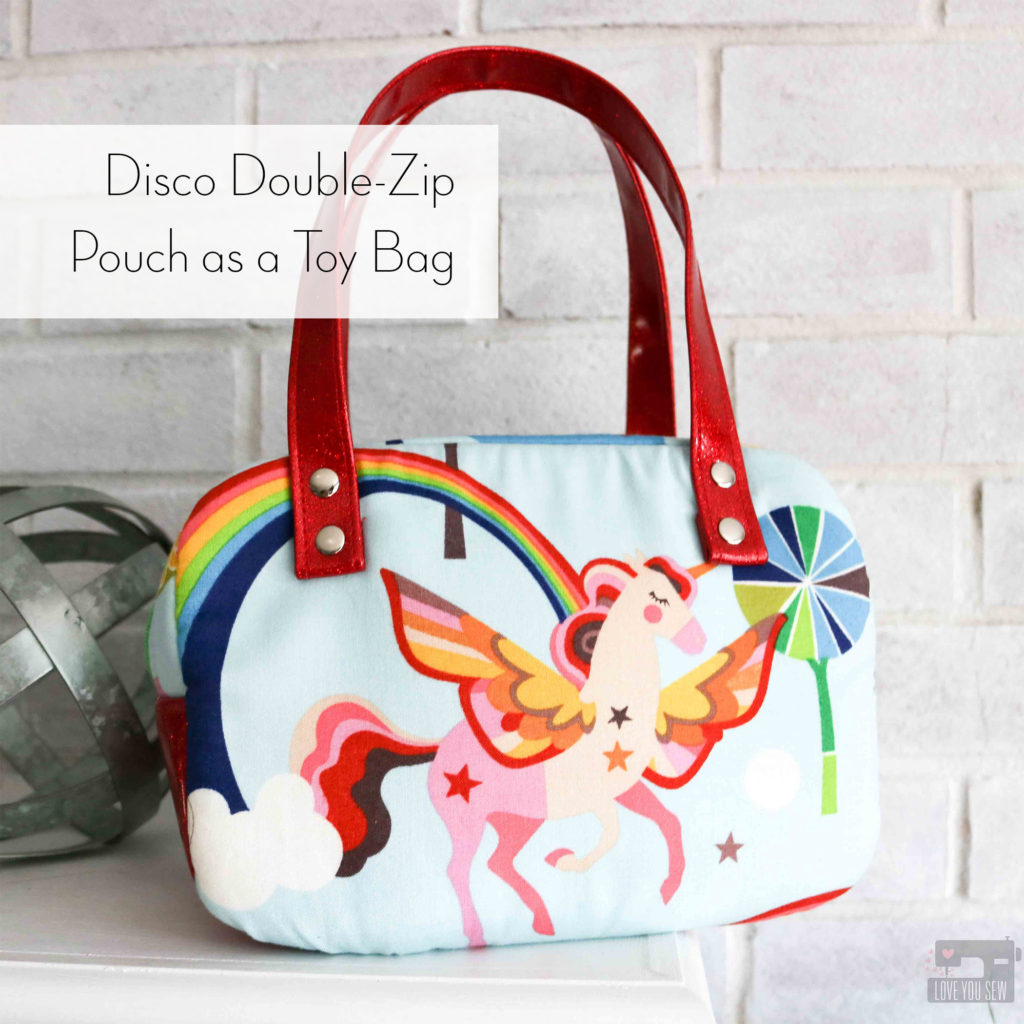
Gift Idea: Disco Double-Zip Pouch as a Toy Bag

It’s holiday gift-giving season already and I’ve been thinking about my handmade line-up for awhile now.  I don’t know if I’m just getting better at planning or if the consumer marketing seems to be pushing earlier.  It’s probably the latter, right?!?  So, I’m going to try to show you some of my favorite handmade gift ideas through the blog and on Instagram (without leading to any spoilers for my family!) to help inspire handmade for the holidays!

Fortunately, Sew Sweetness just released Season 2 of her Minikin patterns.  This collection includes 13 patterns (many with multiple sizes) and accompanying videos.  If you didn’t know already, I’m a huge fan of these patterns and love how unique they are.  (You can check out my Sidewinder from Season One here.)  The Minikins offer such a great variety of patterns and I love having the library of patterns available when I need a gift.

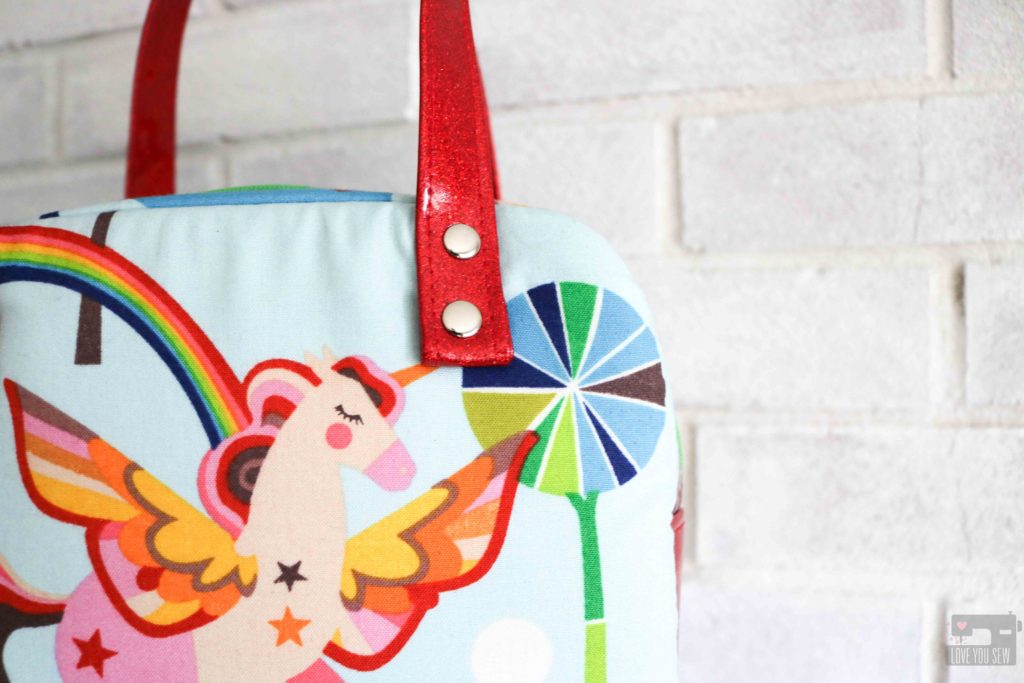
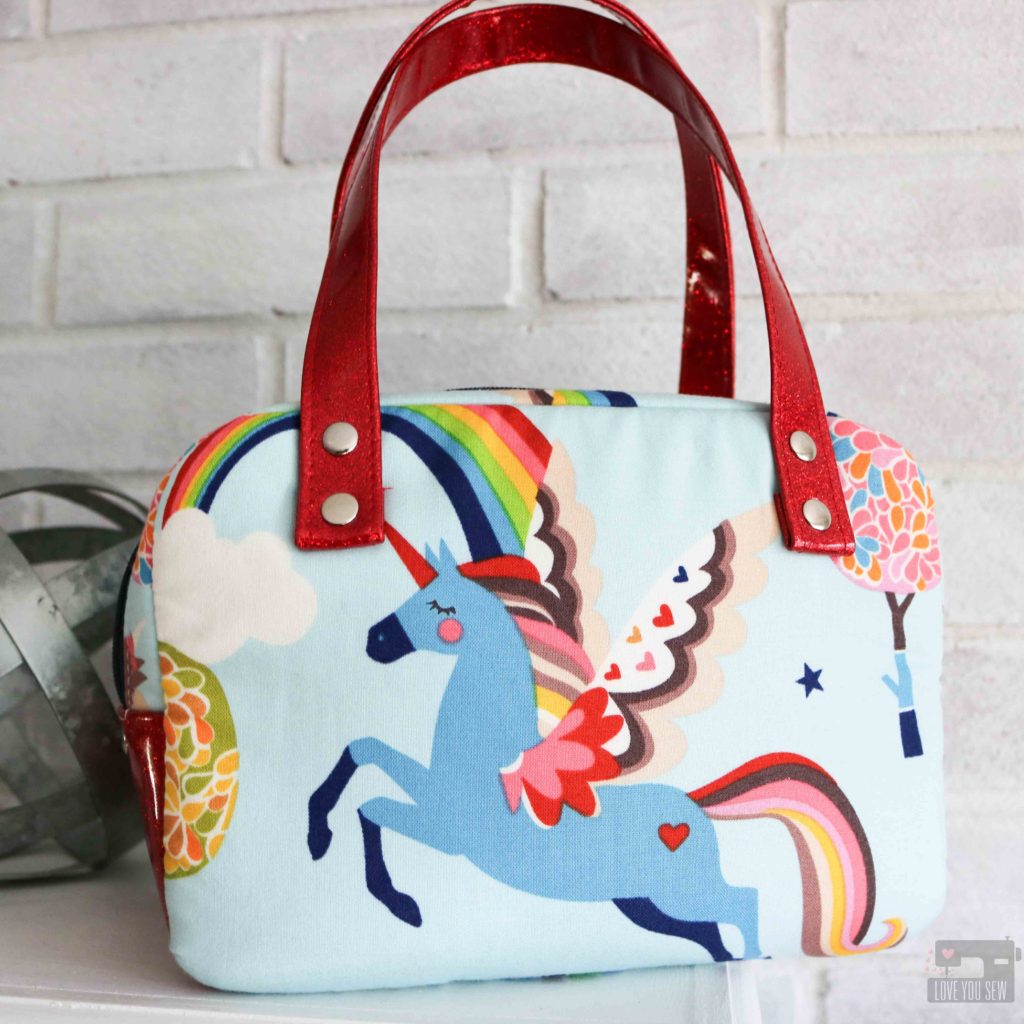
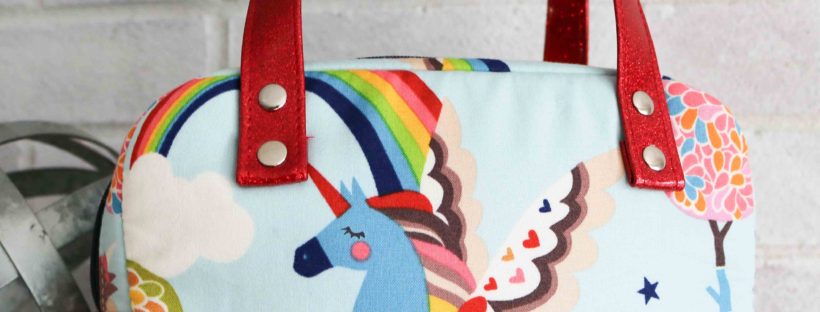
My youngest son was invited to birthday party for a little girl about a month ago.  It’s hard as a boy-mom trying to figure out what’s popular, so I figured handmade is the best way to never have the same gift as another guest.  Luckily, I had this great Alexander Henry Unicorn fabric already in my stash, because we know ALL girls (young and old) love Unicorns 😉  The Disco Double-Zip Pouch, even in the small size, provided great side panels to show off these magical creatures.

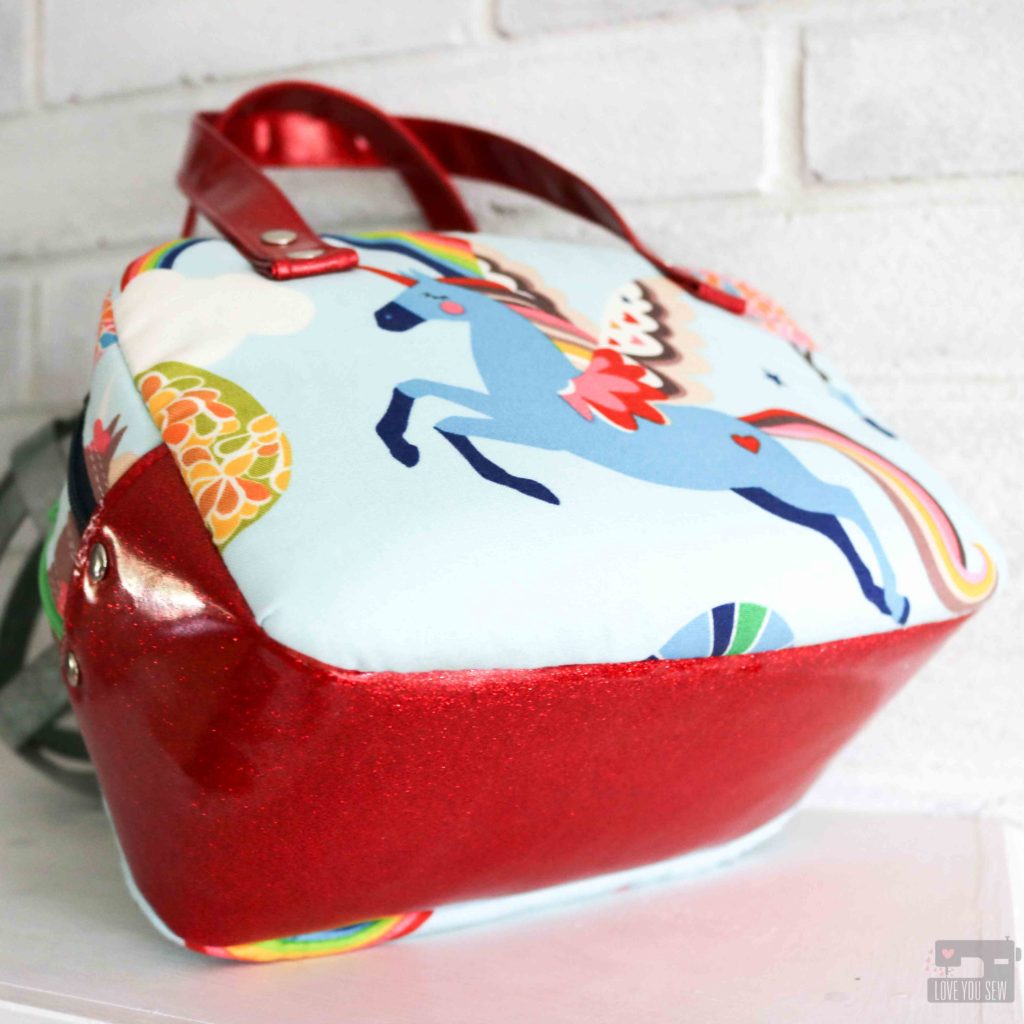
To really make this bag special, I used Red Glitter Vinyl on the bottom gusset to add some sparkle.  Although the vinyl is thin, it is still stiff and required a bit of wrestling along with a lot of clips.  You will need to make quite a few extra cuts into the seam allowance to sew around the curve of the side panels.  But, it’s all worth it!

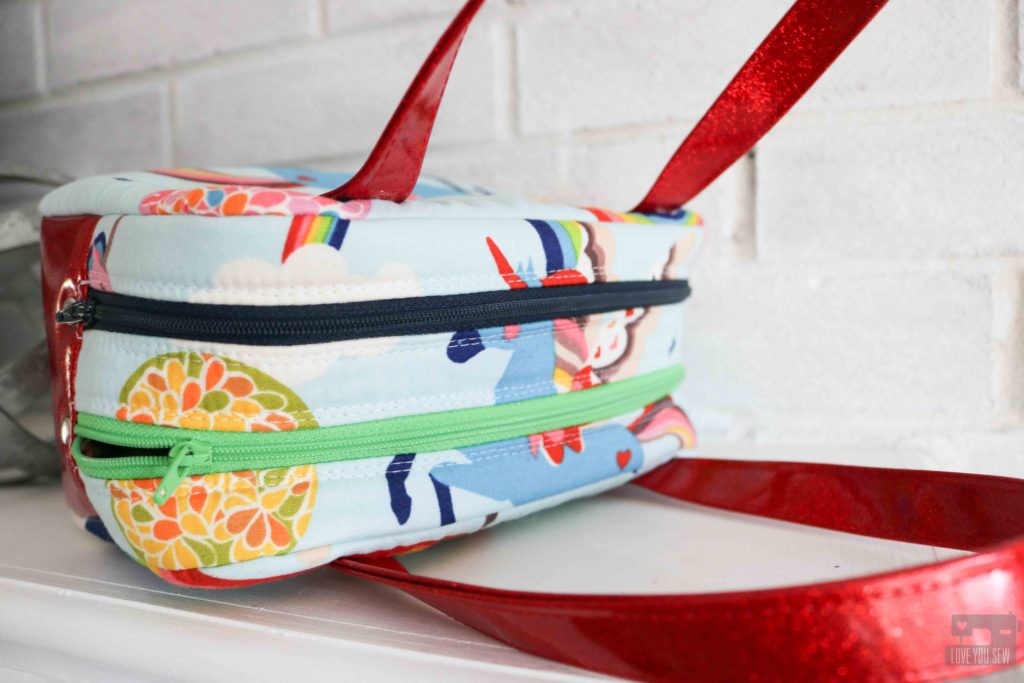
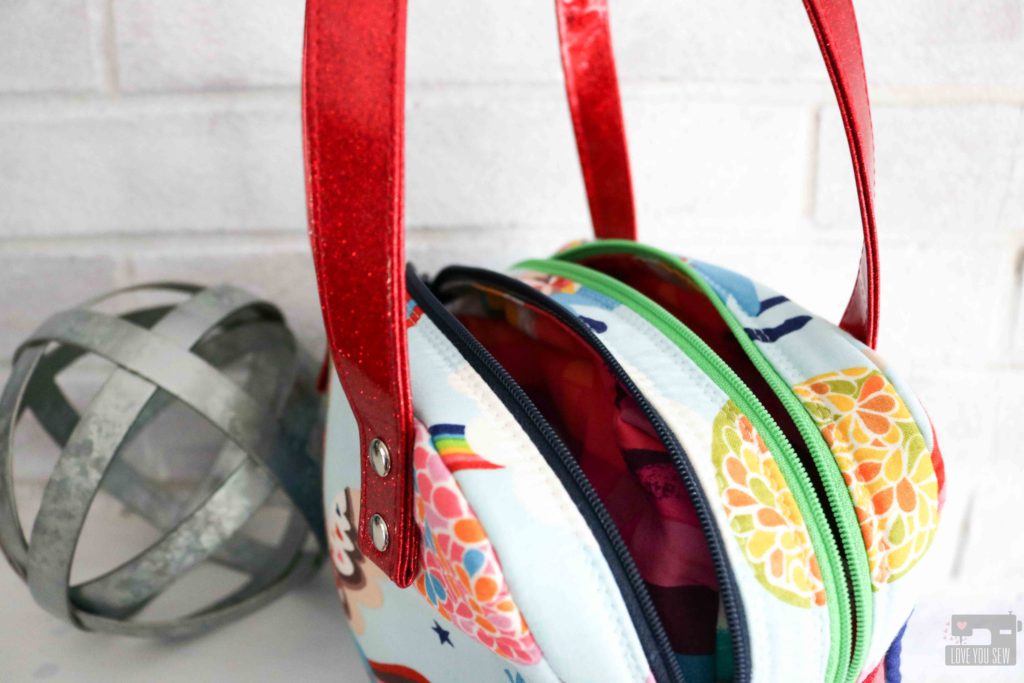
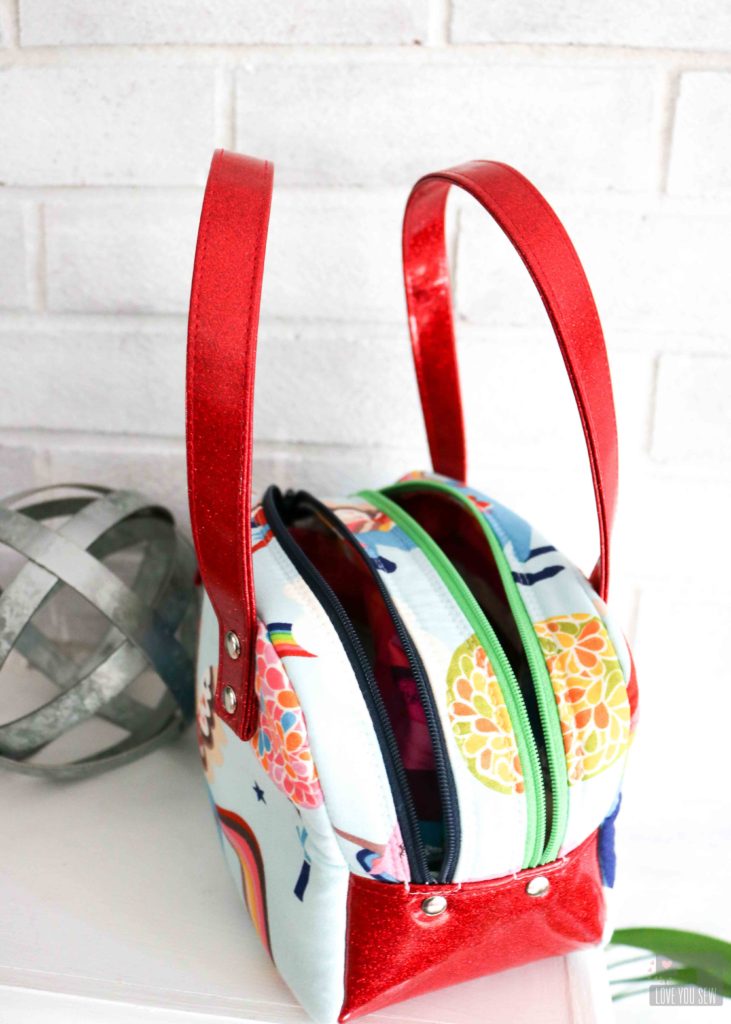
When I first decide on this pattern, I figured this pouch would be great to carry little knick-knacks and maybe some markers.  But I quickly realized the compartments were bigger than what I imagined in my head.  My son’s friend could carry a lot of her toys in these generous pockets.  So, I thought adding straps would make the Disco Double-Zip more like a little carry-all.

I omitted the side handle and cut (2) 3′ x 18″ strips of the vinyl,  folded them lengthwise into fourths and sewed up both sides to create the straps.  Each short end was folded up by 1/2″, placed 1 1/2″ down from the top edge and 1 1/2″ in from the left/right of each side panel.   Tip: Use a Teflon foot and a larger needle to get through the layers of vinyl.

Since the straps were an afterthought, I used rivets to attach them to the bag.  But you could sew them on before attaching the zipper gusset to the side panels.  I also used the rivets on the Glitter Vinyl at the end of each zipper to give the bag a more professional look.

Disco Double Zip by Love You Sew

The mom of the birthday girl told me this bag was such a hit and her daughter carries it around everywhere!  My son’s friend loved the Unicorns mixed with all the sparkle and she is so happy that she can put so much in her own little bag.  I call that a success and hope you have someone who could appreciate a Disco Double-Zip Pouch just as much!

Project Stats:


Happy Holiday Sewing!

Cristy


This post may contain affiliate links for which I may receive compensation after a purchase has been made.  This helps fund the website and keeps the content rolling.  Thank you always for the support!

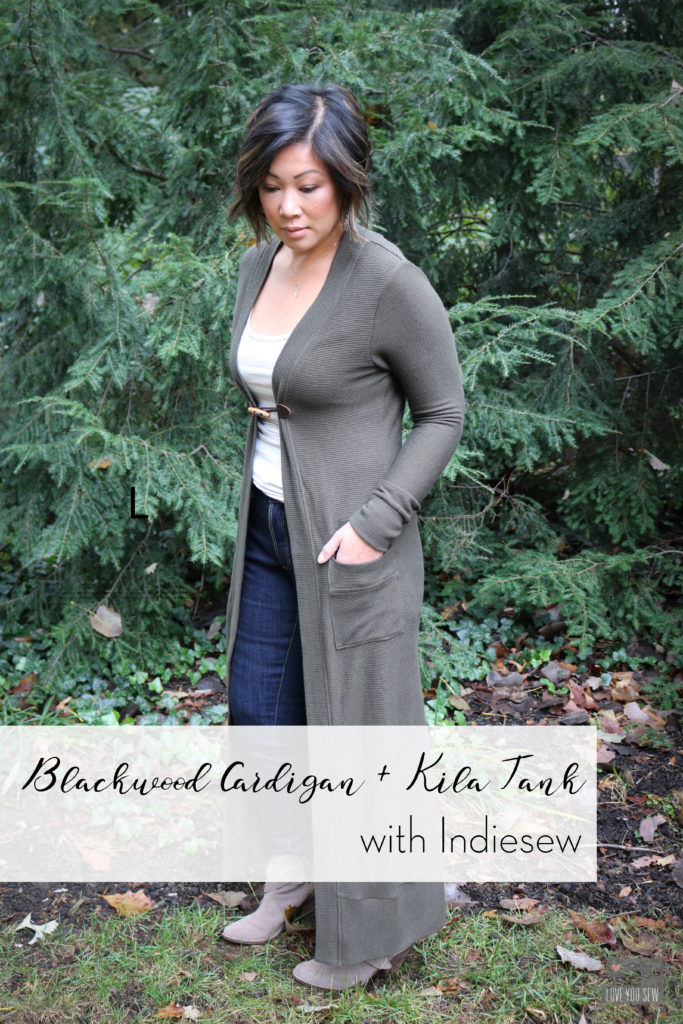
Blackwood Cardigan + Kila Tank with Indiesew

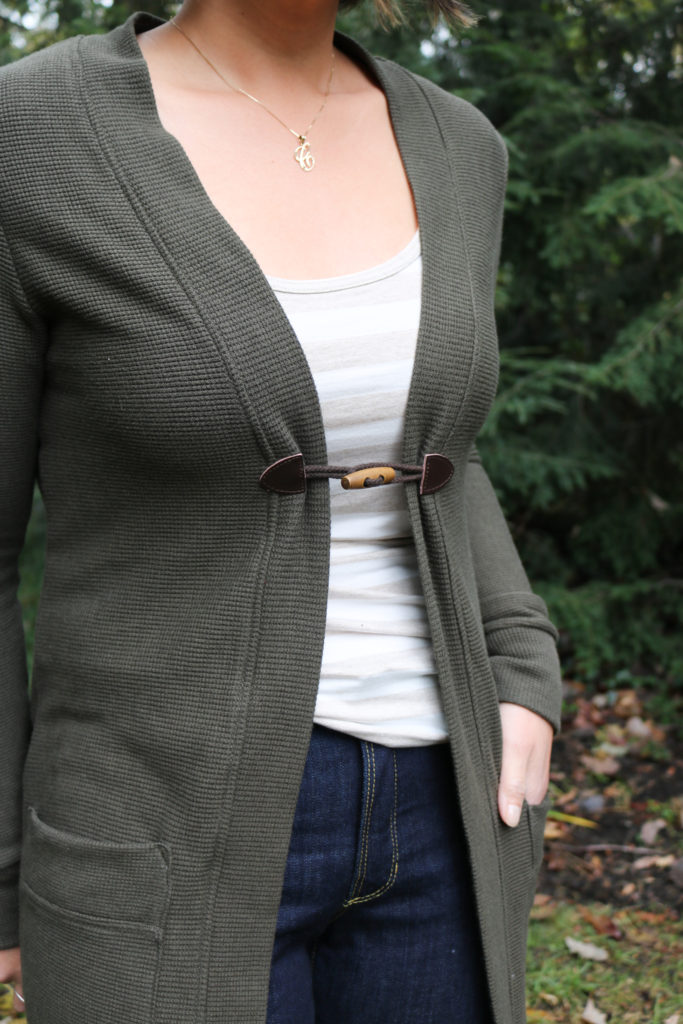
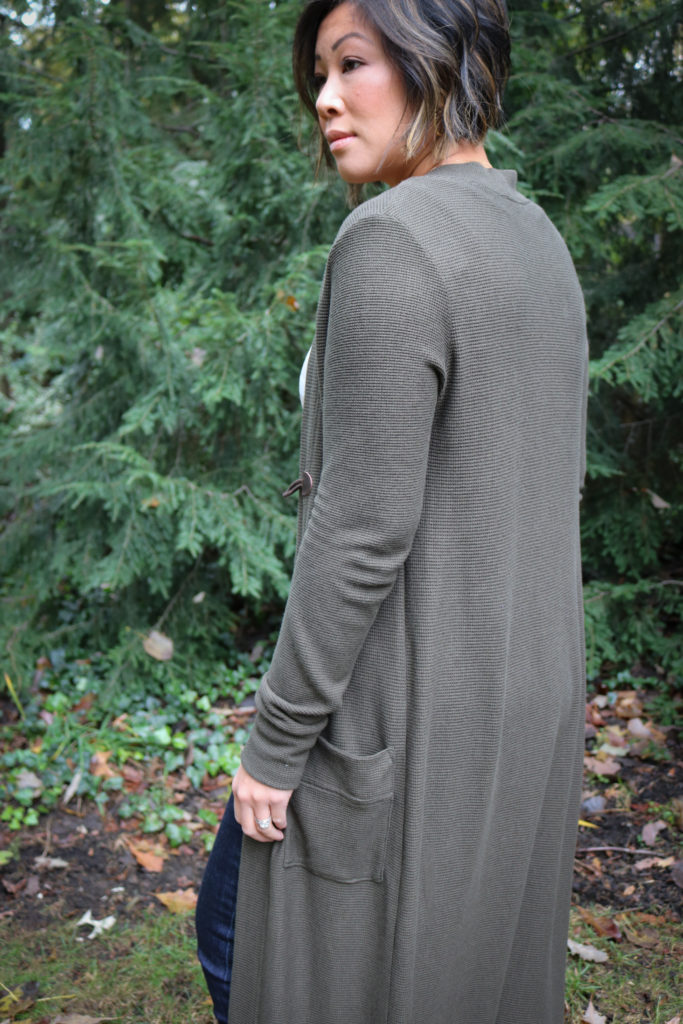
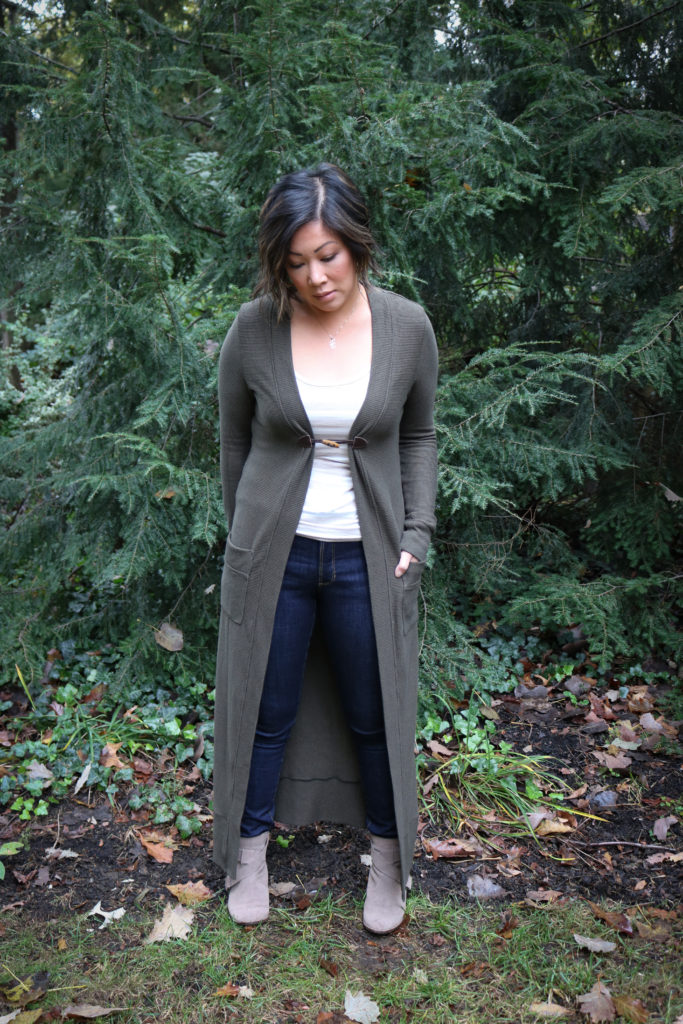
It’s so easy to drop into the habit of just yoga pants and a hooded sweatshirt this time of year.  After camping and a very wet weekend, that’s all I really want to wear.  But I know I always feel better when I pull myself together and make some sort of effort on an outfit.  That’s why I wanted to make this duster style Blackwood Cardigan to add a bit of (good) drama to my everyday.  It can go on top of any {tank + jeans} or {t-shirt + leggings} combo and look SO put together.

Most of the time, I find a pattern I would like to sew and then pair it with the right fabric.  But when I saw this Modal Waffle Knit at Indiesew, I knew I wanted to hack the Blackwood Cardigan and take advantage of the fabric’s incredible 72″ width of fabric!  What makes this the perfect cardigan fabric is the modal content, which is a semi-synthetic rayon that is SO silky to the touch and yet breathable.  It makes for the perfect layering piece.

If you follow my Instagram, you know I’ve been leaning toward more of this army green color for the season.  I want to always make sure that new pieces in my wardrobe work with what I already own.   This green is a great neutral to pair with denim and lots of the creams and blacks in my closet…so I know I’ll get lots of use out of it!

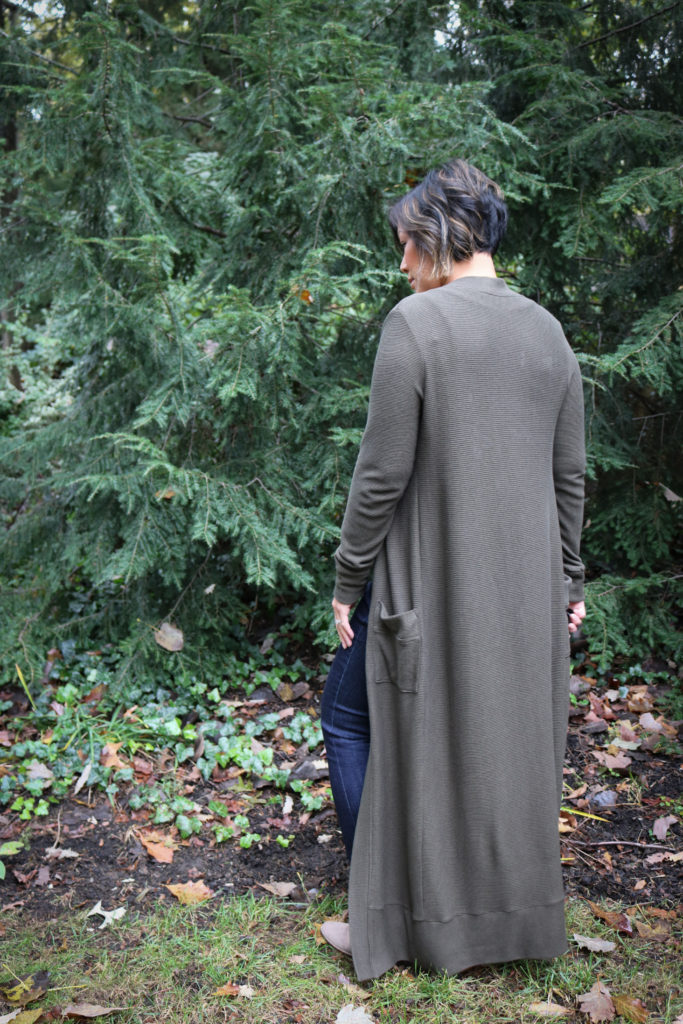
The Blackwood Cardigan is the first pattern I’ve sewn by Helen’s Closet.  The instructions were very straightforward and easy to follow.  This is quite a popular pattern so it was nice to see all of the different versions on the web before I made my first cut.  But like I said earlier, I wanted to utilize the great width of fabric on this waffle knit and extended the length by a straight 12″ from the bottom of the front, back and neck pieces.  With my serger, this made for a fairly quick sew, which is always so nice!

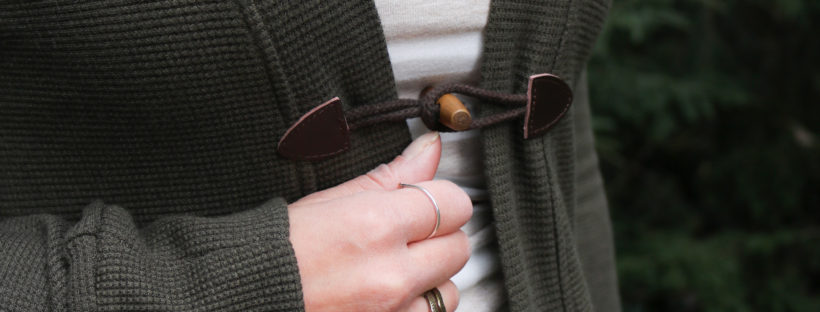
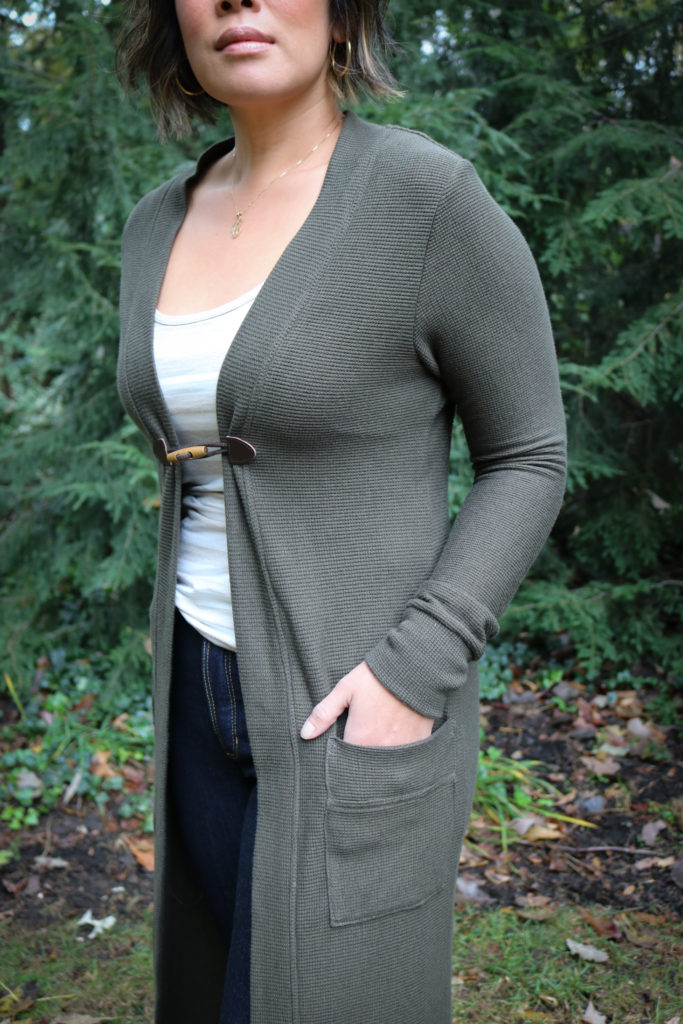
For the top-stitching around the neckline, the instructions say to use a zig-zag stitch, but I opted to use a straight stitch with wooly nylon in the bobbin.   I use this method around most of my knit necklines and it still allows the stitching to stretch a bit.  Another change is the addition of a toggle right at the bust line.  With the weight of the duster, the sides were pulling away from center and sitting more into my armpits.  I wanted to anchor them with some kind of closure but had to take into account the weight and stretch of the knit.  Luckily, I had the toggle in my stash and could sew them over the serged neckband seams to help distribute the tension.

As with most patterns and my 5’3″ frame, I had to shorten the sleeves by 2″.  I could have probably taken off 3″, but with a cozy cardigan I like to pull the sleeves over my hands on those brisk days.  With the knit cuffs, I also like to always angle in the seams at the fold.  So I took out 1/2″ on both sides of the pattern piece at the fold for a more fitted feel.

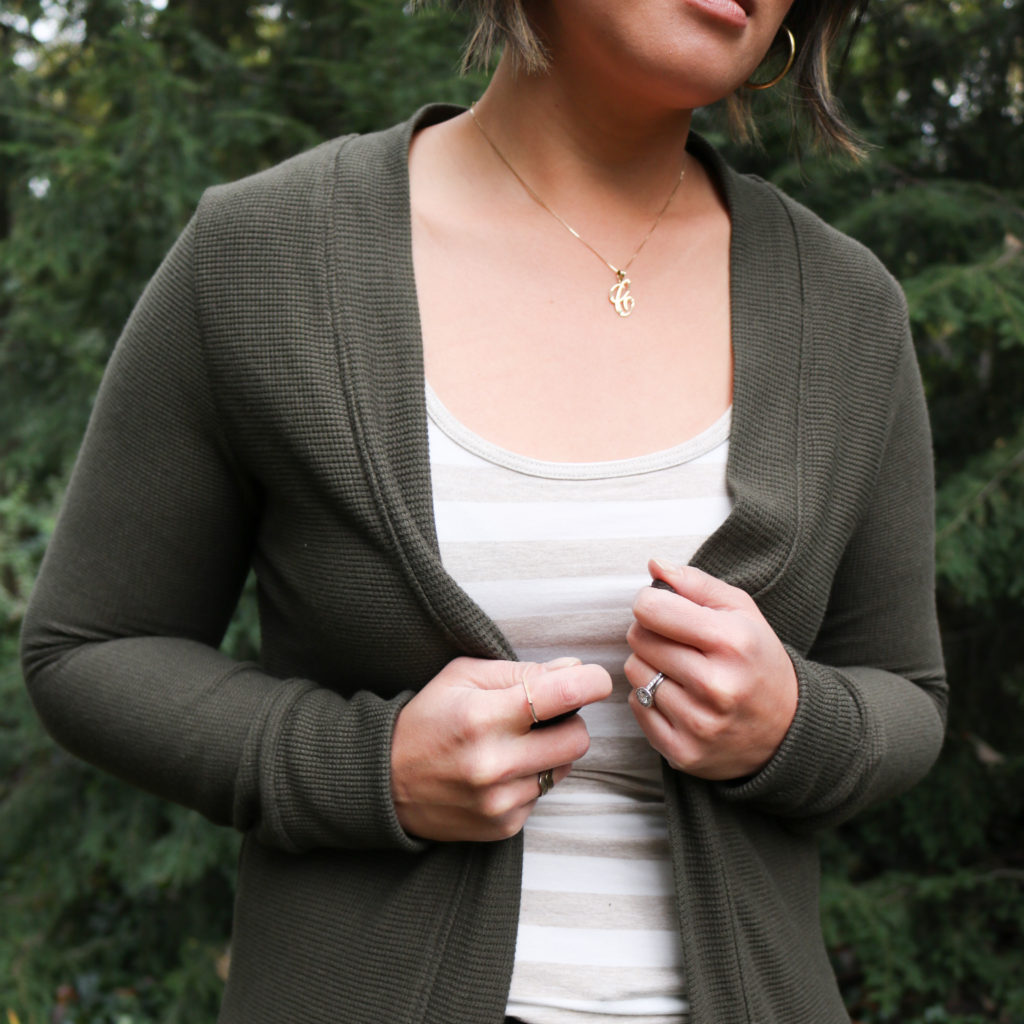
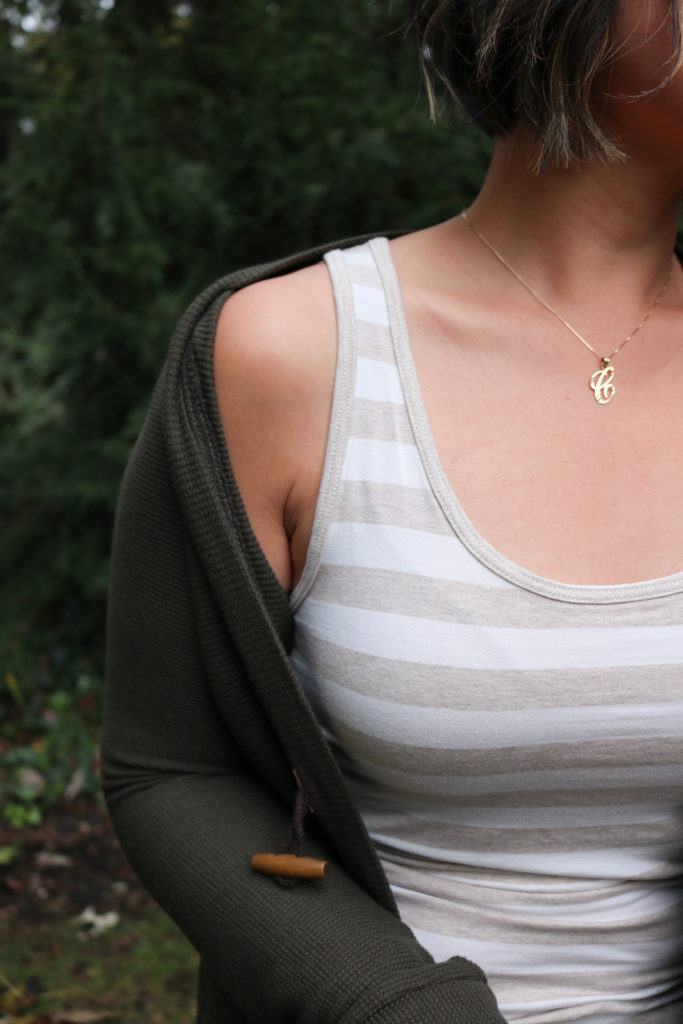
A great layer to have under the Blackwood is the Kila Tank.  This is a slim fit tank that uses around a yard of knit, so it’s stash friendly and another quick sew.  The neck and arm bands are attached in a very clever way and great for those who do not have a serger or coverstitch.  Even though I have a serger, I stayed true to the instructions and used my twin needle for the bands.  I love how it looks like ready-to-wear!   But since I DO have a serger, I may go back to the old method just to save some time 😉

The fabric is this soft Rayon Spandex Oatmeal and White Striped Knit from Indiesew which I was saving for a dress, but realized I need more of these staple tops.  There is always more fabric, right?!?  Be on the watch for a long sleeve tee in this same fabric soon….

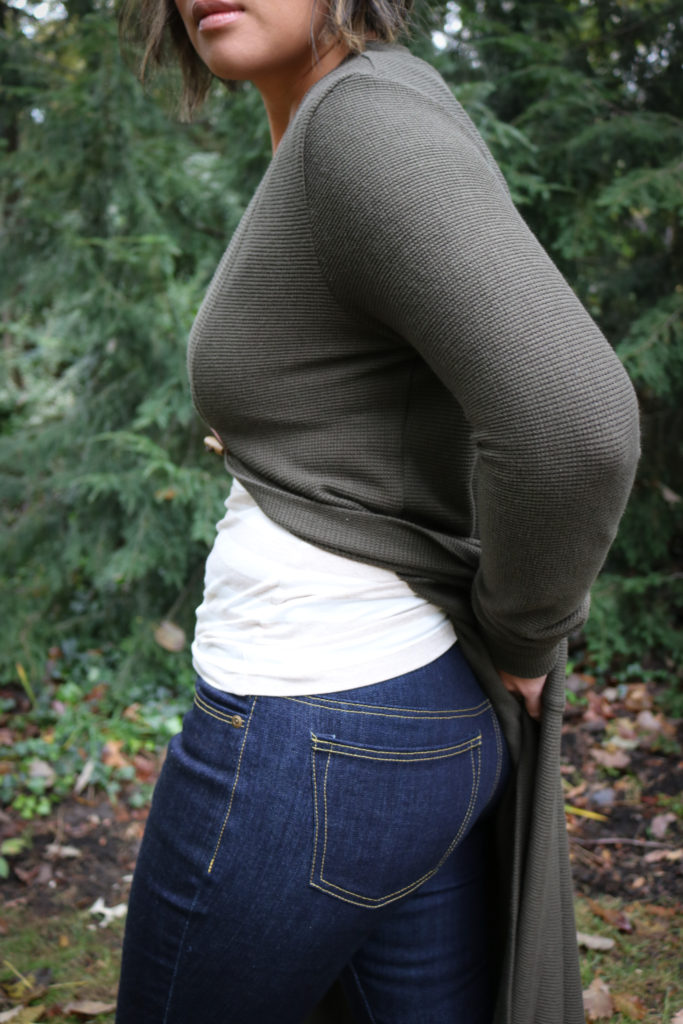
To finish off my entire #memade outfit, are my Ginger Jeans.  These are my very first pair and also my first Closet Case pattern.  It’s taken me about a month to complete these jeans (because I needed a break after all the modifications,) but I’ll make sure to get into more detail with my fitting adjustments on a future post.

I’m so pleased with my simple outfit that’s churning out the bit of extra drama!  Do you like the duster look?

Project Summary:


This post was written as part of the Indiesew Blogger Team.  All opinions are my own.  There are also possible affiliate links for which I receive a small commission only if a purchase is made.
Colleen “Shortie” Tote Bag with Loved to Pieces Blog Party

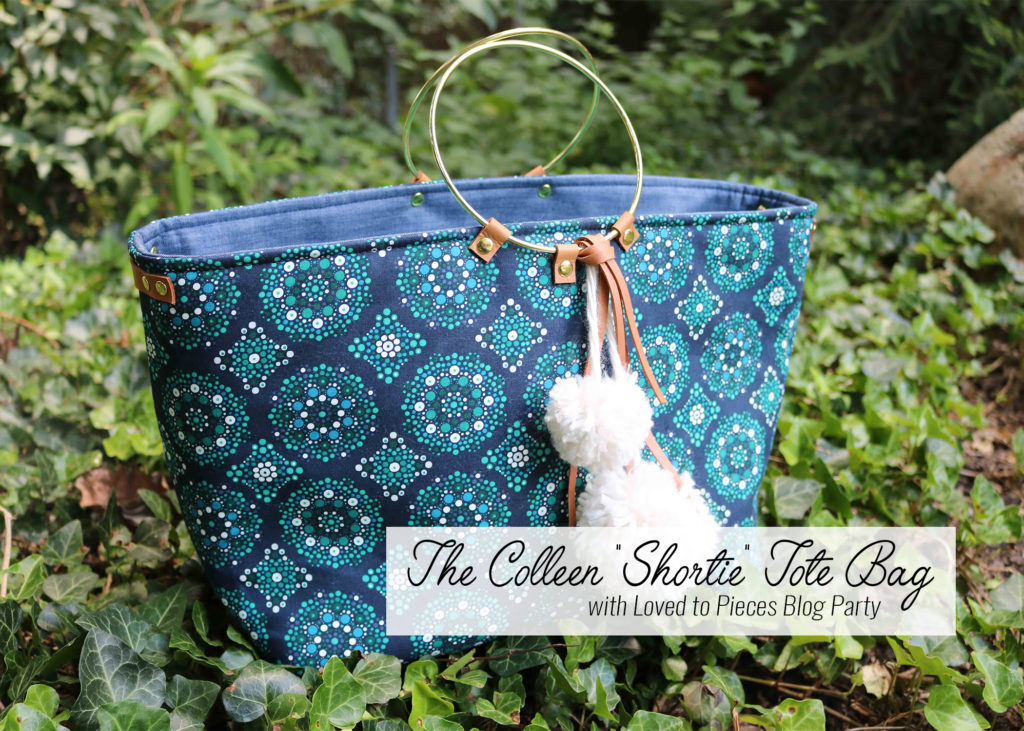
When Mathew Boudreaux (aka Mister Domestic) throws a party, you know it’s gonna be big and fabulous!  And this Blog Party is living up to all the hype with over three weeks of amazing projects using Mathew’s debut fabric collection, Loved to Pieces.  I’m so honored to be a part of all the festivities, so I thought I would bring my new Colleen Tote along for the ride.

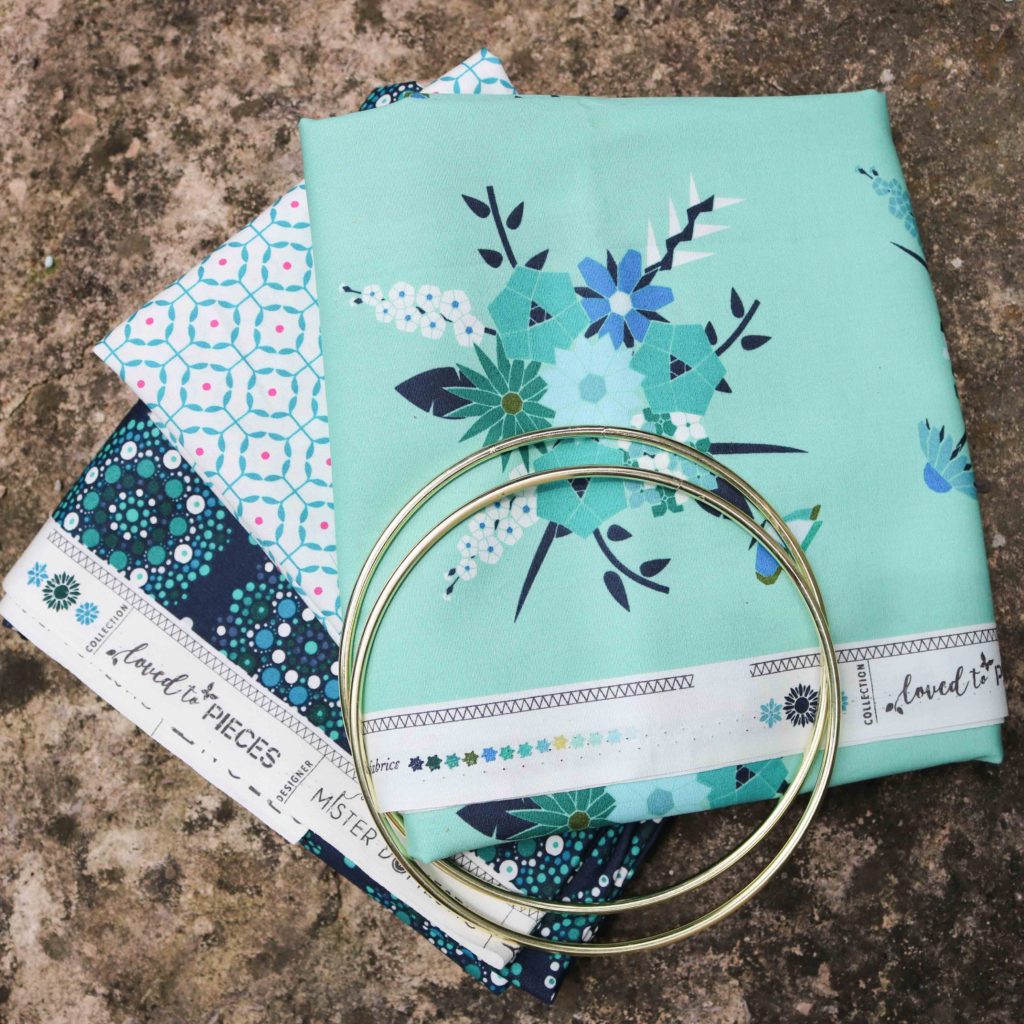
Loved to Pieces is a beautiful fabric collection inspired by Mathew’s love of English paper piecing and his sweet daughter’s love of florals.   I love the mix of blues and teals complemented with sharp pinks for a lot of fun.  There is a great mix of quilt cottons, rayons, and knits for all kinds of great projects. For more inspiration, you can view the look book here.

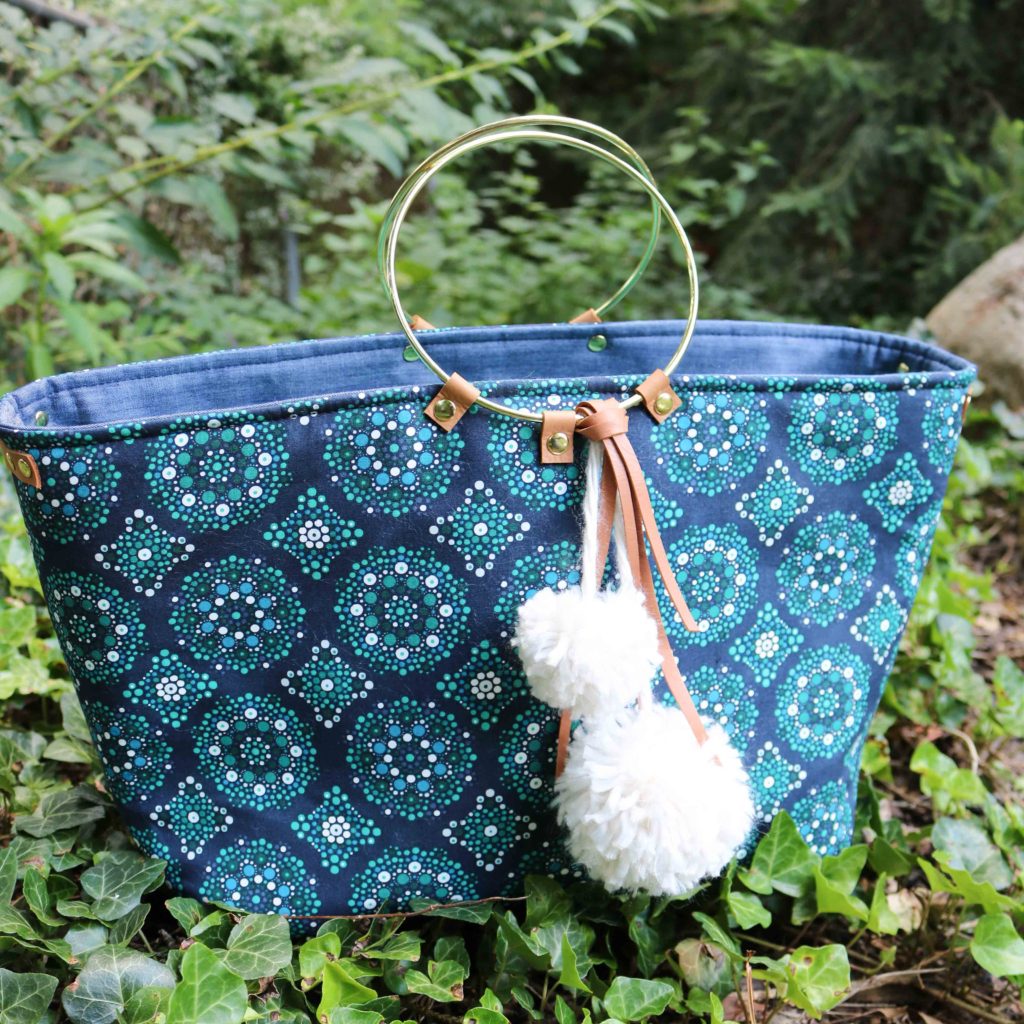
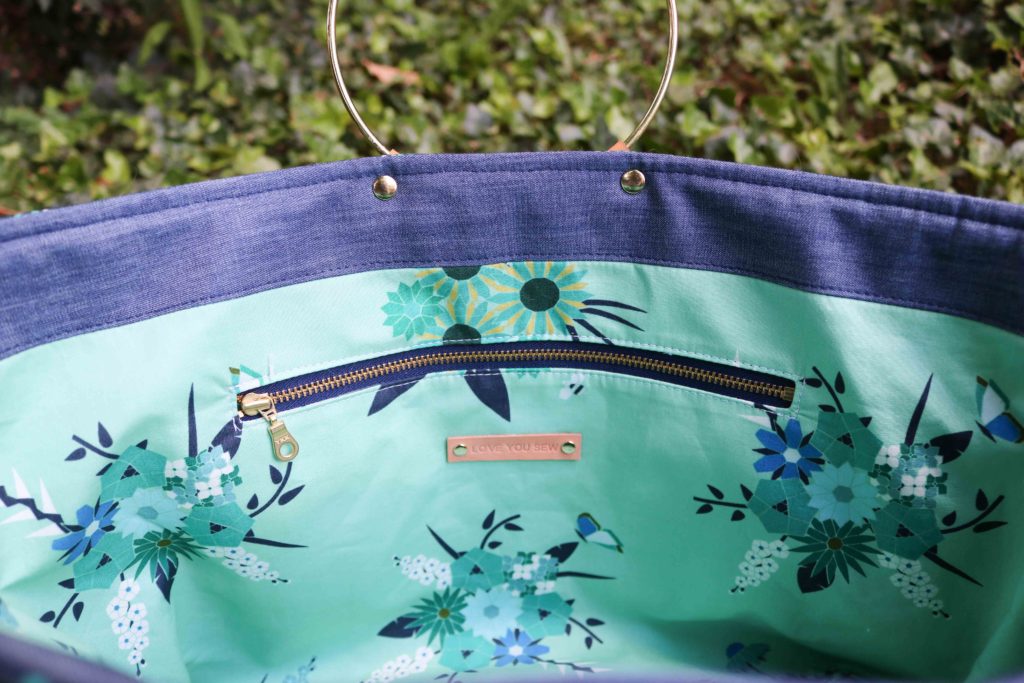
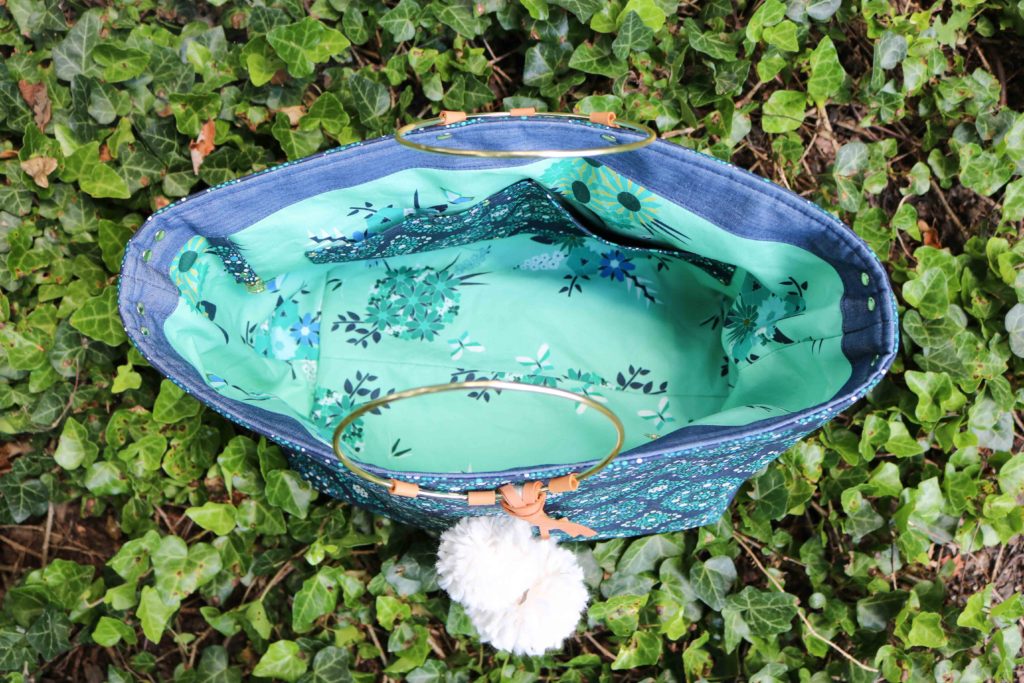
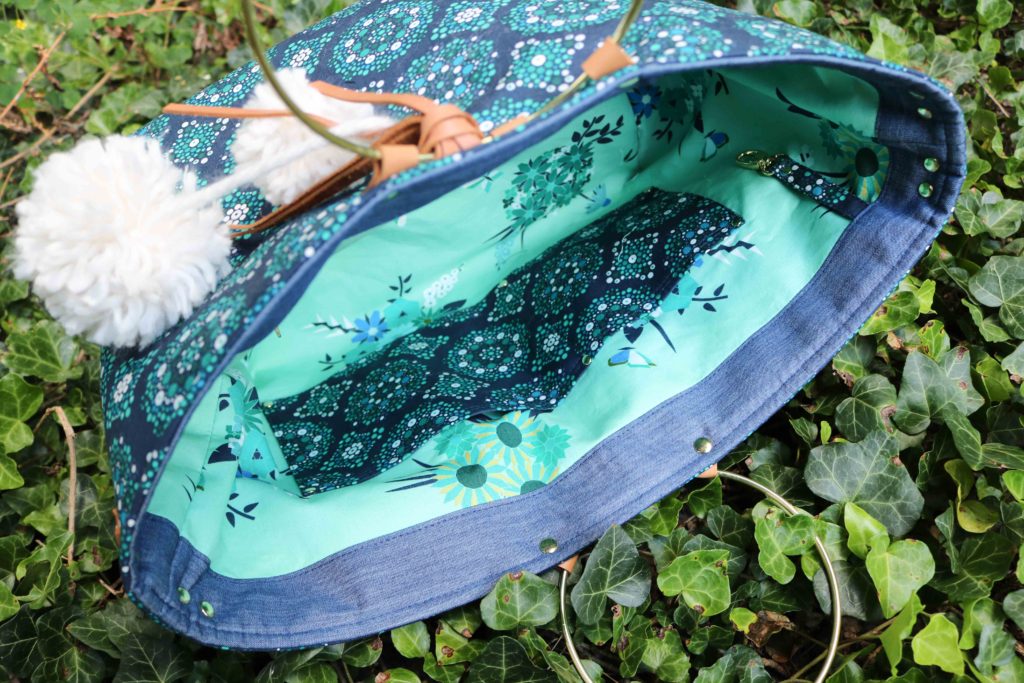
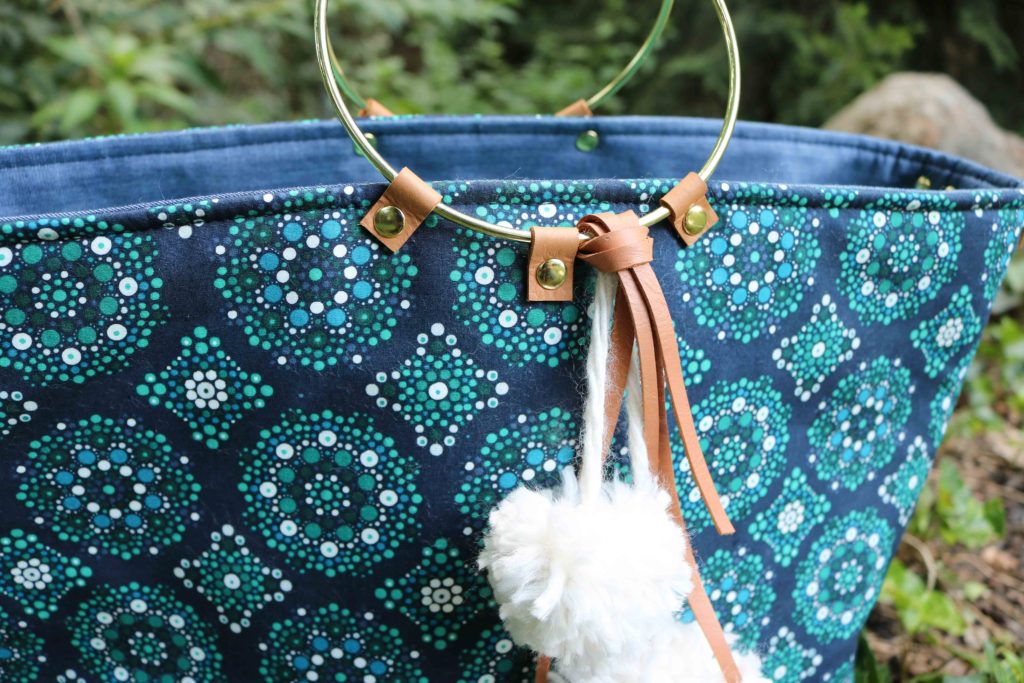
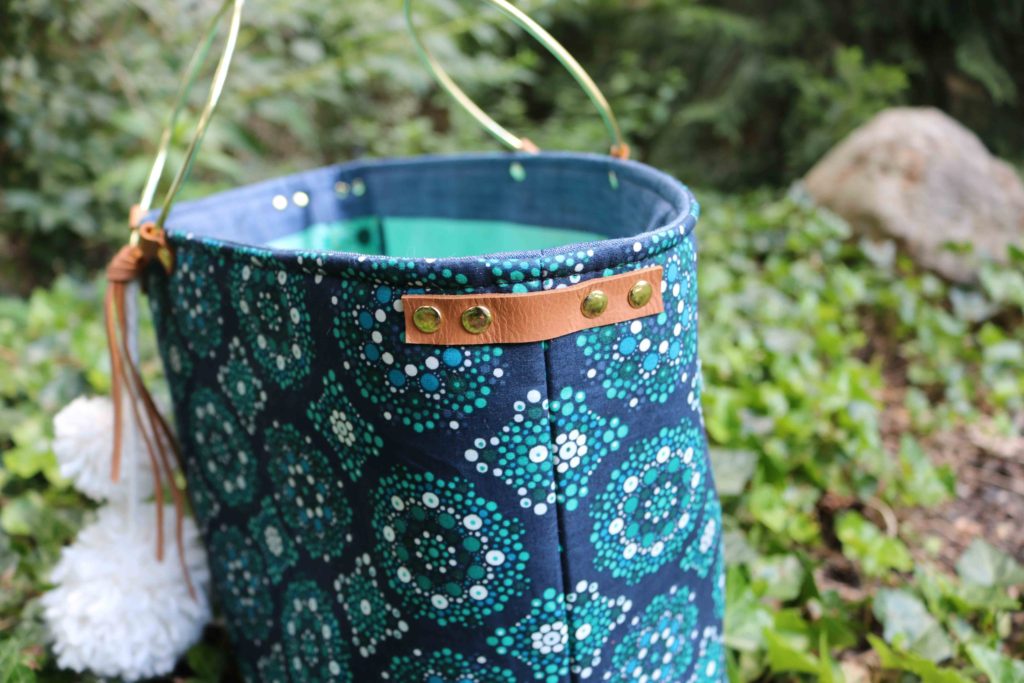
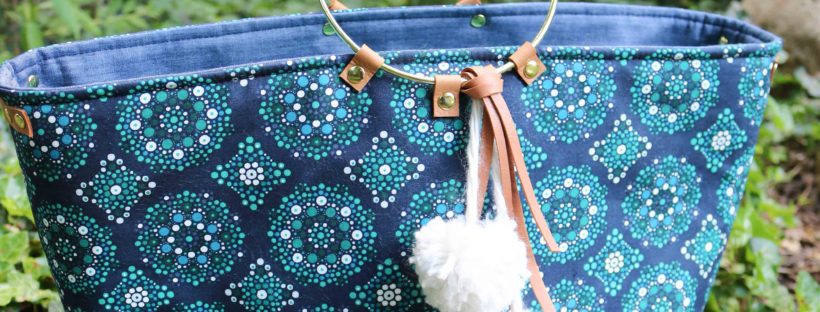
For my Colleen Tote, I wanted to go for a chic look and let the print stand on it’s own. For the exterior, I selected Mandala Drops Midnight with it’s striking and hypnotic design.  Plus, it’s a nice dark print that’s perfect for the exterior of a bag to hide any dirt or debris.  I like the linings to pop a bit, so  Pieced Bunches Cool was ideal with the gorgeous geometric florals.  The pinks in the collection are such a nice complement and I had to add a bit of Reap and Sew Light inside the zipper pocket.  Finally, the interior contrast band is Art Gallery Fabric’s Indigo Shadow Smooth Denim.

I’ve been seeing brass metal rings all over the handmade and fashion world for a little while now.  They are used in macrame weavings, dreamcatchers, floral arrangements and I saw heavy usage of this accent in handbags this past spring.  I was so inspired and I knew I had to add this unique hardware to one of my own bags.

These rings have a solid 5″ diameter and would make fantastic bag handles.  However, to use the rings as handles, I knew I couldn’t make a huge heavy bag.  So I decided to make a “shortie” version of my Colleen Tote pattern.  This entailed shortening the exterior, linings, and coordinated woven interfacings all by 3″.  The zipper pocket was then shortened by 6″ overall.

Instead of using fusible fleece, I used Soft and Stable to keep the bag more structured.  This was in order to hold the weight of the rings and to keep them upright.  The exterior had to be basted 1/4″ all around  the pattern piece to keep the fabric nice and smooth.  The Soft and Stable really  makes the bag look so polished.

Everything else in the pattern was all kept the same (minus the handles, of course.) There is still a nice roomy slip pocket for your phone and sunglasses and the zipper pocket to tuck away the essentials.  The fob is essential to keeping those keys in check!

These rings could have been stitched into place, but I opted to used leather and rivets to add more texture and interest.  The ring was first secured with the center rivet while the exterior panel was still flat and not sewn on the sides.  Once the tote was completely finished, I then added the other rivets to the left and right of the initial one.  This is why you can only see two rivets on the lining for each handle.

I added some extra leather and rivets to balance out all the hardware around the handles.  With a  nice clean exterior, I decided to add just a little more fun and to keep this bag on trend with some pom-poms and leather lacings (all using scraps from my stash of crafting goodies!)

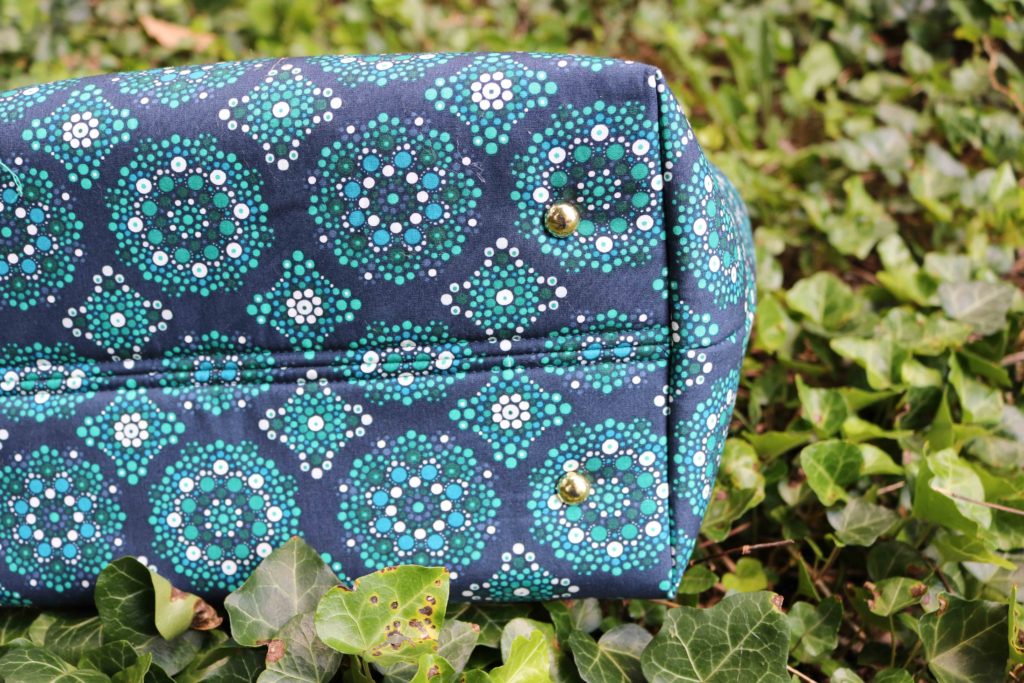
Last, but certainly not least, is the Colleen’s bottom.  With the ring handles, this is not a bag you just sling over a chair back.  So, I make sure to take care of this lady by added some shiny shoes.  Whether the tote has to sit on another chair or (heaven forbid) the floor, she will be protected!


Project Details:


For the full Loved to Pieces Blog party line-up, check out:


Thanks for visiting and partying with me here!  Don’t forget to head over to Mister Domestic’s Instagram feed to see how you can win a bundle of these delicious fabrics!

Happy Sewing,

Cristy


Fabric was provided for the blog post.  However, the project conception and all opinions are my own.  Please note there maybe affiliate links for which I may receive a nominal commission if you make a purchase.  This helps keep the website ticking along.  Thanks always for your continued support!
Tillery Skirt Review

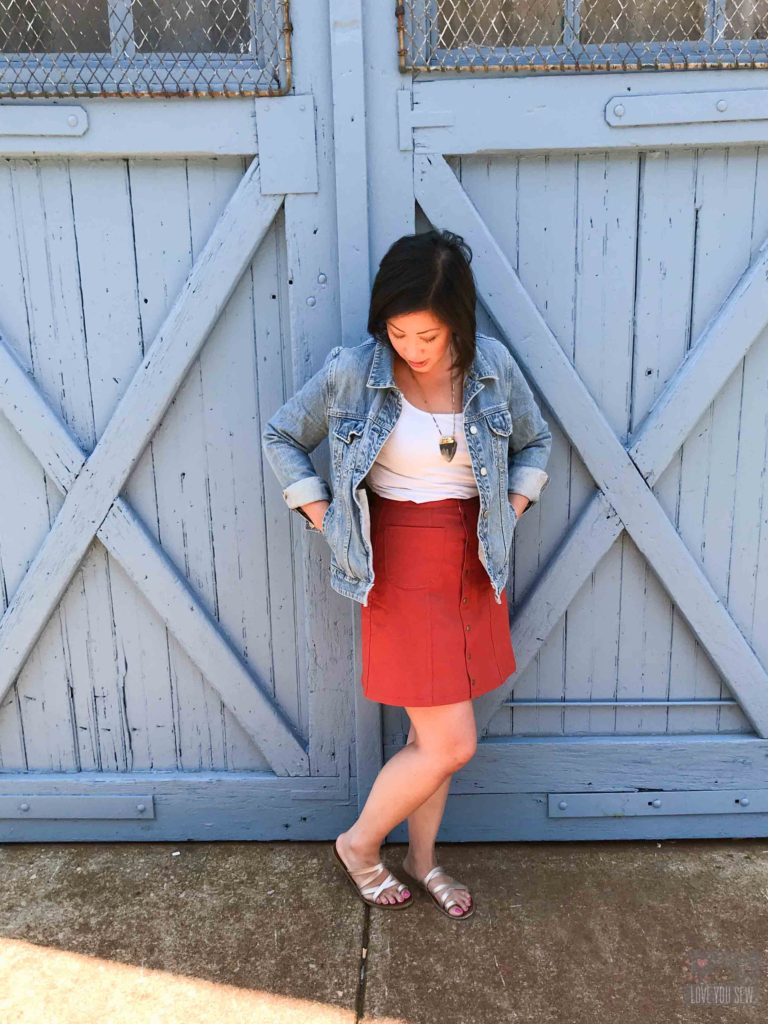
When I went to Texas a month ago, I was hoping to make this Tillery Skirt for the hot weather ahead.  Unfortunately, I ran out of time and did not make it then.  But, I was able to finish this skirt now that central Ohio feels like Texas…at 93*F!  I’m so glad I was able to get this made for our first of many heat waves this summer.

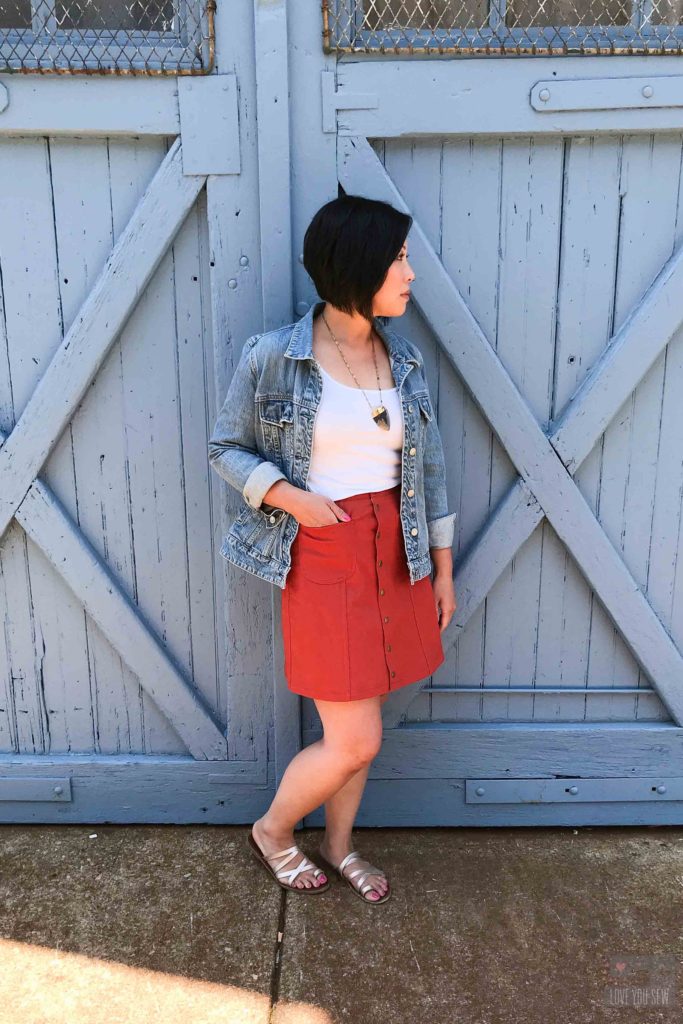
Sometimes shorts just don’t cut it.  My wardrobe was in need of more casual skirts to get me from swim lessons with the kids to date night with the hubs.  So when I saw this digital pattern by Blank Slate Patterns, I knew I had to make it.  The Tillery is a great high waisted skirt with a 70’s vibe making my Boho fashion heart flutter.  Who doesn’t love the look of the flat felled seams?!?

I recently had the opportunity to visit the Imagine Gnats shop and instantly gravitated to this J.Crew overstock stretch twill in Brick.  This rust color is definitely my summer color to go with all the denim <3  It is so rich and complements my coloring.  I can always use the extra comfort of Lycra, so the extra give in the twill makes it perfect for a skirt or pants.

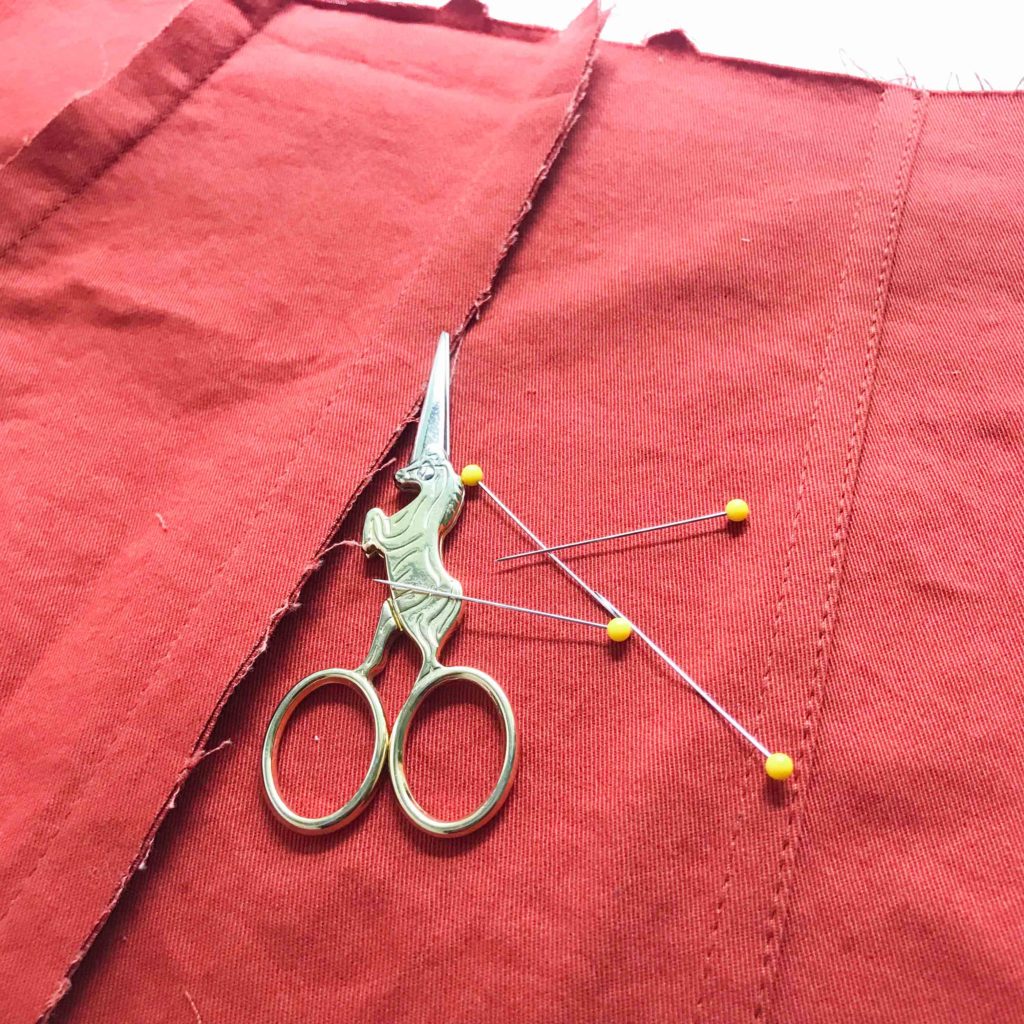
As mentioned earlier, these flat felled seams give the skirt so much design character.  It maybe a little intimidating sewing eight panels to make the Tillery, but it is all worth it.  I never made these kind of seams before, but after watching Melly Sews’ video, the instructions all made sense. TIP:  Baste all panels together to check fit. I ended up grading in a size around the waist.

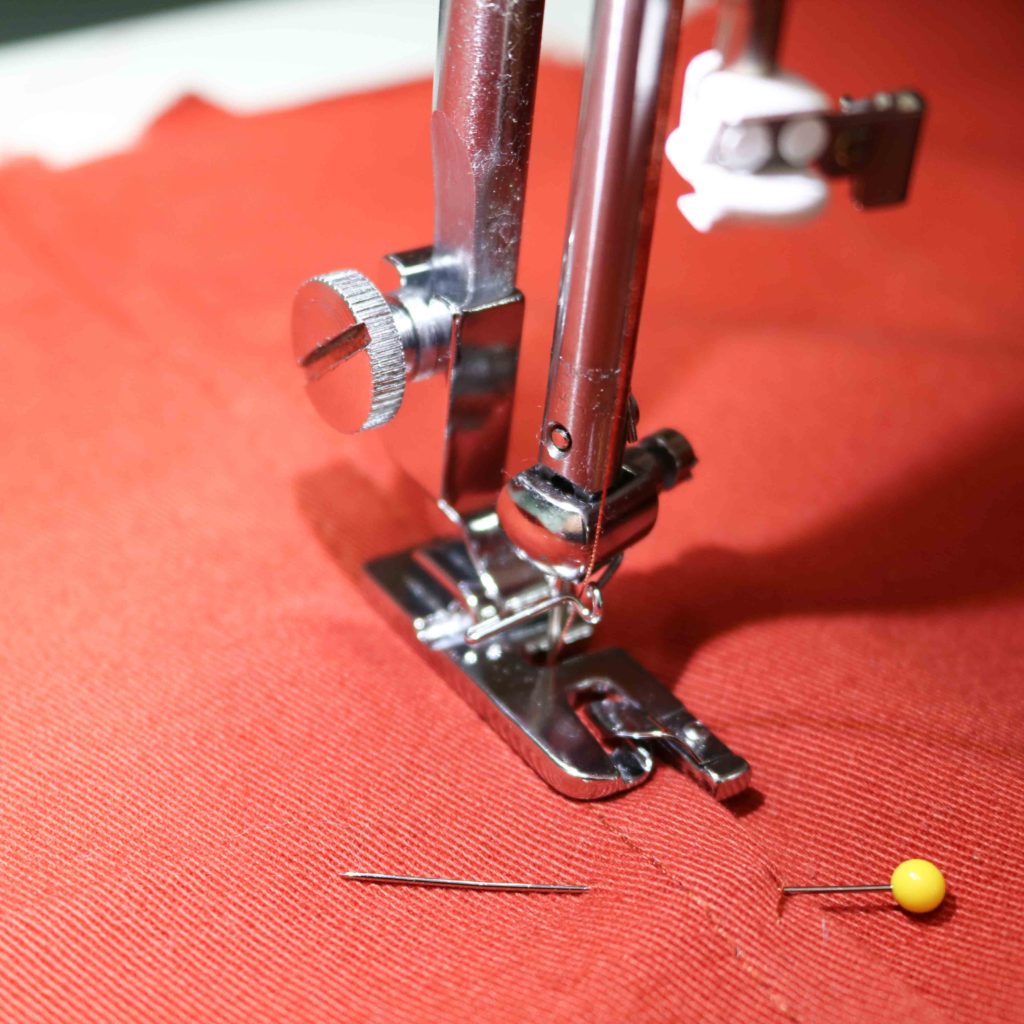
With the seams visible and lots of top-stitching ahead, I used my rolled hem foot to give me an even edge to sew along.  Many machine have an edge or top-stitching foot.  My Juki only came with a few feet and this foot works great to get even spacing.

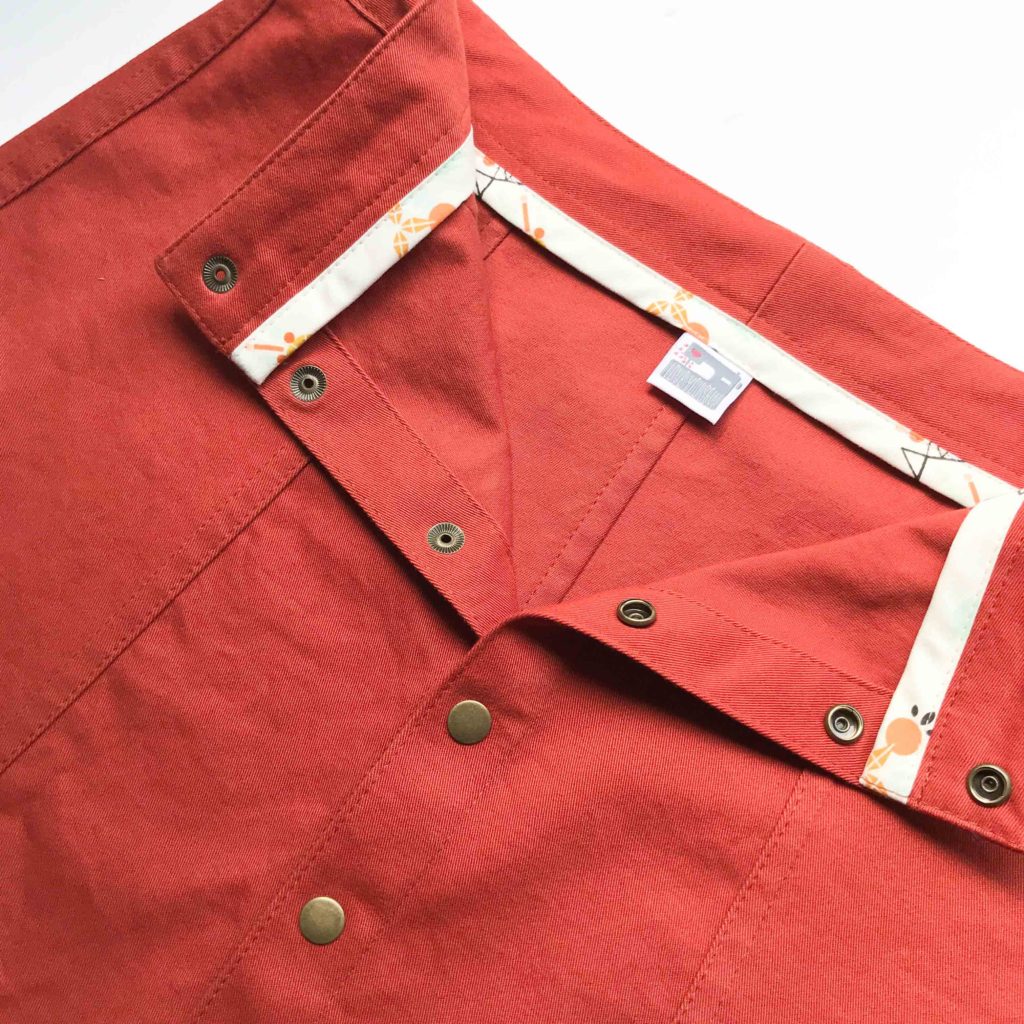
Look at those beautiful skirt guts!  Or maybe lack thereof…  The flat felled seams gives the skirt such a clean inside, so it’s soft and smooth all around.  I used some Wanderer fabric by April Rhodes left in my stash for this extra pop around the waistband.  The little hints of black and mint really bring out the brick color of the fabric.

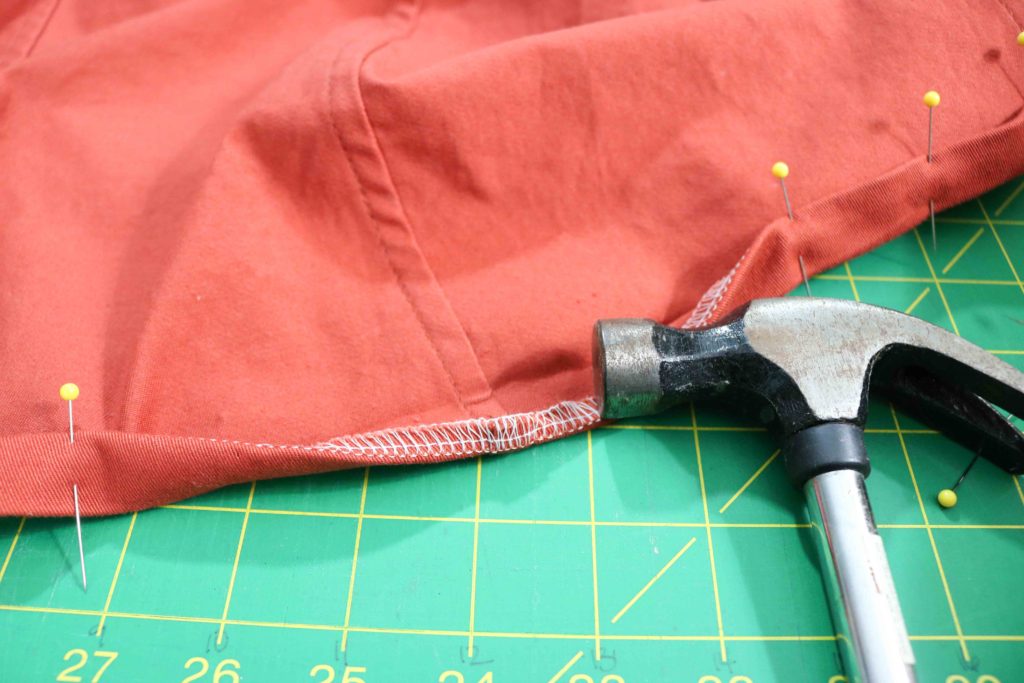
As you can imagine, the hem of the skirt can get pretty thick when doubled over against these flat-felled seams.  My regular foot didn’t even want to go over all of this bulk, so that’s when I broke out my hammer to help flatten them out for stitching.  TIP:  Make sure to test your fabric and hammer to the inside of the hem so you don’t create any “shine” on the front of your skirt.

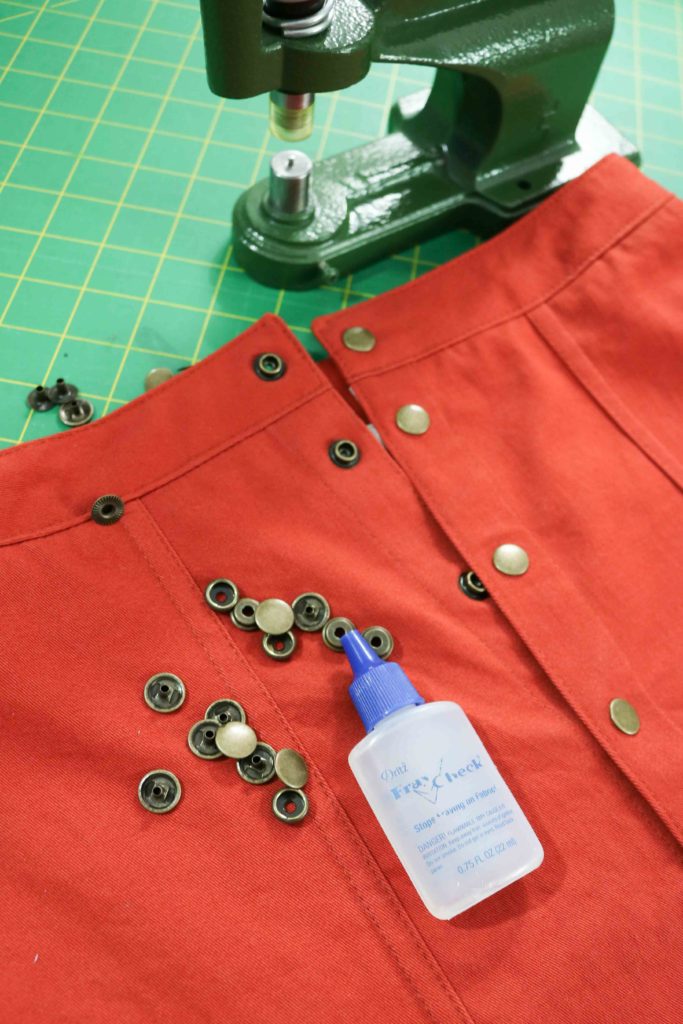
Another beautiful feature of the Tillery are the use of metal snaps.  There are instructions within the pattern with a link to video to help you, if needed.  Fortunately, I already had the snaps and the correct dies for my hardware setter (as the bag-maker you know I am.)  I was able to add these snaps quickly making the skirt look so professional.

The next time I make this skirt, I think I will grade back in from the hip down.  The waist and hip fit perfectly, but with the A-line cut of this pattern, I feel like I have a little bit too much flare going outwards.  It’s hard to tell in this photo, but the skirt A-lines at every angle (not just the front and back) thanks to some extra booty…
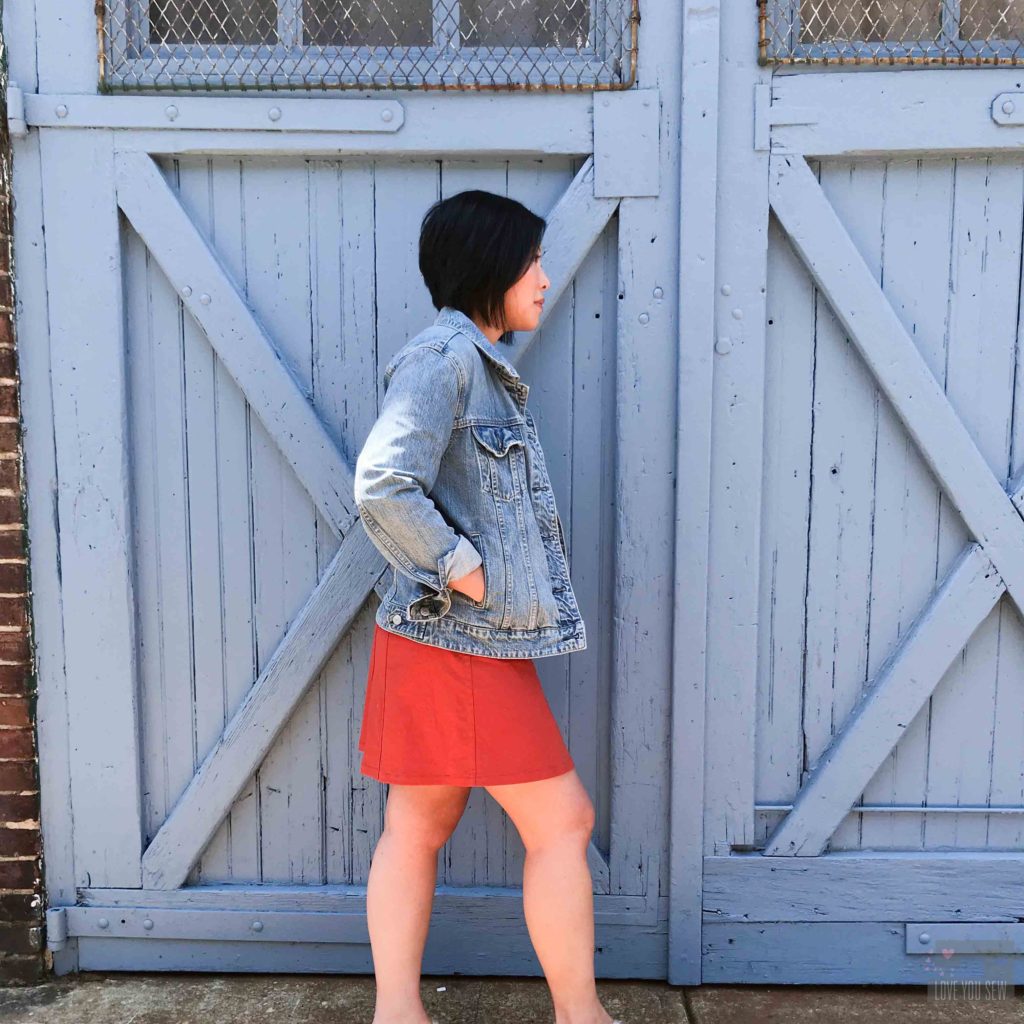
I ended up skipping the belt loops and even contemplated the pockets.  But the pockets really make the skirt and break up the high-waisted silhouette…AKA looking like old school mom/dad jeans!  Who was I really kidding?  Always add pockets.


I’m in love with this skirt and love how it all came together.  The solid fabric really brings out the seams and this brick color is a definite wardrobe staple.  My Tillery will be on repeat all summer long with it’s casual style and it will go with tanks and tees.  This piece will definitely be worn into the fall!

Project Details:

  • Pattern:  Tillery Skirt by Blank Slate Patterns
  • Sizing:  6 in the waist graded out to an 8 in the hip
  • Length: Mini
  • Fabric:  J.Crew Overstock stretch Twill from Imagine Gnats
  • Machine:  Juki TL-2010Q
  • Hardware:  Gold Star Tool Hardware Setter with in-house snaps. Unfortunately, I cannot recommend their snaps.  They bend a little when opening, but not enough to make me remove them all.  Going forward, I’ll only use Tandy Leather Snaps.)


Happy Sewing Friends!

Cristy


This post does include afflilate links for which I would be compensated only if you make a purchase.  All of it goes to keeping this blog as ad-free as possible!