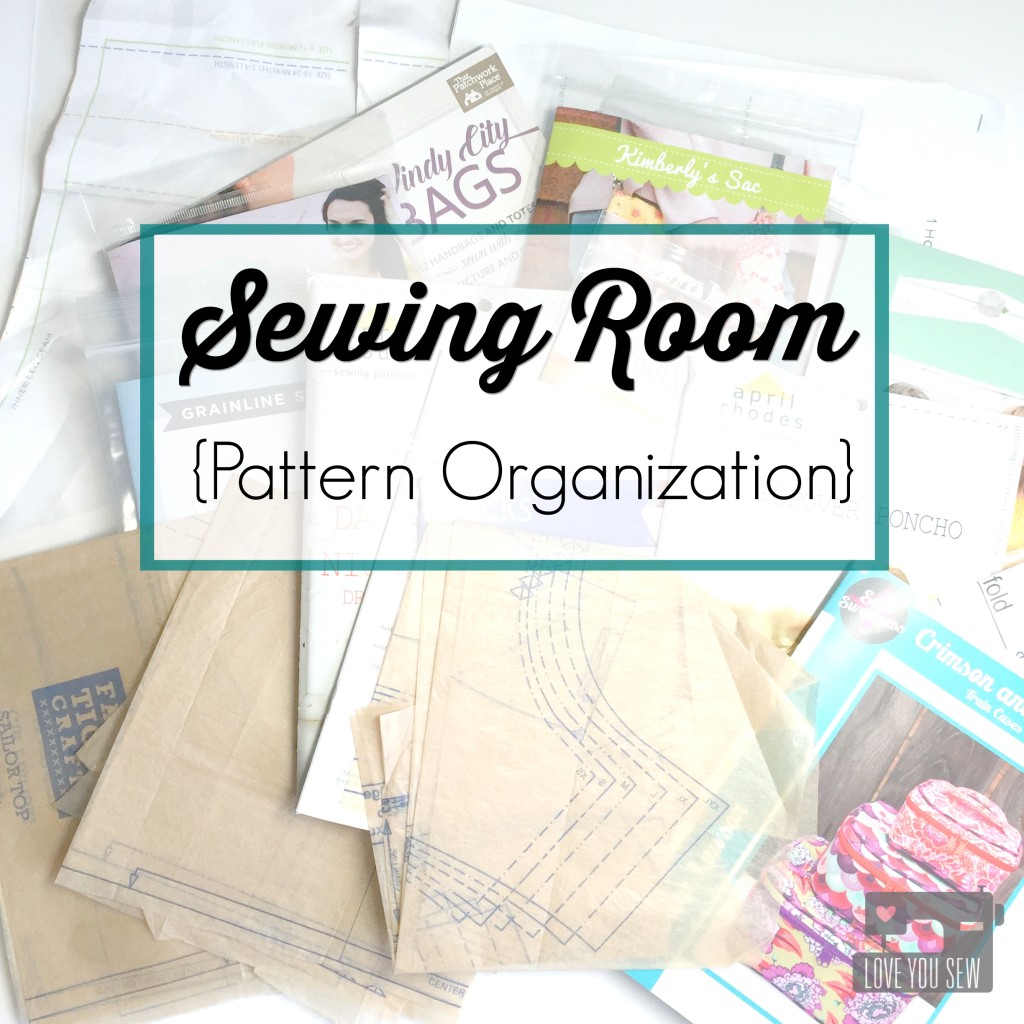
Sewing Room {Pattern Organization}

Pattern Organization Title

It’s funny when I’m asked what kind of sewist I am.  Quilter? Bag-Maker? Garments?  Well….I tell everyone, “I am all of the above.”  I like to dabble in everything — to challenge myself and I just love being able to make as much as I can with my own hands.  With this variety in my sewing repertoire, comes a TON of patterns!

I have a mix of both digital and paper patterns.  If given the option, I almost always take the full printed pattern.  As much as I love the instant gratification of downloading a digital pattern, the extra taping is a bit annoying and I have more difficulty tracing with printer paper.  I know…it’s nice to always have a back-up of a pattern on my computer, but be rest assured, I always make copies.  I trace garment patterns onto muslins and I create cardstock templates of bag pieces.  Which type of pattern do you prefer?

With all of the patterns and their print-outs…and the traced muslins…and the instructions…how do I organize them all?  As much as I would love a one-size fits all solution, it just doesn’t work for me. I have three different methods of organizing my sewing patterns and maybe one, two, or all three of them may work for you.

Classic Filing Method

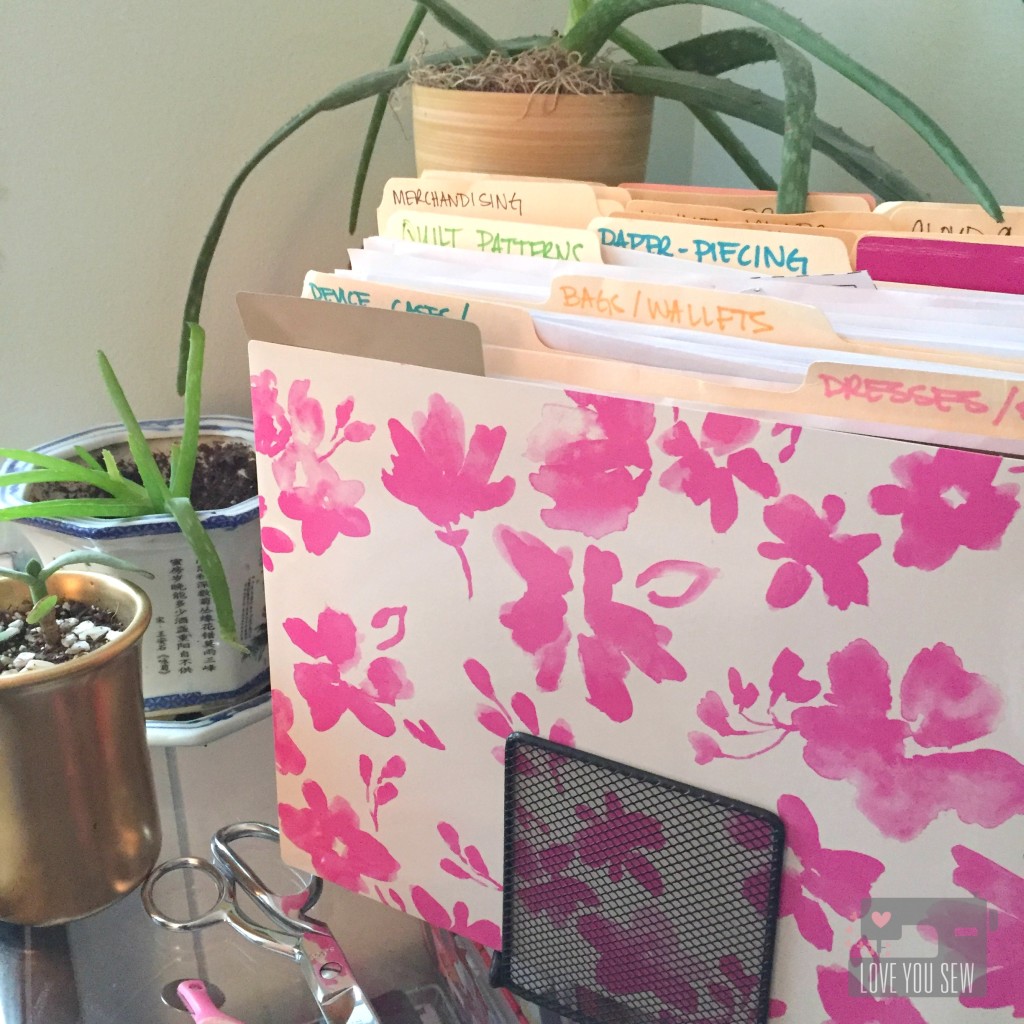
Pattern Organization File Folders

This has place from my former corporate office days.  It also was my first method when started sewing.  Having all the supplies on-hand didn’t hurt either.  I had a stack of file folders, a desktop tiered rack, plastic file boxes and even a metal cabinet.

I use this method to hold my digital patterns and printout of free tutorials on-line.  (Thank you fellow bloggers!)  These are all categorized by my most frequent sews as shown.


Shelf Method

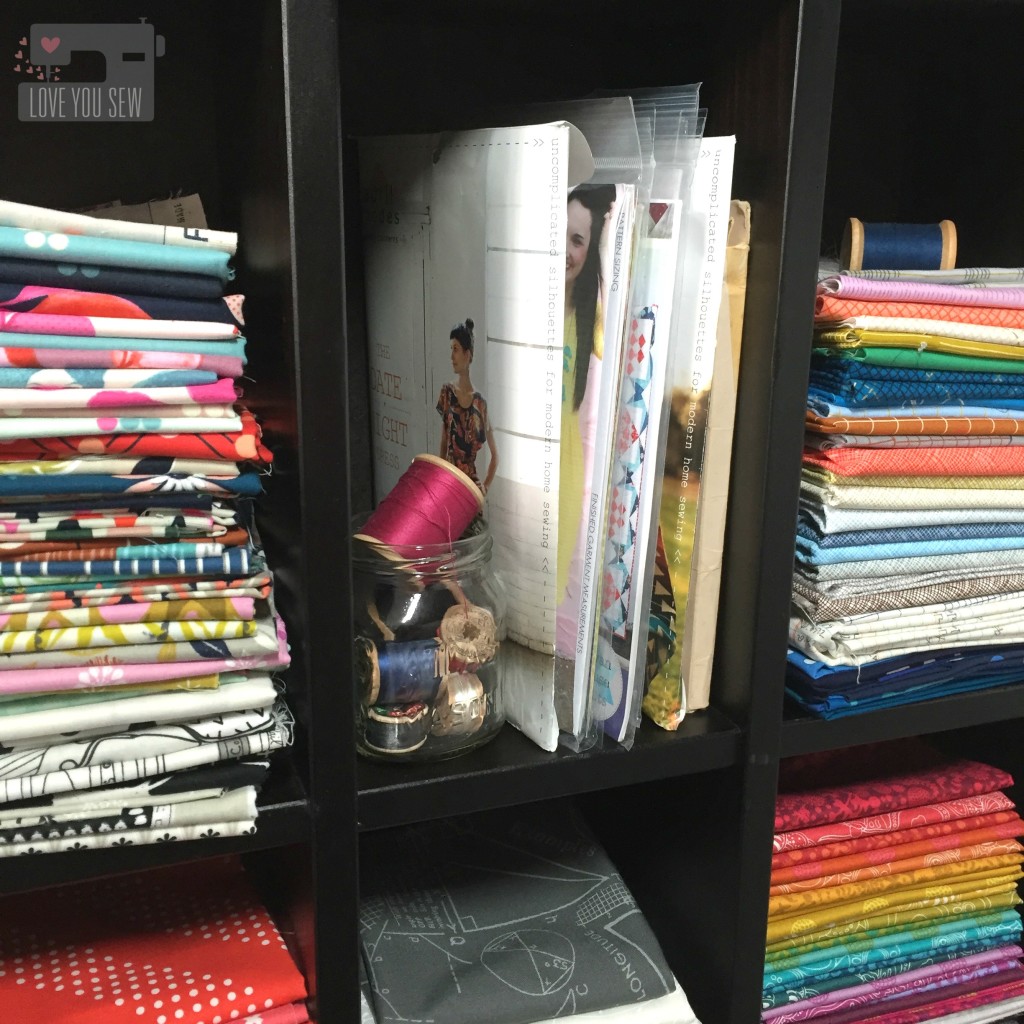
Pattern DVD Storage

Most physically purchased paper patterns are about 6″ x 10″.  They can easily get lost in regular shelving and other paper storage containers.  For awhile I had mine in cute little wire bins…but the patterns were quickly outgrowing my bins and I couldn’t see them well.

Fortunately, I had a friend who wanted to get rid of a DVD shelf…and it was nice solid piece.  (I bartered a toddler dress for this…score!)  This DVD shelf not only is the perfect size for paper patterns, but it holds fat quarters perfectly.  I love how I can see everything and my patterns are in easy access.


Art Portfolio


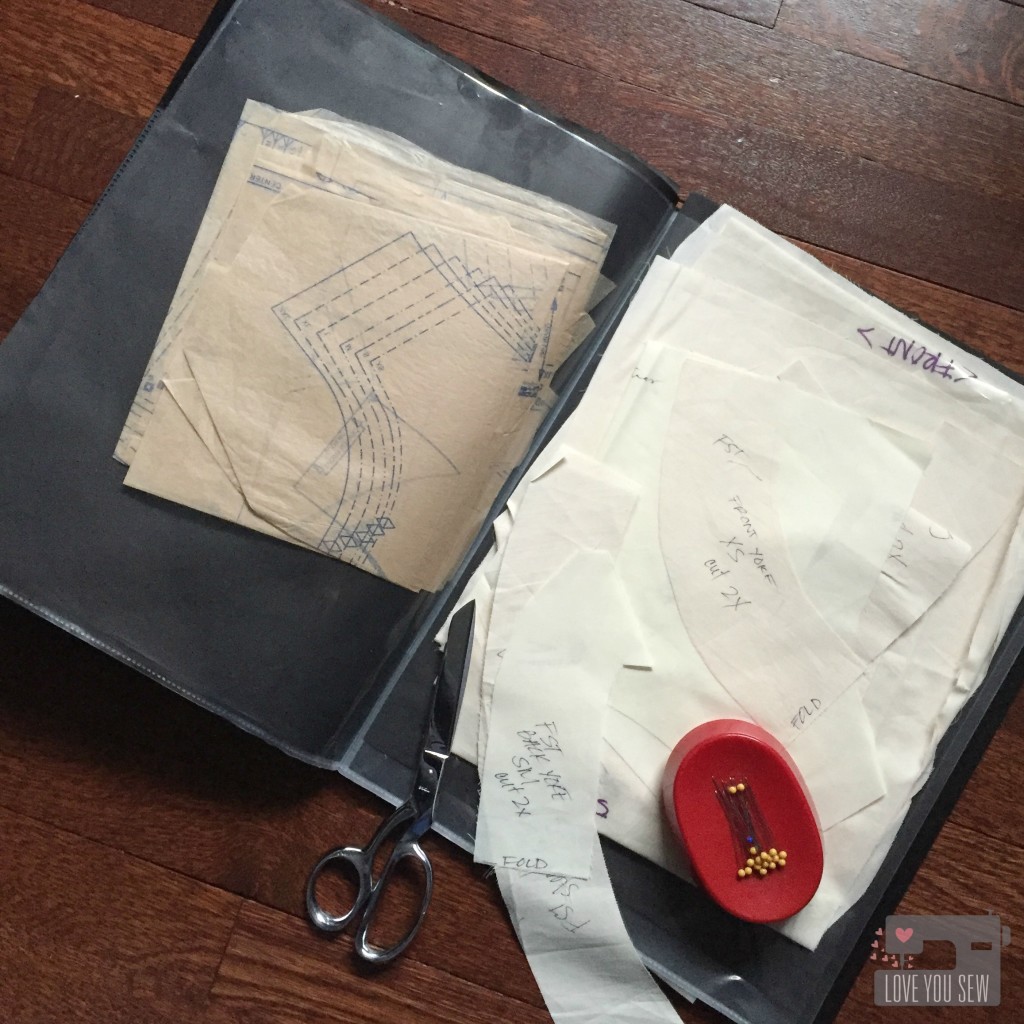
Pattern Organization Portfolio Open

So we tackled, letter-sized patterns and instructions with the file folders and the smaller printed patterns, but what about the big stuff?  For awhile, I folded all the taped pdfs up in those file folders and even used a large binder with those clear plastic sheet protectors, but they didn’t last long.  The patterns were all poking out and the folders got too full too quickly.  I needed something bigger…

When my kids started to bring home arts and crafts from school, I wanted to save all their cute projects.  So I picked up a smaller size art portfolio from my local big box retailer.  I use them to organize each year of school for my guys.  Then….it dawned on me one day that I should use one  for my big paper patterns.

This 11″ x 17″ portfolio size is perfect for my needs.  All of my patterns fit with only one or two folds without needing advanced origami skills to get them back into original form.  I love how it also holds my muslins and the clear pockets allow me to quickly identify what patterns are which.

How do you store all of your patterns?


Have a great week!

Cristy
 

Mountain View – 2016 Paintbrush Studio New Block Blog Hop

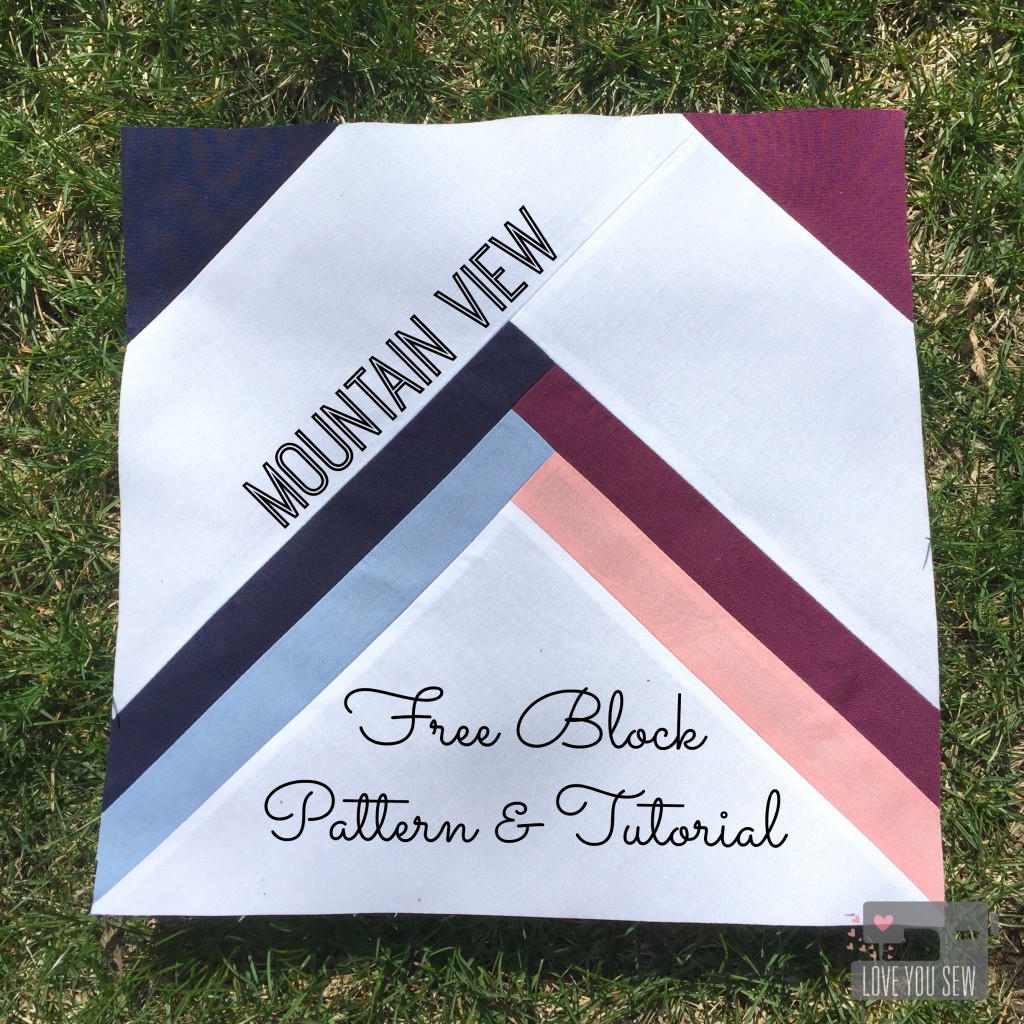
Mountain View Title

Welcome to the 2016 Paintbrush Studio New Block Blog Hop!  During the next three days, you will see a flurry of uniquely designed 12″ x 12″ (finished) quilt blocks.  The best part?  These are all FREE patterns!  For a full list of participants, please visit the host of each day’s hop:

Monday, March 28th – Yvonne @Quilting Jetgirl

Tuesday, March 29th – Cheryl @Meadow Mist Designs

Wednesday, March 30th – Stephanie @Late Night Quilter

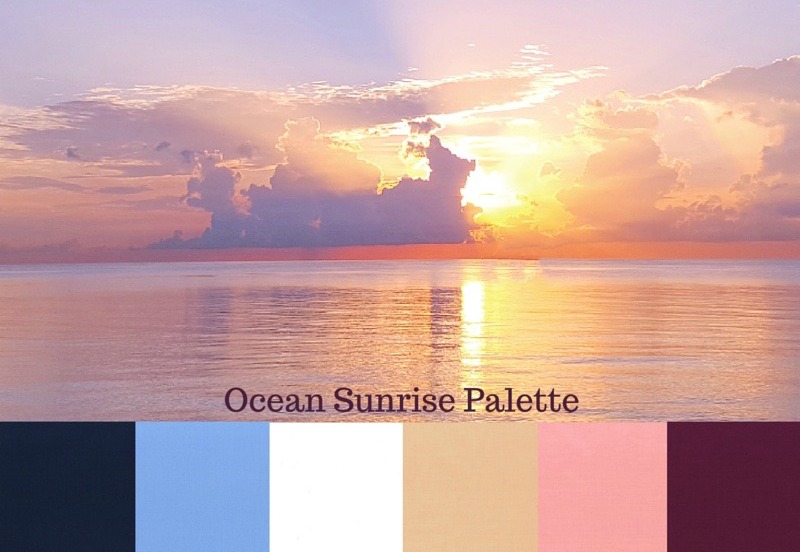
Ocean Sunrise Palette

The challenge with this blog hop, was to use at least 3 colors of Painter’s Palette Solids in the Ocean Sunrise bundle.  You can find all the details of the chosen colors here.  Do you use your quilts on the beach or by the water?


Mountain view Block

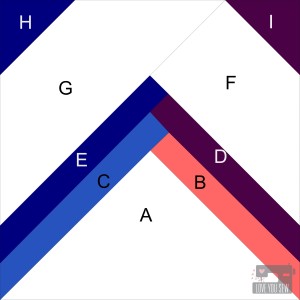
This call to design a new block was indeed a challenge for me.  I usually always have a design idea that’s been brewing in my head.  However, this time I was drawing up blanks.  I played with many ideas until I saw a sun catcher with this similar design.  It really inspired me with it’s simple lines like ones in Log Cabin style quilts.  But this block is set apart by it’s angles and the negative space produces a great chain design.

Mountain View Block Labeled

v2

As with all sewing projects, please read through full instructions before beginning. 

Cutting instructions:

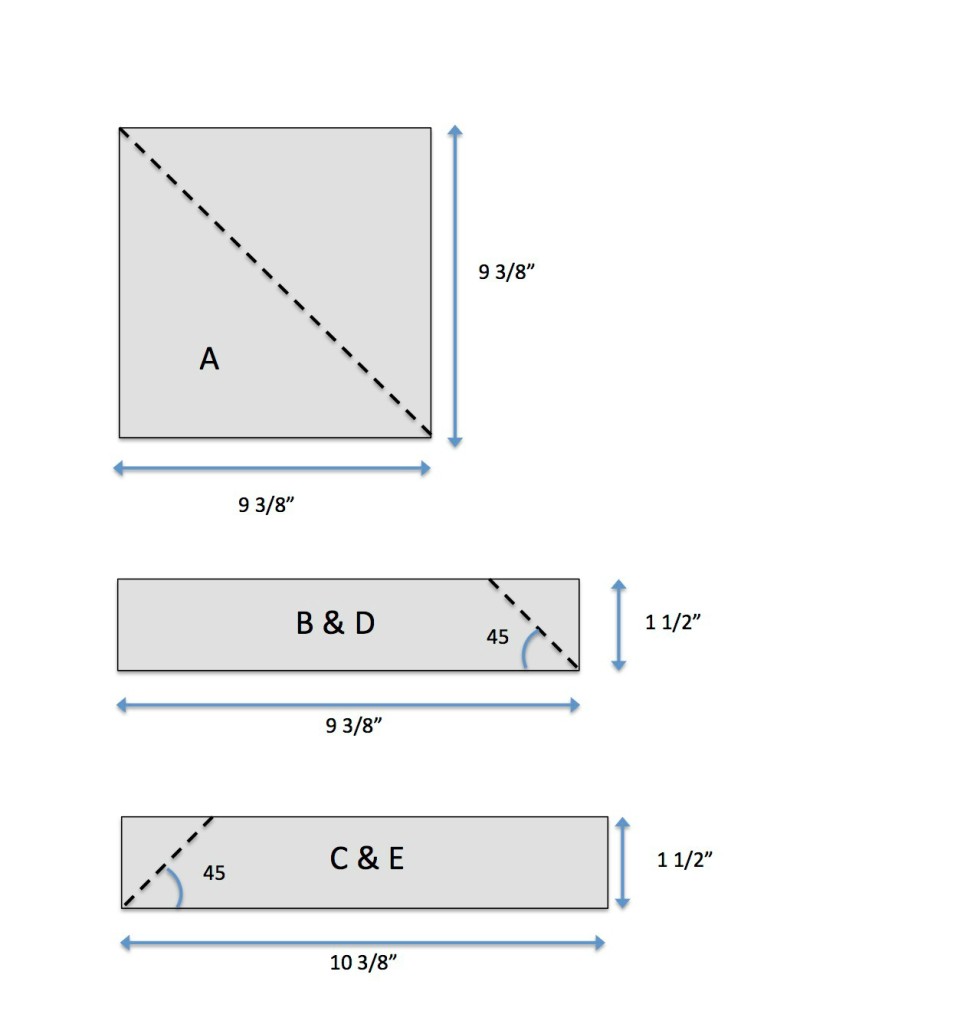
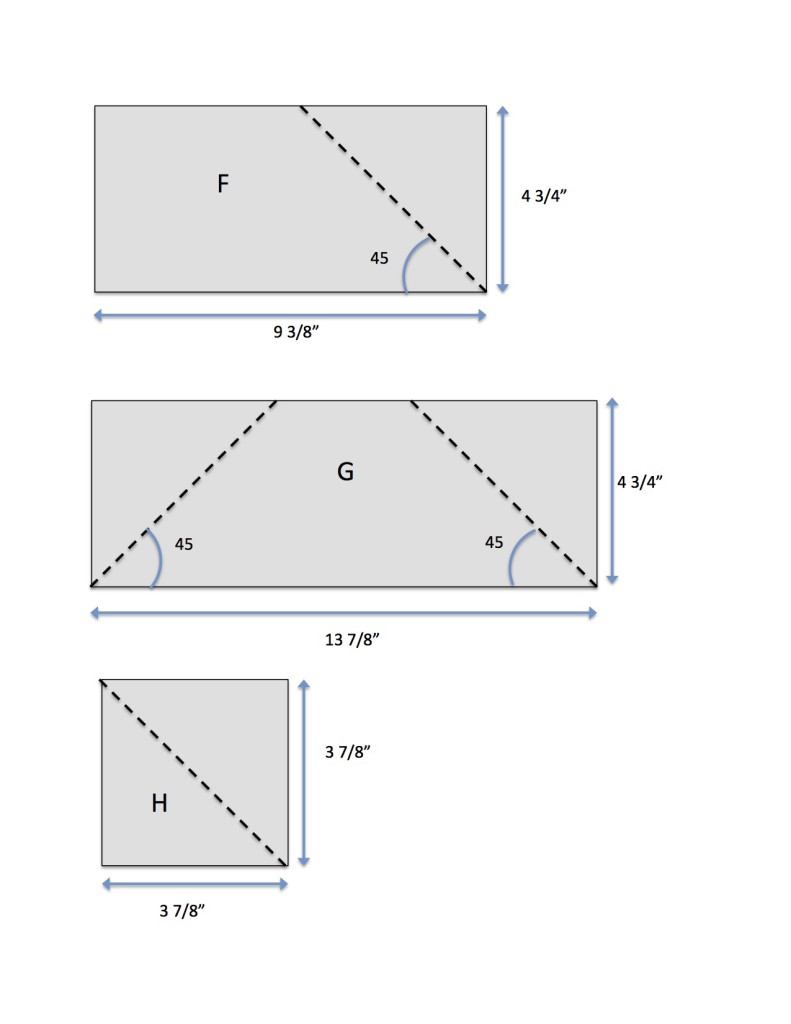
Below are illustrations of every piece of the block.  The dotted line represents where you cut.  A large quilting rule with 45 degree angles is required.  Please see block illustration above for reference.  TIP:  Check and double-check your angle placement on printed fabric before cutting.a


MV cuttingpiecing Instructions

Please note a 1/4″ seam allowance

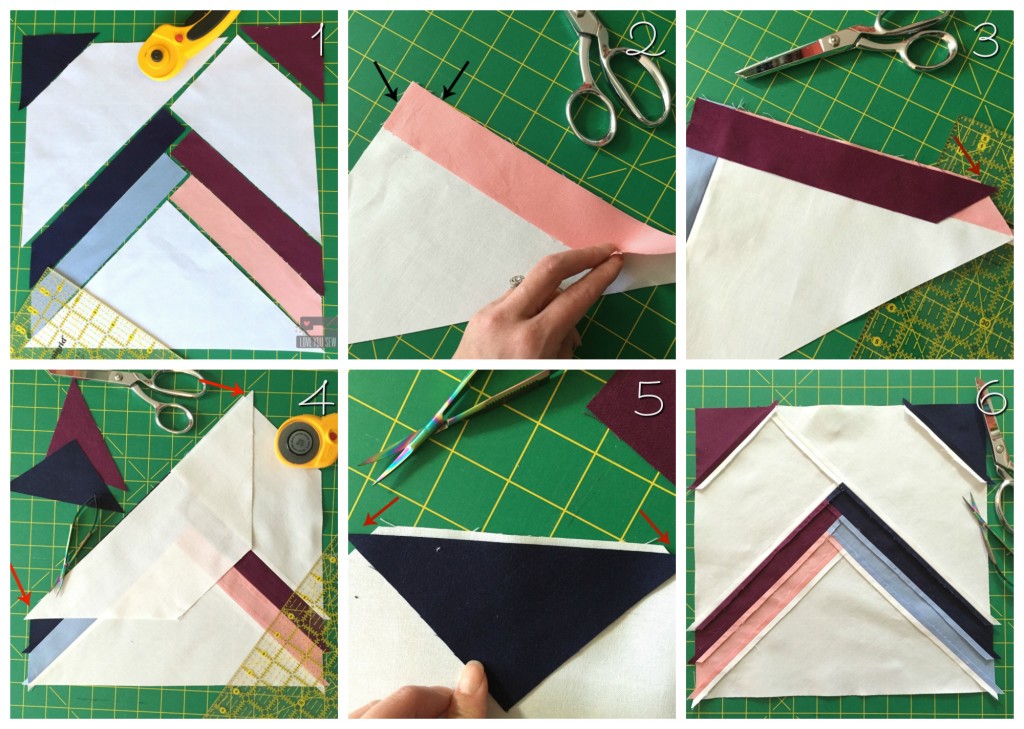
Mountain View Piecing Collage

  1. Layout the block with your intended fabric placement
  2. Line up the short edge of piece B to piece A right-sides together (RST) and sew down the long side. Repeat for piece C but on the opposite side.
  3. Line up the short edge of piece D to ABC.  You should have a 1/4″ overhang off the block. Repeat for piece E of the opposite side and then add piece F.
  4. Line up the long-side of piece G to ABCDEF.  You will have 1/4″ overhangs on both sides of the trapezoid.
  5. Line up the long-sides of H to each corner.  You will have 1/4″ overhangs on both sides of the triangle.
  6. Make sure to press all seams out as you go and you will have a nice flat back as shown.

Trim the block to 12 1/2″ square.

Additional Quilt variations:

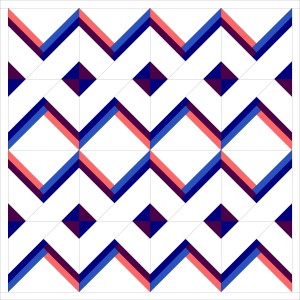
With the play of colors and negative space, there are quite a few different ways you can lay this quilt block.  Here a just a few other ideas.

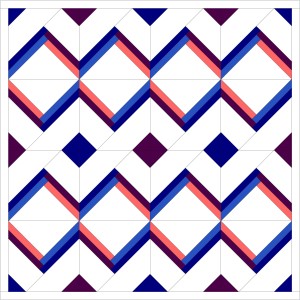
v5

This placement puts the “chain” in the center of the quilt and you can play with the smaller triangle (H) to get solid squares in between.

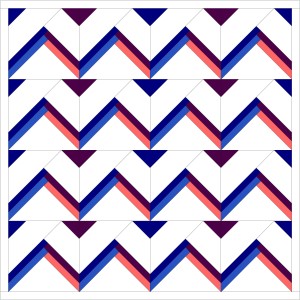
v4

This variation plays with the chevron you can create.  Leave the smaller triangles (H) colored, and you get an arrowhead look or leave them the same color as your background to let the chevron stand on it’s own.


Visit Painter’s Studio’s blog, Inspired by Fabric and/or Quilting Jetgirl (two separate giveaways) to get your chance to win a whole HALF-YARD bundle of Ocean Sunrise!!! {Edit – Giveaway closed}

IMG_4386

 Don’t forget to get additional FREE quilt block designs and tutorial by visiting the following:

Host: Yvonne @Quilting Jetgirl

Jess @Quilty Habit

Silvia @A Stranger View

Cristy @Love You Sew

Kelly @Quilting It Out

Renee @Quilts of a Feather

Bernie @Needle and Foot

Terri Ann @Childlike Fascination

Chelsea @Patch the Giraffe

Mary @Quilting is in my Blood

Diana @Red Delicious Life

Sarah @123 Quilt

Thank you for visiting and I hope you get to try out this block along with all of the others on the 2016 Painter’s Studio New Block Blog Hop!

Happy Stitching,

Cristy


This blog hop was sponsored by Painter’s Studio.  The quilt design, tutorial and all opinions are original and my own.

Kimberly Sac Sew-Along

Kimberly Sac Title

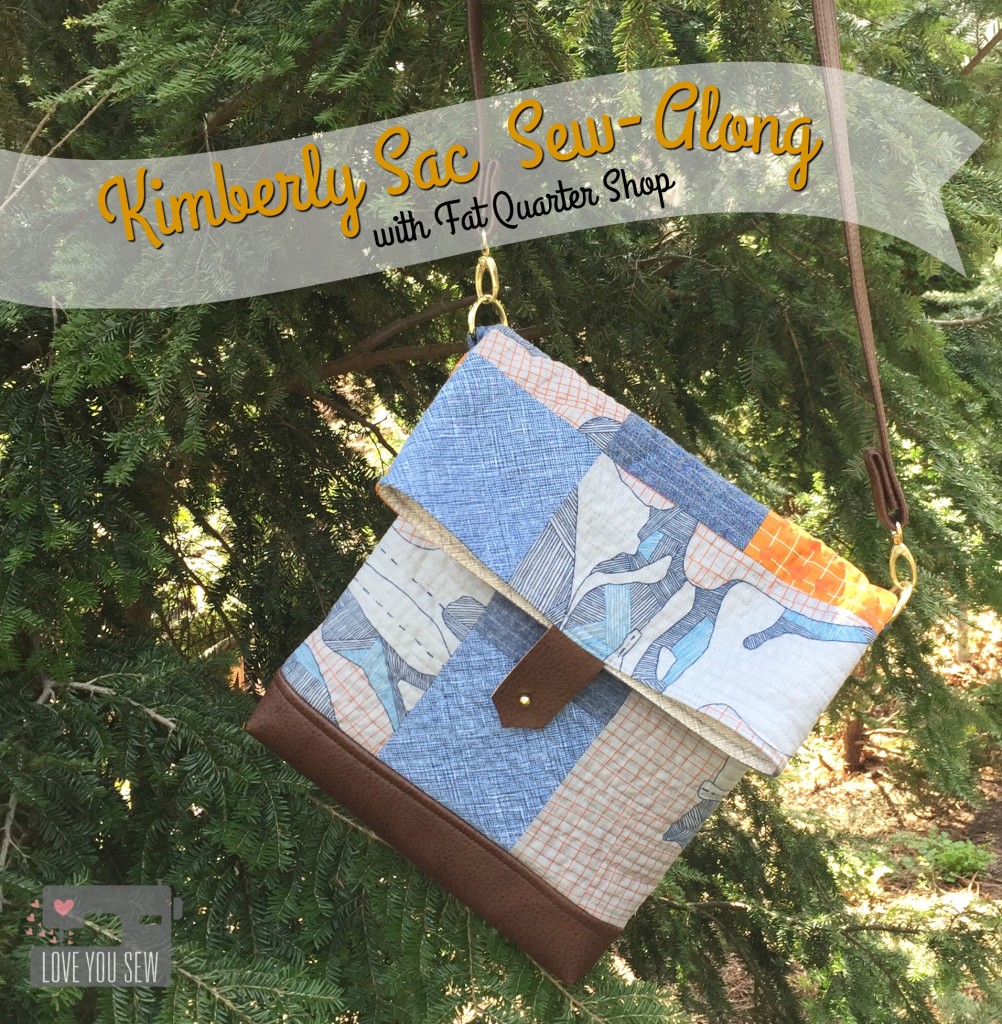
Fat Quarter Shop has another great pattern….and it’s for a bag!  When I was asked to join this sew-along, I could not say “no.”  I love making bags just as much as I do quilting.  With the Kimberly Sac by Fig Tree Studios, you get both!  It is a great cross-body design with some simple patchwork.  I’m so excited to show you my version along with all of Fat Quarter Shops versions found here.

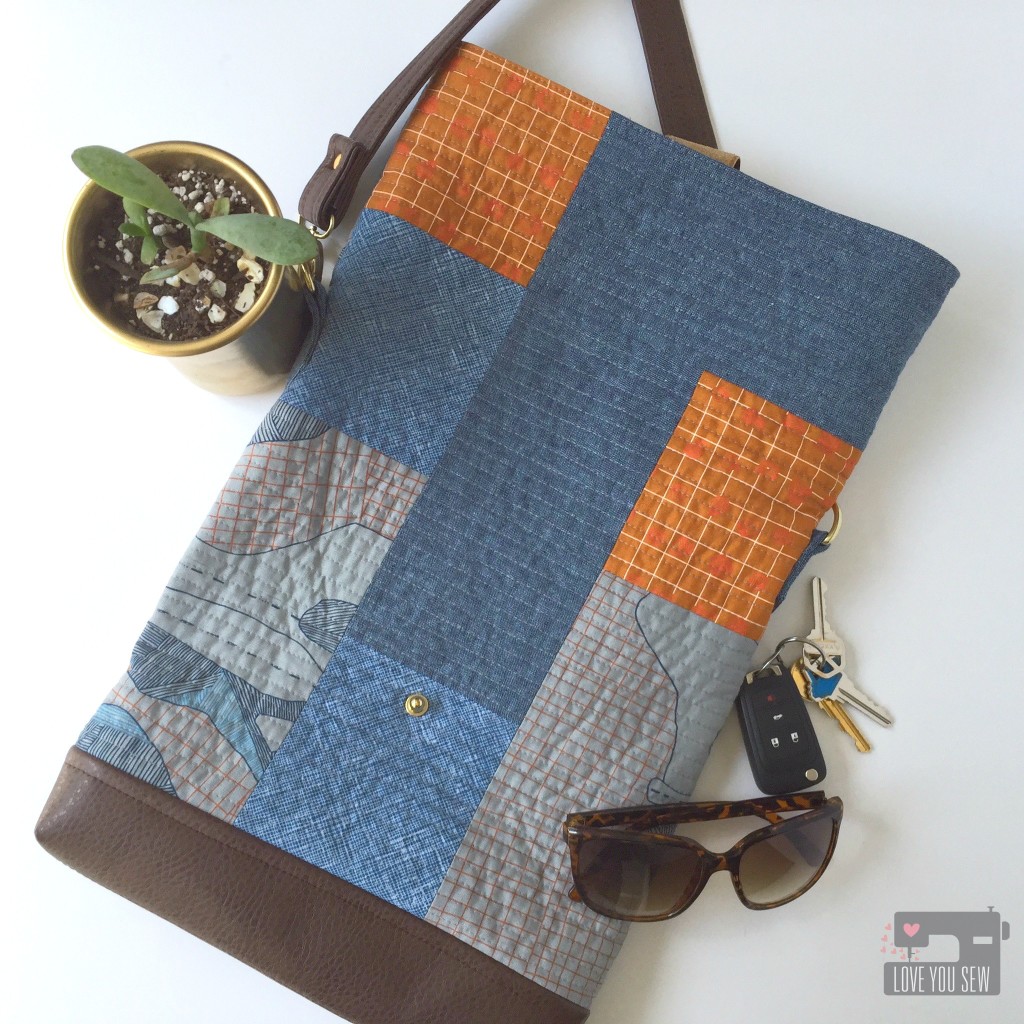
Kimberly Sac Fully Open

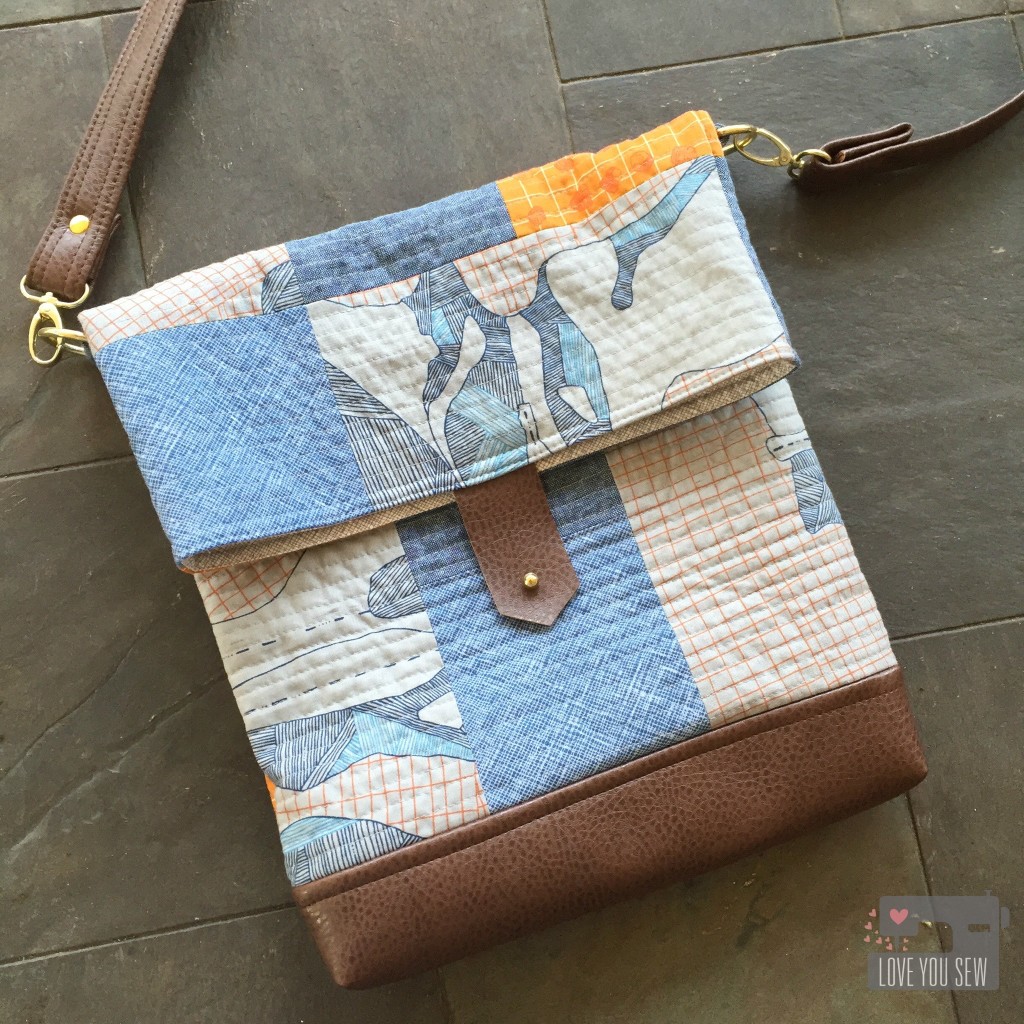
I like having different looks and feels to all of my bags.  After making my Indigo Sky Quilt, I fell in love with the Essex Yarn-Dyed Linen in nautical, so I wanted to incorporate it into the Kimberly Sac.  It really helps complement Carolyn Friedlander’s fabrics.  There is a mix of Carkai and Architextures Crosshatch in more earthly tones.

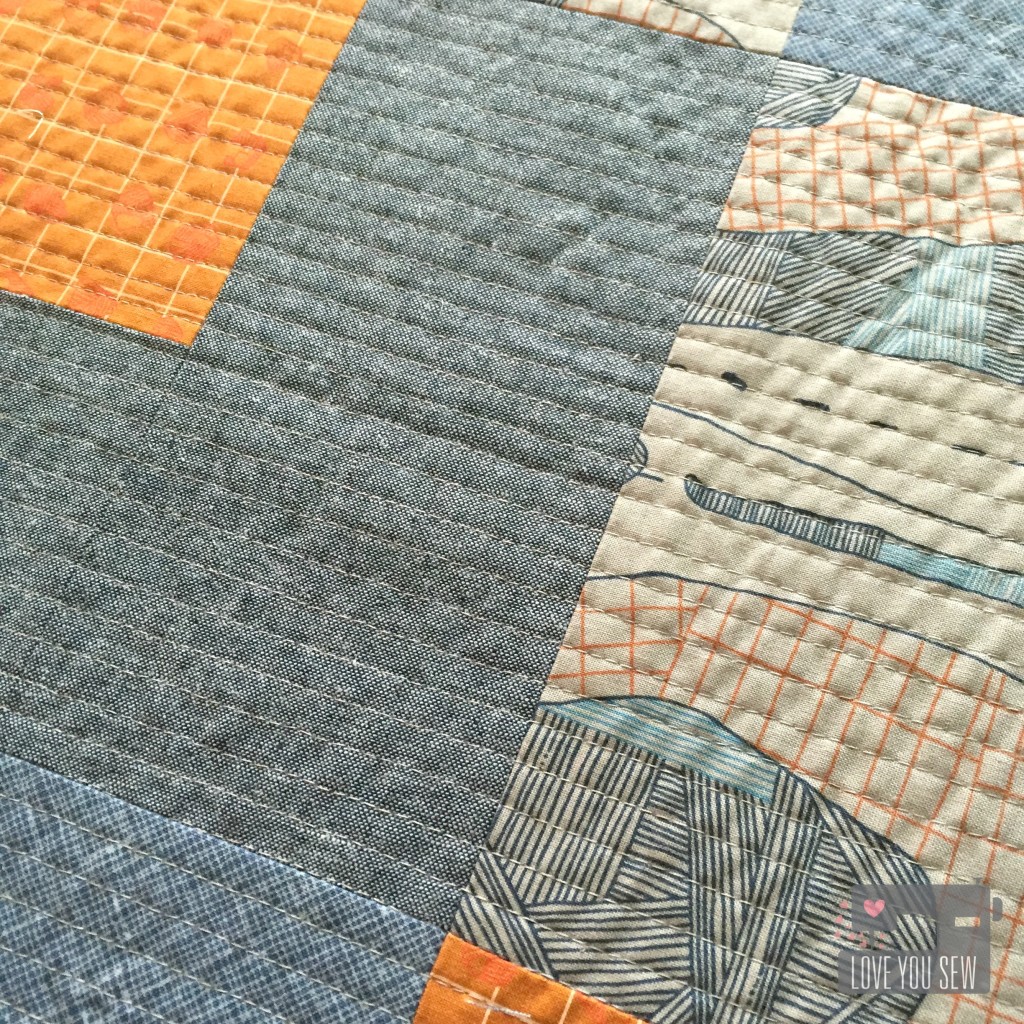
Kimberly Sac Quilting Close Up

The bag came together very quickly, especially without having to deal with a zipper.  I did use 1/4″ straight-line quilting, but you can opt for a more simple design.  If you decide on more heavier quilting like I did, I would suggest cutting the batting about 1″ larger all around and then trim it back.

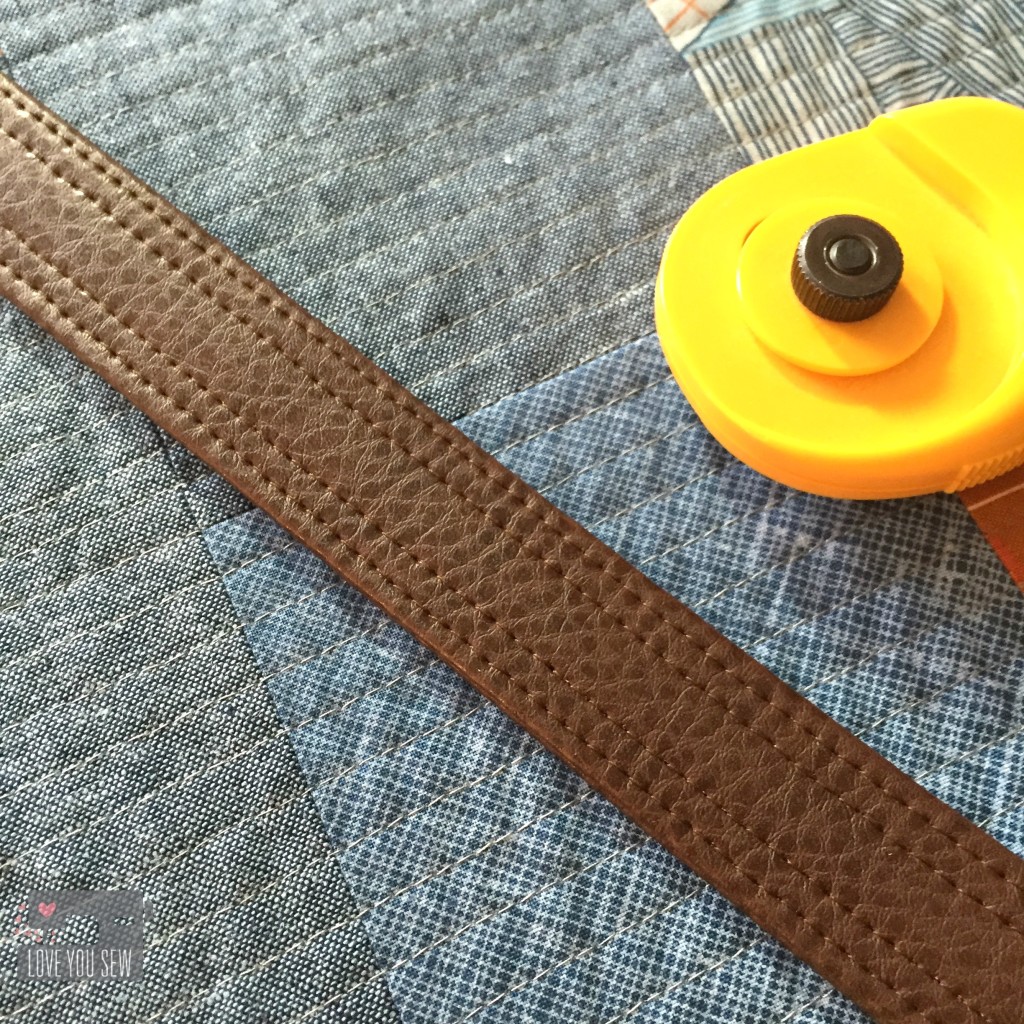
Kimberly Sac Vinyl Strap

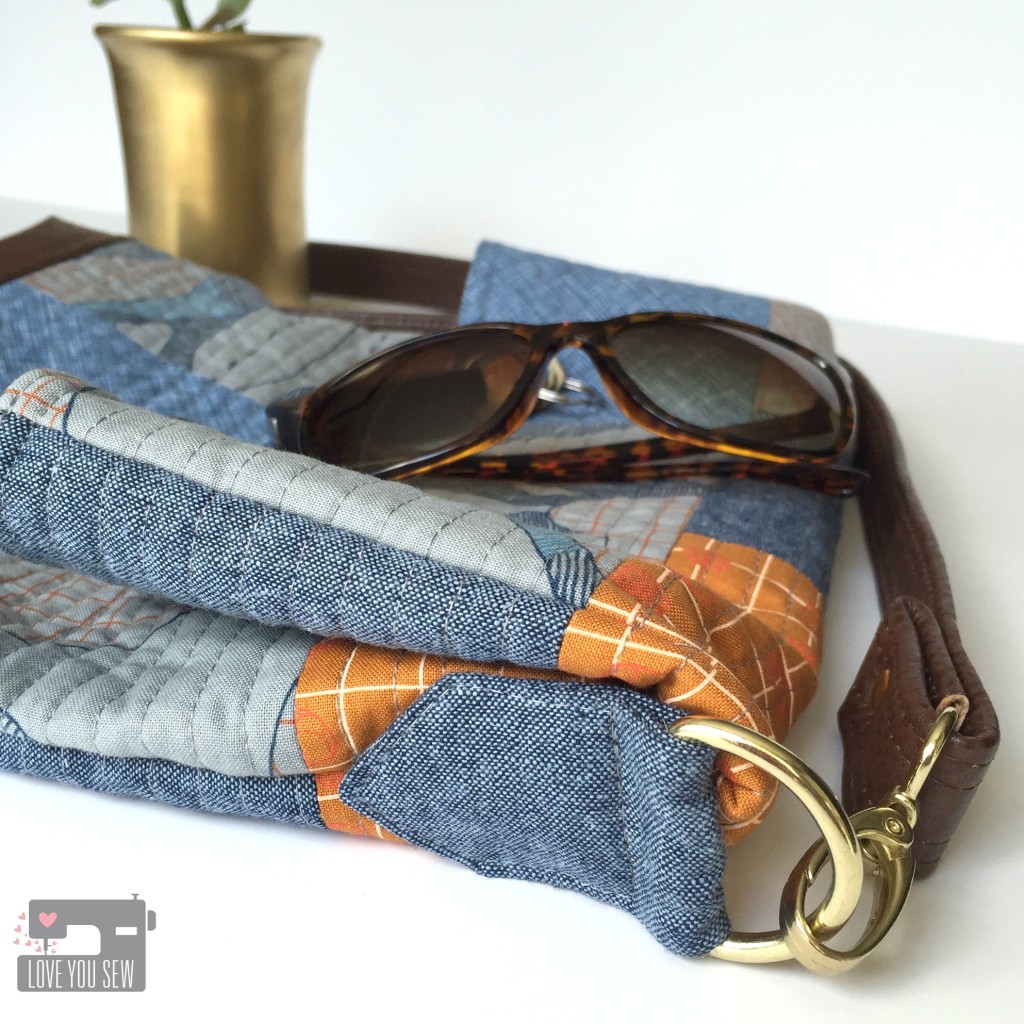
One of the most noticeable changes I made was to use vinyl for the straps and bottom of the Kimberly Sac.  The brown vinyl gives any bag an extra level of sophistication and structure.  Make sure to test the vinyl with your machine before committing though!

Button Stud Close Up

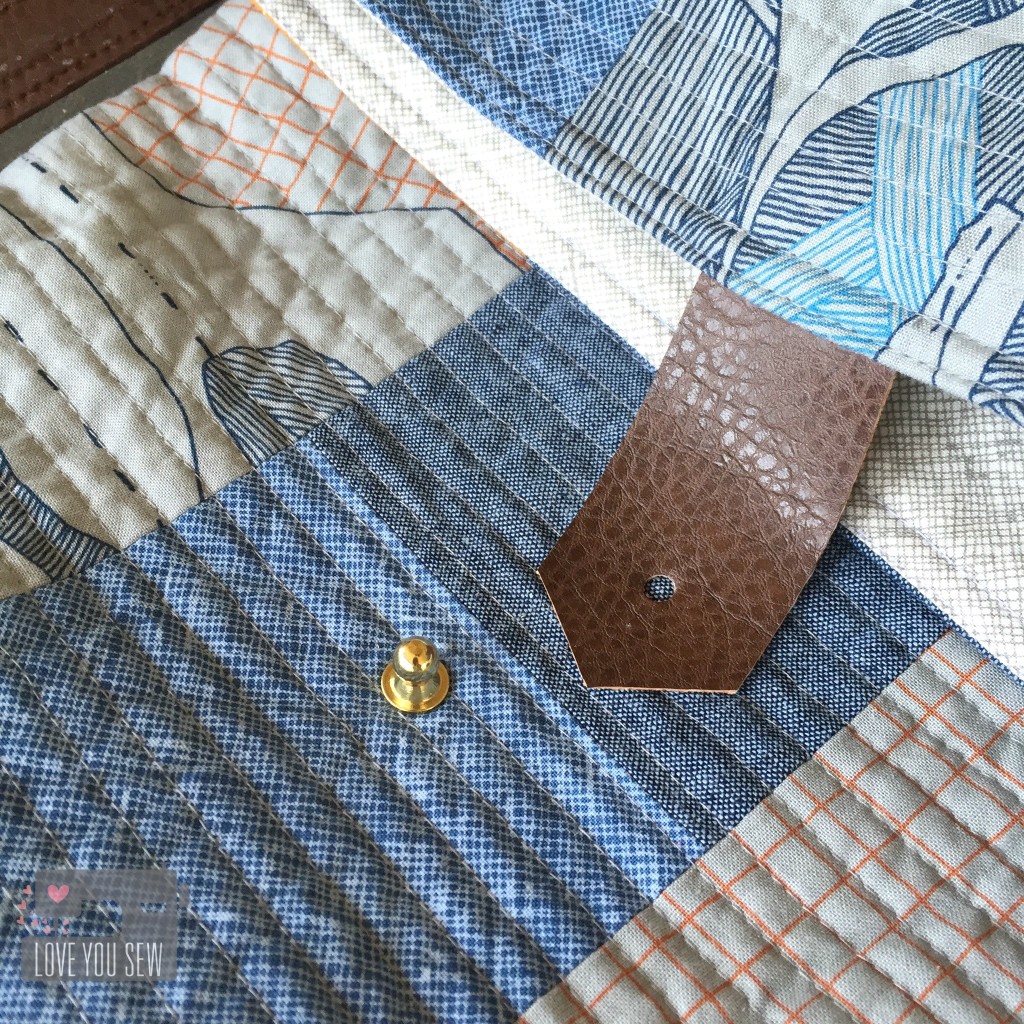
When I have to break out a hammer on a project, it’s a good day 🙂  I love playing with hardware and saw the opportunity to use this button stud when the pattern called for a traditional sew-on button.  The loop was replaced by a strip of vinyl I hand-punched.  This closure adds a fun edgy detail to the bag.

Kimberly Sac Side Close Up

A tip to keep these tags straight and in place, is to use some Sewline Glue. It allows you to place the pieces on the bag before top-stitching.  With so many layers, pins were distorting the tabs shape, so the glue helps them lay nice and flat for straight stitches.

Kimberly Sac Fully Profile

The Kimberly Sac was a nice easy sew and the lack of zippers makes it very beginner friendly!  I love the relaxed slouchy design and who doesn’t love the ease of a cross-body strap?  The Carkai and vinyl make this a great everyday bag for running errands and is large enough to handle everyday life.  What is the strangest thing you have to carry in your purse or bag?

  • Need the Full Kit with hardware and Strawberry Fields Revisited fabric?  You can find it here.
  • If you would like just the pattern, you can find that here.
  • Let’s make all of this even easier by watching full video tutorial with Fat Quarter Shop and Fig Tree Studio.


For more inspiration, visit all my Kimberly Sac Sew-Along  bag-mates below:

Fat Quarter Shop

Emily Ann’s Kloset
Seasoned Homemaker
Jedi Craft Girl
Sharon Holland Designs
Why Not Sew
She Can Quilt
Love You Sew (you are here)
Sweet Little Pretties


Have fun stitchin’!

Cristy


As part of the Fat Quartershop Kimberly Sac Sew-Along, I have been compensated for my time and materials.  However, all opinions are all my very own. 


Plaid Flannel Cargo Duffle

CargoDuffleTitle

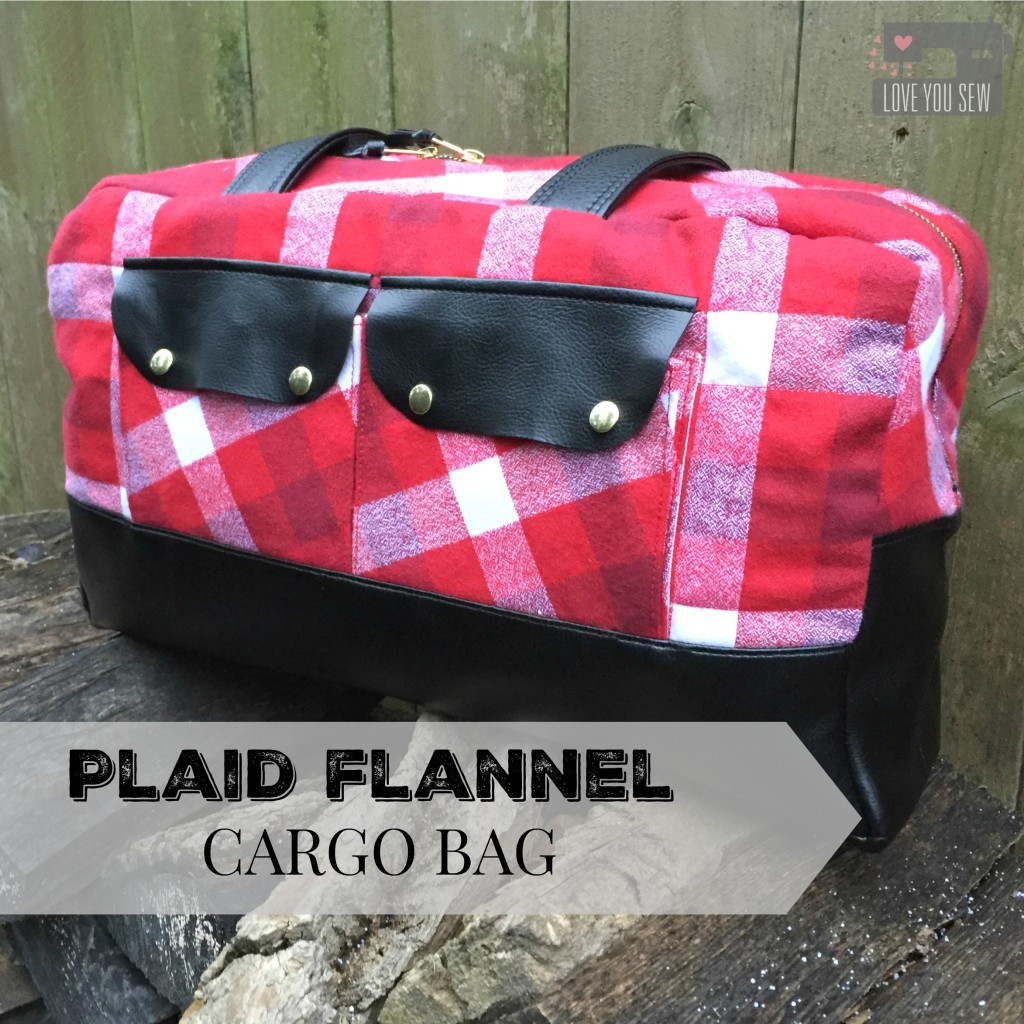
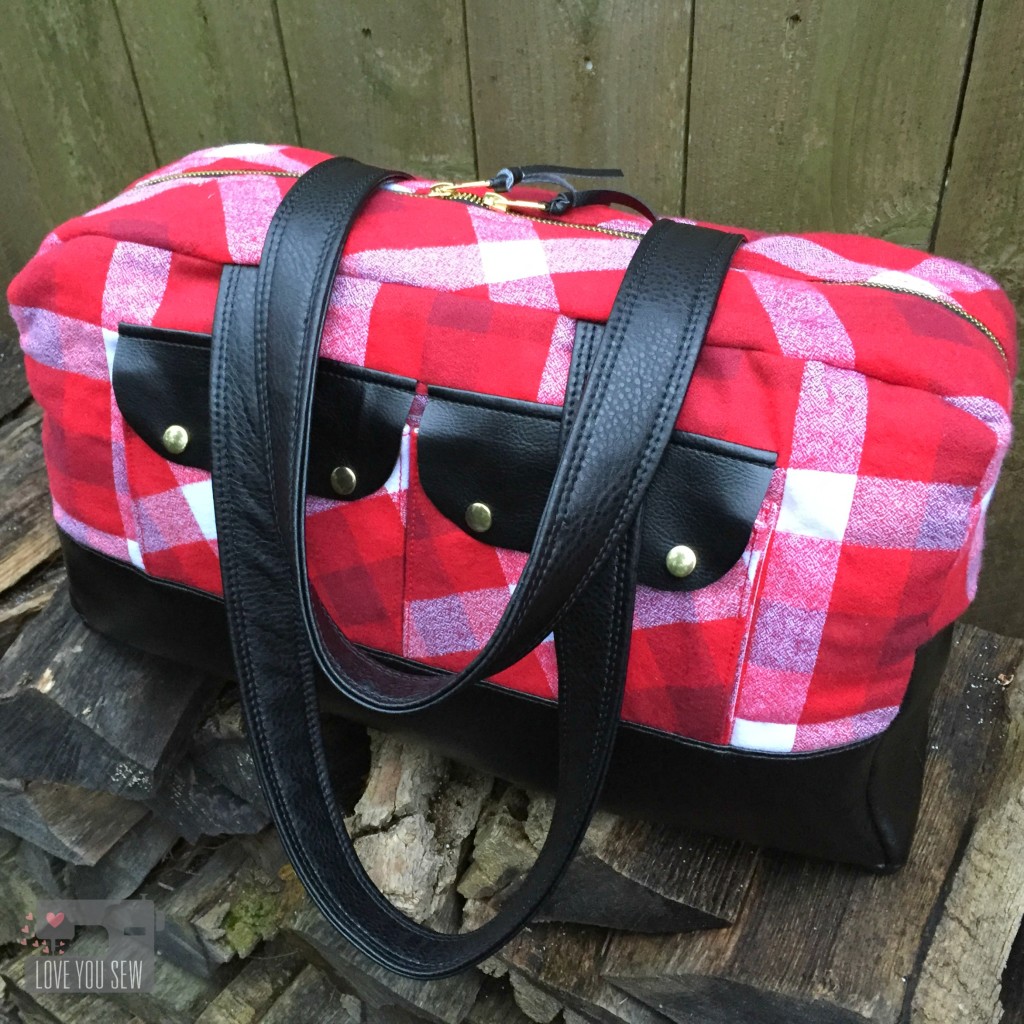
After I made my first Noodlehead Cargo Duffle for Sew Sweetness‘ Pursepalooza shown here, I quickly received a request to have one commissioned.  How many times has that happened to you?  However, the request came from my sister…so you know it turned into a gift instead 😉 Now that Christmas has passed, I can finally show you this version!

FullProfileWStraps

My sister wanted a plaid flannel just like my original…so of course, I went back to Robert Kaufman’s Mammoth Plaids.  They are just SO soft.  The black vinyl is “suede cloth” purchased from my local JoAnn’s.

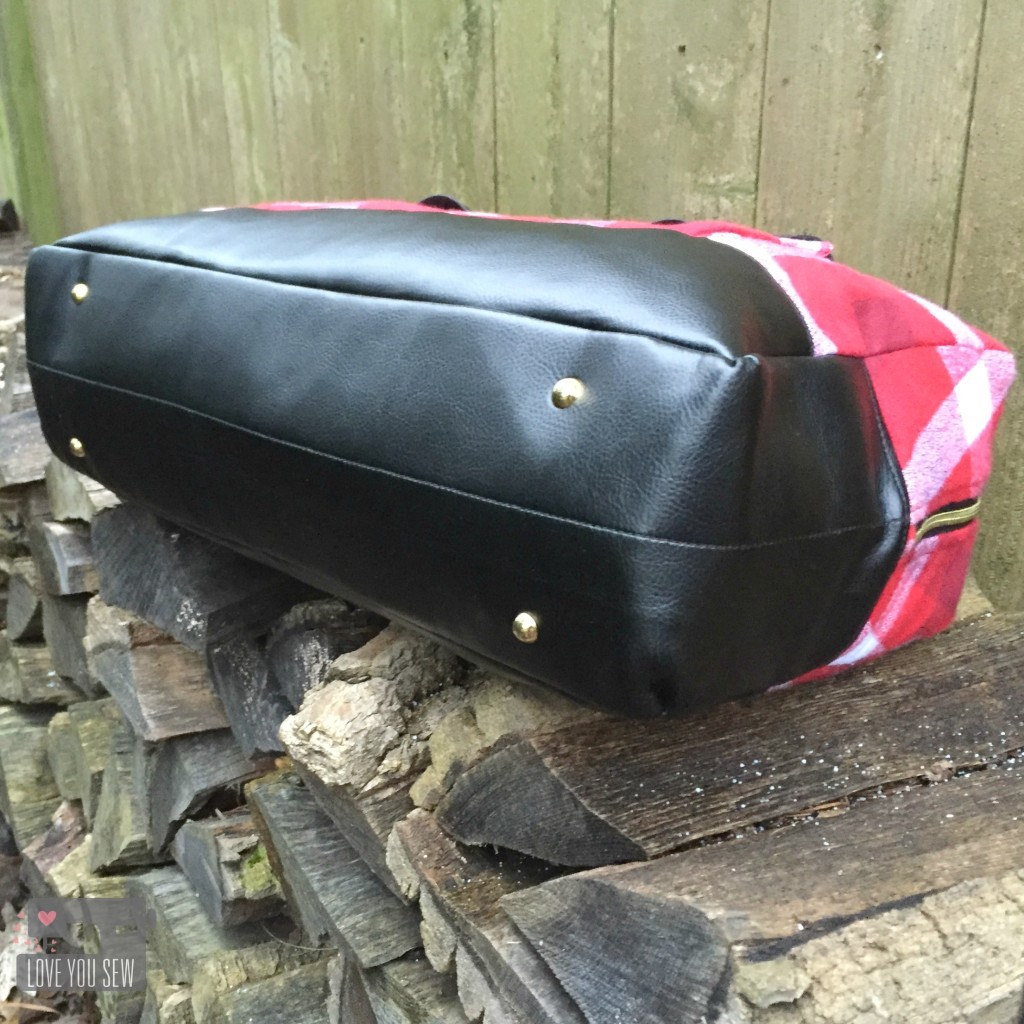
BottomFeet

Purse feet are a great added touch to make a bag look more professional.  These are from Emmaline Bags.  I adjusted the spacing to them vs my original to be a little closer together. They are approximately 14″ apart lengthwise and 1.5″ in from the outer seams.  The pocket snaps are from Tandy Leather.

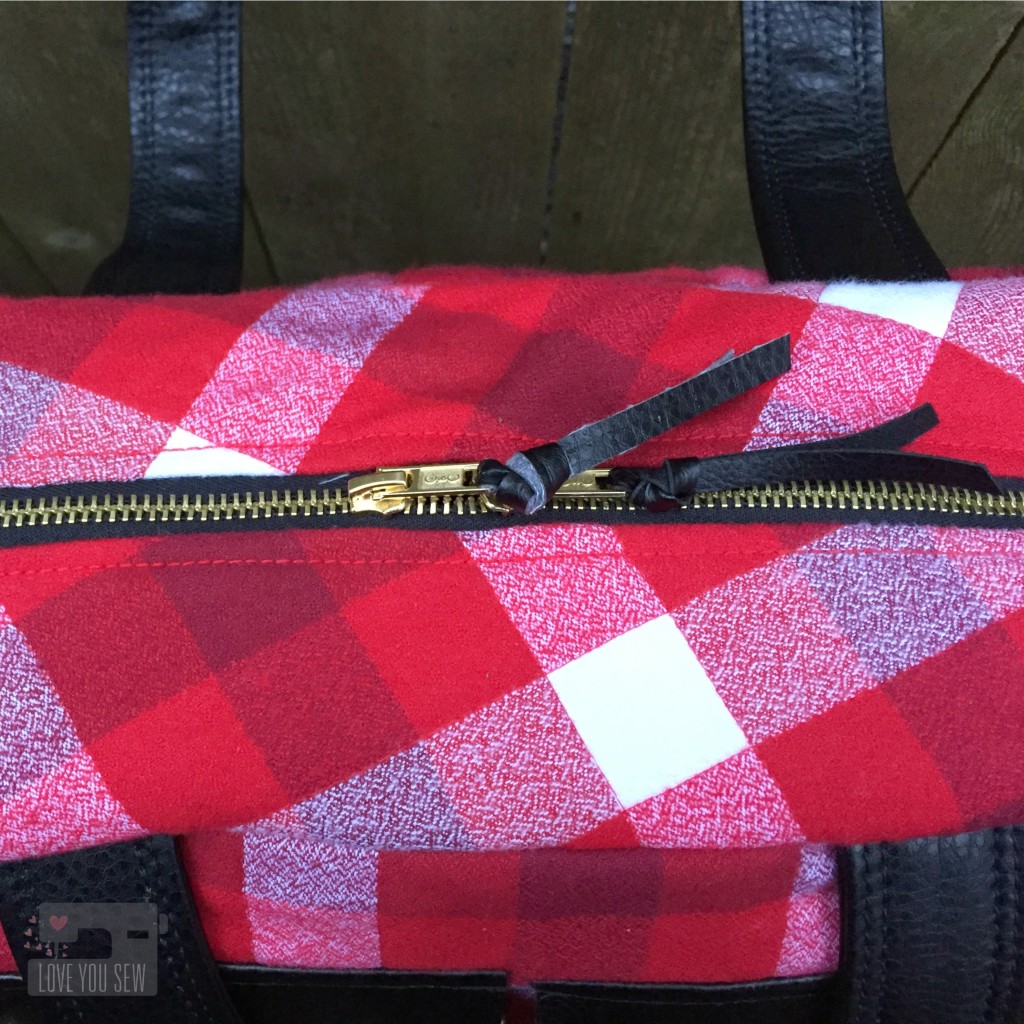
DuffleTop

If I can use a metal zipper on a bag, I always will….they are just so pretty!  The outer zipper is a coverall style by Coats and Clark.  The interior zipper is YKK.

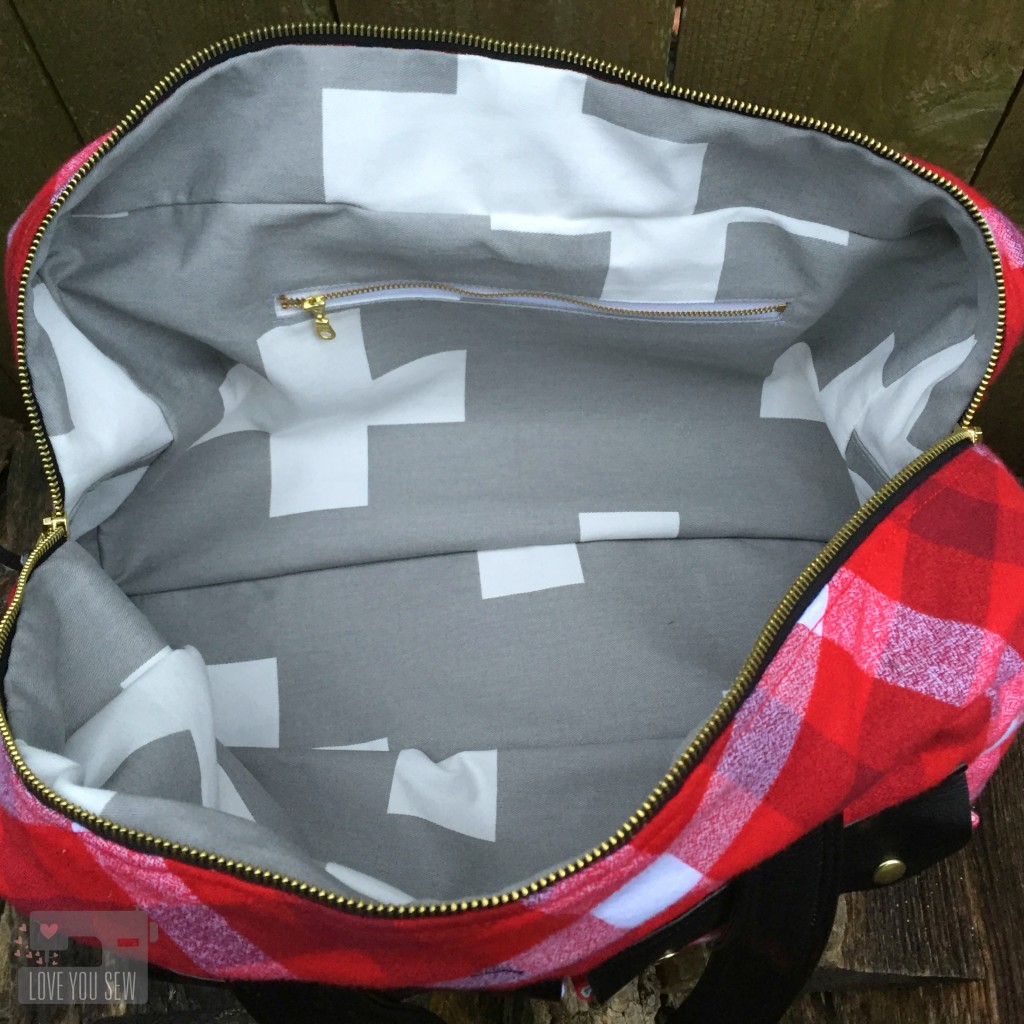
InsideView

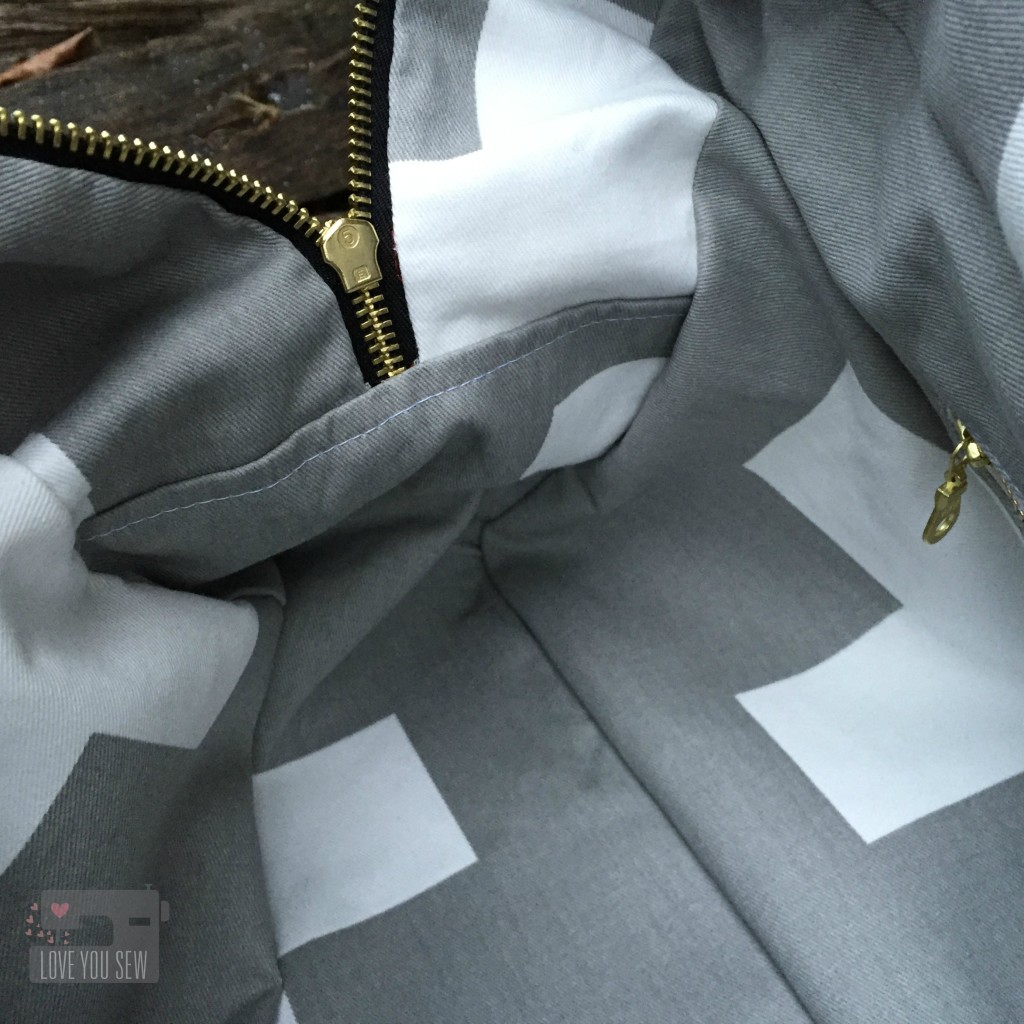
The biggest difference with this bag is the interior.  I used this tutorial by Small Town Thread to create a drop-in lining.  I tacked the liner to the bag’s top corners then hand-sewed it to the zipper.  This was just to keep the look clean and keep any extra fabric away from being snagged into the zipper.

InteriorCloseUp

I use a lot of Premier Prints home dec fabric and this interior fabric is no different.  It is the larger Swiss Cross pattern.  This fabric complements the red and black exterior while echoing the plaid design as well….I really love it 🙂

I’m happy to report my sister loves this bag as well!  She is one of my strongest supporters and also one of my best salespeople.  It is quite flattering that she wanted one of my bags to go alongside all of her designer ones.  Now I’m off to make her another bag….haha!  It never ends, right?!? 😉


xoxo – Cristy


Fall Fabric Pumpkin Decor

Fall Fabric Pumpkin Decor

I know I’m a little late…but it’s still before Halloween….so Happy Fall, friends!  From lattes to lights, you can find everything in pumpkin form this time of year.  So, how about some fun Fall Fabric Pumpkin decor?

Last year, I found this great tutorial from Fiskars to make a Pumpkin Pincushion on Pinterest.  I had a bunch of random JoAnn’s fabric scraps and wanted to have some new autumnal accessories for my home without having to buy them.  (Nice when that can actually happen, right???)

Fabric Pumpkin

Instead of using the 6″ circle pattern (4″ diameter,) I enlarged the circle to a 9″ diameter and then to a 12″ diameter.  This was a simple adjustment with a compass to draw up the circles.  TIP: You can use some household bowls that are roughly around the same size as templates.

Fall Fabric Pumpkin

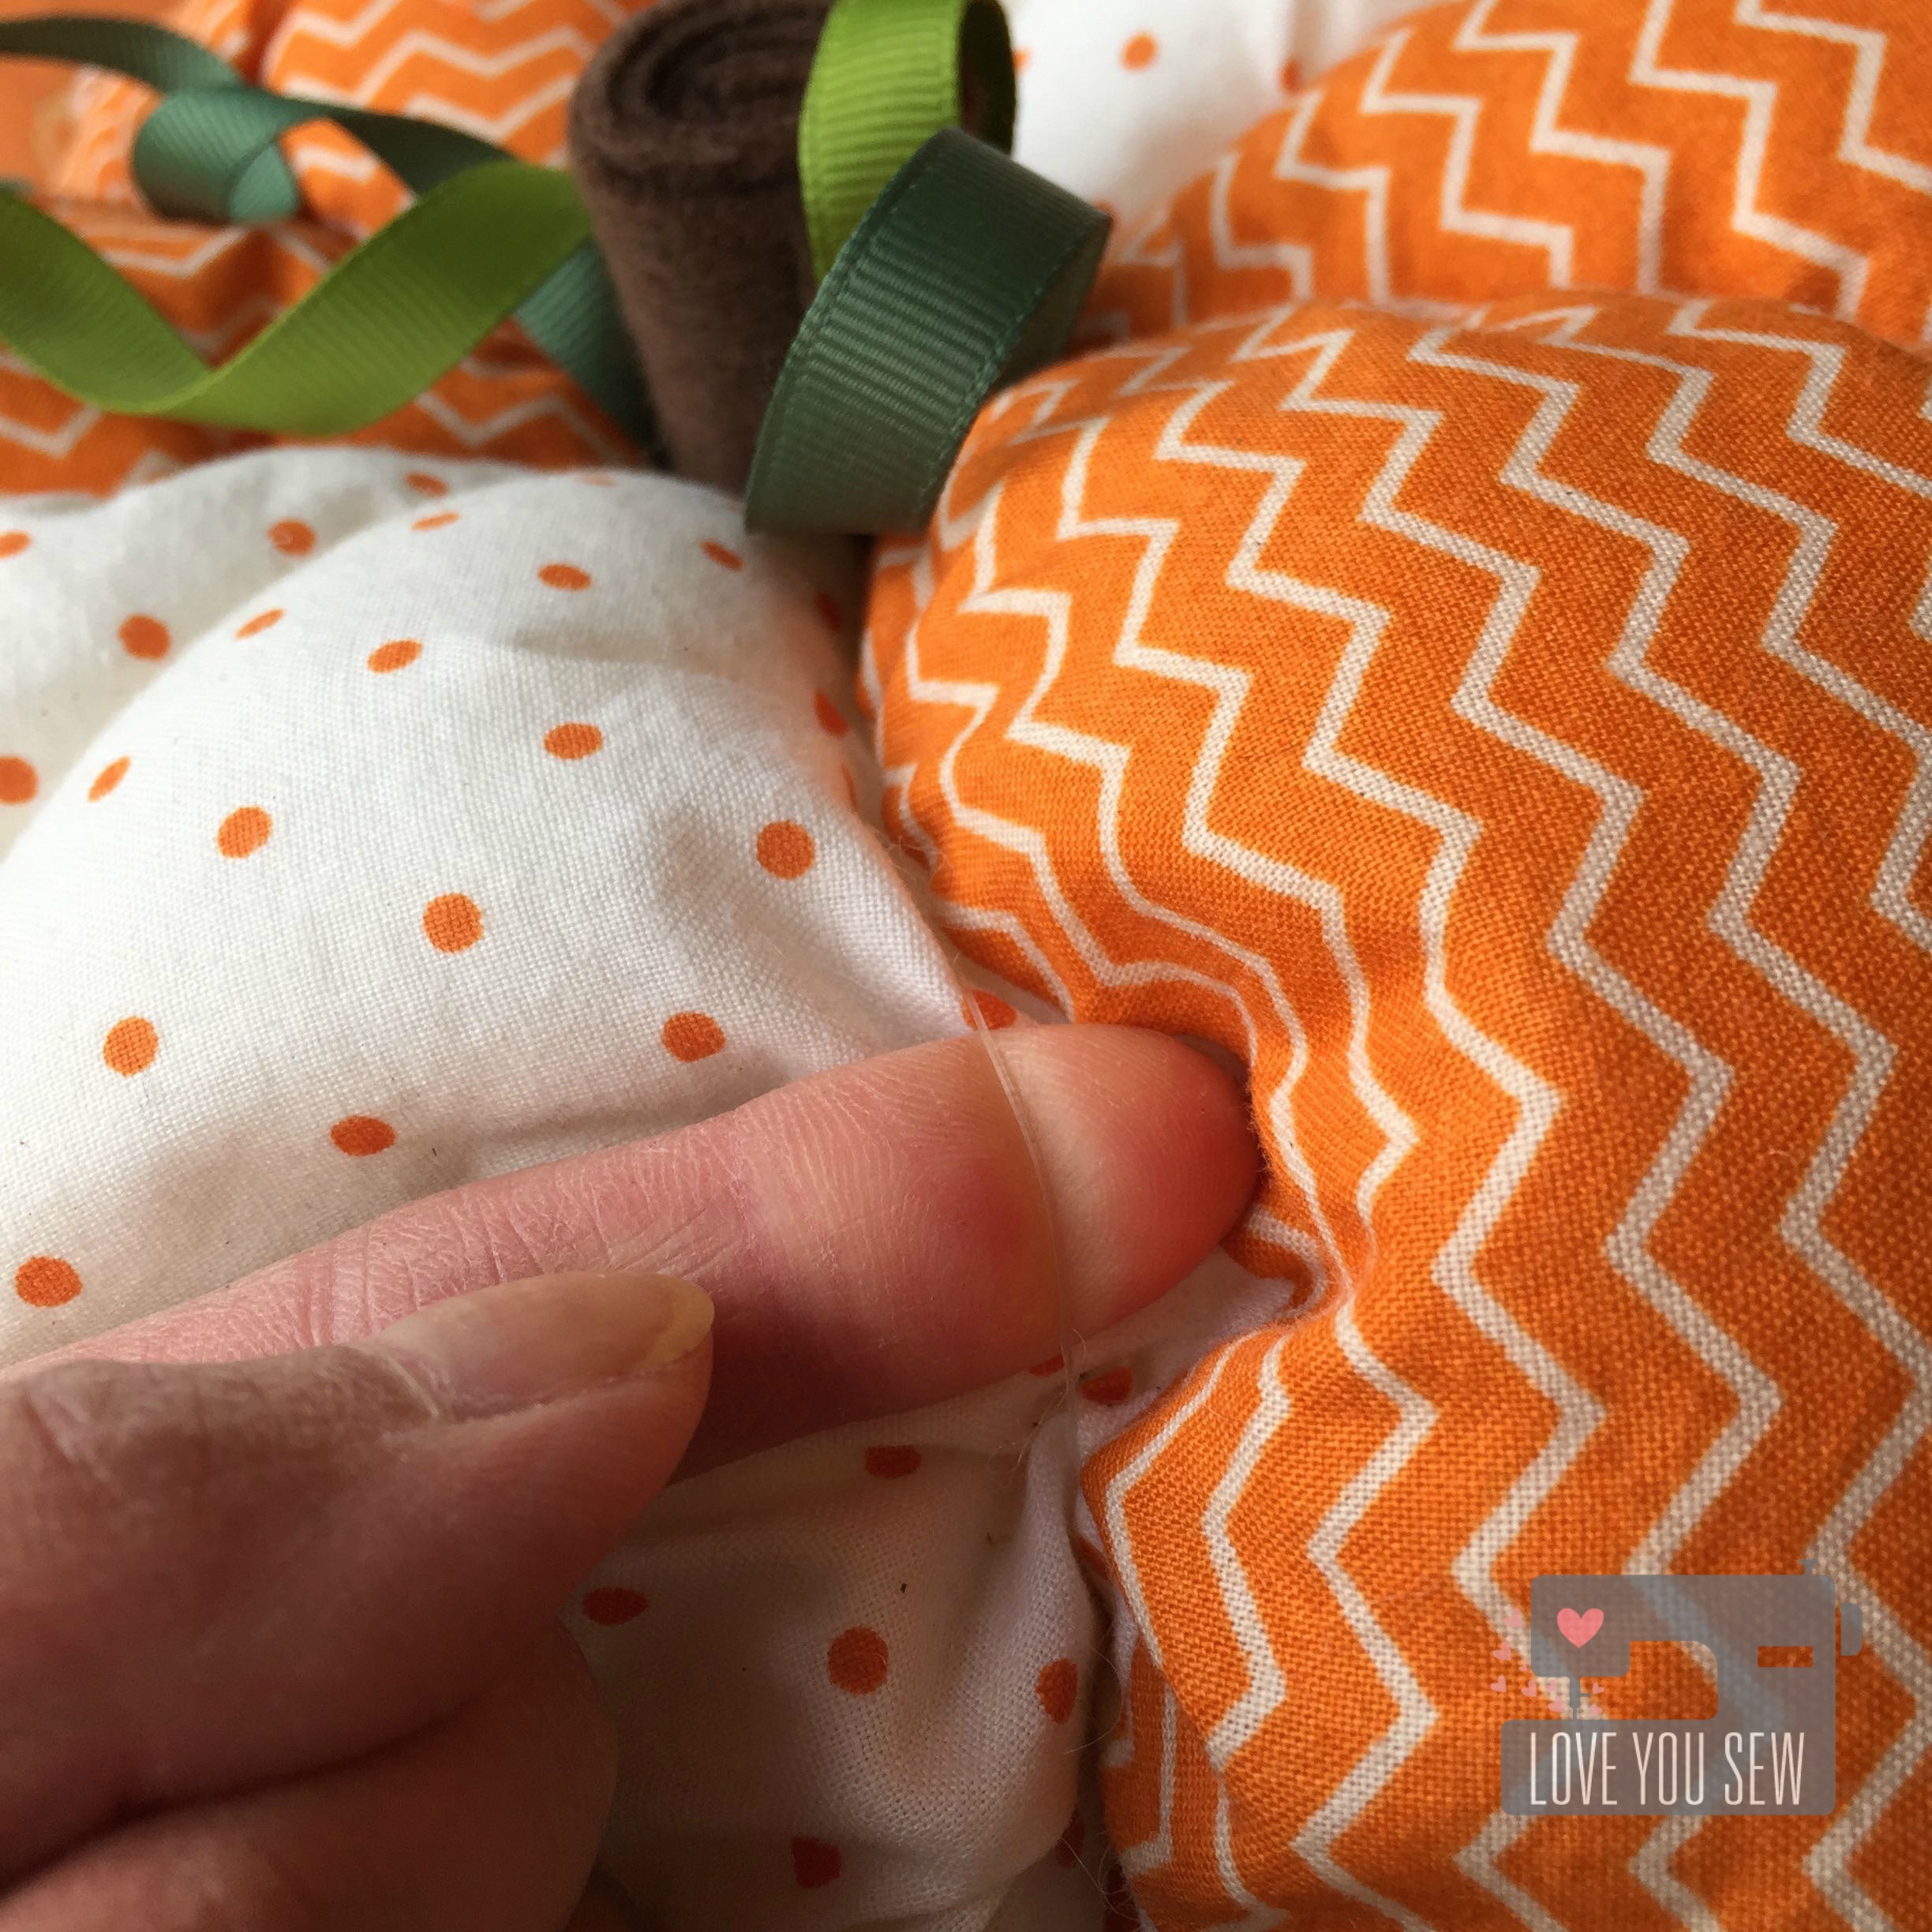
Instead of embroidery thread (which I didn’t have on-hand,) I used good old fishing line with a large-eye needle to make the ribs.  TIP:  Start sewing from the top of the pumpkin.  There will be large knots from the fishing line which can be secured and hidden by the stem later.

Fabric Pumpkin with Ribbon Detail

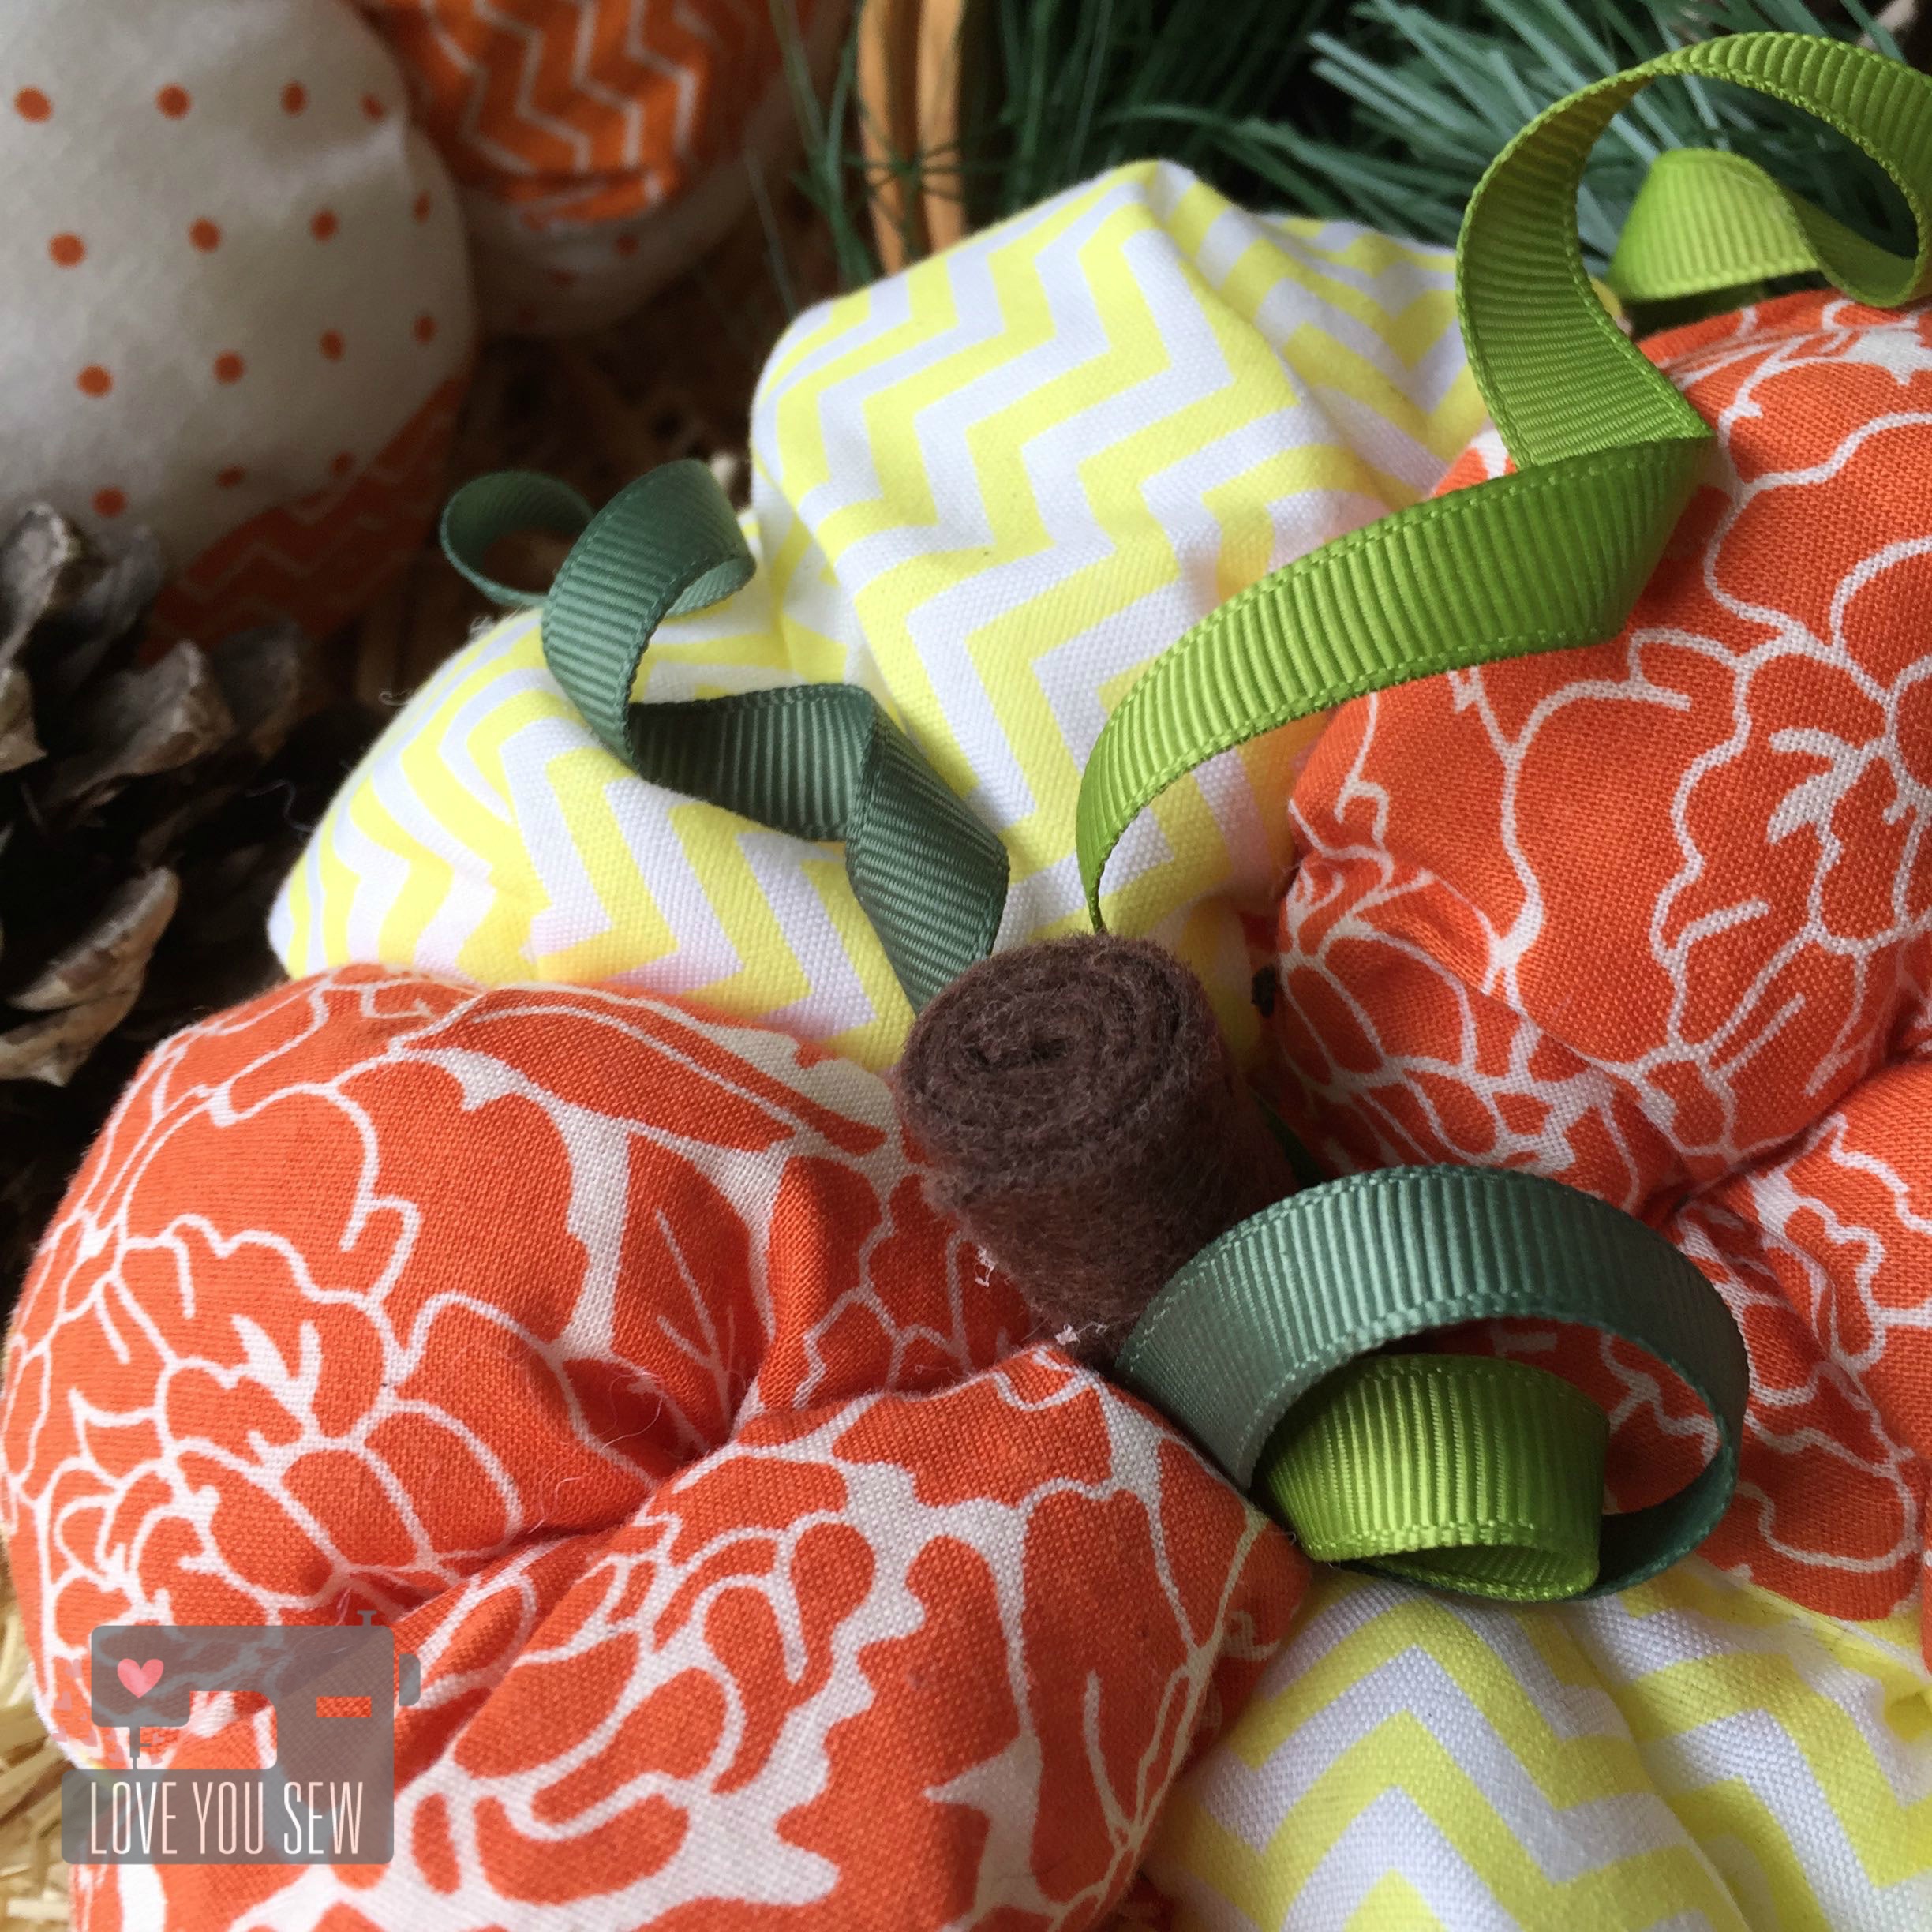
For the stem, I hot-glued a 2″ x 4″ piece of craft felt into a tight rolled cigar and then set aside to cool.  With two different colors of 1/2″ ribbon, I created the “leaves” with loops; securing them with hot-glue in the center of the pumpkin.  The “tendrils” are just wound ribbon with small dots of hot-glue securing them directly on the fabric.  Lastly, the stem is glued in the center to hide the fishing line knots and the ends of the ribbon.

I have several of these pumpkins that adorn my mantle and dining room table.  They are so festive and it brings me so much joy that they are hand-made.  What decor do you love in the fall for your home?


Happy Stitching!

Cristy


*** This post may contain affiliate links.  They help keep this site running 🙂