Laure Dress :: Pattern Review

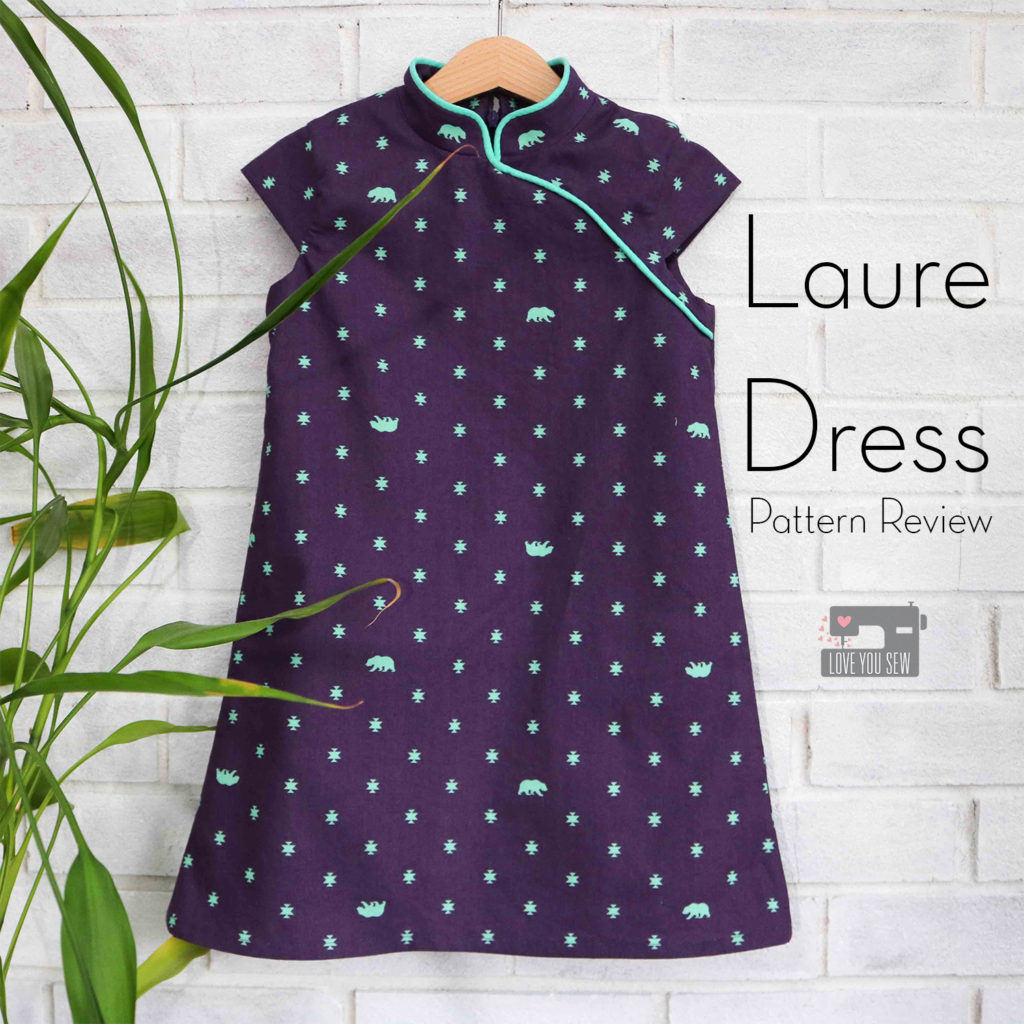
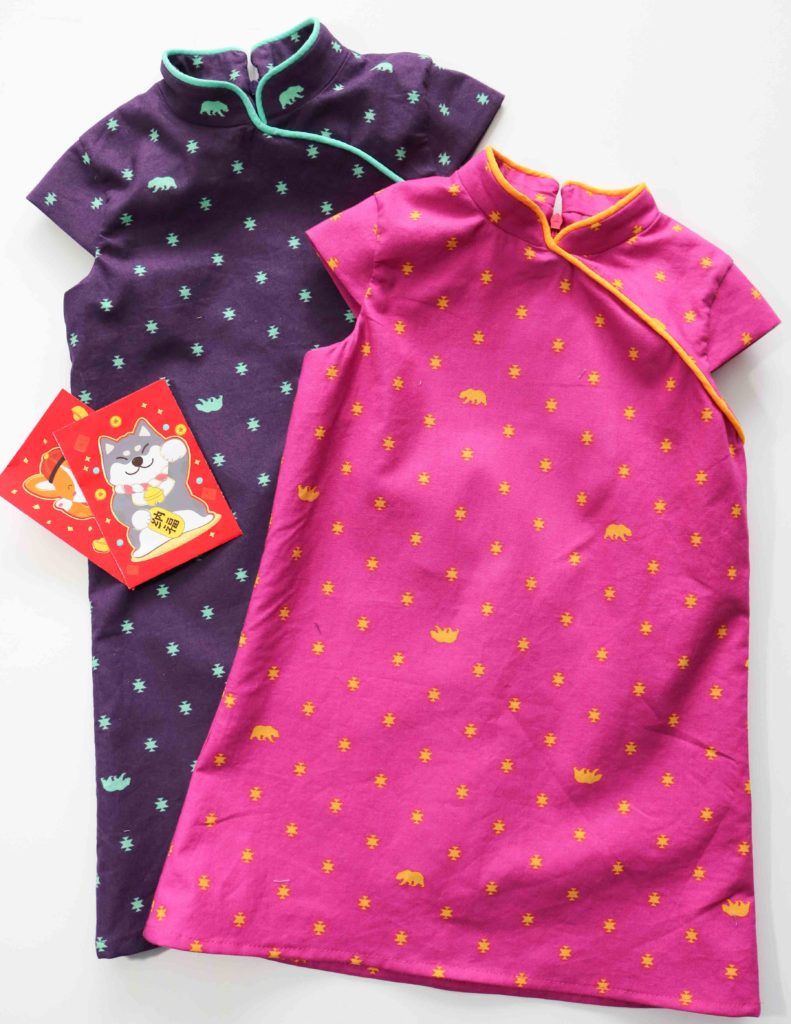
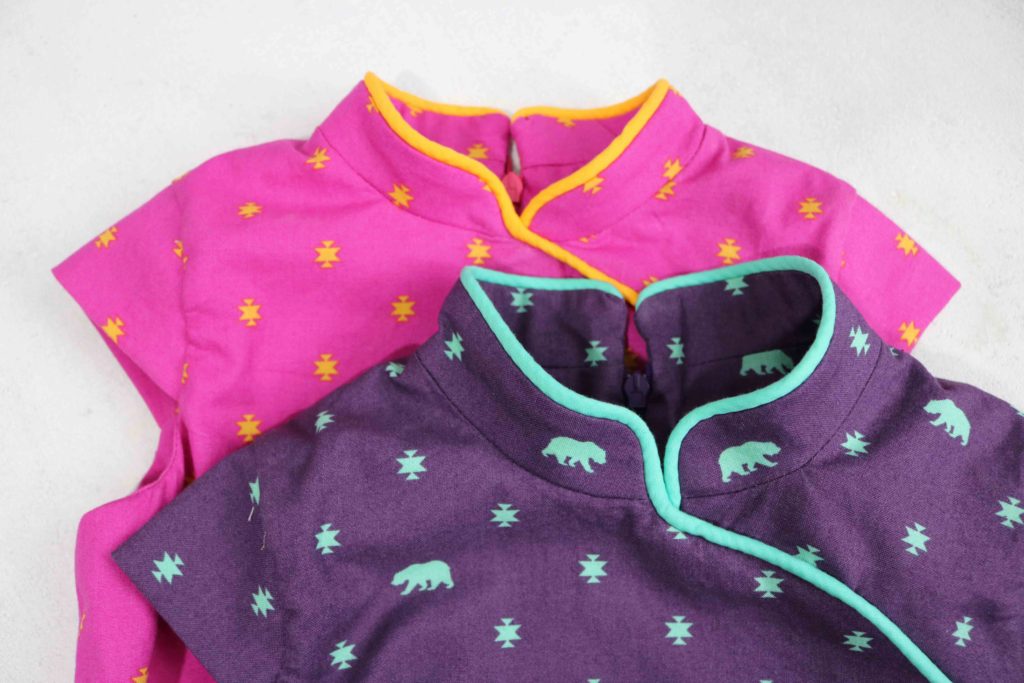
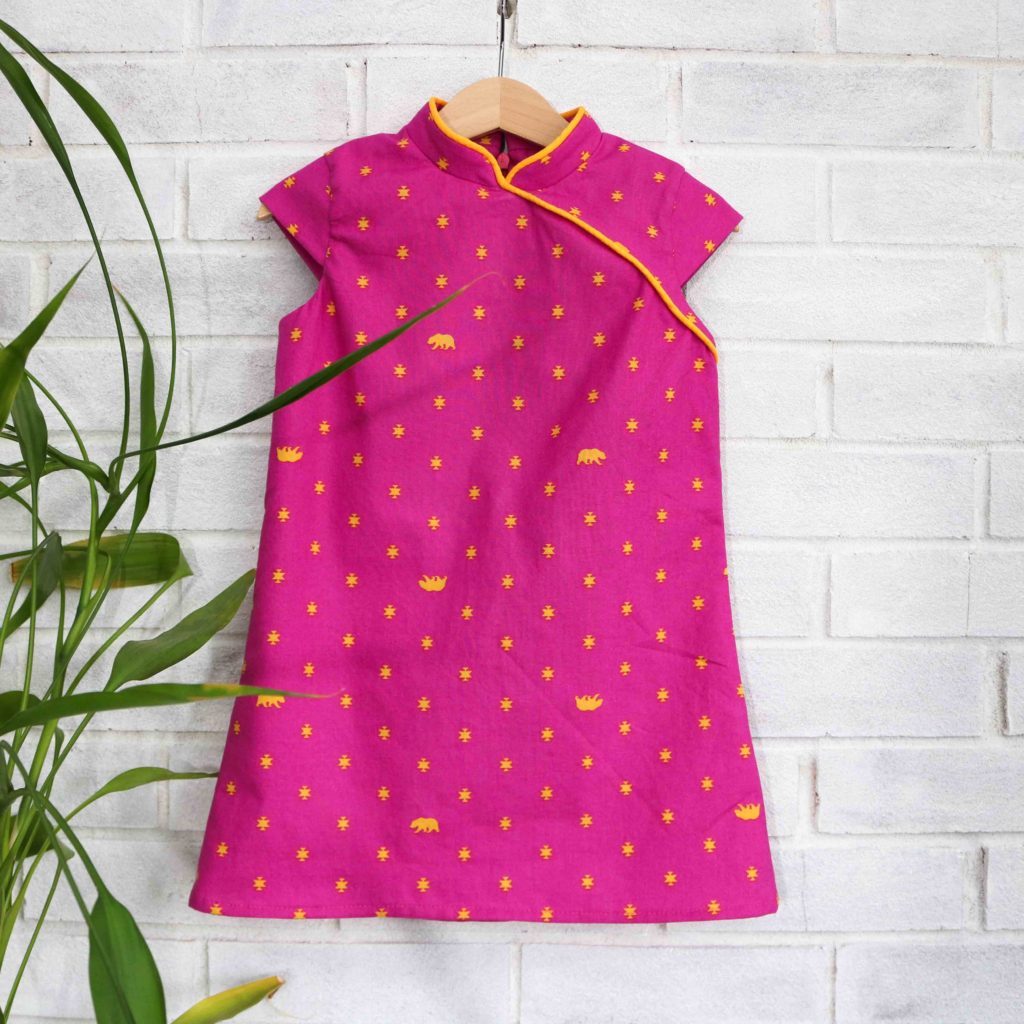
The first pattern I ever saw from Straightgrain Patterns was this Laure Dress in the Quipao version.  I was clicking away on Instagram and stopped in my tracks when I saw this adorable pattern!  Being of Chinese decent myself, these dresses always catch my attention…especially in fresh modern fabrics.  (And yes, I actually own two Quipaos, but in more traditional red and gold brocades.)  Since I don’t have girls of my own, I knew I would one day make these for my nieces…because I’m just the best aunt, you know 😉

Today marks the first day of the 2018 Lunar New Year (Year of the Dog) and I just had to share these with you!  This was such an important and fun time in my house while growing up.  We would have huge feasts and celebrate with lots of fireworks in Philadelphia’s Chinatown.  Now, in Columbus, the celebration is a bit smaller but just as fun as I hope to pass on the traditions to my boys.

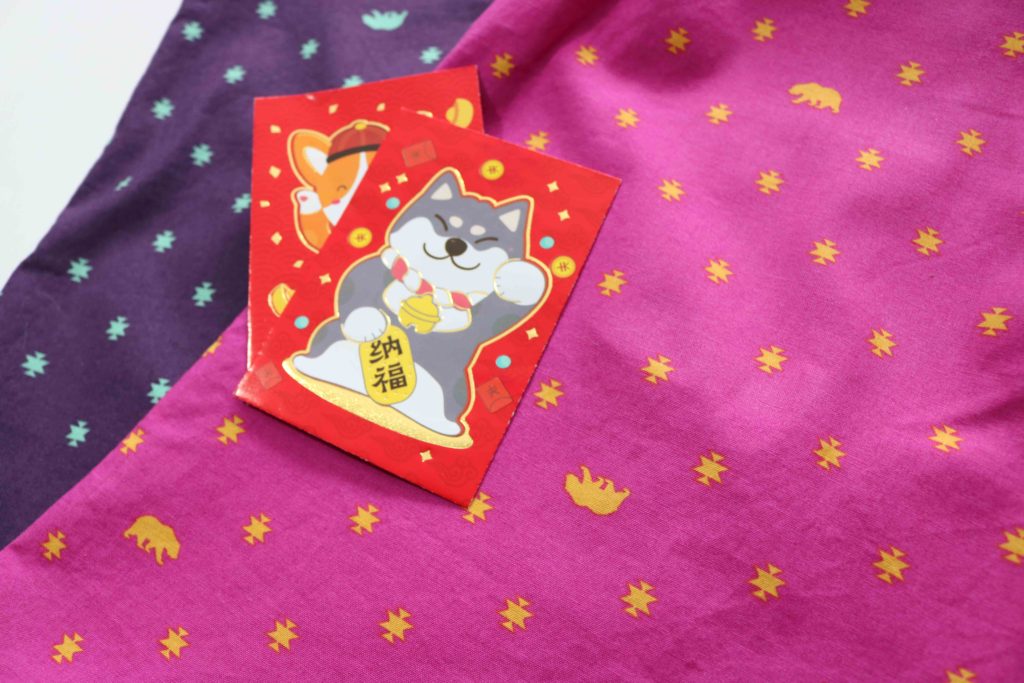
Traditionally, children receive these red envelope filled with money to bring good fortune and health into the new year.  I’m hoping these dresses will also bring them lots of good cheer and love too, since I’m still in love with this Spirit Animal (aff link) fabric by Tula Pink.  Although the good luck color of the new year is red, I thought the girls would get more use out of these great colors and the small scale silhouettes would be perfect to wear all year around.

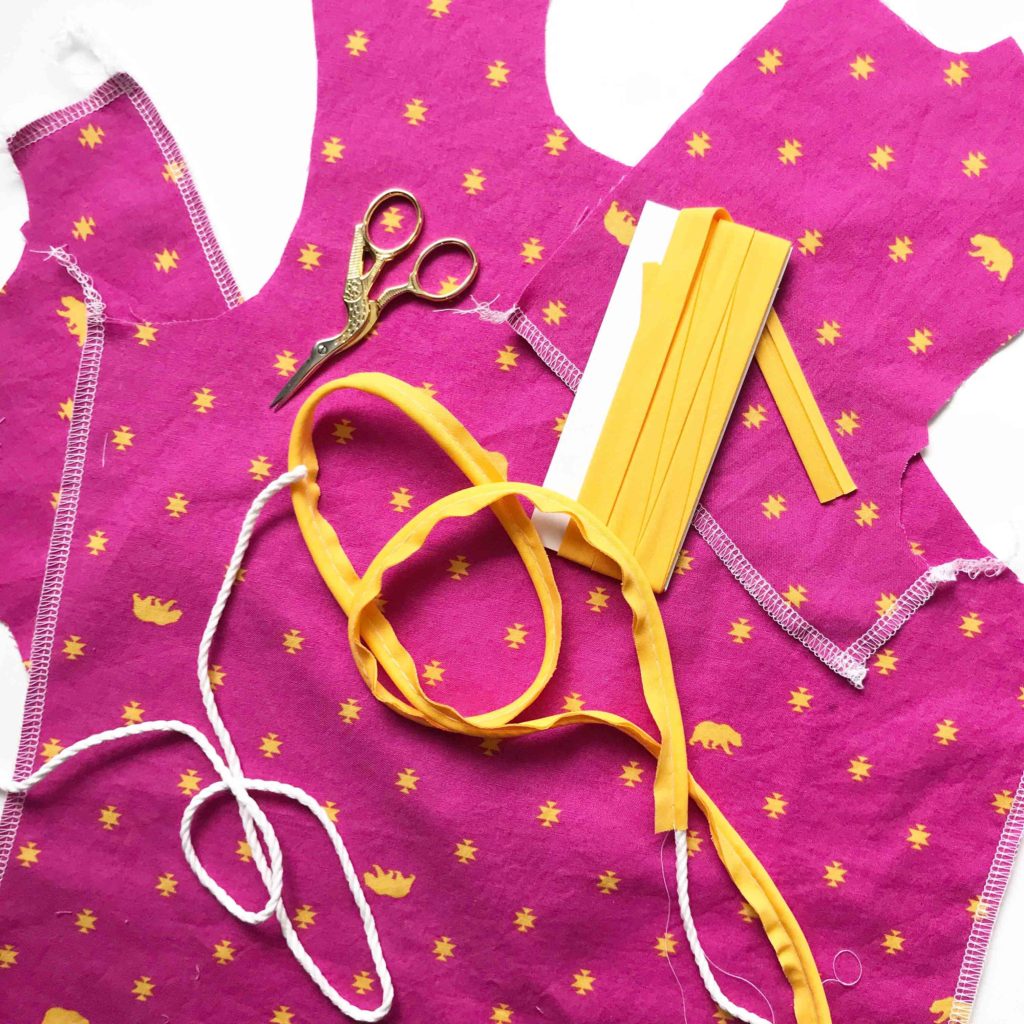
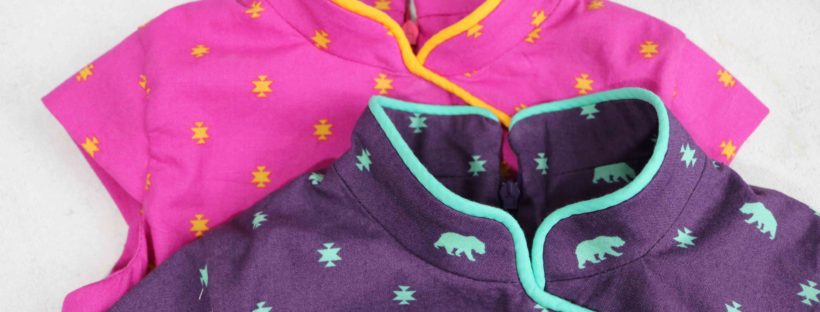
One of the great style features of any Quipao is the piping along the mandarin collar and down the front of the dress.  I knew this was a step I could not skip, but finding the right color in pre-made piping was not easy.  Because of ease and look, I tend to buy pre-made piping from the big-box stores.  (They do a MUCH better job than what I could make!)  With the bright colors, I could not find any piping…  However, I could find pretty close matches when it came to pre-made single fold bias tape.  I used this along with some cotton cording from my stash to make my own piping (reluctantly, of course.)  I don’t have a special foot, so I just use my zipper foot, a basting stitch and tried to sew as close to the cording as possible.

This process adds some time…especially when you’re like me and need two passes to get in close to the cording.  But look at the results!  The piping really highlights the curve of front yoke and brings out the colors in the fabric. *High-five!*

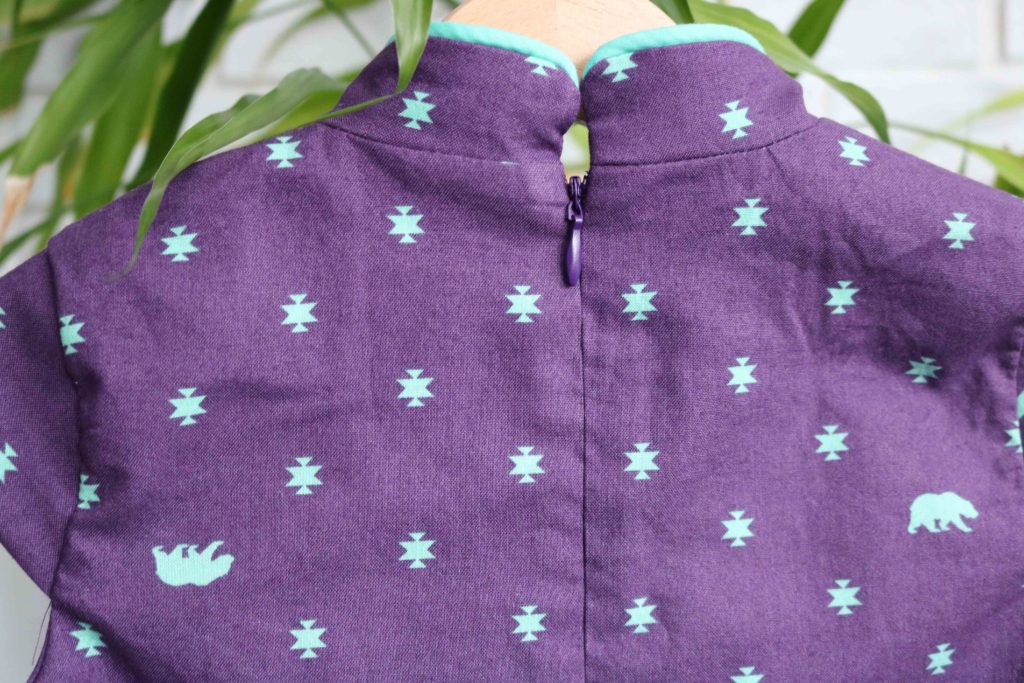
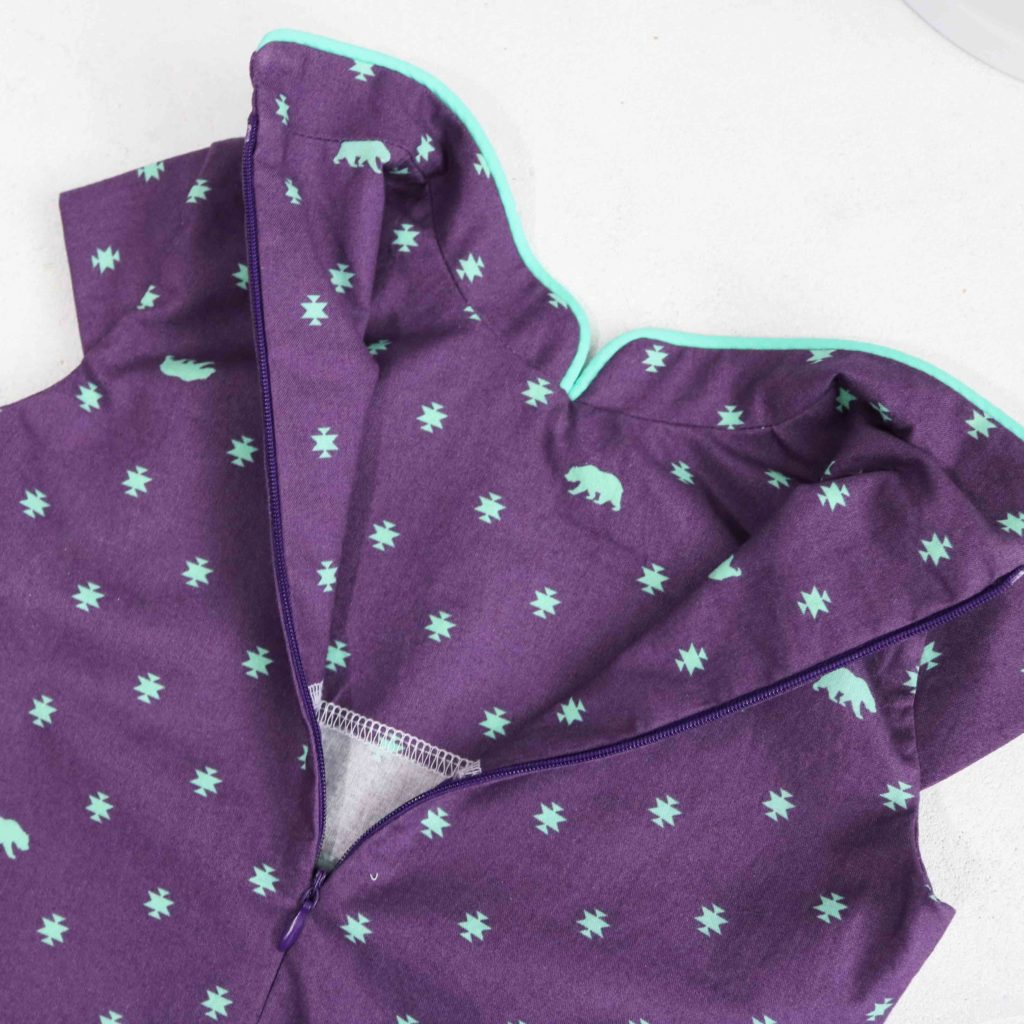
It’s been awhile since I had to insert an invisible zipper, but after a few seam rips, I was able to get pretty close even without a specialized foot.  I used my regular zipper foot and made sure to stitch slowly right in the zipper fold along the teeth.  My awl saved me through this step!

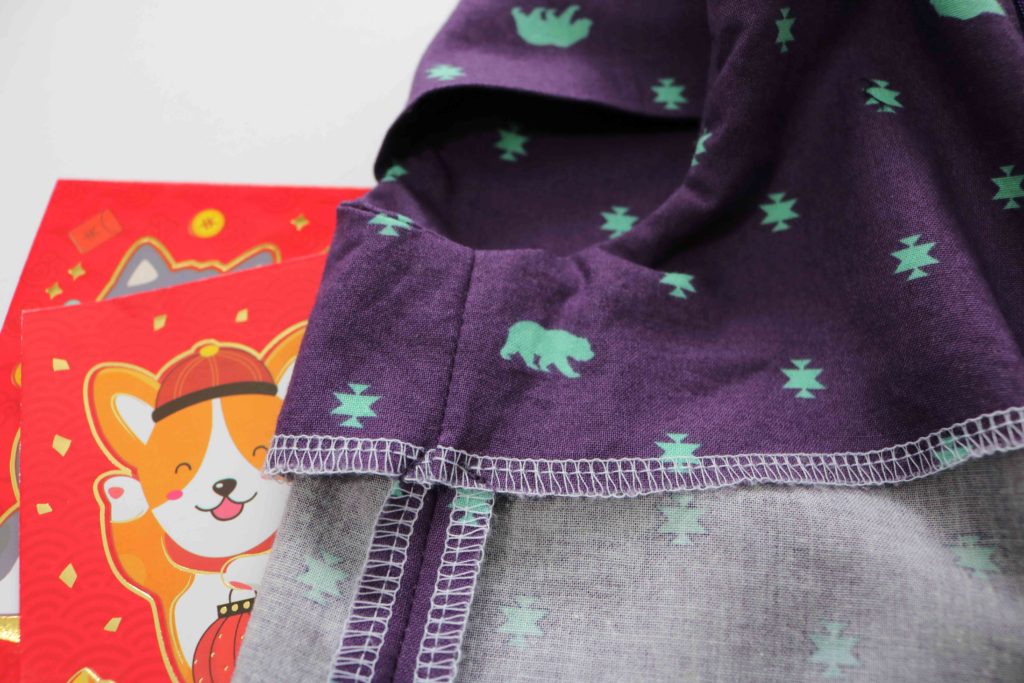
I know you all like to see the guts of my garments, so this is the inside lining of the Laure.  I serged the bottom ends and left most of the inside top seams raw after trimming them down with pinking shears.  The lining hides almost all the seams, so there is no need to serge them after sewing.
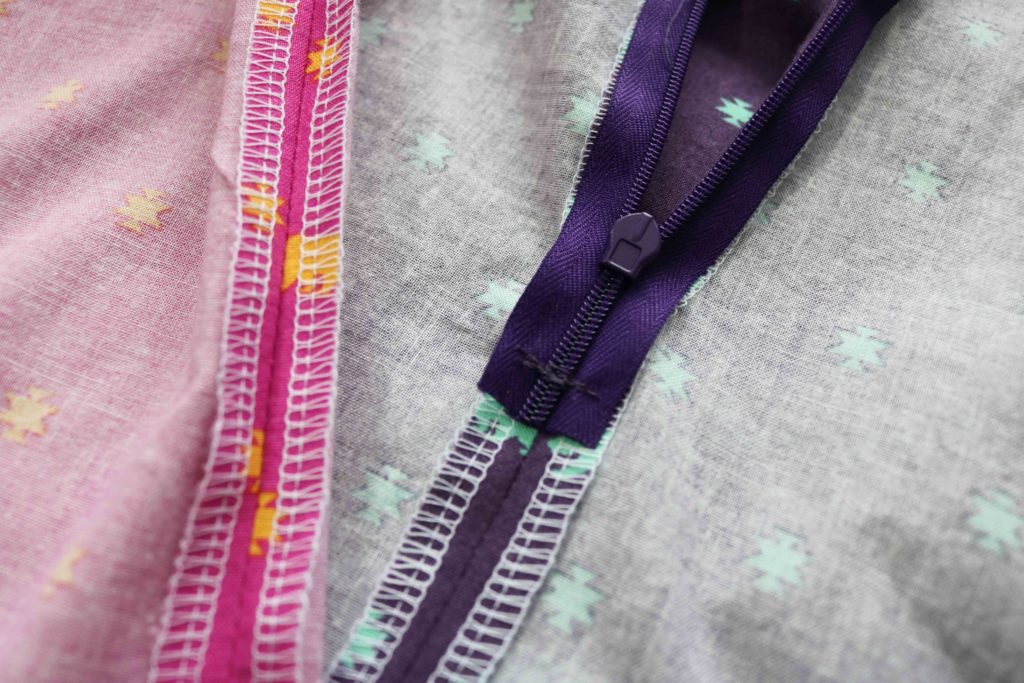


The only invisible zipper I could find was about 20″ and the pattern calls for 12″.  I sewed back and forth along the teeth at the 12″ mark and then cut the zipper 1/2″ below that.  To seal up the zipper tape so it doesn’t fray with wear, I use a lighter to flame it juuust until it melts.  You can use a seam sealant like fray check (aff link) if you aren’t comfortable using a lighter.

After giving the dress a final pressing, I secured the lining down by making a few stitches to the side seam allowance.  This helps the armscye stay straight and prevents the lining from flipping up with wear.

I love how the Quipao version of the Laure Dress came out and I can’t wait to make some of the other versions of this pattern. It comes with plenty of other neck, body and skirt options for more looks of the western world 😉  Check out the other options here.

Do you have any special cultural holidays or traditions you share with your family?  I love hearing about what they rest of the world does..tell me about them in the comments!


Happy Lunar New Year, Friends!

Cristy


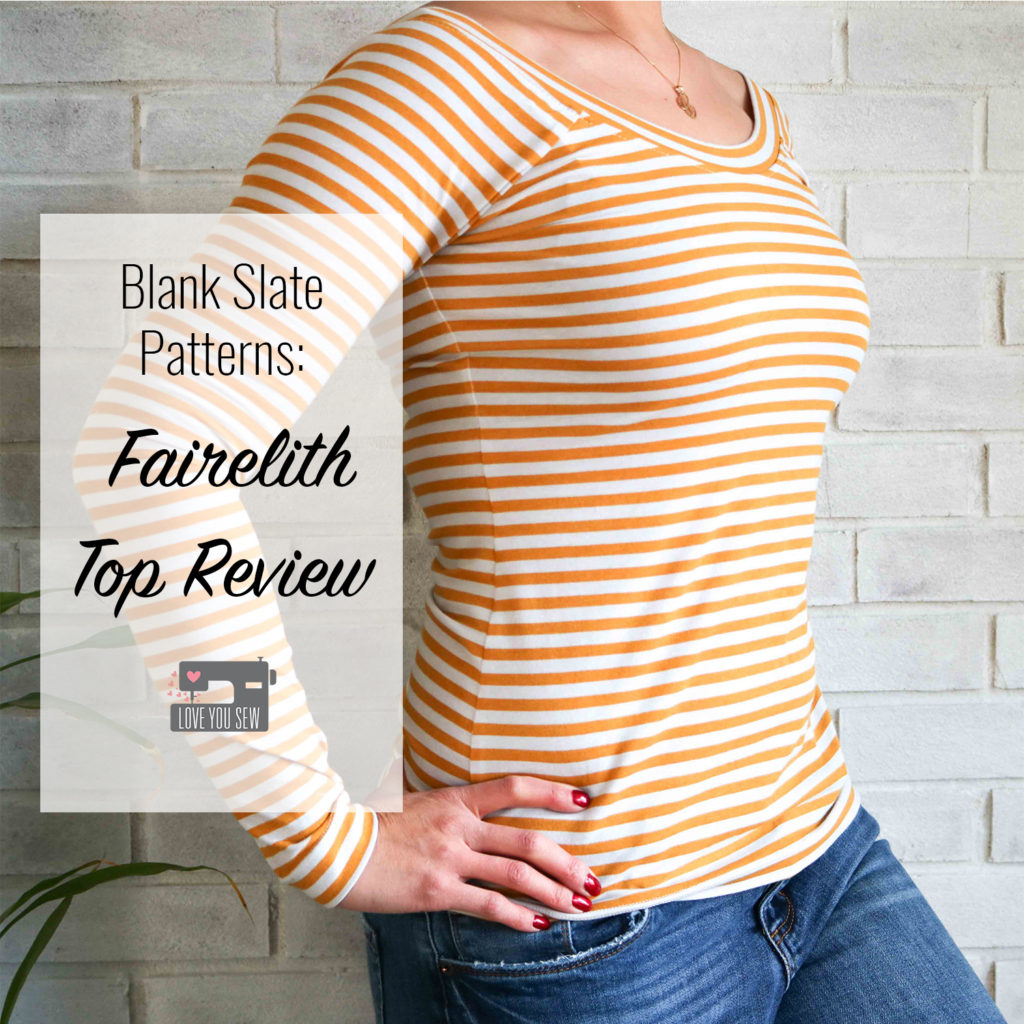
Blank Slate Patterns: Fairelith Top Review

As I sew more clothing for myself, I try to create pieces which will last and fit with my existing wardrobe staples.  However, I also find myself looking into fashion trends again.  The 80’s and 90’s have come back again with a mixture of looks.  I didn’t think I would be into high waisted jeans, but I just bought my first pair (after these photos were taken) and LOVE them!  With young kids, you never have to worry about running around with them and accidentally showing off your plumber skills (Eek!)

With mid and high-waisted pants taking over, I see so many tops being tucked in.  Overalls are back in a big way, so slender layers are needed.  While taking these all into mind, I thought I could really use a Fairelith Top (aff link) by Blank Slate Patterns in my closet.  This body skimming version was what I was looking for and I knew it would also be perfect tucked in with my Moss Skirts which you can see here and here.

I wanted a little more color in my closet while staying pretty classic, so I chose this fantastic mustard stripe Blake cotton knit jersey (aff link) by Carolyn Friedlander.  It is a great tone with my olive skin and pairs SO well with denim, black and other blues (the predominant colors I wear!)

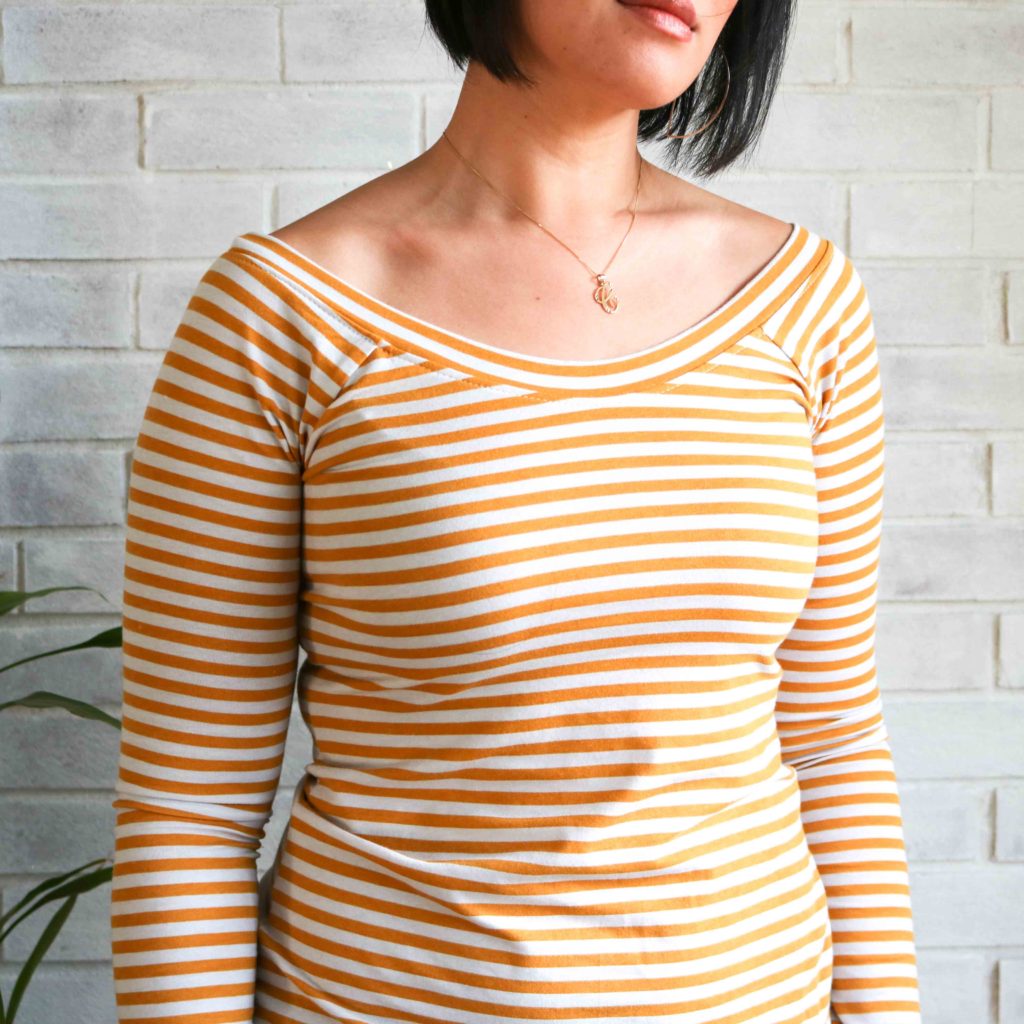
When I first measured myself for this top, it was before the holidays and I cut all my pieces.  But of course the holidays got the best of me and it ended up a wee bit more snug than I would have liked.  :/  Luckily, I was able to get my body back on track so I could share this make with you (a few months later…)  Although, next time, I will definitely make a larger arm.  As I’ve mentioned before, my arms are heavy for RTW based on my waist and bust measurements….so I  should’ve known the arms would be slightly too tight!  You can see all the extra folds around my armpit area.  But it’s my fault for being too anxious and not making a muslin. (Rookie mistake…)   Melly Sews does include instructions to narrow out the neck…so maybe I’ll move up a whole size and then use that adjustment.  (I’ll keep you update and let you know what I do and how the process goes.)

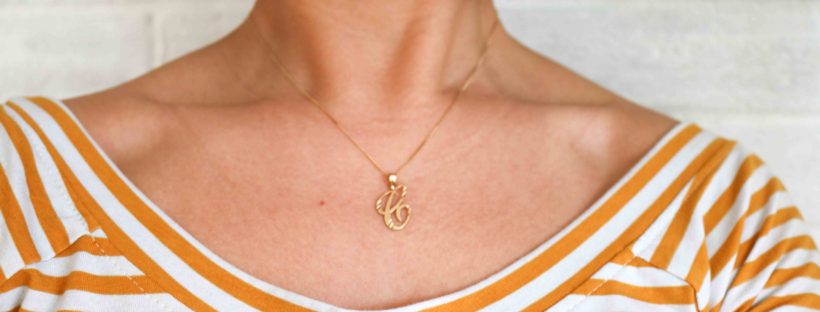
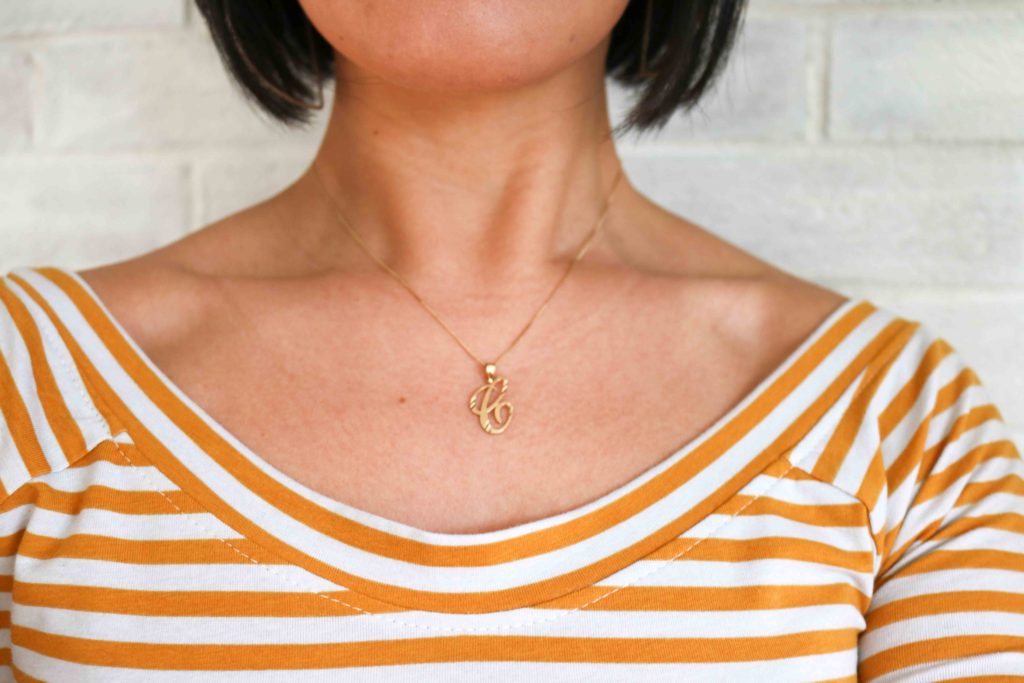
This neckline is just gorgeous, right?  The ballet neckline hits at just the right spots on the shoulders so it’s not falling off.   I love how it shows the collar bone and is perfect for a statement necklace.  Bandana scarves are pretty hot right now and would pair well with this kind of opening.

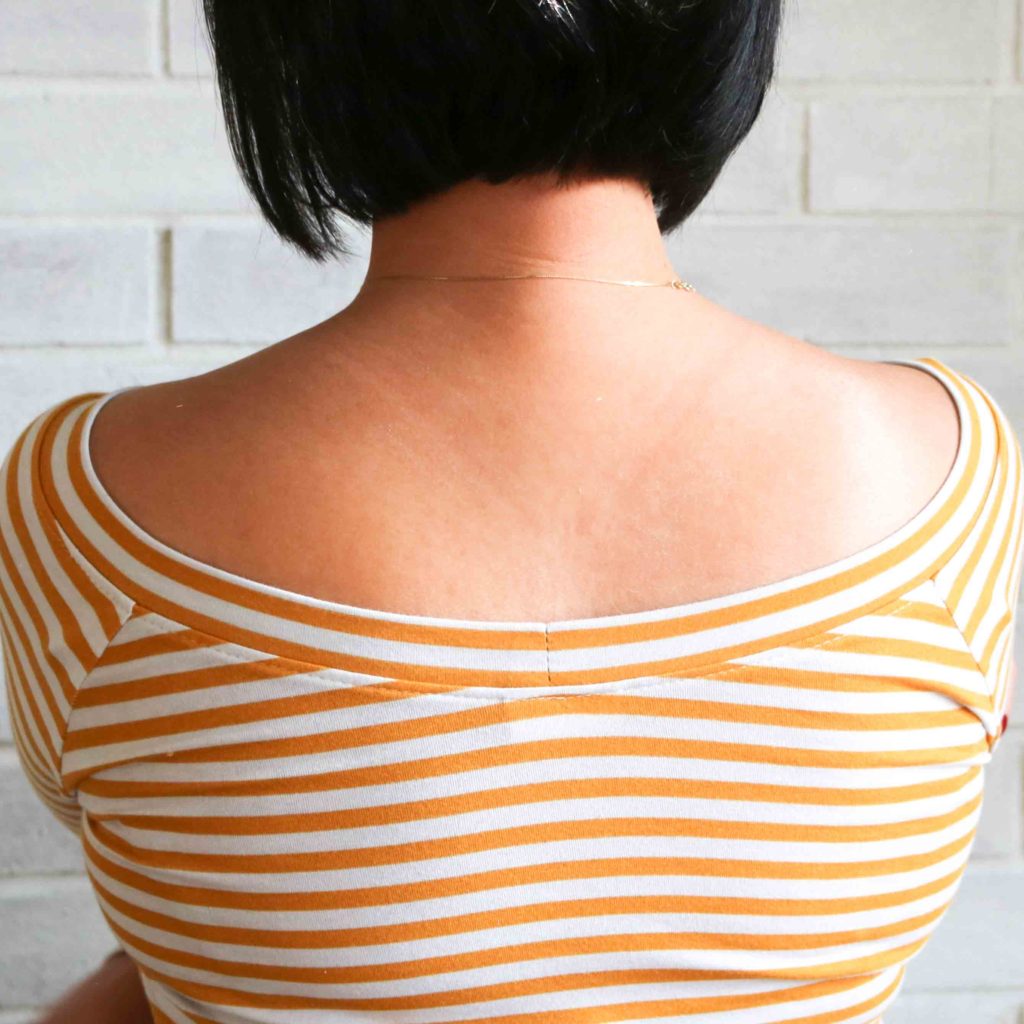
The open neckline continues to the back. With my short hair, this ballet opening highlights my neck well.  I like this different style, which I haven’t seen much in other indie designers.

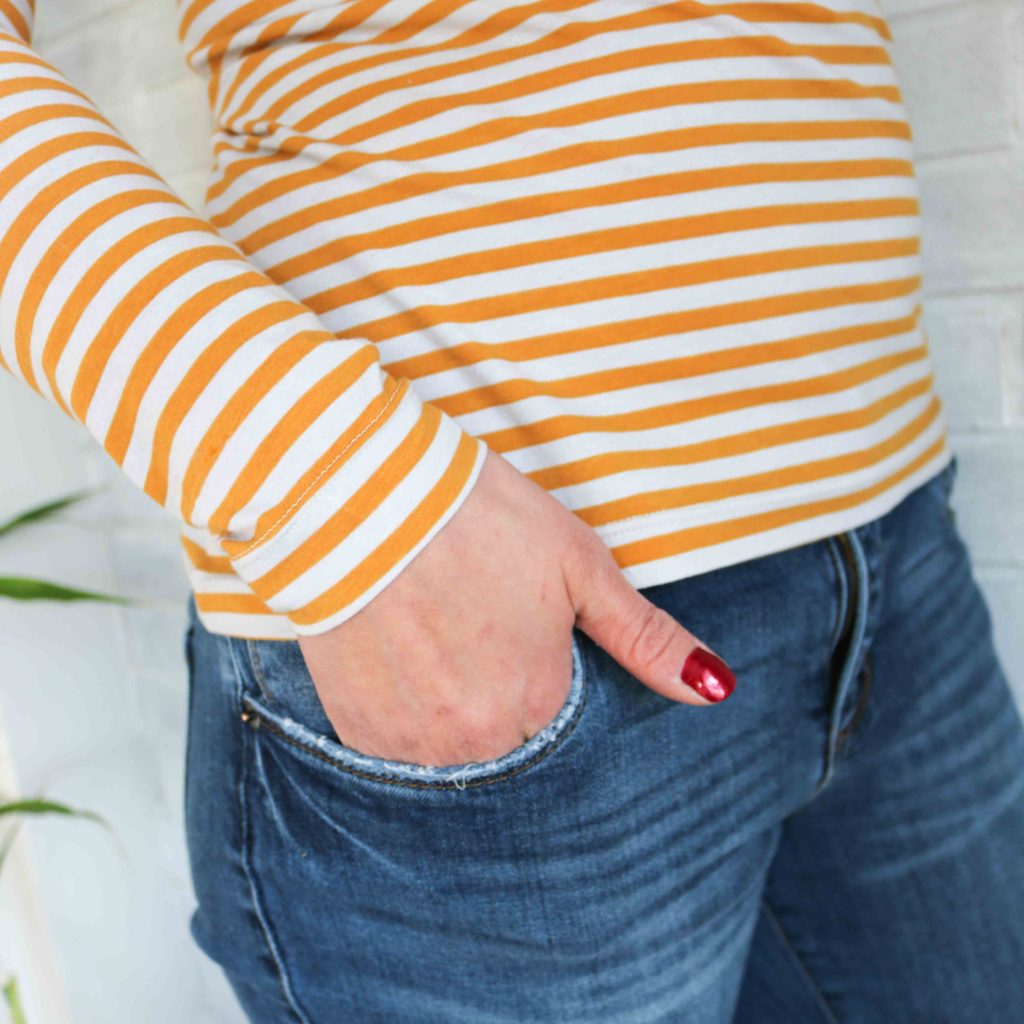
With a  raglan sleeve, this make comes together quickly.  The hem and sleeves are all pressed under and finished with a twin needle.  I like to use wooly nylon (aff link) in the bobbin for a little extra stretch and comfort with this method.  When sewing, it’s good to leave long thread tails and stretch out the hems afterwards.  This is just in case you have some tension issues and the bobbin thread was pulled too tight.


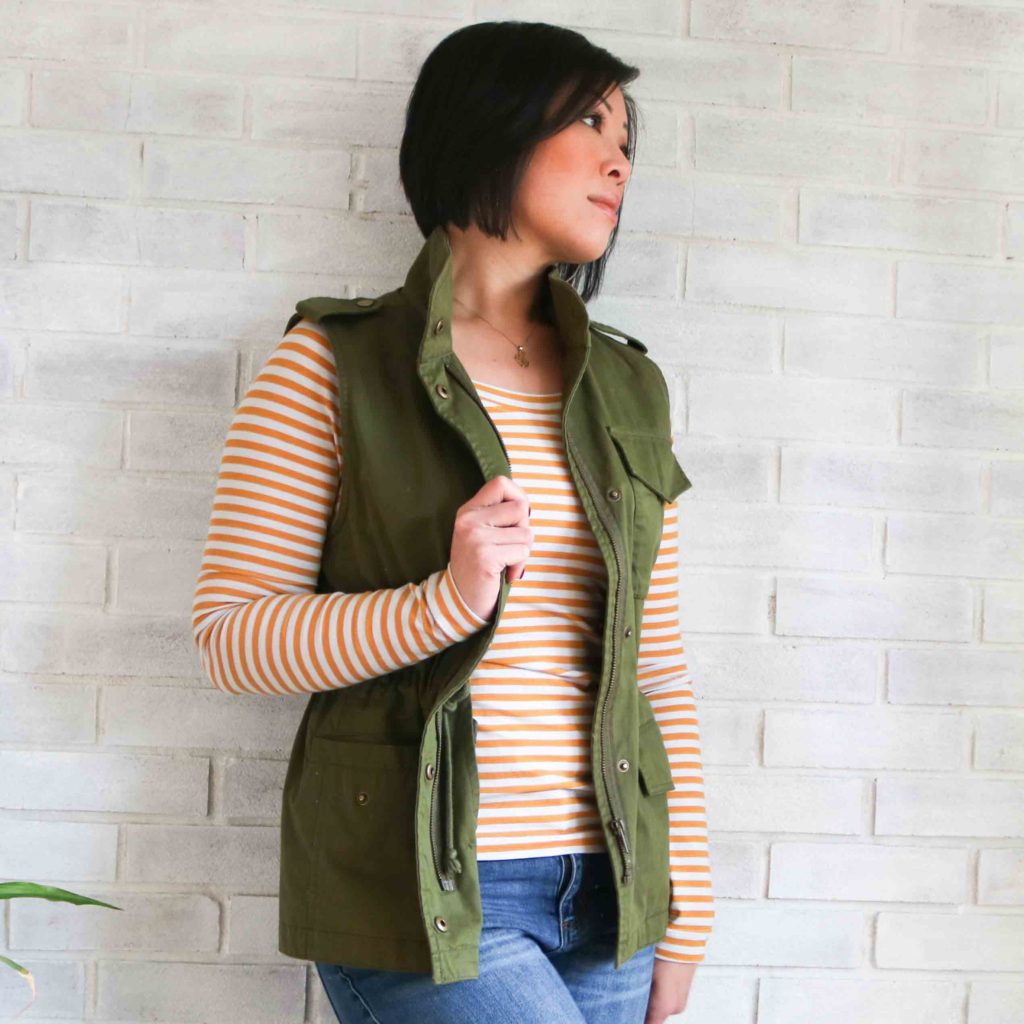
Even with the puckering around the armpit, I still love the design features of the Fairelith Top (aff link) and can’t wait to make another (with the right adjustments!) The extra folds do not matter to me on a day-to-day basis.  But if you run across the same issue, a jacket or vest like this one above can help you hide it.  Lol.

Happy Sewing Friends!

Cristy
 

Art Gallery Rayon :: Cookie Blouson Jacket

I’m kicking things off with Art Gallery Fabric‘s Rayon Blog Hop today!  Rayon is their newest substrate and I can’t even tell you how much I luuuurve it.  I was lucky enough to get an advanced preview when April Rhodes release her Heritage Fabrics and I just am obsessed with the drape and feel of this fabric.  You can read more about it here.

When most people hear “Rayon,” they think of summery dresses or slippery nightgowns.  But in this blog hop, we were tasked to come up with other ways to use the fabric.  As fall was approaching and while I was looking through the fashion blogs, the maker light bulb went off when I started to see bomber jackets.  The 90s fashion trends are back (some I’d rather not relive…) and I thought a fun bomber made of rayon would be perfect to ride the satin and army green trends showing up on the streets right now.  Check out my Pinterest Board here to see my inspirations.

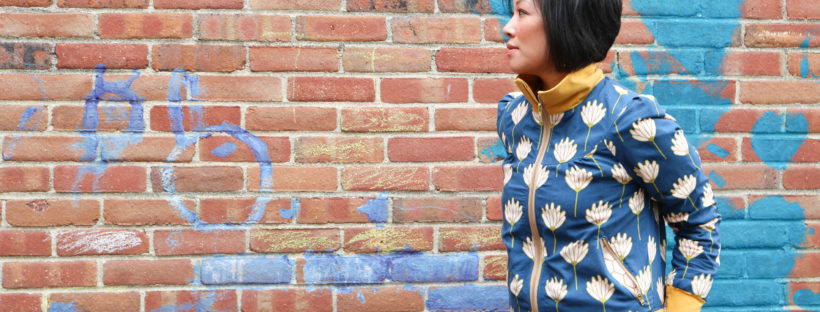
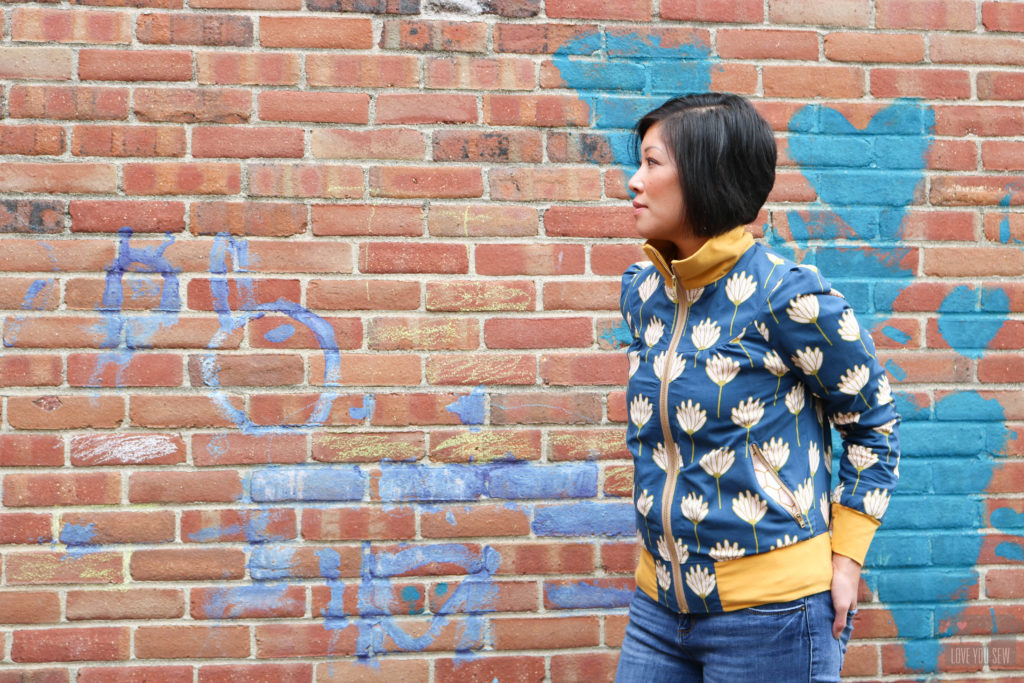
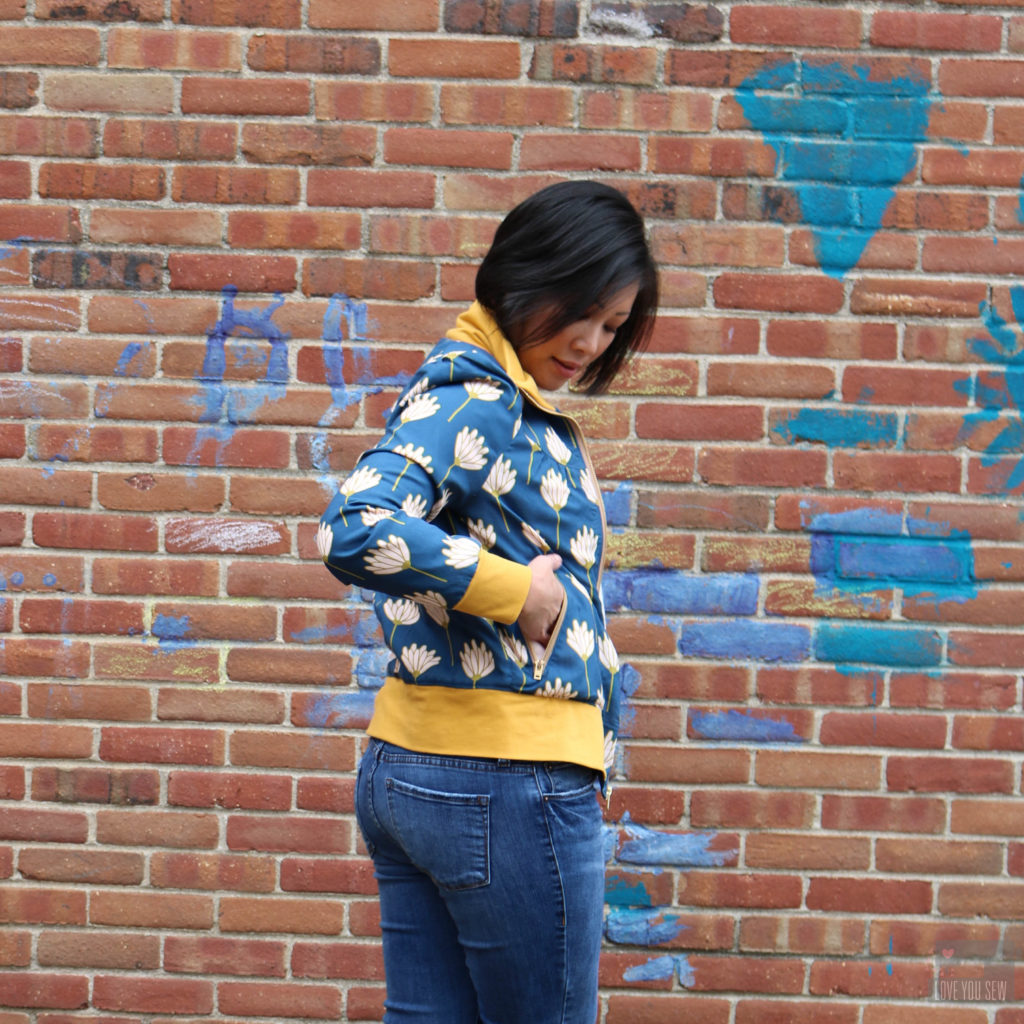
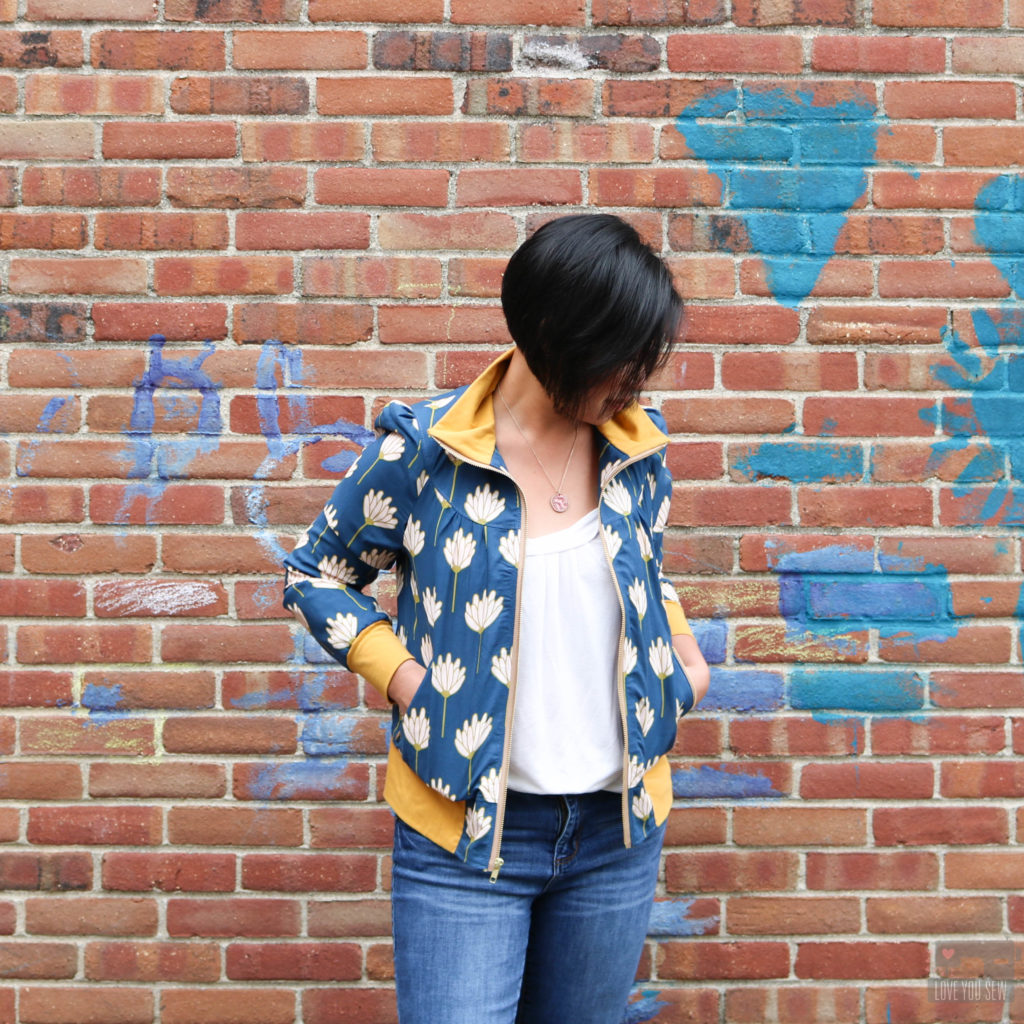
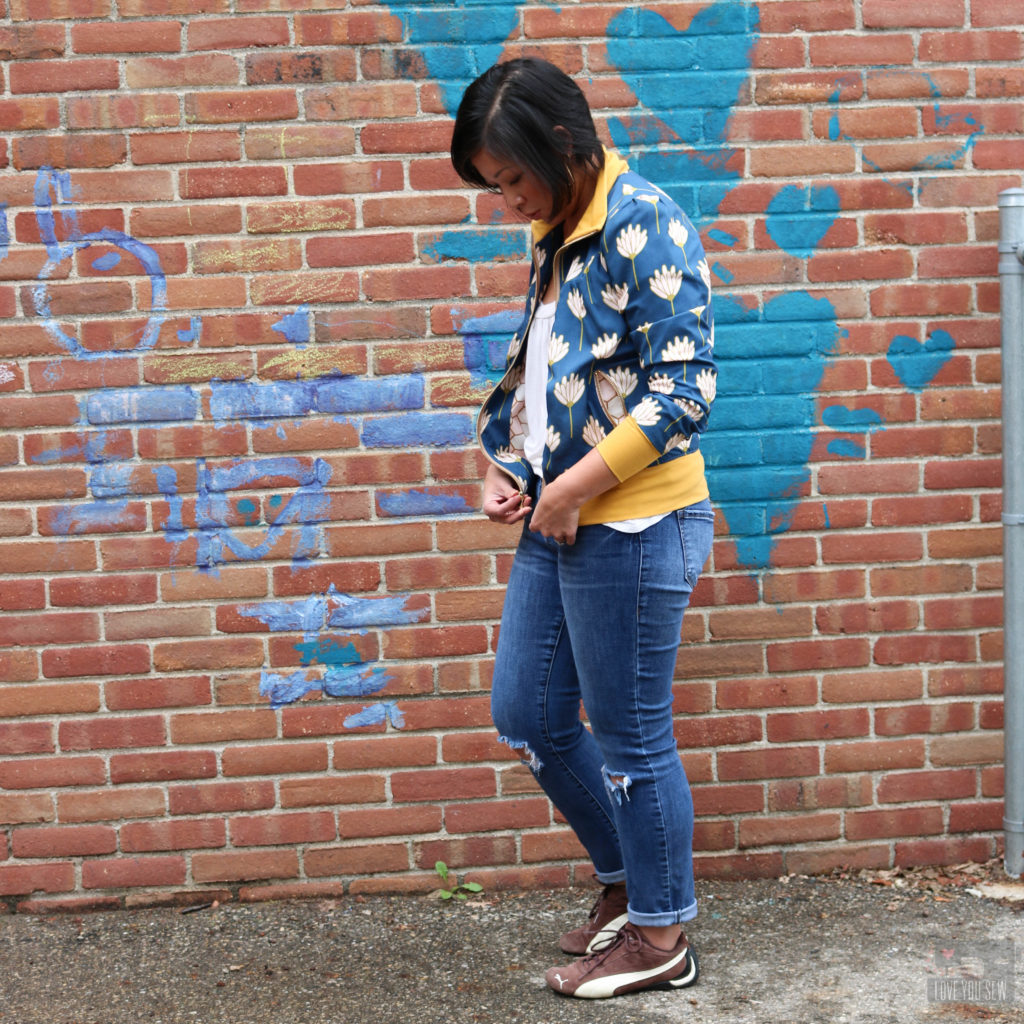
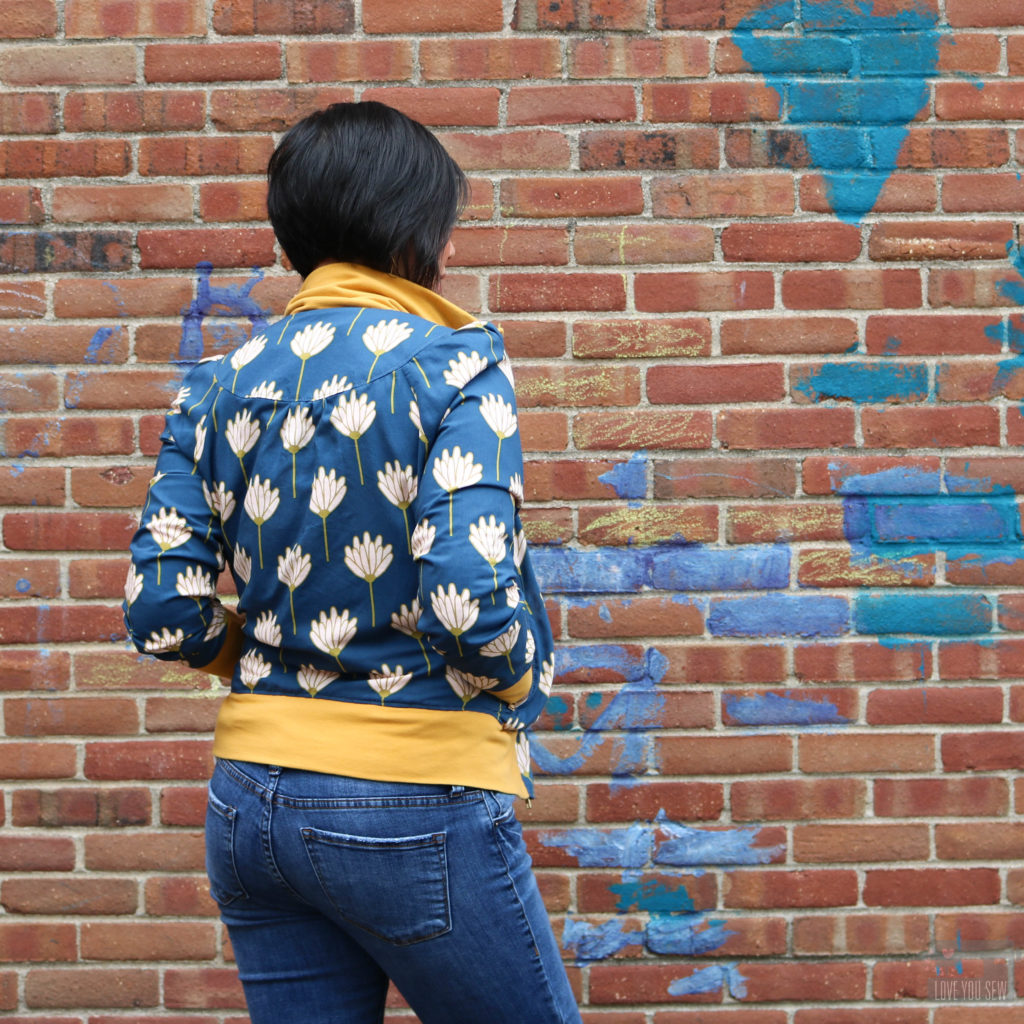
I’ve had my eye on the Cookie Blouson by Waffle Patterns for awhile now.  The design is a great feminine take  on a track jacket with the gathered sleeves and gathered body around the yokes.  Even though it’s a track style versus a bomber, I knew this pattern would give me the same feel…The only difference  is the collar.

I was in-between sizes per the measurements, but after reviewing the finished measurements, I decided to size down for a more fitted look.  With the fabric and bold pattern, this jacket would look great in heels as much as in sneakers 🙂 I wanted to make sure it would be a great jacket to wear indoors and out.

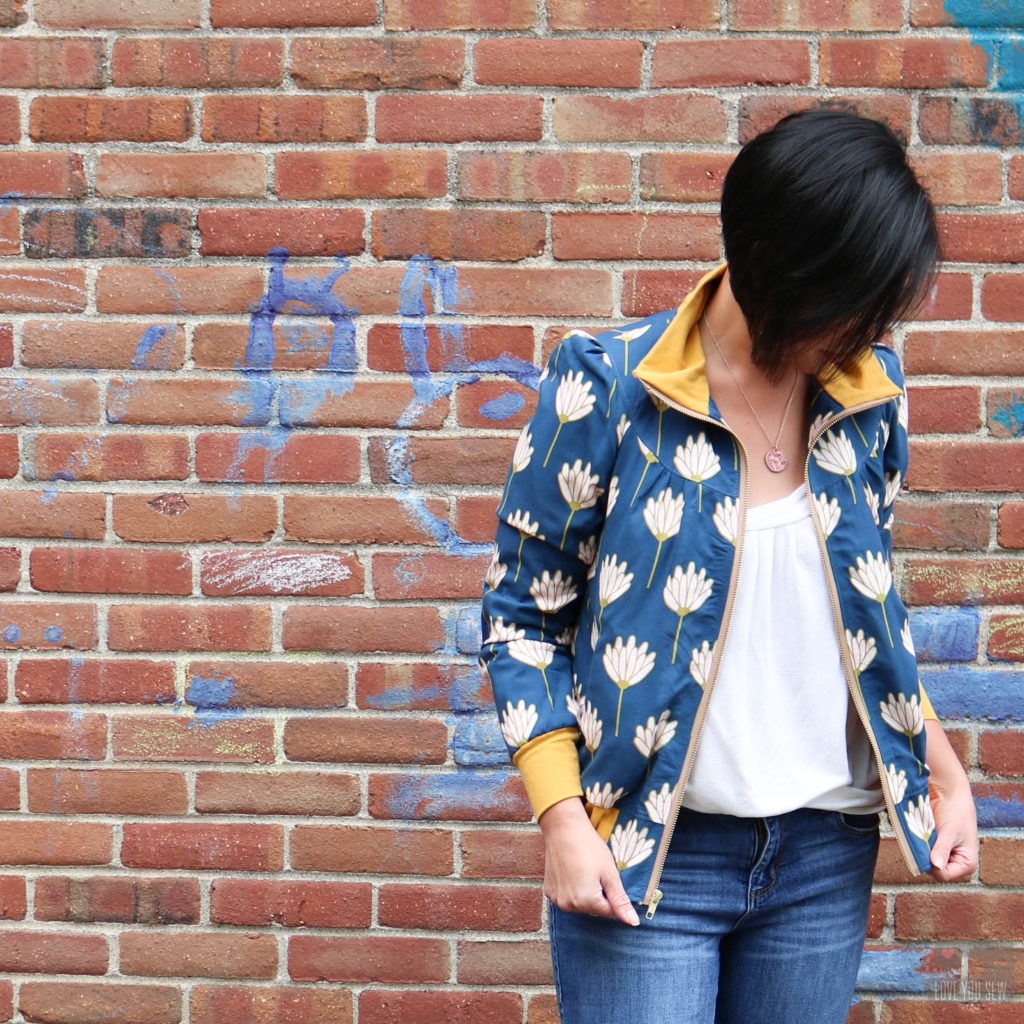
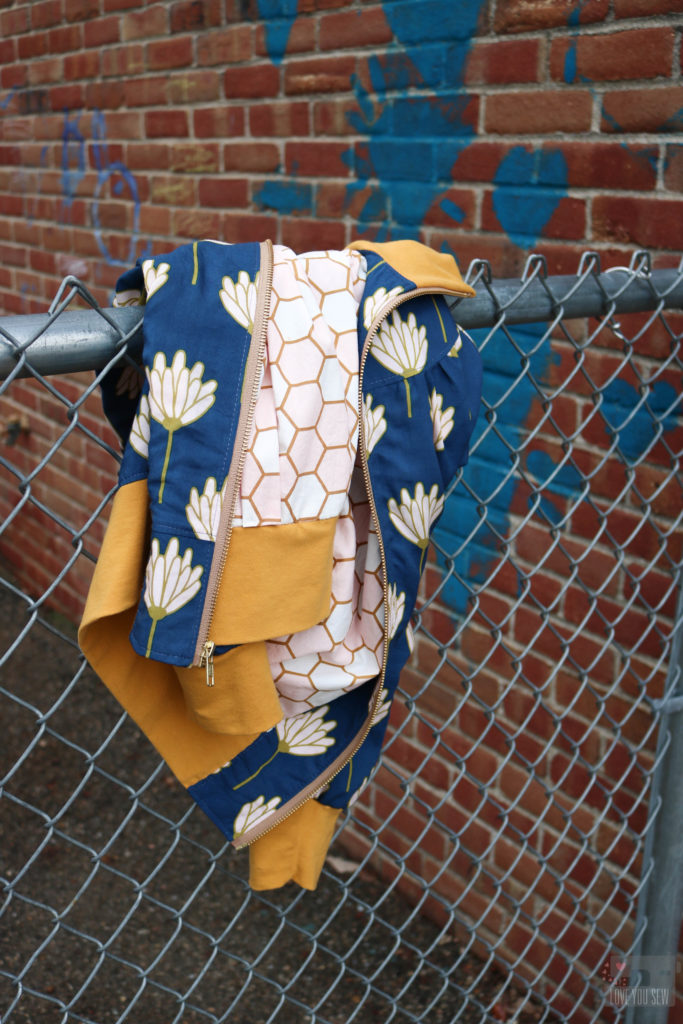
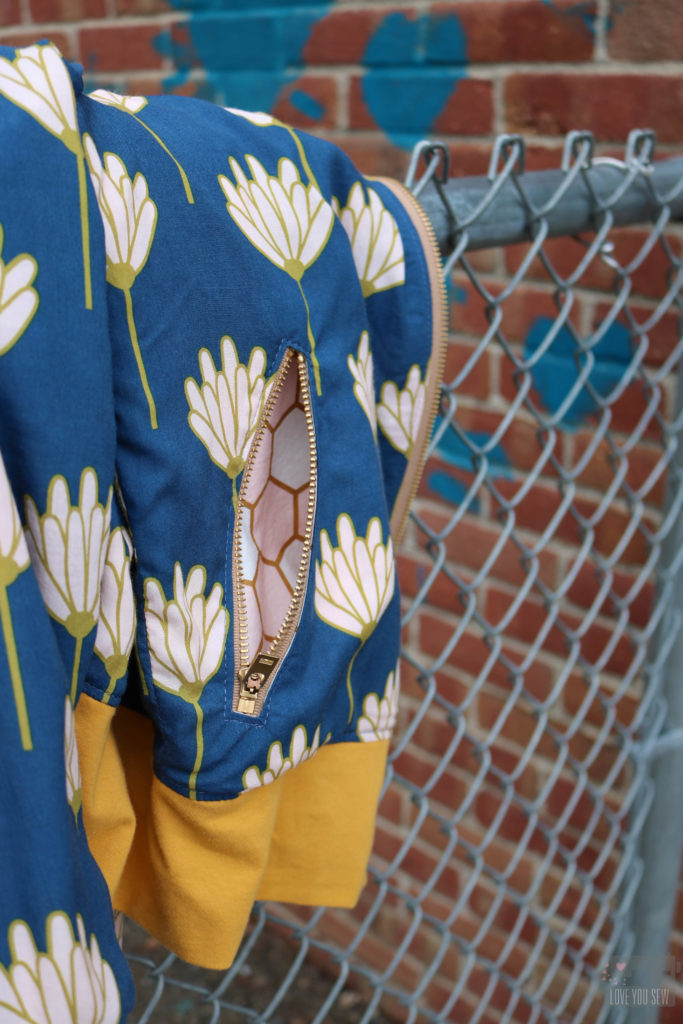
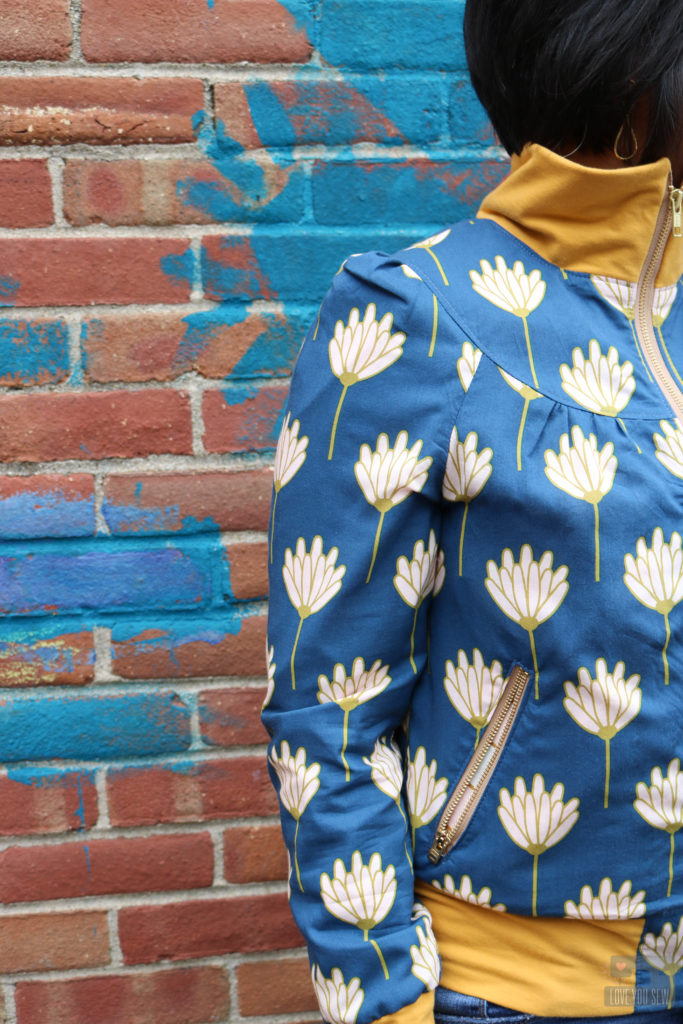
For the right statement fabric, I chose Floret Sunkissed from the Blush fabrics collection by Dana Willard as the shell.  For the interior, I used Hex Rose from the same collection, but in quilting cotton.  AGF Solid Knit in Sahara Sun was a great complementary color to really make this jacket pop and add some fun!

While working through the jacket, it was very important to reinforce the high stress areas since rayon is so delicate.  I used Pellon 906F interfacing around all the metal zippers (due to their extra weight) and even on the exterior yokes to provide some additional structure as well.

These zipper pockets are such a great detail.  However, the pattern called for a 5″ zipper opening.  After taking 1/2″ allowance away for the zipper head and stopper, I would be left with a 4.5″ opening….which is pretty tight (and I have small hands!)  I increased the opening to 6″ for a little more room to maneuver because I HAVE to use pockets if they are there.

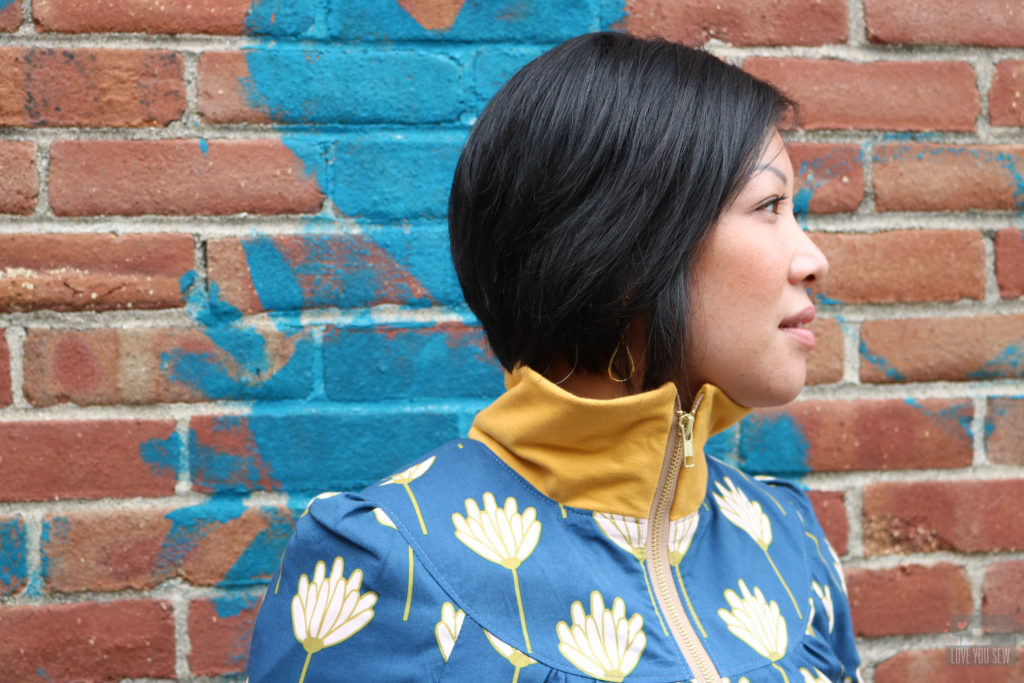
With the track collar, I wanted it to stand up when zipped, but it also needed to handle the weight of the metal zipper.  So I doubled up the layers of the Solid Knit jersey.  Not only does the collar stand up (mission accomplished,) but it keeps my neck extra warm!

For the construction of this jacket, I used Polyester thread throughout for the strength.  A jacket is going to experience a good bit of wear and this thread allows for a bit more give and movement.  However, I used matching Sulky Rayon Thread for all of the top-stitching to match the sheen of the fabric.  I’m pretty hooked on the look of rayon thread….it’s so beautiful!

The Cookie Blouson pattern itself, was not too difficult.  Even with the zippers, I would rate this as advanced beginner.  But then came the lining…   It was a free add-on via a few blog posts by Waffle Patterns.  The pattern designer’s first language is not English, so the translations were a bit rough.   I was pretty frustrated at some points, but made it work.  I would consider the lining at an intermediate level because you are essentially drafting your own pattern pieces.  If I would’ve known this beforehand, I probably would’ve skipped the pattern altogether because I needed a lining with a rayon shell.  But, of course, I love the final product 🙂


I’ve made a handful of Rayon garments, and have a few tips I’d like to share:

  • For accurate cuts, I cut on the floor for an even cutting surface…especially if you are pattern matching.  Any fabric hanging off the edge of a cutting table can pull and distort your cut.
  • Don’t be shy with fabric weights.  This points to the slippery and shifty nature of rayon.  You want an even and accurate cut.  Iron and smooth out your fabric with your fabric aligned and then set the weights down.
  • A small rotary cutter is great to cut out patterns because scissors can cause movement and shifts in your fabric as you cut.  (This doesn’t matter as much if you aren’t pattern matching.)
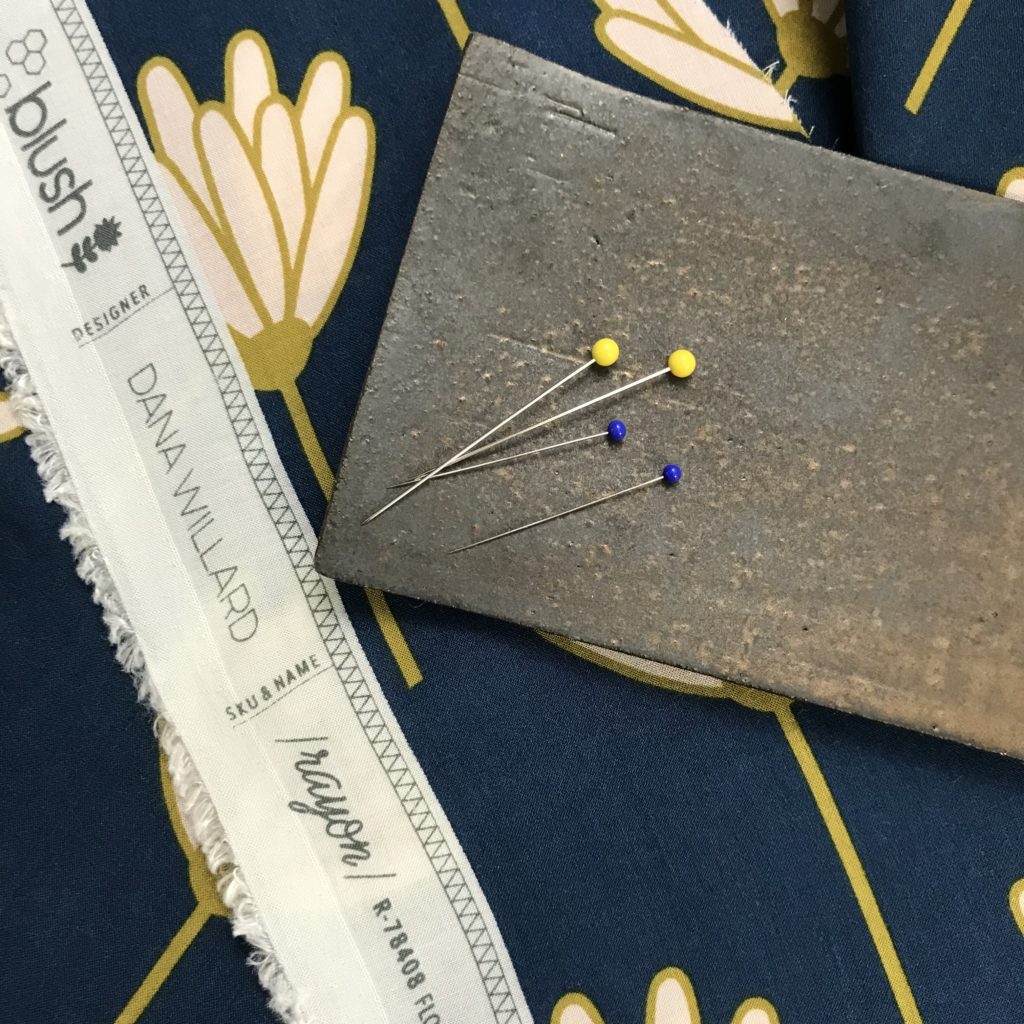
  • I use ultra fine pins (with the blue heads, shown above) for construction.  The traditional quilting pins (with the yellow heads) are a bit larger and can cause pulls in the fabric.  With the slippery rayon, I also use a lot more pins that I would with cotton – probably twice as many to keep my fabrics aligned together.

Project Summary:

  • Exterior Shell Fabric:  Floret Sunkissed Rayon by Dana Willard for Art Gallery Fabrics
  • Lining Fabric: Hex Rose Quilting Cotton by Dana Willard for Art Gallery Fabrics
  • Accent Knit: Sahara Sun Solid Knit by Art Gallery Fabrics
  • Pattern:  Cookie Blouson by Waffle Patterns
  • Piecing Thread:  Gutermann Polyester
  • Top-Stitching Thread: Sulky Rayon 50 wt
  • Zippers: YKK Brass separating and jeans zippers in Camel by Wawak Sewing Supplies

Don’t forget to stick around all this AND next week for the rest of the #AGFrayonbloghop.  I’m so excited to check out all of the projects alongside you!

Monday, October 9 – Cristy @loveyousew_ (you are here!)

Tuesday, October 10– Nicole @modernhandcraft

Wednesday, October 11 – Sarah @sariditty

Thursday, October 12 – Jesy @needle_ink_and_thread

Friday, October 13 – Danyella @madesewmodern

Monday, October 16 – Nichole @wildboho

Tuesday, October 17 – Cynthia @cnytz51

Wednesday, October 18 – Vicki @orchidowlquilts

Thursday, October 19 – Amanda @pinkmandarinhandmade

Friday, October 20 – Jenn @jennrossotti


I hope you have found some inspiration or just enjoy some fabric eye-candy!  Do you have a rayon project lined up or on the wishlist?  I’d love to hear what you would make.


Happy Sewing Friends!

Cristy
 

***This post was sponsored by Art Gallery Fabrics.  While the fabric was provided for the post, the ideas, execution and post are all my own work and words.  Please also note there are affiliate links which help run this blog.  Thanks for your support!

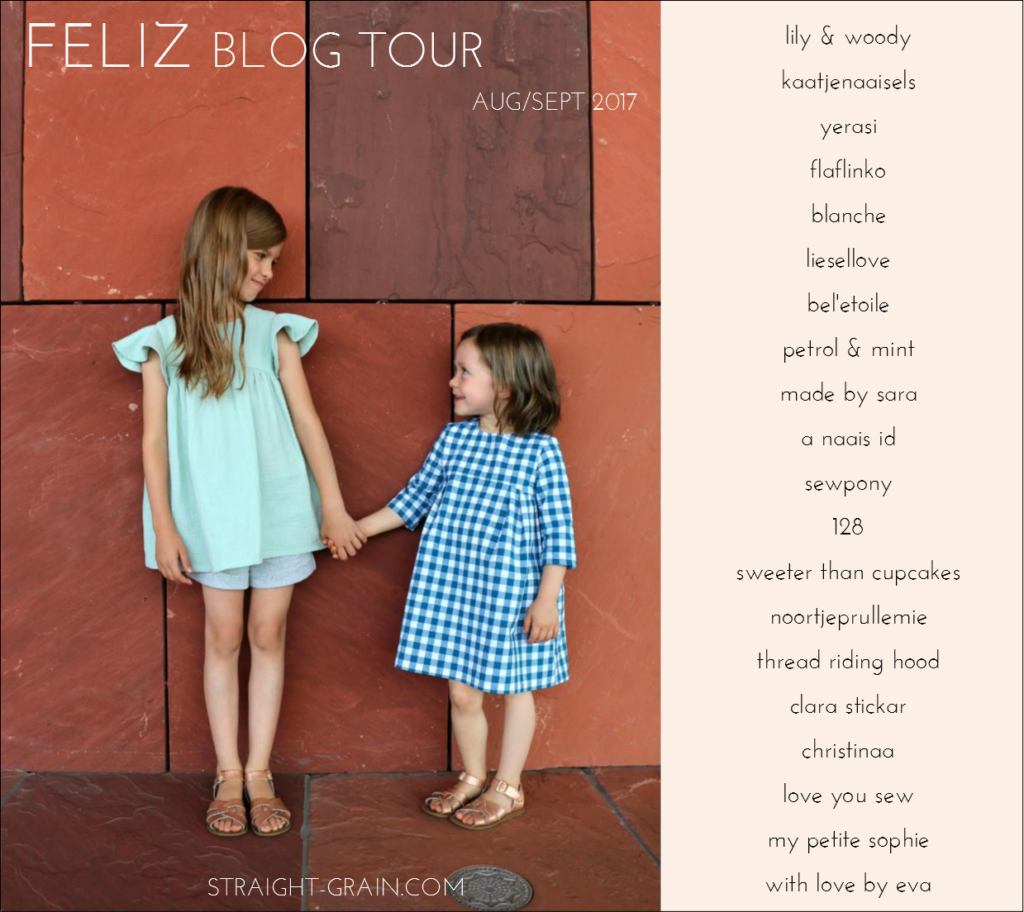
Feliz Pattern Blog Tour

I love Straightgrain patterns.  That’s it…’just gonna put it out there.  You know I can’t stop making girls’ dresses and An’s designs are always at the top of my list.  She creates children’s garment patterns with beautiful clean lines and they are just so chic!  You can read about my previous Nova dress here

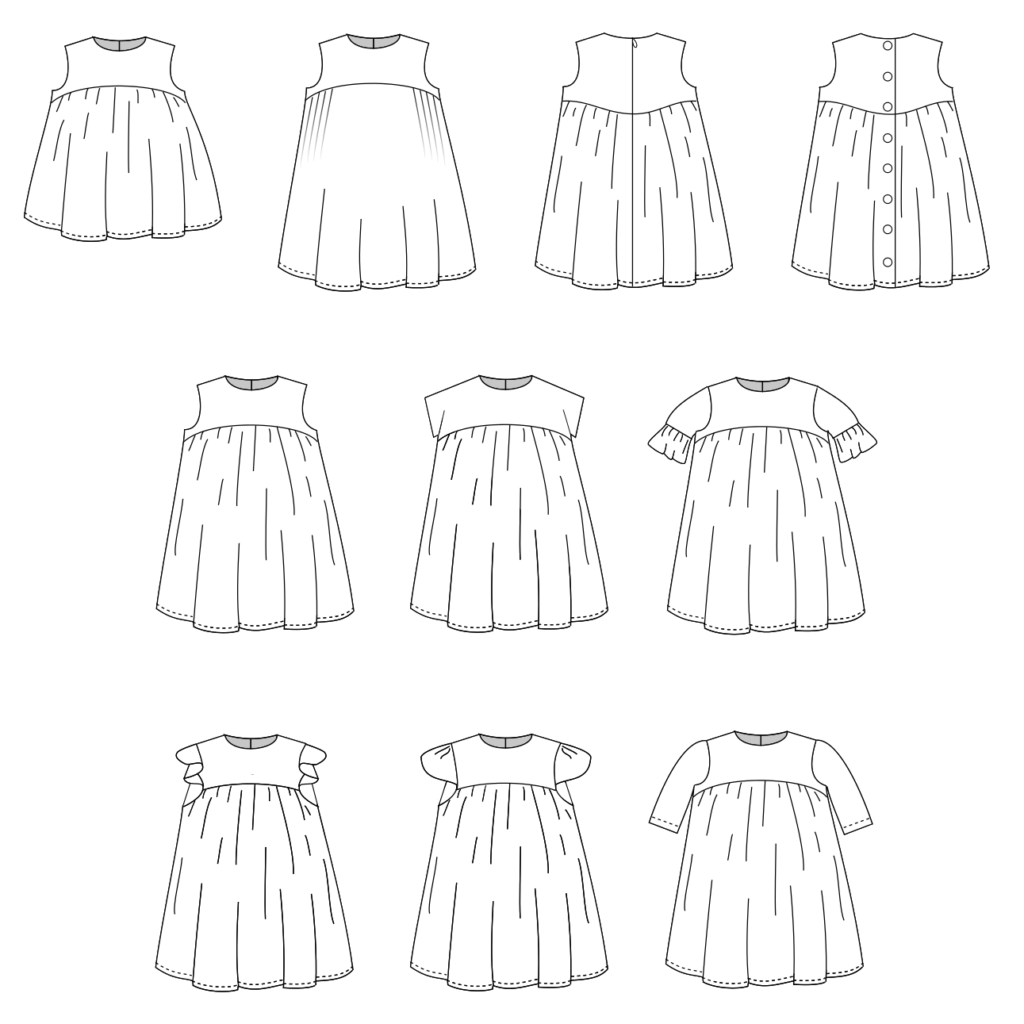
Straightgrain patterns always includes several variations to give you a number of different styles and the Feliz is not different. You can choose from a PDF or paper pattern from her online store here.  With the pattern, you can make a tunic or dress with 6 different sleeve options, two different back closures, and two different skirts.  It’s great to get so much versatility out of one pattern and I think An’s are a great value for all which she provides.

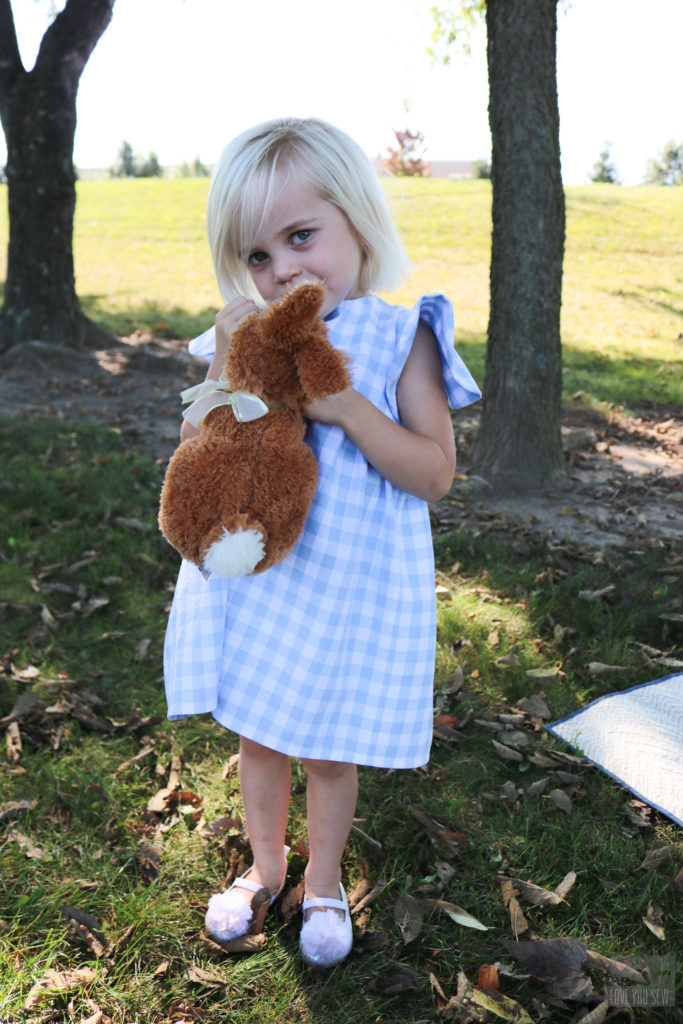
Of course, I picked the dress version. I make all my dresses as gifts (since I’m a boy mom) and dresses count as a full outfit 🙂 It makes me happy to work on a tiny garments (purely because of the cute factor) and my nieces are happy to get some custom clothes.

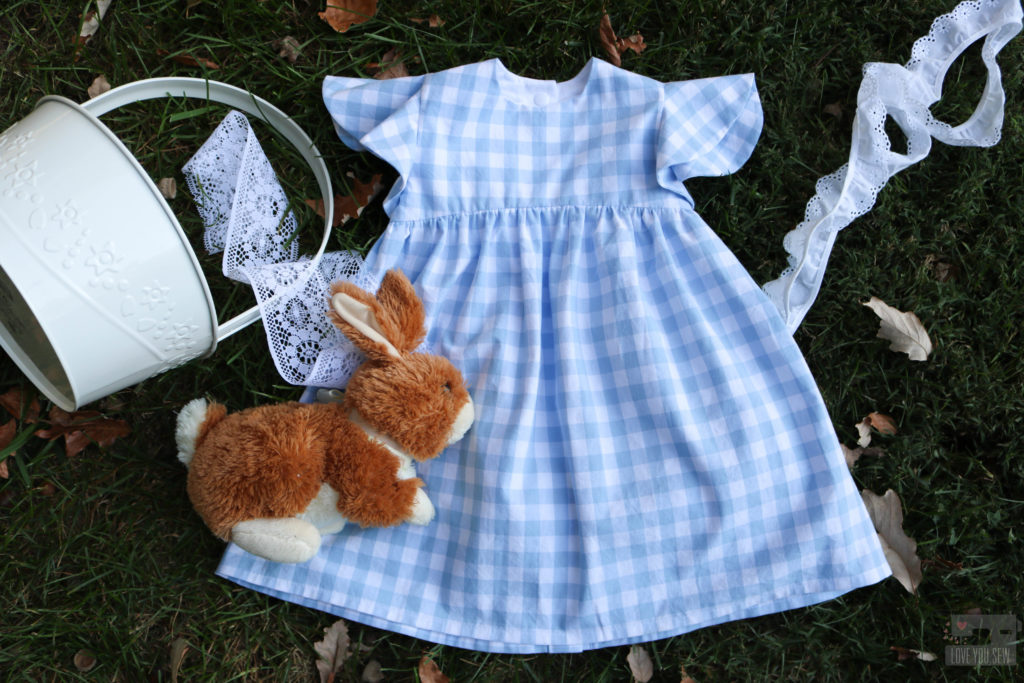
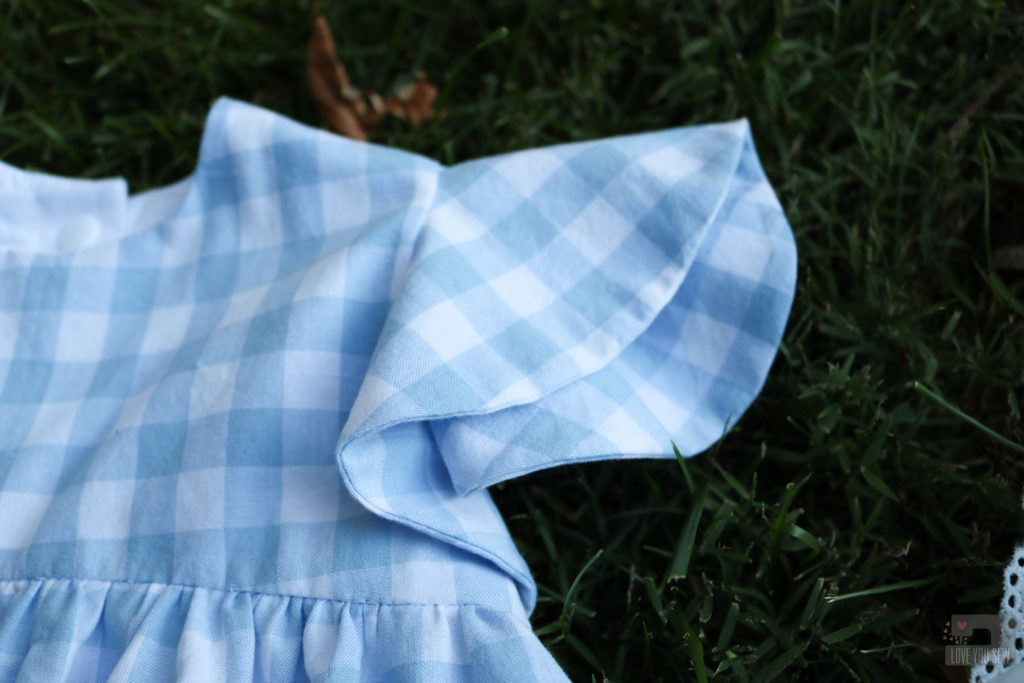
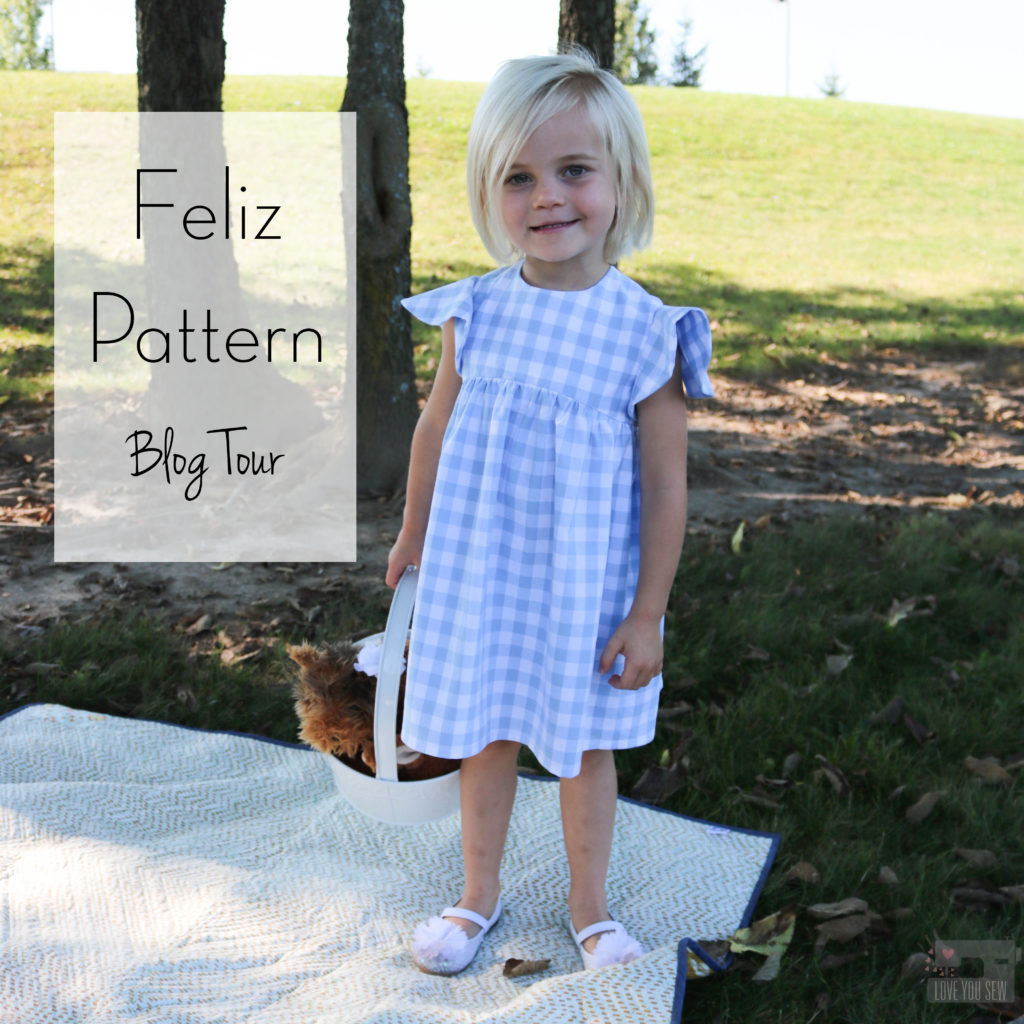
Did you see the flutter sleeve options?  SO cute!!! The soft waves are so feminine and really soften out this silhouette. It was hard for me to choose between the narrow and wide options. But I settled on the wider for just a little more arm coverage.

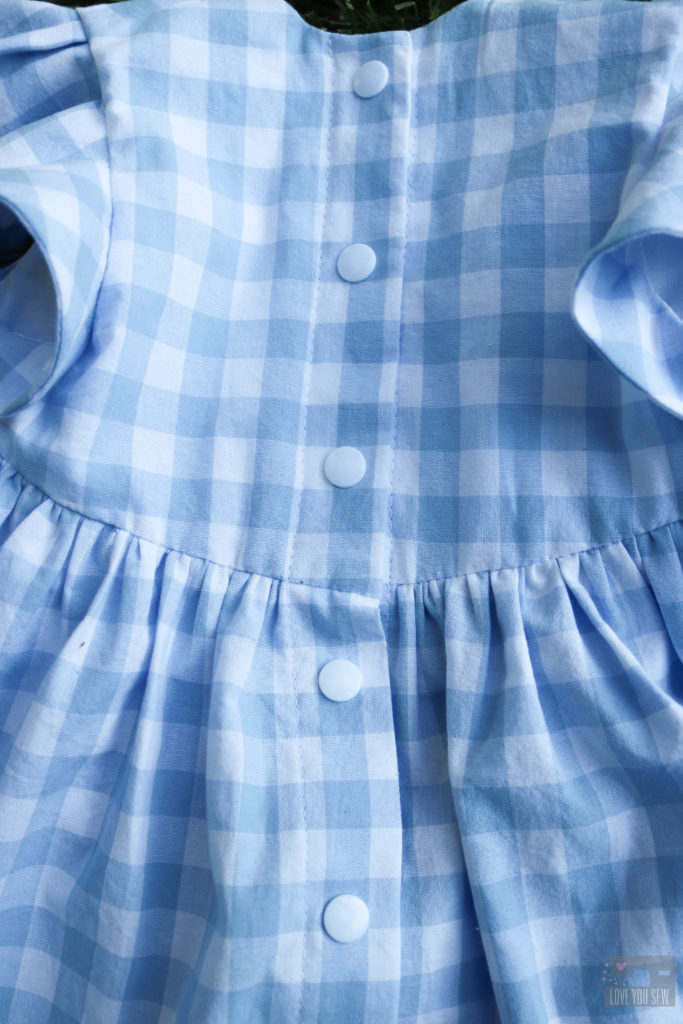
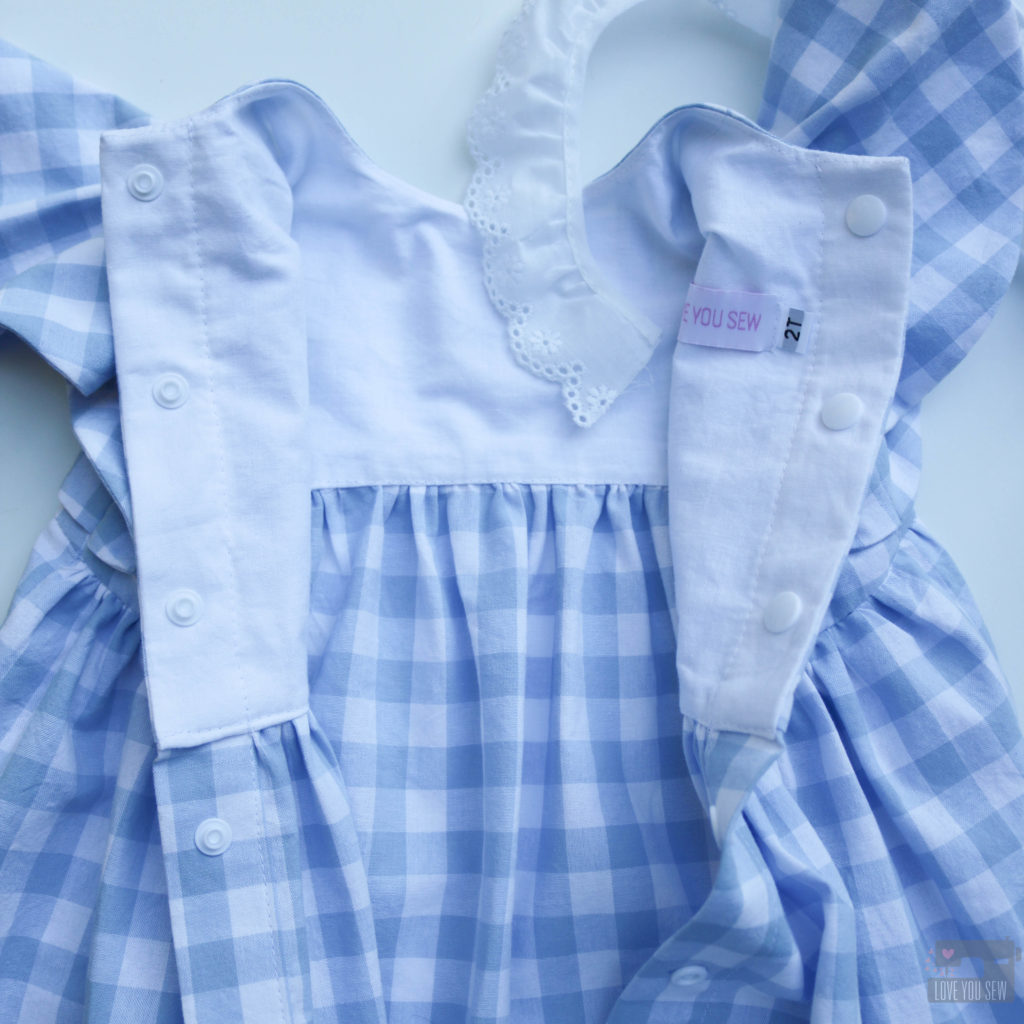
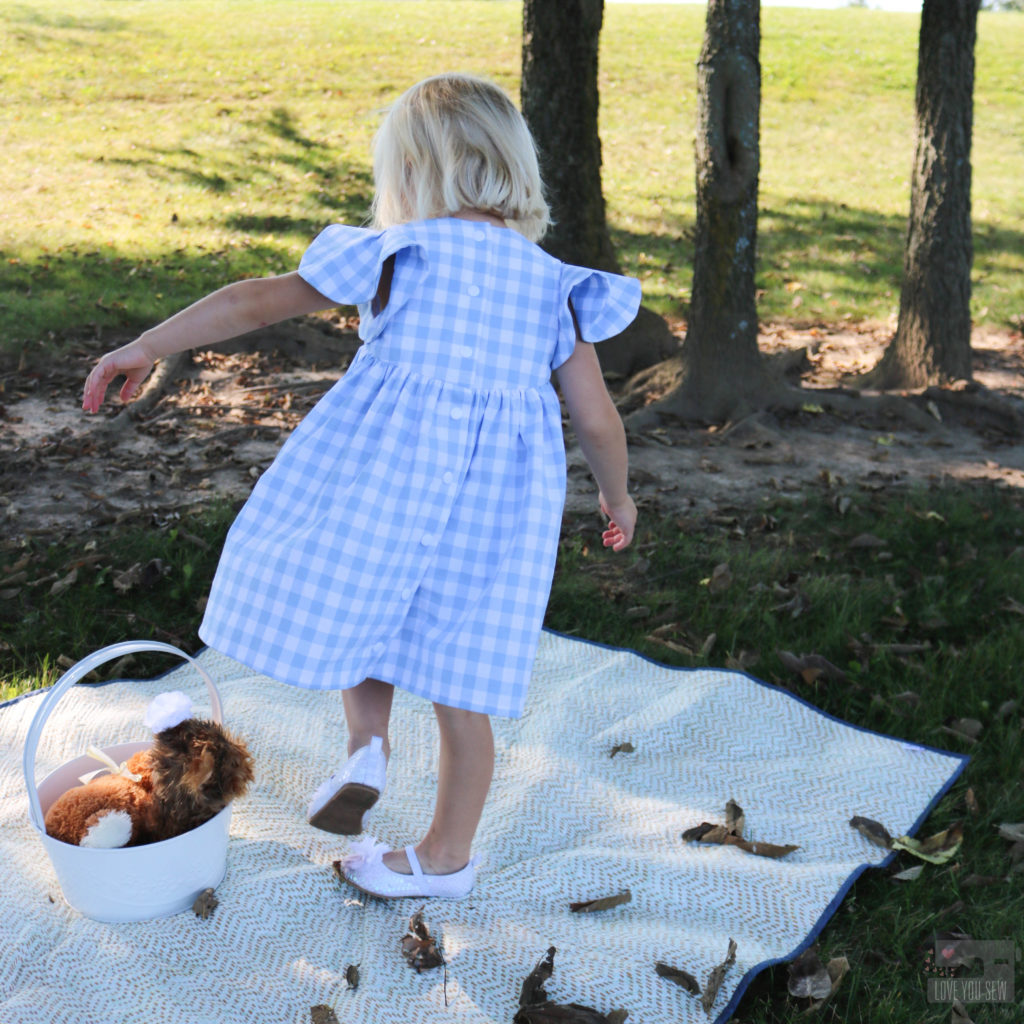
With the back of the Feliz dress, I knew I wanted to make a button closure. But instead of buttons, I used KAM snaps. I have quite a collection in my stash and they make for very quick dressing and undressing.


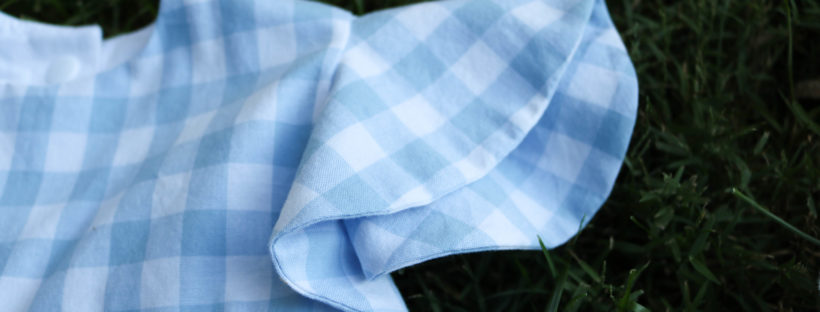
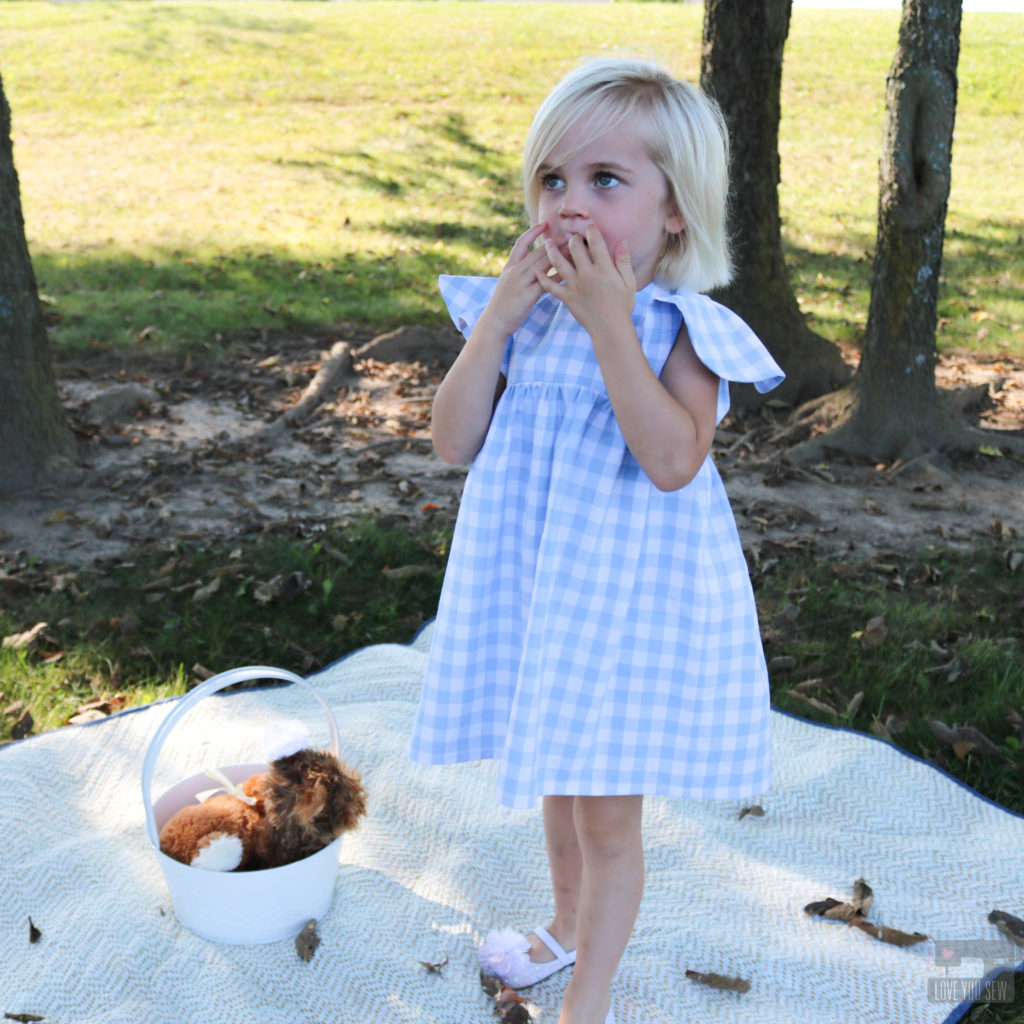
I happened to have Cotton and Steel’s yarn dyed gingham in Sky and was able to make this dress with just one yard of it!  There wasn’t enough left for lining, but Kona Snow worked in perfectly.  I’m so glad I saved the fabric from becoming a scarf (like I initially planned) because the Feliz is just the such a darling pattern and pairs well with this sweet fabric.

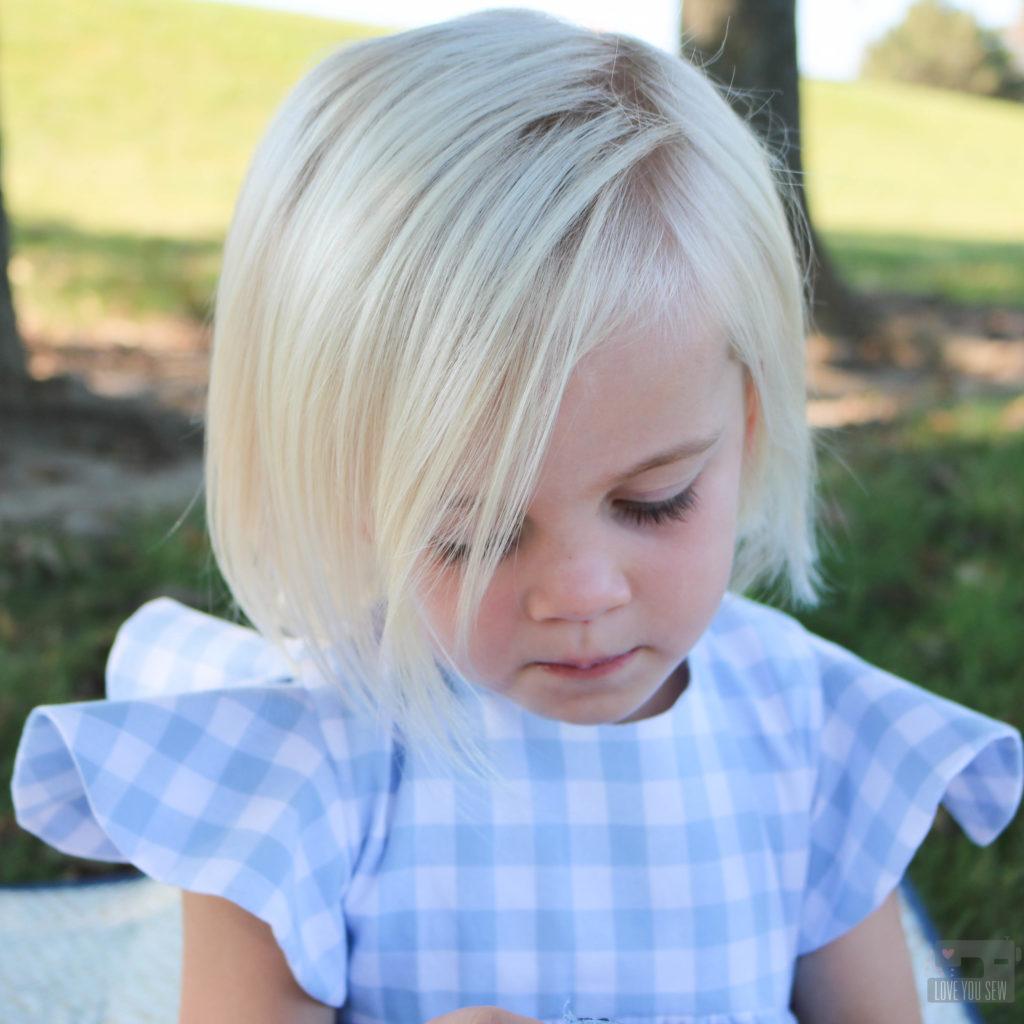
I think my model agrees! She would not take off this dress after our photo shoot.  Can you blame her at all?  I’m thinking I need some gingham love in my wardrobe soon…

The sizing is spot on with this pattern.  My model is a 3T for length, but is still pretty slim, so the 2T fit her well…and of course, I pre-washed all the fabric so there is no surprise shrinkage.  The dress hits her at just the right spot on the knees and is the perfect for some playtime!


I like the lift on the sleeves with a woven fabric.  It adds a little more drama 🙂  But if you used something lighter, like a double-gauze, it would be more draped.

I really love the versatility of this pattern and can’t wait to make a few more!  What combo would you make?

If you need even more Feliz eye-candy, please check out #felizpattern on social media and visit all the bloggers part of the blog tour:

Happy Sewing Friends!
Cristy
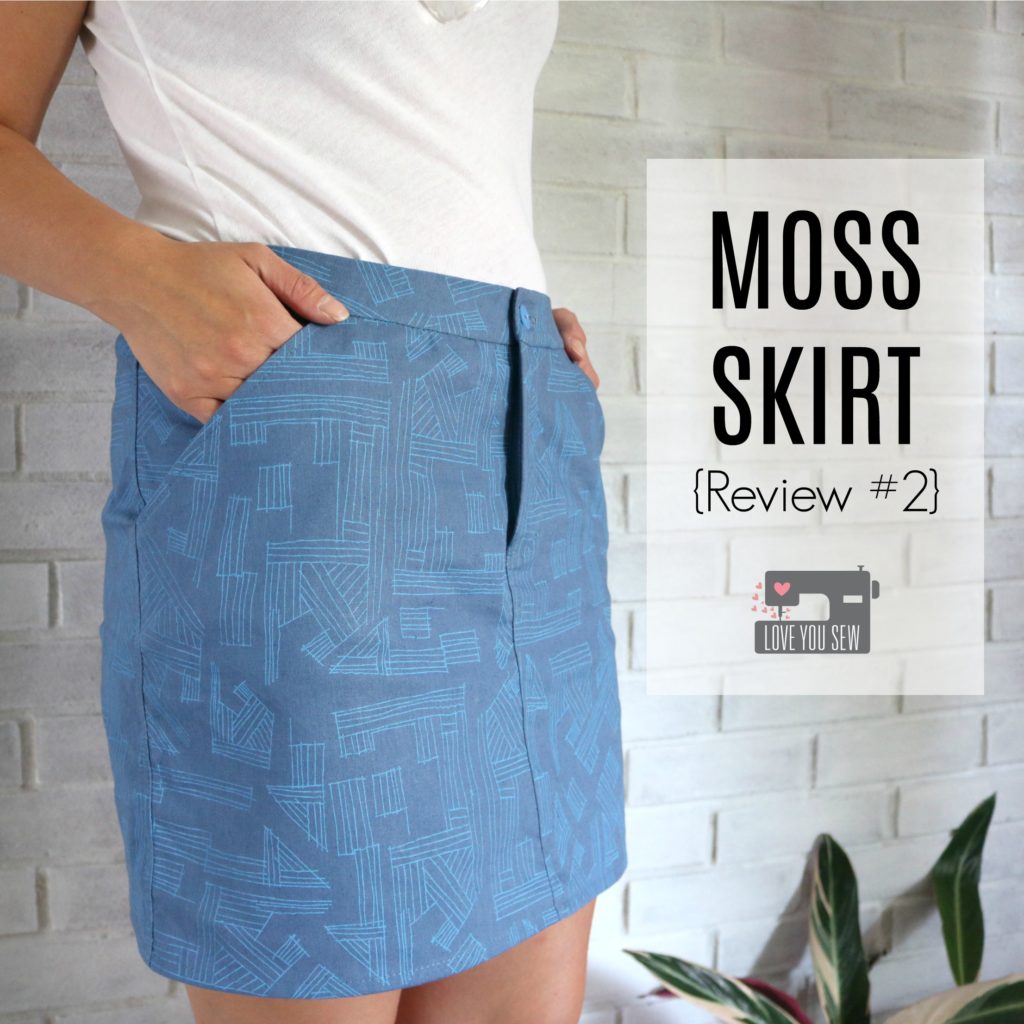
Moss Skirt {Review #2}

I had my fabric selected for my Moss Skirt by Grainline Studios months ago…hoping to be able to wear it all summer long.  But as you know, life just happens and selfish sewing gets put on the back burner.  This is the second one I’ve made and love it even more than before.  For the first one I made over a year ago, you can read about it here.

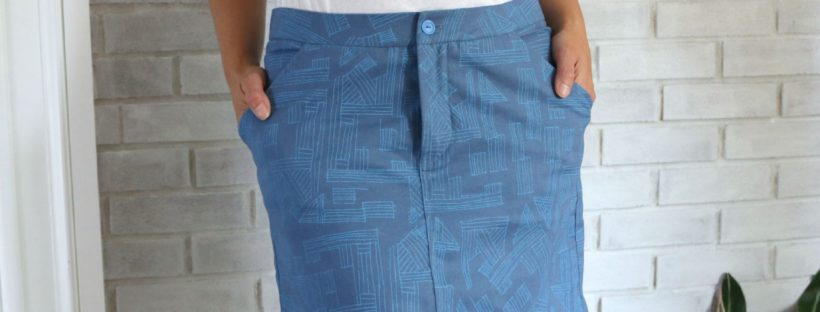
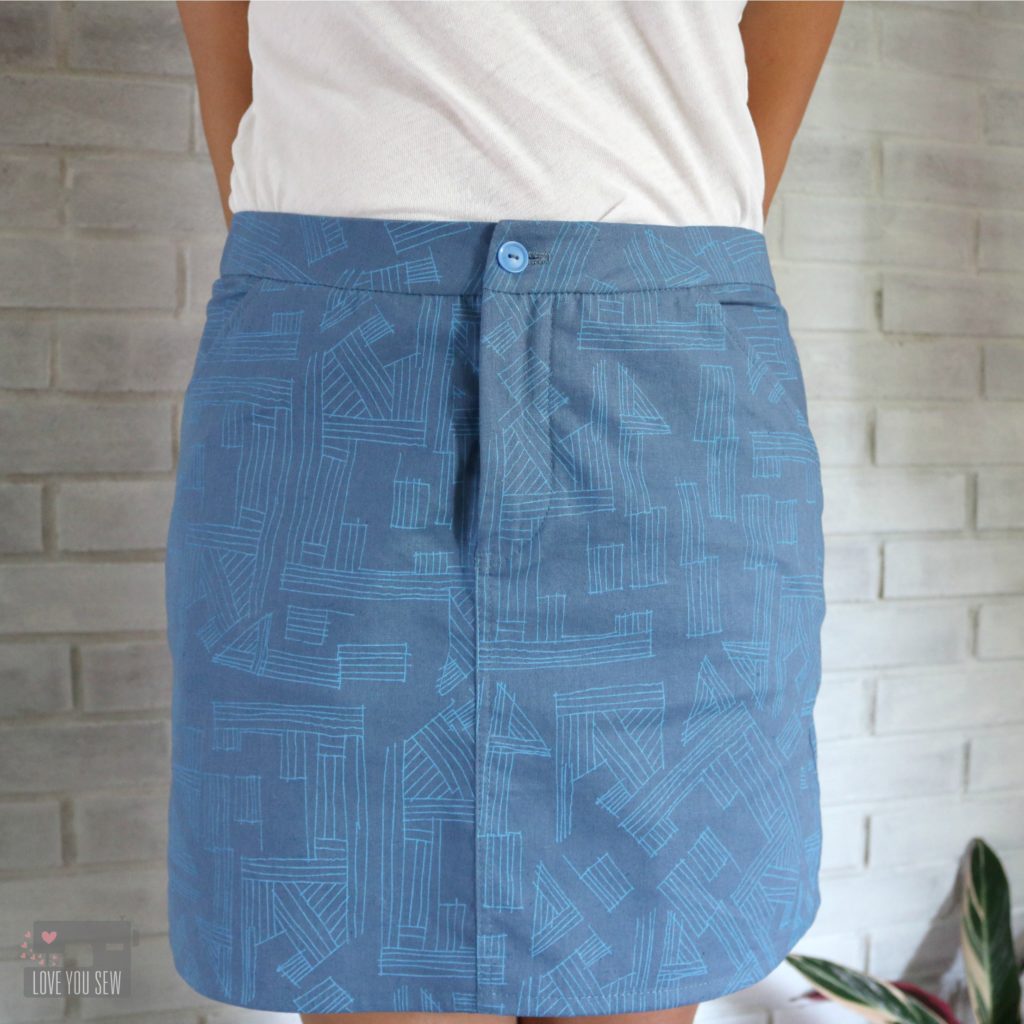
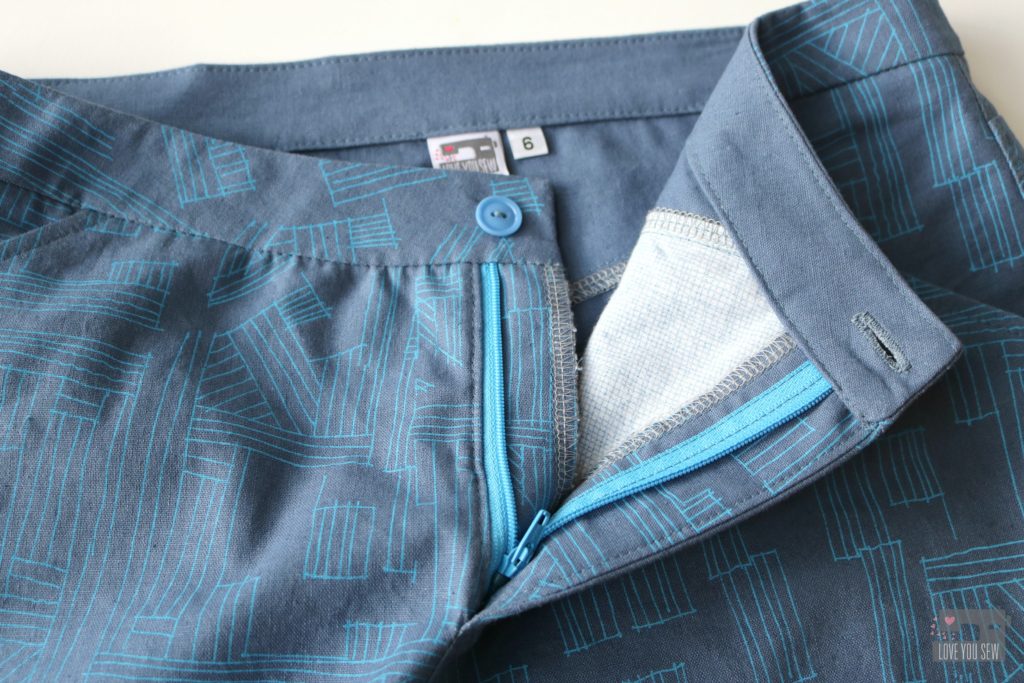
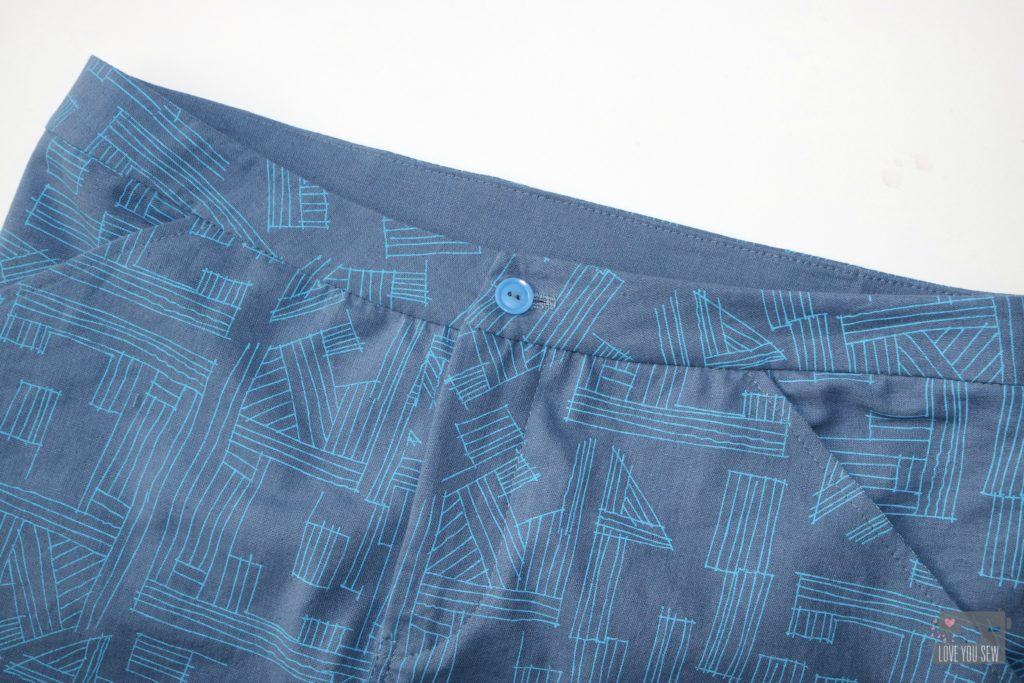
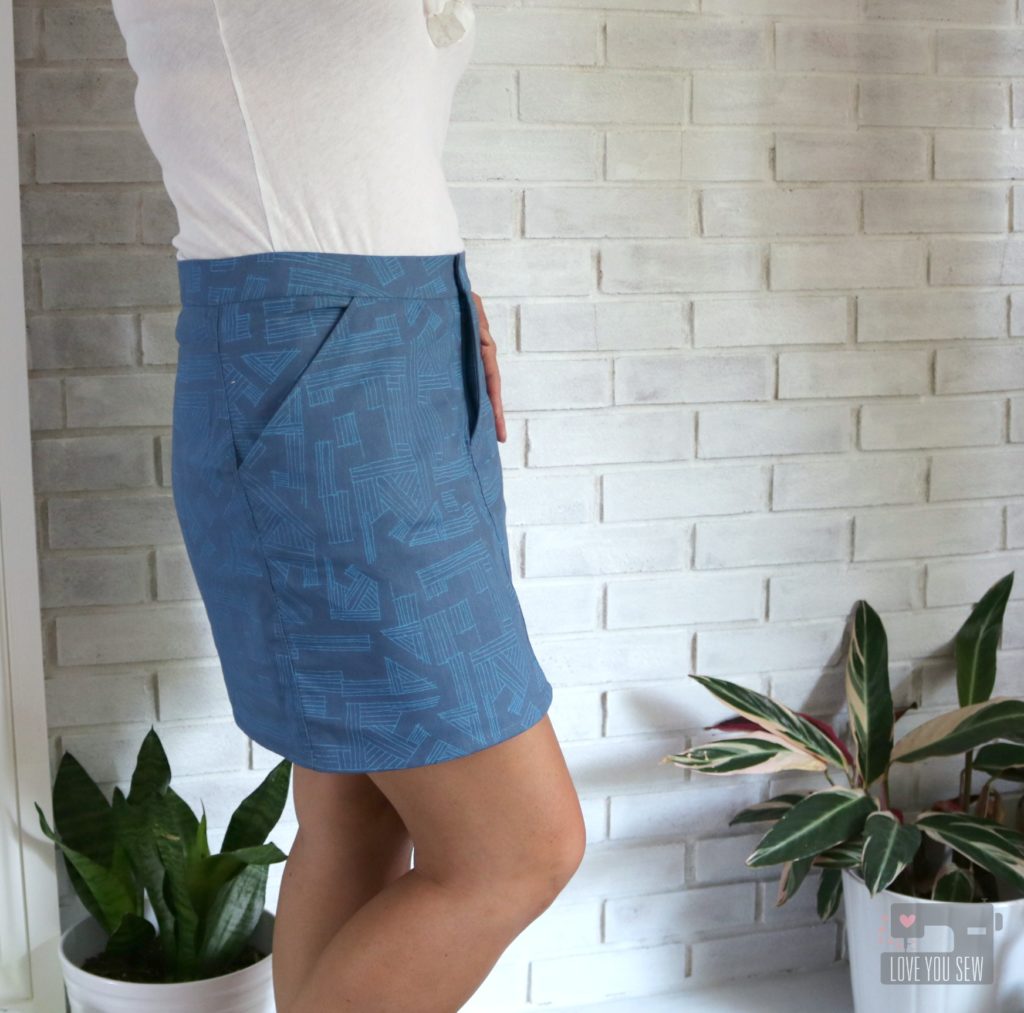
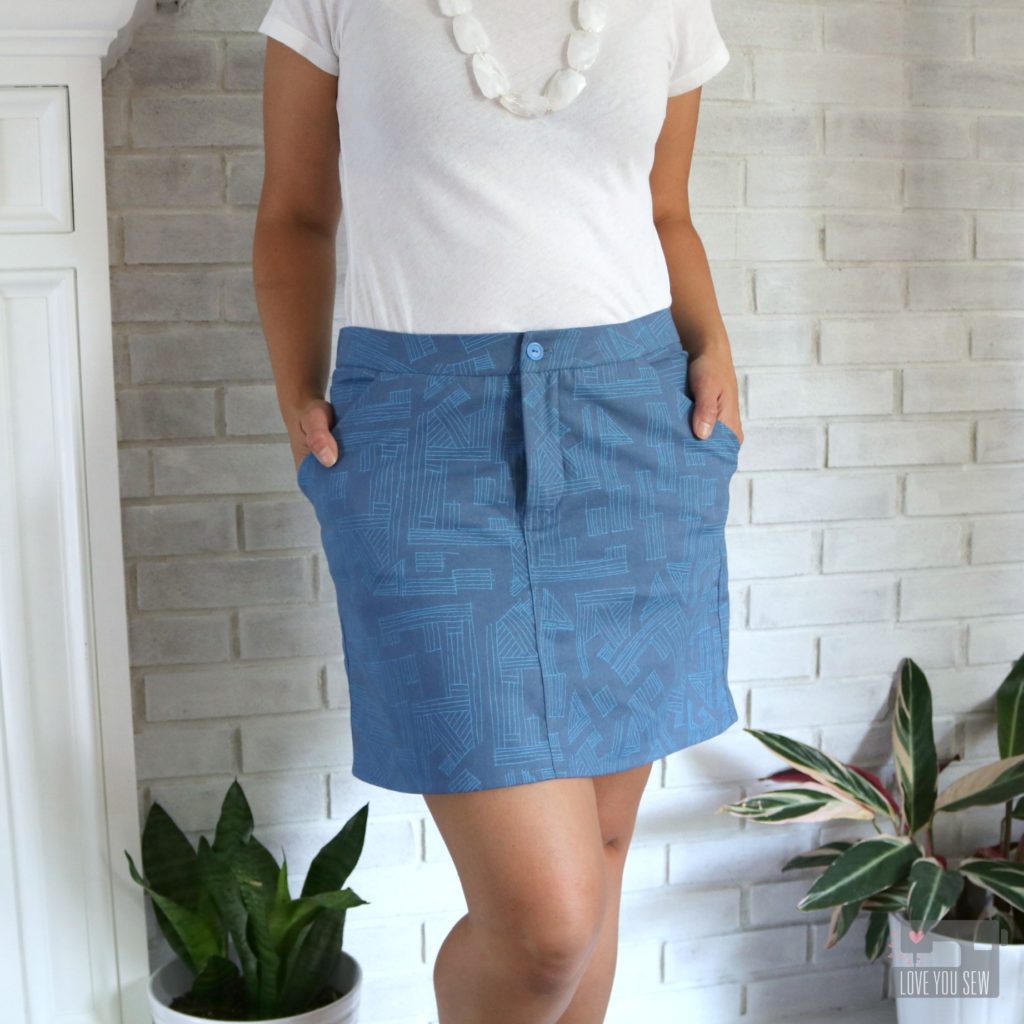
For this version, I used Euclid fabric in Cadet which is a printed linen/cotton blend.  This is slightly heavier than quilting cotton, and makes for the perfect summer weight skirt. With the blend, you get the texture of the linen, but not all the wrinkles. I’m all about less ironing!  By making View A this time, I was able to make this skirt out of one yard of fabric (minus the pockets.)


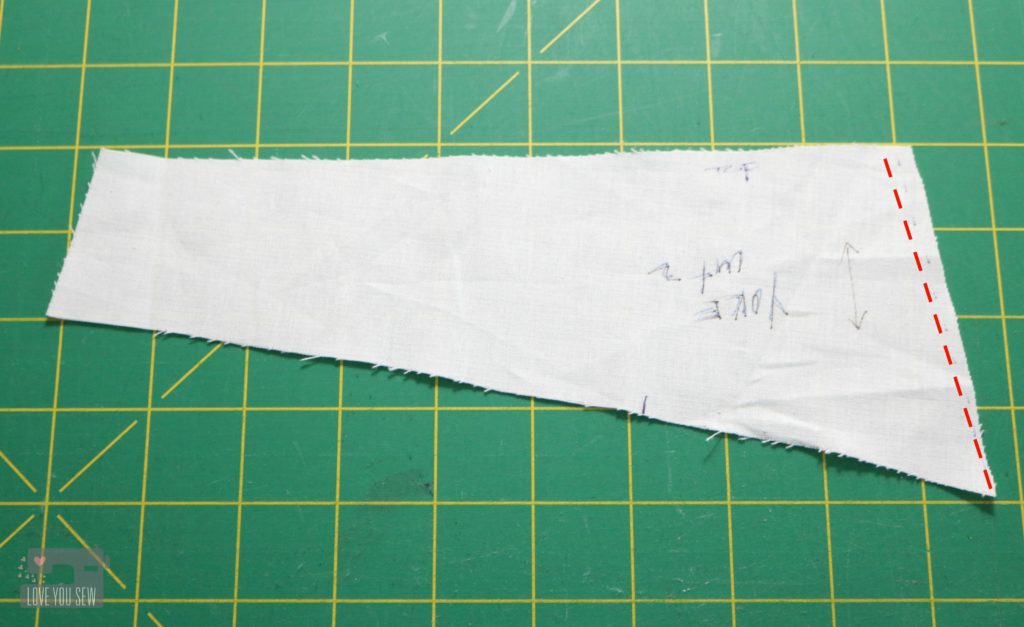
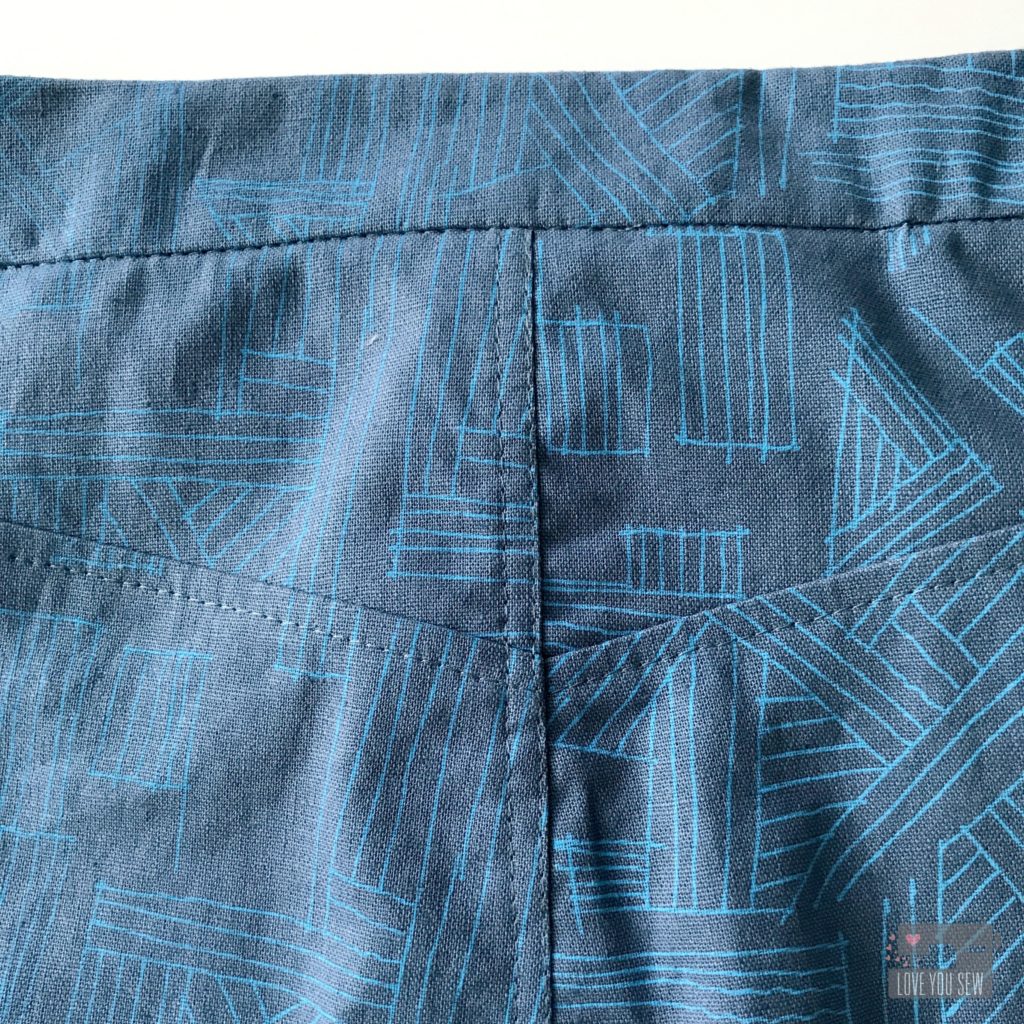
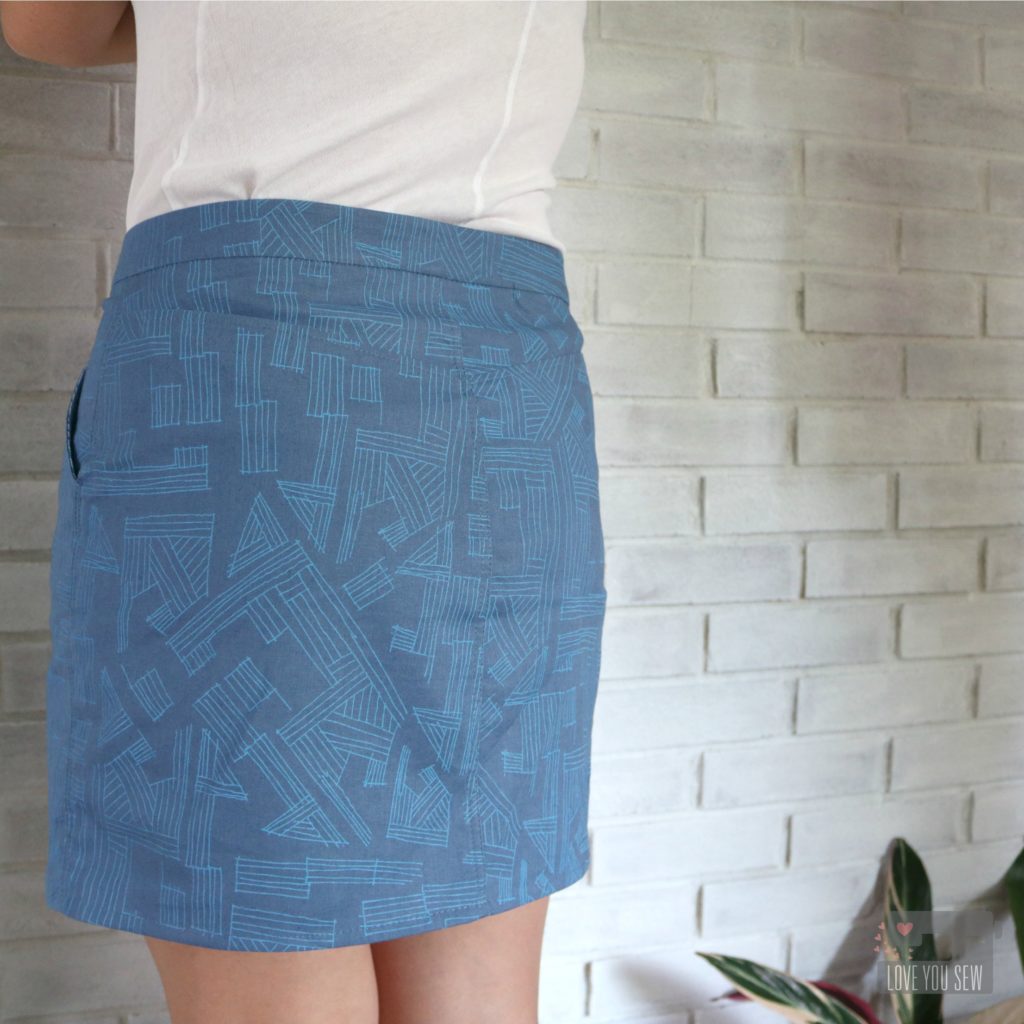
After learning from my first Moss, I knew I had to adjust the back yoke to get rid of the gap. You can see (on the dotted line above) how I cut into the yoke pattern piece on an angle to leave the room for my rear but move the waistline closer to my back.

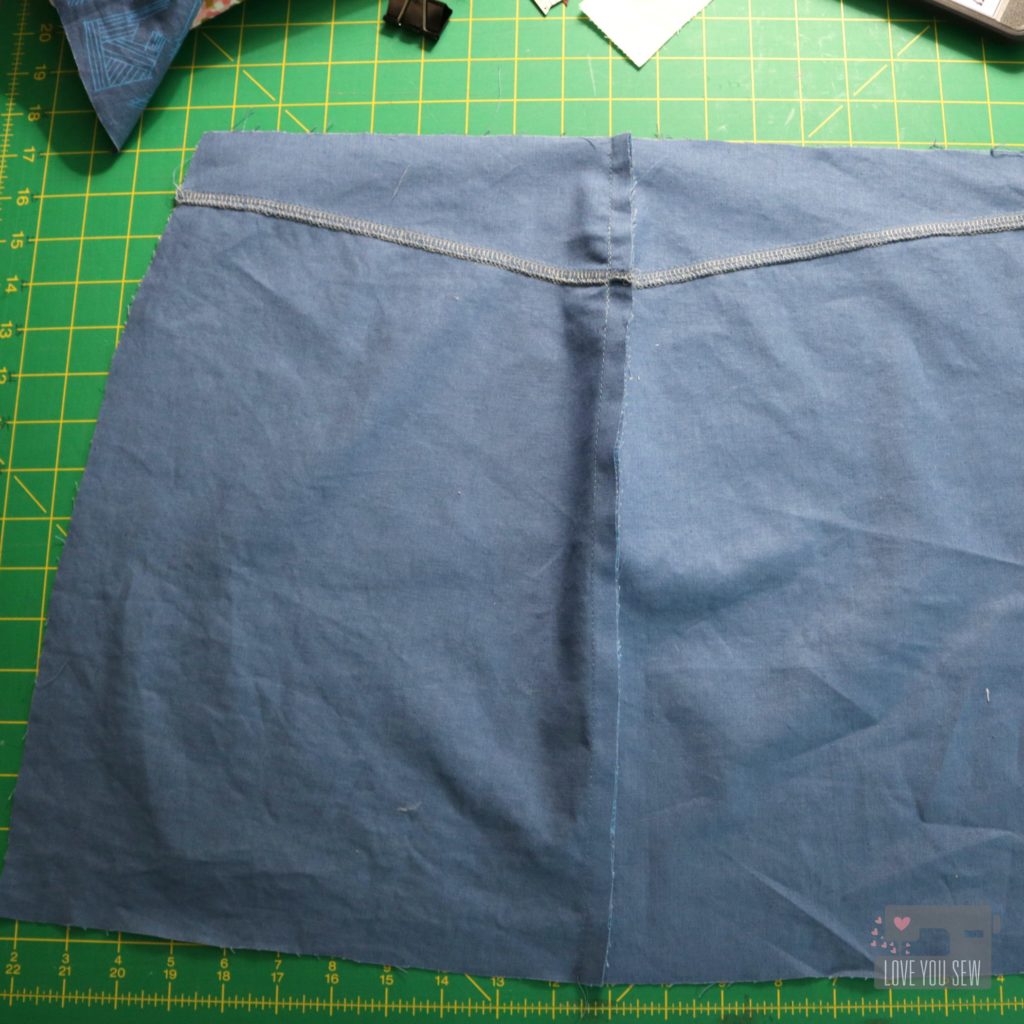
The other other learning was to keep my vertical seams unfinished until I was ready to add the waistband and hem. This allowed me to make just slight tweaks to curve my seams, if needed. Once I was satisfied with fit, I serged my seams.


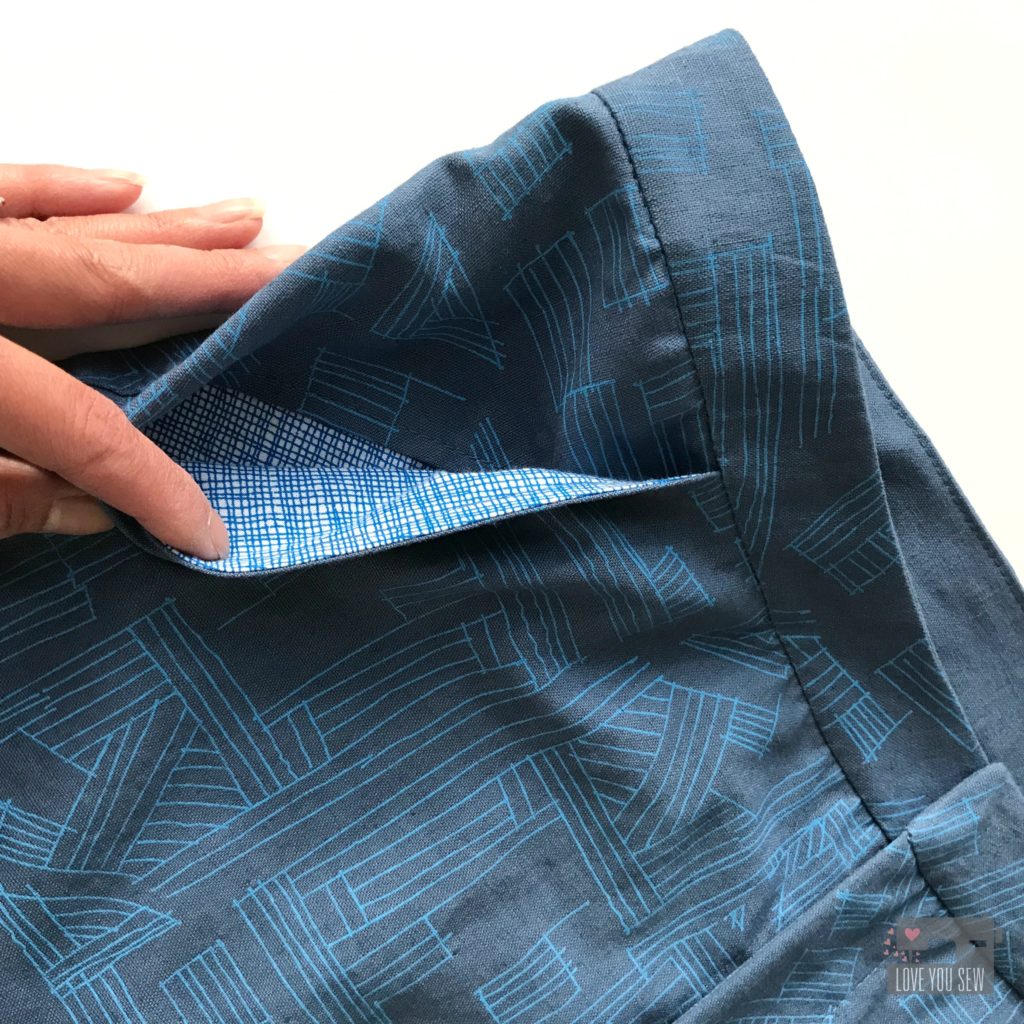
For some fun and to keep the silhouette smooth, I used Architextures Gridlines for my pockets. This allowed me to use some scrap fabric and reduce the bulk if I would’ve kept to the same cotton/linen blend.

As I moved through the pattern pieces, I mimicked the same top-stitching as seen on a pair of ready-to-wear jeans. I love how it turned out! Be sure to increase the stitch length and go slowly to ensure nice straight line.

The great thing about making your clothes, not only for the custom fit, is being able to add so many special touches.  Like the pockets, I added a contrasting zipper and button for fun.  The button came from my MIL’s long hoarded collection and it reminds me of her as I wear this new garment.

For the waistband, I decided to machine stitch the inside down verses slip-stitching it as the pattern calls.  I’m a busy mom and I try to machine wash and dry as much as I can.  For me,  a machine stitch would just hold up better with my lifestyle.  This lady does not have time for all that hand-washing!  I pressed the interior band down just wide enough to just cover the seam and stitches.  (If you have any branding or sizing tags, this is the perfect time to pin them in.)  I used a Sewline glue pen to keep the interior waistband in place while I stitched-in-the-ditch along the exterior.  This allows me to just catch the interior band.


With View A, I hemmed as directed.  This length was perfect on my 5’3″ frame.  It hits a few inches  above the knee, but is perfect for the summer.  If I was any taller, this might be a tad too short for my “mom” lifestyle which requires a lot of bending up and down…and sometimes a bit of unexpected climbing.  🙂

As I’ve been building my handmade wardrobe, I’ve been selective in choosing some slimmer silhouettes for my petite frame.  I am heavier in the arms and legs, thus like to emphasize my waistline.  This is the perfect skirt pattern for just that.  The clean lines and waistband keep everything smooth to draw the eye up and down.  The printing on the fabric is just the right scale to keep everything in place and not over emphasize one part or the other. 😉

I love how I can pair this skirt with just a white tee and the outfit still looks polished.  I’m hoping to extend this skirt’s life with some heavy tights and cute clogs with a slim long-sleeve tee in the fall. Check out my IG feed to see how it pairs with a yellow and white striped tank and the other outfit pairings!


Project Details:

  • Pattern: Moss Skirt by Grainline Patterns
  • Exterior Fabric: Euclid in Cadet by Carolyn Friedlander for Robert Kaufman Fabrics from Fabric.com
  • Pocket Fabric: Architextures Gridlines in  by Carolyn Friedlander for Robert Kaufman Fabrics
  • Piecing and Top-Stitching Thread: Gutermann 236 polyester
  • Zipper: YKK from ZipIt Zippers
  • Button: Vintage (manufacturer unknown)


Happy Sewing!

Cristy


Please note there are affiliate links.