Make the Most Comfortable Fabric Mask

It’s hard to imagine months later, we are still here…  But now with mask mandates across so many US cities and numbers of COVID-19 cases back on the rise.  Everyday, more and more businesses are requiring masks when in their stores and even schools are requiring them as well.  We ALL need to do our part and wear a mask to prevent the spread of this coronavirus.  This is not a practice that will be going away soon, so I figured I would make the most comfortable fabric masks for my family and friends.
This post details what I’m using for my fabric masks (which are non-medical) and where to find supplies.  I am not a medical professional and/or a PPE engineer or expert.  I made these masks in lieu of purchasing medical grade supplies to keep them available for healthcare and other frontline personnel.  I encourage you to read the CDC fabric mask guidelines for additional info and how you can help prevent the spread of COVID-19.

Background
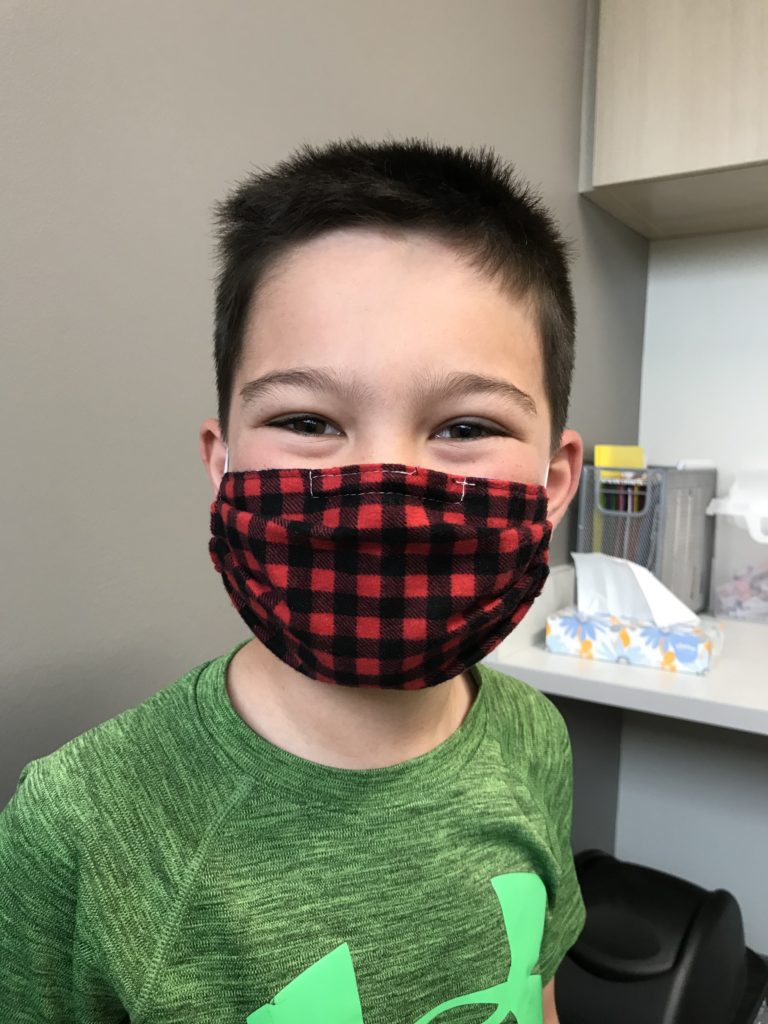
At the doctor’s with jewelry cording elastic and a paper clip nose bridge

Back in May, I took my oldest son (9 years old) to his annual check-up and it was required that both of us had to wear masks.  No problem.  From the time B put on his mask until we were seen and back in the car, one whole hour passed.  But during that time, he was batting at his ears the ENTIRE appointment.  Granted, the only elastic I could get my hands on at that time was jewelry cording.  While the cording fit behind the ears and didn’t push them forward, after awhile they felt like they were cutting into the ears a bit….making them so uncomfortable.  I knew we needed something different for comfort and just knowing masks are here to stay for awhile.

Pattern
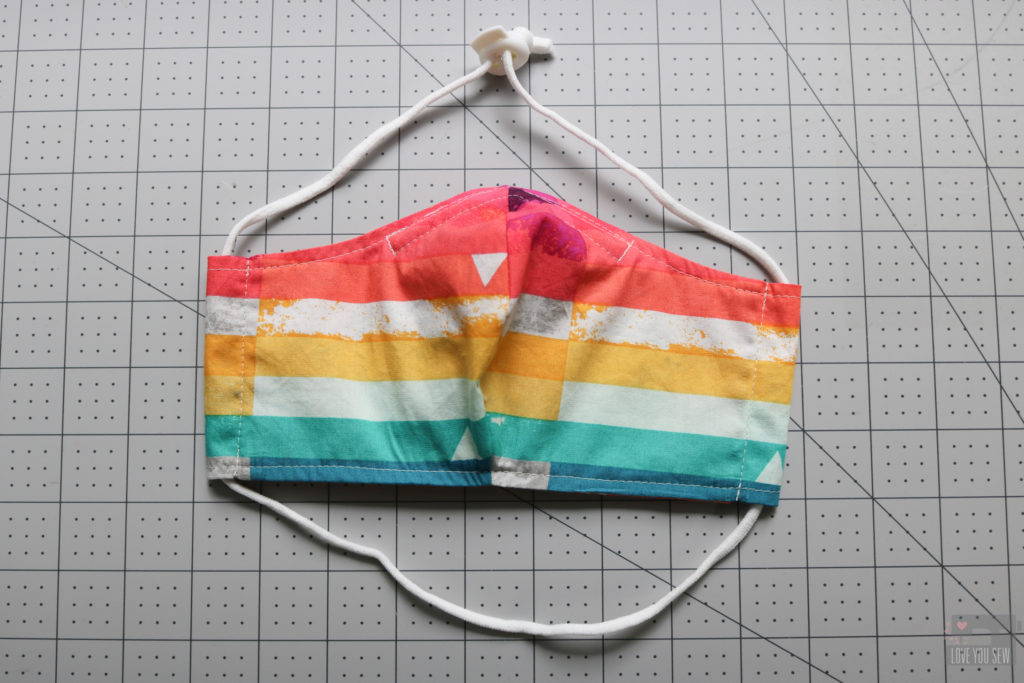
With so many sewists in mask making mode since the beginning of the pandemic, it was not hard to find patterns.  I even have a Pleated Mask (with Ties) Tutorial you can find here.  If you are looking to upcycle or do a project with kids with no sewing, I also have a No Sew T-Shirt Mask Tutorial using hair elastics you can find here.  But for comfort, I was looking for a pattern that I could either tie in the back or use elastic to hold around the head instead of pressure by the ears.  I decided to use the Craft Passion version because (1) It was already drafted for a nice contoured fit around the face and used less fabric which I thought could be cooler? (2) It came in multiple sizes (3) Had instructions for a filter pocket and (4) Came with pattern length adjustments for elastic/tie widths.  You can find the very detailed blog post with videos and even more options here.
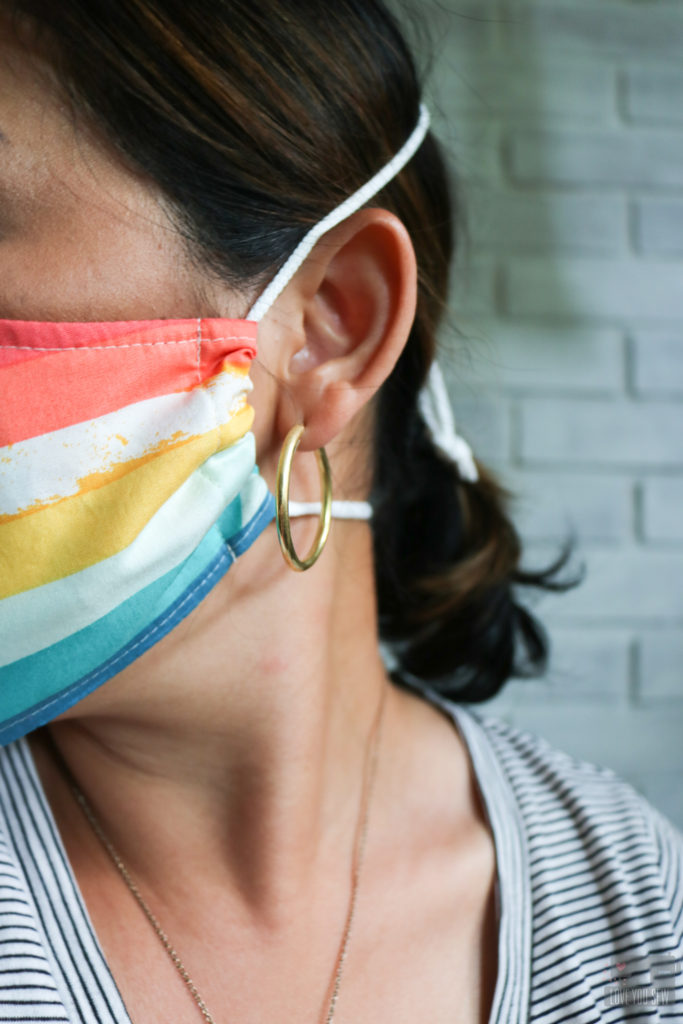
I decided to make the original mask with filter pockets, but used the extended length for wider elastic/ties even though the widest width elastic I would use is 1/4″.  The extra length allows room for the mask to scrunch and fit around the face better.  If it’s more narrow and closer to the stitching and folds (aka bulk) of the fabric, it doesn’t contour as well.

Elastic
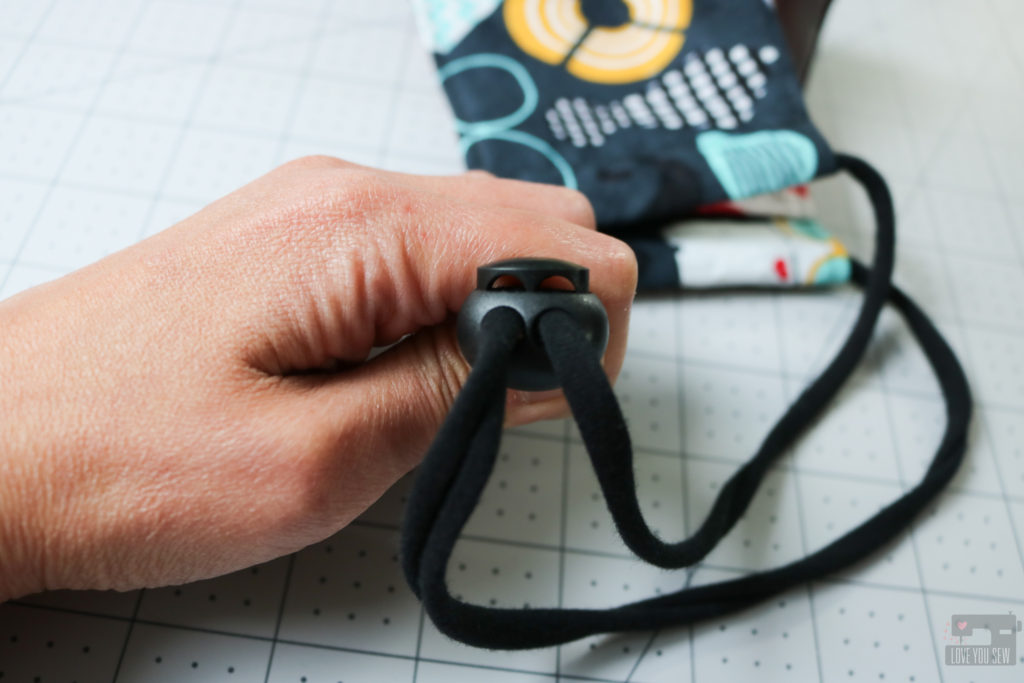
Mask with DIY knit jersey “elastic”

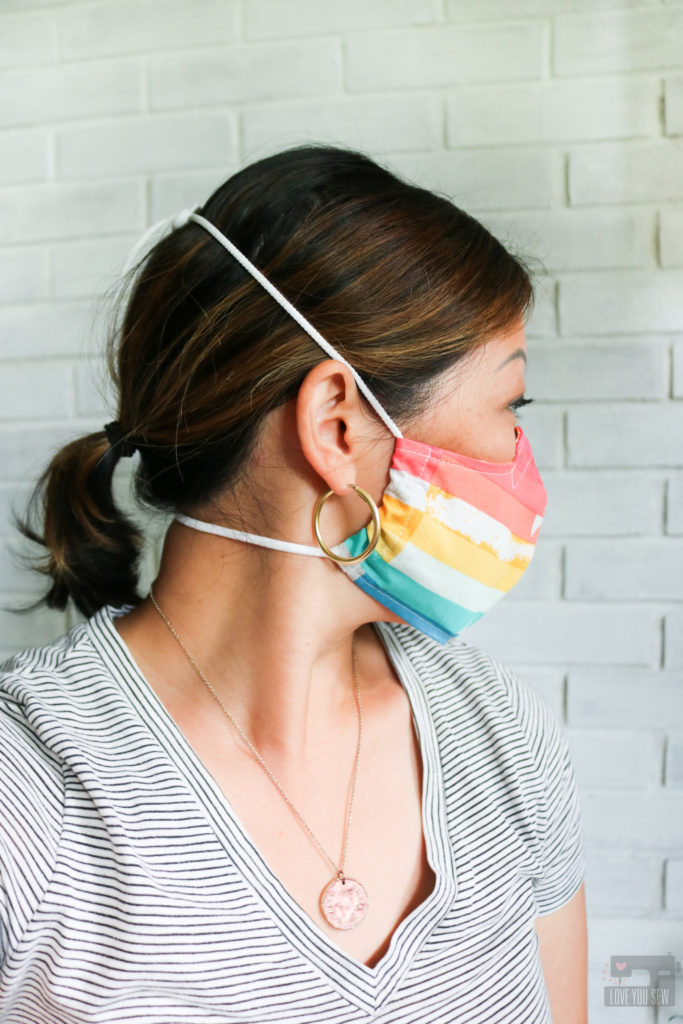
With my kids as my target audience, I knew the elastic definitely needed to be changed.  When I was first testing out this pattern, I used knit ties made from cutting 1″ 4-way jersey knit fabric and pulling on each strip until they coiled around.  But I wanted a little bit of a faster (and easier) make since I was sewing for family and friends too.  Luckily, elastic supplies are back in stock and I was SO pleased to find rounded knit elastic that is MUCH softer  than traditional braided elastic and came in various widths.  To the touch, these elastics feel so much softer and do not have that rubber texture.  They are are incredibly more comfortable than the cording I was previously using.
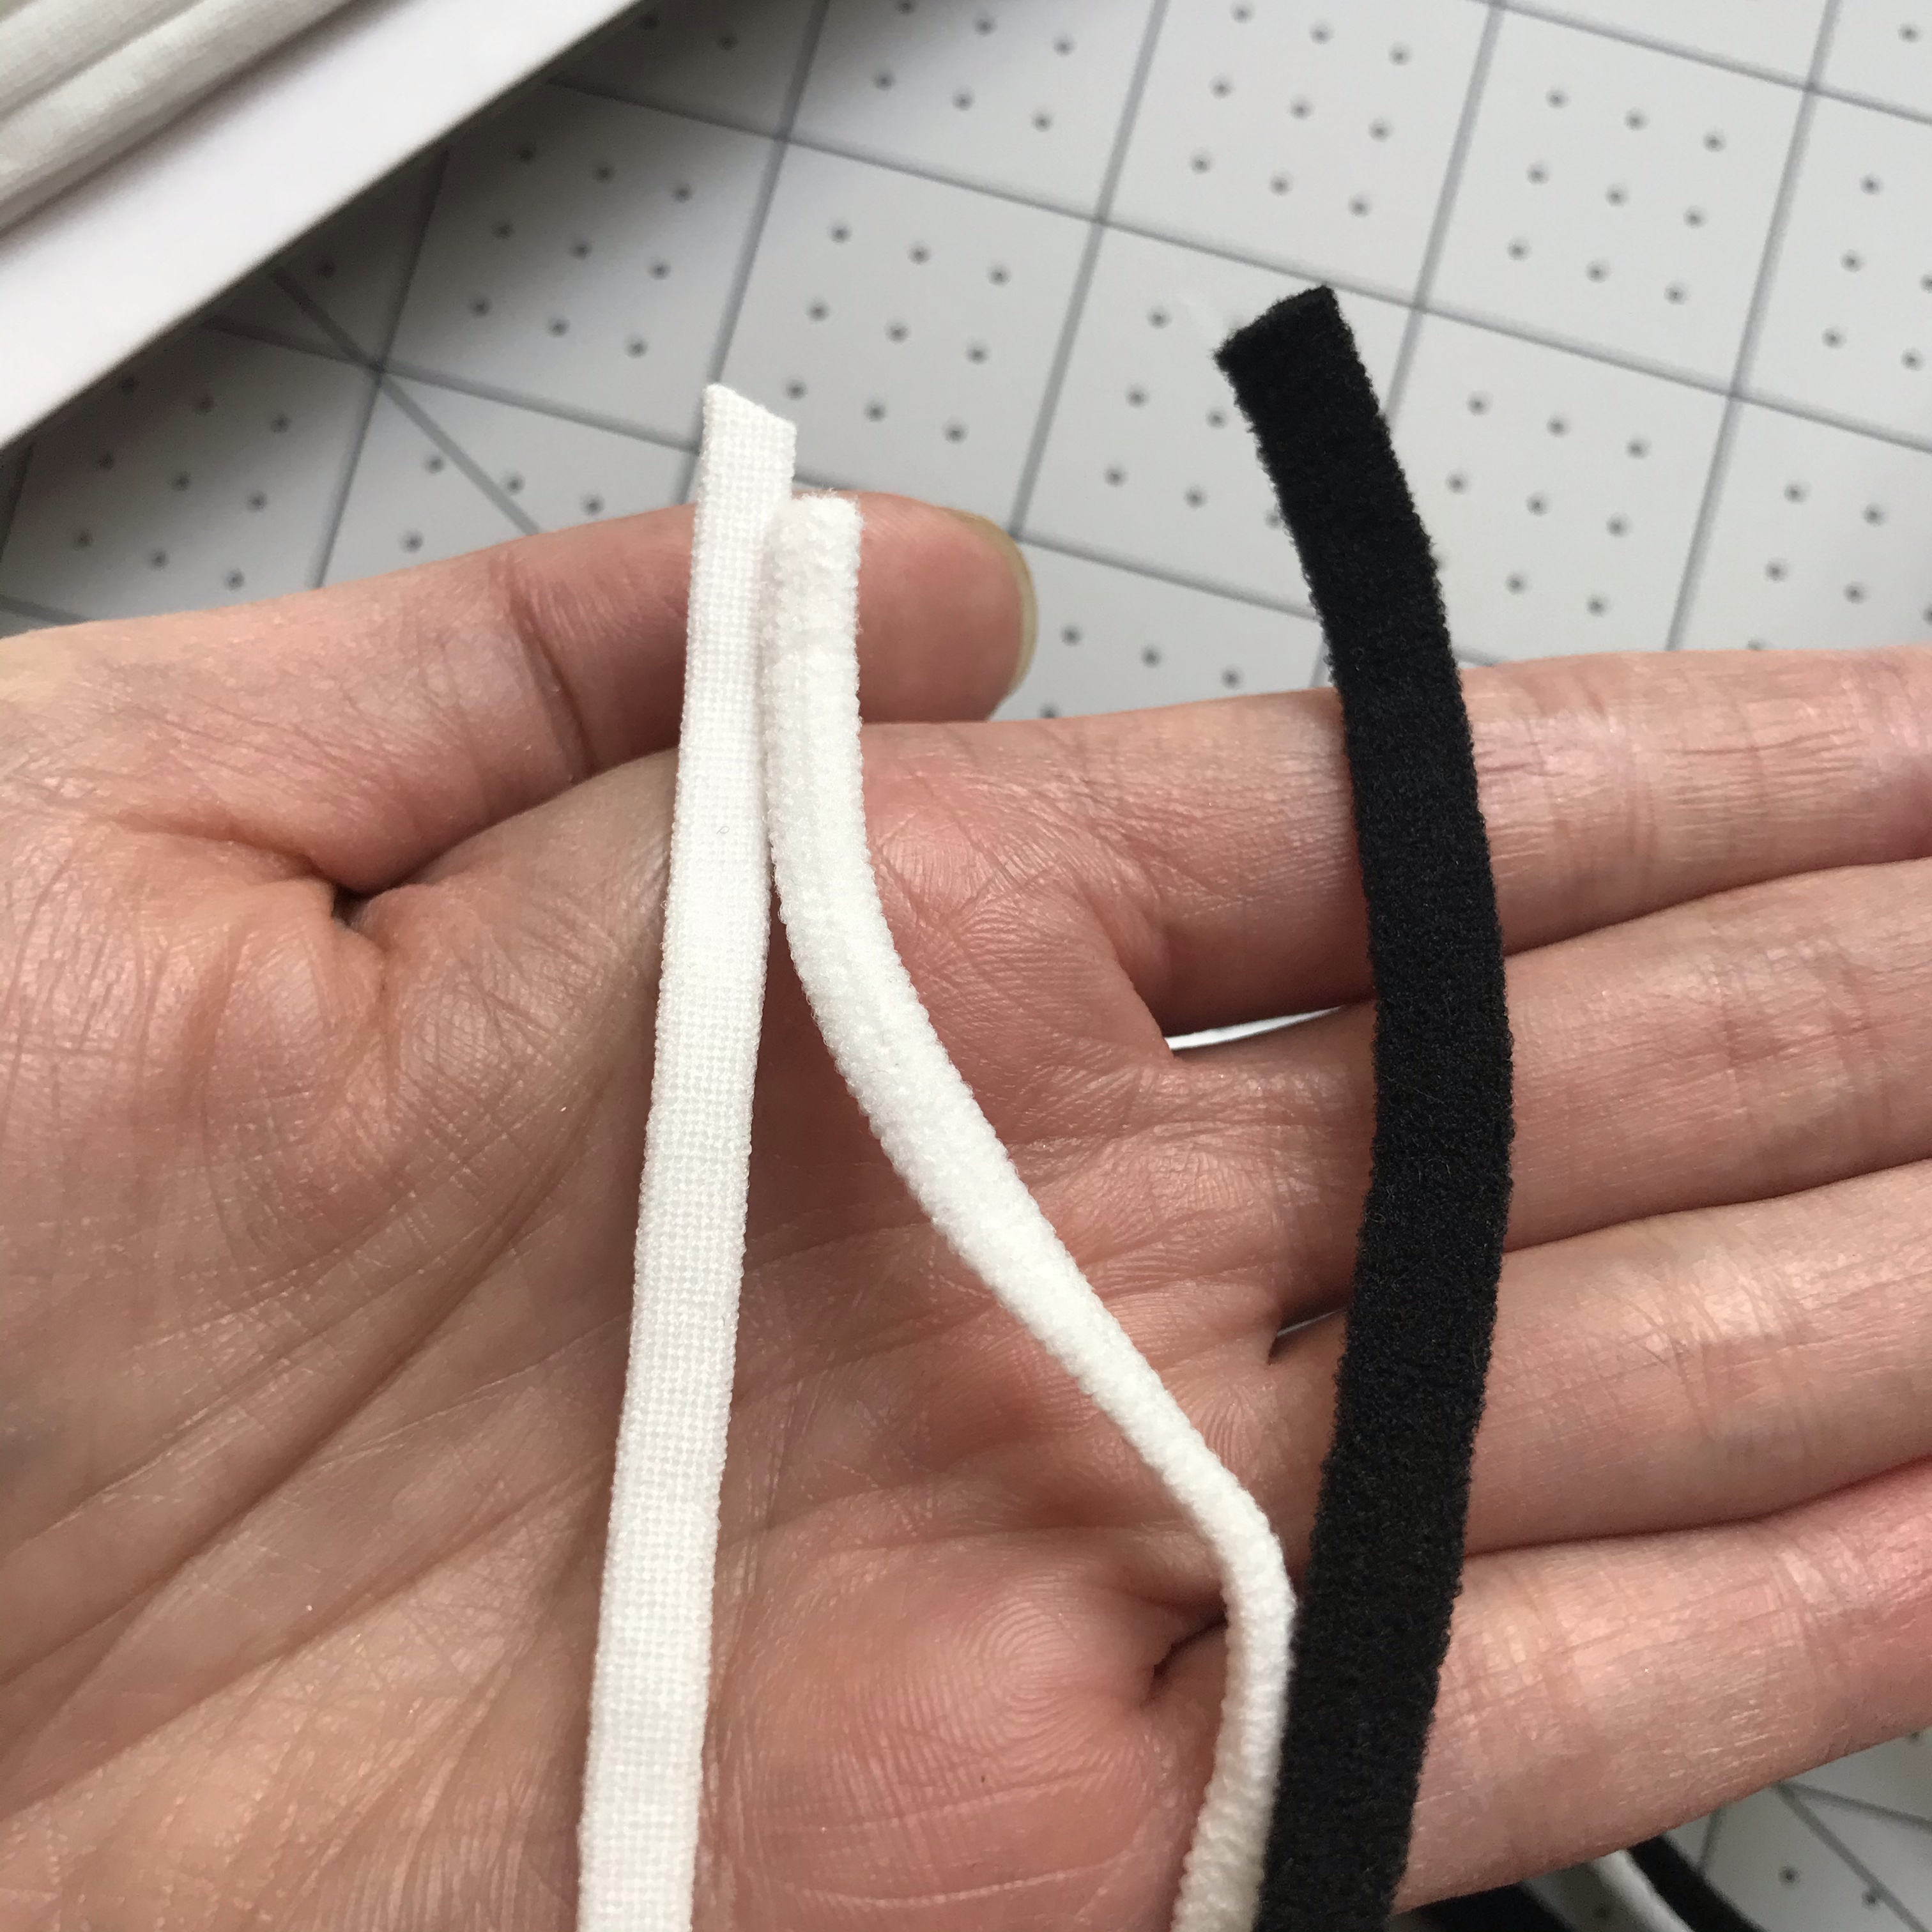
I’ve been purchasing the majority of my elastics off of Amazon and like the flat 4mm width the most, but have had to order from different sellers based on available stock. From left to right (top image) and going top-left clockwise (in bottom image):
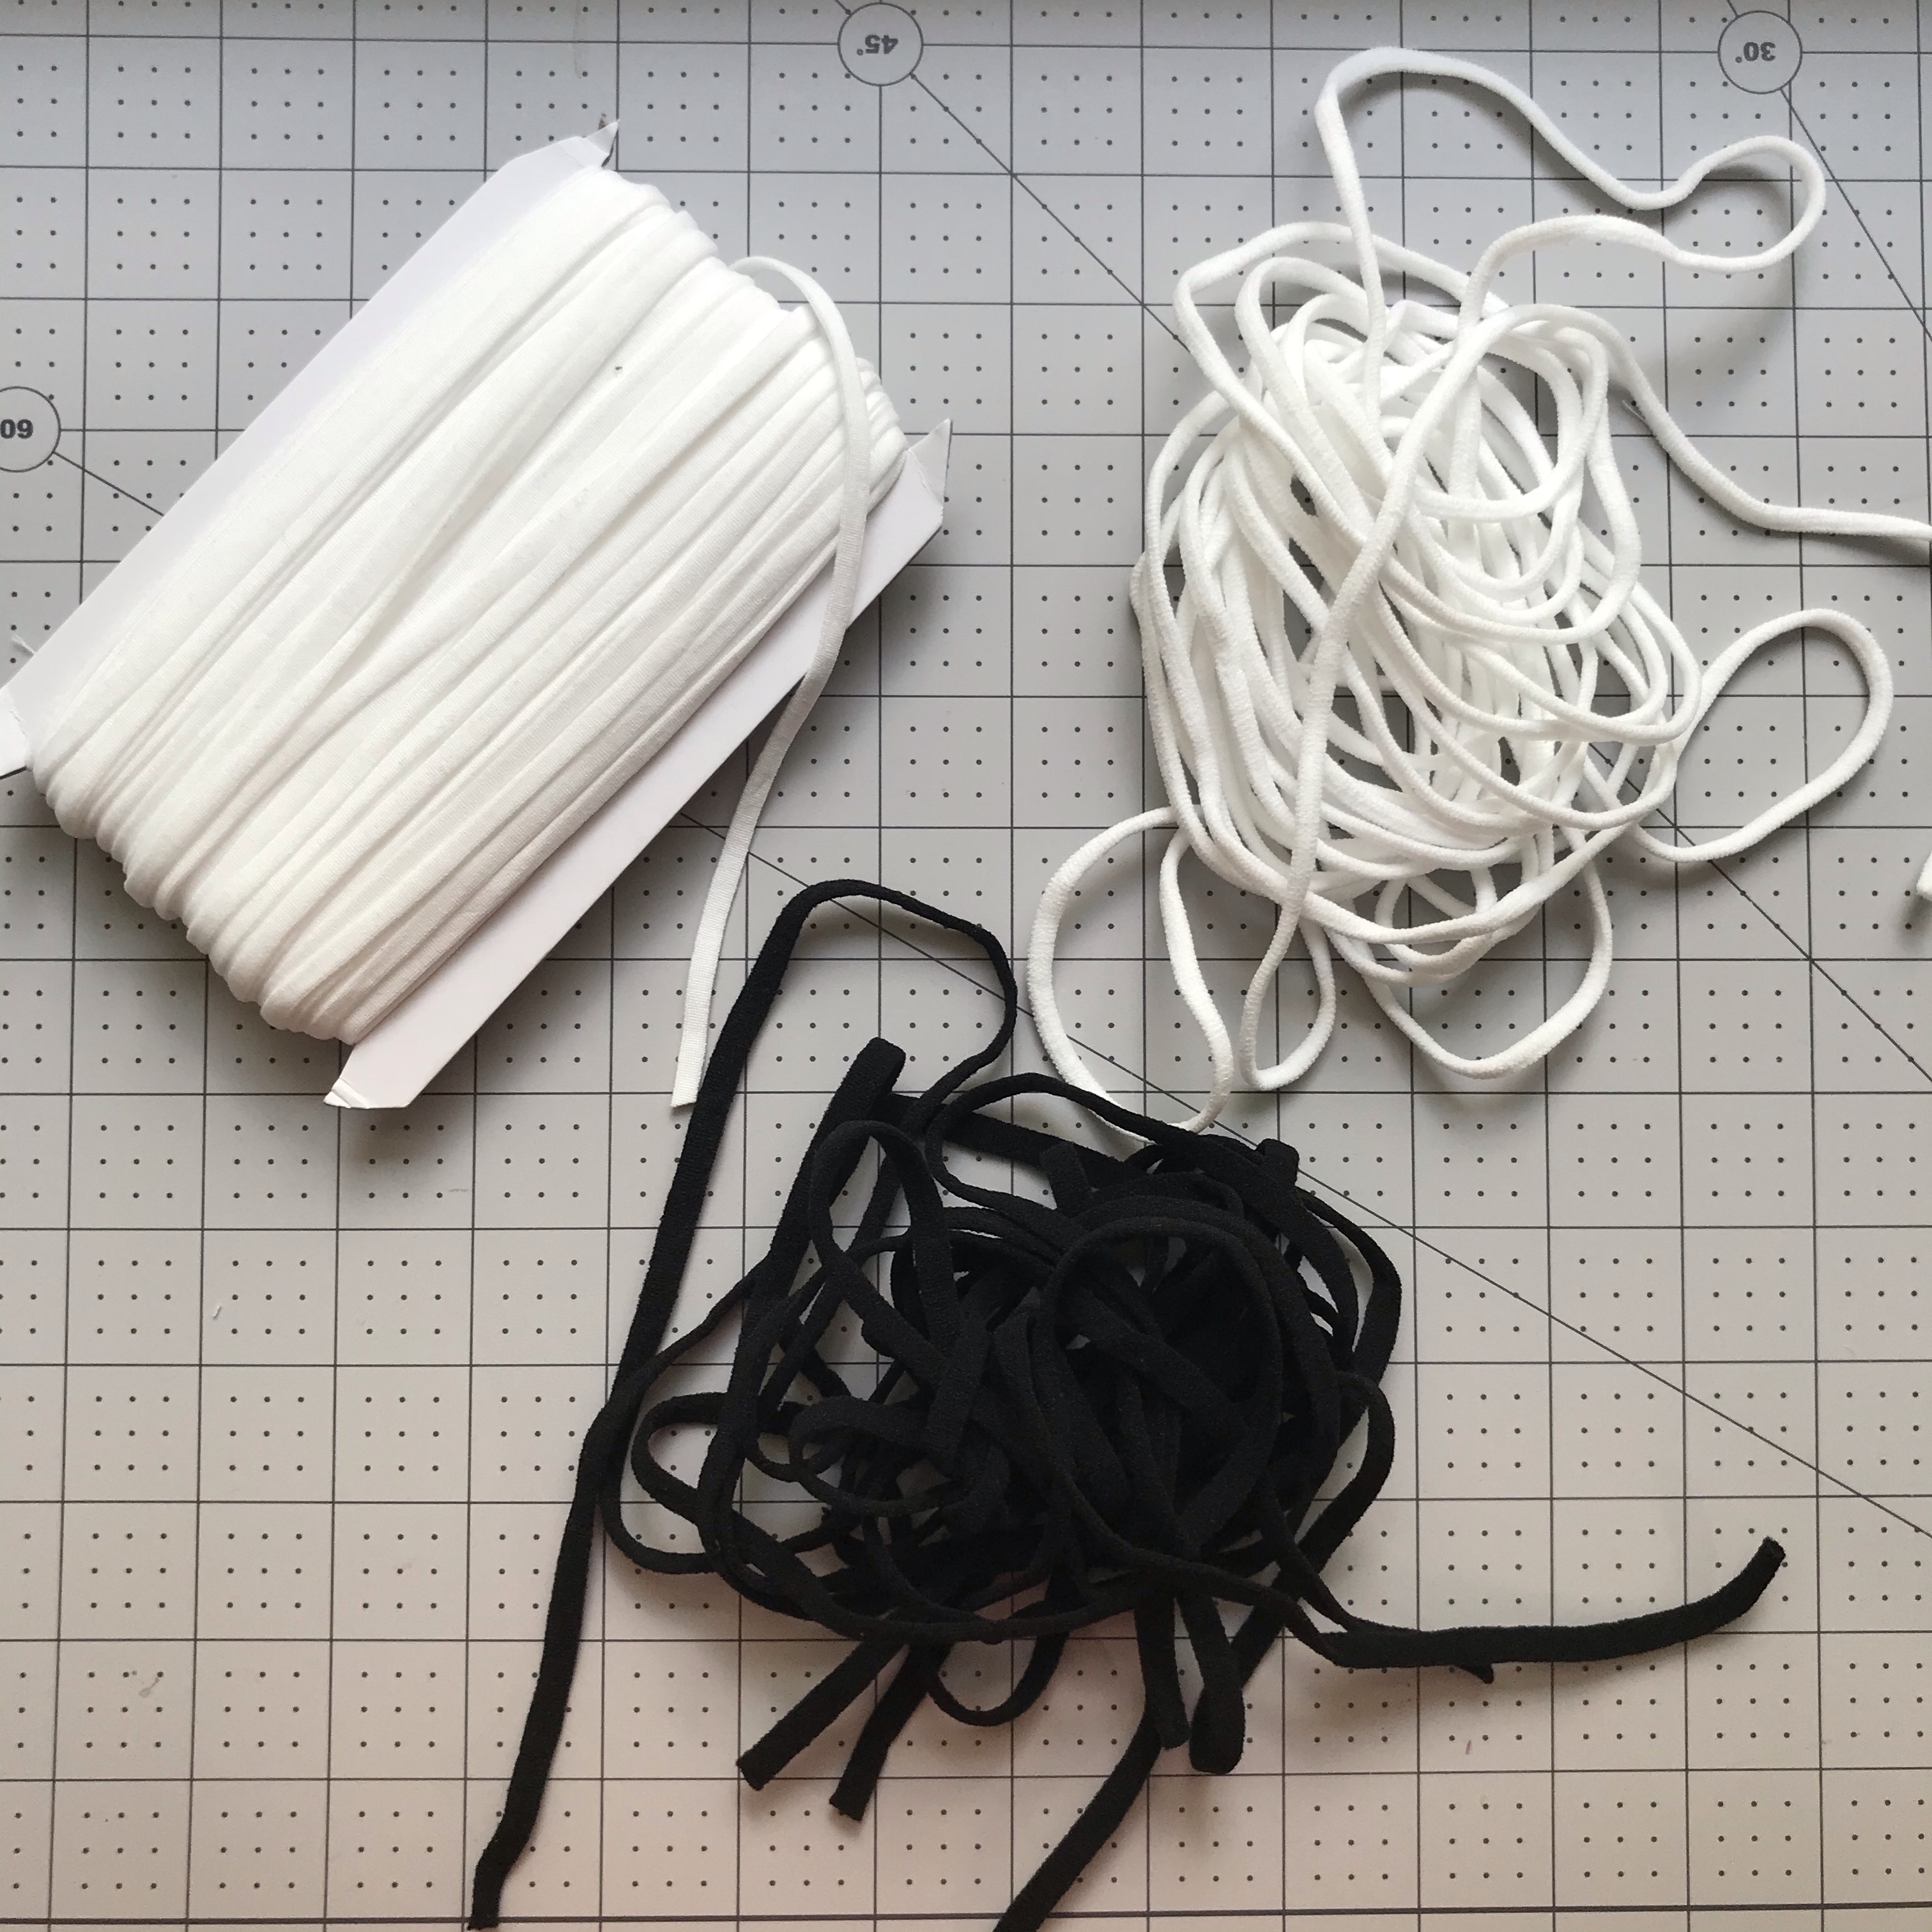
  • White Flat 4mm – Feels like a heavier stocking and has great stretch and recovery.  I got this particular one from Amazon, but have purchased similar product from Salt and Summit Supply.  If you are planning to make a lot of masks to sell or for friends and family, I got a great deal ($15.99) on a large 145 yd spool here.
  • White Rounded 4mm – This one feels more like the inside of a sock and also has good stretch and recovery.  It’s not quite flat, and not completely round, but definitely thicker than the above flat elastic. You can find it here.
  • Black Flat 6mm (1/4″) – The touch of this elastic is like a traditional pair of sheer stockings or like many baby headbands.  It stretches the most out of these three and had good recovery as well.  You can find it here.
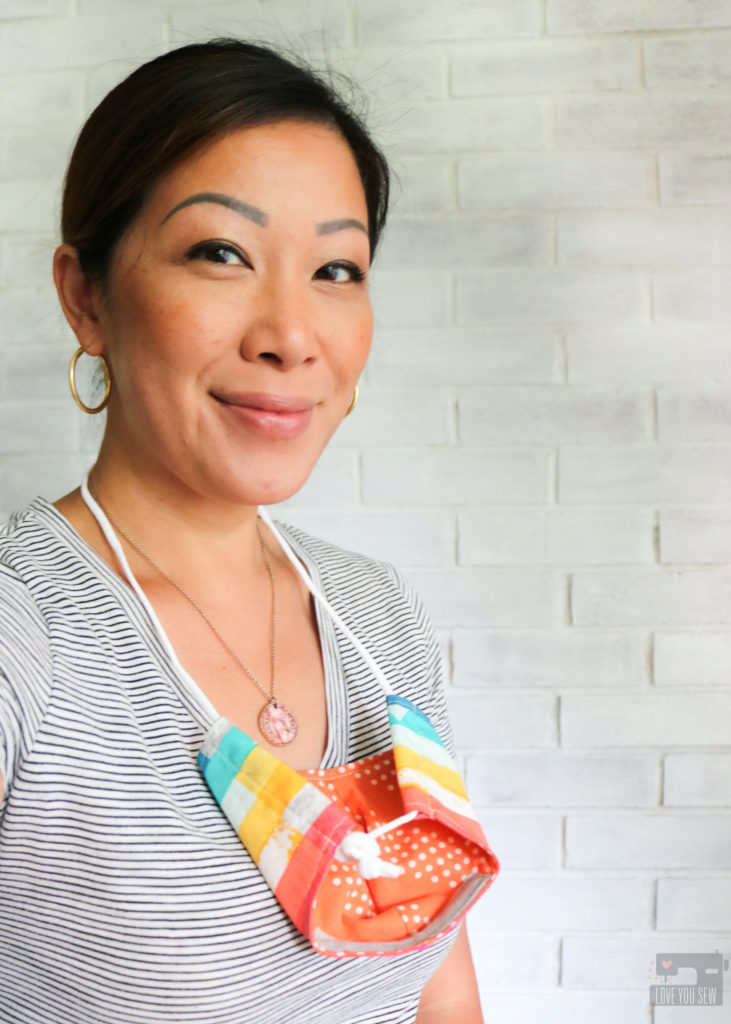
The other great part about having a mask with elastic around the head is that you can pull it down (with washed hands and socially distanced from others) to eat or to grab a breath. The way the mask hangs, the inside doesn’t come in contact with your neck or clothing too!  I imagine that these masks will turn into the new “lost glove,” especially with kids.  So, I love that this style of mask can stay with the person and not be sitting on random surfaces, fall to the floor or stuffed in a pocket. Having the tie or knot on the top of the head is CLUTCH! You just have to grab the knot and pull down. This helps to reduce contact with the actual mask itself.

For each sized mask, I used the following lengths:

  • Men – 36″
  • Women/Teen – 30″
  • Older Kids – 24″
  • Little Kids – 20″

Note:  As with all items that hand around the neck, these can become a chocking hazard. Please make sure kids are monitored by an adult at ALL times while wearing a mask.

Cord Locks
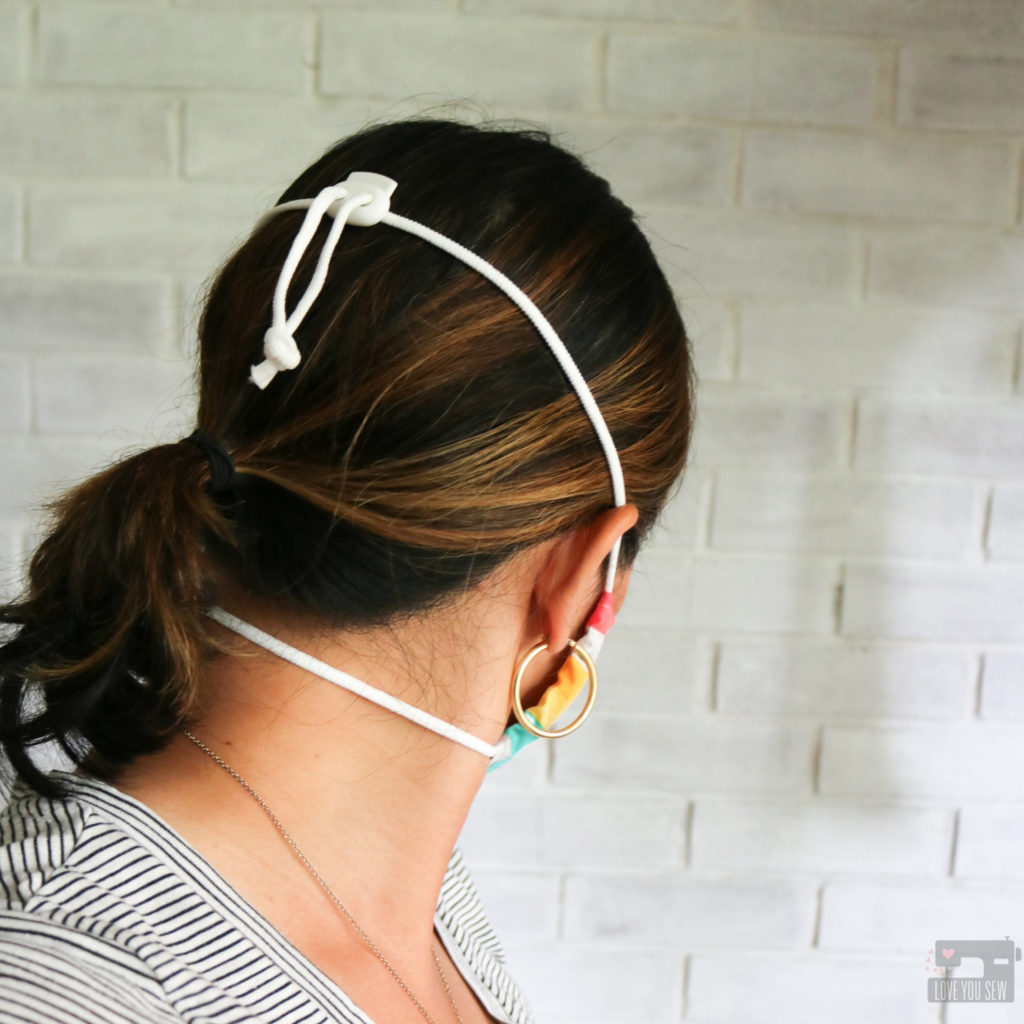
To pull down the mask, the elastic would have to be adjusted and I just couldn’t imagine my kids having to tie their masks….they barely can tie their own shoes well!  So, I thought adding a plastic cord lock made the most sense.  This allows a nice firm fit around the head which keeps the sides of the masks close to the cheeks and it won’t shift if you have to talk while wearing the mask.
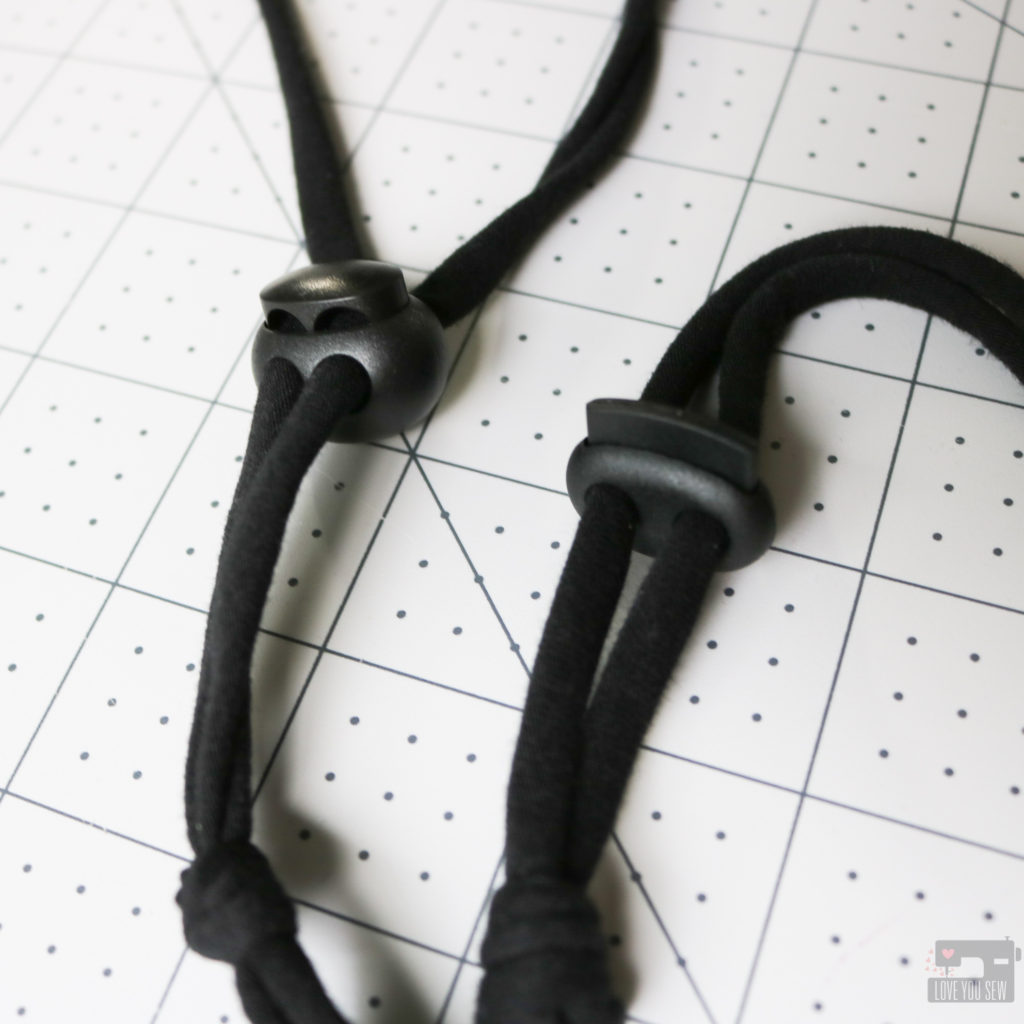
Sphere vs Slim Cord Locks

When I first was looking at locks, I (of course) went to Amazon to find a deal on just a handful of them to try out.  I bought the spherical ones here and while they are strong and give you ample surface area to pinch down on the lock, they were just too bulky for my tastes.  Nothing goes to waste, so I used them on just the men’s masks I was making.  I then found these slimmer locks from Paracord Planet for the best pricing at the time ($21.99/50) with more color choices too.  But just the other week I found the same locks only in black for WAY less ($8.49/50) here!  These are the same quality..if not a little better than the ones from PP.

Nose Bridge
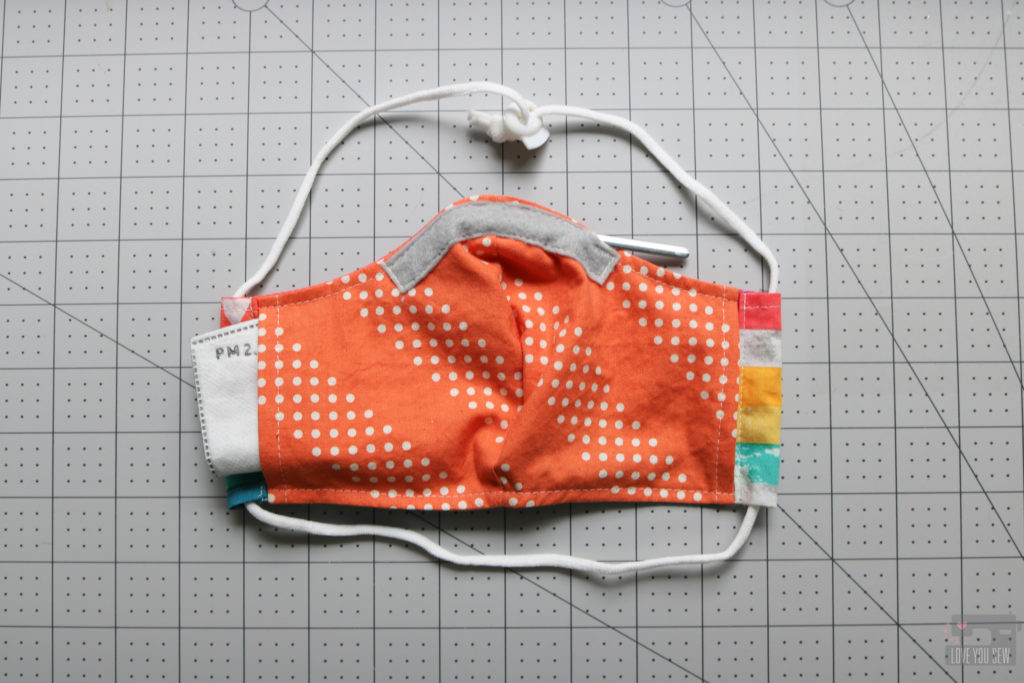
There is some debate among sewists to which side the nose bridge should go…and I choose the inside – call me a rebel!  For my method, I complete the entire mask and sew on a 4″ x 1/2″ piece of acrylic felt, leaving  a 1/2″ opening to add and remove the metal when washing or for replacement purposes.  I back-stitch on both sides of the opening and at the short ends of the felt rectangle for extra security.
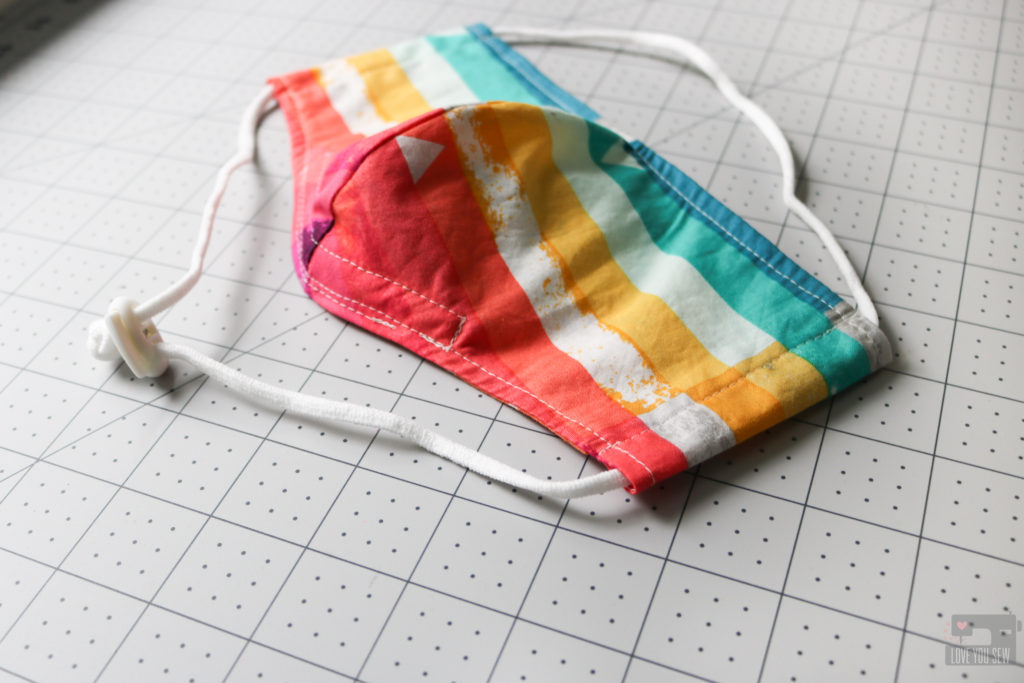
You can use any material to make the nose bridge chamber (ribbon, twill tape, folded fabric, etc.)  Personally, I like the felt for the extra loft and softness on my nose.  I wear glasses just about every single day and definitely have been blinded by fog coming out of the refrigerated produce room in Costco!  The extra loft seems to help catch more of the moisture and I love how you can leave it with a raw-edge…double-win!
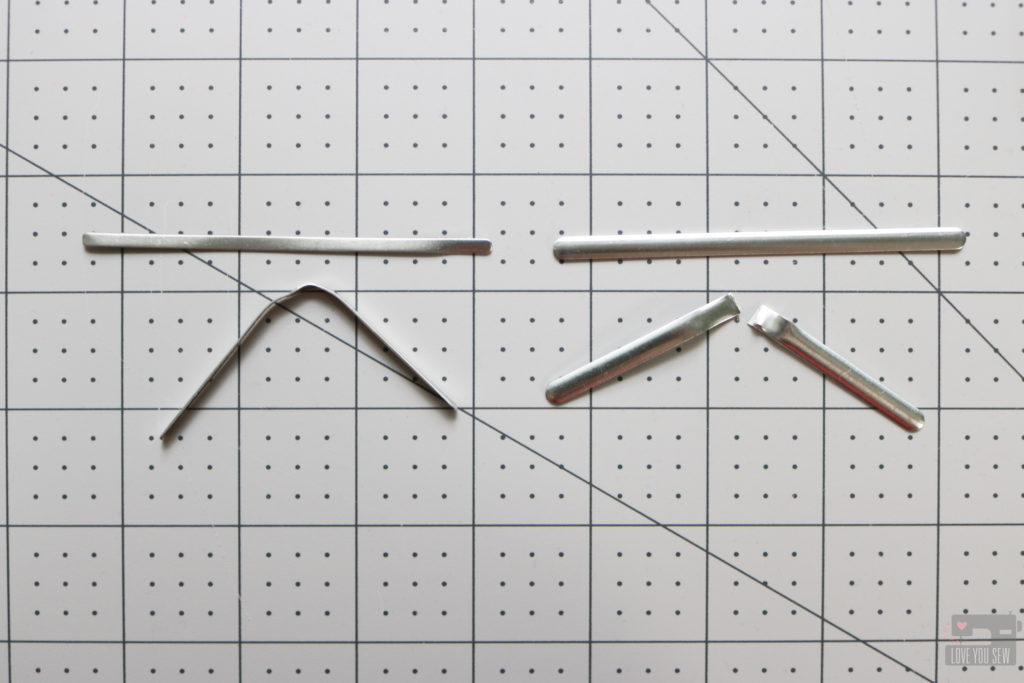
Domesticity vs Amazon

Early on in the pandemic, I was using pipe cleaners and paper clips for nose bridges and they were okay, but I was never truly fog-free.  Then metal strips were slowly coming onto the scene and they are wonderful!  The strength and extra surface area that helps wrap your nose is truly key in making a good seal.  I first bought (50) 3 1/2″ x 1/8″ aluminum strips from Domesticity back in May and they are great!  I tried to bend one bridge back and forth 50+ times and it still hasn’t snapped.  But I’m always on the hunt for a great deal and found 200 of these strips with an adhesive backing for just about the same price.  While these strips are also Aluminum and slightly larger at 3.54″ x 1/5″, they are also slightly thinner and broke after about 38 repeated bends.  Even though I have plenty of extras for back-up, I would definitely switch back to the ones at Domesticity for their strength.

Filters
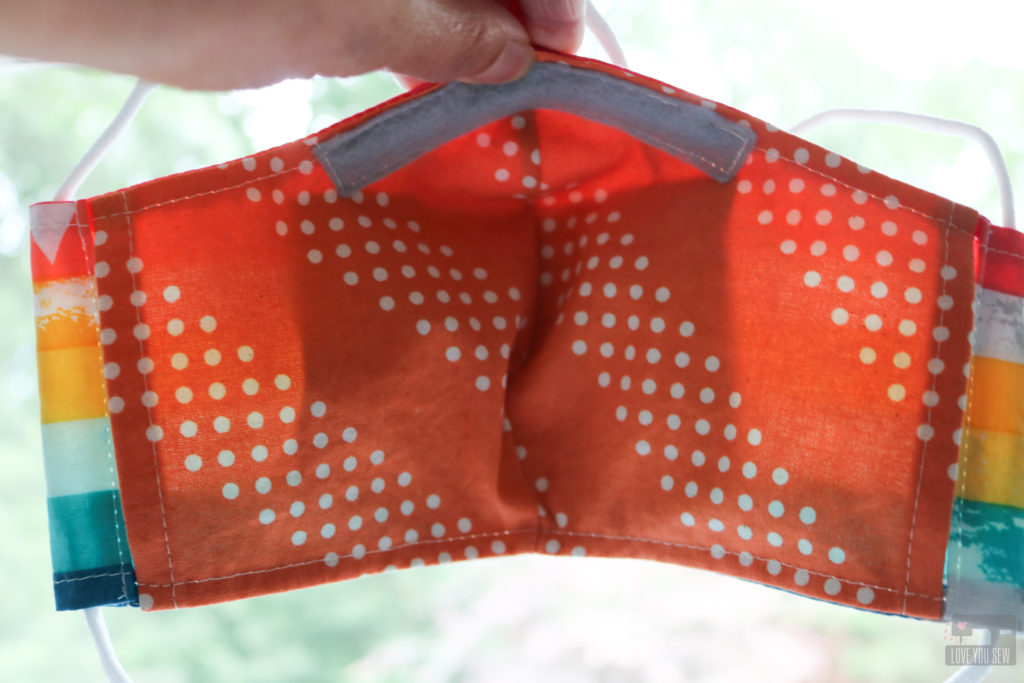
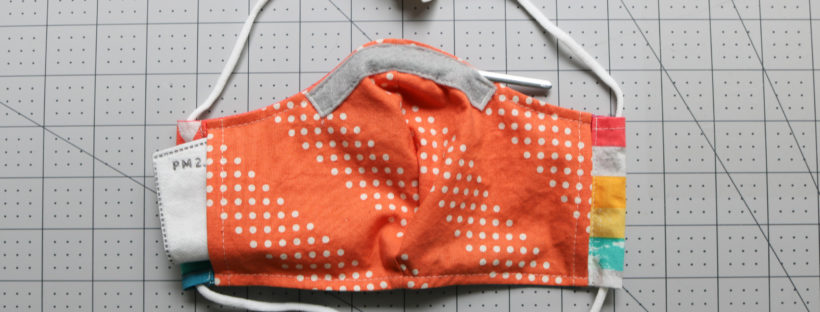
As I mentioned above, I used the Craft Passion mask pattern since it was drafted with a filter pocket feature.  You can purchase mask filters like these, but I caution that they do come from overseas and do not come in sterile single packaging.  I have yet to find a domestic supplier, so if you know of one, please comment below!  You can certainly use paper towels, another layer of fabric or coffee filters for extra protection.  Shown above, you can see how a filter fits inside this mask.

Fabric
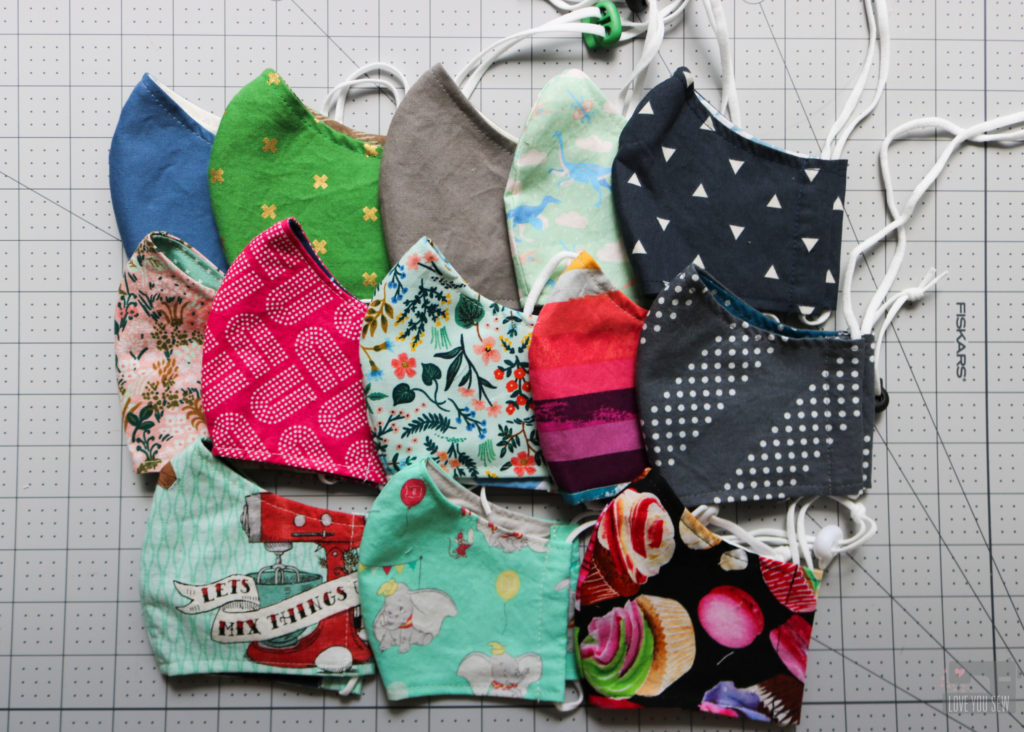
Fortunately, my stash has always included lots of designer quilt cottons from my quilt making days.  I was able to use my stash through the beginning of the pandemic and I’m getting around to supporting small quilt shops as I receive personal requests for masks from friends and family.  Of course, I love Sew to Speak which is local to me and I can pay online for contactless pick-up.  While picking up the nose bridges, I’ve also purchased fabric from Domesticity.  I love Circa Fabric Studio for great clearance prices on designer cottons and recently bought from Hart’s Fabric which has a nice selection.
Final Thoughts

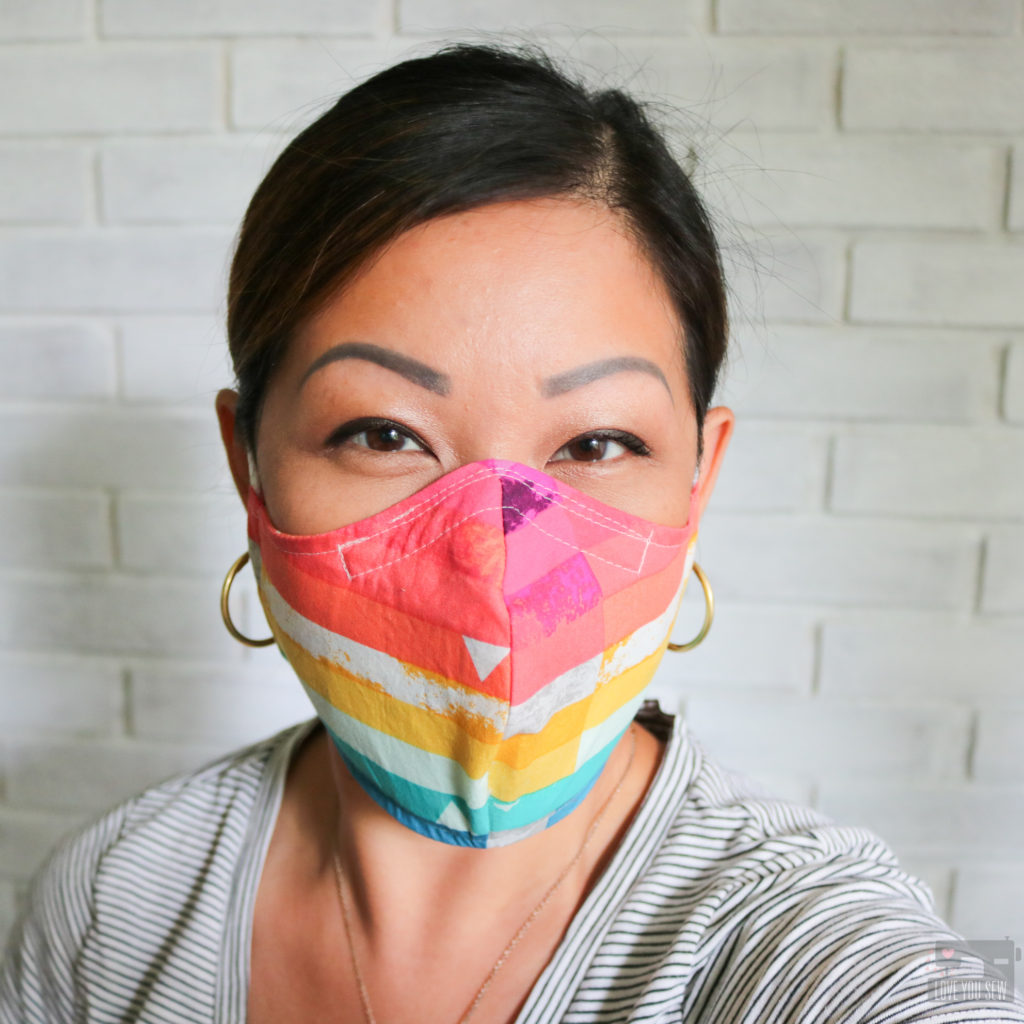
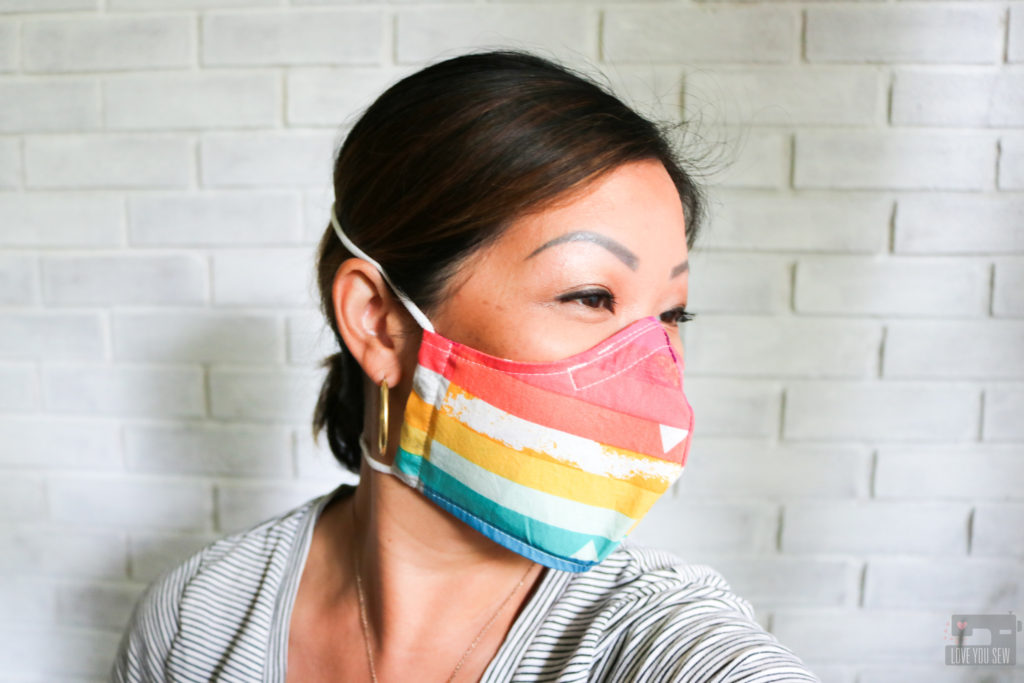
I think this is a great pattern for a mask and fits such a wide variety of faces.  The feedback I’ve received is a combination of the softness of the fabric (designer cotton, baby!) and how nice it is to have pressure relieved from the ears.  The cord-lock is MUCH appreciated by parents and it only took a few learning sessions for my 7 and 9 year olds to put them on and take them off on their own.  Please let me know how any of these supplies worked out for you!

DON’T FORGET TO WEAR A MASK!


Hugs and Stitches!

Cristy


While there are many affiliate links in this post (please read full Disclosures here,) I purchased all of these supplies on my own for my own fabric masks.  I’m sharing the supplies based off of feedback when I shared many of these links on my Instagram account.
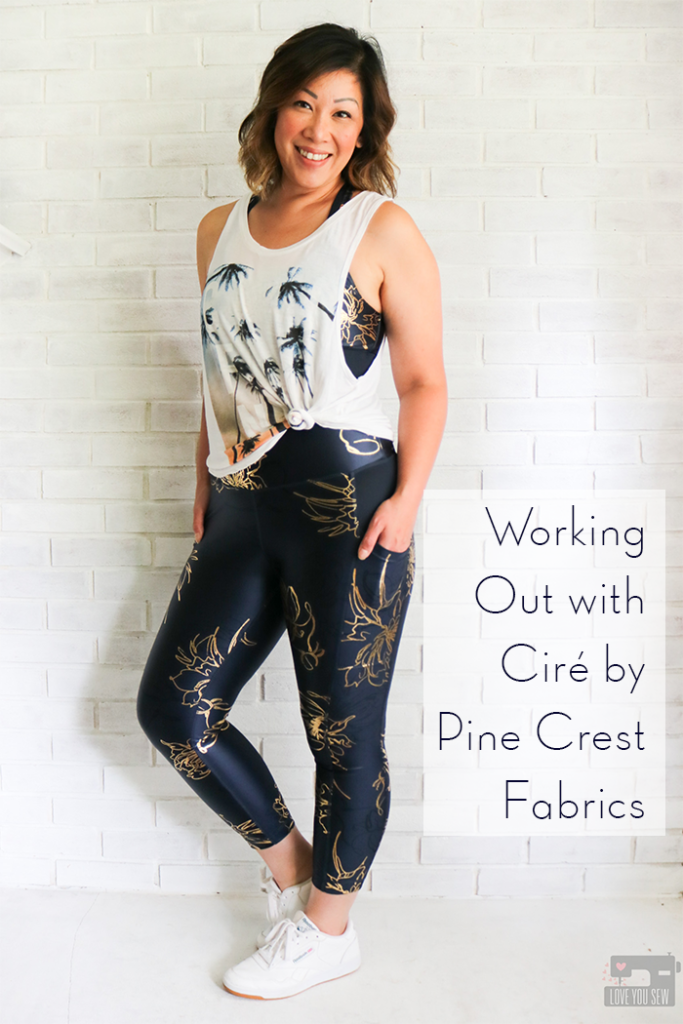
Working Out with Ciré by Pine Crest Fabrics

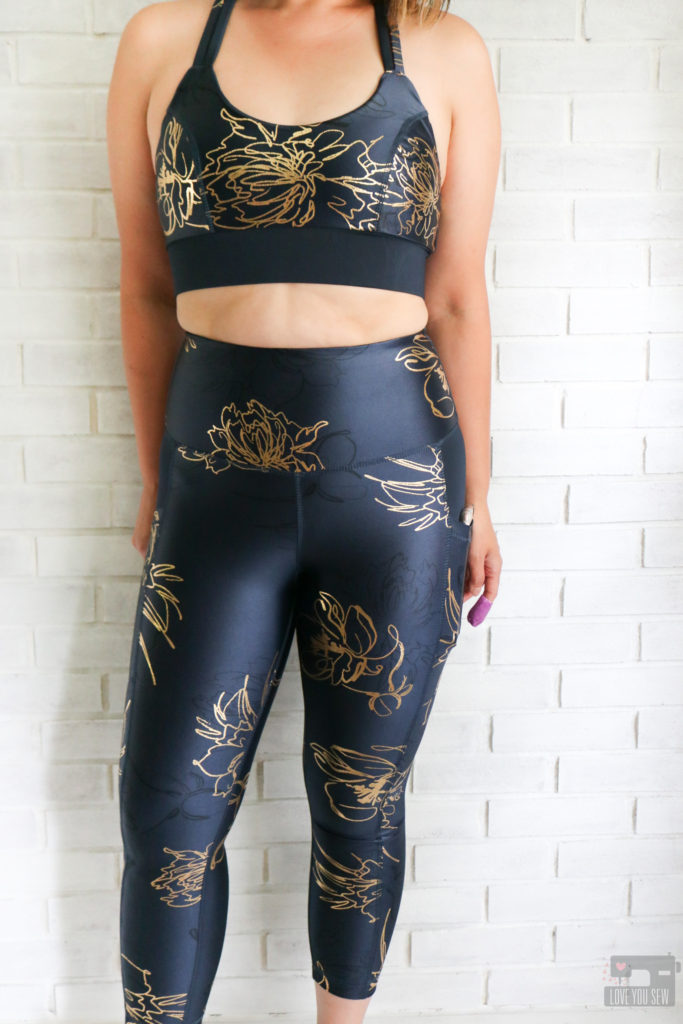
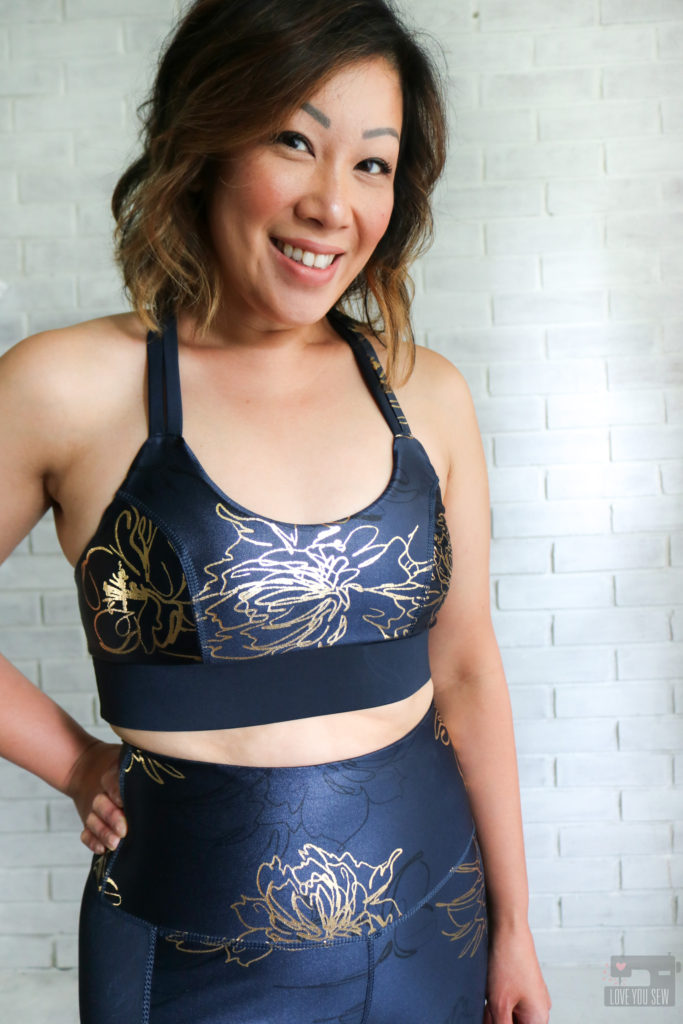
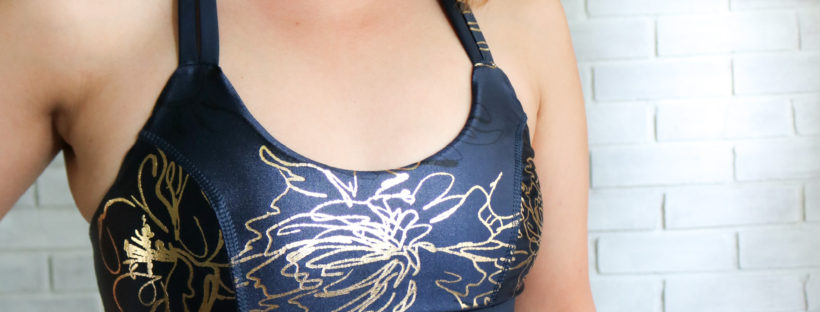
With a short, petite frame and hips two sizes larger than my waist, I’ve struggled to find athletic wear that won’t roll or shift down while I move.  Even with poor luck with the big name athleisure companies, I started making my own work out clothes a few years ago and haven’t turned back since.  The fabric and compression fit are important factors to me and why I am SUCH a big fan of Pine Crest athletic fabrics.  I was pretty stoked when they asked me to work with their gorgeous Blazer Floral Printed Ciré fabric since I was curious to see how it felt and moved with it’s liquid-like look.

You can understand my love for this company by checking out my other makes using Pine Crest fabrics like my Full-Zip Rashguard, Textured Web Athleisure Capsule, and Holiday dress with their Stretch Velvet.


FABRIC

When I was first asked to work with the Blazer Floral Printed Ciré, I honestly admit, I was a little hesitant about how it would look and feel.  Would it be TOO shiny?  I mean, I do like some flash…but I don’t consider my style to be flash-yyy…  Would it have a “plastic” coating to it?  Would I end up sticking to it when I work out?  There were so. many. questions.

Well, I’m so glad I took the plunge because this fabric is A-MAZING!  While there is remarkable shine and sheen to the top of the fabric, the Ciré is not “sticky” at all.  It is smooth to the touch and is completely matte on the reverse, making it SO comfortable and soft.  The fabric is 80% Nylon, 20% Spandex, 195GSM, and has a generous 56/58″ WOF.  There is ~40% four-way stretch with GREAT compression — making this fabric ideal for working out, dancing and even swimwear.  You can check out more the full line of Ciré fabrics including more colors and prints here.

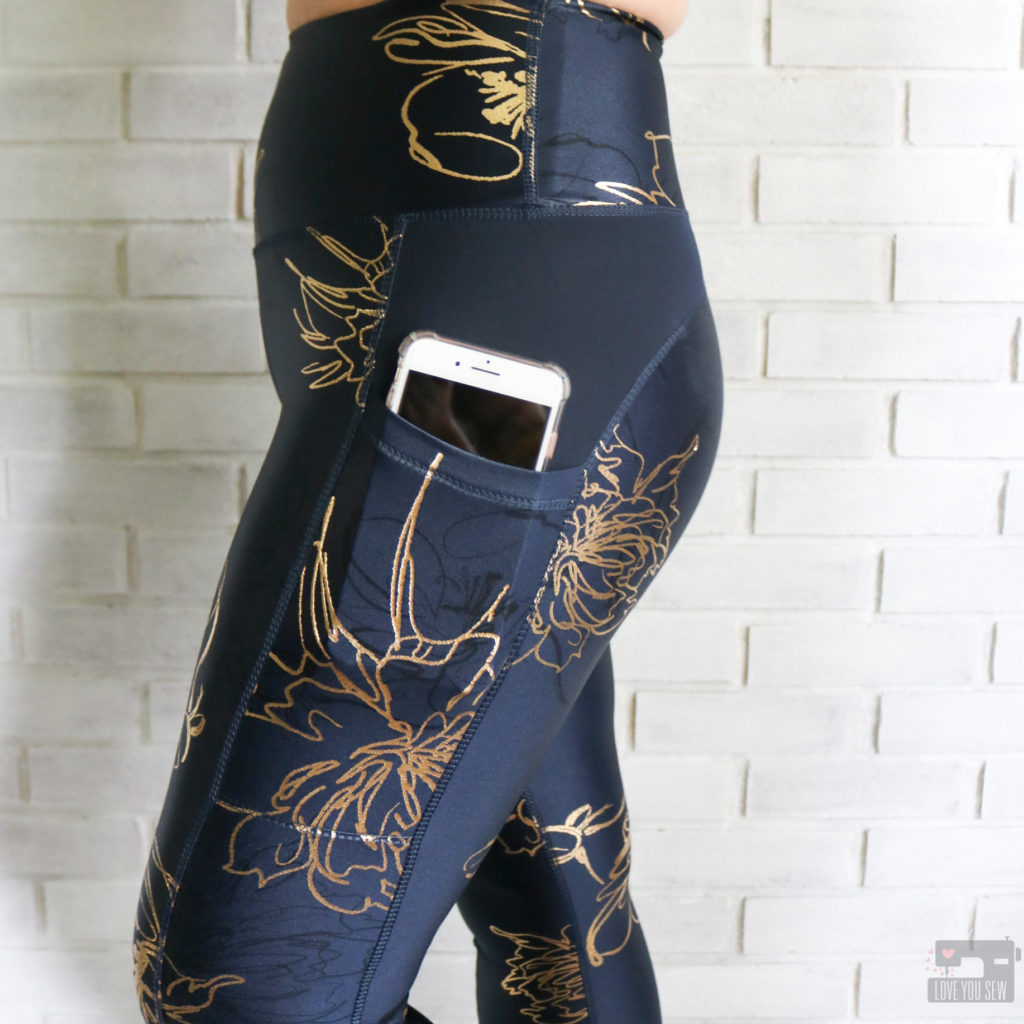
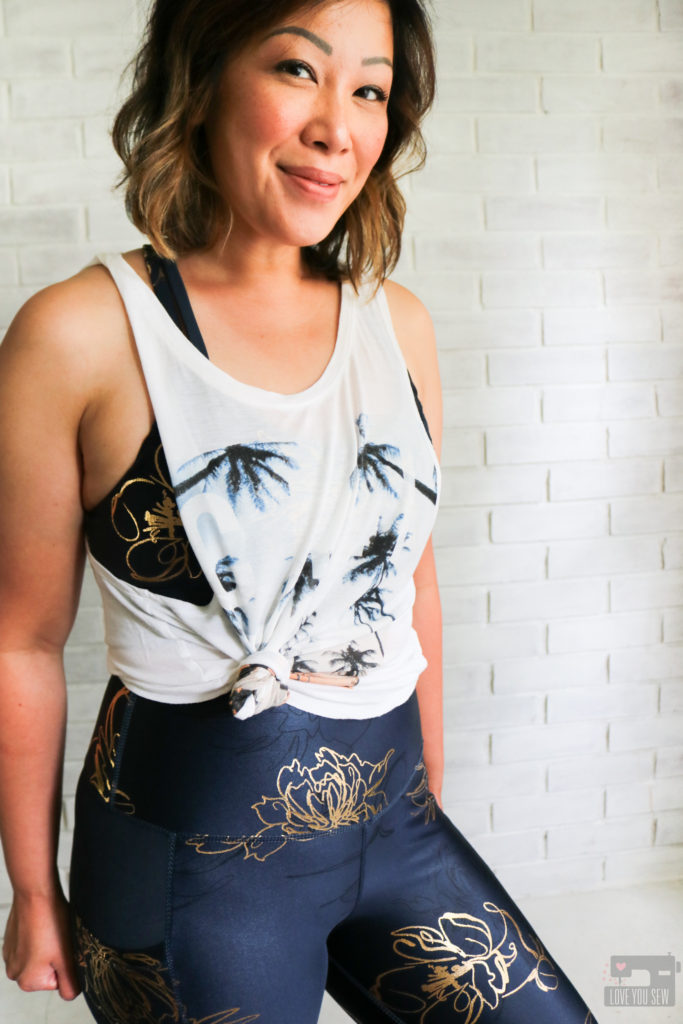
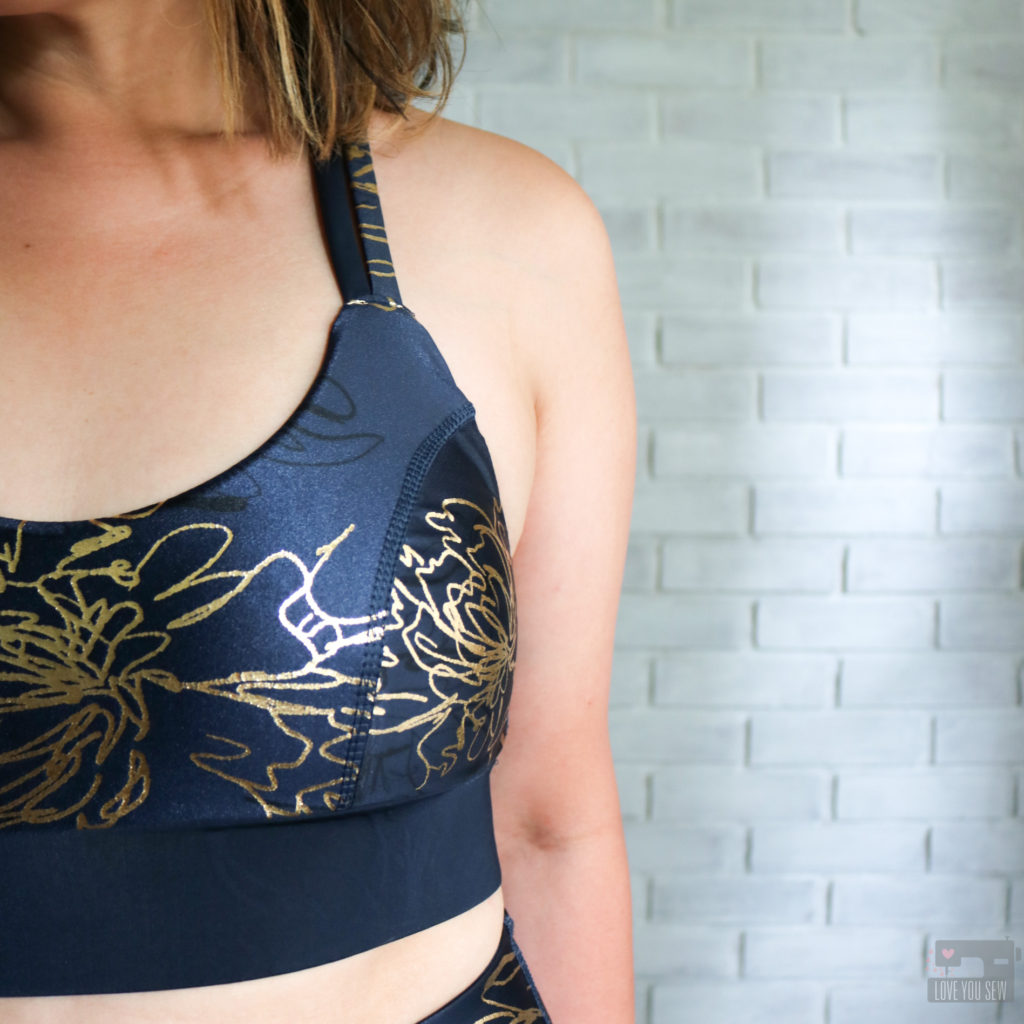
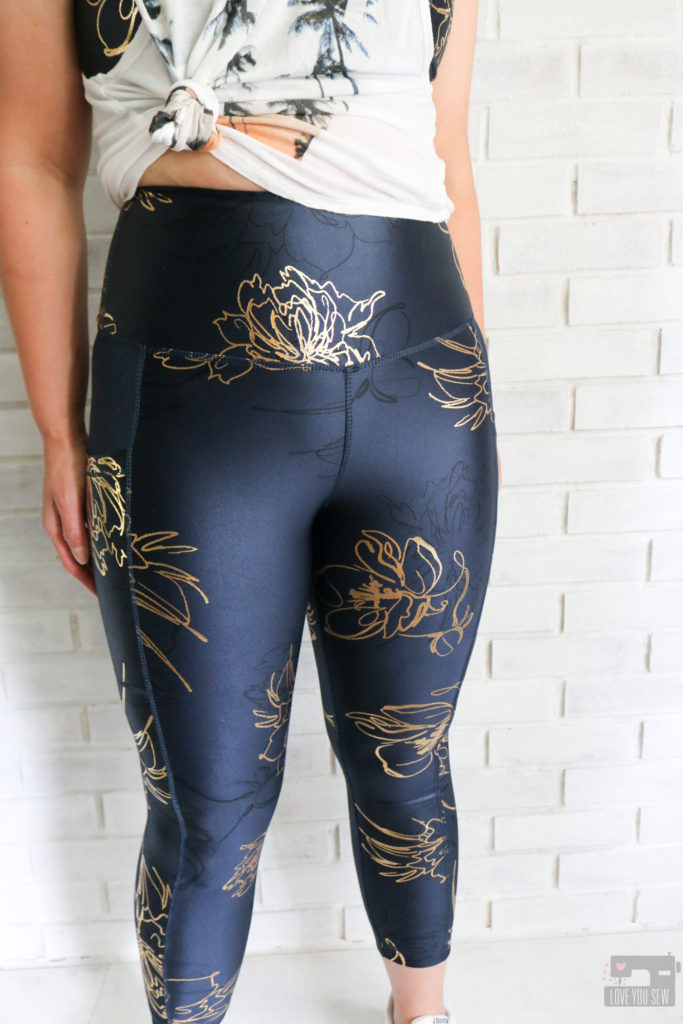
In addition to the amazing base cloth, the Blazer Floral Printed Ciré  has these stunning gold foil flowers that stretch and move beautifully with the fabric.  There are also subtle black printed shadows of the same flowers that give the fabric even more depth and texture.  I’ve washed this fabric twice and even tried to pick at the foil a little bit, and it is not coming off!  The fabric has remained vibrant with that signature sheen and even with all the stretching, the gold foil recovers back to a smooth finish — winner!

PATTERN

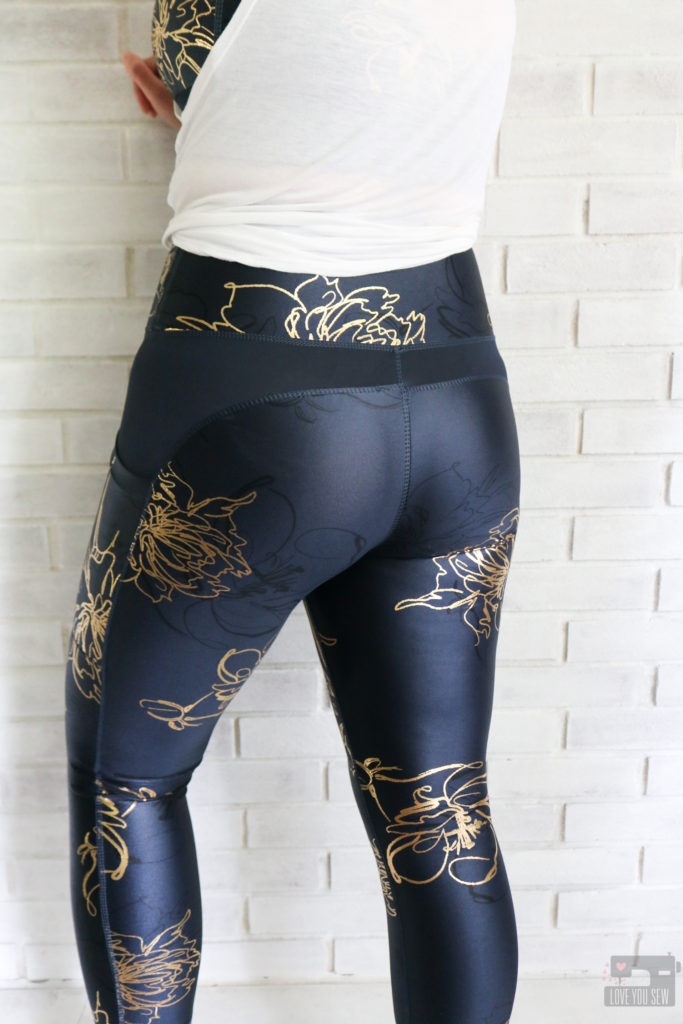
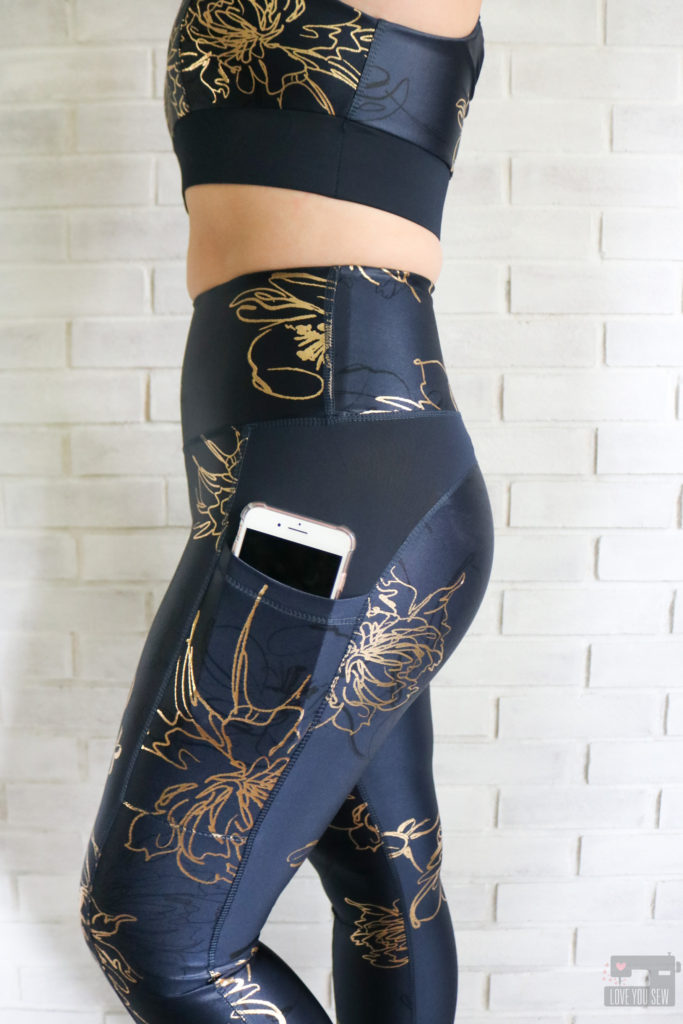
The true test of the Ciré is how it sews up and wears on the body.  So, I chose the Greenstyle Creations Power Sports Bra and Stride Athletic Tights (because…pockets!)  With the floral print, I made sure to take extra care with pattern placement with nothing odd coming out off the crotch and rear areas.  (We’ve all made those mistakes before!)  I LOVE the scale and how the foil flowers look on the body.  There is a nice balance between the gold and the navy base.  Too bad my Zumba studio is still closed, else, I’d be showing this off!

I used both my Juki MO-2000QVP Serger and Juki MCS-1700QVP Coverstitch to make both of these pieces.  It’s been awhile since I last used my Coverstitch machine and I was riding high on my “great” sewing skills on the first pass of the leggings…..until I went to try them on….and heard a series of pops.  Ugh!  I had to remove all of the thread and coverstitch again…only to go back and repeat.  SMH.  Even though I eventually got it right,  the Blazer Floral Printed Ciré took a pounding at the seams with so many additional punctures that were certainly not necessary.  With other stretch fabrics, the area would have been worn down and fuzzed up. But to my surprise, there didn’t seem to be any additional wear! This was kinda shocking since I really beat up the fabric.

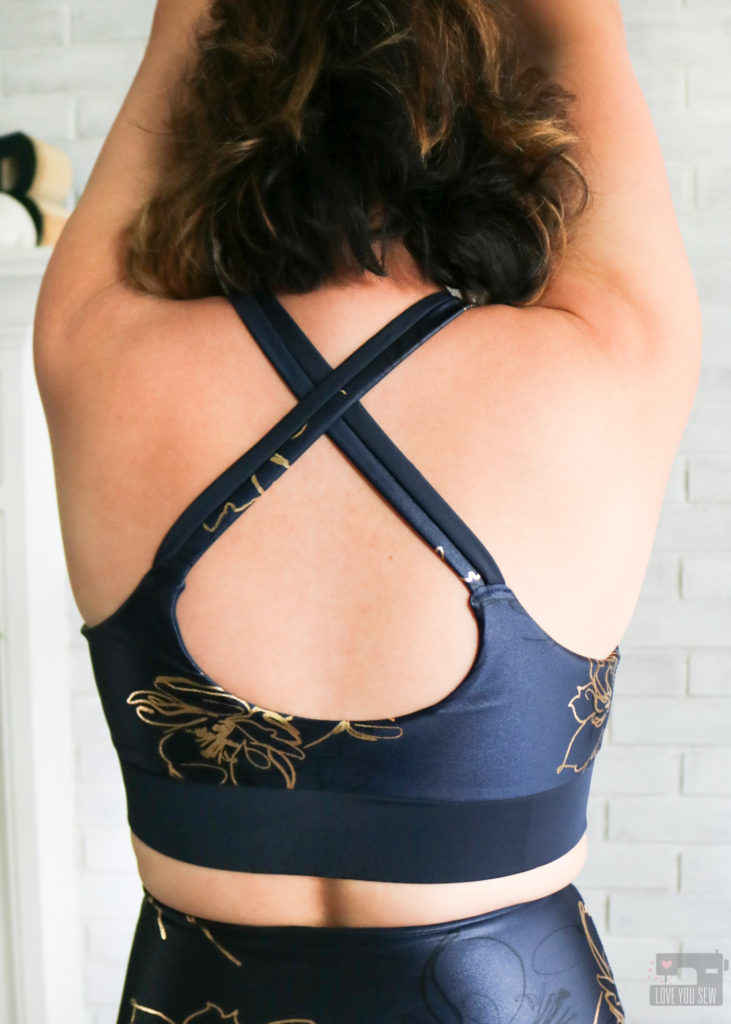
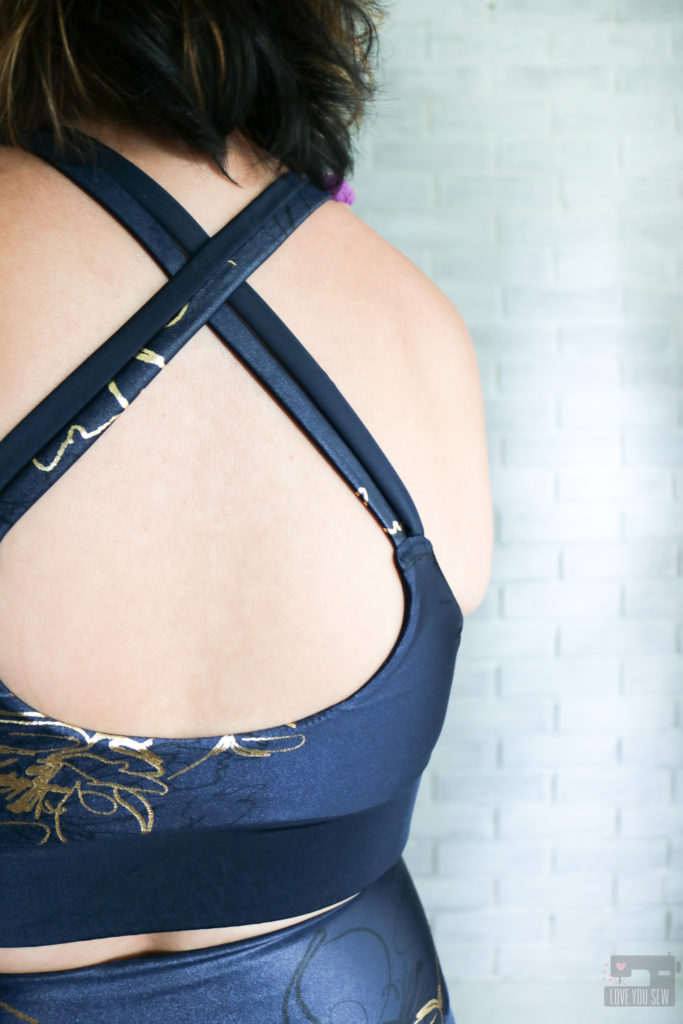
With the reverse of the fabric being matte, I couldn’t help flip it over for a subtle accent.  You can see I used the matte side on the back of the tights and in the band and straps of the Power Sports Bra.  I love the extra use out of the same Blazer Floral Printed Ciré!
Other Pattern Notes:

  • Power Sports Bra
    • Made the  34C U-back with extra wide band
    • Stitched down the sides of band to keep from shifting
    • Used reverse side of fabric for the lining
  • Stride Athletic Tights
    • Made the Medium from hips down
    • Graded to Small in waist using curved add-on waistband
    • Add Power net to waistband along with elastic
    • Shortened pattern by 1.5″
    • Cut the cropped length
    • Added optional gusset for full range movement

PROJECT SUMMARY

I hope you are inspired to try out some new fabric that might not necessarily be your style…you maybe surprised with the results!


Happy Sewing!

Cristy


Fabric for this post was provided by Pine Crest Fabric.  Project conception and all opinions are my own.  

There maybe (noted) affiliate links in this post.  For my full disclosures, click here.
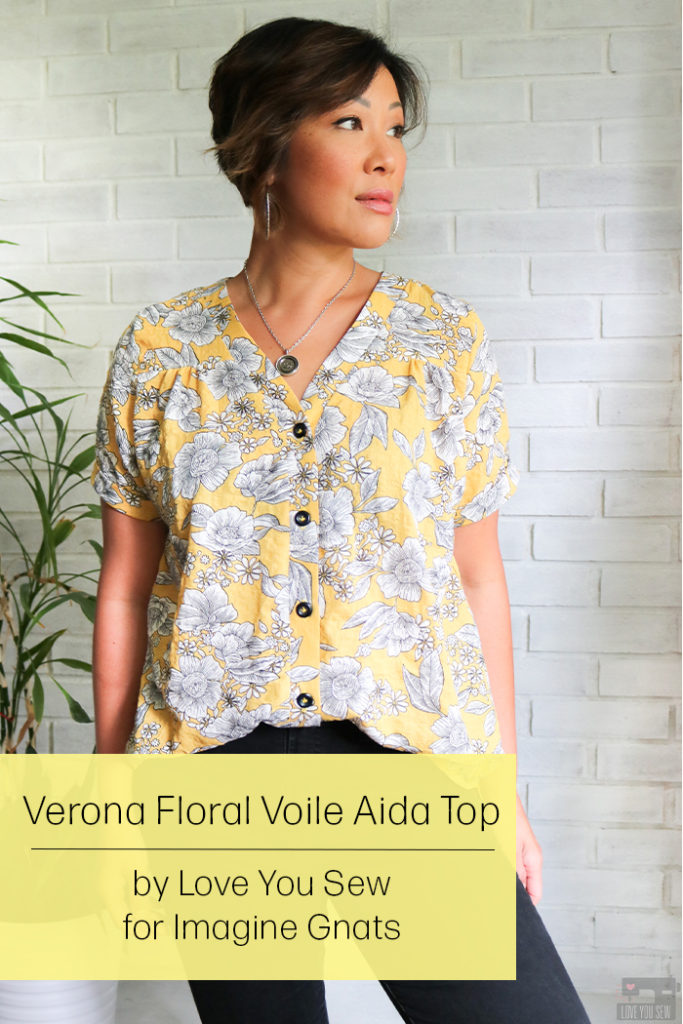
Pattern Review: Aida Top in Verona Voile

This post was originally published August 13, 2019 for the Imagine Gnats Blog.  Since the shop closed in early 2020, I have republished my contributors posts (with permission) to this blog.  I have included some additional thoughts and pictures after some real-life wear and tear.  Enjoy!

In Ohio, we are in the dog days of summer, and this hazy heat is beating down on all of us. It’s at the point of just scorching outside or freezing inside almost all buildings with the air conditioning blasting to compensate for the weather.

So, I’ve been on the hunt for a lightweight woven fabric and a shirt pattern with some nice ease for a loose and breezy top (enter my voile Aida top). I was so happy to see this Verona Voile (aff link) and had to have it!  Then all I could think about was pairing it with the Aida Top by Sew Liberated.

Fabric

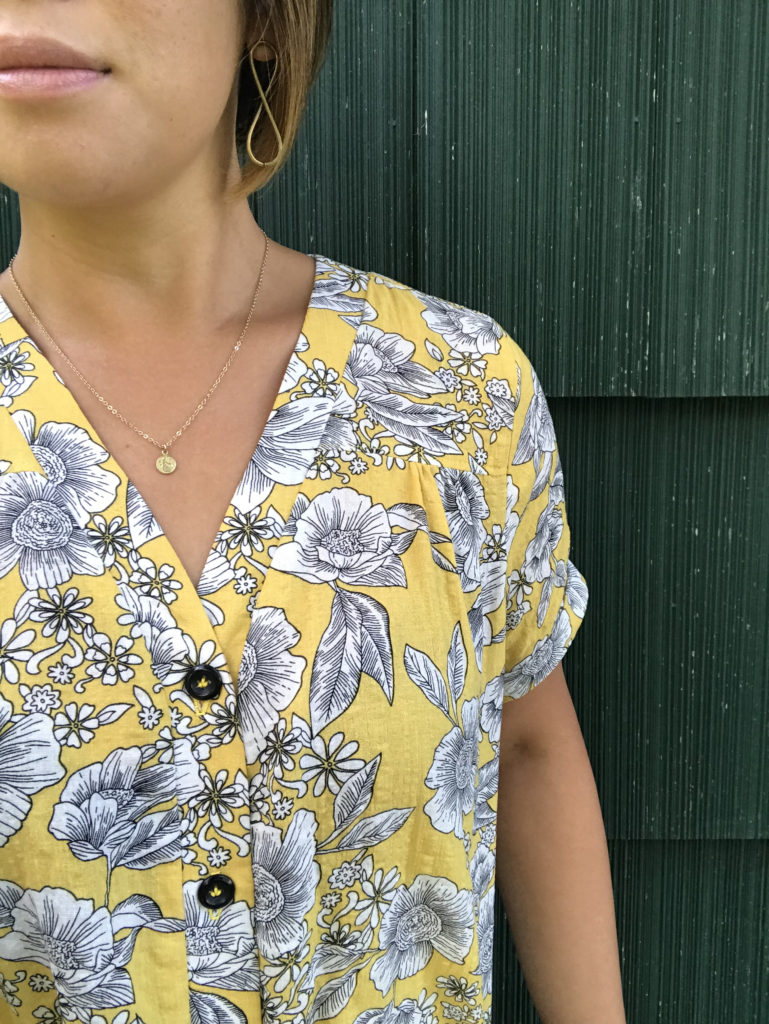
When I first saw the Verona, I loved that it was voile. I love the lightweight characteristics of this type of fabric, but was curious to the fact that it’s a 50/50 of cotton and rayon. Well, now I can say that it’s a great combination because it allows more drape which makes for a great summer fabric.

If you look closely, you’ll be able to see the great puckered texture the Verona Floral Voile has after washing. It’s not like a seer-sucker with the same repeat waffle texture, but it’s like striped puckering which has been woven in. It’s absolutely gorgeous, and I became a quick fan…since I don’t have to worry about wrinkles anymore!

There are two colors of this Verona Voile Floral – navy blue and yellow. Since I just finished a few blue chambray projects, I wanted to add a little color to my wardrobe with the yellow.

It’s not a color I wear a lot, but I figured I’d go big with the yellow and large flowers since it WAS going to be a summer shirt after all 😉

Pattern

The Aida Top is a new addition to the Imagine Gnats pattern library, and I was pretty stoked to sew it up. It had everything I was looking for: lots of ease, shirt-tail hem, v-neck, button placket, AND written for lightweight woven fabrics.

I was mostly drawn to the v-neck button placket because its a popular style I’ve been seeing with strappy tanks lately.

Based on my measurements, I am an 8 in the bust and also in the waist. With my hips (that don’t lie), I clock at a size 12. With all the ease in this top and after reading some other reviews, I felt pretty comfortable sewing a straight size 8.

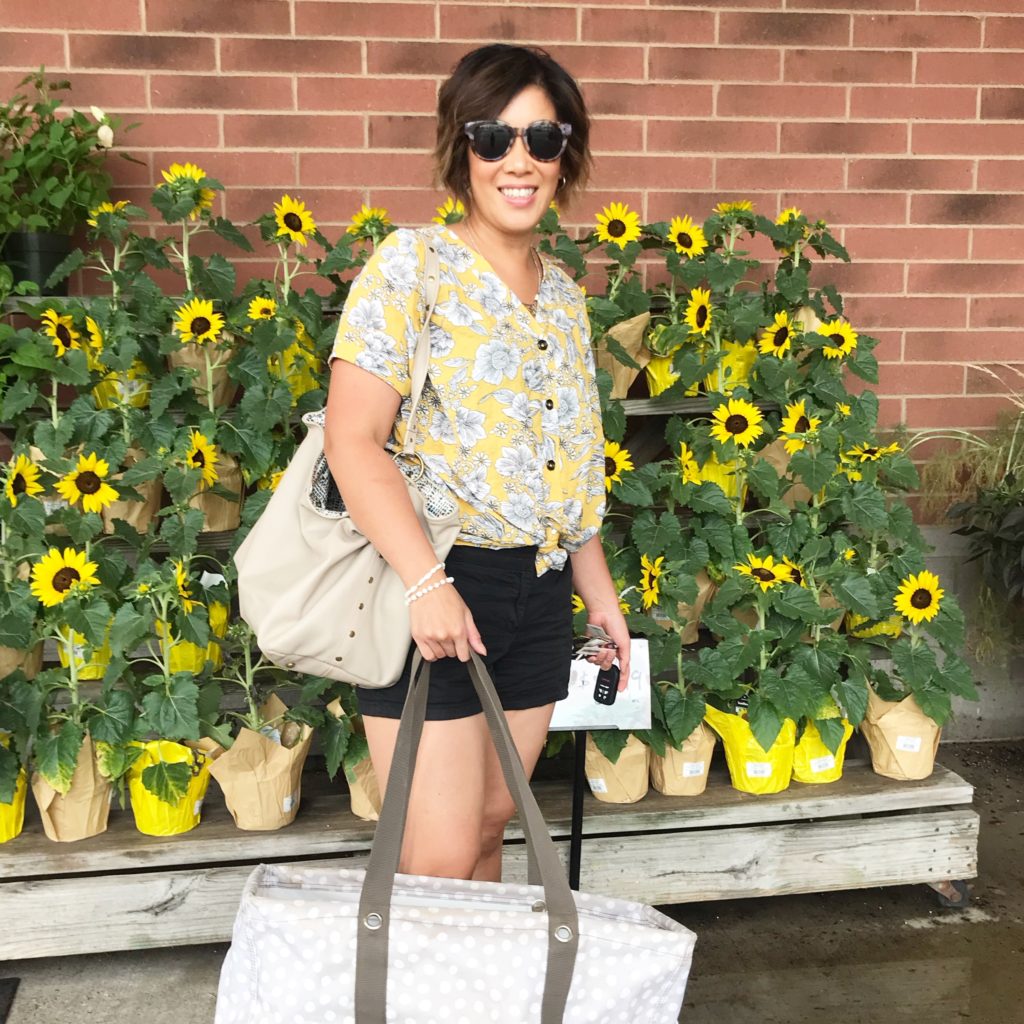
You can see in the profile shot of the shirt that the voile Aida top still clears my backside with room to spare! Woohoo!

There are two views of the Aida with either a flat-front or with gathering, and I chose the latter. I like the extra shaping and added texture it has. I also sewed the shirt-tail hem as written, but I think a cropped boxy version would also be great in this pattern.

My arms are on the heavier side for a size 8. RTW woven shirts are generally tight around my biceps and were always tough for me to find since I didn’t want to wear something that was then bigger everywhere else.

My arms fit into the sleeves as drafted, but I wanted a little more ease to be consistent with the look of the top. I reduced the seam allowance by 1/4″ for a little extra breathing room. I also added a 1″ cuff on each sleeve for an extra detail and visual interest.

Since I love to use buttons from my MIL’s old stash, I found 5 black ones which were pretty close matches. The pattern calls for 7, but I thought 5 was enough.

Even though I didn’t use the recommended 7, I do wish there was a button template just to know where to place the top button. I had to do a good bit of trial and error to figure out where it should go while keeping a flat neckline, but everything did work out!

The Aida Top in this Verona rayon/cotton voile is just a dream shirt for the summer. I wore it during a heat wave and was so impressed with the airiness and soft feel….making the heat (slightly) more bearable 🙂

I hope you grab some of this fabric and make a voile Aida top of your own soon!!!

{Edited May 2, 2020}

Since making this top in August, I’ve worn it at least another dozen times and have yet to iron it –so the textured voile is definitely a winner!  The fabric washes well and the texture is still perfectly waffled.  I just broke it out for the first time this year since the temperatures jumped about 20*F.  But with Covid-19 quarantine and all the additional baking happening… I need some coverage while still being  breathable, and this is it.  The  Aida is still a winner in a my book!  Below are updated links if you would like to make your own:


Happy Sewing!

Cristy


This post may contain affiliate links.  You can read about my disclosures here.

Pattern Review || Fibre Mood Holly Dress

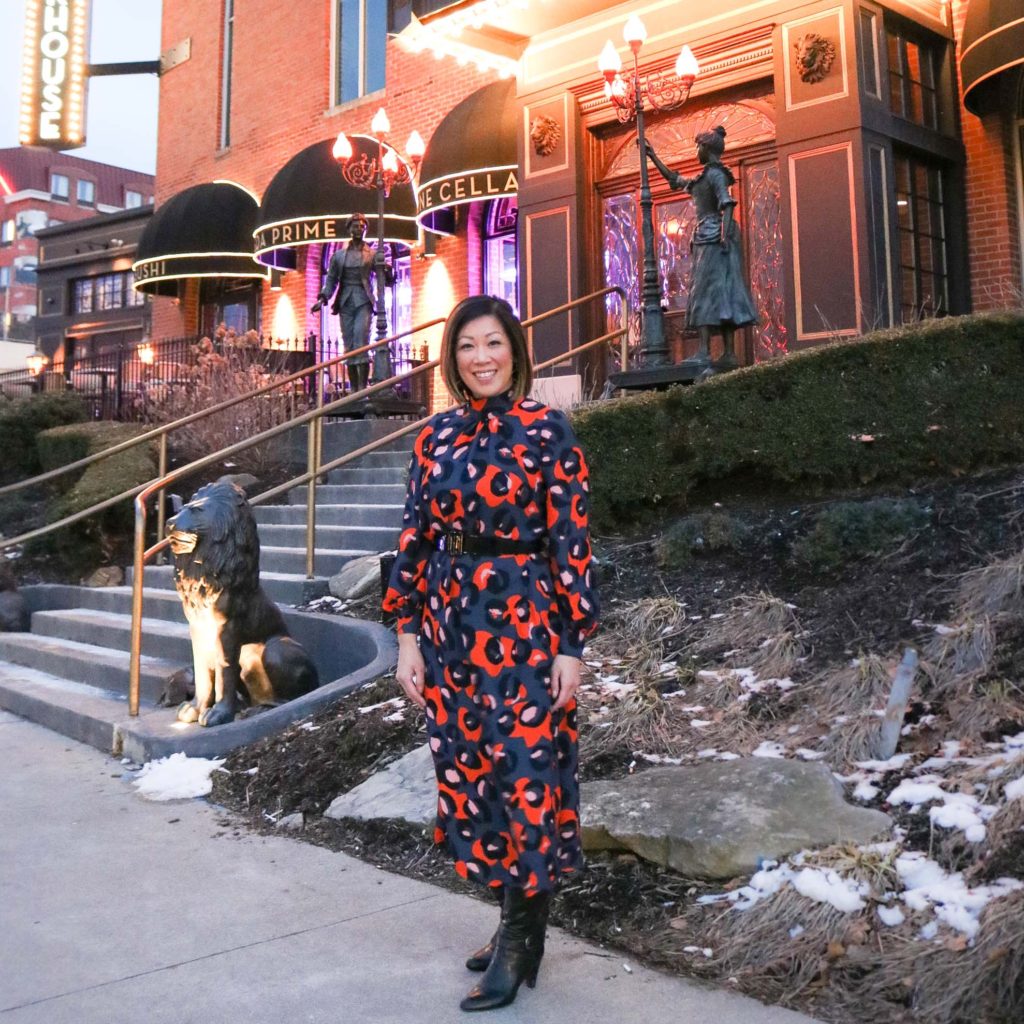
Things got pretty busy around the holidays, so it’s about time I get back to the blog.  I can’t believe it’s March already and I’m just getting around to reviewing the Fibre Mood Holly Dress I made back in November!  We are in the midst of Covid-19 self-quarantine and blogging a bit is helping me deal with the current environment along with feeling some kind of accomplishment for the day.  I hope this post brings some distraction to all of you at this unbelievable time in our world.

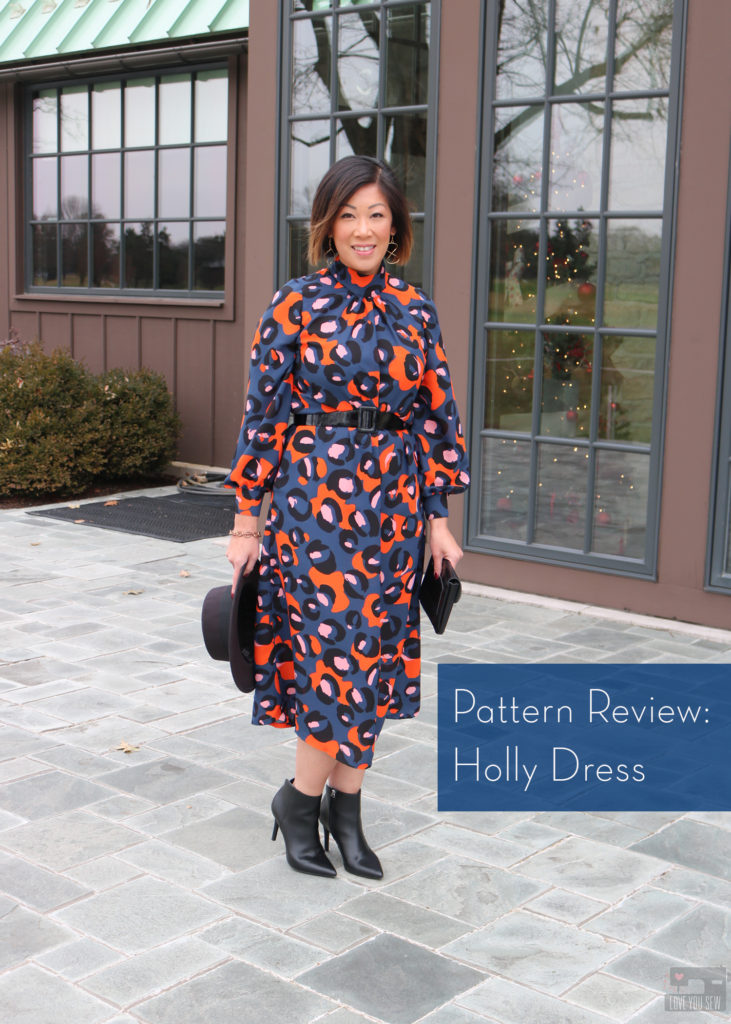
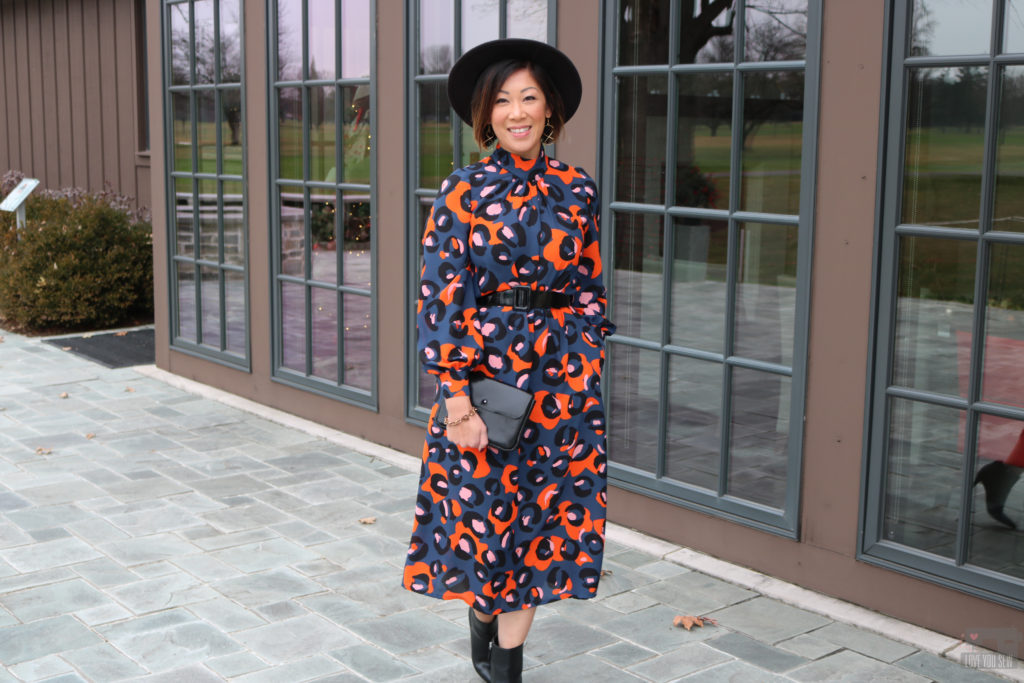
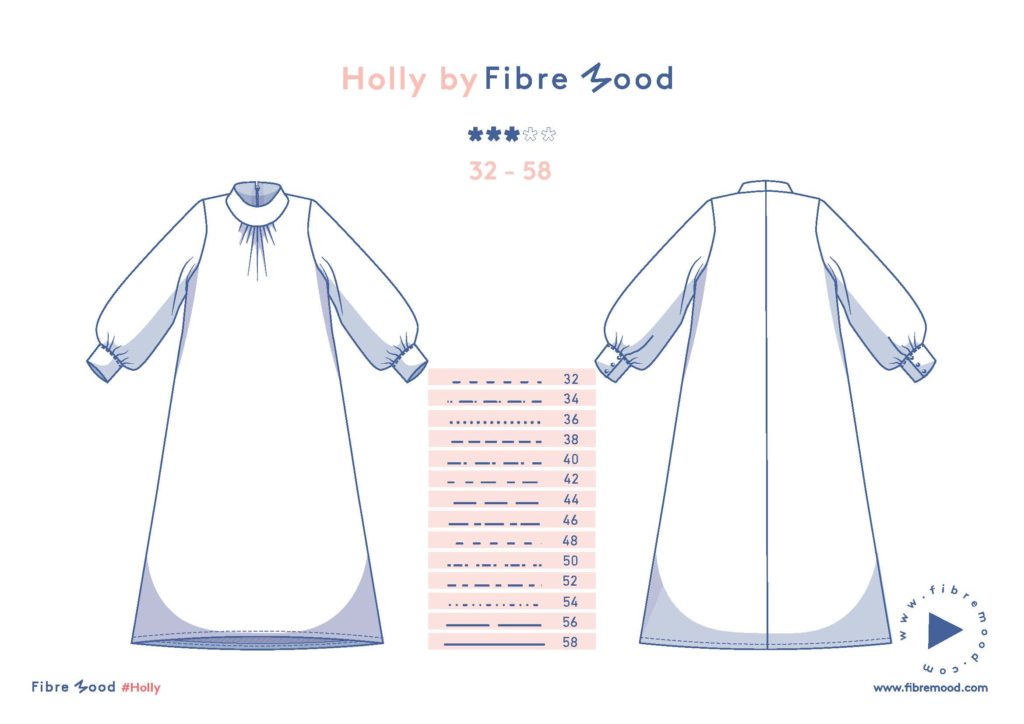
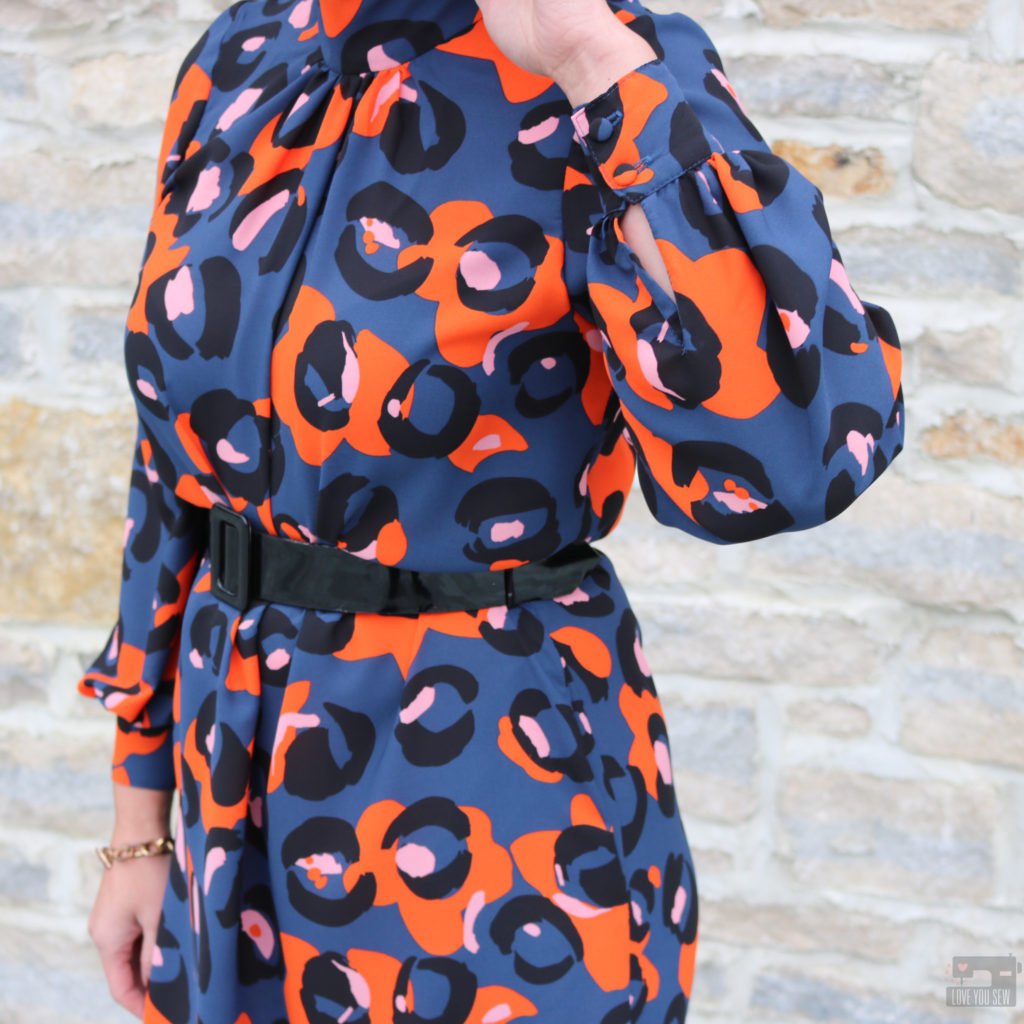
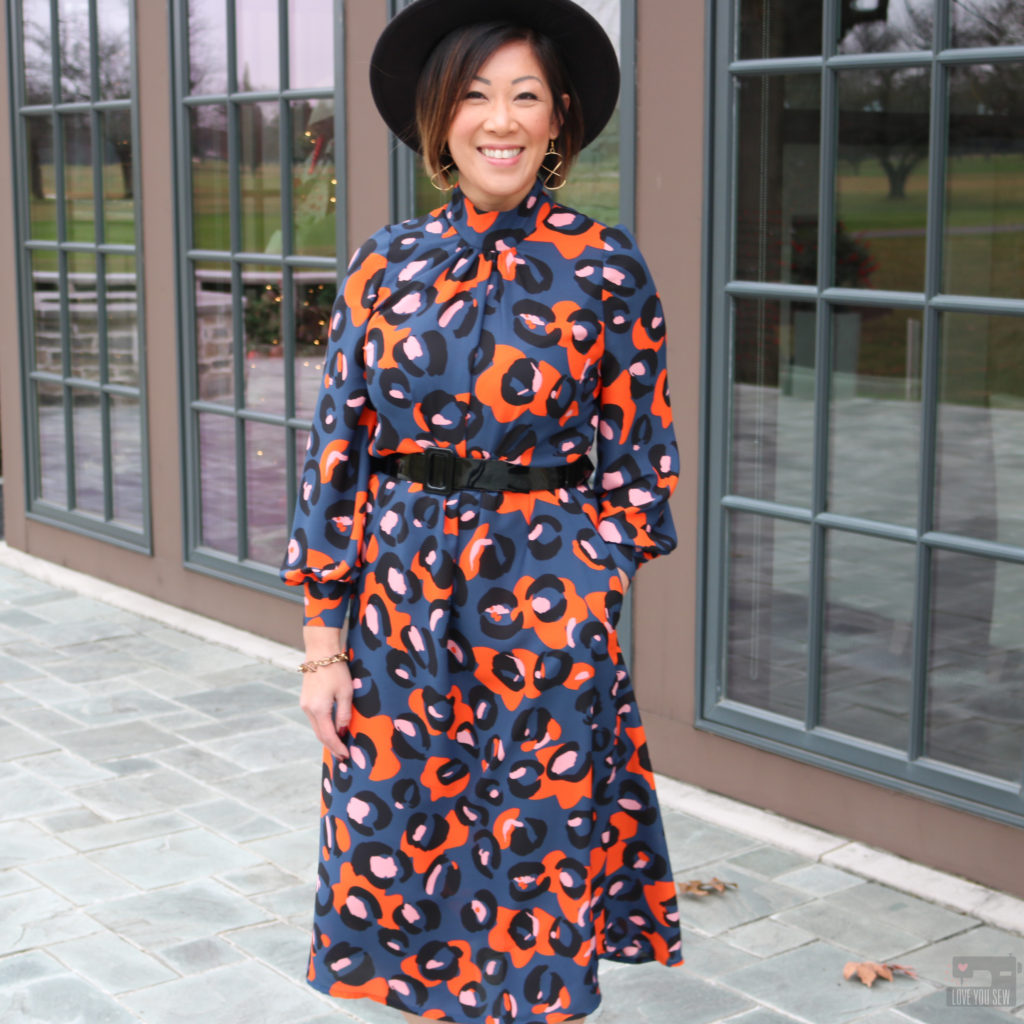
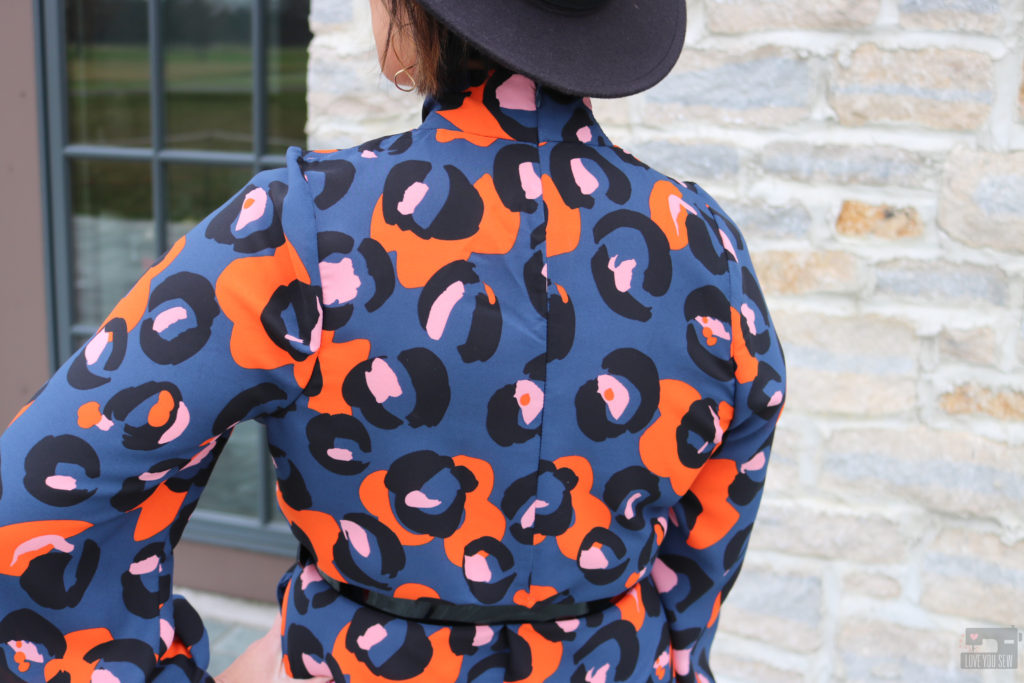
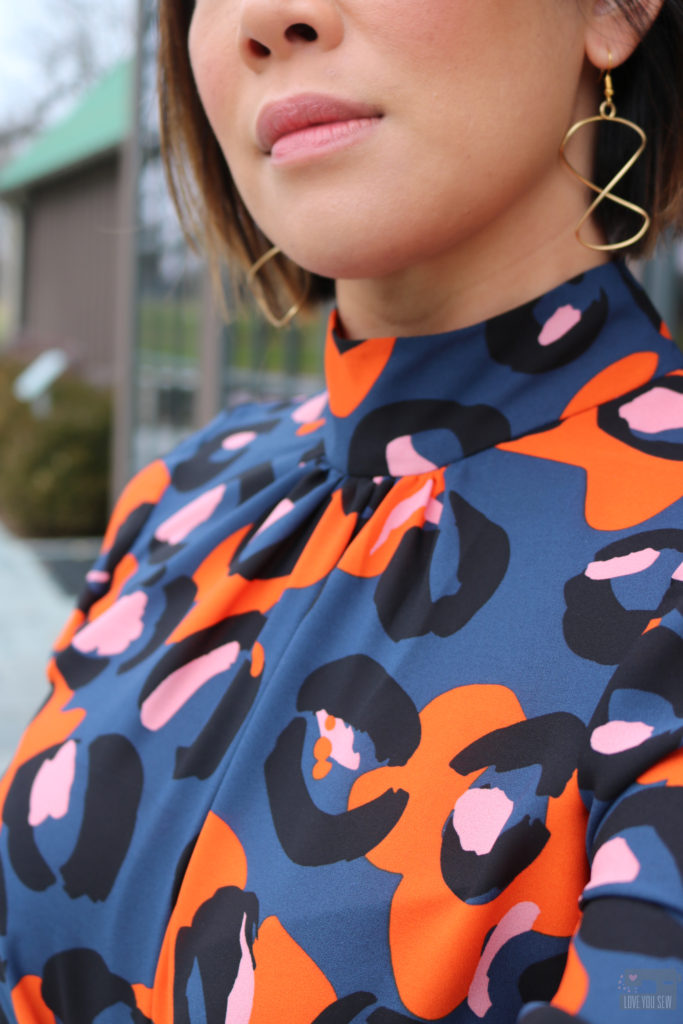
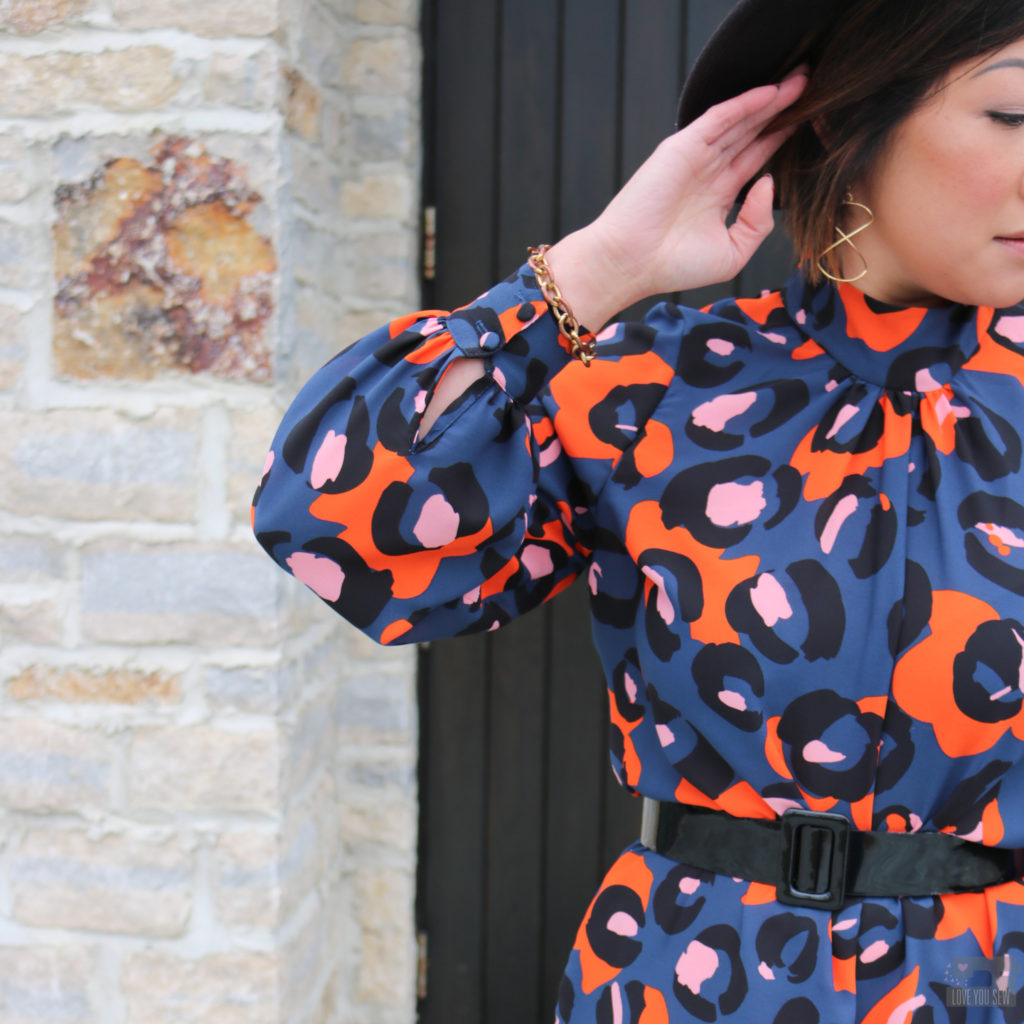
With the 2019 fashion trends bringing “prairie” style along with bold statement sleeves, I was on the hunt for a pattern that was still modern and not full “Laura Ingalls Wilder.”  Then I happen to see a version of the Fibre Mood Holly Dress on Instagram and knew it was for me!  I loved the clean high collar, full sleeves with button placket and the perfect midi length!

Pattern

I had never made a Fibre Mood pattern before.  The company is a European based sewing magazine (available in several different languages) which also sells their digital patterns a la cart here.  When I purchased this pattern in November of 2019, there are a few things to note about the pattern:

  • It  was available only in A4 paper sizing
  • You had to add in your own seam allowances (SA)….to every single pattern piece.  Yikes!  I’m not used to doing that, since I’m accustomed to US patterns which includes the SA already.  But, I still wanted to make the dress badly and was willing to take the extra time
  • Since purchasing this pattern, Fibre Mood has started to add SA to their new pattern launches and has made their digital patterns available in US Letter and AO (copy shop) formats.  This pertains to only the new patterns being released in new magazines, but they might go back to old patterns.  I’m crossing my fingers!

The nice thing about a pattern without SA, is that you can tissue-fit it without having to do all of the math (subtracting the seam allowances) to your body.  The down-side is this process is VERY time intensive…even with the double pencil trick!

Fabric

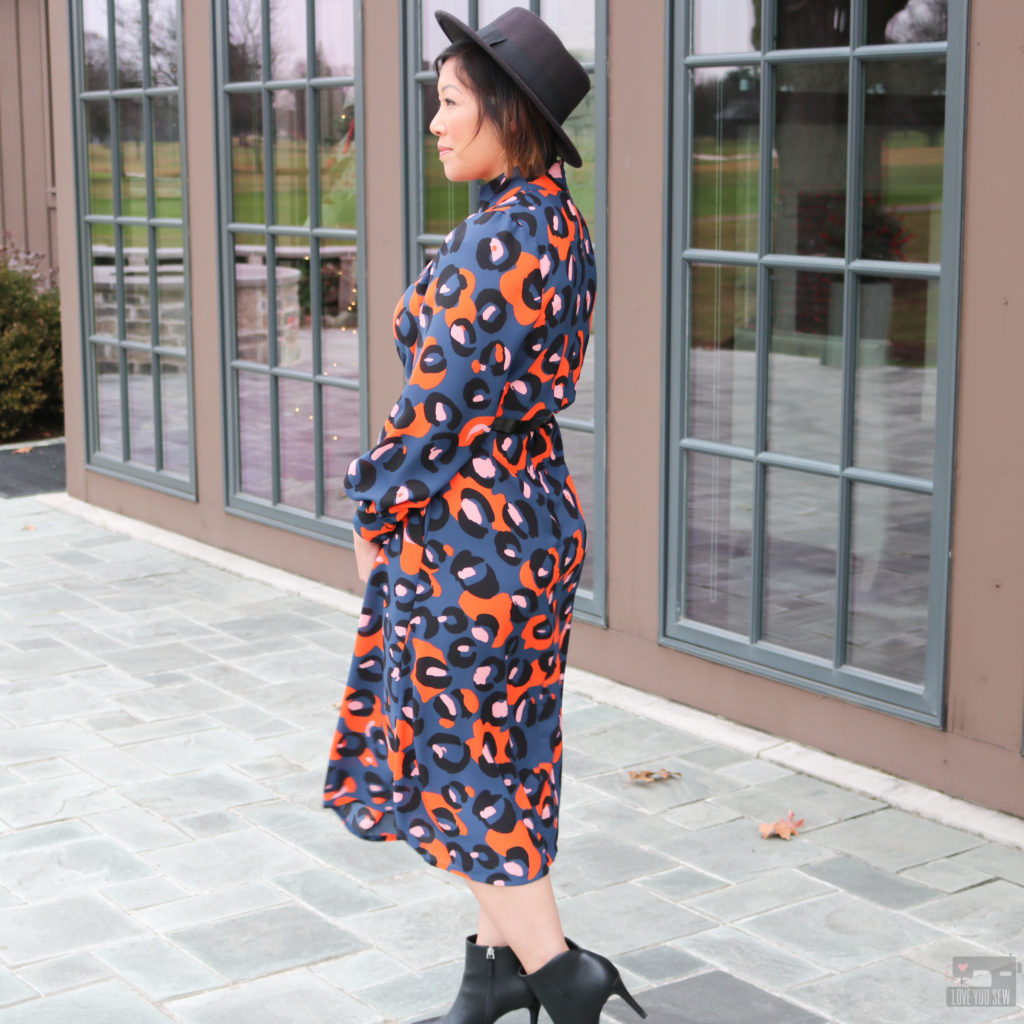
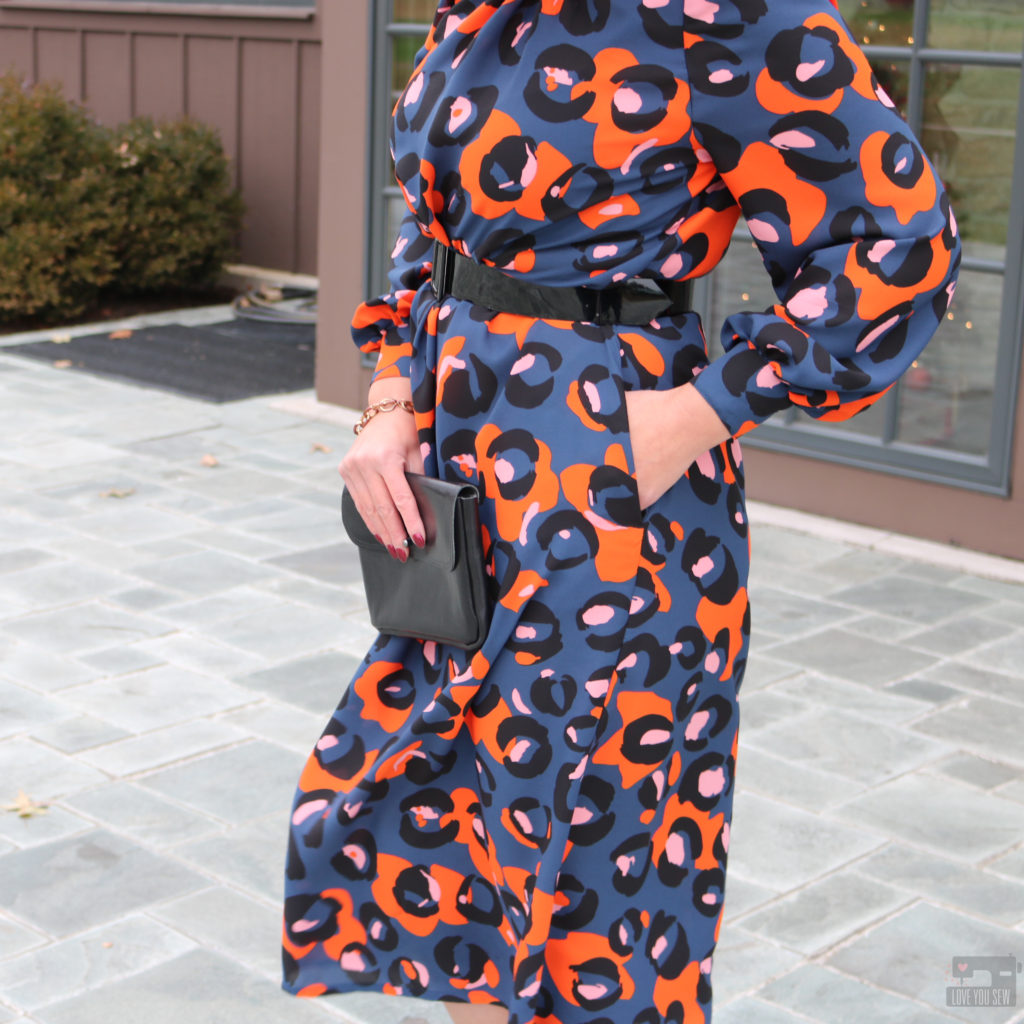
I fell in love with this Telio polyester crepe over the summer with leopard also making its resurgence as the hot print of the moment.  Since everyone and their mother is wearing animal print, I wanted to enjoy the trend but be a little different in this bold orange and blue combo.  I purchased a few yards with no plan in mind until I found the Holly Dress.  I paired this fabric with the pattern to really make the dress more modern to balance to the high neck and more traditional ballon sleeves.

The fabric is lightweight with fluid drape and needed to be cut with care due to it’s shiftiness.  I did not cut on the fold and opted to cut everything out as one layer of fabric.  This crepe is also semi-sheer so you would need a lining, but I opted to just wear a slip underneath the dress afterwards.

Construction

I measured between a 38 and a 40, but opted for the 40 since I needed the clearance over my hips.  Although I made a straight 40, next time I will widen the shoulder and possibly add a little length to the sleeve….which is surprising because I am 5’3″ and usually have to narrow the shoulders with American patterns.  Other modifications included:

  • Omitted belt for a solid RTW one – I knew I wanted to tone down the pattern just a little bit to eventuate the waist and not be completely lost in the print.
  • Used basting stitches to help set in the sleeve (they were not part of the instructions.)
  • Swapped out the 24″ invisible zipper for a 16″ which I had on hand – There was still plenty of clearance to get the dress on and off

  • Hacked in pockets using the Derby Dress pattern pieces – This is my go-to pattern piece when I want in-seam pockets.

  • Narrowed the neckband by 1″ in total by taking out (2) 1/2″ wedges where the band meets the shoulder seams.

  • Made fabric covered buttons for an elevated look using a kit similar to this.

Final Thoughts

Overall, I really love this dress.  The fabric and pattern were a perfect pairing for my style and wardrobe needs.  I’ve worn it out for date nights with my husband and can’t wait to bring it into spring!  I would definitely make this pattern again, just with a slight widening of the shoulders and maybe a different length just for some variety.

What do you think about this dress style?  Are you into leopard print too?


Hugs and Stitches,

Cristy


This post may contain affiliates links.  You can read my full disclosure here.  I bought the fabric and pattern on my own.  But after making this garment, have since become a member of the Fibre Mood ambassador team.

Colleen Tote Bag Gemology Tour

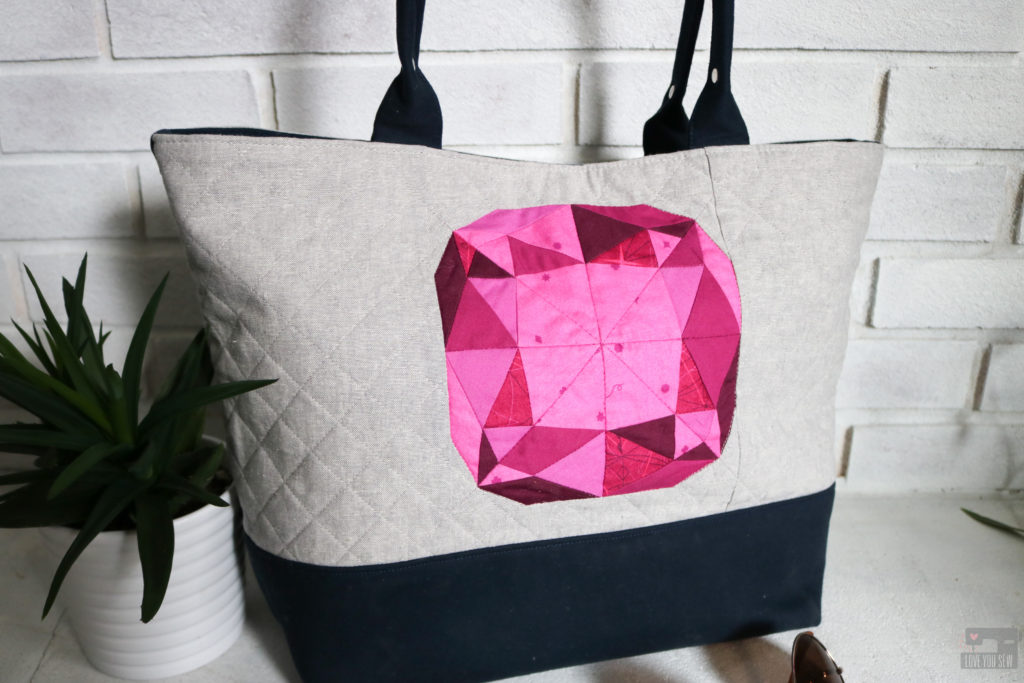
Gemology Blog Tour with the Colleen Tote

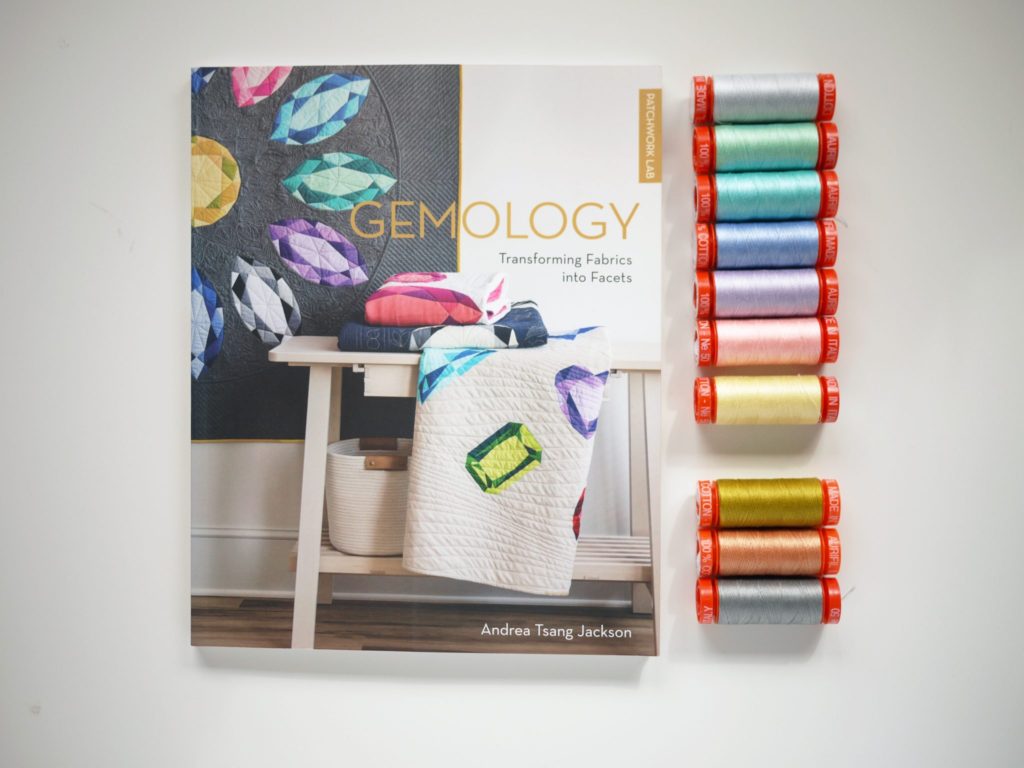
Today is my day on the Gemology Blog Tour supporting my friend, Andrea Tsang Jackson and her new quilting book, Patchwork Lab – Gemology. I had the absolute pleasure of meeting Andrea earlier this year at QuiltCon – Nashville after following her on Instagram with her amazing quilt art for so long.  We met over coffee and had SUCH a great conversation about building businesses in the fiber arts world and also being immigrants in North America.  Our stories are very similar and one of the reasons why I was thrilled when she asked me to be a part of this tour!!!

Colleen Tote Bag Gemology Tour

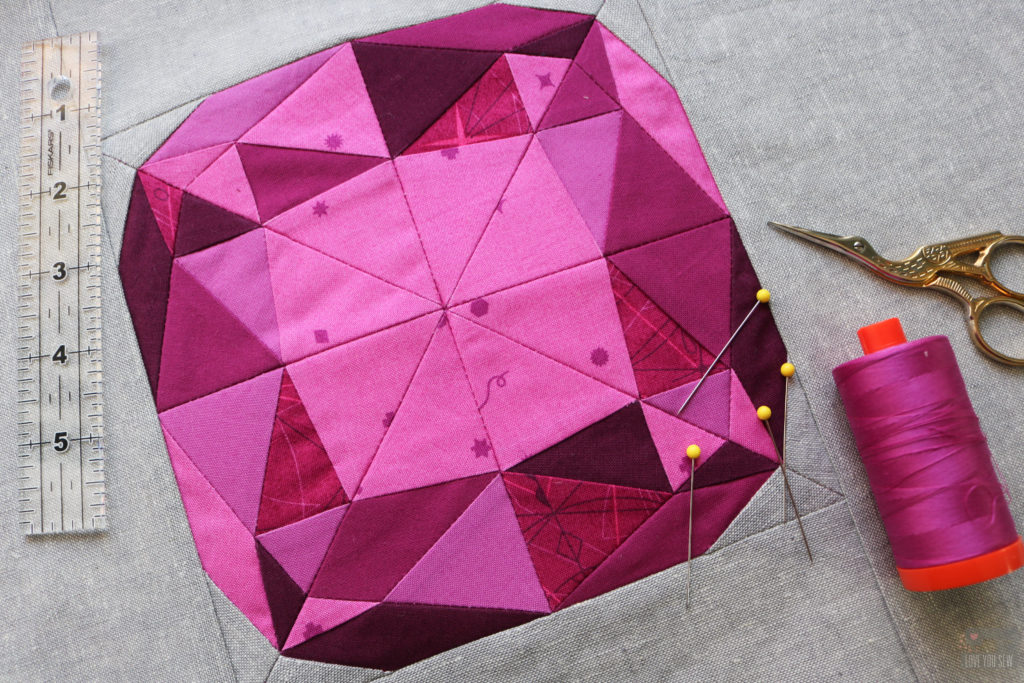
This new Patchwork Lab – Gemology book is absolutely beautiful and jam-packed with designs featuring nine different gem shapes which you can adjust into four different sizes ranging from a 6″ to a 24″ square block. There are additional instructions to make 5 quilts and a sweet little coin purse. The great thing about the book is that it is not just another quilting book. There is SO much additional information about how light hits the facets producing different colors and info about birthstones themselves.  It really gives you extra appreciation of the blocks as you construct them.

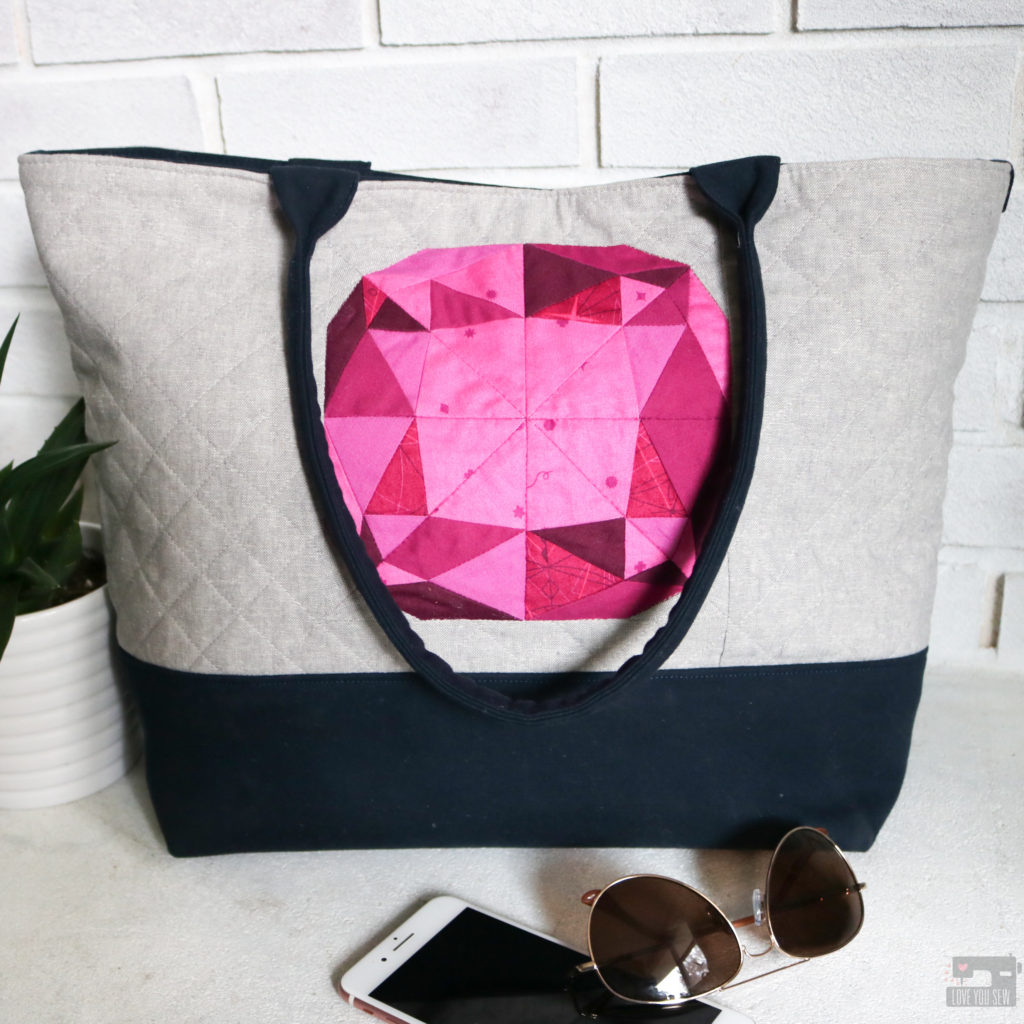
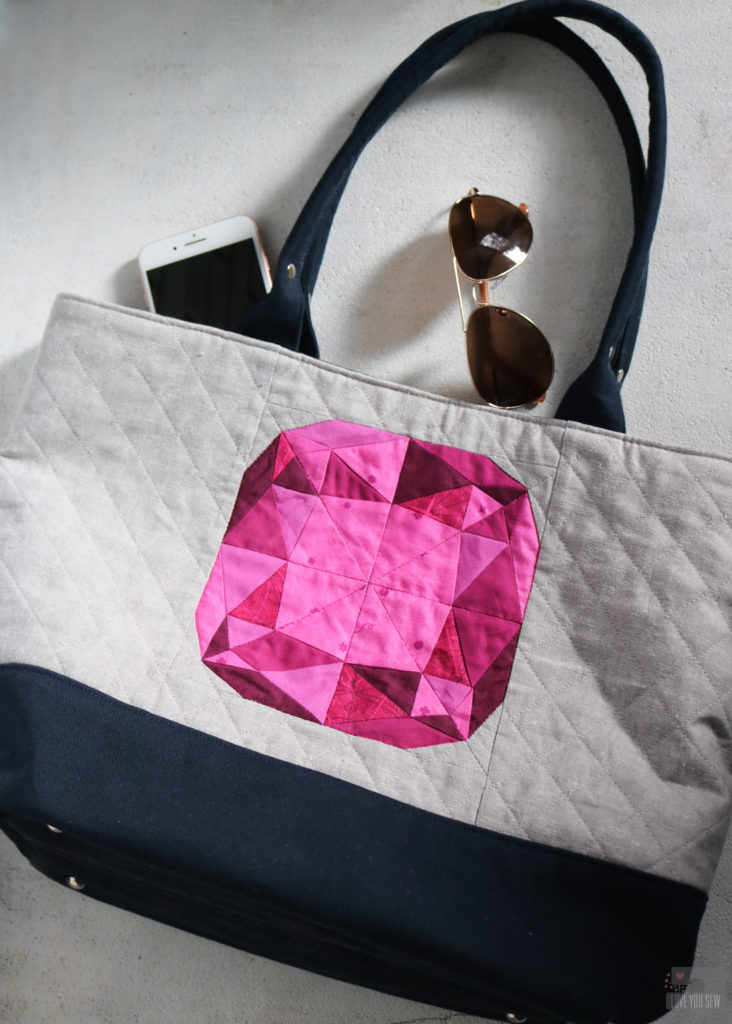
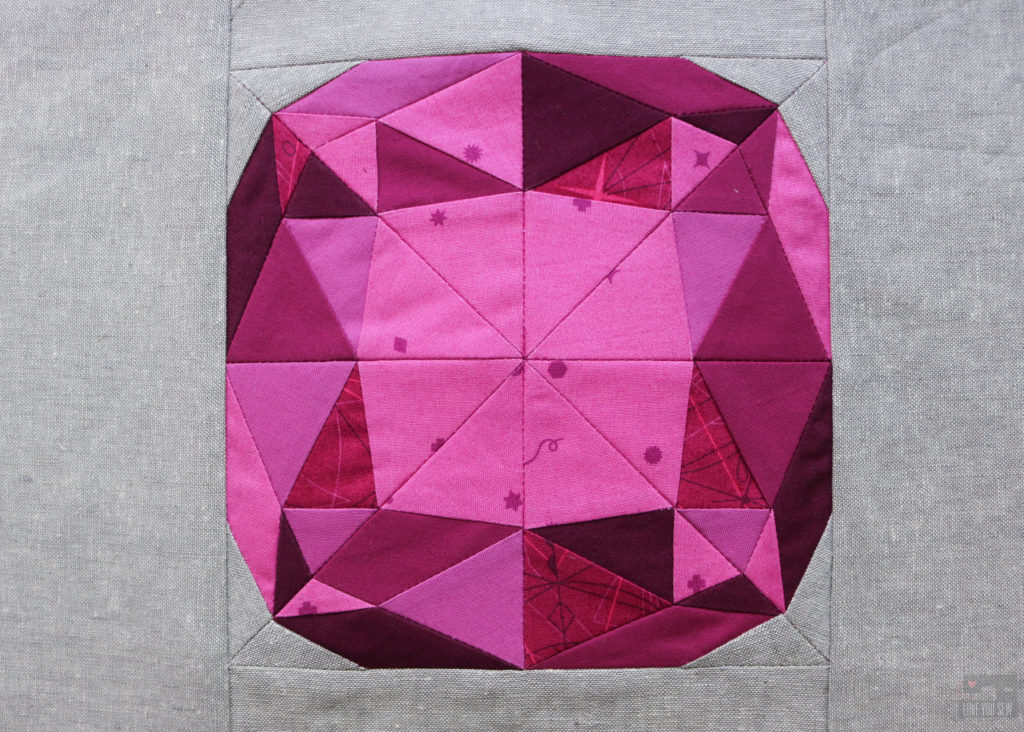
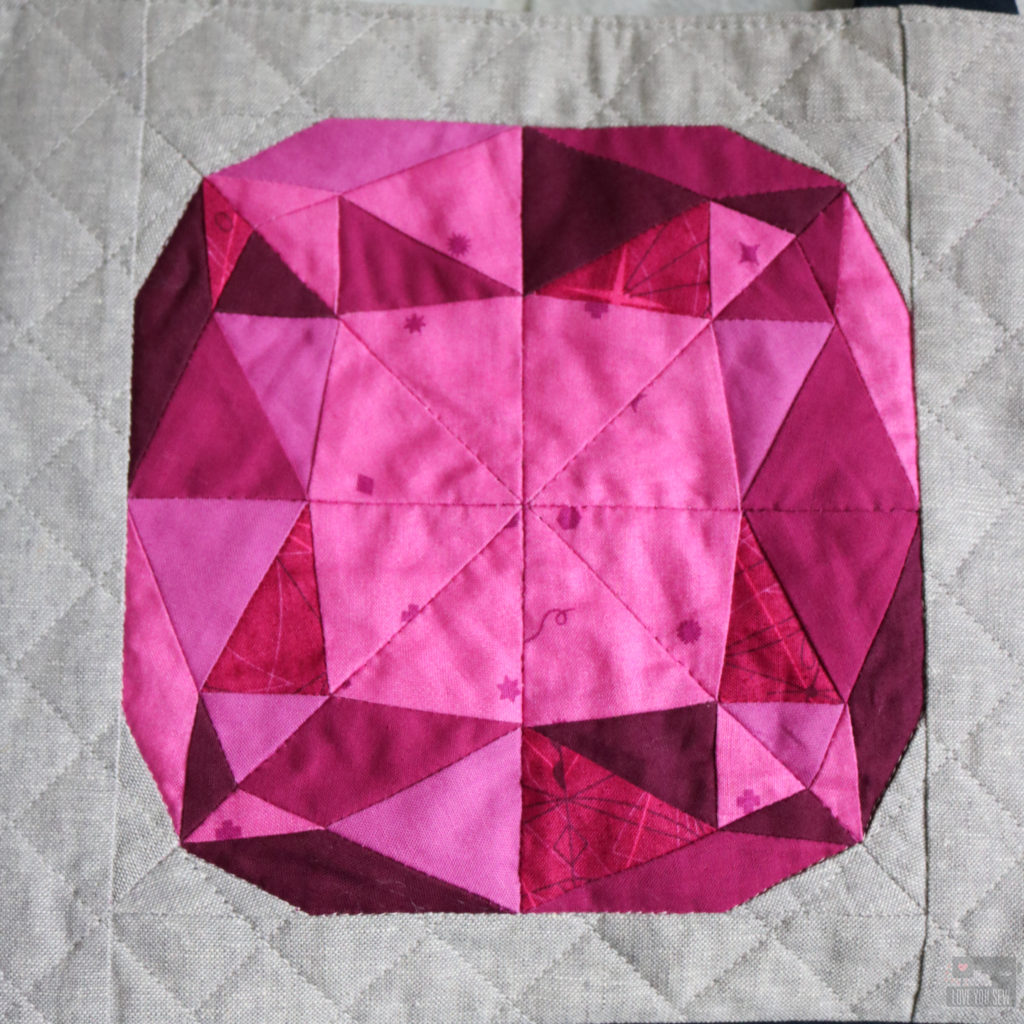
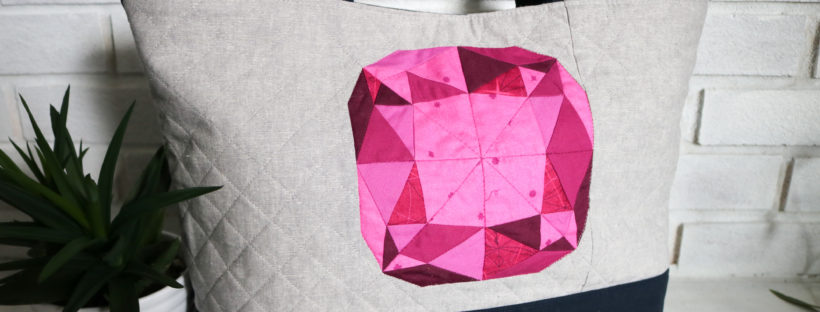
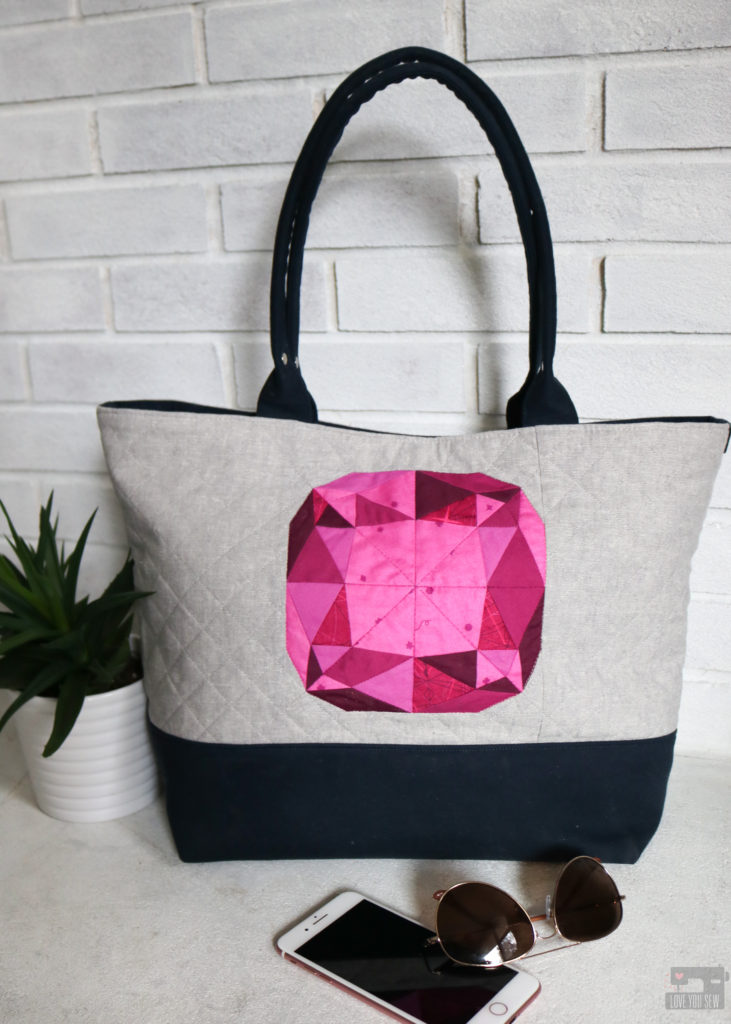
I knew after seeing the book, I would use the  6″ block for the exterior of my Colleen Tote Bag pattern.  When I first designed this bag, the quilter in me wanted enough open space on the exterior to eventually use quilt blocks to add some fun flair to the outside.  I’m so glad I finally got a chance to make this happen with the Cushion cut pattern.

Fabric

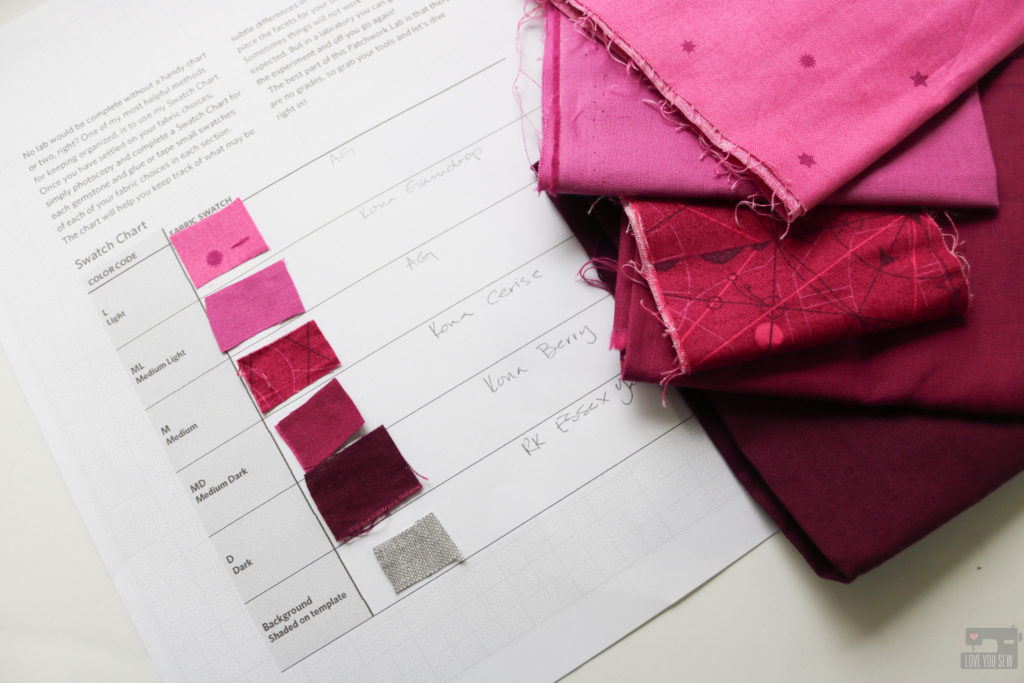
There are great fabric suggestions in the book for many of the birthstones, but I decided to use my own stash and make up my own gem. The Swatch Chart reference sheet is definitely a must IMO. It helped me sort out my fabrics and was a great visual reference as I was piecing the block together.

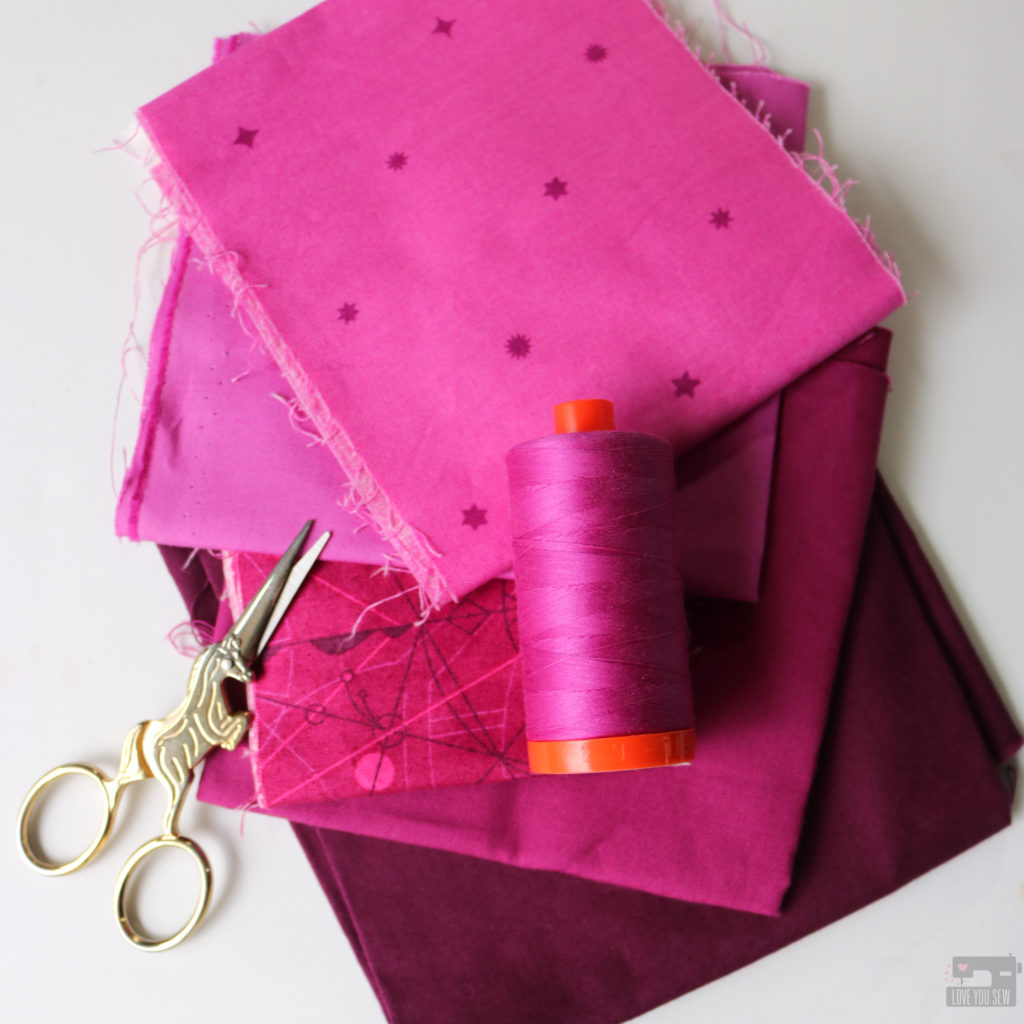
I really wanted the gem to pop on a bag so I used the following in the magenta family: (aff links)

For the rest of the bag, I used:

To Make the Side Panel with Gem Block

With this bag, I knew I wanted the exterior to be quilted for the texture and also to help secure the block to the interfacing. When doing this for a bag, it is always important to cut the fabric larger than what is needed, quilt it, THEN come back and cut it to size. Quilting will always shrink down a block and can become pretty significant difference if you are using more lofty batting or interfacing.

Since the finished panel would be 20 1/2″ x 10″, I added 3″ wide borders to the top and bottom (referred to as the “sides” in the book) and then 12 1/2″ x 7″ to the sides.  Instead of using fusible fleece as the interfacing, I swapped it out with Pellon 988 Sew-in Fleece.

I used matching Aurifil 2535 to stitch-in-the-ditch around the gem and then on all the intersecting seams that ran completely across the the pattern.  For the background, I used Aurifil 2615 to sew 1″ blocks at a 45* angle, stopping when I hit the gem. The nice part about quilting a bag panel is that you can leave the thread tails and just tie them off without having to bury any of them!

To cut the panel and create equal spacing above and below the block, you find the center horizontally and cut 4 3/4″ below the line and then 5 1/4″ above the line. The measurements are not equal to account for the different seam allowances as written in the Colleen Tote pattern.

Other Modifications

Every time I make a pattern (whether my own or someone else’s) I can’t help but add some different features so each one is unique.  I believe that every bag has it’s own personality and calls out for different features. I made the following changes to this Colleen:

  • Extended the key fob to 16″ in total length
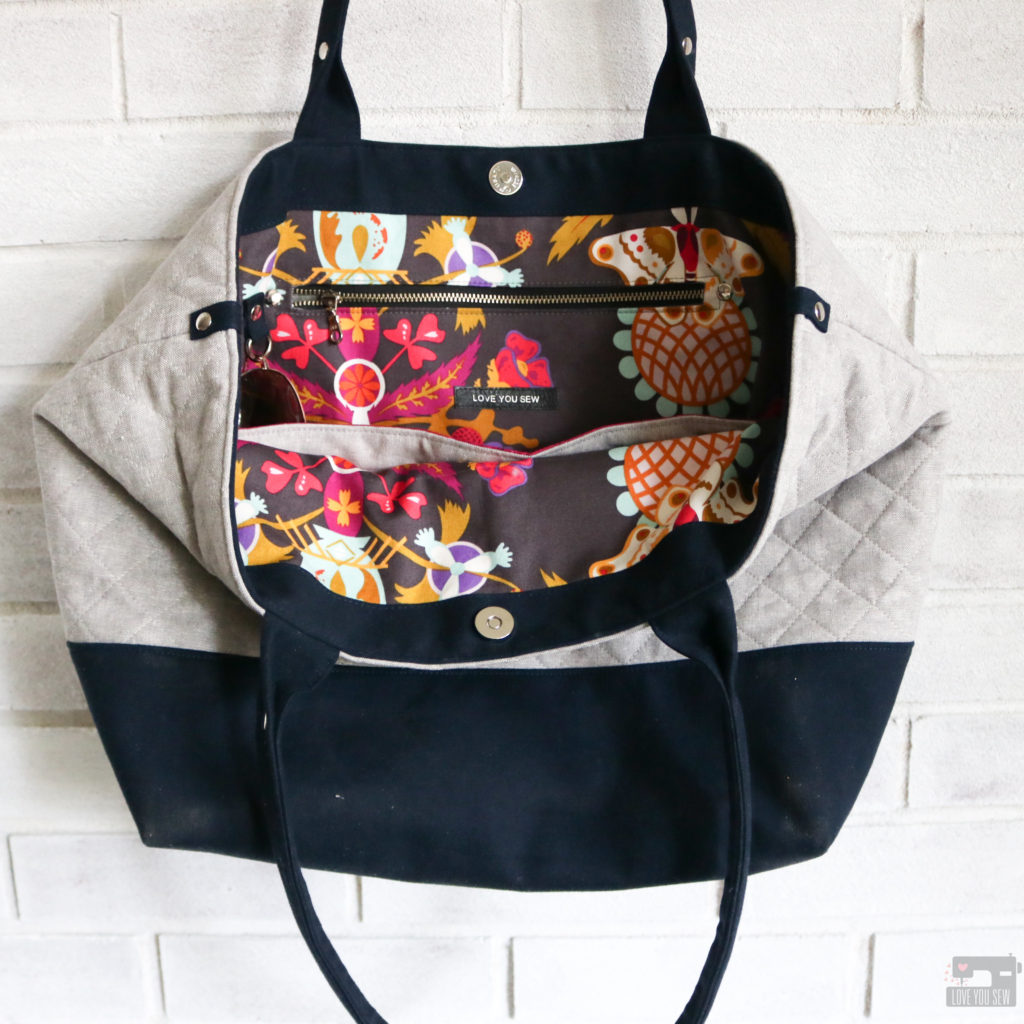
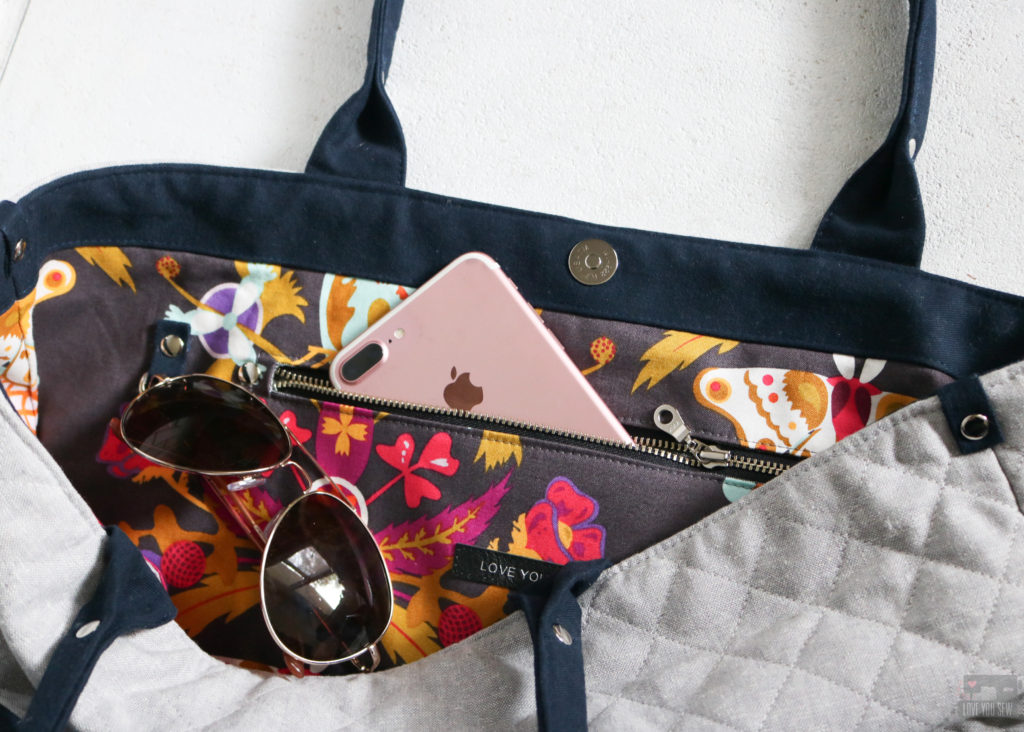
  • Added a interior D-ring
  • Added a magnetic snap to the interior band
  • Pieced the line with some of the Sangria Compass to bring some of the Gem colors to the interior
  • Added Purse Feet following the add-on instructions here.
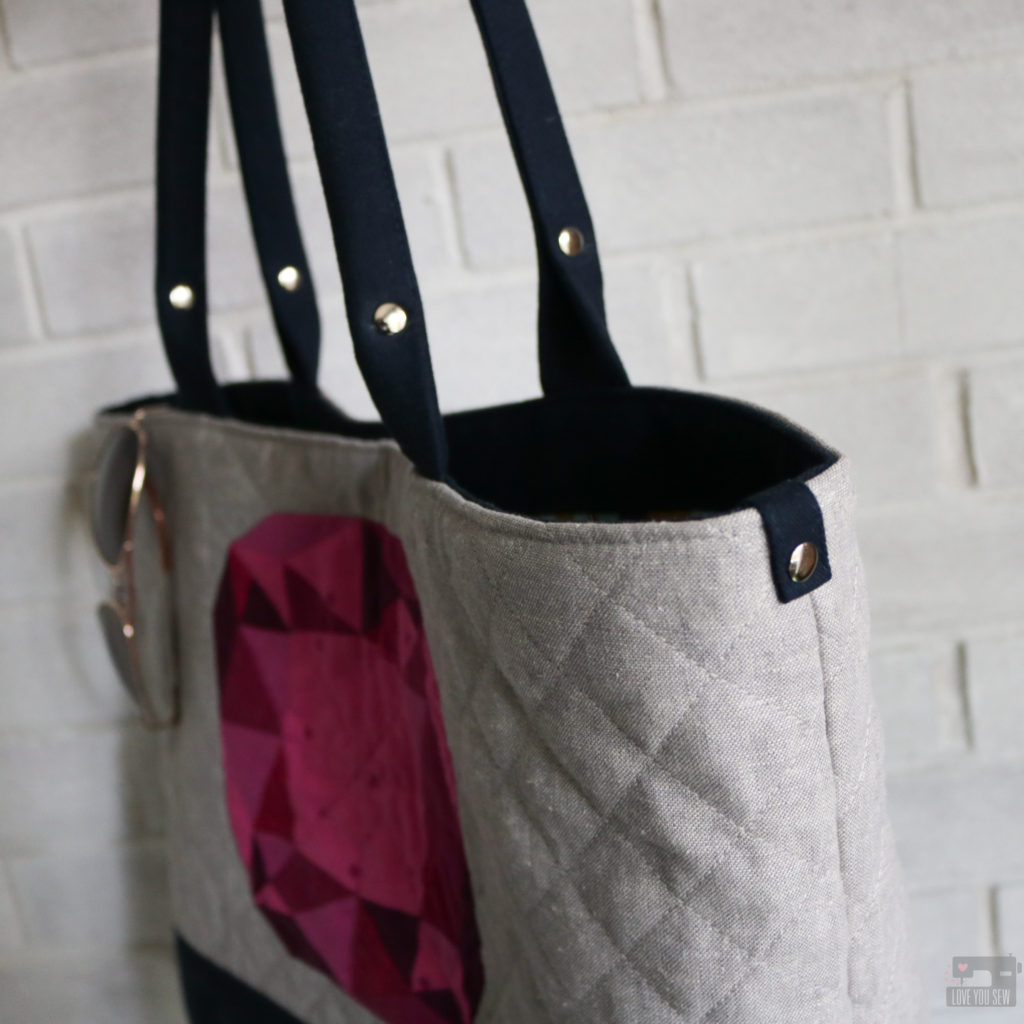
  • Broke up the gray a little more on the exterior with some accent tabs and rivets.

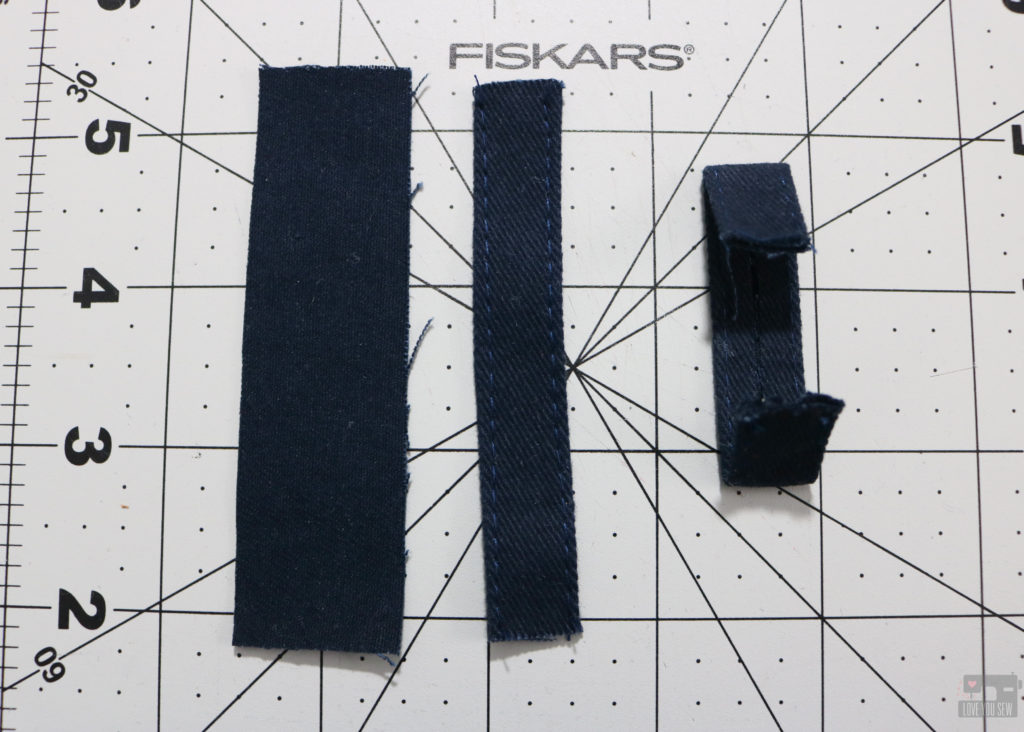
I did this by using the scraps I cut out of the bottom accent fabric.  You will need (2) 3 1/2 x 1″ strips.  Fold each long side to the center creating a single-fold tape and top-stitch 1/16″ along each side.  Fold down each short end by 3/4″ with wrong sides together.

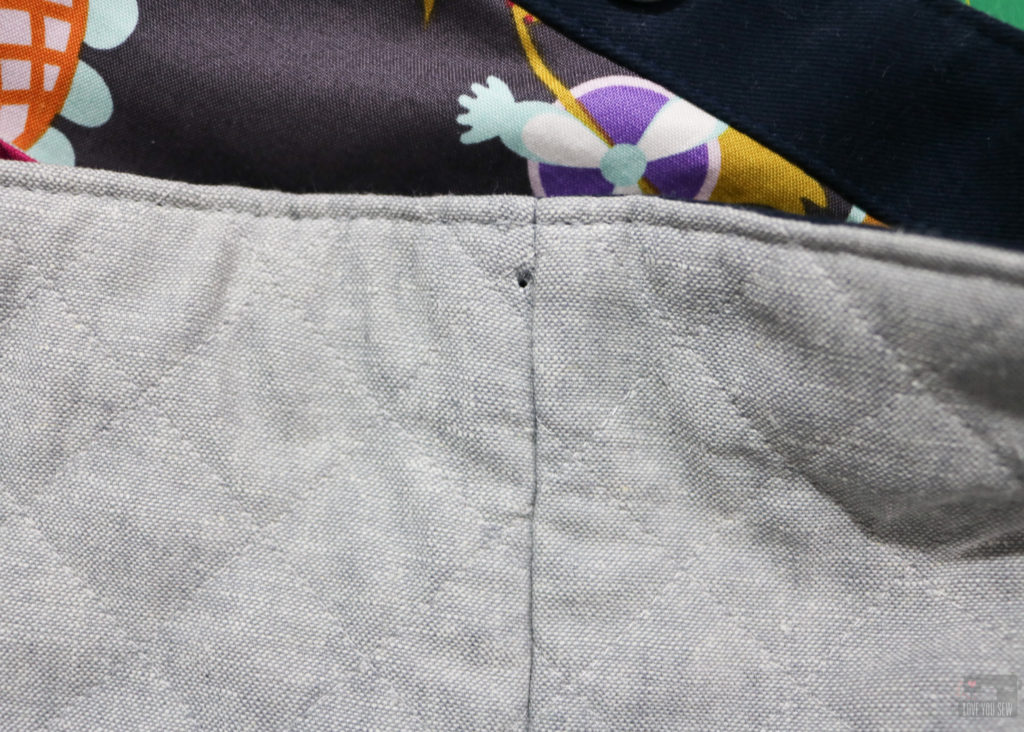
The trick to adding these tabs over the top of the bag is to fold the tab and cut those holes first.  Then place it over the edge of the bag and mark it just to the left of the side seam and cut the hole in the bag.  By moving the hole you won’t cut into the side seam but it will appear that the tab is centered from far away!  Add the rivet and now you have a cute tab that makes this look more high-end.

Please make sure you follow Andrea @3rdstoryworshop to keep up with the rest of the Gemology Blog Tour.  You can find her blog and shop her book here.

Tomorrow, Rebecca Makas is up with her Gemology Project.  Click to find her here.

I hope you enjoyed the new spin on the Colleen Tote Bag and all of the gemstone inspiration from Patchwork Lab – Gemology!


Hugs and Stitches,

Cristy


This post is in collaboration with Andrea Tsang Jackson for which I received a complimentary copy of her book.  //  This post may also contain affiliate links and you can read all the details in my Disclosures here.