Spring Roll Pouch Launch

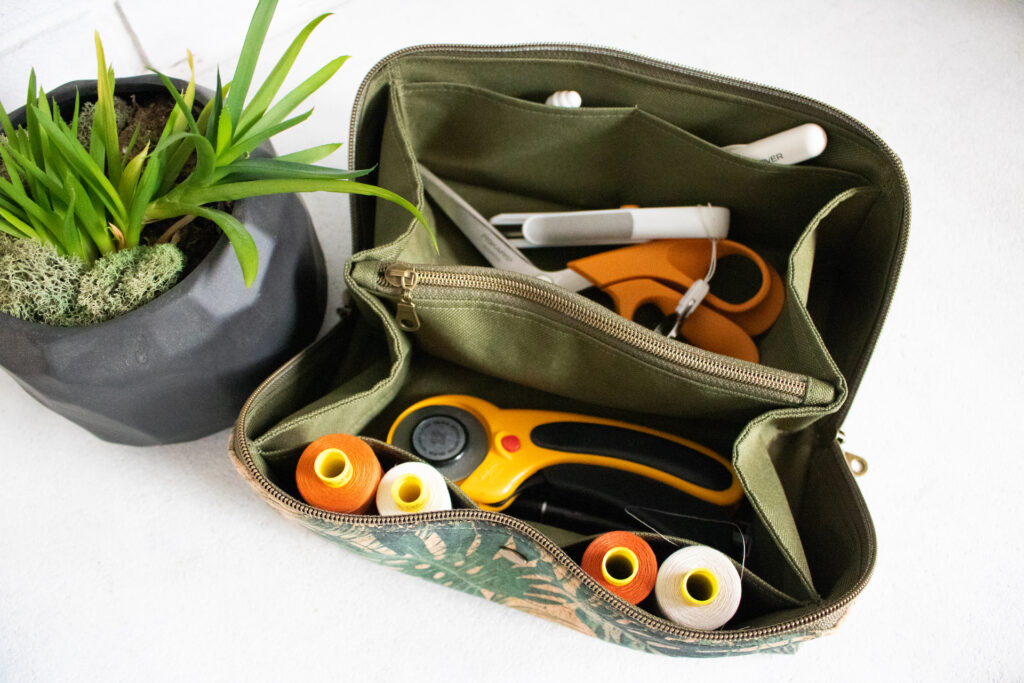
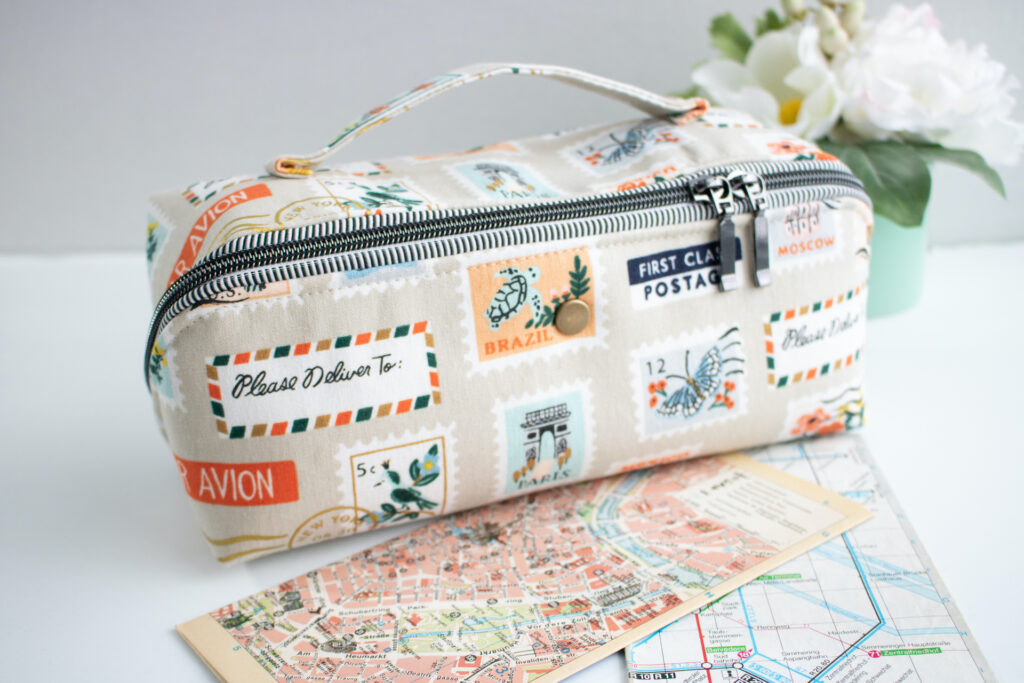
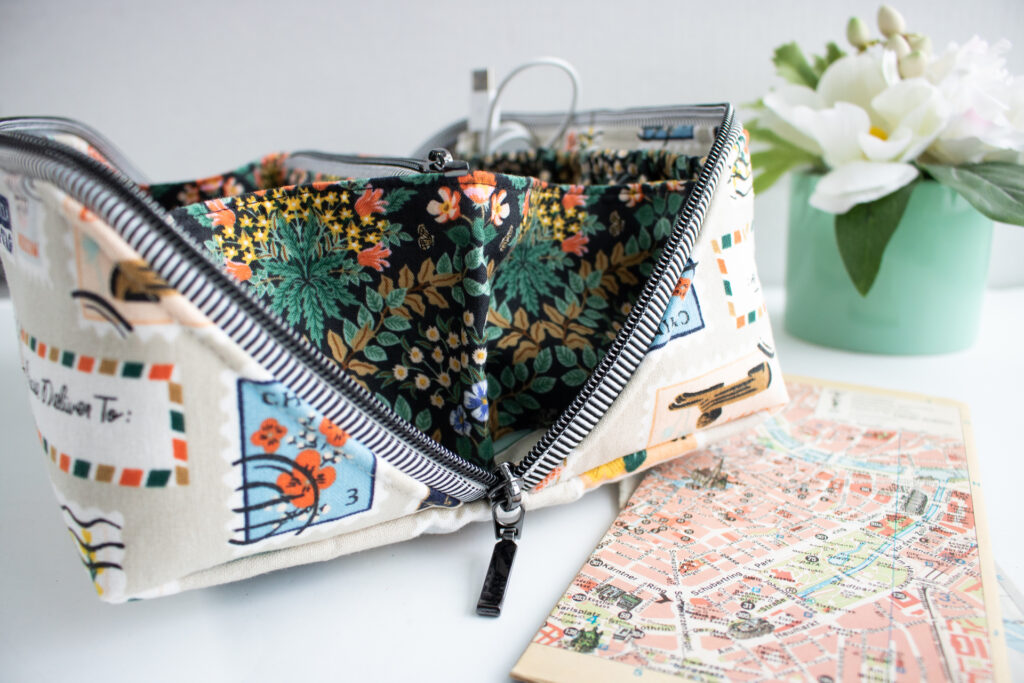
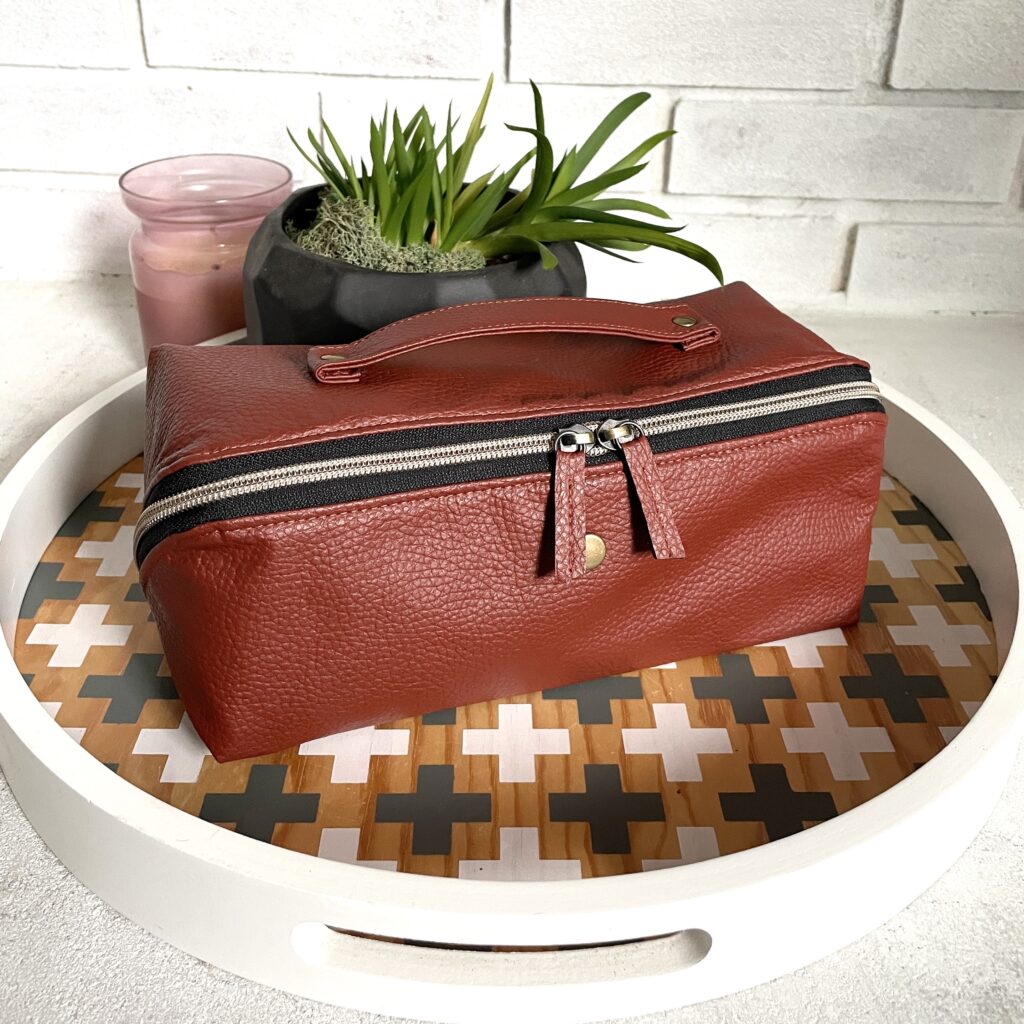
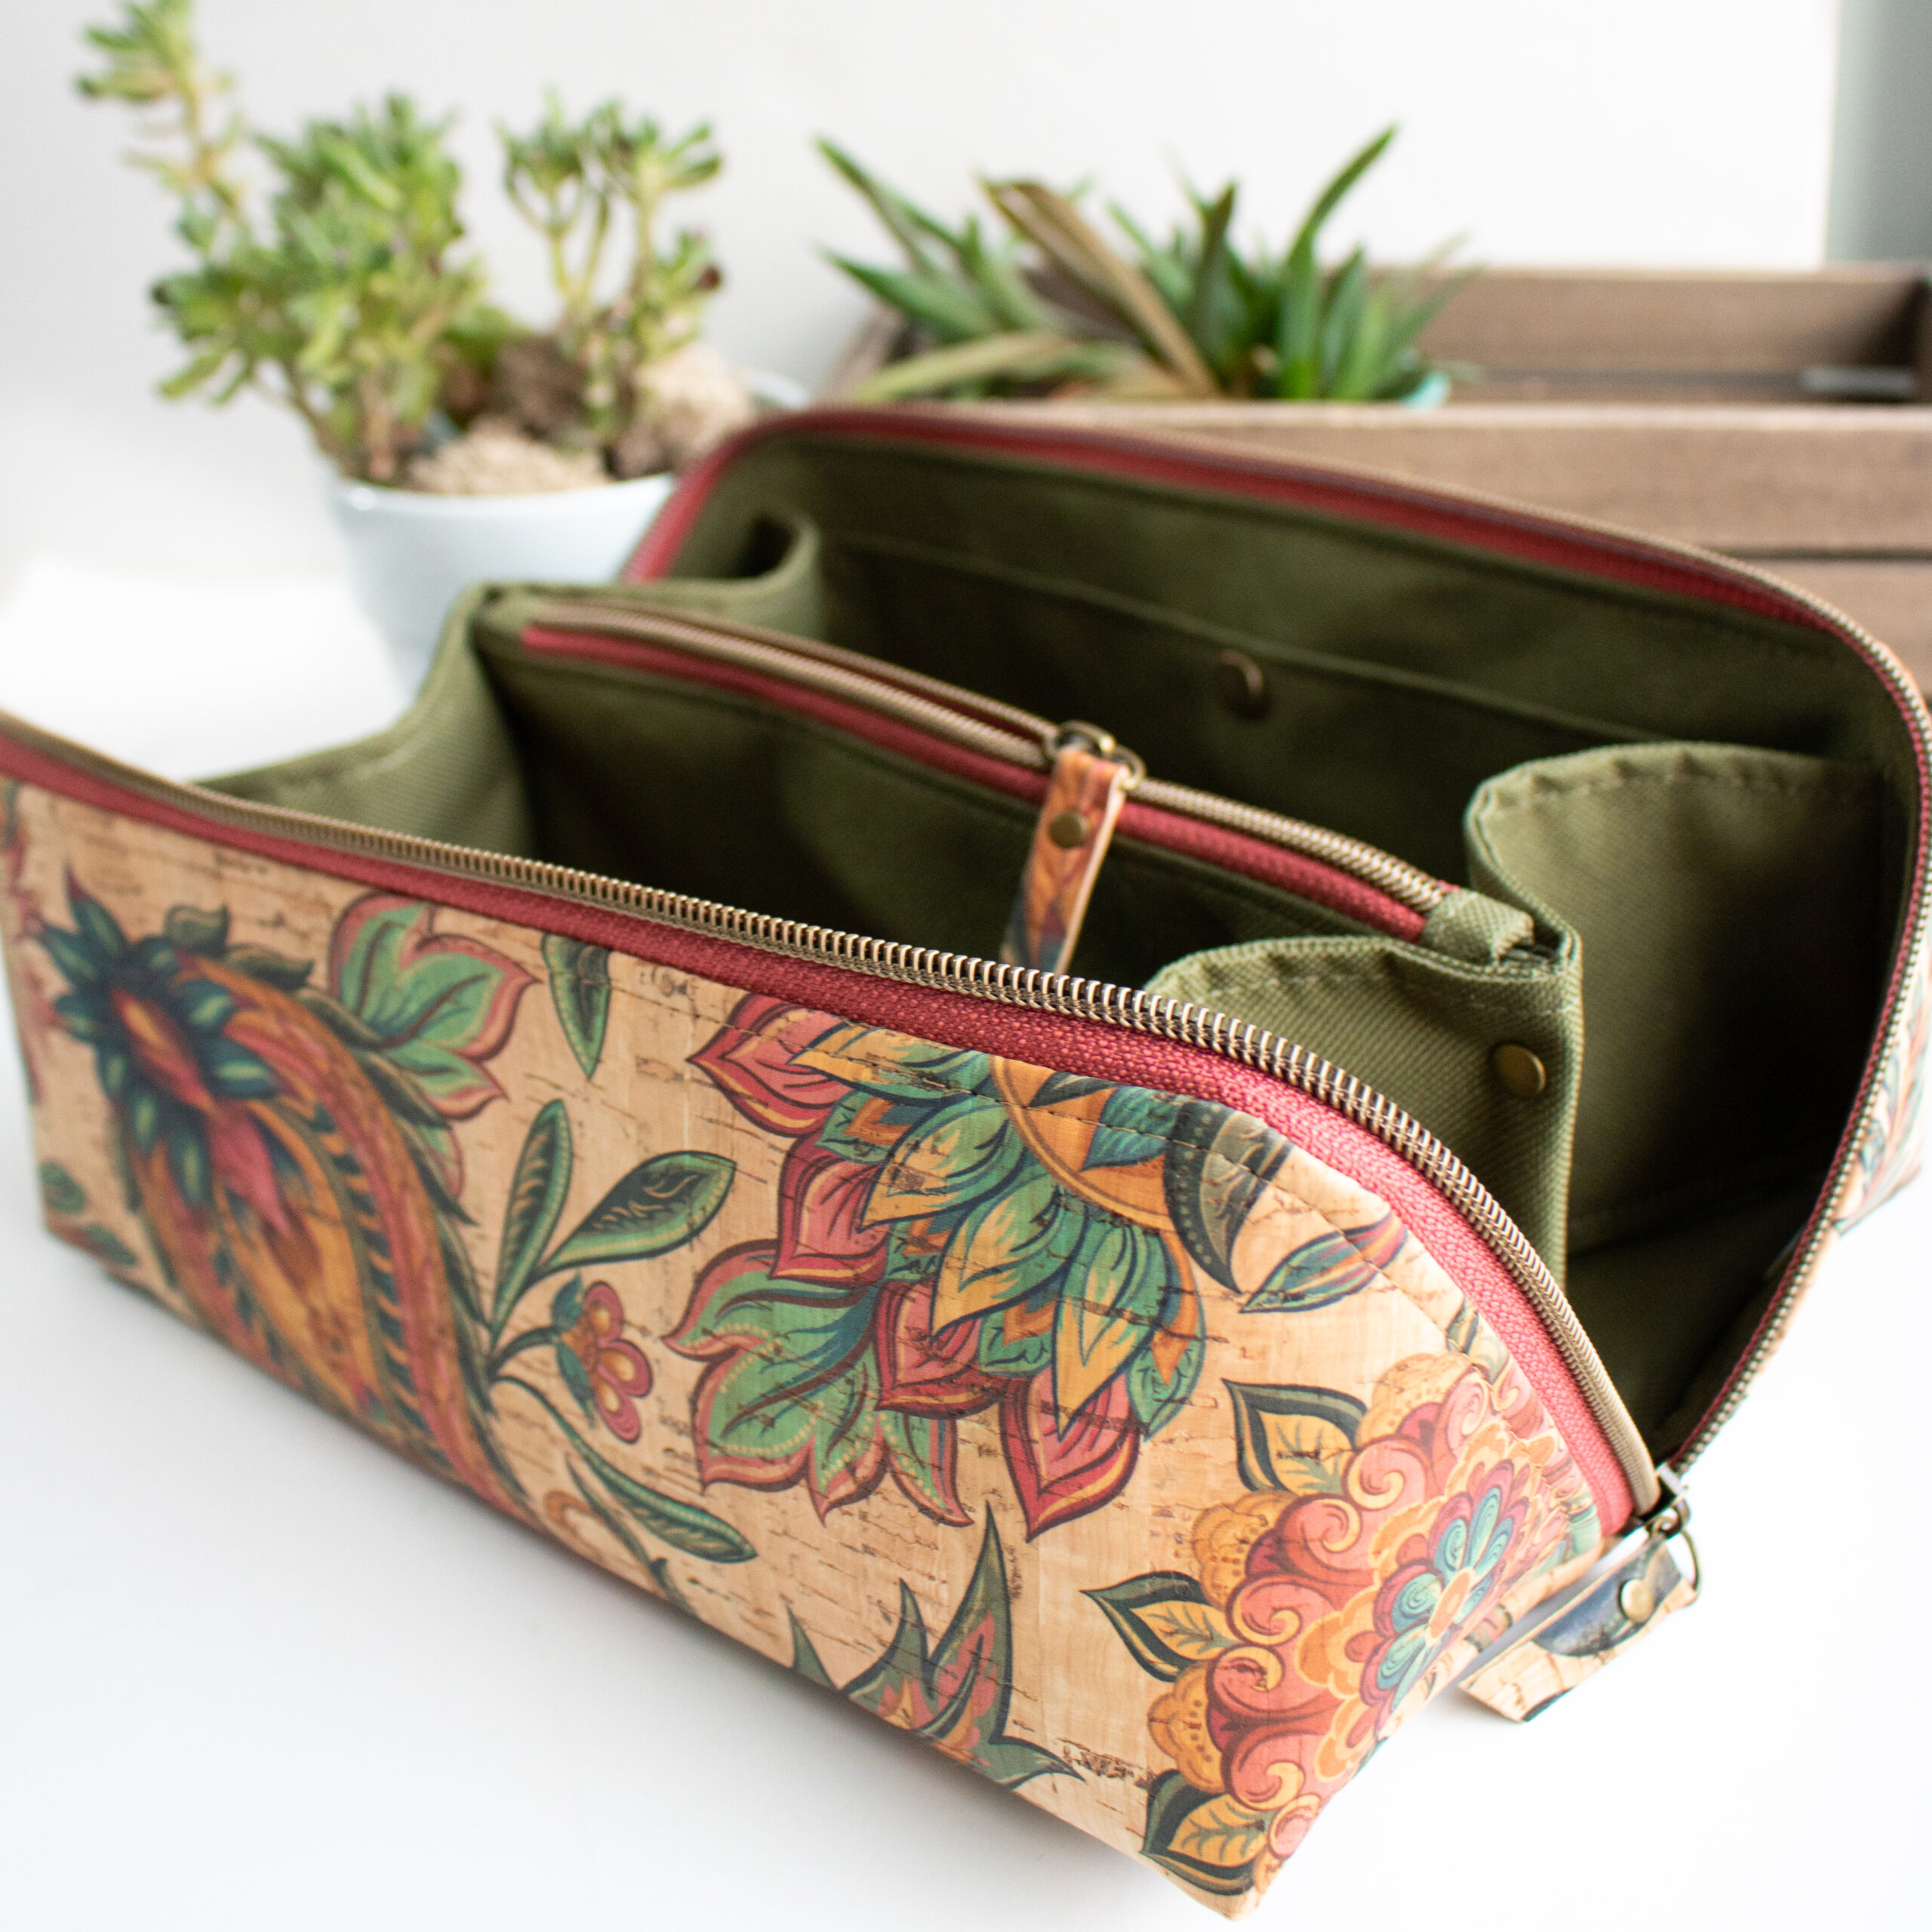
It’s been quite awhile since I’ve released a bag pattern, but I’m back with the Spring Roll Pouch! Just like my favorite food, the Spring Roll Pouch wraps up so much goodness in one little package. This multi-purpose accessory bag has a great rectangular shape and an angled zipper at the side, making the pouch open to twice its footprint! The main zipper opens to reveal a divided compartment with ample room for all of your craft supplies, cords, skin care and even toys!
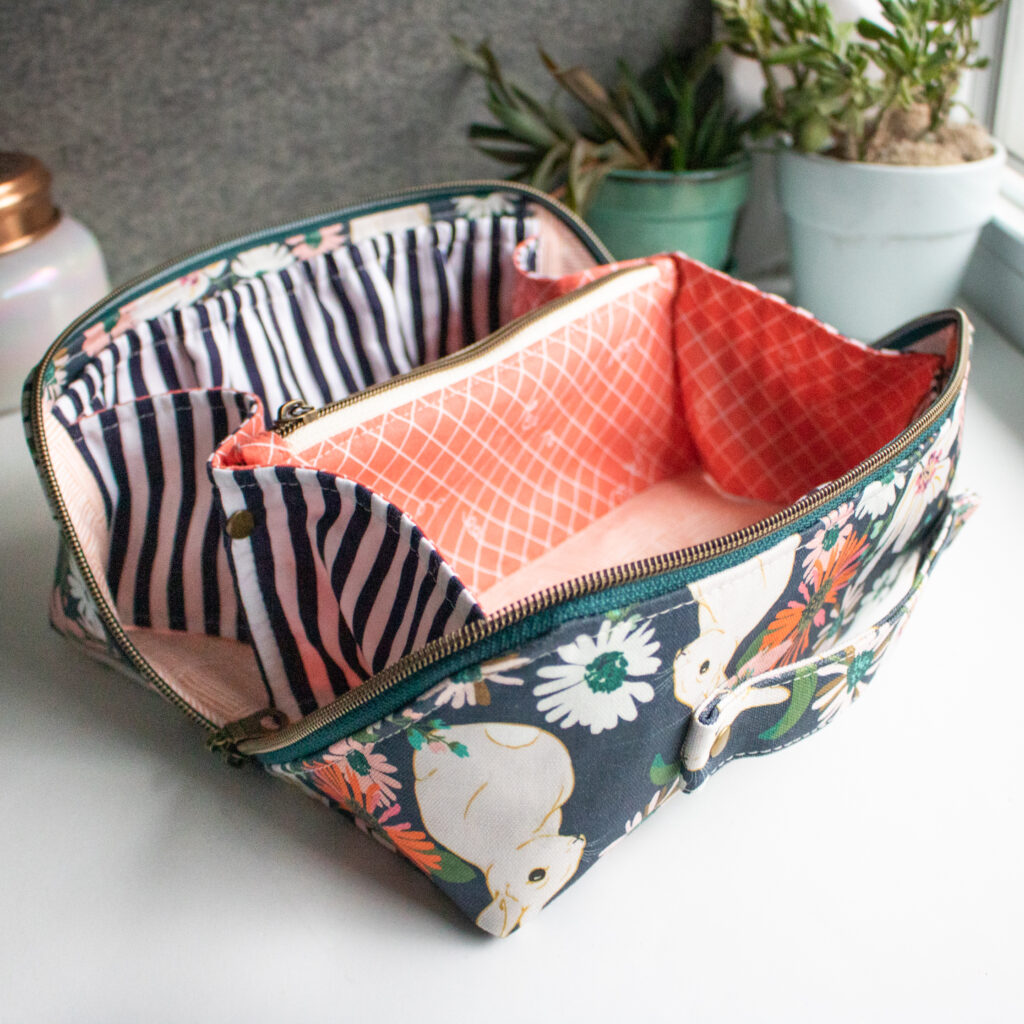
With a single piece exterior, this bag has been simplified with sleek style and minimal seams. There are four different inside options of the bag for you to mix and match for your needs. If you want to keep things basic, you can even leave them all off for a streamline version of the pouch. Best of all, the lining finishes with hidden seams for a clean and polished look.
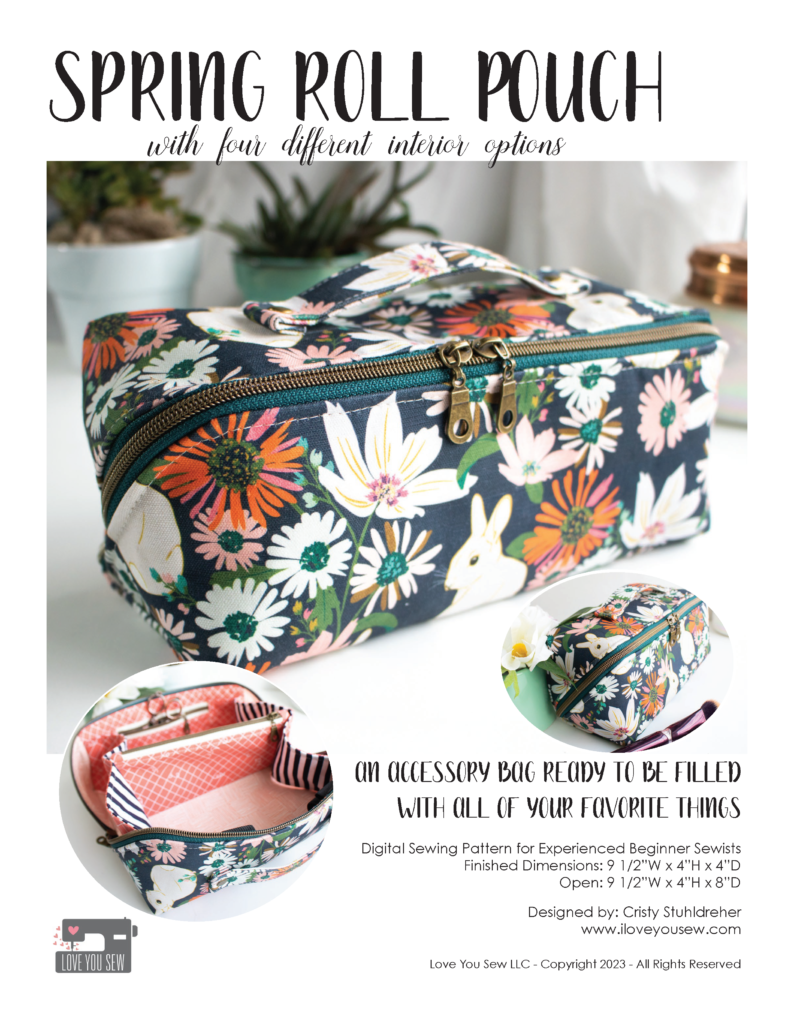
In this bag you will learn how to sew Y-seams (Dots are your friends!) This is when three seams will join together and its definitely needed in the lining. You will also use nylon zipper tape and learn several finishing techniques. This pattern shows how to make a divided compartment pocket and how to make other pocket styles.
Inspiration

When I saw this unique angled zipper and how it can be used to open a pouch to twice its initial footprint, I was intrigued! But of course, I wanted to make the design better than the cheap version I saw in the wild. This meant making it more sleek and most importantly, compatible for a domestic sewing machine.

As I was playing around with ideas, I wondered if it was possible to have a one-piece exterior….and it was! This keeps the Spring Roll Pouch streamline and with less seams, means less sewing. And less sewing, means some saved time! My other main objective was to have a clean finish. This means NO binding (I think you all suffered enough with the Christine Sling) and I wanted to make sure my next release was traditionally “birthed.” 😉
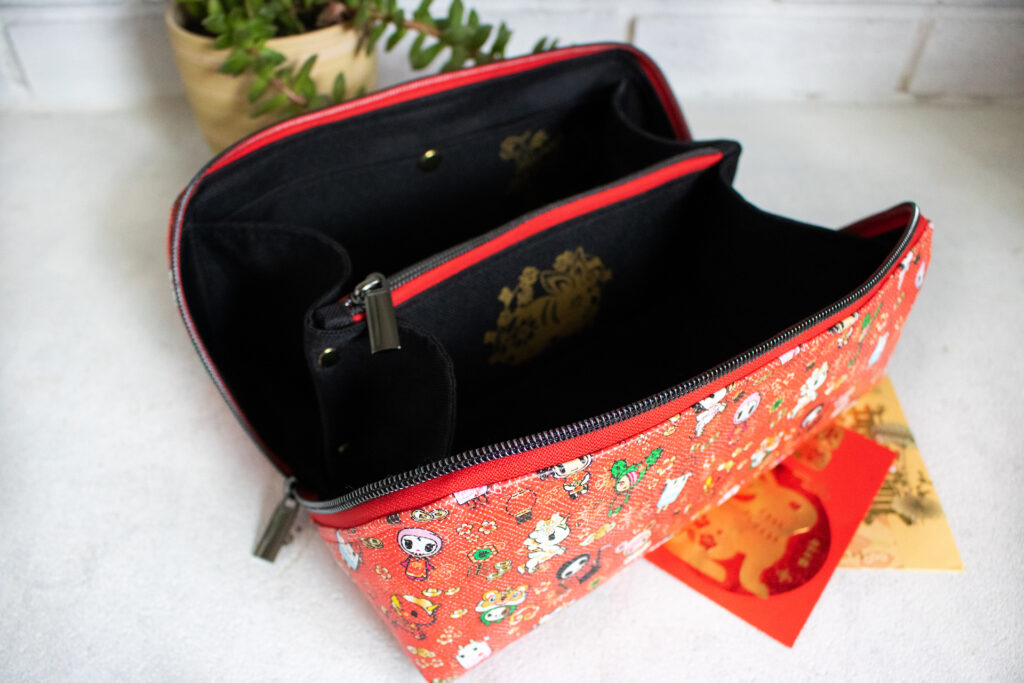
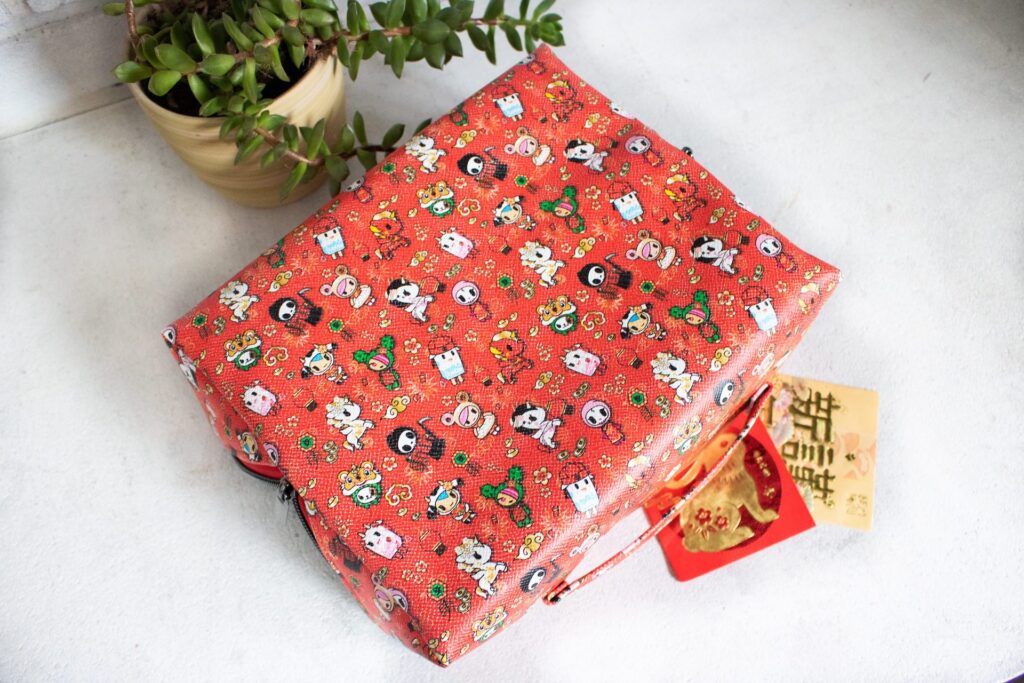
Even after figuring out the design and construction, the name is always the hardest part. But since the Lunar New Year was quickly approaching and I was thinking about all my favorite foods, this pouch reminded me of the yummy Spring Roll. With the bag opening wide and how it “rolls” back up, Spring Roll had to be the name.
Bag Features

  • Large Zipper Opening
  • Wide Handle
  • Divided Zipper Compartment
  • Clean Finish – No Bias Tape
  • Different Interior Options: Slip Pocket, Elastic Pocket, Flat Zipper Pocket, Elastic Slots
Materials Needed

FABRIC

HARDWARE

  • (1) 22” #5 Nylon Zipper Tape with (2) pulls (Idle Blooms, Wawak, Amazon, By Annie)
  • (1) 8” #5 Nylon Zipper Tape with (1) pull
  • (6) Sets of Rivets (8 mm post length) (optional)

The Spring Roll Pouch uses exactly 1 yd of zipper tape, if you choose the Flat Zipper Pocket option. Otherwise, you just need 30″ to complete the bag. I love using nylon zipper tape because of it’s versatility, color and finish options, and how I, personally, don’t need to switch out presser feet for the #5 width. Due to the trickiness of the zipper installation, I used nylon zipper so that it could easily be sewn across and not have to be mindful of ends and stoppers.

FRONT/BACK OPTIONS

  • Elastic Pocket – (1) 10” length of 1/4” Elastic
  • Slip Pocket- (1) 12.5mm (or smaller) Snap Set 
  • Zipper Pocket- (1) 6” #5 Nylon Zipper Tape with (1 pull)
  • Elastic Slots- (2) 6” length of 1/2”-1” wide Elastic

Based on your selection for the Front and Back of the Spring Roll Pouch, you’ll need these optional notions.
Fabric Recommendations

It’s important to know that this pattern was written for canvas and quilt cotton fabrics. The bag making world is huge and there are SO many different fabrics out there. With that number of fabrics combined with all the different types of interfacing, I always have to have some constraint or else the instructions would go on forever. As you select your fabrics, keep in mind the weight, structure and feel with the intended finished bag. Home decor and/or bottom-weight fabrics such as cotton or linen blend canvas, duck cloth, and denim with weights of ~ 6-8 oz/sq yard would be great for the Main Fabric. The Lining is based on quilt cotton and woven fabric with similar weights of ~4 oz/sq yard, such as linen or chambray.

You can use quilt batting, sew-in fleece, or foam with the Main fabric. The quilt batting/sew-In fleece will you a softer, pliable feel while helping to cover the feel of the inside seams. The foam will provide more structure and loft, with more of that “plump” look. If you are using foam, the interior can be made completely with Lining fabric. But if you opt to use batting or sew-in fleece, use Main Fabric for the Base and Front/Back pieces to get added stability.
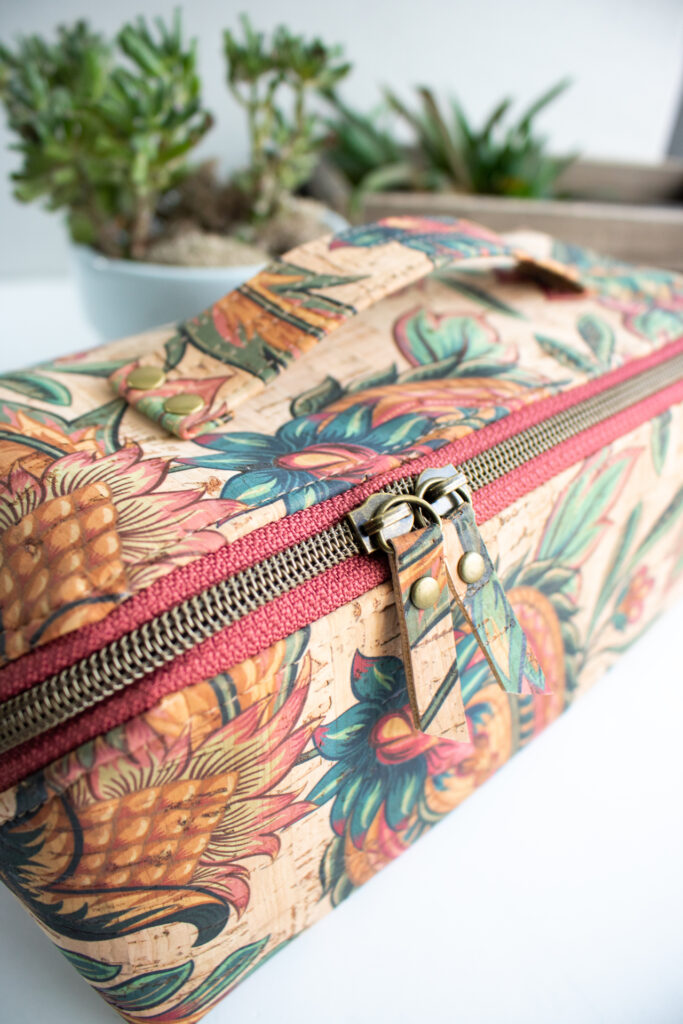
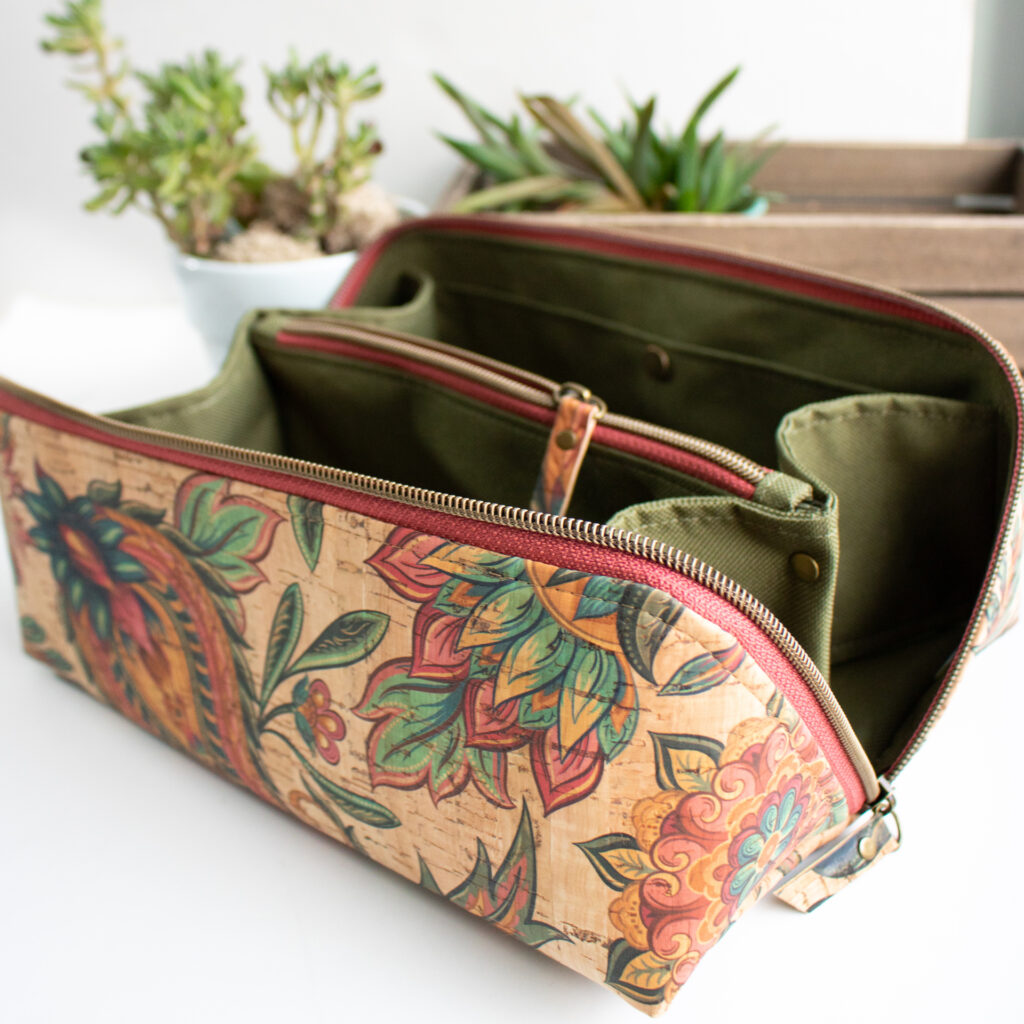
If you decide to use vinyl, cork, leather or other fabrics with a heavier hand, you may be able to omit interfacing, but still optionally use batting for soft structure. You can also possibly omit interfacing on the interior of the bag if using waterproof canvas, oilcloth, and other coated fabrics with a heavier hand. Due to the angled zipper and the trickiness of closing the pouch, it is recommended to NOT use vinyl, cork or leather as your Base or Front/Back pieces.

With the dimensions I used, I’m very proud that you can use 1/2 yards of fabric and if you want to get scrappy, the interior can be made from fat quarters. The Lunar New Year custom vinyl and cork fabrics I used were sold as 18″ long rolls and the exterior fits right on…even with a little room to spare!

As I was working on this pattern, you KNOW I had to use plenty of other substrates to see how they would look and handle with the Spring Roll Pouch…all in the name of research, right?!? The cork and vinyl versions definitely come together quickly with the omission of interfacing. However, if you are new(er) to bag making, I HIGHLY recommend making your first bag with the canvas/quilt cotton combo.
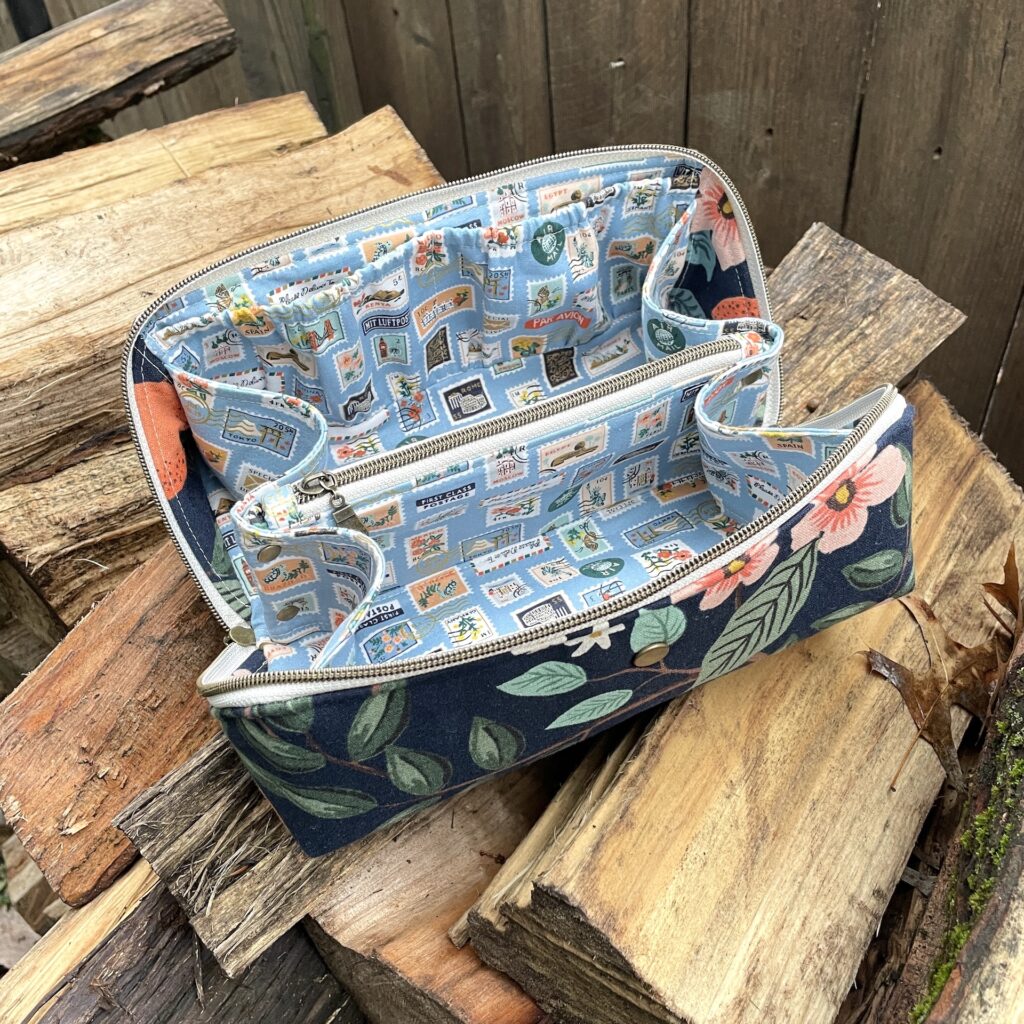
I’ve included lots of different versions in this post and the following are my favorite combinations as you select your fabrics:

  • Stamps Version
    • Main = Cotton/Linen Canvas with Soft & Stable Foam
    • Lining = Quilt Cotton with Canvas for Front/Back and Bases
    • Interfacing = Woven
  • Bunnies Version
    • Main = Cotton/Linen Canvas with Cotton Quilt Batting
    • Lining = Quilt Cotton with Canvas for Front/Back and Bases
    • Interfacing = Woven
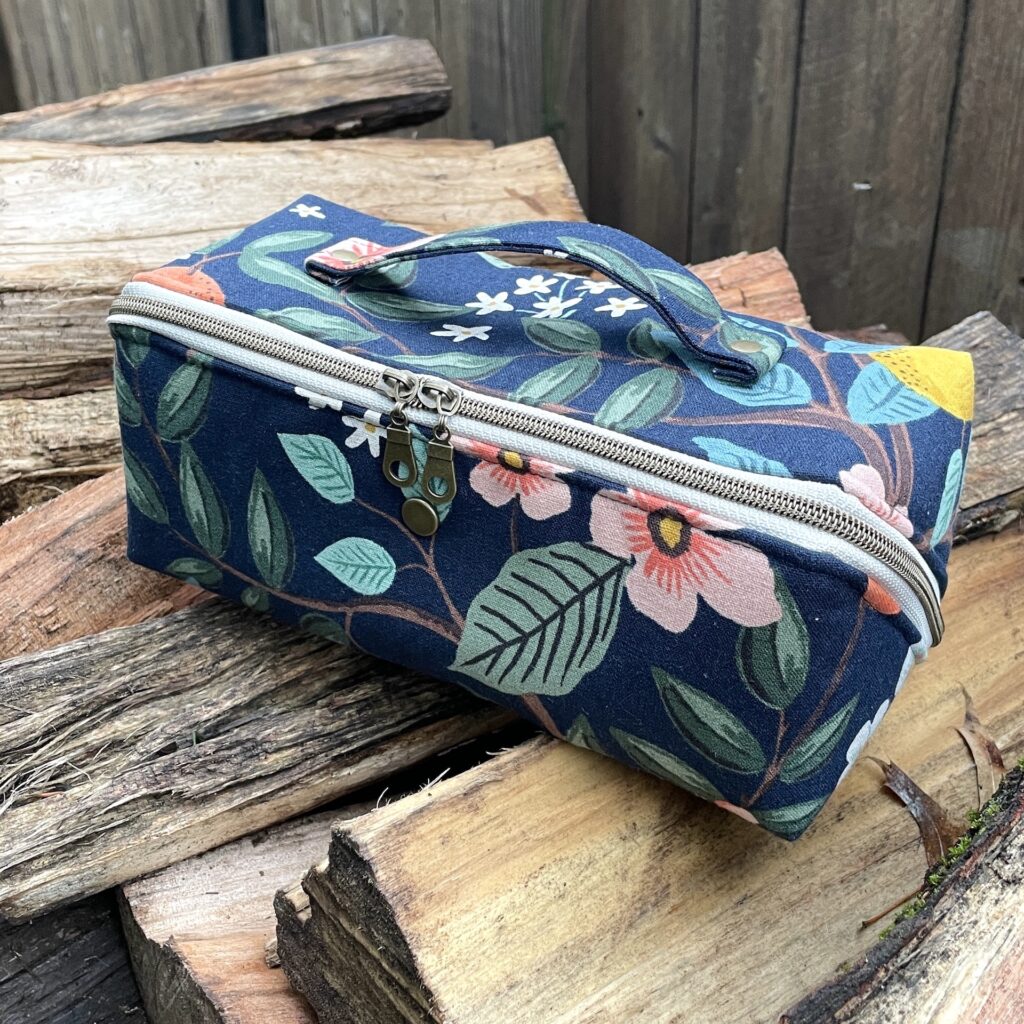
  • Navy Floral Version
    • Main = Cotton/Linen Canvas with Soft & Stable Foam
    • Lining = Quilt Cotton
    • Interfacing = Woven
  • Cranberry Vinyl Version
    • Main = Light Faux Leather
    • Lining = Ottertex Waterproof Canvas with Faux Leather
      • omitted inner lining of Divider Pocket, inner lining of Slip Pocket and inner Gussets
    • Interfacing = none
    • Handle = made with single fold
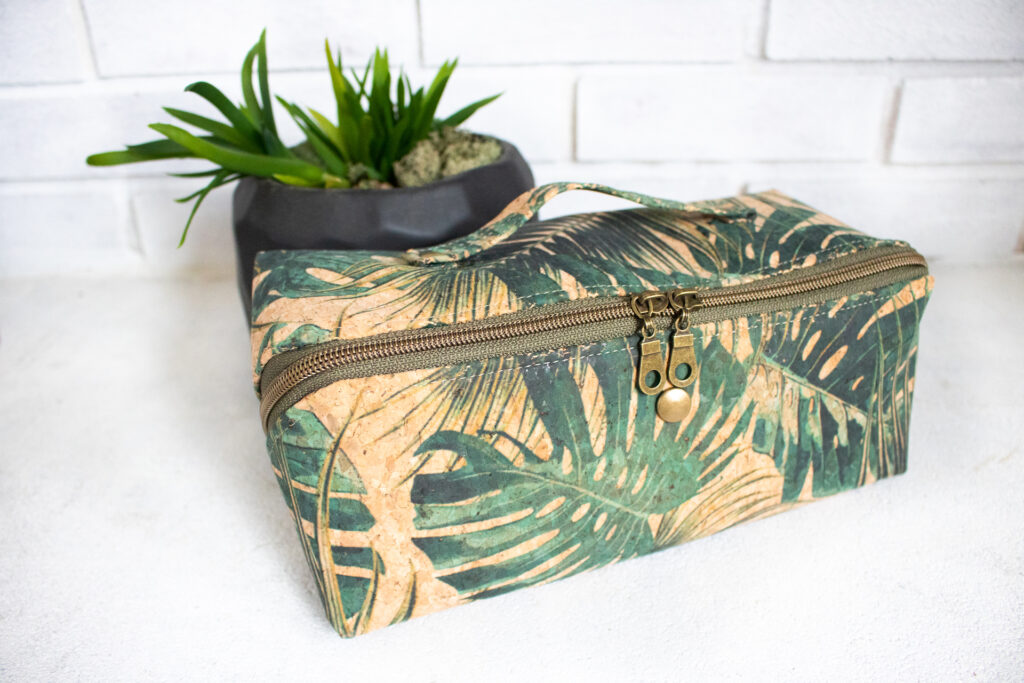
  • Cork Floral and Palm Versions
    • Main = Cork only (Portuguese made from Cork and Cloth)
    • Lining = Ottertex Waterproof Canvas
      • omitted inner lining of Divider Pocket, inner lining of Slip Pockets
    • Interfacing = none
    • Handle = made with single fold
  • Lunar New Year Version
    • Main = Vinyl only (custom printed from Sewful Therapy)
    • Lining = Ottertex Waterproof Canvas
      • omitted inner lining of Divider Pocket, Slip Pocket, and Flat Zipper Pocket
    • Interfacing = none
    • Handle = made with single fold

Construction

This bag was designed with a domestic sewing machine (I use a Juki 2010Q,) so a home machine with some heavier needles will do the trick. It is for an experienced beginner who is familiar with sewing zippers, basting, and y-seams. Although this bag looks complicated, the steps are more simple that you would imagine!
Currently, there is one video on my Love You Sew YouTube Channel that takes you through the most difficult parts of closing the Spring Roll Pouch, but I WILL make a full tutorial soon. Honestly, I didn’t think this pattern would be as popular as it has been and I try to direct my time and resources toward patterns that have a bigger customer base. Well, you definitely let me know and I’ll be working on it this upcoming week.
I hope all of you love the Spring Roll Pouch as much as I have loved writing and designing the pattern for you! Don’t forget to tag your social media posts with #springrollpouch and #loveyousew patterns so I can see your beautiful makes!

Happy Sewing,

Cristy

*This post may contain affiliate links for which I may receive a small commission that helps me run this website. I appreciate all of your support.
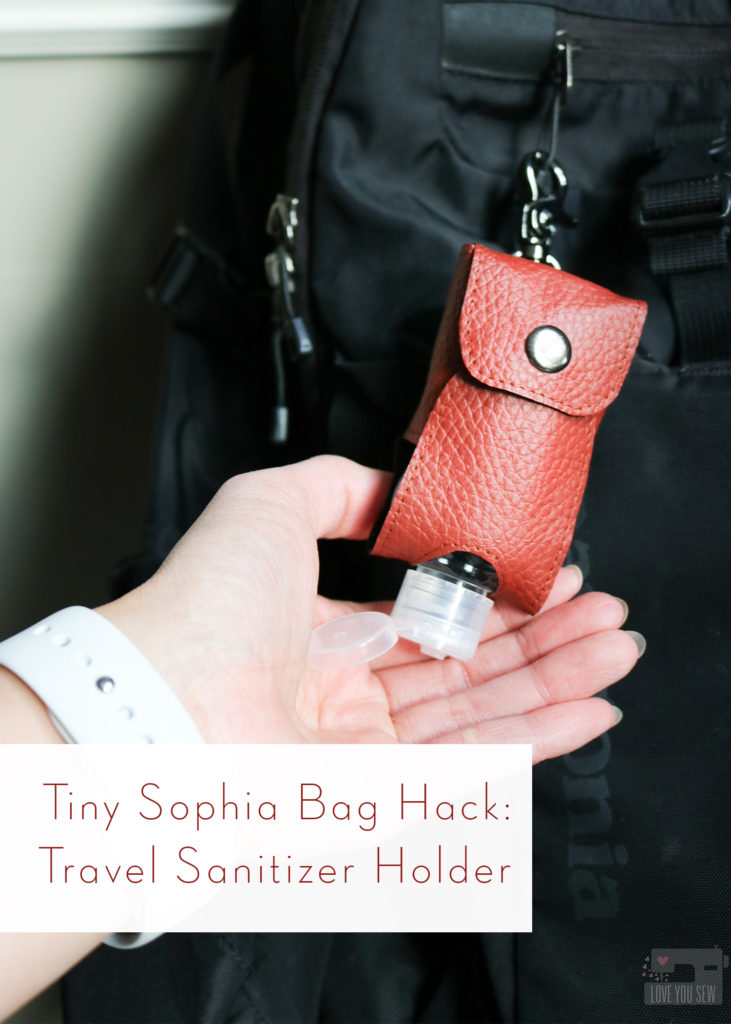
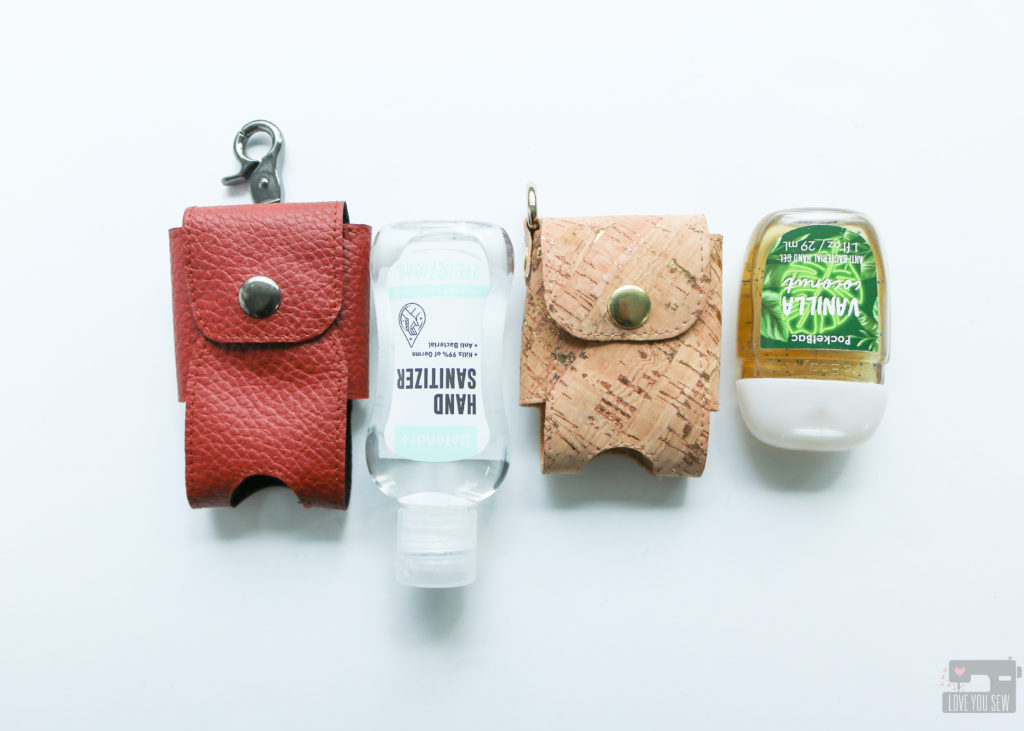
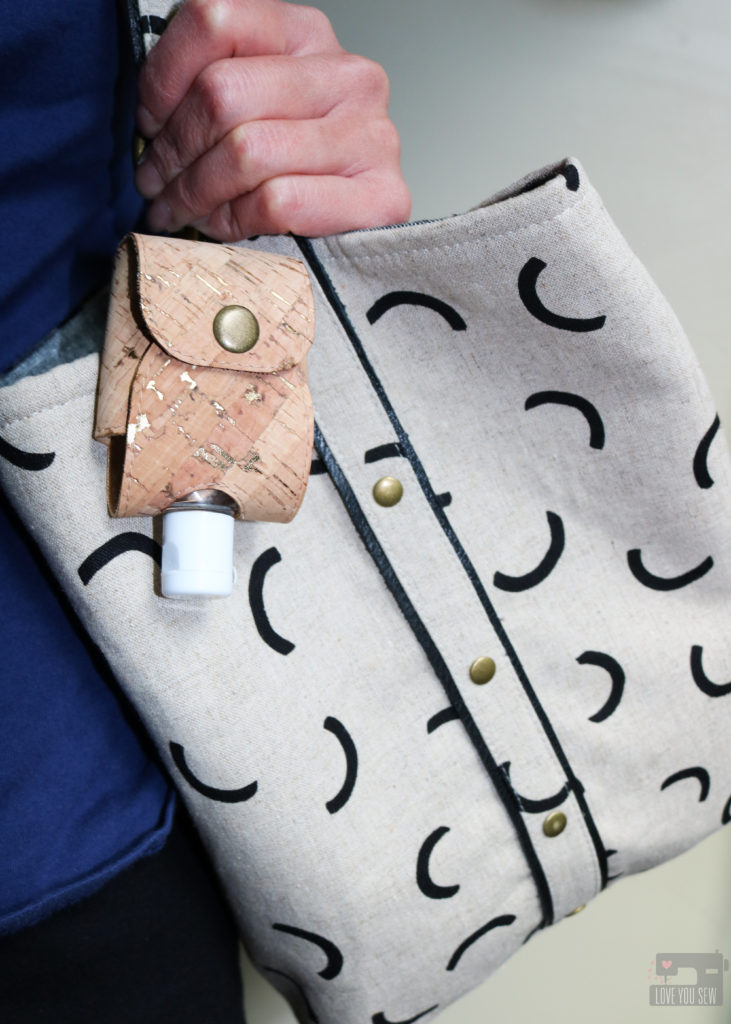
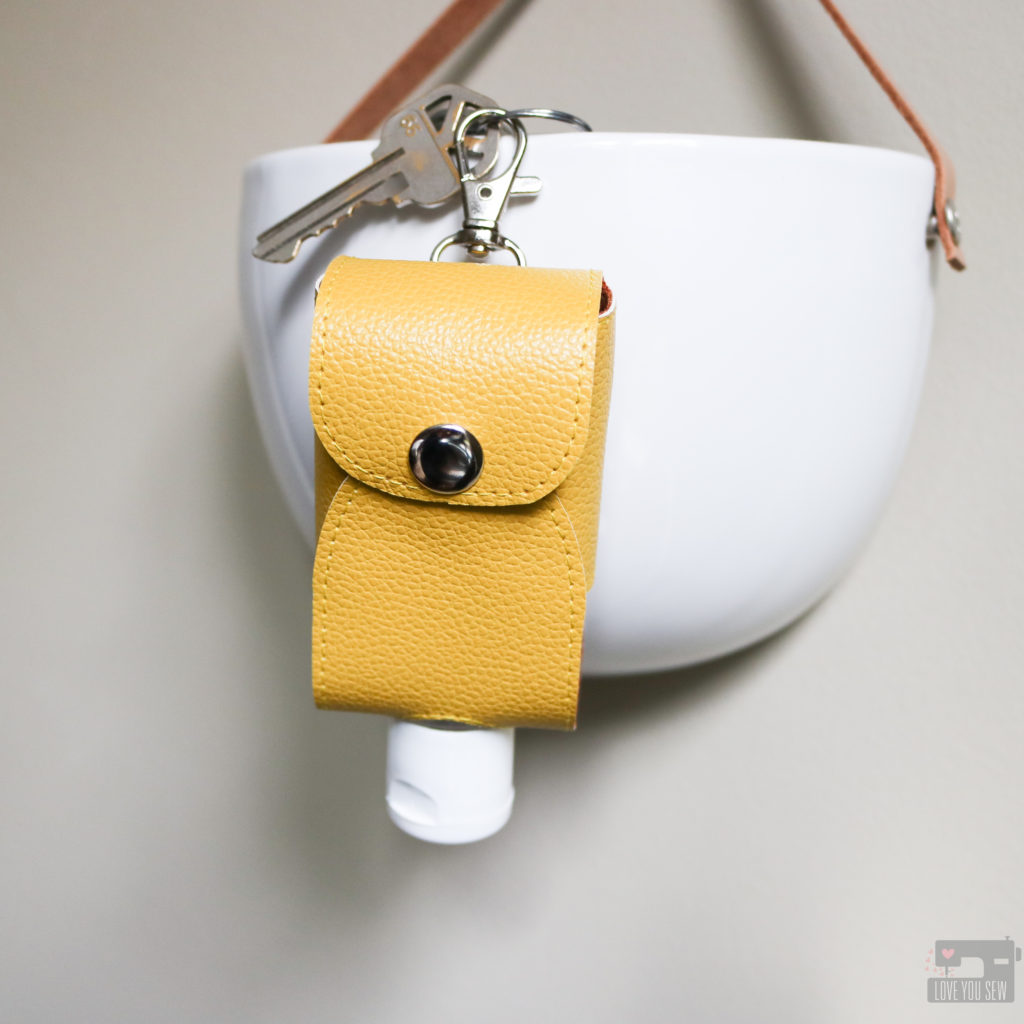
Tiny Sophia Bag HACK: Travel Sanitizer Holder

As the world goes on, we know washing hands and using sanitizer is LIFE right now. It is SO important to stay healthy and protect ourselves against all germs – pandemic or not!  Washing hands with soap is the preferred way to keep them clean, but when there isn’t a sink around hand sanitizer is a decent alternative. You can read more about the benefits of hand-washing here with the CDC.

Like all of you, I want to keep my family safe and have sanitizer on them at all times – especially as school opened up for my kids. But of course, supplies have been (and still are) very bare.  Trying to find those manufactured jelly style travel sanitizer holders was just impossible. That’s when I took it upon myself to make cases for my kids and husband.

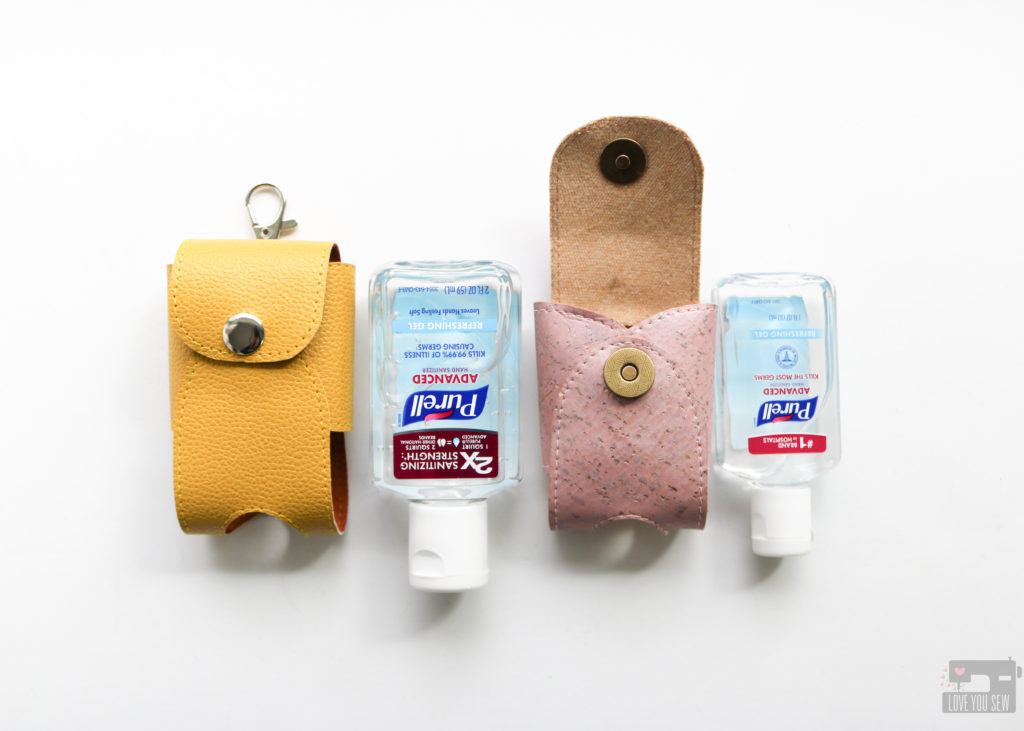
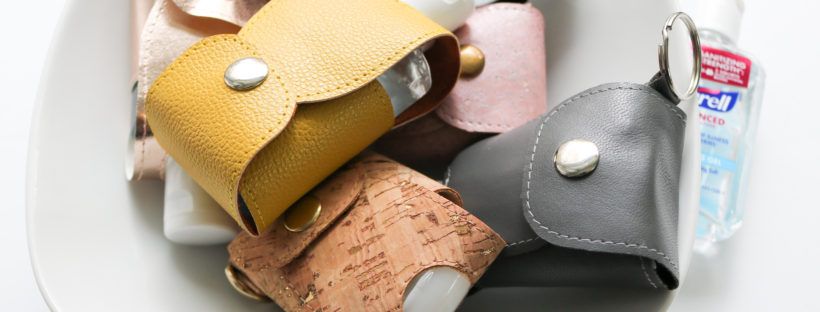
Different size travel bottles

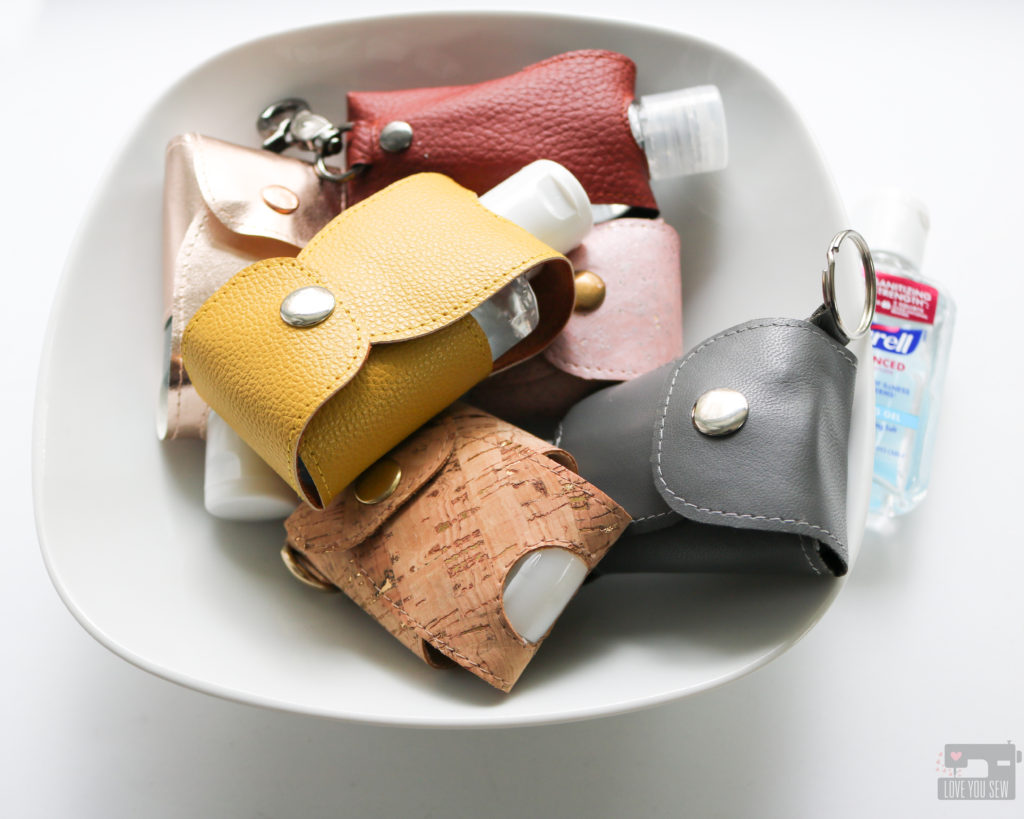
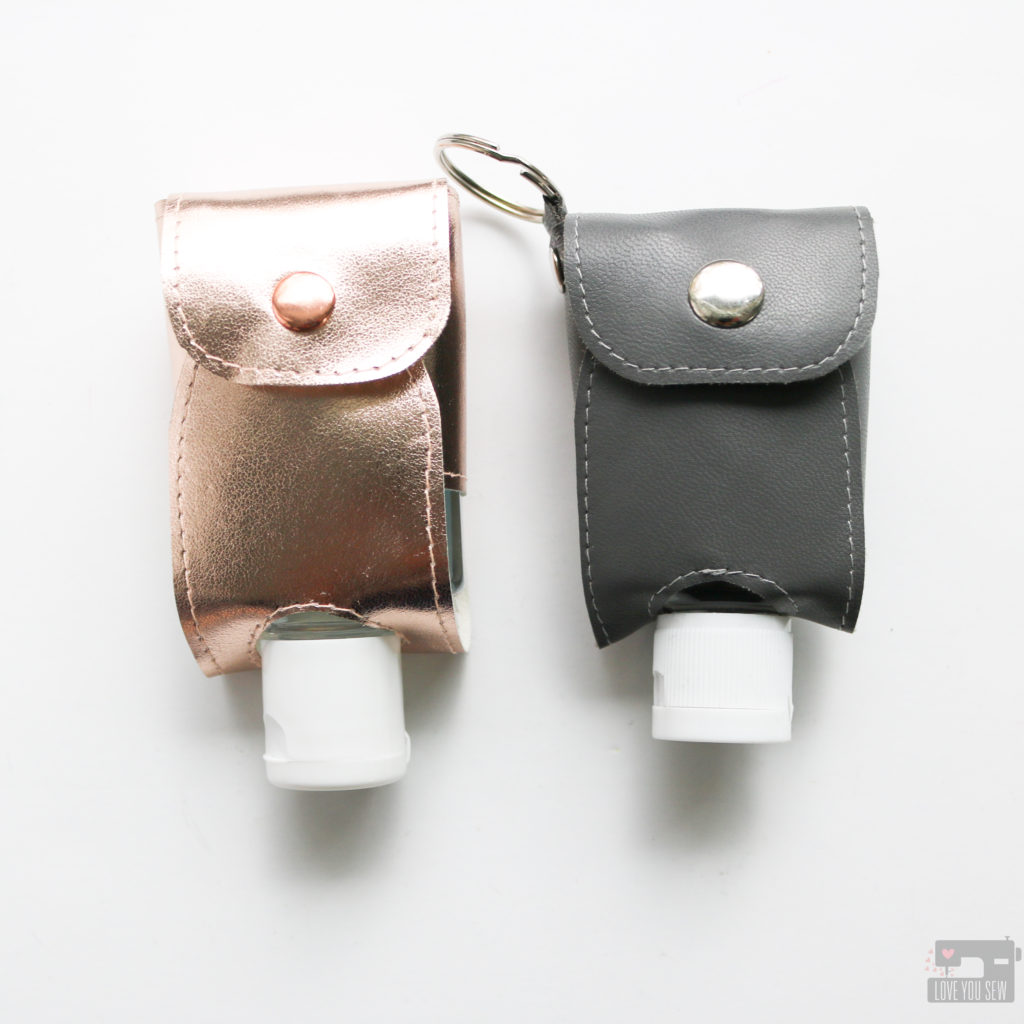
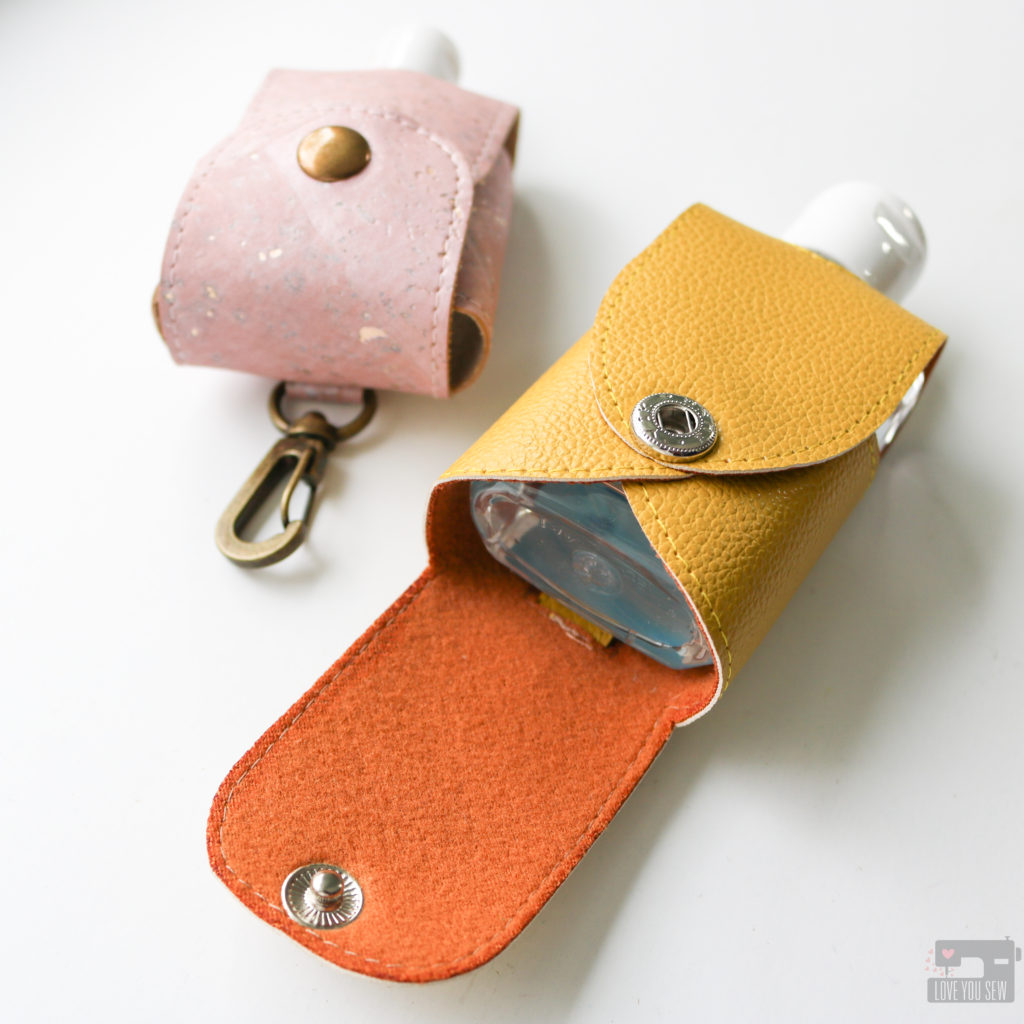
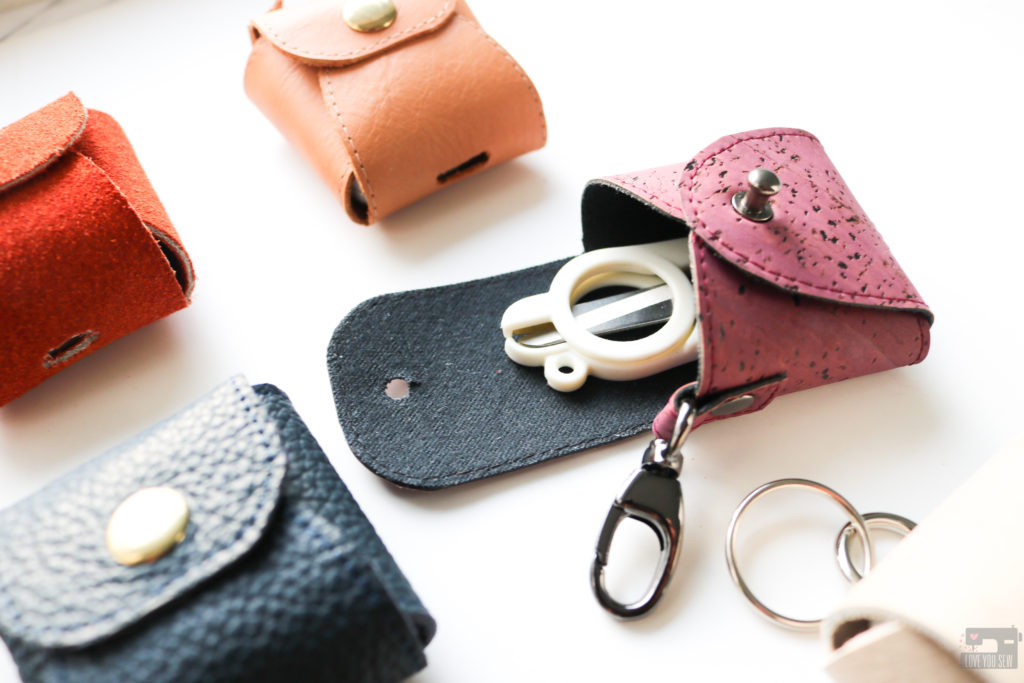
It turns out that the Tiny Sophia Bag (read about it here) is the right width to hold most travel sanitizers! The height just needs to be adjusted and that’s where this hack was born. This hack will take you through the steps to transform your #tinypurse to a sanitizer holder for most 1-2 oz travel bottles.  I tried to find a variety of bottles to test so you can see how they fit and decided to create one version for bottles from 1-1.6 oz and then another version that can fit 2 oz bottles.  If you are using bottles different from any of those pictured, be sure to check the template against your sanitizer BEFORE cutting any material.

2 oz Holder vs 1 oz Holder


Materials Needed:

  • The Tiny Sophia Bag pattern – found here
  • Ruler
  • Extra paper
  • Marking Instrument
  • Clear Tape

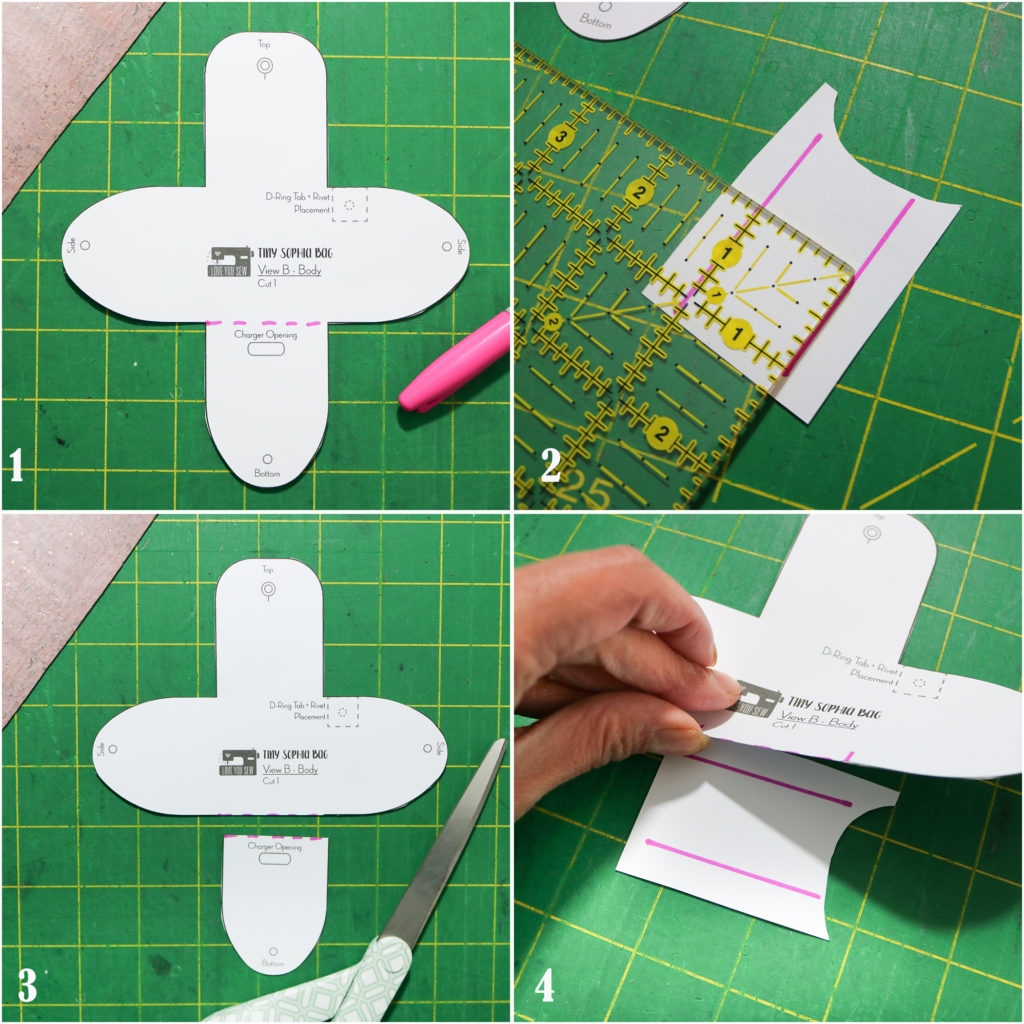
Tutorial

***Please note there are adjustments depending on whether you are making a holder for a 1.0-1.6 oz. bottle versus a 2 oz. bottle.   Please read instructions carefully.

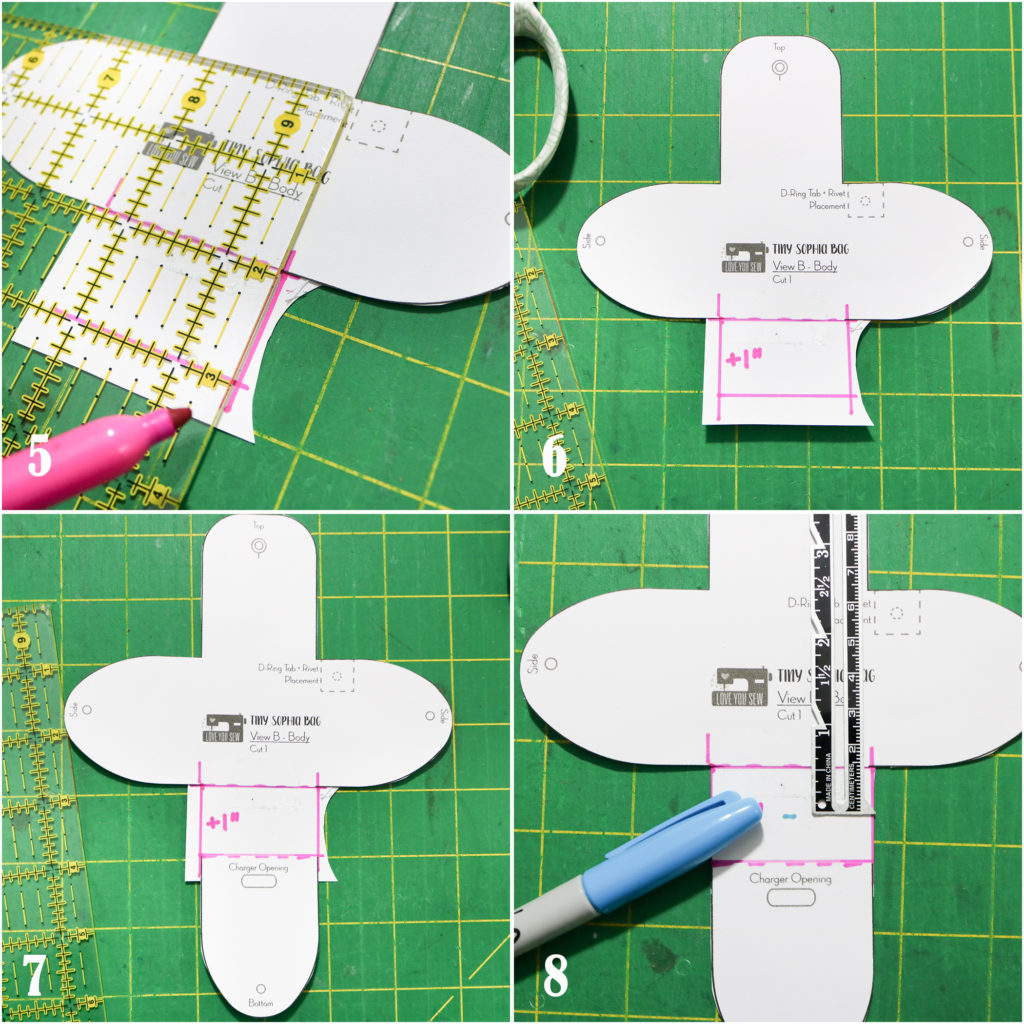
1. Cut the pattern template out per instructions. Mark the cut line along where the bottom flap meets the sides.

2. Take a scrap piece of paper (wider than the bottom flap) and mark a 1″ high extension for 1-1.6 oz. sanitizer bottles. *If you have a 2 oz. bottle, you will want to mark a 2″ high extension.

3. Cut the bottom flap off the bag template following your markings

4. Line up the top of the pattern along the extension and tape into place.

5. Take a ruler and mark the right side of the extension aligning it to the Top flap’s side edge.

6. Repeat on the left side of the extension.

7. Line up the bottom flap to the lower side of the extension making sure it matches the side markings.

8. Trim away the excess paper.  Mark a line 1/2″ from the top of the extension. *If you are making a 2 oz. bottle holder, mark a line 1″ from the top of the extension.

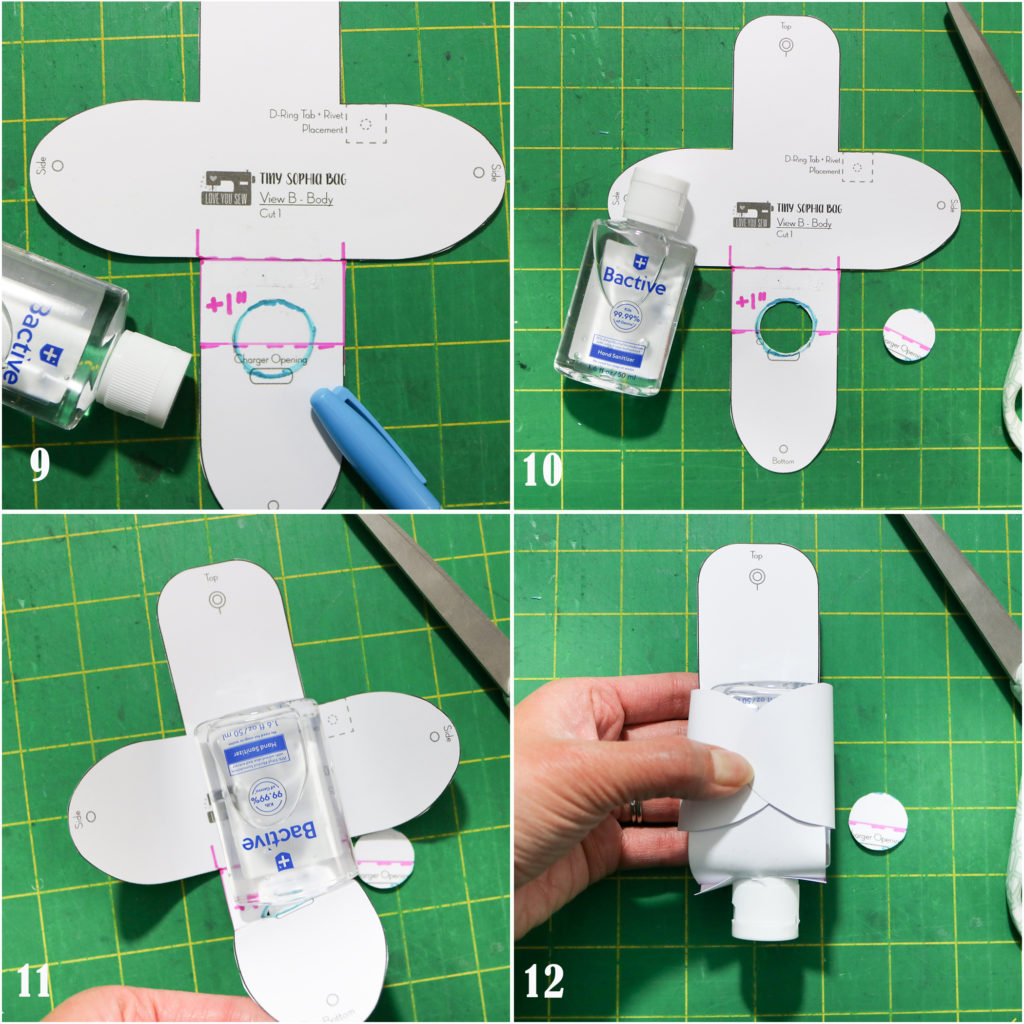
9. Use a sanitizer bottle cap as your opening.  (This replaces the Charger Opening.)  Center it vertically on the template and place it just under mark made in the previous step.  Trace.

10. Carefully cut out the circle with paper scissors.

11. Check that the sanitizer bottle you want to use fits through the opening on the template. Adjust as needed.

12.  Check that the template fits around the bottle by aligning the hardware holes.  Adjust as needed.  Once you are satisfied with the fit, follow the steps in The Tiny Sophia Bag to finish your  travel sanitizer holder!

Notes:

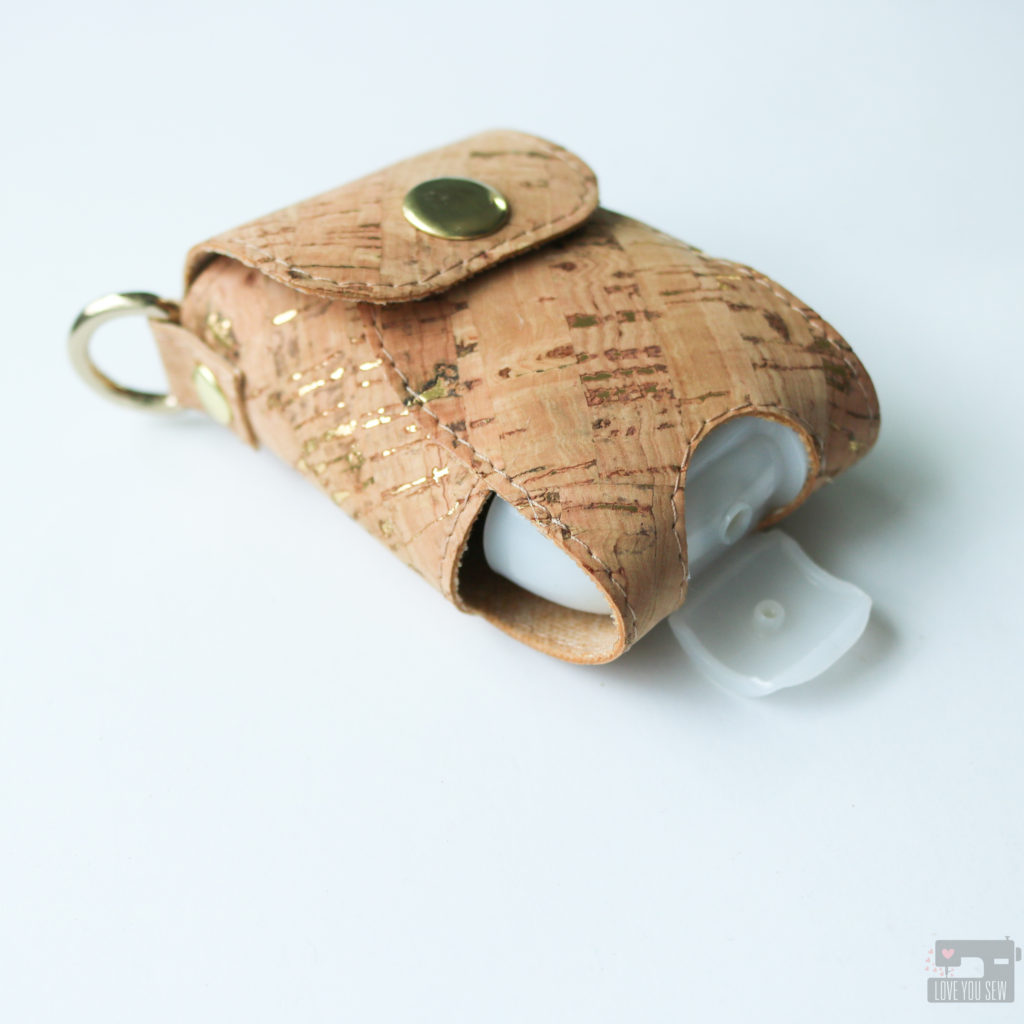
This cork version uses the 1 oz adjustment, but if I were to make it again just for this style of sanitizer bottle from Bath & Body Works, I would make a slightly wider opening to accommodate  that wider flip-cap.

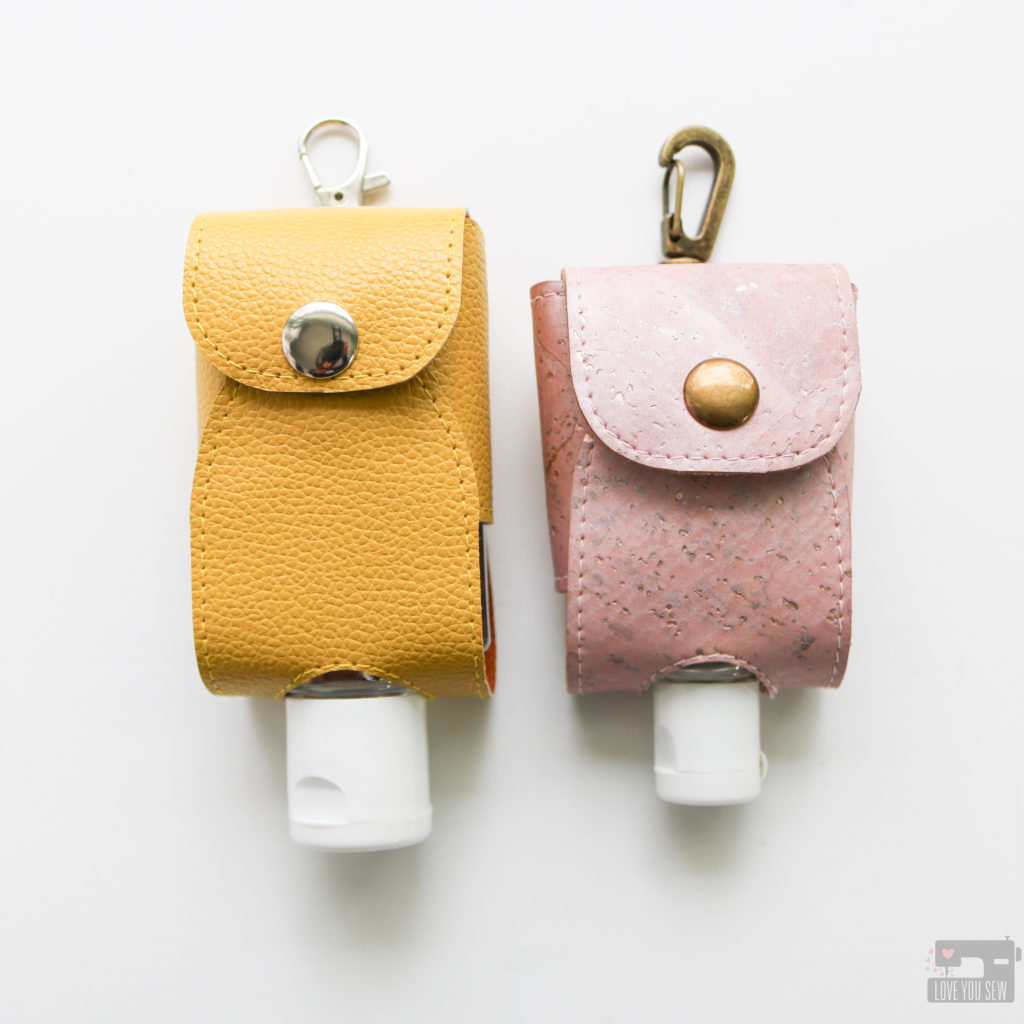
I added stitching to all of my samples in this post, but you don’t have to.  Using faux leather with felt backings like these pictured above leave no fraying and make this a fast and simple project.
With the holidays ahead, these will make such great gifts!  So I will switch up the hardware to swivel clasps on the back so they can hang easily from key chains, purses and backpacks.
Where to find supplies:

  • For Cork or Faux Leather, I’m a big fan of Sew Sweetness.  Shipping is flat-rate, fast and I think a great deal!
  • For real leather and a variety of finishes, TanneryNYC has remnant bags.  I received small – medium sized cuts and was able to make several Tiny Sophia Bags out of the surprise shipment. These are high quality pieces of soft leather.
  • I love Emmaline Bags and By Annie’s hardware, but if you are looking for a value set for kids, I recently bought these (pictured on yellow case) and these from Amazon.
  • For Snaps, I used spring style ones from Gold Star tool, but recently fell in love with these Rivet Magnets from Kam Snaps (as seen with the pink cork version above.)


I hope you enjoy this hack and find it useful in our current environment.  Please drop a comment and let me know what you think!


Hugs and Stitches,

Cristy


This post may contain affiliate links.  Any earnings go right back into powering this website.  Please read my Disclosures here.

Introducing The Tiny Sophia Bag

We are in the thick of the holiday season and I thought I did some pretty good seasonal planning.  I made gifts for my nieces and nephew early since I went to visit them in November and even got my fancy holiday dress finished by my husband’s birthday a few weeks ago.  But then I shared my Tiny Sophia Bag with all of you on Instagram and my feed (DMs too!) filled up with requests for this pattern.  You caught me in a moment of weakness because I said, “Sure, why not?!  This is probably the time when you would like this pattern the most!”  So why not add another “thing” to the list…famous last words. Lol!

You can purchase the Tiny Sophia Bag here.

If you have been following my stories on IG, I shared these itty bitty purses by Jaquemus which I’ve been seeing all over the fashion reports.  Although completely useless as an actual purse (and WAY too expensive *eyeroll*) I still wanted one…but of course, in my own DIY way!  Spoiler alert – my way is MUCH more cost effective.

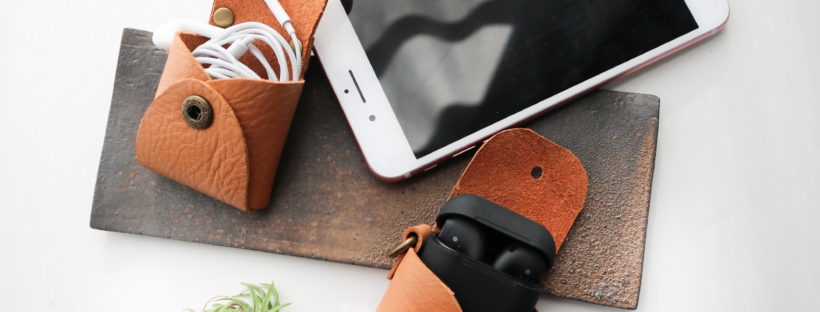
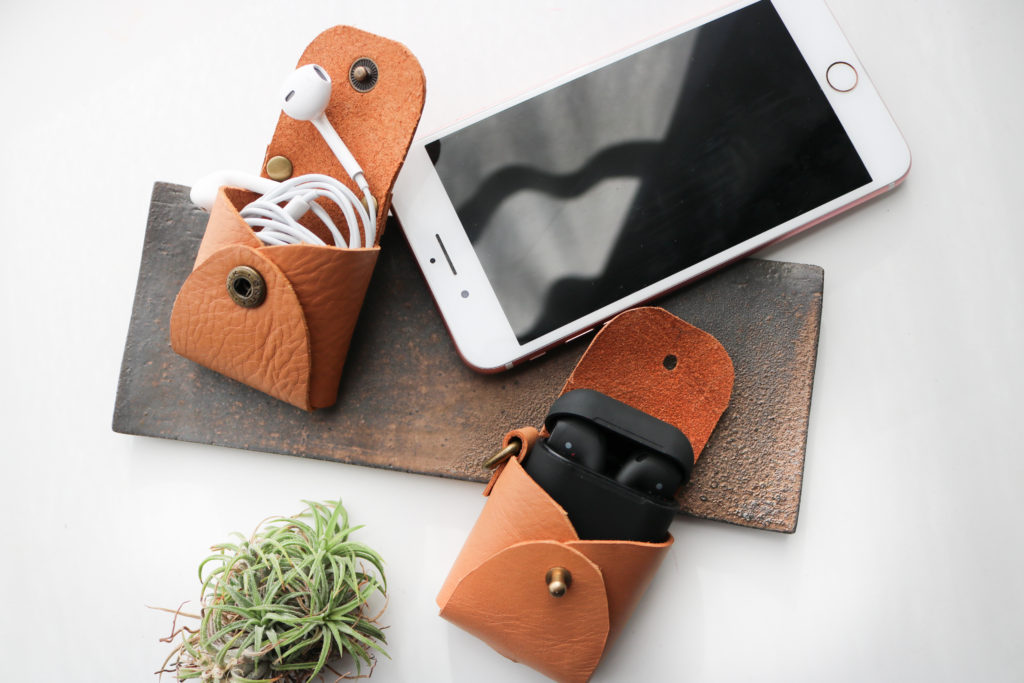
Over the summer, I toyed around with some paper templates to make a tiny bag for fun, but nothing really came out of it.  Then a visit back east to see my family made me really notice the wireless ear pods my brother was wearing.  Shortly after that, Lizzo came out on the red carpet with a tiny Valentino bag!  Combine these events and it made me wonder if the pods had a carrying case…aaaand if that case could also be a purse!

Namesake

As I was developing this pattern and making all of the prototypes, I knew this bag would be named after my niece, Sophia.  (All of my bag patterns are named after one of my nieces.)  Miss Sophia is a petite lil’ lady and the absolute CUTEST…just like this bag!  She is always game for a little fun and adventure, which makes her a great travel companion.  Since her dad was also part of the inspiration, it’s only fitting that this bag is named after her.

View B

Features

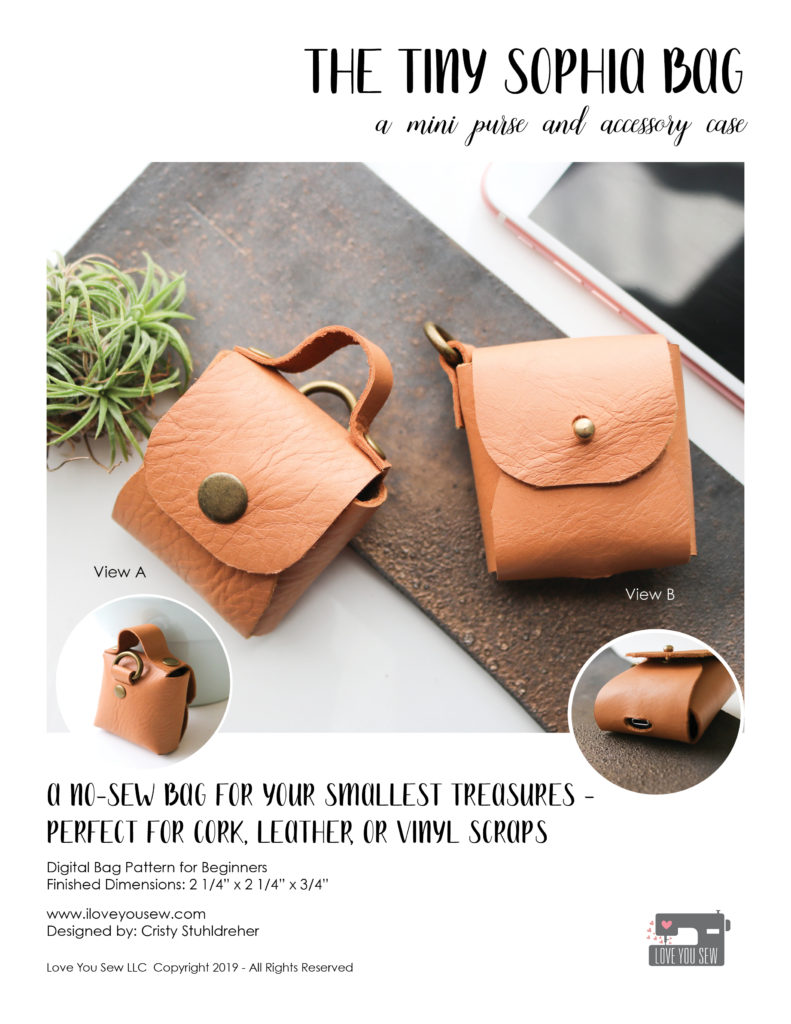
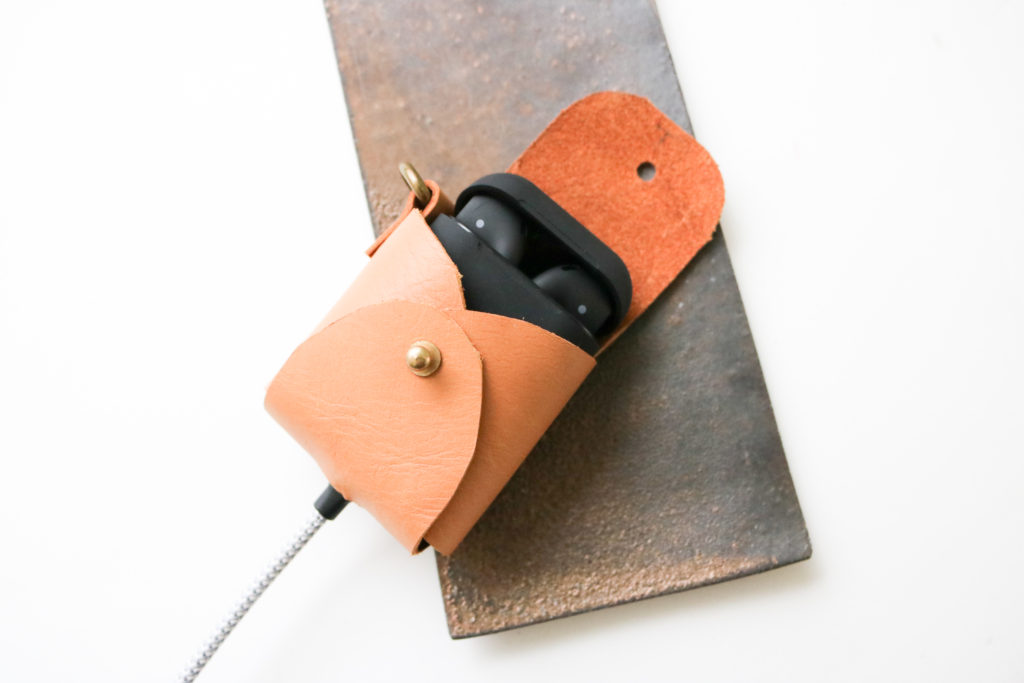
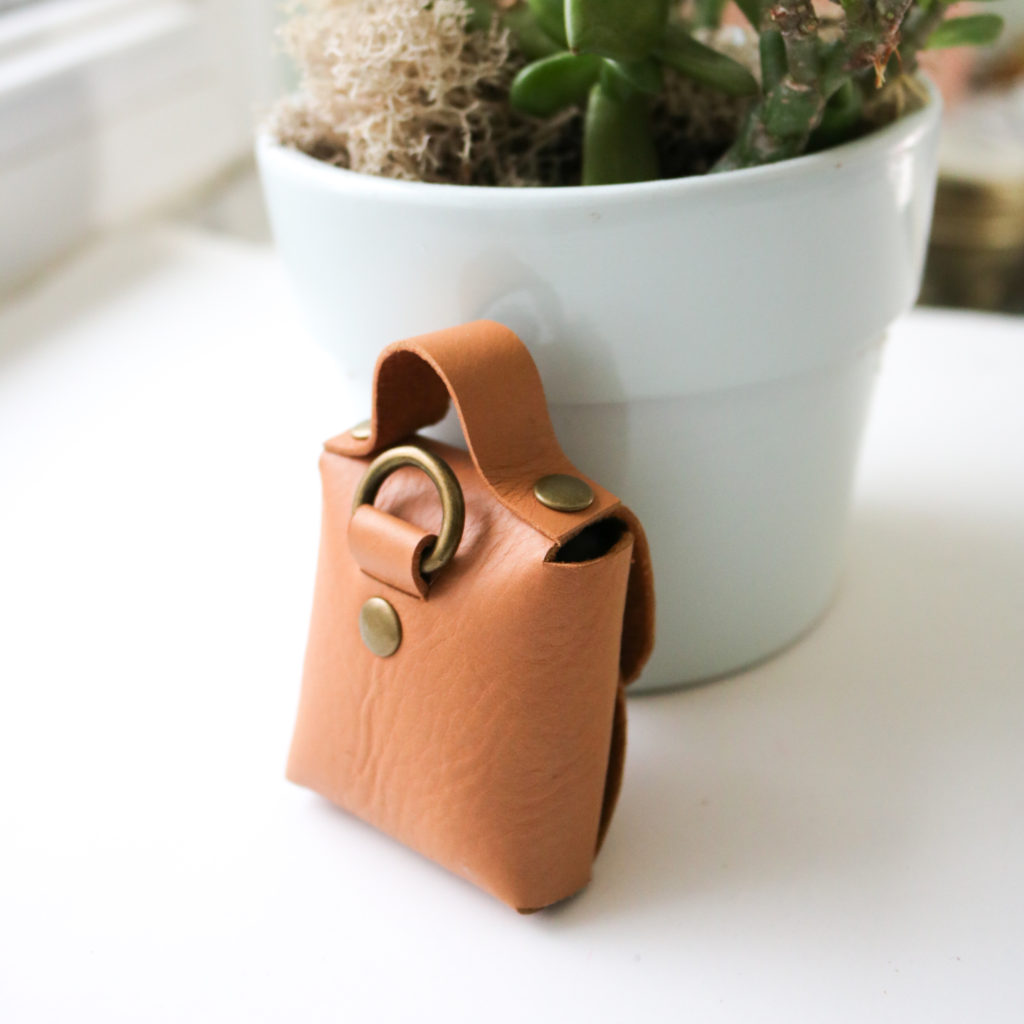
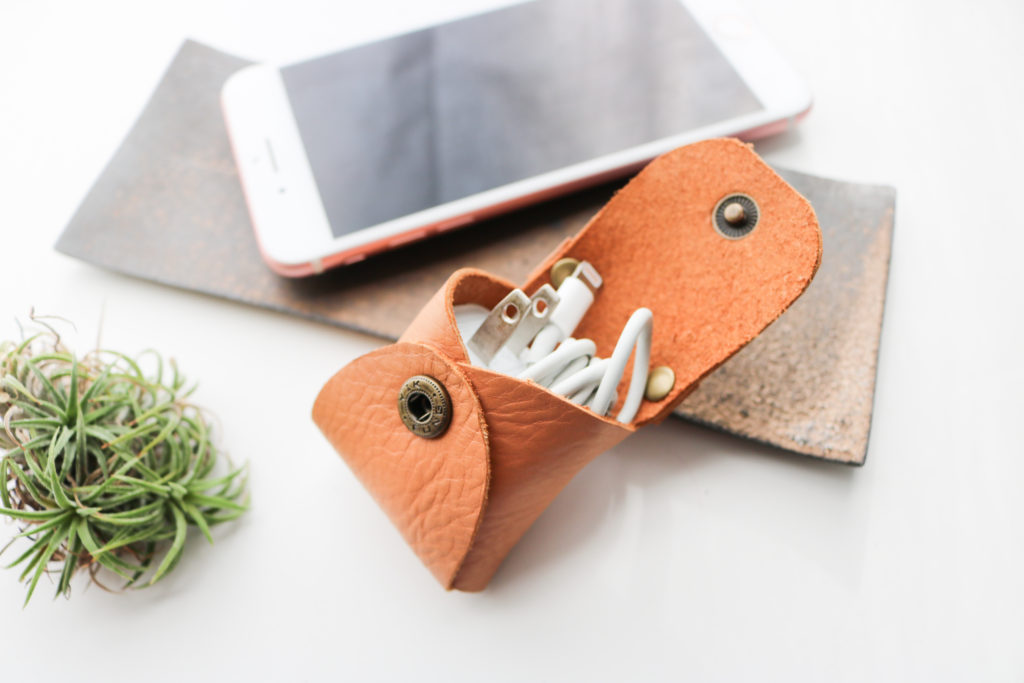
I know there are a ton of aftermarket pod cases out there and I thought a leather one would be chic and beautiful.  After a few hours (with my husband and boys at basketball practice,) I was able to draft a headphone case AND a bag by switching up the options.  This is no-sew pattern with two different views and the features can certainly be mixed and matched!

  • View A  “Mini Purse” – This has a strap on the top flap with a D-ring on the back and a snap closure.
  • View B “Accessory Case” – This has a bottom slot opening for a charger and the D-ring is set on the side.  A button stud is used as the closure.

View A

Hardware

The Tiny Sophia Bag requires rivet and snap or button stud installation.  This is assumed in the pattern (and I promise I will add more posts about how I install.)  I want to let you know my favorite suppliers:

  • Rivets:  For a long time, I set these just using just a hammer and anvil.  You can find these tools  in my shop, here.  Emmaline Bags carries a wide variety of sixes in different finishes. (Pictured above are the “small” rivets in Antique brass.)
  • Snaps: I’m a big fan of double-cap spring snaps from Gold Star Tool.  These are the same ones I used for my Kelly Anorak which you can find here. (On the cover photo, I have a size 20 ligne brass snap.)
  • Button Studs (screw on): These are THE best, since there are no special setting tools needed…just a screwdriver.  I grab most of mine from Amazon and I like the Tandy ones (when I’m in a pinch for timing since there is a store nearby.)  I think the 6mm/7mm head ones are a good proportion for this small bag.  (The 8mm head studs are used in my Kelly Waist Bag pattern)

New SVG Files

A big addition to this pattern release is the inclusion of SVG (scalable vector graphic) files which you can use with most electronic cutting machines.  I’ve always imported images and traced my own files, but have never created ones from Illustrator before.  So, I was pleasantly surprised to see how this pattern cut on my machine!  I have an old Silhouette Cameo with a straight knife and the cork cut so well on setting #7.  It did not like leather though…I’m hoping the rotary blades do much better.  There are three files for the different views and an extra one to combine all of the features together.  Please let me know what you think about this new feature!

Cutting by Hand

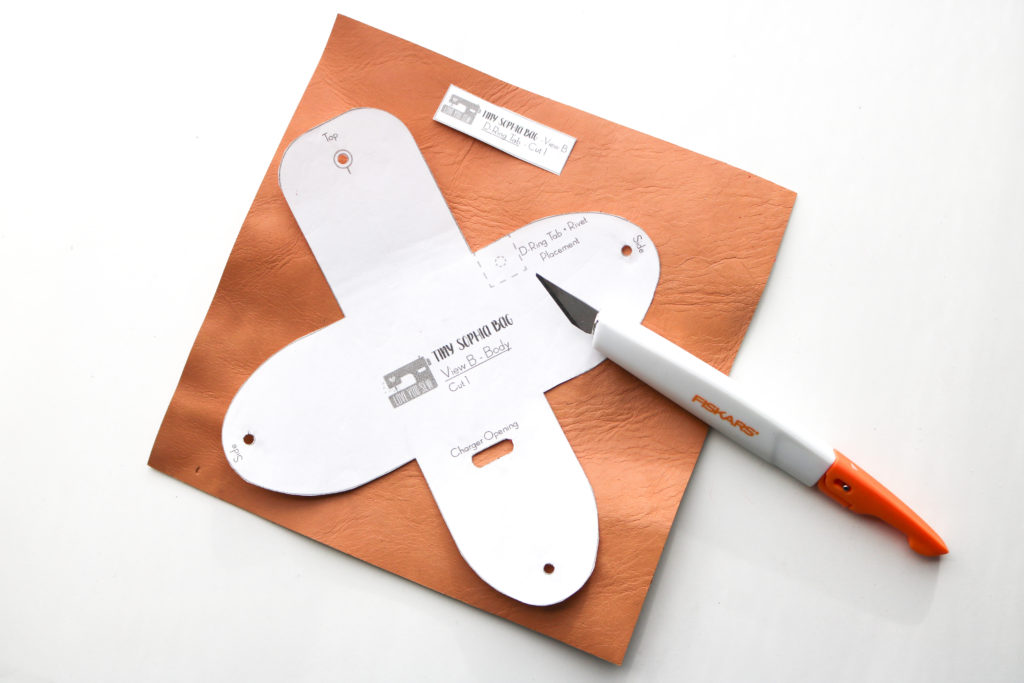
For those who don’t have a cutting machine, please know that I made all of these Tiny Sophia Bags by hand.  After making lots of leather bags and over a dozen of these minis, here are a few tips and tricks that will help you though.

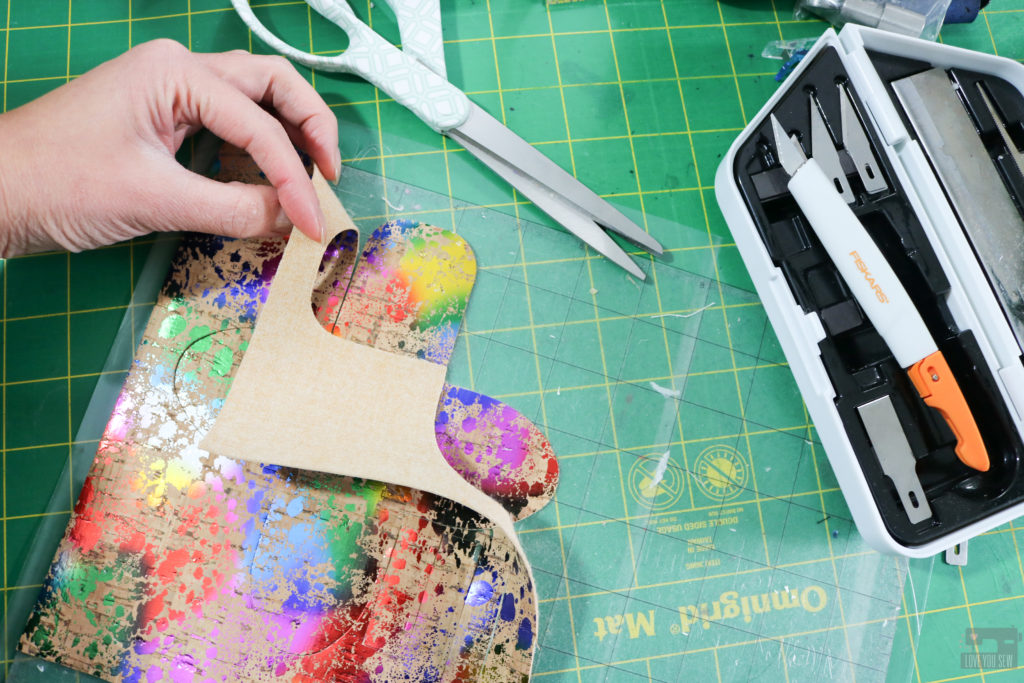
  • I LOVE this heavy duty multi-blade craft knife set by Fiskars.  The different blades are great depending on the type of cut you need to make…my fave is the 1/2″ straight edge one.
  • The pattern essentially looks like a cross, so the edges are right angles.  If you match up the sides with a ruler, you’ll have a smoother (and more accurate) cut.
  • Use a metal ruler with a craft knife for the straight edges.
  • For thicker leather/suede, you might want to use a box cutter for a stronger blade and press down on the ruler so it doesn’t drag.
  • Speaking of blades, remember to use a new one that’s nice and sharp for clean cuts.
  • With the curves, try to find household objects like bowls that match to balance your knife against.
  • For the back D-Ring opening, one of my testers said a button-hole cutter like this one is great for cutting the edges.

Customize

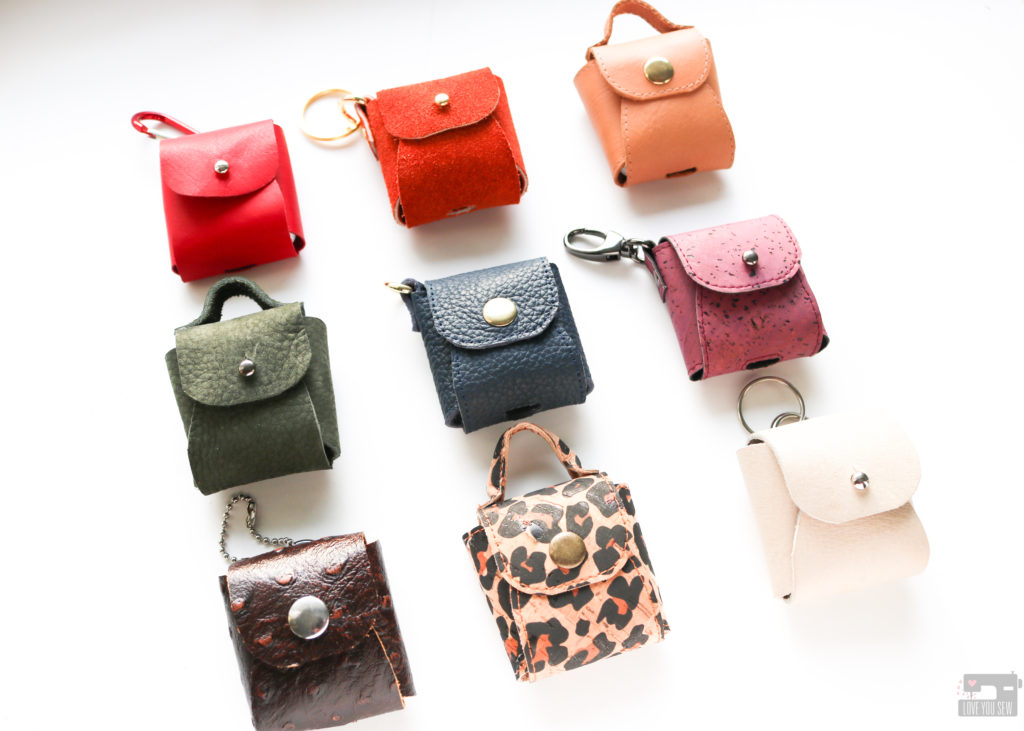
There are so many different ways to customize your Tiny Sophia Bag.  Luckily, I have a nice stash of leather scraps from thrifting and from friends.  You can use leather, suede, faux leather, and even cork!  Based on the thickness of your substrate, you may have to adjust the position of the holes which is also covered in the the pattern 😉

Check out #TheTinySophiaBag on social media to see all of the different versions.  I like the extra stitching around the edges to make the bag look more polished (don’t forget to use that leather needle and teflon or walking foot!)  Many of my testers used decorative hardware too.  I can’t wait to see what you do!

If you are ready for the cutest little purse, you can grab the Tiny Sophia Bag pattern, here.  Use it to carry your trinkets, coins, and all the smartphone accessories.  One of my testers mad bags for her daughters’ dolls!  I’m adding one of these on my Christmas tree and will use it later to hang off my purse for my own headphones.

How would you use your Tiny Sophia Bag?


Happy Sewing!

Cristy


This post may contain affiliate links.  You can read about my Disclosure, here.

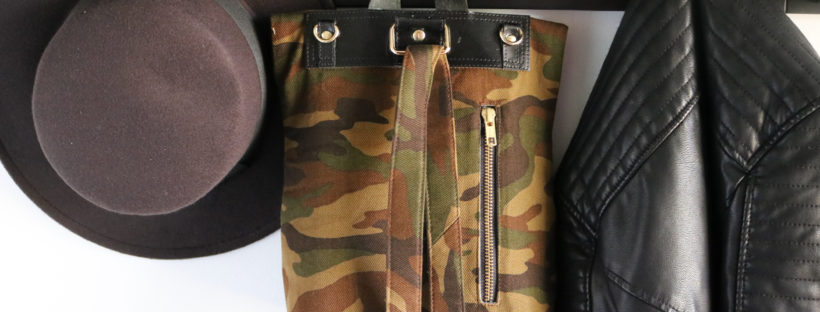
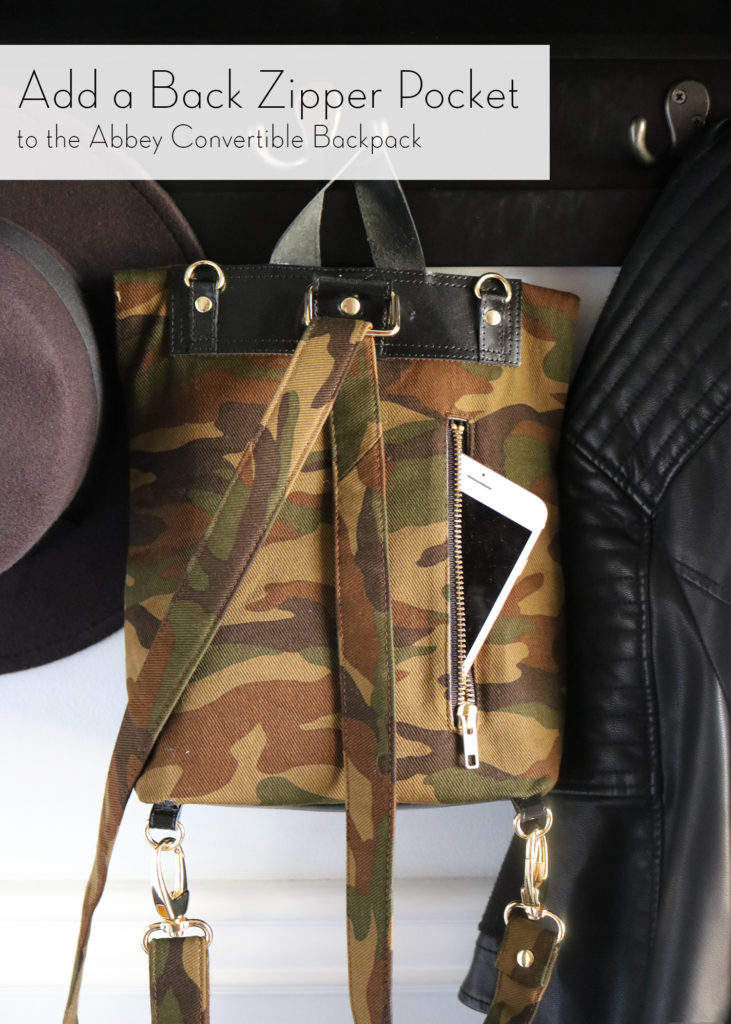
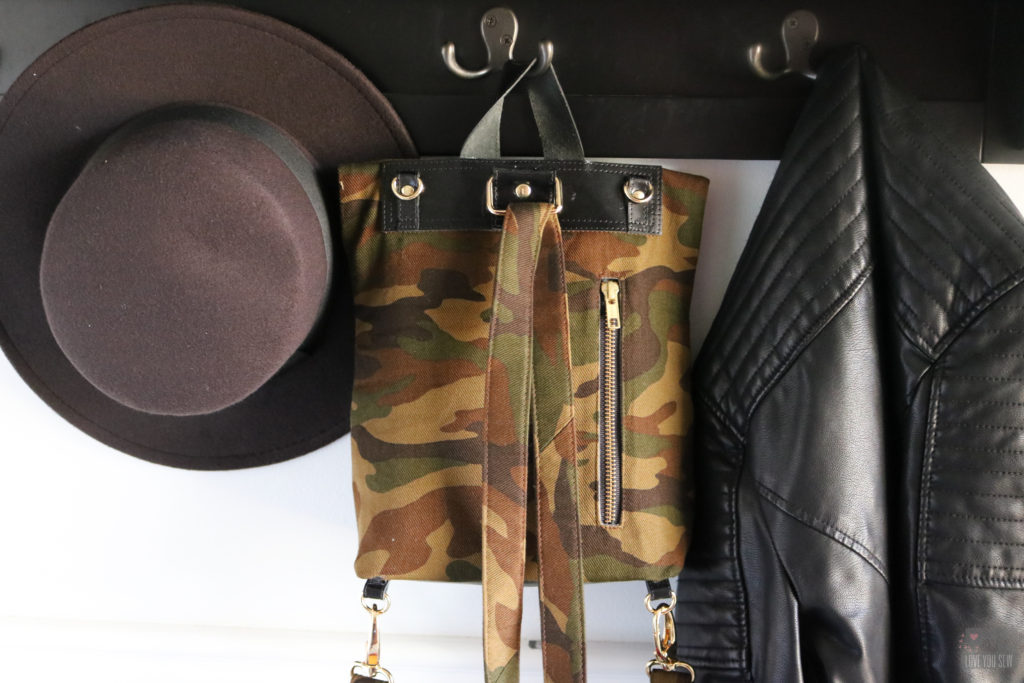
Add a Phone Zipper Pocket to the Abbey Convertible Backpack

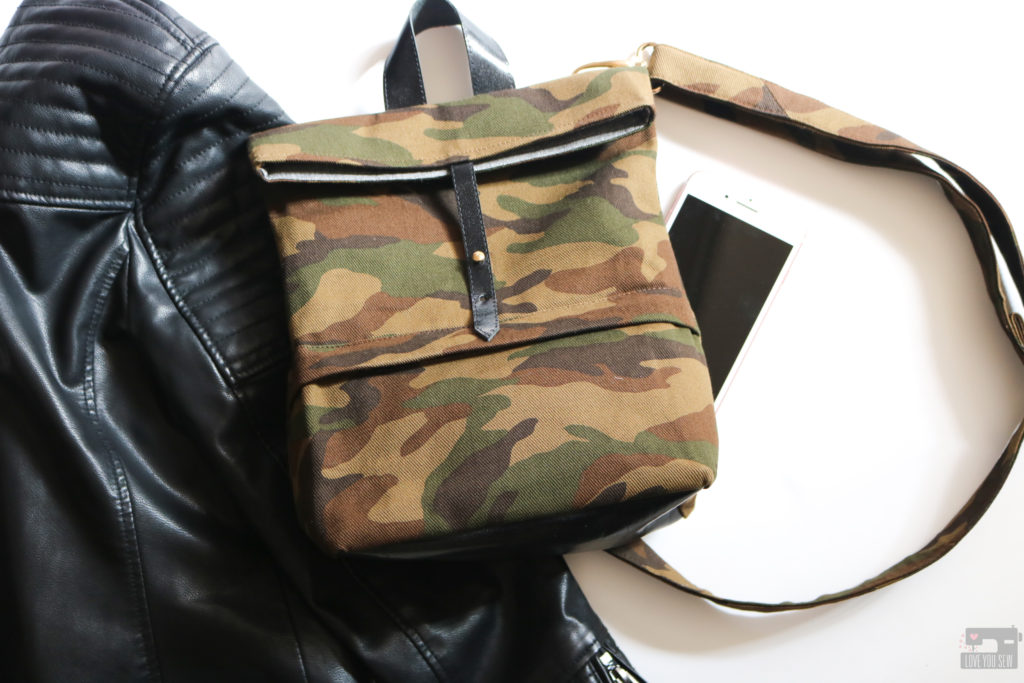
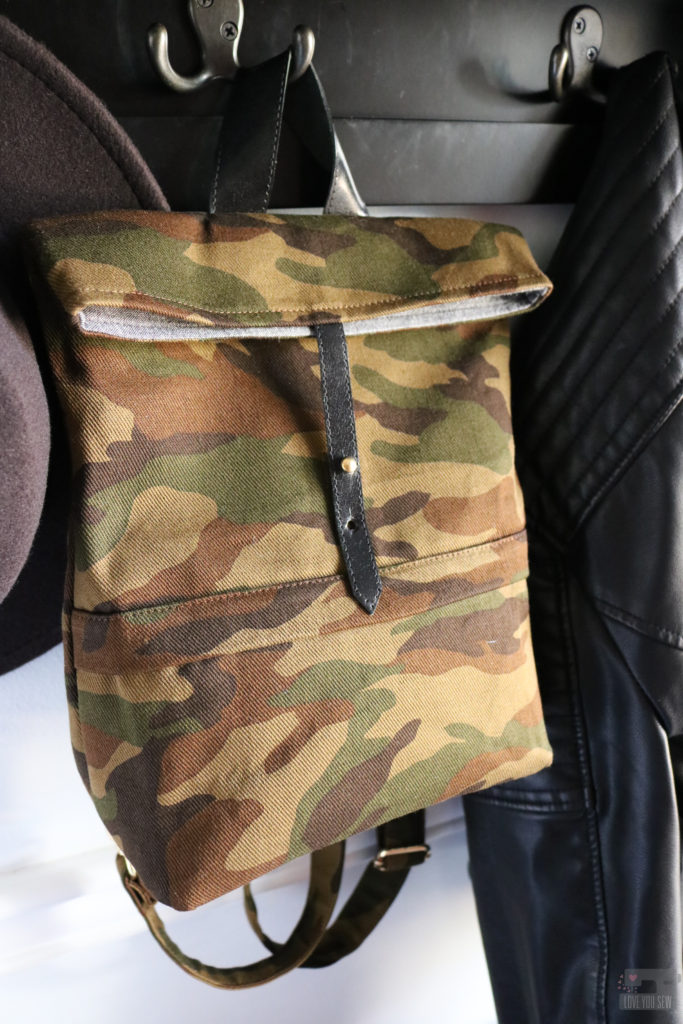
The Abbey Convertible Backpack is my go-to bag when taking day-trips with my kids. I like having it out of the way but still being able to hold the essentials. But being a designer, I constantly have new ideas and wish there were different features with every bag I own.

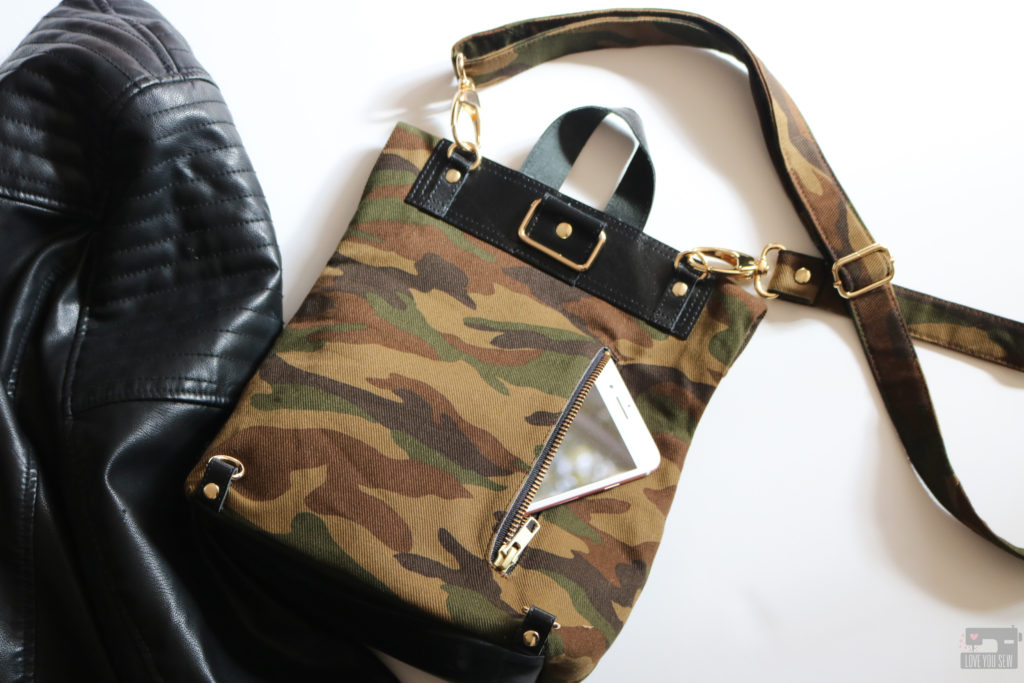
On the back of the Abbey, there is a slip pocket. I added the feature with the intention that it would be a quick spot to hold your phone or keys without having to open the main compartment as frequently. But since I happen to wear my bag more as a backpack, I have to swing it around to access the pocket and felt that a slip pocket just isn’t as secure for an expensive smartphone — and BOOM, I have the idea for the back welt pocket hack.

Back Welt Pocket Tutorial

You will need the original instructions and templates for the Abbey Convertible Backpack which you can find here. Additionally you will need:

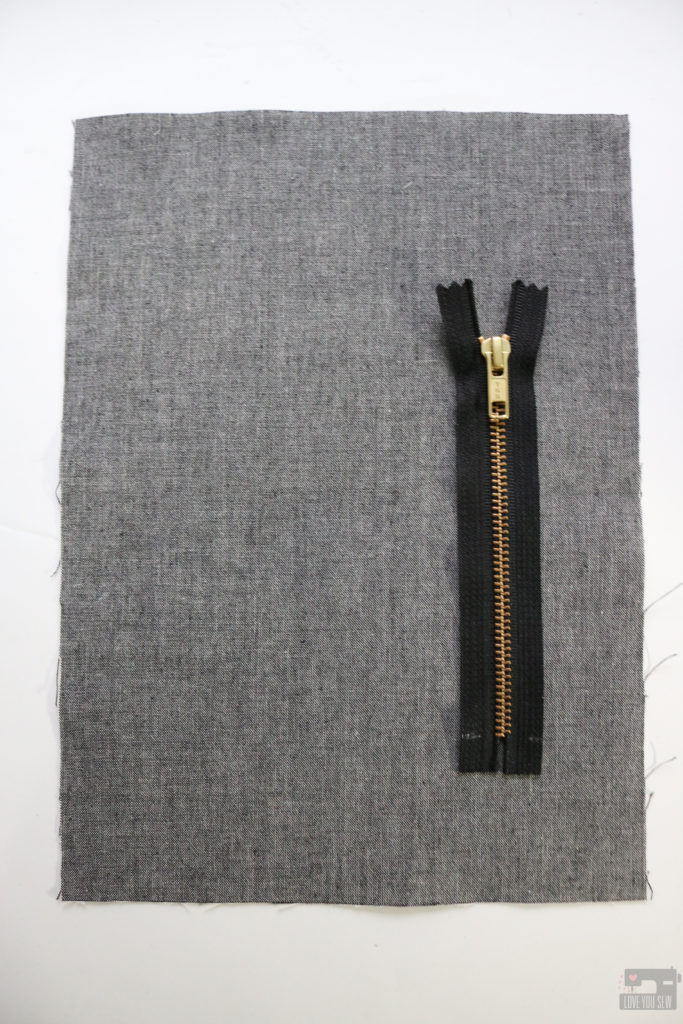
  • 6″ Zipper
  • 8 3/4″ x 12″ Lining Fabric + Interfacing (this is large enough to fit an iPhone 7+ with a thick Otterbox case.)

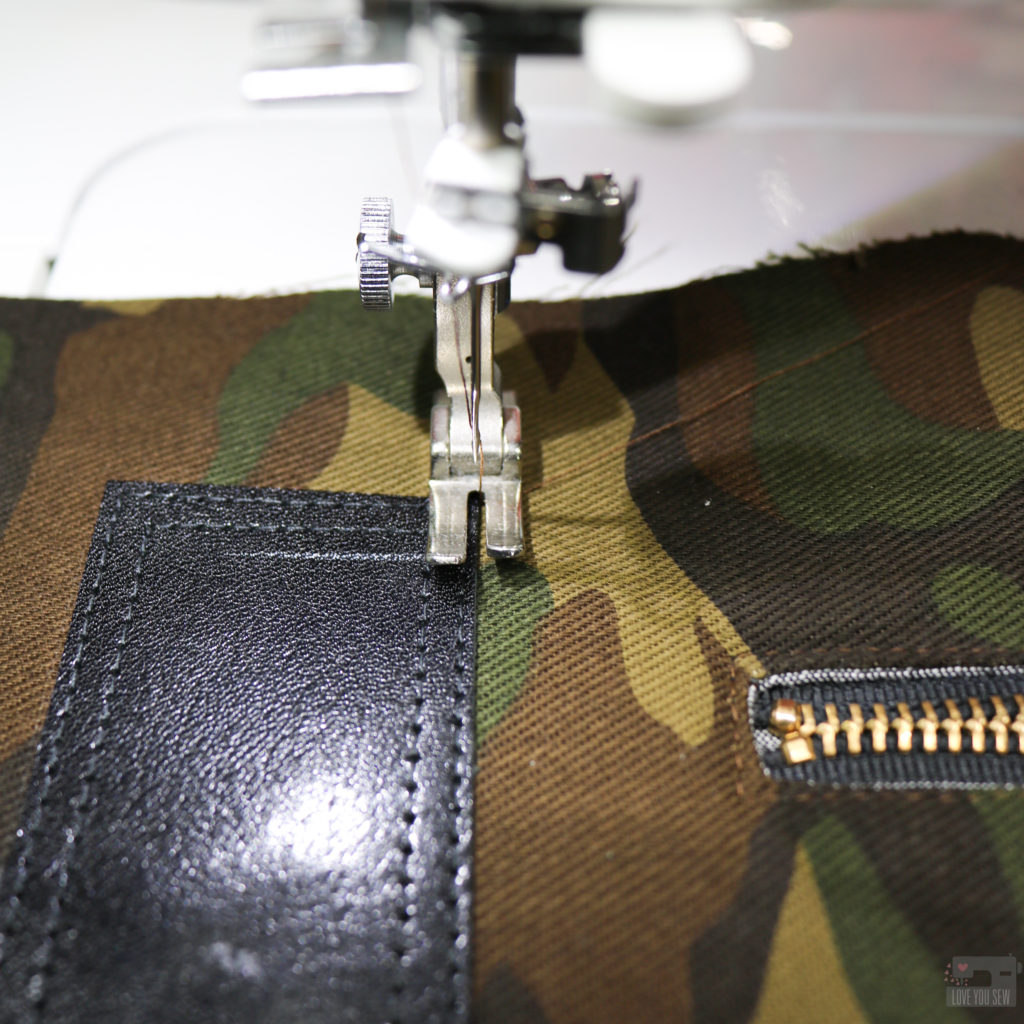
To make the Back Zipper pocket, you will omit all of the fabric and interfacing for the Slip Pocket and move through Step #41. (Please note I don’t have connectors added to my handle base at this point since I used leather and added them later.)

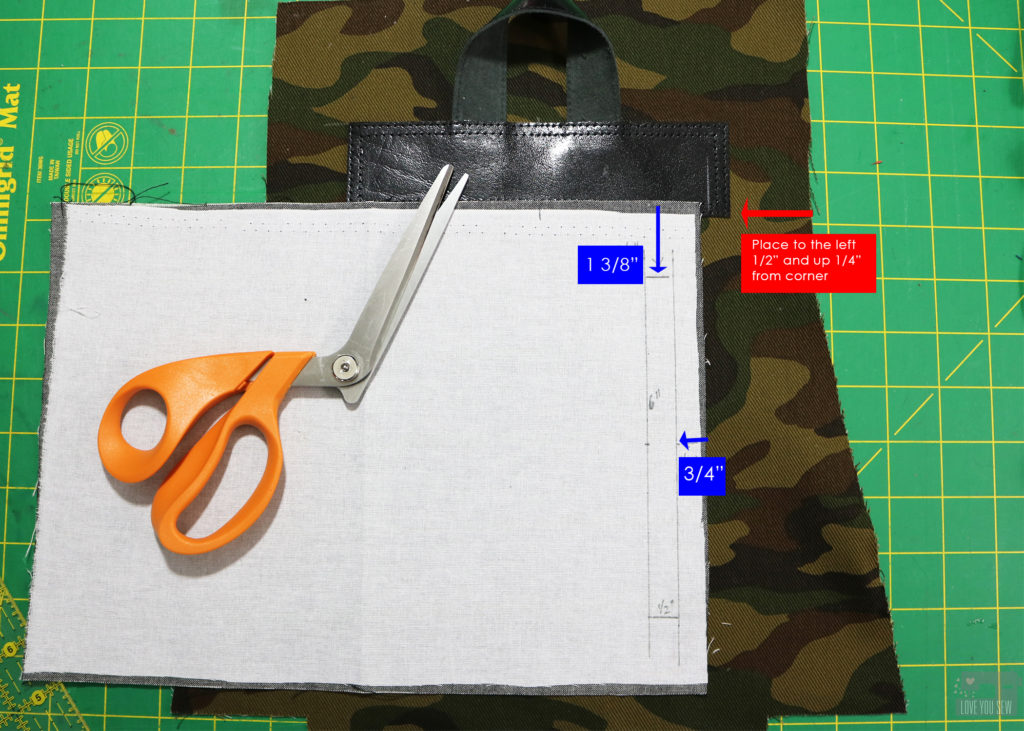
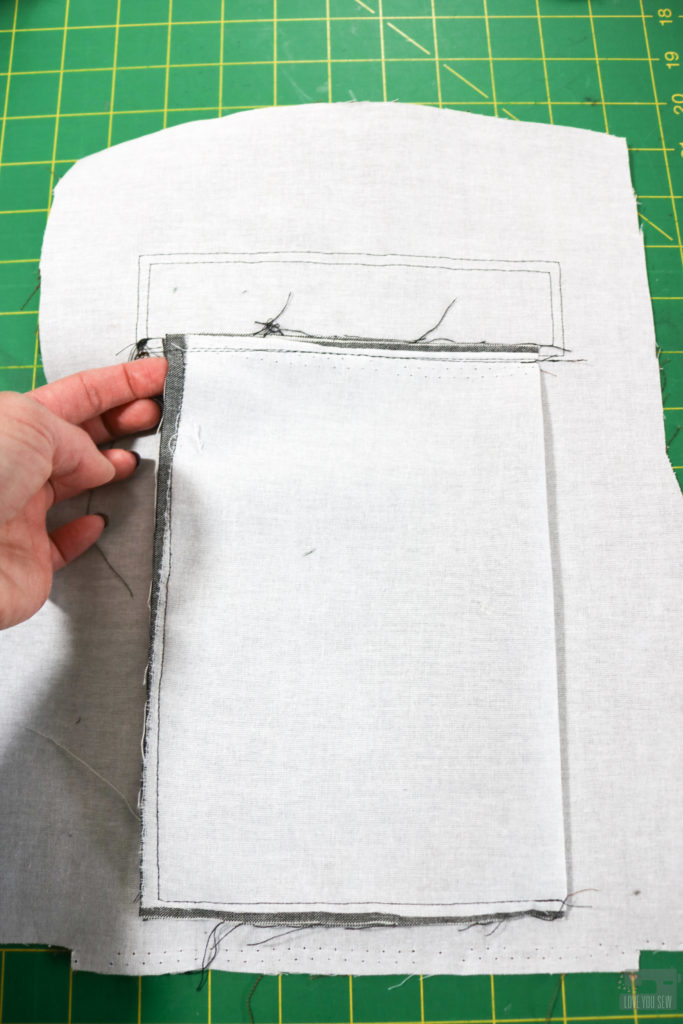
Draw a rectangle measuring 6″ x 1/2″on the wrong side of the Pocket Lining centered and parallel to the short side as shown. The Zipper will run vertically.  There should be 1 3/8″ above and below the rectangle and 3/4″ space to the right. 

Line up the Pocket Lining as shown with the right edge 1/2″ in and up 1/4″ from the sides of the Handle Base. Pin the Pocket Lining in place. Go back and follow Steps #21-28 to finish the pocket! Voila – a chic looking vertical zipper pocket to keep your phone or other valuables a little more safe as you sling the backpack around.

Since the Pocket Lining hangs vertically instead of horizontally, the weight of a phone would make it drag awkwardly and pull on the zipper.  So, the Pocket Lining needs to be anchored horizontally so the weight can hang straight down naturally.  To do this, flip the back of the bag right side up and sew directly below the Handle Base from corner to corner catching the Pocket Lining.  Back-stitch well.

This is the wrong side after securing the Pocket Lining.  The weight of the phone is evenly distributed and won’t distort the structure of the bag.

Additional Modifications

You know I cannot resist using leather in my personal bags!  I had this great glazed black upholstery leather I got from Tandy which I used to make a few Kelly Waist Bags.  The scraps are great for all of Abbey’s accents like the connectors, handle and closure tab.

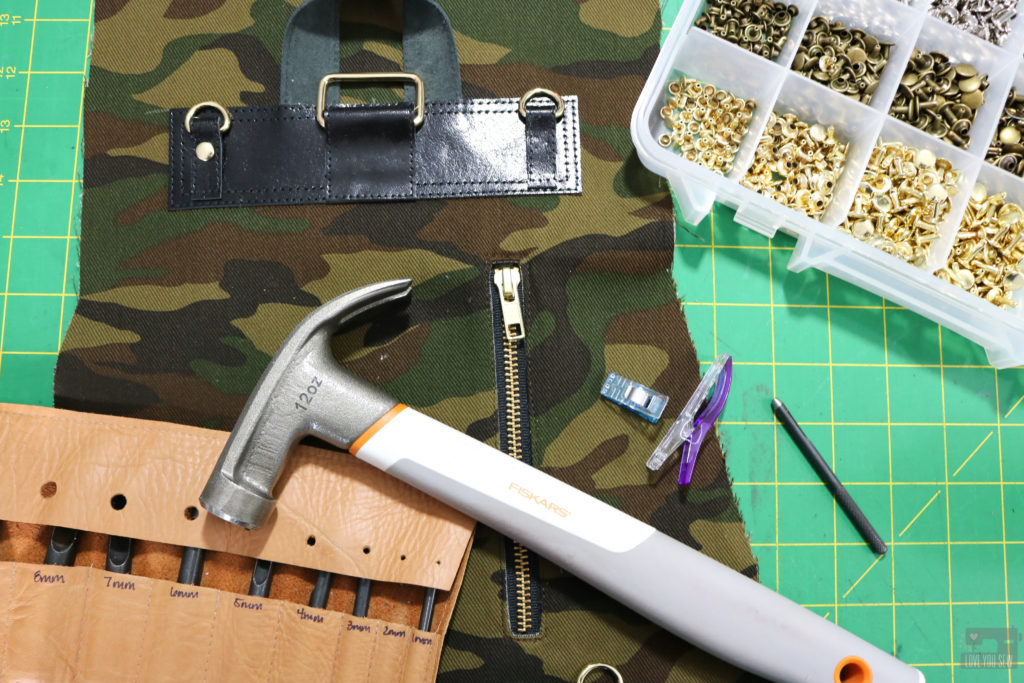
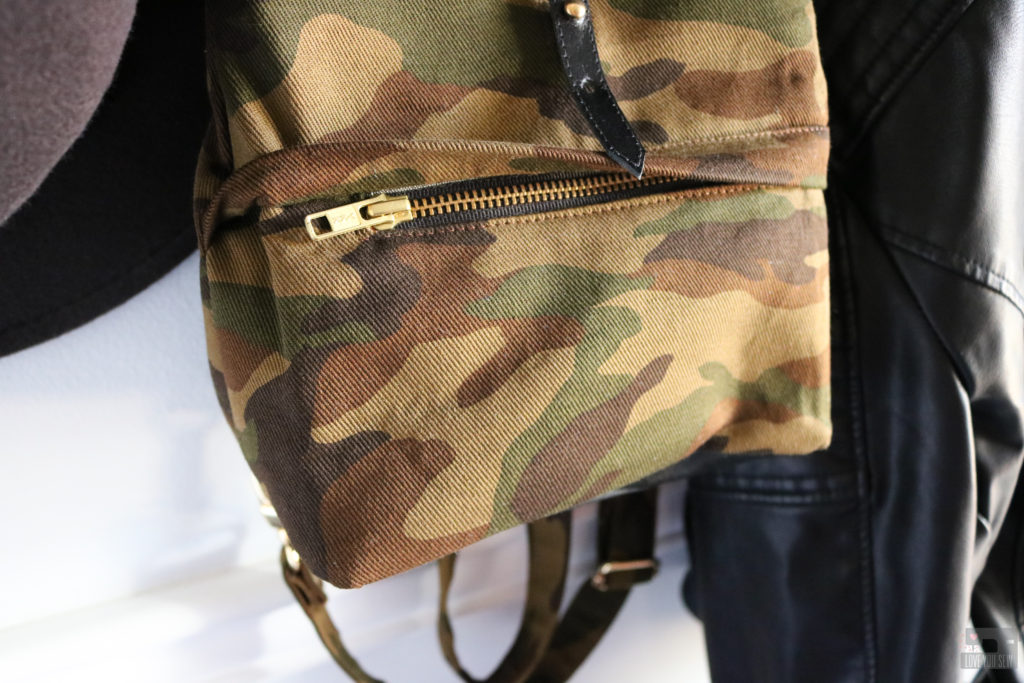
I also used my other Abbey Backpack Zipper Cover and Button Stud Hacks which you can find here.  I like the clean look from the front and just love using button studs with leather.

Project Details

I hope you enjoy this hack and even use it for other projects!  Don’t forget to use #abbeyconvertiblebackpack and #loveyousewpatterns on social media so everyone can see your fabulous makes!

Hugs and Stitches,

Cristy


This post may contain affiliate links which I use to keep this website pumping along.  Please visit my Disclosures page for all  the info on my affiliate relationships.

Kelly Waist Bag and Clutch

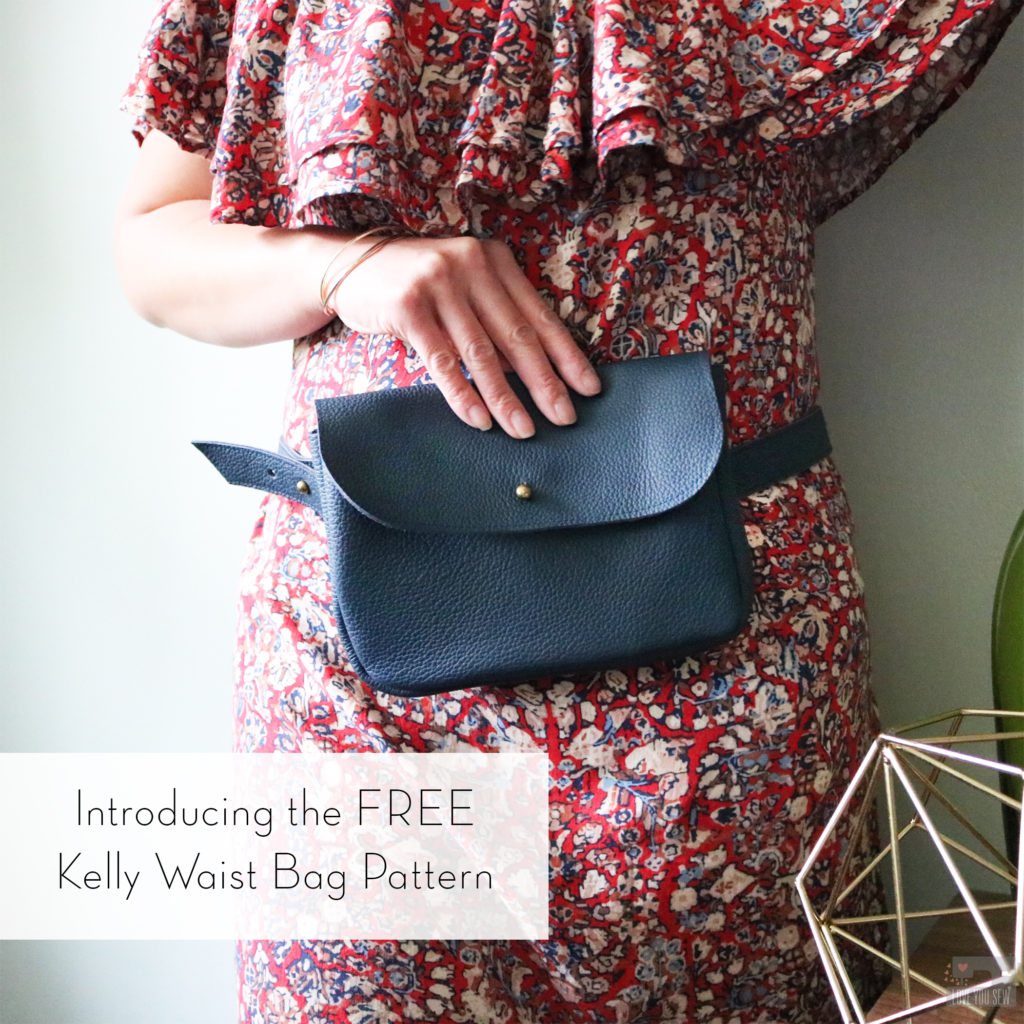
Introducing the FREE Kelly Waist Bag Pattern

It’s such an incredible feeling when inspiration hits at the right time and the creative juices are just flowing.  That’s what happened when I paired this beautiful leather from Measure Fabric with  my idea for a simple and sleek waist bag.  I was able to quickly design, prototype, tweak and write a full pattern within 48 hrs (muuuuch different from my usual practice of taking months to write a pattern!)


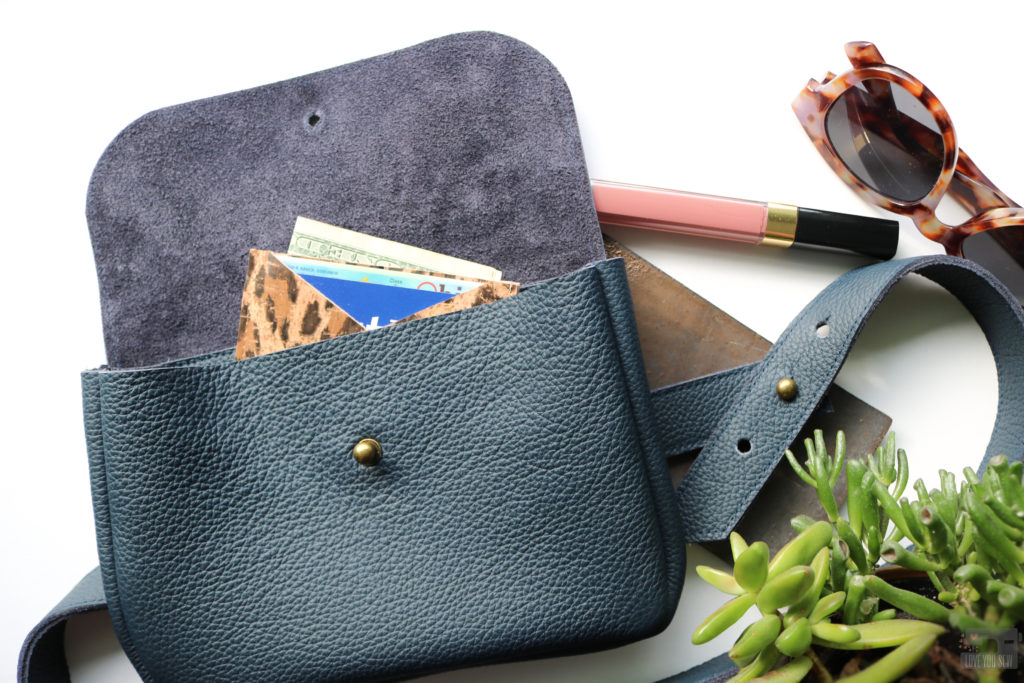
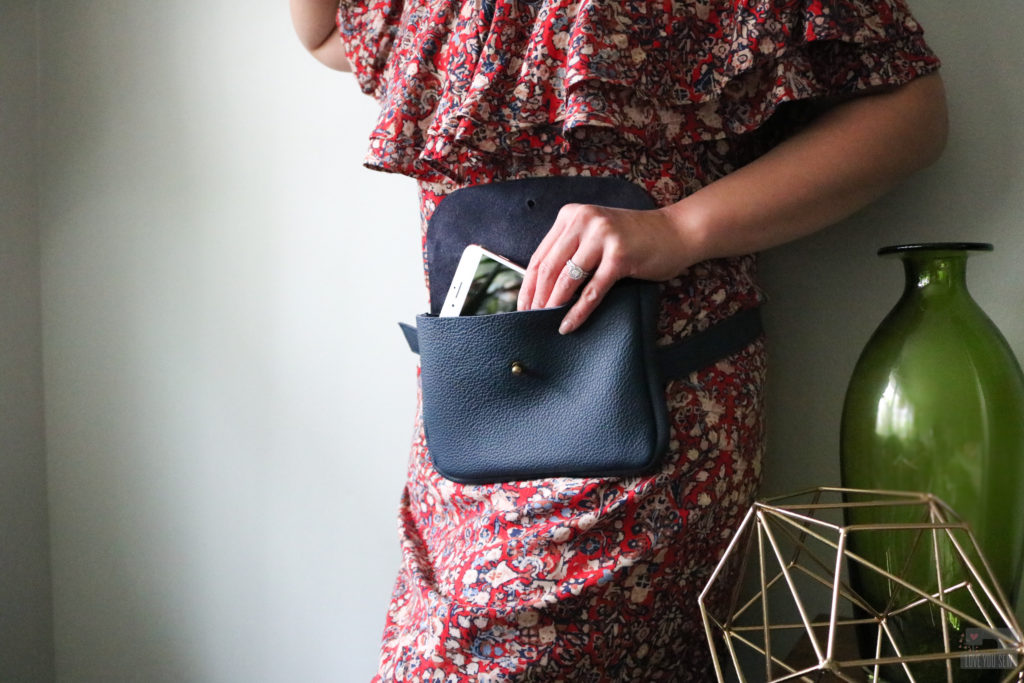
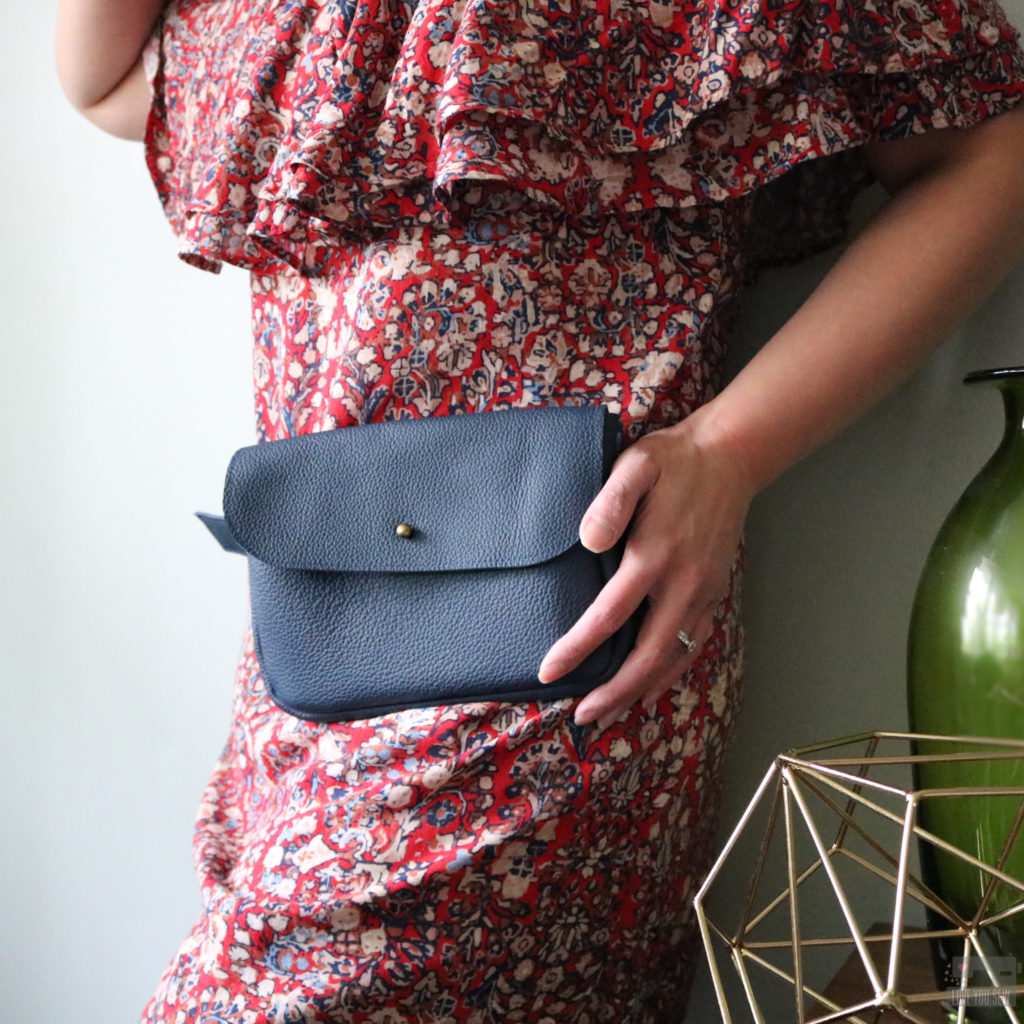
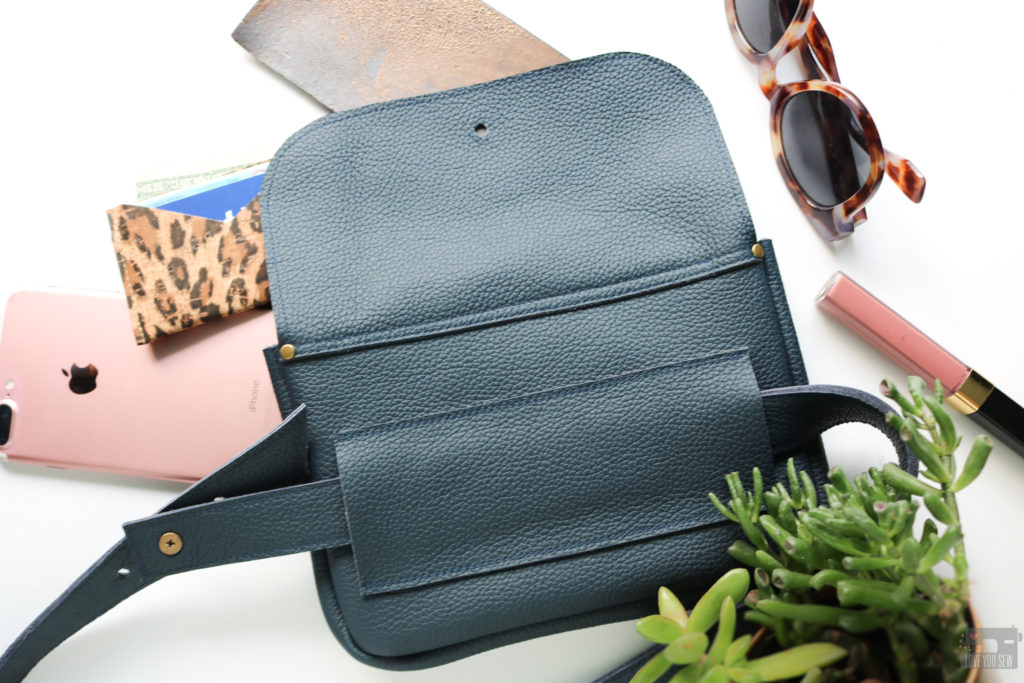
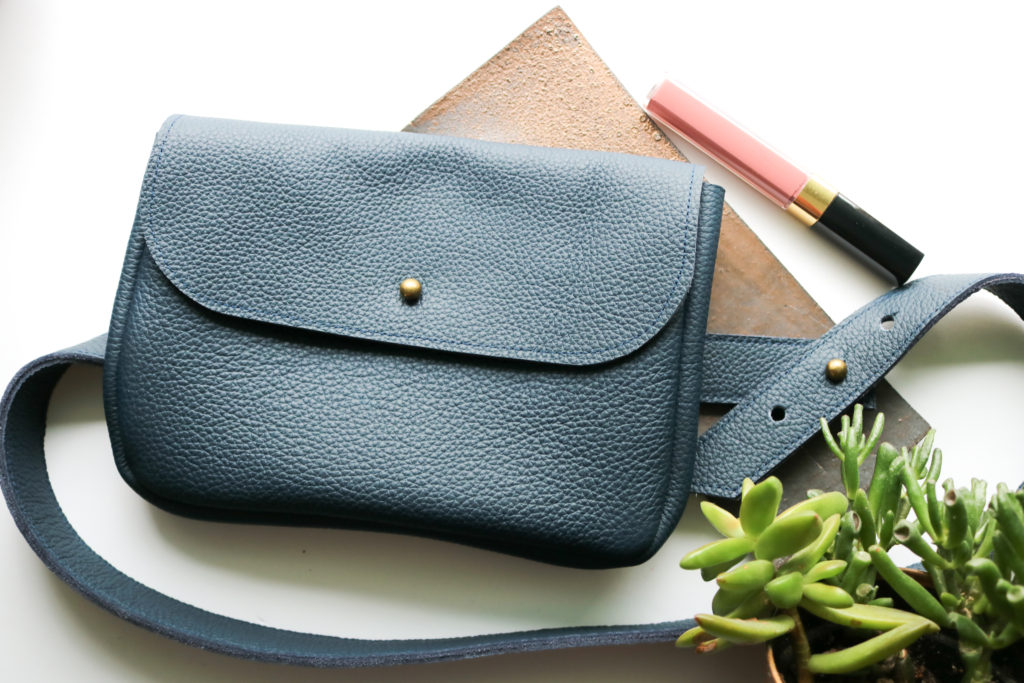
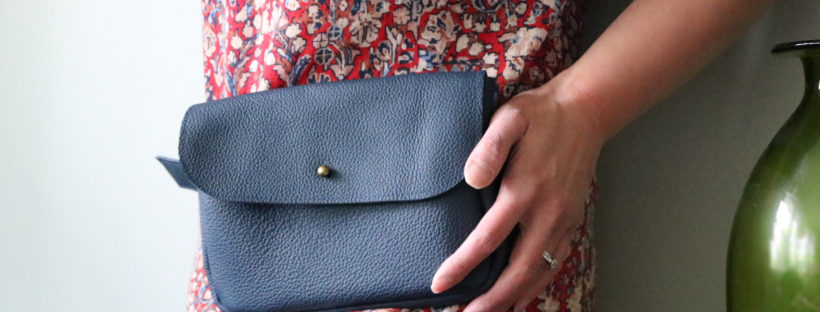
Whatever you call them – waist bag, fanny pack, belt bag, hip bag….wearing a bag around your torso is the hottest bag trend right now.  Although the classic 80’s throwback style is probably the most popular, I wanted to have something with cleaner lines to match my fashion tastes.   I also wanted to make sure if I’m making a bag (especially in leather,) it can last beyond the current trend.  So I designed a minimalist raw edge leather bag which can convert to a clutch, simply by removing the belt.

Leather

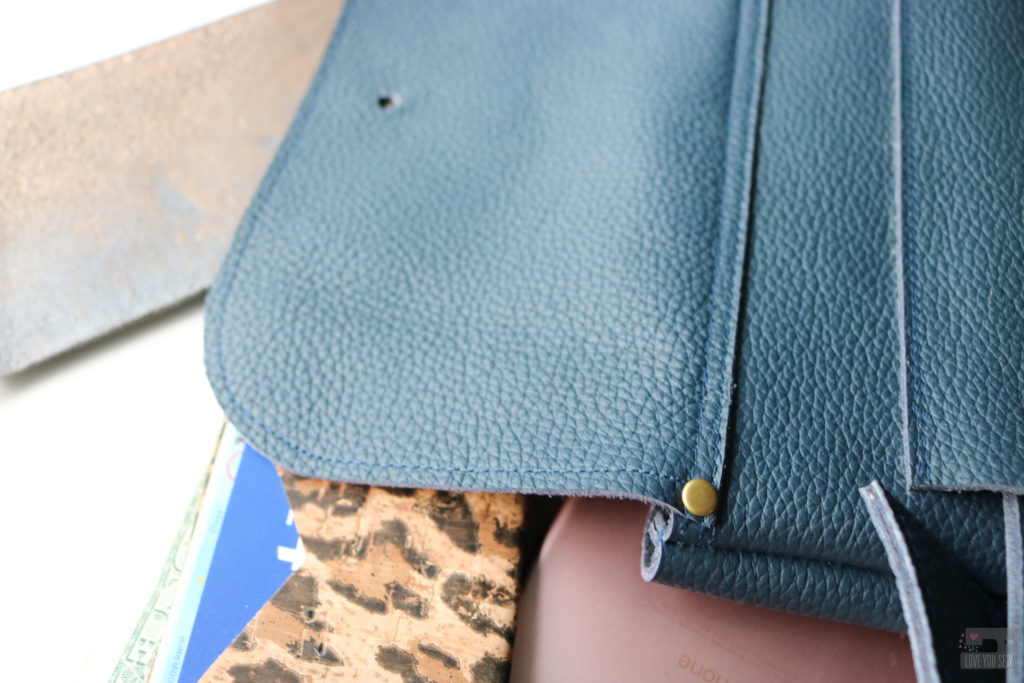
Initially, I thought I would make an envelope style clutch when I first saw this leather on Measure Fabric’s website.  I thought the leather might be a little too difficult to sew on my machine.  I figured I could use a bunch of rivets to origami it altogether since I already fell in love with the top-grain texture and beautiful neutral navy color.

Thanks to the miracle of videos on Instagram, the shop ladies were able to show me the leather’s softer hand.  The hide is approximately 2mm thick, but is still pliable enough to shape and can hold some weight.  You can check out their entire selection here. Get ready to drool over all the beautiful hides!

Bag Features

Named after one of my awesome nieces, this waist bag is all about having some freedom.  Whether you want hands-free options to wrangle the kids like me, or to attend the latest festival concert like Kelly (oh to be in my twenties again,) this is your bag!  It’s small but mighty with plenty of great features:

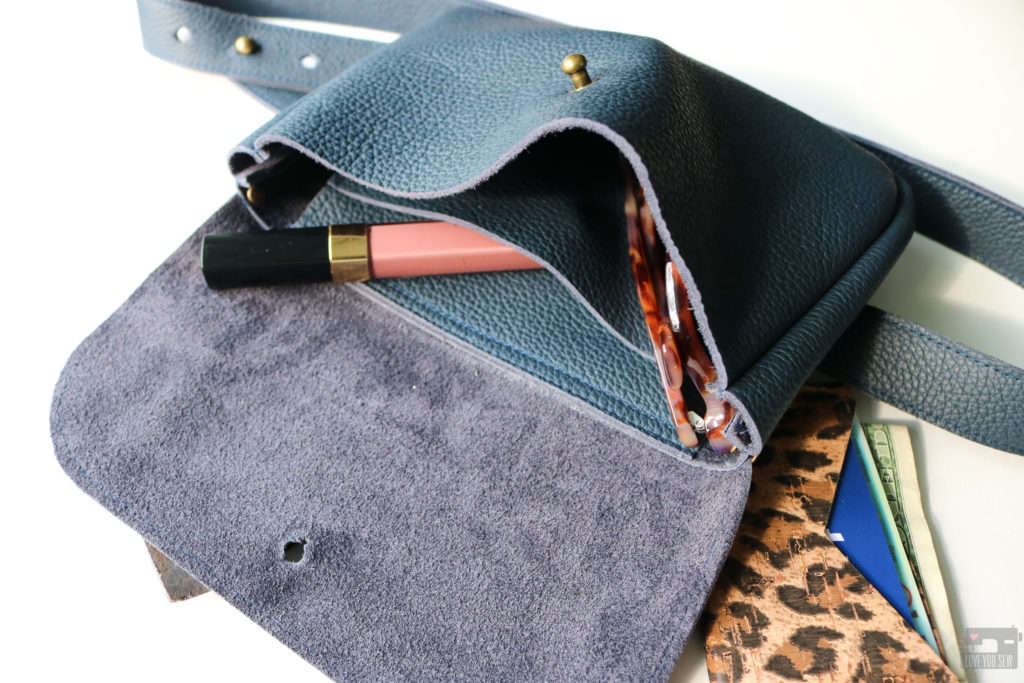
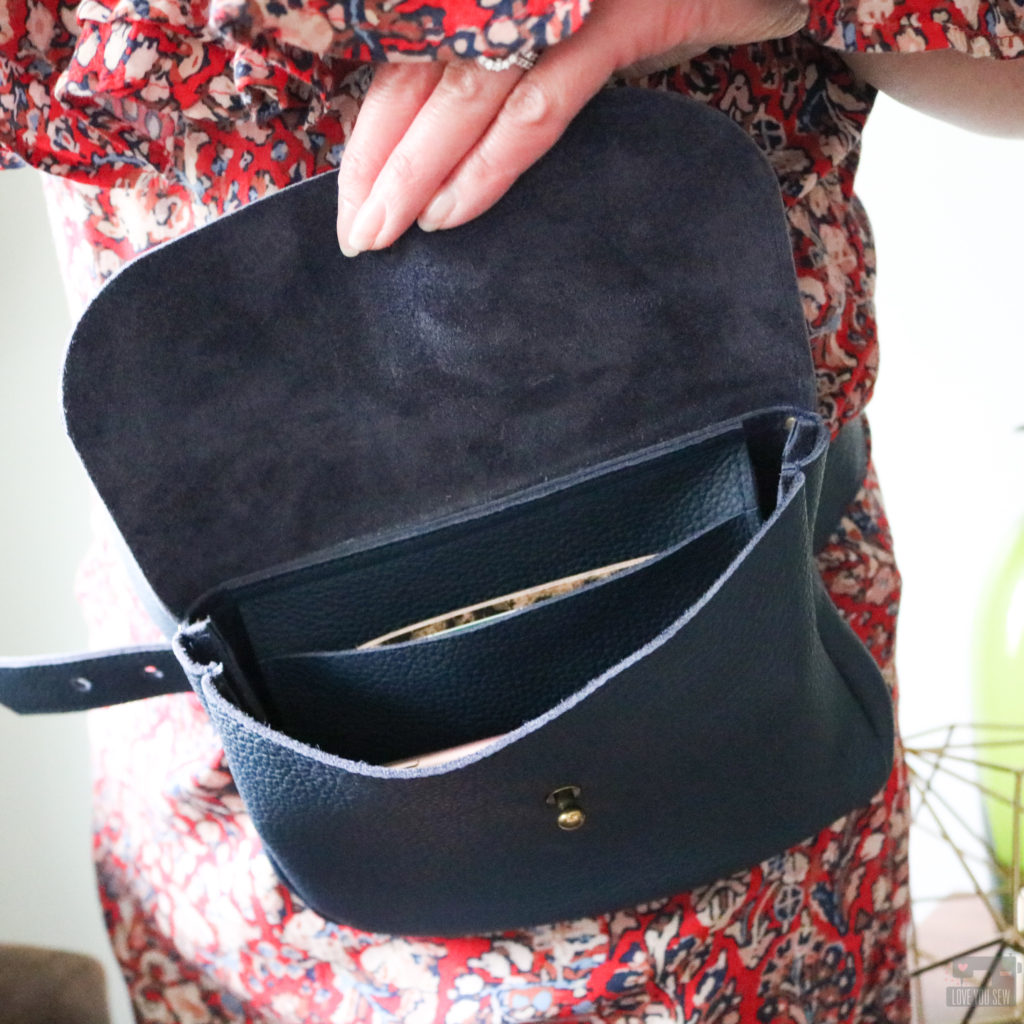
  • Slip pocket – Perfect to stowe away cash, ID and/or a Shuffle Cardholder
  • Simple screw on button stud – There is no need for fancy hardware or tools.  But feel free to make this your own!  You can find them on Amazon here or here and on Etsy here. (aff links)
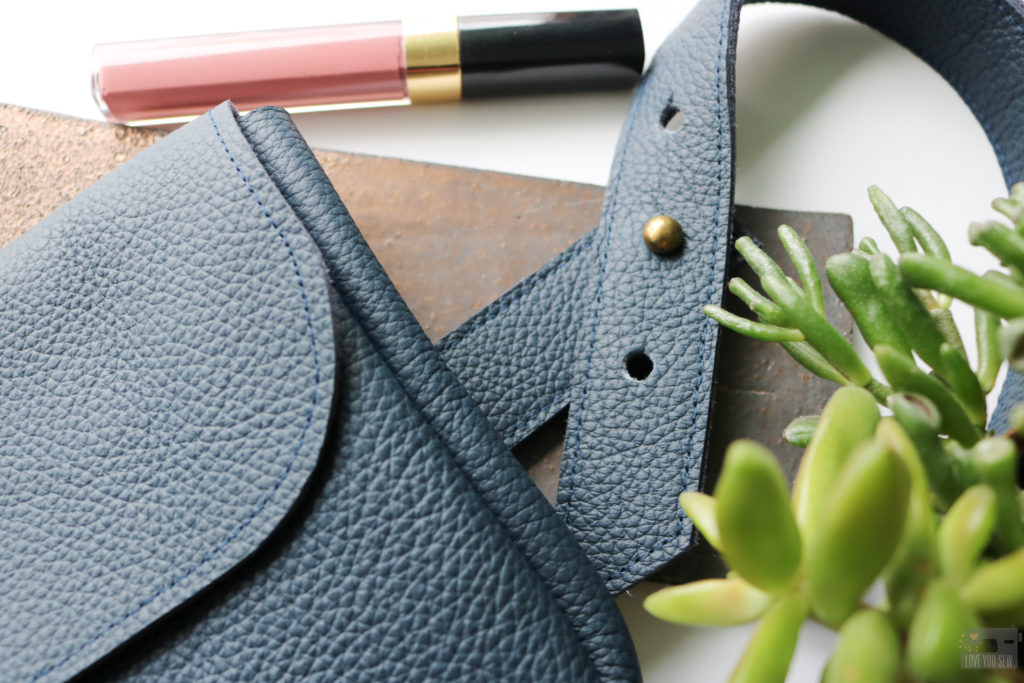
  • Adjustable belt design – Whether you wear this with just a tee or over a bulky sweater, the belt can change with you.
  • Convertible to clutch – Simply remove the belt and you have a perfect leather clutch for a night out or use it as a pouch in a larger tote.
  • Able to use any belt – The belt guide is generously sized to accommodate most belt widths.  You can use your own belts to mix and match, creating different looks.
  • Fits many arena and public venue bag guidelines – With finished dimensions of 8″ x 5″ x 1″, the Kelly conforms to many stadium and concert bag regulations.  It’s the right size for your phone, ID, cash, with room to spare for keys.

Sewing Tips:

  • Leather and some vinyl are not self-healing.  Needle holes will be permanent, so work slowly and use clips instead of pins.
  • Use a leather needle with leather or a heavy duty (16 or 18) needle with cork or vinyl to handle the extra thickness.  Machines vary, so don’t forget to TEST before making the bag!
  • With thicker substrates, leave long thread tails to manually tie off with double and even triple knots.  Don’t try to back-stitch because your machine may not like the bulk.
  • A walking foot is great to get even stitches without sticking and a Teflon foot prevents sticking as well
  • Use a stiletto tool like this or carefully notch into the gusset 1/8″ to help maneuver around the curves. (aff link)
  • For punching the holes, I love this tool with a softer plastic bed vs a metal bed.  You get a cleaner cut through the leather. (aff link)

|| Click Here for the Kelly Waist Bag + Clutch Pattern by Love You Sew ||

#kellywaistbag #loveyousewpatterns 

Print at 100% or Actual size

Please share your projects on social media with the #kellywaistbag and #loveyousewpatterns tags.  I would LOVE to see what you do with the pattern.  Don’t forget to give me a follow and tag me @loveyousew_ so I don’t miss it!

Enjoy!!!


Leather for this project was provided by Measure Fabric.  All thoughts and opinions are always my own.  There are also affiliate links in the post for which I would receive a small commission only if you decide to make a purchase.