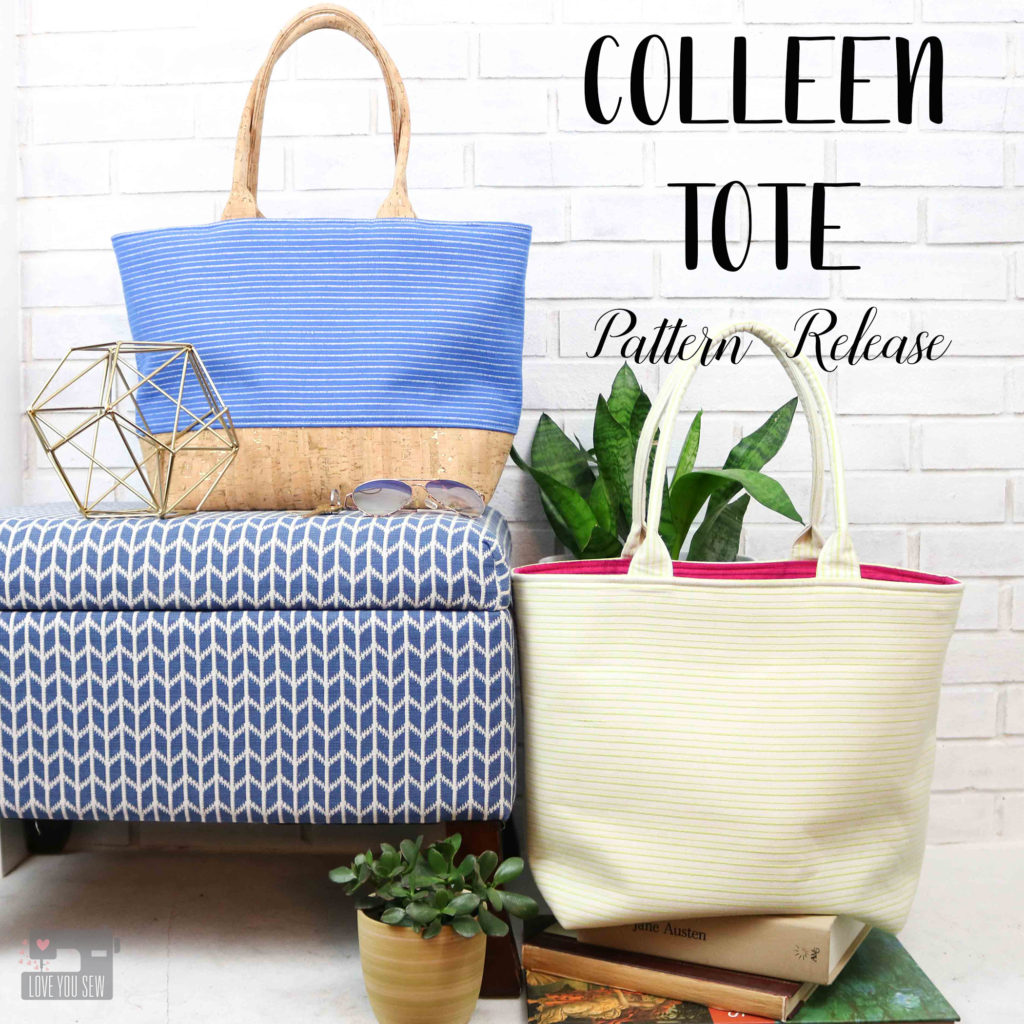
Colleen Tote :: Pattern Release


It’s been quite a journey, but I have finally written my Colleen Tote bag pattern! If you’ve been following me on Instagram, you know I’ve been making this bag for well over a year now, but always tweaked the design every time I made it.  As a newbie designer, I just wasn’t comfortable enough to bring it out to the sewing market.  There were people were asking me about the pattern every time I posted a new iteration and I kept pushing it off until…I finally told myself to get out of my own head and just write it!
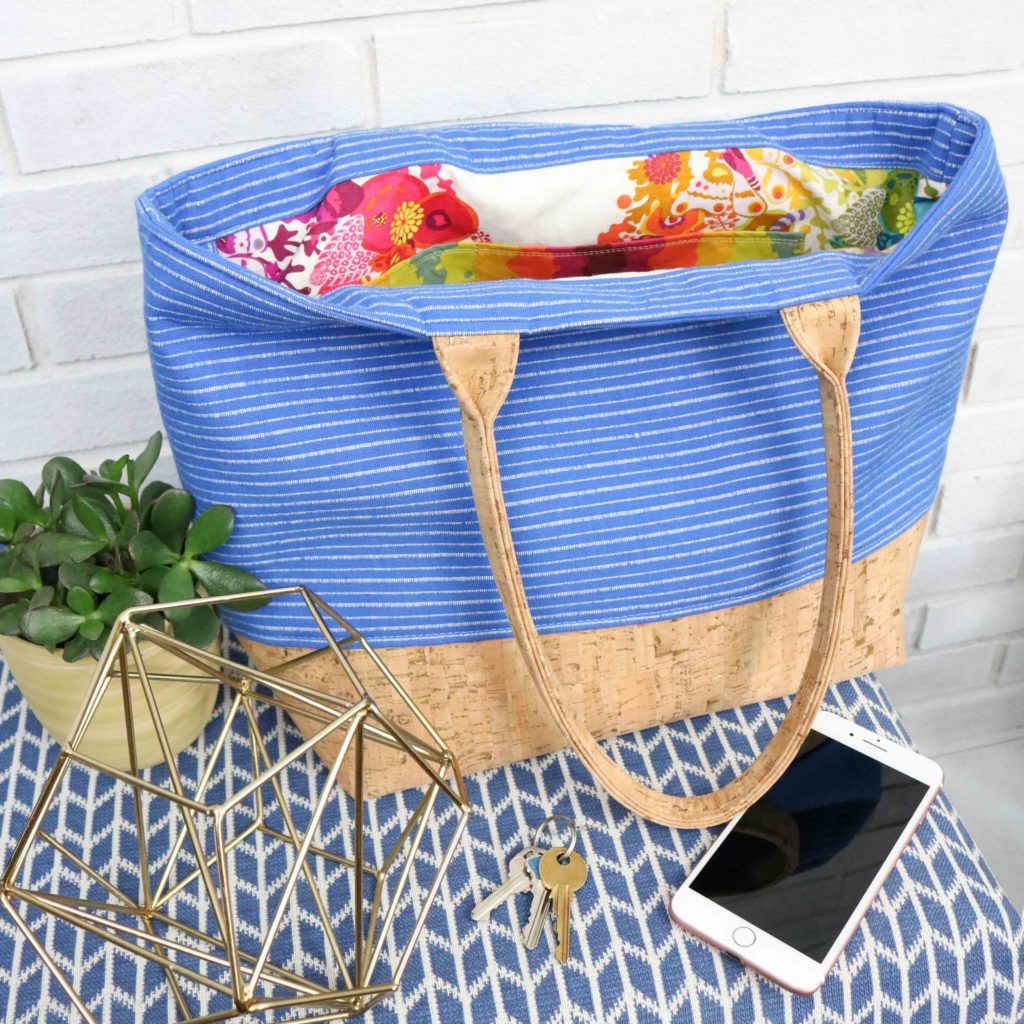
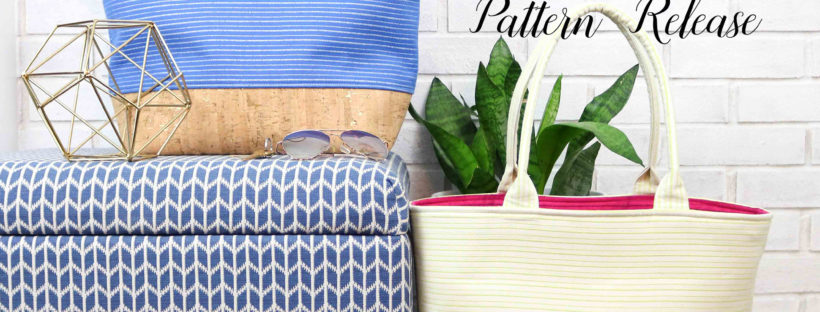
The Colleen Tote was designed to be the classic open tote bag to carry a large number of things. The clean design makes it versatile enough for any occasion…and allows you the creative freedom for customization.  I’m thinking a quilted block maybe in the works 😉   You can use the tote for the beach, as a work bag (large enough for a laptop,) a diaper bag or just a throw-all-your-junk-in bag.  There are so many possibilities.
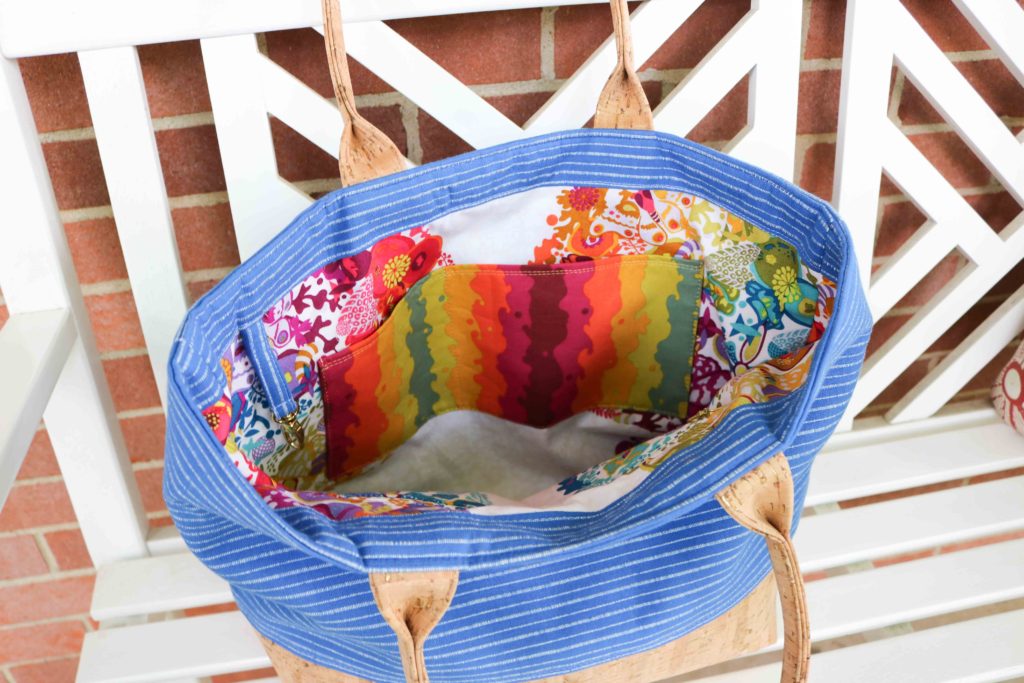
 

With a roomy open compartment, I made sure to add in a zipper pocket to keep personal items secure and an easy-access slip pocket for a phone and chapstick.  You can also see the fun, yet functional interior band.  This adds deign interest while giving extra support for the weight of the rolled handles.
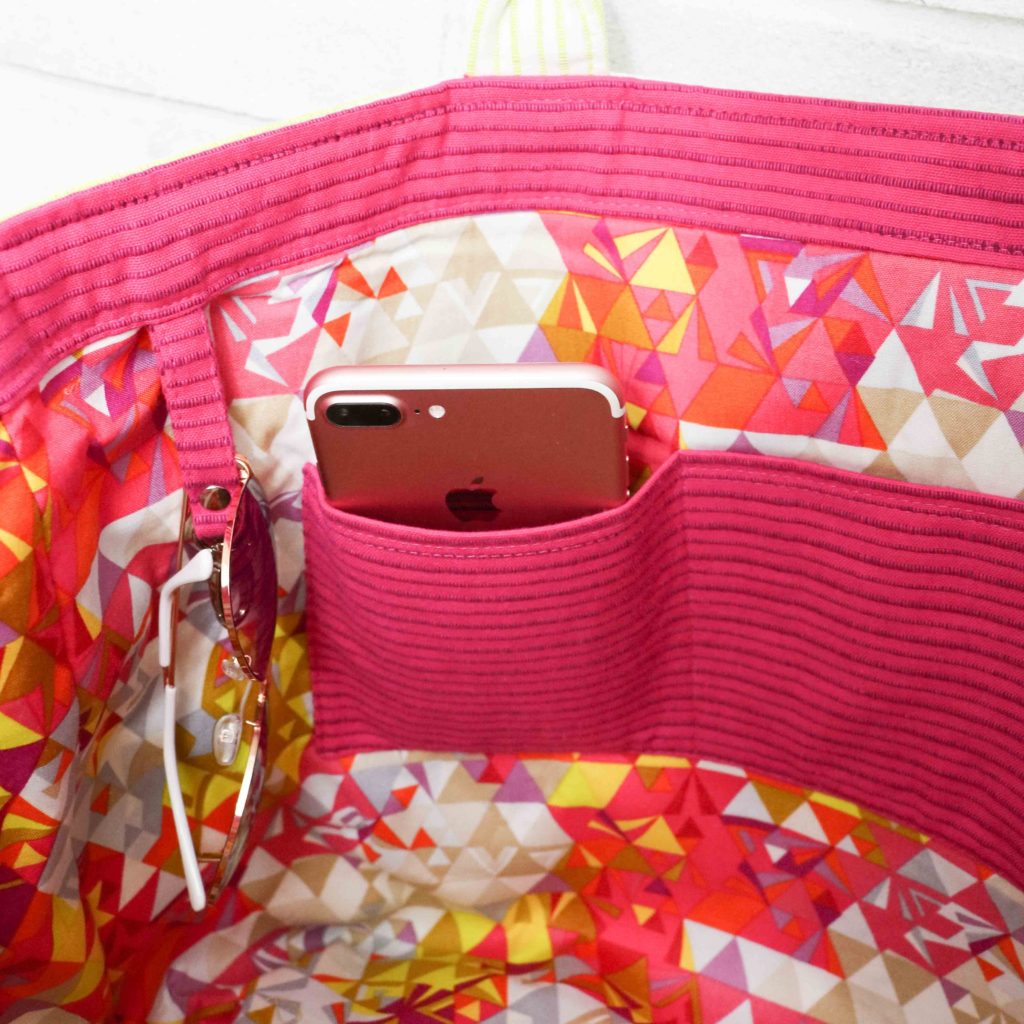
The next feature added was a trusty key fob.  I have a car with the keyless ignition, so I find myself actually losing my keys or leaving them in my car more than I’d like to admit….so I made sure to add in this feature to quickly allow me to click my keys onto the tote.  The other thing I find myself doing is fishing around for my sunglasses.  I tend to just throw them in my bag, so I made the key fob double duty.  You can hang your glasses through the loop to more easily find and locate your sunnies!
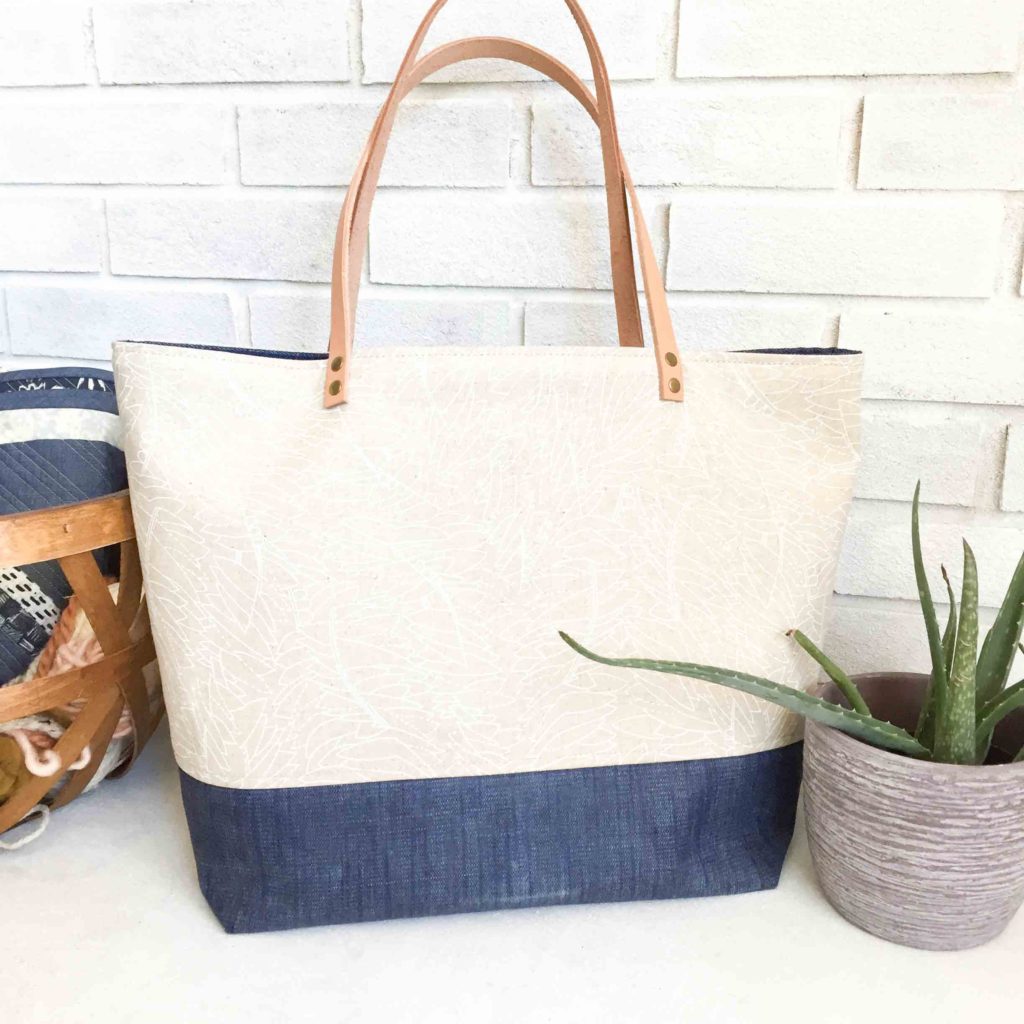
Original Tote Pattern

When I first made what would turn into the Colleen, I was testing out waxed canvas and learning to make my own.  I figured a tote would be a great use for this fabric treatment.  I drafted a VERY simple tote with very light interfacing and didn’t even even really create a sturdy bottom.  I cut leather straps and attached them with rivets as shown above.  But this was just the jump off…
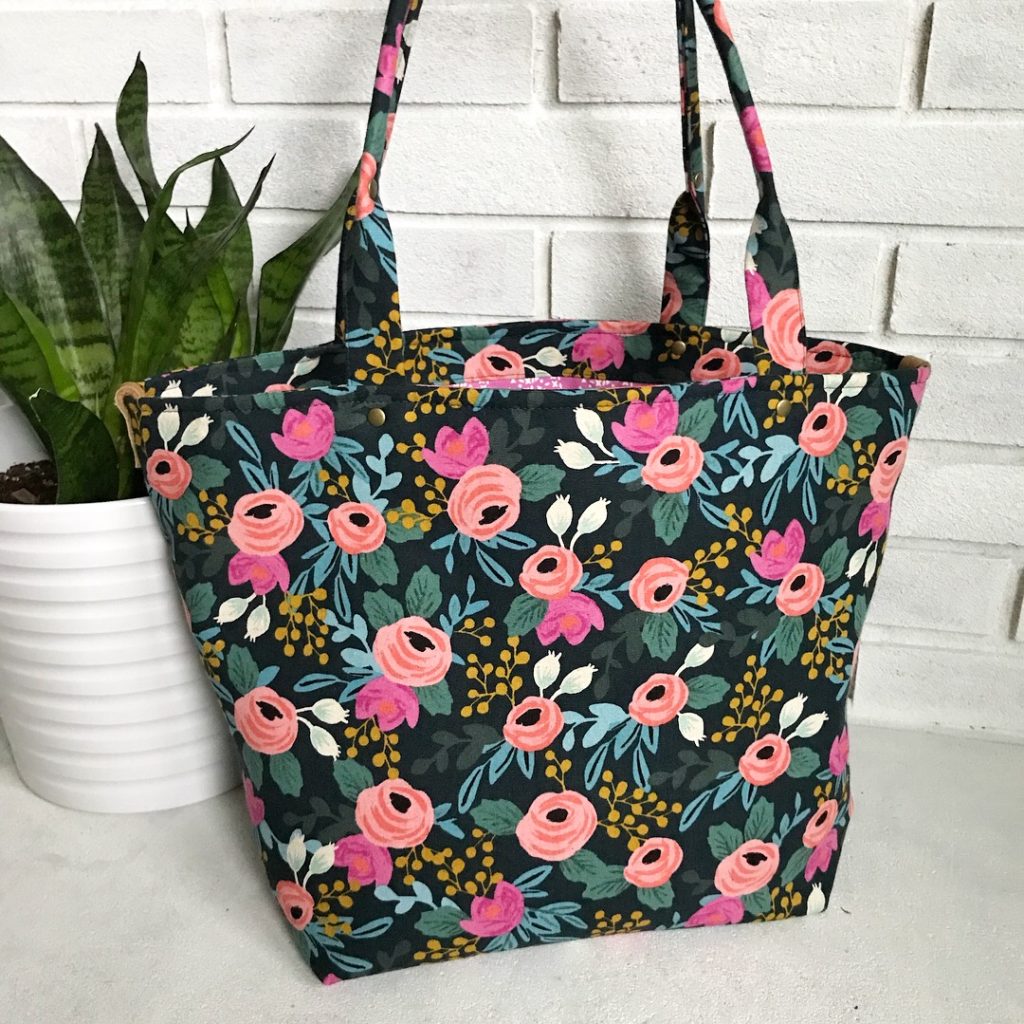
Customer Order

Later on,  one of my very best and loyal customers asked me to make a “plain” tote bag as she called it with just one fabric for the exterior without any contrasting bottom or the leather handles.  It’s a joke between us now…because she knows I do not make “plain.”
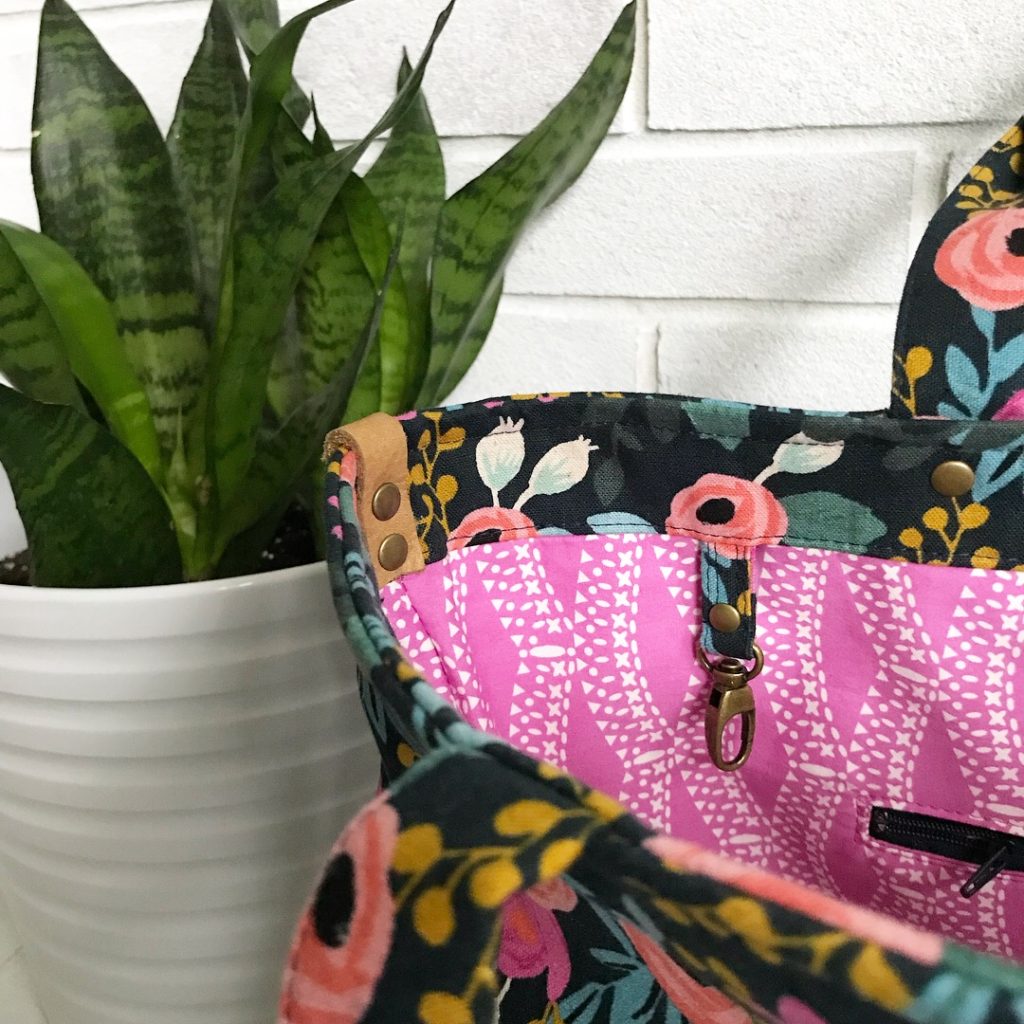
Beautiful Leather and Rivet Enhancements

That’s when I suggested some rolled handles to make the tote a bit more interesting instead of just flat sewn-in ones.  And of course, I jazzed it up with some rivets and leather accents.  With this special request came the second view of the Colleen along with the rolled handles.
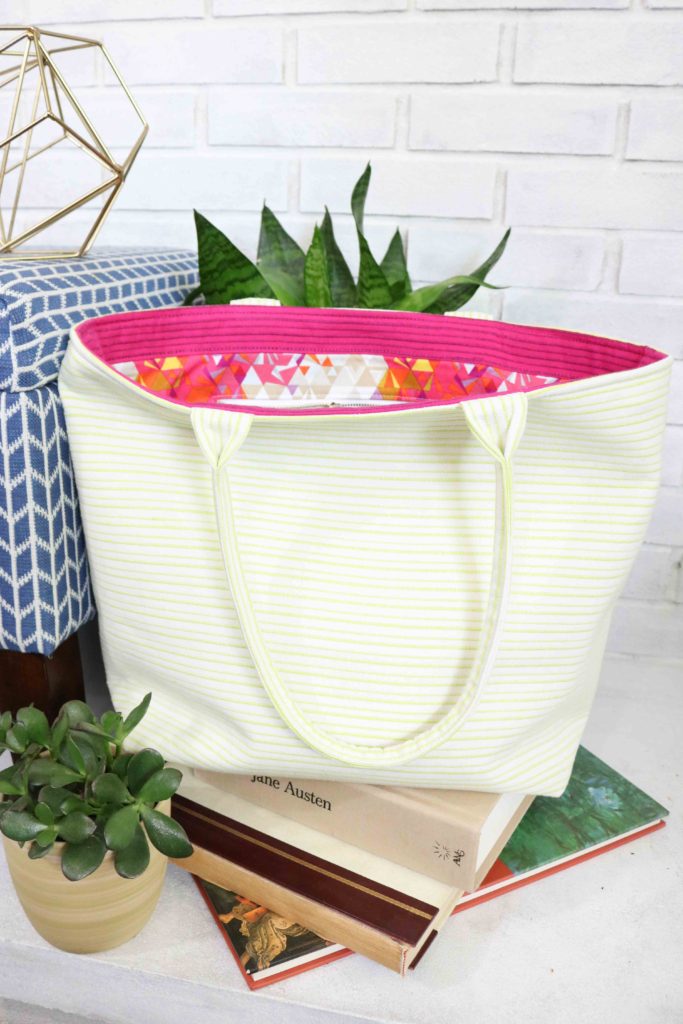
As I worked on the design, I played with different interfacing combinations and thought a combo of woven plus fusible fleece works for me.  If you would like something more rigid, yet soft, some foam would be perfect.  However, the weight of the bag does get heavy….especially when you start to add your own stuff inside.  Peltex lines the base to make the Colleen sturdy and you can swap it out with needlepoint plastic if that’s more to your liking.
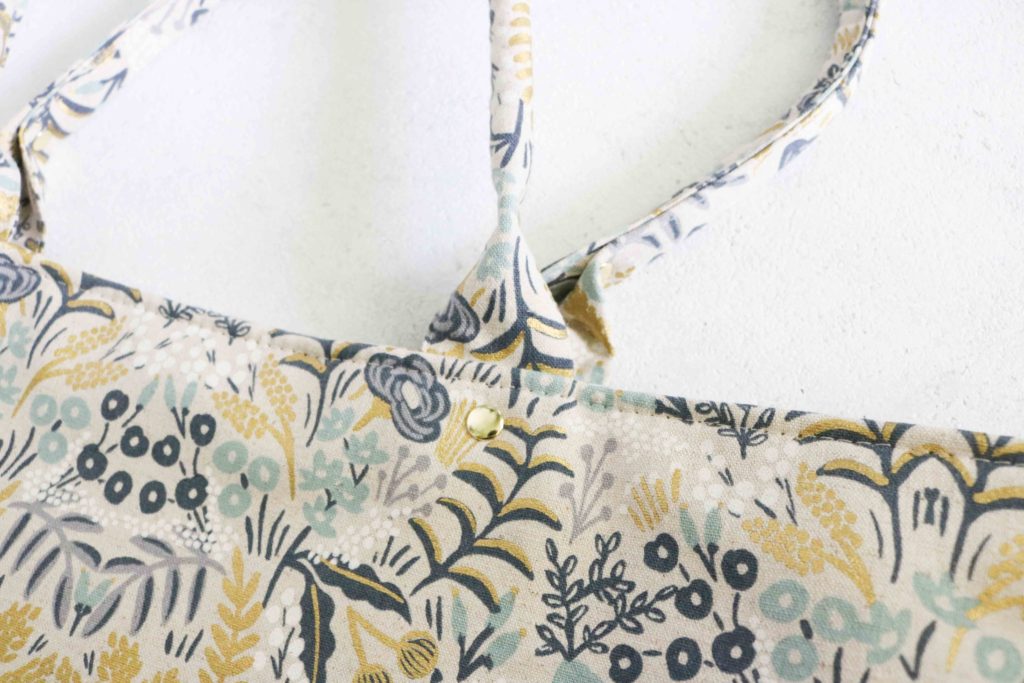
The handles are secured down with two rows of top-stitching, but you can opt to use rivets in place of the second row of stitching.  The extra bit of hardware makes this pattern look so chic and professional.
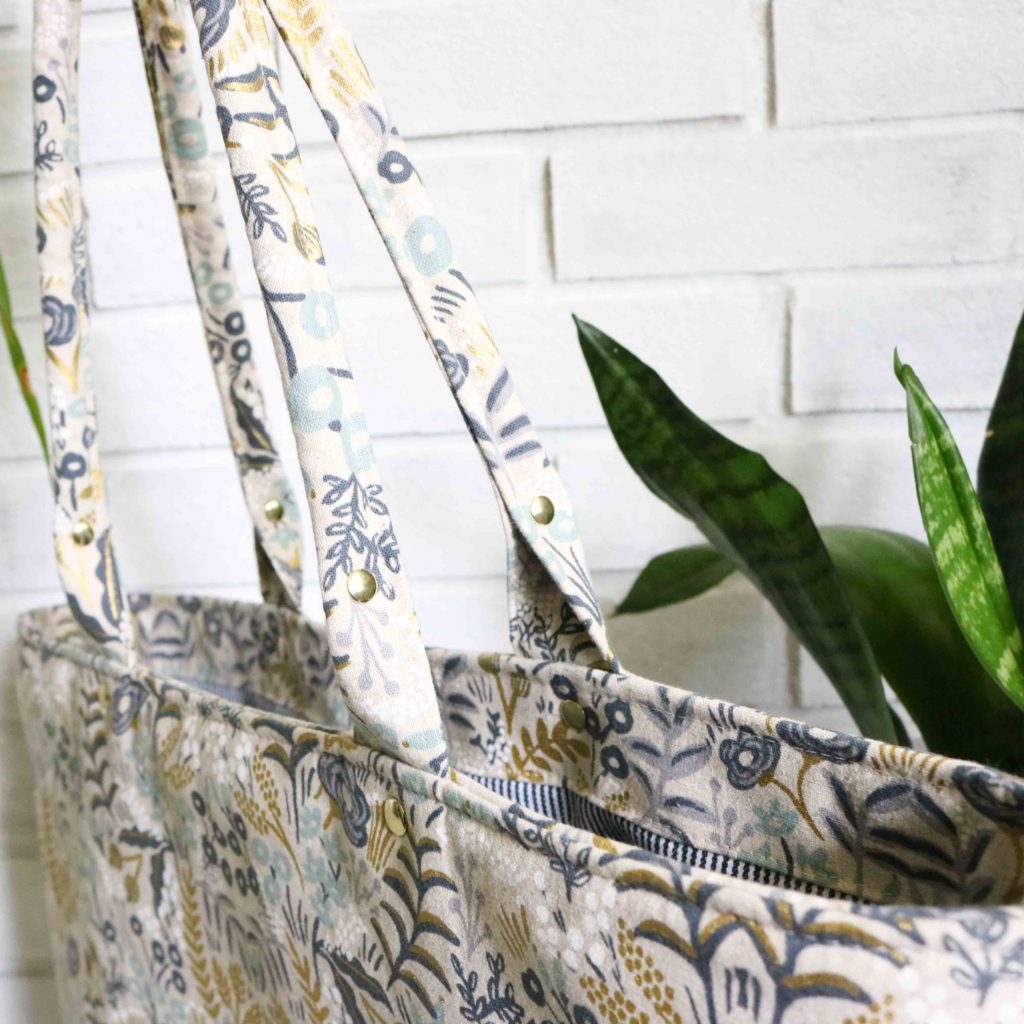
Additionally, rivets can be added to the handles for strength and for a little more jazz.  These are all fun ideas to help bring your Colleen Tote up a notch!
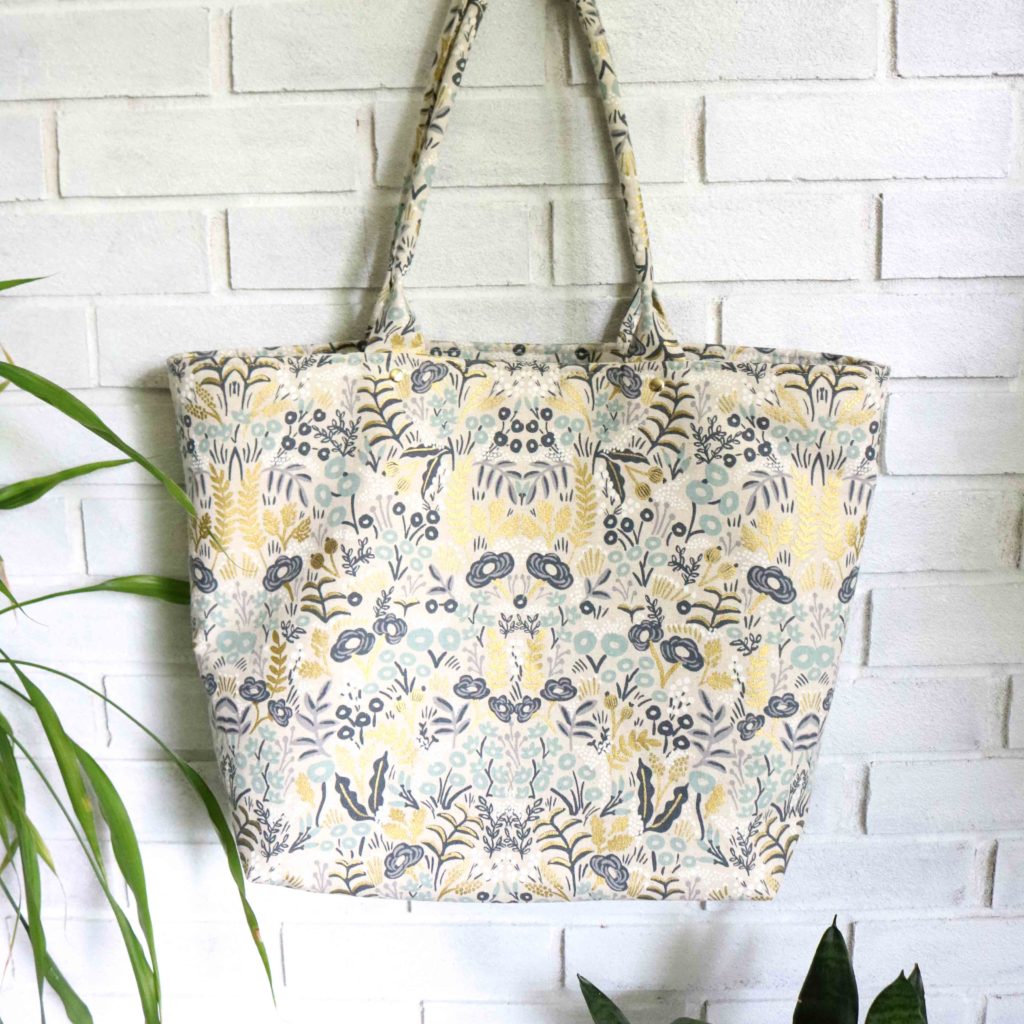
As part of the release this week, you can purchase the Colleen Tote digital PDF pattern for 20% off in my Etsy shop. Additionally, you can also get my Claire Foldover Crossbody bag on sale as well! (Sale good through July 2, 2018.)


Happy Sewing Friends!

Cristy
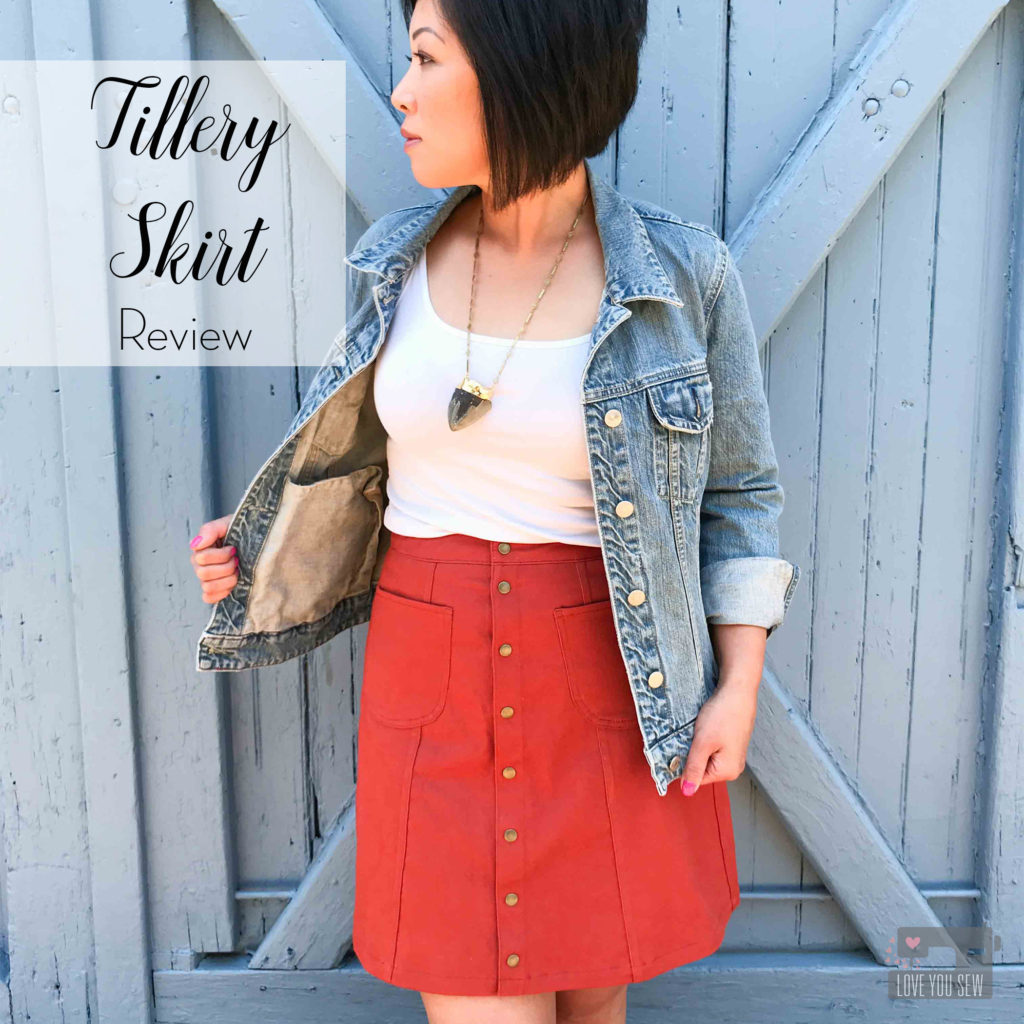
Tillery Skirt Review

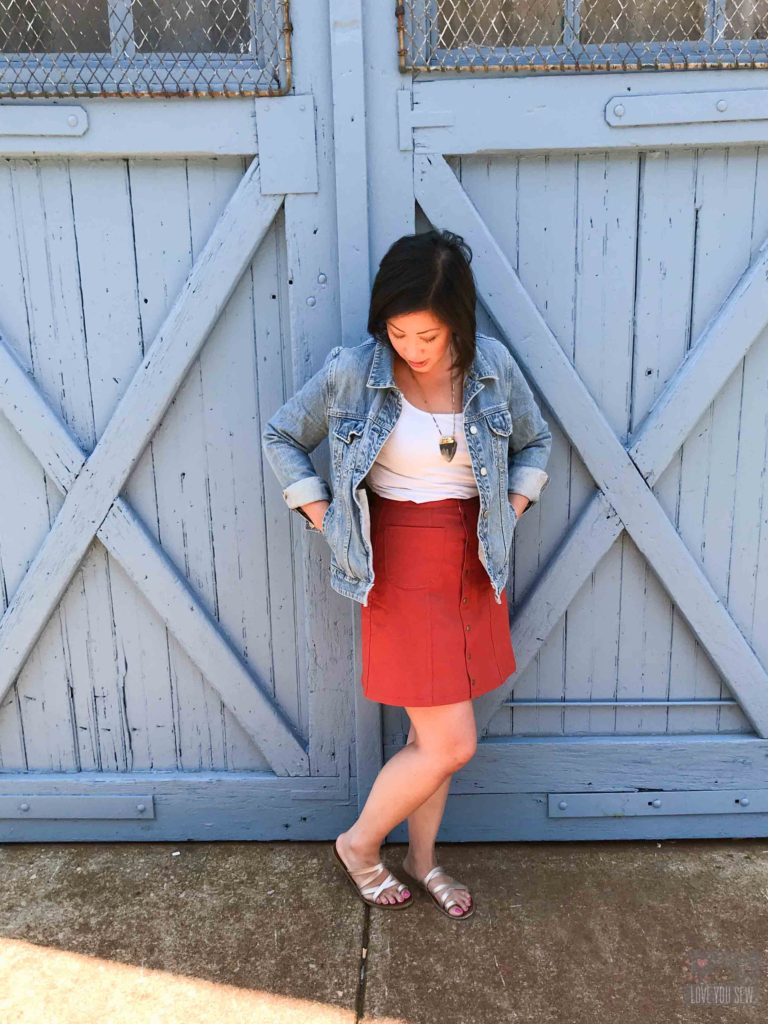
When I went to Texas a month ago, I was hoping to make this Tillery Skirt for the hot weather ahead.  Unfortunately, I ran out of time and did not make it then.  But, I was able to finish this skirt now that central Ohio feels like Texas…at 93*F!  I’m so glad I was able to get this made for our first of many heat waves this summer.

Sometimes shorts just don’t cut it.  My wardrobe was in need of more casual skirts to get me from swim lessons with the kids to date night with the hubs.  So when I saw this digital pattern by Blank Slate Patterns, I knew I had to make it.  The Tillery is a great high waisted skirt with a 70’s vibe making my Boho fashion heart flutter.  Who doesn’t love the look of the flat felled seams?!?

I recently had the opportunity to visit the Imagine Gnats shop and instantly gravitated to this J.Crew overstock stretch twill in Brick.  This rust color is definitely my summer color to go with all the denim <3  It is so rich and complements my coloring.  I can always use the extra comfort of Lycra, so the extra give in the twill makes it perfect for a skirt or pants.

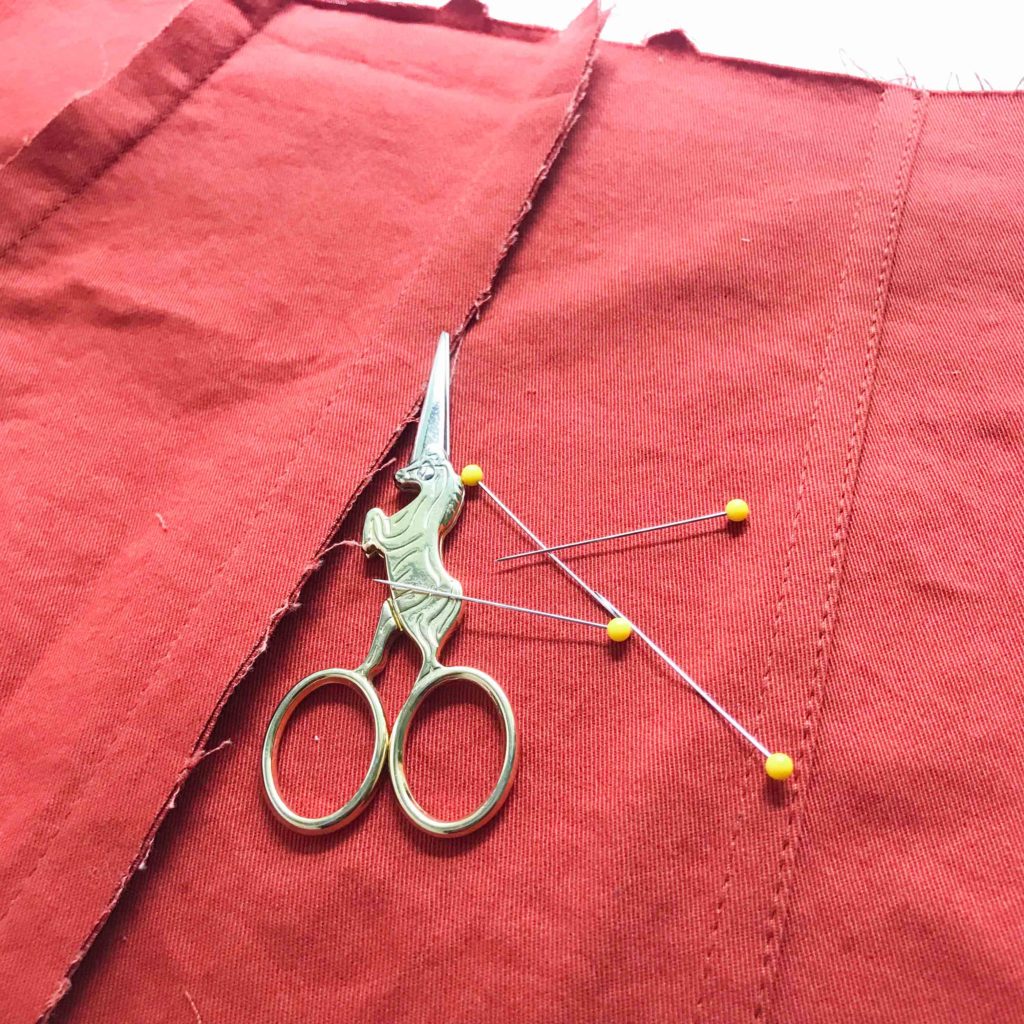
As mentioned earlier, these flat felled seams give the skirt so much design character.  It maybe a little intimidating sewing eight panels to make the Tillery, but it is all worth it.  I never made these kind of seams before, but after watching Melly Sews’ video, the instructions all made sense. TIP:  Baste all panels together to check fit. I ended up grading in a size around the waist.

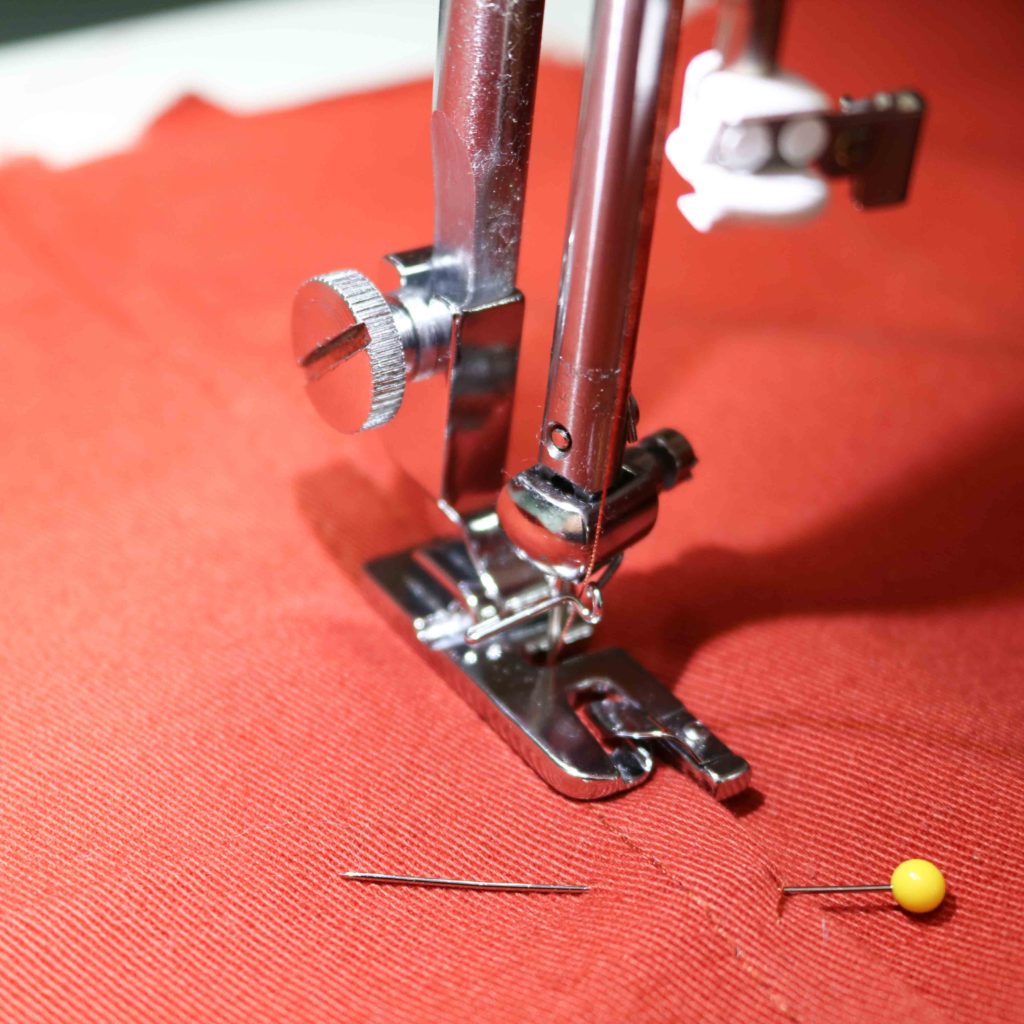
With the seams visible and lots of top-stitching ahead, I used my rolled hem foot to give me an even edge to sew along.  Many machine have an edge or top-stitching foot.  My Juki only came with a few feet and this foot works great to get even spacing.

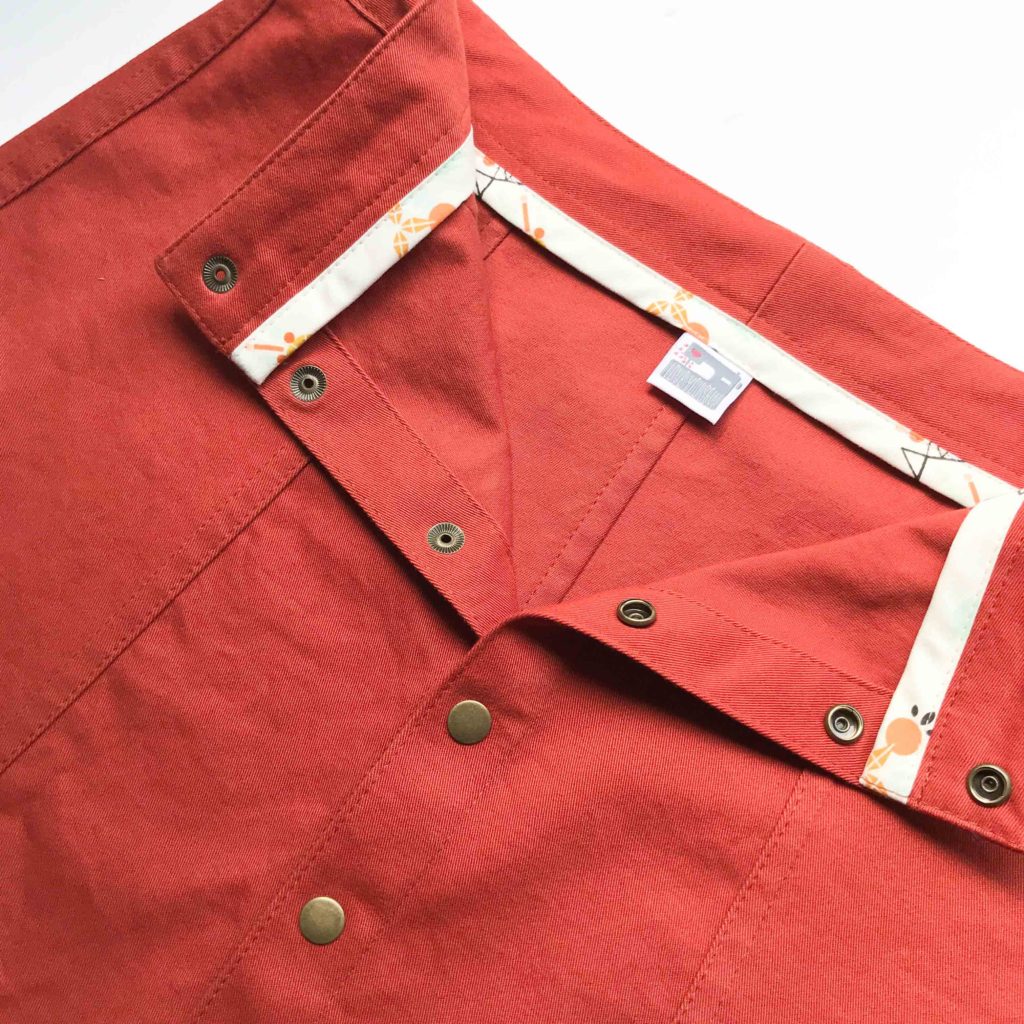
Look at those beautiful skirt guts!  Or maybe lack thereof…  The flat felled seams gives the skirt such a clean inside, so it’s soft and smooth all around.  I used some Wanderer fabric by April Rhodes left in my stash for this extra pop around the waistband.  The little hints of black and mint really bring out the brick color of the fabric.

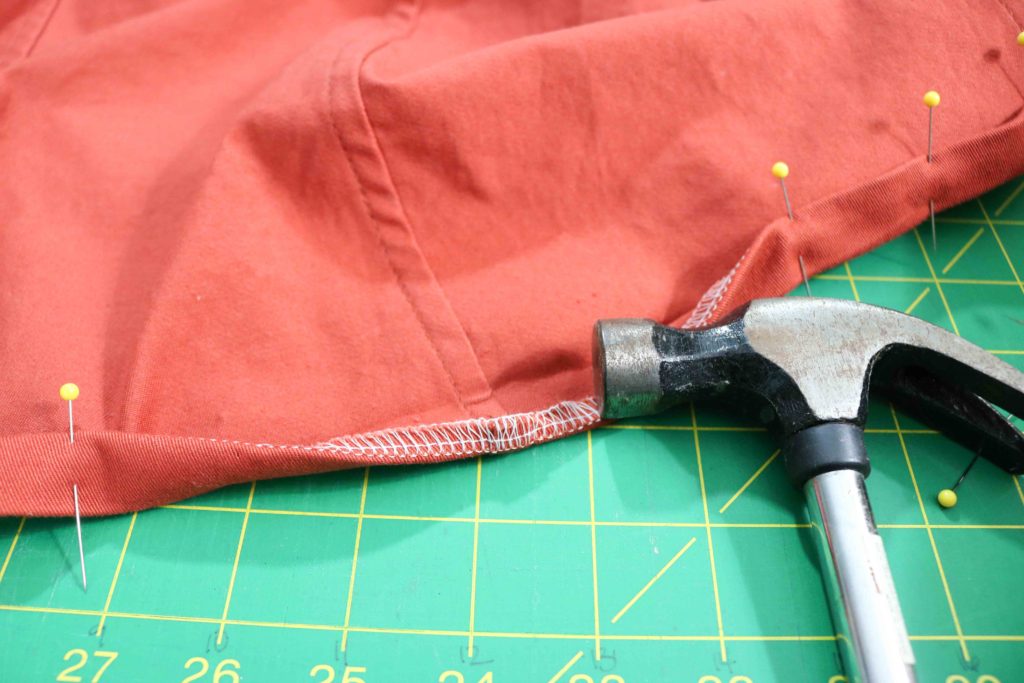
As you can imagine, the hem of the skirt can get pretty thick when doubled over against these flat-felled seams.  My regular foot didn’t even want to go over all of this bulk, so that’s when I broke out my hammer to help flatten them out for stitching.  TIP:  Make sure to test your fabric and hammer to the inside of the hem so you don’t create any “shine” on the front of your skirt.

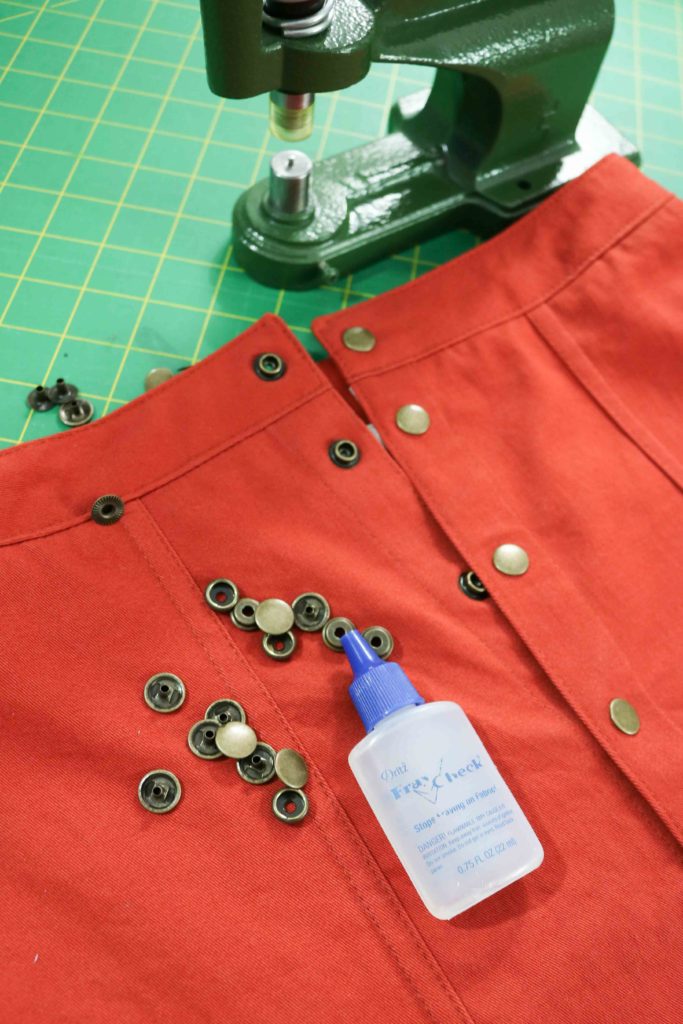
Another beautiful feature of the Tillery are the use of metal snaps.  There are instructions within the pattern with a link to video to help you, if needed.  Fortunately, I already had the snaps and the correct dies for my hardware setter (as the bag-maker you know I am.)  I was able to add these snaps quickly making the skirt look so professional.

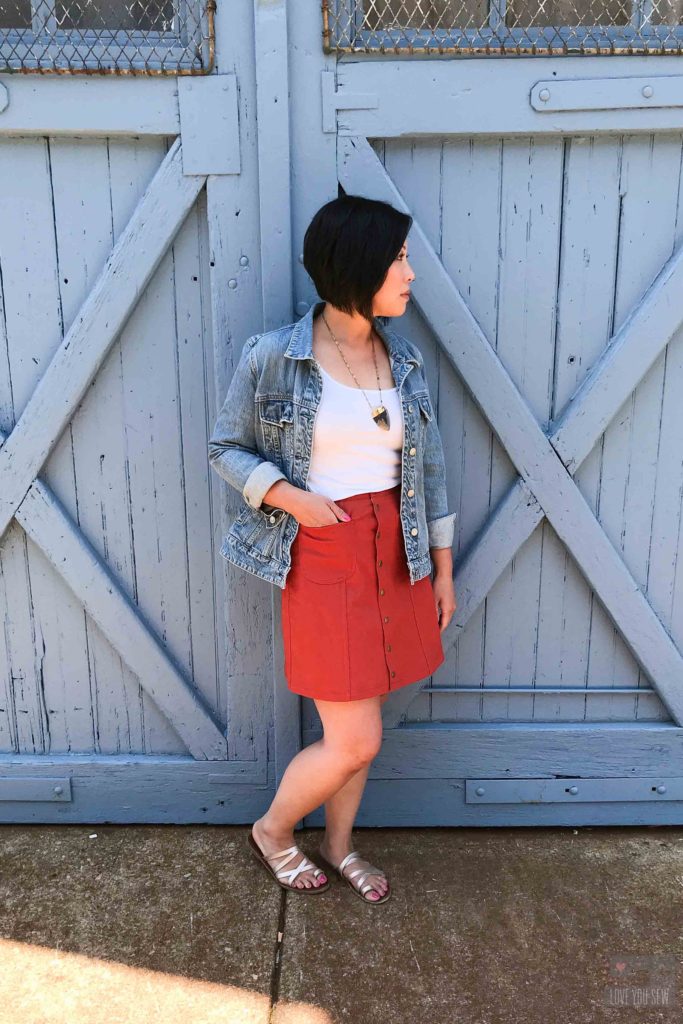
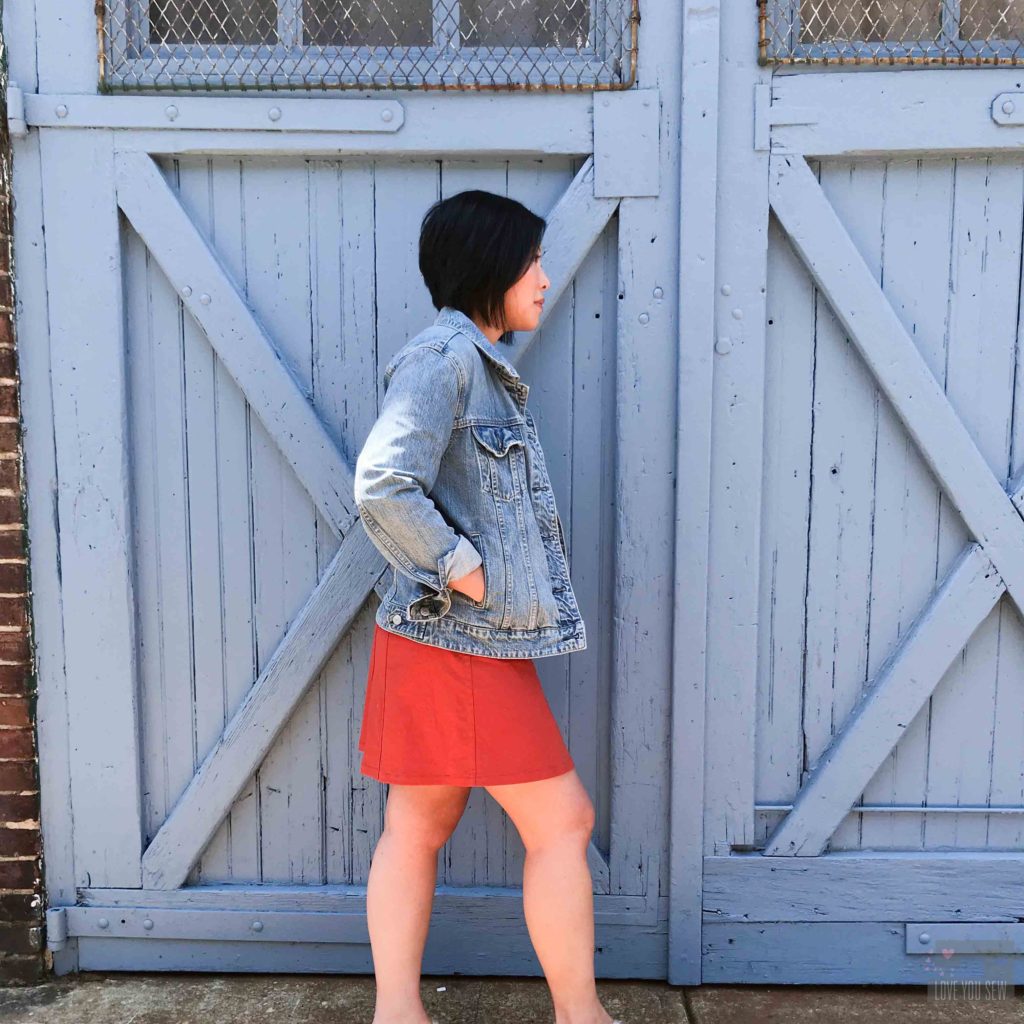
The next time I make this skirt, I think I will grade back in from the hip down.  The waist and hip fit perfectly, but with the A-line cut of this pattern, I feel like I have a little bit too much flare going outwards.  It’s hard to tell in this photo, but the skirt A-lines at every angle (not just the front and back) thanks to some extra booty…

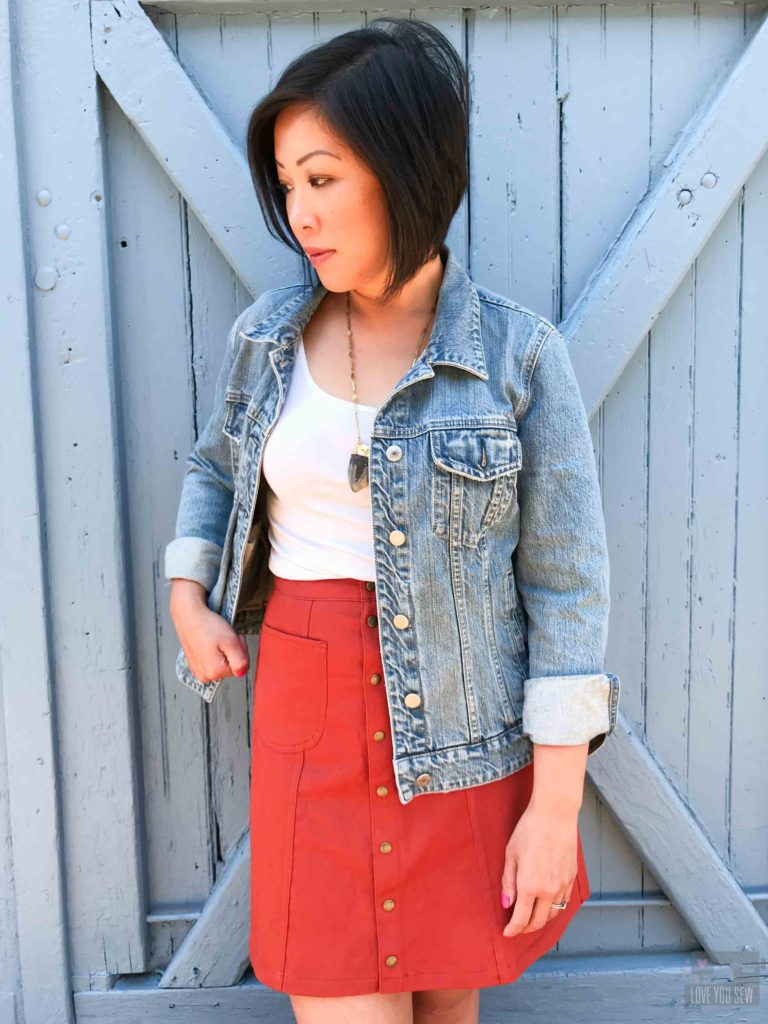
I ended up skipping the belt loops and even contemplated the pockets.  But the pockets really make the skirt and break up the high-waisted silhouette…AKA looking like old school mom/dad jeans!  Who was I really kidding?  Always add pockets.


I’m in love with this skirt and love how it all came together.  The solid fabric really brings out the seams and this brick color is a definite wardrobe staple.  My Tillery will be on repeat all summer long with it’s casual style and it will go with tanks and tees.  This piece will definitely be worn into the fall!

Project Details:

  • Pattern:  Tillery Skirt by Blank Slate Patterns
  • Sizing:  6 in the waist graded out to an 8 in the hip
  • Length: Mini
  • Fabric:  J.Crew Overstock stretch Twill from Imagine Gnats
  • Machine:  Juki TL-2010Q
  • Hardware:  Gold Star Tool Hardware Setter with in-house snaps. Unfortunately, I cannot recommend their snaps.  They bend a little when opening, but not enough to make me remove them all.  Going forward, I’ll only use Tandy Leather Snaps.)


Happy Sewing Friends!

Cristy


This post does include afflilate links for which I would be compensated only if you make a purchase.  All of it goes to keeping this blog as ad-free as possible!

Sora Sweater :: Review

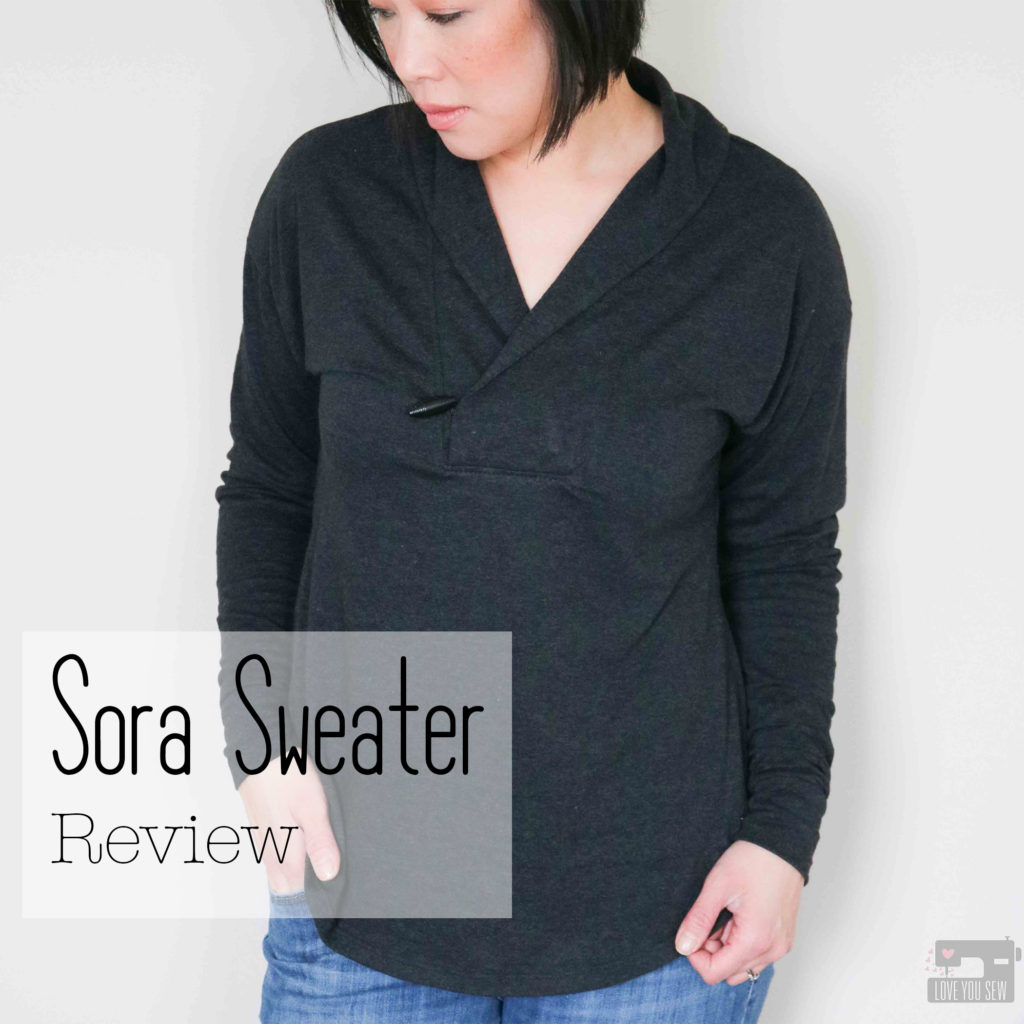
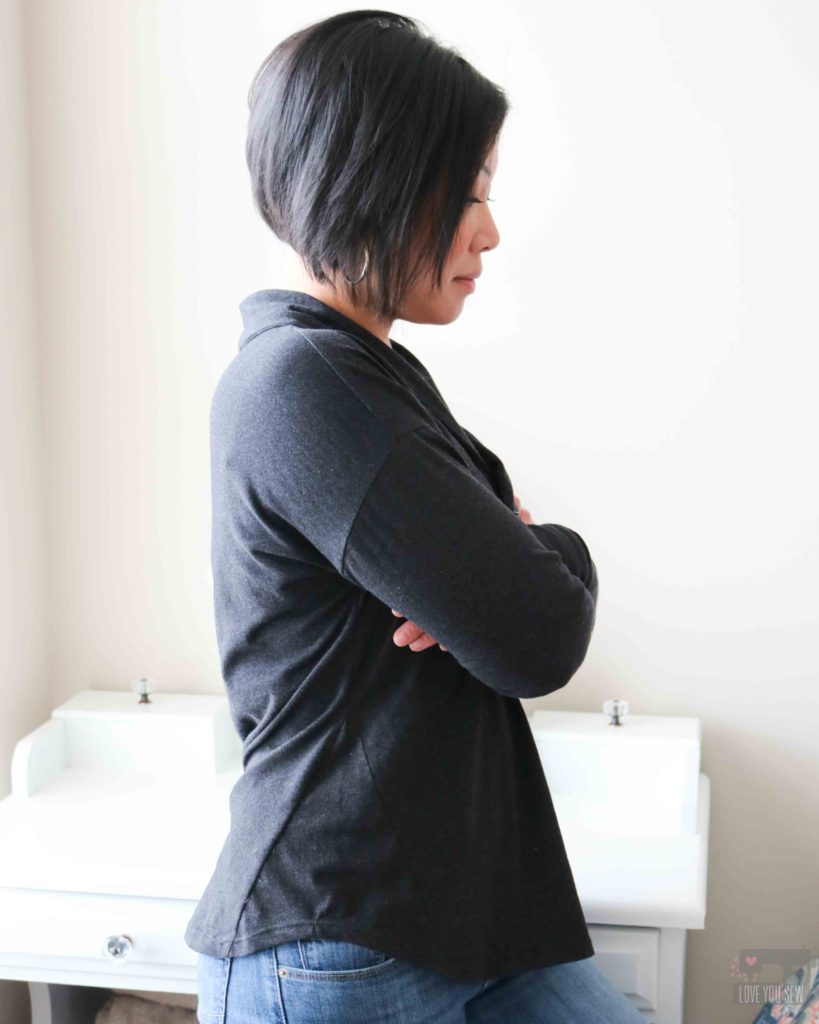
As a member of the Blank Slate Patterns Sewing Team, I get to see and test out patterns before you do.  (Yeah, it’s a pretty amazing gig…)  This last release with this Sora Sweater (aff link) certainly did not disappoint.  It’s a beautiful pullover and cardigan pattern for knits with a great relaxed and casual design available from XXS to 3X sizing.

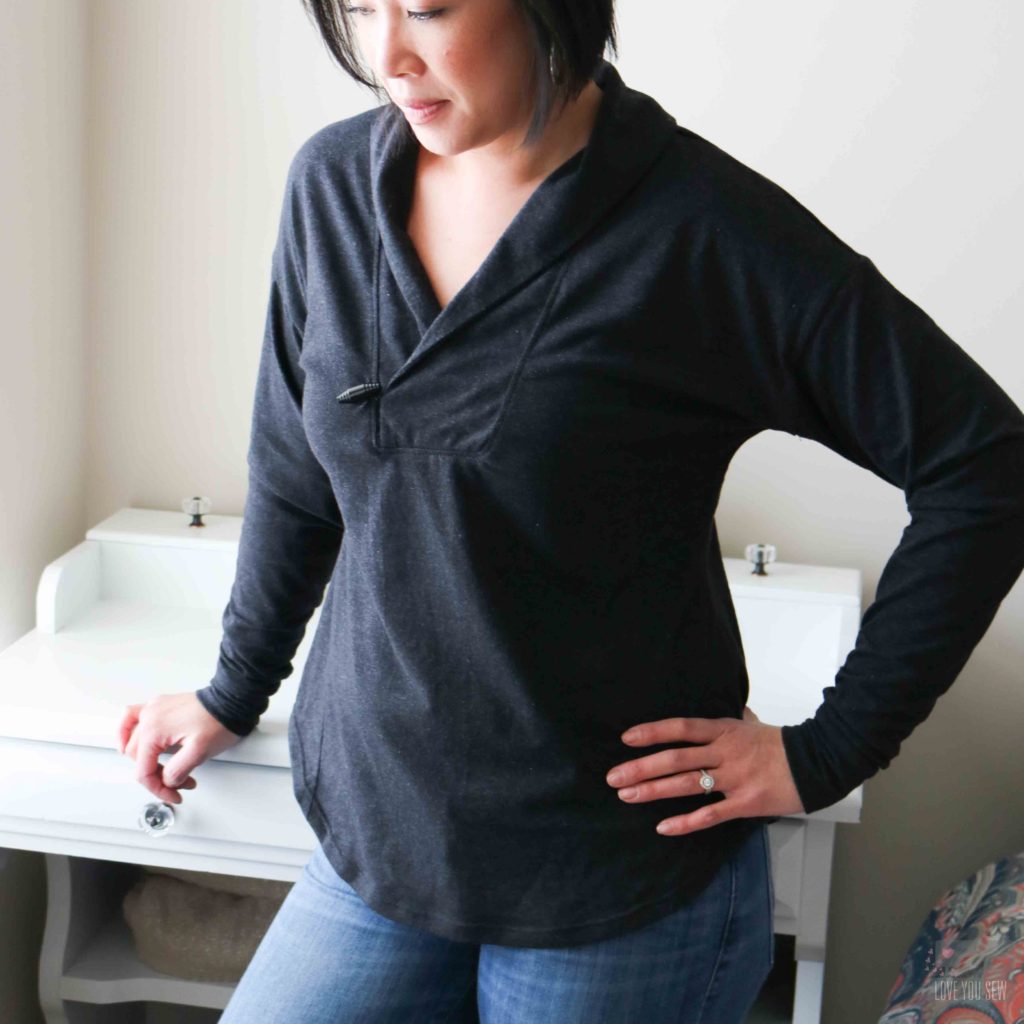
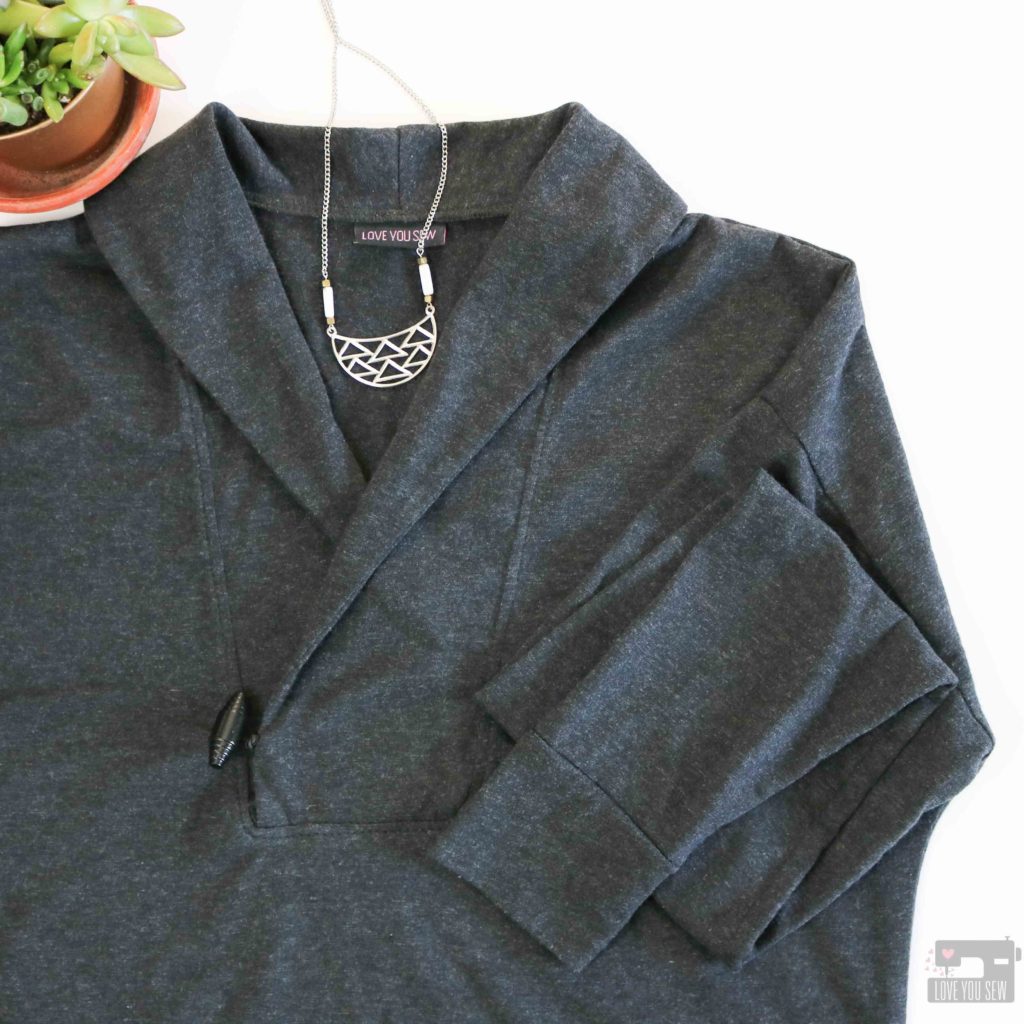
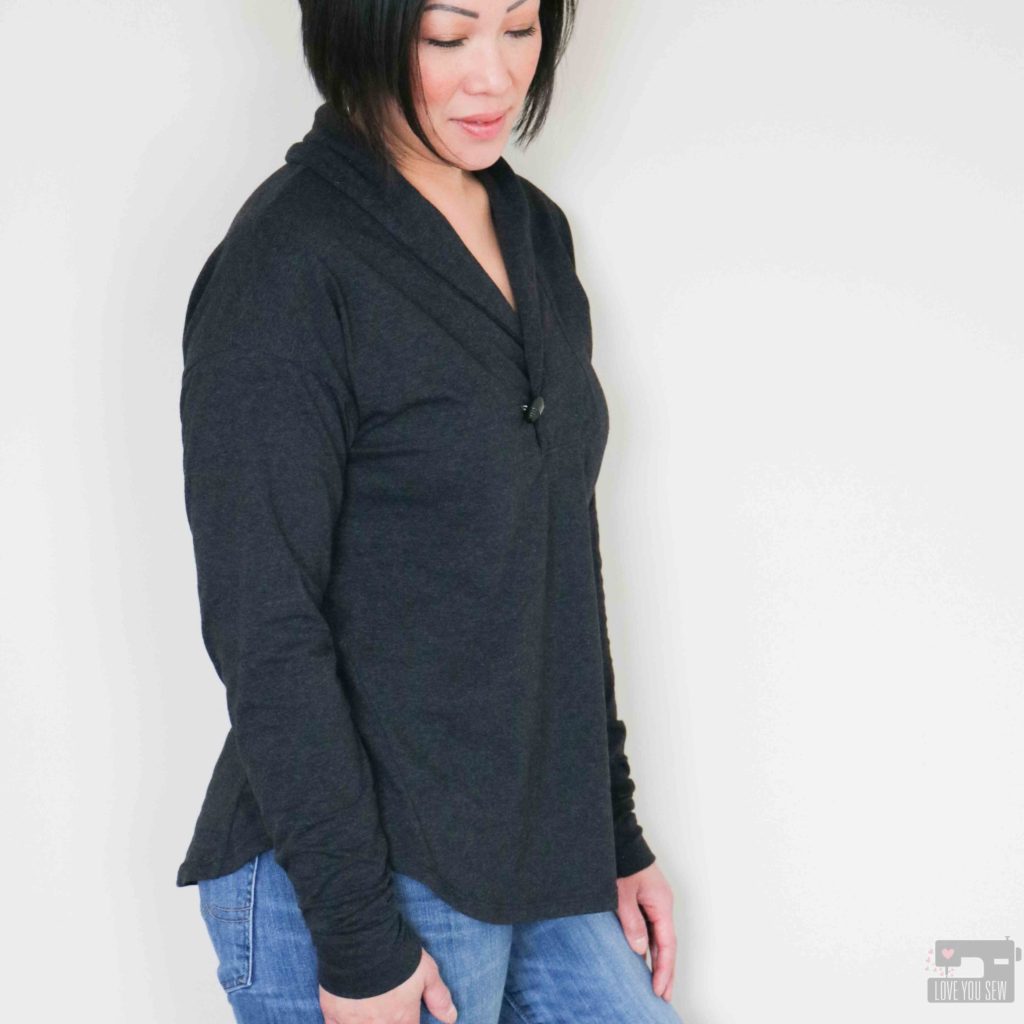
For my first sew (and yes, there are other versions floating in my head,) I decided to make the pullover view with the shawl neck.  It took me a minute to wrap my head around the construction, but I made it through pretty well for my first run.  I like to live on the edge (ha!) and not muslin with companies I’ve sewn with before.  Luckily for all of you, Melly created a video to get you through this step and you can find it here.

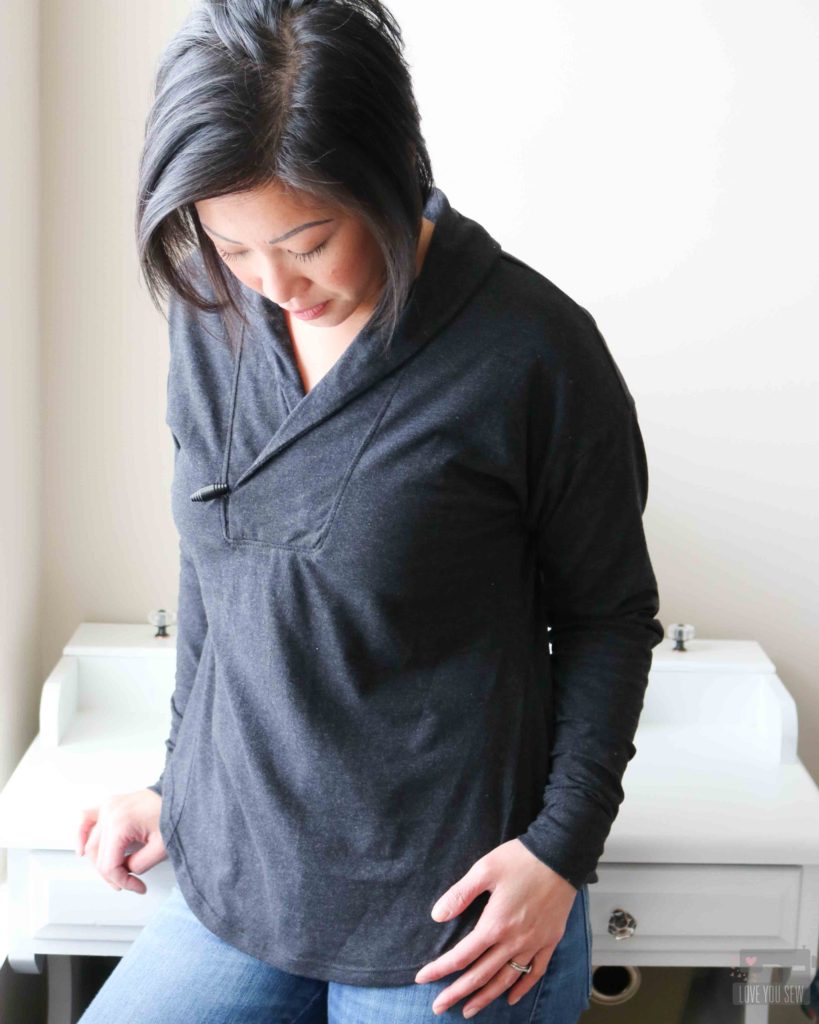
The other great feature of this top is the side gusset.  I’ve never sewn one into a top before, but absolutely love it.  It adds fabulous shape around the hips without adding volume all-over the garment.  The front of the Sora still sits nice and straight.  You can find the tutorial in the same video above.

I used a lightweight  Eco-knit made from 50% recycled fiber and 50% organic cotton.  This dark peppered gray is a nice neutral and will go with so much in my wardrobe….especially my blue and black denim jeans!  This fabric was a great find from the Instagram of TrashN2Tees .  I don’t know if Jenelle will offer the buy again, but you should check out her website.  She is an inspiration for the upcycle and textile re-use world.

I opted for the long sleeves with my make, but you can make a short sleeve version for some layering or to just wear alone.  The sleeves are drafted to be a bit longer….which I really appreciate given the style of the Sora.  With comfy cozy types of tops, I tend to pull down the sleeves to warm up my hands a bit and are perfect for just that.  If you aren’t sure what you like, you can always sew them as the pattern says and take off an inch or two if they are too long before adding the cuff.

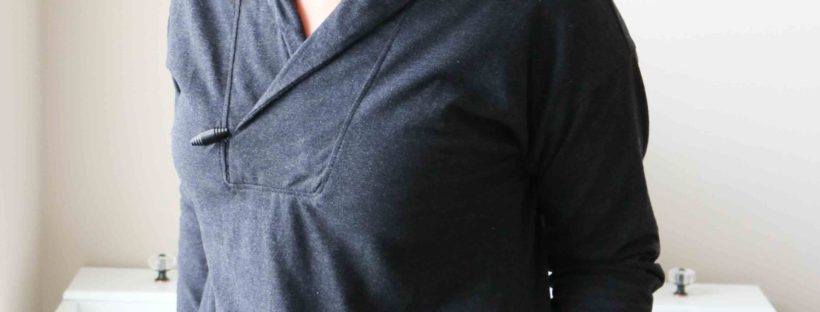
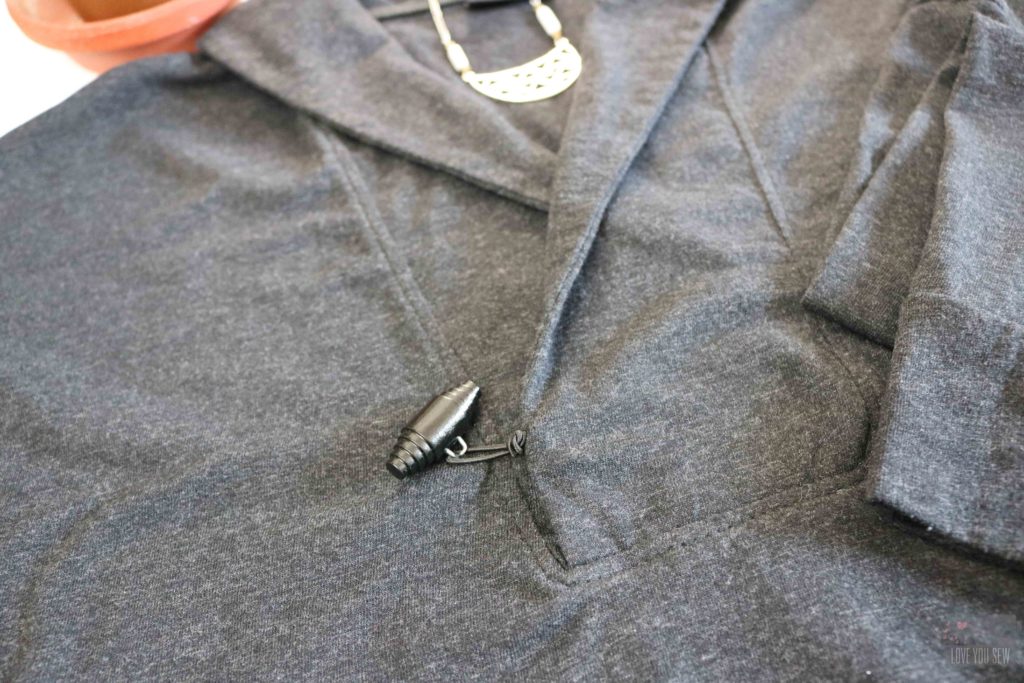
To add to the casual factor, I modeled my Sora after some menswear versions with the toggle.  I sewed in corded elastic which I looped so it could wrap over the toggle.  If you see other versions of the Sora pullover, you’ll notice that the shawl neck overlaps with the left side over the right.  But, I already sewed in the elastic and had to have the right side over the left as you see here.  So if you want to add an embellishment, remember my mistake and plan for the correct side!  TIP:  Use a small piece of fusible interfacing behind the toggle or button to keep the knit from pulling open.


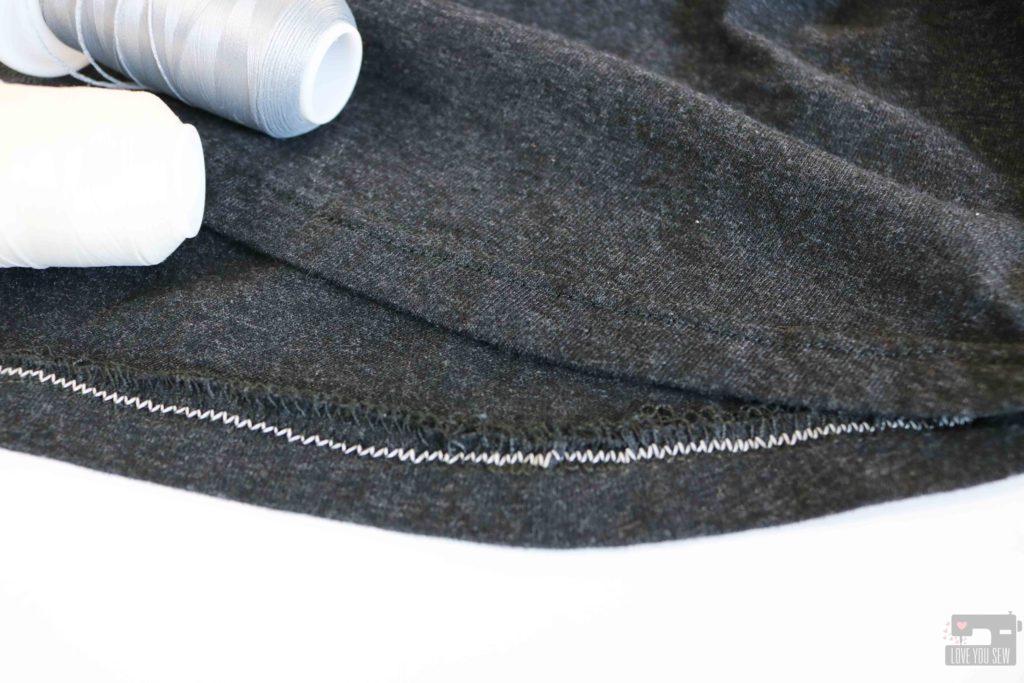
The shirt-tail hem is folded up with a nice clean finish.  I serged the raw edge and then used my twin-needle with wooly (aka bulky or smooth) nylon in the bobbin.  You can see I have grey in my stash but was too lazy to wind another bobbin when I already had the cream color ready to go.  (Hey, you can’t stop me when I want to get a shirt finished!)  I love using wooly nylon in the bobbin of my domestic machine and also in the upper loopers of my serger for extra stretch and stress forgiveness.

You can find other versions of this pattern using #SoraSweater on social media and you can find it for purchase here (aff link.)

I hope you are enjoying my continual quest for a handmade wardrobe and this top definitely fits into the basics I need and will wear for years to come.


Happy Sewing!

Cristy


*This pattern was provided to me as part of the Blank Slate Patterns Sewing Team, but I was not asked to blog about it.  Any affiliate links are noted.  As always, all opinions and words are my own.

Winning with the Sunday Everyday Sweater

I love finding new independent garment designers and was so happy to find Ensemble Patterns just a few months ago!  They have a great mission of creating comfy and stylish pieces which are intended to work with one another.  With the launch of the company and their first pattern, the Sunday Everyday Sweater, Ensemble had a great giveaway on their Instagram account.  You had the chance to win this pattern AND the next THREE  releases.  And guess who won??? This girl!!!

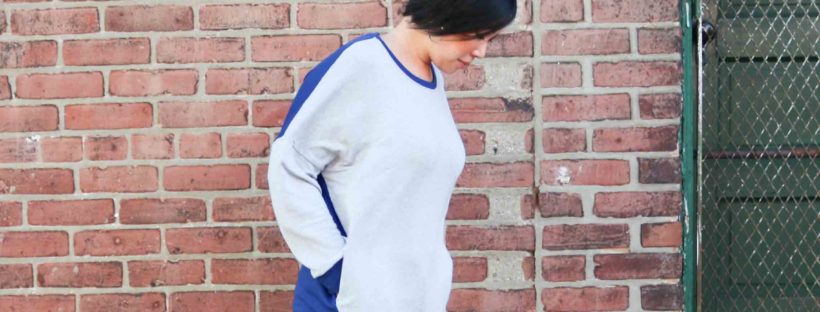
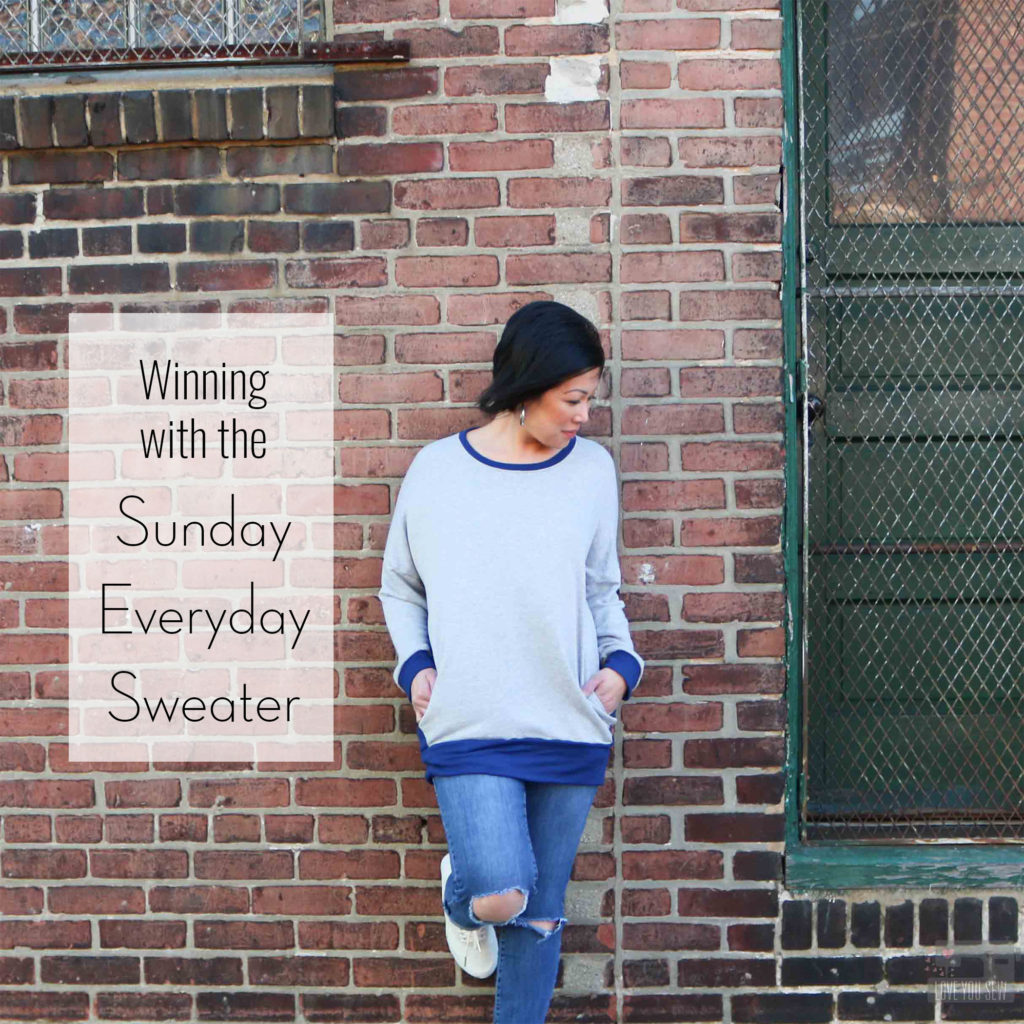
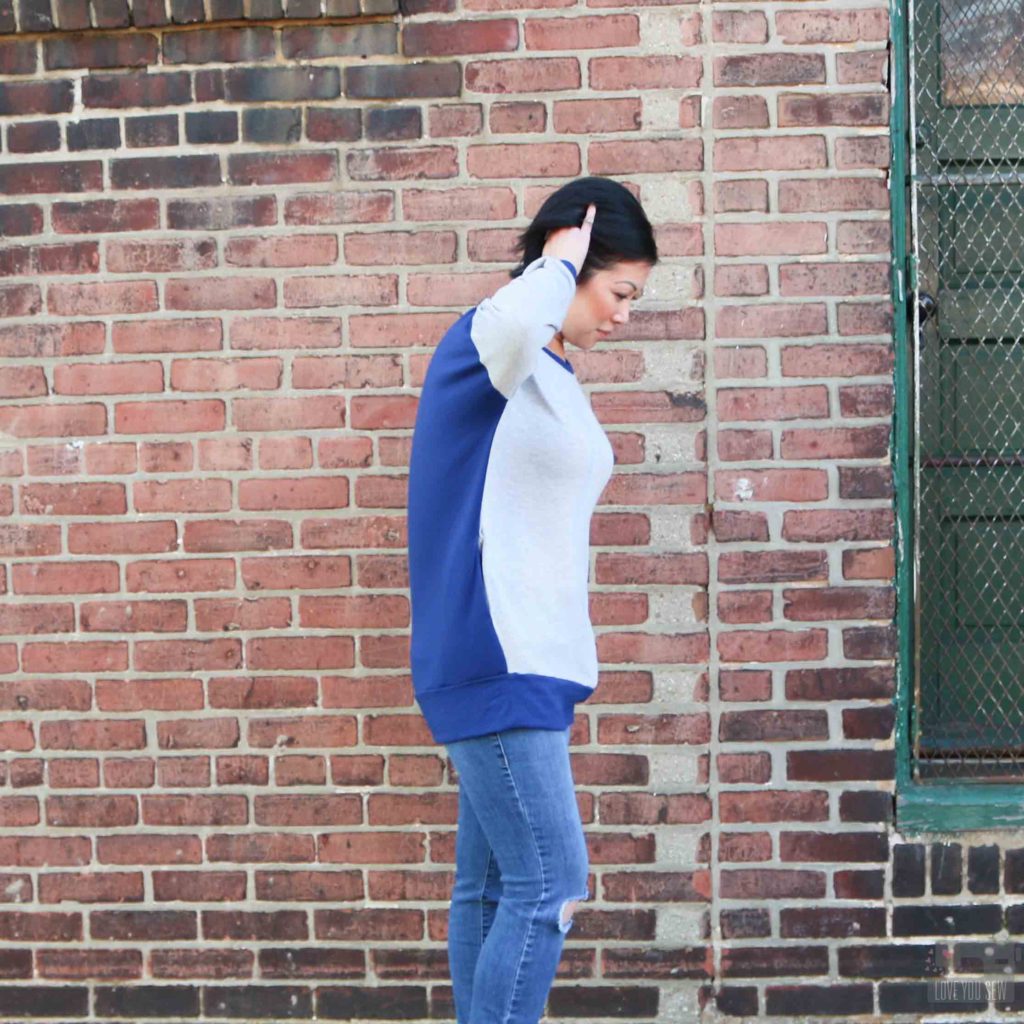
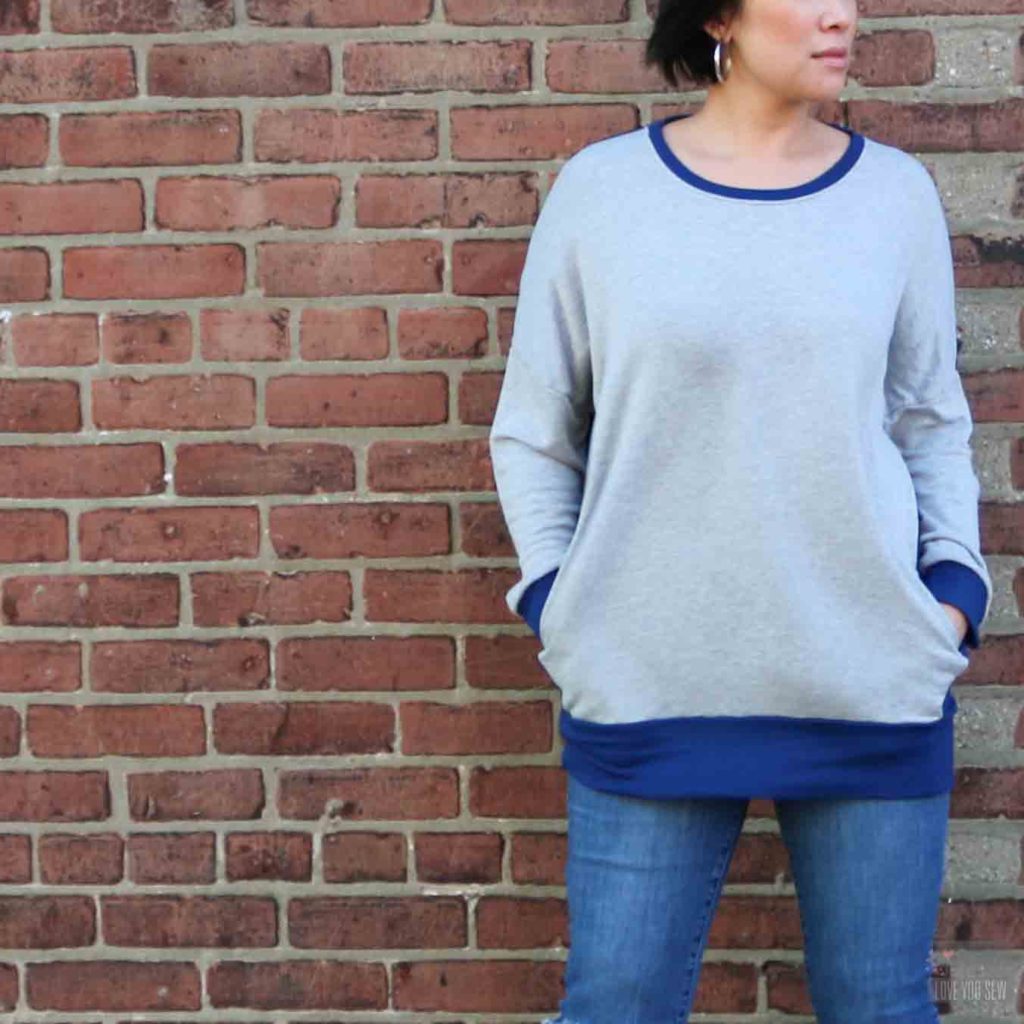
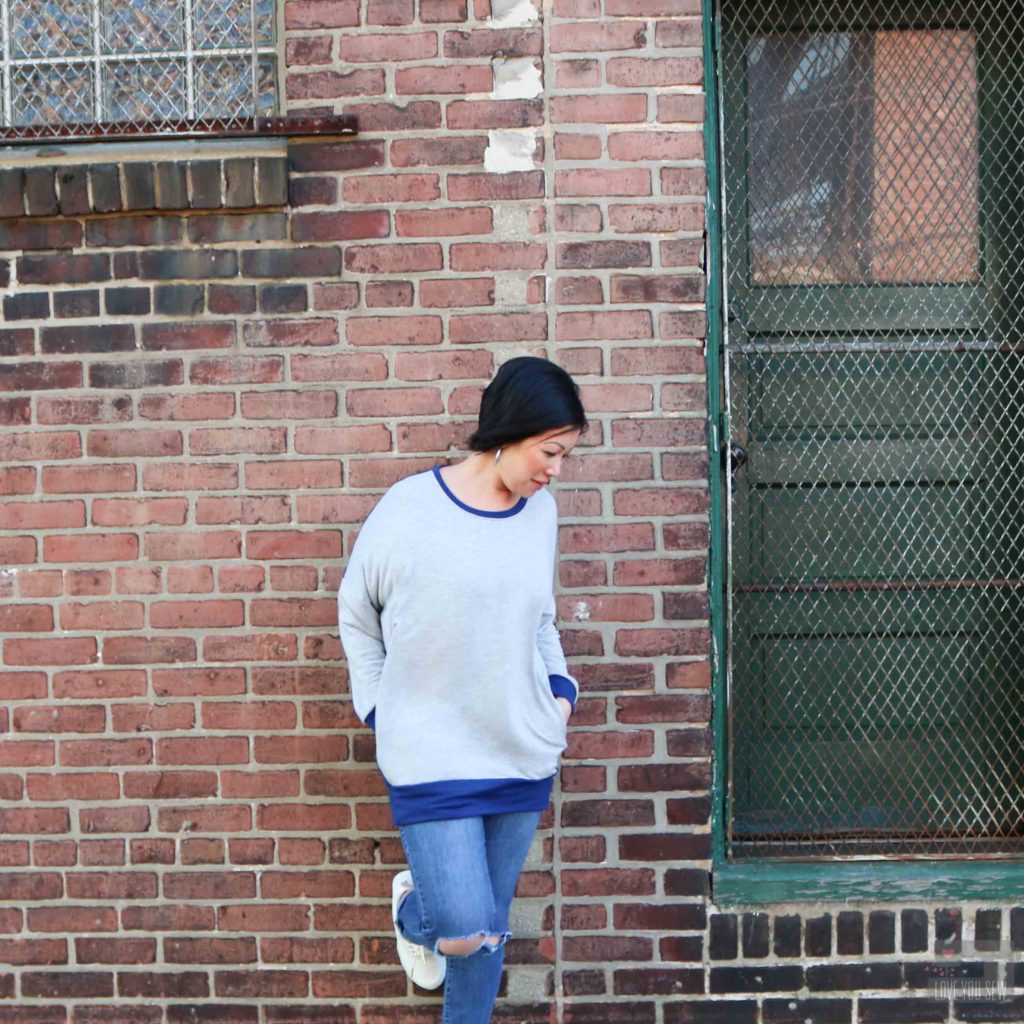
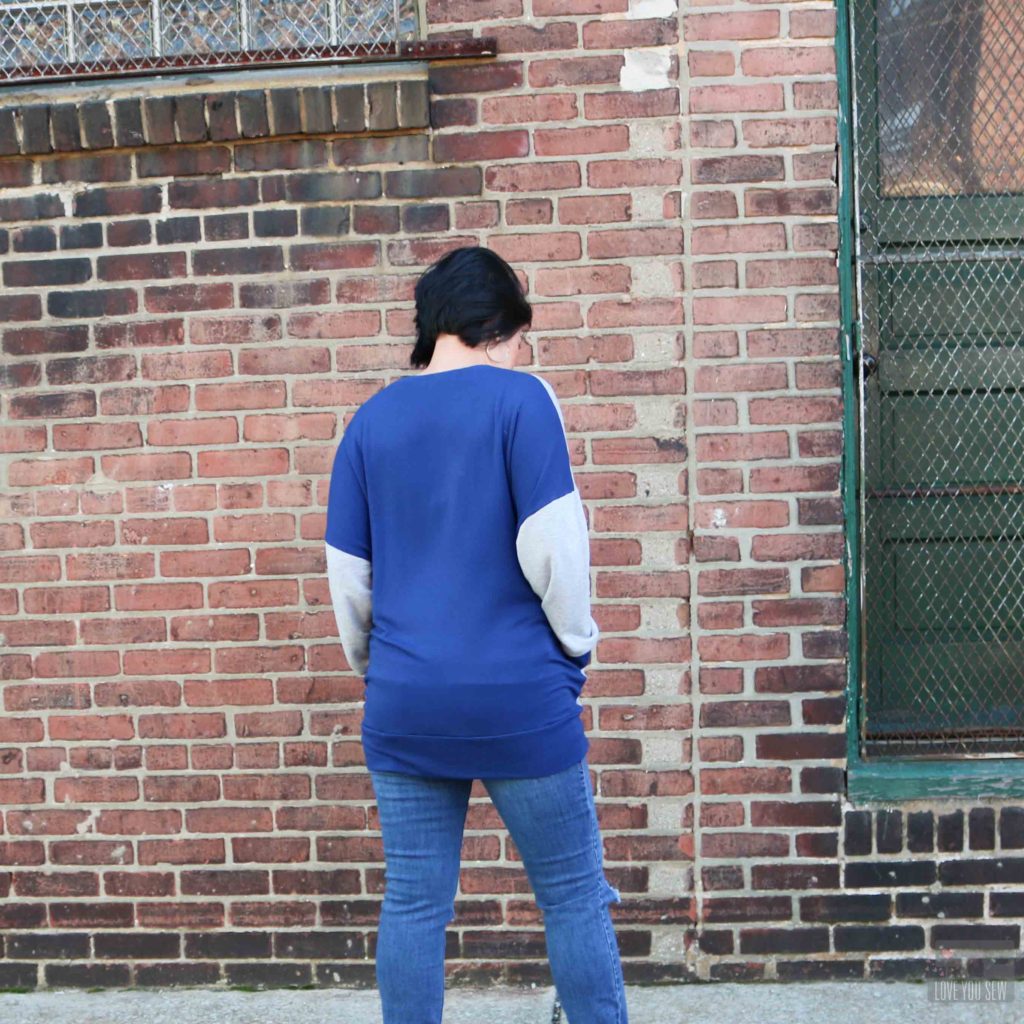
As much as I love all the pretty dress patterns out there, my busy “mom” lifestyle enjoys comfort and lots of athleisure.  So, when I received this pattern for a chic, oversized sweater, I got to work!    I wanted to color block this design and when I saw the gorgeous Bamboo brushed fleece from Imagine Gnats, I was done.  The grey and royal blue colors were just perfect…not to mention how crazy soft they are.

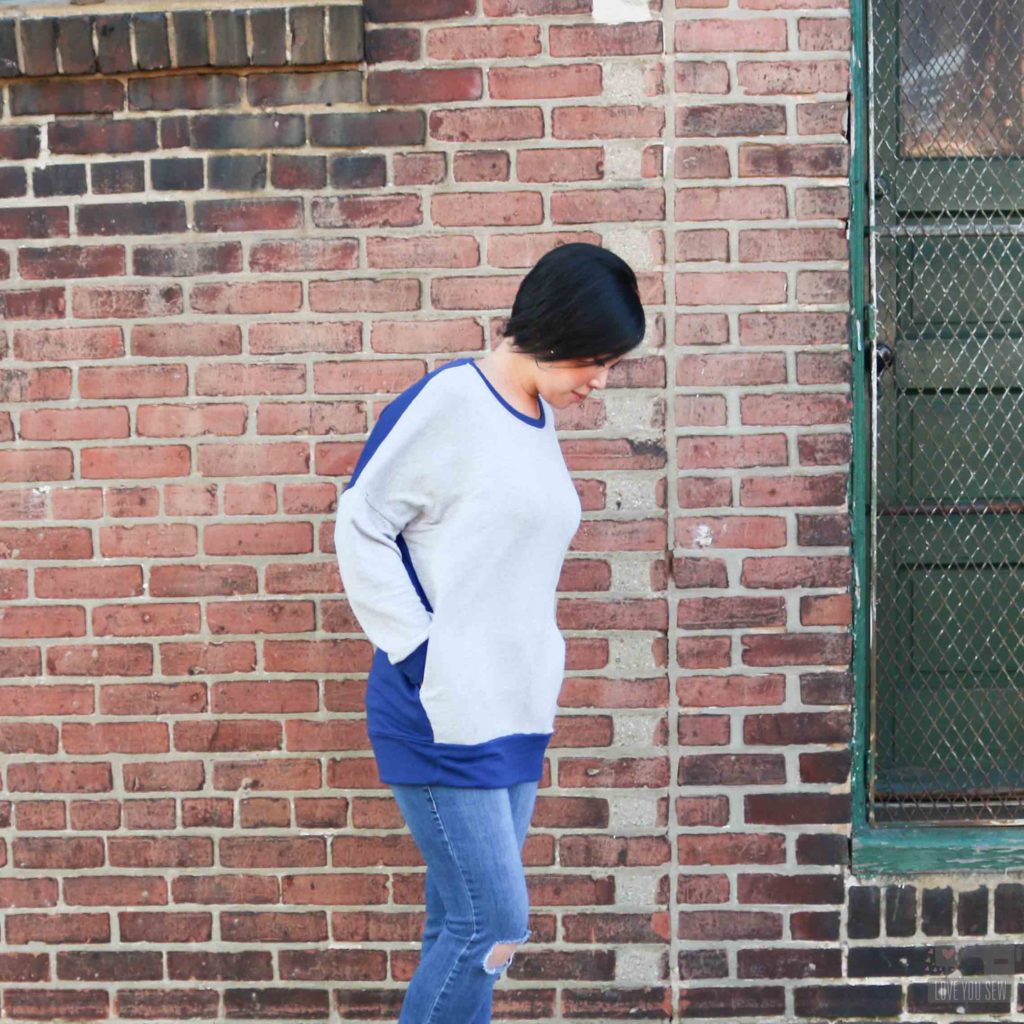
For the cut, I chose the straight hem and the basic view with the regular length.  I was torn between the cropped (because I’m a shortie) and the regular length..knowing it probably would become tunic length on me.  But the option of pockets pushed me over to the regular length.  And I’m so happy with them.  I just love how they are hidden and really amp up the cozy factor.

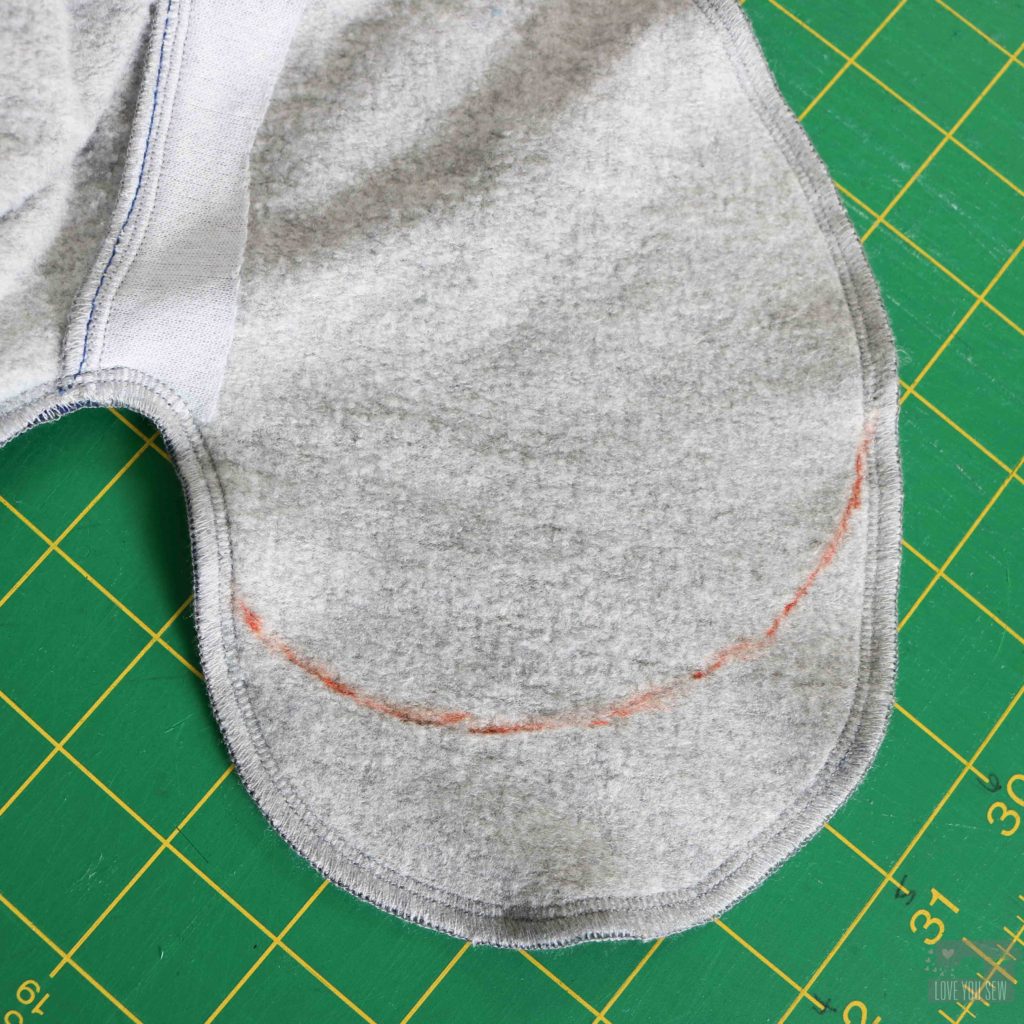
With the 40% stretch in this fabric, I ended up having to trim the pockets down by about 2 inches.  They were hanging too low.  So the pockets were either peeking out under the hemmed or they were being pushed up into the body which was creating some unsightly bulge.  I used the pattern piece to create a new curve from the pocket’s lowest point and now they are perfect.

In addition to the pockets, I also took two inches off the sleeves.  Again, I’m a shortie and the sleeves were just bunching up too much for me.  I left enough on to still keep the relaxed look and feel.

One of the other great features of this pattern are the use of notches for the cuffs, hem and neckbands.  It makes lining them up much easier for a beginner.  Most patterns assume you know how to evenly distribute the band around the neck, but I appreciate how there were additional notches for where they meet up with the shoulder seams.

Overall, I really enjoyed this pattern (not just because I won it!)  There is both a PDF and copy shop print options, so I was pleased off the bat.  Taping paper together is on the bottom of my enjoyable sewing tasks list…ugh….  I do love the oversized look and feel of this design….and who doesn’t love pocket options?!?  Next time I make this pattern, I want to try it with a heavier weight knit and in the cropped length, but I still want to incorporate the pockets.  We’ll see if I can squeeze in some smaller ones like I altered here.

Are you into comfy oversized sweaters like this design?  I’m a definite YES!  I can’t wait to see the next pattern releases.


Happy Sewing!

Cristy

Chi-Town Chinos with Indiesew

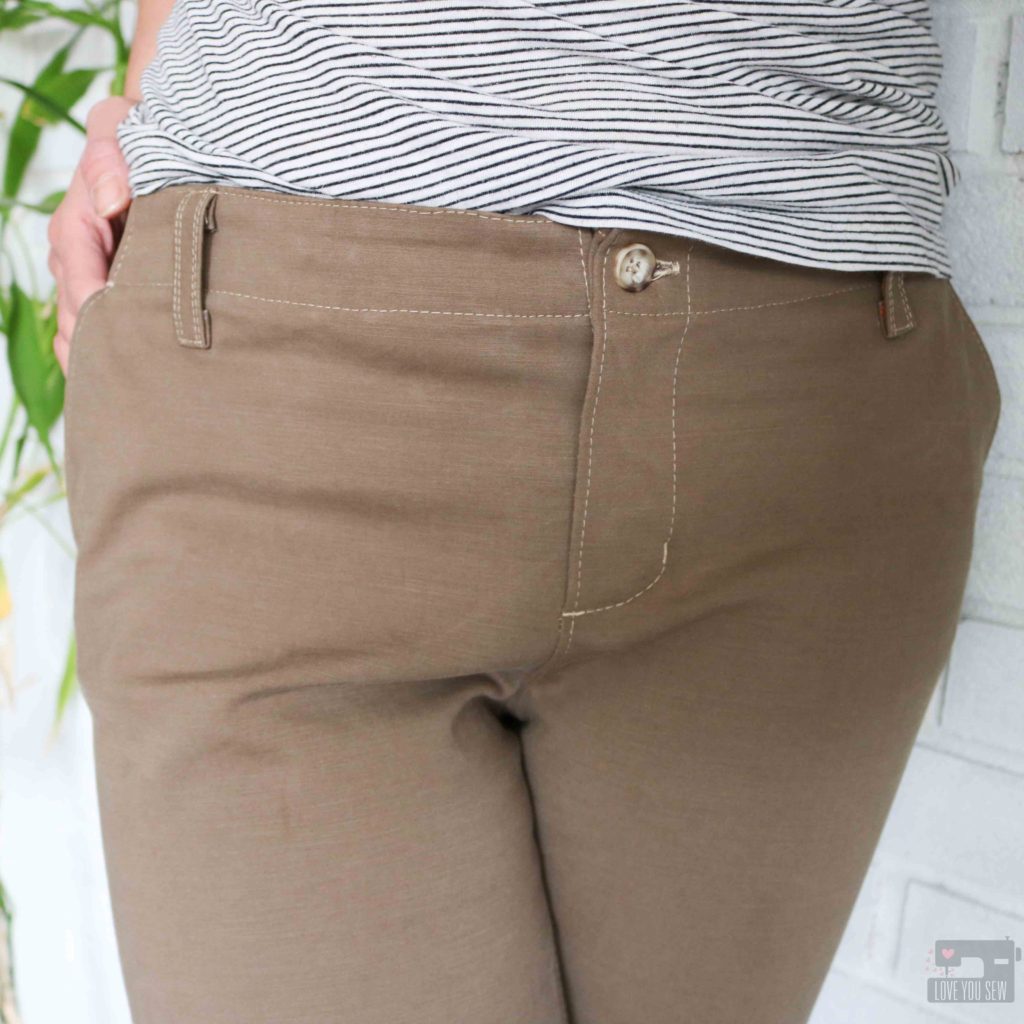
My quest to add more handmade clothing to my closet continues!  Check out my previous Make Nine post with all of my 2018 garment goals here.   I’m so happy to be checking off one of the patterns off my list…and it’s still only February!  The Chi-town Chinos are complete and it certainly wouldn’t be possible without the resources and products from Indiesew.


My handmade wardrobe is still in need of basics which include “non-elastic waist” pants.  Don’t get me wrong, I LOVE an elastic waist, but sometimes you just need a clean and classic pair of trousers.  The Chi-town Chinos are just that with their timeless design and versatility.  This pattern can also be made into a skirt or shorts, and has a number of different pocket options.  For the pants, I needed both the original pattern plus expansion pack #2, which you can find all at Indiesew. If I’m buying a pattern, I like it to go the distance and I appreciate all the options.


Trousers have been lower on my garment list for awhile.  There is so much more fitting required…especially since I have wider hips and heavier thighs than my waist aka booty issues.  I’ve always been plagued with RTW fit issues, but I’m always up for a challenge.  After making so many tops and skirts, I knew this would have to be next.  Luckily, there is an amazing maker gallery on Indiesew’s website.  Searching hashtags on social media is great for some photos, but I love the in-depth reviews and blog links in the “Creations” section.  It’s SO nice to see the Chi-town Chinos on so many different bodies and read about the adjustments (if any) that each person has made.  There is also a blog post about denim Chi-town Chinos on the website, which you can find here.  With all of these resources,  I felt much more confident about my decision to make the pattern.

I had the pattern selected, but what about the fabric?  Again, the booty issues!  I was thinking I would have to make a possible looser pant with a standard twill, but then Indiesew had just enough of this amazing stretch (!!!) Cotton Sateen Hearth left for the Chinos and I knew I had to grab it.  The 11 oz weight was just what I needed to keep this silhouette looking smooth and structured.  The 20% stretch was going to make fit a bit easier and I know this fabric would be able to keep up with my momming lifestyle (which is chasing…er keeping up with two crazy young boys.)

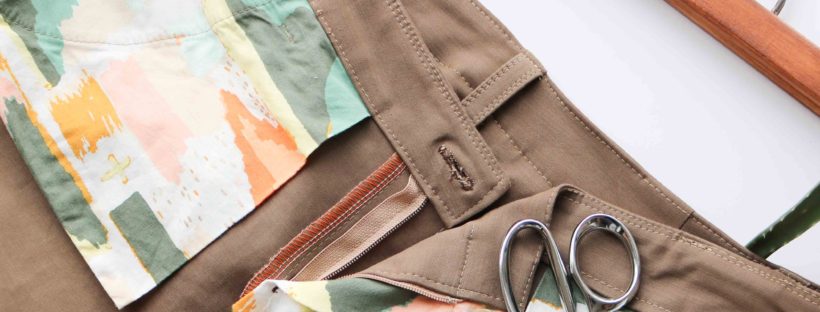
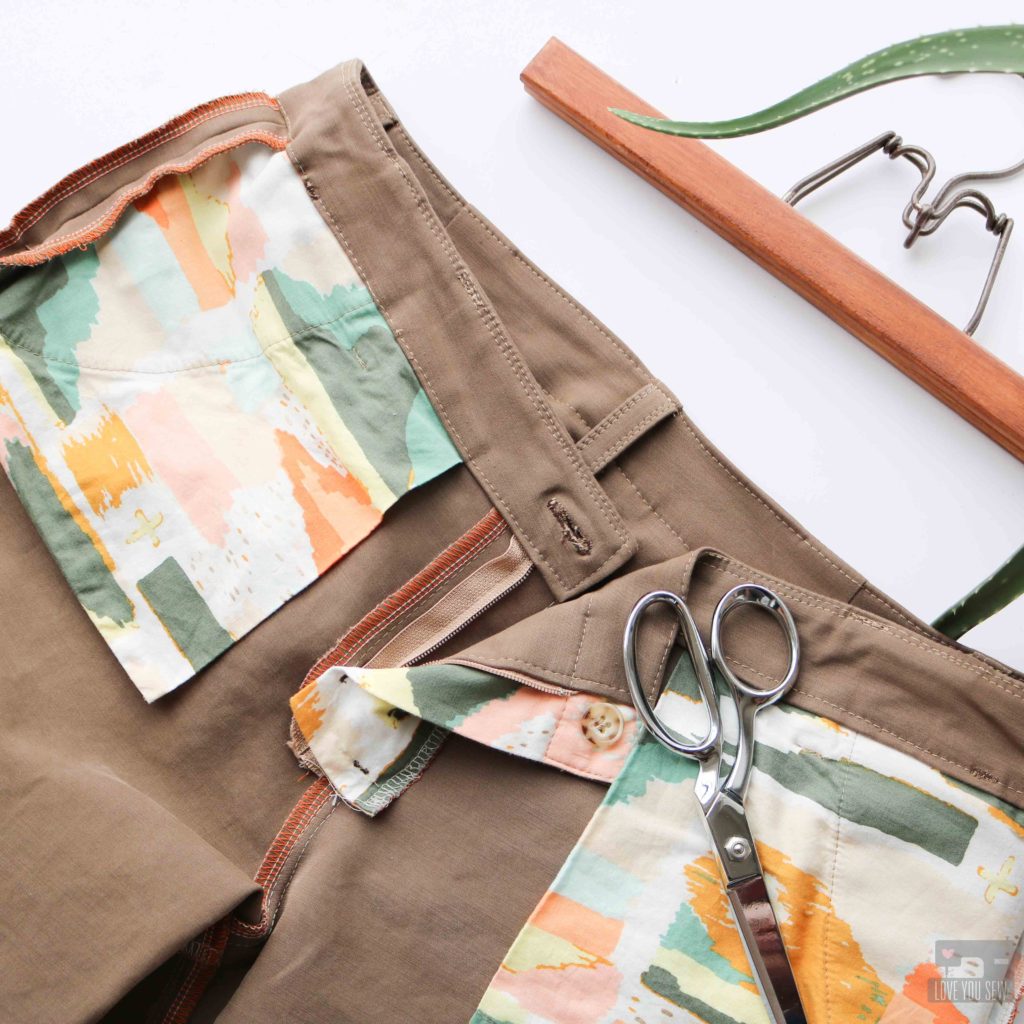
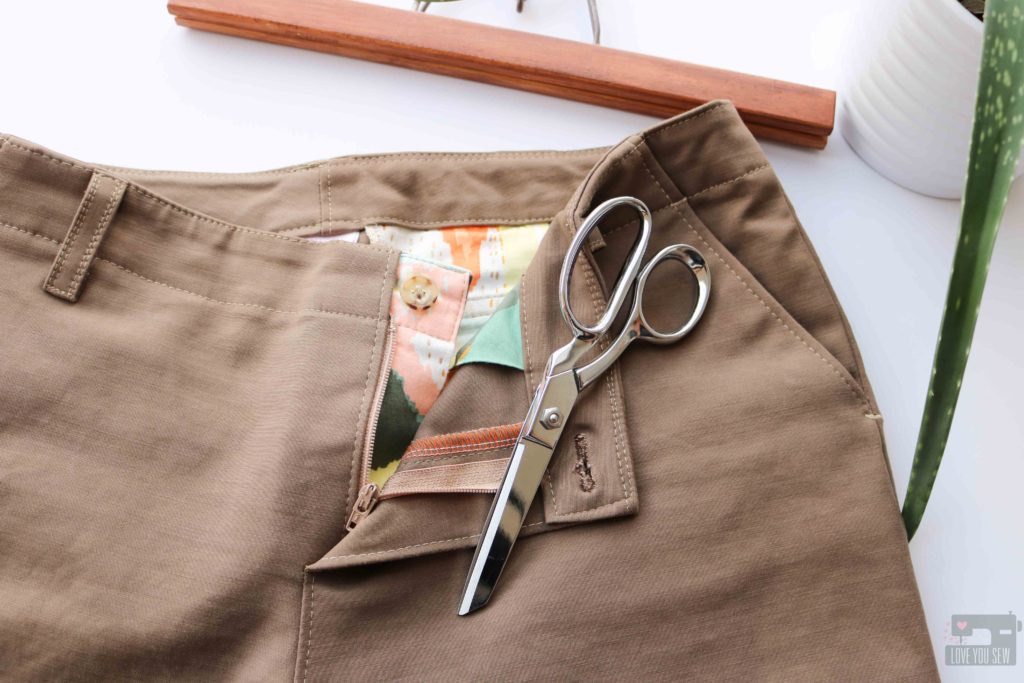
The cotton sateen was a pretty “safe” neutral, so I wanted to have more fun with the pocket bags and fly shield.  I dug out this great fabric from April Rhodes out of my stash and it definitely adds  some great pops of color….there is even some metallic!  Isn’t this the best part of making your own clothes?!?

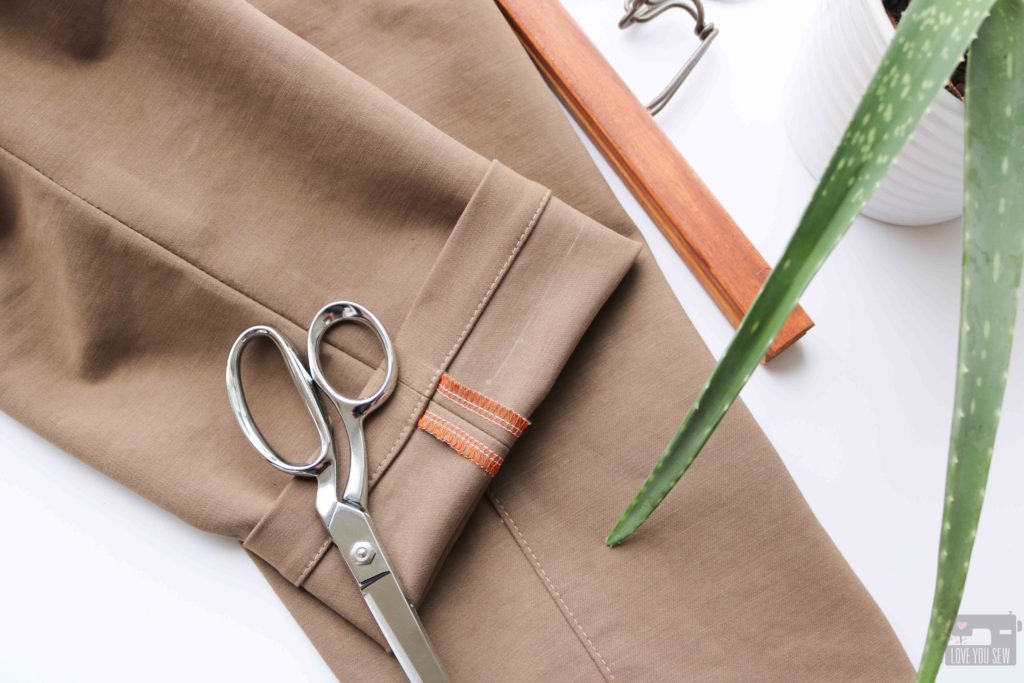
While I was picking out the pocket fabric, I figured I could also have even more fun with my serging.  I used a 4-thread overlock stitch with the stretch cotton sateen and used the contrasting orange in the upper looper.  TIP:  Using the contrast thread in only the upper looper can save on thread.  If you are like me, and only have a handful of serger thread colors, you will only need to purchase the one color.  I used cream in all the other spools and you don’t really see those colors as much.

I debated between a hook and eye or button fly closure.  But it came down to seeing what was available in my notions box…and the button won.  All the buttons are from my MIL’s vintage collection and I always try to use her old stash as much as possible.  I’ve never had to buy a button since I’ve started sewing garments!  She always had something good 🙂

I love how Alina Design & Co designed this pattern with two back darts over the pockets.  Her instructions come with how to make a muslin (don’t skip this step!) which I absolutely loved…not having to actually make the muslin, but in that she told you what pieces you needed.  It relieved me of playing the guessing game trying to figure out the pattern.  The muslin is how I knew I needed a 2 inch waist adjustment.  I sized to fit my hips and then split the adjustment between the two darts.  So one inch came out out both sides.  This made the fit absolutely perfect!

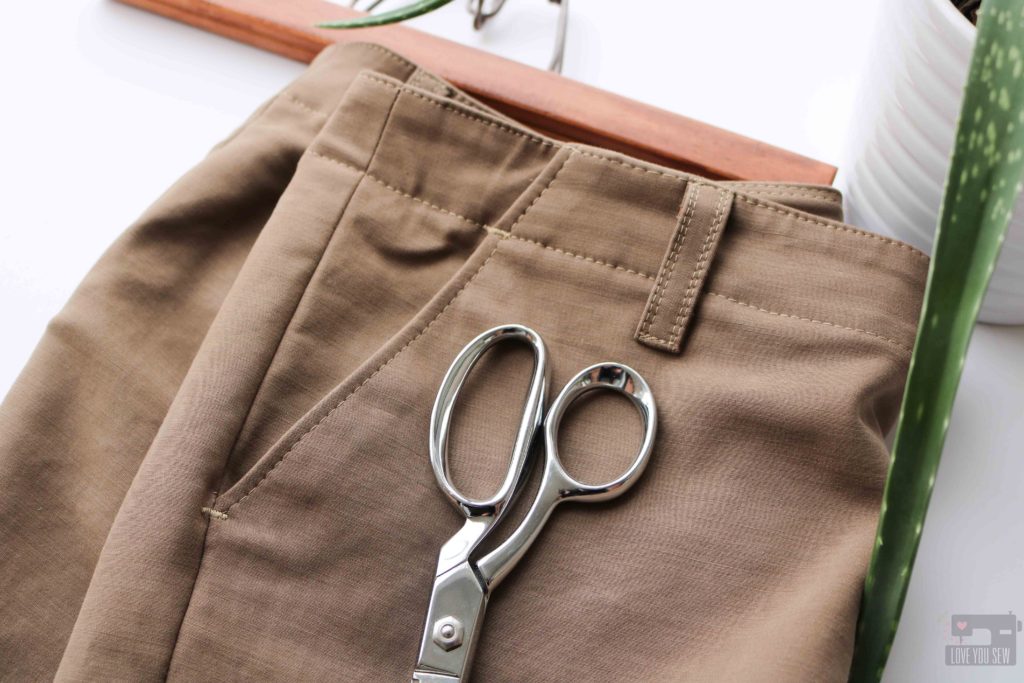
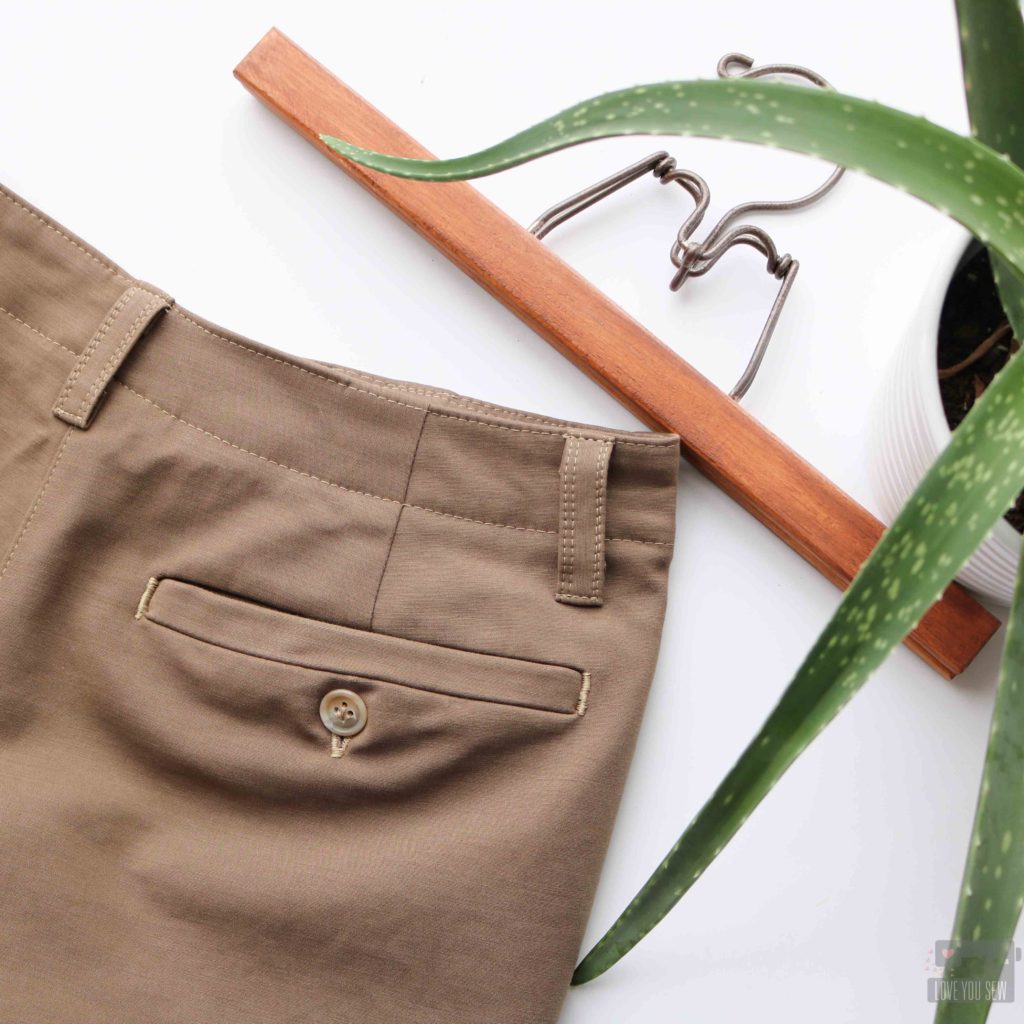
For the back pockets, I opted for the welt design…which was probably the most difficult choice.  This was not the best move on my behalf, but I made it through…  The difficulty came when trying to transfer the pattern lines on a curved 3-D back.  Of course, after I struggled through this, Allie Olsen (the founder of Indiesew) showed how she places pockets on a pressing ham to replicate the shaping.  I wish I’d seen that about a week before it was in her Instagram stories!

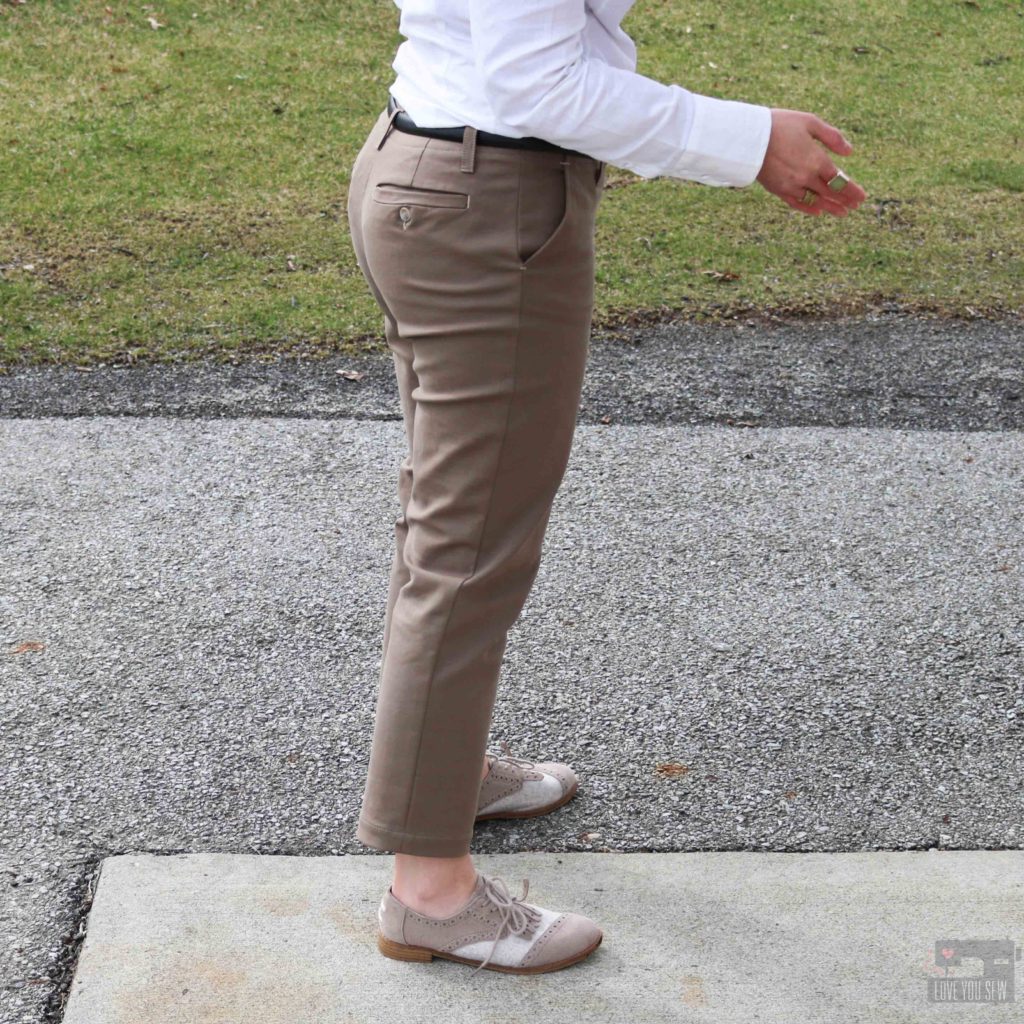
The other major adjustment I made was to hem these to a cigarette pant length (which is right above the ankle.)  I’m only 5’3″ and already made a 2″ length adjustment during muslin time.  But I was torn between a full length (which I could wear in all seasons) or the cigarette length because I do tend to fold up my pants…especially since fashion has really loved the ankle for the past few years.  Luckily, all of my Instagram followers who took my poll, decided the cigarette length was right.  (Thank you!)  I am so pleased with how it came out and how the length makes these pants look so clean.

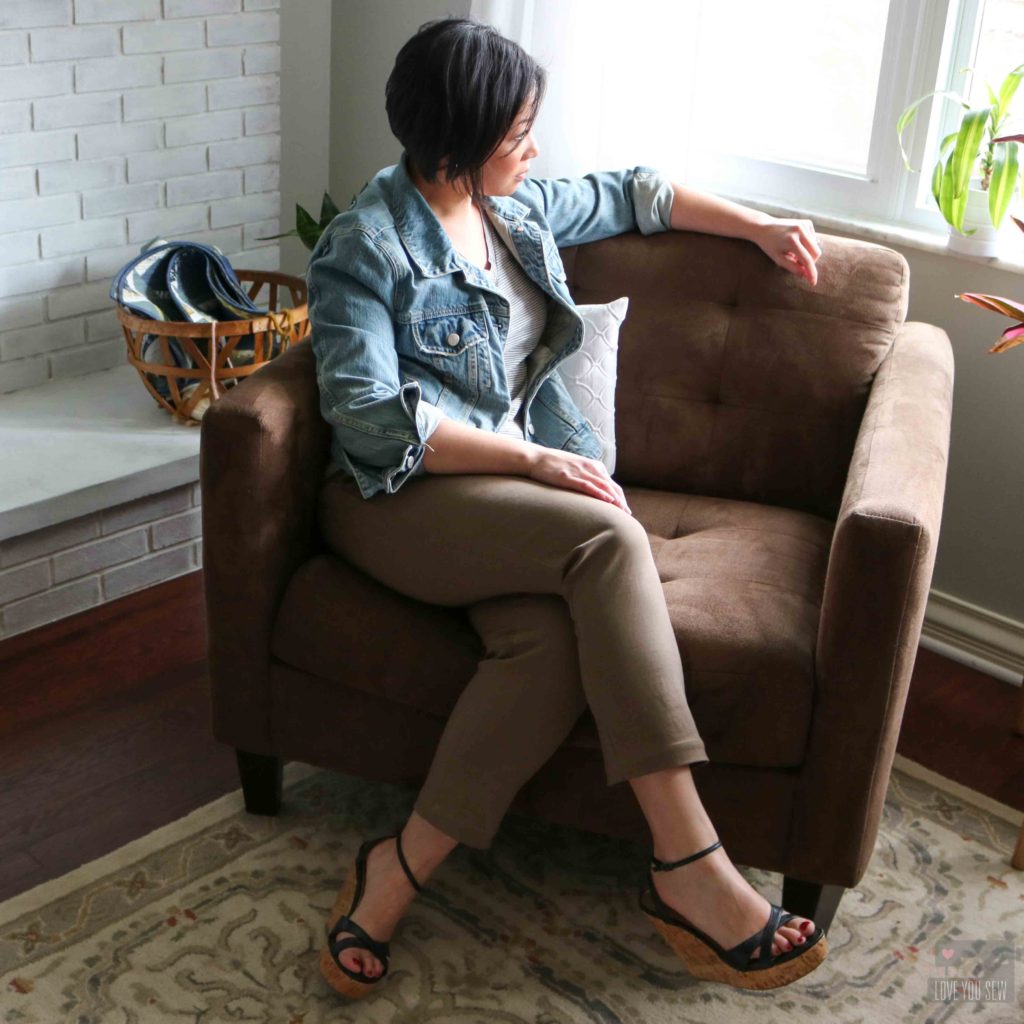
These Chi-town Chinos came out even better than expected.  (The full two weeks I spent on mostly-careful construction paid off!)  The cotton sateen fabric makes them look so stylish and the elastane blend keeps them from wrinkling (Big bonus!!!)  The heavier weight keeps the silhouette lines so well.  I love how this is such a great wardrobe staple and works with so many items in my closet already.  Look how it pairs with a simple striped tee and vintage denim jacket!  This would be great with just a pair of casual sneakers or sandals too.  It would make for a great everyday outfit.

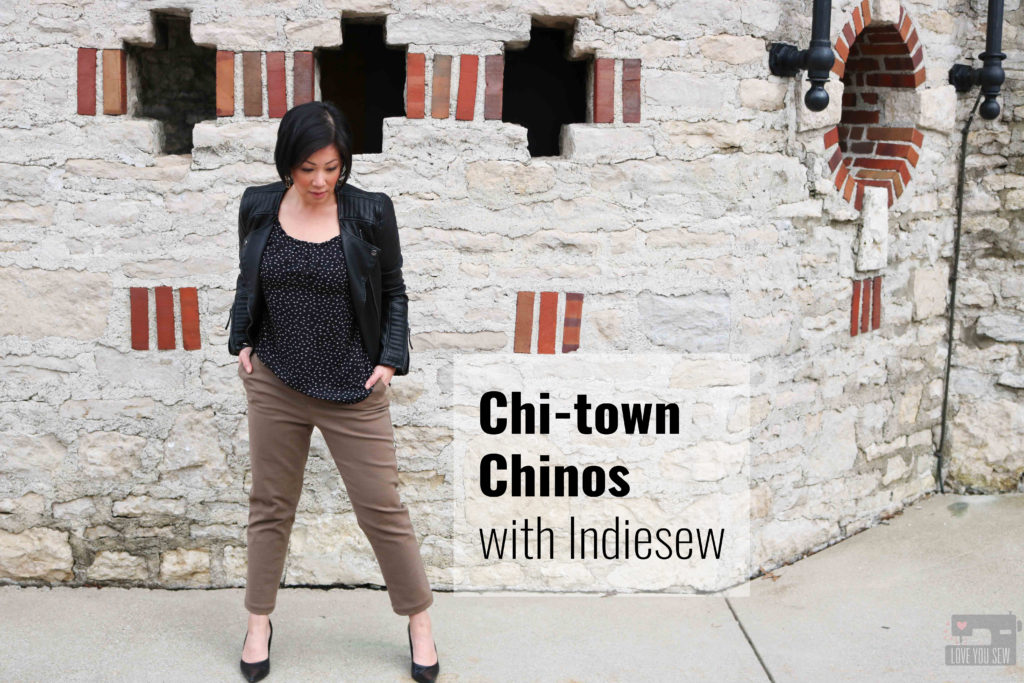
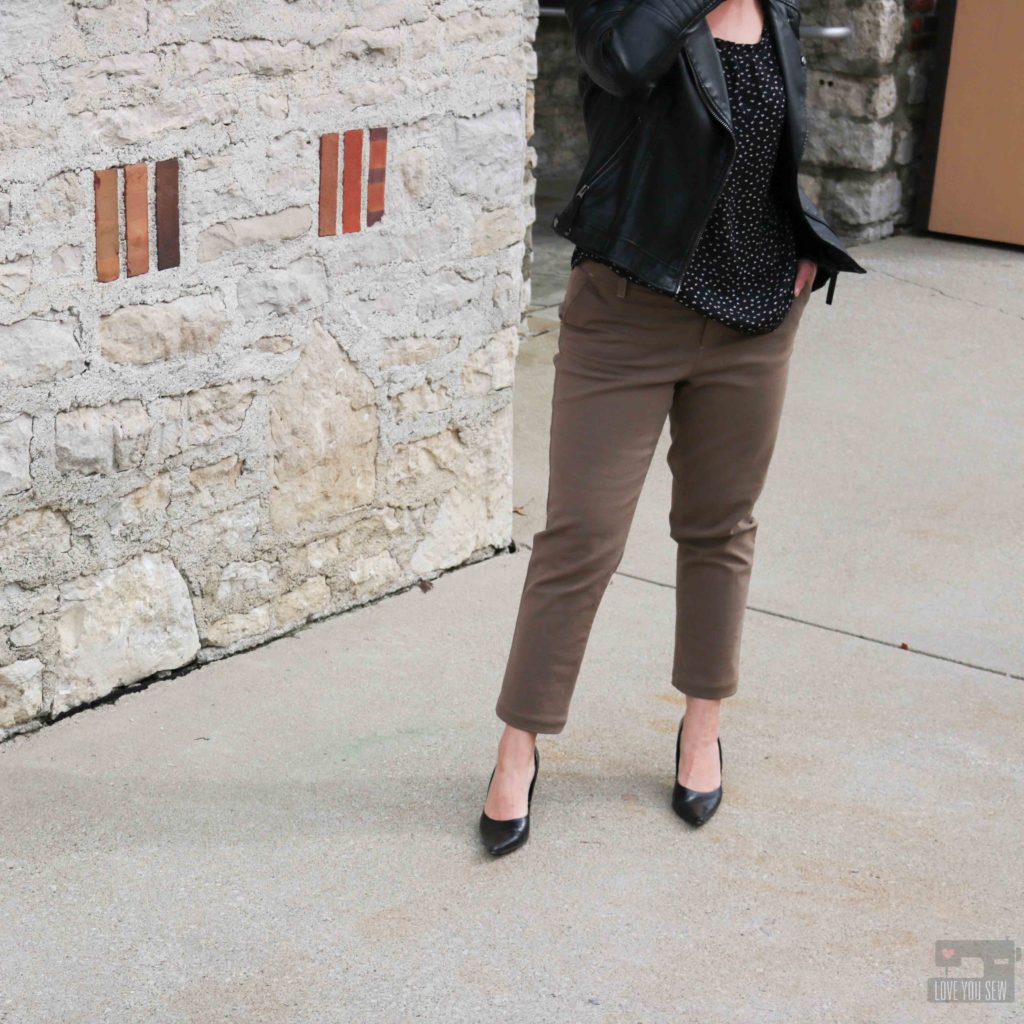
You can take the edge up a notch with some black stilettos and a great faux leather moto jacket.  This is perfect for a night out on the town with the girls or maybe date night instead 😉

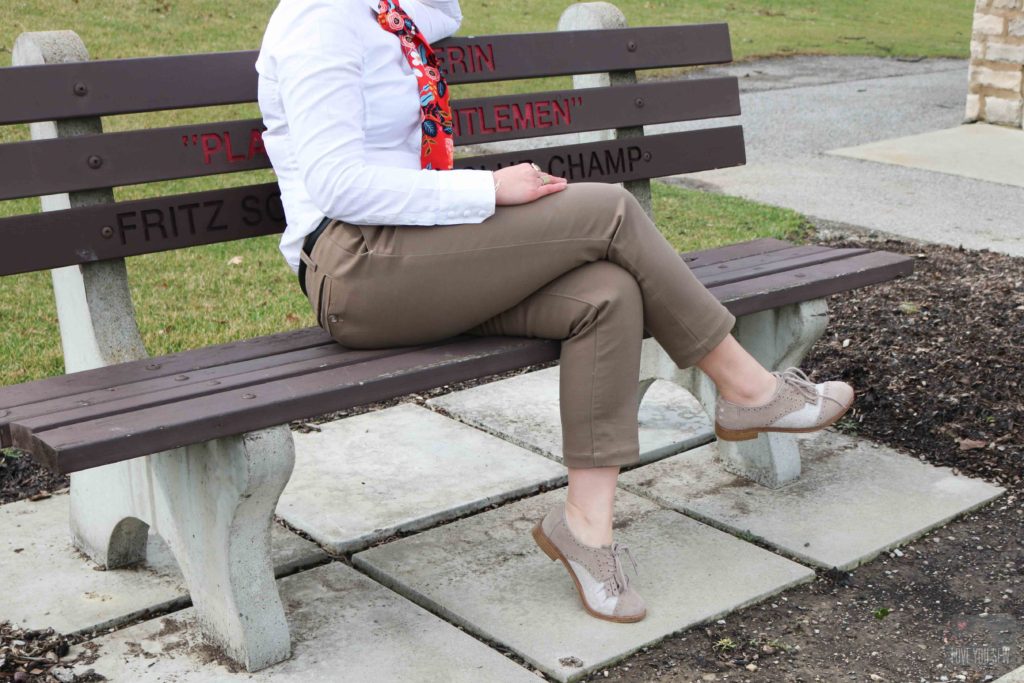
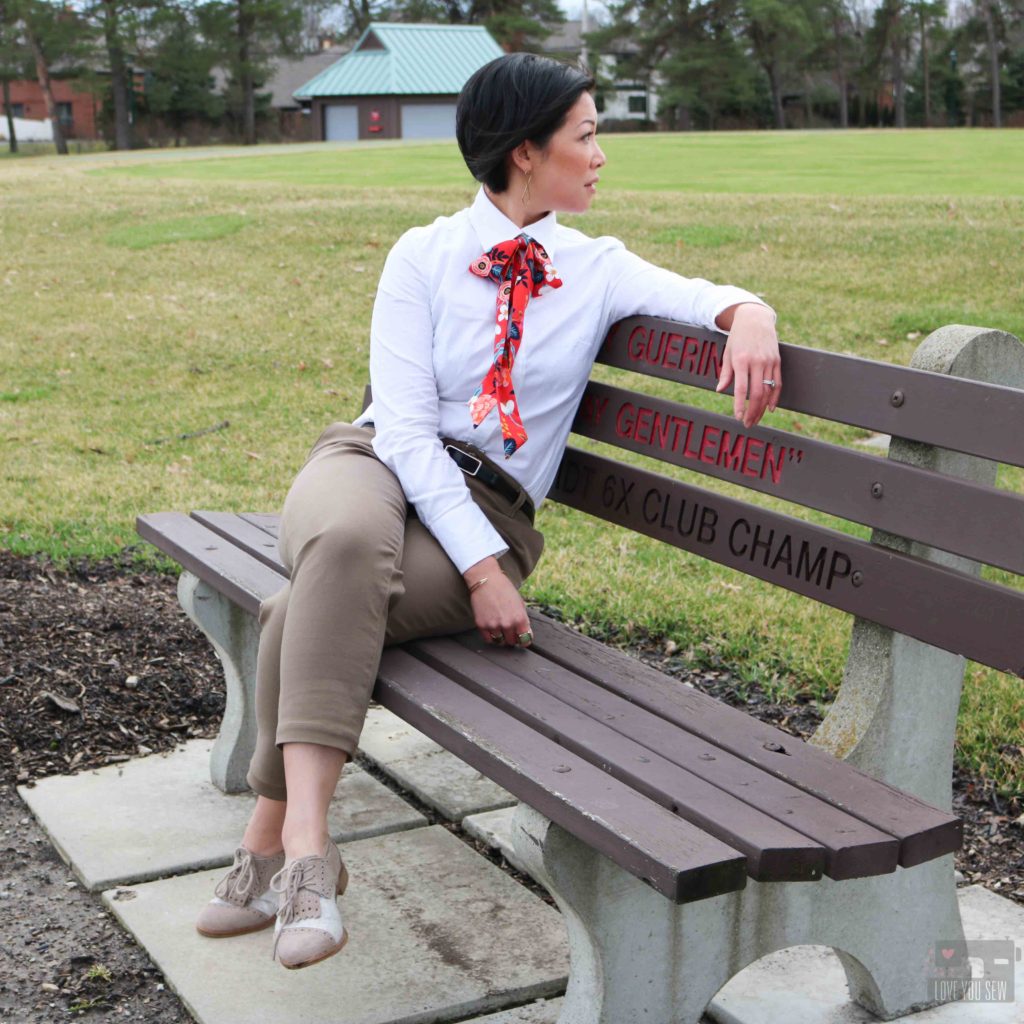
You can also go the dapper route with some wing-tips and a great crisp white button-down shirt.  I’ve always been drawn to menswear styling since my old corporate days, but I love the feminine touch with the pussybow.  You can make your own with the same Rifle Paper Co Floral rayon challis. This outfit would be a great look for business meetings or an extra dirty martini.


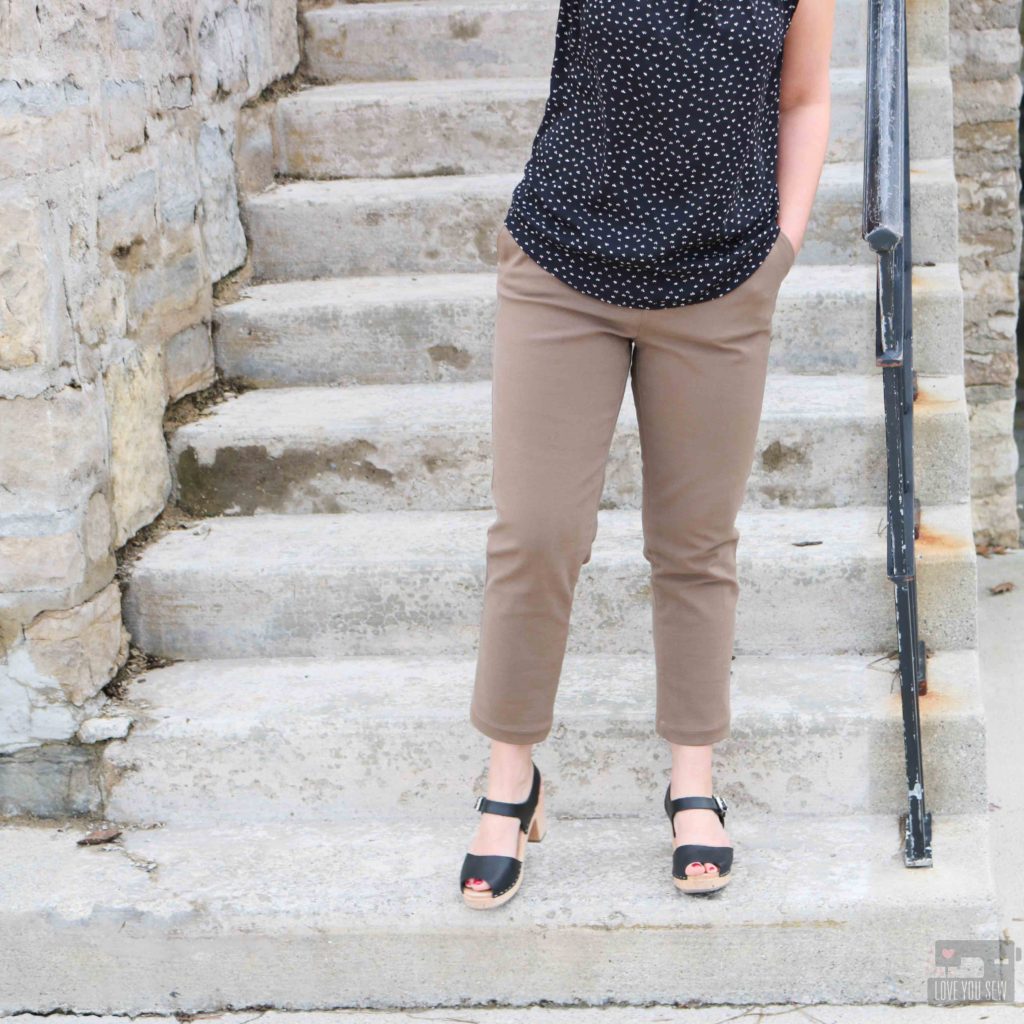
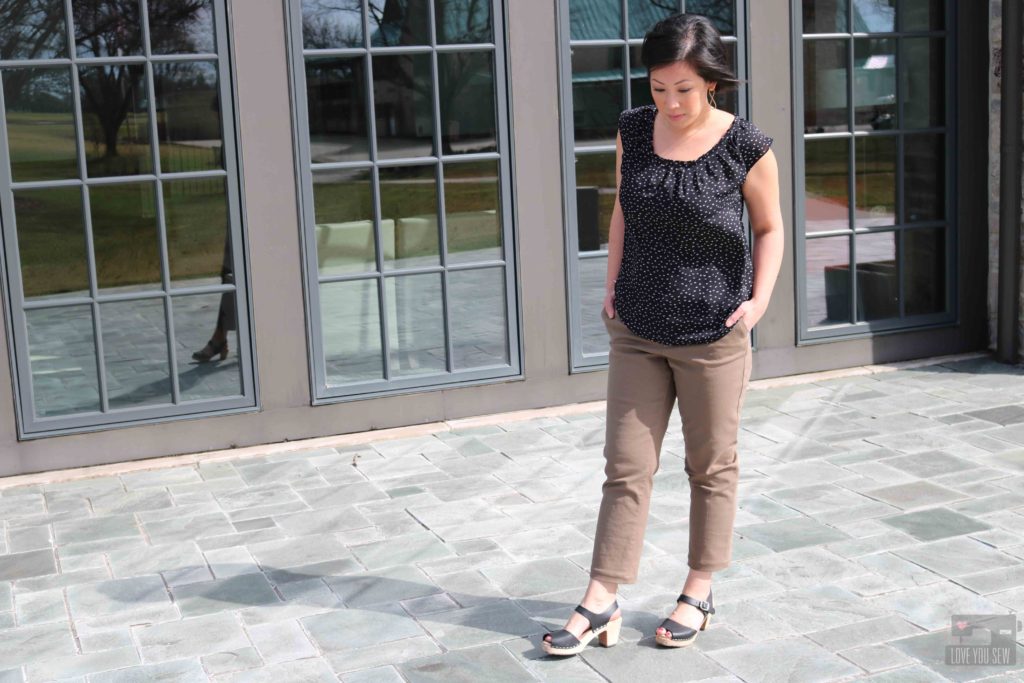
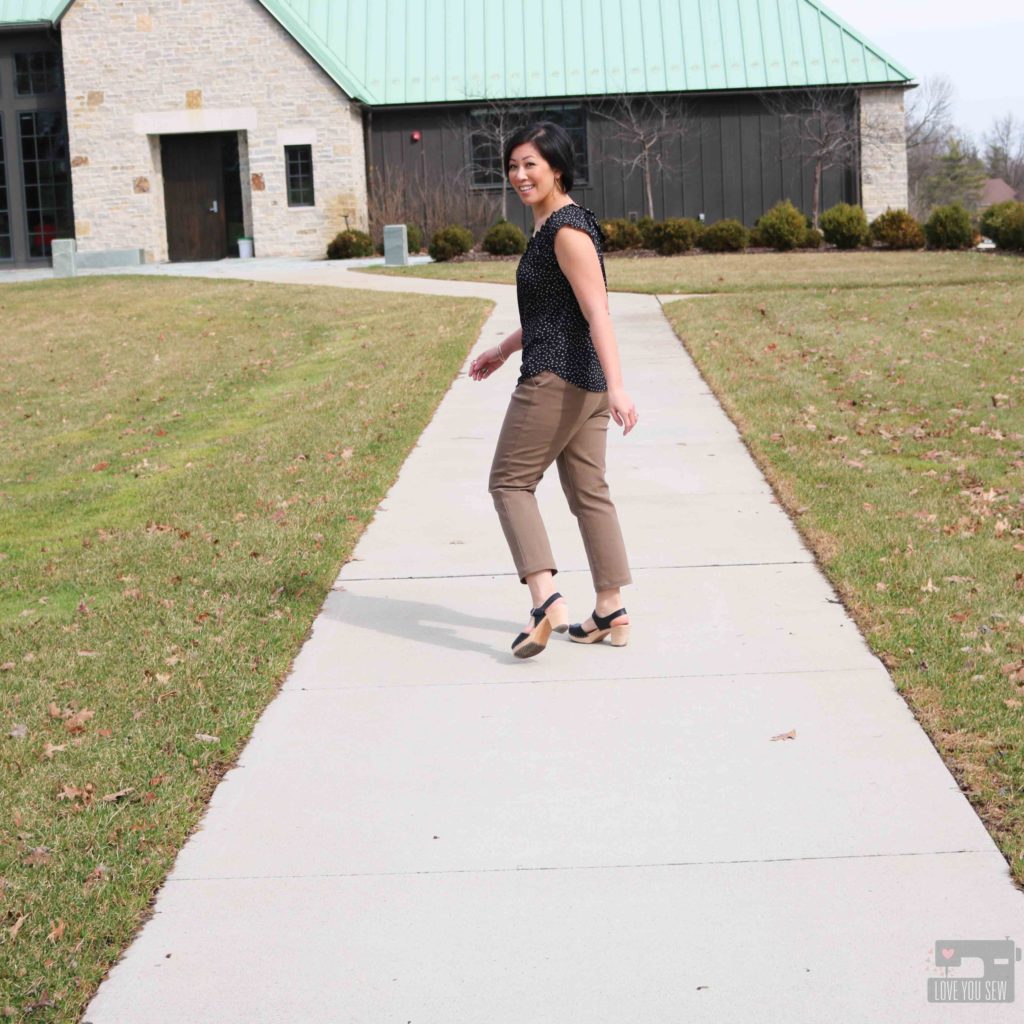
These chinos are just so versatile that just a change of shoes can completely change the look.  I swapped out the stilettos for some Swedish open-toe clogs and now its completely relaxed.  This is great for a coffee-date or brunch with friends.

I hope you enjoy my review of the Chi-town Chino pattern with the personal touches I added, as well as all the styling options.  You better believe I will be adding this make (and others) to Indiesew’s Creations.  I want to help others as that feature had definitely helped me!  Have you checked out that section of the website yet?


Stay Creative, Friends!

Cristy
 

The Chi-Town Chinos pattern and Cotton Sateen Fabric were both discounted by Indiesew for this blog post.  But as always, the make is my conception and all thoughts and opinions are my own.