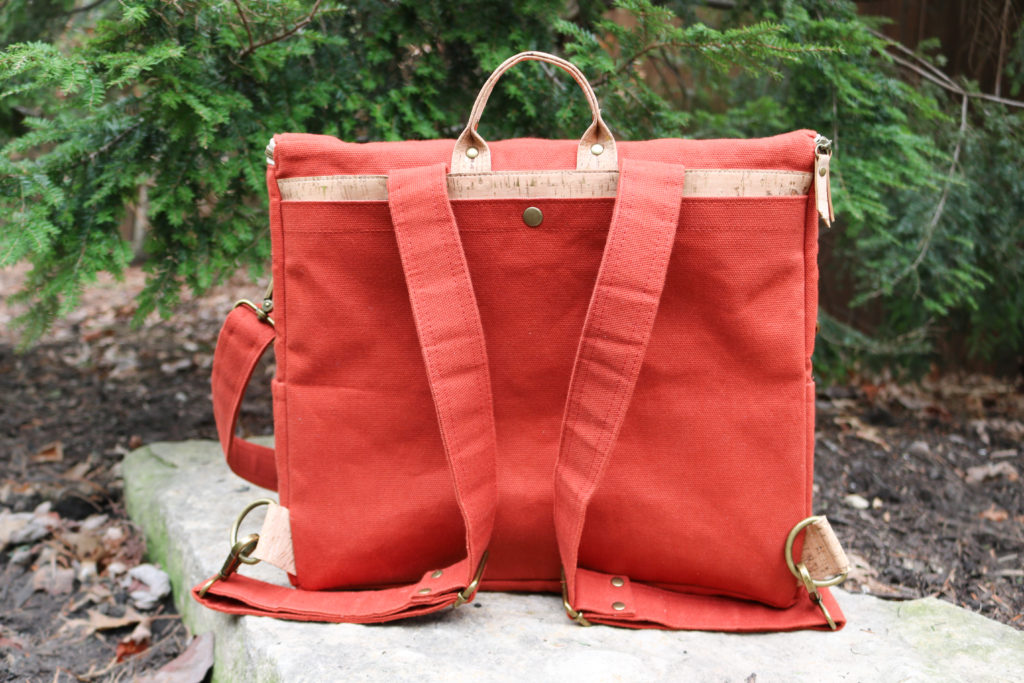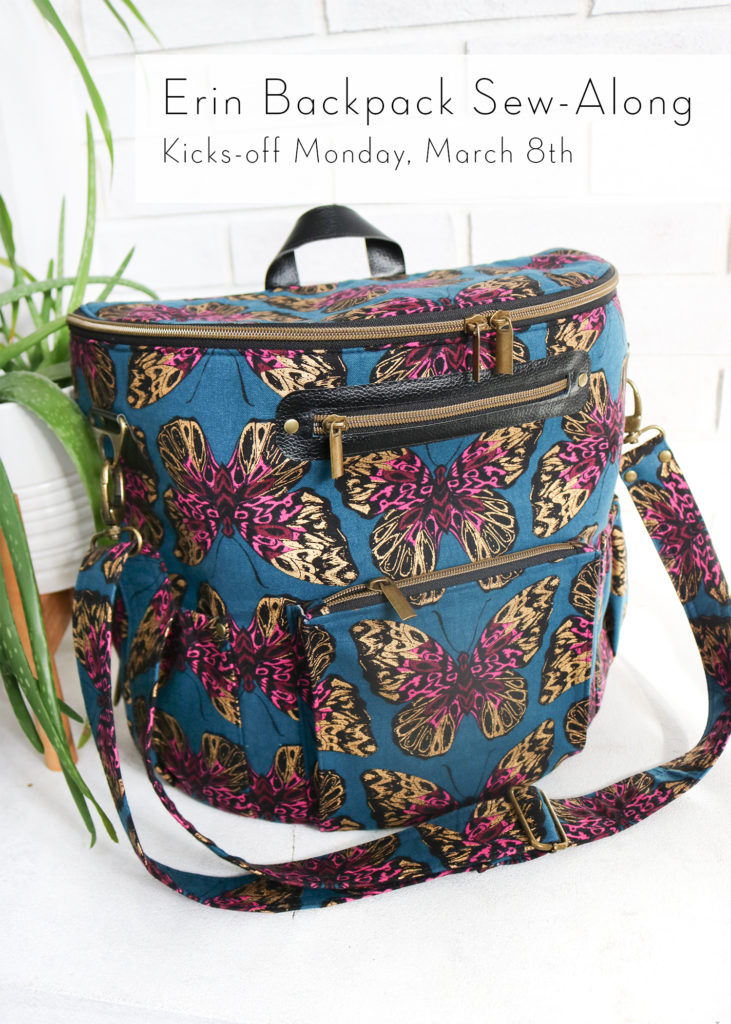
Erin Backpack Sew Along || Part 6: Final Bag Assembly

Welcome Back to the Erin Backpack Sew Along!  We are now at the FINISH —  Part 6: Final Bag Assembly!  If you missed any of the prior blog posts, you can find them below:

It’s now time to put the bag altogether and add all the dimension.  To make sewing a little easier, remove the sewing machine table to better maneuver the bag around the free arm.  Take time sewing even though the videos are short…most segments have been sped up 4x-6x the normal speed!

ASSEMBLE the exterior

To assemble the exterior part of the bag, click into the video above.  Note the following as you watch:

  • You can always unzip zipper to help ease the bag under the machine
  • Don’t be afraid to  use finger and arm muscles to keep thick layers together.  Move up to a larger needle, if needed
  • Backstitch well over pocket seams
  • Go back and stitch Y-seam corners, if needed.  I have to go back all the time!
  • With Main bottom, trimmed SA in half instead of notching due to thickness of canvas and foam.

ADD LINING To FINISH BAG

Items to note:

  • I added the Craft/Wonder tape to the Lining while it was free and unattached to the bag.  This makes it a little easier than waiting later as instructed in the pattern
  • Trim back any foam or fabric that maybe creating bulk, especially at the zipper ends.
  • When attaching the Lining, fold in the seam allowance  to see where placement should be BEFORE gluing.
  • Again, move slowly for even stitching around the zipper
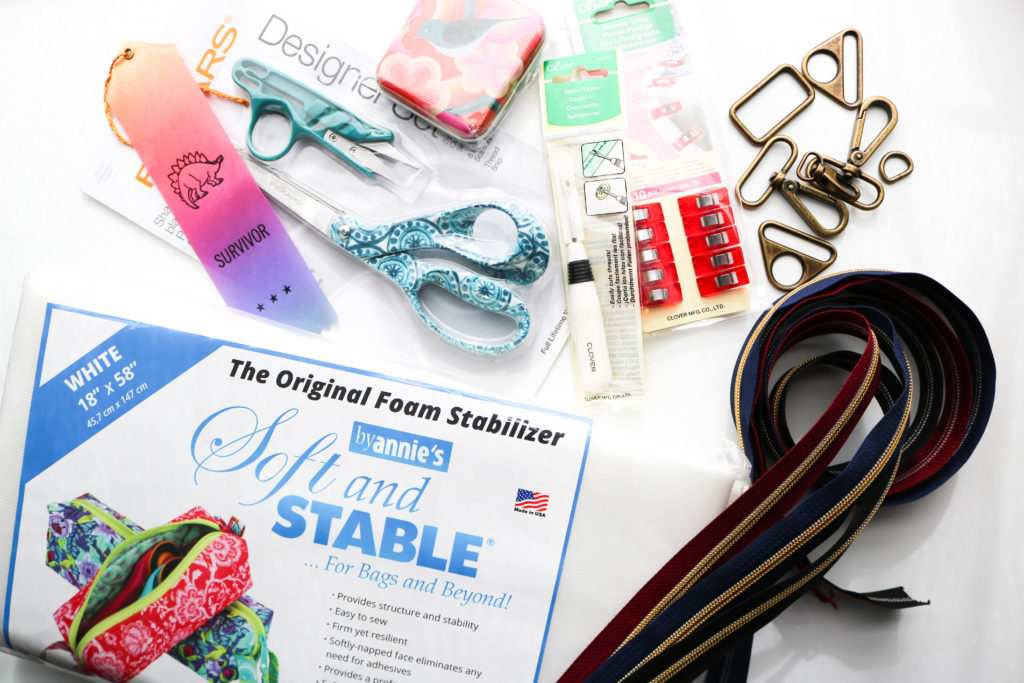
  • If you are looking for the Jumbo Clips or thimble I use, you can find them on my >> Amazon Erin Backpack Supply List.

If you haven’t added the rivets onto the Back Strap Tabs, you can add them on now.  (I’ve decided to leave them off of my version.)


CONGRATULATIONS on your new Erin Backpack!  Make sure to post your pictures on Instagram using #ErinBackpackSewAlong #ErinBackpack and #LoveYouSewPatterns to win the prize pack!  Entries are open until the end of the month!

Thank you to everyone who has joined along for my very first sew along!  I’ve learned quite a bit about video editing while trying to provide you the right content to navigate through this pattern.  I hope you enjoyed it!  Let me know your thoughts in the comments.


Happy Stitching!

Cristy


This post may contain affiliate links.  Please read here for all of my Disclosures.

Announcing the Erin Backpack Sew-Along!

Welcome to the Erin Backpack Sew Along! 

Since all of my bag and accessory patterns are all digital, I have the luxury of unlimited pages and love the fact I can add more details into my instructions…but I know one photograph is not nearly enough for some of the more complicated steps.  I was asked by YOU to provide a sew along and HAD to oblige!  So if you already have some questions or comments, please post them below so I can address them during the month!

DETAILS
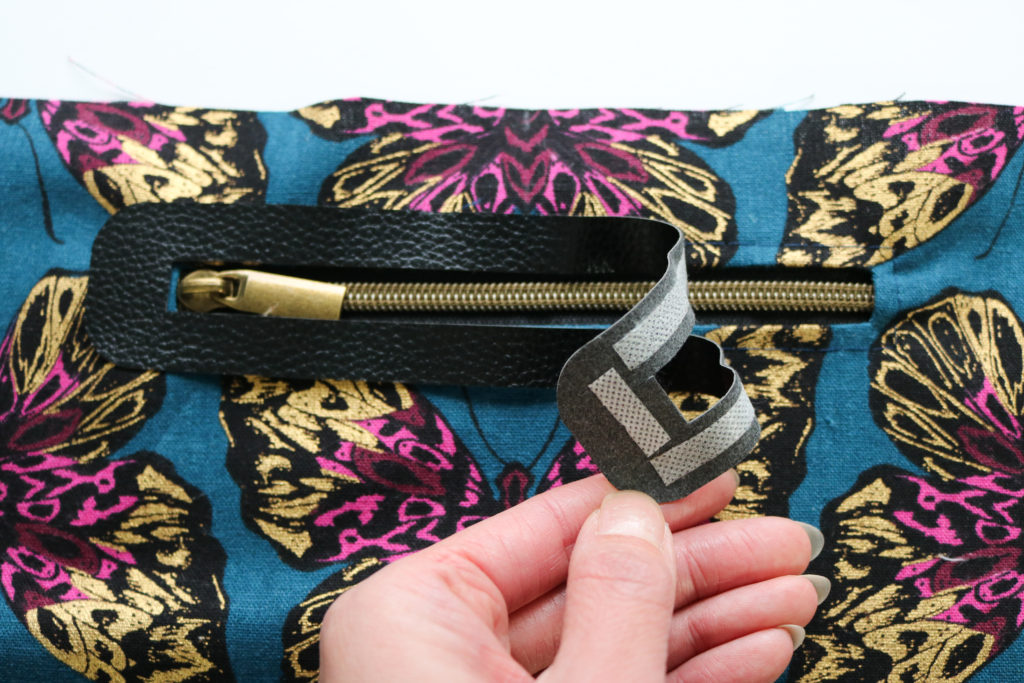
This sew along will be broken down into 6 parts as listed below and will be posted every Monday and Thursday throughout March, starting March 8th. 

  1. Prepare the Fabric + Hardware tabs (including cutting, interfacing and basting)
  2. Make the Convertible Strap and Key Fob + a hack for Permanent Backpack Straps
  3. Create the Back Panel
  4. Create the Front Panel
  5. Make the Lining
  6. Final Bag Assembly 

For some added fun, I have prizes for participating in this sew along on Instagram.  Post any picture of your progress whether it be a fabric pull or the finished product and use the hashtags #loveyousewpatterns, #erinbackpack and #erinbackpacksewalong to be added into the pool of entries.  I’ll randomly select a winner for $25 shop credit, a copy of all of my digital bag patterns, and a package of my favorite bag notions at the end of the month.  It’s that simple!  Don’t forget to tag me @loveyousew_ so I can see your makes along the way!

>> To get you going, you can grab the Erin Backpack pattern for 20% off  and Hardware Kits for 15% off in my shop,  here, all month long.

If you are ready for a little pre-work, you can checkout the introductory post of the Erin Backpack here and find lots of inspiration in the tester versions here.

Now let’s talk a little more in depth about fabric and supplies you need before we officially start next week!

FABRIC

As you know, the selection of fabric is KEY with any bag.  You have to look a little into the future to see how you really want to use your Erin Backpack.  Will it be used outdoors, for home, or maybe for the family?  The answers will help you decide what fabrics you want to use. Below are the fabric notes (as written in the instructions of the pattern – in blue italics) along with some extra guidance.
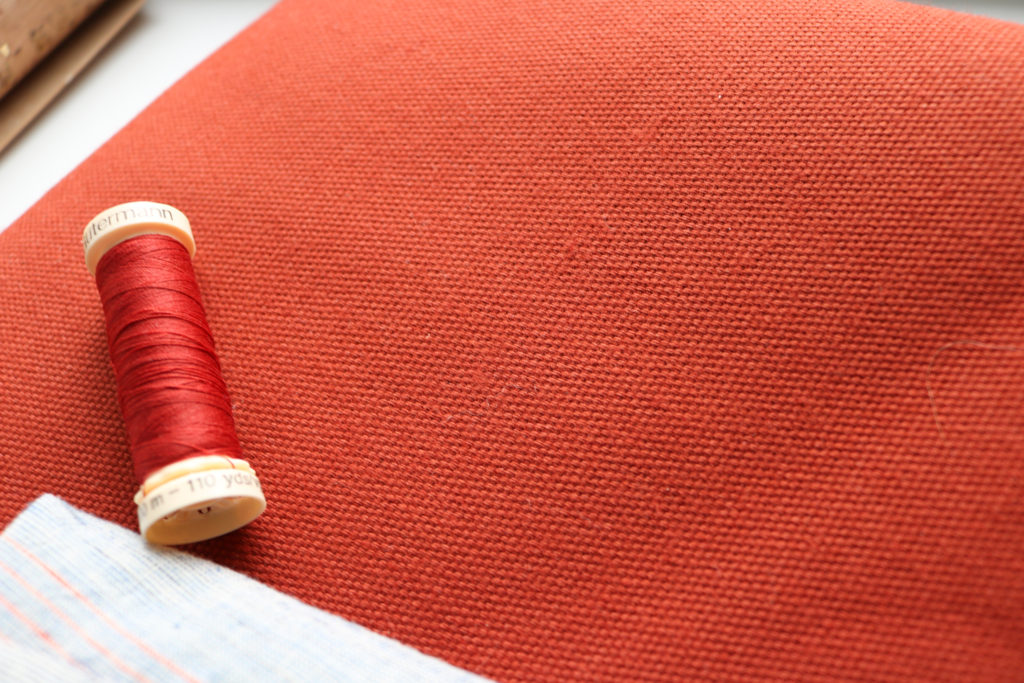
This pattern is written for bottom-weight fabrics such as canvas, duck cloth, and denim with weights of ~ 6 oz per square yard or more.For large bags like the Erin Backpack, you want a heavier and more durable main fabric that can withstand some beating.  The last thing you want to do is make a bag with fabric that ends up wearing away before you want to stop using it.  For the sew along, I will be using a heavy and durable 9 oz Expedition dry oilskin canvas by Merchant and Mills.  I chose this fabric for the weight and color, but also for its water resistant properties which is PERFECT for an everyday backpack.  On the flip side of heavy duty fabrics, you also want to be cautious with selecting a fabric that maybe TOO thick for your personal home machine.  (I sew with a semi-industrial Juki and am confident it can handle this fabric.) There are points in the construction where you will be dealing with several layers of fabric, interfacing and accent fabric all combined.  Always test the layers BEFORE sewing the actual bag.

*As a side note, since I’m using a treated fabric, the manufacturer states I cannot use heat or iron this fabric and will be adjusting interfacing in the first part of the sew-along (which is fine given the weight of the fabric.)  So if you are using something like a waxed canvas or a vinyl, you will have to make sure the weight balances out the fact that you will have to omit some interfacing.
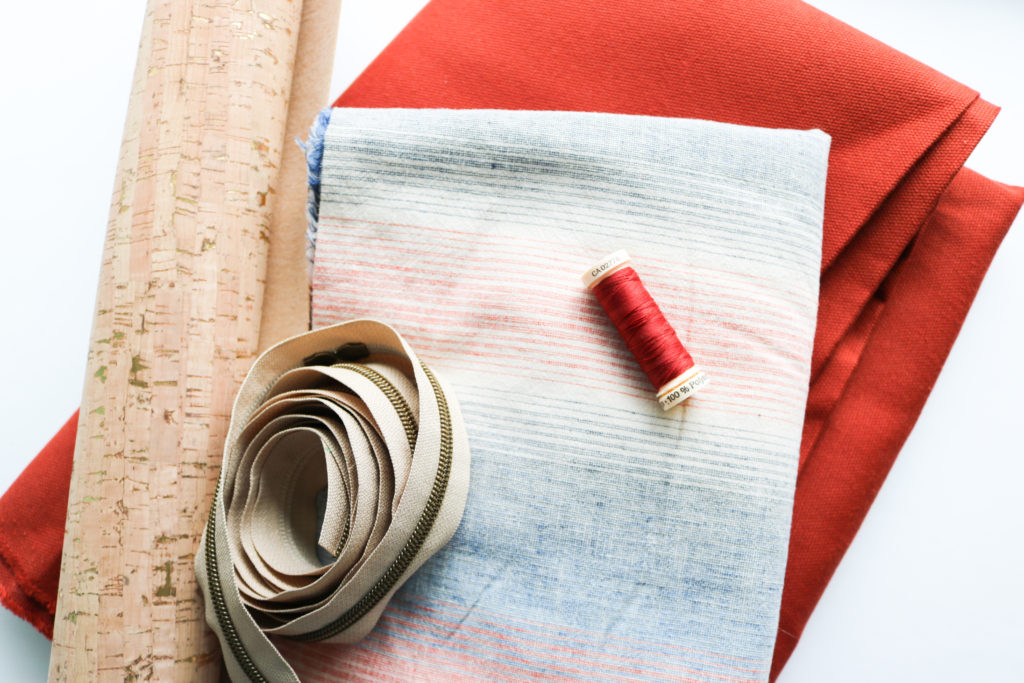
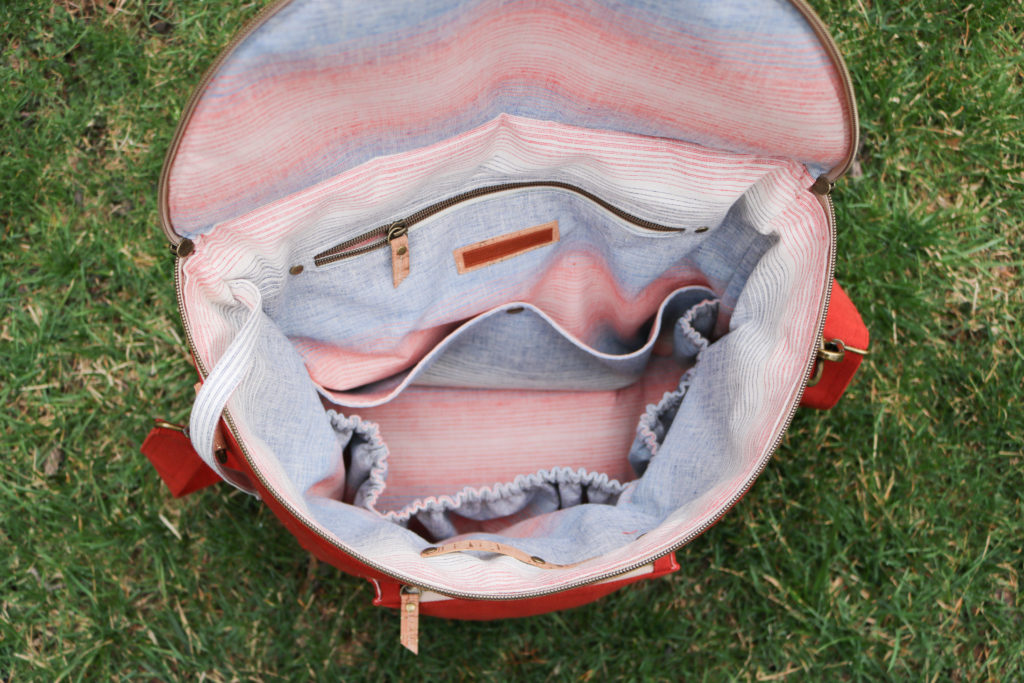
The lining is based on quilt cotton and any other fabric with the same weight (~4 oz) can be used such as linen, chambray and twill. — Since the lining does not get nearly as much wear as the main fabric, you can have more fun with a tight woven quilt cotton.  This would also be a great place to use a light laminate like these from Cloud 9.  If you want the inside to be wipeable, this is a nice laminate that is easy to sew through.  I have such a deep stash of fabrics from old projects that I will be using leftovers from a linen blend fabric I used on a dress years ago….But doesn’t it look great with the canvas?!?
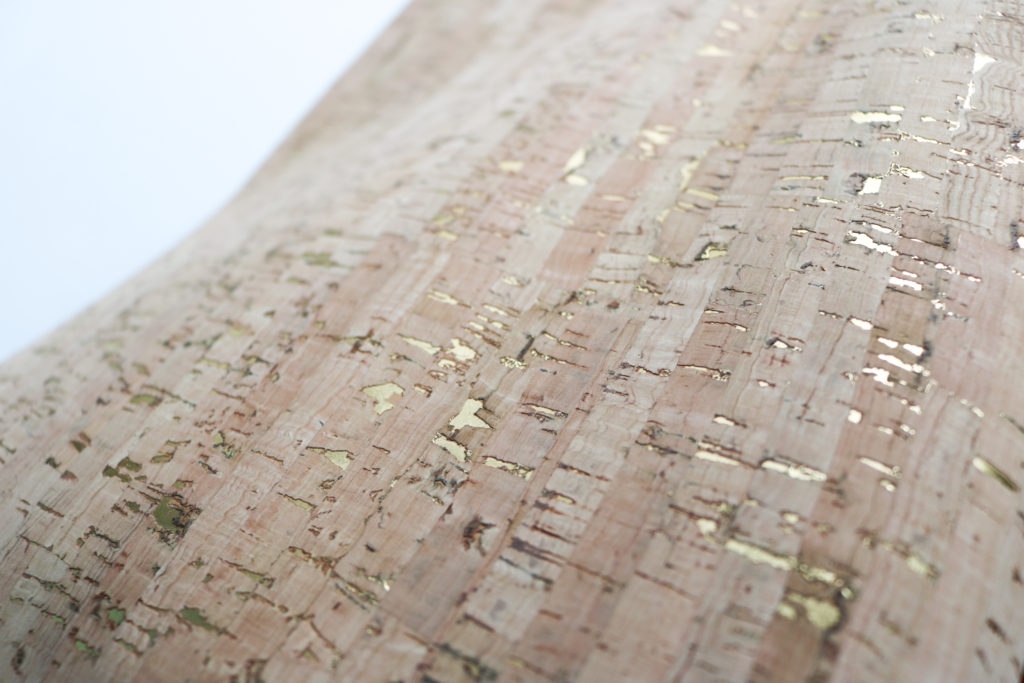
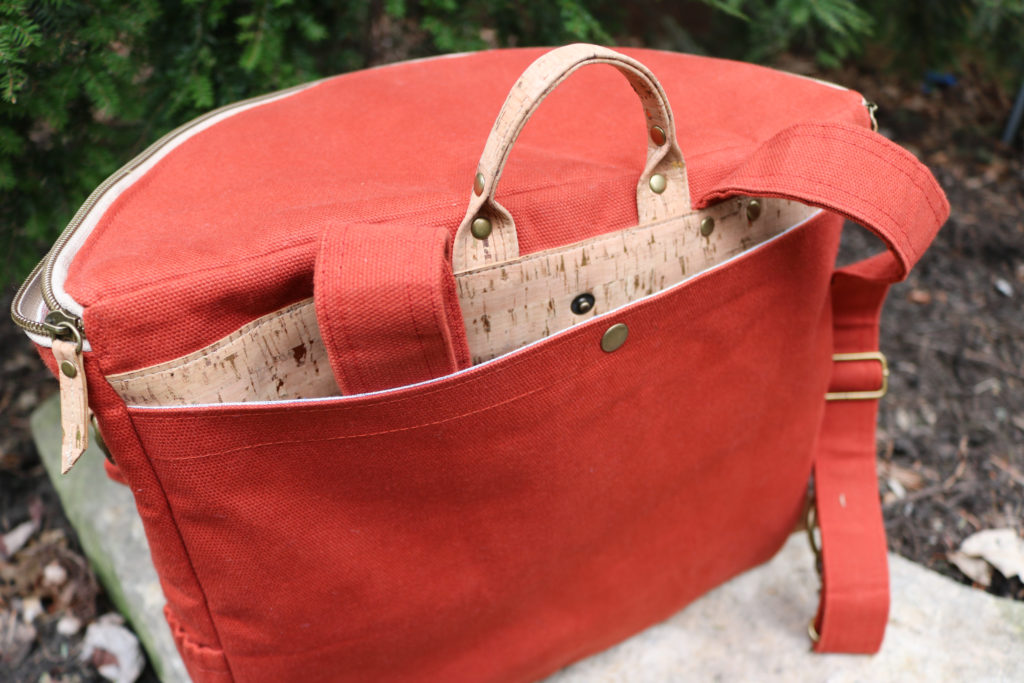
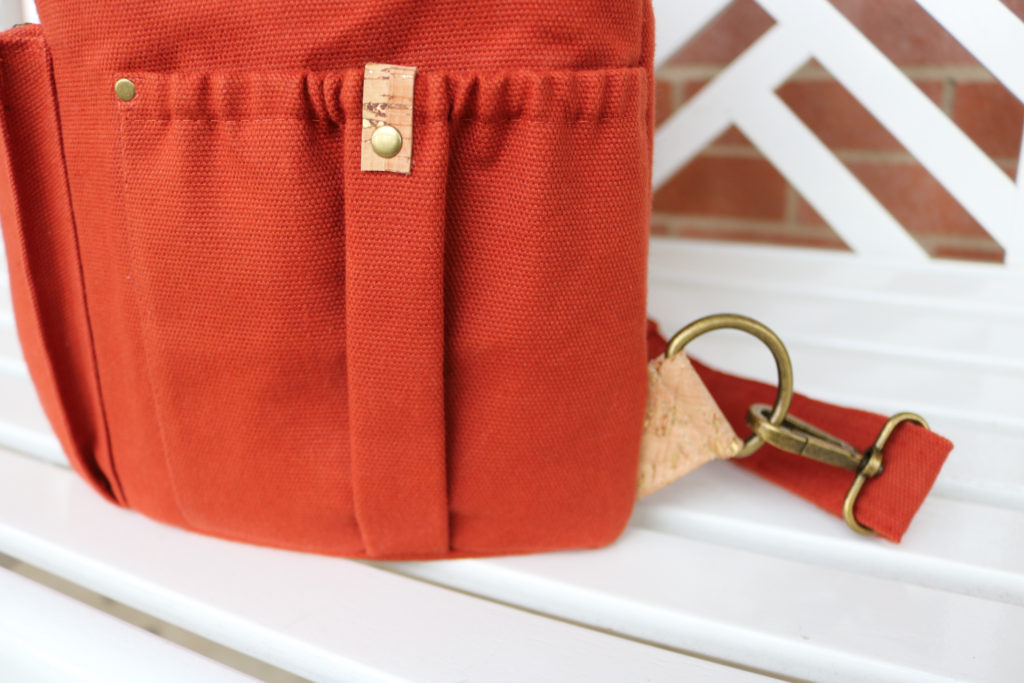
The accent fabric is intended to be left with a raw edge, allowing you to use leather, suede, vinyl, cork or another non-fraying substrate. This allows you to add some high-end details to elevate your bag. The Erin Backpack assumes the use of thicker 2-3 mm accent fabric. *If you use a thinner accent substrate like some corks or a lambskin leather, you may want to cut two handles for a sturdier finish. For this bag, I’ll be using some gold flecked cork fabric from Sew Sweetness and will show you how to finish this substrate, as well as how to reinforce some areas.

If you are looking for other sources of faux leather/vinyl Big Z Fabric’s has a nice selection and I’ve used the Terracotta DuroLast vinyl in a Megan Bucket Bag, here.  This brand is great for a beginners with a more basic home machine because it’s thinner and MUCH easier to sew through. The pebbled finish makes it look like real leather too!  Sew Sweetness also carries thinner faux leather as well…including the black I used for the pattern photography.


INTERFACING

The interfacing mix is based on these suggested fabrics and the foam is crucial to holding the structure, while still being pliable.  

  • Please make sure you are using a non-fusible foam to avoid wrinkles on the main fabric as the bag wears.  By Annie’s Soft and Stable is my preferred foam which is denser and thus, provides more structure than Pellon foam.  You can grab it in my shop here.  But if you can only get Pellon, it works well too.  
  • For woven interfacing, I generally use 60” wide Pellon Shapeflex SF101, but I just tried out Barb’s Bags Interfacing (which is great too…just have to see how it wears before a full endorsement) to block fuse (when you fuse the interfacing to the fabric first and then cut out the pattern pieces…but we’ll get into more of this next week!)  It’s allows me to use the entire width of fabric, but you generally can only find 20″ WOF in stores….which IMO is more wasteful.
  • For the firm stabilizer, Pellon Peltex sew-in interfacing is a great choice.  It provides a stronger base for both the lid and bottom of the backpack.

If you would like to use other types of fabrics, please test interfacing with fabric swatches to see what you like before cutting.

HARDWARE
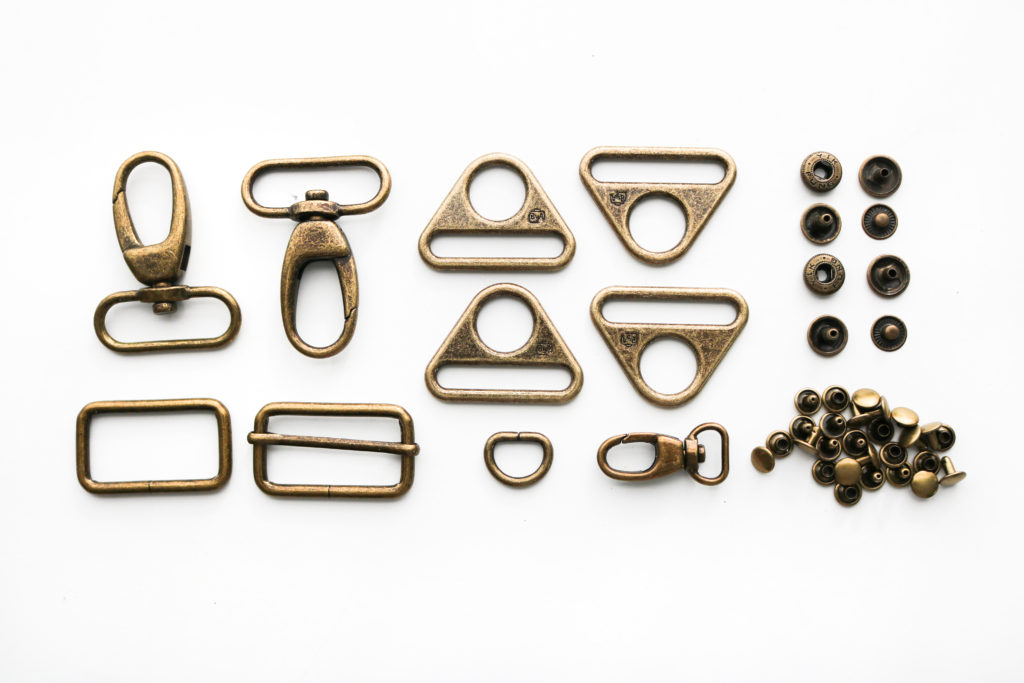
With a full-size backpack of this nature, there is a good bit of hardware involved.  This helps the bag look more polished and gives the ability to be be a convertible bag.  I’ve sourced some amazing hardware from Emmaline Bags and By Annie’s as part of a full kit you can find here in my shop.

The kit includes:
(4) 1 1/2″ Triangle Rings
(2) 1 1/2″ Swivel Clasps
(1) 1 1/2″ Rectangle Ring
(1) 1 1/2″ Strap Slider
(1) 1/2″ Swivel Clasp
(1) 1/2″ D-Ring
(3) Sets of 12.5 mm Double-Cap Spring Snaps
(5) Sets of Medium Double-Cap Rivets (9mm cap x 8mm post)
(20) Sets of Small Double-Cap Rivets (8mm cap x 6mm post)

Will we be going through some hardware installation?  Yes!  I know this is a tricky part for many folks and you can refer back to the Intro post for some links to videos I already have.

ZIPPERS
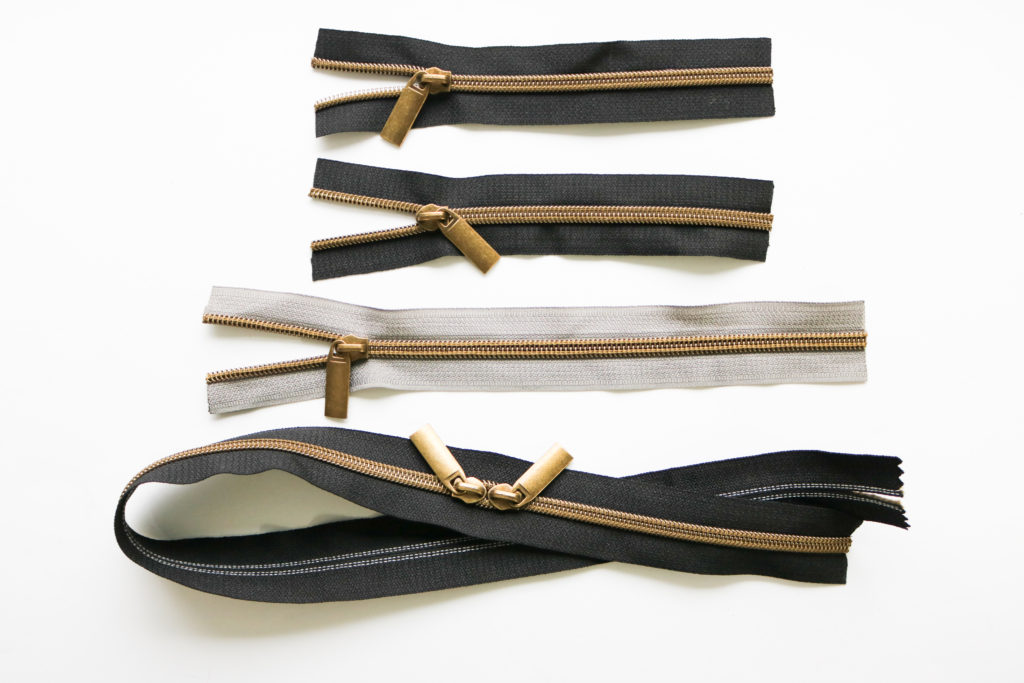
With four zippers in the Erin Backpack pattern using three different sizes, it’s a great idea to use zipper tape to cut exactly what you will need.  I used metal zippers for a long time for their polished style, but have fallen in love with these nylon ones that look like metal!  You can cut through them with craft scissors (don’t use your special fabric ones!) and sew right through them as well.  There is no laborious effects to cut away teeth with these zippers!  I love the ones from Emmaline Bags (if you are looking for basic colored tapes) and My Handmade Space for more variety in both tape color and teeth finishes.

Other Supplies
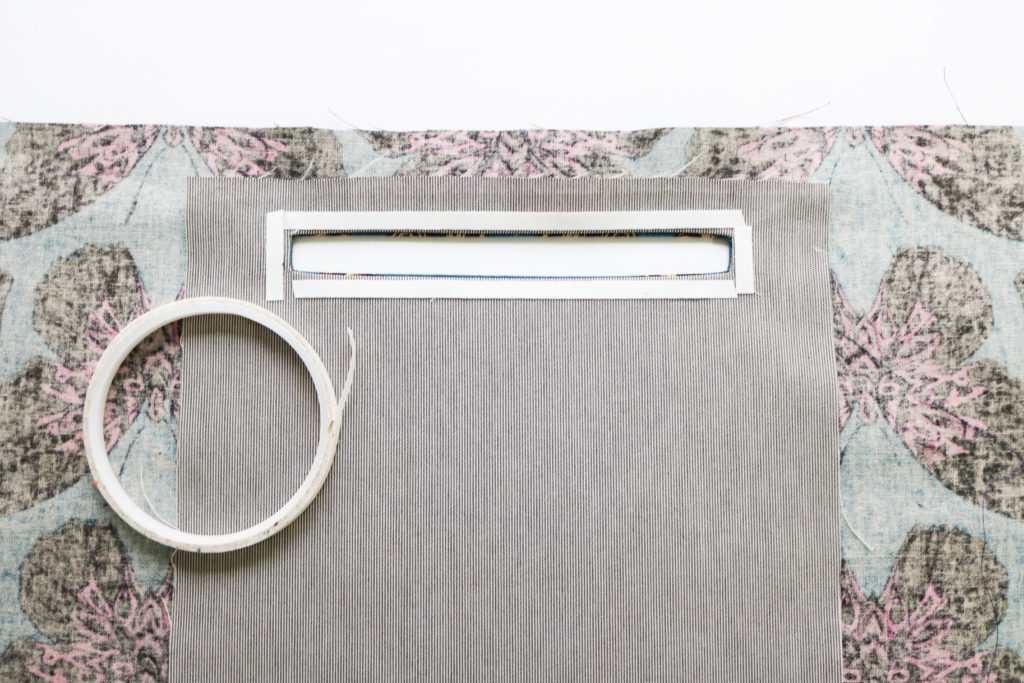
There are plenty of other supplies and notions I reference in the Erin Backpack pattern.  For your ease, I’ve added them all onto an “Idea List” below through Amazon.  It’s included my favorite glue, fabric punch, hardware setting tools, and also the interfacings mentioned above.  I continue to add to all of my list as part of my Storefront all the time as I test out new products in my projects….so don’t forget to “like” it!

>> Making the Erin Backpack list on Amazon


I hope this is enough information to get you started on the Erin Backpack.  Again, please post any questions and/or comments below.  I’ll be sewing along with you so that I can address any concerns along the way!


Happy Sewing!

Cristy


Please note, this post contains affiliate links.  Please refer to my Disclosures for additional information.
#SewPink Blog Hop with the Erin Backpack

October is Breast Cancer Awareness Month, and with 3.5 million women in the US with a history of current and/or past treatment, we all have someone close to us who has been affected.  Unfortunately, I’ve seen my aunt suffer and pass away from this disease and also continue to see more and more friends go through their own personal battles.  It’s so difficult to see anyone suffer and knowing that I am personally at higher risk – as an aging woman. That is why I’m SO proud to be part of the By Annie #SewPink Initiative to bring more awareness to this cause.

The #SewPINK Blog Hop has been taking place all this month to raise awareness for breast cancer and breast cancer prevention. You can follow the hashtag on social media to follow along!   By Annie’s is even running a photo contest here and released a great FREE pattern which you can find here.  These are great ways to get involved and the pattern is a nice and easy sew with your friends and/or guild.  On top of all of these activities, By Annie’s has graciously offered to provide a $30 shop credit to one of you!!!!  (Details are below.)
Earlier this very year, my OB/GYN told me I’ve hit the age where I need to start getting mammograms.  (‘Nothing like getting older, right?)  85% of new cases happen to those who have NO prior family history (due to genetic mutations) so early detection is key!  (Source: www.breastcancer.org )  But just like everything else that has also happened this year, my appointment was put on hold. Getting the call to be part of the #SewPink Blog Hop really gave me the push to get a screening back on my schedule and I am so very grateful! I hope you do the same and check out available screenings below:

Project

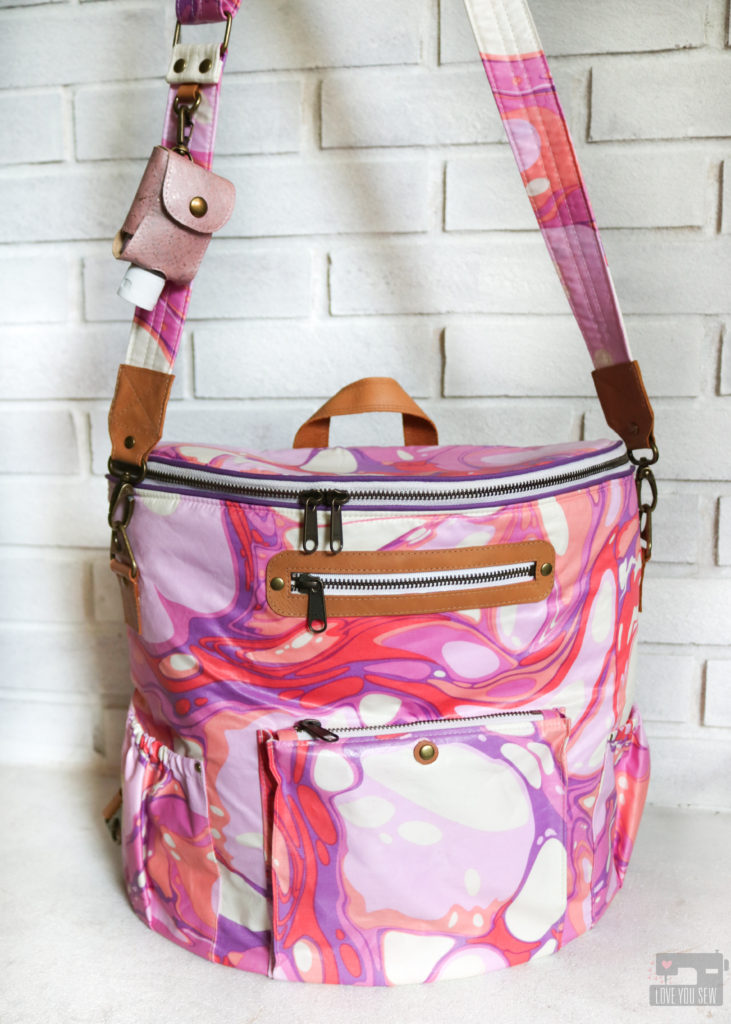
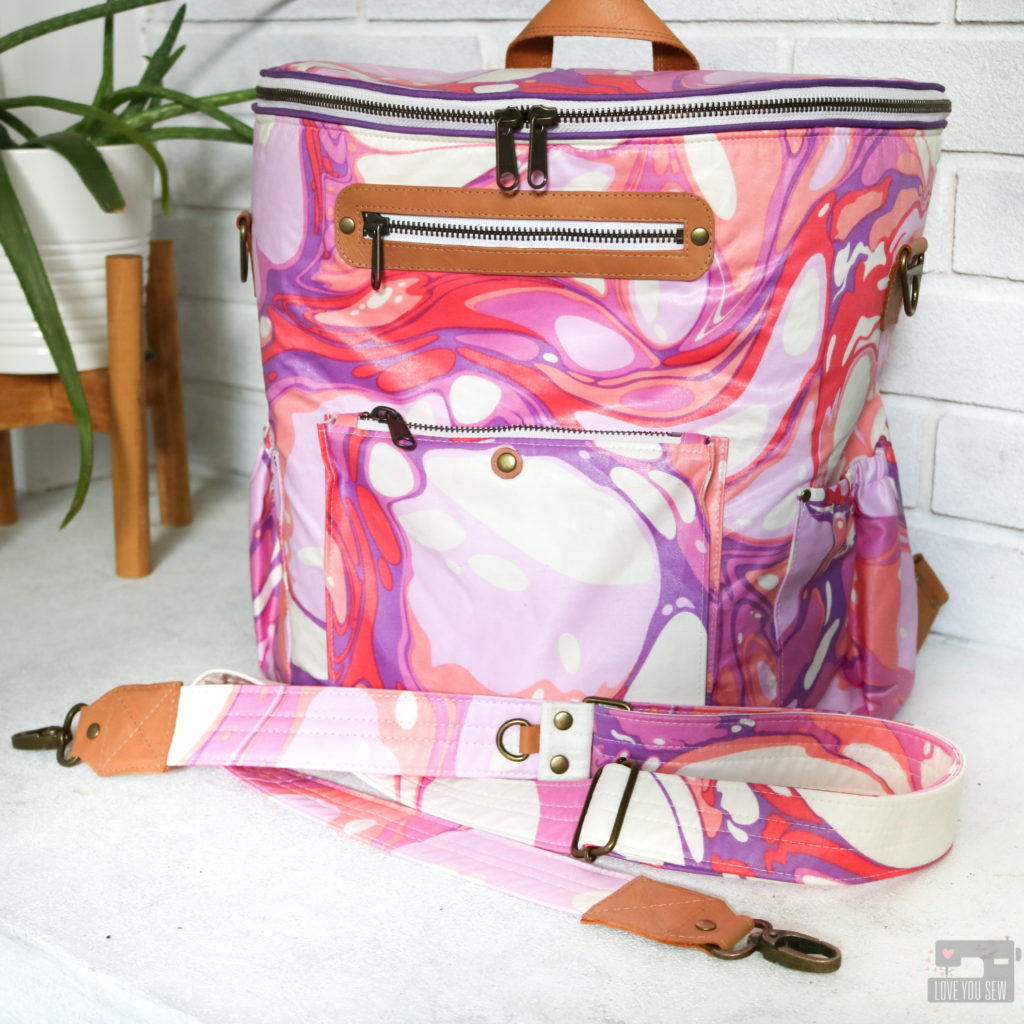
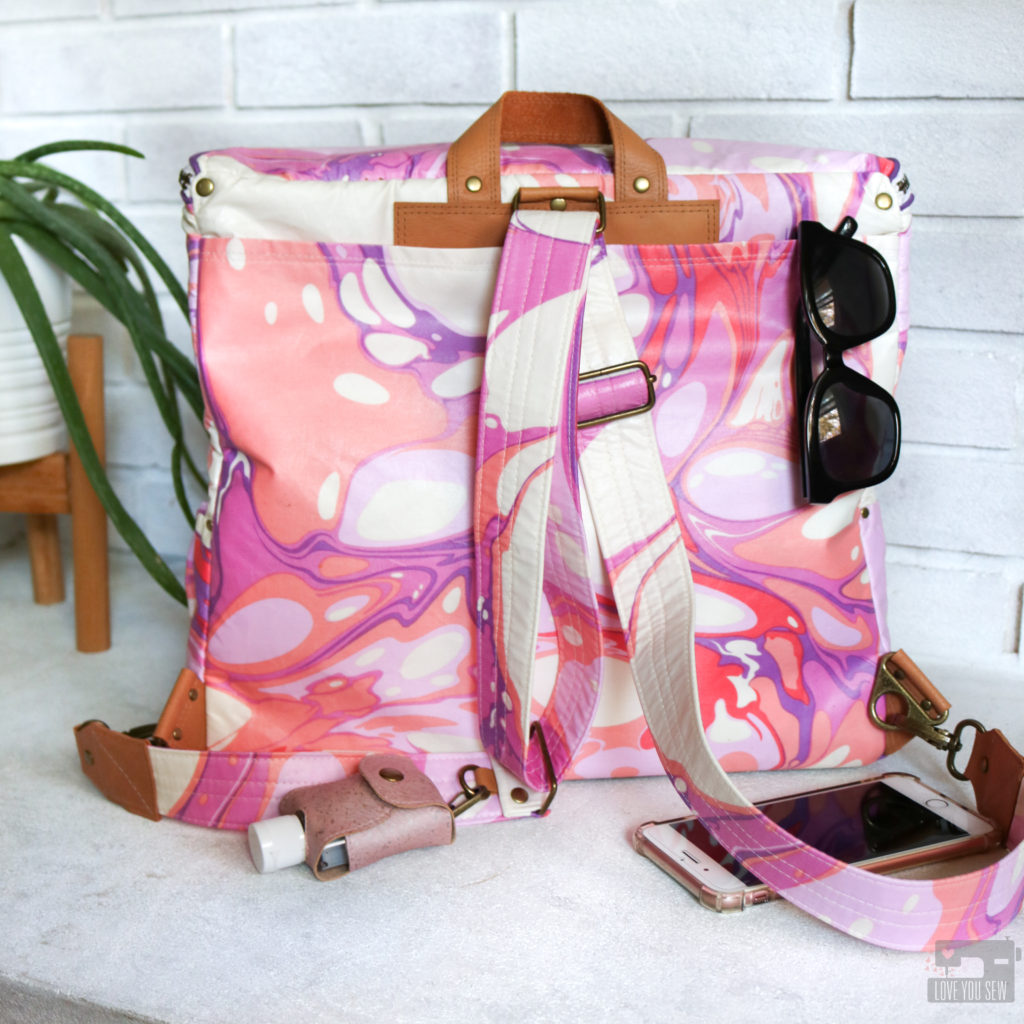
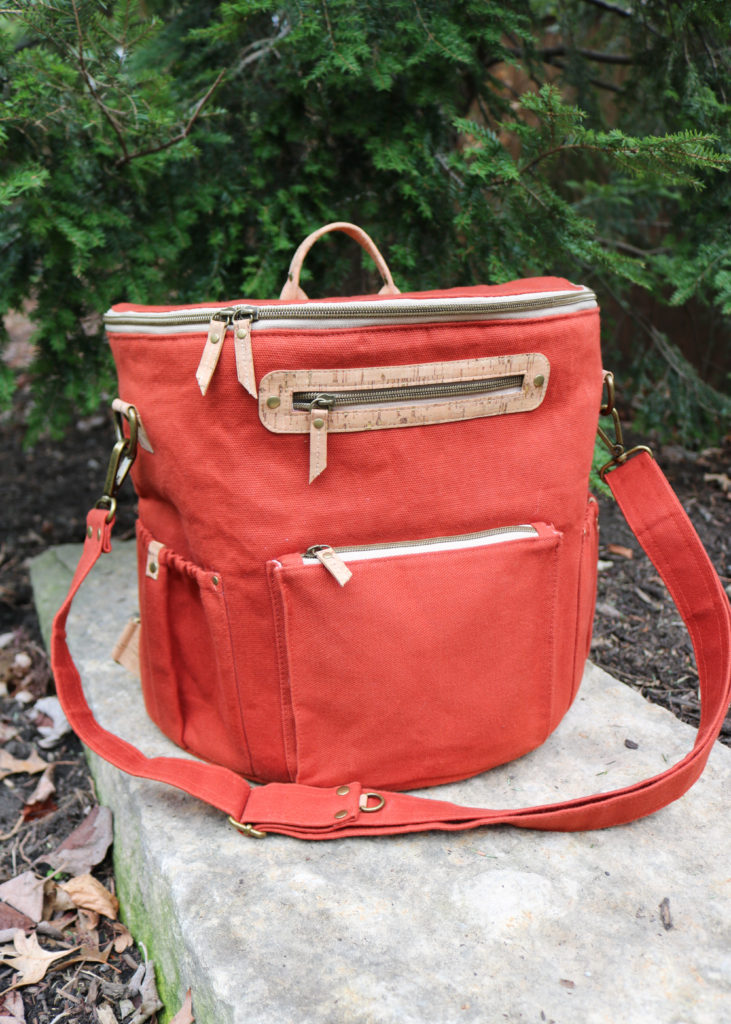
For my Blog Hop project, I made the (soon to be released) Erin Backpack. This is a design I’ve been working on and off again for over a year — OK, it’s been more off, then on but it will be released by end of year!  This is a spacious backpack with a half moon design that also converts to an over-the-shoulder or crossbody bag.  It is large enough to be used as a diaper bag or just for some day-tripping.

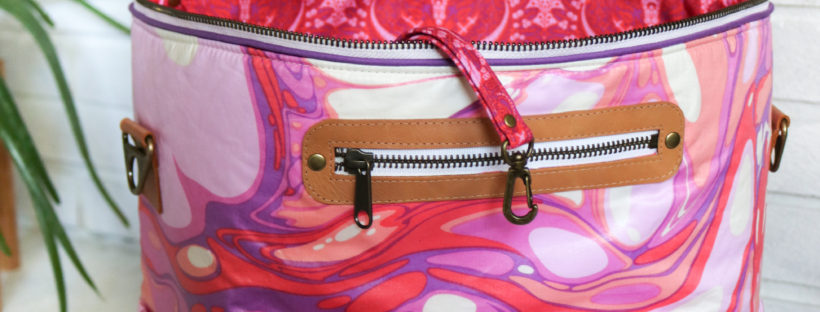
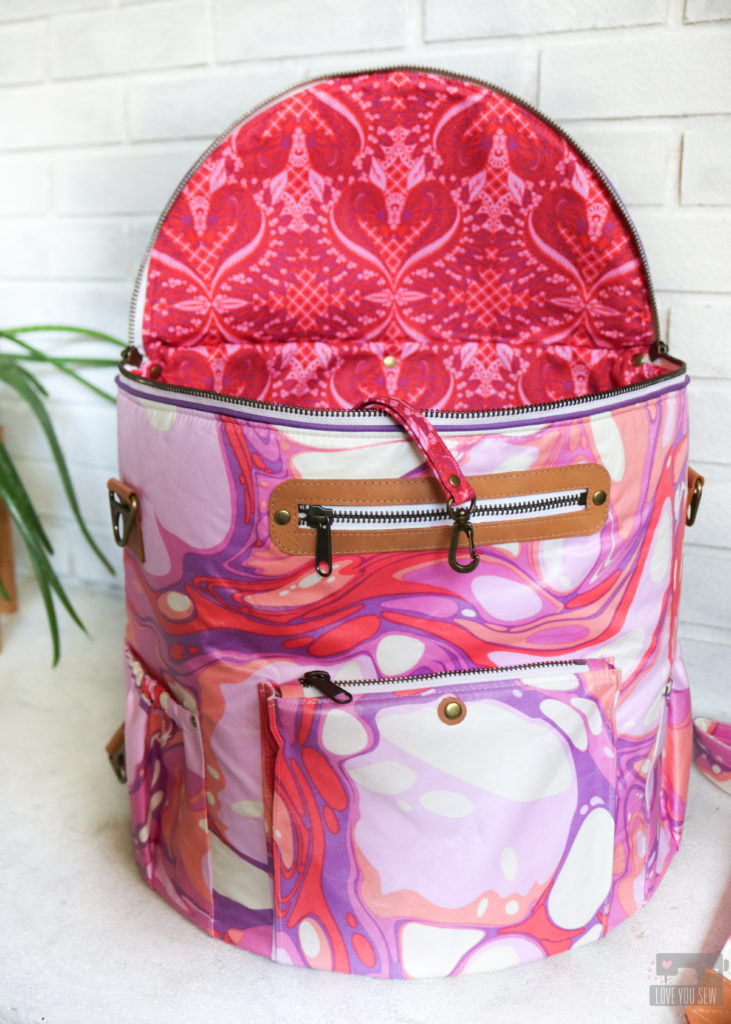
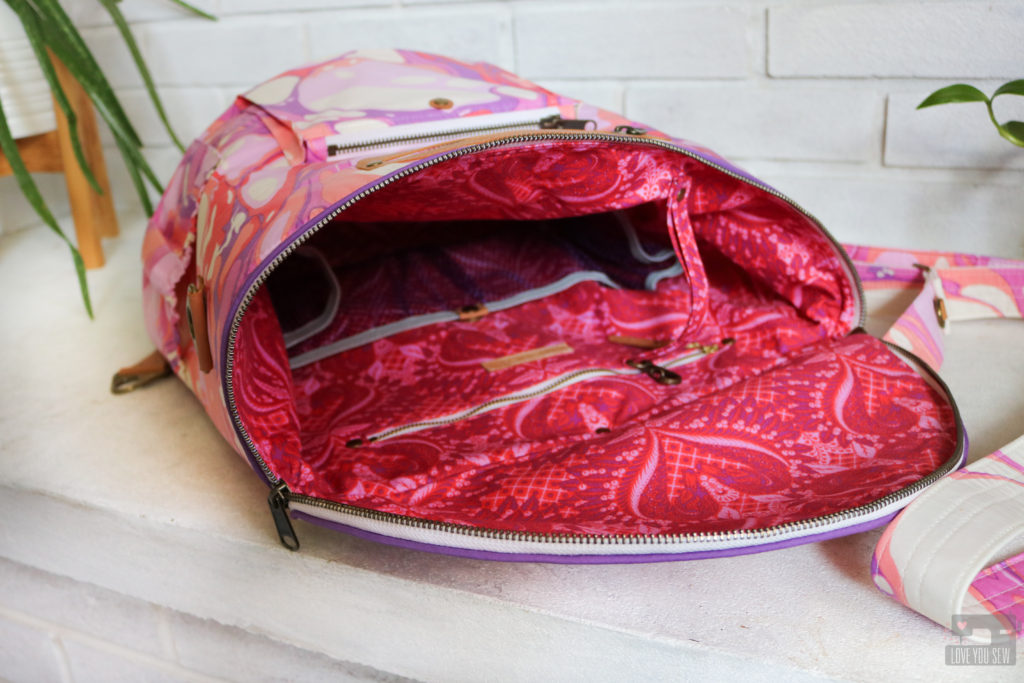
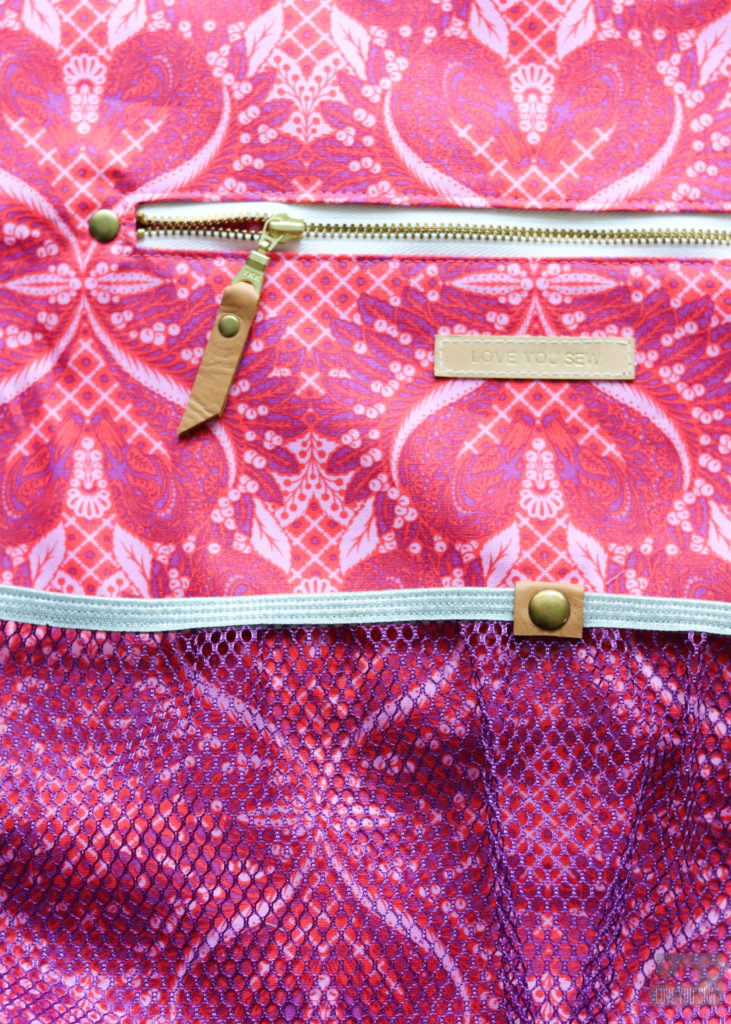
I wanted, of course, to make my backpack PINK!  This is not a color I use often in my sewing and definitely not as a focused hue.  So, I chose this great Tula Pink quilt cotton for it’s beautiful marbling of pinks and purples balanced on a natural background. The lining is also from the same collection and I just love that deeper shade of magenta with the swans.  Who wouldn’t love some swans?!?

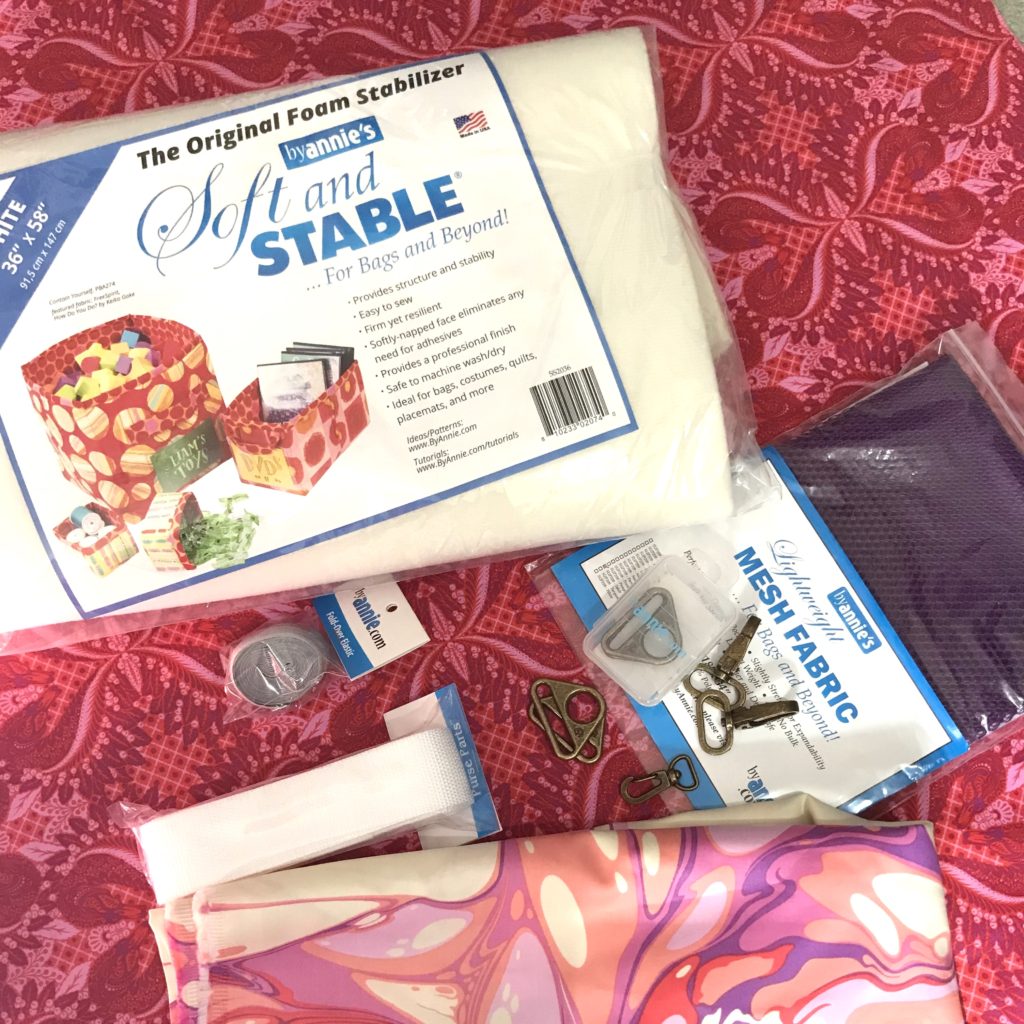
The structure of the Erin Backpack is based on By Annie’s amazing Soft and Stable product.   I’ve been such big fan of this stabilizer for awhile and appreciate the firm shape it creates beyond other interfacing — especially when using a lighter substrate like quilting cotton as seen in this kid’s bag here and should bag seen here. Soft and Stable is also wonderful in how it provides great stability but is also soft and pliable.  Most domestic machines can sew through this quite easily!  The last thing I’ll gush about is how I love the loft of this product and how it could also provide so much great texture.  I used it on my favorite duffle bag (EVER!) you can find here.

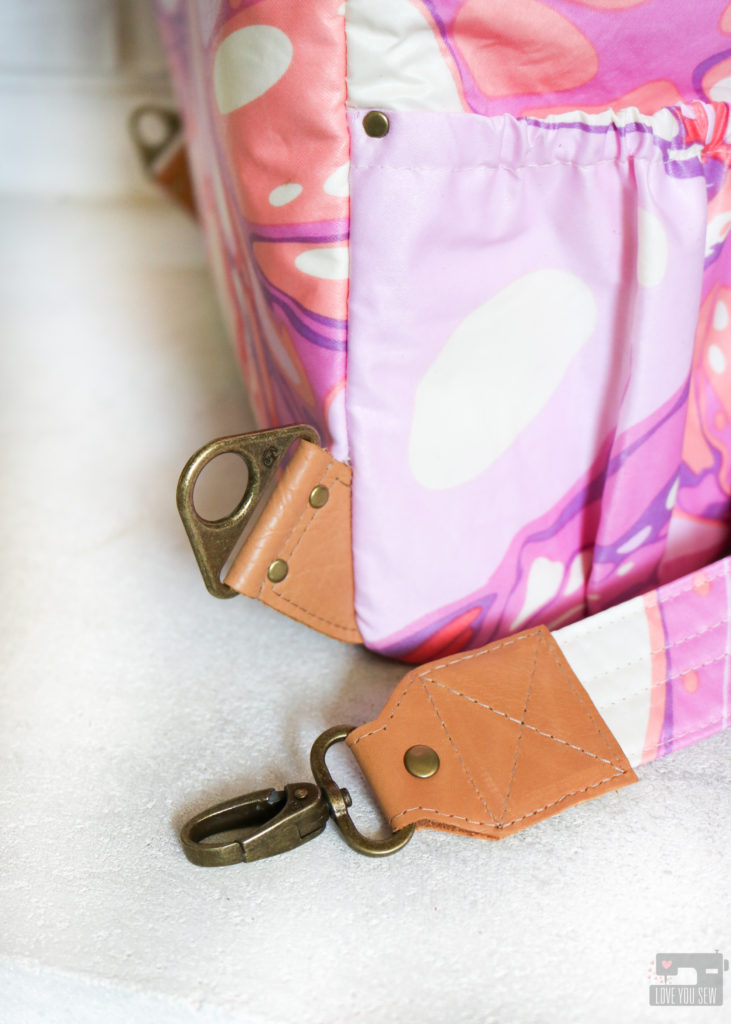
By Annie’s also has so many other great purse accessories. I knew I had to try out some of the hardware!  The swivel clasps and triangle rings in the antique brass finish were perfect for my project. They went well with the leather details and balanced with the metal zippers.  The hardware is nice and sturdy and definitely feels like it will hold up well over time.

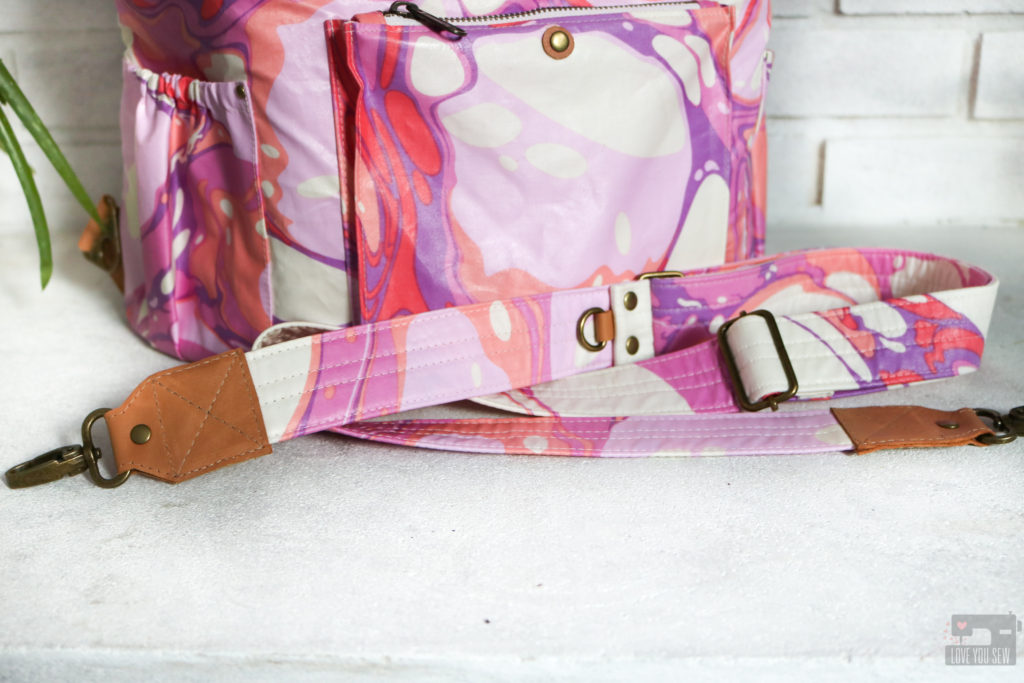
For the strap, I use my Guitar Strap tutorial and FREE pattern templates you can find here.  (You’ll notice I made a change for this strap to be adjustable…which is the addition of an extra rectangle ring.)  Inside the strap, I also added By Annie’s 1.5″ wide Strapping to add more strength and heft when wearing this backpack.  This is a nice large bag and I wanted to make sure the weight when filled up doesn’t make the straps dig into my shoulders.

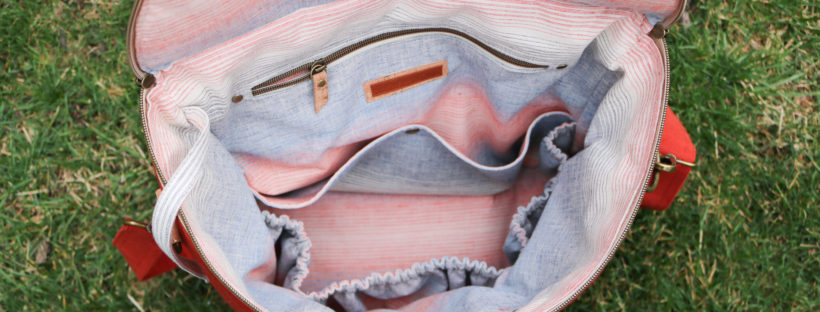
Inside Erin, there is room for a large zippered welt pocket and 5 separate slip pockets. Since this bag can be used for virtually anything, I wanted the lining to serve as more organizational than just storage.  This way,  you can hold larger snacks water bottles, books and even craft projects inside!

But in a large backpack, it can be hard to see all the contents which is why the By Annie’s Lightweight Mesh is so wonderful.  You can check out everything in your pockets at a glance and I love that there is a little stretch for anything you may want to carry. The top edge is finished with Foldover Elastic and was a breeze to sew with my coverstitch, but any zig-zag stitch would work as well.

I hope you enjoyed my PINK Erin Backpack for the blog hop.  Its pairs perfectly with my rose gold phone and hacked Tiny Sophia Bag, don’t you think?

Contest

For your chance to win $30 shop credit to By Annie’s, please comment below.  I’d love to hear your connection with breast cancer.  If your own story is too personal, let me know how you like my project or share your own bag-making journey.

Giveaway will be open until 10/31/2020 and open internationally.  

2020 Blog Hop info:

Schedule

Message from By Annie’s:  “The #SewPink Initiative was created by ByAnnie.com LLC to raise awareness for breast cancer throughout the year. Our efforts culminate in an annual blog hop during October’s Breast Cancer Awareness Month to promote self-care, awareness, early detection and support for those affected by breast cancer.” 

To learn more and see the calendar of events visit: https://www.ByAnnie.com/SewPINK


Bag making products, as mentioned, were provided for this post By Annie’s as part of the Blog Hop.  The Erin Backpack is my own design.  All reviews and opinions are my own. For my full disclosures, you can read about them here.
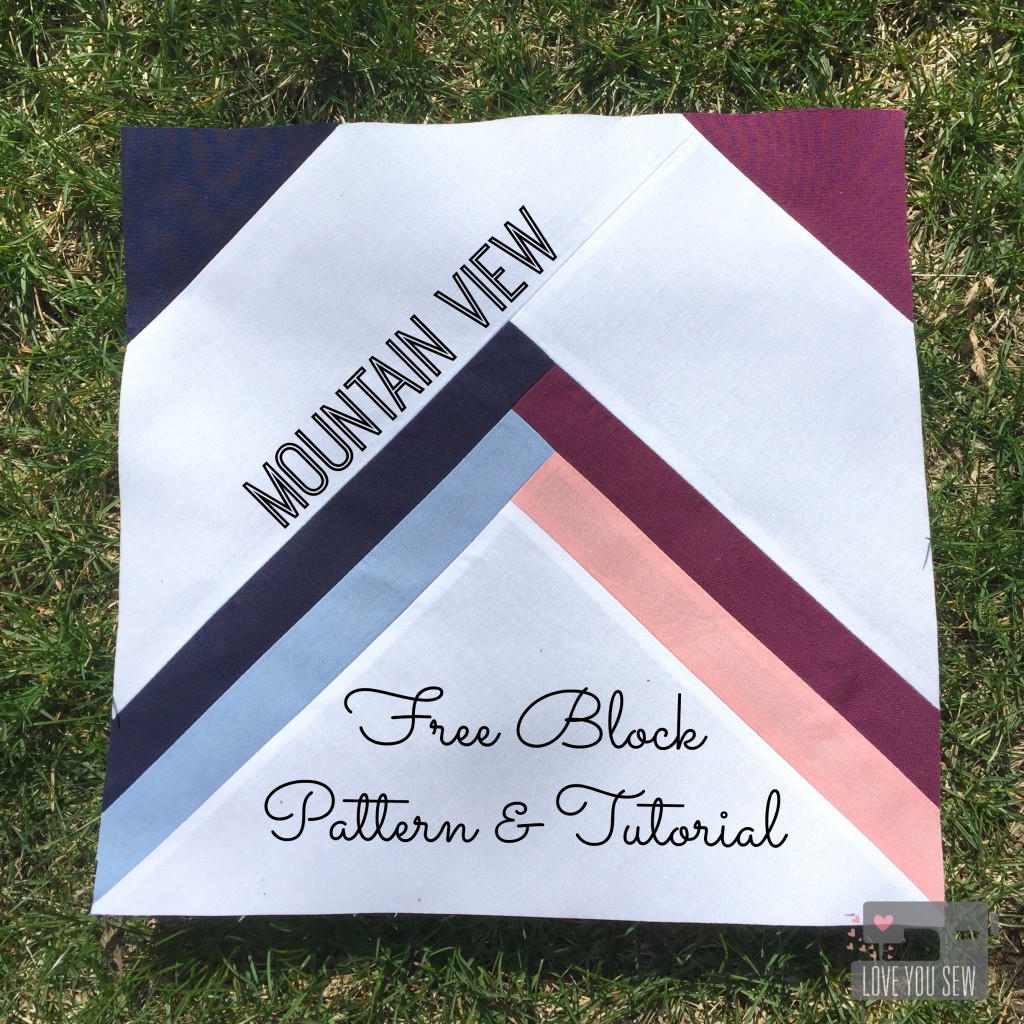
Mountain View – 2016 Paintbrush Studio New Block Blog Hop

Mountain View Title

Welcome to the 2016 Paintbrush Studio New Block Blog Hop!  During the next three days, you will see a flurry of uniquely designed 12″ x 12″ (finished) quilt blocks.  The best part?  These are all FREE patterns!  For a full list of participants, please visit the host of each day’s hop:

Monday, March 28th – Yvonne @Quilting Jetgirl

Tuesday, March 29th – Cheryl @Meadow Mist Designs

Wednesday, March 30th – Stephanie @Late Night Quilter

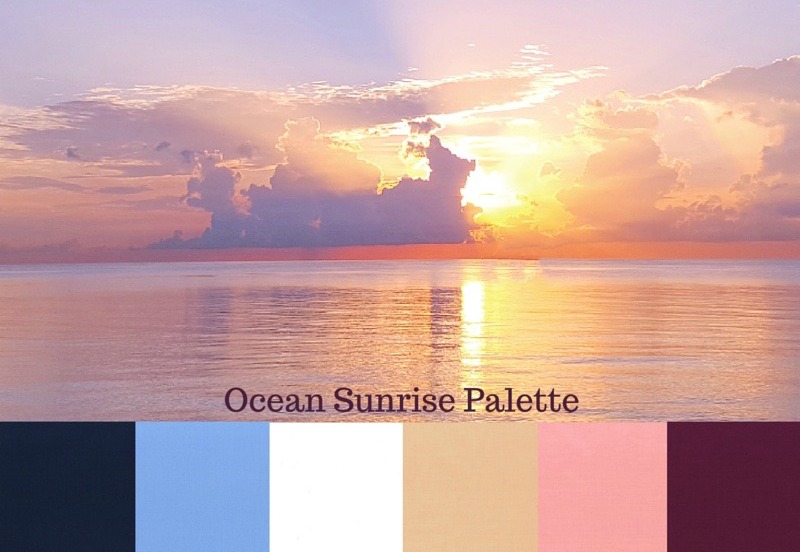
Ocean Sunrise Palette

The challenge with this blog hop, was to use at least 3 colors of Painter’s Palette Solids in the Ocean Sunrise bundle.  You can find all the details of the chosen colors here.  Do you use your quilts on the beach or by the water?


Mountain view Block

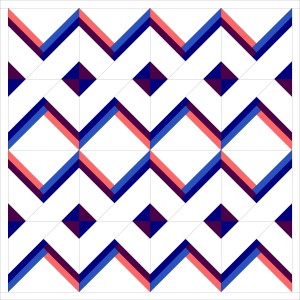
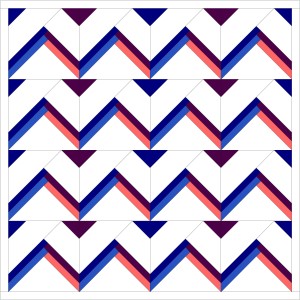
This call to design a new block was indeed a challenge for me.  I usually always have a design idea that’s been brewing in my head.  However, this time I was drawing up blanks.  I played with many ideas until I saw a sun catcher with this similar design.  It really inspired me with it’s simple lines like ones in Log Cabin style quilts.  But this block is set apart by it’s angles and the negative space produces a great chain design.

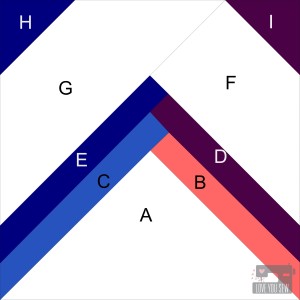
Mountain View Block Labeled

v2

As with all sewing projects, please read through full instructions before beginning. 

Cutting instructions:

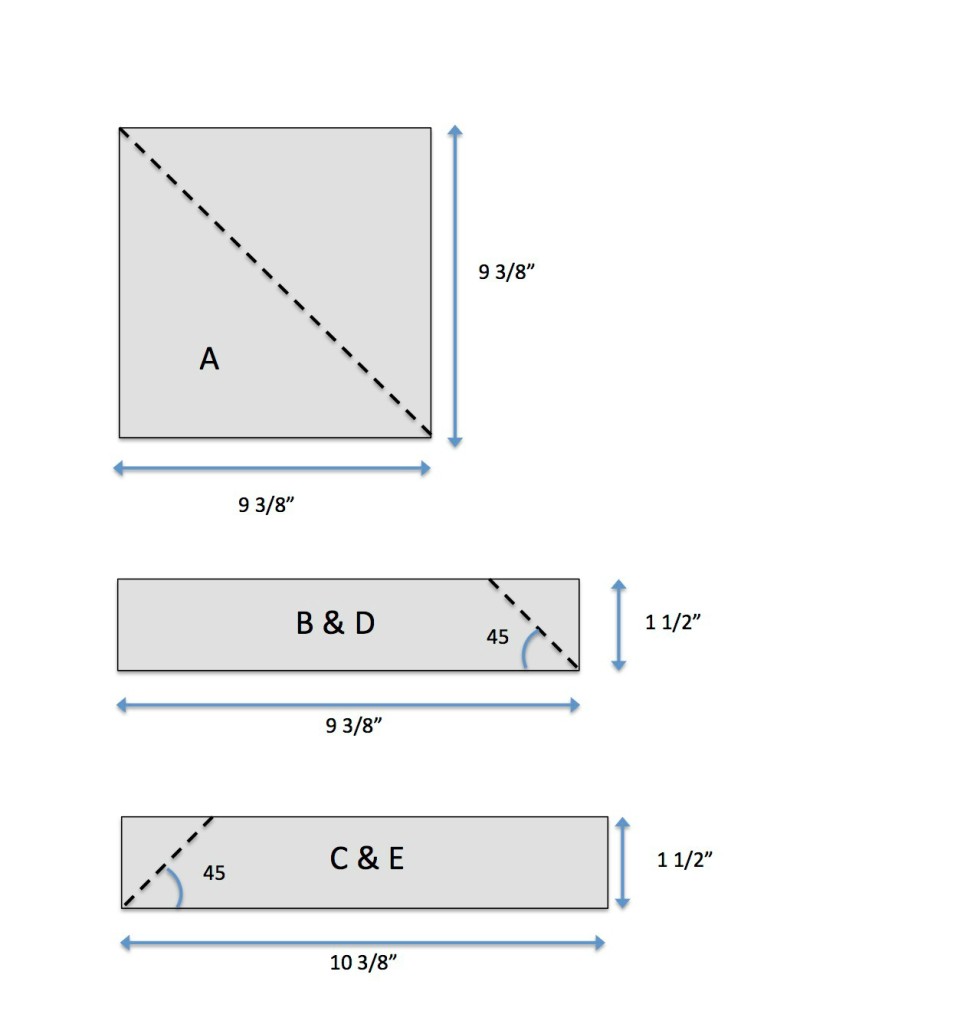
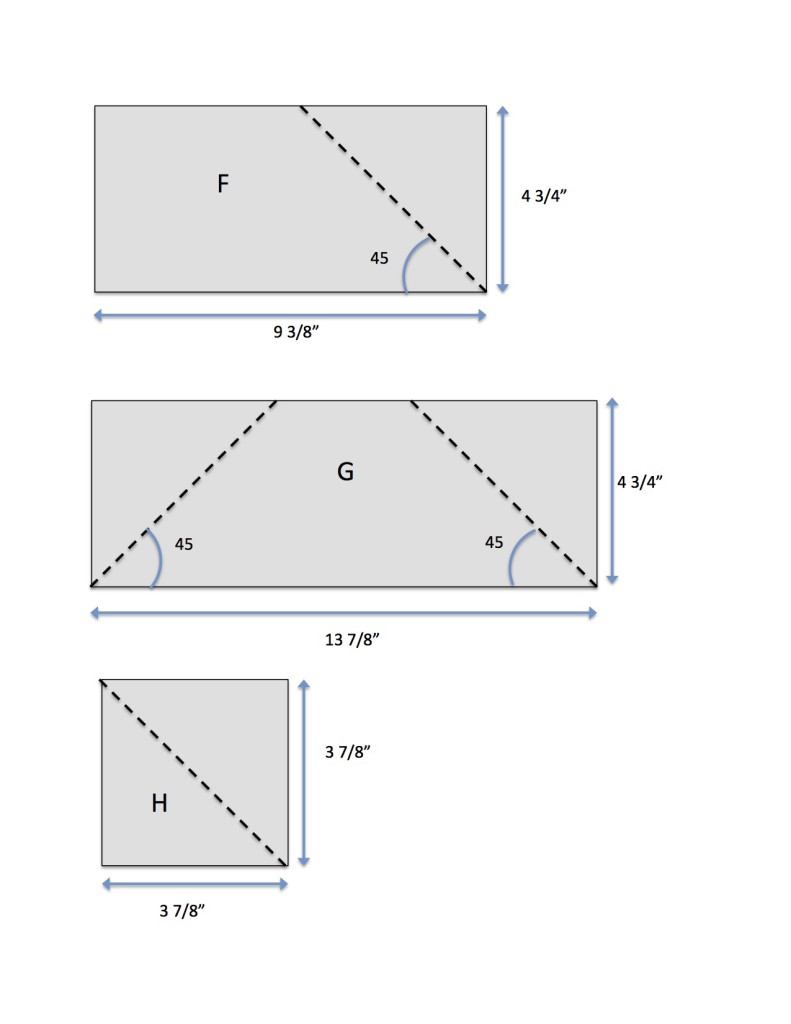
Below are illustrations of every piece of the block.  The dotted line represents where you cut.  A large quilting rule with 45 degree angles is required.  Please see block illustration above for reference.  TIP:  Check and double-check your angle placement on printed fabric before cutting.a


MV cuttingpiecing Instructions

Please note a 1/4″ seam allowance

Mountain View Piecing Collage

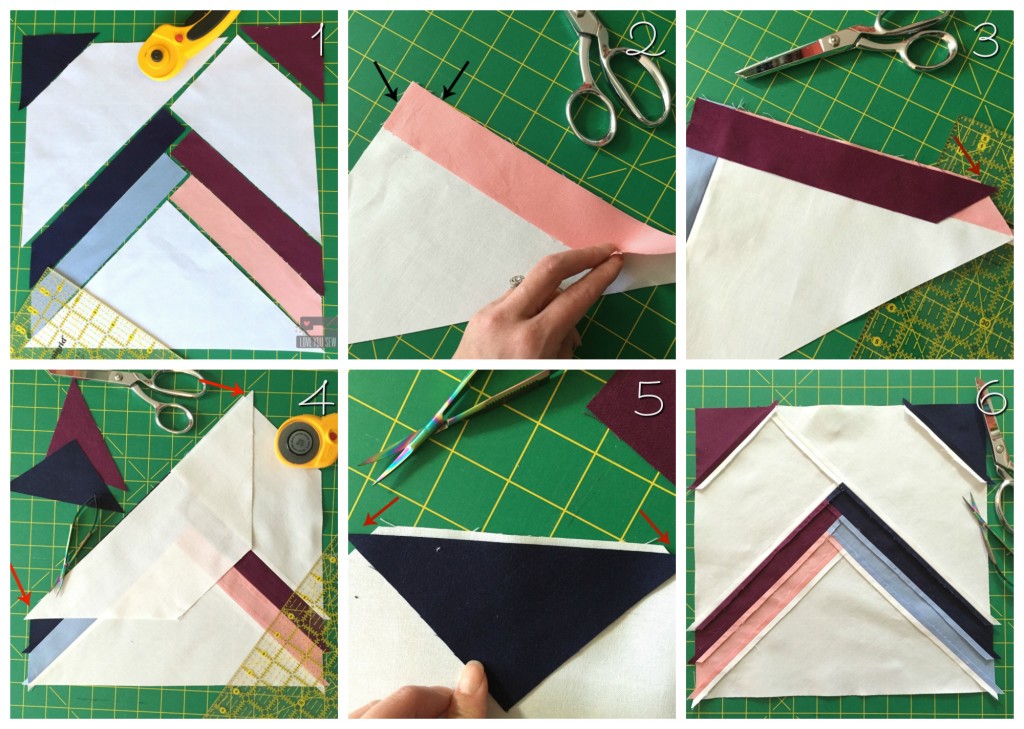
  1. Layout the block with your intended fabric placement
  2. Line up the short edge of piece B to piece A right-sides together (RST) and sew down the long side. Repeat for piece C but on the opposite side.
  3. Line up the short edge of piece D to ABC.  You should have a 1/4″ overhang off the block. Repeat for piece E of the opposite side and then add piece F.
  4. Line up the long-side of piece G to ABCDEF.  You will have 1/4″ overhangs on both sides of the trapezoid.
  5. Line up the long-sides of H to each corner.  You will have 1/4″ overhangs on both sides of the triangle.
  6. Make sure to press all seams out as you go and you will have a nice flat back as shown.

Trim the block to 12 1/2″ square.

Additional Quilt variations:

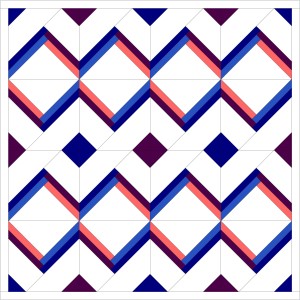
With the play of colors and negative space, there are quite a few different ways you can lay this quilt block.  Here a just a few other ideas.

v5

This placement puts the “chain” in the center of the quilt and you can play with the smaller triangle (H) to get solid squares in between.

v4

This variation plays with the chevron you can create.  Leave the smaller triangles (H) colored, and you get an arrowhead look or leave them the same color as your background to let the chevron stand on it’s own.


Visit Painter’s Studio’s blog, Inspired by Fabric and/or Quilting Jetgirl (two separate giveaways) to get your chance to win a whole HALF-YARD bundle of Ocean Sunrise!!! {Edit – Giveaway closed}

IMG_4386

 Don’t forget to get additional FREE quilt block designs and tutorial by visiting the following:

Host: Yvonne @Quilting Jetgirl

Jess @Quilty Habit

Silvia @A Stranger View

Cristy @Love You Sew

Kelly @Quilting It Out

Renee @Quilts of a Feather

Bernie @Needle and Foot

Terri Ann @Childlike Fascination

Chelsea @Patch the Giraffe

Mary @Quilting is in my Blood

Diana @Red Delicious Life

Sarah @123 Quilt

Thank you for visiting and I hope you get to try out this block along with all of the others on the 2016 Painter’s Studio New Block Blog Hop!

Happy Stitching,

Cristy


This blog hop was sponsored by Painter’s Studio.  The quilt design, tutorial and all opinions are original and my own.

Chalk and Paint Fabrics Blog Tour {Crimson and Clover Traincase}


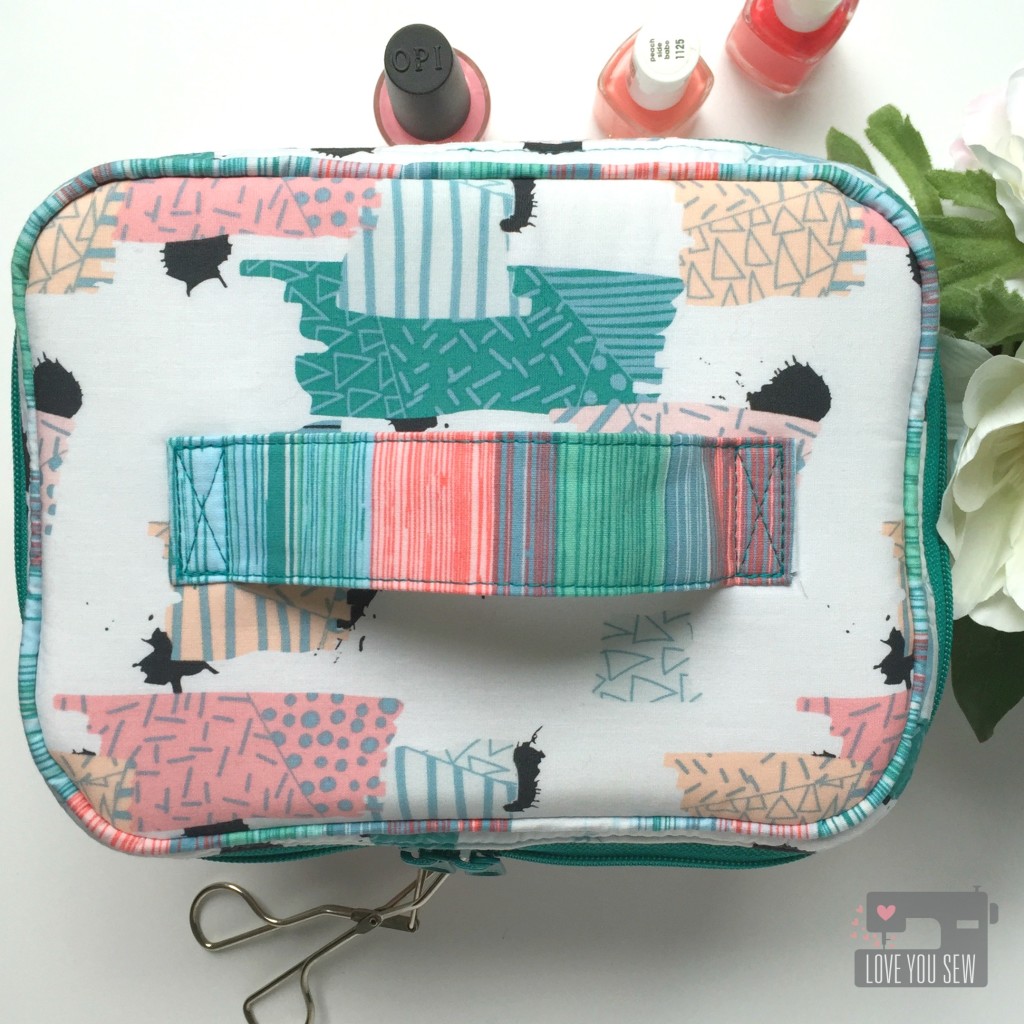
Traincase Full Profile A

Welcome to the kick-off for the Chalk and Paint Fabrics Blog Tour!  I am so happy to share my project with these new Art Gallery fabrics with you.  Sew Caroline has quite an amazing line-up ahead for the next few weeks and I know each blogger will have something amazing with Chalk and Paint.

Logo-PNG2

I have been a long-time admirer of Sew Caroline‘s garment patterns (umm..hello, Kimono Jacket..here and here…)   It is no exception when it comes to her fabrics.  All of her collections are youthful and so fun.  But this newest line has a more muted pastel palette, which I just adore!

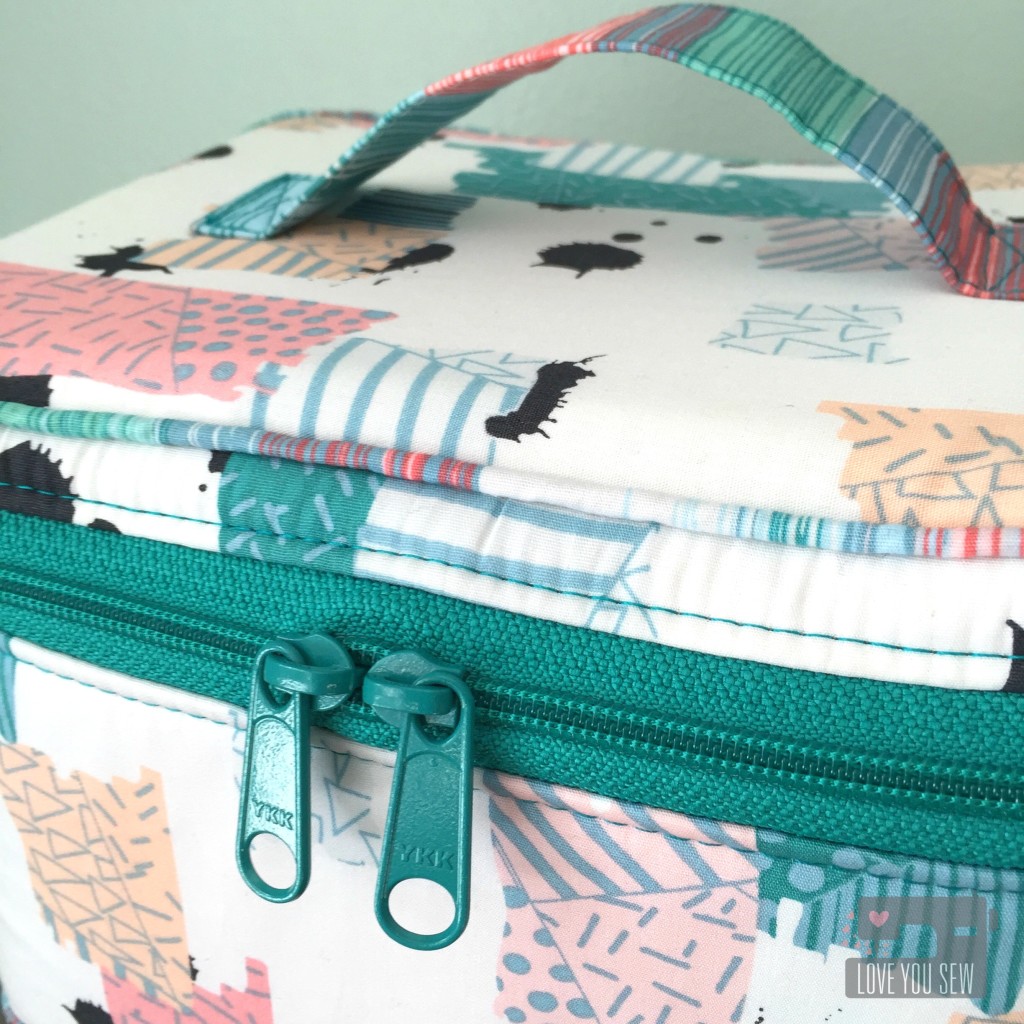
Traincase Top

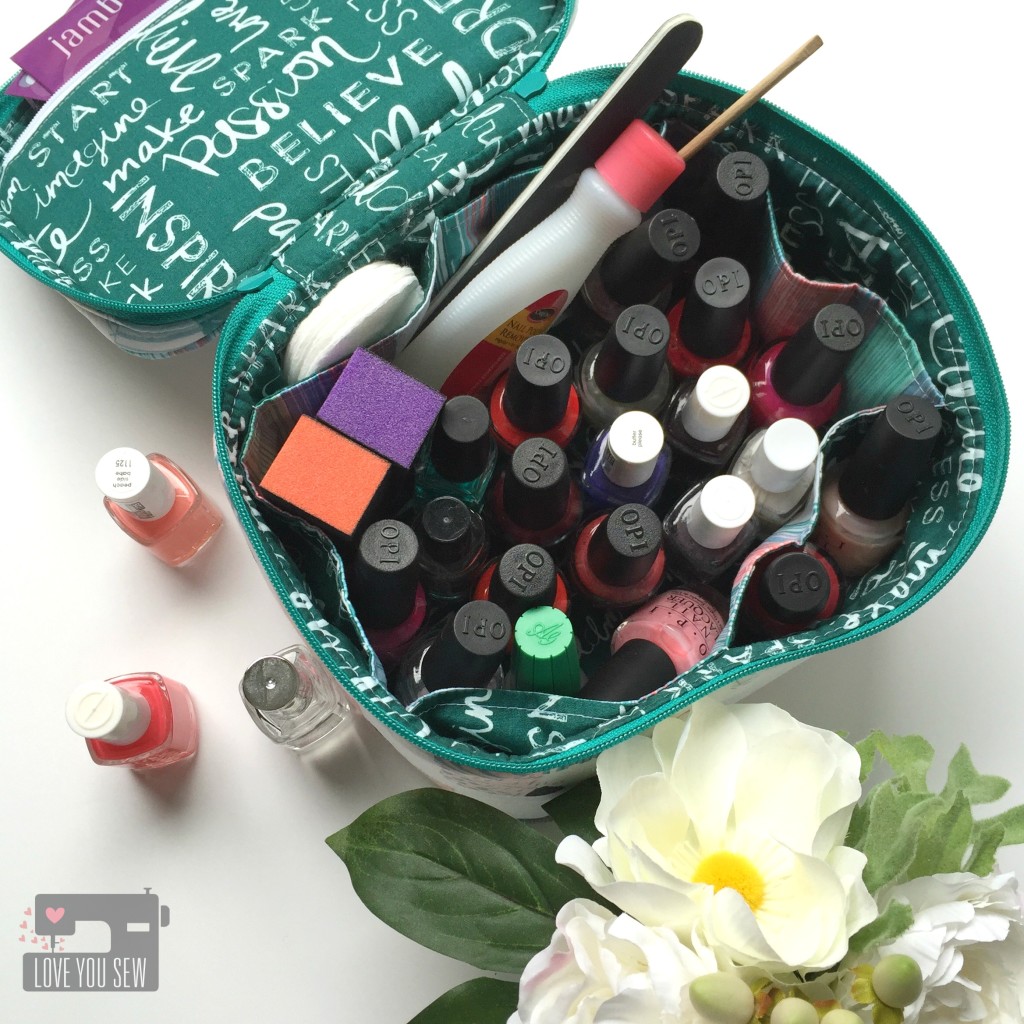
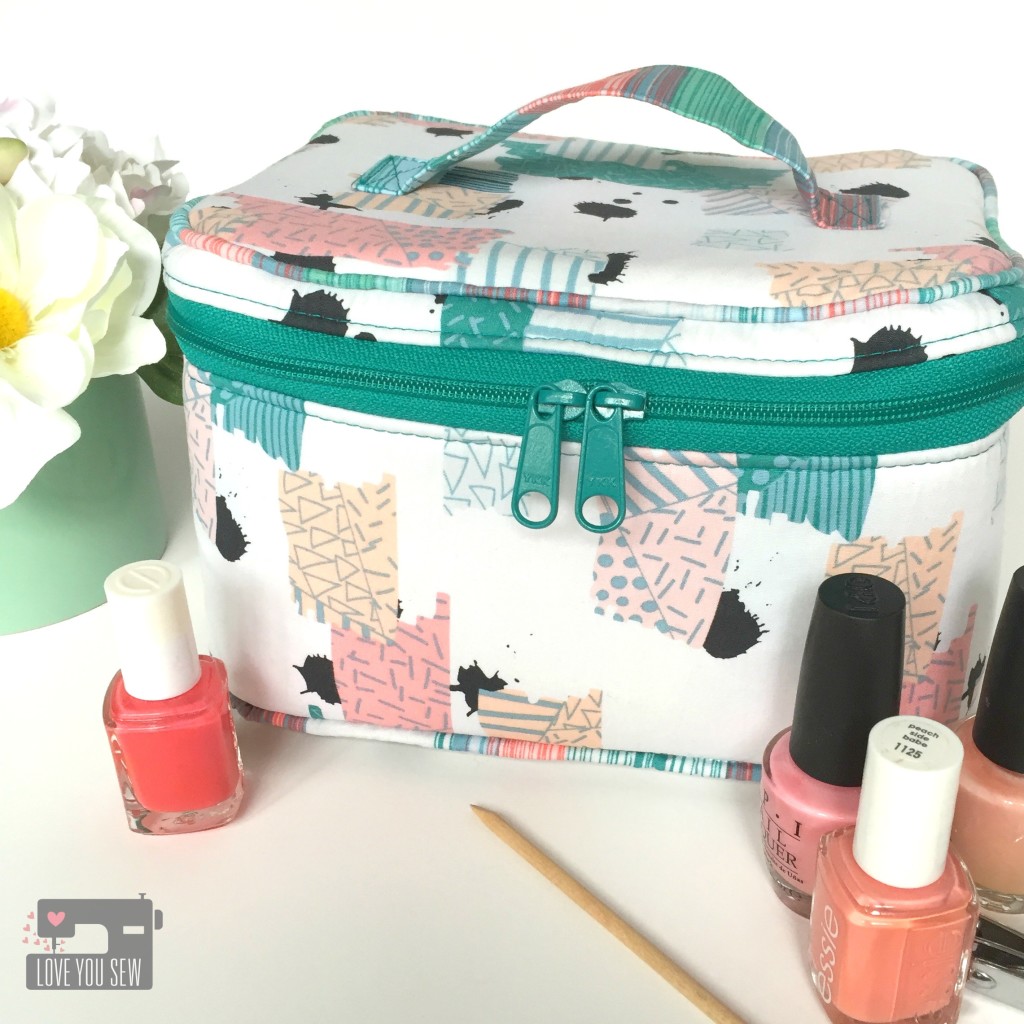
When I saw Untaped Splatter Frost, I knew it was going to be my next Crimson and Clover Travelcase (pattern by Sew Sweetness.)  I love this case because it holds everything…and it’s not even the larger size.  The interior side pockets are so nice for organization and lord knows I need all the help I can get!

Traincase Open Full Polishes

As I was sewing this bag, I realized why I put the two together….it was my sewn version of a Caboodle!  This exterior fabric has an 80’s vibe and being the child of immigrant parents, I never had one.  “What..a shoebox wasn’t good enough to hold your junk?”  They never understood the need for adolescent acceptance…haha.

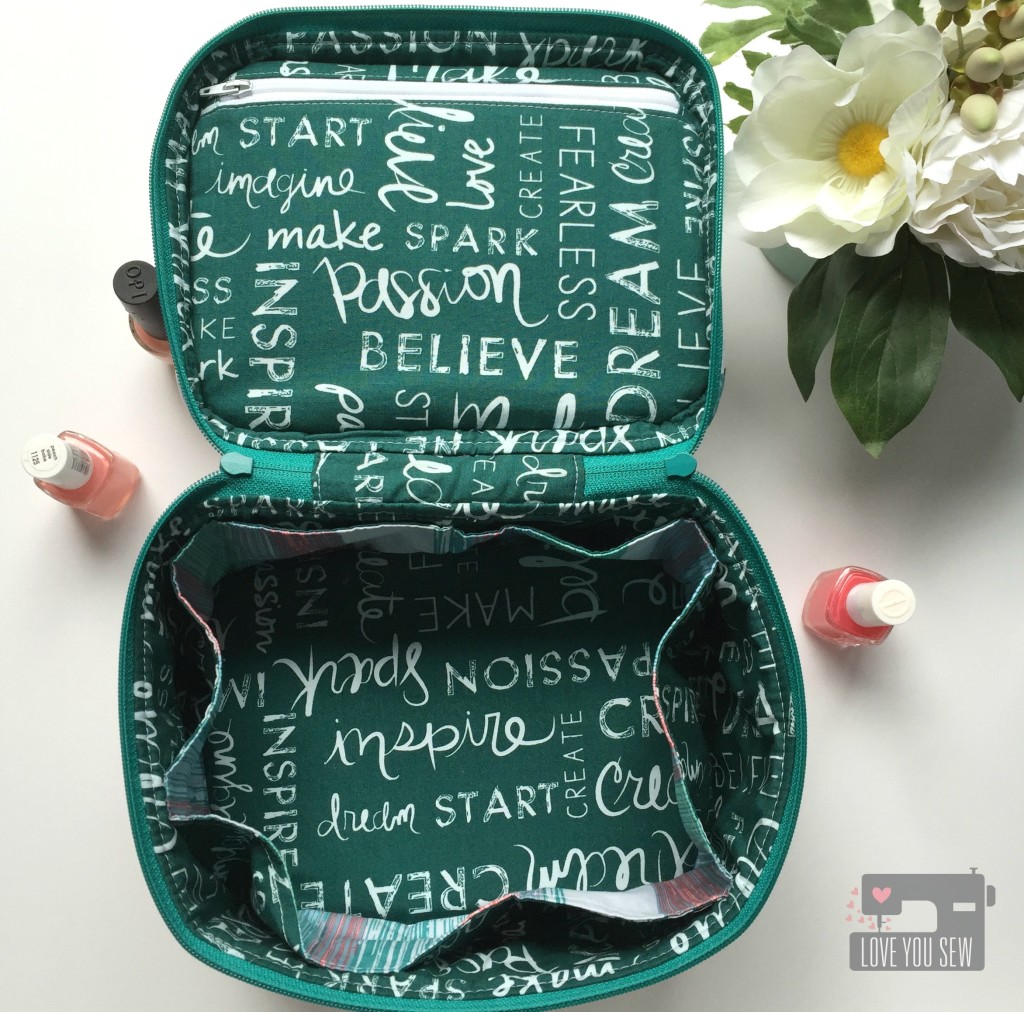
Traincase Open Empty

For the interior, I used Writings on Boards as a darker complement to hide any spills or smudges which may occur (yes, I know myself well.)  How cute is this text fabric, right?  I love the inspirational words to welcome me every time I open this bag.

Traincase Front Zipper CloseUp

For the piping, handle and interior pocket accents, I used Dripping Paint Cooling.  You get so much color and texture in such a small amount of yardage, that it was just perfect for that extra “pop.”  Now…I think my “Caboodle” is pretty rad, isn’t it? 😉

Don’t forget to visit all of these amazing blogs for more Chalk and Paint projects!

Cristy // Love You Sew –> Right here!

Katie // The Simple Life

Jenn // Quilts and Conversations

Robin // Pattern Revolution

Alicia // Love Knot Photo

Holly // Holly Gets Quilty

Chris // The Tattooed Quilter

Alexis // My Sweet Sunshine

Adrianna // Hey June Handmade

Taylor // Taylor Made Creates

Casey // Casey Taylor Threads

Hayley // Welcome to the Mouse House

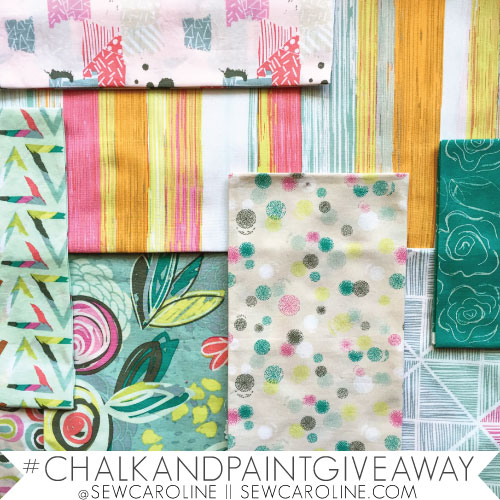
Giveaway-Graphic

What would you make with the Chalk and Paint collection?  You have a chance to WIN a Full FQ Bundle on Instagram by (re)posting your favorite image from the blog tour using #chalkandpaintgiveaway and tagging @sewcaroline. (Full Details are on Caroline’s blog.)


Good luck!


***This post may contain affiliate links which help me on the back end to fund this site.  Compensation is only through your own purchase.