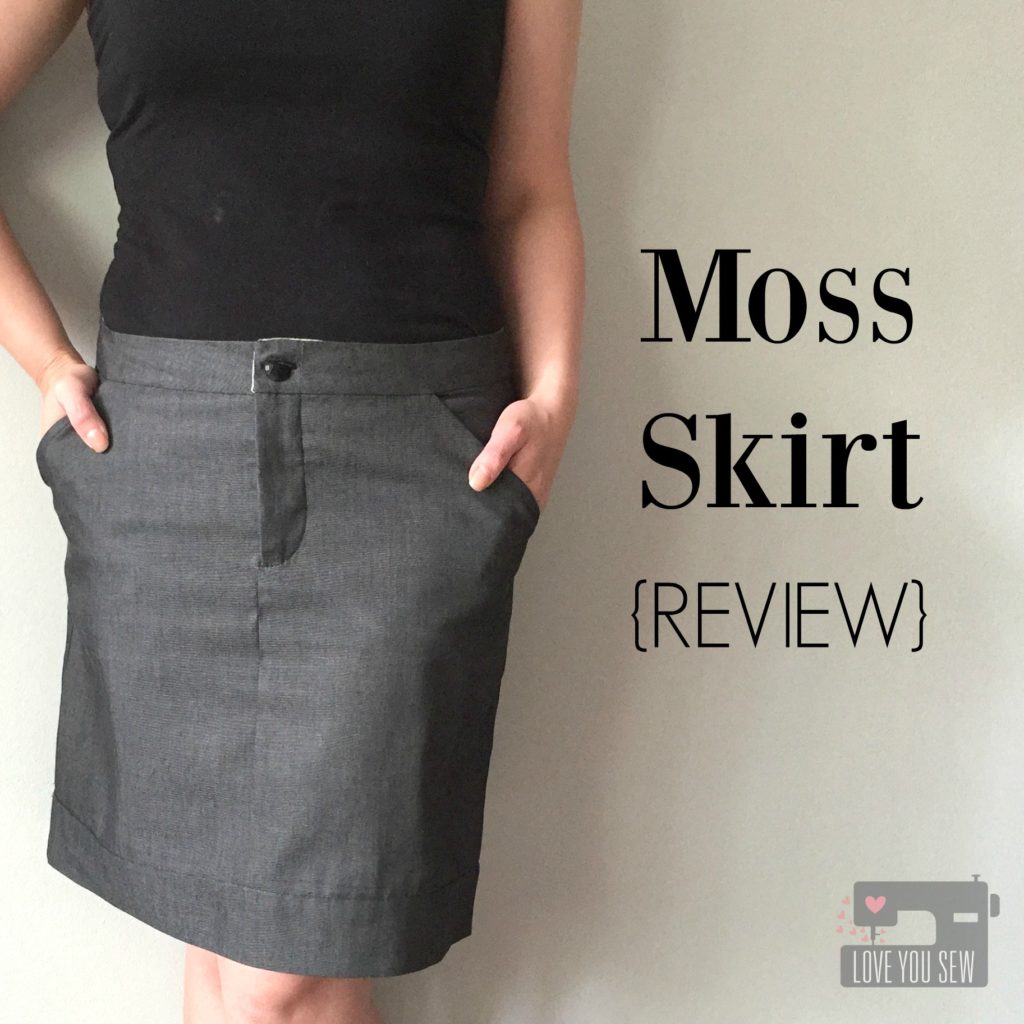
Moss Skirt {Review}

MossSkirtTitle

With all of this great warm weather, I’ve been thinking about adding some new pieces to my wardrobe and skirts are definitely included.  Coincidentally, it is also #MeMadeMay where you show off your handmade clothing on social media all throughout the month.  So…I obviously needed to make one rather than buy one 😉

PatternCover

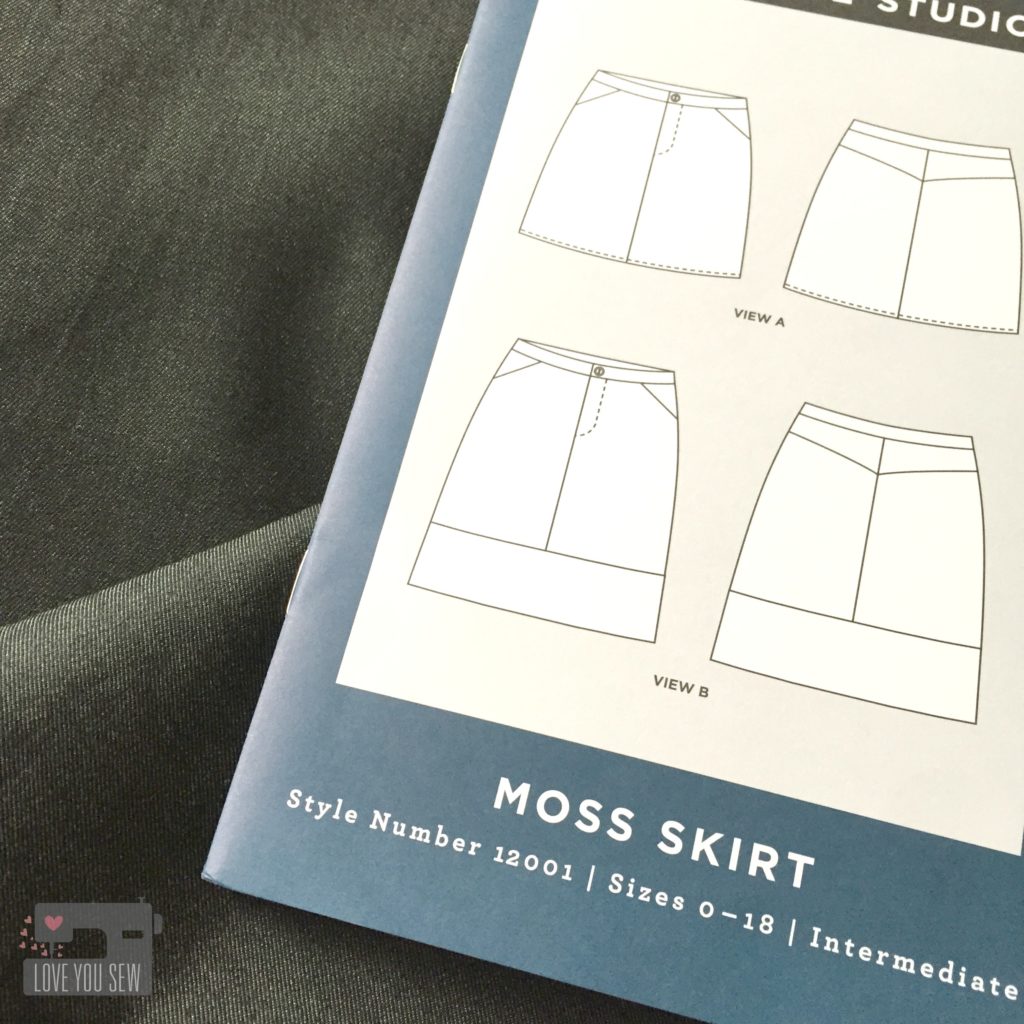
I’ve been casually looking over designs for a few months and wanted a clean silhouette without an elastic waistband.  Although the thought of a zipper scared the bejesus out of me, I still selected Grainline Studio‘s Moss Skirt.  The instructions and pictures are well done and I love how there are great resources on Grainline’s blog in case you get stuck (which of course, I did.)  I also love the two variations with a short mini and knee-length options.

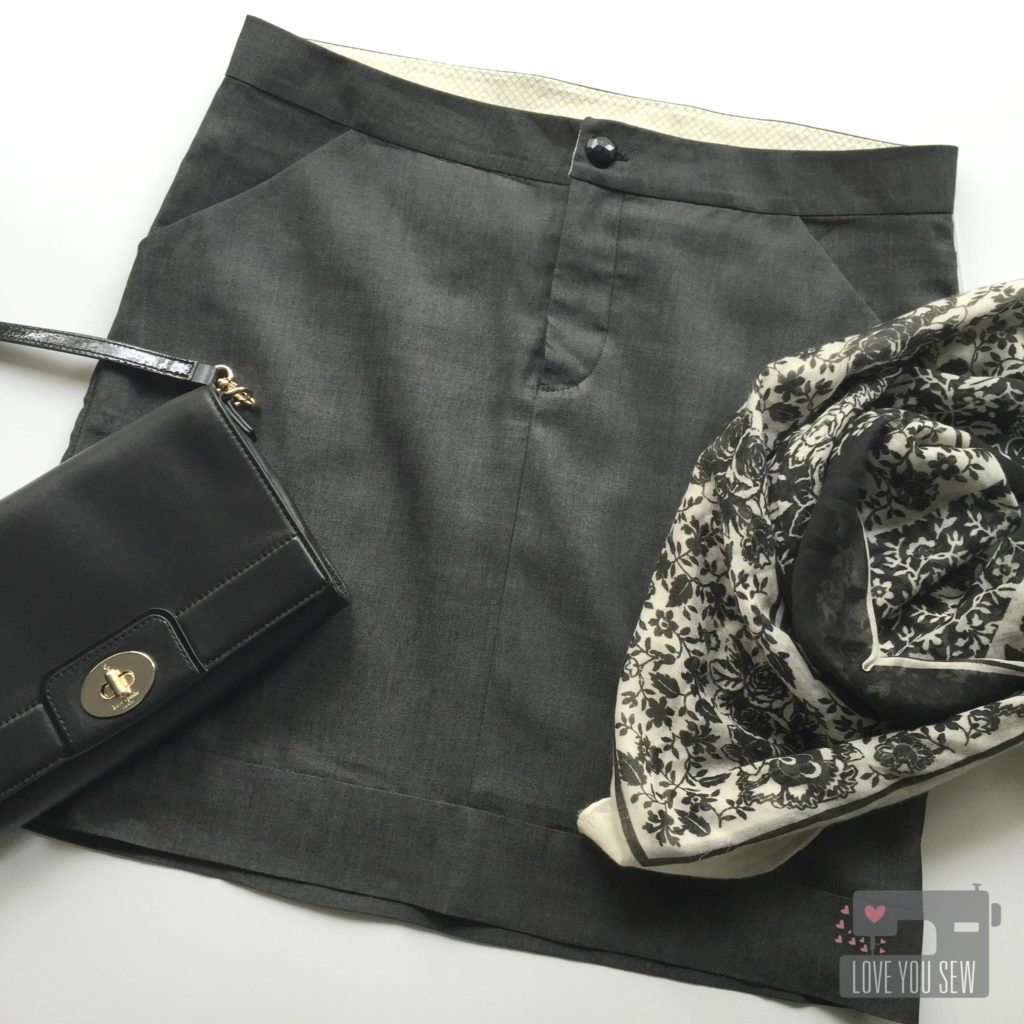
I chose this beautiful Robert Kaufman black denim for my skirt.  It has a lightweight structure and has pretty classy look and feel.  Who can knock the bonus slimming effects of black as well?

ZipperInsertOpen

The body of the skirt came together pretty quickly.  I used a combination of my Juki TL-2010Q to sew the straight seams and then finished with my Singer 150 Anniversary 14T948DS Serger.  If you make a lot of garments, I highly recommend a serger to really make your seams look professional.

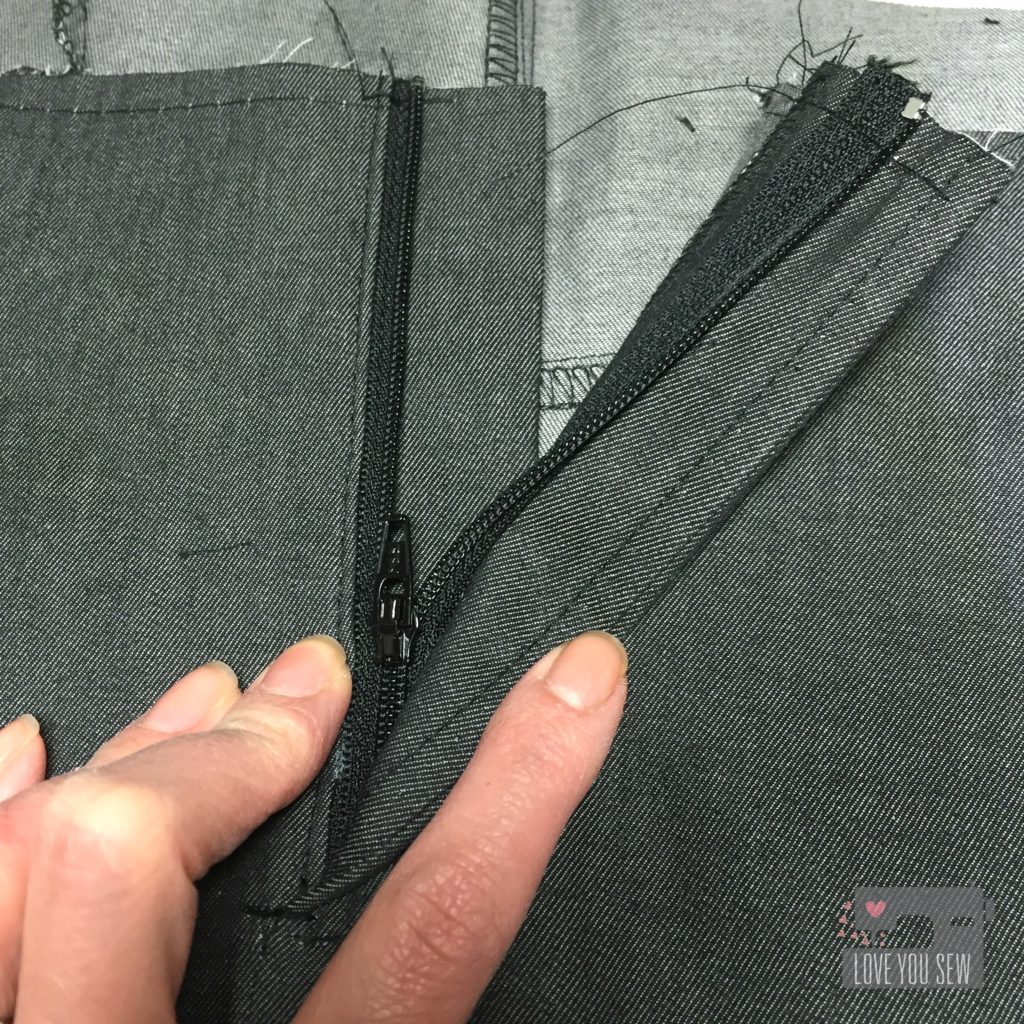
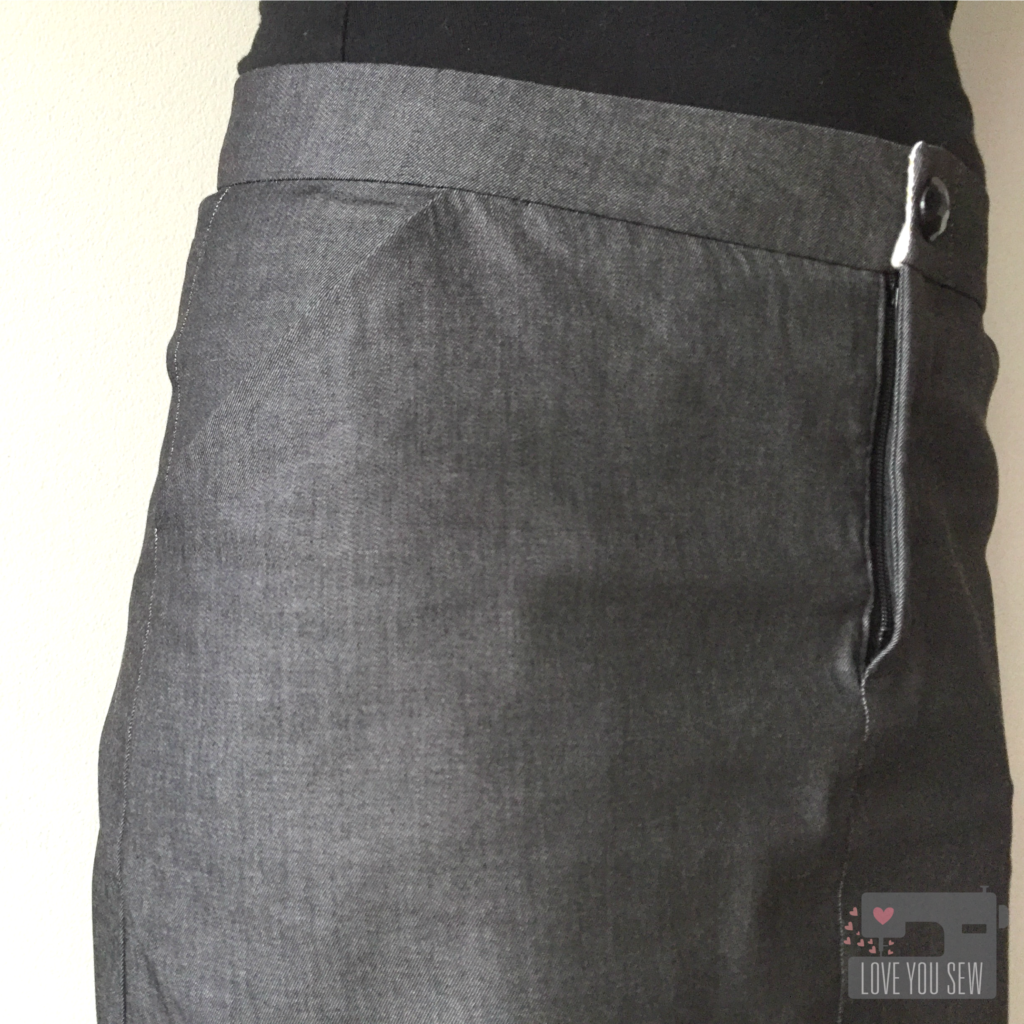
After I got the body and pockets complete, it was onto the zipper insert.  Since this was my first one (ever!) I couldn’t wrap my head around the pattern’s instructions.  Luckily, Grainline has a ton of supplemental resources under “Tutorials”  to help.

ZipperInsertClosed

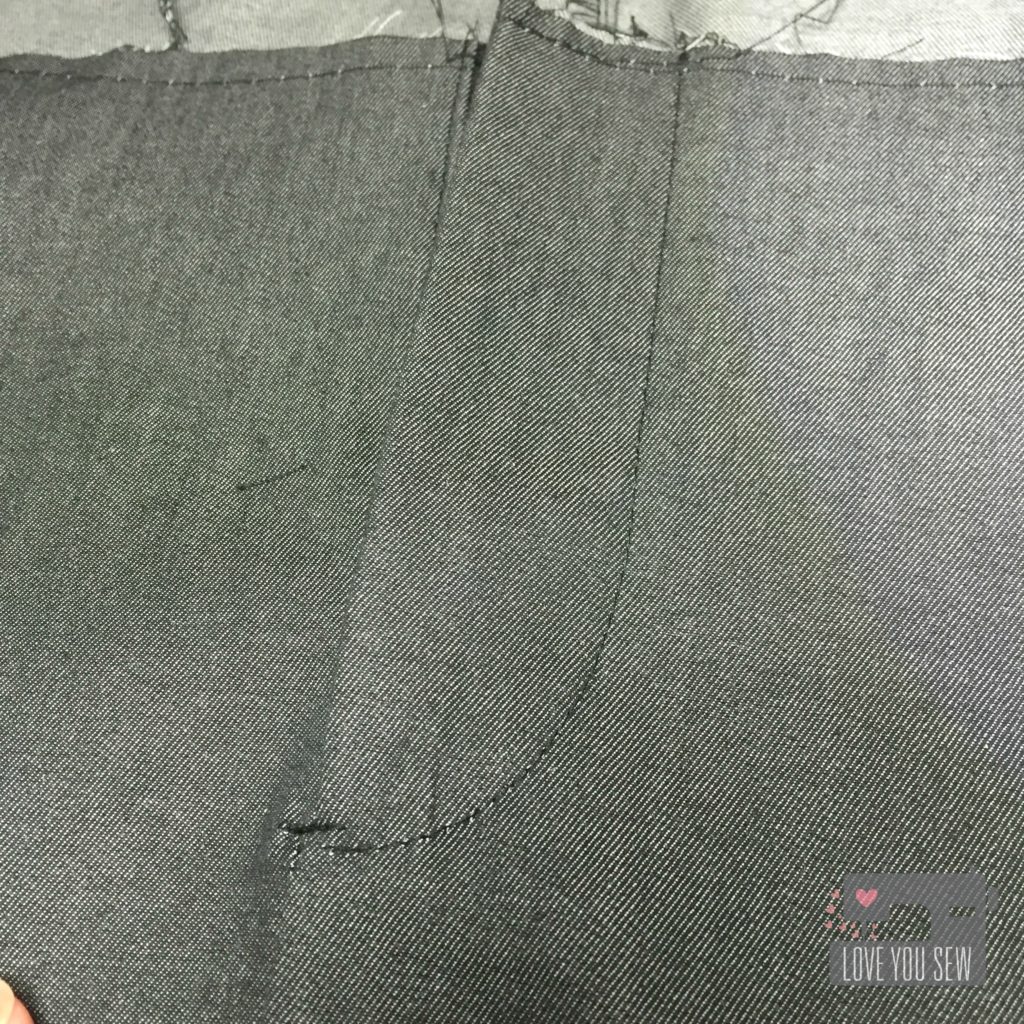
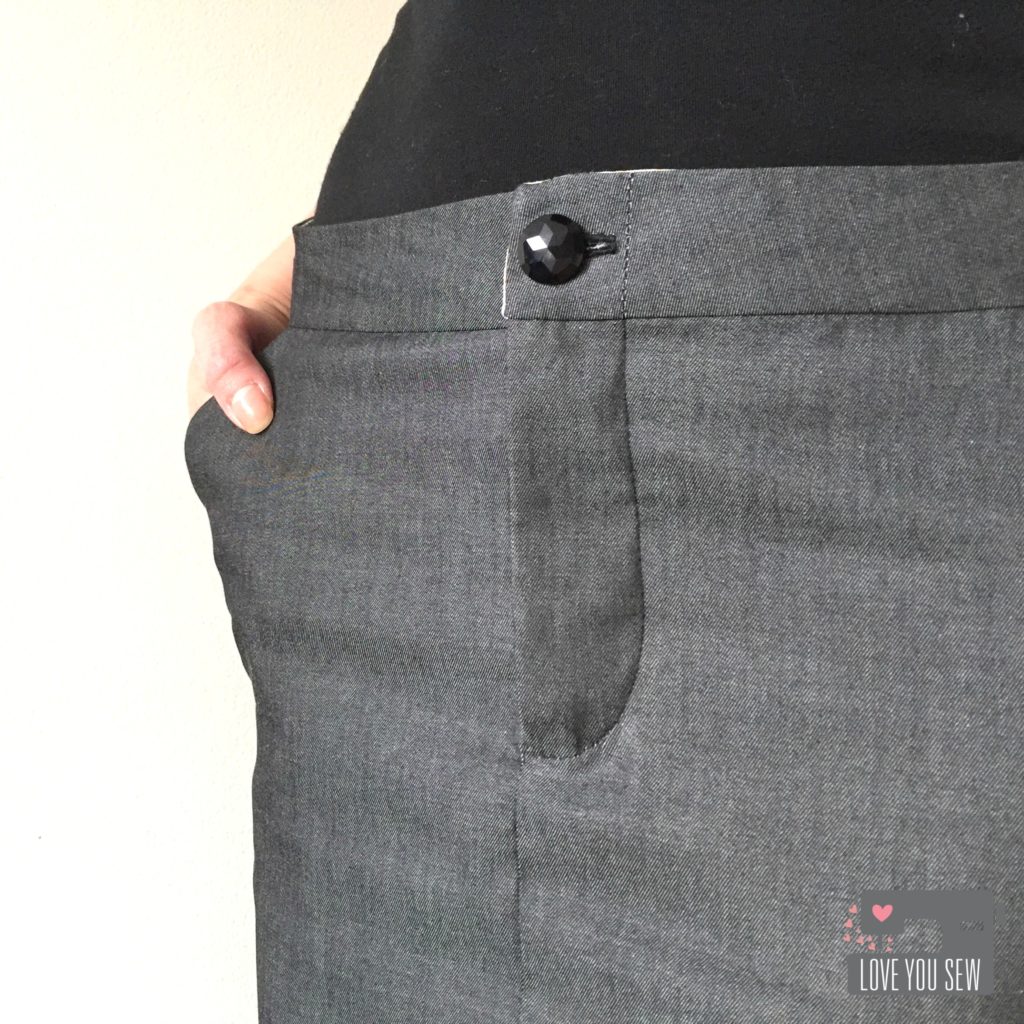
After looking at the blog’s additional pictures and instructions (about 10 times,) I finally dove in and added the insert.  Instead of basting, I used my favorite Sewline Glue Pen to keep the zipper and fly pieces all in place.  I’m so proud of how this came out…who knew it actually pays off to take your time?  😛

WaistbandButton

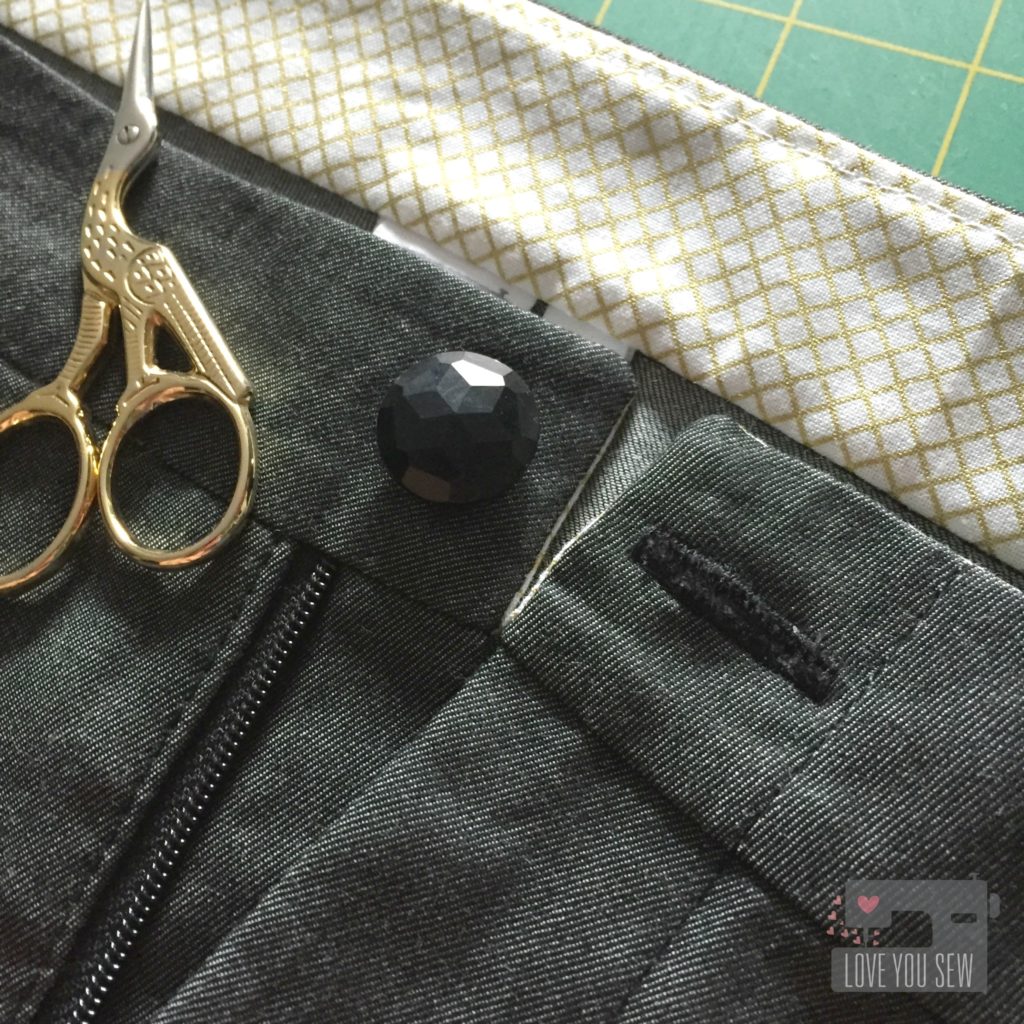
I like fun little details like adding this metallic fabric inside the waistband.  It is Remix by Ann Kelle for Robert Kaufman and really adds some flare.  This button is extra special – It is from my mother-in-law’s stash which was passed to me when she moved to a retirement home.  I wanted to make this skirt for Mother’s Day and it was really nice to have something from my MIL because we couldn’t spend the day together.  I think it maybe from a coat because I have about 5 of these pretty gem-like buttons.

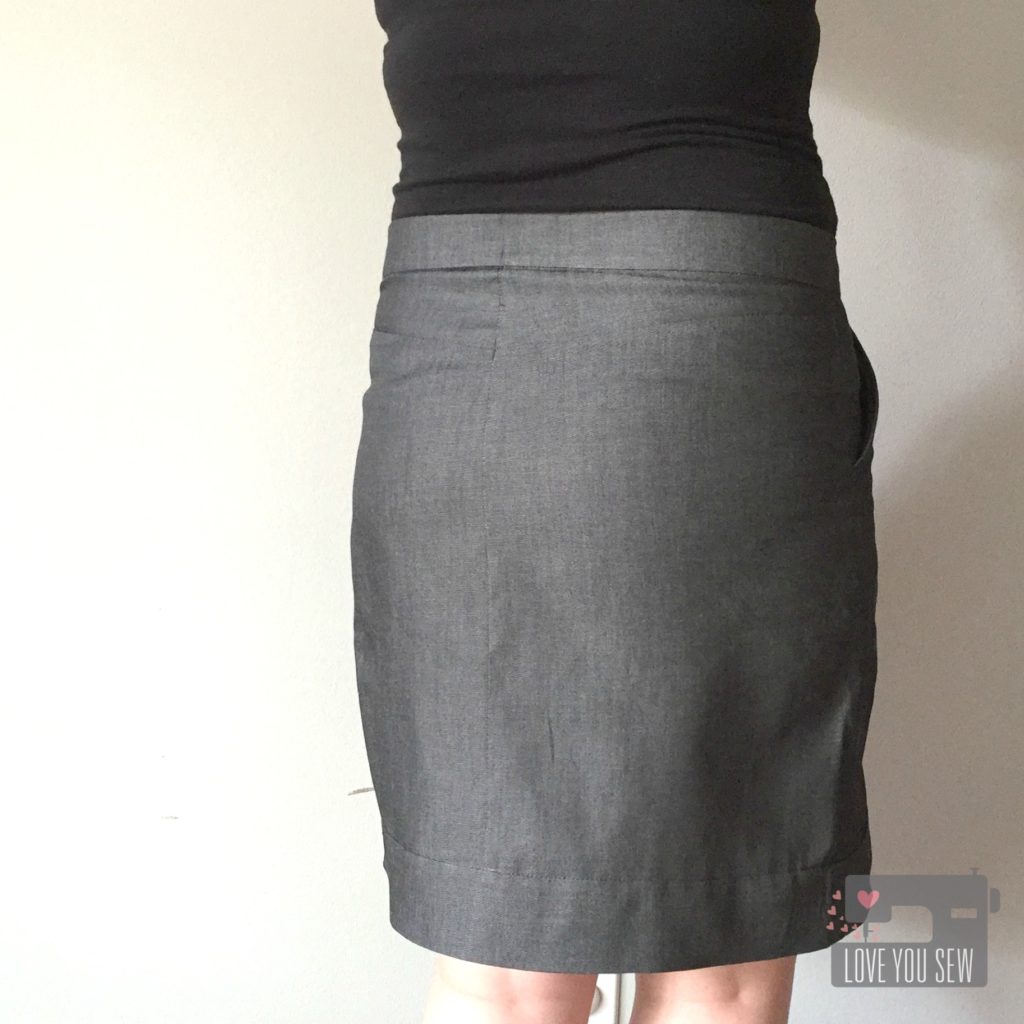
MossSkirtBackview

Before adding the waistband, I adjusted the waist measurement at the back yoke.  (My backside is one size and my waist is another.)  Next time, I’ll wait to serge the center-back seam until after I  tailor it in…just for clean seam.   What I completely forgot to do, was to slightly curve the yoke back down after the adjustment.  You can see the slight fold in the yoke right below the waistband….that should be smooth.

MossSkirtSideview

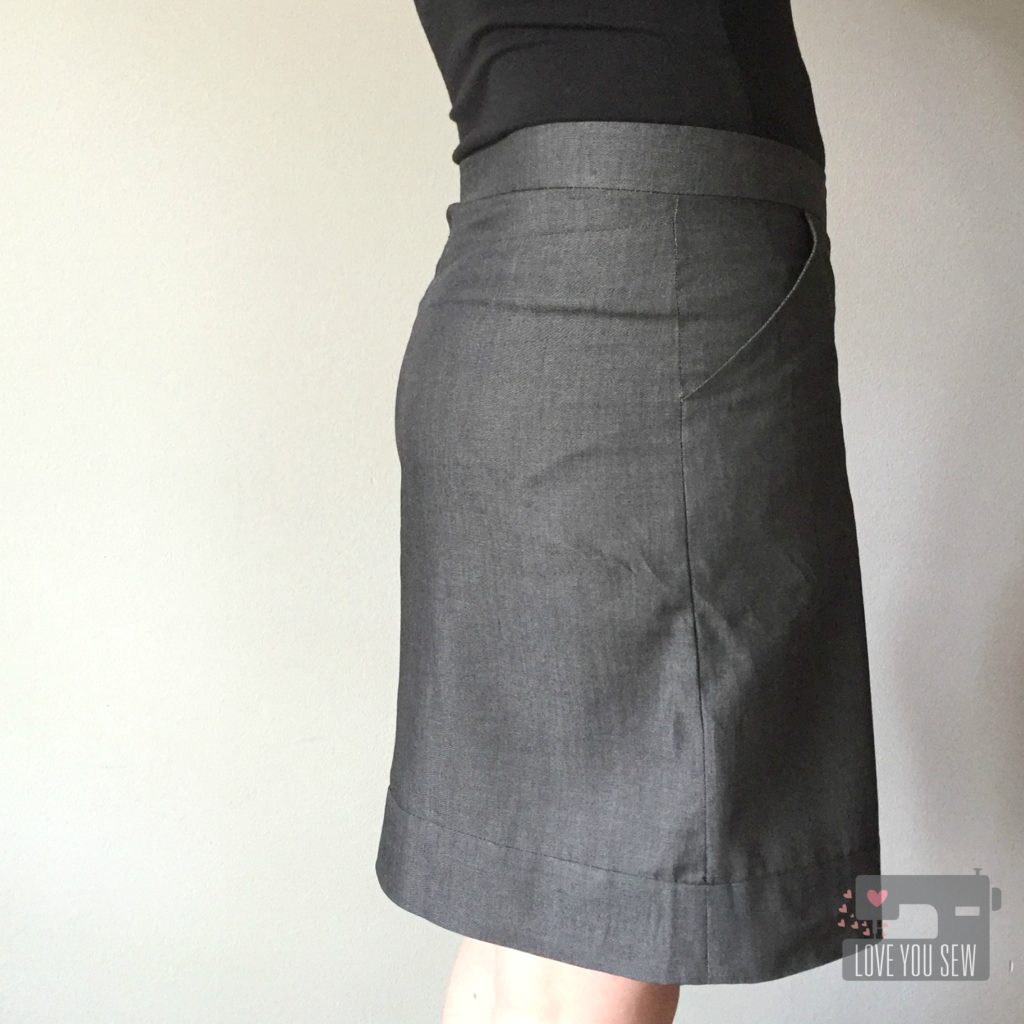
The other change I made was to decrease my seam allowance to 3/8″ for the waistband to make it slightly wider.  After kids, I enjoy a mid-rise and wider waistbands to keep “everything” in it’s place…hehe.

MossSkirtFrontCloseUp

If you read other reviews, there is a mix of people who are able to use the waistband as written, and others who come up a little short.  I’m still a newbie to garment construction and I fell into the latter group.  Since I adjusted the back yoke, my waistband was only about 1″ too short.  I added the extra length to line up with the fly shield and you would never know there was an issue.  Fortunately, I did not cut my interior waistband facing yet and could adjust to match.

MossSkirtSideCloseUp

The pockets on this skirt are great.  Since I’m a bit more curvy, ready-to-wear pockets tend to poke out and it looks like little wings are flapping out of my hips.  I would have to sew them shut to look somewhat normal, but then have to sacrifice functionality.  These pockets hug to the body and I’m so glad I can actually use them!

MossSkirtStyled

I opted for View B of the Moss Skirt to wear this out to slightly more conservative places, but changed the band to hang only 2 1/4″ down since I’m a shortie (5’3″.)  There are definite plans for some more casual versions with View A for the summer.  Let’s hope I have the time to get them complete before autumn hits!

I really love the clean look of this skirt.  Since I used denim, I debated top-stitching all of the pieces like a pair of jeans, but I’m glad I held back.  This skirt looks really polished as-is and I highly recommend this pattern if that’s the look you want.

Has anyone made this pattern yet?  What is your favorite skirt pattern?


Happy Stitching,

Cristy
Out & About Dress {Pattern Review}

OutandAboutTitle

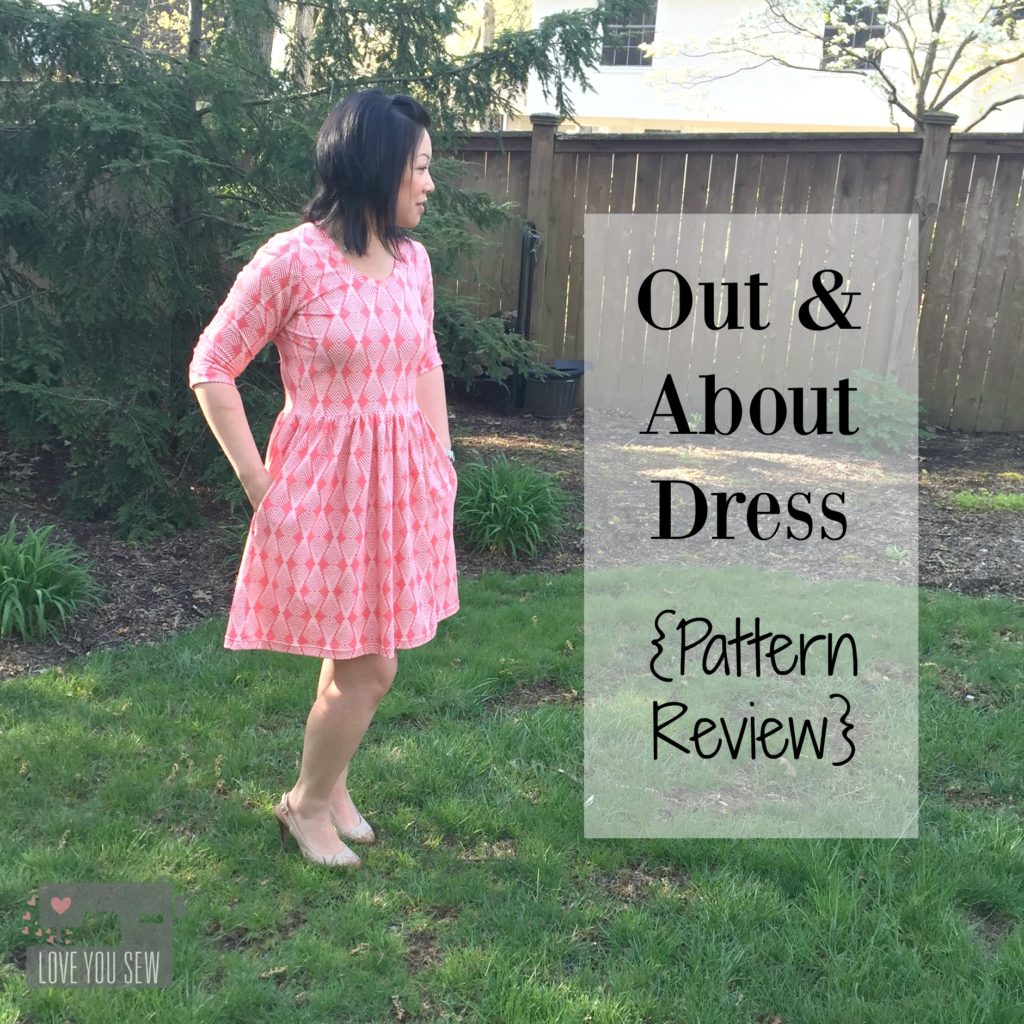
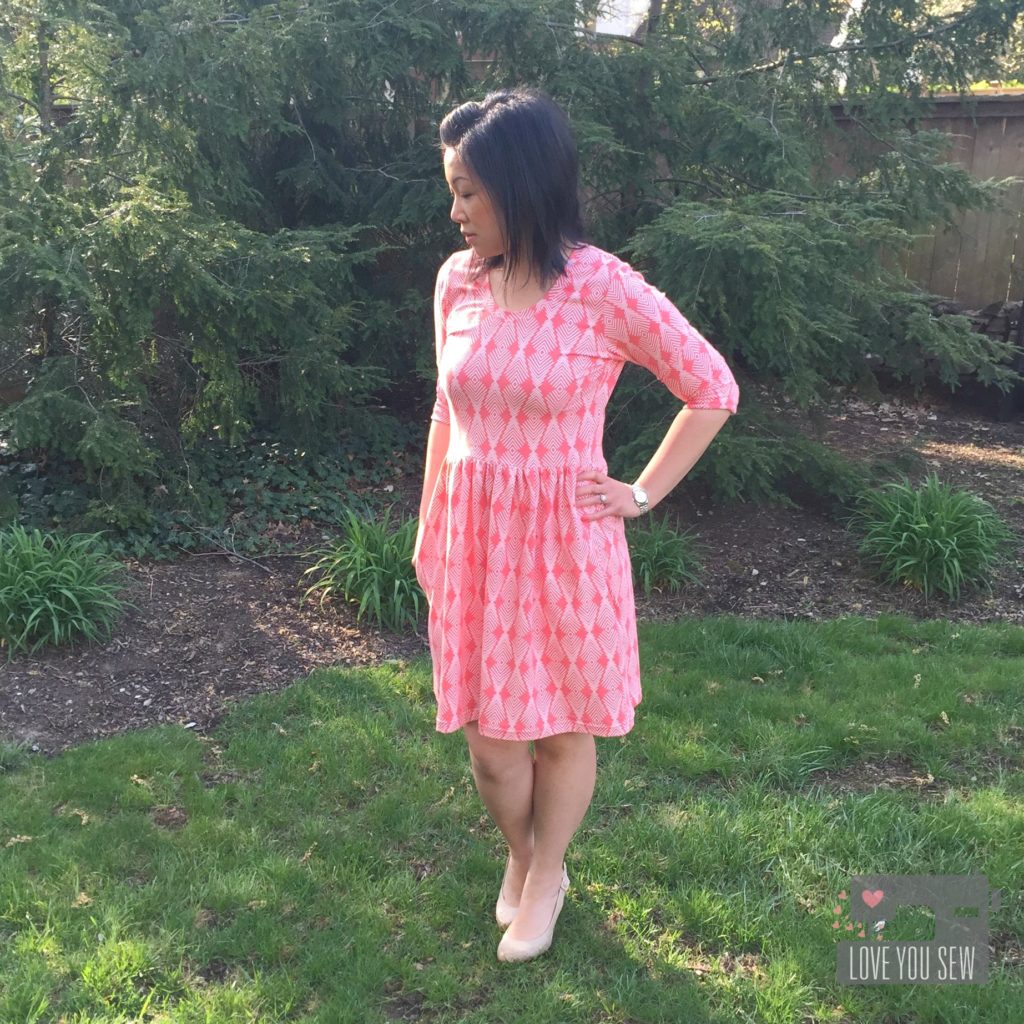
‘Nothing like having some crazy beautiful weather to push me to finally make my Out and About Dress.  (Anyone else getting snow in April, then full sun and 70* the next day?)  I’ve had this pattern since Black Friday when Sew Caroline had a great sale, but like most selfish sewing plans, this was pushed to the side.  Once the weather warmed, I knew I needed to add some more pieces to my me-made wardrobe.

I chose Plumage Poppy knit by Art Gallery Fabrics which is just amazing.  It’s bright, springy and just feels so soft and good too.  Best part is I picked up this from my little quilt shop (LQS) Sew to Speak…on sale!  Doesn’t that always make a project feel even better? 🙂

Garment sewing can be intimidating…especially with knits, so I want to show you how I finished my dress with a bunch of close-up shots.

Cuff

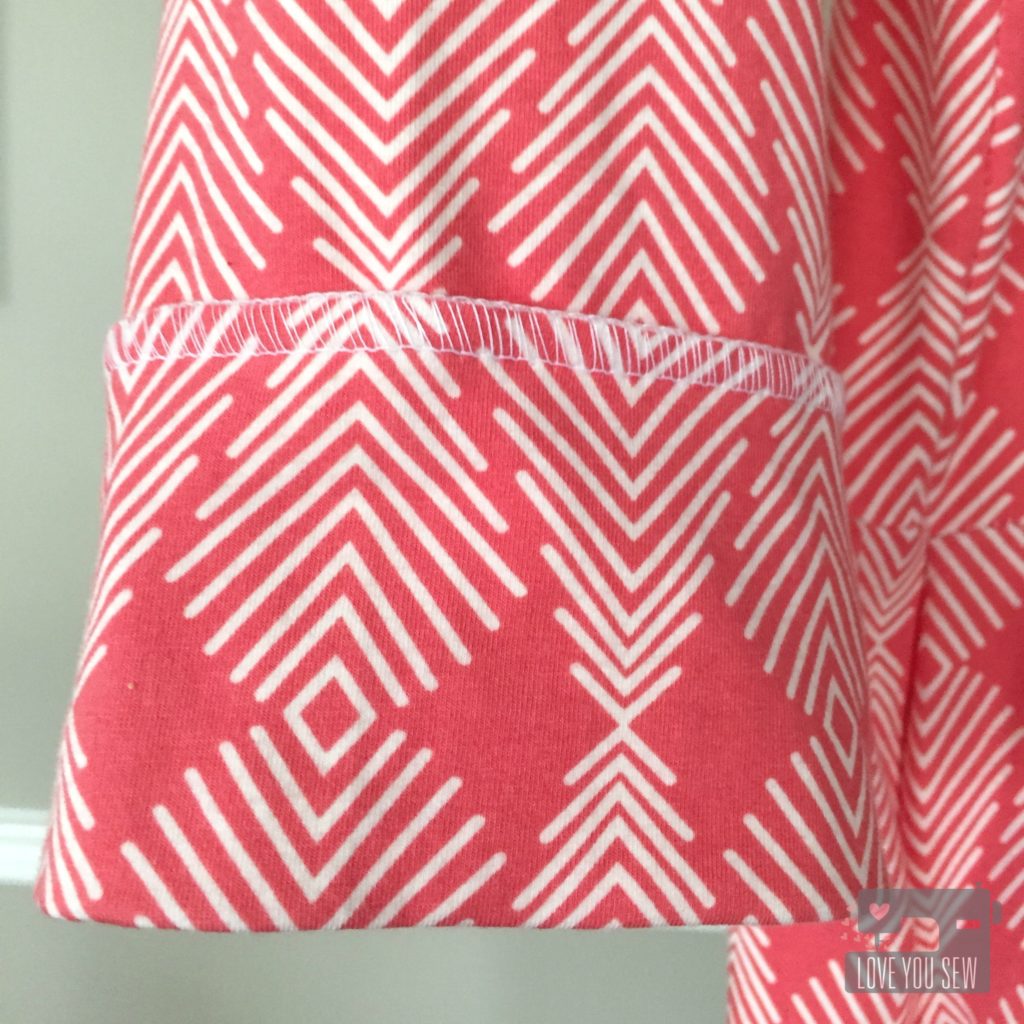
I have a serger and it’s a god-send when it comes to knits.  The knife cuts a nice even edge and the overlock stitch helps tie up everything so beautifully.  There is a nice stretch which I chose to use here in the sleeves.  This pic was taken before I tacked the cuffs into place to hide the seams.

Hem

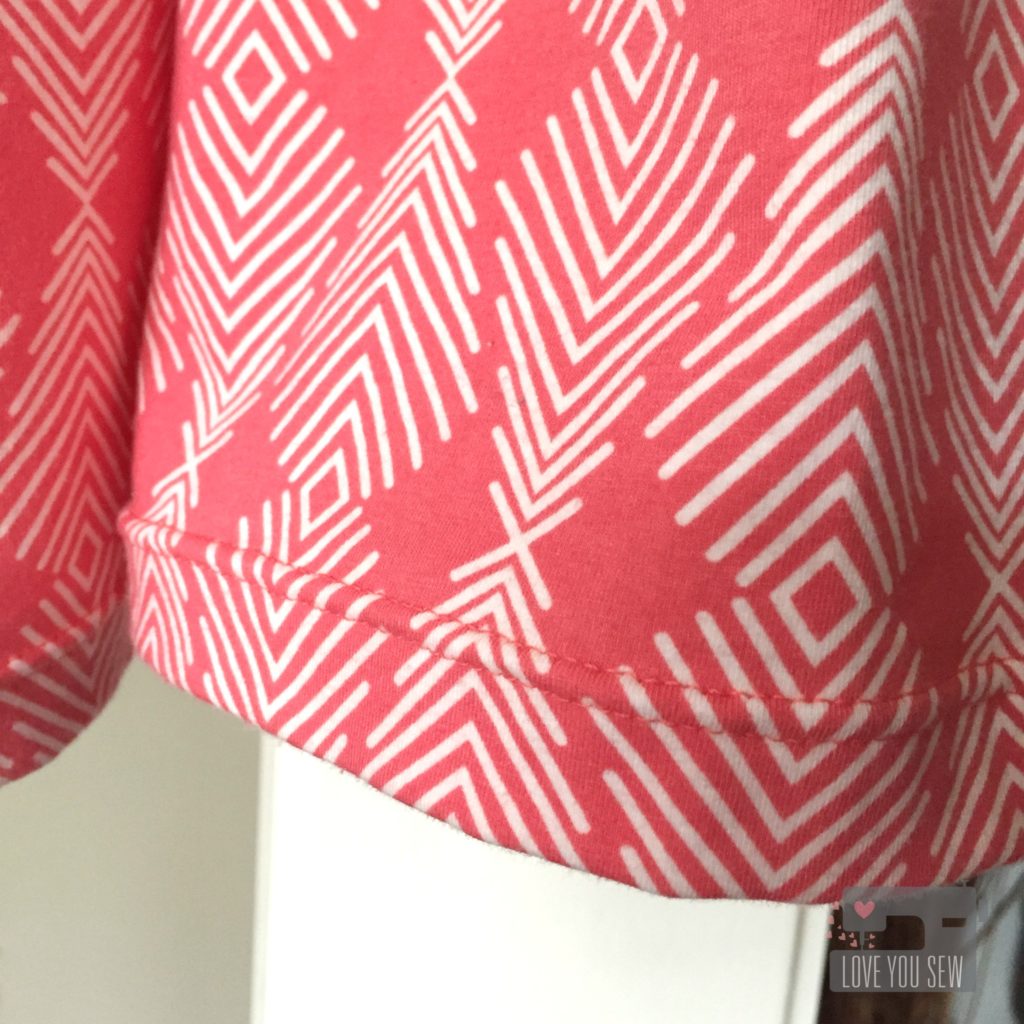
For the bottom hem, I used a ballpoint double-needle for this professional look. This allows for a decent stretch but not as much as the serging. With this being a loose dress, I am not worried about the stretch in the skirt….I’d rather it just look good! Ha.


Neckline1

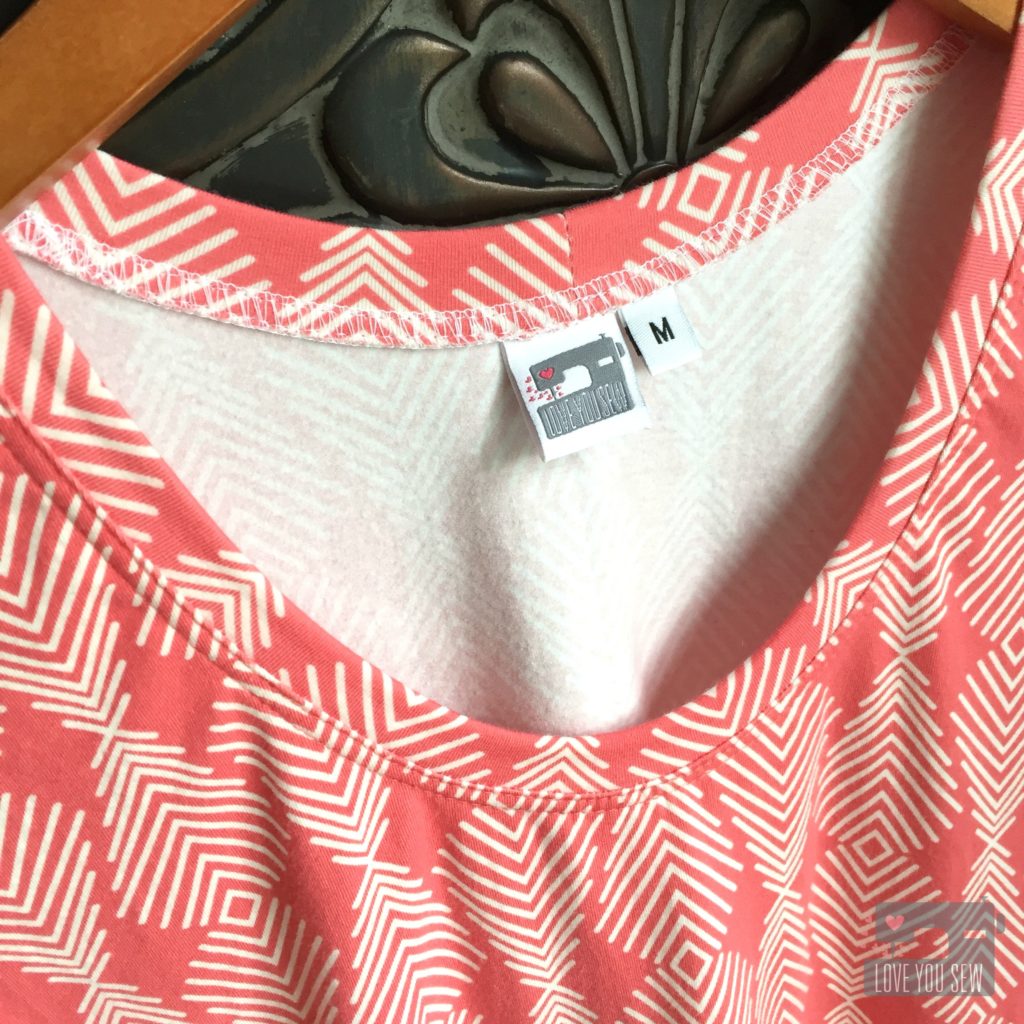
Around the neck, I serged the neckline onto the dress for a clean look on the hanger.  But for that professional look, I added two top-stitch seams while tugging at the knit a little bit.  A coverstitch machine would probably do the same but I don’t have one (It IS on my ultimate wishlist though.)  The size of the head opening is large enough that I’m not concerned with having to really stretch it out, so the top-stitching works.  It’s always good to test your stitches on a scrap piece to see how much stretch you need.

fullprofile

This was more simple sew than anticipated…even with the pockets!  So, I know this won’t be my last Out and About Dress.  It was true to size, but since I’m 5’3″ I took about 4″ off the hem to hit just above the knee.  I may have to attempt a hack for a tank version.  Let’s see how long it will take me to make one!

Have you made anything new for yourself lately?


Happy Stitching,

Cristy
Sewing Room {Pattern Organization}

Pattern Organization Title

It’s funny when I’m asked what kind of sewist I am.  Quilter? Bag-Maker? Garments?  Well….I tell everyone, “I am all of the above.”  I like to dabble in everything — to challenge myself and I just love being able to make as much as I can with my own hands.  With this variety in my sewing repertoire, comes a TON of patterns!

I have a mix of both digital and paper patterns.  If given the option, I almost always take the full printed pattern.  As much as I love the instant gratification of downloading a digital pattern, the extra taping is a bit annoying and I have more difficulty tracing with printer paper.  I know…it’s nice to always have a back-up of a pattern on my computer, but be rest assured, I always make copies.  I trace garment patterns onto muslins and I create cardstock templates of bag pieces.  Which type of pattern do you prefer?

With all of the patterns and their print-outs…and the traced muslins…and the instructions…how do I organize them all?  As much as I would love a one-size fits all solution, it just doesn’t work for me. I have three different methods of organizing my sewing patterns and maybe one, two, or all three of them may work for you.

Classic Filing Method

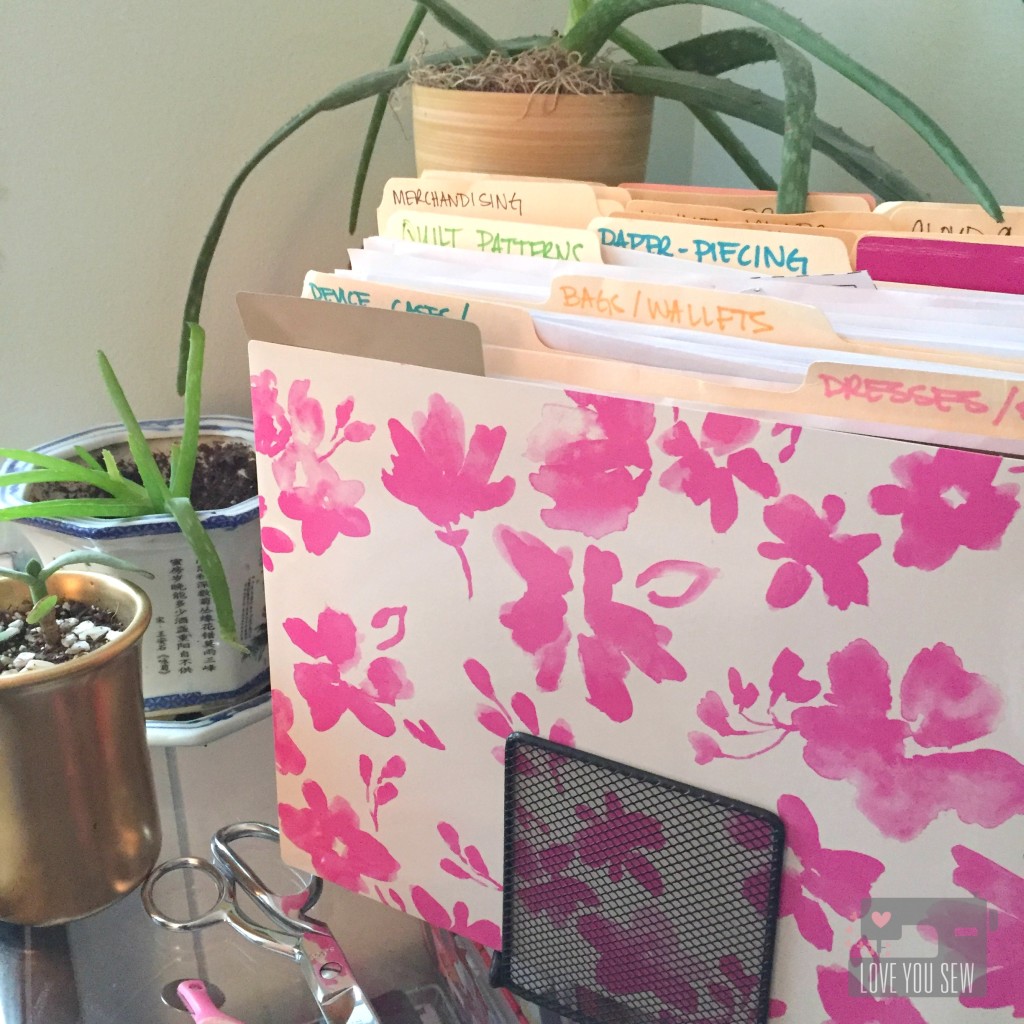
Pattern Organization File Folders

This has place from my former corporate office days.  It also was my first method when started sewing.  Having all the supplies on-hand didn’t hurt either.  I had a stack of file folders, a desktop tiered rack, plastic file boxes and even a metal cabinet.

I use this method to hold my digital patterns and printout of free tutorials on-line.  (Thank you fellow bloggers!)  These are all categorized by my most frequent sews as shown.


Shelf Method

Pattern DVD Storage

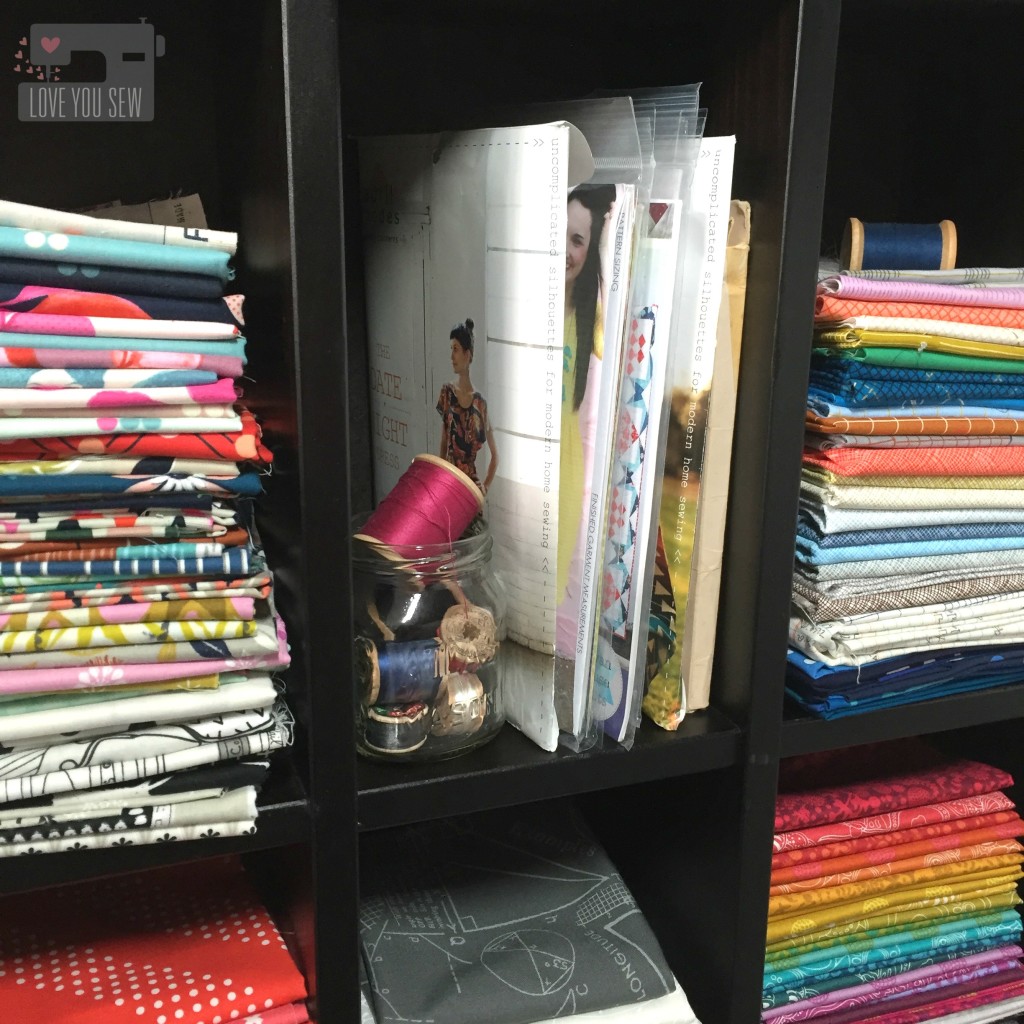
Most physically purchased paper patterns are about 6″ x 10″.  They can easily get lost in regular shelving and other paper storage containers.  For awhile I had mine in cute little wire bins…but the patterns were quickly outgrowing my bins and I couldn’t see them well.

Fortunately, I had a friend who wanted to get rid of a DVD shelf…and it was nice solid piece.  (I bartered a toddler dress for this…score!)  This DVD shelf not only is the perfect size for paper patterns, but it holds fat quarters perfectly.  I love how I can see everything and my patterns are in easy access.


Art Portfolio


Pattern Organization Portfolio Open

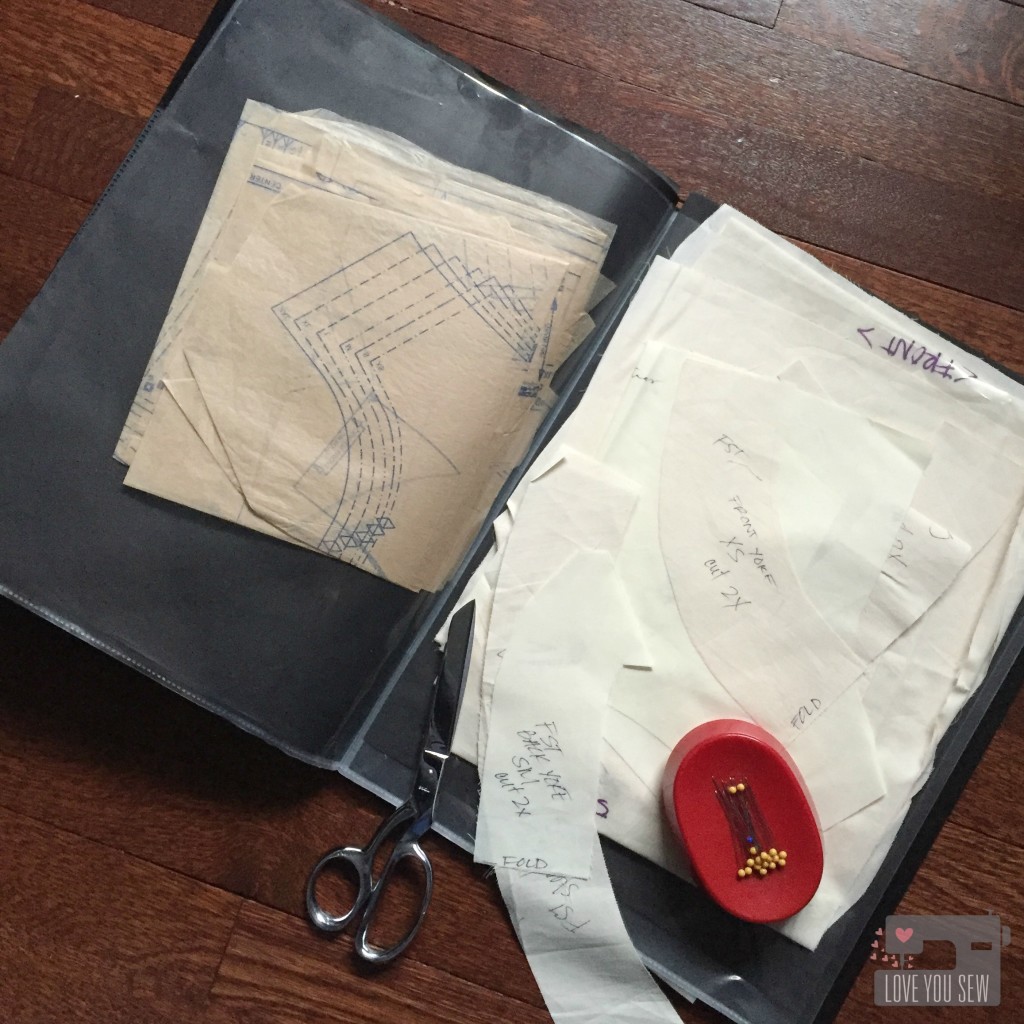
So we tackled, letter-sized patterns and instructions with the file folders and the smaller printed patterns, but what about the big stuff?  For awhile, I folded all the taped pdfs up in those file folders and even used a large binder with those clear plastic sheet protectors, but they didn’t last long.  The patterns were all poking out and the folders got too full too quickly.  I needed something bigger…

When my kids started to bring home arts and crafts from school, I wanted to save all their cute projects.  So I picked up a smaller size art portfolio from my local big box retailer.  I use them to organize each year of school for my guys.  Then….it dawned on me one day that I should use one  for my big paper patterns.

This 11″ x 17″ portfolio size is perfect for my needs.  All of my patterns fit with only one or two folds without needing advanced origami skills to get them back into original form.  I love how it also holds my muslins and the clear pockets allow me to quickly identify what patterns are which.

How do you store all of your patterns?


Have a great week!

Cristy


Sew It Yourself Kimono

Kimono Title

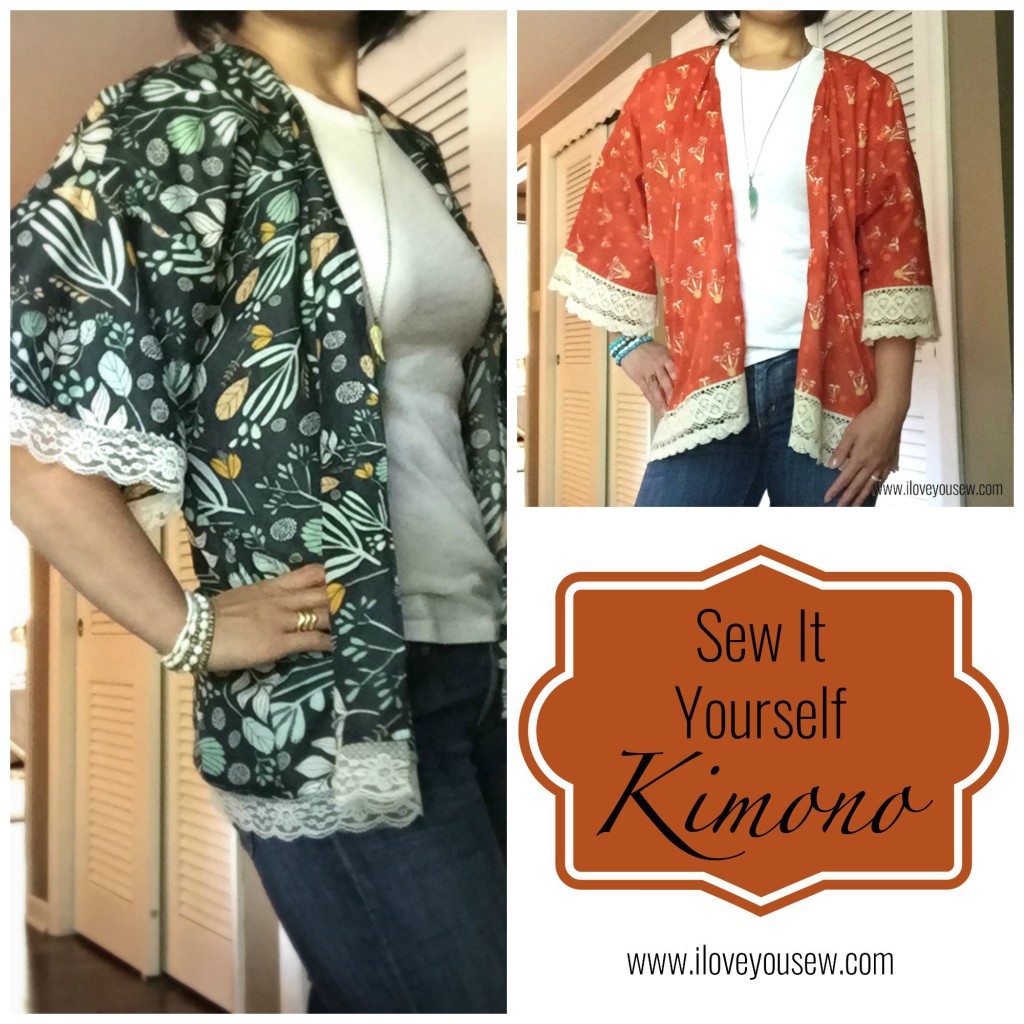
Boho style is all over the place right now and I thought I’d try to catch up with this Sew It Yourself Kimono.  The wrap is part of the Bohemian Chic trend which is all about being unconventional, artsy and spirited. To me, it’s a very relaxed and airy style but the “chic” part keeps it classy.

I’ve been in a fashion rut ever since having my little guys. I’m much happier (and more comfortable) in my yoga pants and a t-shirt any day. But whenever I have a “girls trip” with my hip city friends, I feel like the frumpy charity case…so I decided to do something about it!

I’ve been eying up Kimonos for awhile, but when Sew Caroline had a post referencing her FREE pattern on IG one day, I knew I had to suck it up and make my own. The pattern is one size fits most and being a whopping 5’3″, it was good for me 😉

KimonoFabric

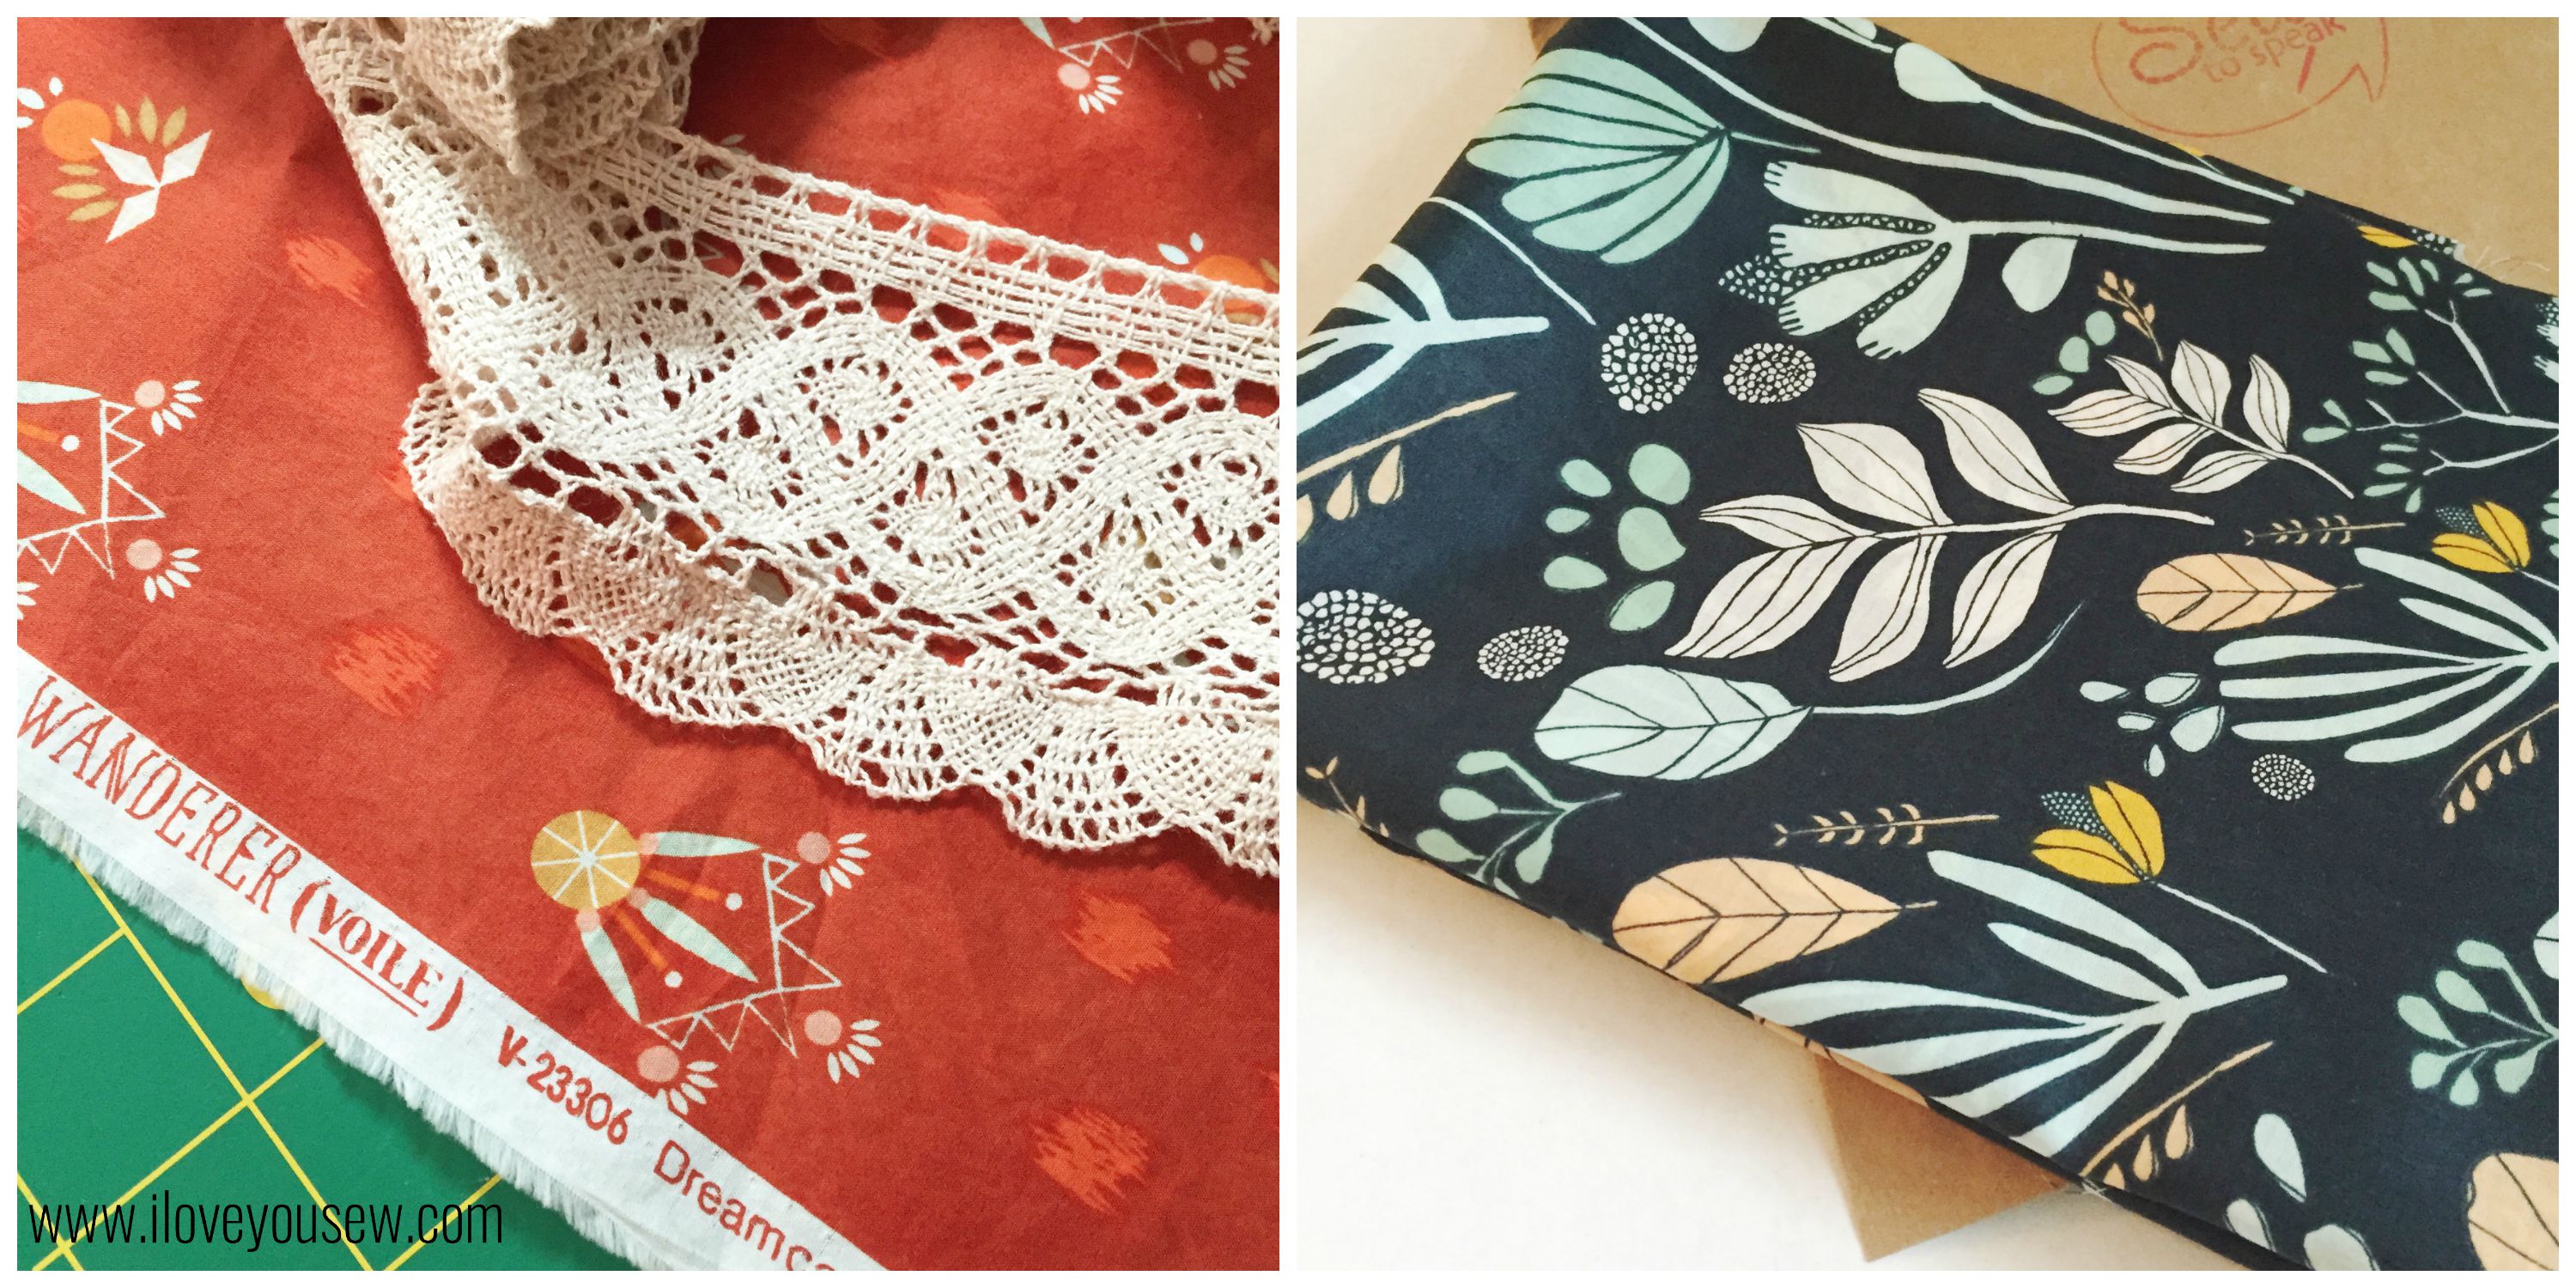
When selecting fabric for a Kimono, you need some good drape.  I knew anything from April Rhodes, was gonna be perfect.  Luckily, one of my favorite prints came in voile, so I snagged up Dreamcatching Flare from the Wanderer collection right away.  For trim, I wanted some earthly lace.  I tried to get a friend to crochet some for me (hehehe,) but ended up at my local JoAnn’s!  Who knew they had such a selection?!?  As I was gathering supplies, I thought I should make two styles….so I picked up Leah Duncan’s Bare Nopal Gloom from Morning Walk in voile at my Local Quilt Shop (LQS).  For the trim on this one, I used some delicate vanilla lace from my stash to complement the steely blue.

Version A- Morning Walk:

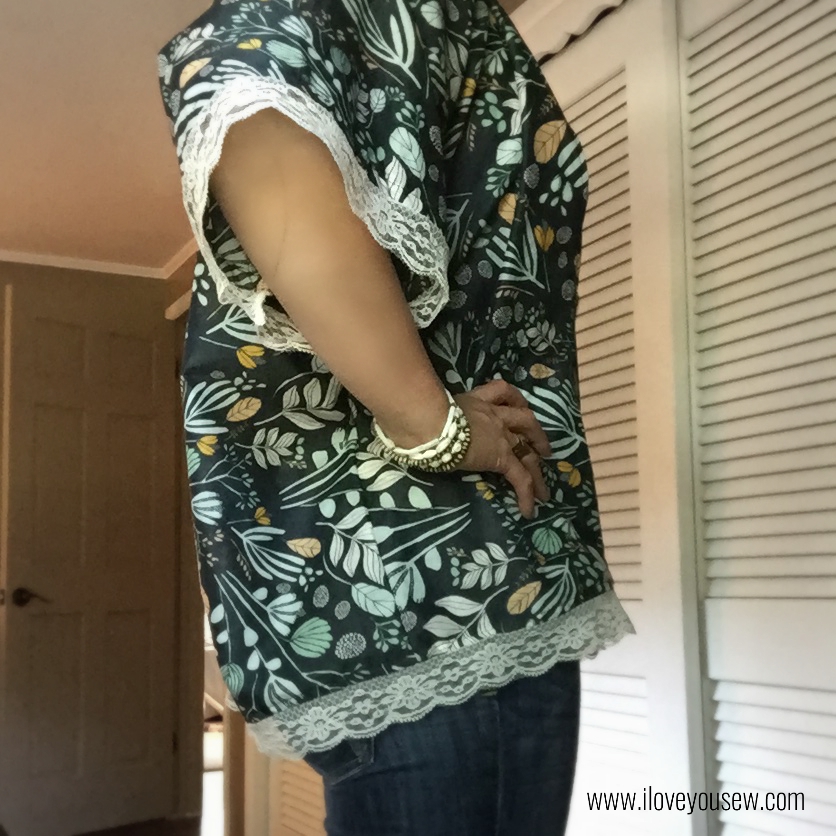
Morning Walk Finished Side

Sew Caroline‘s pattern and instructions are pretty straight-forward and simple.  However, I did get hung up on how she attached the trim to the sleeves.  I tried to find some pattern reviews online to show me how, but couldn’t find any (at least without having to pay subscription fee.) The following are the steps as I interpreted them so there would be some pictures out in cyber world 😉

Encased Trim 1

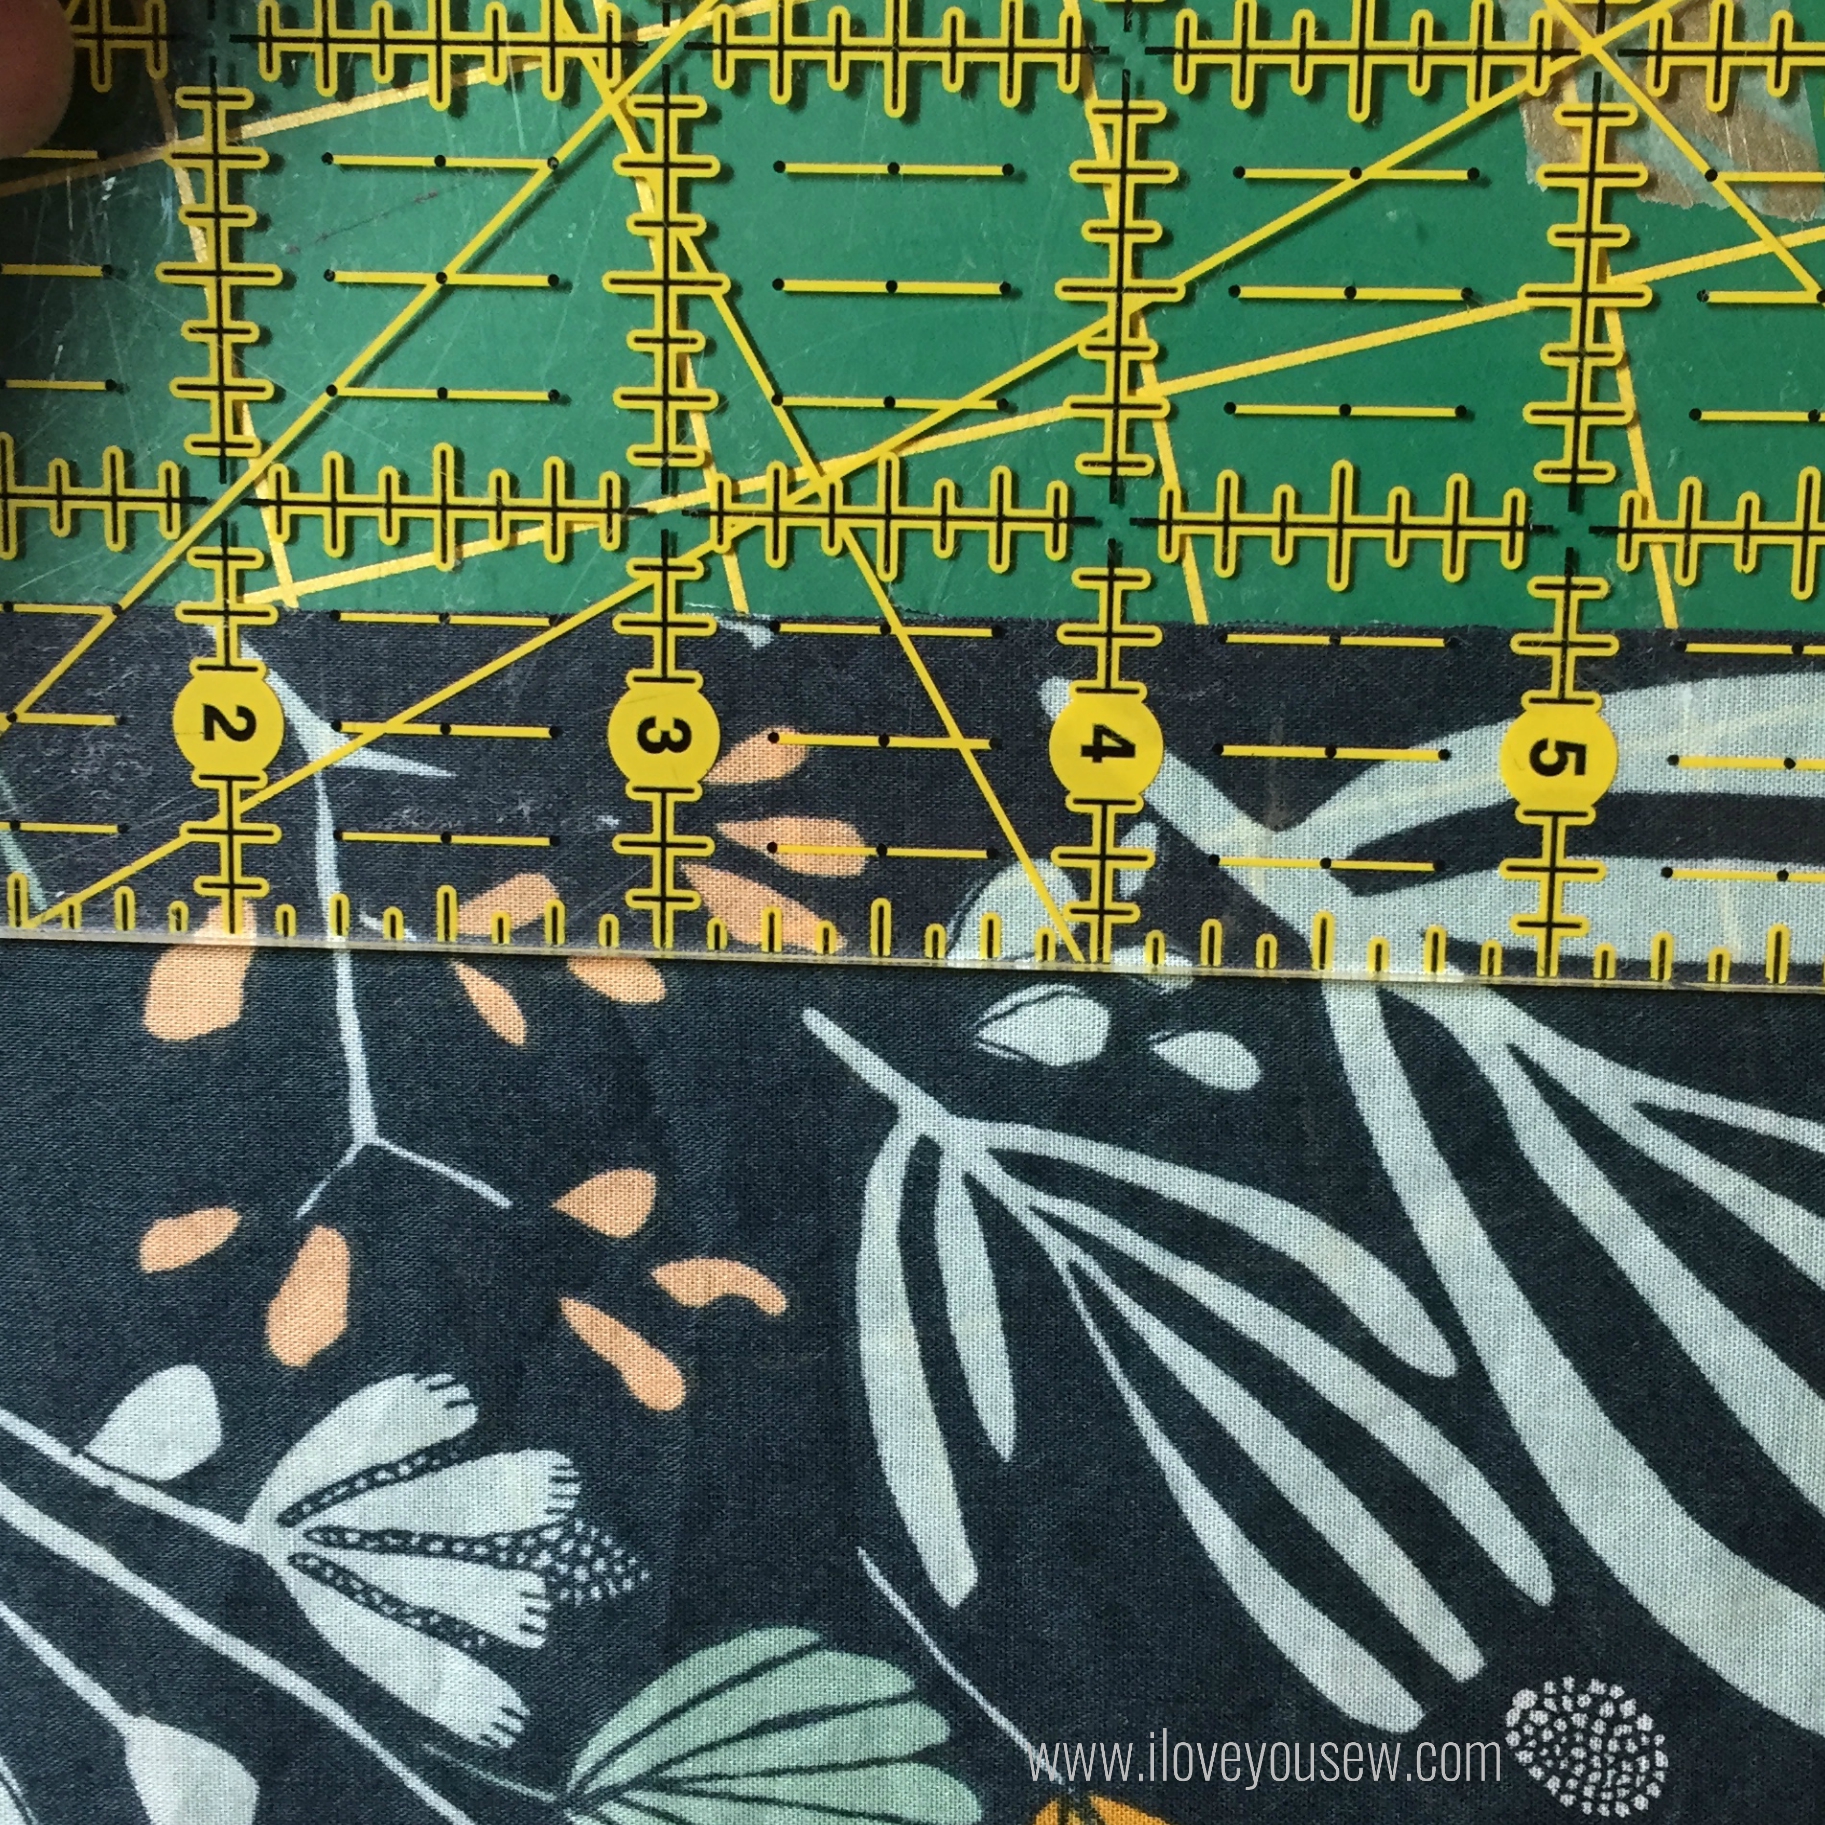
With the right-side facing up, measure 3/4″ down from the end of the sleeve and mark.

Encased Trim 2

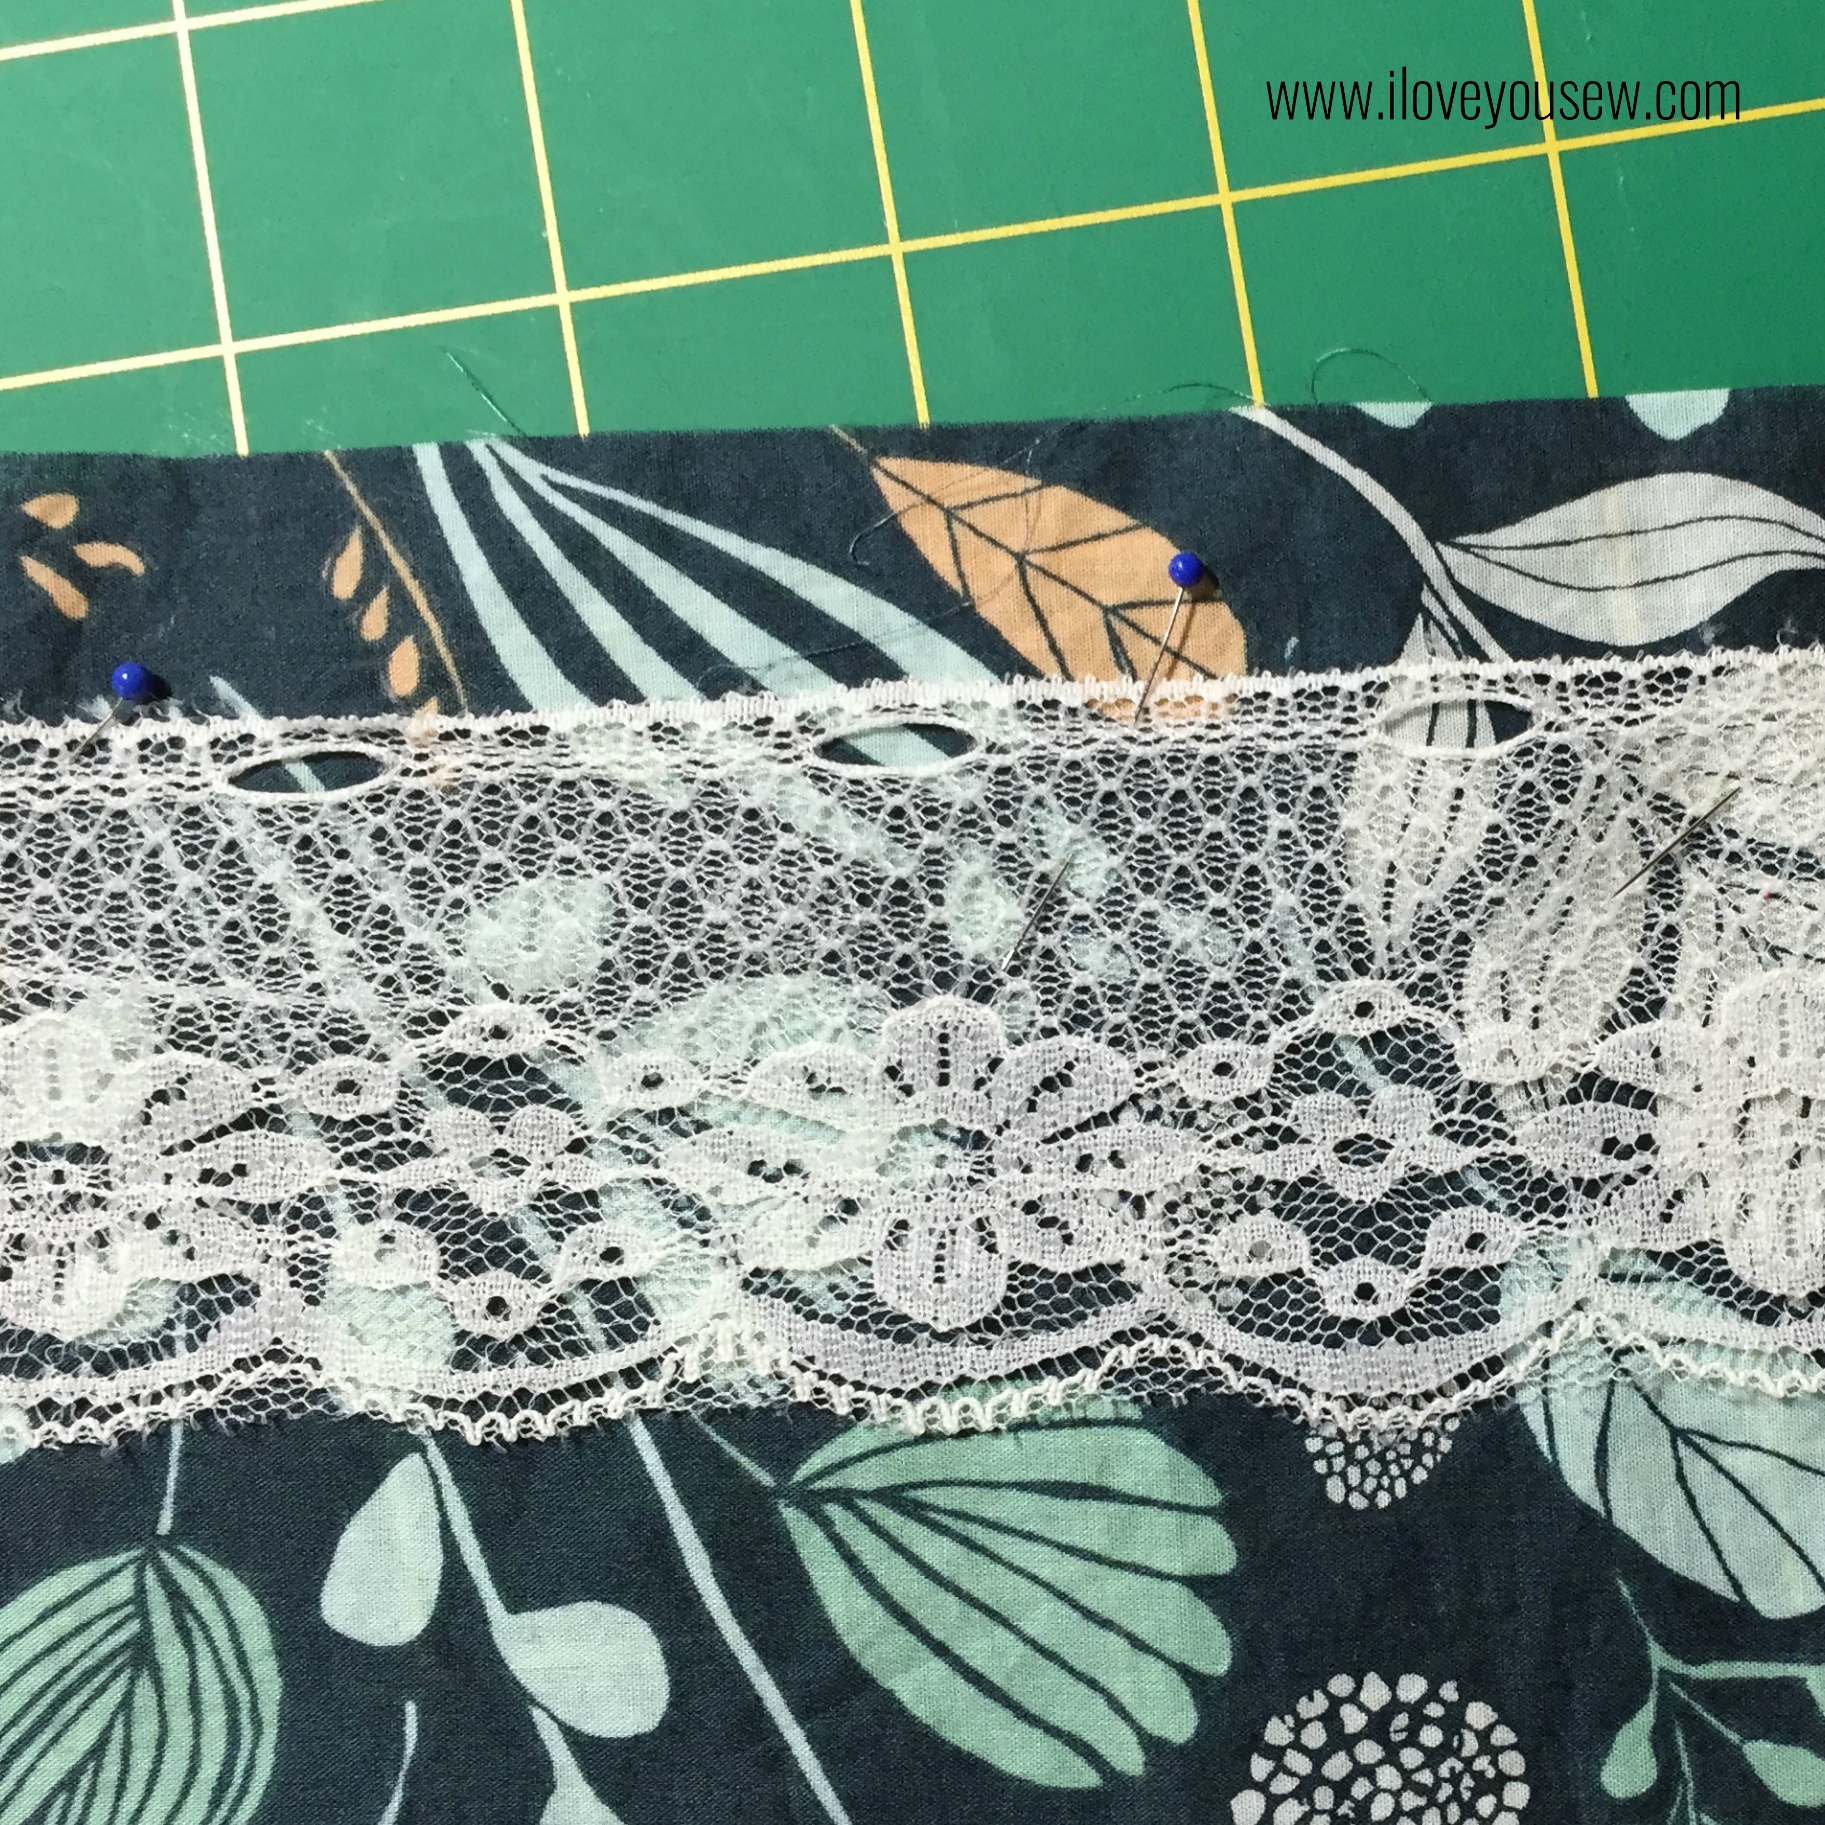
Pin the trim right-side facing the sleeve fabric on the line marked.

Encased Trim 3

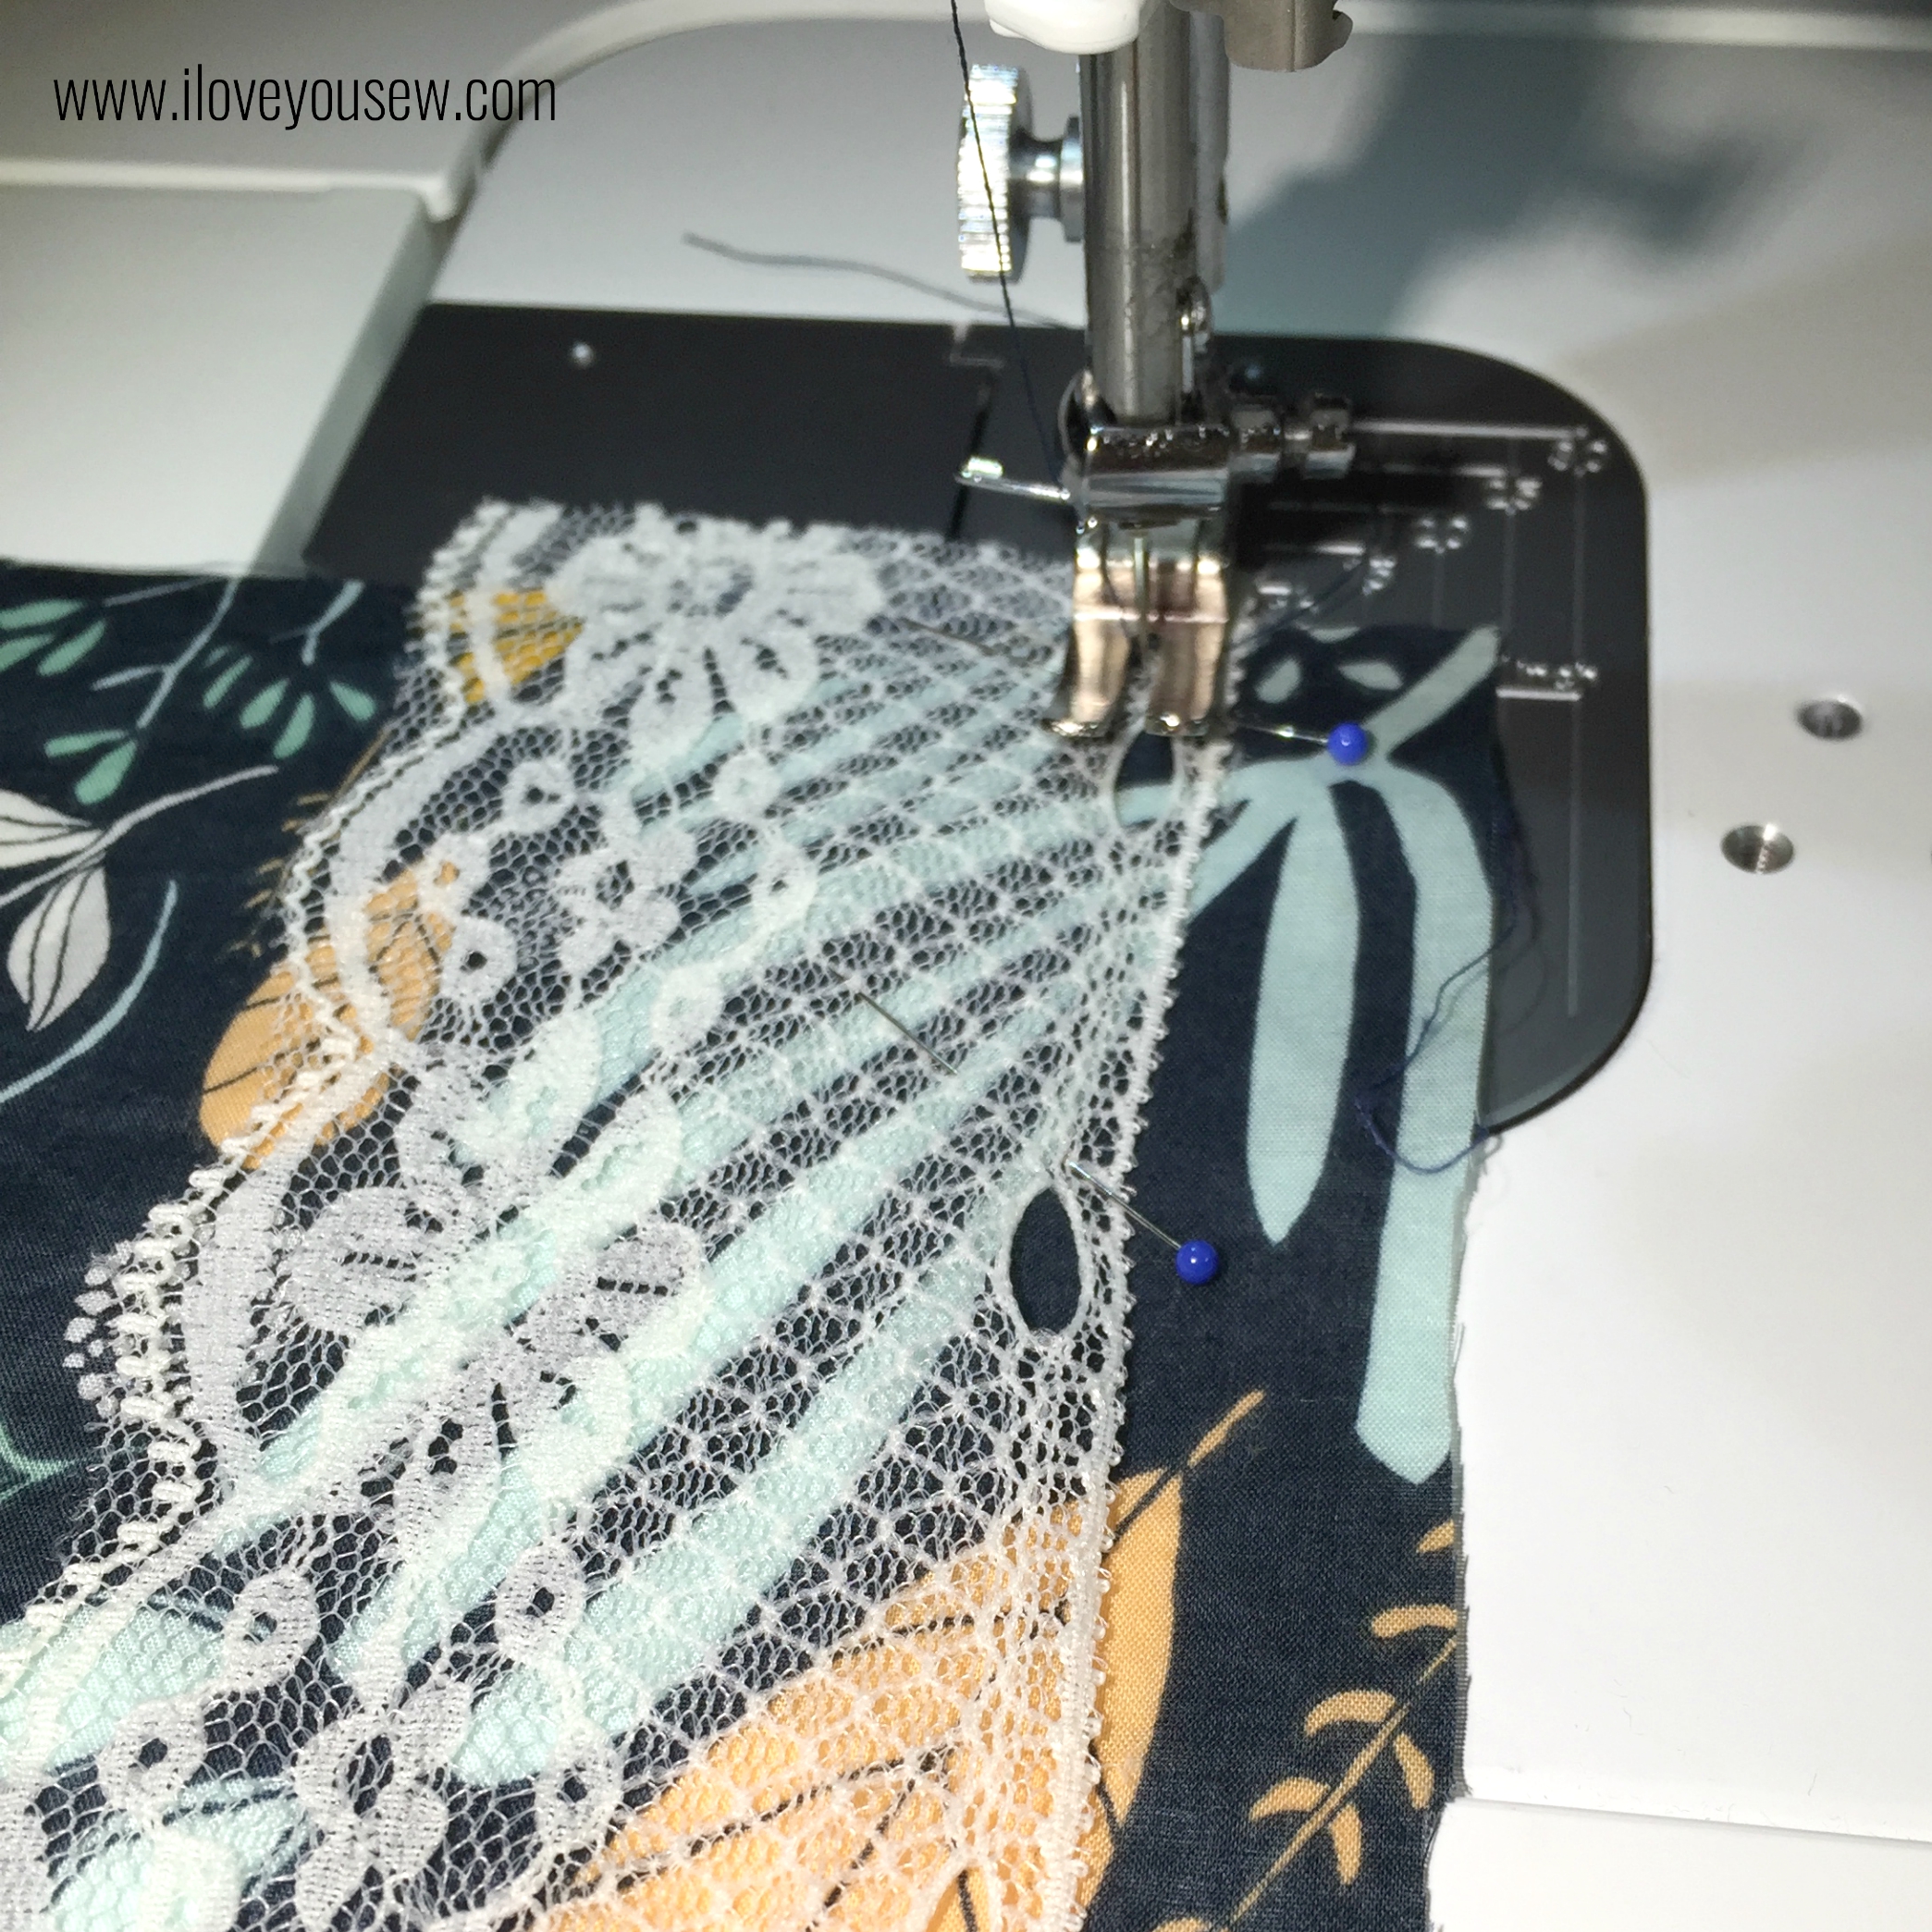
Sew the trim onto the sleeve with a 1/4″ seam allowance.

Encased Trim 4

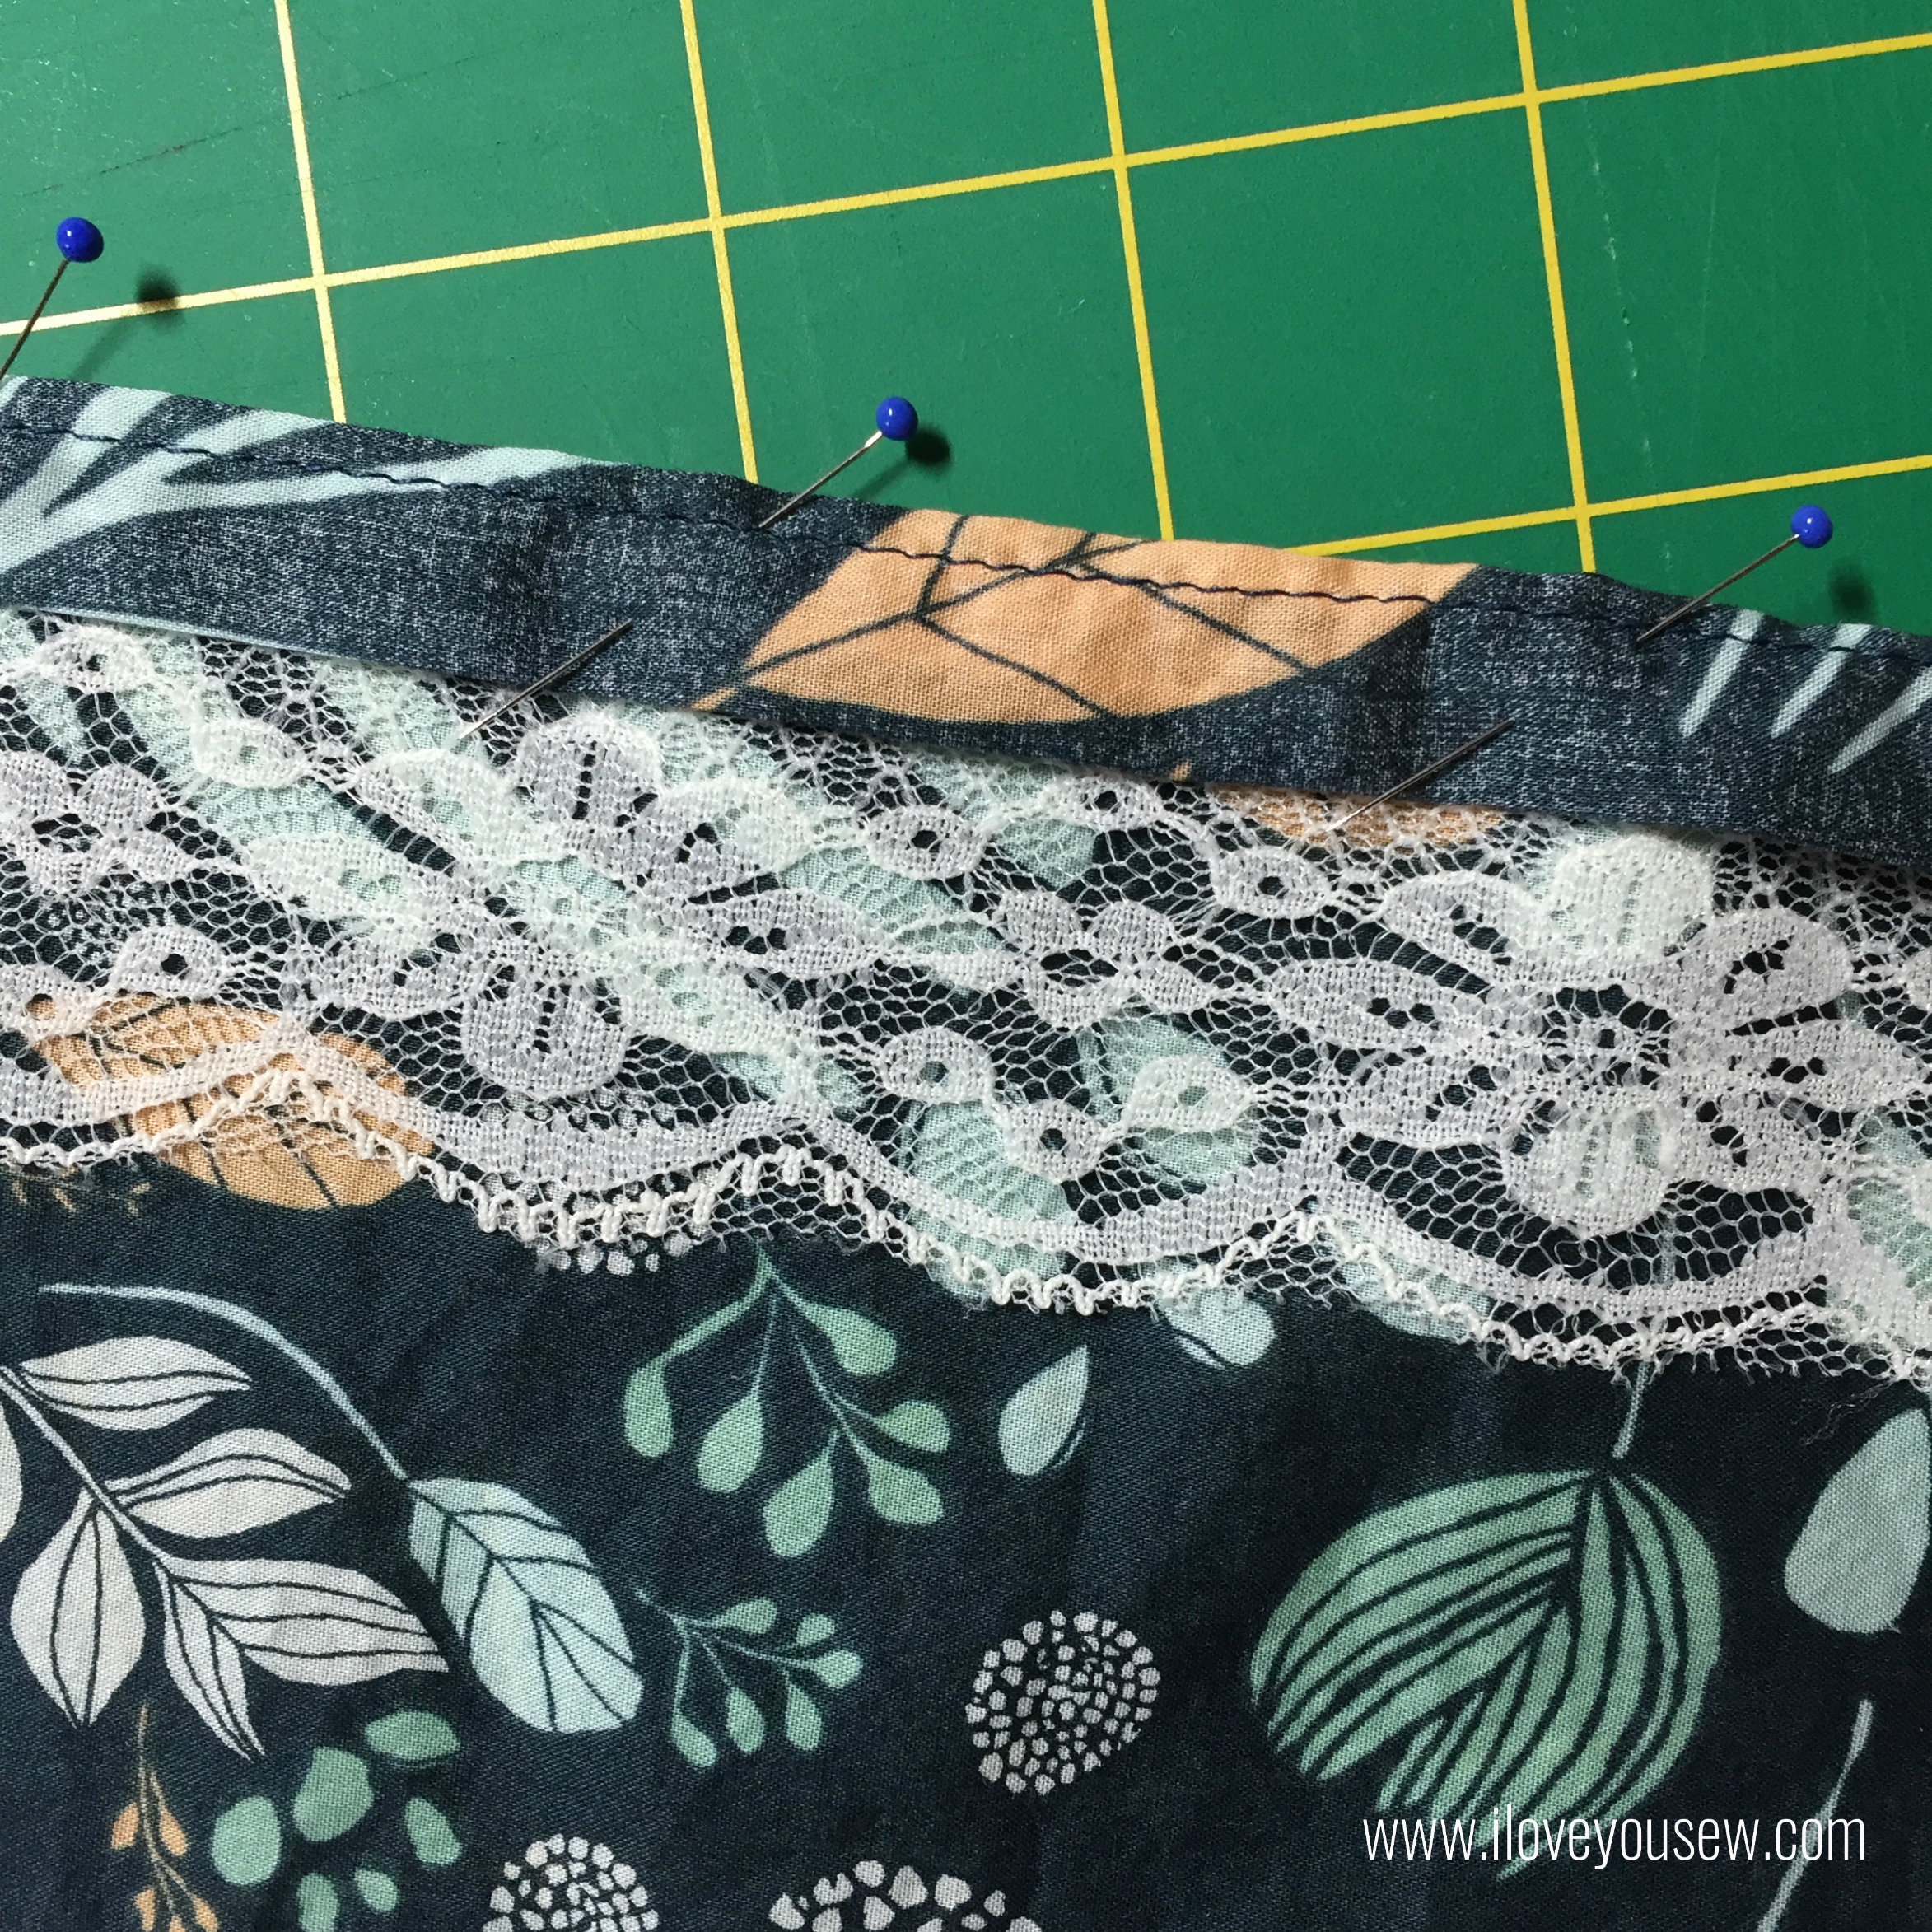
Fold the end of sleeve up 1/2″ and press (not pictured.)  Fold up another 1/2″ press and pin in place. Sew 1/8″ from edge fold next to lace.

Encased Trim 5

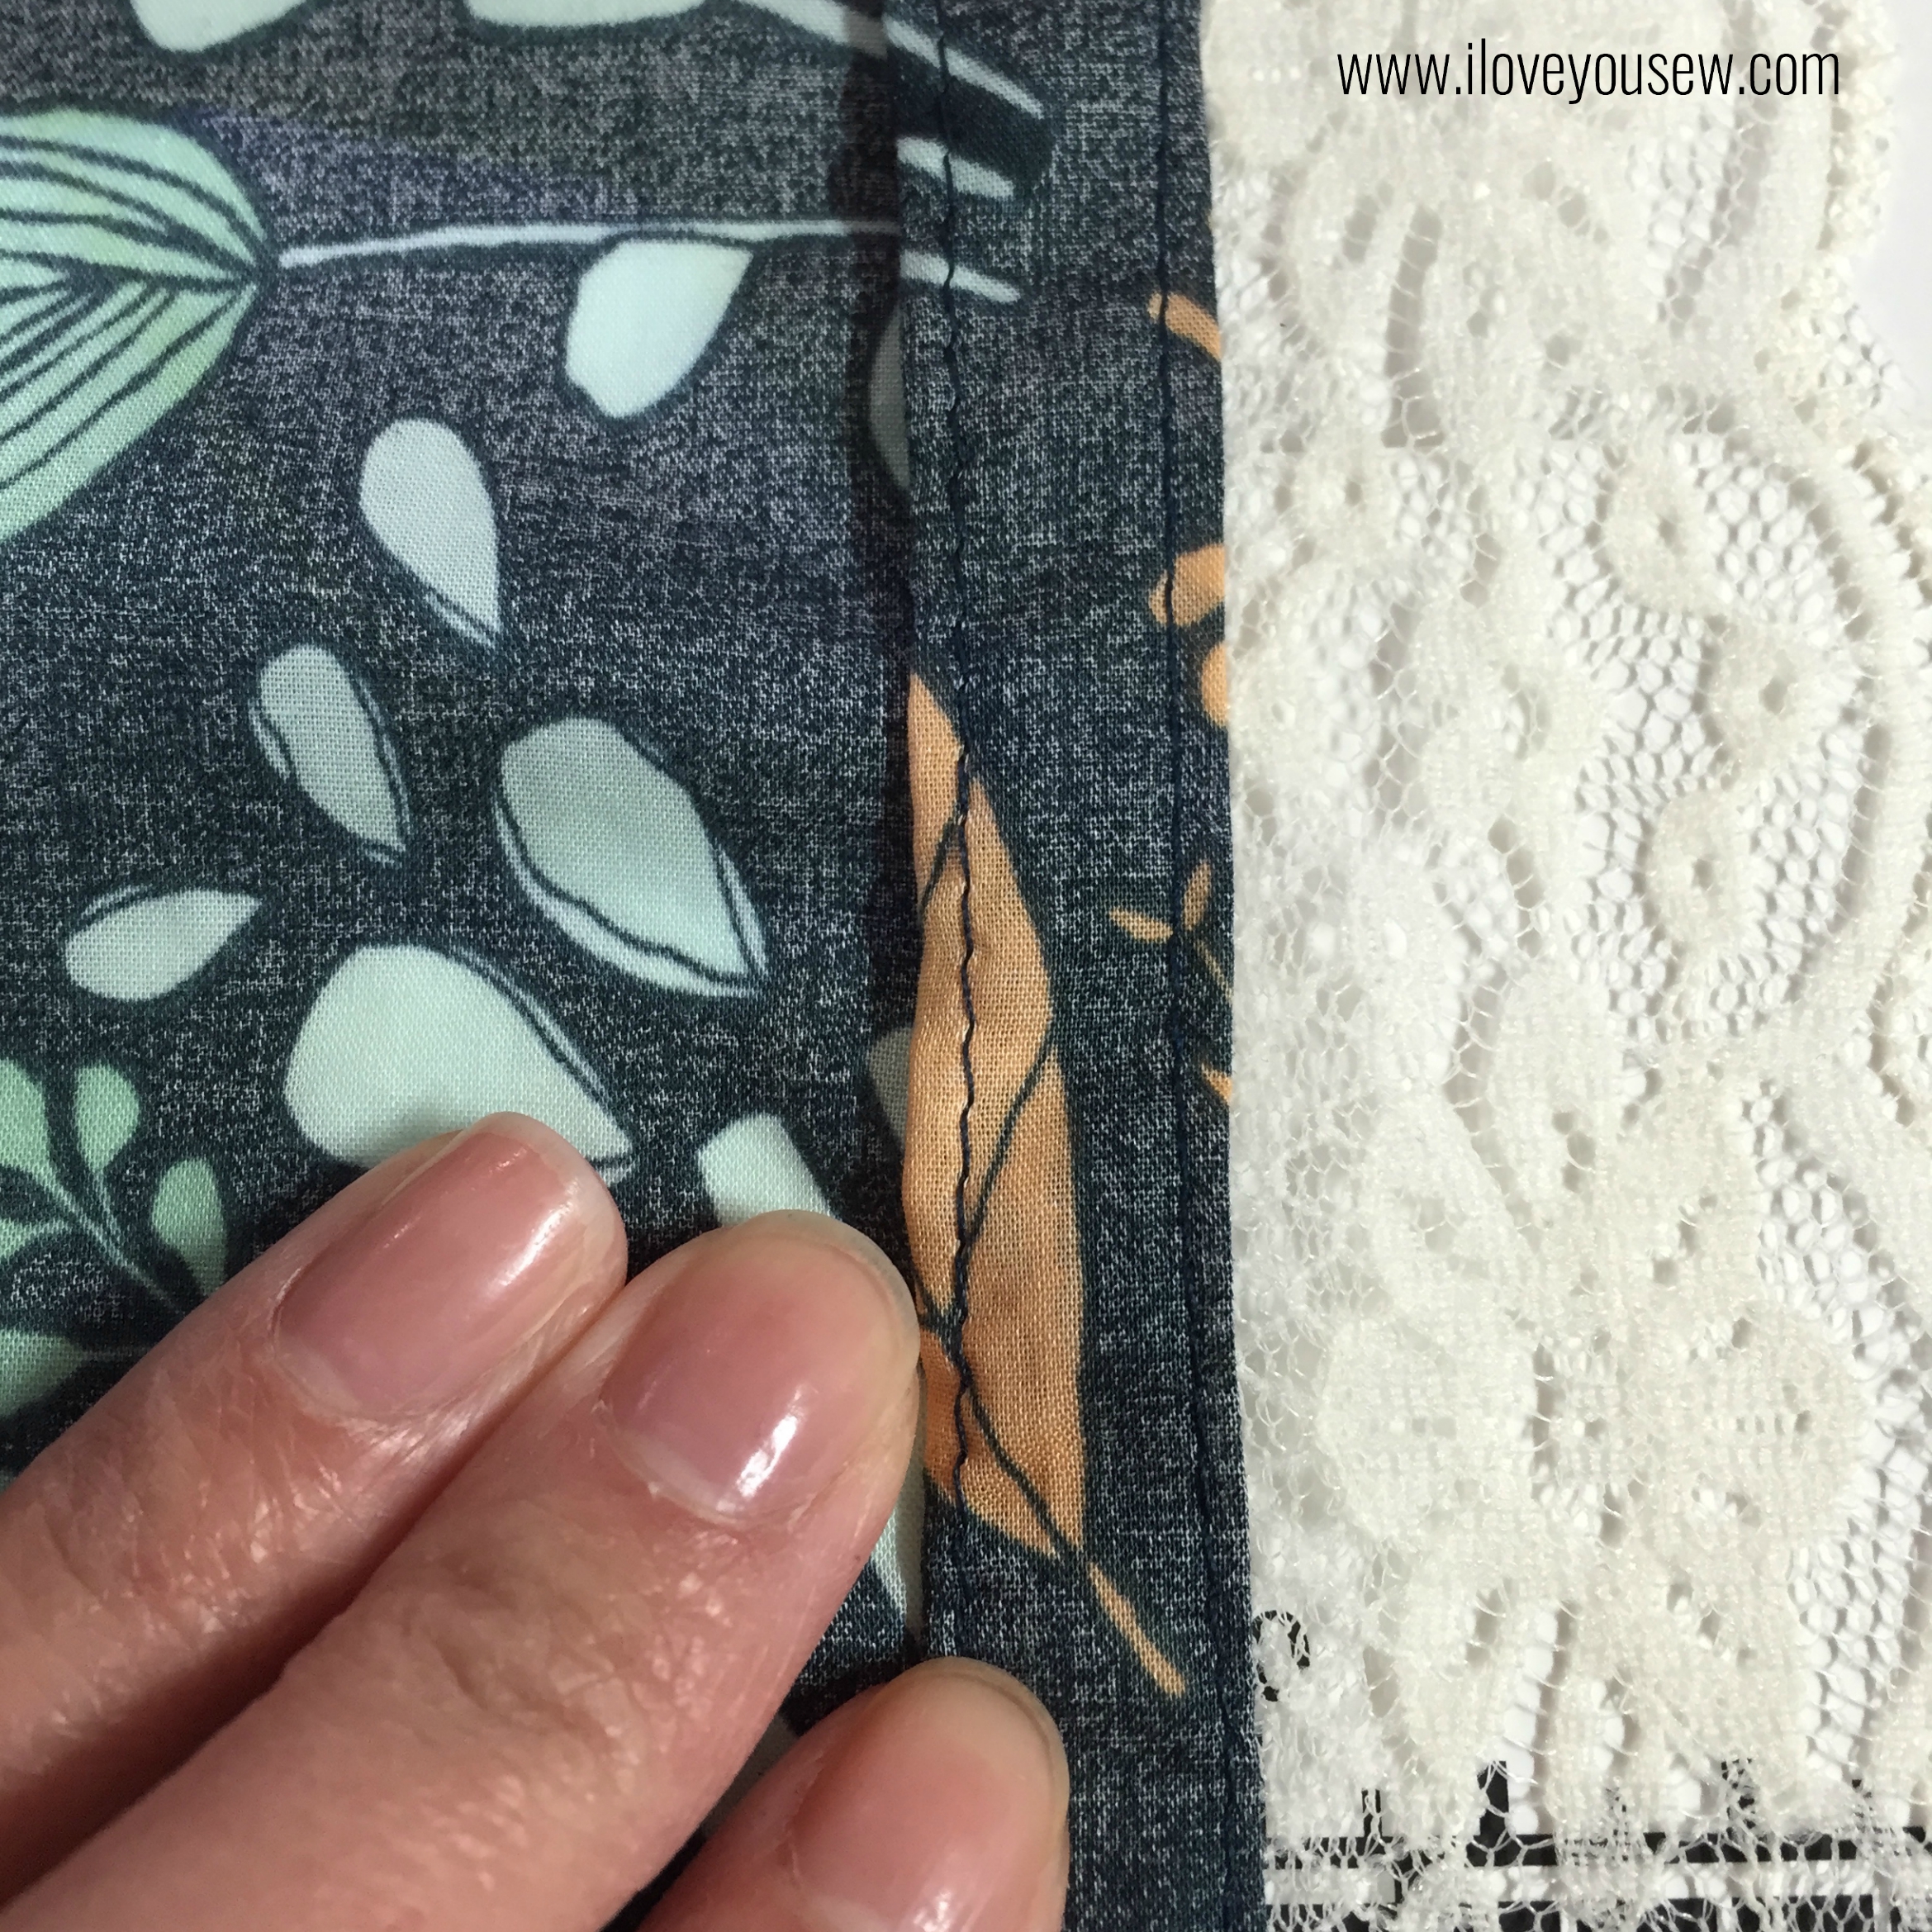
Fold the entire casing to the inside of the sleeve and press.  Sew on top of the inside seam (under my index finger) to secure .

After I added the lace on each sleeve, I tried on the Kimono and wasn’t 100% happy with this technique.  The sleeves “belled” out on their own and didn’t lay down as nicely.  The extra folding and all the seams made the sleeves stiffen out a bit.  However, I left the sleeves be and hoped that some washing will soften them out.

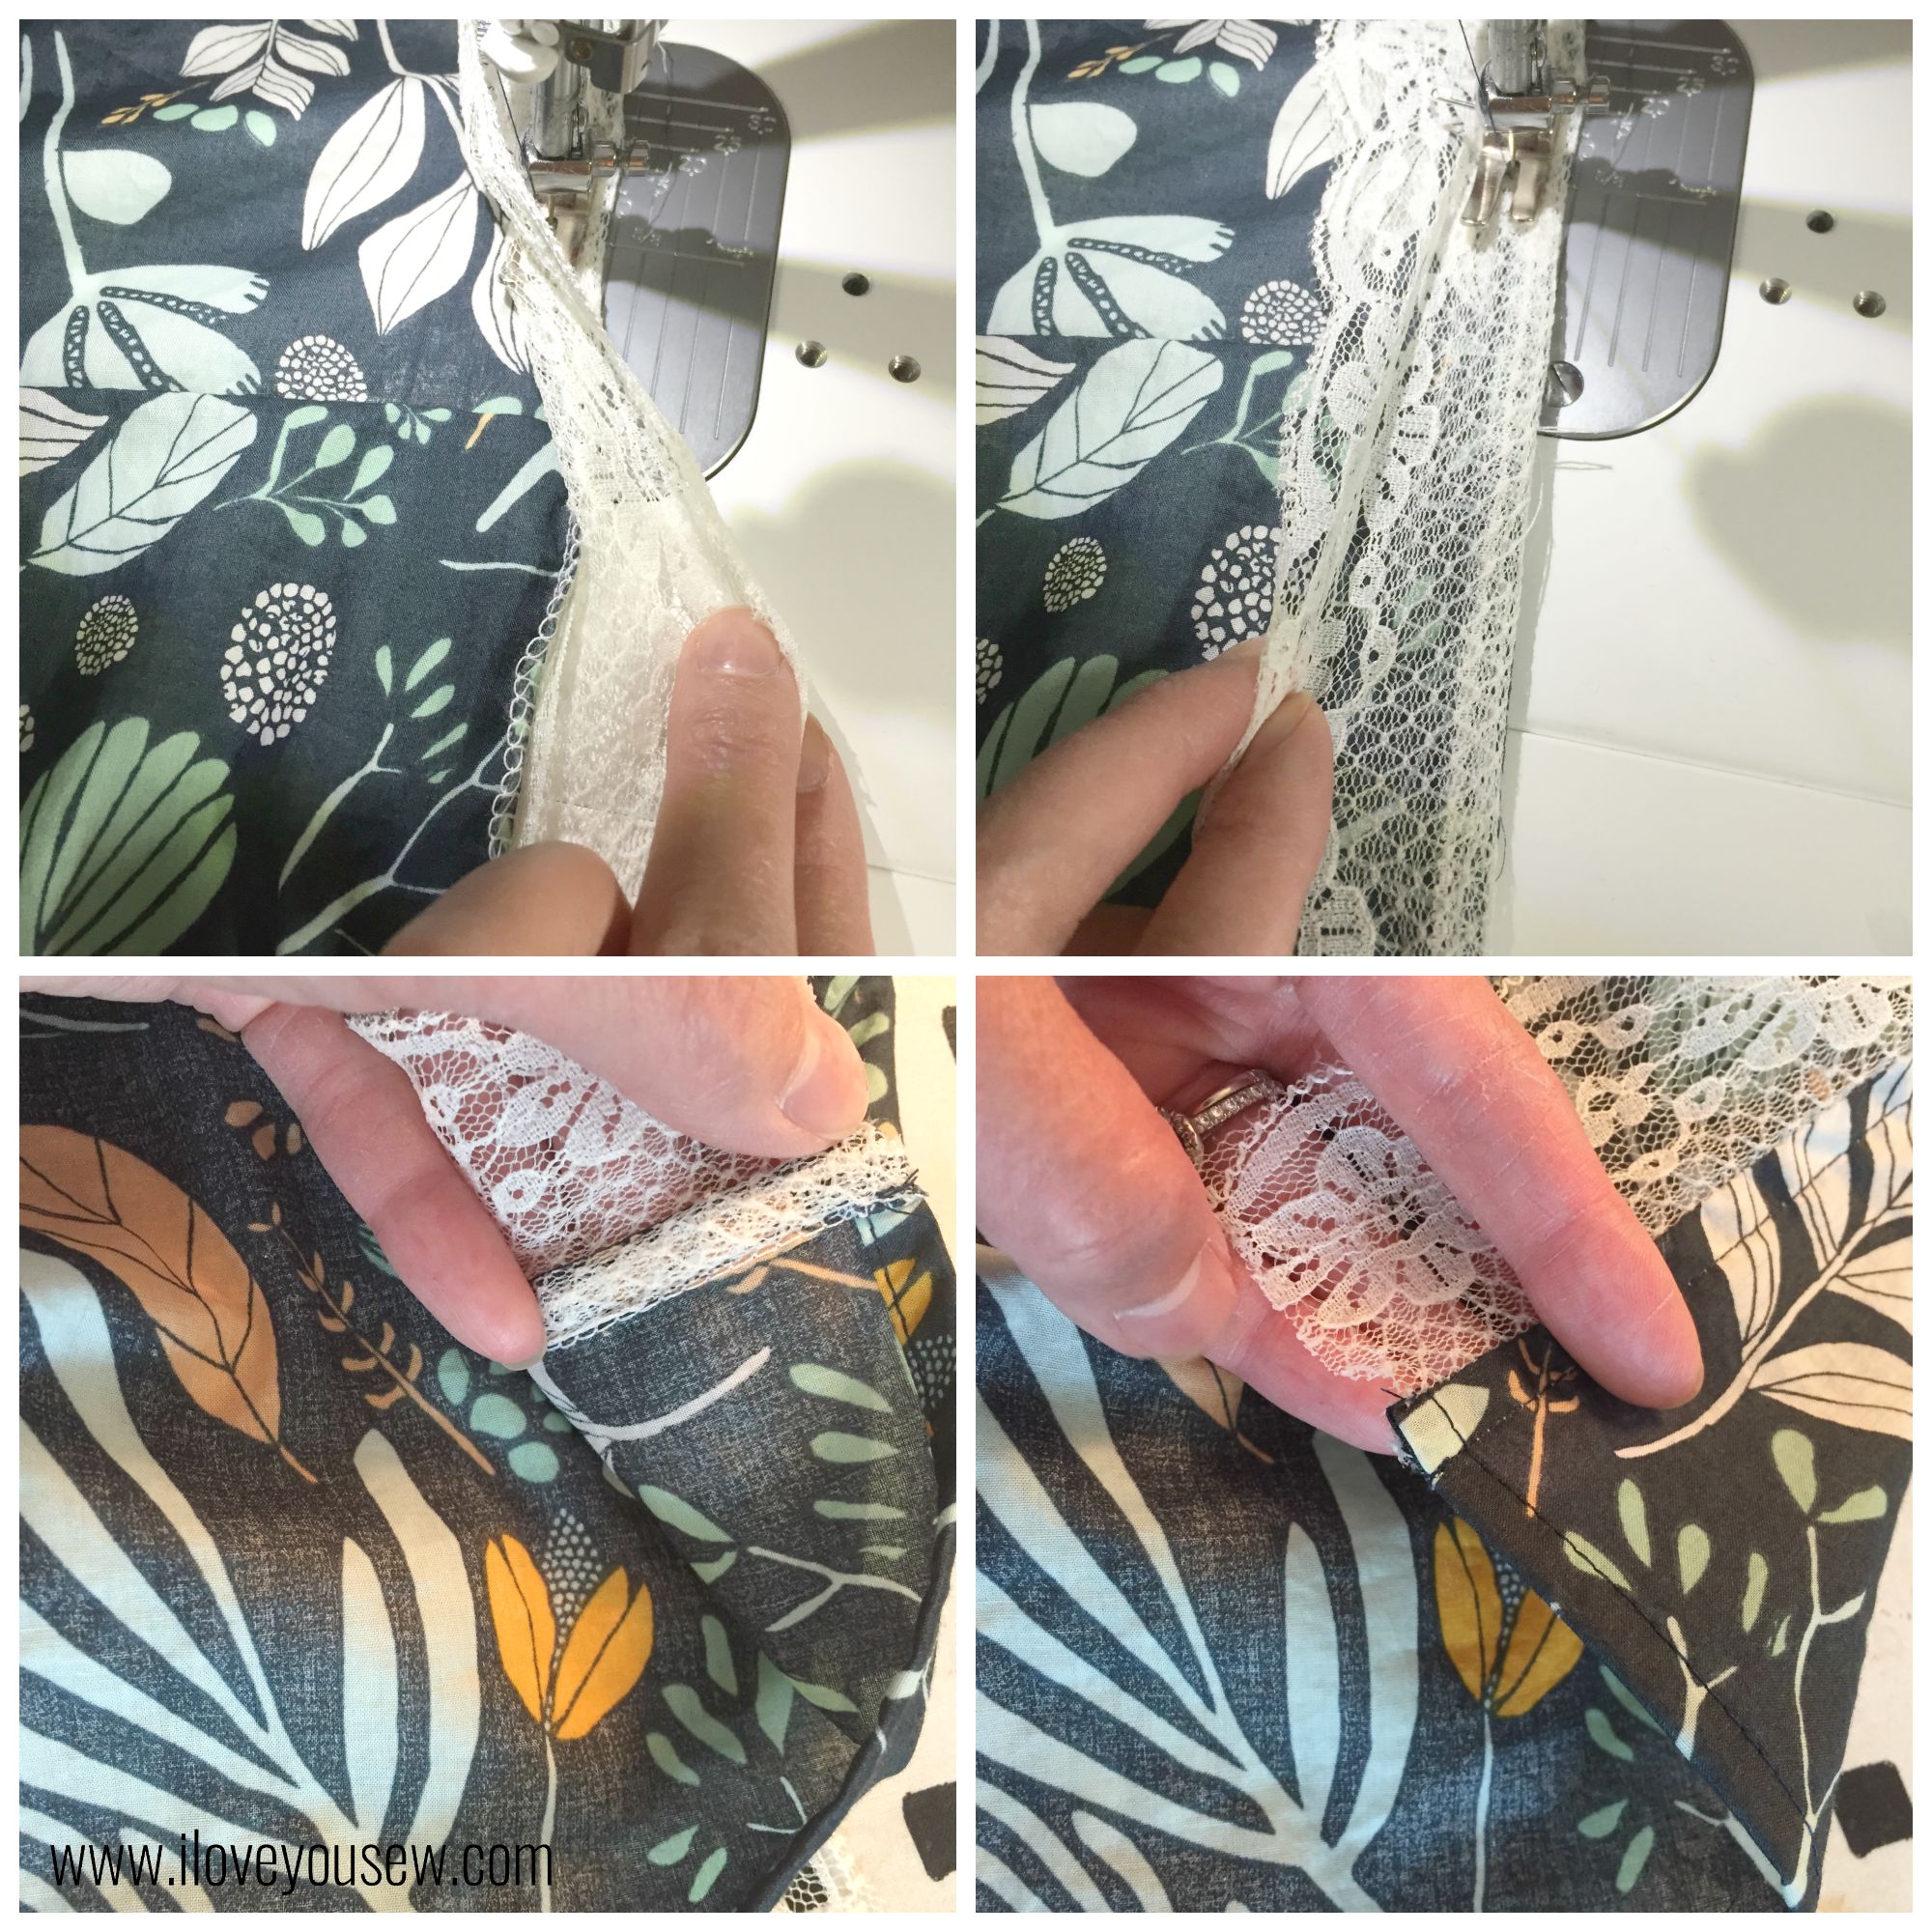
With the lace on the bottom of the Kimono, I decided to test out a French Seam technique that would drape more and allow for more of the lace to show.

FrenchSeamCollage

Clockwise from top-left:

  1. Serge or straight-stitch with wrong side of fabric and lace together.
  2. Fold the seam over with fabric and lace are right-facing.  Press and sew 1/4″ seam
  3. Fold lace out and press. Sew seam in place.
  4. Outside of Kimono finished.


Version B- wanderer:

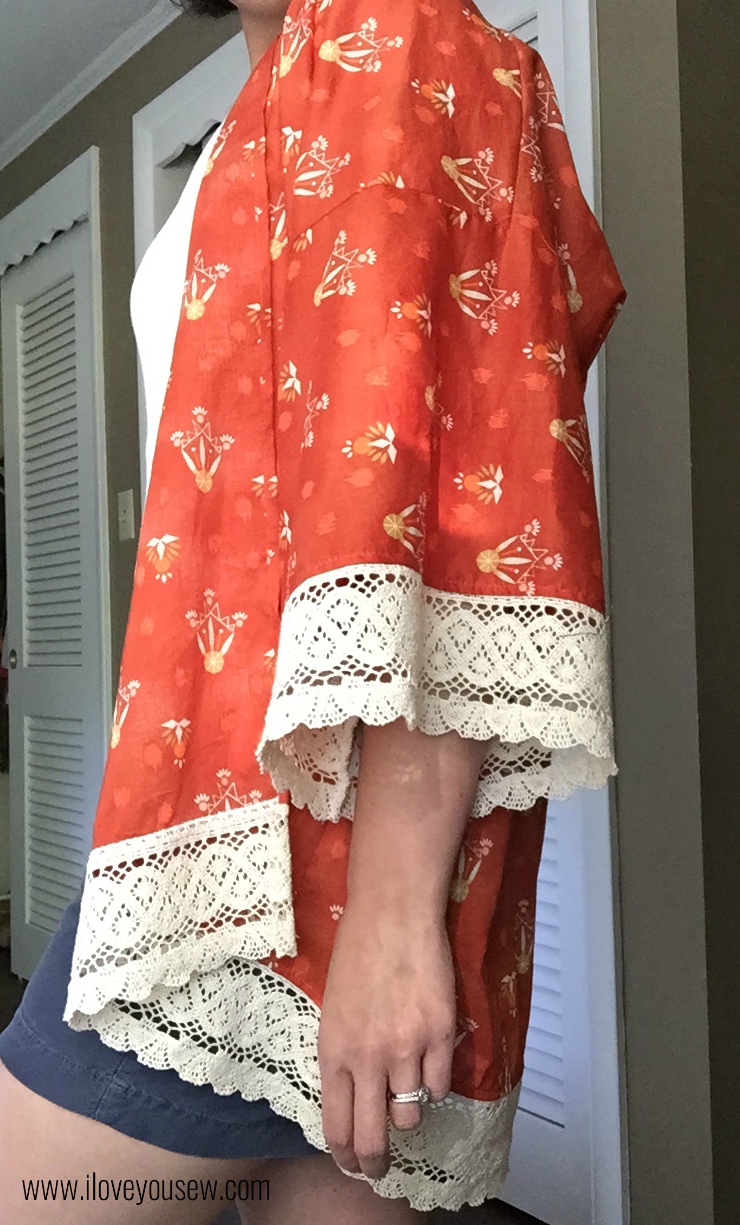
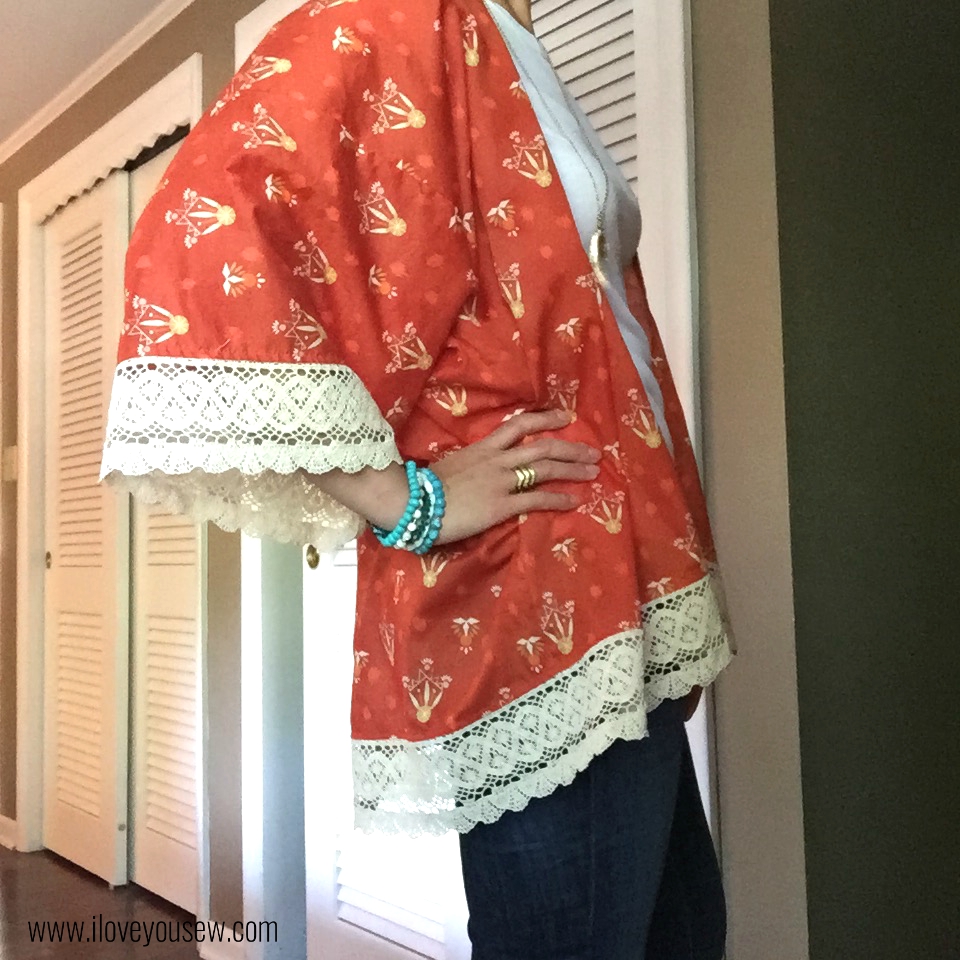
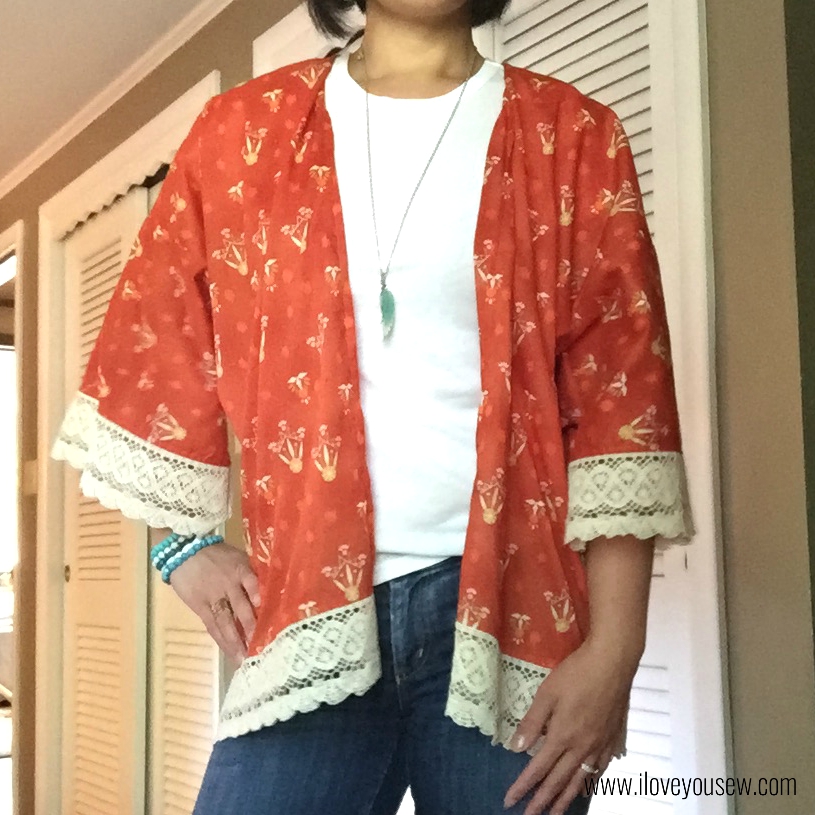
After making the Morning Walk Kimono, I made a few adjustments with this Wanderer one.  The first adjustment was to make the back a little longer with the colder autumn season quickly approaching.  I’ll wear this with denim jeans and leggings to go along with the amazing burnt orange color.
Dreamcatcher Finished Side Arm Down


I cut the back piece 2″ longer than the pattern piece.  After attaching the front pieces to the back, I folded the entire Kimono in half and made a cut connecting the original length of the front pieces to the longer back.  This made for the nice drop to hide my bum 😉

Dreamcatcher Finished Side

The second change I made was how I attached the lace.  I wanted to have as much of the lace showing because it’s just gorgeous and I didn’t want to stiffen up the sleeves like with Morning Walk. The lace was attached with my serger (blade disengaged) and then I top-stitched it into place.

Dreamcatcher Finished Front

The interior isn’t as pretty as the original pattern instructions, but I don’t mind one bit.  I got all the extra length and flow I expect from a Kimono.  The width and the weight of the lace will most likely keep the inside seams hidden away…

I absolutely love both versions of Sew Caroline’s Kimono pattern and definitely recommend this as a beginner garment.  I can’t wait to strut around with some more Boho Chic style this season 😉  What are you making this fall?  I need some suggestions for some future wardrobe fillers!


Happy stitching,

Cristy