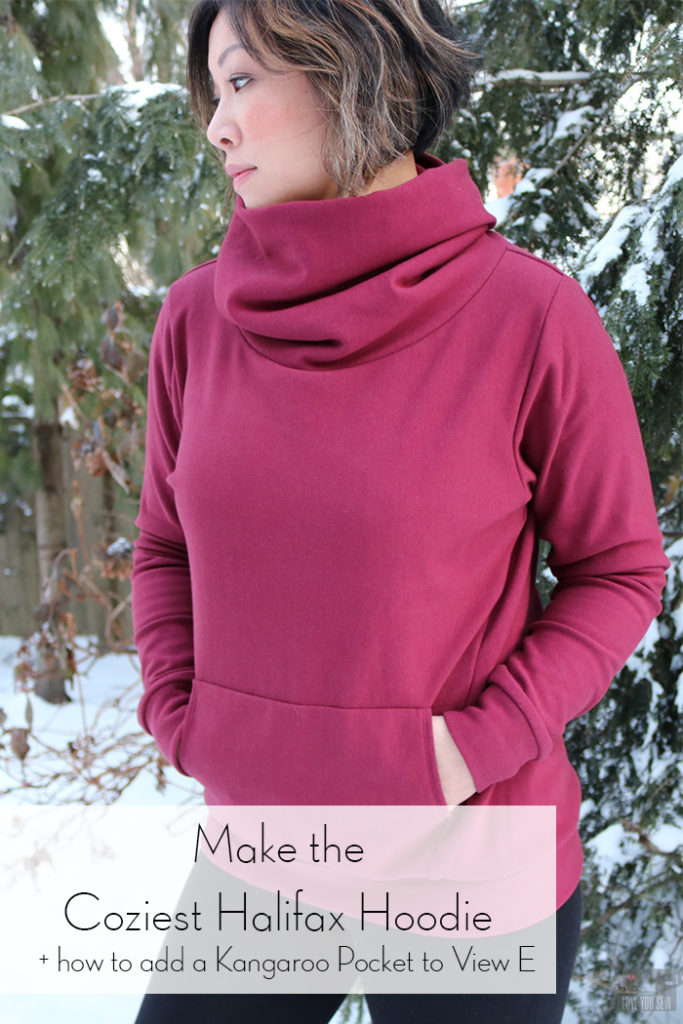
Make the Coziest Halifax Hoodie + Kangaroo Pocket Hack for View E

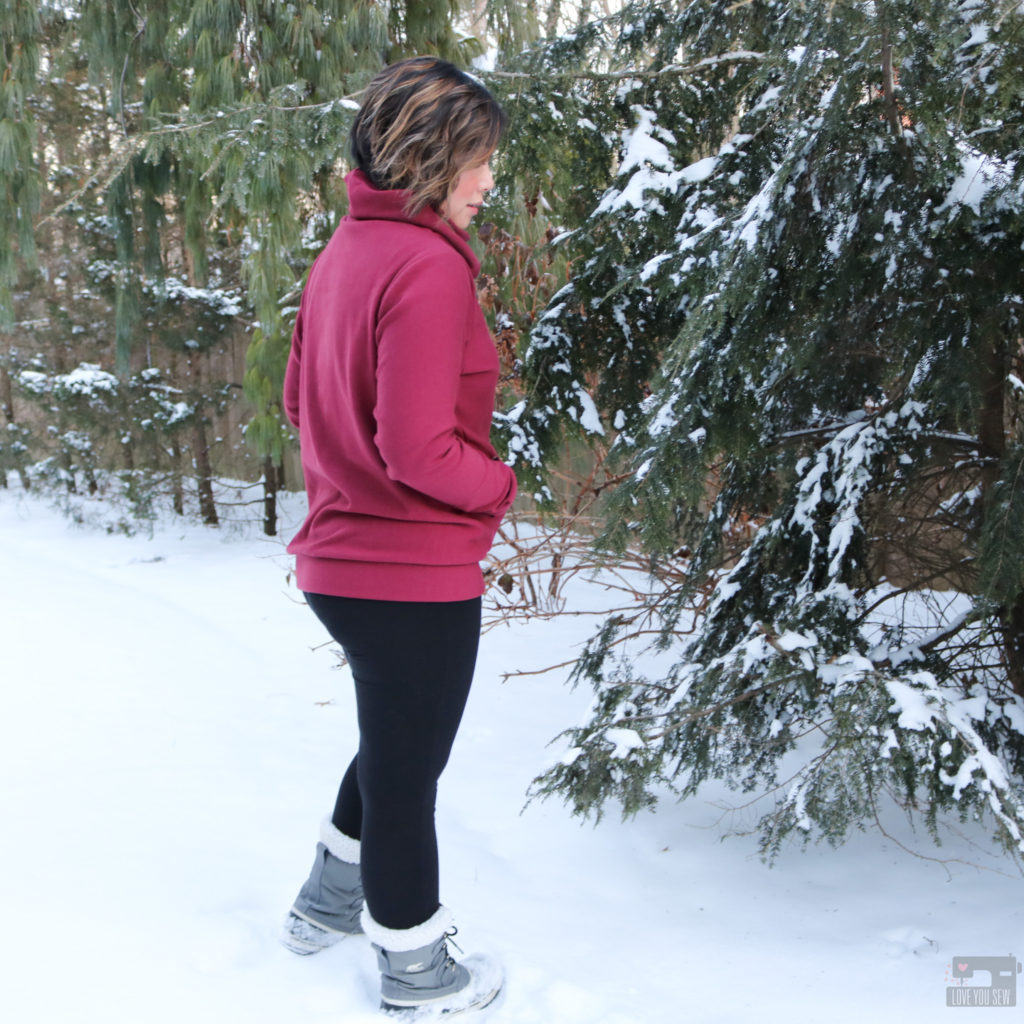
After the holidays, January is such a drag. Then, throw in the Polar Vortex that hit the Midwest this week and it’s just downright depressing.  We can’t go anywhere, school had been cancelled two-days in a row, I can’t send the kids to go out and play….plus, it’s just so friggin’ COLD! I am thankful, however, to have made this Halifax Hoodie the other week. The plush softness of this fabric combined with a comfy cozy sweatshirt design is keeping me pretty warm through this cold spell.
FABRIC:

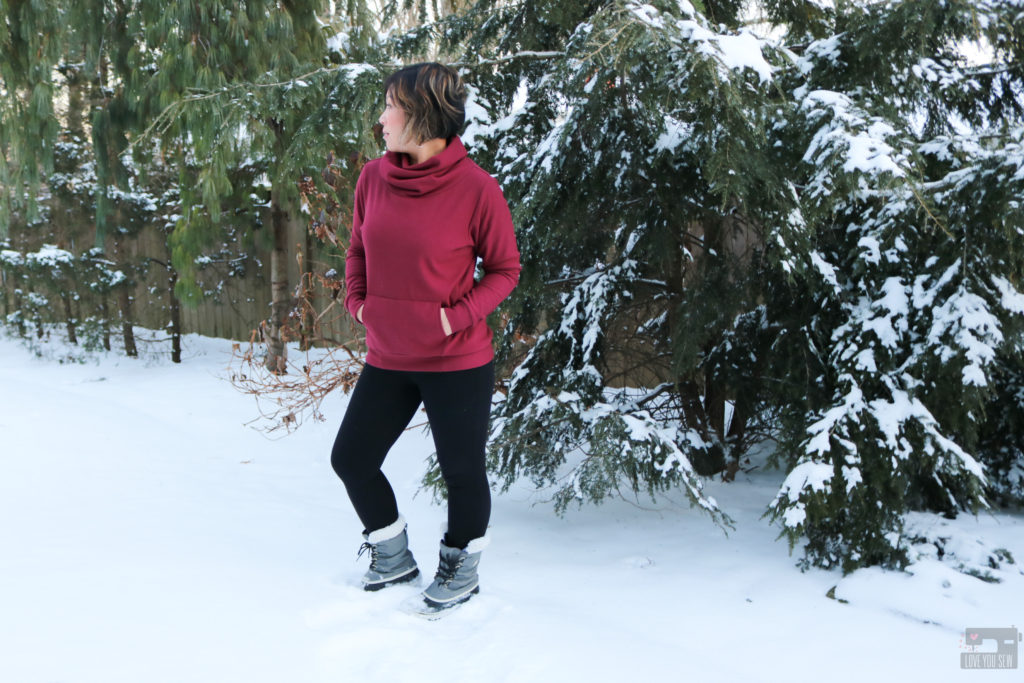
I picked up this heavyweight bamboo/cotton sweatshirting in Heretic from Imagine Gnats.  Right now, the shop carries a number of different colors of this fabric, as well as matching ribbing!  When I bought my fabric, they were sold out of the ribbing (which was a bummer,) but the 25% four-way stretch in this sweatshirting is more than enough for the cuffs and waistband.  I love how soft the fleeced inside of this fabric is from the bamboo…even after multiple washings.
PATTERN:

The Halifax Hoodie by Hey June Handmade is a very popular pattern with it’s classic casual design and multiple features.  This is a great pattern for knits and allows for so many different styles and combinations….whether you want a full zip-up hoodie or just a crew-neck sweatshirt.

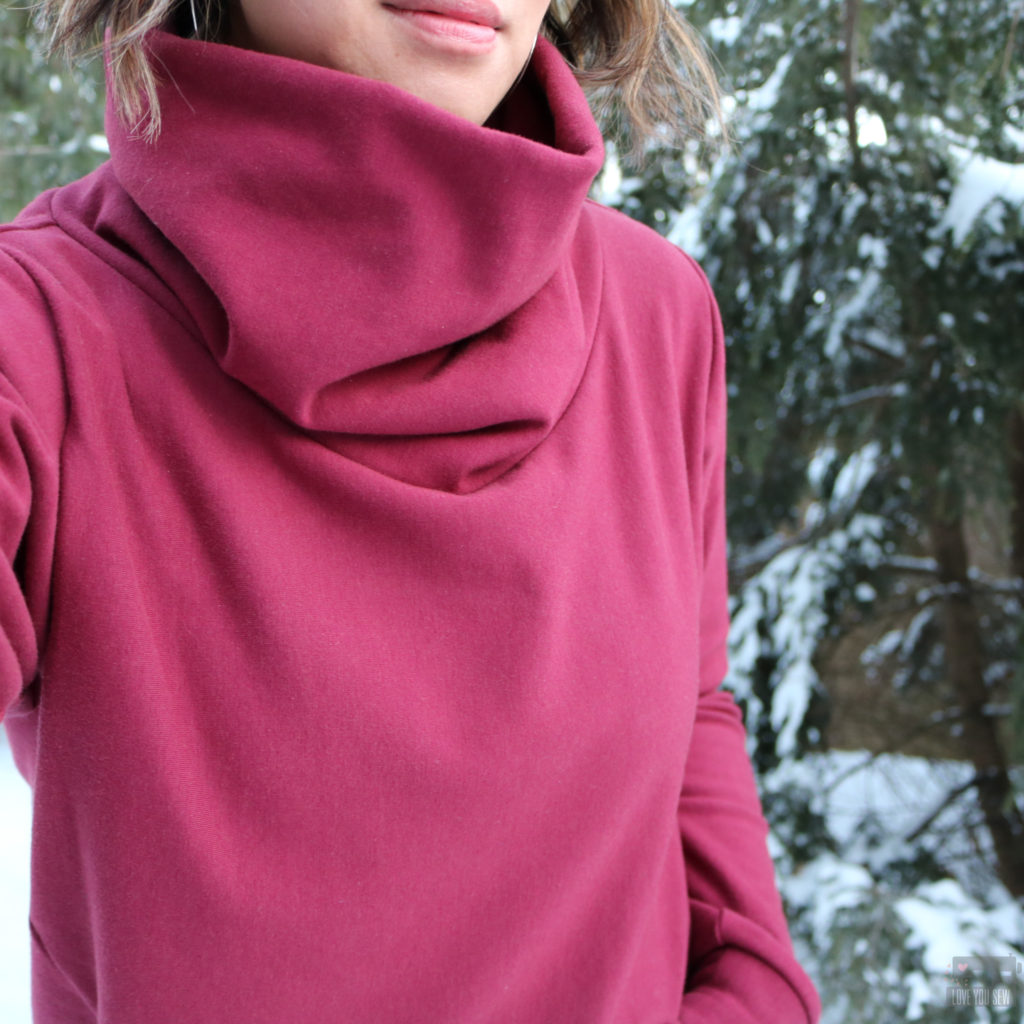
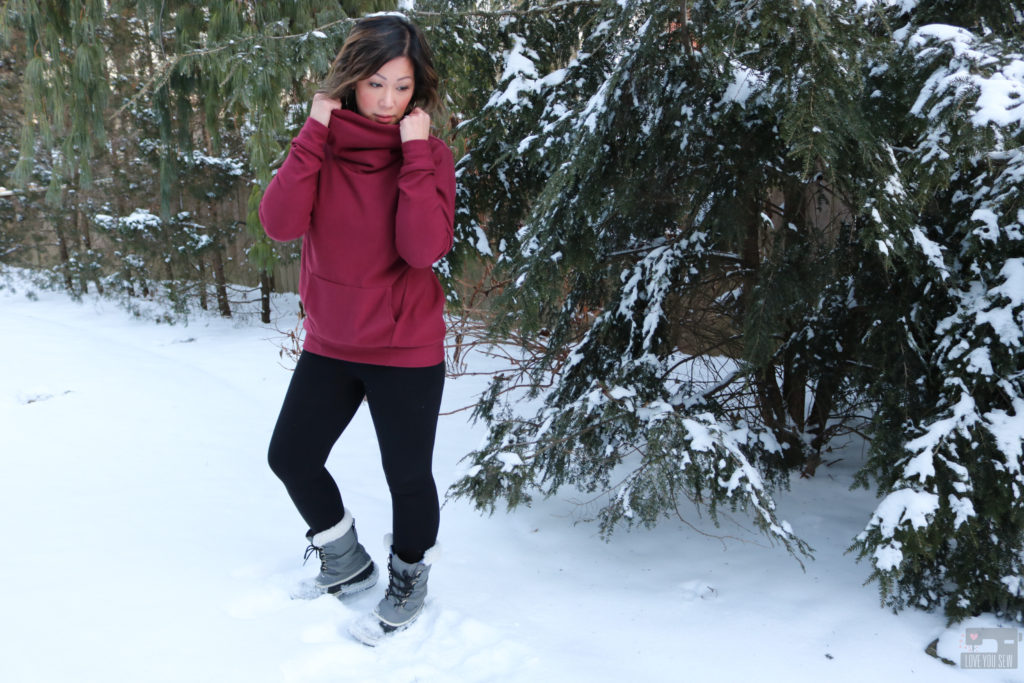
I opted for View E with the angled side seams this awesome funnel neck.  I’m a big fan of Lululemon athleisure-wear and they tend to have higher necks in many of their jackets and tops.  I love this feature since I’m always cold and can’t say no to a built-in scarf 😉 I even raised the funned neck an additional 1.5″ on the fold (3″ overall,) to add even more of the cozy factor.  The thickness of the sweatshirting helps the funnel neck stand up and provide volume. If you are using a regular weight knit, you may end up with more of a cowl look instead.

KANGAROO POCKET HACK:
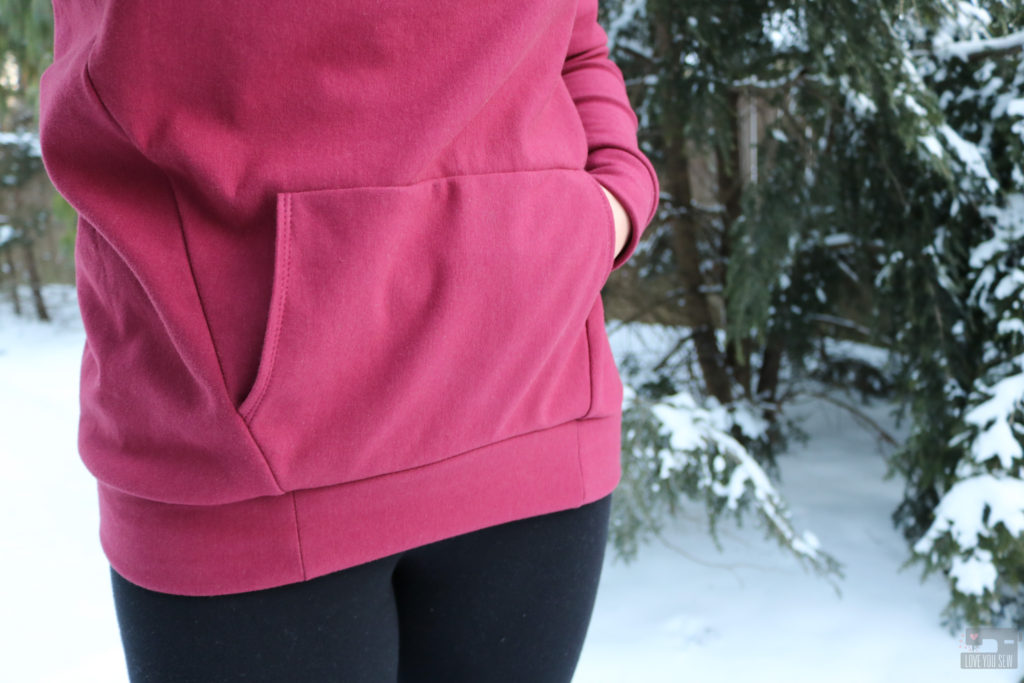
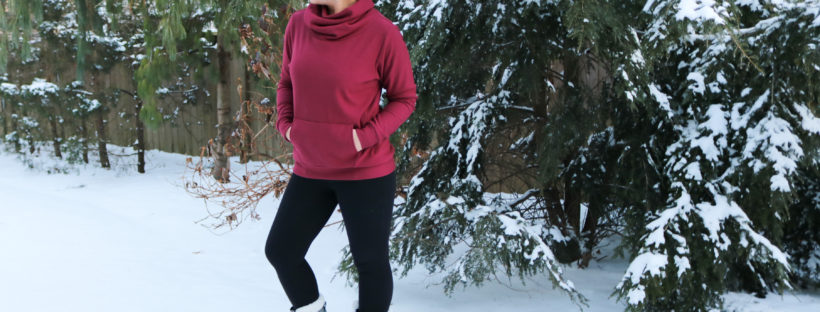
While the other views of the Halifax had pockets, View E did not.  When I was planning this too, I just wanted the extended neck, but I happened to be wearing a regular crewneck sweatshirt while cutting out the pattern pieces.  I realized how many times I was reaching for my stomach to warm up my hands, just like when I wear my hoodies.  I decided I definitely needed a kangaroo pocket and you can follow how I made one below.
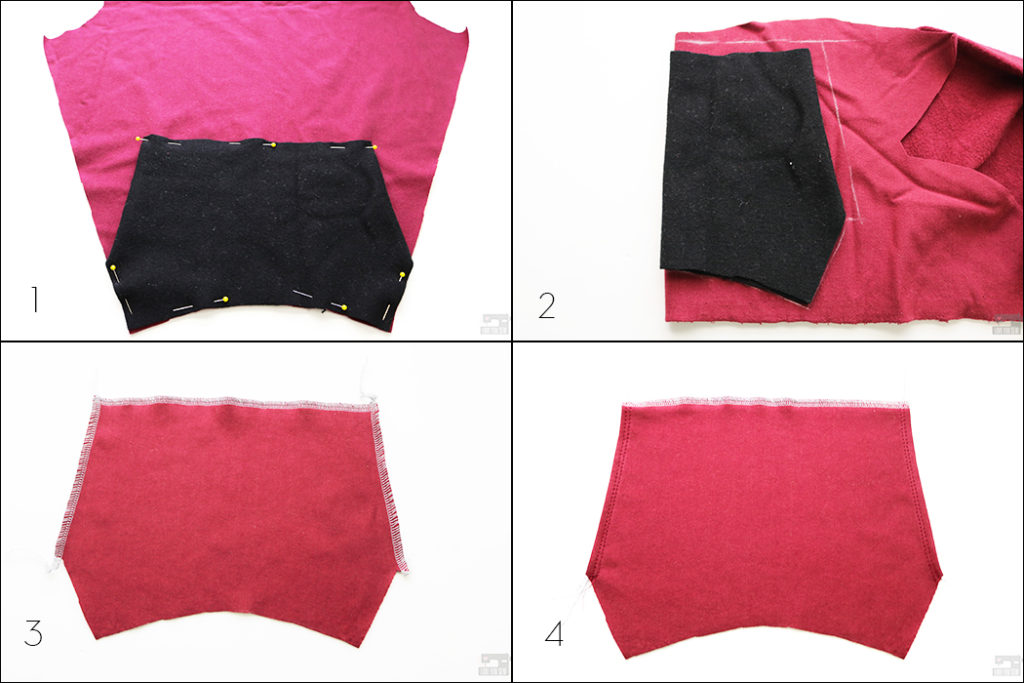
1. With the angled side seams. I wanted to make sure the pocket followed the same sharp lines and thus, didn’t use the pocket pattern included (which has rounded openings for the hands.) I used a scrap piece of knit fabric to create a new pocket.  The scrap was laid down and I played with the sizing by folding the scrap until it looked right.  I used my own hands to make sure the opening was big enough for me to easily access the pockets.  Then I trimmed up the scrap to match the lines of the front sweatshirt hem and side seams.

2. Folding the new template in half, transfer the design to my fabric and added 1/2″ seam allowance at the top and side hand openings.

3. Open up the pocket and finish the top and side hand openings by serging or by using a zig-zag stitch.

4. Fold under the side pocket openings by 1/2″ and top-stitch.  I stitched at 1/8″ and at 1/4″.
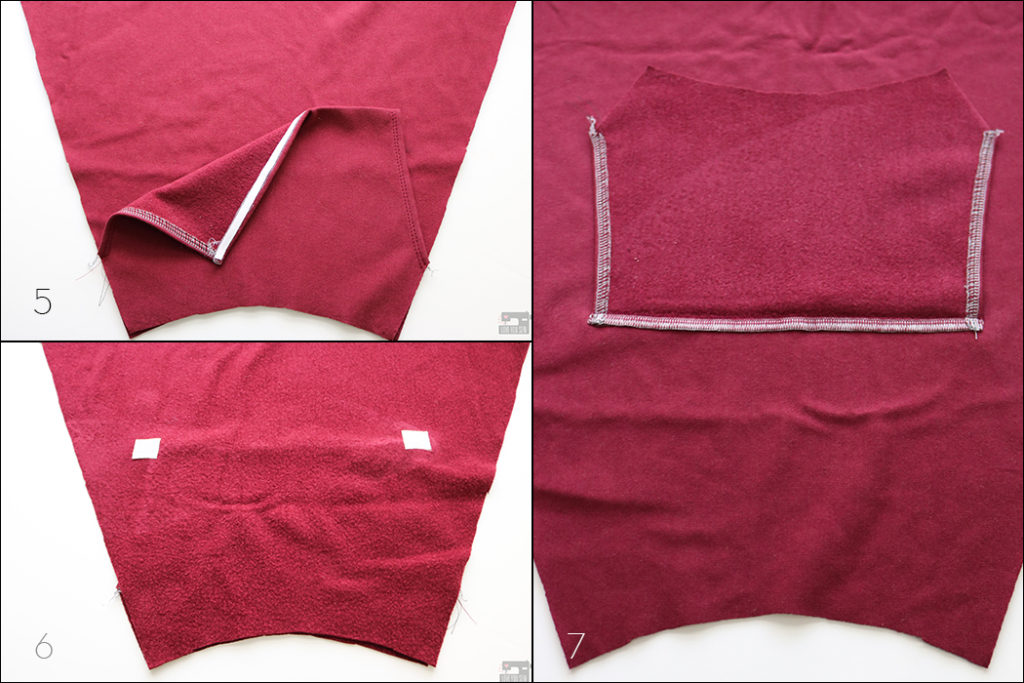
5. Press under the top of the pocket by 1/2″.  Add some Wonder Tape along the seam allowance and remove the backing.  Press the pocket into place centered on the front to prevent the pocket from shifting.

6. On the wrong side of the front, fuse small scrap pieces of interface at the top corners of the pocket.  You can feel the corners through the fabric.

7.  With the right side of the front facing up, flip up the pocket and sew along the top of the pocket. Backstitch well at the beginning and end
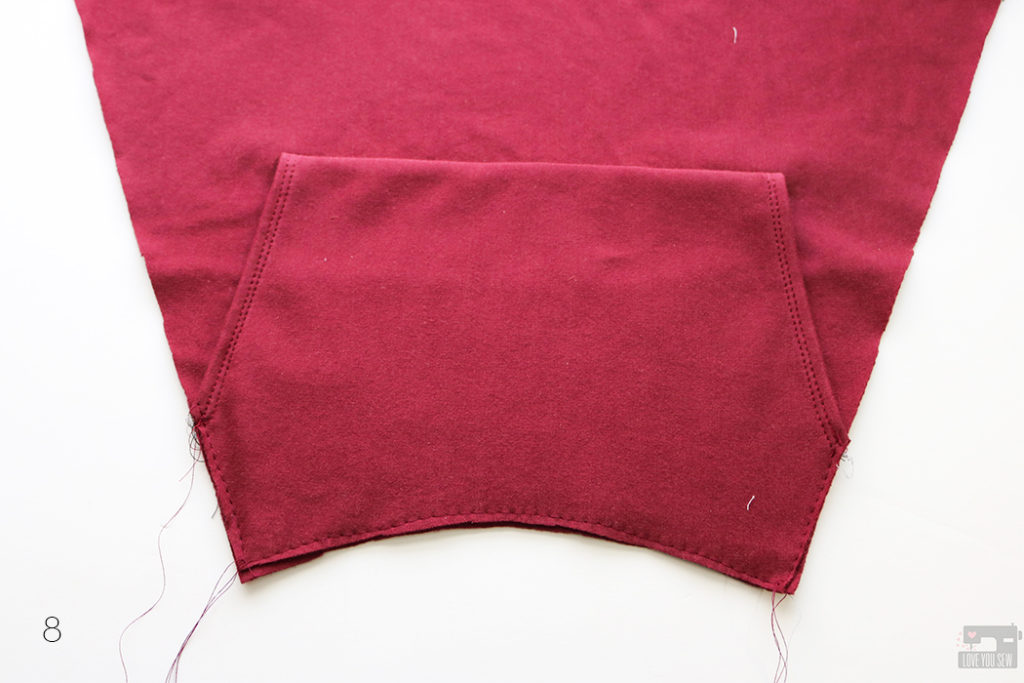
8. Flip the pocket back down and baste the sides and bottom of the pocket to the front.  After I took these pictures, I went an extra step and tacked down the top corners of the pockets for extra strength.
SIZING

I’m a 36″ bust, 40.5″ around the hips and made a straight medium. Being 5’3″, I usually have to make a sleeve length adjustment, but left it all the same to keep the slouch and ease. I love this generous fit and the stretch in this fabric allows for great movement. I probably won’t make any adjustments when I make my next Halifax.
I hope you are all staying warm or have fled to warmer climates! In the meantime, I hope you checkout the Halifax Hoodie and this tutorial to add a pocket to View E.


Happy cold-weather sewing!

Cristy
Make Welt Zipper Pockets with the Skye Joggers

Skye joggers by Love You Sew

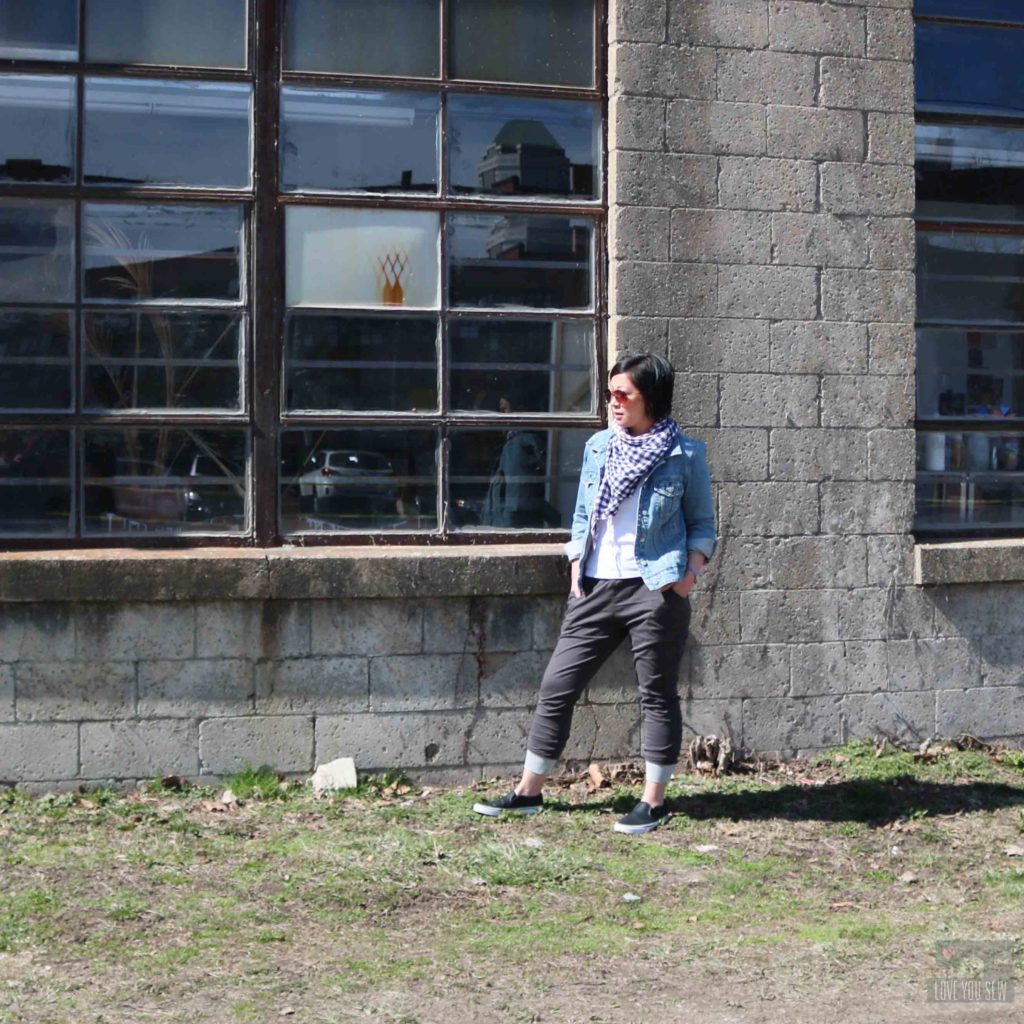
When joggers hit the market a few years ago. I was definitely into the look. They had the feel of my old Champion sweats from back in the day. (You know, the ones with the elastic ankle and all!) However, it seemed that the trend was not really feeling me. I tried on a few RTW pairs and have even sewn a few patterns. But, I didn’t like how they clung to my thighs and calves. I mean if I want leggings, I’ll just wear leggings….and that’s what I did.

Skye joggers by Love You Sew

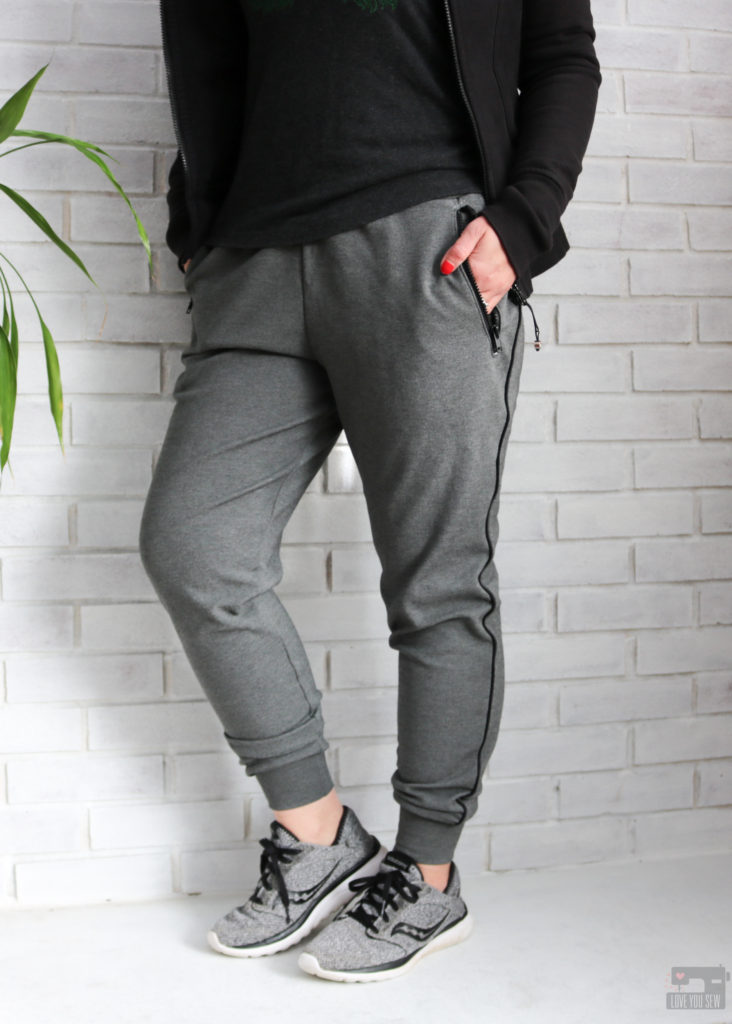
Since then, I’ve seen so many more joggers on the street and figured out I was into the more menswear style – which are a little looser and fit that ol’ sweatpant nostalgia, I remember. Fortunately, I’ve made the Skye Joggers by Blank Slate Patterns before and knew exactly the changes I wanted to make to get my perfect pants.

Skye joggers by Love You Sew

Fabric

Skye joggers by Love You Sew

When I made my very first Skye Joggers, I knew they were going to be a wearable muslin. So, I used whatever knit I had on-hand…which was a lightweight modal (definitely not on the recommended fabrics list.) They stretch out so much around the knees that I just wear them at home.

Skye joggers by Love You Sew
I tried to push the ankles up to hide the knees…Ha!

As with any muslin, lessons are learned. I knew I wanted a heavier knit and “athletic” fabric that looked like the RTW versions on my Pinterest board here. Either a ponte or scuba would work and I decided on ponte. I’ve worked with it before like on this Denver Tunic and love the weight and recovery. I grabbed this great dark grey Ponte de Roma Viscose Blend from Imagine Gnats awhile ago and the Arietta Navy Ponte from Craft South while on a trip. But you can still grab some of the Arietta from Etsy here.

Sizing

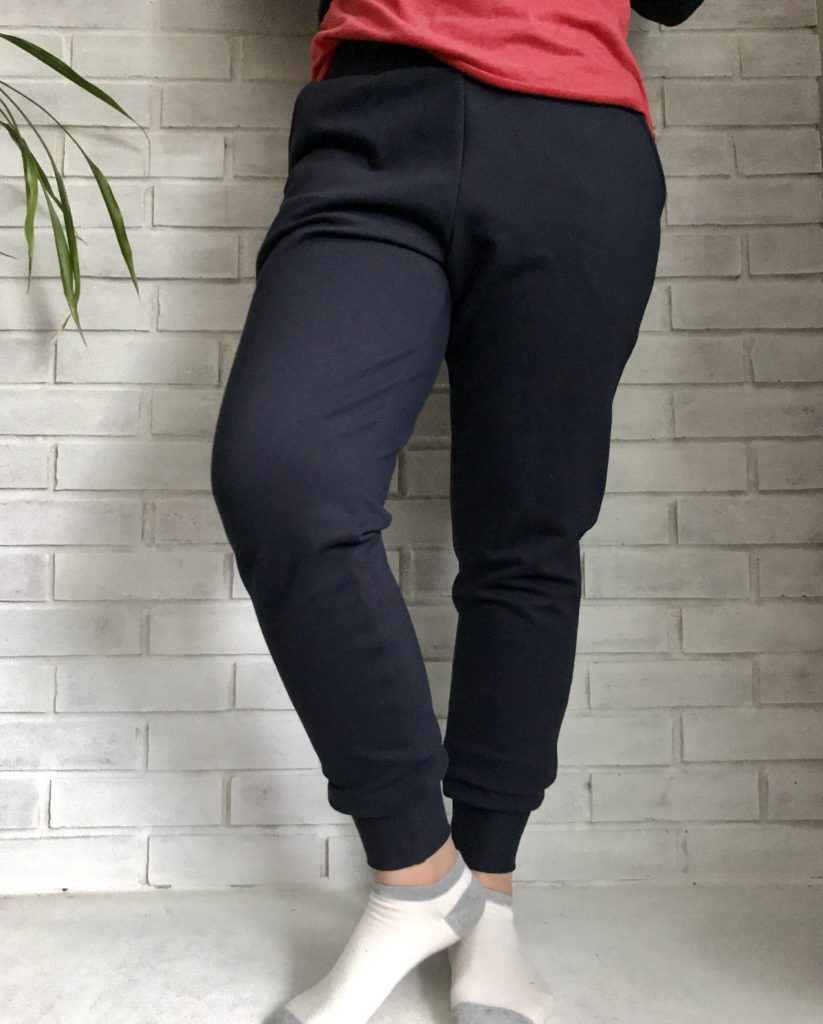
Based on the muslin, I wanted just a bit more ease and sized up a step. I coach sports for my boys and want a bit more movement (aka air circulation) with my joggers. One can only wear leggings for so long!

Skye joggers by Love You Sew

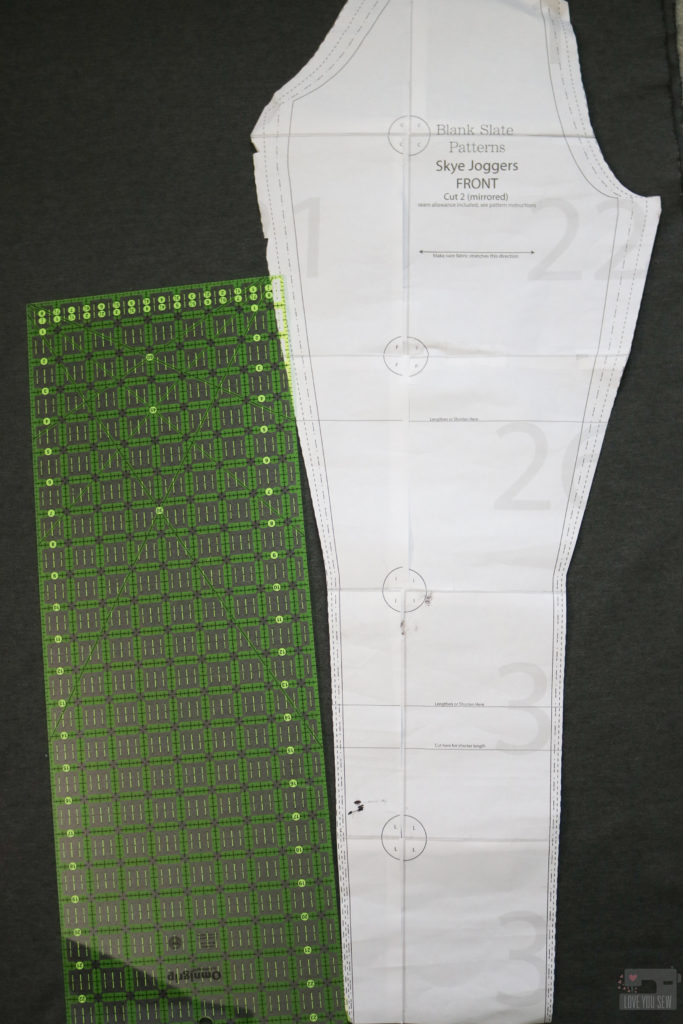
Additionally, I widened the knee and calves by drawing a straight line front the shorten/lengthen line all the way down to the ankle. I have heavy calves (and don’t fit into most boots as a result,) but I know I can adjust when I sew. I almost always have to make this adjustment on pants patterns, but left it pretty simple since I was working with this heavy ponte.

Skye joggers by Love You Sew

These are another pair of Skye Joggers I made with the same sizing adjustments. You can see the extra ease allover, and especially in the knees and calves where the fabric is not pulled.

I happen to make these before the #SewFancyPants challenge and felt like they were a bit too safe and boring (perfect for coaching basketball though!)

Welt Pocket Tutorial

Skye joggers by Love You Sew

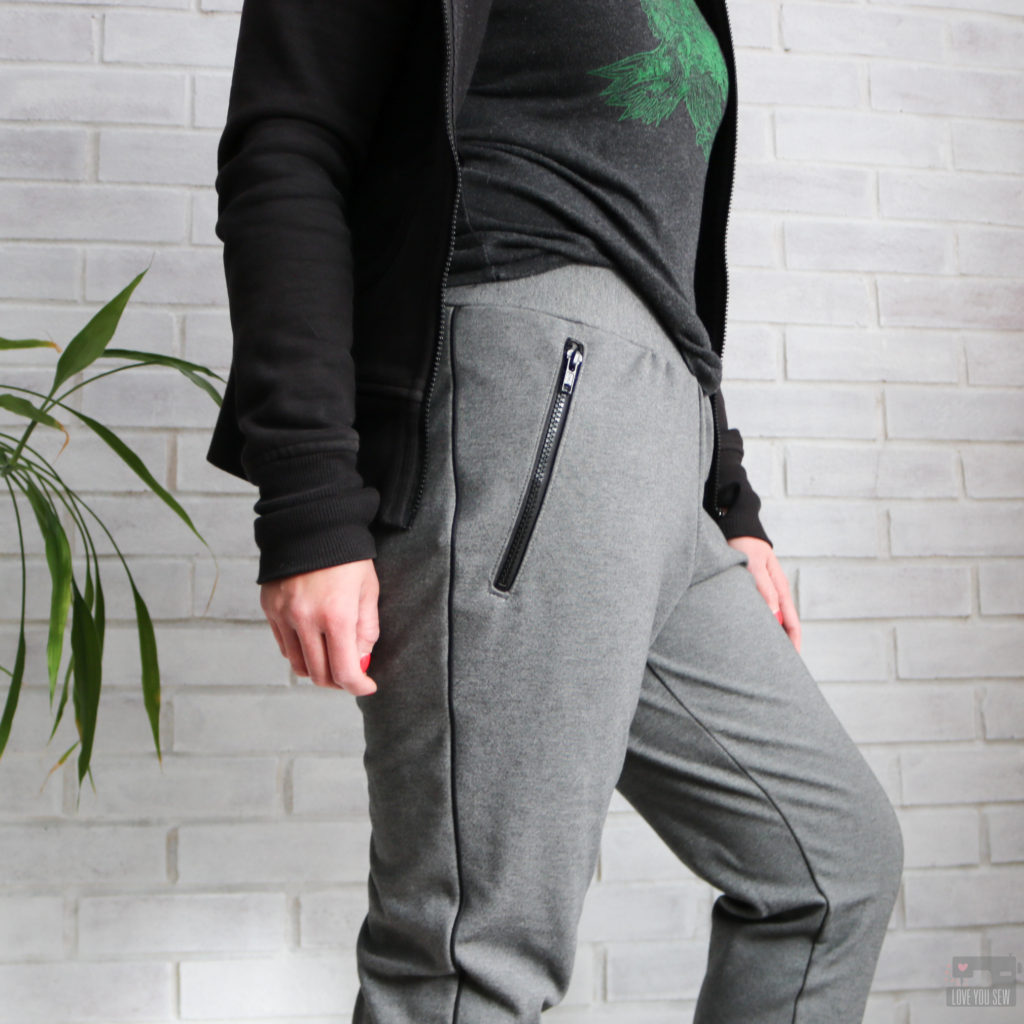
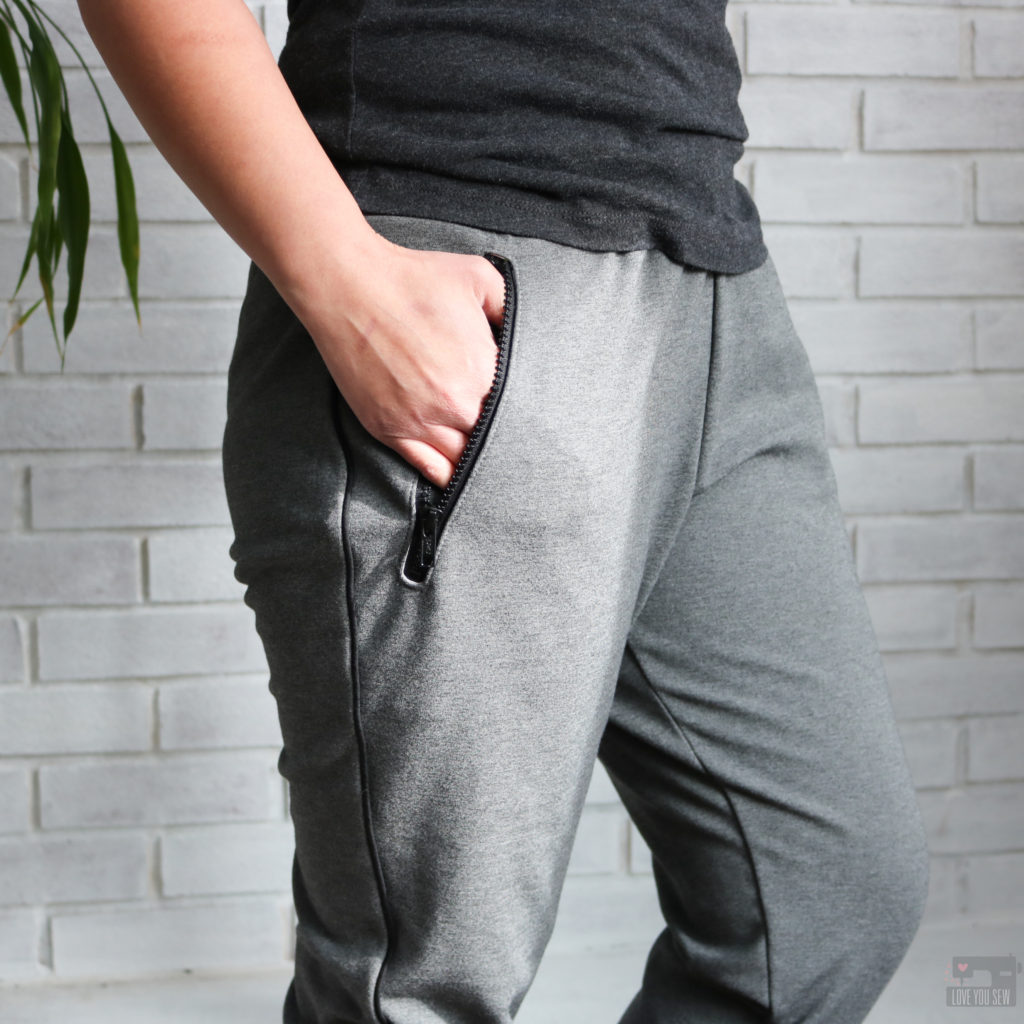
With the new year and planning out my projects, these were the only additional pants on my docket. But when the #SewFancyPants challenge came across my Instagram, I knew I wanted to participate somehow. I decided to stick to my plans since I already had all of my fabric. With the ease I added into my joggers, they were definitely looking more like the men’s versions I’ve seen (and absolutely love!) I figured I would go all the way and make these even more masculine by hacking the slash pockets to make some pretty dope welt zipper ones.

Welt pocket Tutorial by Love You Sew

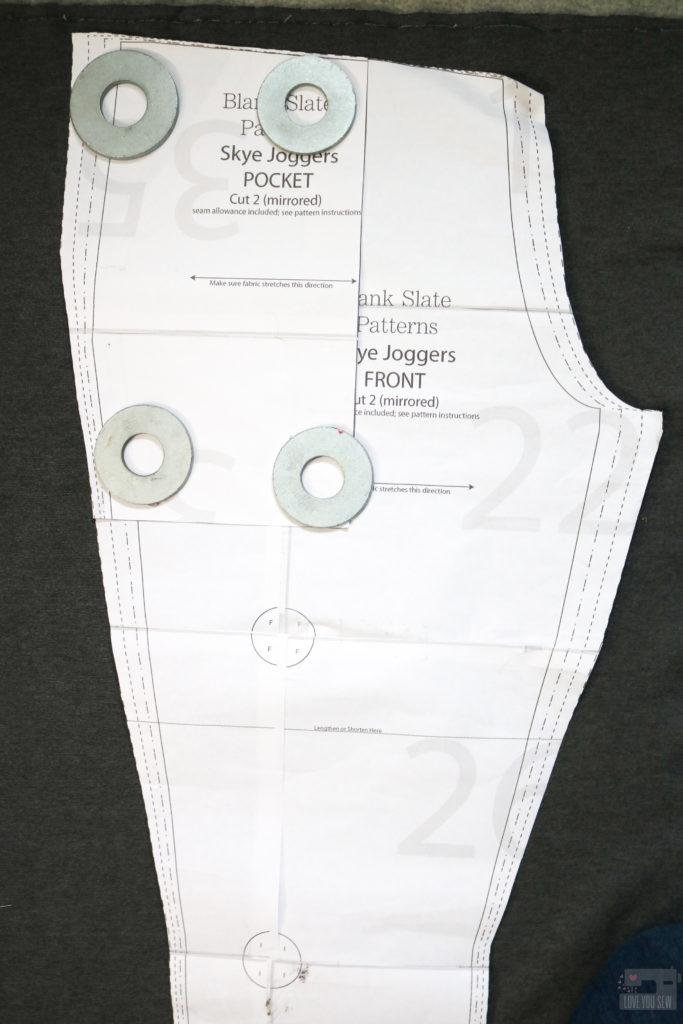
To make welt pockets, you first have to bring up the lines of the front pant pattern’s pocket area to match the side seam and waistline. To do this, lay the pocket pattern right on top of the front leg (as shown) and cut out the fabric following your new combined pattern.

With this change, you will no longer need the front facing pattern piece and instead, will need four of the pockets. To make things much easier on myself (and after some tough lessons learned before,) I used a quilt cotton to make the welt pocket opening. This allows for more stability and less bulk…especially when working with a heavy knit. For the back of the pockets, I then went back to the ponte.

Welt pocket Tutorial by Love You Sew

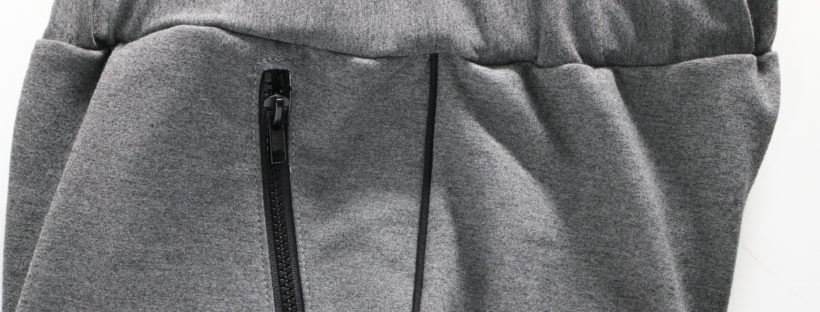
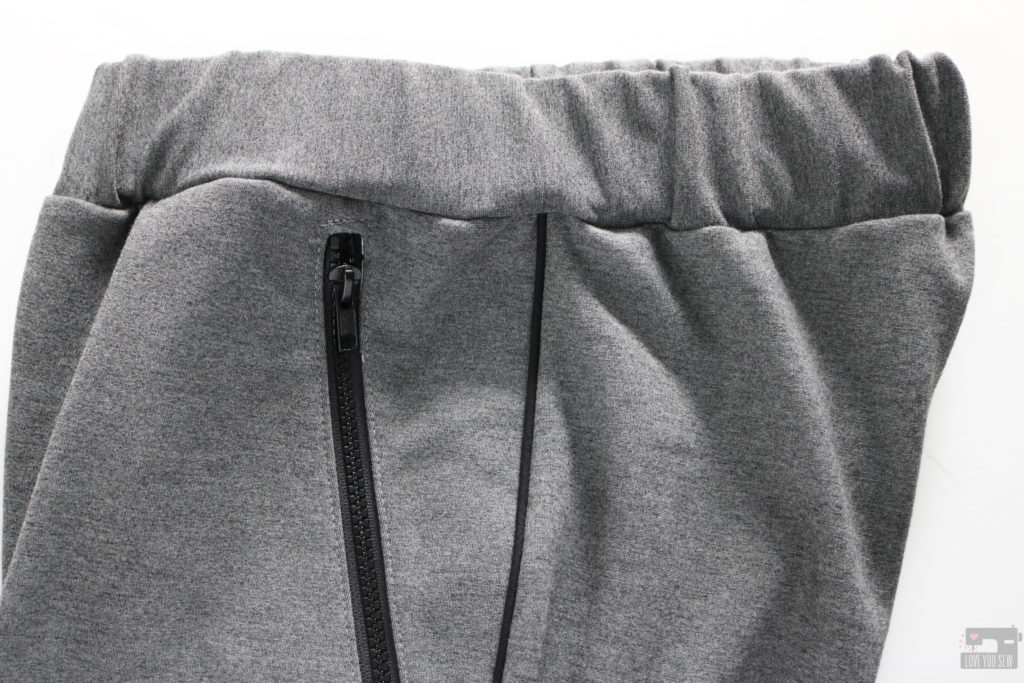
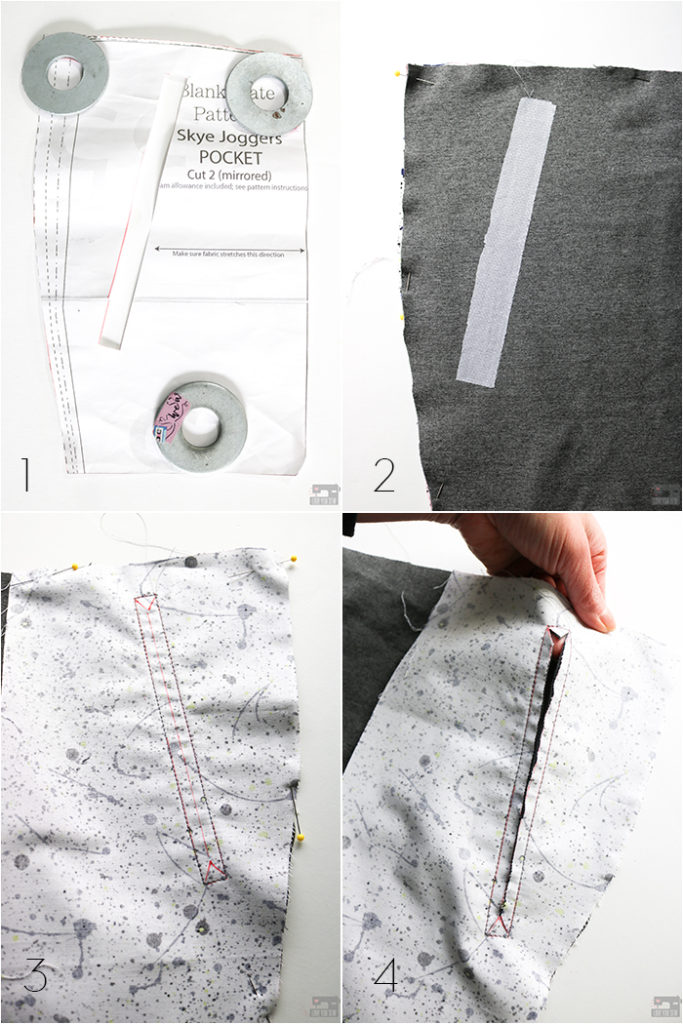
1. For the zipper opening, I used a 7″ sport style nylon zipper like this one. The pockets are very generous with the Skyes and I wanted to make sure my hands and phone could fit through easily. (No one likes those little zip pockets that can only fit a tube of Chapstick!) For the placement, I literally clipped the pocket pattern to pants I was already wearing to see where my hand naturally would go. I made sure to place it far enough down to account for seam allowance. Then I drew and cut out a 7″ x 1/2″ rectangle exactly where I wanted the zipper to go.

2. On the wrong side of the front pant leg, I marked the zipper box using the pocket pattern and then fused a 8″ x 1″ pieces of knit interfacing overtop of the zipper markings.

3. With right sides facing together, lay the front pocket lining against the front pant. Pin in place. Mark the zipper opening to the wrong side of the pocket lining and stitch around the entire rectangle. Draw a line down the center of the rectangle (as shown) leaving 1/2″ at the beginning and end between the line and the sewn box. Draw two V’s to connect each corner to the center line (as shown.)

4. Cut along the red lines and use small scissors to get as close into the corners as possible without cutting any threads.

Welt pocket Tutorial by Love You Sew

5. Remove pins. Take the pocket and push it all through the zipper opening and finger-press the seams down.

6. Press the inside of the zipper opening while rolling a bit of the ponte inward.

7. Press the outside of the zipper opening making sure you don’t see the lining.

8. Using some Wonder Tape (or a fine line of washable fabric glue,) line the zipper opening as shown on the pocket. Remove the backing from the tape.

Welt pocket Tutorial by Love You Sew

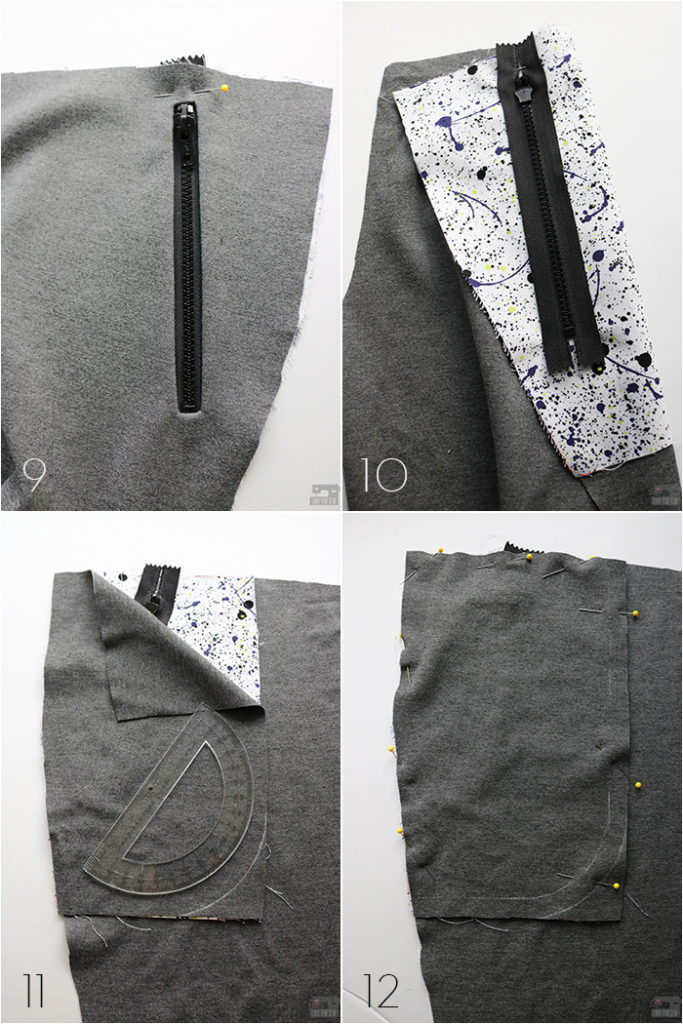
9. With right side of the pant up, center the zipper opening over the zipper. Make sure the zipper opens downward. Finger press around the zipper opening to attach the zipper to the pocket. Use extra pins as needed. Top-stitch 1/8″ around the zipper opening through the pant front, pocket and zipper.

10. Flip joggers to the wrong side to make sure you got through all the layers. Trim threads

11. Line up the back of the pocket lining to the front lining and pin only the pockets together. At this point, I decided to curve the pockets since I was going to serge them together. This would eliminate the extra bulk a corner would give me. I used a ruler to draw the arc, but you could also use a bowl.

12. Since I was using a serger, I measured in my 1/2″ seam allowance to give me a guide as I ran the pocket through my machine. Serge or sew the pocket linings together, making sure to push back the pant front.

Take a step back and check out the off-the-rack look of that zipper!

Welt pocket Tutorial by Love You Sew

Piping

Welt pocket Tutorial by Love You Sew

If I was gonna add welt pockets with some sporty zippers, I had to keep going and add some contrast piping to these Skyes 😉 Unfortunately, I couldn’t find any black stretch piping under 10 yds that would also deliver within a week. (Why is everything I need overseas???) I could find every other color, except for basic black – go figure. So, instead I used woven bias tape piping straight out of the package like this one. The piping balances out all of the black accents and makes these look so professional….but I did have some help…

Welt pocket Tutorial by Love You Sew

With regular piping, I could use my zipper foot to attach it with a straight stitch, but I wanted a stretch stitch given the ponte. Plus, all of these layers definitely needed to be overlocked. I didn’t have the right foot with any of my machines to do a zig-zag or overlooking stitch with piping, so I got this new foot for my Juki Serger. As seen above, my regular foot is to the left and the piping foot is to the right. There is a channel that allows the piping to move through and now I can serge everything!

Welt pocket Tutorial by Love You Sew

This piping foot was amazing! It allowed for a tight and even application. I’ve sewn piping on garments before like these Laure dresses, but sometimes I have to go in to sew twice for an even seam. This foot was flawless. Guess you’ll be seeing more piping from me!

My Real Inspo

Welt pocket Tutorial by Love You Sew

I didn’t even realize it until my son helped me with taking pictures, but he pretty much has the same jogger that I was trying to create. I must’ve been channeling his pants within my subconscious this whole time! Now we can “twin” in our gear together.


I hope you enjoy the welt pocket tutorial! Please let me know if you have any questions or additional thoughts in the Comments section below.

Happy Sewing!

Cristy


This post contains affiliate links. A small commission maybe earned if you decide to purchase through any of these links. As always, these payments go directly back to fund the website, so I can provide you with an ad-free experience. (I dislike banner ads as much as you do!)

M7429 Pine Crest Velvet by Love You Sew

Holiday Dressing with Stretch Velvet

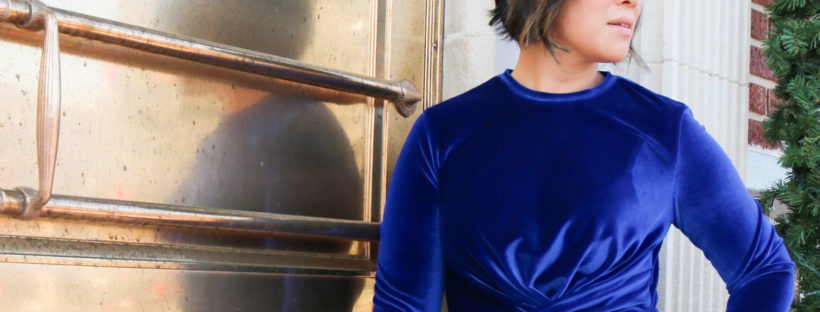
Nothing says “Happy Holidays” more than some velvet. There is just something about this fabric that conjures up feelings of wintertime mixed with luxury…especially in deep royal blue. Luckily, it is also one of the hot fabrics of the minute with odes to the 90s still in full fashion swing.

Fabric

The nap of velvet gives the fabric its trademark characteristic. The soft texture lends some weight, which makes it a great fall/winter substrate. With the popularity of velvet, there are a lot of options currently out in the market. There are non-stretch and stretch varieties which is great based on what you would like to make…whether it be a structured blazer, tights or a dress.

I was able to get this gorgeous Royal Radiance Velvet Spandex from my friends over at Pine Crest Fabrics. When they asked if I wanted to try out one of their velvets, I just couldn’t say no (even with a month full of other sewing commitments.) I knew that this velvet would be special since Pine Crest is a company that specializes in high performance fabrics…and friends, this Royal Radiance did not disappoint. You can find similar fabrics at Fabric.com here.

What makes this fabric incredible is the base cloth. I’ve made a few garments which you can read about here, using other Pine Crest athletic fabrics and I knew the velvet’s “wrong side” would be silky smooth…and it was! The 4-way 10% Spandex stretch made it ideal for a form-fitting dress and it has great recovery – so the dress keeps its shape. Even with the heavier weight of this fabric, it remained cool and breathable which is key when wearing this fabric out to a party.

Velvet Tips

  • Pay attention to the nap. Make sure it feels smooth running down the garment and cut pattern pieces with this in mind…because you know you will want to pet yourself!
  • If you do need to iron, use a towel as a pressing cloth to avoid crushing the pile. (There was hardly any wrinkling with my dress, so I luckily didn’t have to press often.)
  • There is a little mess cutting into velvet. Run a sticky roller on the velvet immediately after your cuts to keep the fuzz at bay.
  • Use a stretch or jersey needle with stretch velvet.

The Pattern

For my holiday dress, I used McCall’s #M7429. Variation B was exactly what I wanted for my stretch velvet. I wanted something more form-fitting, but NOT body-con. (I am not a skin-tight kinda gal.) This front knot and half-wrap design is perfect for camouflaging one of my trouble spots, but is also visually appealing. Only a solid fabric could really show off this design element and using my Royal Radiance just made it SO much better.

No lie…I was definitely tripped up by the knot. I was able to get pretty far with the limited illustrations and instructions known with the Big 4 pattern companies. Luckily, I found this video by Brittany Jones to help guide me through.

These Big 4 patterns also tend to allow more ease into their recommended sizes, so I was a bit concerned on what size to cut. I went with the pattern’s recommendation and feel like I could have probably gone down one size because there is quite a bit of fabric hanging under my arms and into the bust. The shoulders could be cut in 1″ on each side as well. Other modifications I made:

  • Graded out one size in hips down to the hem, including the back pieces
  • Narrowed the sleeves 1″ (folded) at the wrist and graded to the elbow
  • Shorted sleeves by an additional 1″
  • Increased hem by 1.25″
  • Deepened the neckline by an additional 1/4″
  • Tacked the wrap skirt into the knot with a few hand-stitches to keep it straight

What do you think about velvet for this holiday season? There’s still time to make this dress for Christmas or New Year’s!

Happy Holidays!

Cristy

*Fabric for this post was provided by Pinecrest Fabrics. As always, all thoughts and opinions are my own.

Fall Sewing: Alix Dress in Télio Rayon Slub

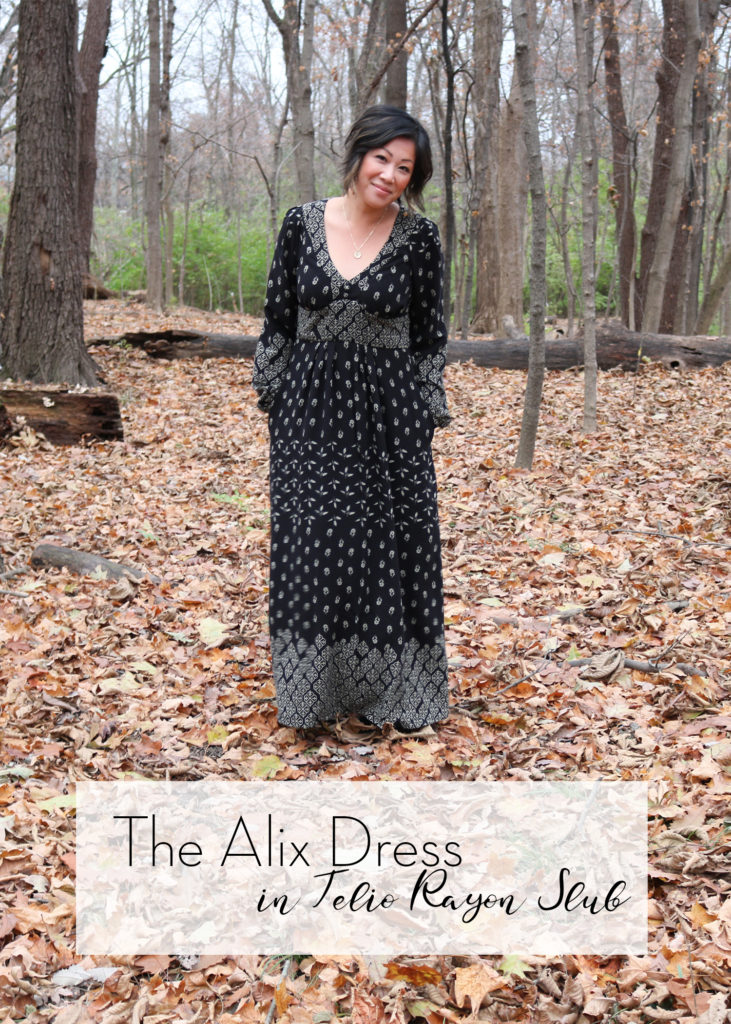
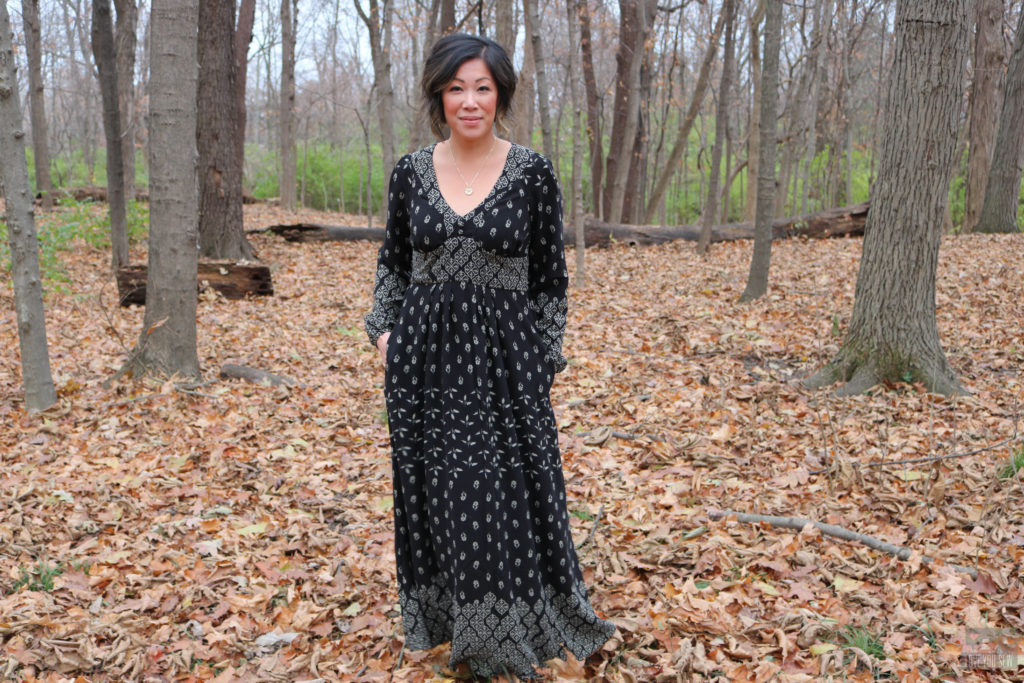
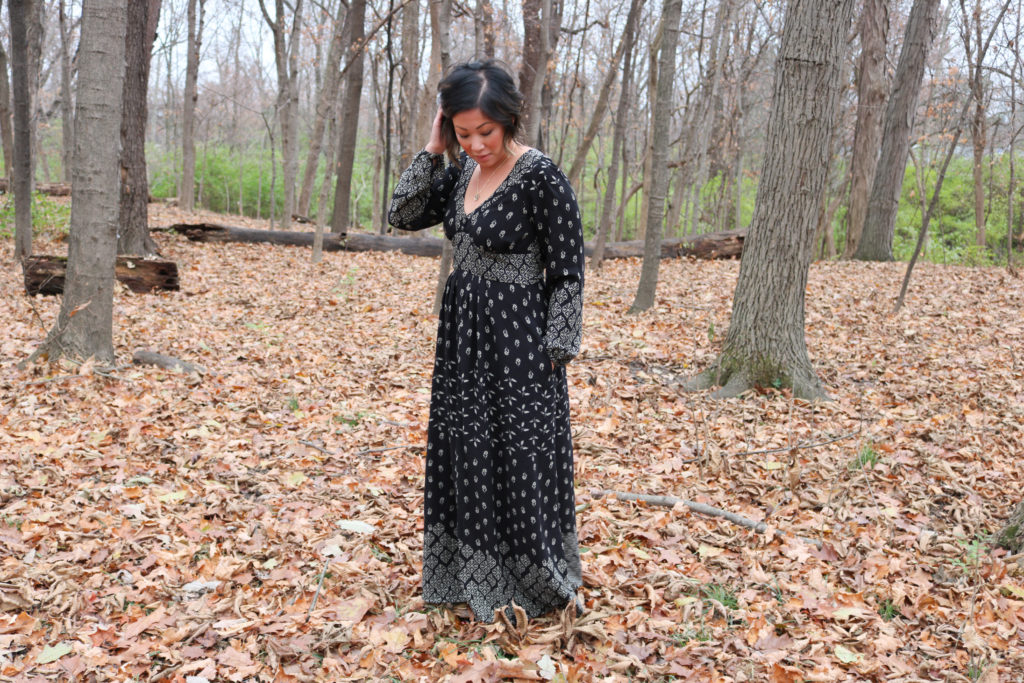
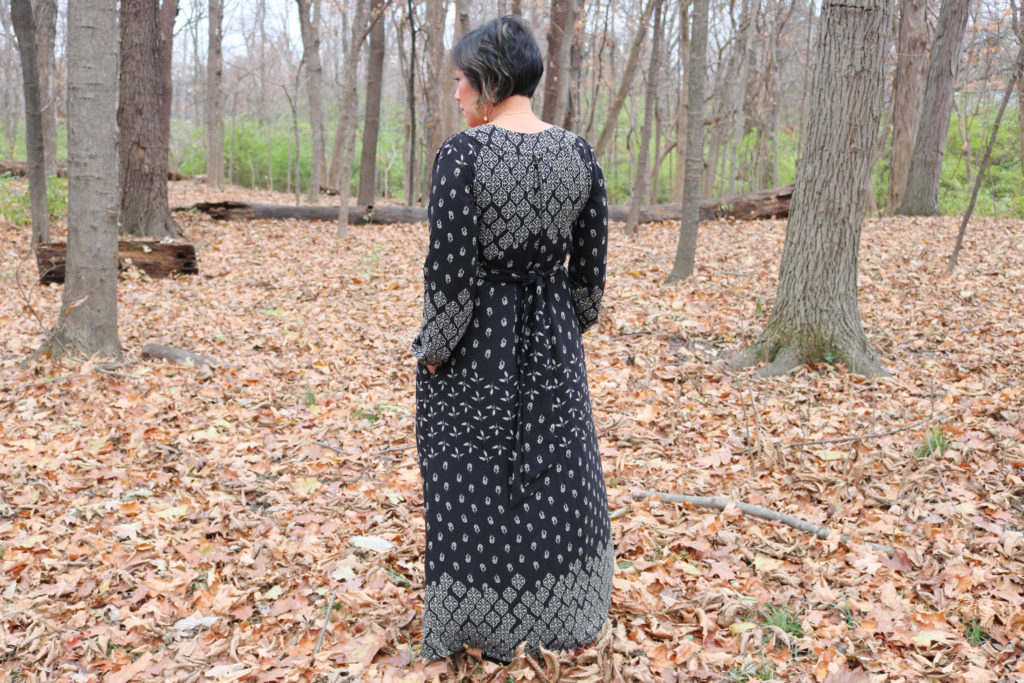
After making a number of practical everyday garments likes jeans and sweatshirts, it feels good to make something that’s a little extra special.  I’ve been dying to make a Boho maxi dress for the days I want some statement style but still have a light relaxed feel.  Then Télio asked me to collaborate and I already adore their fashion-forward garment fabrics.  How could I refuse an opportunity after seeing this gorgeous border print?  The fabric along with By Hand London’s Alix dress pattern were going to be THE perfect match!

Fabric

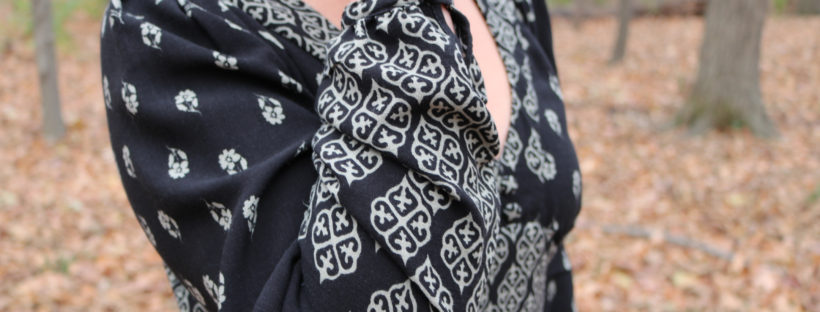
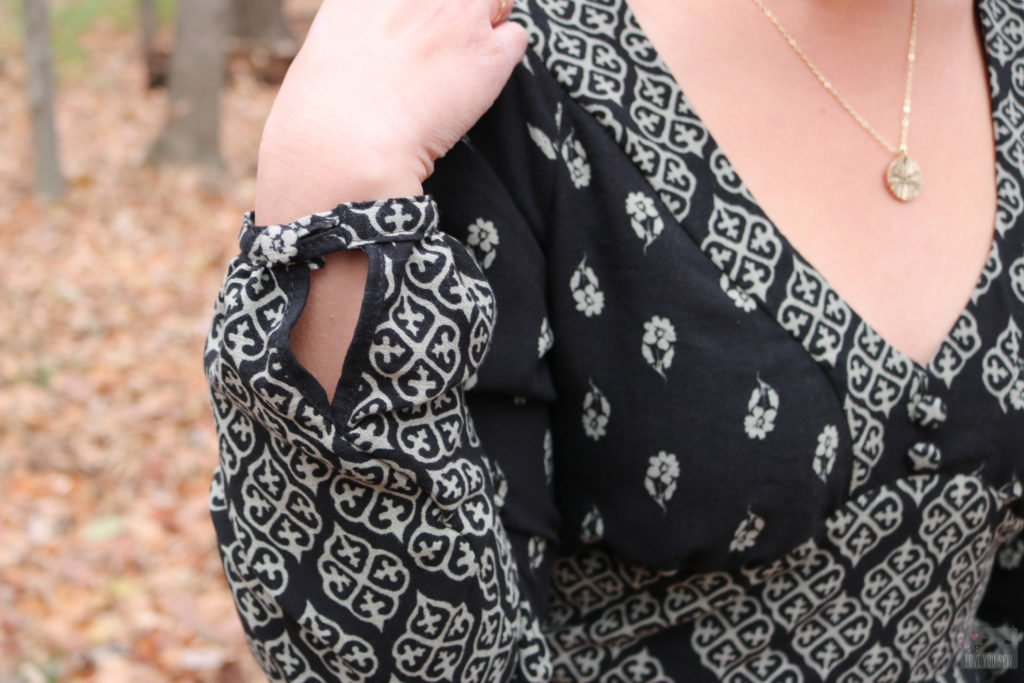
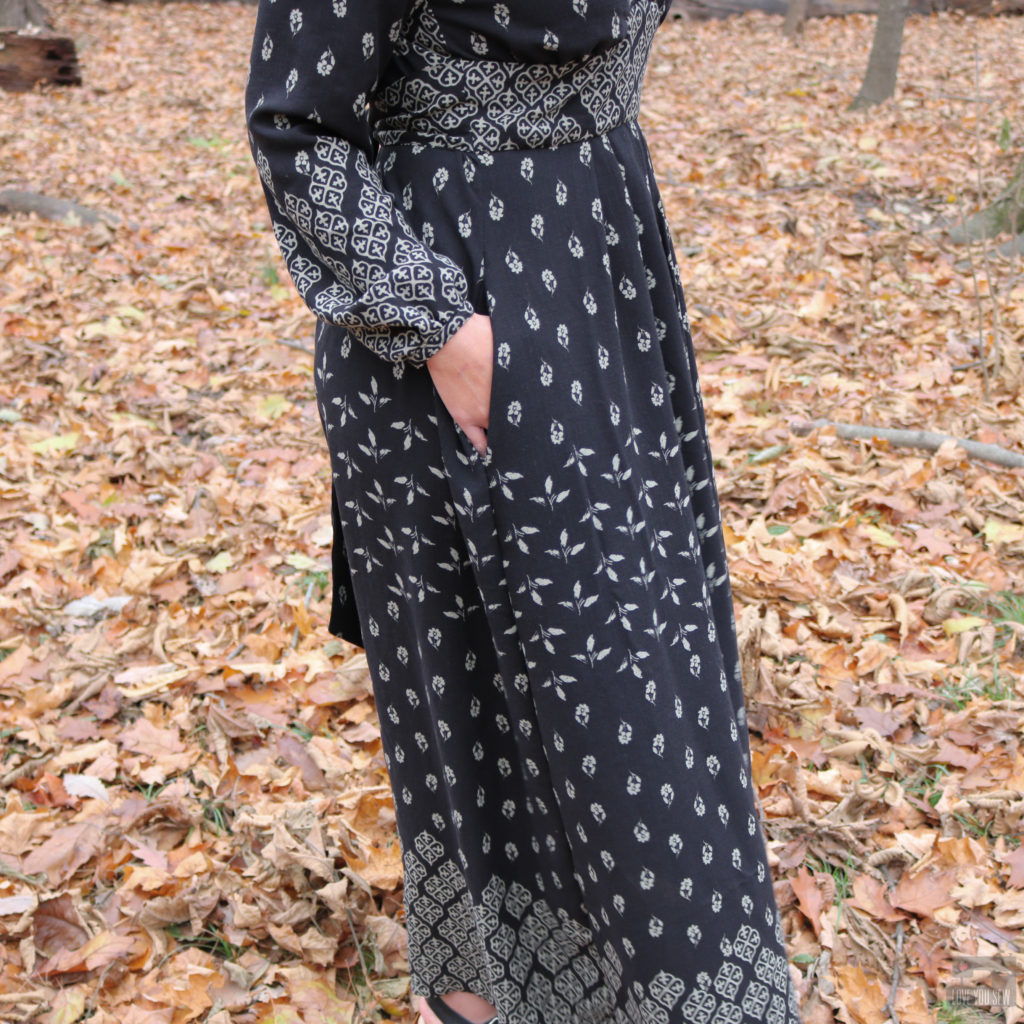
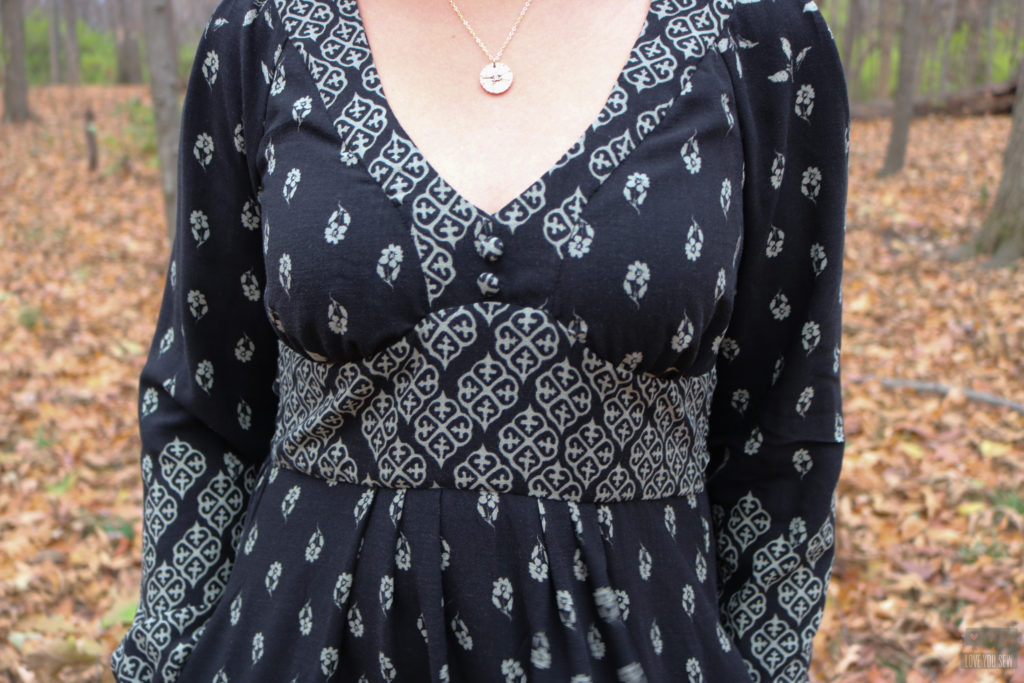
The first time I used Télio fabric was here.  I was impressed with the high quality and how the fabric washes well.  So, it’s no wonder I fell in love with this Télio Kahlo Rayon (#39801) for its gorgeous double-border print.  Look how the three different patterns are layered to give an impression of a tiered dress without having to actually sew one!  It gives so much visual interest and I was able to play with the design with my fussy cuts of the dress pattern.

The fabric is 100% rayon with an incredible slub texture.  The feel of the natural fiber knobs adds to the character of the Alix Dress and Boho vibe.  As with all rayon, the fabric is still lightweight with beautiful drape and movement.  It is also completely opaque.  After adding linings to my last few makes, I’m happy to leave that step out!

Pattern

Initially when I chose this fabric, I wanted to make a long shirtdress.  But when I received it, I knew I wanted something else to show off this print.  After going through dozens of other patterns, I remembered how the Alix Dress caught my eye awhile back.  I’ve sewn up the Holly Trousers before and By Hand London writes up a great pattern.

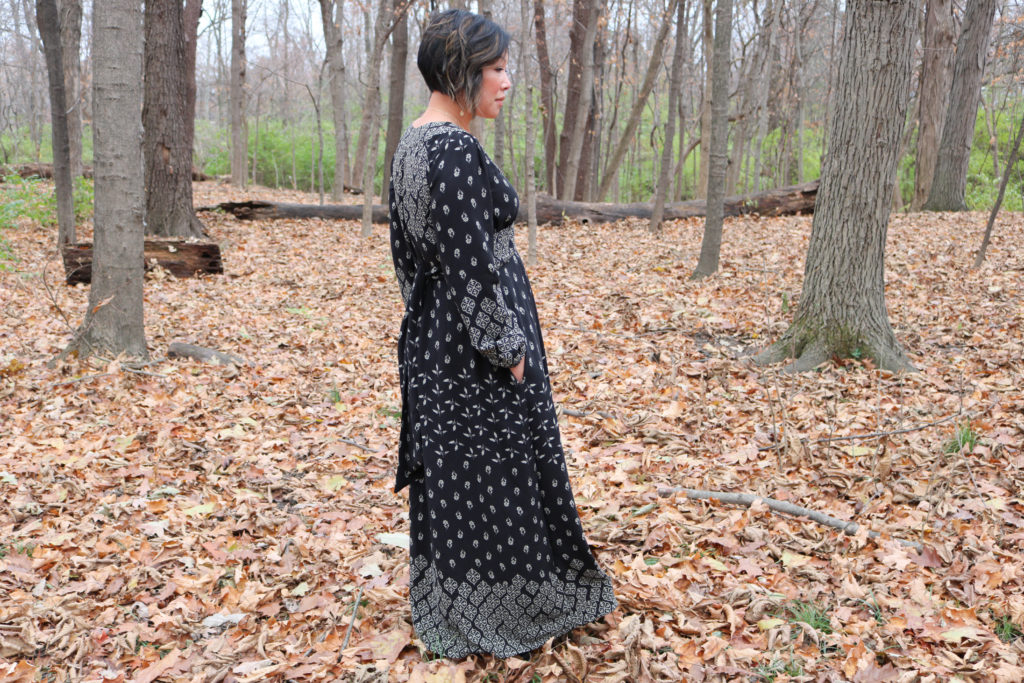
I really love this dress silhouette.  It’s relaxed all over with a beautiful tie-back to show off the waist.  This allows a nice shape without having me look like I’m drowning in fabric….especially, when I’m petite.  The tie-back also allows for weight fluctuations, which is VERY much appreciated in a handmade wardrobe.

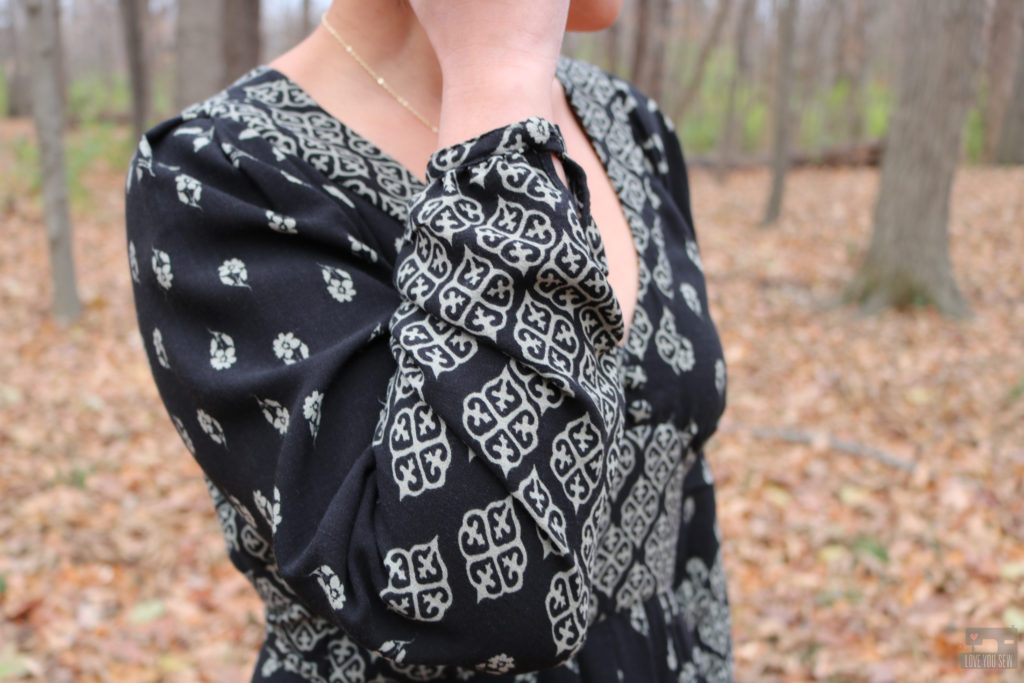
One of the features that drew me into this pattern were the peasant sleeves.  I have heavy arms and usually have to make a bicep adjustment with woven patterns, so the ease in the sleeves looked pretty attractive.  I ended up not having to make any adjustments to the sleeve pattern.  The darts at the top of the shoulder allow full range of motion.

However, I still did hack into the sleeve to change out the elastic casings.  I wanted a clean look and went for a slim button cuff with a 2″ long placket made with 1/4″ bias tape.  Since the cuff is only 1/2″ wide, I didn’t want to make a buttonhole and opted for a loop with my fabric covered button.  This a small detail, but I love being able to make my own custom buttons.

The other change I made to the Alix dress is the addition of pockets….because all dresses need pockets!  Amirite?  I used the in-seam pocket pattern from Christine Hayne’s Derby Dress (it’s my go-to pocket) and marked them about 4″ down from the top of the skirt.  If you ever wonder if you should add pockets, do it!  You won’t regret the extra work 🙂

Since I was working with a border print, I was limited to the 56″ wof and had to cut off 5.5″ from the skirt just to fit the pattern piece onto the fabric.  I was worried this would have to turn into an ankle or midi-length dress, but it was worth the sacrifice to show off the design.  For once, I was thankful for being 5’3″ because the dress turned out to be just long enough!  I created a 1 1/2″ hem and it just hits the top of my foot.  Phew!

There were two choices to either make a dart or gather the fabric under the bust.  I opted for the gathers and made sure to push them more toward the center of each breast.  This helped eliminate any sagging fabric around the sides into the bodice.

It maybe hard to see (which is good,) but I also added two fabric covered buttons to the front yoke.  My fussy cutting into the border left me with too much negative space right at the bottom of the V-neck.  Unfortunately, I didn’t have much fabric left and couldn’t cut out another piece.  So I made due with what I had and added the buttons to balance out the print a bit more.  Do you think it works?

I’m in LOVE with this make and it’s the perfect relaxed statement dress.  I can wear it with clogs (shown here,) flat booties and then sandals in the spring.  I’m thinking this may come with me to Thanksgiving….

Project Summary:


Happy Sewing Friends!

Cristy


Fabric was provided by Télio Fashion Fabrics for this blog post.  Pattern was purchased by myself and as always, all opinions are my own.  There maybe affiliate links in the post.  
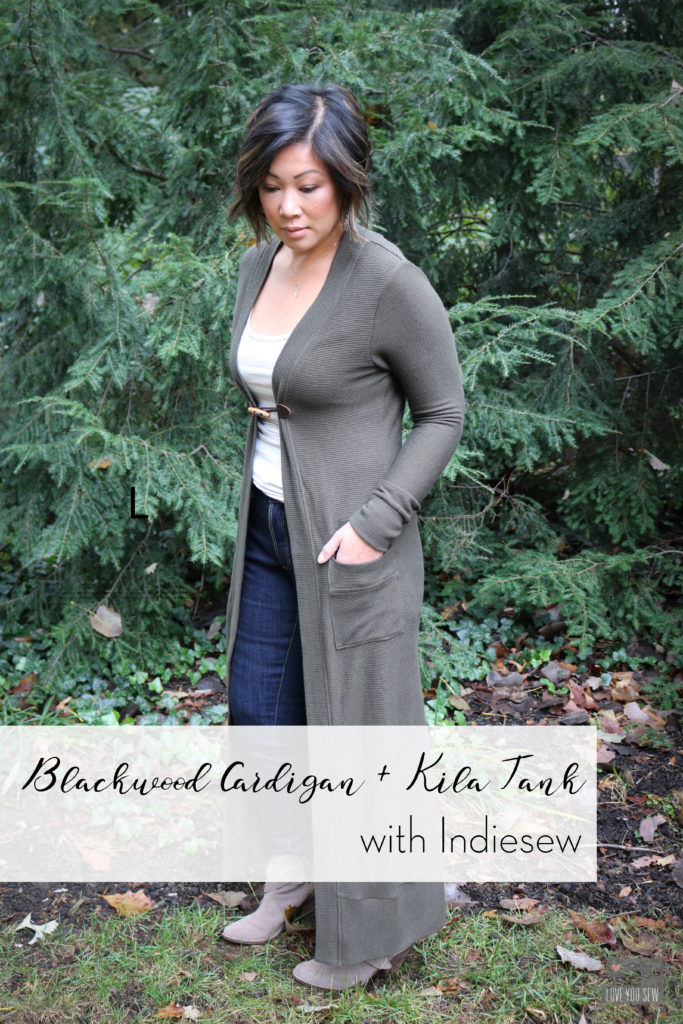
Blackwood Cardigan + Kila Tank with Indiesew

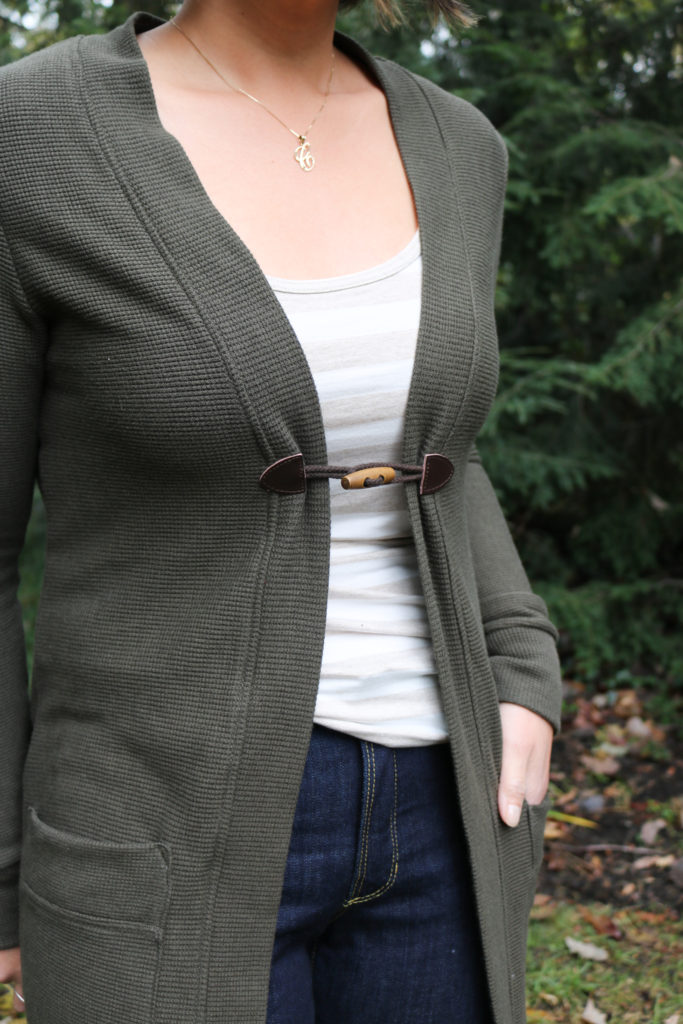
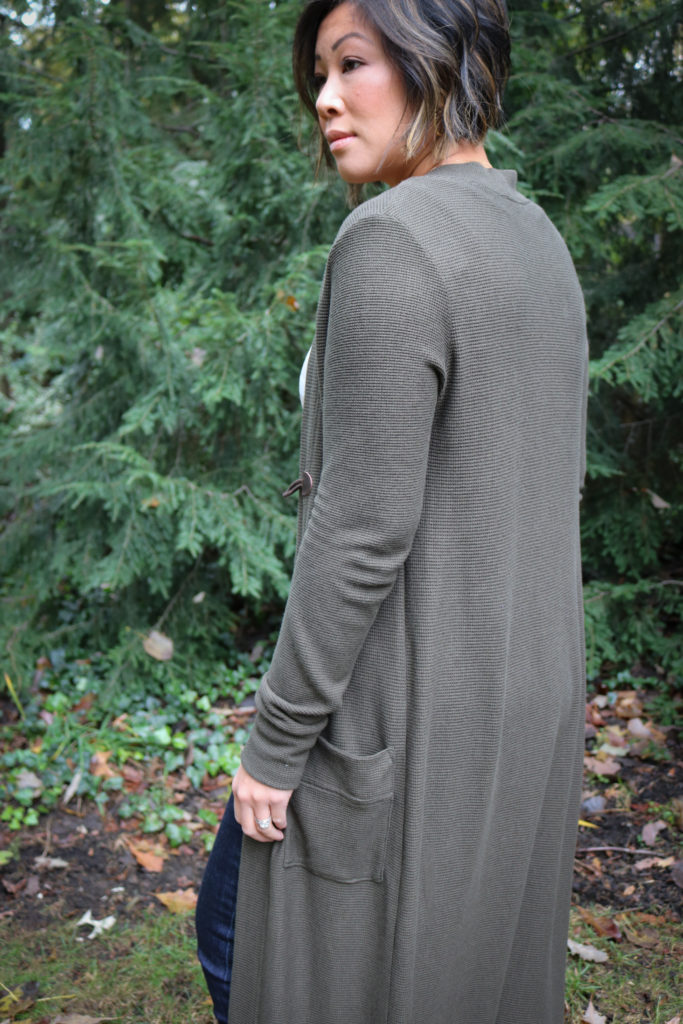
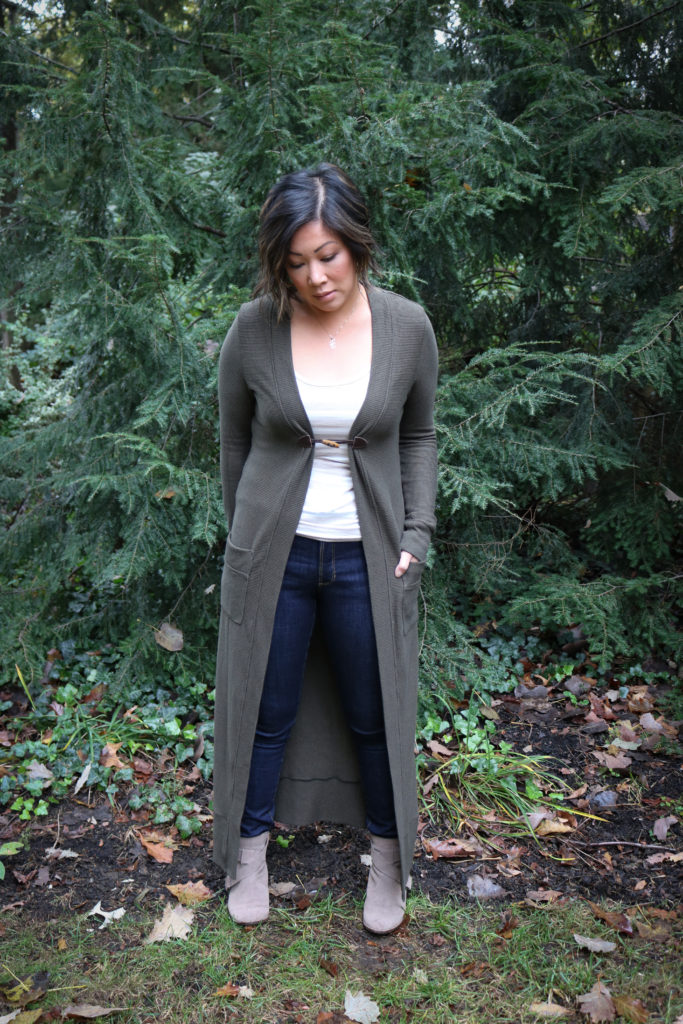
It’s so easy to drop into the habit of just yoga pants and a hooded sweatshirt this time of year.  After camping and a very wet weekend, that’s all I really want to wear.  But I know I always feel better when I pull myself together and make some sort of effort on an outfit.  That’s why I wanted to make this duster style Blackwood Cardigan to add a bit of (good) drama to my everyday.  It can go on top of any {tank + jeans} or {t-shirt + leggings} combo and look SO put together.

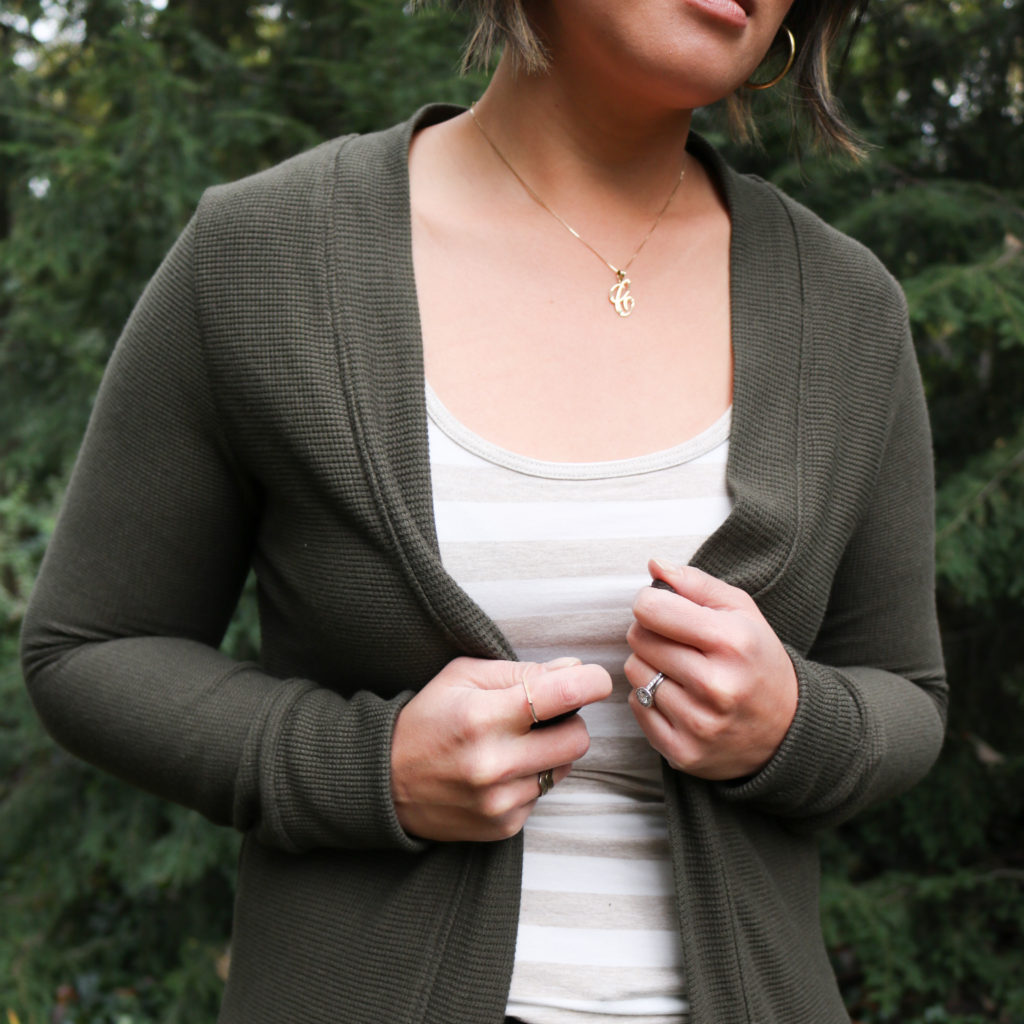
Most of the time, I find a pattern I would like to sew and then pair it with the right fabric.  But when I saw this Modal Waffle Knit at Indiesew, I knew I wanted to hack the Blackwood Cardigan and take advantage of the fabric’s incredible 72″ width of fabric!  What makes this the perfect cardigan fabric is the modal content, which is a semi-synthetic rayon that is SO silky to the touch and yet breathable.  It makes for the perfect layering piece.

If you follow my Instagram, you know I’ve been leaning toward more of this army green color for the season.  I want to always make sure that new pieces in my wardrobe work with what I already own.   This green is a great neutral to pair with denim and lots of the creams and blacks in my closet…so I know I’ll get lots of use out of it!

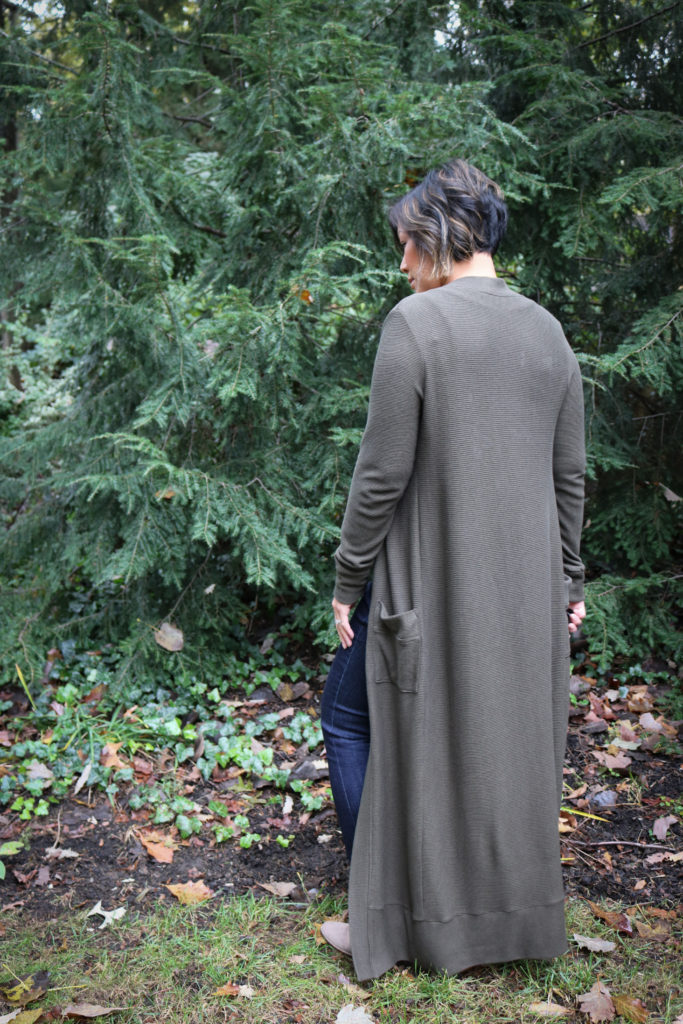
The Blackwood Cardigan is the first pattern I’ve sewn by Helen’s Closet.  The instructions were very straightforward and easy to follow.  This is quite a popular pattern so it was nice to see all of the different versions on the web before I made my first cut.  But like I said earlier, I wanted to utilize the great width of fabric on this waffle knit and extended the length by a straight 12″ from the bottom of the front, back and neck pieces.  With my serger, this made for a fairly quick sew, which is always so nice!

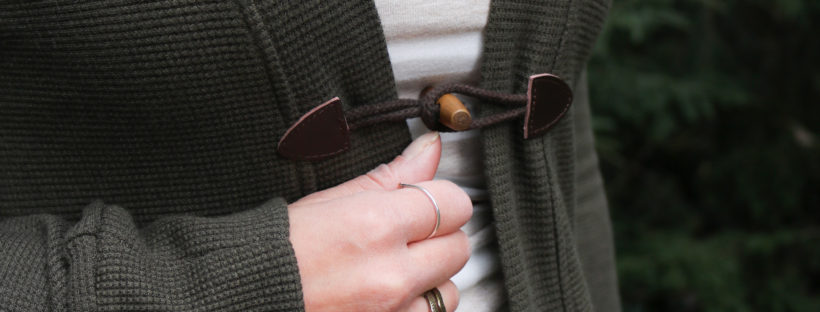
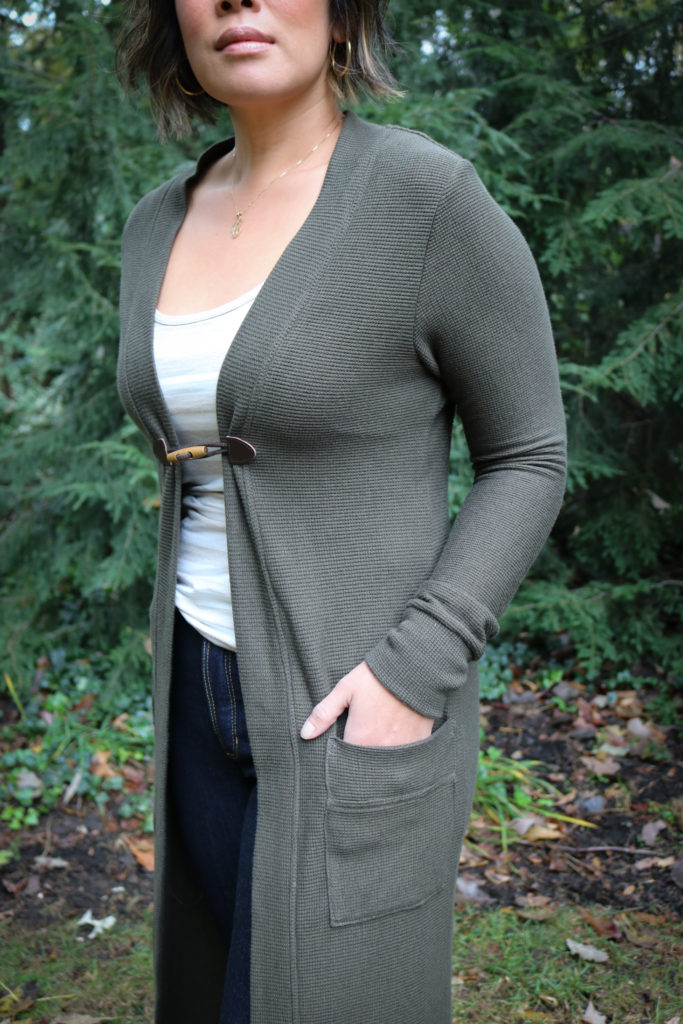
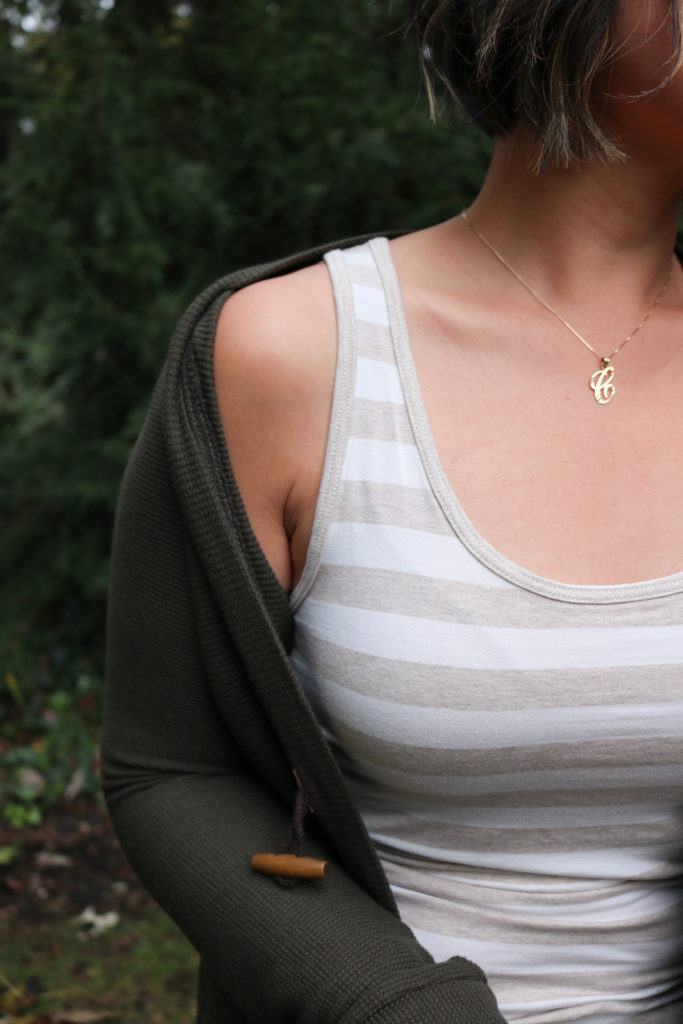
For the top-stitching around the neckline, the instructions say to use a zig-zag stitch, but I opted to use a straight stitch with wooly nylon in the bobbin.   I use this method around most of my knit necklines and it still allows the stitching to stretch a bit.  Another change is the addition of a toggle right at the bust line.  With the weight of the duster, the sides were pulling away from center and sitting more into my armpits.  I wanted to anchor them with some kind of closure but had to take into account the weight and stretch of the knit.  Luckily, I had the toggle in my stash and could sew them over the serged neckband seams to help distribute the tension.

As with most patterns and my 5’3″ frame, I had to shorten the sleeves by 2″.  I could have probably taken off 3″, but with a cozy cardigan I like to pull the sleeves over my hands on those brisk days.  With the knit cuffs, I also like to always angle in the seams at the fold.  So I took out 1/2″ on both sides of the pattern piece at the fold for a more fitted feel.

A great layer to have under the Blackwood is the Kila Tank.  This is a slim fit tank that uses around a yard of knit, so it’s stash friendly and another quick sew.  The neck and arm bands are attached in a very clever way and great for those who do not have a serger or coverstitch.  Even though I have a serger, I stayed true to the instructions and used my twin needle for the bands.  I love how it looks like ready-to-wear!   But since I DO have a serger, I may go back to the old method just to save some time 😉

The fabric is this soft Rayon Spandex Oatmeal and White Striped Knit from Indiesew which I was saving for a dress, but realized I need more of these staple tops.  There is always more fabric, right?!?  Be on the watch for a long sleeve tee in this same fabric soon….

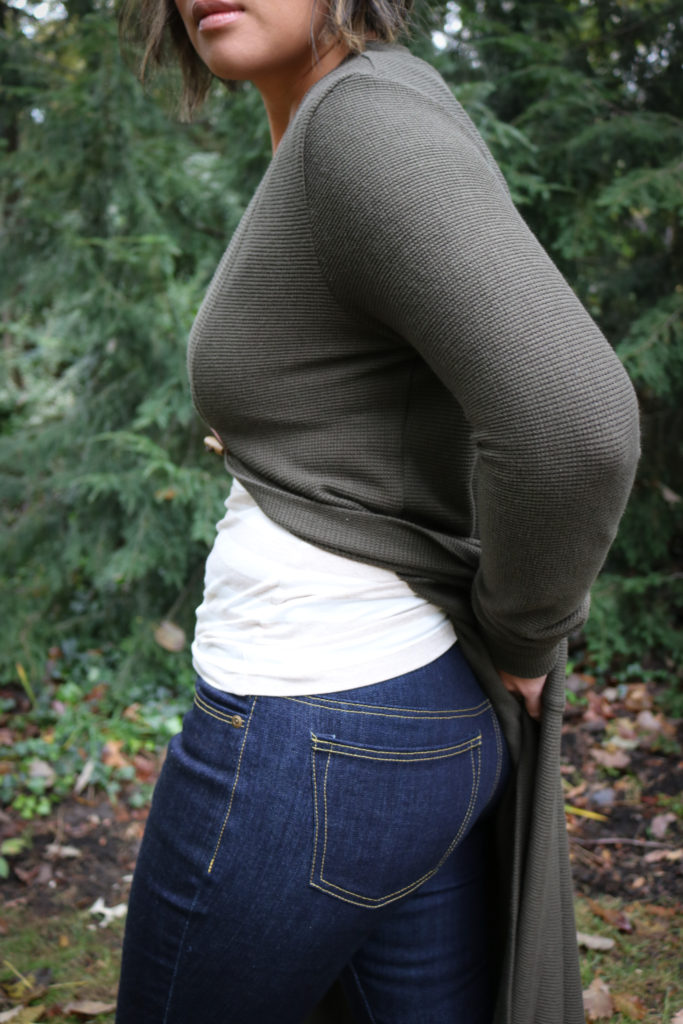
To finish off my entire #memade outfit, are my Ginger Jeans.  These are my very first pair and also my first Closet Case pattern.  It’s taken me about a month to complete these jeans (because I needed a break after all the modifications,) but I’ll make sure to get into more detail with my fitting adjustments on a future post.

I’m so pleased with my simple outfit that’s churning out the bit of extra drama!  Do you like the duster look?

Project Summary:


This post was written as part of the Indiesew Blogger Team.  All opinions are my own.  There are also possible affiliate links for which I receive a small commission only if a purchase is made.