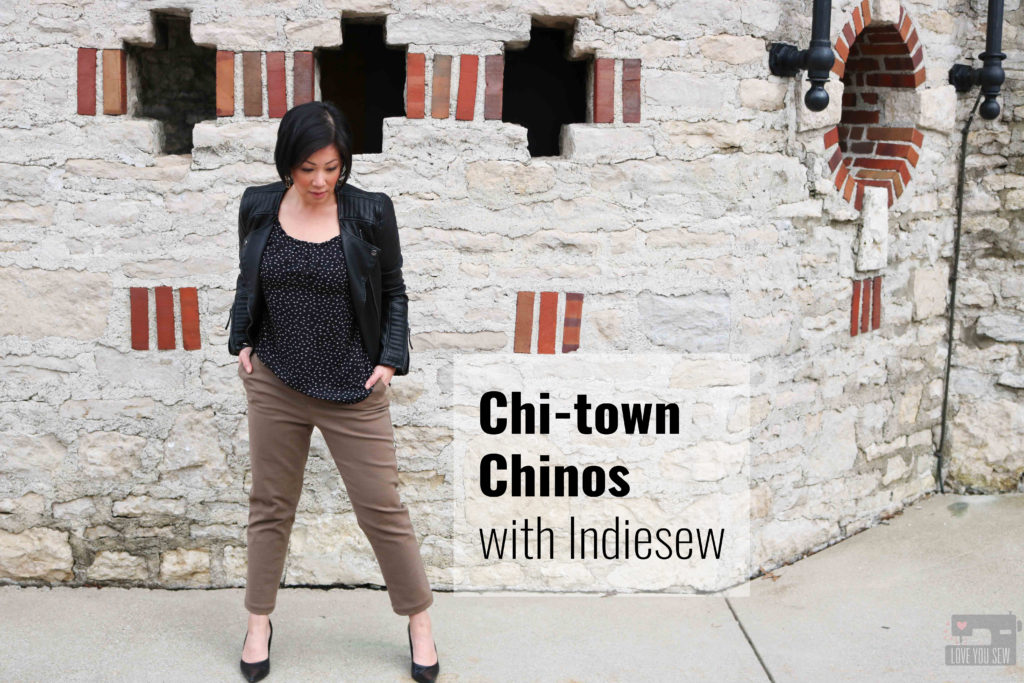
Chi-Town Chinos with Indiesew

My quest to add more handmade clothing to my closet continues!  Check out my previous Make Nine post with all of my 2018 garment goals here.   I’m so happy to be checking off one of the patterns off my list…and it’s still only February!  The Chi-town Chinos are complete and it certainly wouldn’t be possible without the resources and products from Indiesew.


My handmade wardrobe is still in need of basics which include “non-elastic waist” pants.  Don’t get me wrong, I LOVE an elastic waist, but sometimes you just need a clean and classic pair of trousers.  The Chi-town Chinos are just that with their timeless design and versatility.  This pattern can also be made into a skirt or shorts, and has a number of different pocket options.  For the pants, I needed both the original pattern plus expansion pack #2, which you can find all at Indiesew. If I’m buying a pattern, I like it to go the distance and I appreciate all the options.

Trousers have been lower on my garment list for awhile.  There is so much more fitting required…especially since I have wider hips and heavier thighs than my waist aka booty issues.  I’ve always been plagued with RTW fit issues, but I’m always up for a challenge.  After making so many tops and skirts, I knew this would have to be next.  Luckily, there is an amazing maker gallery on Indiesew’s website.  Searching hashtags on social media is great for some photos, but I love the in-depth reviews and blog links in the “Creations” section.  It’s SO nice to see the Chi-town Chinos on so many different bodies and read about the adjustments (if any) that each person has made.  There is also a blog post about denim Chi-town Chinos on the website, which you can find here.  With all of these resources,  I felt much more confident about my decision to make the pattern.

I had the pattern selected, but what about the fabric?  Again, the booty issues!  I was thinking I would have to make a possible looser pant with a standard twill, but then Indiesew had just enough of this amazing stretch (!!!) Cotton Sateen Hearth left for the Chinos and I knew I had to grab it.  The 11 oz weight was just what I needed to keep this silhouette looking smooth and structured.  The 20% stretch was going to make fit a bit easier and I know this fabric would be able to keep up with my momming lifestyle (which is chasing…er keeping up with two crazy young boys.)

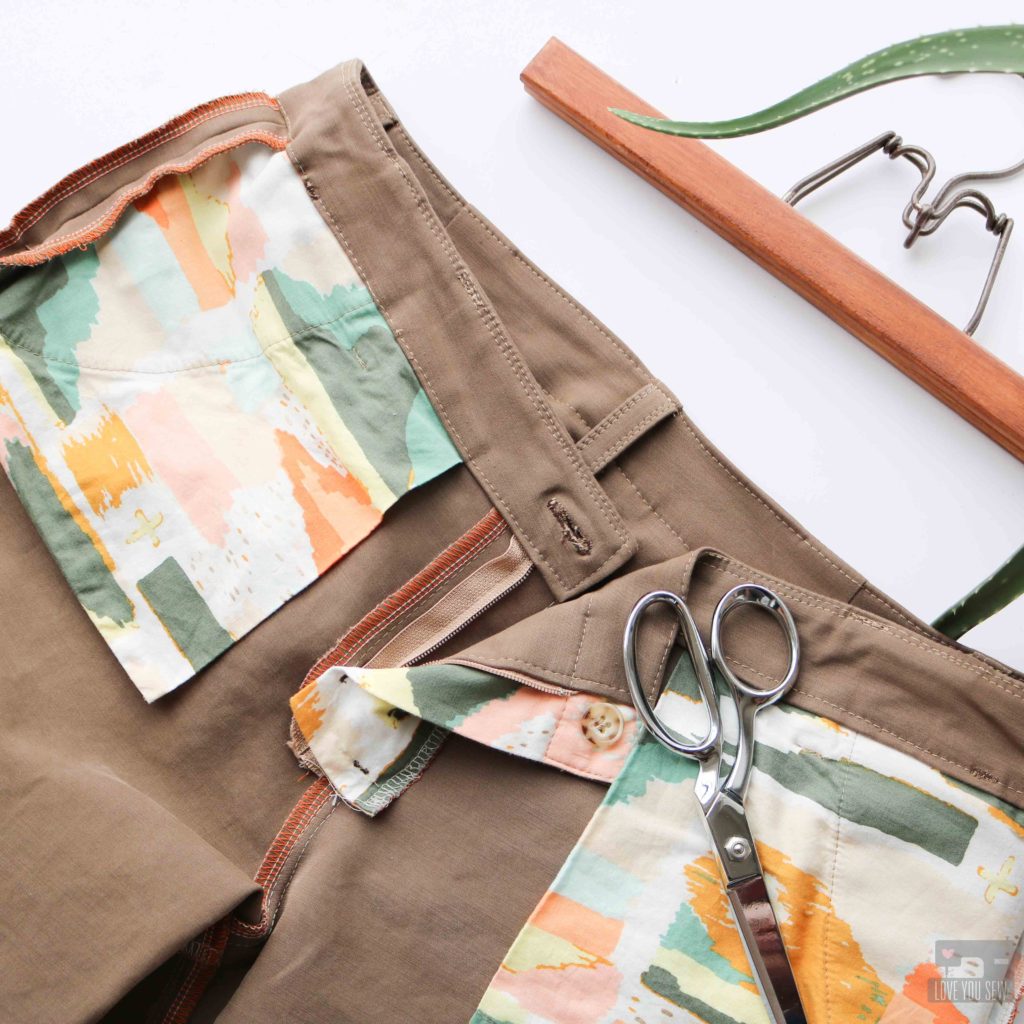
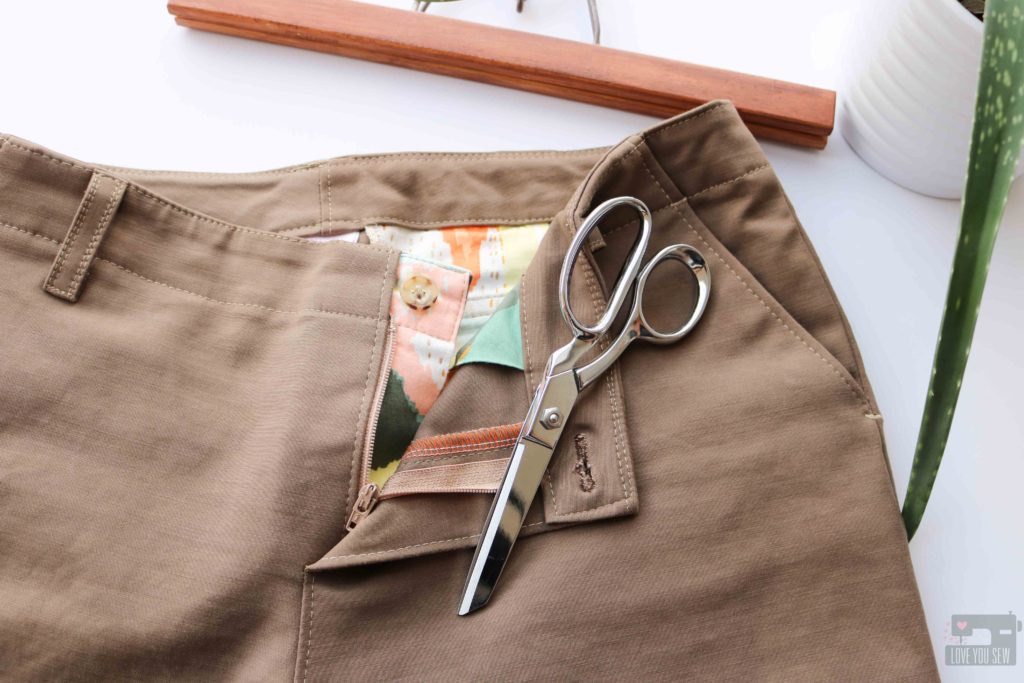
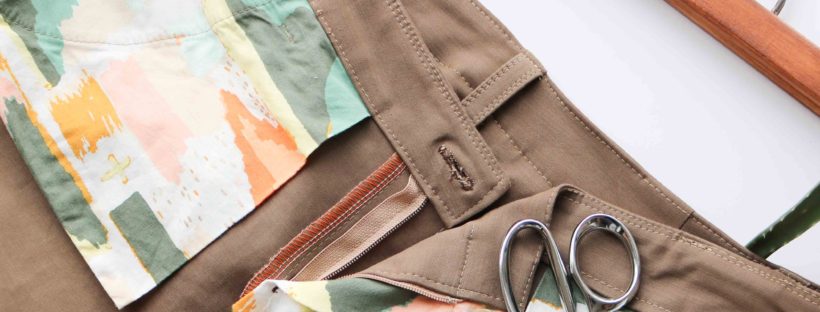
The cotton sateen was a pretty “safe” neutral, so I wanted to have more fun with the pocket bags and fly shield.  I dug out this great fabric from April Rhodes out of my stash and it definitely adds  some great pops of color….there is even some metallic!  Isn’t this the best part of making your own clothes?!?
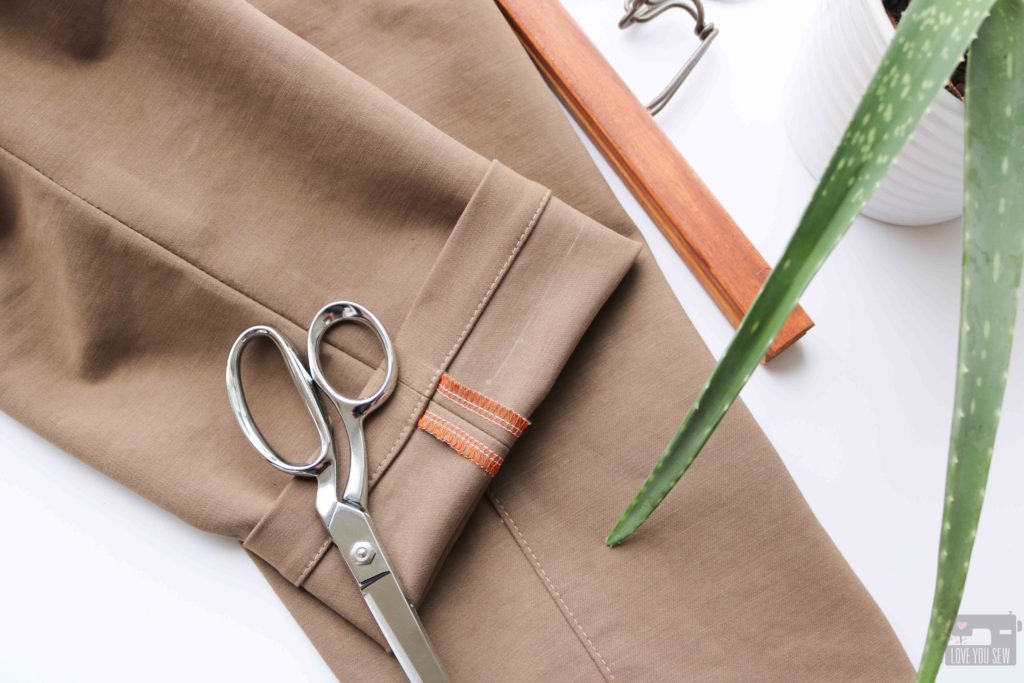
While I was picking out the pocket fabric, I figured I could also have even more fun with my serging.  I used a 4-thread overlock stitch with the stretch cotton sateen and used the contrasting orange in the upper looper.  TIP:  Using the contrast thread in only the upper looper can save on thread.  If you are like me, and only have a handful of serger thread colors, you will only need to purchase the one color.  I used cream in all the other spools and you don’t really see those colors as much.

I debated between a hook and eye or button fly closure.  But it came down to seeing what was available in my notions box…and the button won.  All the buttons are from my MIL’s vintage collection and I always try to use her old stash as much as possible.  I’ve never had to buy a button since I’ve started sewing garments!  She always had something good 🙂

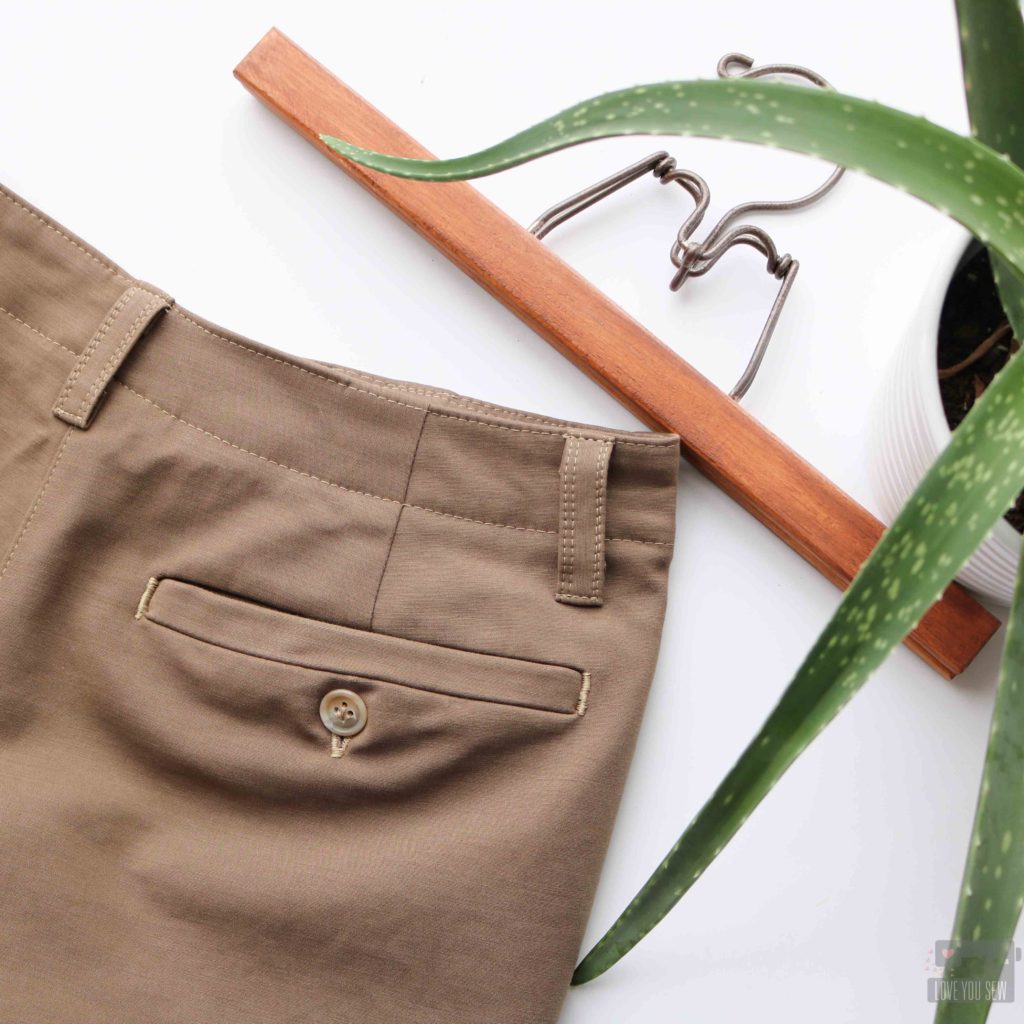
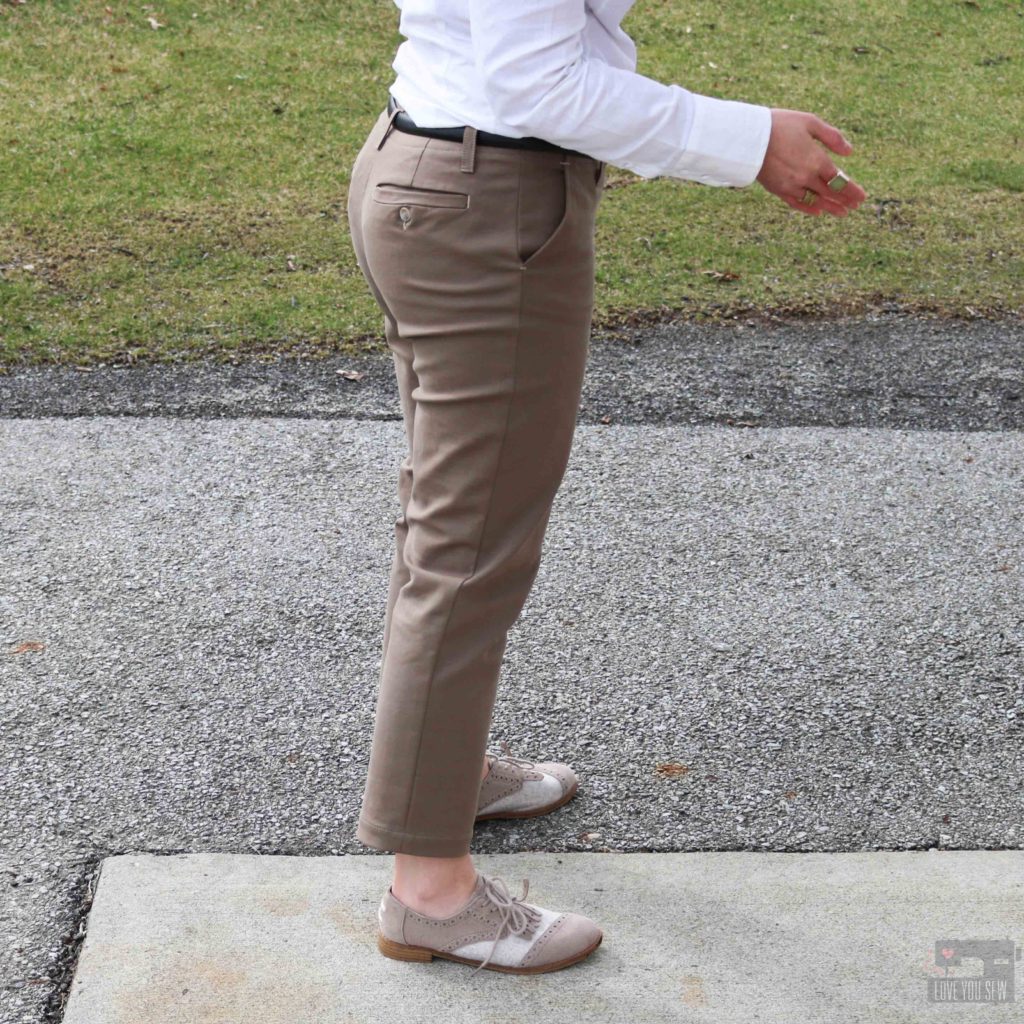
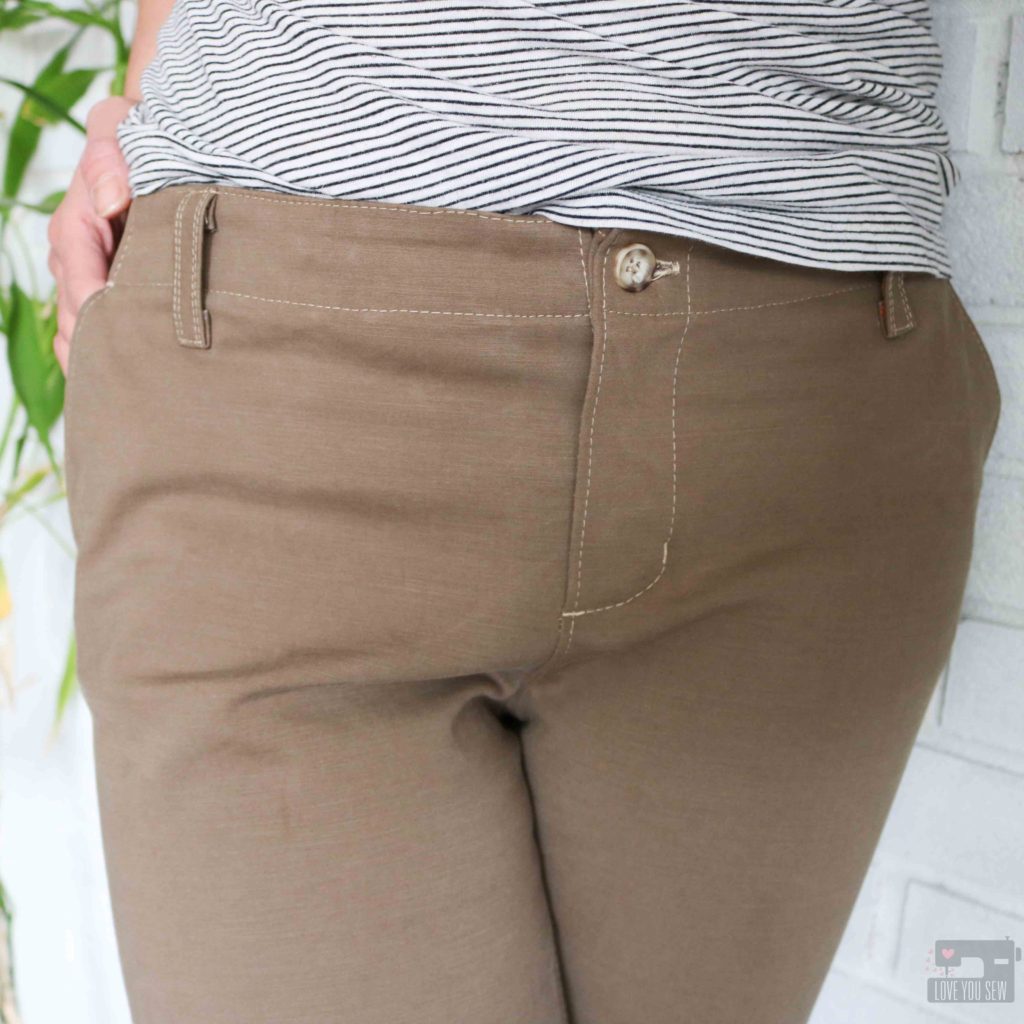
I love how Alina Design & Co designed this pattern with two back darts over the pockets.  Her instructions come with how to make a muslin (don’t skip this step!) which I absolutely loved…not having to actually make the muslin, but in that she told you what pieces you needed.  It relieved me of playing the guessing game trying to figure out the pattern.  The muslin is how I knew I needed a 2 inch waist adjustment.  I sized to fit my hips and then split the adjustment between the two darts.  So one inch came out out both sides.  This made the fit absolutely perfect!

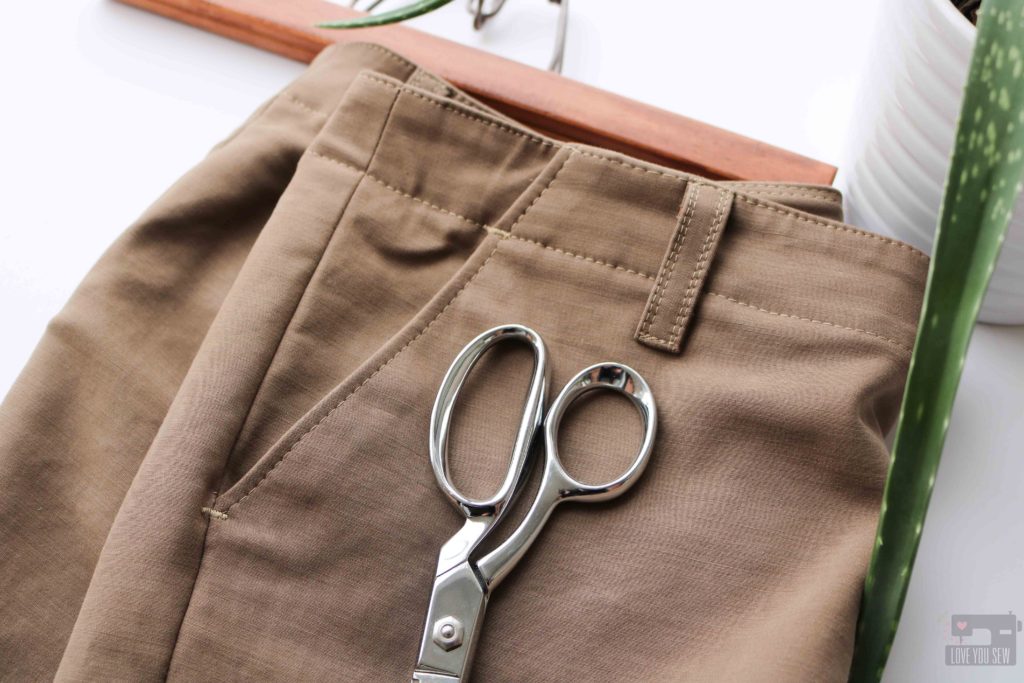
For the back pockets, I opted for the welt design…which was probably the most difficult choice.  This was not the best move on my behalf, but I made it through…  The difficulty came when trying to transfer the pattern lines on a curved 3-D back.  Of course, after I struggled through this, Allie Olsen (the founder of Indiesew) showed how she places pockets on a pressing ham to replicate the shaping.  I wish I’d seen that about a week before it was in her Instagram stories!

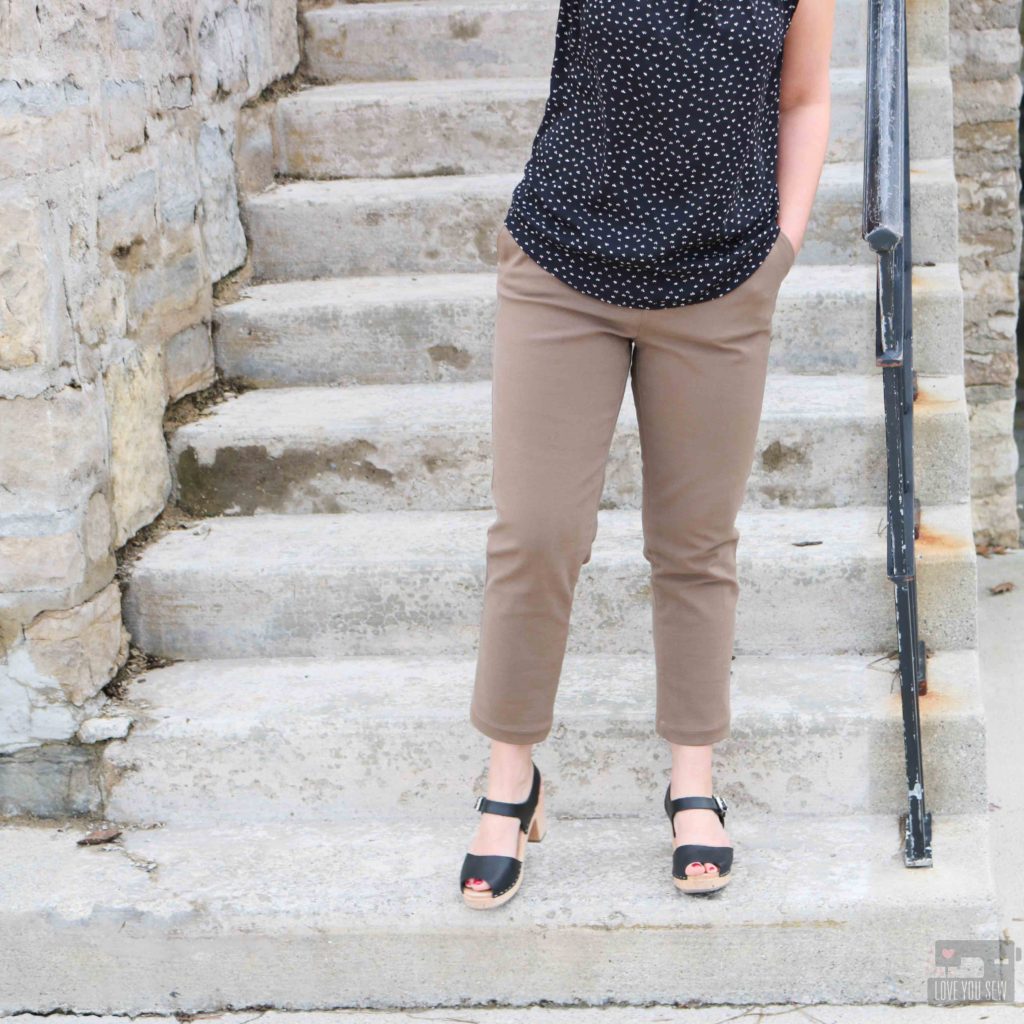
The other major adjustment I made was to hem these to a cigarette pant length (which is right above the ankle.)  I’m only 5’3″ and already made a 2″ length adjustment during muslin time.  But I was torn between a full length (which I could wear in all seasons) or the cigarette length because I do tend to fold up my pants…especially since fashion has really loved the ankle for the past few years.  Luckily, all of my Instagram followers who took my poll, decided the cigarette length was right.  (Thank you!)  I am so pleased with how it came out and how the length makes these pants look so clean.

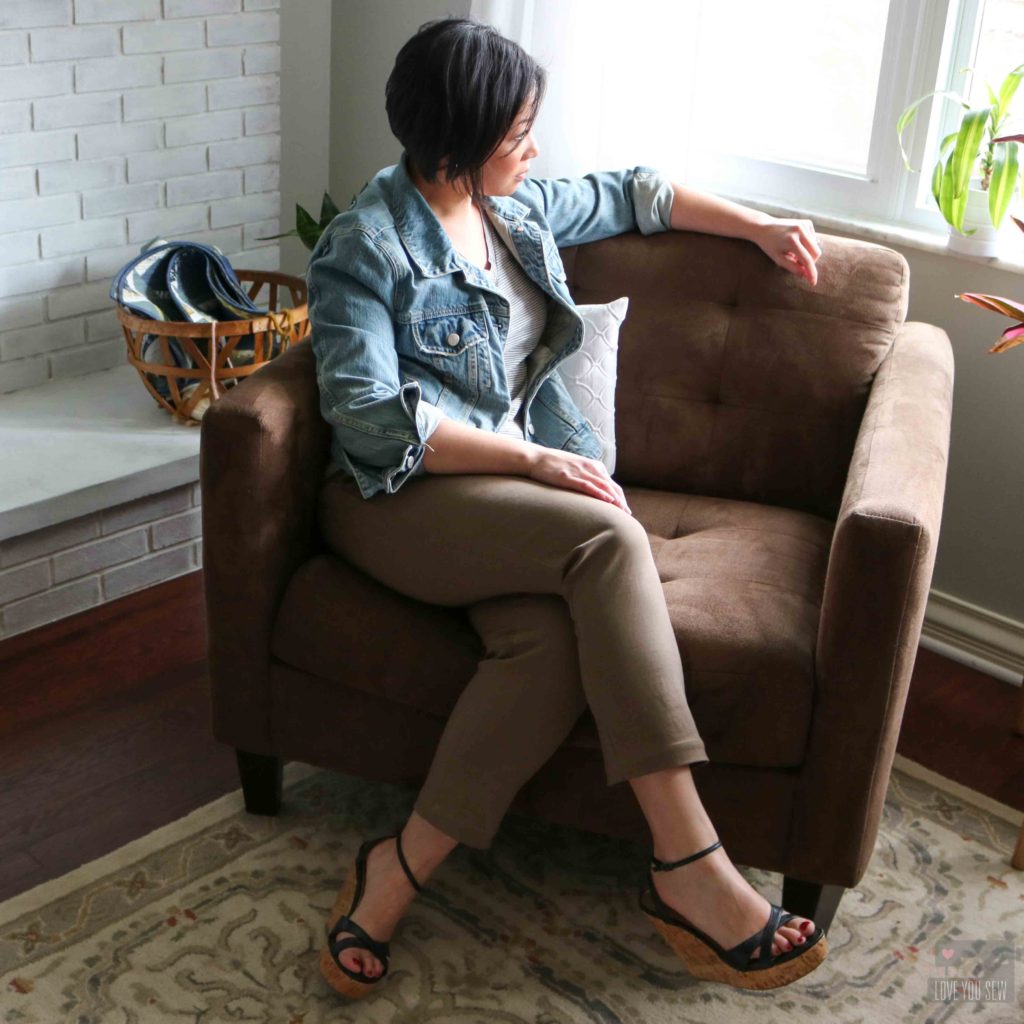
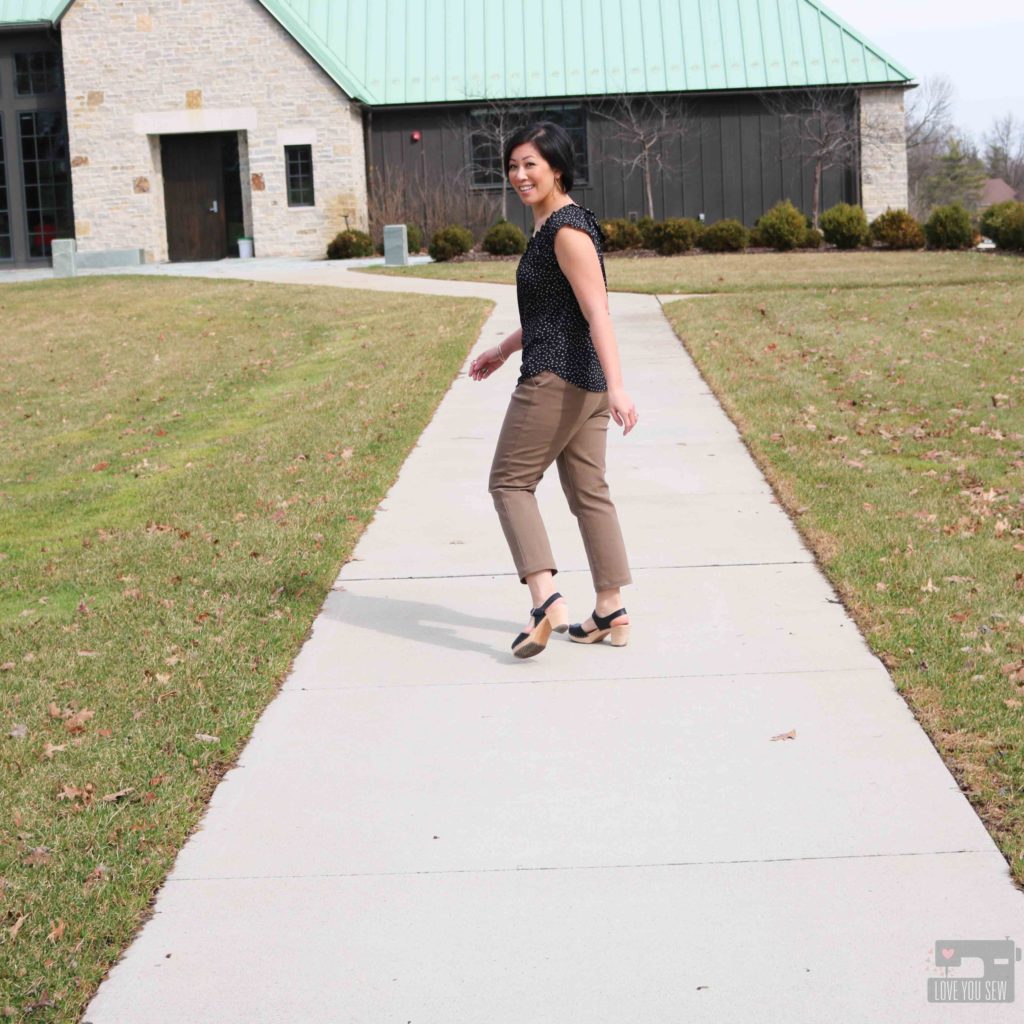
These Chi-town Chinos came out even better than expected.  (The full two weeks I spent on mostly-careful construction paid off!)  The cotton sateen fabric makes them look so stylish and the elastane blend keeps them from wrinkling (Big bonus!!!)  The heavier weight keeps the silhouette lines so well.  I love how this is such a great wardrobe staple and works with so many items in my closet already.  Look how it pairs with a simple striped tee and vintage denim jacket!  This would be great with just a pair of casual sneakers or sandals too.  It would make for a great everyday outfit.

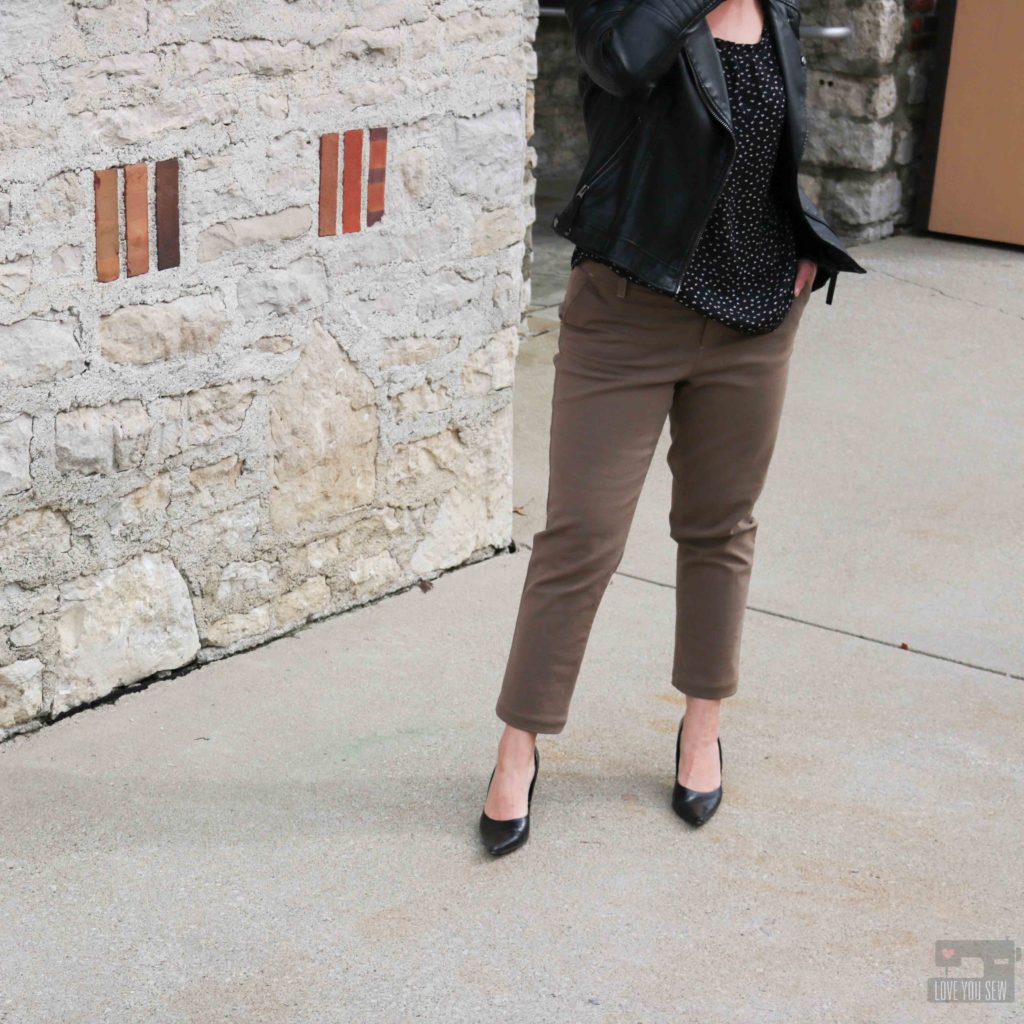
You can take the edge up a notch with some black stilettos and a great faux leather moto jacket.  This is perfect for a night out on the town with the girls or maybe date night instead 😉

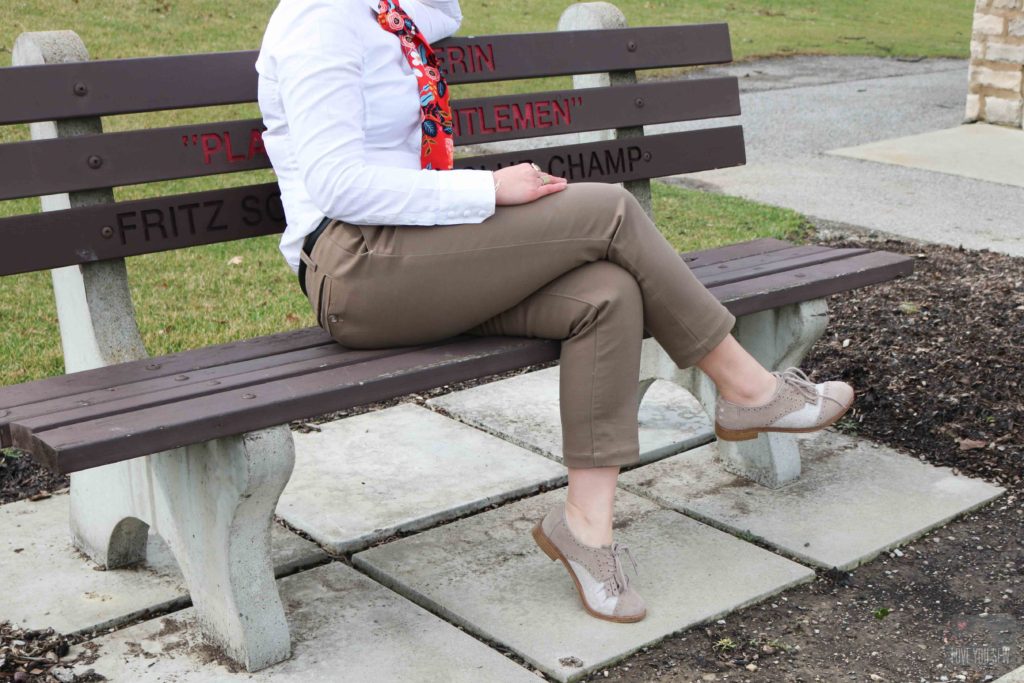
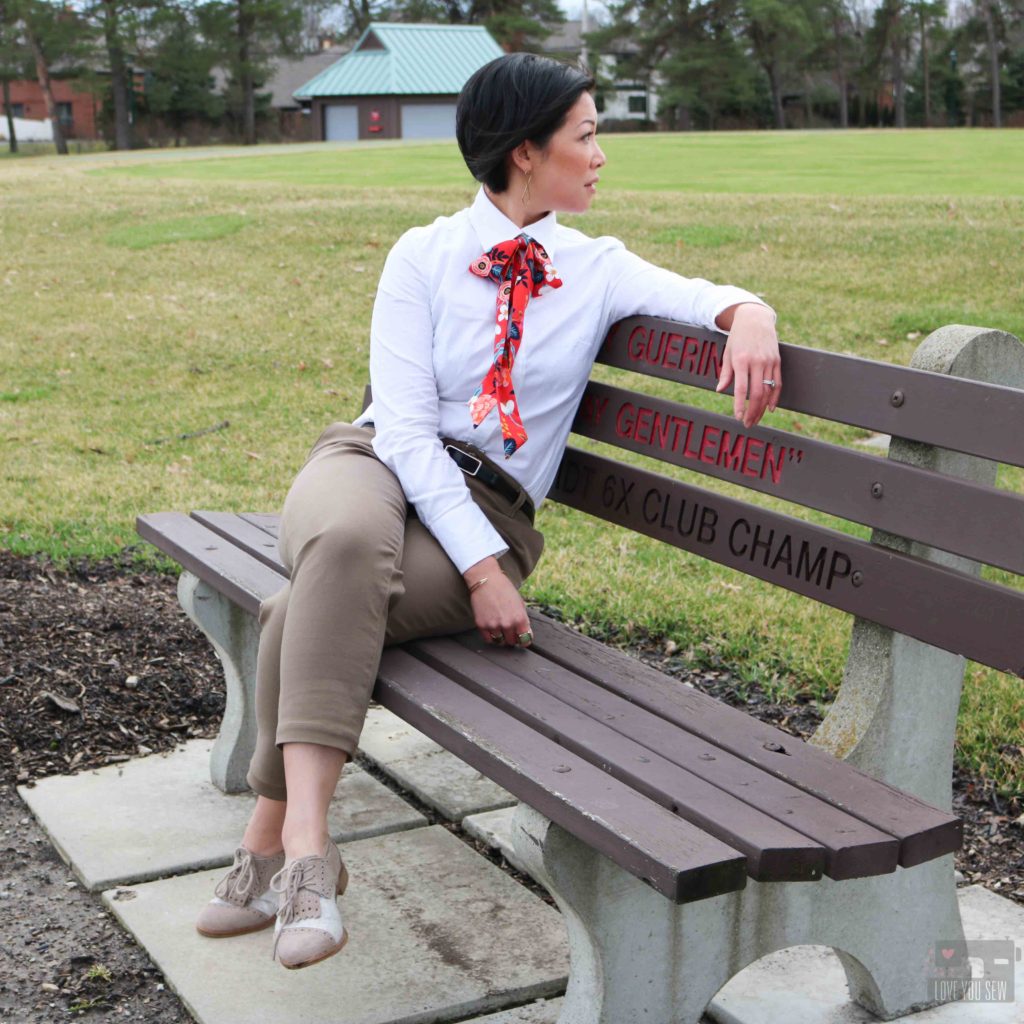
You can also go the dapper route with some wing-tips and a great crisp white button-down shirt.  I’ve always been drawn to menswear styling since my old corporate days, but I love the feminine touch with the pussybow.  You can make your own with the same Rifle Paper Co Floral rayon challis. This outfit would be a great look for business meetings or an extra dirty martini.


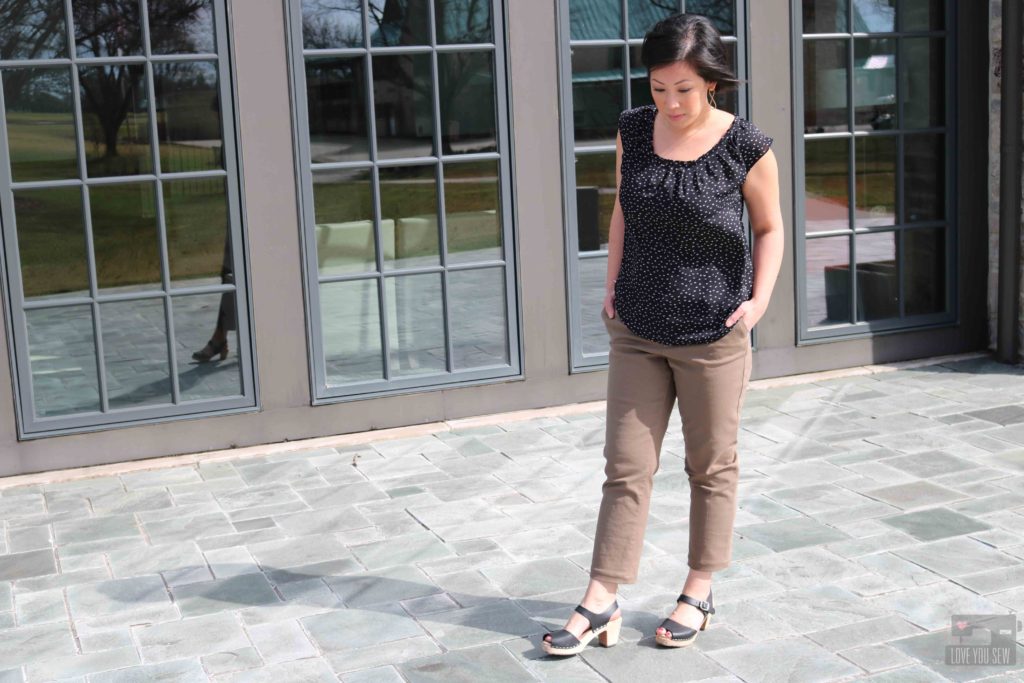
These chinos are just so versatile that just a change of shoes can completely change the look.  I swapped out the stilettos for some Swedish open-toe clogs and now its completely relaxed.  This is great for a coffee-date or brunch with friends.

I hope you enjoy my review of the Chi-town Chino pattern with the personal touches I added, as well as all the styling options.  You better believe I will be adding this make (and others) to Indiesew’s Creations.  I want to help others as that feature had definitely helped me!  Have you checked out that section of the website yet?


Stay Creative, Friends!

Cristy


The Chi-Town Chinos pattern and Cotton Sateen Fabric were both discounted by Indiesew for this blog post.  But as always, the make is my conception and all thoughts and opinions are my own.
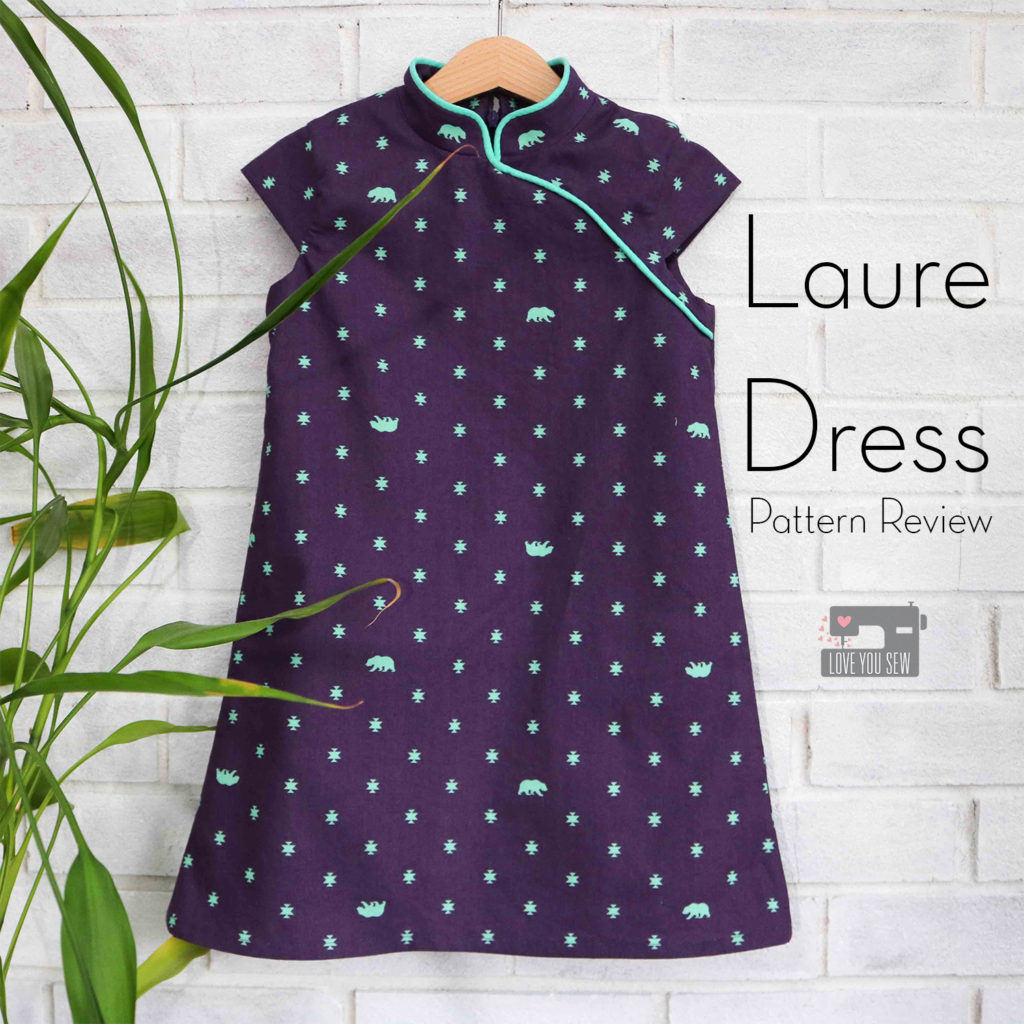
Laure Dress :: Pattern Review

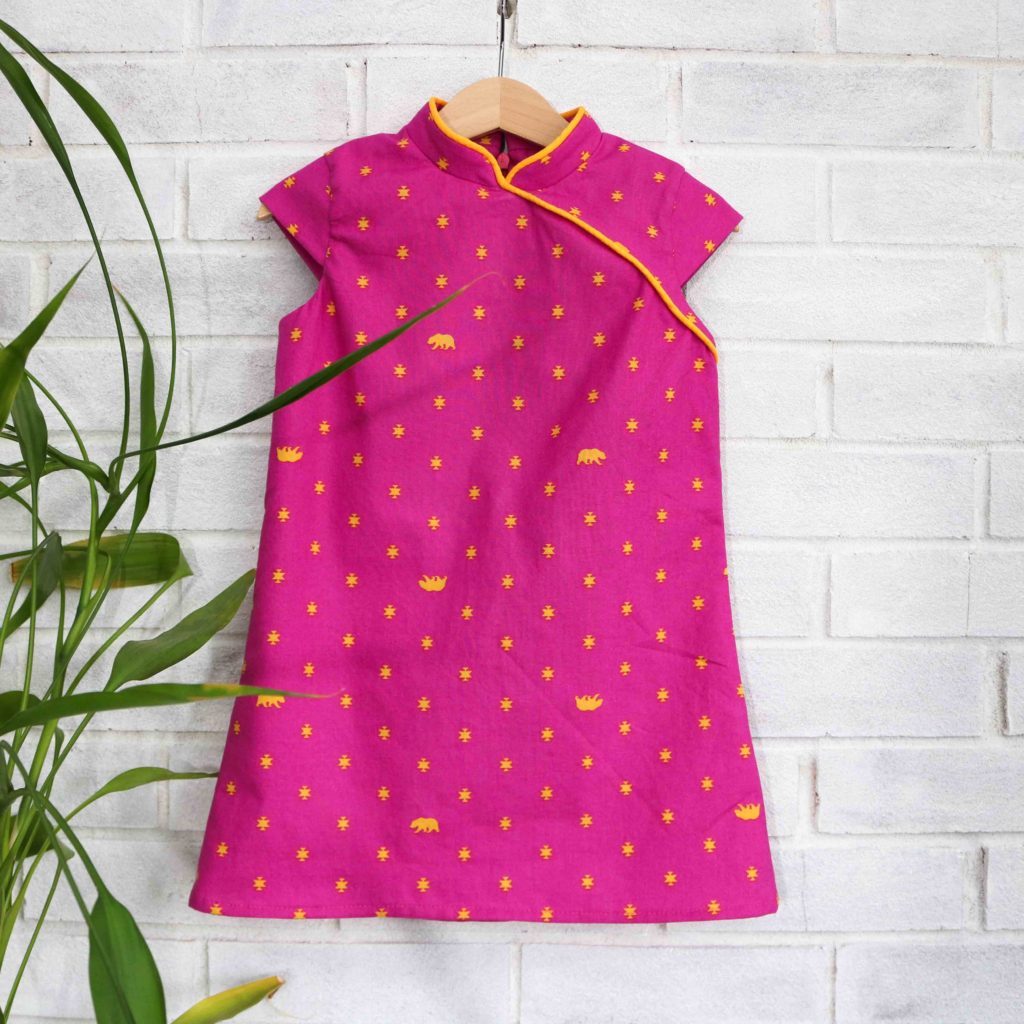
The first pattern I ever saw from Straightgrain Patterns was this Laure Dress in the Quipao version.  I was clicking away on Instagram and stopped in my tracks when I saw this adorable pattern!  Being of Chinese decent myself, these dresses always catch my attention…especially in fresh modern fabrics.  (And yes, I actually own two Quipaos, but in more traditional red and gold brocades.)  Since I don’t have girls of my own, I knew I would one day make these for my nieces…because I’m just the best aunt, you know 😉

Today marks the first day of the 2018 Lunar New Year (Year of the Dog) and I just had to share these with you!  This was such an important and fun time in my house while growing up.  We would have huge feasts and celebrate with lots of fireworks in Philadelphia’s Chinatown.  Now, in Columbus, the celebration is a bit smaller but just as fun as I hope to pass on the traditions to my boys.

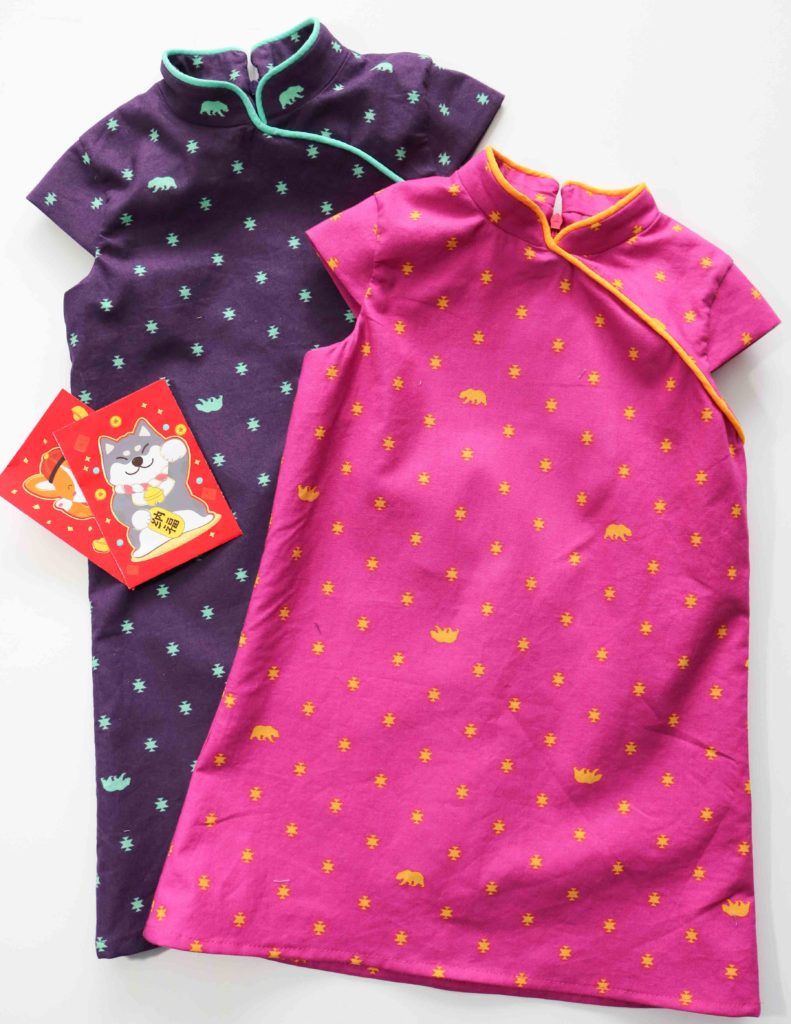
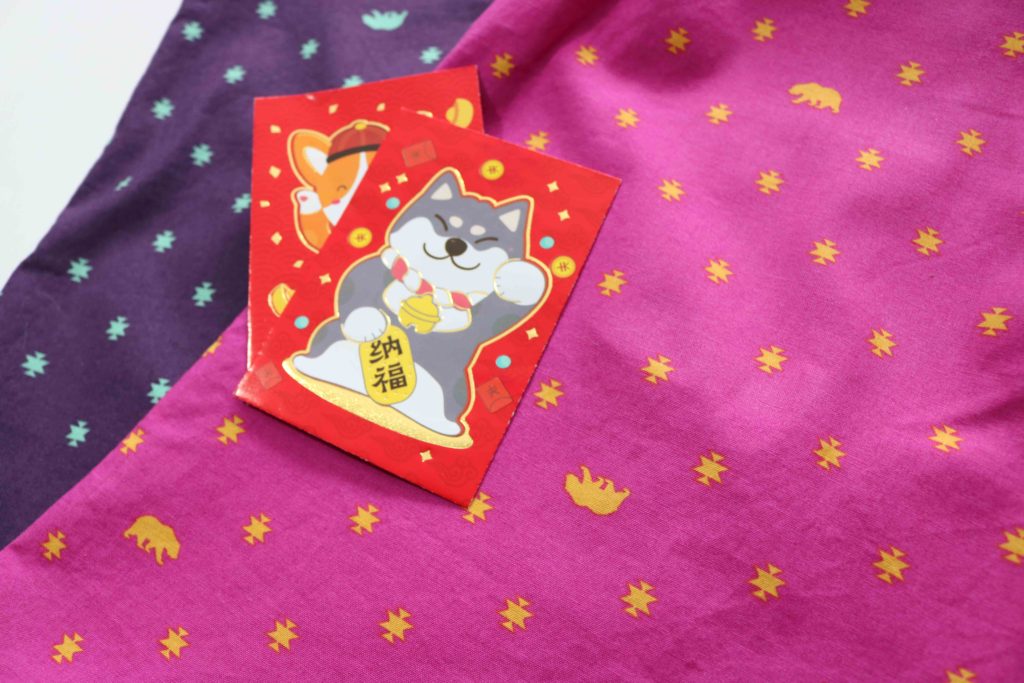
Traditionally, children receive these red envelope filled with money to bring good fortune and health into the new year.  I’m hoping these dresses will also bring them lots of good cheer and love too, since I’m still in love with this Spirit Animal (aff link) fabric by Tula Pink.  Although the good luck color of the new year is red, I thought the girls would get more use out of these great colors and the small scale silhouettes would be perfect to wear all year around.

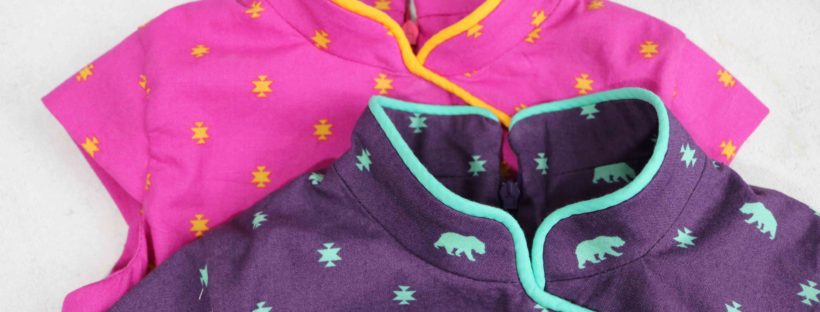
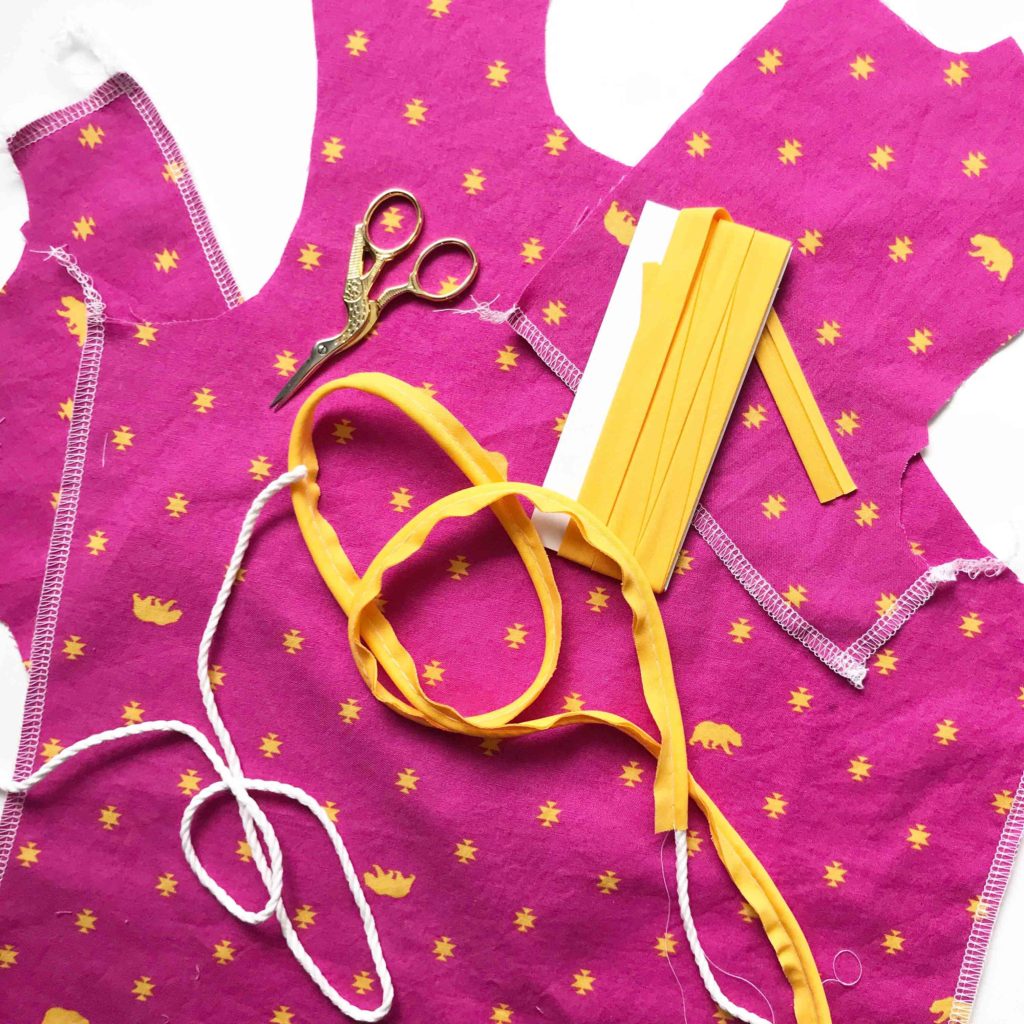
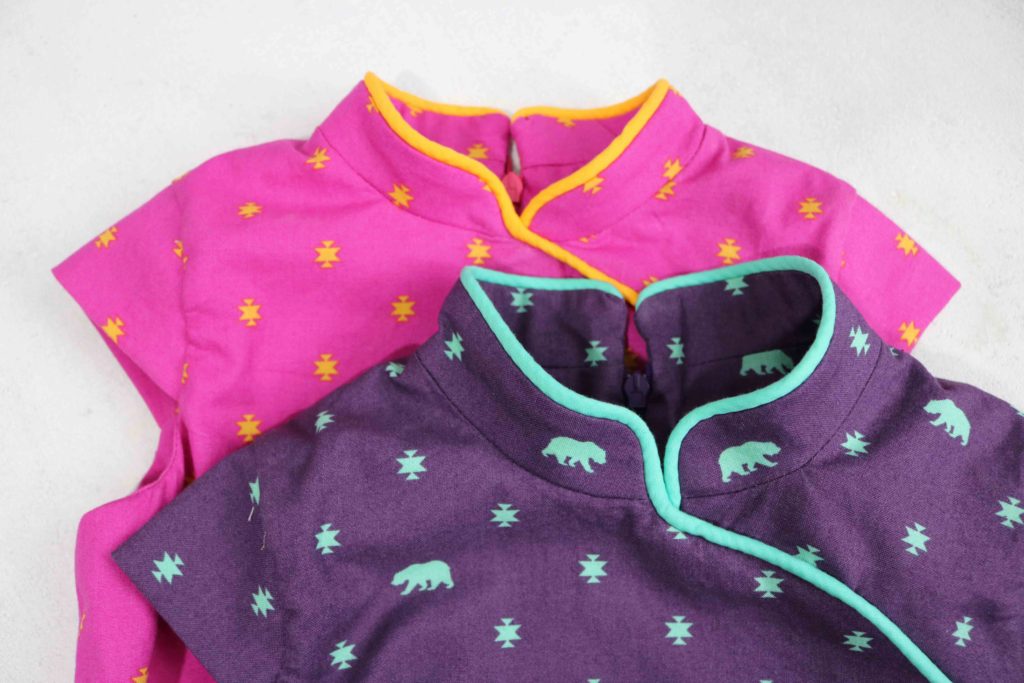
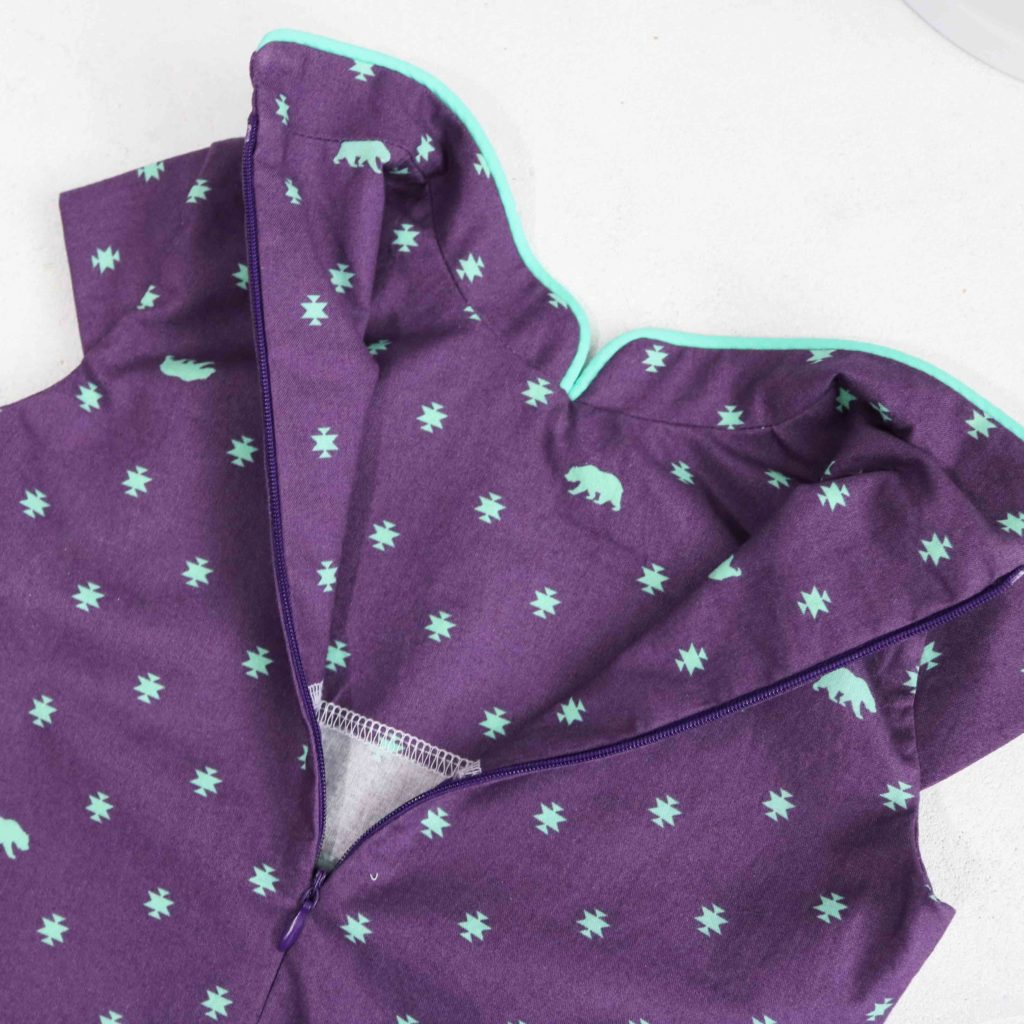
One of the great style features of any Quipao is the piping along the mandarin collar and down the front of the dress.  I knew this was a step I could not skip, but finding the right color in pre-made piping was not easy.  Because of ease and look, I tend to buy pre-made piping from the big-box stores.  (They do a MUCH better job than what I could make!)  With the bright colors, I could not find any piping…  However, I could find pretty close matches when it came to pre-made single fold bias tape.  I used this along with some cotton cording from my stash to make my own piping (reluctantly, of course.)  I don’t have a special foot, so I just use my zipper foot, a basting stitch and tried to sew as close to the cording as possible.

This process adds some time…especially when you’re like me and need two passes to get in close to the cording.  But look at the results!  The piping really highlights the curve of front yoke and brings out the colors in the fabric. *High-five!*

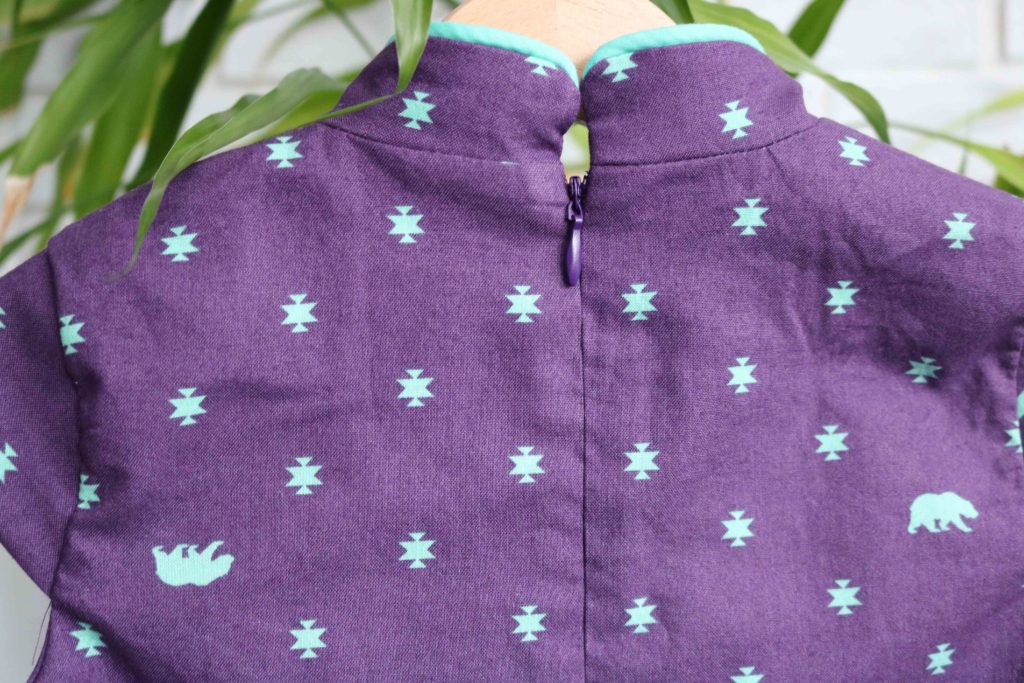
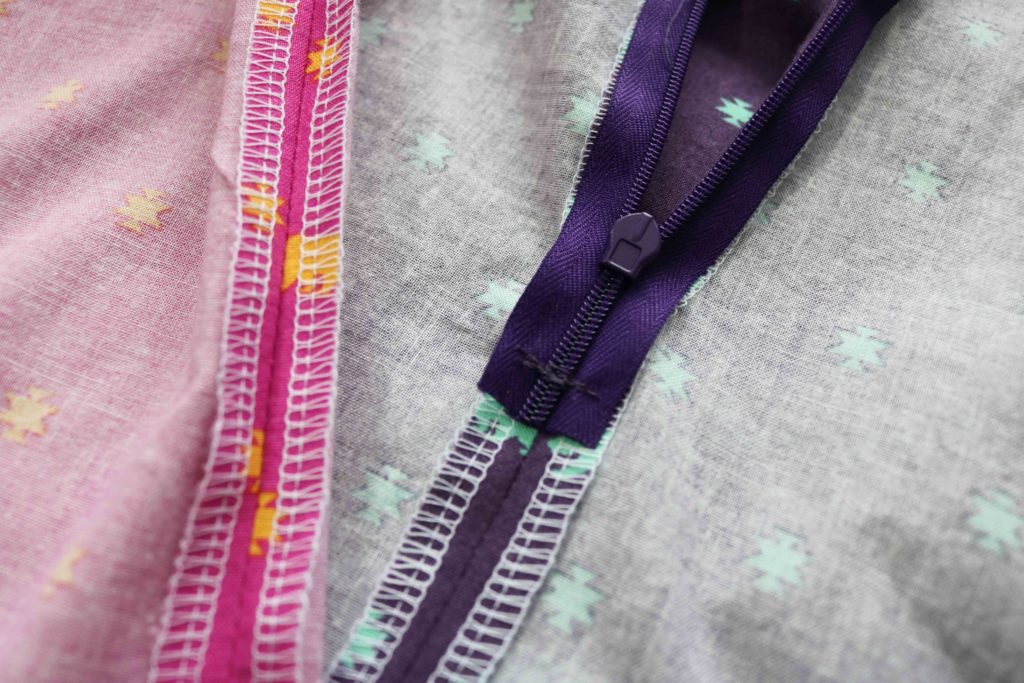
It’s been awhile since I had to insert an invisible zipper, but after a few seam rips, I was able to get pretty close even without a specialized foot.  I used my regular zipper foot and made sure to stitch slowly right in the zipper fold along the teeth.  My awl saved me through this step!

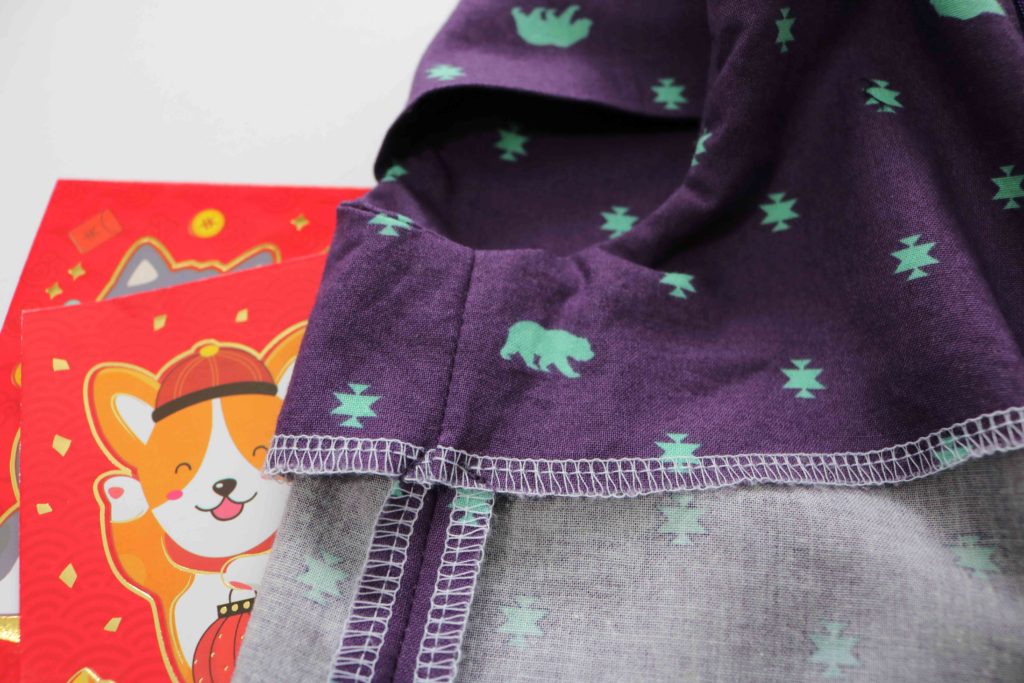
I know you all like to see the guts of my garments, so this is the inside lining of the Laure.  I serged the bottom ends and left most of the inside top seams raw after trimming them down with pinking shears.  The lining hides almost all the seams, so there is no need to serge them after sewing.


The only invisible zipper I could find was about 20″ and the pattern calls for 12″.  I sewed back and forth along the teeth at the 12″ mark and then cut the zipper 1/2″ below that.  To seal up the zipper tape so it doesn’t fray with wear, I use a lighter to flame it juuust until it melts.  You can use a seam sealant like fray check (aff link) if you aren’t comfortable using a lighter.

After giving the dress a final pressing, I secured the lining down by making a few stitches to the side seam allowance.  This helps the armscye stay straight and prevents the lining from flipping up with wear.

I love how the Quipao version of the Laure Dress came out and I can’t wait to make some of the other versions of this pattern. It comes with plenty of other neck, body and skirt options for more looks of the western world 😉  Check out the other options here.

Do you have any special cultural holidays or traditions you share with your family?  I love hearing about what they rest of the world does..tell me about them in the comments!


Happy Lunar New Year, Friends!

Cristy


Blank Slate Patterns: Fairelith Top Review

As I sew more clothing for myself, I try to create pieces which will last and fit with my existing wardrobe staples.  However, I also find myself looking into fashion trends again.  The 80’s and 90’s have come back again with a mixture of looks.  I didn’t think I would be into high waisted jeans, but I just bought my first pair (after these photos were taken) and LOVE them!  With young kids, you never have to worry about running around with them and accidentally showing off your plumber skills (Eek!)

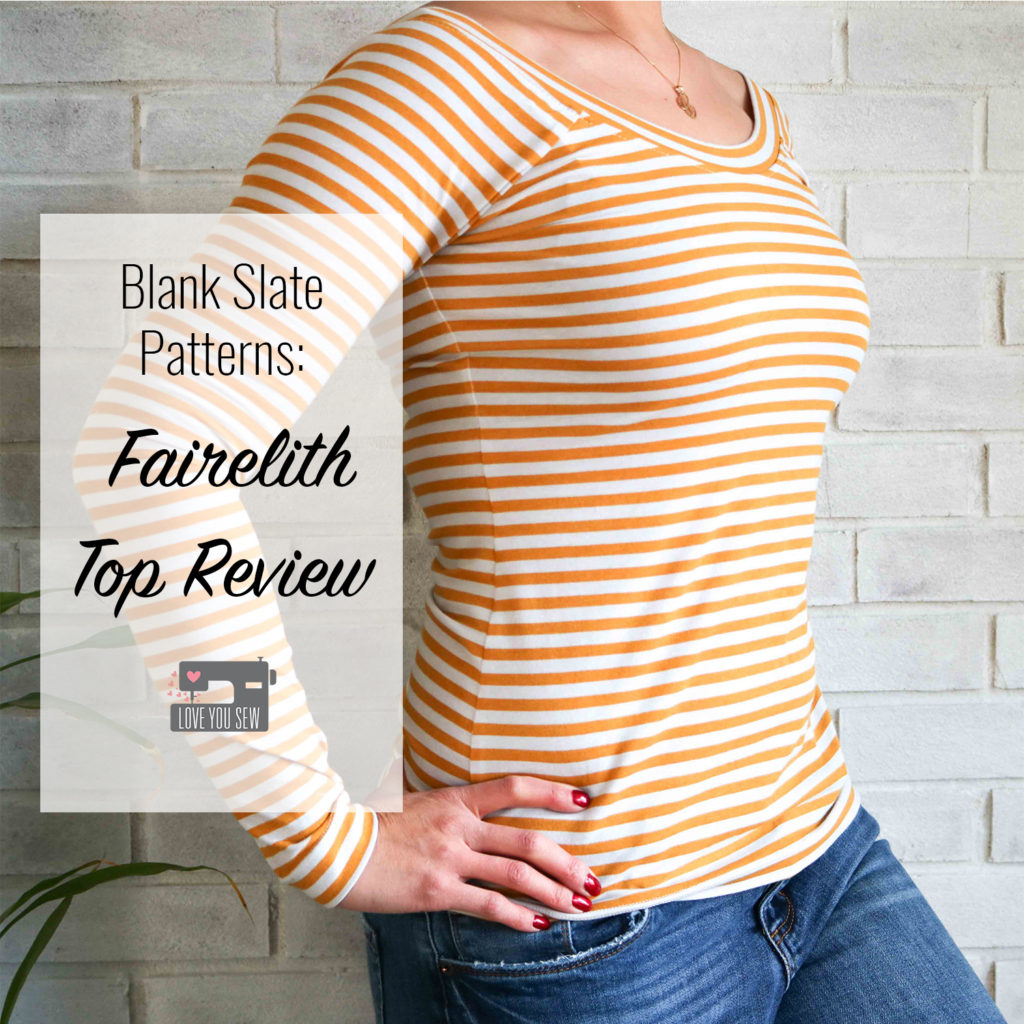
With mid and high-waisted pants taking over, I see so many tops being tucked in.  Overalls are back in a big way, so slender layers are needed.  While taking these all into mind, I thought I could really use a Fairelith Top (aff link) by Blank Slate Patterns in my closet.  This body skimming version was what I was looking for and I knew it would also be perfect tucked in with my Moss Skirts which you can see here and here.

I wanted a little more color in my closet while staying pretty classic, so I chose this fantastic mustard stripe Blake cotton knit jersey (aff link) by Carolyn Friedlander.  It is a great tone with my olive skin and pairs SO well with denim, black and other blues (the predominant colors I wear!)

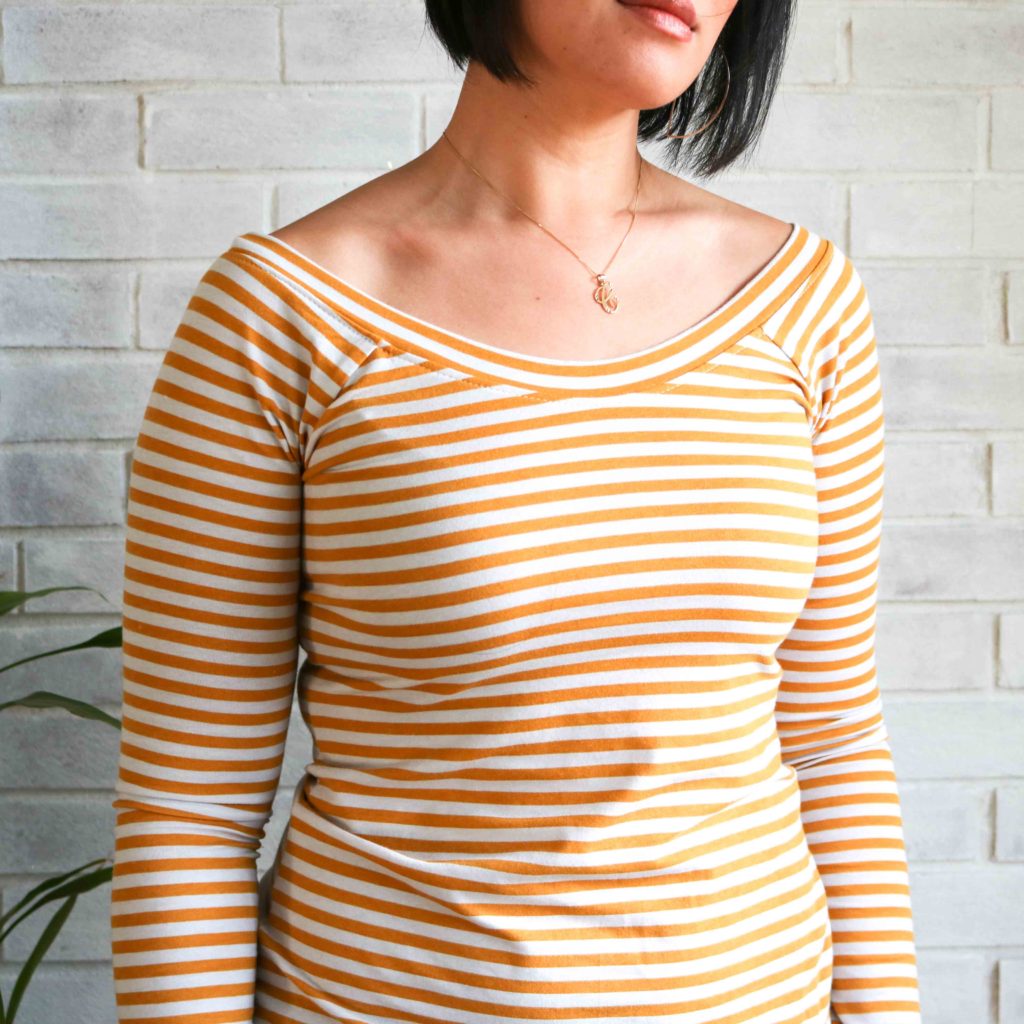
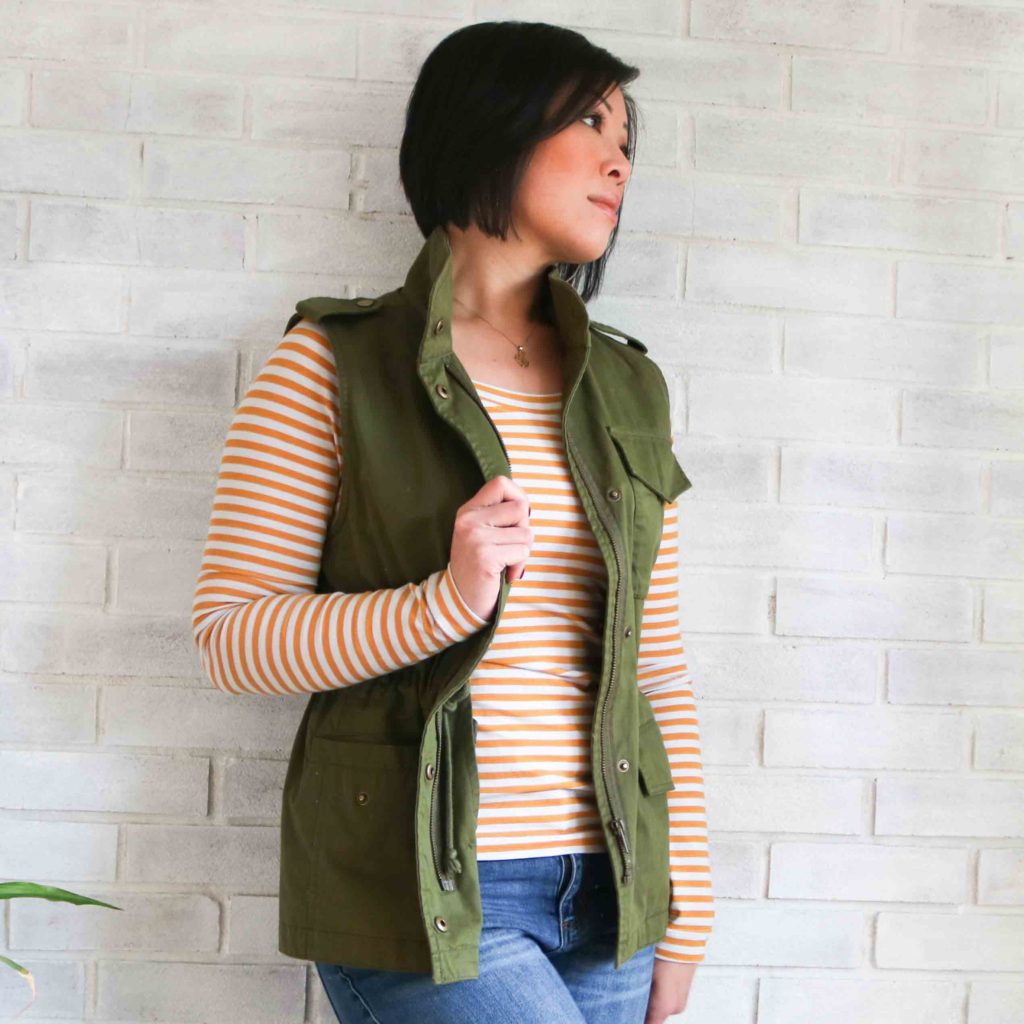
When I first measured myself for this top, it was before the holidays and I cut all my pieces.  But of course the holidays got the best of me and it ended up a wee bit more snug than I would have liked.  :/  Luckily, I was able to get my body back on track so I could share this make with you (a few months later…)  Although, next time, I will definitely make a larger arm.  As I’ve mentioned before, my arms are heavy for RTW based on my waist and bust measurements….so I  should’ve known the arms would be slightly too tight!  You can see all the extra folds around my armpit area.  But it’s my fault for being too anxious and not making a muslin. (Rookie mistake…)   Melly Sews does include instructions to narrow out the neck…so maybe I’ll move up a whole size and then use that adjustment.  (I’ll keep you update and let you know what I do and how the process goes.)

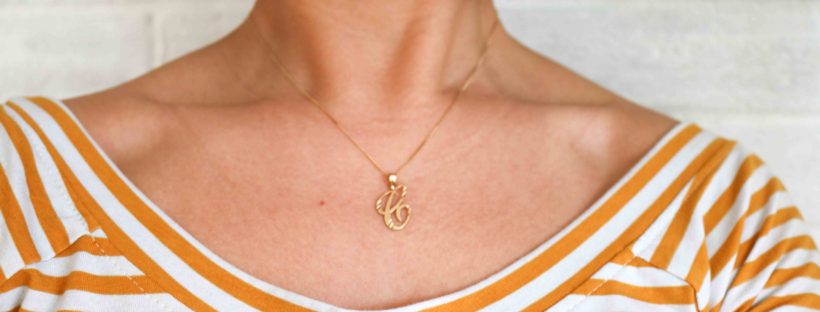
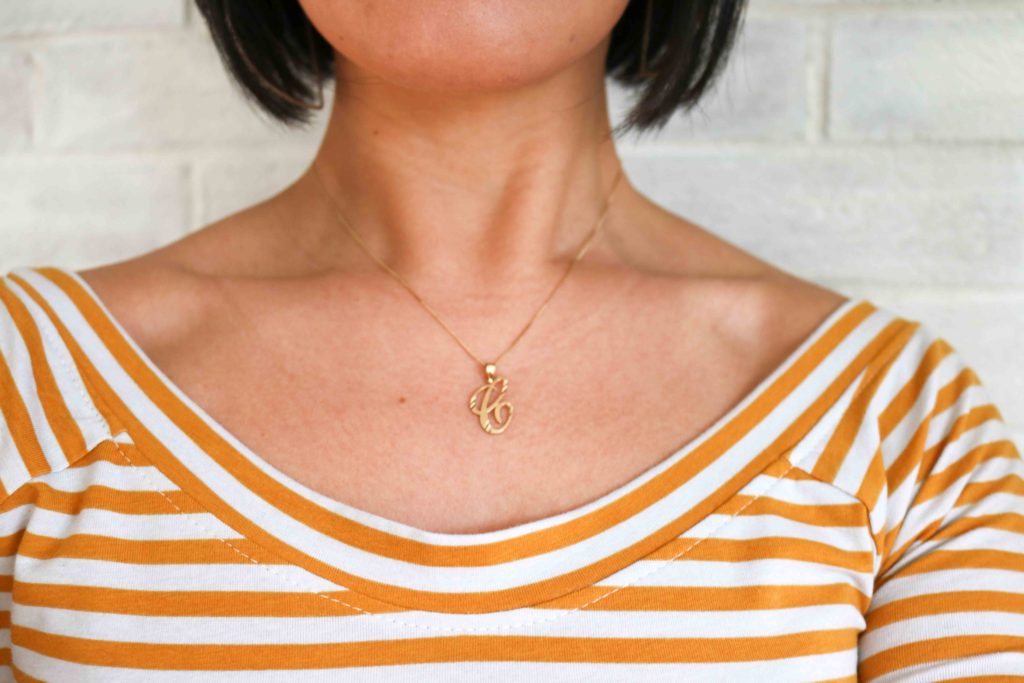
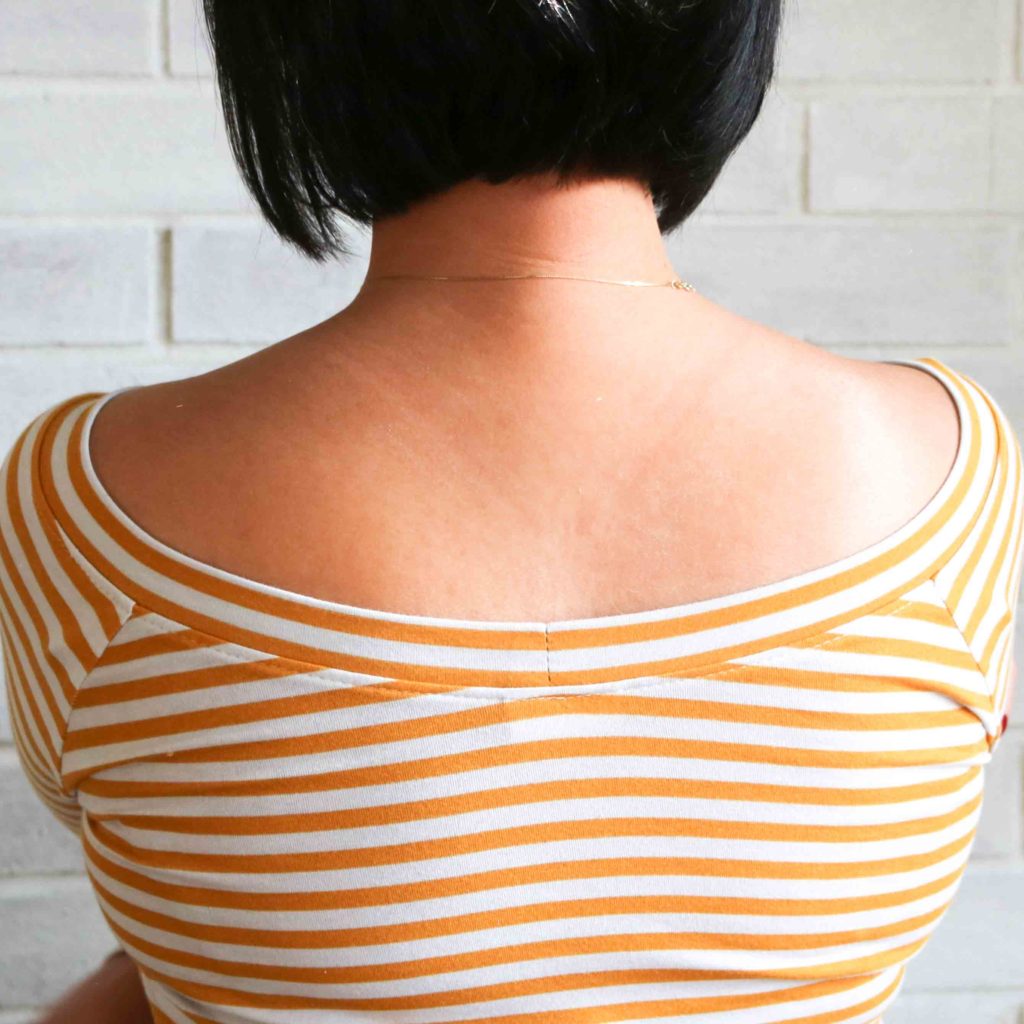
This neckline is just gorgeous, right?  The ballet neckline hits at just the right spots on the shoulders so it’s not falling off.   I love how it shows the collar bone and is perfect for a statement necklace.  Bandana scarves are pretty hot right now and would pair well with this kind of opening.

The open neckline continues to the back. With my short hair, this ballet opening highlights my neck well.  I like this different style, which I haven’t seen much in other indie designers.

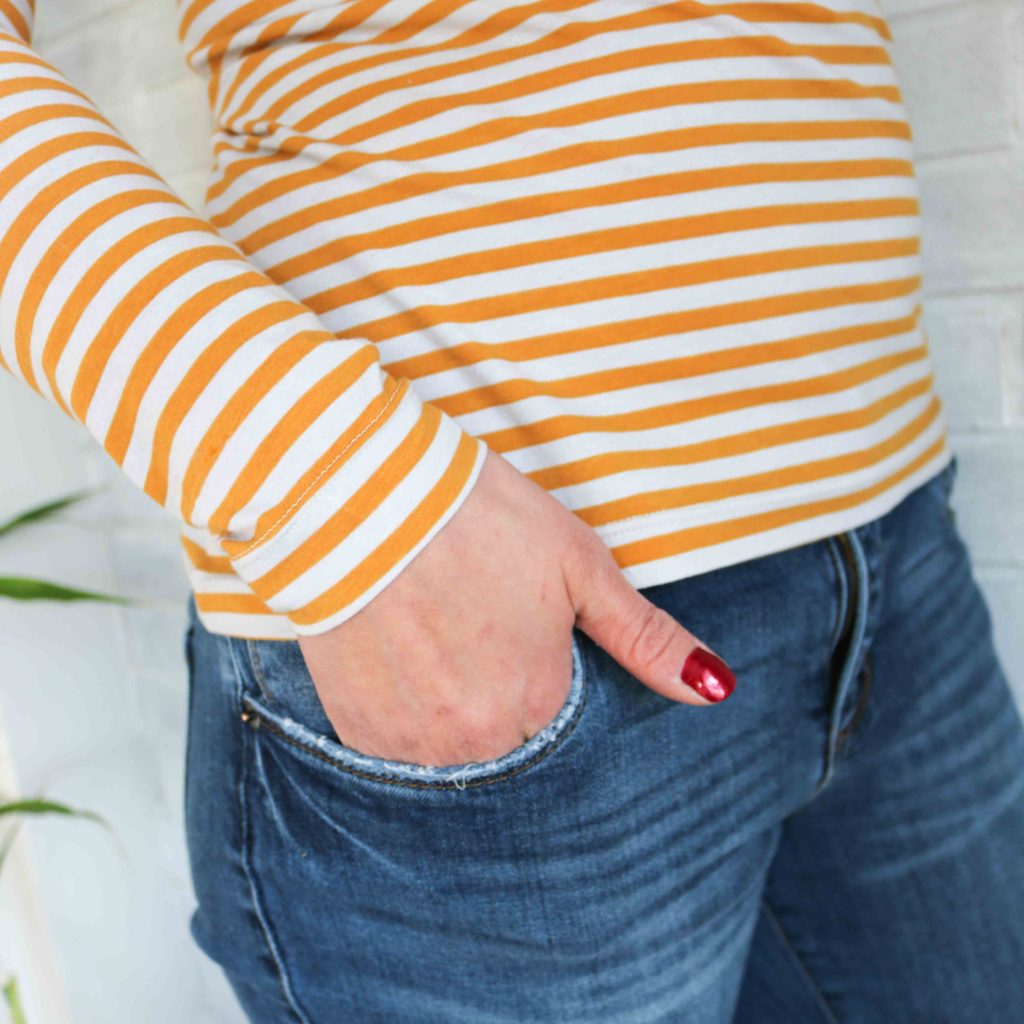
With a  raglan sleeve, this make comes together quickly.  The hem and sleeves are all pressed under and finished with a twin needle.  I like to use wooly nylon (aff link) in the bobbin for a little extra stretch and comfort with this method.  When sewing, it’s good to leave long thread tails and stretch out the hems afterwards.  This is just in case you have some tension issues and the bobbin thread was pulled too tight.


Even with the puckering around the armpit, I still love the design features of the Fairelith Top (aff link) and can’t wait to make another (with the right adjustments!) The extra folds do not matter to me on a day-to-day basis.  But if you run across the same issue, a jacket or vest like this one above can help you hide it.  Lol.

Happy Sewing Friends!

Cristy


2018 Wardrobe Goals :: Make Nine Commitment

If you follow many sewists on Instagram, you probably have seen the hashtags, #MakeNine2018 or #2018MakeNine.  This is an informal challenge to select nine different items to make over the course of the year.  It was first started by @homerowfiberco and has really taken the maker community by storm this new year.  You will see different goals for knitters. quilters, and mine happens to be just for garments.  There is absolutely no pressure and you are accountable for yourself.  This is a fun challenge to start and it’s so motivating to see everyone’s makes!

I’ve been sewing clothes for my kids and occasionally, for myself, over the past 8 years.  However, it’s been the past two years. that I’ve been consciously planning out my handmades.  I have many reasons for sewing my own clothes.  My body fits several different ready-to-wear (RTW) sizes and nothing will ever beat  a custom fit.  I am also trying to step away from the fast fashion industry as much as I can both from the ethical labor and consumption standpoints.

Another big reason for making my own clothes is the financial aspect.  Ever since I quit my corporate job years ago and had a family, my spending habits had to change drastically.  But…I still had that taste for fine fabrics and high quality.  For me to have clothing which will last, I would need those high quality substrates, but would only be able to afford them if I absorbed my own labor costs.  This would allow me to have luxury clothing at a fraction of the retail prices.  Win-win, right?!?

Drum roll, please!  From left to right, top-down, I have chosen the following patterns for a number of different personal reasons.  We all have our own body issues and I’ve thoughtfully chosen these patterns as part of my personal style journey.  The criteria I set for myself are to select patterns (1) I have not sewn up before (2) have more year-round functionality and (3) are wearable with at least three other things in my closet.

  1. The Classic Shirt by Liesl & Co – I am a huge fan of the Oliver & S brand children’s patterns by the same company and had bought this pattern during a sale about a year ago.  I have a hard time finding a relaxed, yet tailored button-down shirt that fits my waist, shoulders and heavier arms.  If I buy RTW to fit my arms, the shoulders are huge and the shirt tends to be boxy.  If I buy to fit my waist and shoulders, my arms are like sausage casings with barely any movement.  I’m excited to make my very first button-down shirt to give me a full range of arm motion while fitting in the shoulders and waist.
  2. Ogden Cami by True Bias – This is another pattern I own and has even been copy shop printed already.   But once the temperatures cooled down here in the Midwest, I moved into craft market mode and left clothing behind.  Now I’m on a mission and I think this silhouette is so flattering…with the relaxed easing around the waist and shallow V-neck.  I just know I’ll be living in these…especially in luxurious rayon!   I have some gorgeous rayon scraps from other projects which have been set aside so I can batch sew a few for the summer.  These will also be great for layering under some cardigans!
  3. Highlands Dress by Allie Olsen – When this pattern first came out, I loved the slim silhouette!  But I try not to buy patterns on first release because of how they look on others. I really have to think about whether the style will really fit me and my lifestyle.  After seeing so many additional versions these past month, I realized I really DO need this in my closet.  I just love how chic the dress looks full-length and I feel like I NEED it for some date nights 😉
  4. Pearl Shift by Greenbee Patterns – Oh gosh…this is probably the oldest pattern I own out of this bunch.  I’ve been holding onto it for probably almost two years now….along with the fabric I bought with it!  I even washed the Robert Kaufman Double-Gauzee Chambray back then and it is softer than it even sounds…  I’ve received many warnings from friends who have made the dress to be aware of the ease.  So, I already know I will size down even though I still want all of the roominess in this dress.  I envision this dress being much more casual and something I could easily slip on to wear out to the farmer’s market or run errands around town.
  5. Sylvie Dress by Christine Haynes – Surprise!  This is yet another pattern I already own.  I’m in need of a more formal little black dress (LBD) because the one I have is a bit old and has been seen by everyone in my circle numerous times.  I still love the one I have, but feel like I need to add another one into the mix.  I’m hoping to find some kind of black on black or primarily black print for a sophisticated look.
  6. Blanc Tee by Blank Slate Patterns (aff link) – I need to stock up on my basic tee collection as my old ones have become either stained or completely stretched out and lost shaping.  I chose this pattern because of the nice scoop neck and cap sleeves.  I will definitely make a few white tees and maybe a few stripes.  These may even get a little vinyl treatment from my Silhouette Cameo.
  7. Chi-Town Chinos by Alina Design Co – The search for the perfect chinos has always been on my radar.  I have a small waist, and thick thighs with a booty to match.  Chinos tend to always have a huge gap for me at the lower back and I use to have the pockets sewn up by a tailor before I sewed myself. The slash pockets would always gape open and make my hips look wider than they are.  I love the olive chino look and like an alternative to denim, but have to go much more relaxed in the leg to avoid my body issues.  I’m hoping to (finally) have a nice tailored pair for a menswear look.  I have a pair of saddle shoes…dying for some cute pants!
  8. Acacia Underwear by Megan Nelson – You know I love a great scrap-busting project and this is perfect for my lighter knits.  I’m also very much interested in being able to make my own undies which have soft elastic that don’t bite into my skin.  With the scraps I have, I also know these will be incredibly soft and I can’t wait to make a few!
  9. Holly (Jumpsuit) Trousers from By Hand London  – Another pattern owned but I knew I wouldn’t get to these until the winter…so I’m just a few months behind. 😉 These wide leg pants just spoke to me with the high rise and the dramatic leg.  I will make a culotte version for the summer, but I really wanted a great pattern which I could later use for a traditional Ao Dai.  This is a tunic and pant combo worn in Vietnam and it’s been on my list to make for years…but I’ve wanted to make a great pant to work with the tunic and I’m hoping this is it.
Have you made a commitment for your #MakeNine2018? Let me know if we have any in common!  Good luck completing your list and I’ll keep you updated on my progress!


Cristy

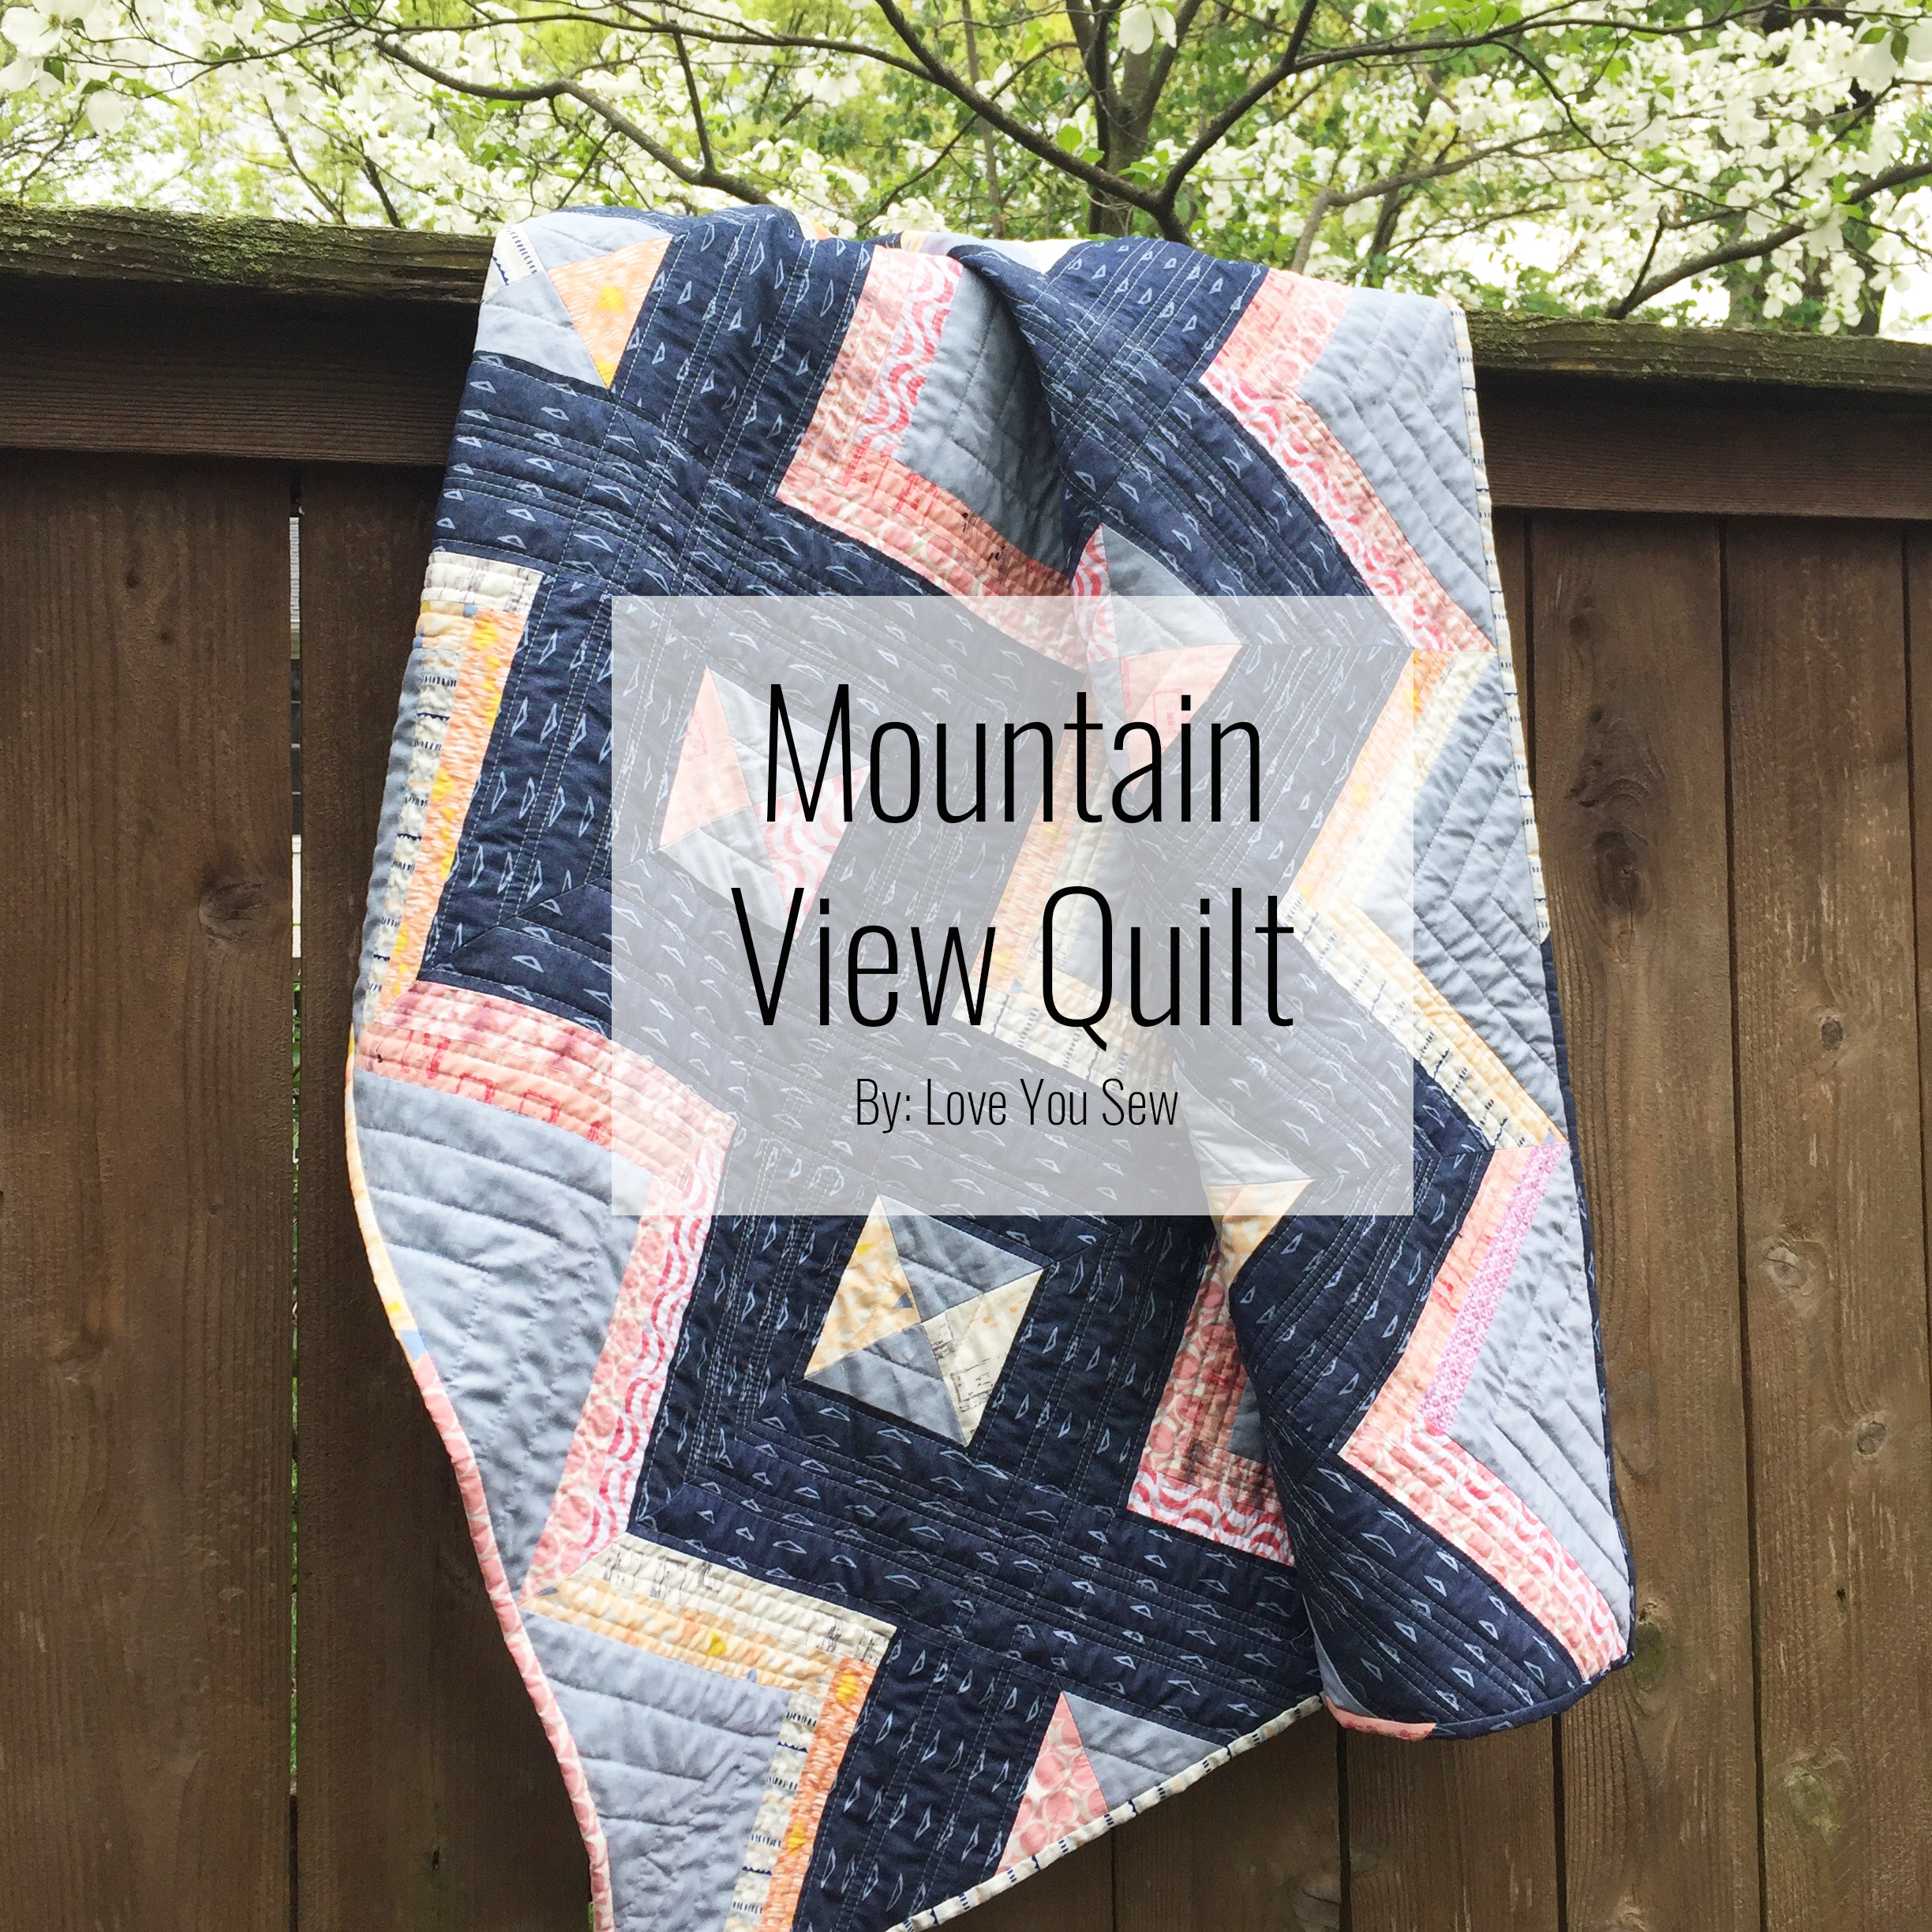
Mountain View Quilt

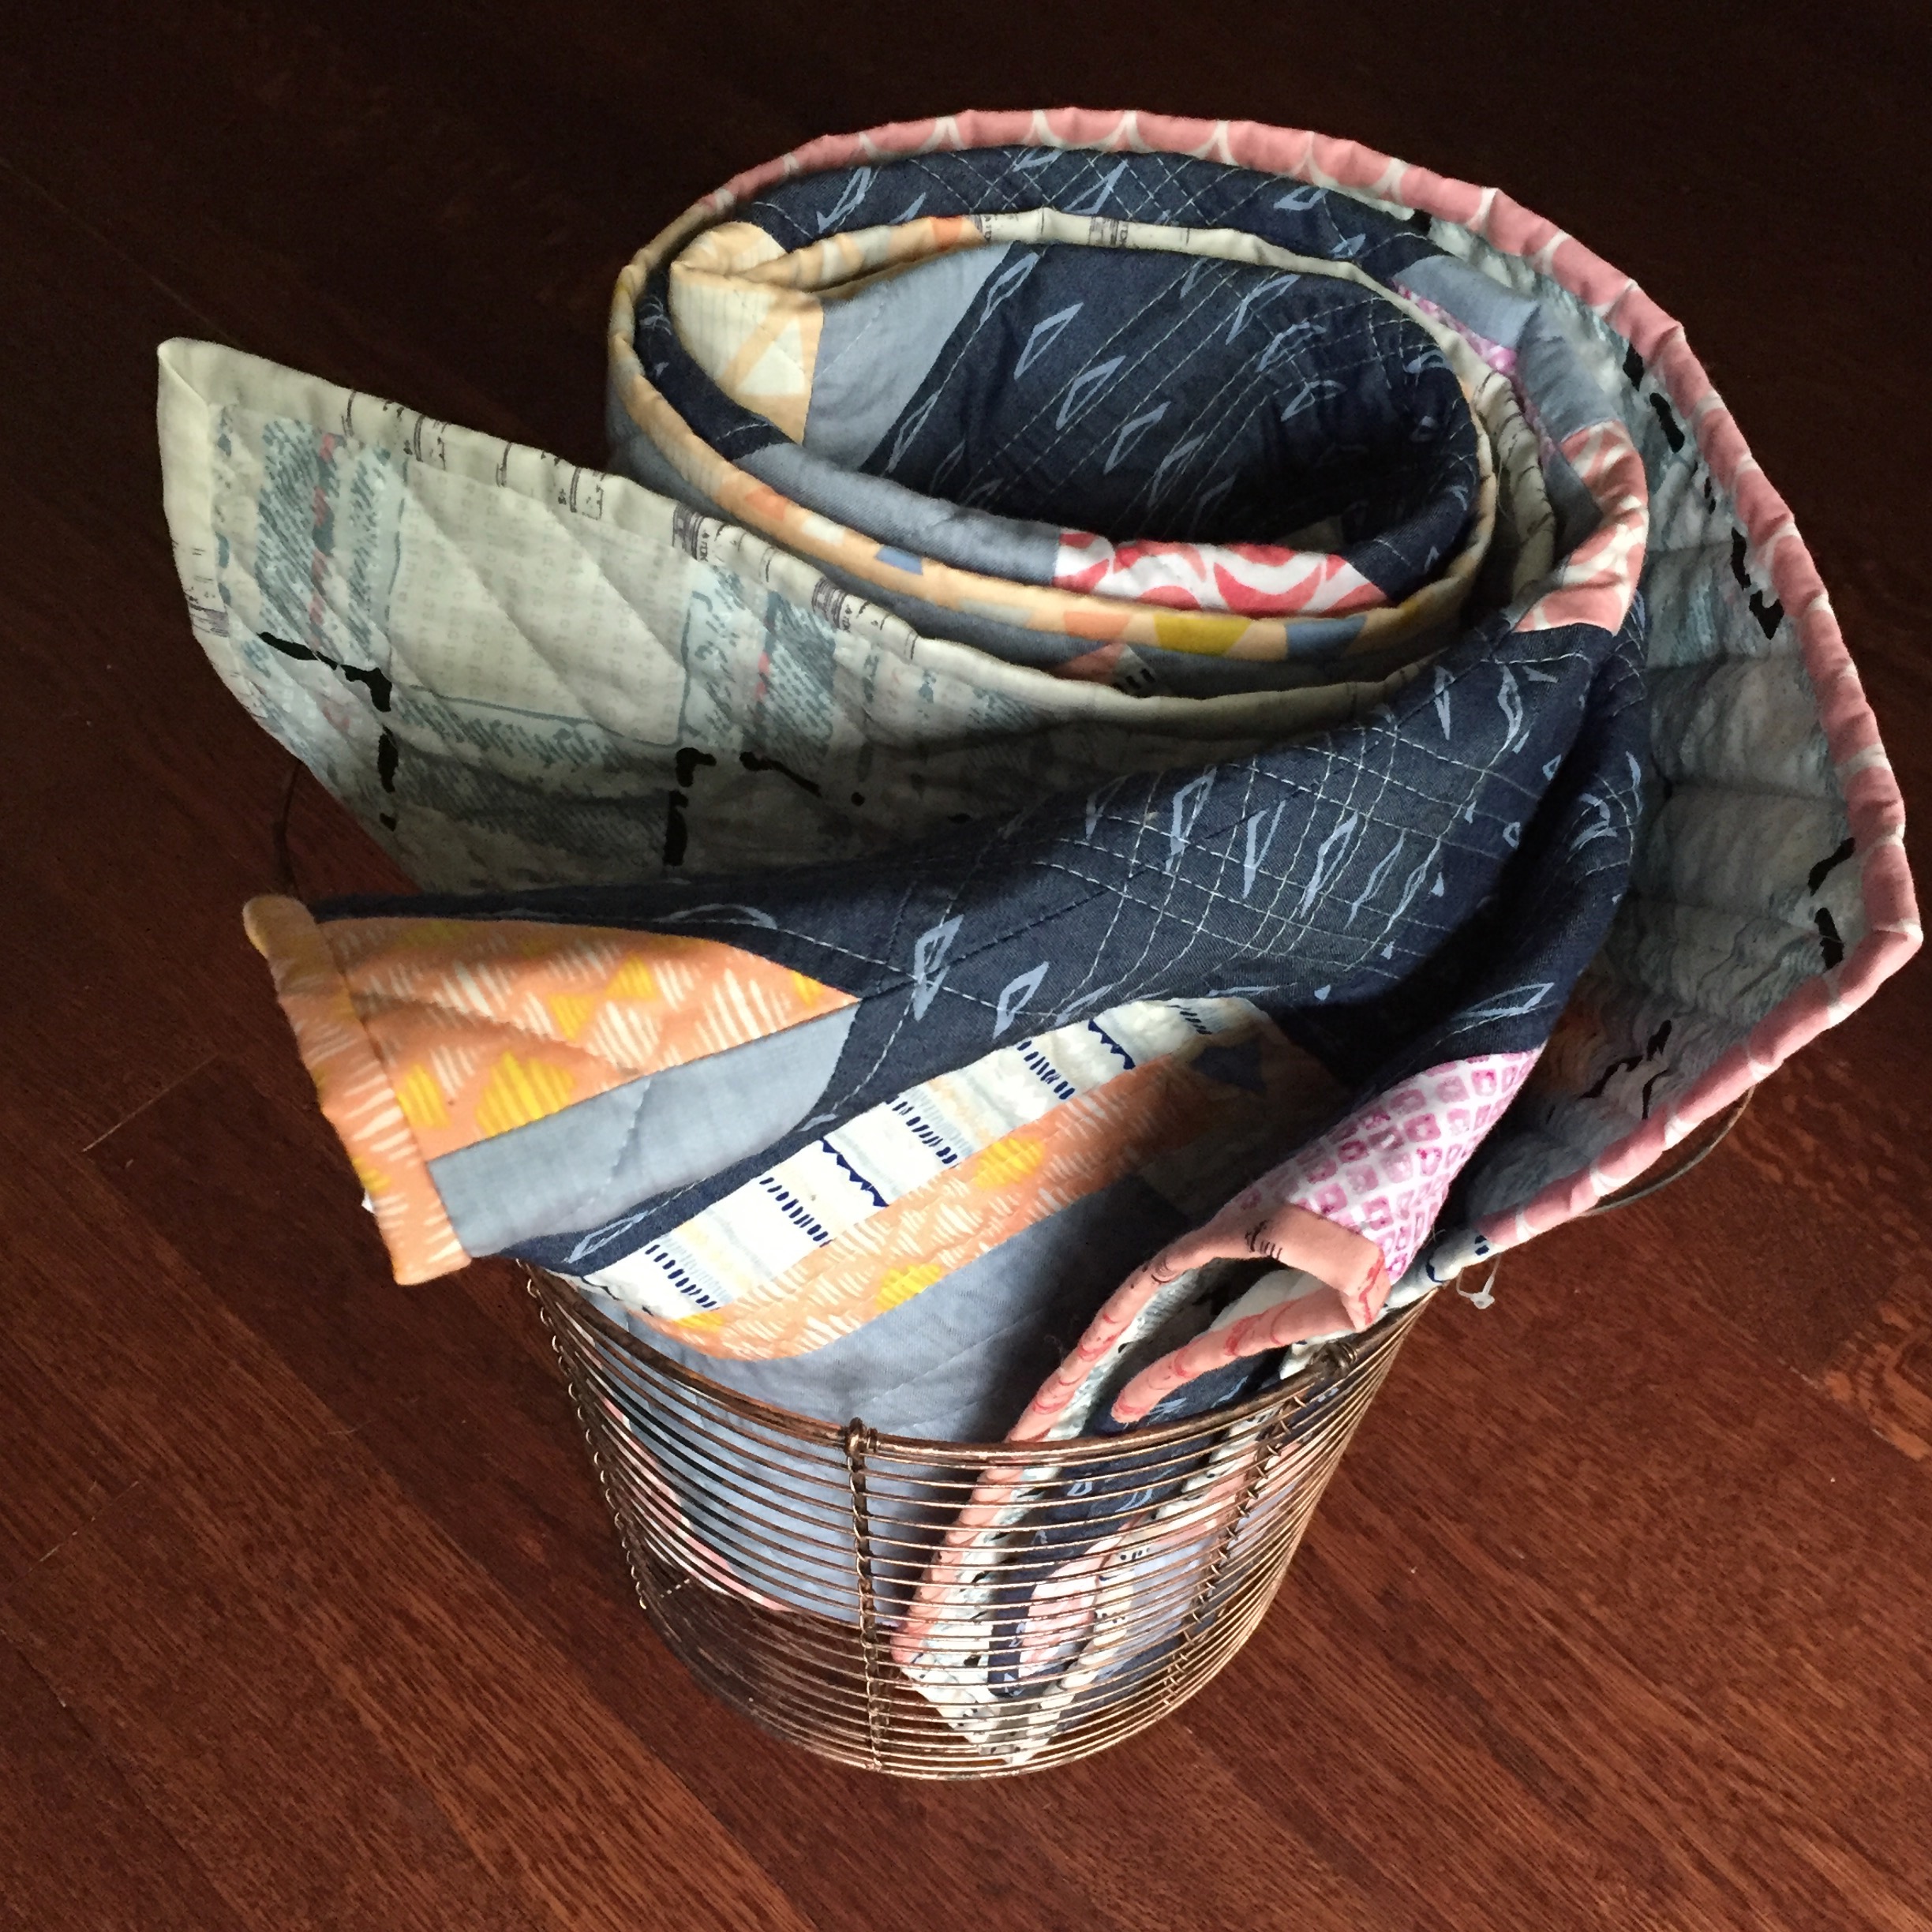
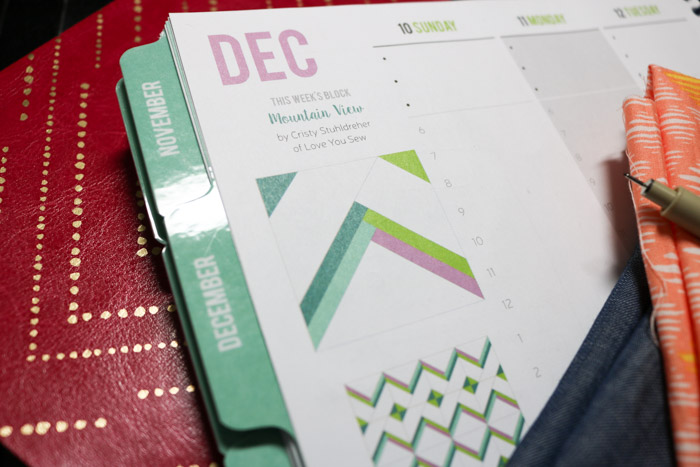
If you are the lucky holder of a 2017 Quilter’s Planner, you might know this is my block week with  “Mountain View.”   If you happened to miss out on the planner, you can still find the instructions to my block here to make your very own Mountain View Quilt and read about the block inspiration.

The Quilter’s planner really helped me organize all my plans with the Project Planner sections.  It’s nice to have a written outline instead of trying to cram everything in my head!  Space is limited there nowadays 🙂

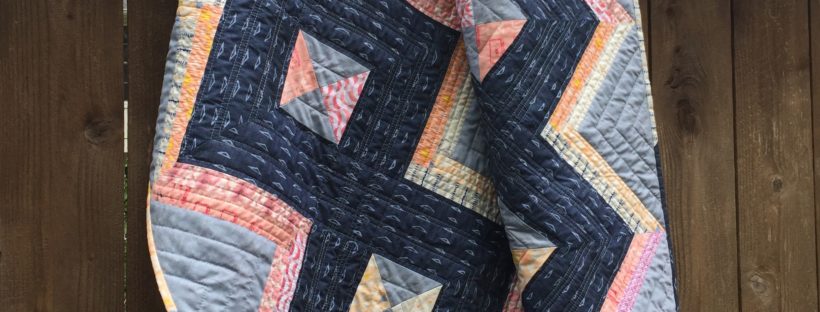
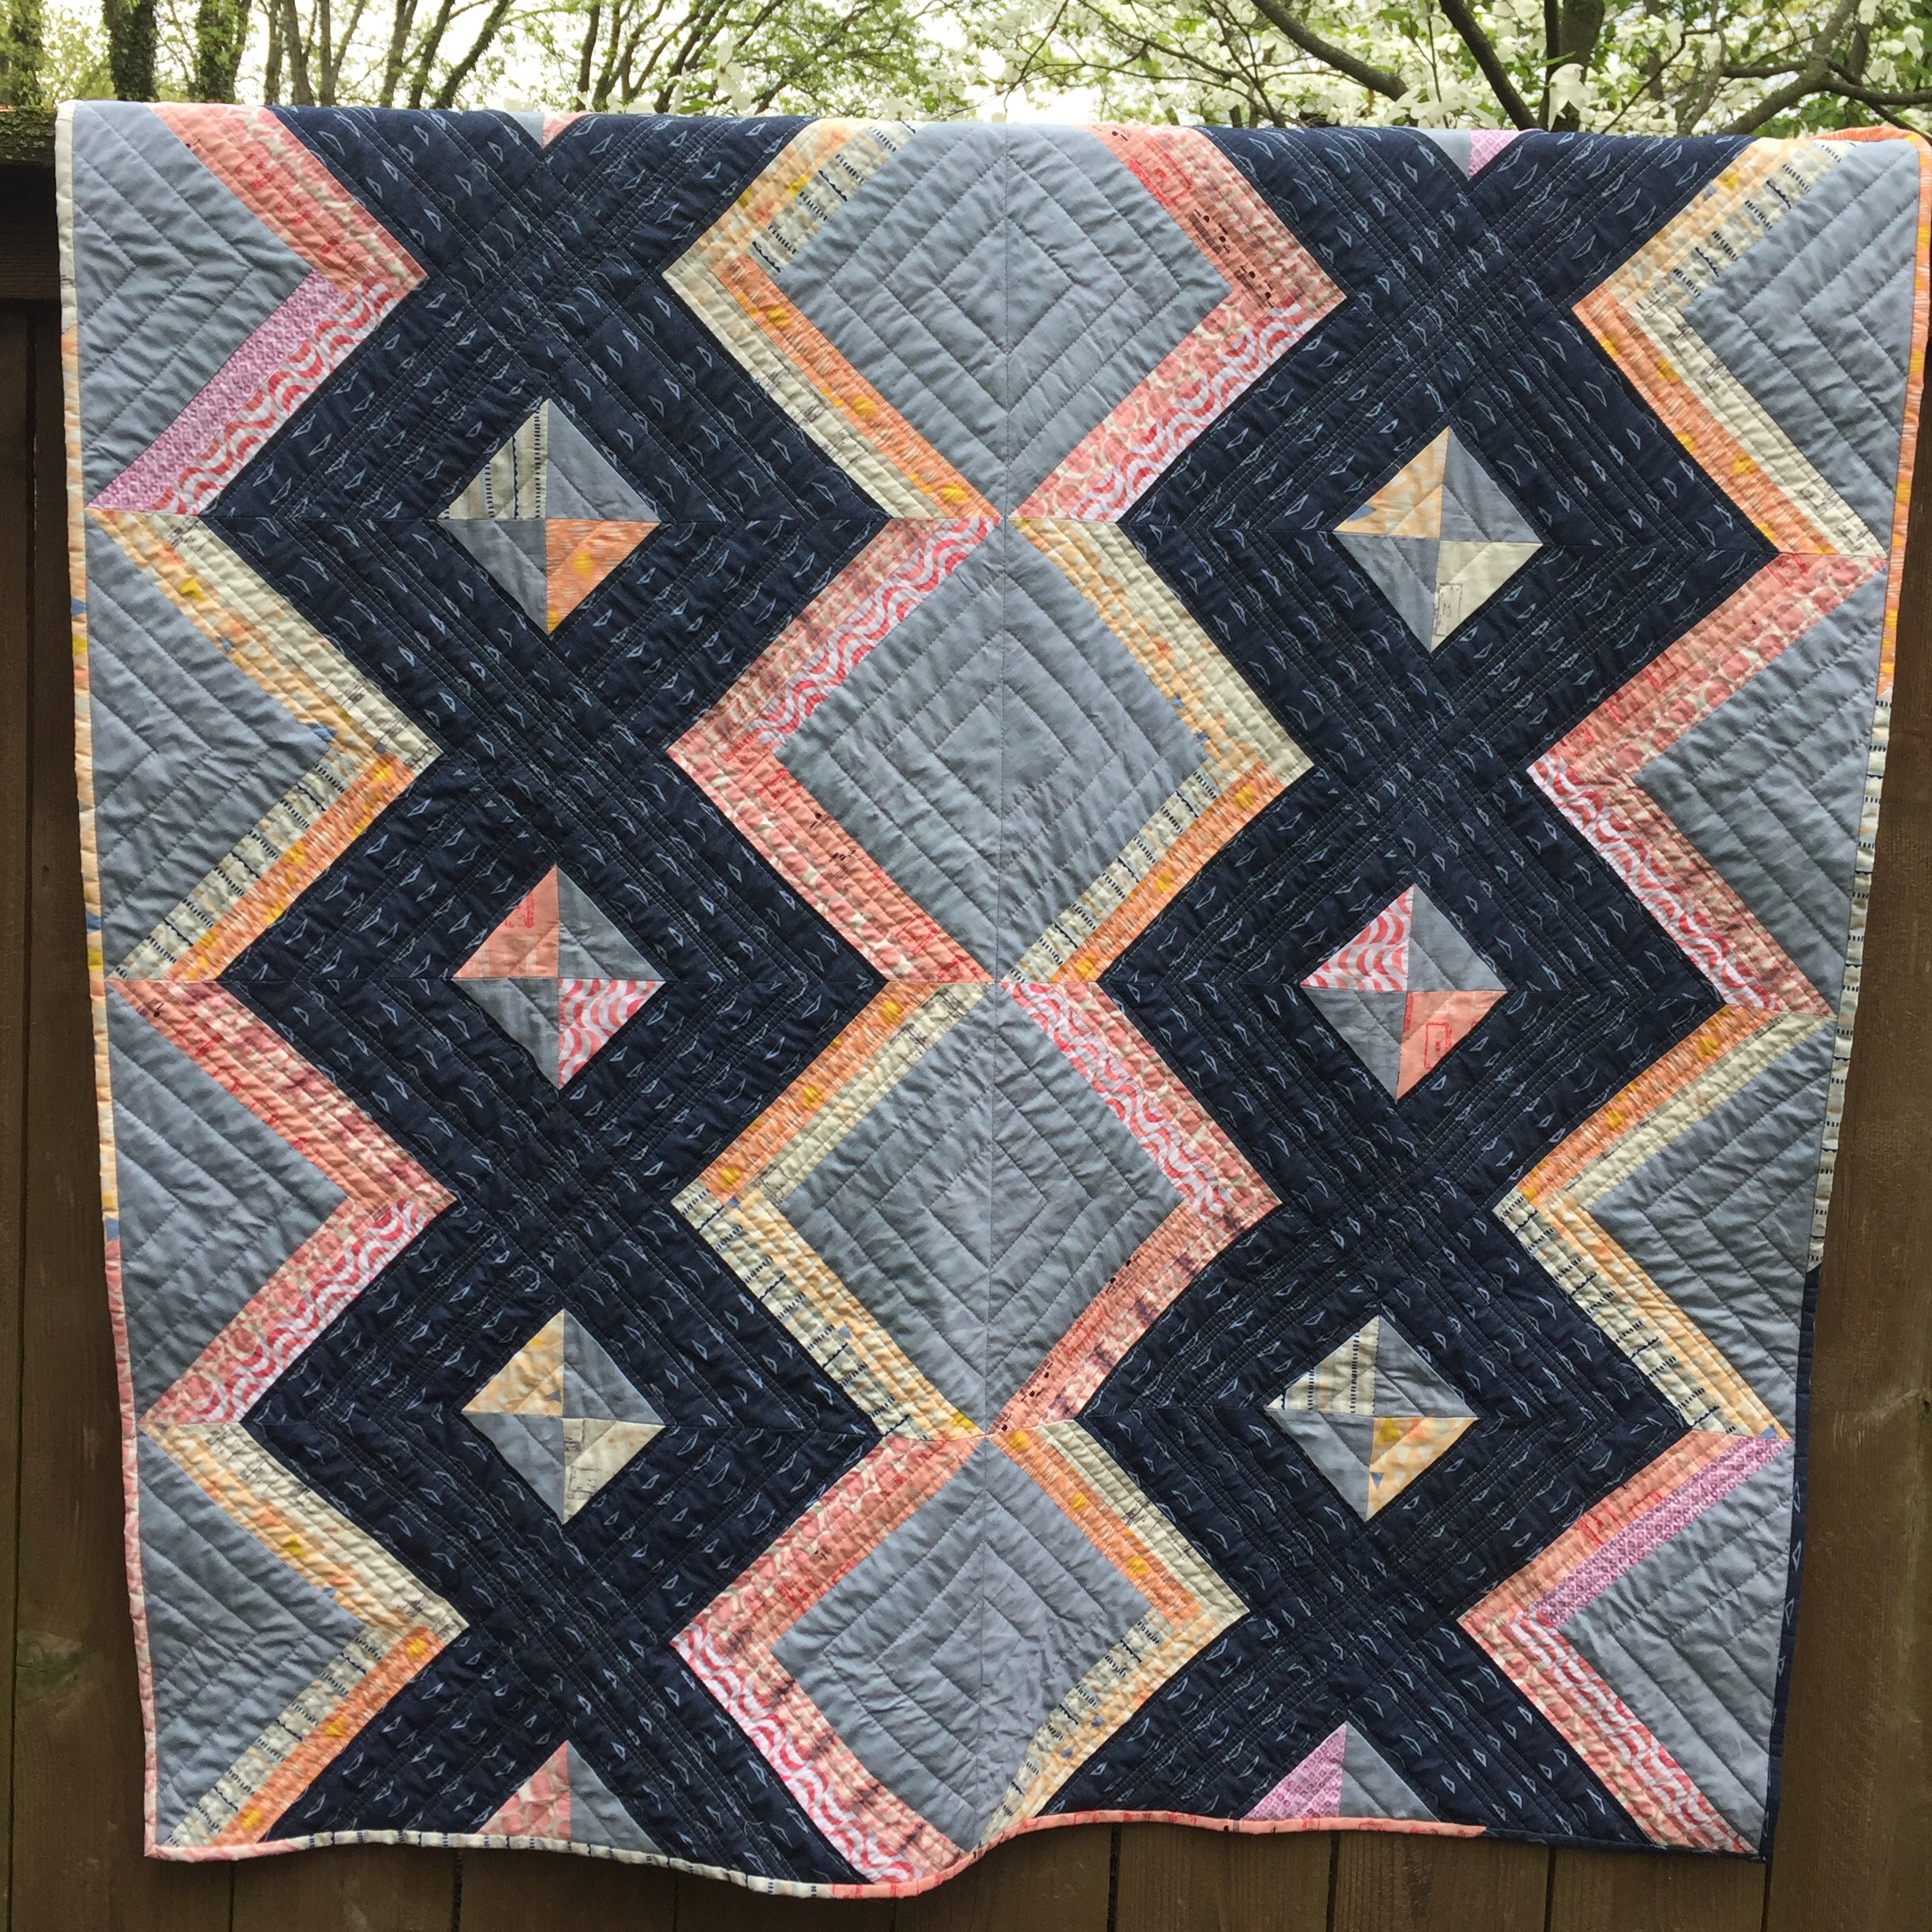
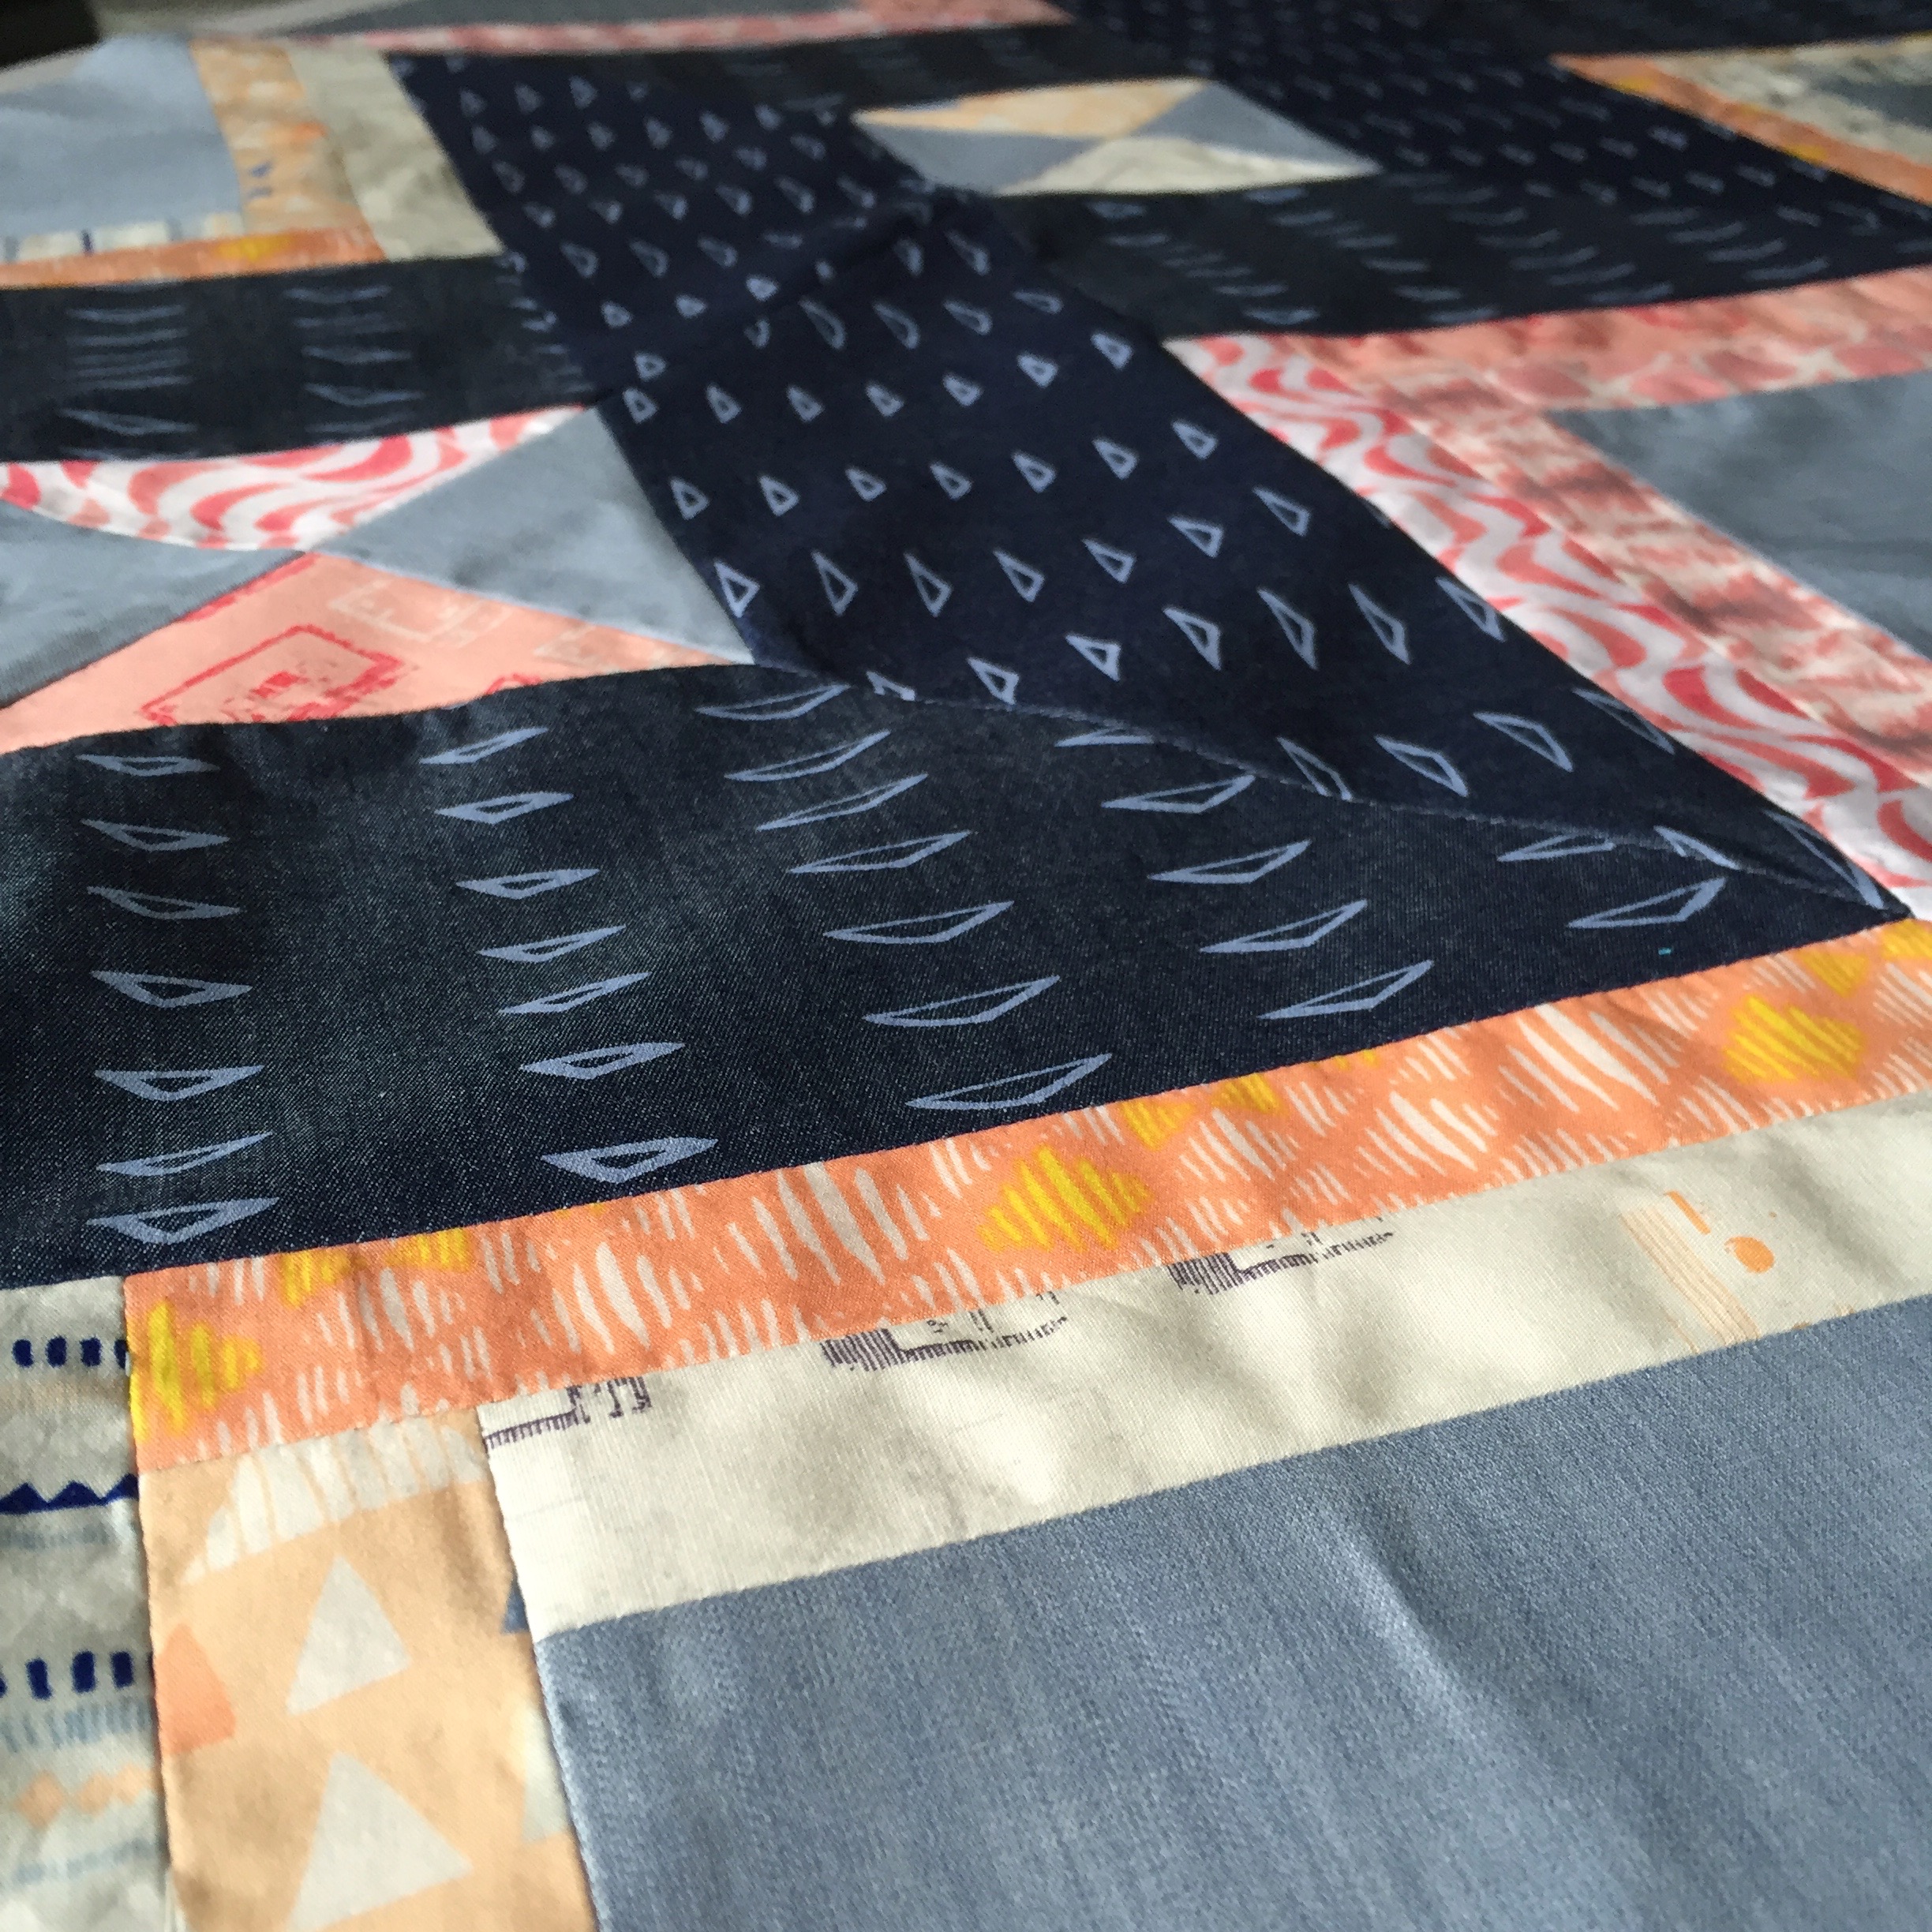
I was lucky to play with some Art Gallery Smooth Denim when it was first released and thought it was perfect for my quilt.  I used the lightweight denim along with some other great assorted Art Gallery prints in peach and pink.


As a lap quilt, the secondary design really comes through and you can see how the profile view (of the single block) becomes an aerial view of the Mountains.  The light blue denim looks like water running through the range and I love how it turned out.

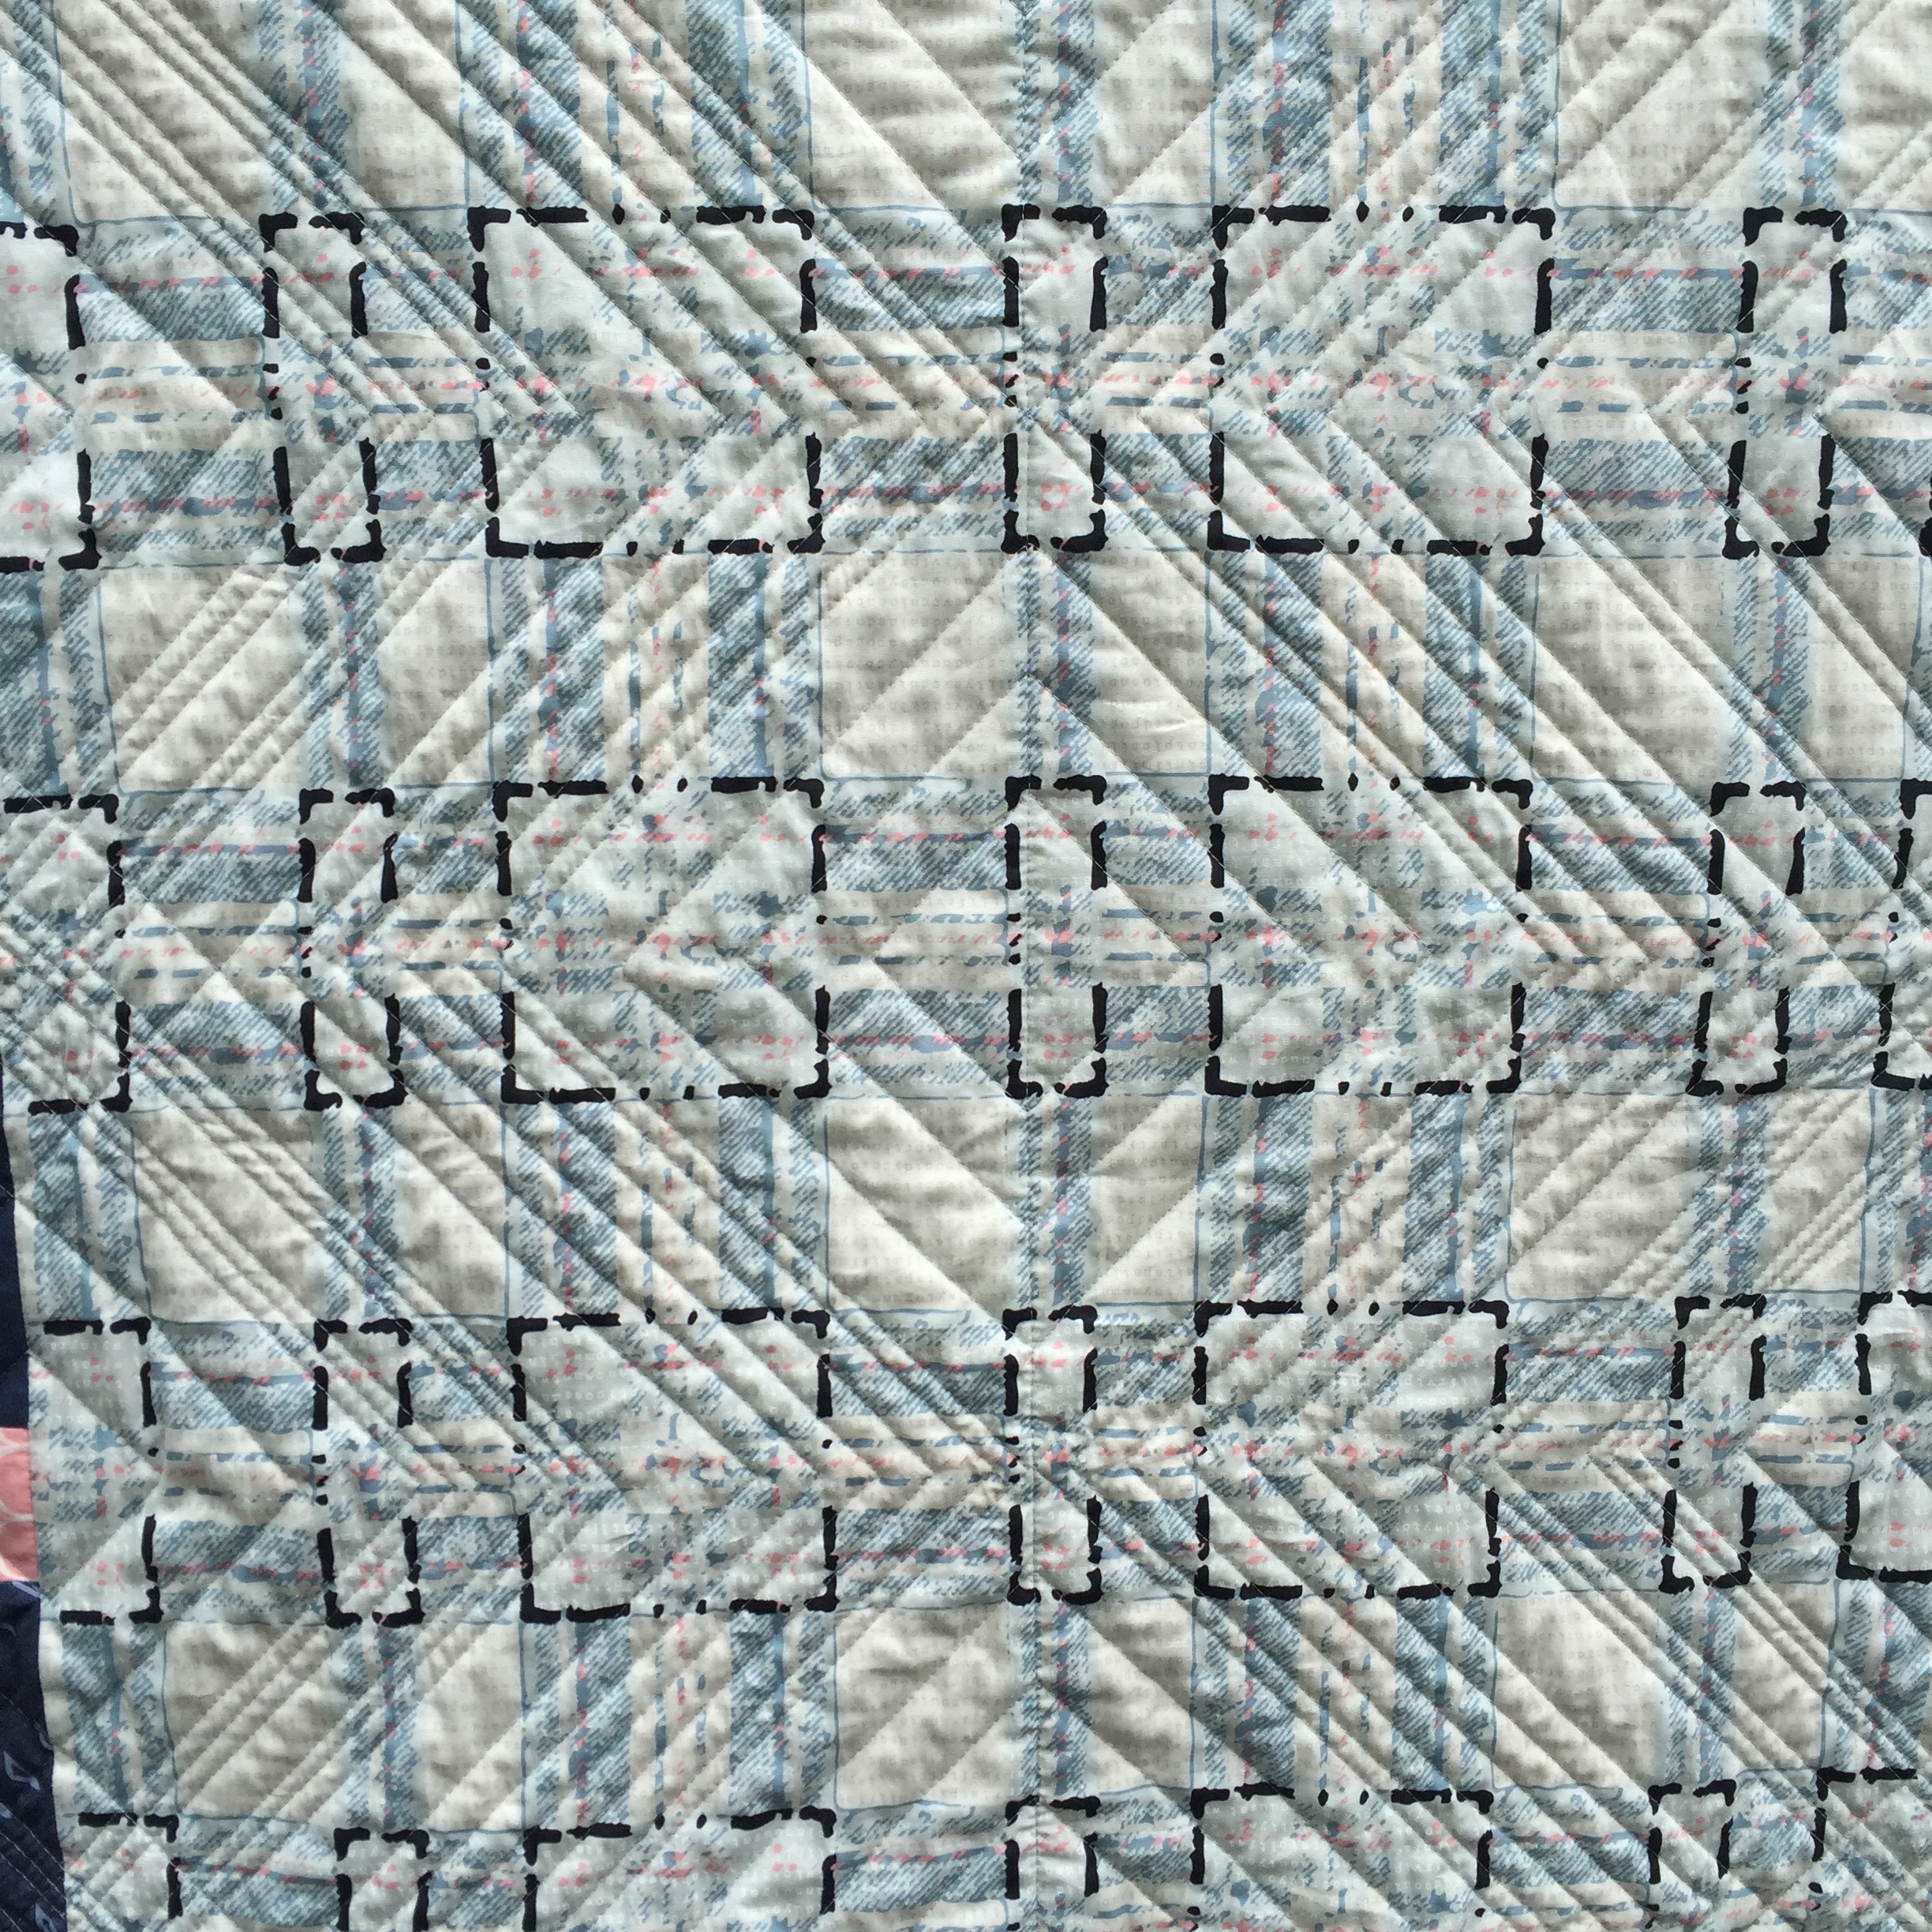
The backing had to be pieced together and I figured it should have some added interest as well.  The extra panel was improvved using scraps and follows the same geometric angles as the front. It’s a nice pop of color against the main backing print.

Look at that texture!  Quilting was done on my domestic machine using my walking foot and favorite Aurifil 2021.  I followed the shapes of the piecing and added more density in the darker blue denim.  This backing really shows all the lines.


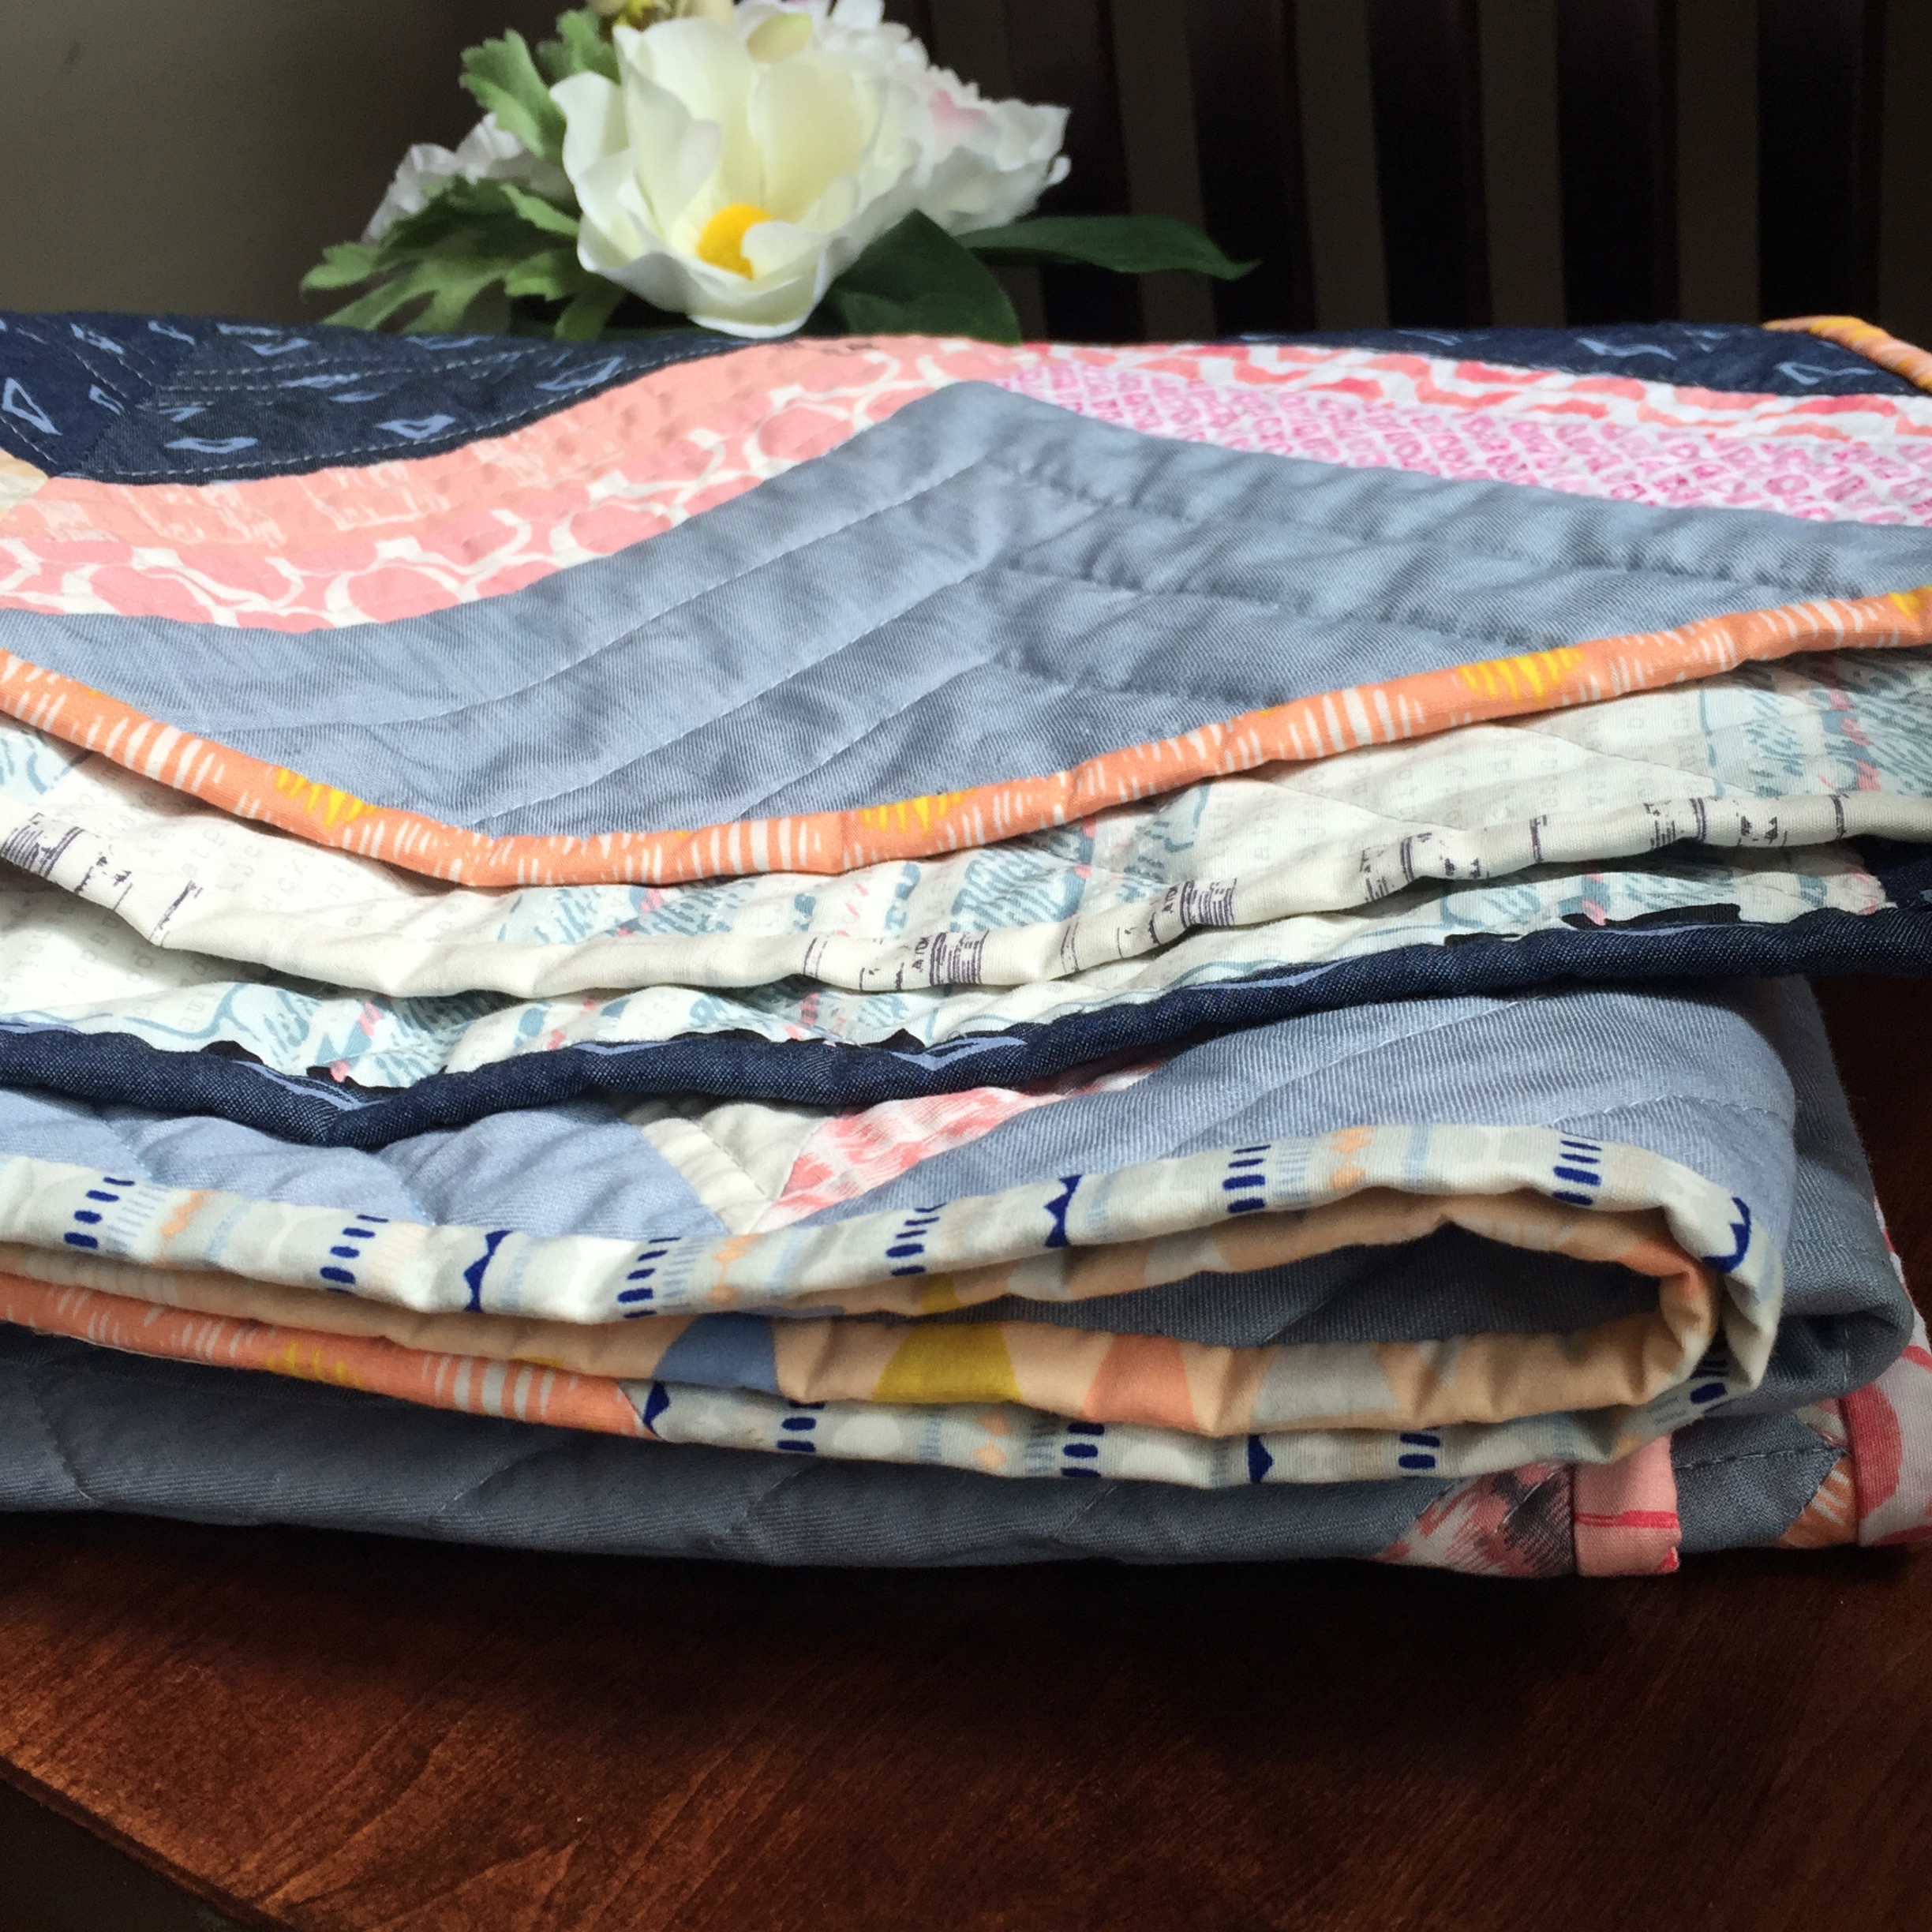
The binding was also scrappy and pieced together.   As always, I machine attach my binding to the front and spend some couch time with my husband which hand-stitching it to the back.  The colors really complement the denim.

Project  Stats: