2018 Wardrobe Goals :: Make Nine Commitment

If you follow many sewists on Instagram, you probably have seen the hashtags, #MakeNine2018 or #2018MakeNine.  This is an informal challenge to select nine different items to make over the course of the year.  It was first started by @homerowfiberco and has really taken the maker community by storm this new year.  You will see different goals for knitters. quilters, and mine happens to be just for garments.  There is absolutely no pressure and you are accountable for yourself.  This is a fun challenge to start and it’s so motivating to see everyone’s makes!

I’ve been sewing clothes for my kids and occasionally, for myself, over the past 8 years.  However, it’s been the past two years. that I’ve been consciously planning out my handmades.  I have many reasons for sewing my own clothes.  My body fits several different ready-to-wear (RTW) sizes and nothing will ever beat  a custom fit.  I am also trying to step away from the fast fashion industry as much as I can both from the ethical labor and consumption standpoints.

Another big reason for making my own clothes is the financial aspect.  Ever since I quit my corporate job years ago and had a family, my spending habits had to change drastically.  But…I still had that taste for fine fabrics and high quality.  For me to have clothing which will last, I would need those high quality substrates, but would only be able to afford them if I absorbed my own labor costs.  This would allow me to have luxury clothing at a fraction of the retail prices.  Win-win, right?!?

Drum roll, please!  From left to right, top-down, I have chosen the following patterns for a number of different personal reasons.  We all have our own body issues and I’ve thoughtfully chosen these patterns as part of my personal style journey.  The criteria I set for myself are to select patterns (1) I have not sewn up before (2) have more year-round functionality and (3) are wearable with at least three other things in my closet.

  1. The Classic Shirt by Liesl & Co – I am a huge fan of the Oliver & S brand children’s patterns by the same company and had bought this pattern during a sale about a year ago.  I have a hard time finding a relaxed, yet tailored button-down shirt that fits my waist, shoulders and heavier arms.  If I buy RTW to fit my arms, the shoulders are huge and the shirt tends to be boxy.  If I buy to fit my waist and shoulders, my arms are like sausage casings with barely any movement.  I’m excited to make my very first button-down shirt to give me a full range of arm motion while fitting in the shoulders and waist.
  2. Ogden Cami by True Bias – This is another pattern I own and has even been copy shop printed already.   But once the temperatures cooled down here in the Midwest, I moved into craft market mode and left clothing behind.  Now I’m on a mission and I think this silhouette is so flattering…with the relaxed easing around the waist and shallow V-neck.  I just know I’ll be living in these…especially in luxurious rayon!   I have some gorgeous rayon scraps from other projects which have been set aside so I can batch sew a few for the summer.  These will also be great for layering under some cardigans!
  3. Highlands Dress by Allie Olsen – When this pattern first came out, I loved the slim silhouette!  But I try not to buy patterns on first release because of how they look on others. I really have to think about whether the style will really fit me and my lifestyle.  After seeing so many additional versions these past month, I realized I really DO need this in my closet.  I just love how chic the dress looks full-length and I feel like I NEED it for some date nights 😉
  4. Pearl Shift by Greenbee Patterns – Oh gosh…this is probably the oldest pattern I own out of this bunch.  I’ve been holding onto it for probably almost two years now….along with the fabric I bought with it!  I even washed the Robert Kaufman Double-Gauzee Chambray back then and it is softer than it even sounds…  I’ve received many warnings from friends who have made the dress to be aware of the ease.  So, I already know I will size down even though I still want all of the roominess in this dress.  I envision this dress being much more casual and something I could easily slip on to wear out to the farmer’s market or run errands around town.
  5. Sylvie Dress by Christine Haynes – Surprise!  This is yet another pattern I already own.  I’m in need of a more formal little black dress (LBD) because the one I have is a bit old and has been seen by everyone in my circle numerous times.  I still love the one I have, but feel like I need to add another one into the mix.  I’m hoping to find some kind of black on black or primarily black print for a sophisticated look.
  6. Blanc Tee by Blank Slate Patterns (aff link) – I need to stock up on my basic tee collection as my old ones have become either stained or completely stretched out and lost shaping.  I chose this pattern because of the nice scoop neck and cap sleeves.  I will definitely make a few white tees and maybe a few stripes.  These may even get a little vinyl treatment from my Silhouette Cameo.
  7. Chi-Town Chinos by Alina Design Co – The search for the perfect chinos has always been on my radar.  I have a small waist, and thick thighs with a booty to match.  Chinos tend to always have a huge gap for me at the lower back and I use to have the pockets sewn up by a tailor before I sewed myself. The slash pockets would always gape open and make my hips look wider than they are.  I love the olive chino look and like an alternative to denim, but have to go much more relaxed in the leg to avoid my body issues.  I’m hoping to (finally) have a nice tailored pair for a menswear look.  I have a pair of saddle shoes…dying for some cute pants!
  8. Acacia Underwear by Megan Nelson – You know I love a great scrap-busting project and this is perfect for my lighter knits.  I’m also very much interested in being able to make my own undies which have soft elastic that don’t bite into my skin.  With the scraps I have, I also know these will be incredibly soft and I can’t wait to make a few!
  9. Holly (Jumpsuit) Trousers from By Hand London  – Another pattern owned but I knew I wouldn’t get to these until the winter…so I’m just a few months behind. 😉 These wide leg pants just spoke to me with the high rise and the dramatic leg.  I will make a culotte version for the summer, but I really wanted a great pattern which I could later use for a traditional Ao Dai.  This is a tunic and pant combo worn in Vietnam and it’s been on my list to make for years…but I’ve wanted to make a great pant to work with the tunic and I’m hoping this is it.

Have you made a commitment for your #MakeNine2018? Let me know if we have any in common!  Good luck completing your list and I’ll keep you updated on my progress!


Cristy

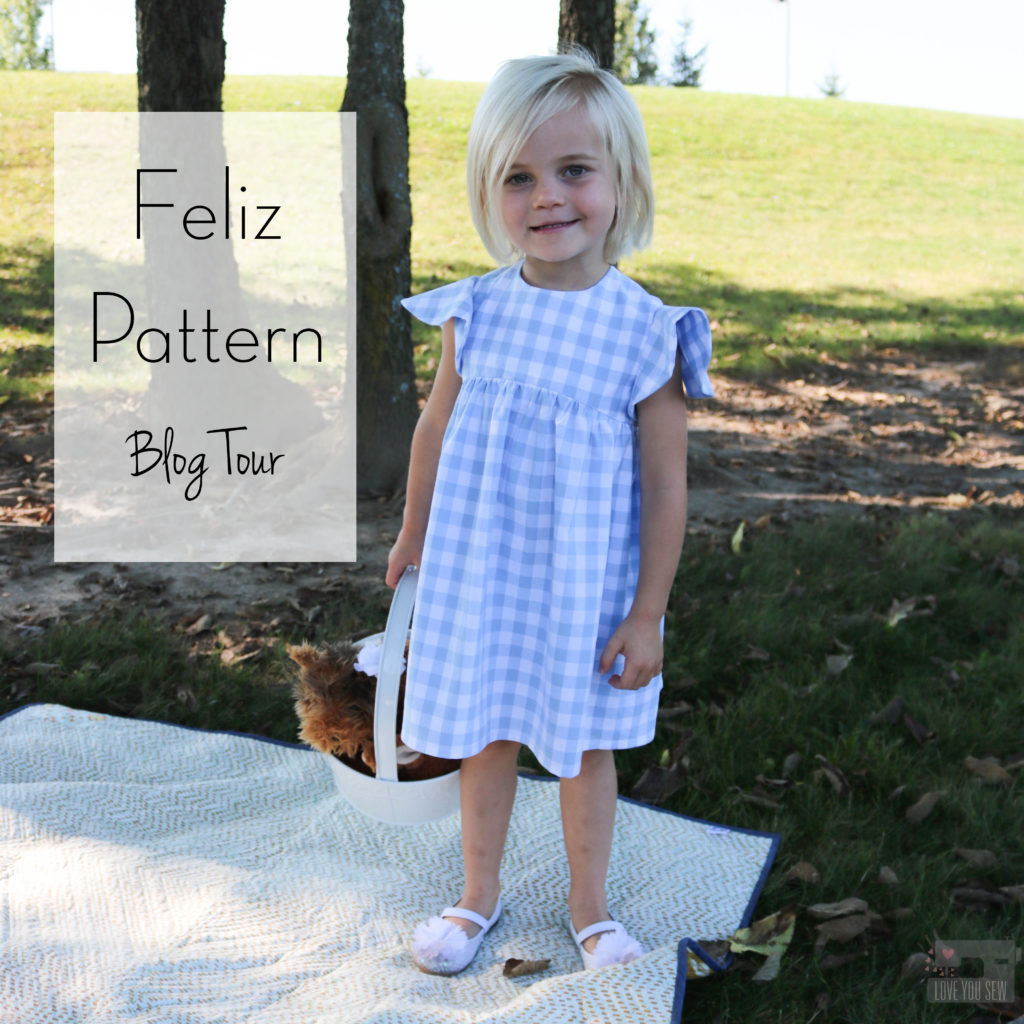
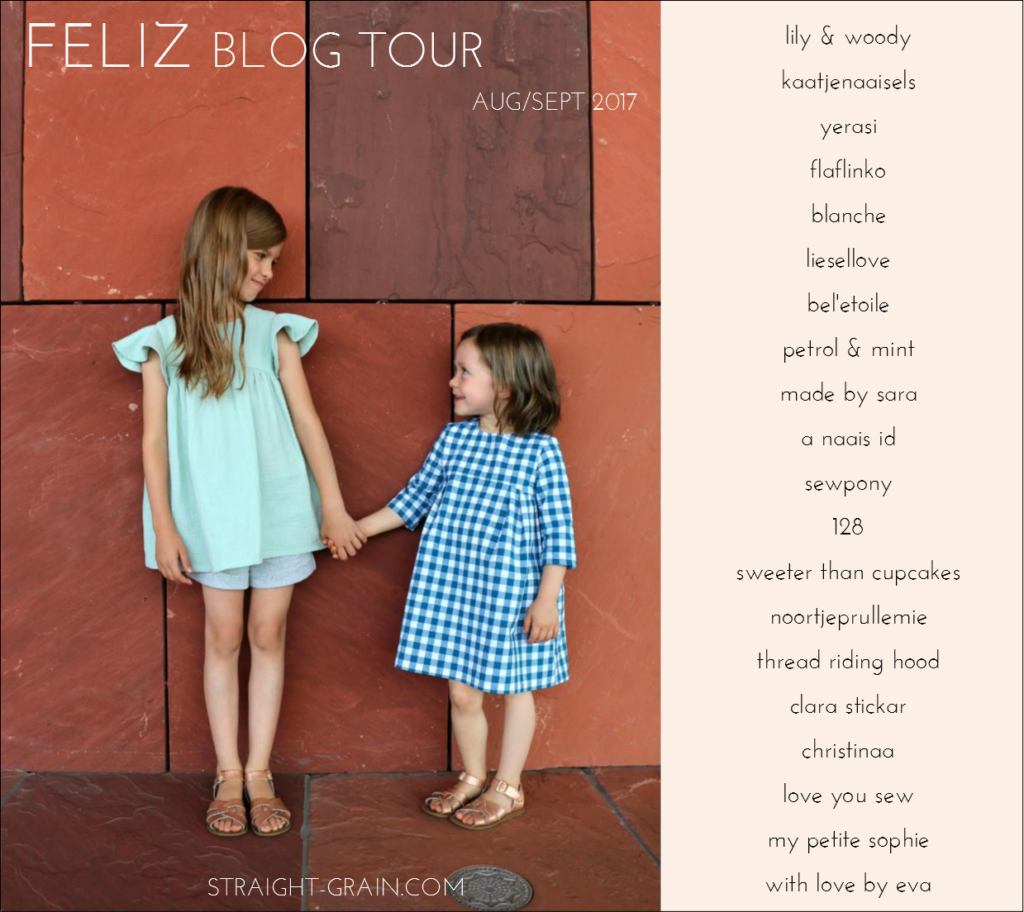
Feliz Pattern Blog Tour

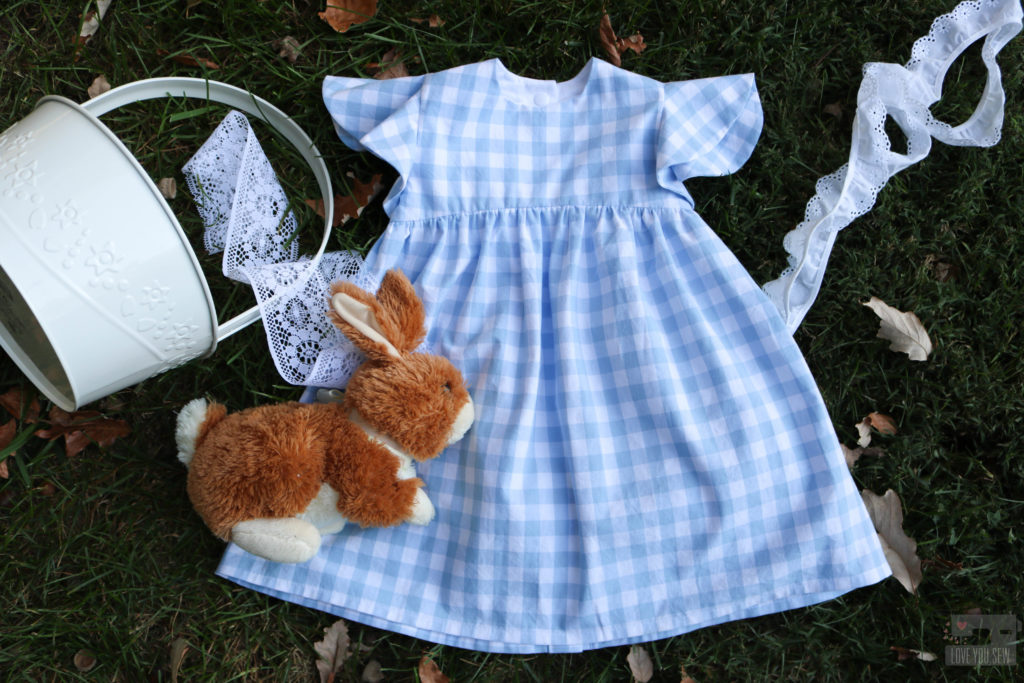
I love Straightgrain patterns.  That’s it…’just gonna put it out there.  You know I can’t stop making girls’ dresses and An’s designs are always at the top of my list.  She creates children’s garment patterns with beautiful clean lines and they are just so chic!  You can read about my previous Nova dress here

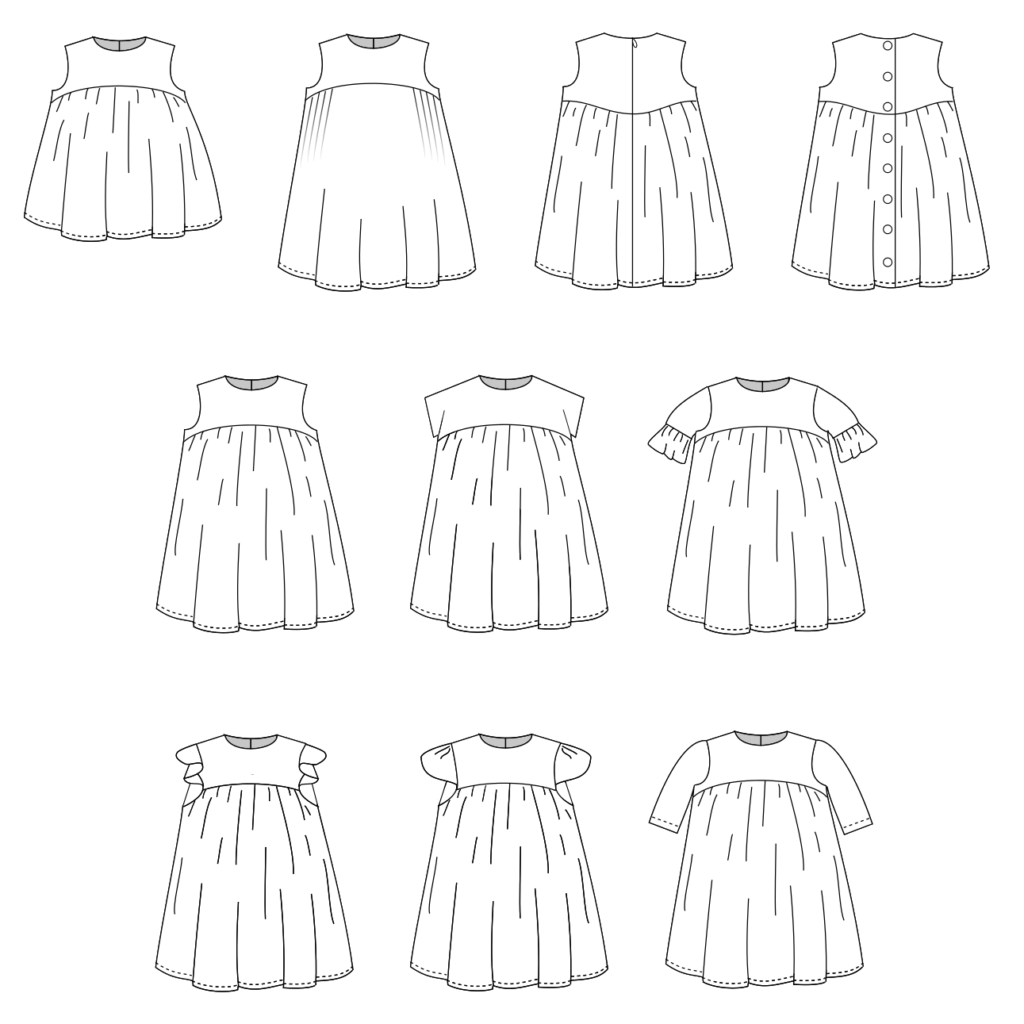
Straightgrain patterns always includes several variations to give you a number of different styles and the Feliz is not different. You can choose from a PDF or paper pattern from her online store here.  With the pattern, you can make a tunic or dress with 6 different sleeve options, two different back closures, and two different skirts.  It’s great to get so much versatility out of one pattern and I think An’s are a great value for all which she provides.

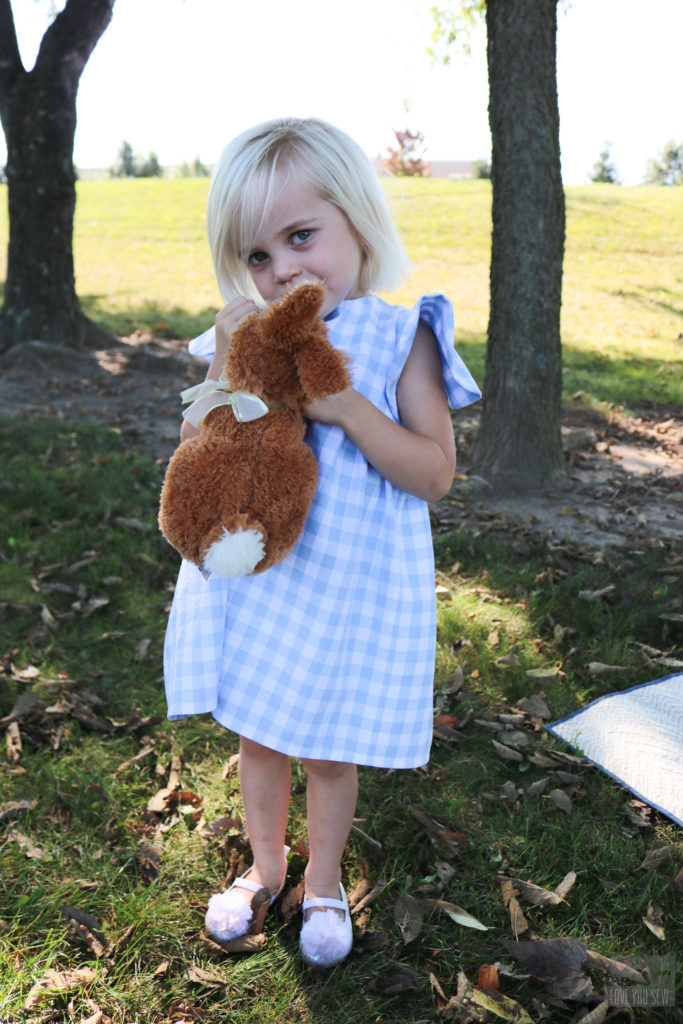
Of course, I picked the dress version. I make all my dresses as gifts (since I’m a boy mom) and dresses count as a full outfit 🙂 It makes me happy to work on a tiny garments (purely because of the cute factor) and my nieces are happy to get some custom clothes.

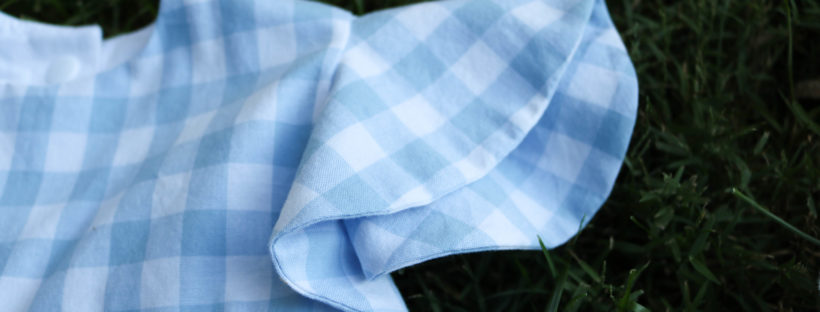
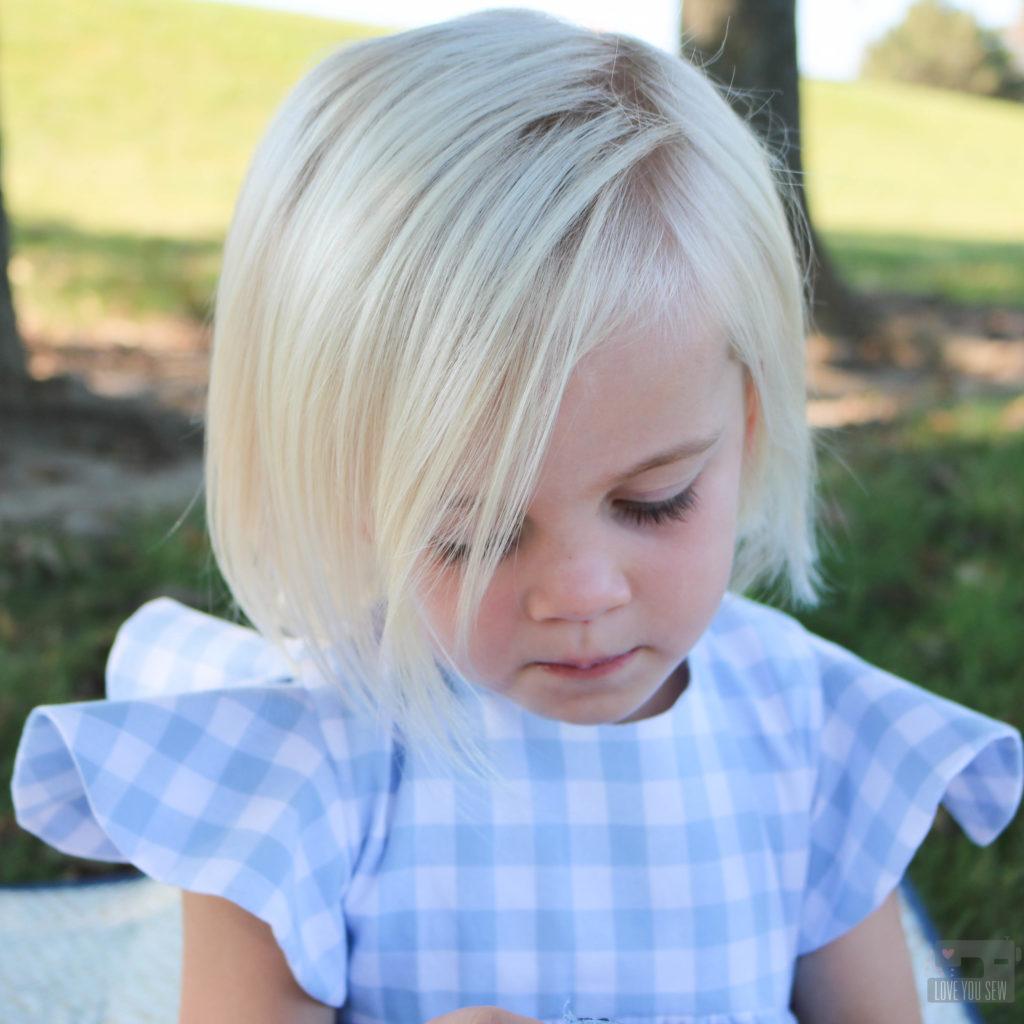
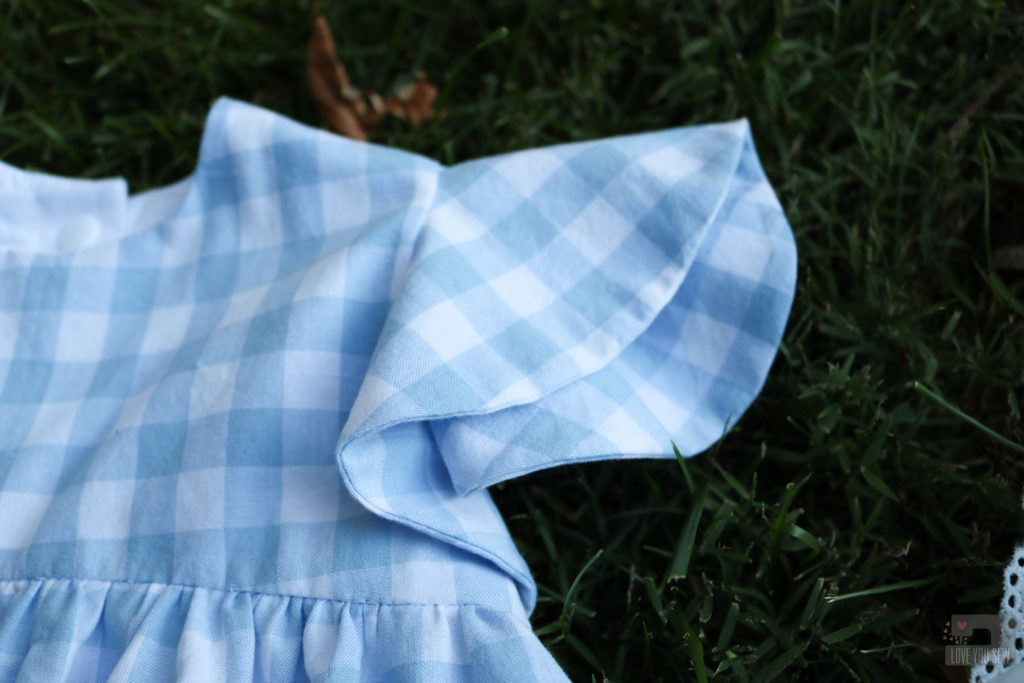
Did you see the flutter sleeve options?  SO cute!!! The soft waves are so feminine and really soften out this silhouette. It was hard for me to choose between the narrow and wide options. But I settled on the wider for just a little more arm coverage.

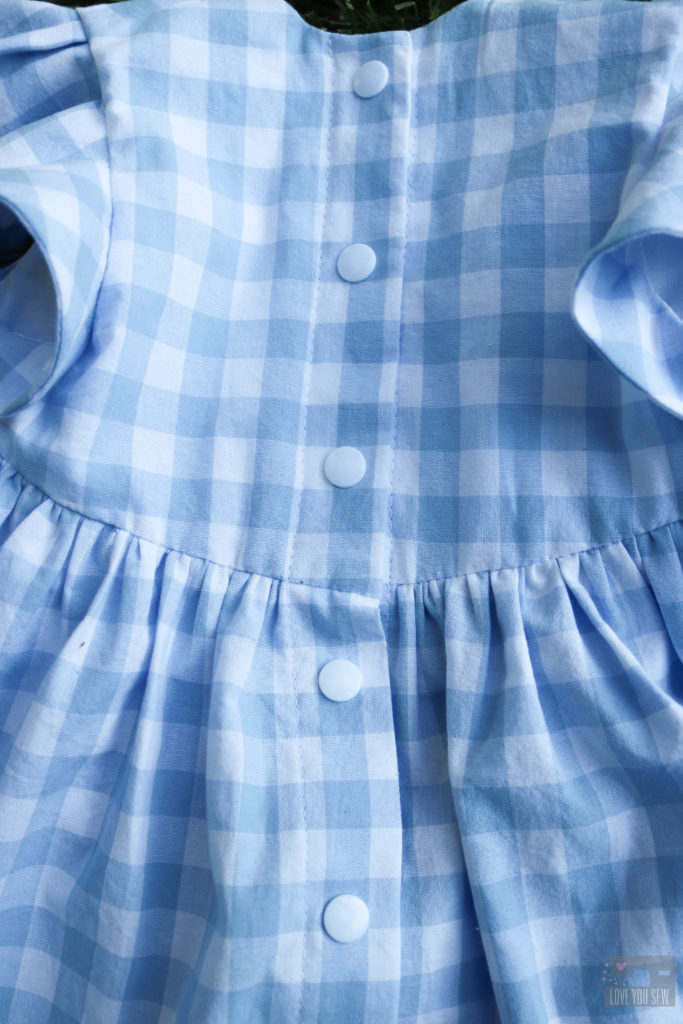
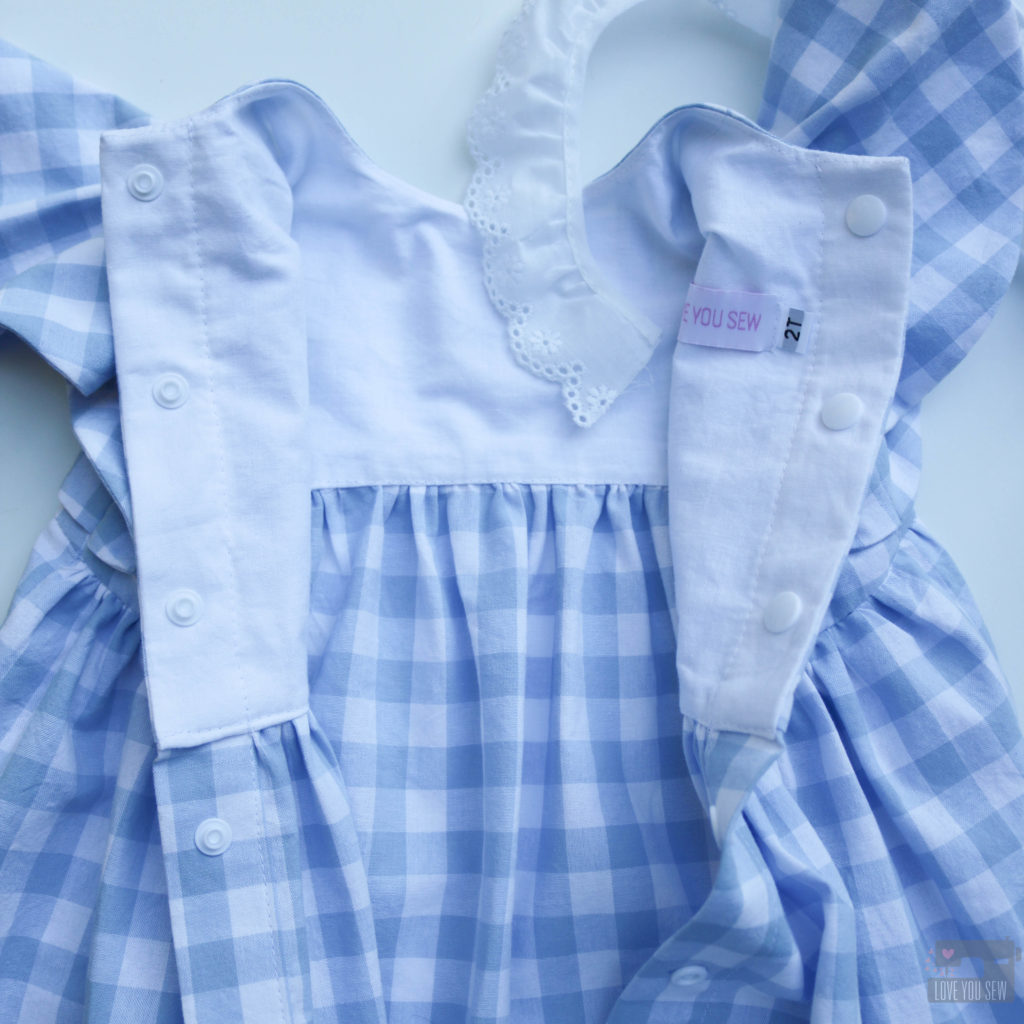
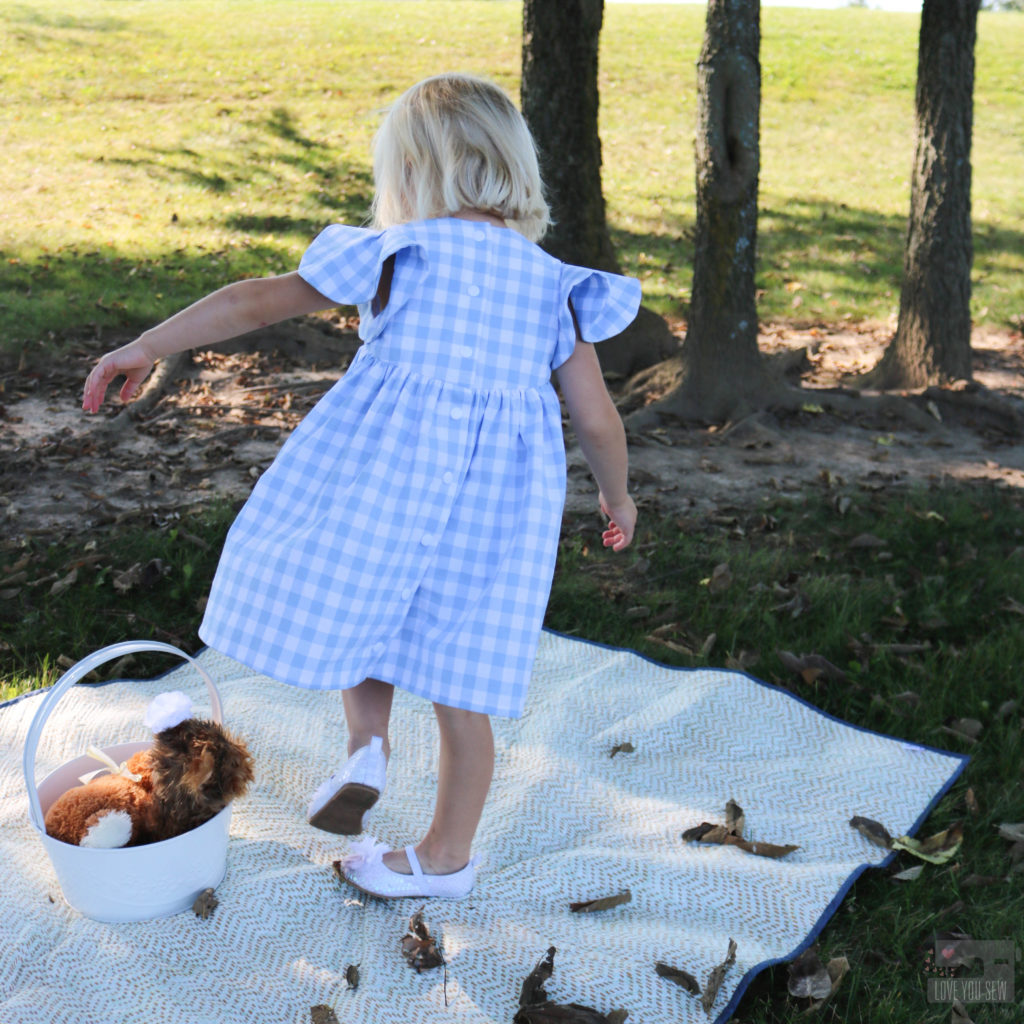
With the back of the Feliz dress, I knew I wanted to make a button closure. But instead of buttons, I used KAM snaps. I have quite a collection in my stash and they make for very quick dressing and undressing.


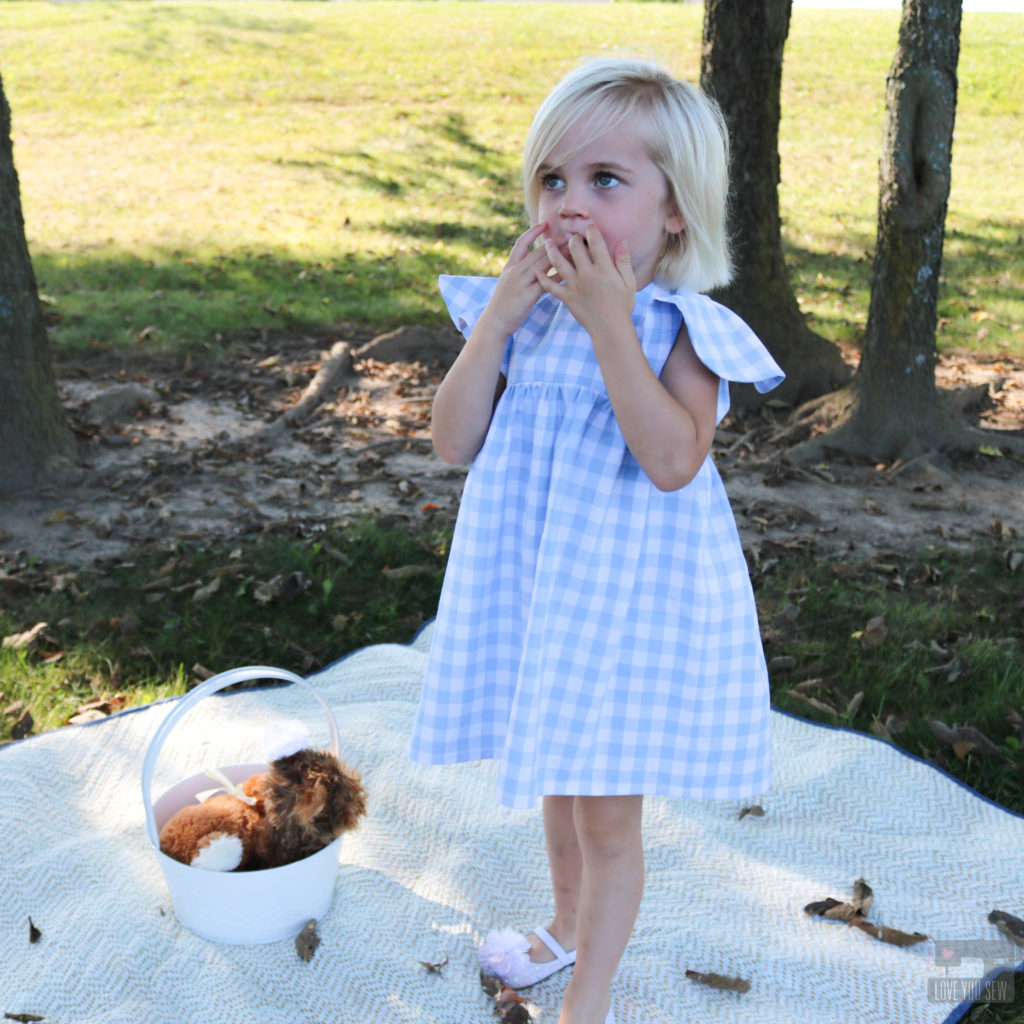
I happened to have Cotton and Steel’s yarn dyed gingham in Sky and was able to make this dress with just one yard of it!  There wasn’t enough left for lining, but Kona Snow worked in perfectly.  I’m so glad I saved the fabric from becoming a scarf (like I initially planned) because the Feliz is just the such a darling pattern and pairs well with this sweet fabric.

I think my model agrees! She would not take off this dress after our photo shoot.  Can you blame her at all?  I’m thinking I need some gingham love in my wardrobe soon…

The sizing is spot on with this pattern.  My model is a 3T for length, but is still pretty slim, so the 2T fit her well…and of course, I pre-washed all the fabric so there is no surprise shrinkage.  The dress hits her at just the right spot on the knees and is the perfect for some playtime!


I like the lift on the sleeves with a woven fabric.  It adds a little more drama 🙂  But if you used something lighter, like a double-gauze, it would be more draped.

I really love the versatility of this pattern and can’t wait to make a few more!  What combo would you make?

If you need even more Feliz eye-candy, please check out #felizpattern on social media and visit all the bloggers part of the blog tour:

Happy Sewing Friends!
Cristy
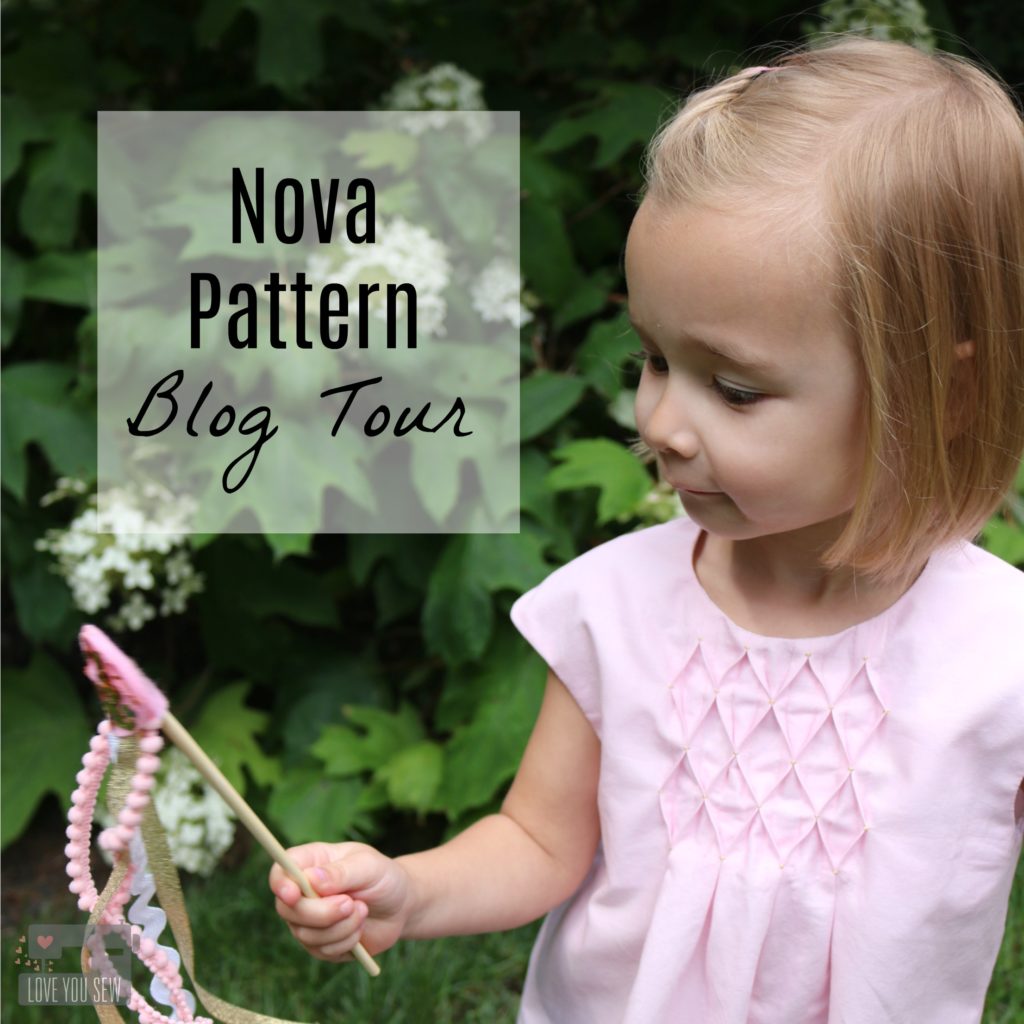
Nova Pattern – Blog Tour

Sewing up little girls clothing is one of my favorite things to do.  I don’t have any girls of my own, but I love making them for my nieces and close friends. It’s such a nice change of pace from all the boy patterns I use and I do love “the twirl” when one of my recipients puts on her dress for the first time.  It just fills my heart!

When I make the plunge to purchase a girl’s garment pattern, it has to be versatile and timeless.  I don’t make them as often as other things and I need them to go with all different fabrics.  That’s exactly the style of Nova by Straightgrain Patterns.   It’s a beautiful no-fuss, clean design with lots of options.  The sizes go from 3m – 12 years too…Now that’s what I’m talking about!

The Nova pattern is available in both PDF and paper forms. I’m a paper person, myself, and love the color coded sizing. Many authors will give you color in the PDF but not the paper, so that was a nice surprise to find.  The pattern is also written in both English and Dutch (for any of my Danish friends out there!)

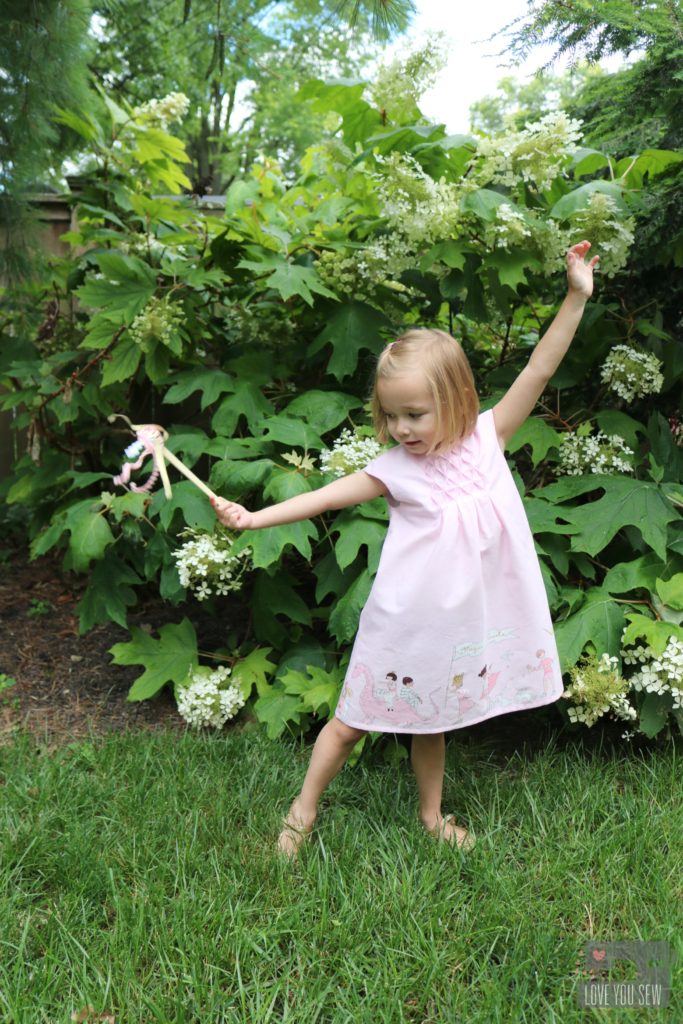
Nova consists of a classic A-line silhouette for woven fabrics.  You can change up the sleeves, the length, back closure, and even collar for a number of different looks. But what makes this pattern really special, are the pleating variations on the front and the back!  All the different pleats are just so amazing and I’m all about that extra texture!

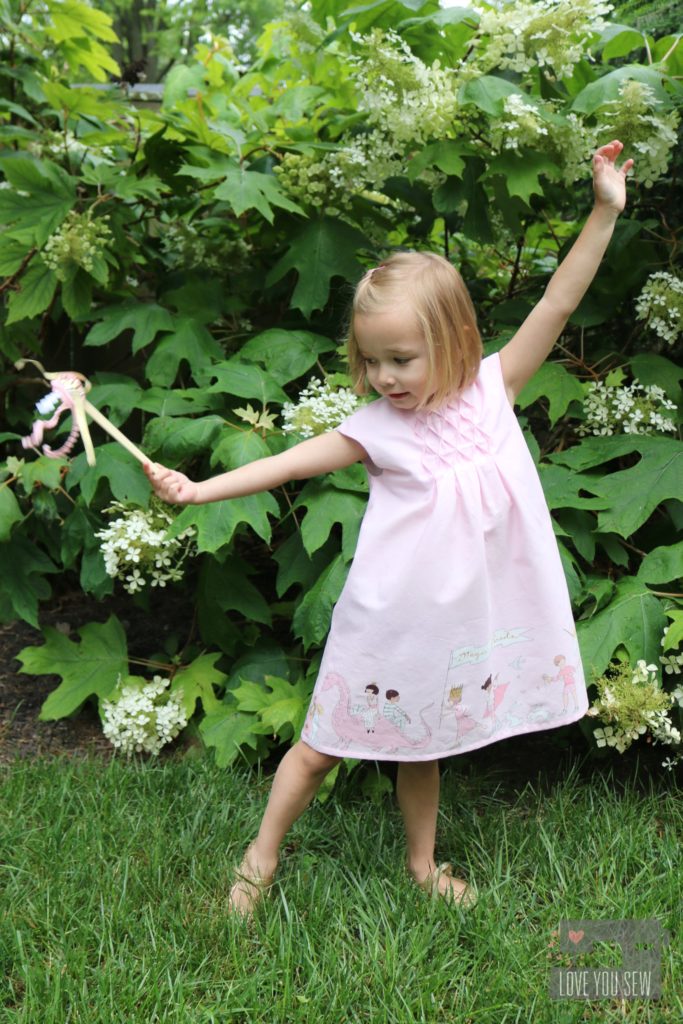
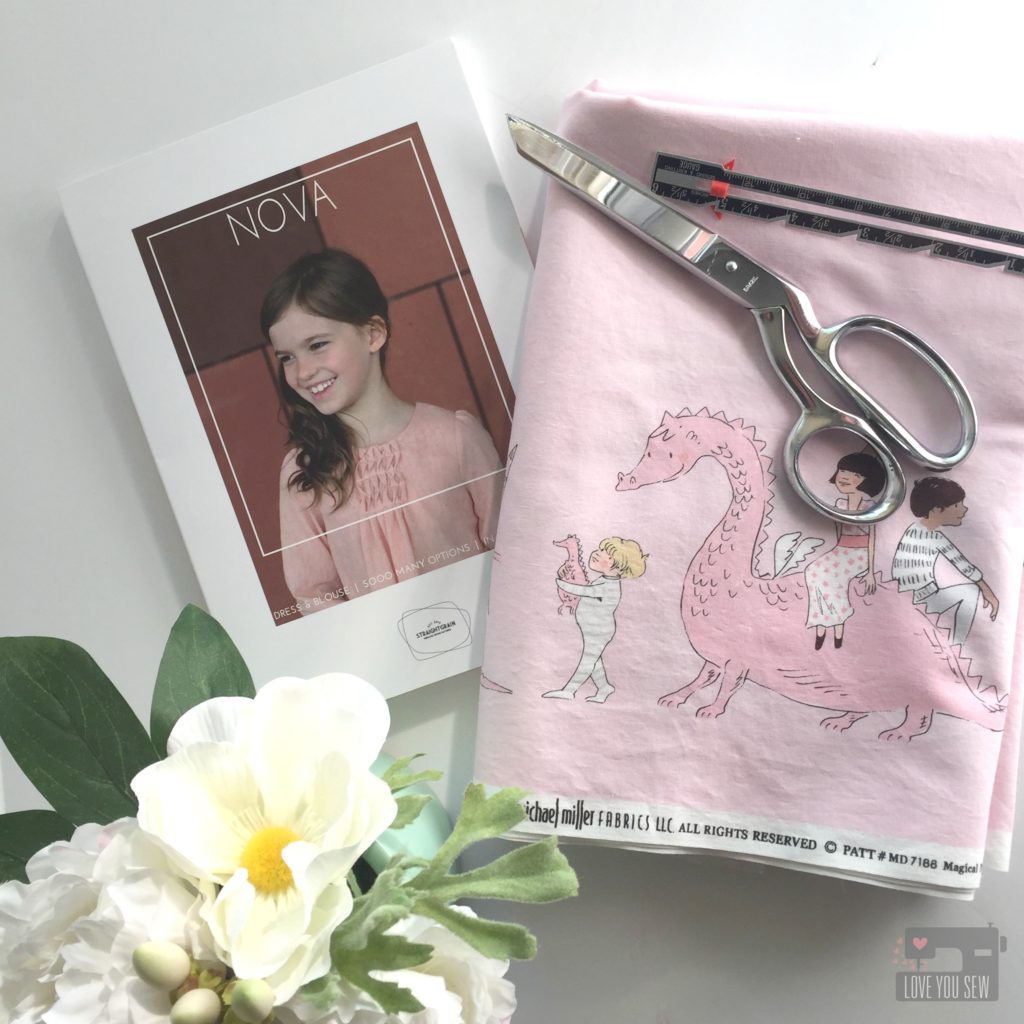
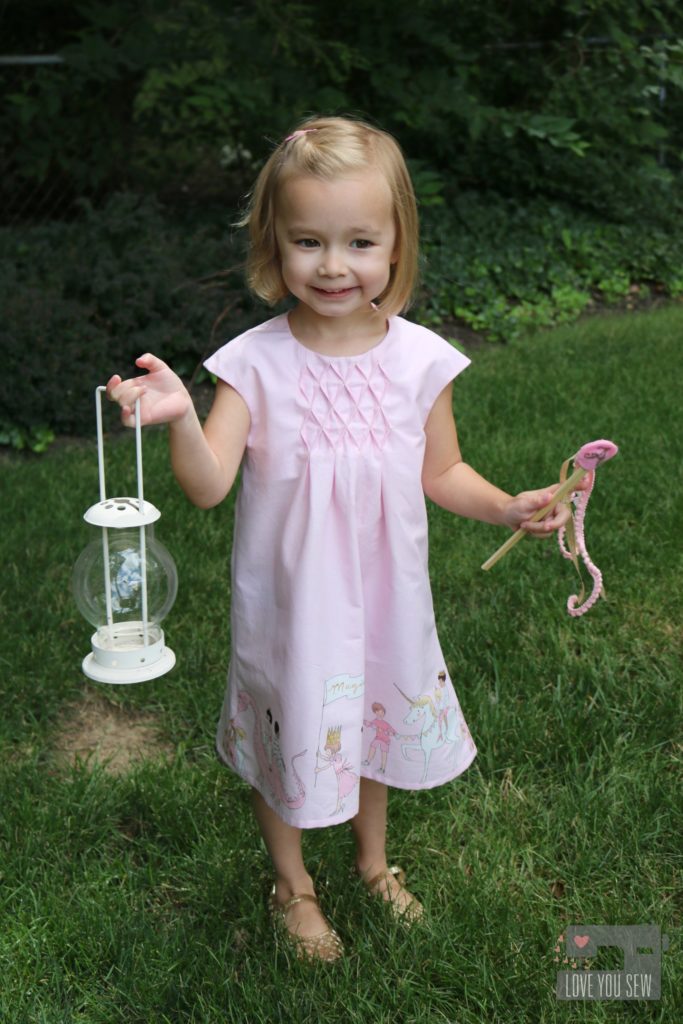
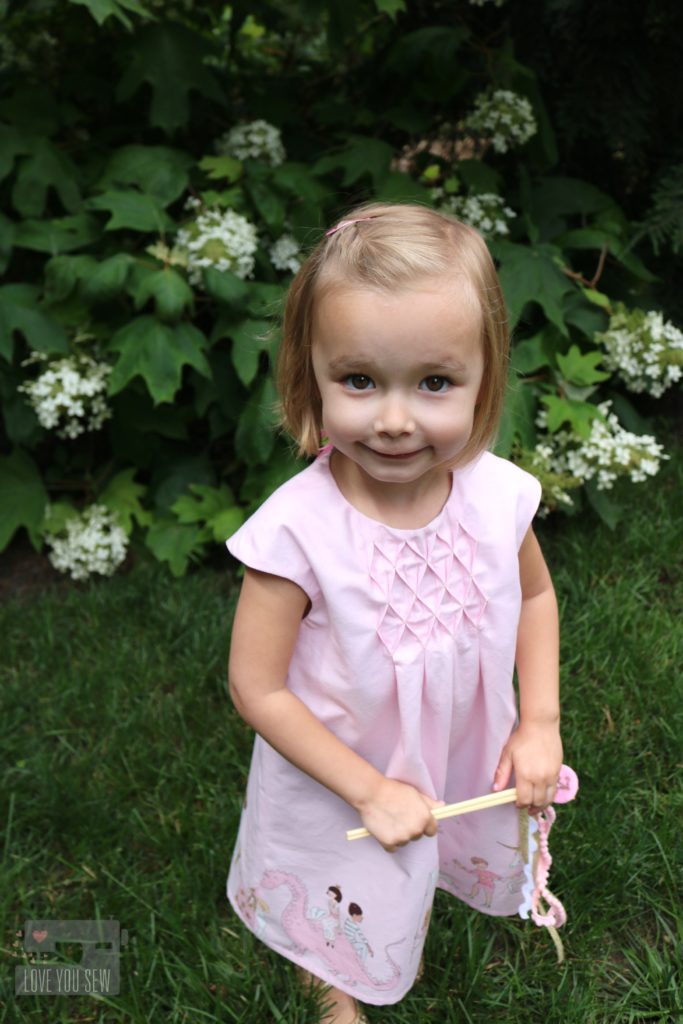
When I received the pattern, I knew the double panel print from Magic! by Sarah Jane was going to be perfect. The parade of magical creatures is so whimsical and such a sweet look at childhood.  The simple solid pink background would really show off that honeycomb smocking.

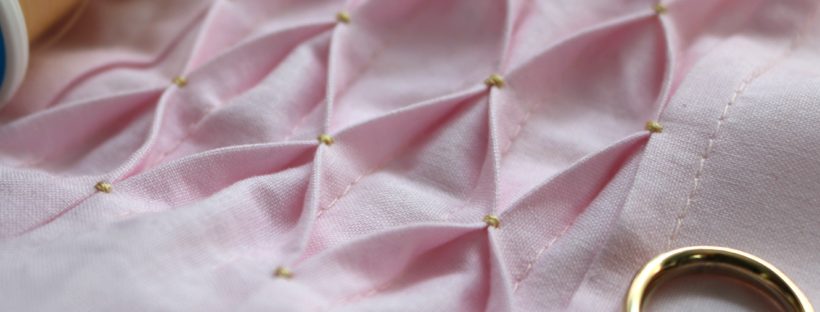
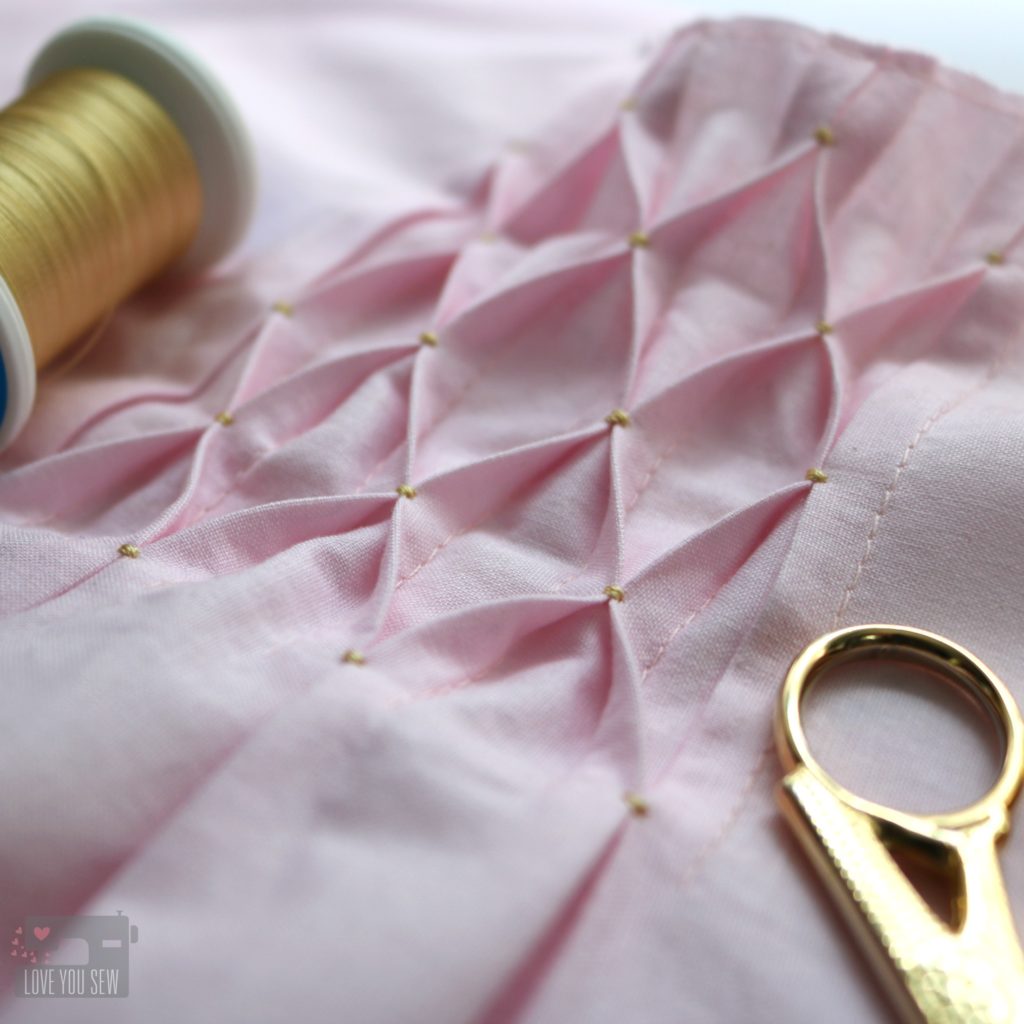
Speaking of…can you believe this was my first time making the honeycombs?  I did have to read and re-read the instructions a few times to wrap my head around the concept.  But luckily, An had a number of great pictures AND a video tutorial to help this newbie.  I made sure to evenly mark my seams, sewed slowly for nice even pleats, and pressed well for a defined shape.  Gold thread really helped to highlight the technique and brings out the metallic details in the fabric.

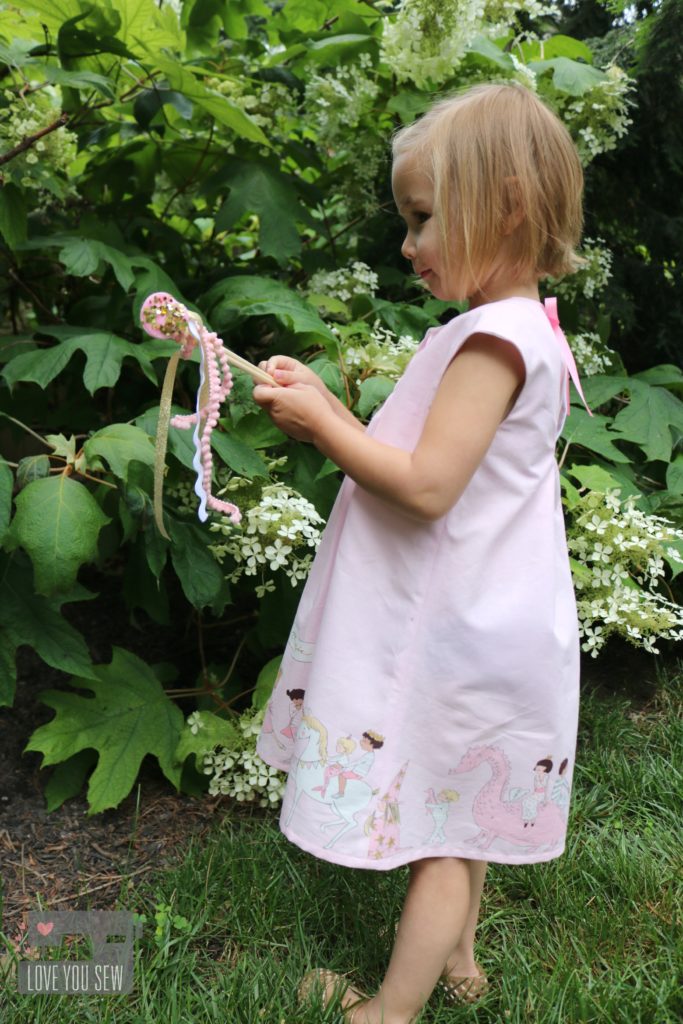
With the honeycomb detail, I kept the sleeves simple with the cap option. It gives such a nice clean style and the dress can be put on and taken off easily too.

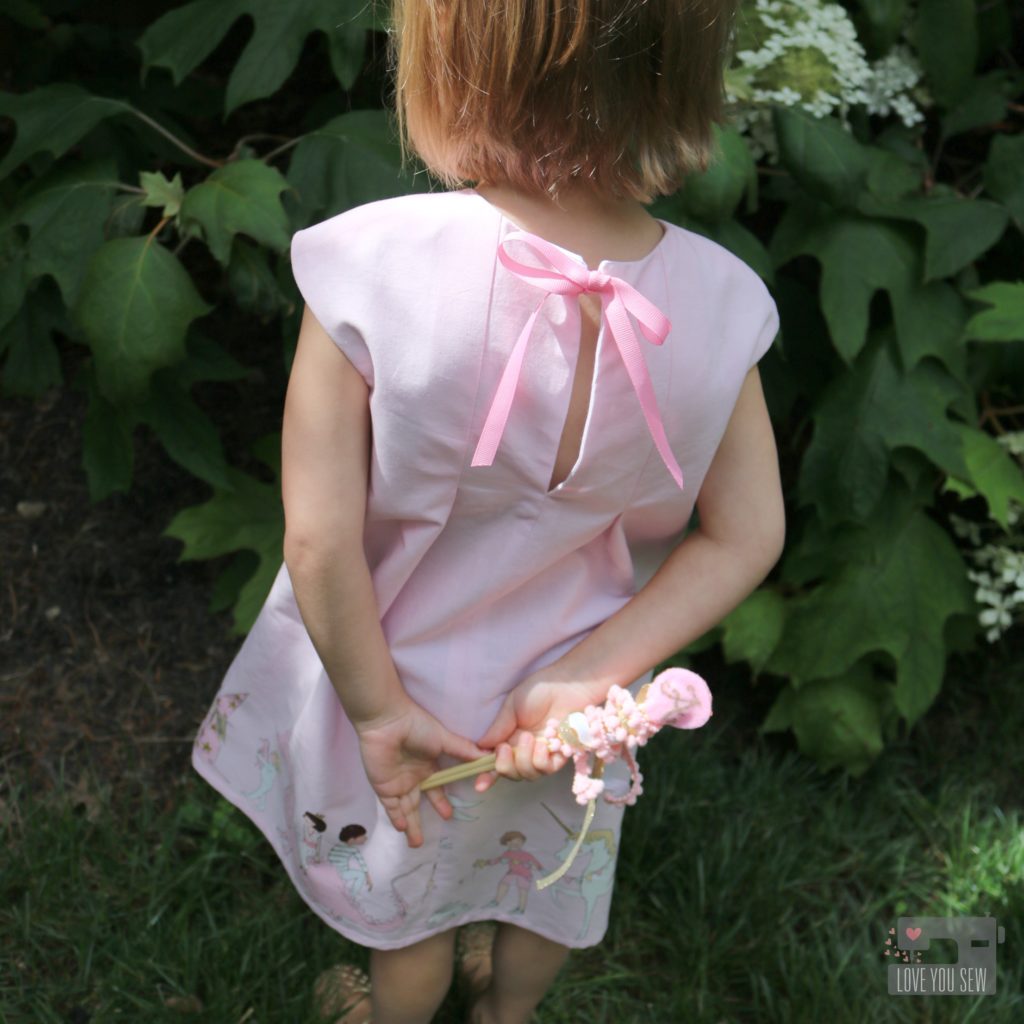
For the back, I opted for the ribbon closure. The fabric is just so sweet that only a bow could work IMO.  I was debating back and forth with ribbon color and settled on a shade that was darker than the body of the dress, but picked up in the print.  It gives the dress some balance and brings your eye up to that keyhole detail.

The Nova was SUCH a fun make. It helped to stretch my comfort level and I learned a new skill in the process…which wasn’t as hard as initially thought! This is another reason I enjoy making little girl dresses. It’s nice to work on my garment skills on a smaller scale…and for a less discriminating audience. Haha.

Project Details:

Make sure to also follow Straightgrain Patterns on Instagram for more inspiration and tutorials to help you along the way.  #novapattern #straightgrainpatterns


Check out the other participants in the Nova tour:

Sisko by MiekeBel’EtoileZowiewo Petrol & Mintsewpony Fairies, Bubbles & Co
Elizabeth LittleMaker Mountain FabricsBetter Dressed Child Just Add FabricMy Petite Sophie
Frances SuzanneI Sew BlancheLily & WoodyMy Minnie Mie
Love You Sew (you are here)- Thread Riding HoodAriane Blog


The Nova pattern was provided by Straightgrain Patterns as part of the blog tour.  All thoughts and opinions are honest and my very own.  

This post contains affiliate links under Project Details

Out & About Dress {Pattern Review}

OutandAboutTitle

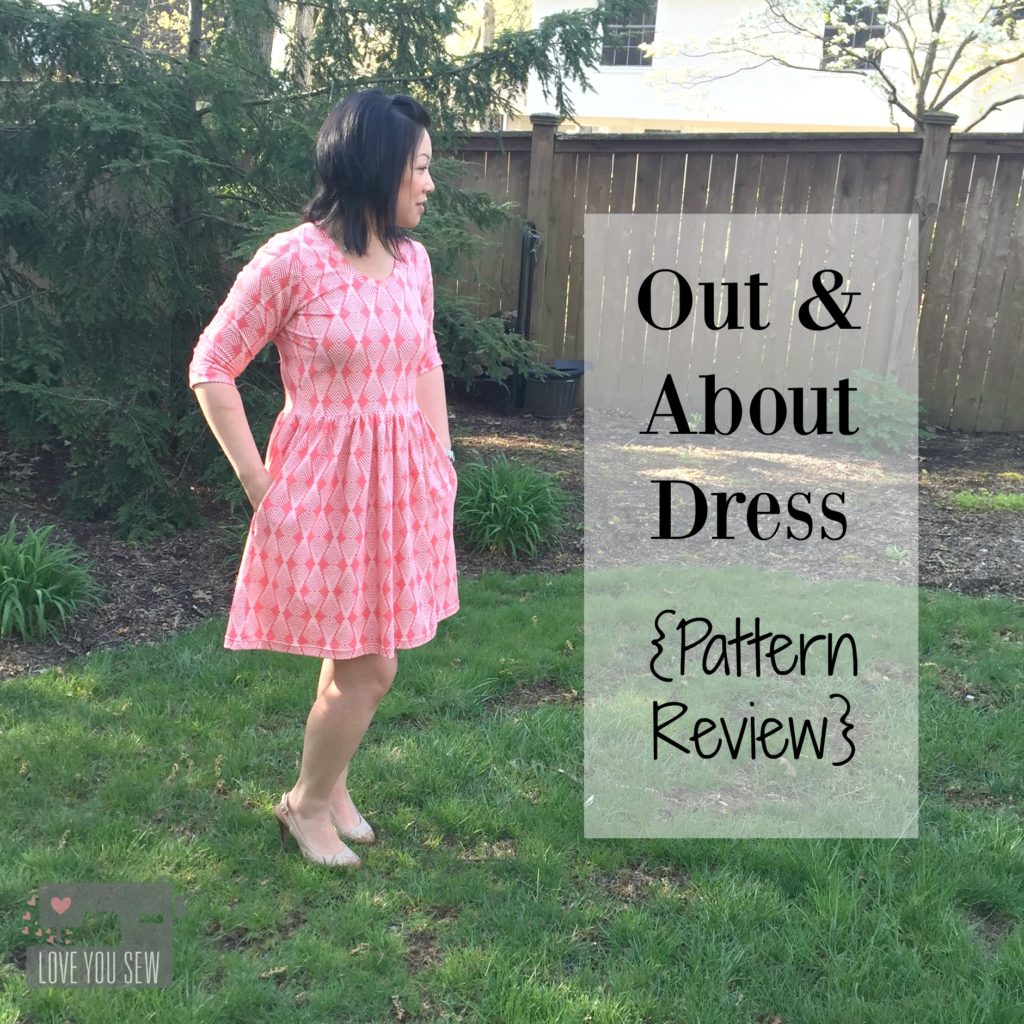
‘Nothing like having some crazy beautiful weather to push me to finally make my Out and About Dress.  (Anyone else getting snow in April, then full sun and 70* the next day?)  I’ve had this pattern since Black Friday when Sew Caroline had a great sale, but like most selfish sewing plans, this was pushed to the side.  Once the weather warmed, I knew I needed to add some more pieces to my me-made wardrobe.

I chose Plumage Poppy knit by Art Gallery Fabrics which is just amazing.  It’s bright, springy and just feels so soft and good too.  Best part is I picked up this from my little quilt shop (LQS) Sew to Speak…on sale!  Doesn’t that always make a project feel even better? 🙂

Garment sewing can be intimidating…especially with knits, so I want to show you how I finished my dress with a bunch of close-up shots.

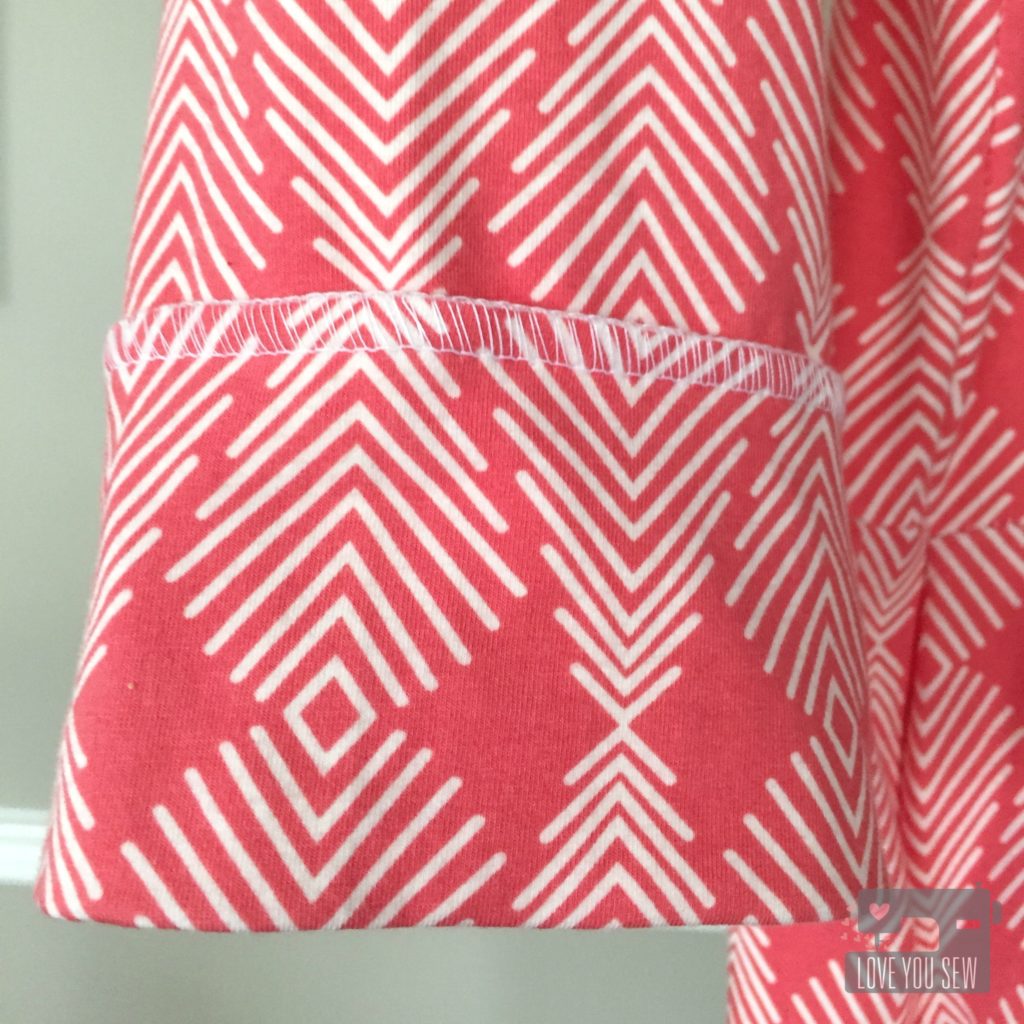
Cuff

I have a serger and it’s a god-send when it comes to knits.  The knife cuts a nice even edge and the overlock stitch helps tie up everything so beautifully.  There is a nice stretch which I chose to use here in the sleeves.  This pic was taken before I tacked the cuffs into place to hide the seams.

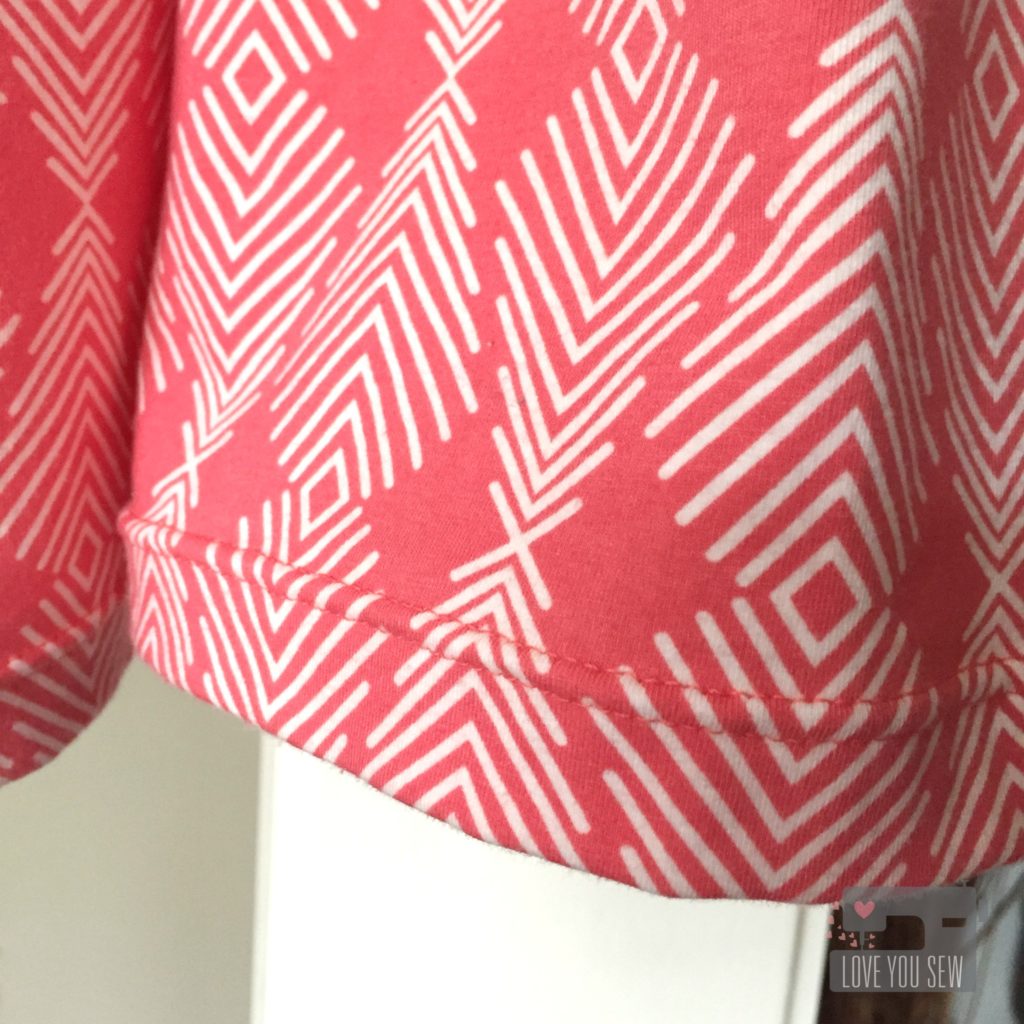
Hem

For the bottom hem, I used a ballpoint double-needle for this professional look. This allows for a decent stretch but not as much as the serging. With this being a loose dress, I am not worried about the stretch in the skirt….I’d rather it just look good! Ha.


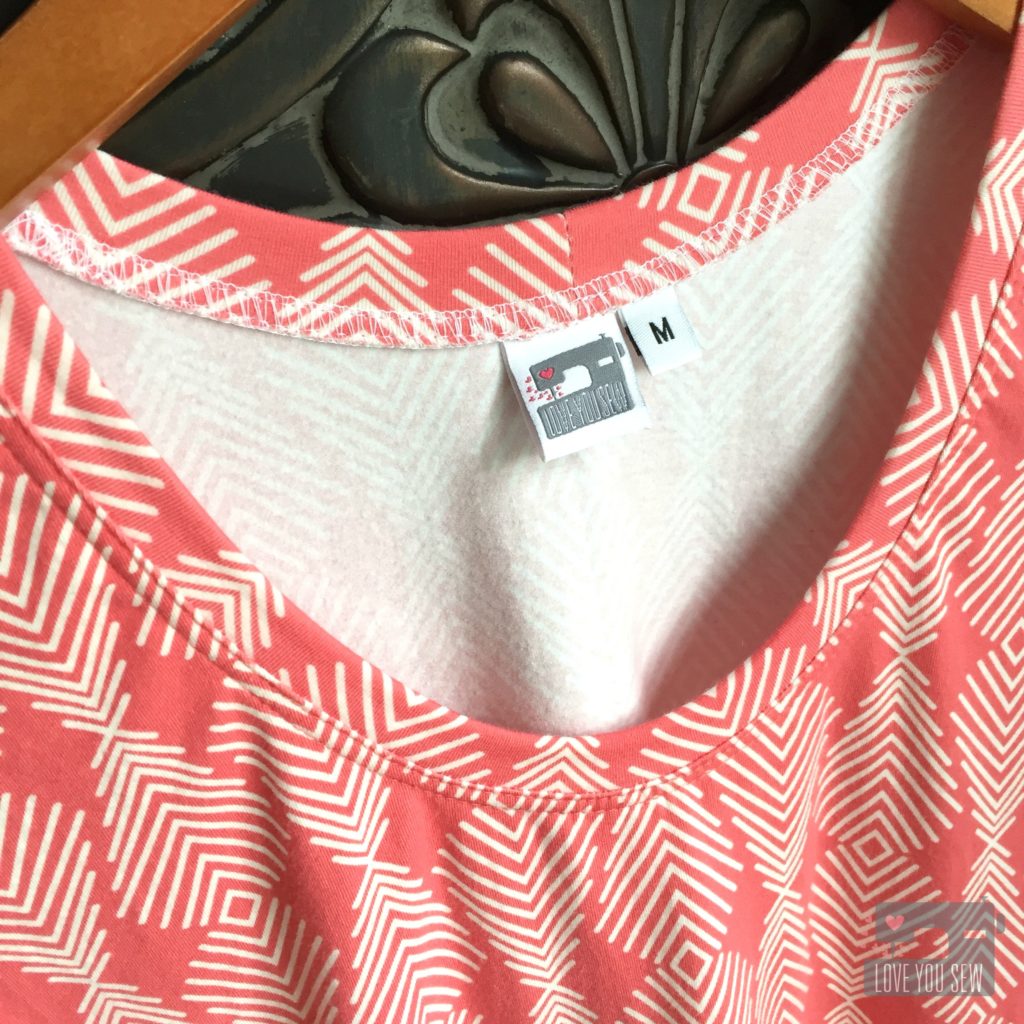
Neckline1

Around the neck, I serged the neckline onto the dress for a clean look on the hanger.  But for that professional look, I added two top-stitch seams while tugging at the knit a little bit.  A coverstitch machine would probably do the same but I don’t have one (It IS on my ultimate wishlist though.)  The size of the head opening is large enough that I’m not concerned with having to really stretch it out, so the top-stitching works.  It’s always good to test your stitches on a scrap piece to see how much stretch you need.

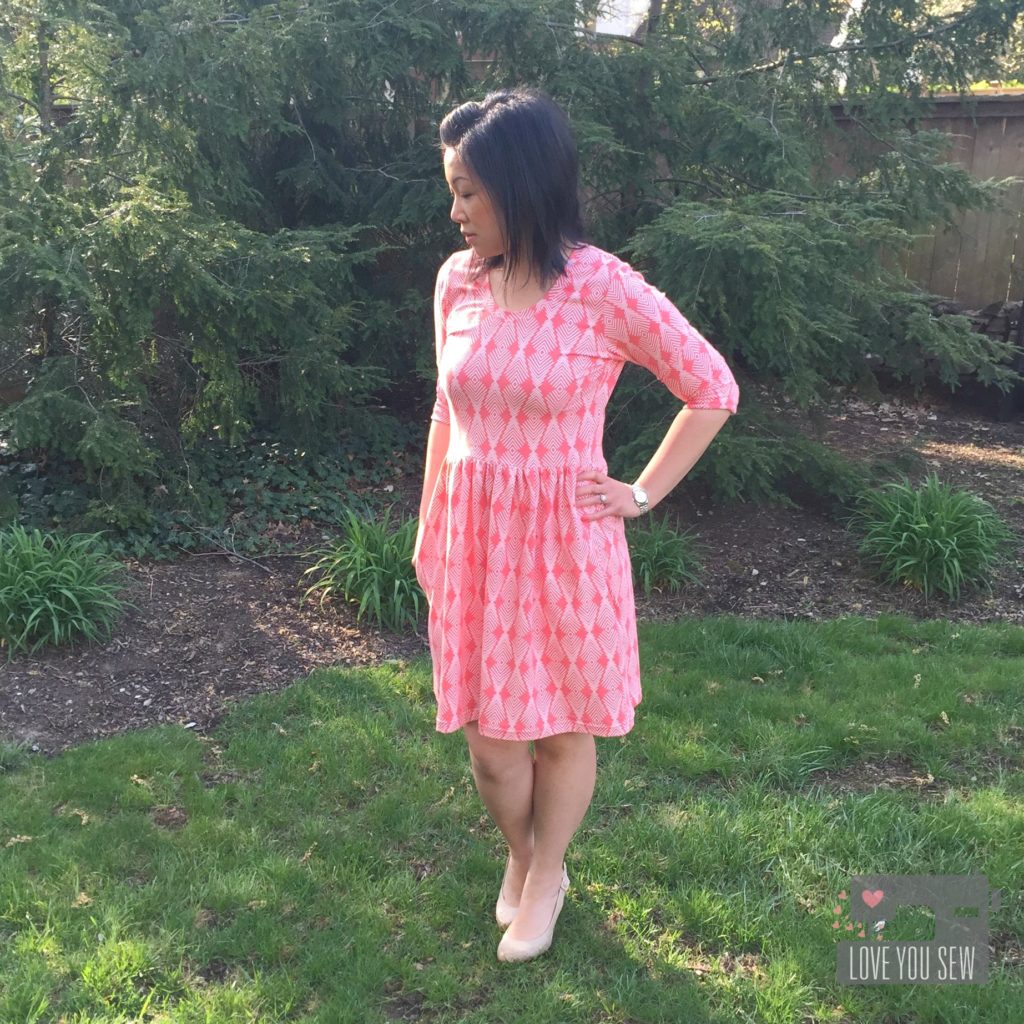
fullprofile

This was more simple sew than anticipated…even with the pockets!  So, I know this won’t be my last Out and About Dress.  It was true to size, but since I’m 5’3″ I took about 4″ off the hem to hit just above the knee.  I may have to attempt a hack for a tank version.  Let’s see how long it will take me to make one!

Have you made anything new for yourself lately?


Happy Stitching,

Cristy
Hawthorne Threads Roam Fabric Blog Hop

blog hopWhen Hawthorne Threads asked me to participate in this blog hop for Roam, I just about jumped out of my seat!  I had the pleasure of working with some of their digitally printed fabric for my niece’s nursery bedding so I already knew just how lovely this fabric would be.

Roam is a soft, dreamy rustic collection in both a Dawn and Dusk palette.  I tend to lean toward blues when I select fabric, but for some reason I couldn’t resist playing with the Dusk fabrics.  There is something about the earthly yellows, purples and pinks that is just so incredibly soothing…

I Love You Sew-4

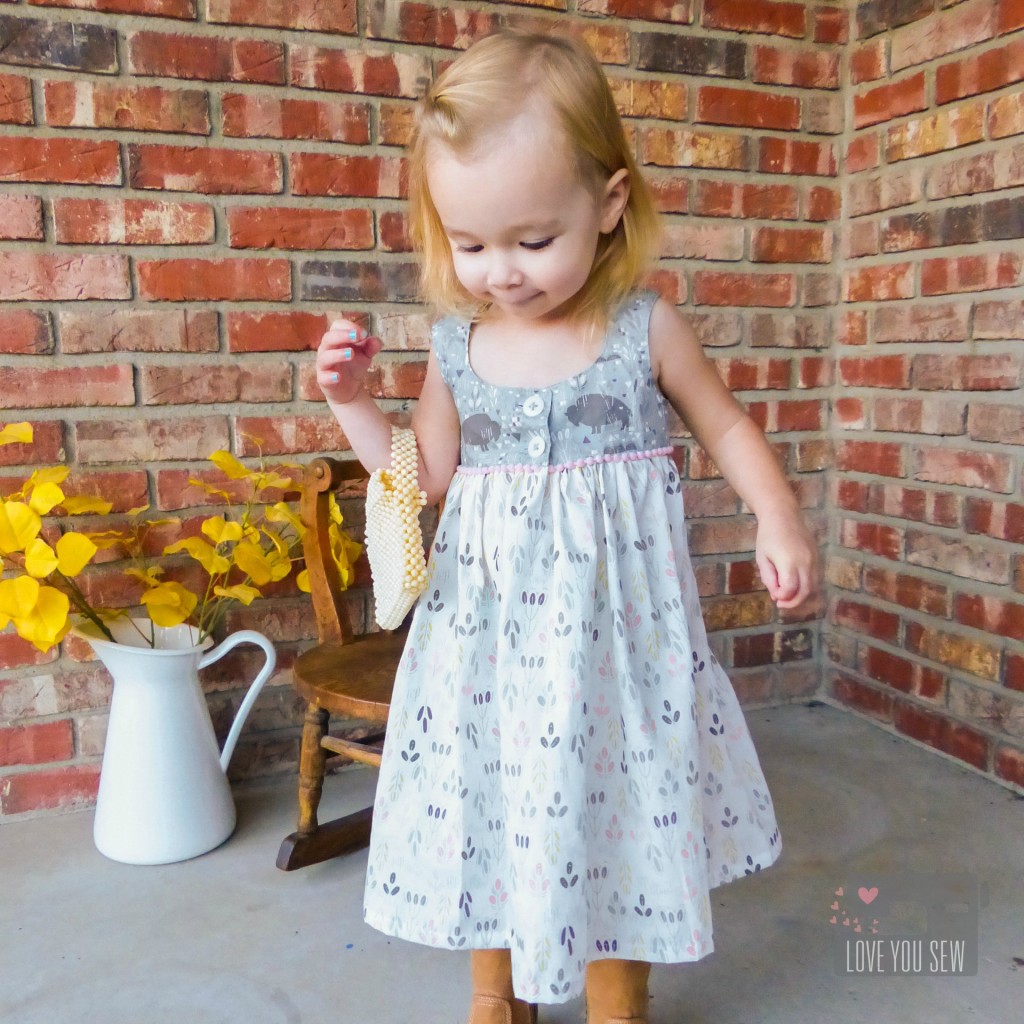
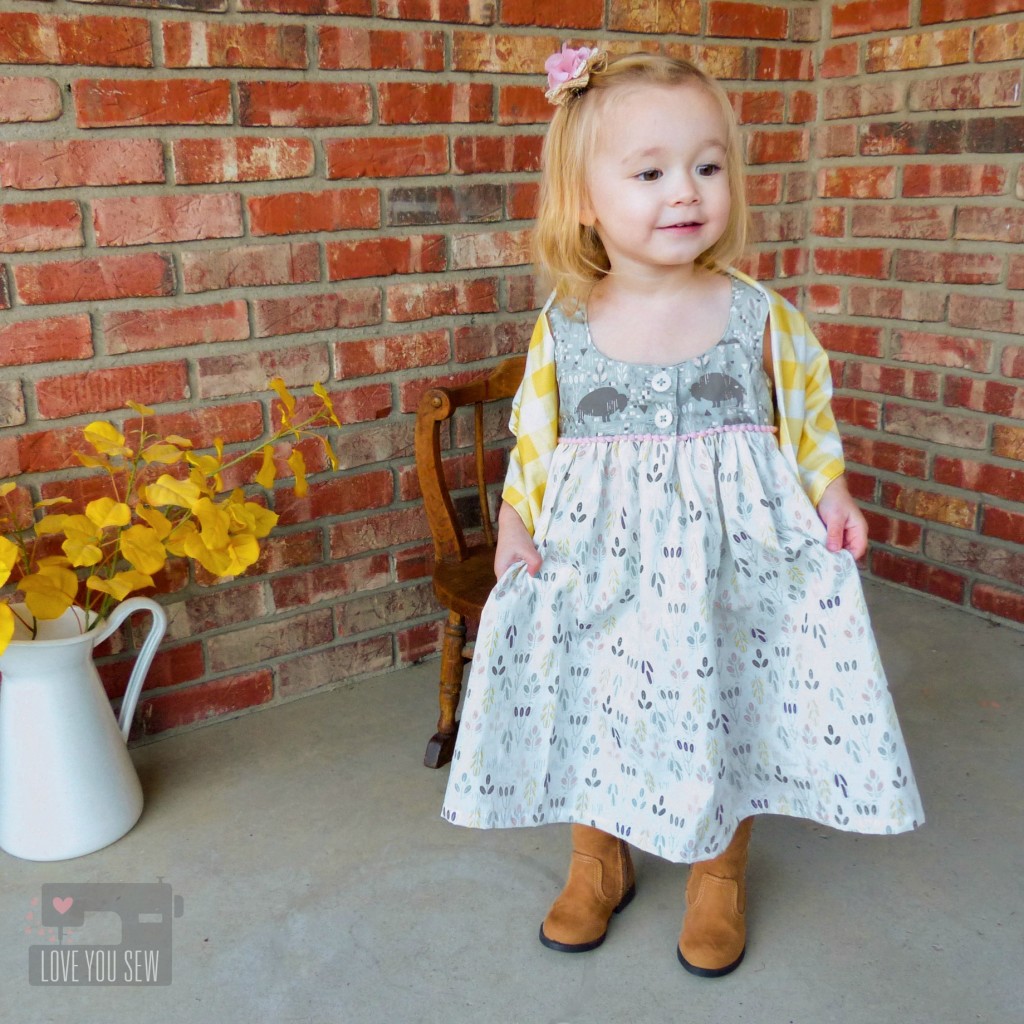
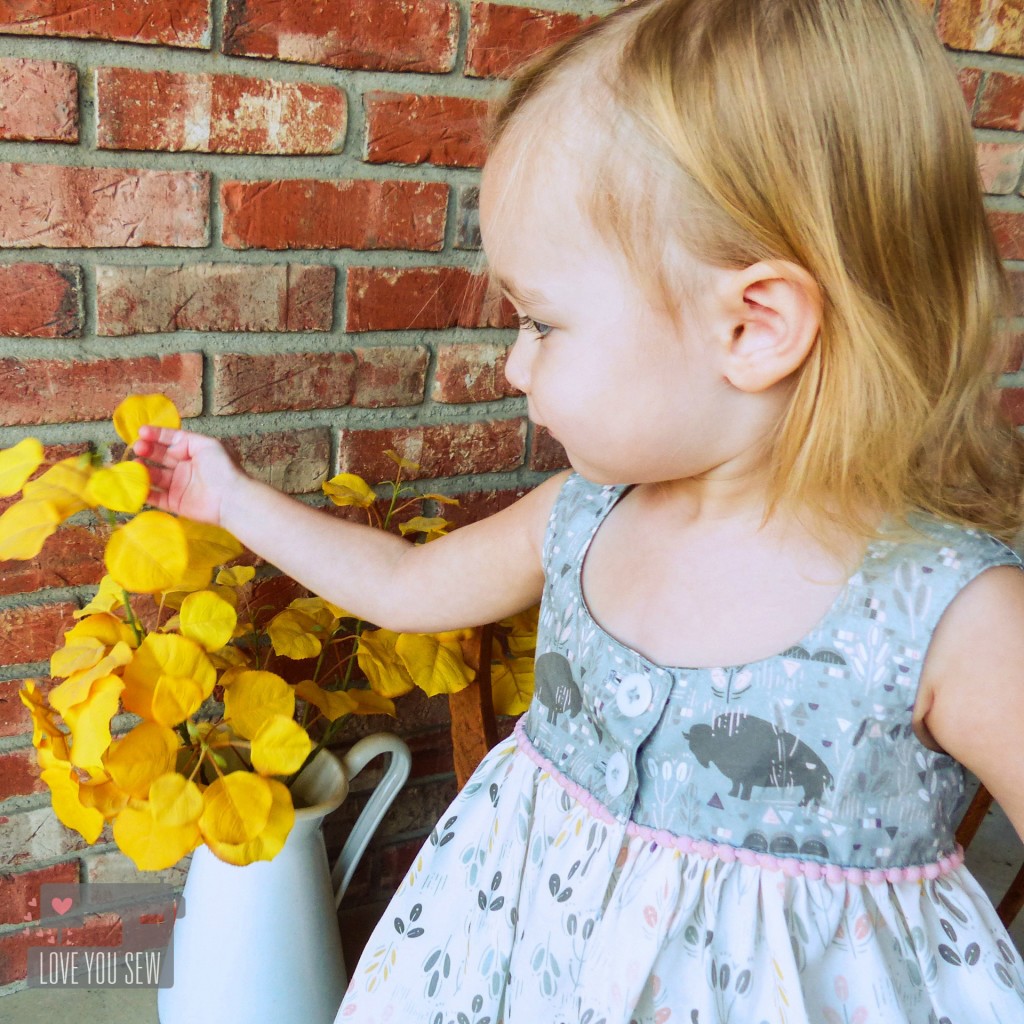
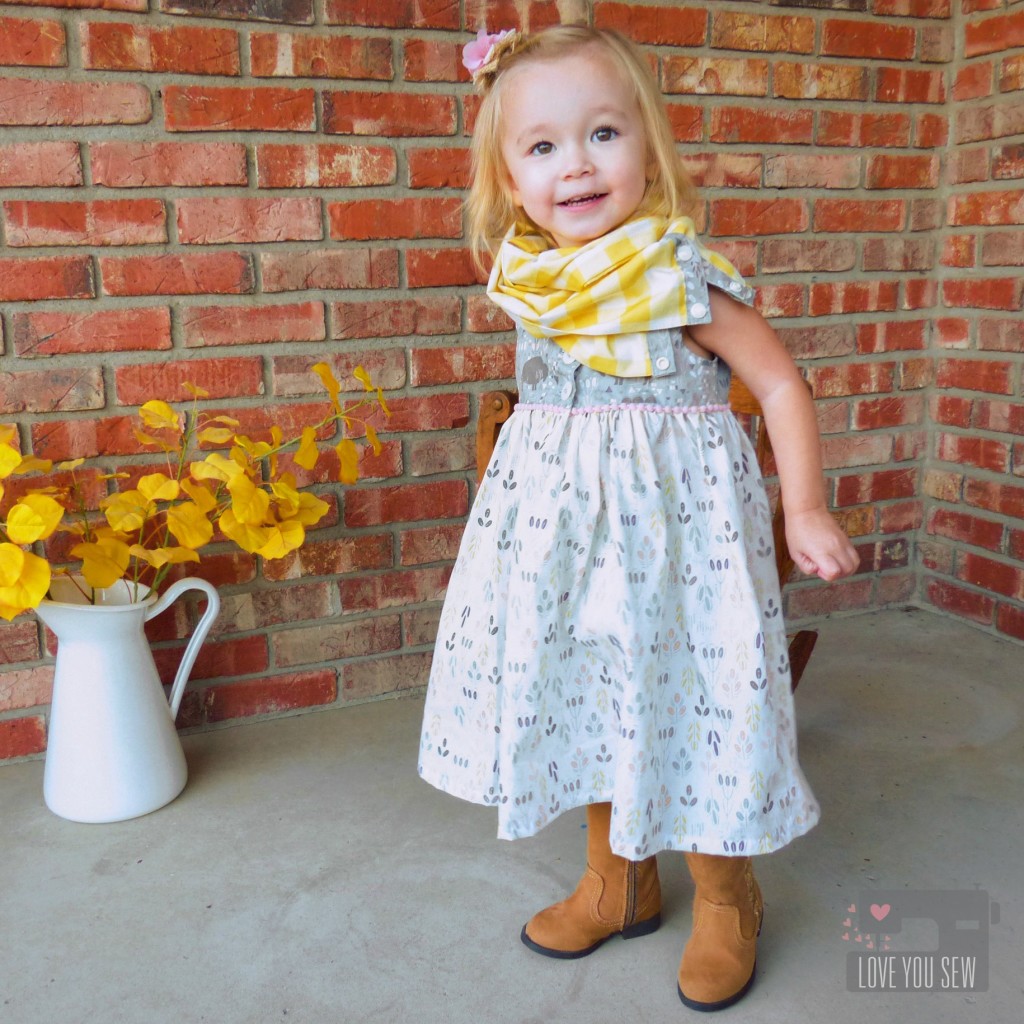
I selected The Plains in Sage and Prairie Flowers in Dusk to make the Desert Rose Dress by Caila Made.  This is such a cute dress pattern for toddlers and the Roam fabric was just a perfect playful fit for the design.

I Love You Sew-1

With the contrasting top and skirt, I couldn’t help but add a little extra pink pom-pom action….because…who can resist, right?!?  If you have not worked with pom-pom trim before, I suggest basting it in before you attached the top to the skirt.  It makes it MUCH easier to attach and stay even as you sew!

I Love You Sew-2Along with the dress, I made a Side-Snap Infinity Scarf.  The Buffalo Plaid in Honey is such a gorgeous coordinate.  I love how it picks up the yellow from the skirt and adds a hip stylish look for a little one.  The best part is the side snap placket which allows you to wrap the scarf without having to slip it over those big heads 😉

I Love You Sew-3You can also play with how you attach the scarf to change the look.  Snap it right in the middle and fold it over allows the scarf to work as a caplet.  If you use all the snaps, the scarf can stand up better to ensure full neck coverage on chilly days.  If you leave the snaps undone, you get a cute little shawl as shown.  Now who doesn’t love a multi-tasking accessory?!?

SideSnapScarfTutorial

To make the Side-Snap Infinity Scarf:

  • Use 1/3 – 1/2 yards of 42-44″ wide main fabric (depending on how much volume you would like.)
  • Fold the fabric with right sides together and sew down the length creating a long tube.
  • Pull the fabric so right sides are facing out and press
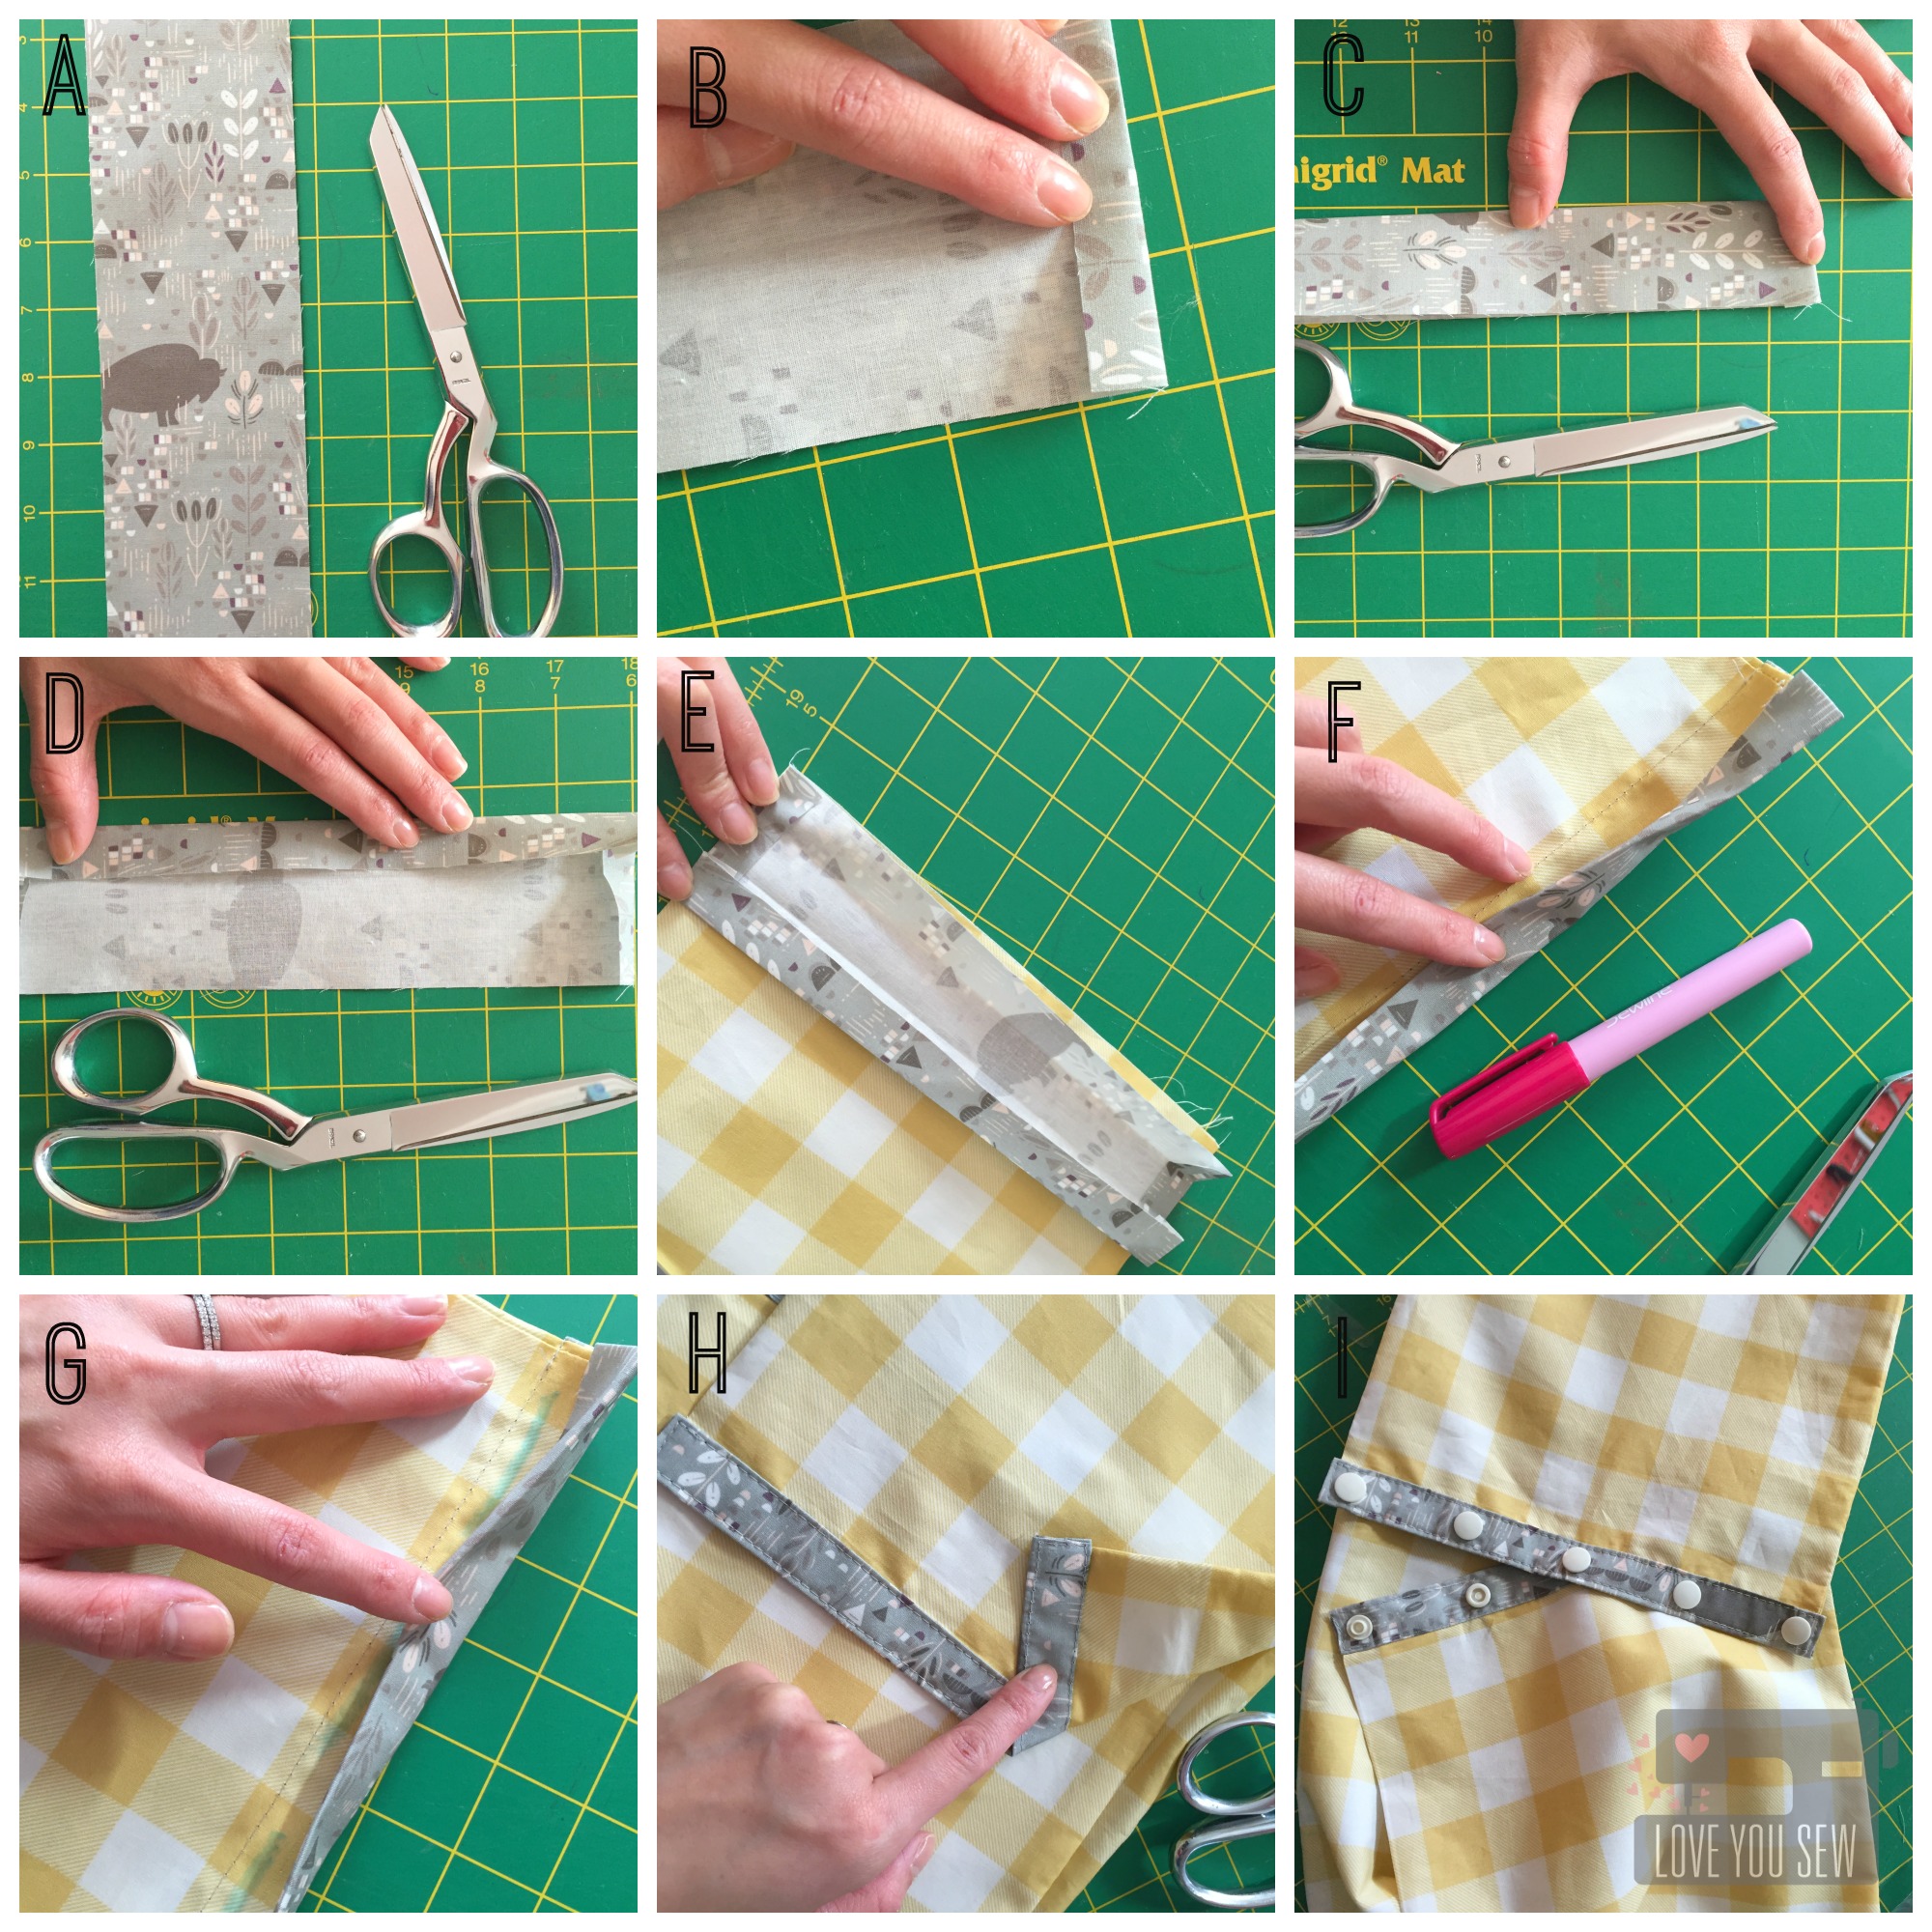
  • For the placket – {A} Take the accent fabric, cut (2) 3″ x 10″ strips (if using 1/2 yd for main fabric) OR cut (2) 3″ x 7″ strips (if using 1/3 yd for main fabric)
  • {B} On the short sides of the accent strips, fold a 1/2″ hem and press on both sides
  • {C} Fold in half length-wise and press.  {D} Open and fold lengthwise again but match the sides to the center line.  Press and make sure you keep a nice rectangle shape with sharp corners.
  • {E} Attach the placket by sewing in the the first crease of the placket closest to the end of the scarf tube.
  • {F} Flip the scarf over and sandwich the open end of the main fabric tube in-between the opening of the placket.  Top-stitch all around with a 1/8″ seam allowance {H.}  Repeat for the other side of the scarf. TIP: Use some washable fabric glue to keep the placket in place as you top-stitch
  • {I} Add plastic snaps such as these KAM ones by marking 5 sets approximately 2 1/4″ apart (for 1/2 yd scarf.) *Yes, I know that one left snap was incorrectly attached, but I didn’t realize it until all the pictures were already taken. It’s been fixed since 😉

Dusk Giveaway Bundle Image

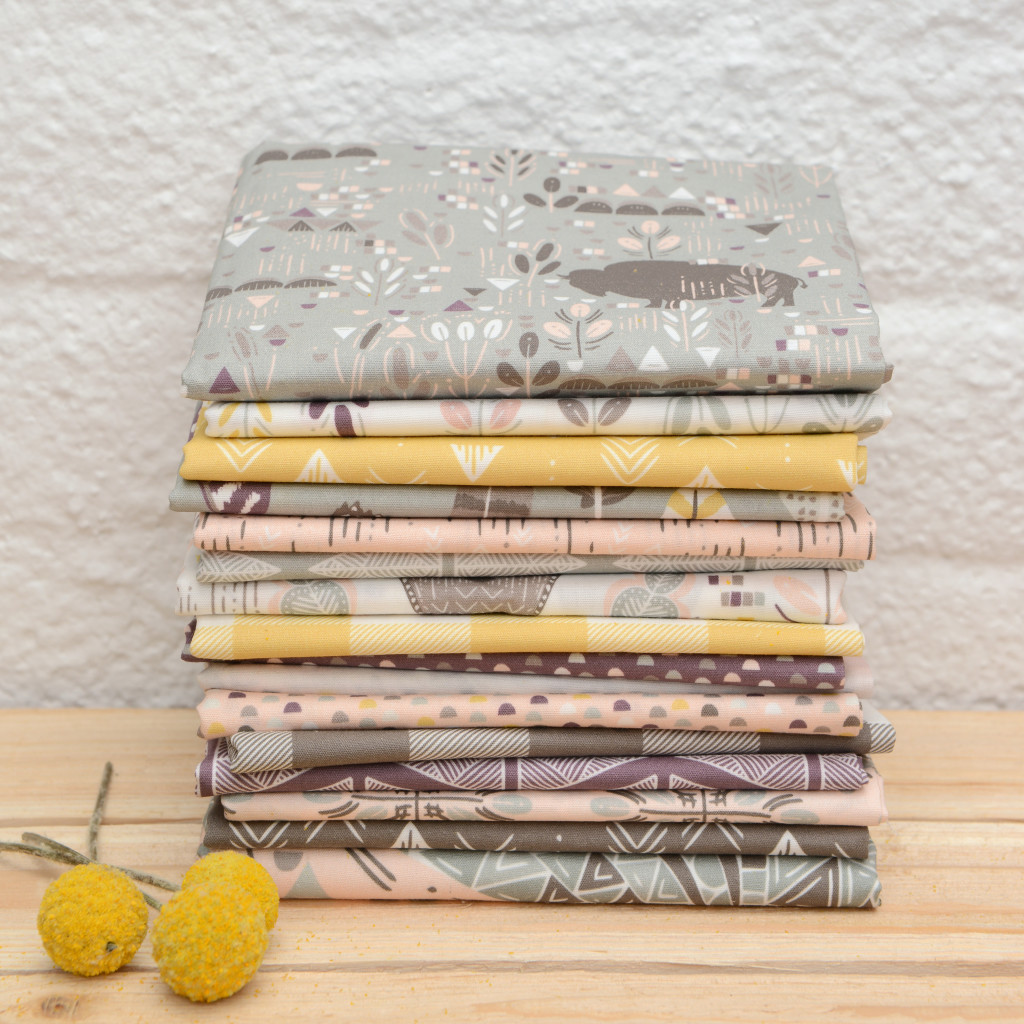
***Giveaway is closed***  Now who’s ready for the giveaway??? Comment with how you would like to use this Dusk color-way for a chance to win the entire fat quarter bundle!  This is open internationally and a winner will be announced once the blog hop is complete.  Make sure to visit everyone on the hop for beautiful ideas and additional chances to win this gorgeous fabric!!!

The complete Hawthorne Threads Roam Blog Hop Schedule:
Tuesday, December 1st – Fabric Mutt
Wednesday, December 2nd – Coffee + Thread
Thursday, December 3rd – Love You Sew
Friday, December 4th – Olivia Jane Handcrafted
Saturday, December 5th – Hawthorne Threads


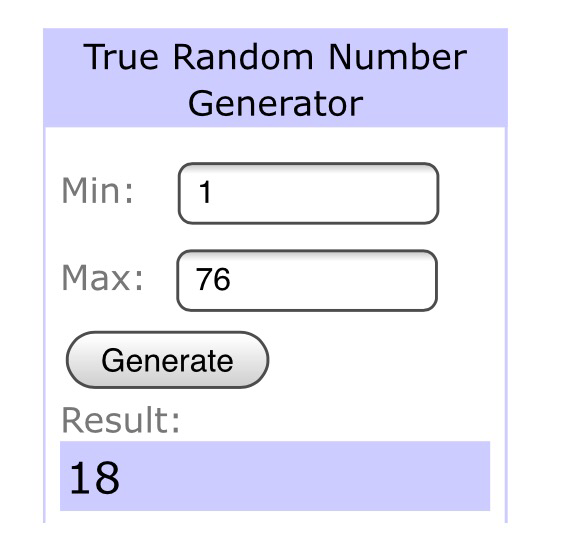
12/15/2015 Update – Randomly Selected Winner is  Veronique Oudard!  Congratulations!!!


Hugs & Stitches,

Cristy
 

***The blog hop was sponsored and fabric was provided by Hawthorne Threads.  All opinions  are my own and have not been influenced by outside parties.