Review: Sirocco Jumpsuit in Luxe Green Scuba

This post was originally written for the Minerva Crafts blog in November, 2019. Additional edits have been made after real-life wear of the garment.

Intro 

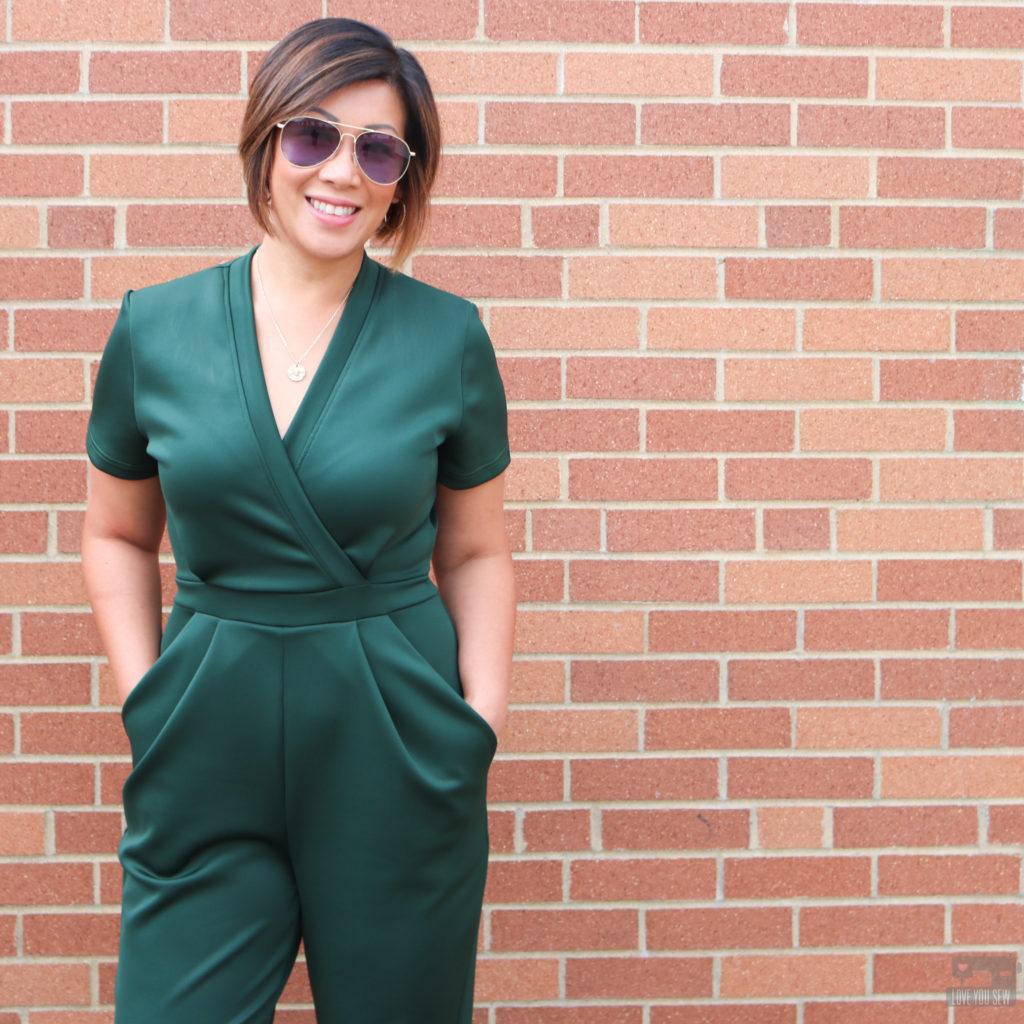
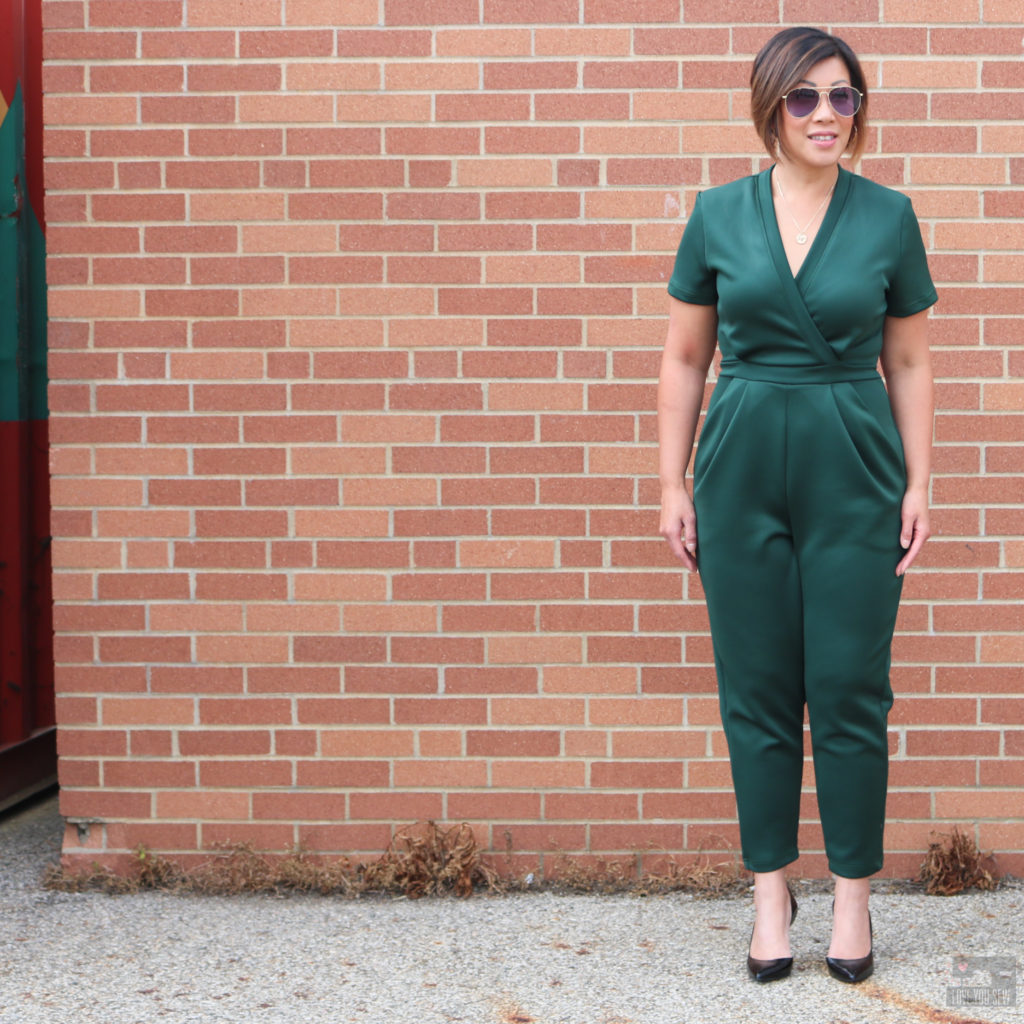
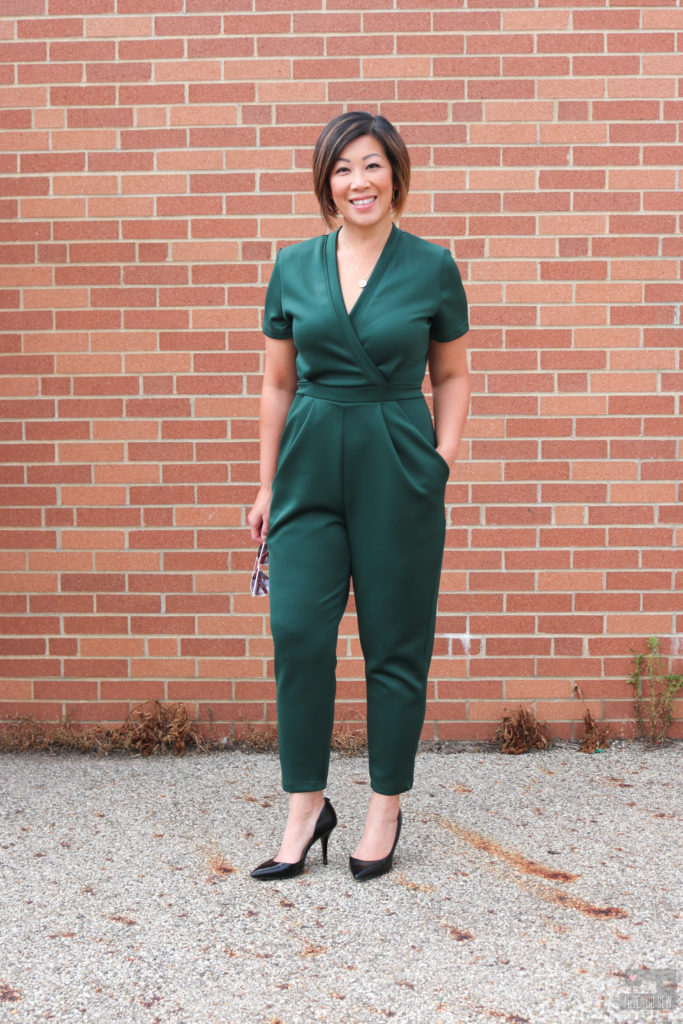
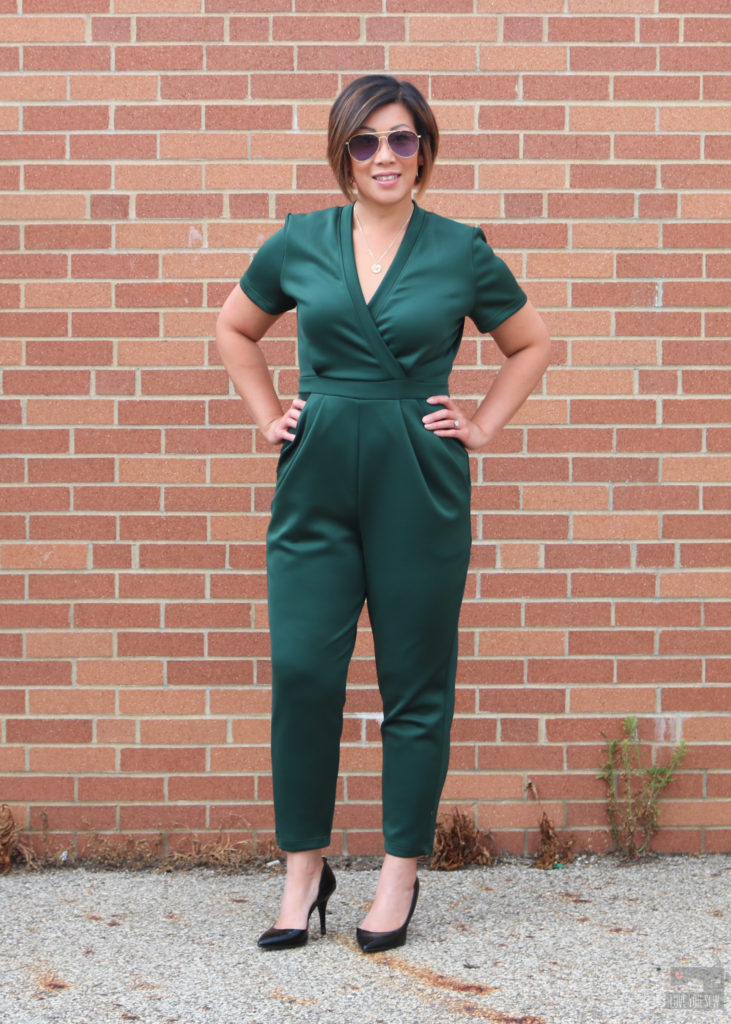
Hi, this is Cristy Stuhldreher from Love You Sew with my very first #MinervaMake as a blog contributor!!!  I was SO excited to be invited to be part of such an extensive team of bloggers here and equally excited to play with so much beautiful fabric.  My first find was this gorgeous Lady McElroy Luxury Plain Scuba Jersey Knit Fabric in Bottle Green.  With autumn (my favorite season!) quickly coming to the States, I knew I would need to get ahead and make some transitional garments with the switch of temperatures that are bound to come.  So, after I saw this scuba fabric I immediately thought of the Deer and Doe Sirocco Jumpsuit (like many other contributors already have!)

Fabric

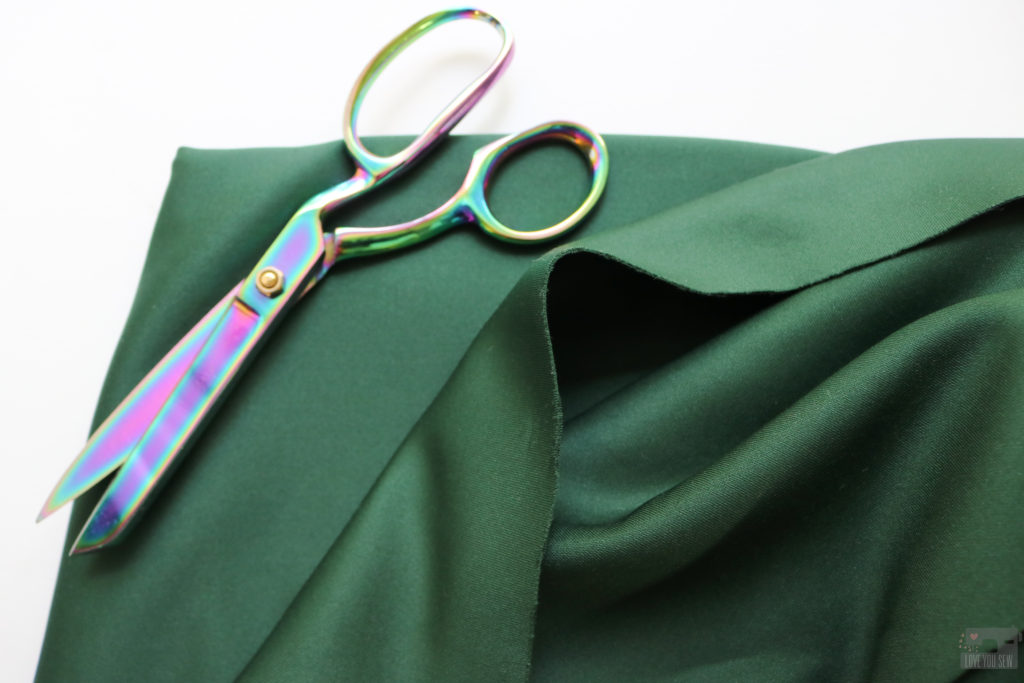
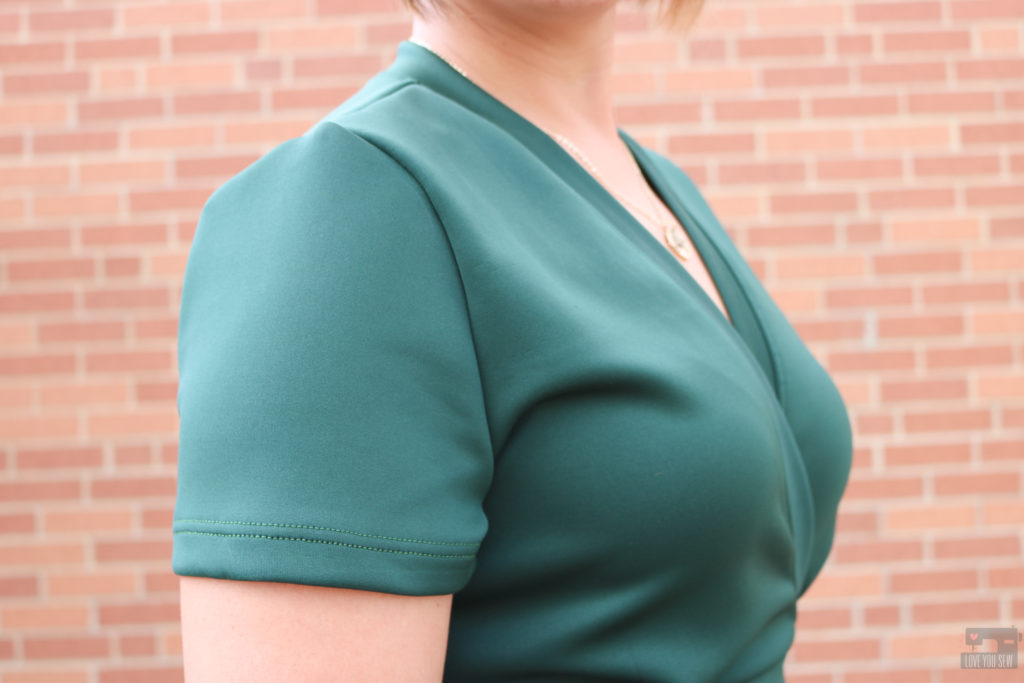
This Lady McElroy Luxury Plain Scuba Jersey Knit Fabric was such a great find!  I’m a big fan of Ponte de Roma fabrics and knew I would love Scuba just the same since they are both heavy double-knits.  They feel and act very similarly, but are made of different fibers.  Scuba is generally poly and elastane whereas Ponte is generally viscose and elastane.  This soft and smooth Scuba Jersey did not disappoint with its great stretch and nice body which is perfect for a jumpsuit when you don’t want every bodily imperfection to show through.  It is also works SO well for a knit jumpsuit with amazing stretch and recovery.  The last thing I would want after all of this hard work would be a saggy stretched out butt!
It’s always hard to tell how color will come out in person versus on a computer, so I was a bit nervous to see how the Bottle Green would be.  It looked slightly more muted, like a deeper sage green on my screen.  But I was actually delighted  to see that the fabric was more of a deep rich gem tone – a solid “Hunter” green, in my opinion.  With my olive skin and dark hair, I love a gem tone- especially for the colder months ahead!  After a few washes, the color has stayed true to the first day it arrived on my doorstep – love that!
With this fabric being a double-knit, I would recommend using a ball-point needle and your stretchiest stitch found on your machine (zig-zag, triple-zig-zag, lightning bolt, etc.)  I used a combination of my overlocker and coverstitch to allow my jumpsuit the greatest amount of stretch to fit larger hips.

Pattern

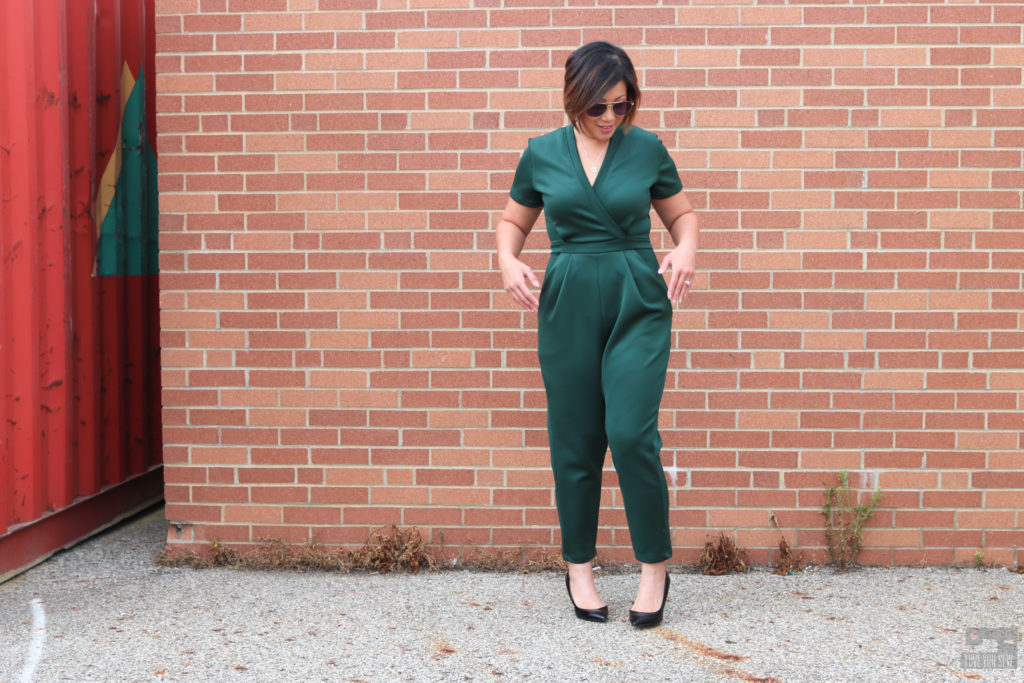
Jumpsuits still look to be on trend a little while longer, so I thought it was safe to make the Sirocco Jumpsuit for the fall.  With the short-sleeves and full pant legs (on View A) I figured this was a great garment to wear on the cooler nights downtown with or without needing a jacket.
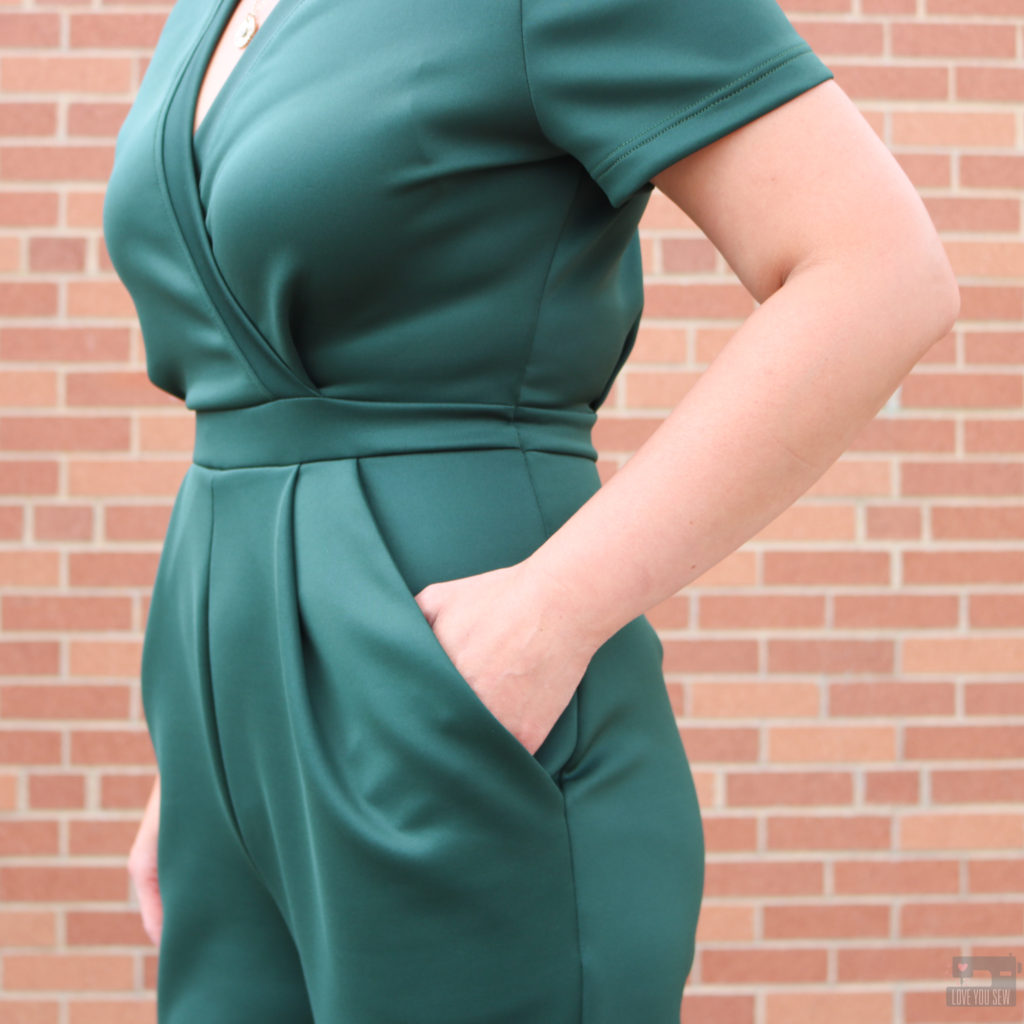
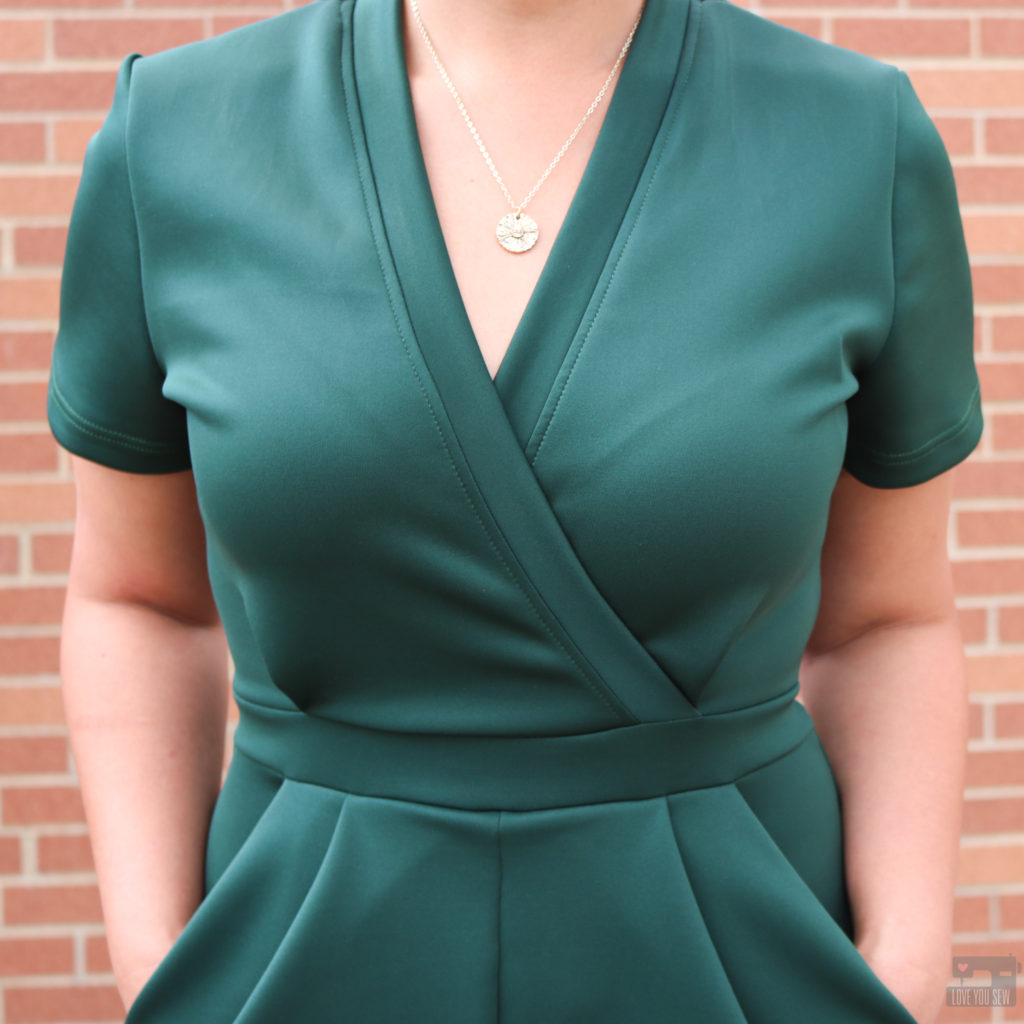
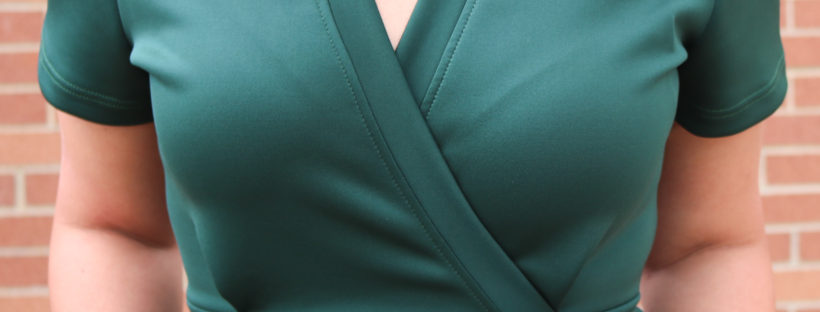
The Sirocco is a unique pattern in that there are no ties or other fasteners used to get in and out of the garment.  You slip in and out of it all through the faux wrap V-neckline.  This might not pose a huge deal for most, but I have hips which are two sizes larger than my waist –which means I REALLY will need to stretch out the waist to maneuver around.  This is the main reason I chose the heavy Scuba fabric to handle the severe stretching over my hips.  As I was fitting the garment, I honestly thought I would have to put in a side zipper for my hips, but the Lady McElroy Luxury Plain Scuba Jersey Knit Fabric proved to have such amazing stretch and recovery that I didn’t need it!  Honestly, I feel like I could wear this all day long…even after multiple bathroom breaks!
I made a few modifications for my SHORT 5’3″ frame with those aforementioned HIPS:
  • Made a 40 bodice and graded to a 42 in the hips and back to a 40 for the rest of the leg
  • Shortened bodice by 1/2″ and used a chainstitch (from my coverstitch) to secure the seam allowance down since the fabric is so lofty – This allows the lapped bodice to stay secure over your chest.
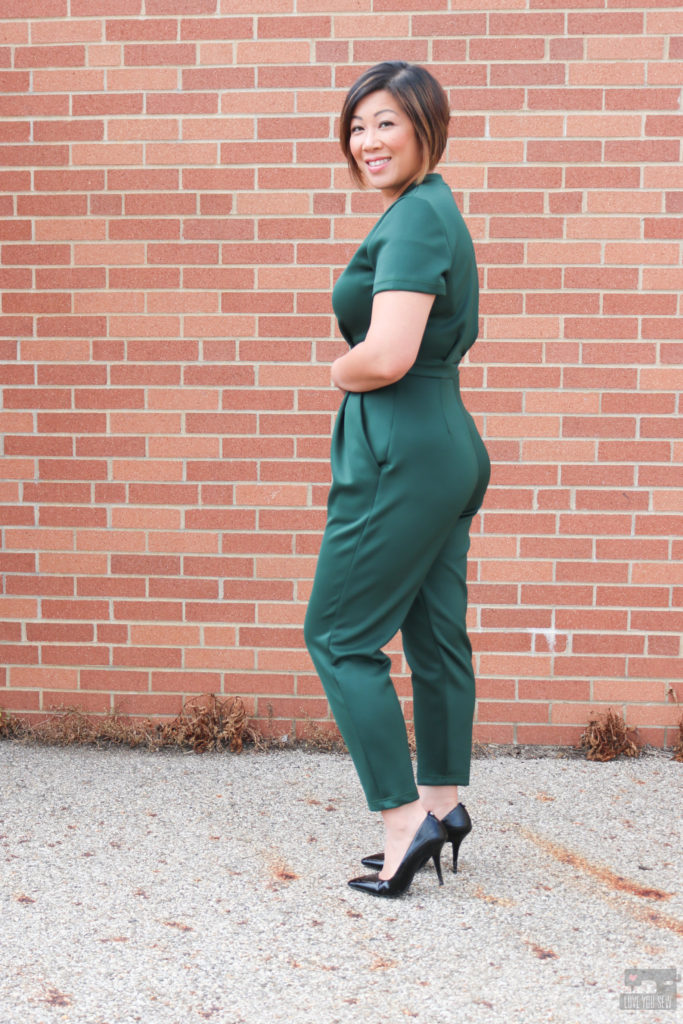
  • Shortened pant legs by 4″ initially (by just tissue fitting) and then took an additional 3 3/4″ when it was time to hem so that it would hit right above the ankle bone – Next time, I will shorten at the thigh and also from the ankle to get a better fit around the knee.
  • Extended the crotch length 3/4″ on both the front and back pant
  • Deepened the seat on the back pant by 3/8″
  • I wish I took out an 1″ out of the rise before cutting, but was able to take 1/2″ out of the overall inseam to narrow the legs and decrease the rise.
  • Took an additional 1″ out of the ankle and blended up to the knee for a slimmer leg

After these changes, I can’t tell you how incredibly pleased I am with my Sirocco JumpsuitThe Lady McElroy Luxury Plain Scuba Jersey Knit Fabricis so chic and the deep green really does make the Sirocco Jumpsuit so “EXTRA!”  Love it!!!
You can find my other makes on the Love You Sew Blog (here!) and more daily inspiration on Instagram @loveyousew_ .


Happy Sewing!

Cristy


Affiliate links are in this post. Check out my Disclosures here. Fabric was provided for review as part of the Minerva Maker Blog Team.  All thoughts and opinions are my own.  


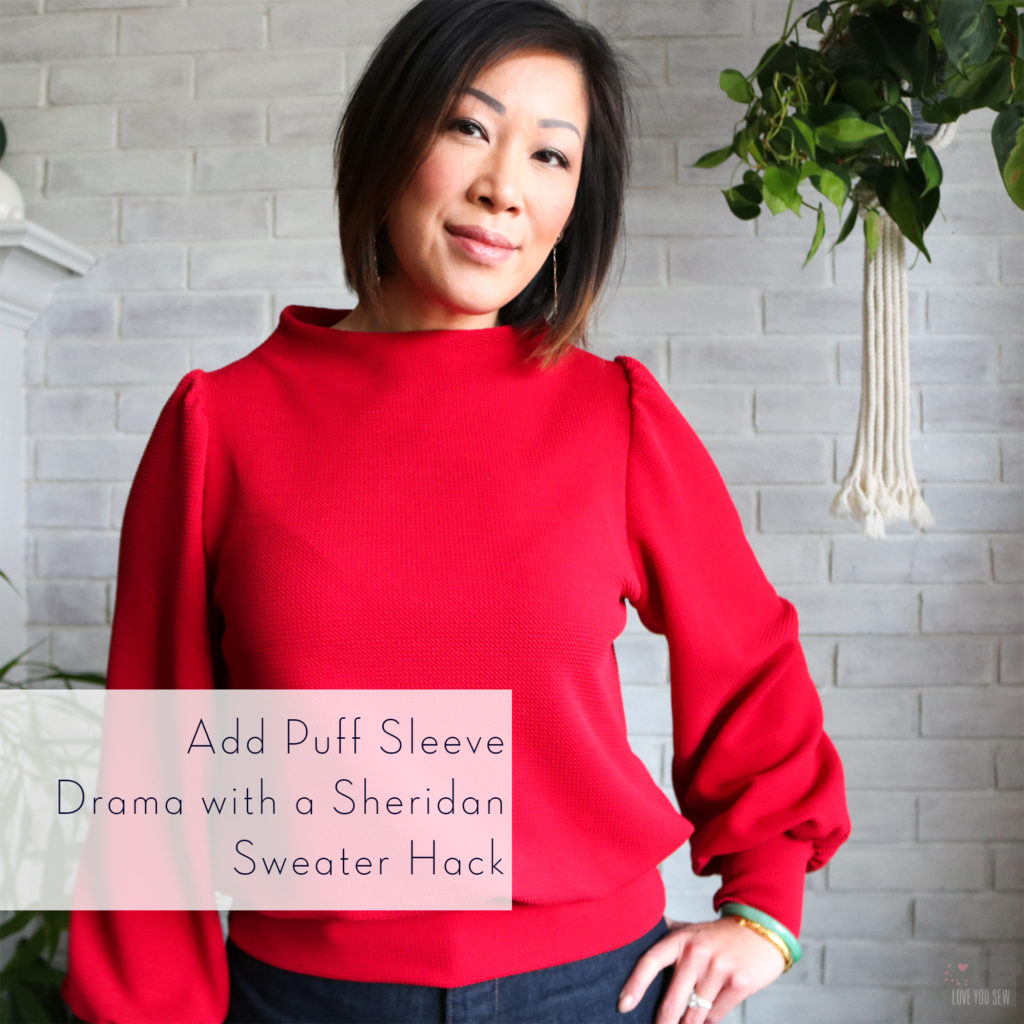
Add Puff Sleeve Drama with a Sheridan Sweater Hack

This post was originally published on the Hey June Handmade Blog in January, 2020.  Edits are in italics and additional pictures have been added (since I love this pattern SO much!)

When I first hacked this Sheridan Sweater for the Hey June Handmade Blog, I had no idea it was going to become one of my MOST worn tops. Prior to March, life was pretty normal while we were just starting to hear about the pandemic. My social world was still moving along and was able to wear my Sheridan to Lunar New Year celebrations (as planned!), Galentine’s Day fun with my girls, and was my go-to for a night out.  I knew even back then that I wanted another Sheridan.

After a #sewingfail with the wrong fabric (it was a red and cream colored stripe that clashed and looked HORRIBLE with my skin tone and hair highlights,) I was ready to make another.  This time I wasn’t going to mess around.  I knew I would ADORE my new Sheridan because I used…the same hack…and the same fabric as my OG…just a different color!


Back in early December, I knew I needed a new red top.  My one cardigan just wasn’t enough for all of the holiday school parties, concerts, church events and even family get-togethers.  I wore that one piece of red clothing OUT and knew I needed something else to add to my festive wardrobe.  But did I really need a new top???  Did I really want to make one??? Then the Sheridan Sweater was launched and my questions were answered.

All of my internal fighting against wanting “another” knit top disappeared.  After seeing the Sheridan launch, my mind switched and I bought the pattern right away.  Of course, I need  a new red top!  It WILL work through the holiday season, AND into the Lunar New Year AND be useful for Valentine’s Day school parties!  Why wouldn’t I need the Sheridan Sweater in my life?!?

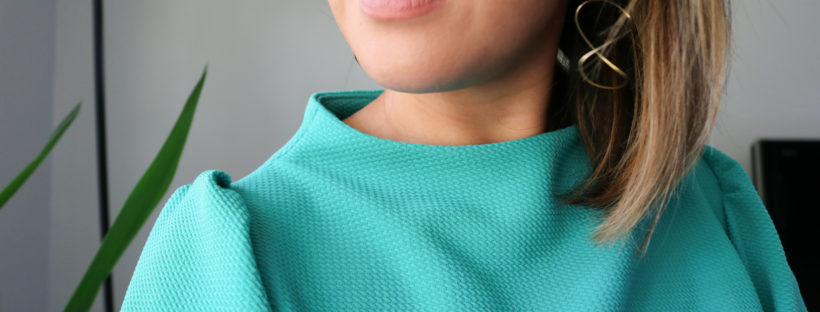
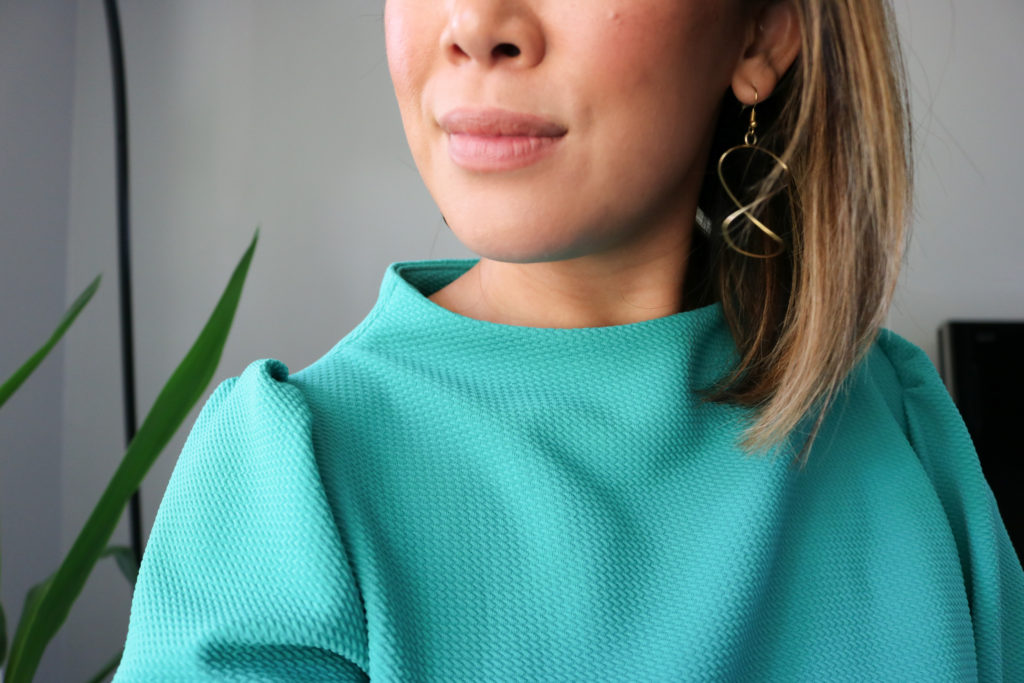
Adrianna did a fantastic job designing the different views and I’m obsessed with the seamless funnel neck, which I haven’t seen in any other DIY pattern.  The Sheridan Sweater also has the big statement sleeves which is on still on trend and I knew both of these features would really stand out in red.  But since this was going to be my all-winter holiday top, I wanted to bring it up juuuuust an extra notch.

FABRIC

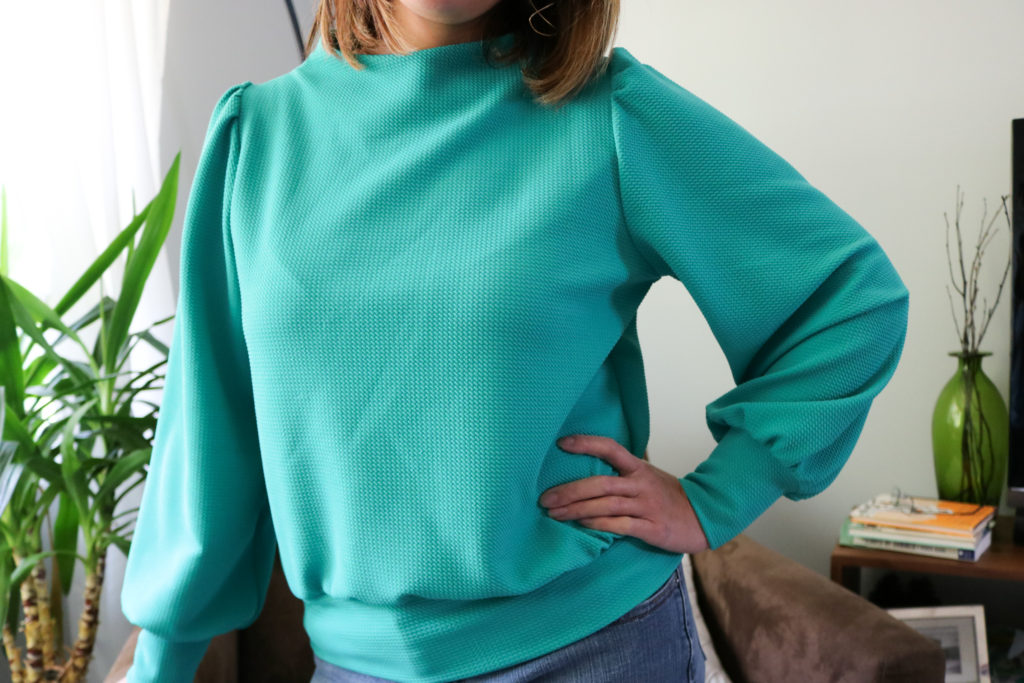
I found this beautiful textured waffle knit from Telio fabrics.  One of the reasons this sweater has been on constant wardrobe repeat is the fabric.  As a poly/spandex blend, the color saturation is on point.  After all of the washing and drying I’ve done, the color still looks as intense as day one.  I was concerned that the texture might be lost over time with dryer heat, but it’s all still there!

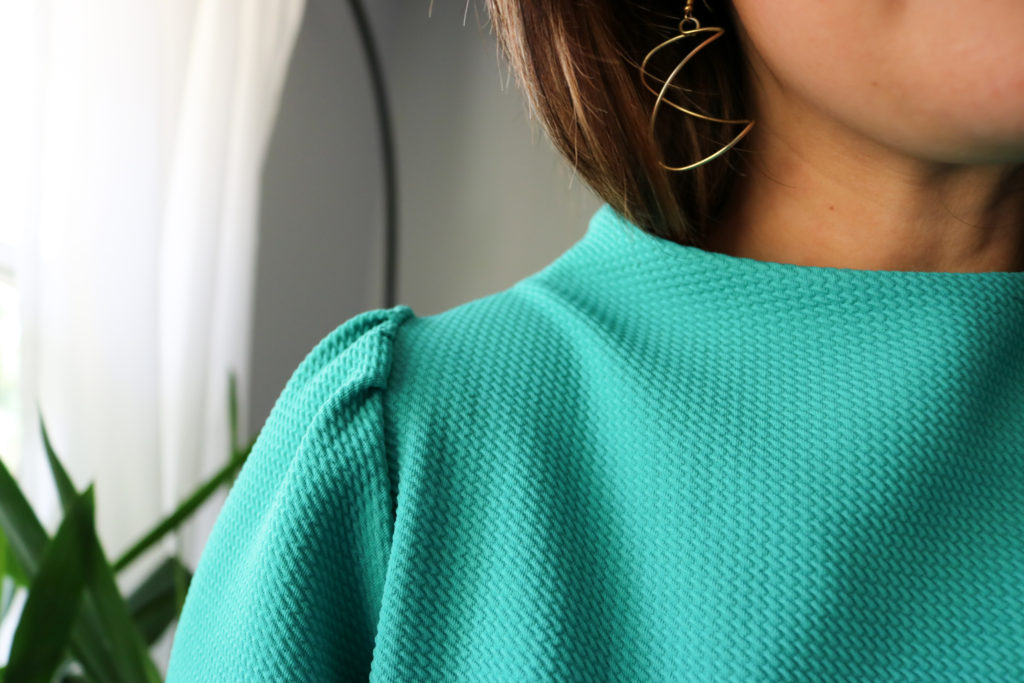
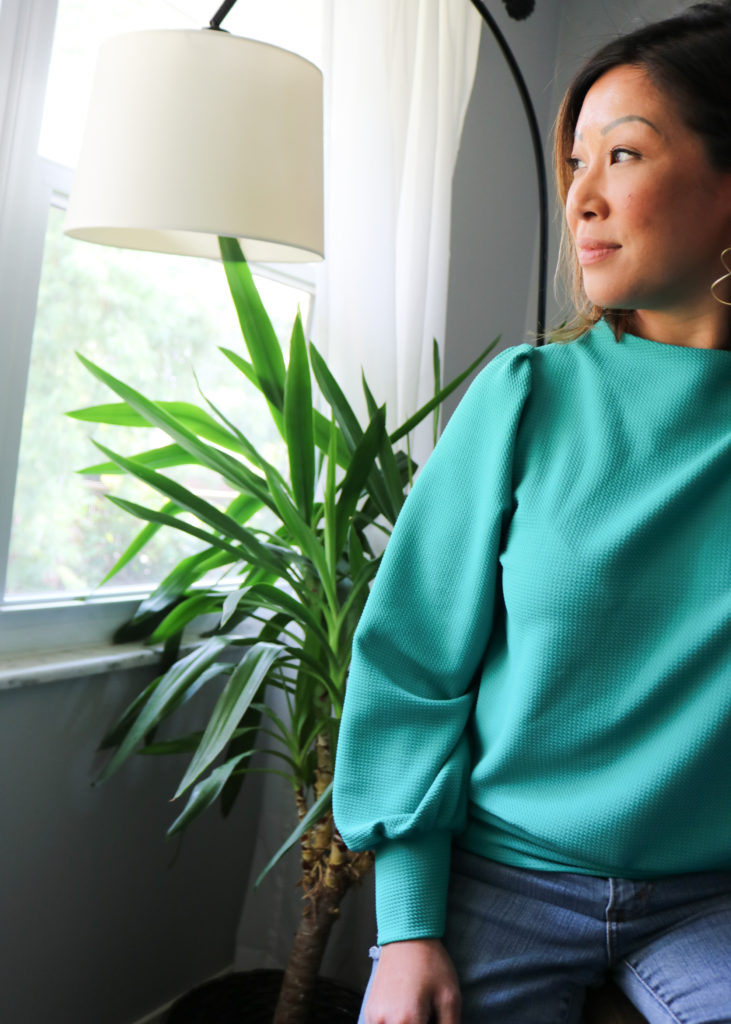
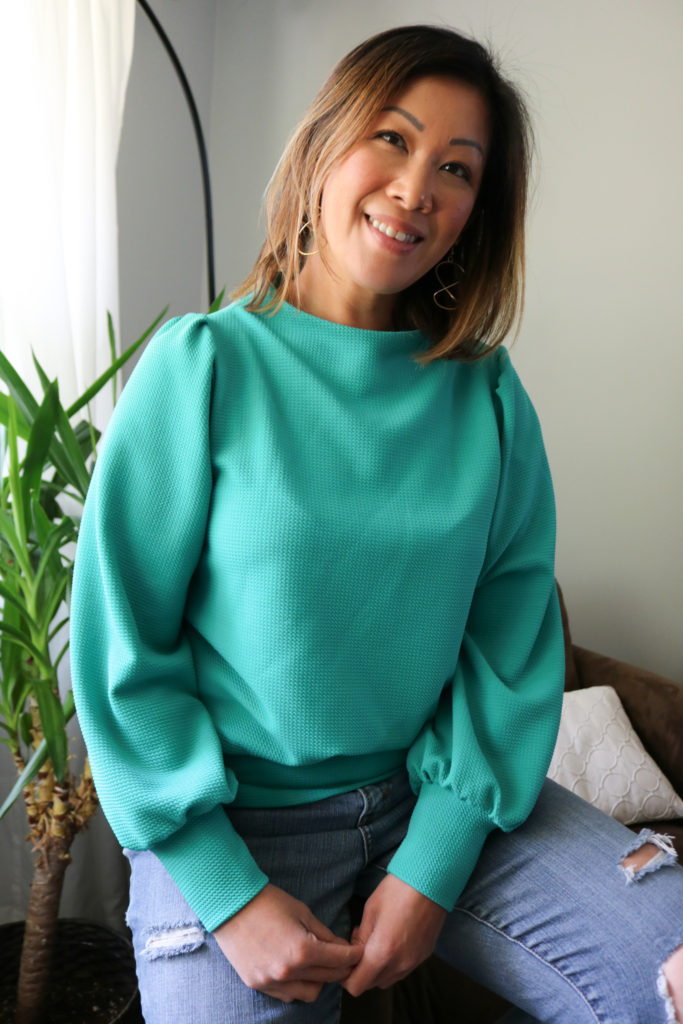
The Paola Pique Liverpool’s medium weight was a perfect complement to this pattern.  It has great body and really shows off the full sleeves.  The stretch and recovery is also very nice.  When I pull up on the sleeves and adjust the waistband, it  holds it’s size well and doesn’t stretch out over the course of the day.  This fabric comes in so many rich jewel tones that I had to have the Emerald.  The pictures come up more teal, but this color swings more to the green side in-person.

TUTORIAL

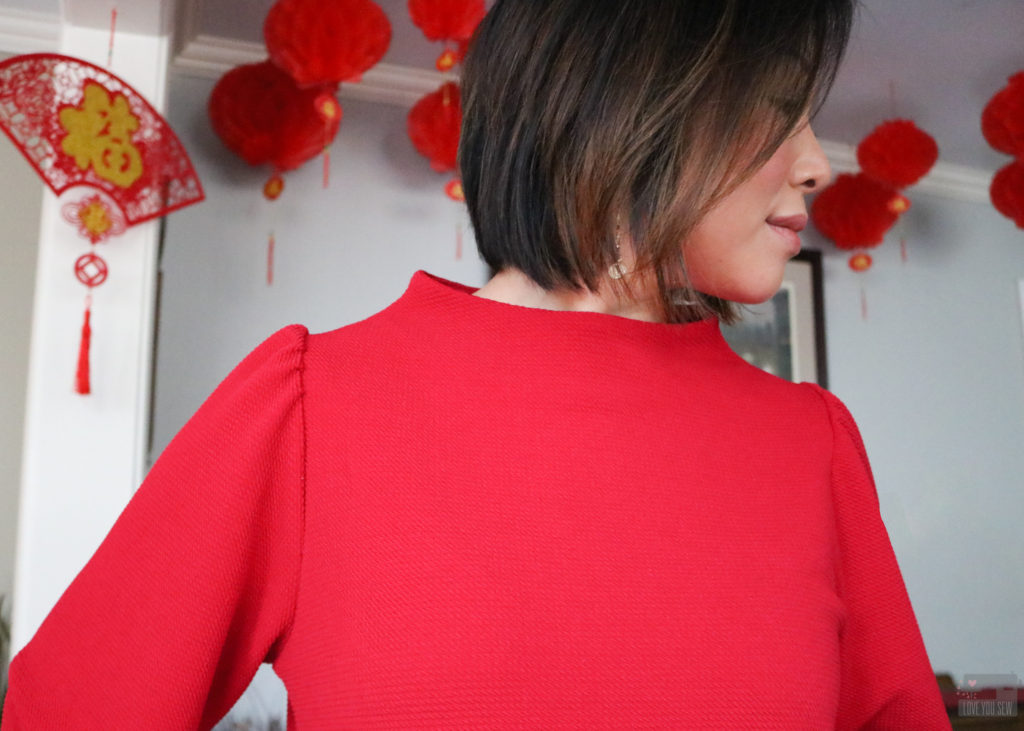
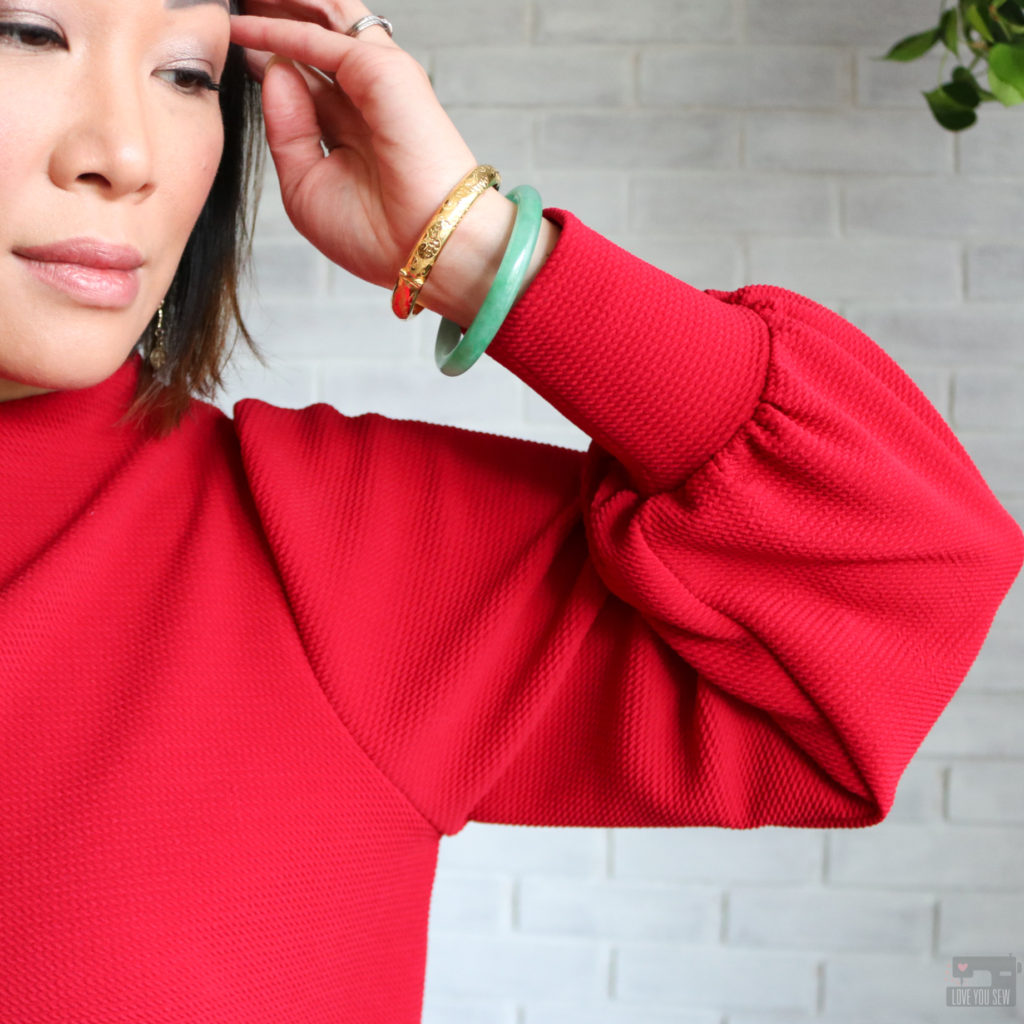
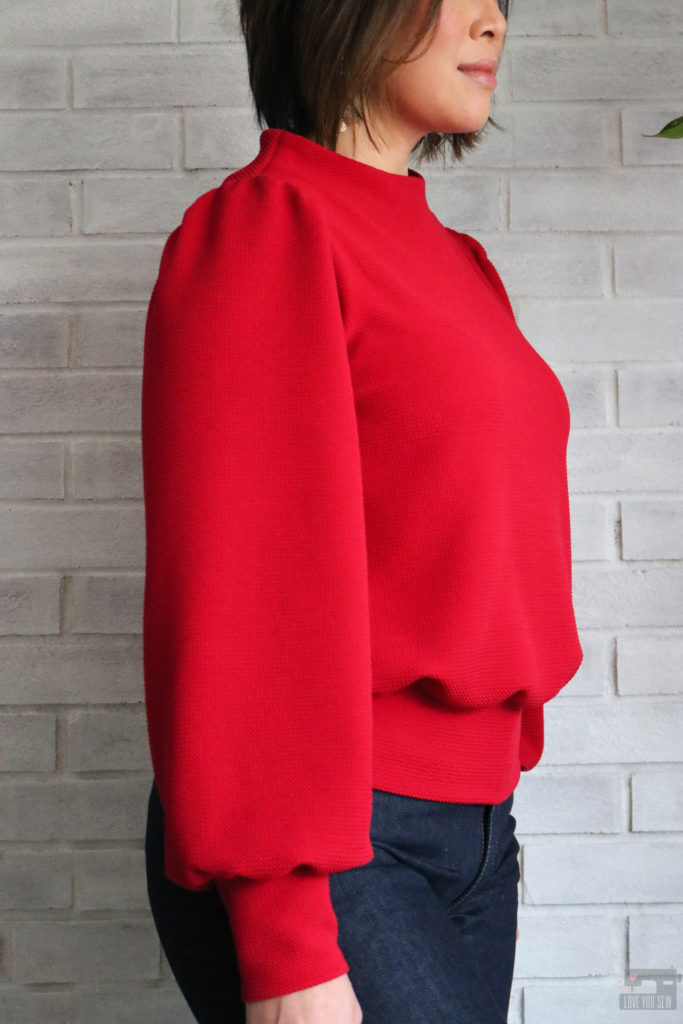
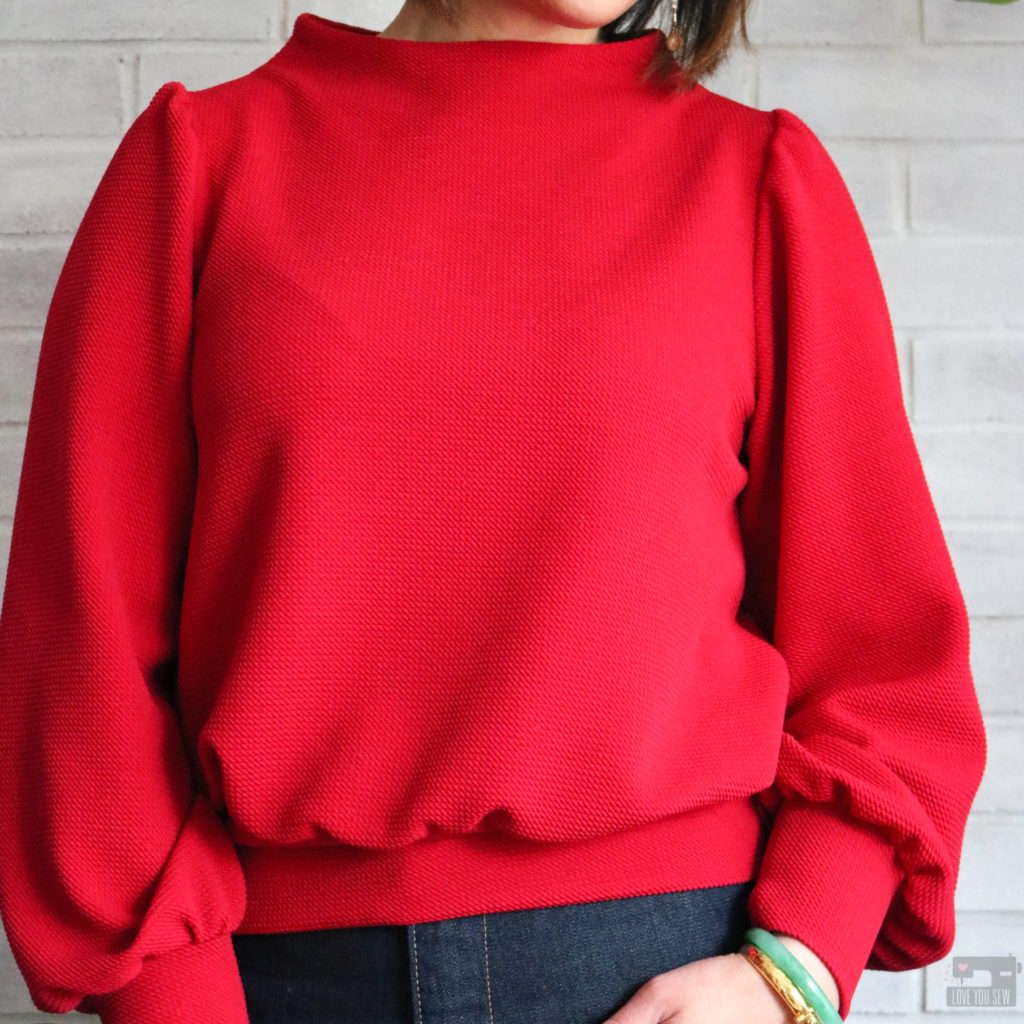
I figured if I was going red, I wanted to make the sleeves stand out even more. So….I hacked the sleeves to be more voluminous in the sleeve head for All. Of. The. Drama.  Below is my quick and definitely non-technical way to achieve that extra shoulder poof.

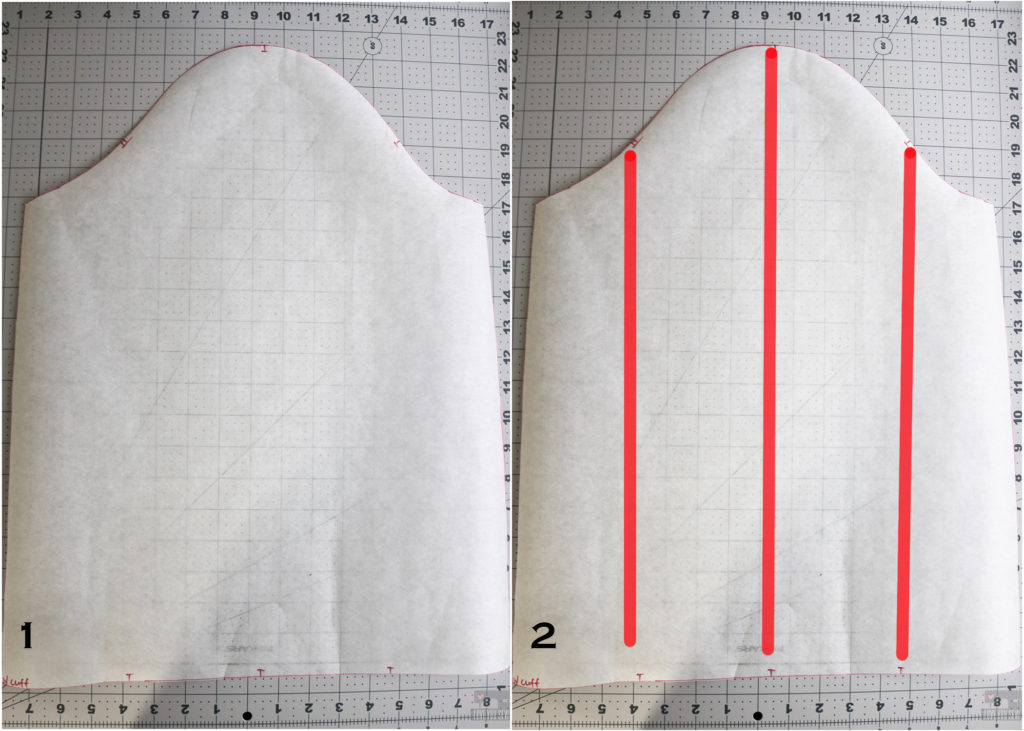
1. Take the sleeve pattern and make a copy.  (I traced the pattern onto some Swedish tracing paper I had on-hand.  I like using this since it’s more pliable than regular paper and can be pinned/sewn without being destroyed.)

2. Divide the sleeve into approximately 4 equal sections by width.  With the nice notch markings already drafted as part of the pattern, I used these as guide when splitting the sleeve.

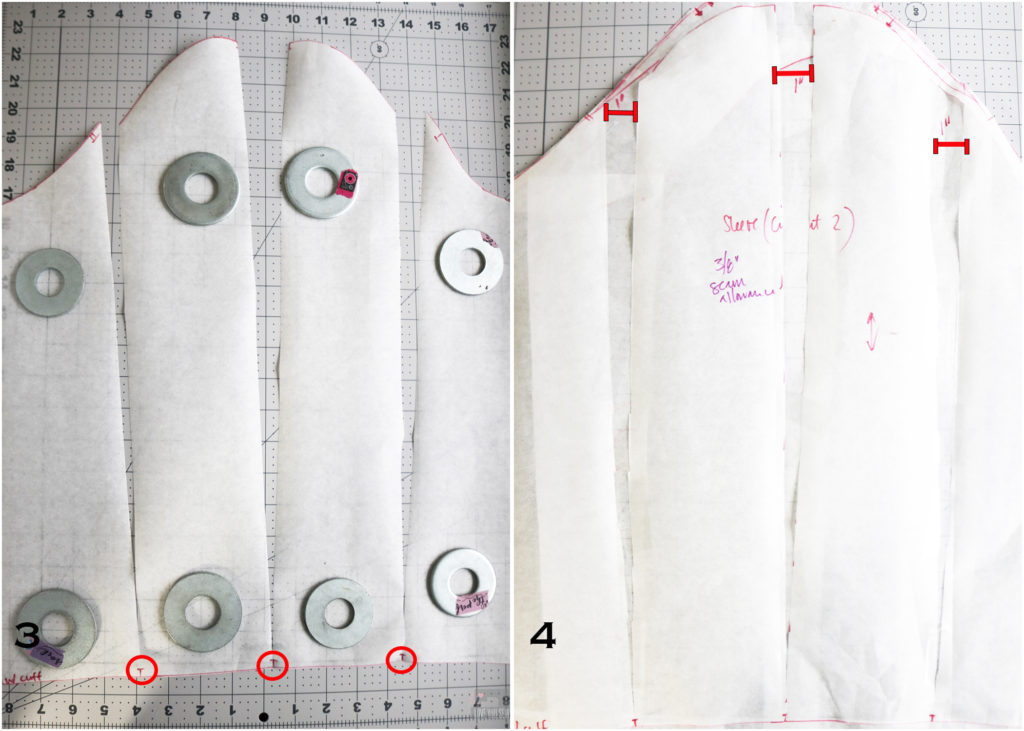
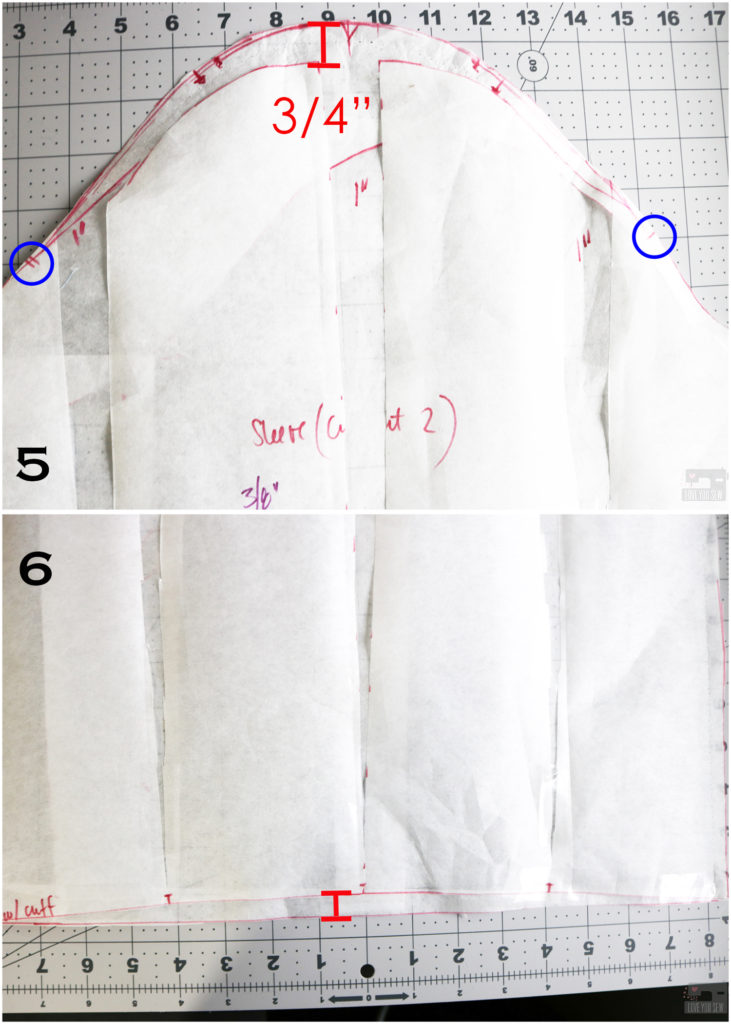
3. Cut the pattern to separate these sections from the sleeve head all the way down to the cuff, but NOT cutting through.  All of the sections should be hinges and able to move.

4. To start, I added 1” in between each section.  I placed scrap paper underneath the pattern, and hinged each section out by 1” at the sleeve cap.  Then I taped the pattern onto the scrap.  Repeat 2 more times between the sections.  If you would like more volume, you can increase the hinge widths.

5. To get the extra volume at the top of the cap, I added 3/4” to the top and blended the line back to the notched parts of the cap, all while following its shaping.  Again, if you want a little more puff in the sleeve cap, feel free to add a little more to length to the top.

6. At the cuff line, true up the pattern so it is straight again.

At this point, I cut out the pattern and did make a muslin, but only had quilt cotton on hand.  It gave me an idea of the extra volume and shape added to the sleeve.  I did have to consider the extra weight and stretch with the knit fabric.  But it was still good enough for me and I went ahead to cut into the main fabric.

To insert the sleeve, I made gathers between the sleeve notches not exactly knowing how it would all look.  But I ended up marking 3” on either side of the shoulder seam and pushed all the gathers in between those markings.  I basted the sleeve into place and was very happy with the result!  With that, I finished sewing the sweater and have never been more pleased!

This hack turned out exactly like what I wanted and just love how “extra” the sleeves are.  The additional gathers and volume in the sleeve cap really balance out the overall ease in the sleeve and I love the extra long cuff to show it all off.  This top is pretty fancy and ready for every occasion now.  It’s still comfy in a stretch knit, but also so incredibly unique and special!

Project Summary

  • Pattern: Sheridan Sweater by Hey June Handmade; View: B; Size 10
  • Mods: Narrowed shoulders by 1/2″ each, increased the cropped length by 1″, used Puff shoulder hack above
  • Fabric: Telio Pique Liverpool Knit from Fabric.com in Hermes Red and Emerald

This hack can be used on just about any pattern with a set-in sleeve.  I may have to try it on a woven pattern this fall/winter.  Please let me know in the comments if you use this hack!  I would love to hear what you think!


Hugs and Stitches,

Cristy


This post may contain affiliate links.  You can read my full Disclosure here.


Emma Stadium Bag Hacks with Twill Tape

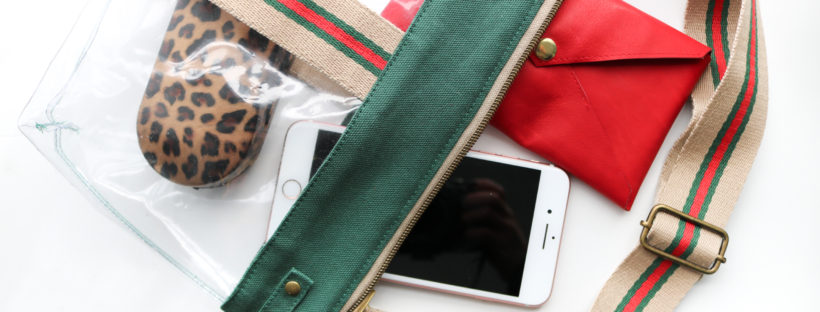
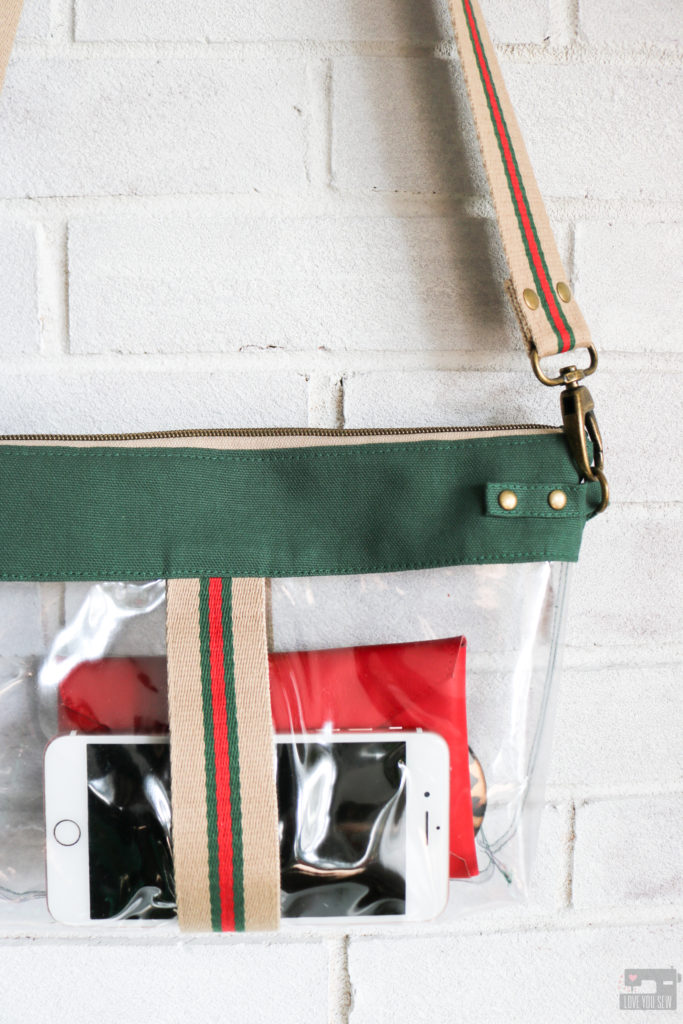
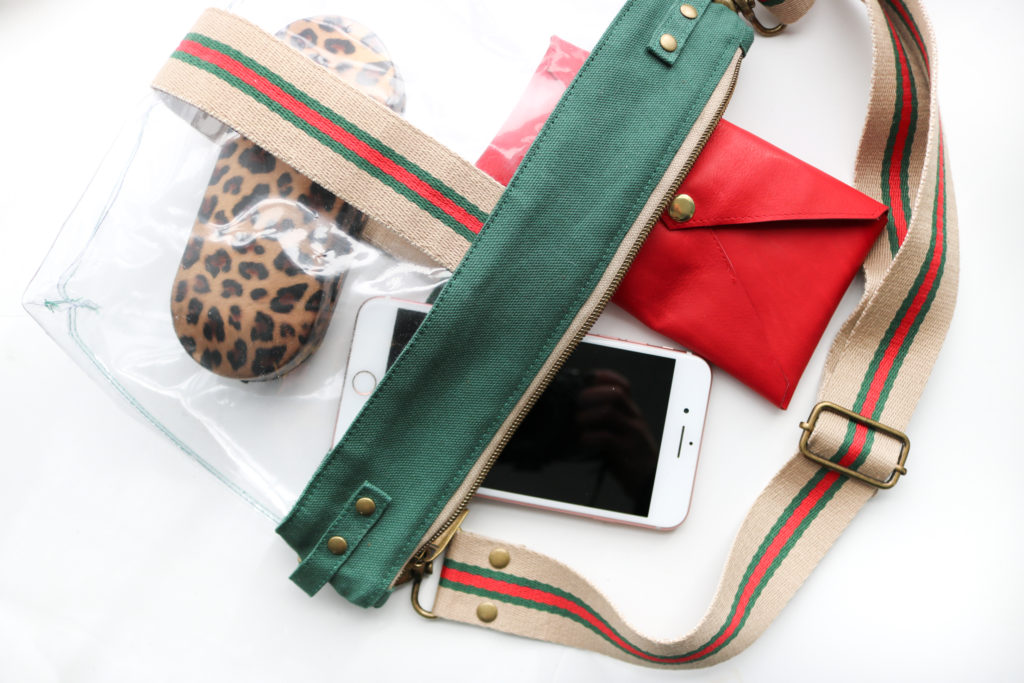
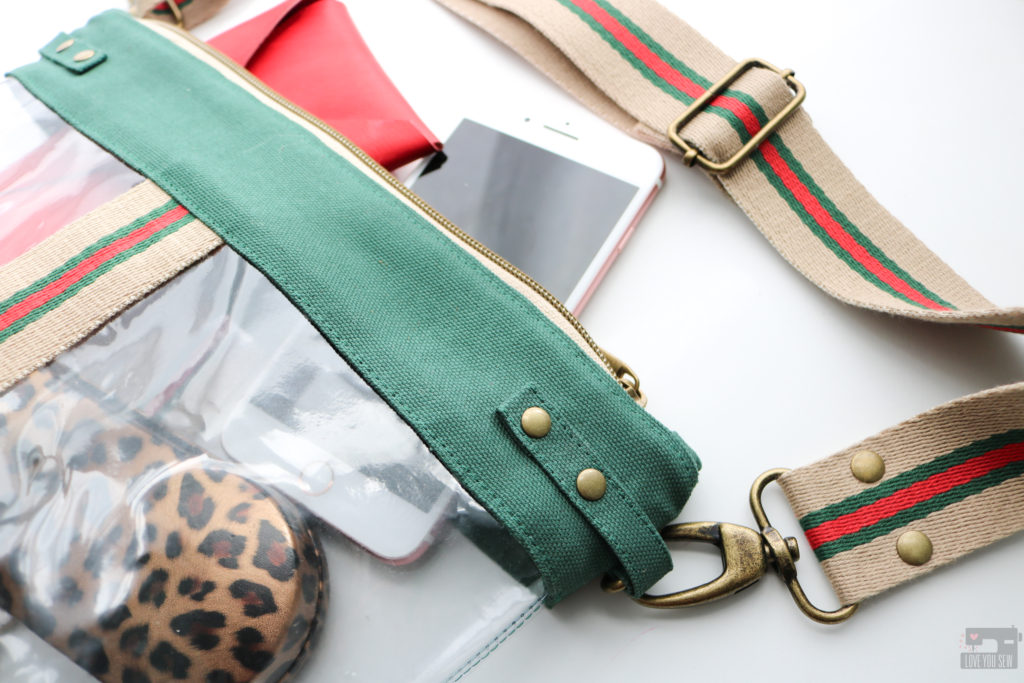
The best part about writing patterns is coming back and hacking them! I’m constantly inspired by the runways and the latest fashion trends. When I wrote this Emma Stadium Bag hack for Sewn Magazine (April 2020,) I noticed how straps were becoming the main focus on bags. They were produced in different fabric from the main bodies and were made in all sorts of distinctive colors and contrasting patterns…making the straps REALLY stand out.  Many brands were  offering customization with mix and match options which help to make a bag feel like it was made for you. I love a good statement strap as seen with my Guitar Strap Tutorial here and my play on a fringed Festival Bag here.  Needless to say, I couldn’t resist making my own designer inspired version.  Can you guess the high-fashion label that was my muse?  Now, you can really make a full personalized bag with the Twill Tape hack below!

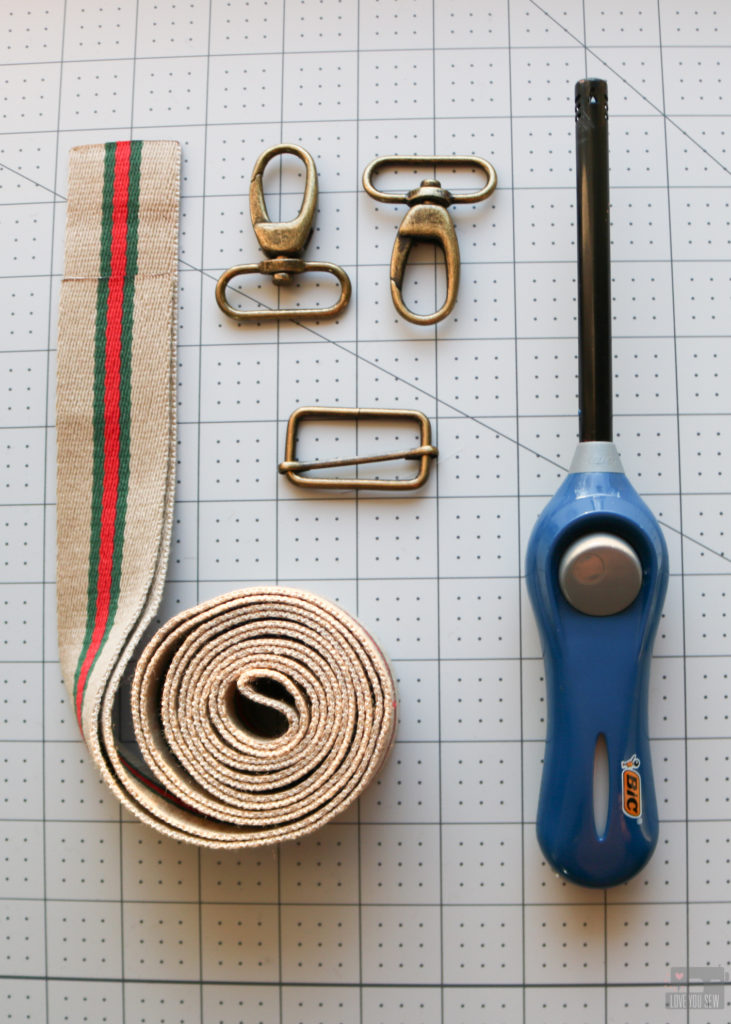
Materials Required

Cutting

  • Cut fabric and vinyl per instructions minus the strap pieces.
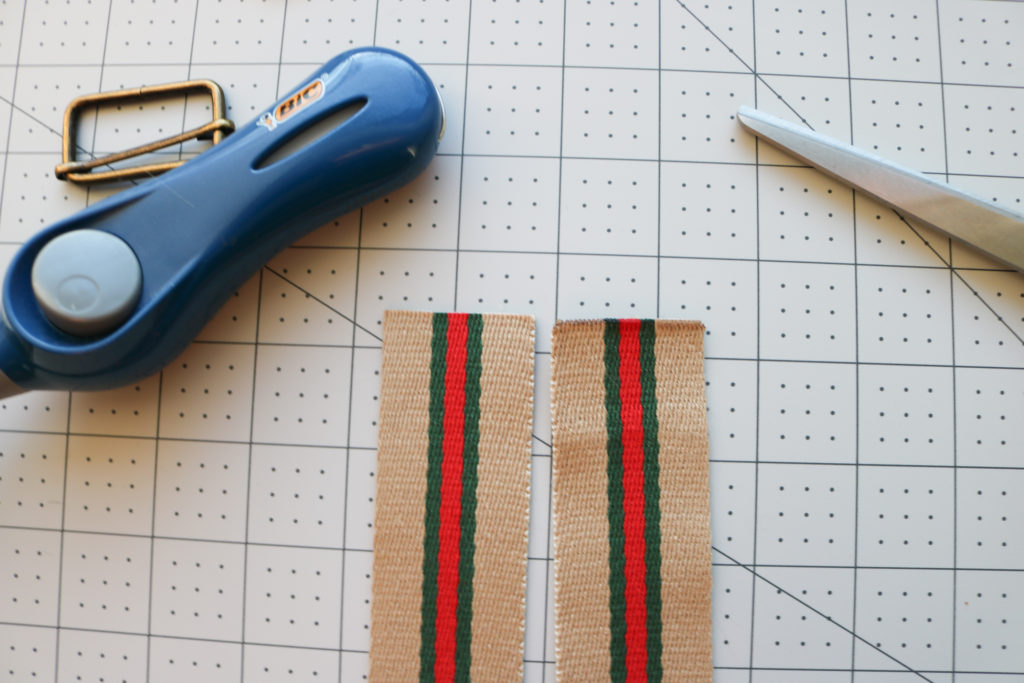
  • Cut (2) 7 1/2” lengths of the Twill Tape. Heat seal each end of the tape with the lighter. Set Aside.

Strap

  • With the remaining Twill Tape, heat seal each end of the tape with the lighter.  *If you are using a 100% cotton tape, you won’t be able to heat seal.  Sew 1/8″ at each raw edge to keep it from unraveling.  Back-stitch well.
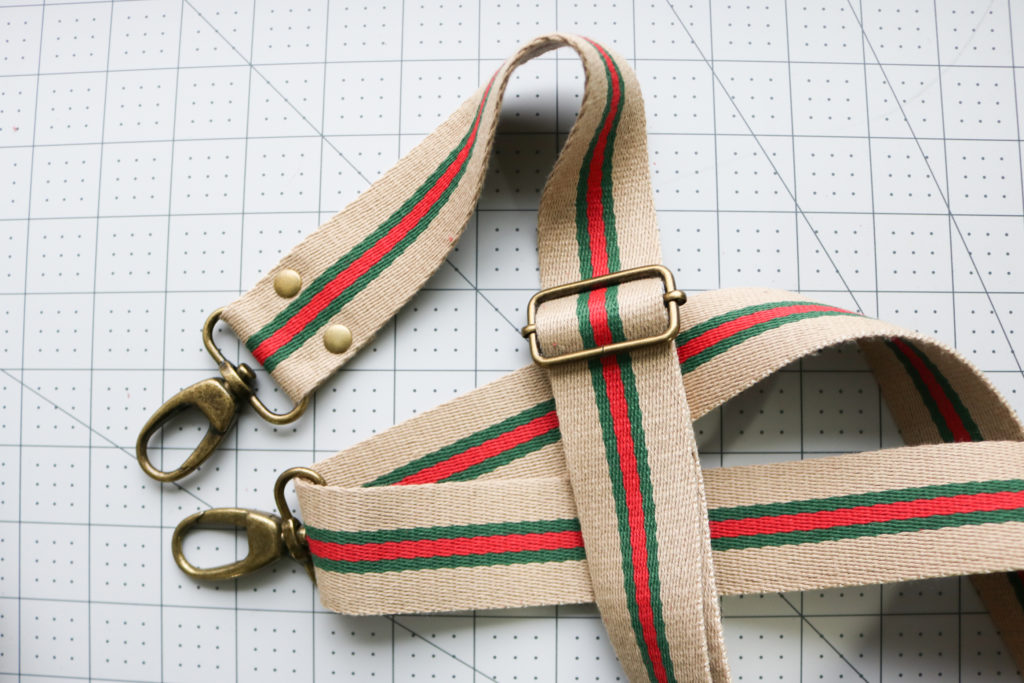
  • Follow the instructions in the pattern to thread the strap through the 1 1/2” slider and (2) 1 1/2” Swivel Clasps.
  • Use (2) Rivets to secure each end of the strap (4 rivets total) or sew into place.  This video can help you through adding rivets.

Pocket

  • This was omitted to let the twill tape stand on its own and not detract from the overall look.

Zipper Top

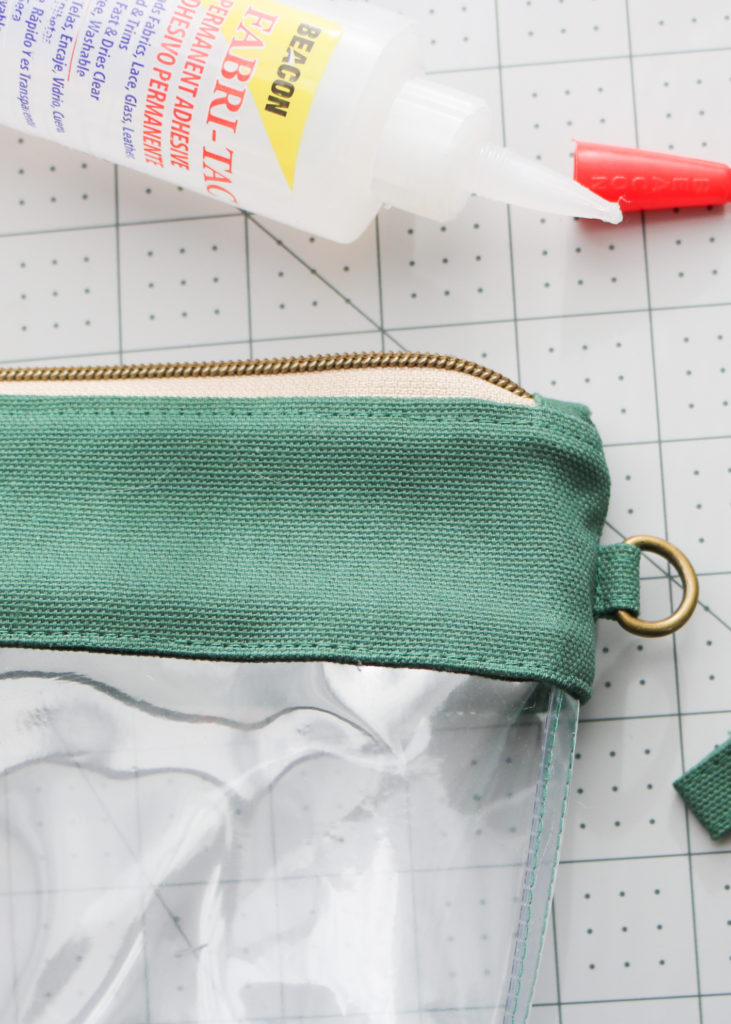
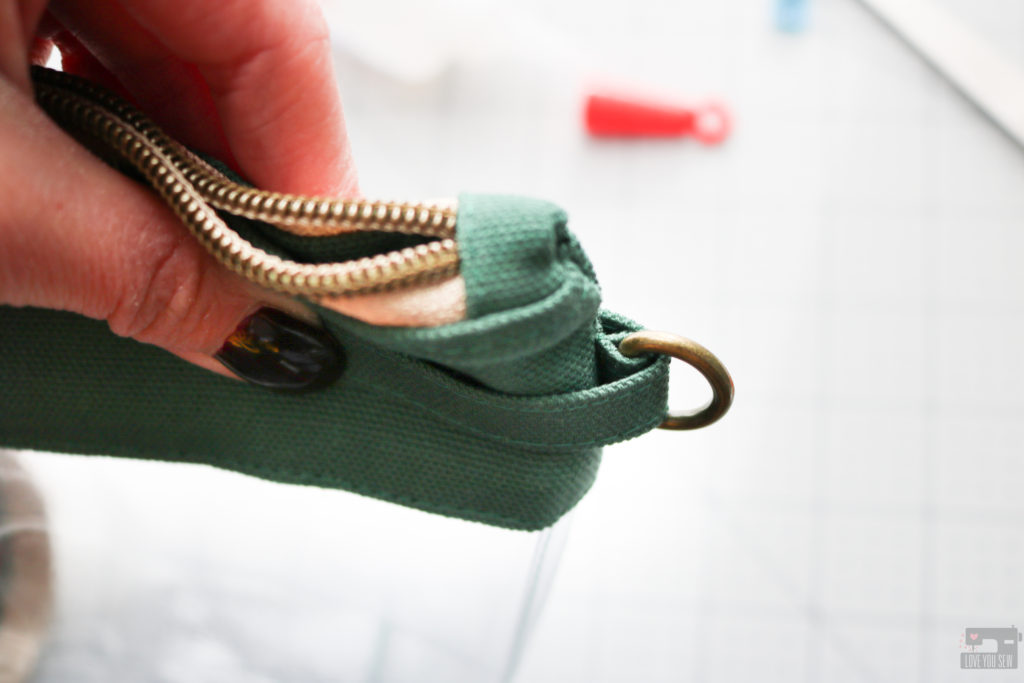
  • Make with the SHORT D-Ring tab option.  Although the photo shows the vinyl already attached, you will only have the Zipper Top completed at this point.

Vinyl Bottom

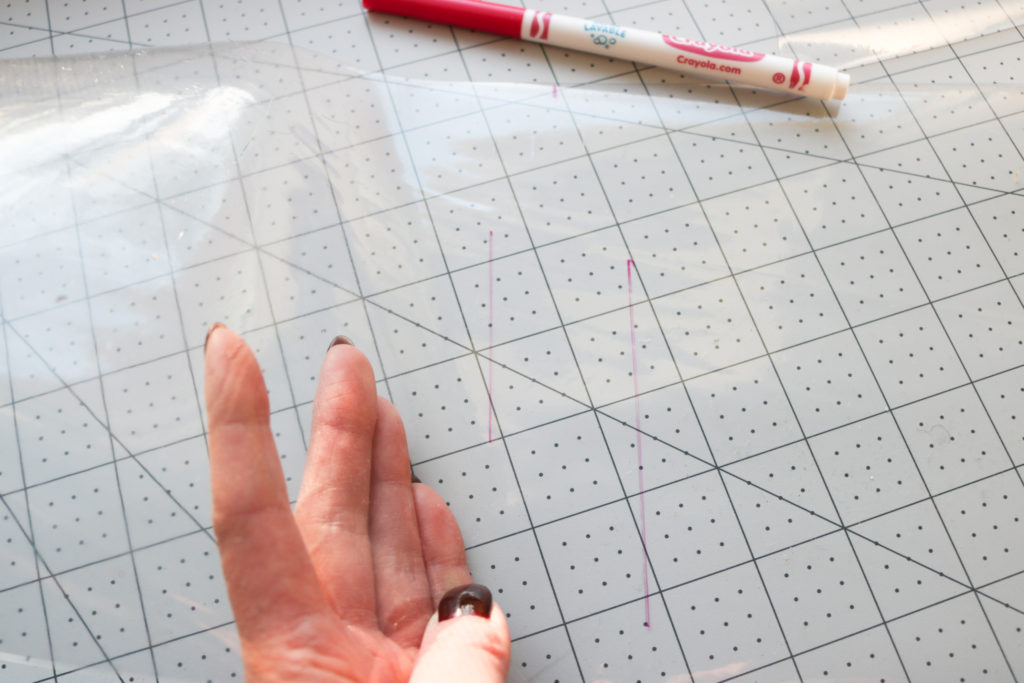
  • After marking the center of the vinyl bottom on the wrong side of the vinyl, mark 3/4” out on either side of the center. These lines will be used as sides for the Twill Tape.
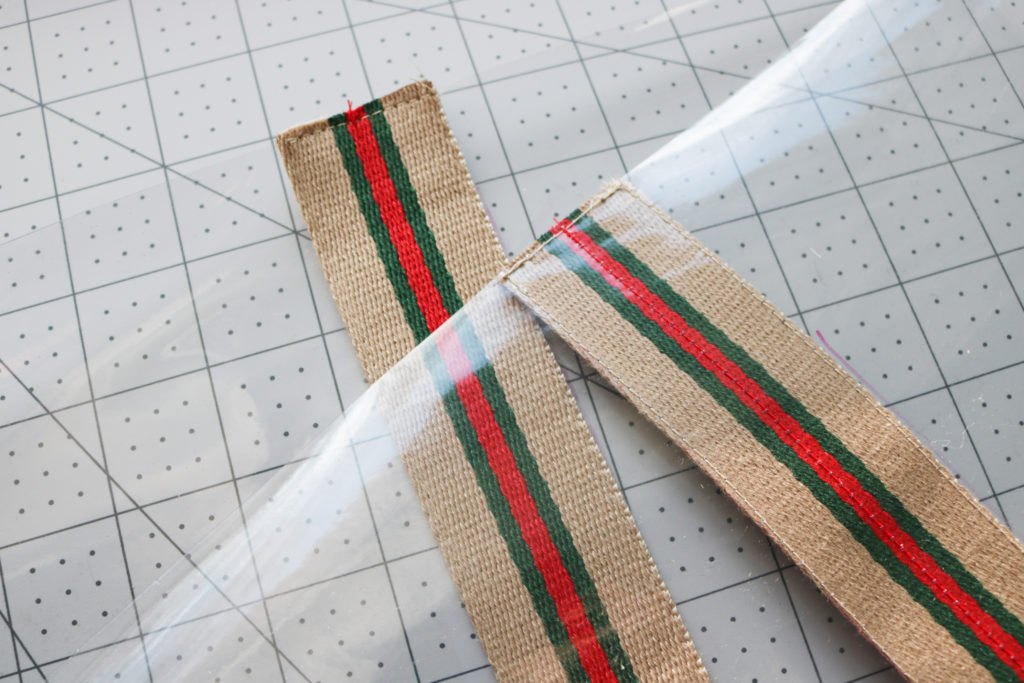
  • Flip the vinyl over and line up Twill Tape within the markings. Top-stitch along the Twill Tape 1/16” into place. Optional – Add another row of stitching down the center of the Twill Tape. Repeat on other side of the body.
    • TIP: Sew down the sides of the Twill Tape in the same direction to avoid possible shifting.
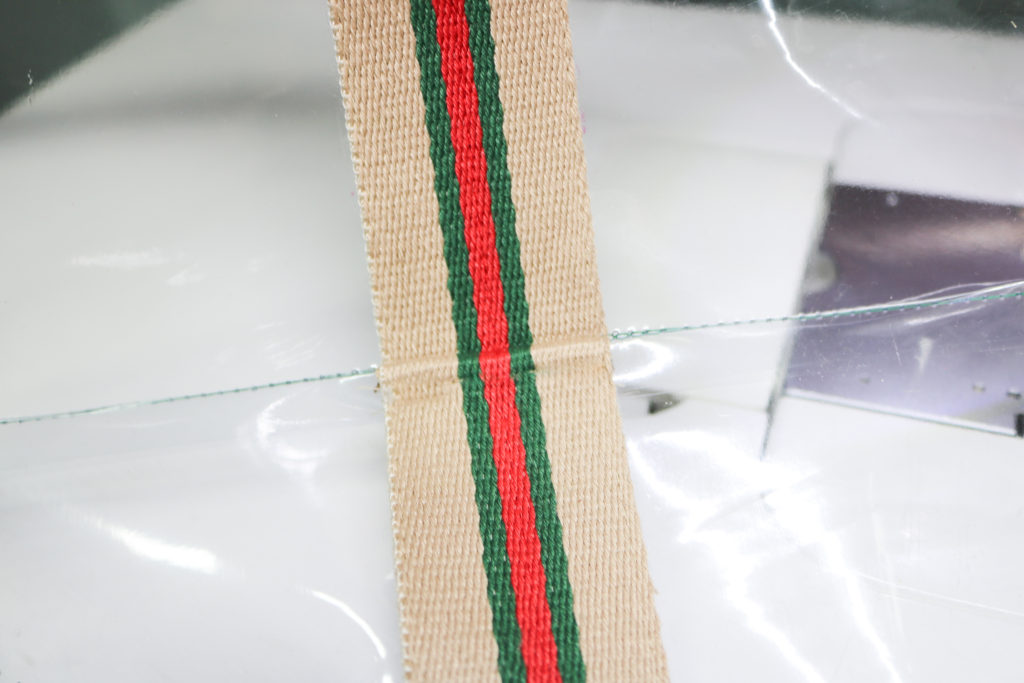
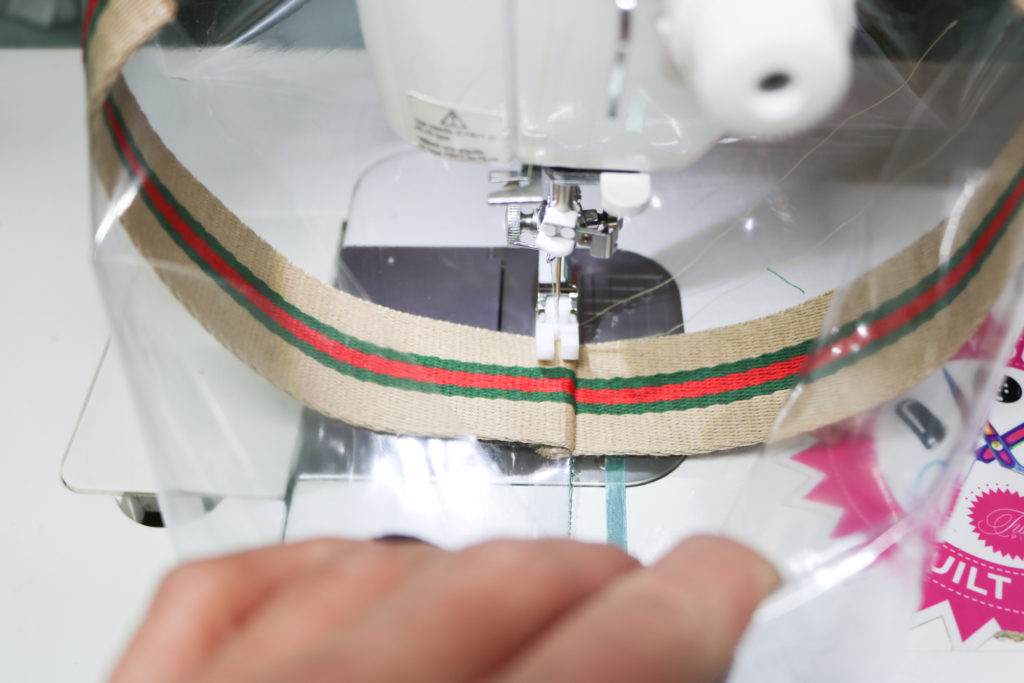
  • Finish sewing the rest of the vinyl bottom, making sure to align the Twill tape when sewing the bottom seam.
  • With the Twill Tape facing up, sew the seam allowance to the body between 1/8″ – 1/4″ from the seam.
  • Finish the bag and wipe away any markings on the vinyl.

D-Ring Accent Tabs

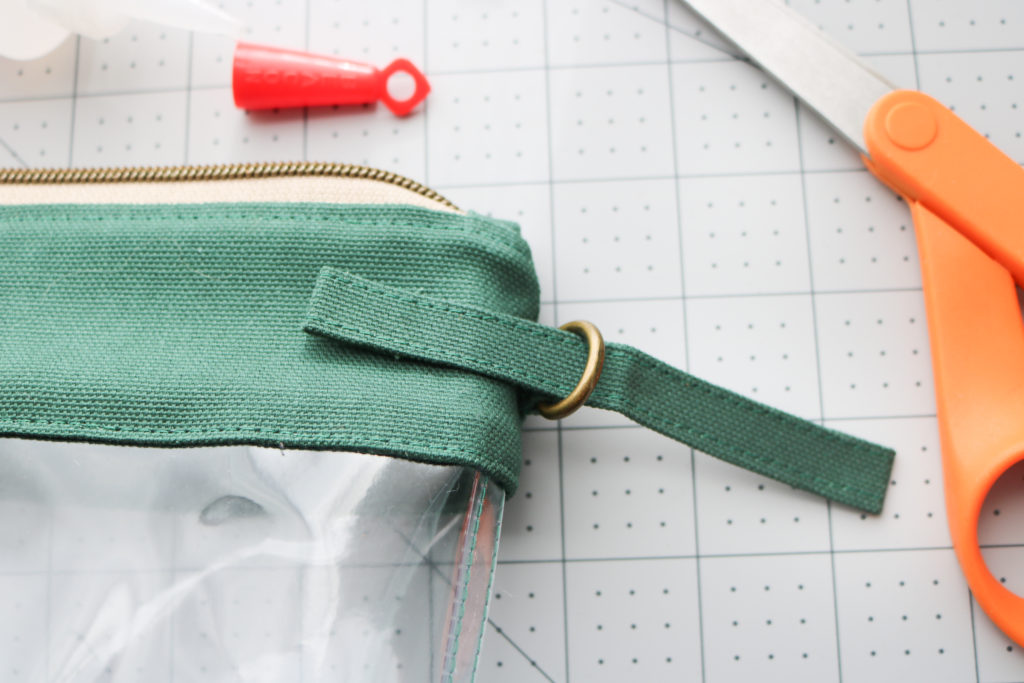
I love the look of extra texture on the Zipper Top and these tabs provide such nice details…especially with the addition of rivets.  However, if you tried to make only these long tabs with fabric, they would pull and go vertical when worn.   The D-ring would also be sliding all across the tab and the weight distribution on the strap would definitely be off.  So when I was trying to decide how I could I could have the look, it dawned on me, that I could literally combine the techniques of the short tab and these riveted accent one.   I developed this “double D-ring” method to have the visual appeal AND have the security of a shorter tab.
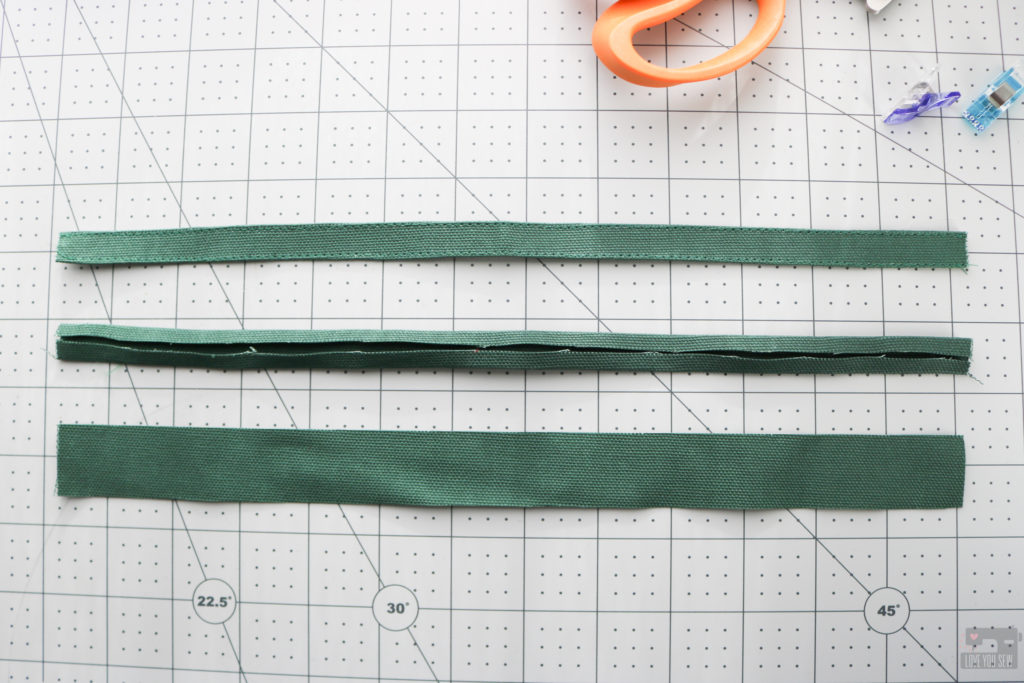
  • To make, take the 13”x1” strip of fabric –
    • (Bottom and middle strips) Fold each long side toward the center, wrong-sides together making 1/2” single-fold tape.  Press well
    • (Top strip) Top-stitch 1/16” along each long edge
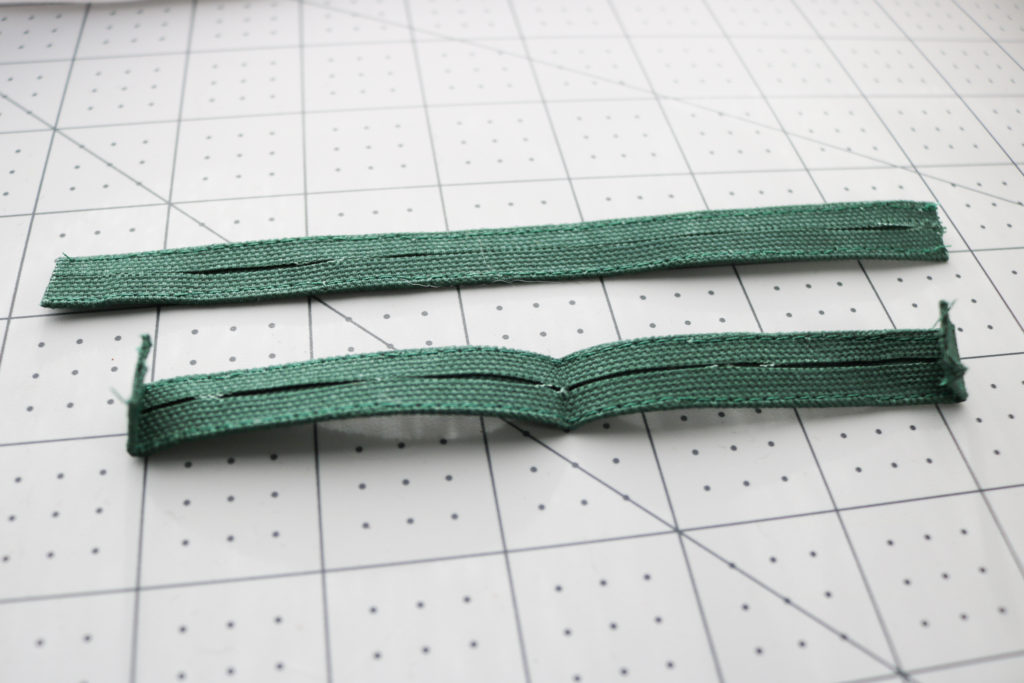
  • Cut in half length-wise so there are (2) 6 1/2” tabs. With each tab, fold each short end inward with wrong sides together by 1/2”.   Press.
  • Fold the entire tab in half, wrong sides together.  Press.
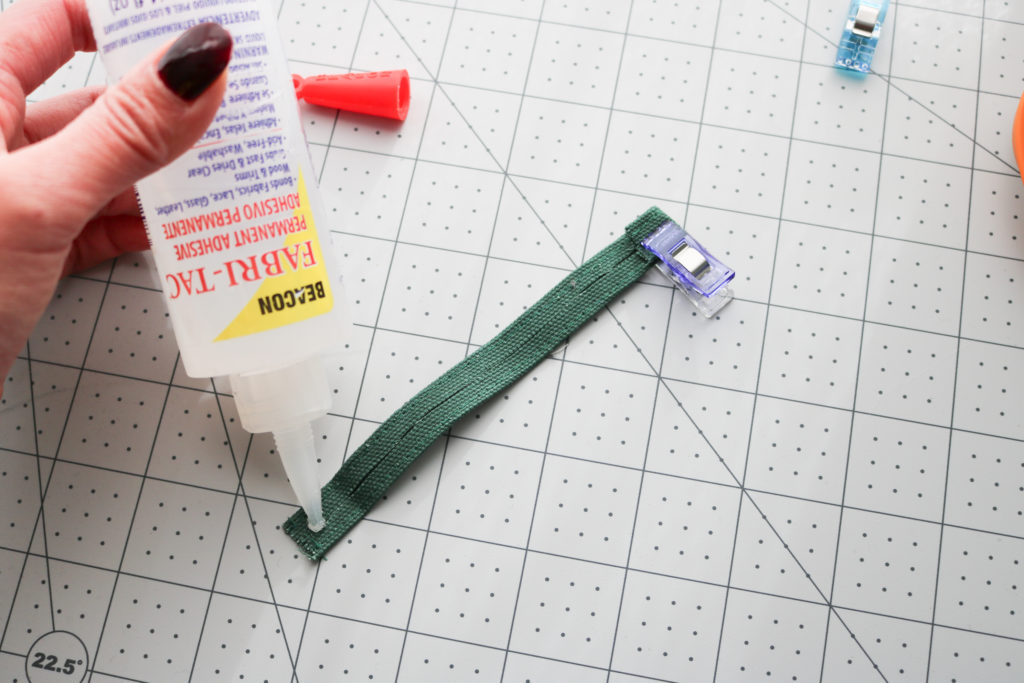
  • Glue down each 1/2” folded end.
  • Slide the Accent Tab equally through the 1/2” D-Ring with right side facing out.
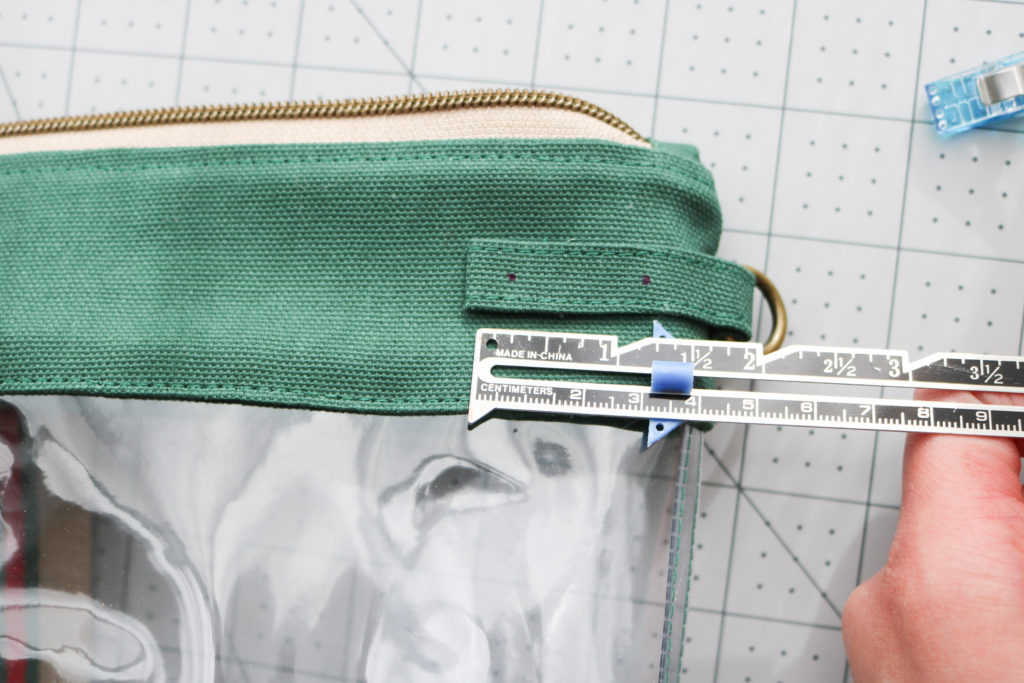
  • With the D-Ring tab fully extended, mark the Accent Tab placement so it is parallel to the zipper and next to, but not pushing into the D-Ring.  Glue the Accent Tab into place.
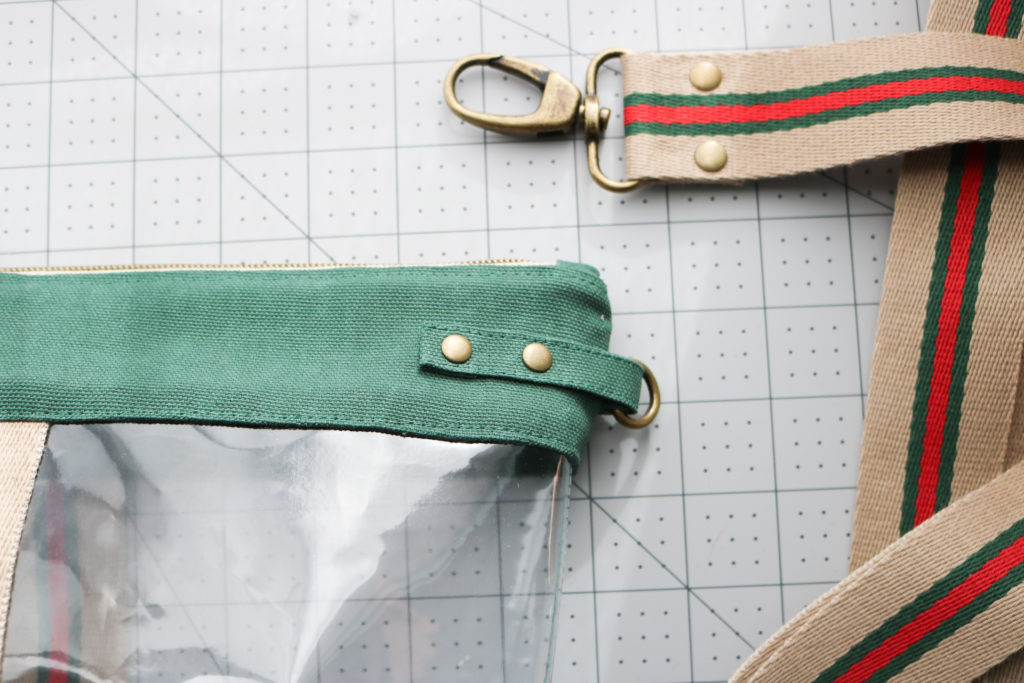
  • From the edge of the tab, mark at 3/8” and 1 1/4” for rivet placement.
  • Use the fabric hole punch to cut through the Accent Tab, Main Fabric, and Lining.  Attach rivets using your preferred method.  You can check out this hand application video here.
  • Repeat on the other side of the same Accent Tab. Then repeat for the second Accent Tab. You will attach 8 rivets altogether on the Accent Tabs.
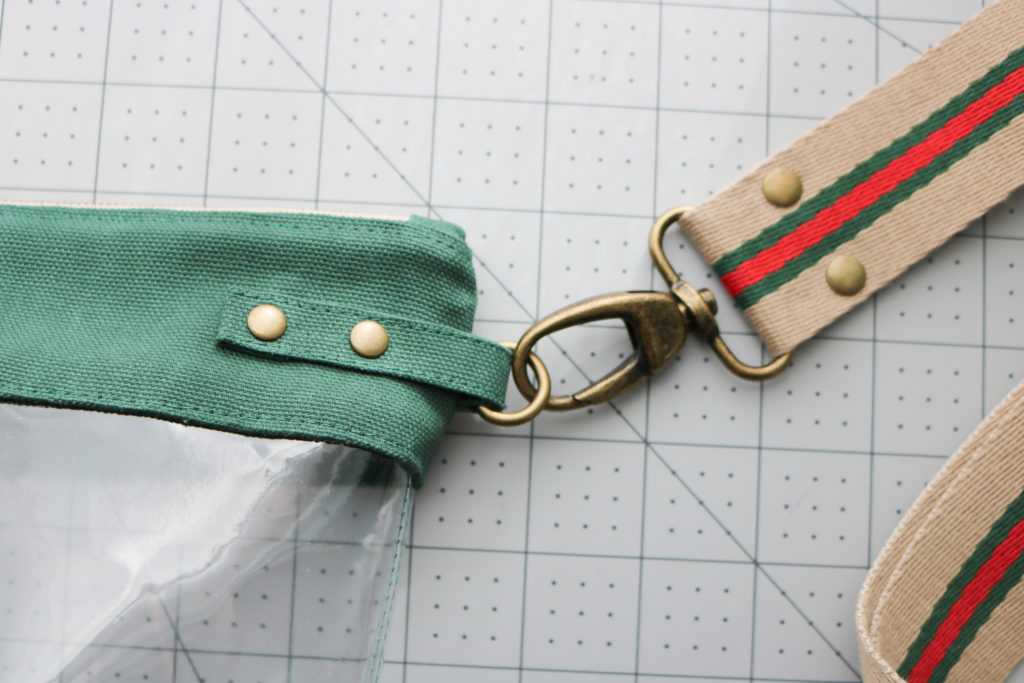
  • Attach the Strap to the D-Rings and you are ready to rock out in style!  How do you like the D-ring illusion?
If you are looking for other ideas to get the most out of your Emma Stadium Bag pattern, check out this post on how to add a leather hook and the Intro post here with tester versions.   Happy Sewing! Cristy  
This post may contain affiliate links which help keep this website and content rolling.  You can read about all of my Disclosures here.

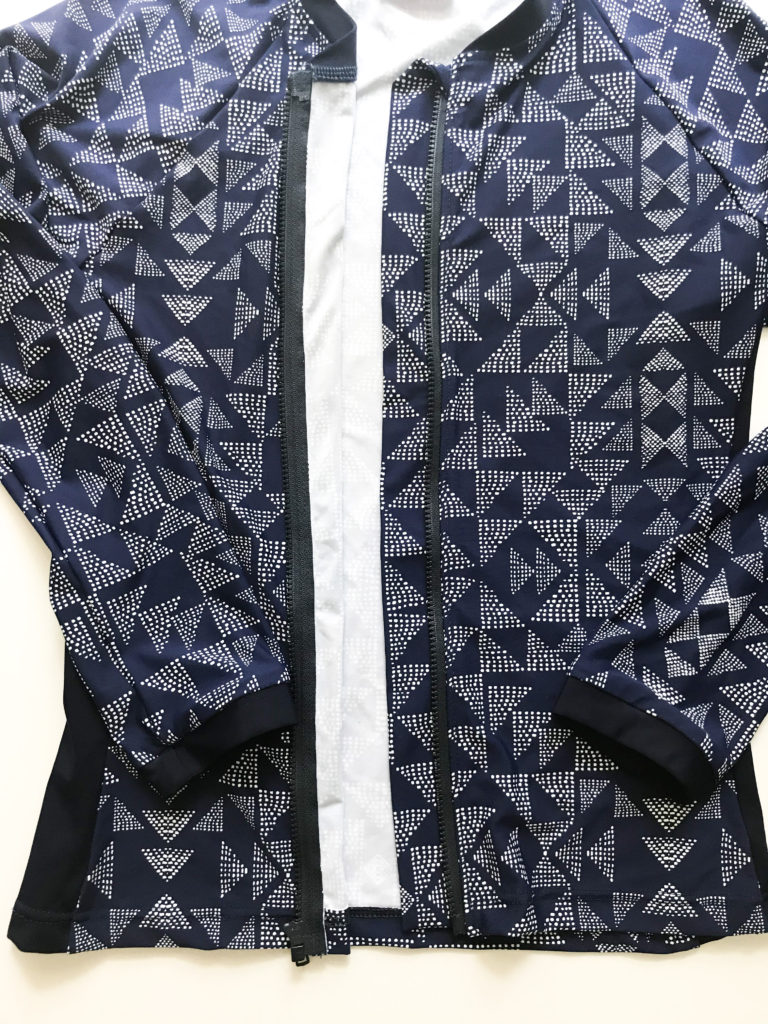
Full Zip Hack with the Grace Rashie Pattern

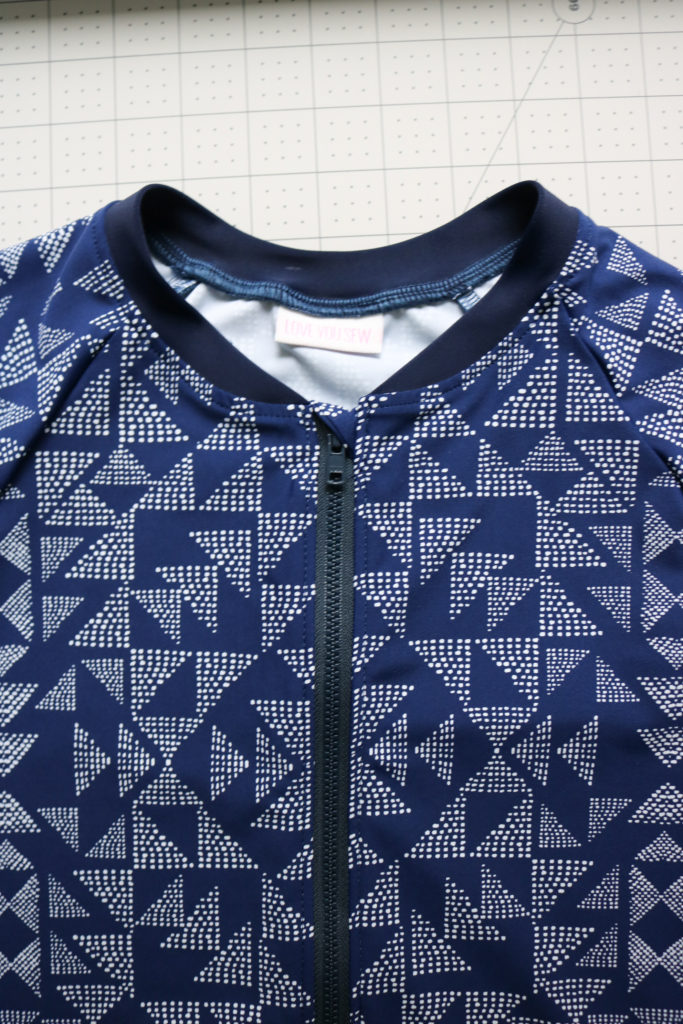
When I first hacked the Grace Rashie by Swim Style Patterns two years ago, I never documented the process…Big mistake, I know!  It was one of my late night experimentations which you can find here.  I honestly didn’t know if it would work or not and got so wrapped up in the process that I didn’t write down measurements or take photos of my complete step outs.  But luckily, I knew I needed at least a second rashguard for myself and made sure to document it this time!

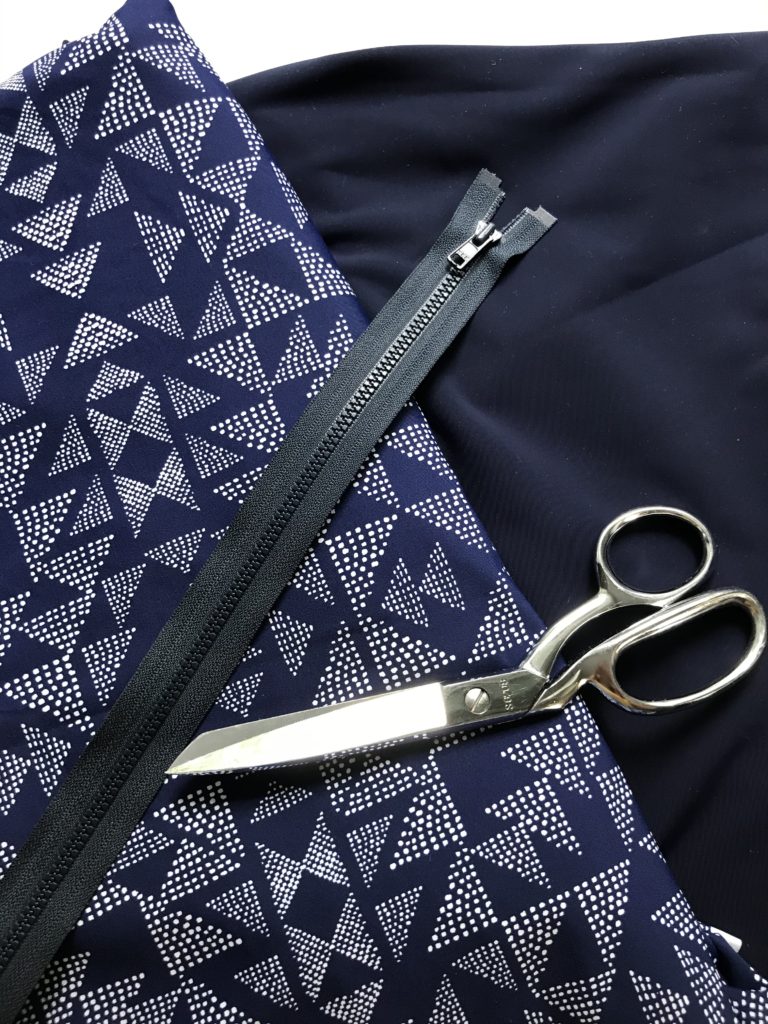
Supplies Needed

Tutorial

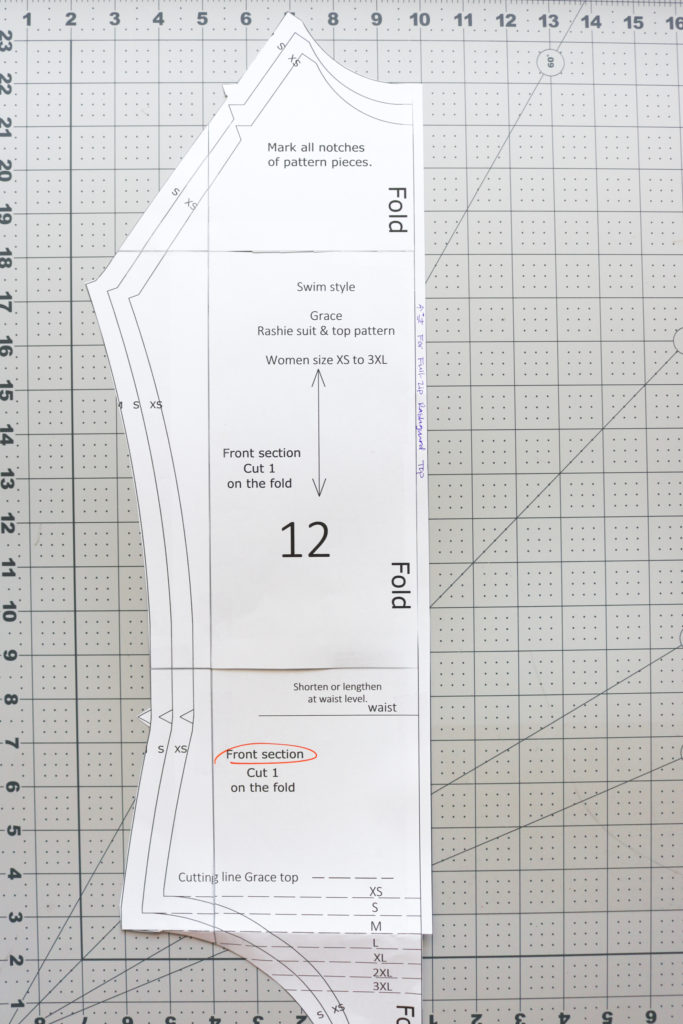
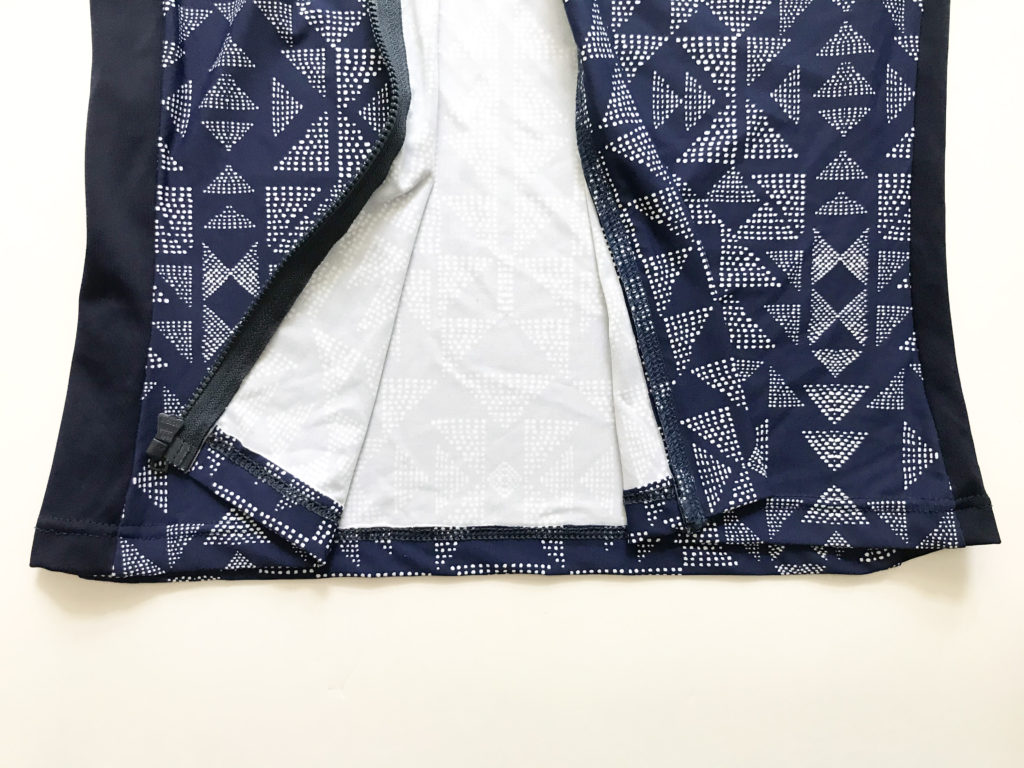
Step 1:  Cut all pattern templates according to instructions.  Pull out the “Front Section” and add 1/4″ to the center-front as shown.  You will cut at the dashed line for just the “Top.”

Note: I made a size M and all measurements for center front, zipper guard, and zipper are ALL for this size.  You will have to adjust as needed for your sizing.

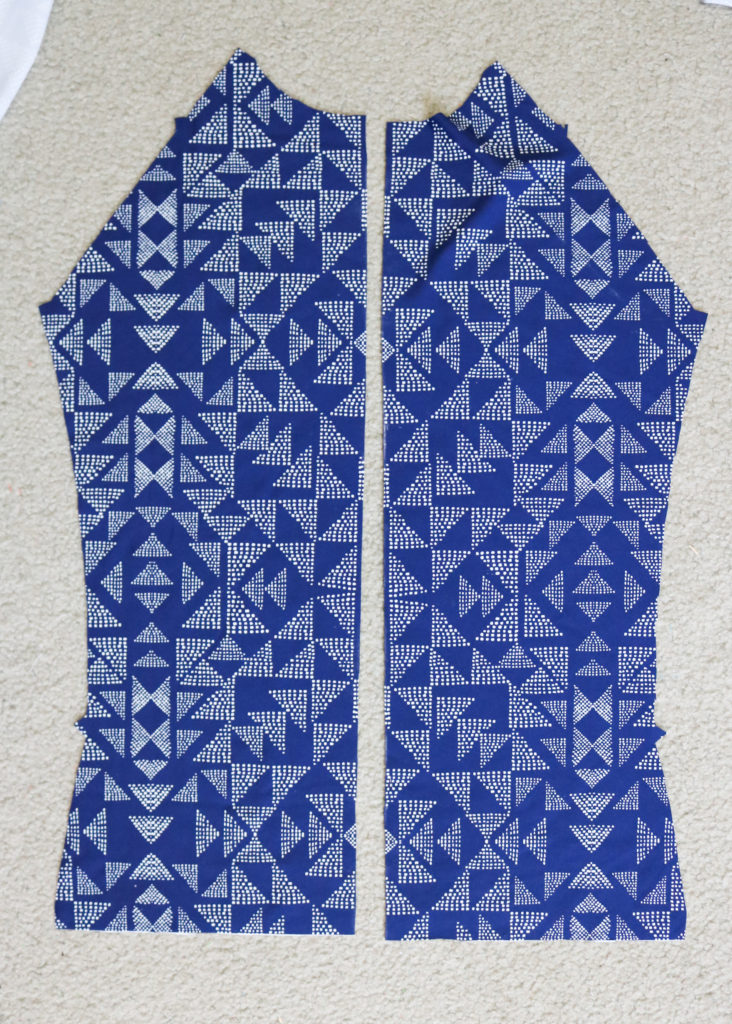
Step 2:  Cut all fabric according to instructions EXCEPT for the “Front Section.”  Instead of cutting the “Front Section” on the fold, you will cut TWO separate mirrored pieces using that 1/4″ you added in.

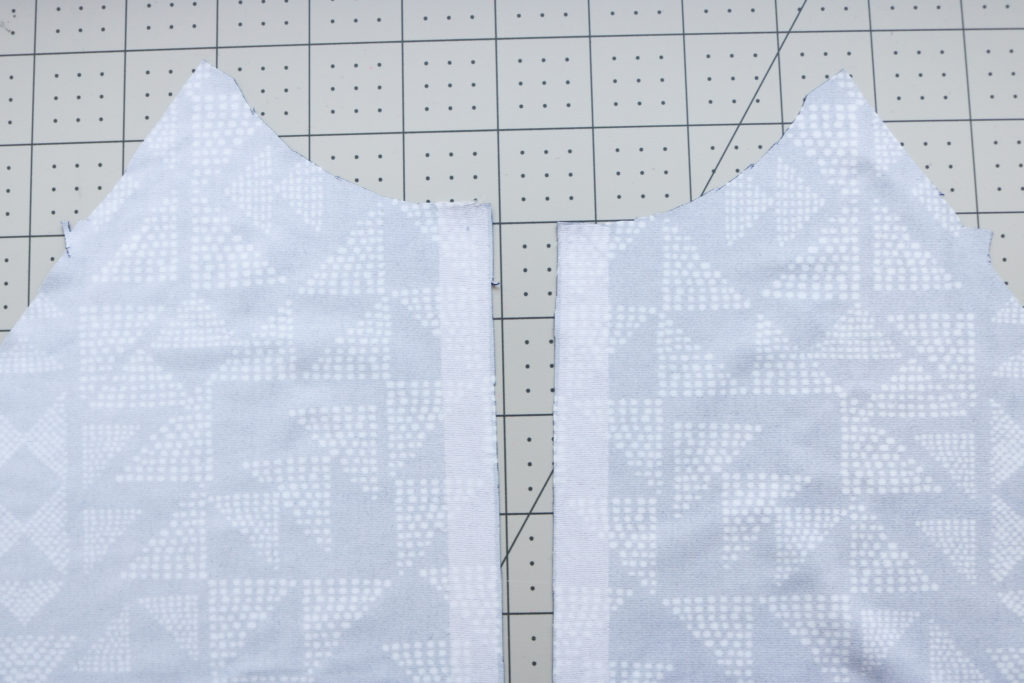
Step 3: Cut (2) 19 1/4″(length of the center front)  x 1/2″ strips of interfacing and fuse to each wrong side of the  center “Front Sections.”  Set aside.

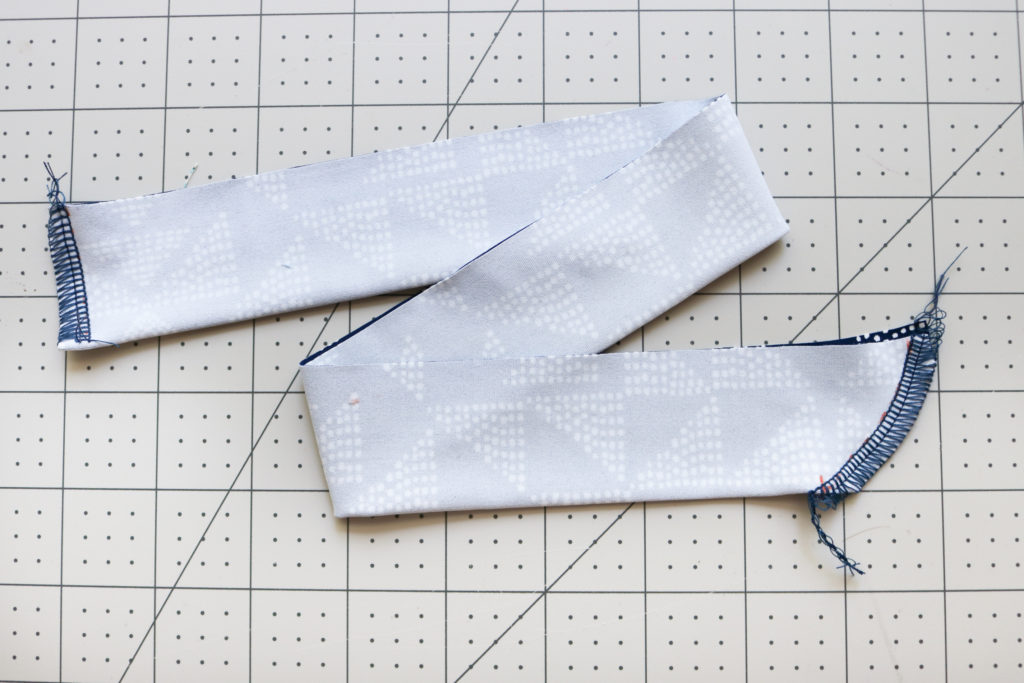
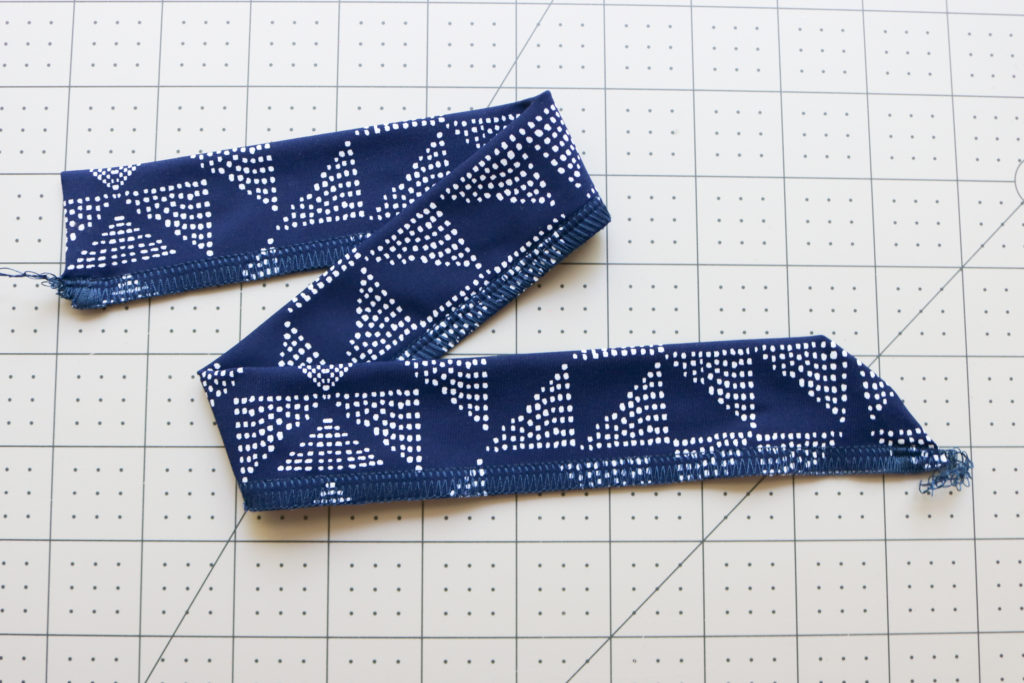
left side of image is the Bottom and the right side is the Top

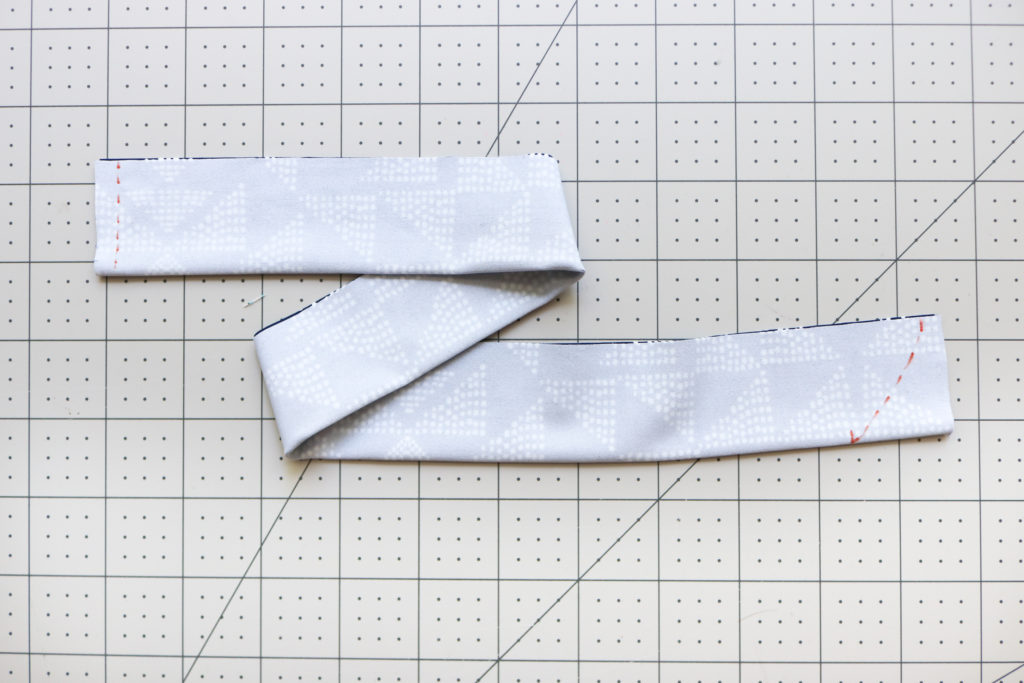
Step 4:  Cut (1) 19 1/4″ (same as length of center front) x 3″ strip of Main Fabric for the Zipper Guard.  Fold the fabric lengthwise with right sides together and press with low-heat iron, if needed. Mark seam with 1/4″ at the bottom.  For the top, measure 1/4″ down at the raw edge and then 1″ down on the folded side.  Connect the two points with a curved line as shown.  It doesn’t need to be precise!

Step 5: Sew on the markings you made. (They don’t need to be serged, but I went ahead and serger the seams while my machine was set up.)

Step 6:  Flip the Zipper Guard right side out, pushing out the bottom corner and the top curve.  Press with a low-heat iron.  Match the raw edges and finish with serger or zig-zag stitch.  Set aside.

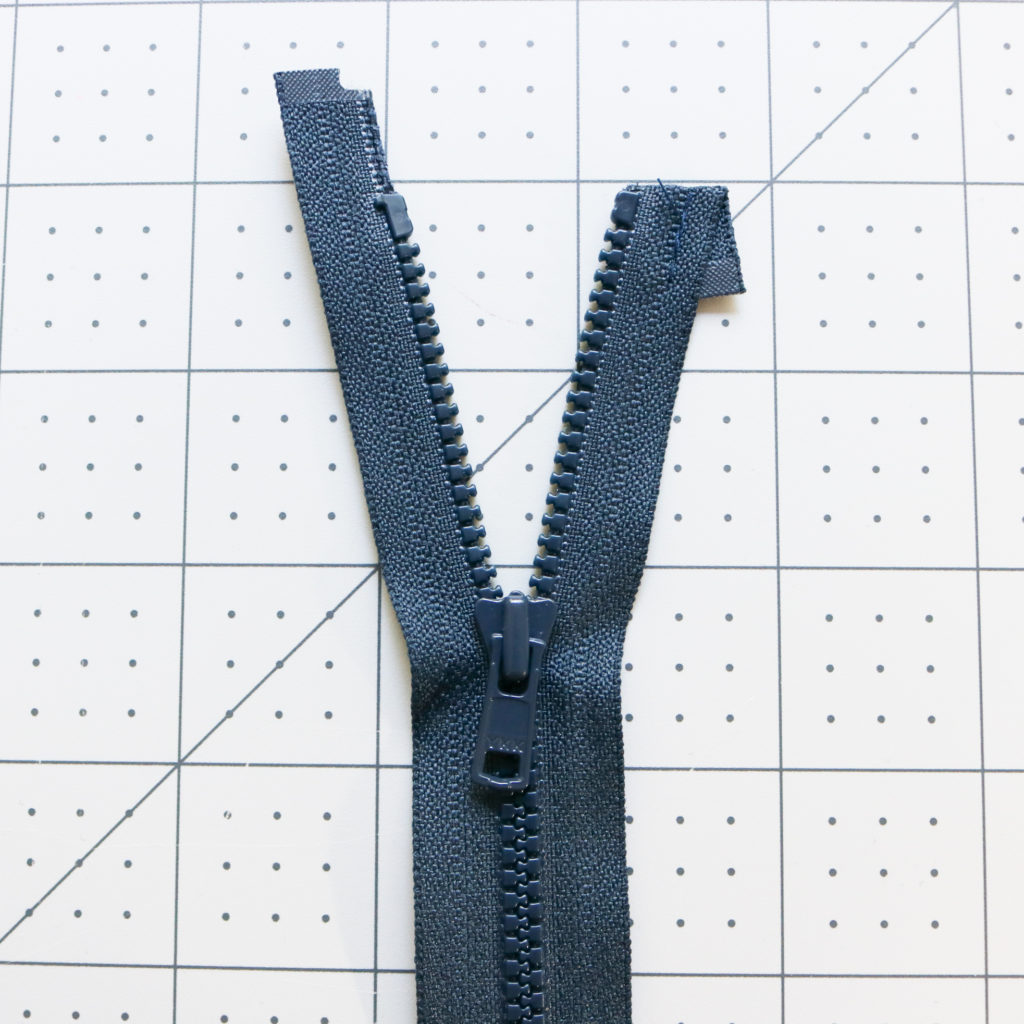
Step 7:  Prepare Zipper by folding down the excess tape above the top stoppers.  Tack the fold into place approx. 1/8″ away from the edge.  Trim the overhanging tape.  (If you are making size L, you might be able to skip this step and use the full length of the zipper.)

***Follow instructions to complete the Grace Rashie (skipping all zipper steps.)  When you get to the hem, double check that the length of the finished center front matches the length of the zipper.

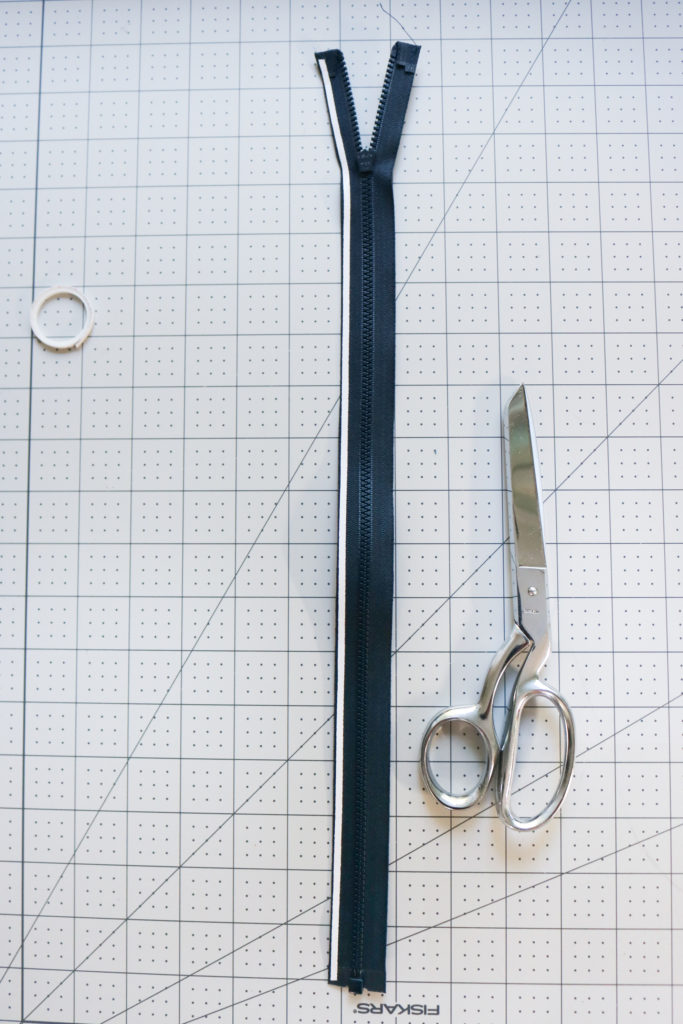
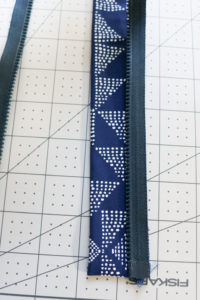
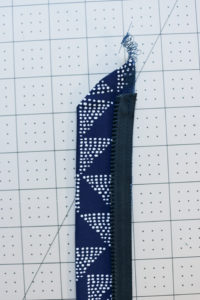
Step 8: With the wrong side of the Zipper facing up, add Wonder Tape to each long side of the tape.

Bottom

Top

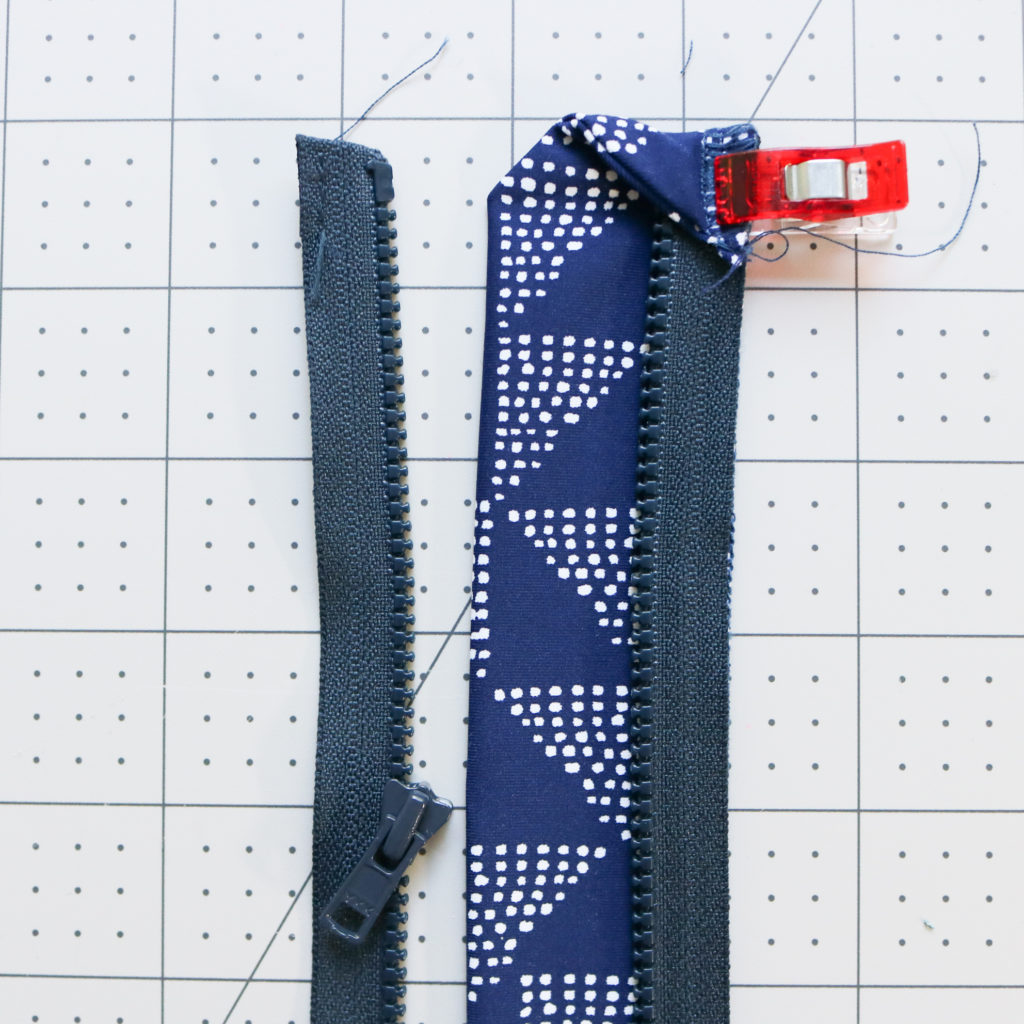
Step 9:  Separate the Zipper and lay one zipper side down on the stitched side of the Zipper Guard.  Pictured is the LEFT side of the zipper (without the head,) but my previous version had the head with the guard.  I honestly don’t know which side of the zipper should sit with the guard, is technically correct.  I was playing to see if there was any real difference in how it wore on the body and I didn’t feel anything different…

Step 10:  Fold the Top of the Zipper Guard over Zipper and tack into place with 1/8″ seam allowance.

Step 11:  Working on the LEFT side of the garment, match the center front of the Rashie with the Zipper Guard, right sides together.  Use a zipper foot and sew itogether with a 1/4″ seam allowance.  Open the Zipper Guard and press seam allowance to the back.  Top-stitch 1/8″ from the edge of the Zipper, going through the Main Fabric, Zipper, and seam allowance.  Repeat with the RIGHT zipper.

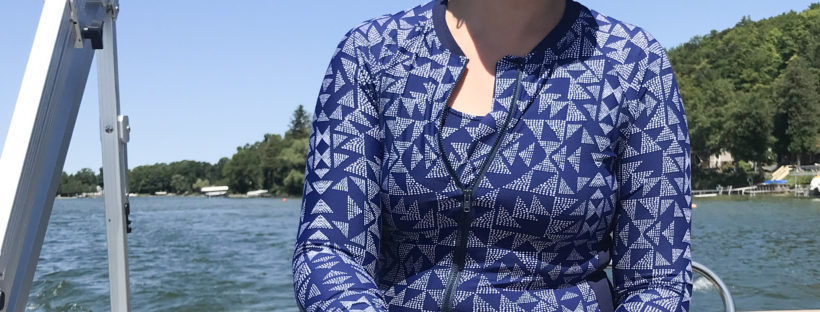
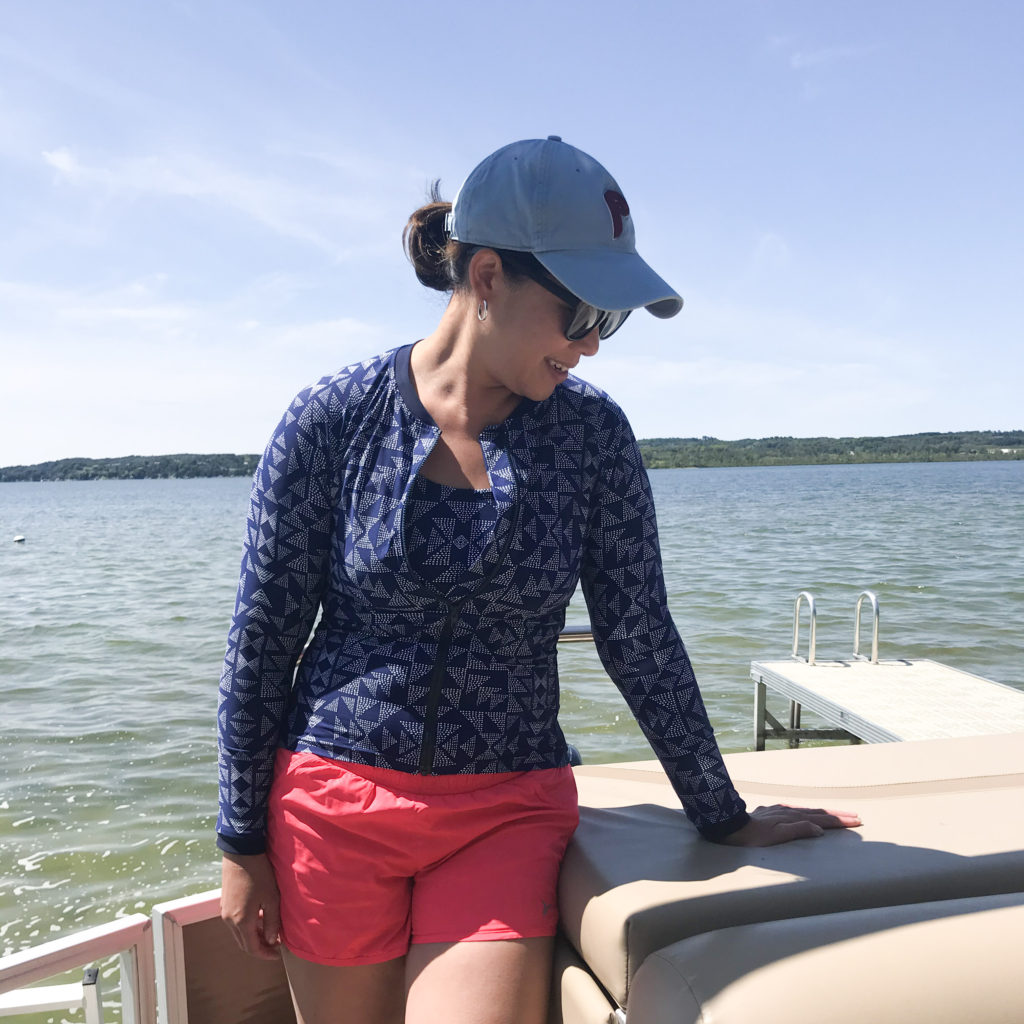
Congratulations!  You now have a custom swim rashguard to protect your skin against the sun and elements.  I love having these for the cool winds of the lake.  The best part is when the rashguard gets wet, I can easily zip it off!

Please let me know how this tutorial worked for you!


Happy Sewing,

Cristy


This post may contain affiliate links.  Please read about my Disclosures, here.

Make the Most Comfortable Fabric Mask

It’s hard to imagine months later, we are still here…  But now with mask mandates across so many US cities and numbers of COVID-19 cases back on the rise.  Everyday, more and more businesses are requiring masks when in their stores and even schools are requiring them as well.  We ALL need to do our part and wear a mask to prevent the spread of this coronavirus.  This is not a practice that will be going away soon, so I figured I would make the most comfortable fabric masks for my family and friends.
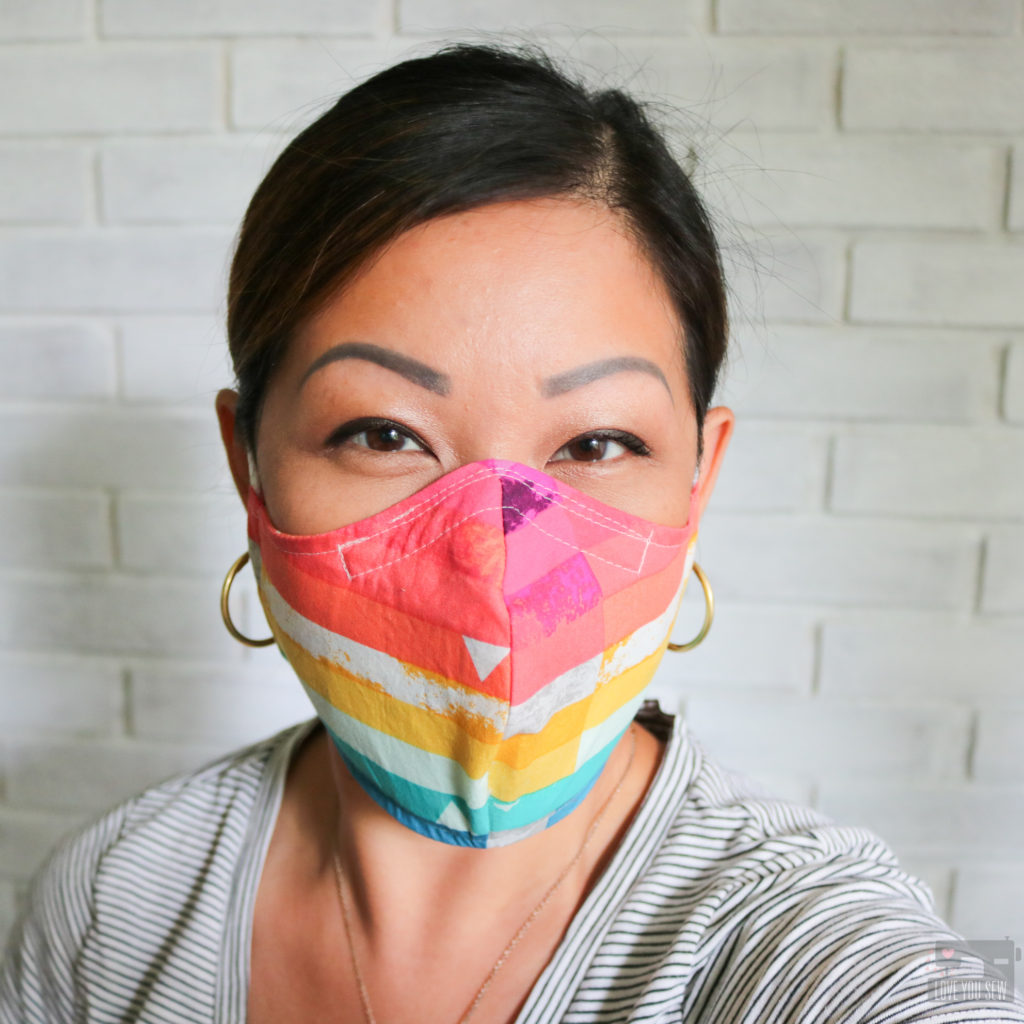
This post details what I’m using for my fabric masks (which are non-medical) and where to find supplies.  I am not a medical professional and/or a PPE engineer or expert.  I made these masks in lieu of purchasing medical grade supplies to keep them available for healthcare and other frontline personnel.  I encourage you to read the CDC fabric mask guidelines for additional info and how you can help prevent the spread of COVID-19.

Background
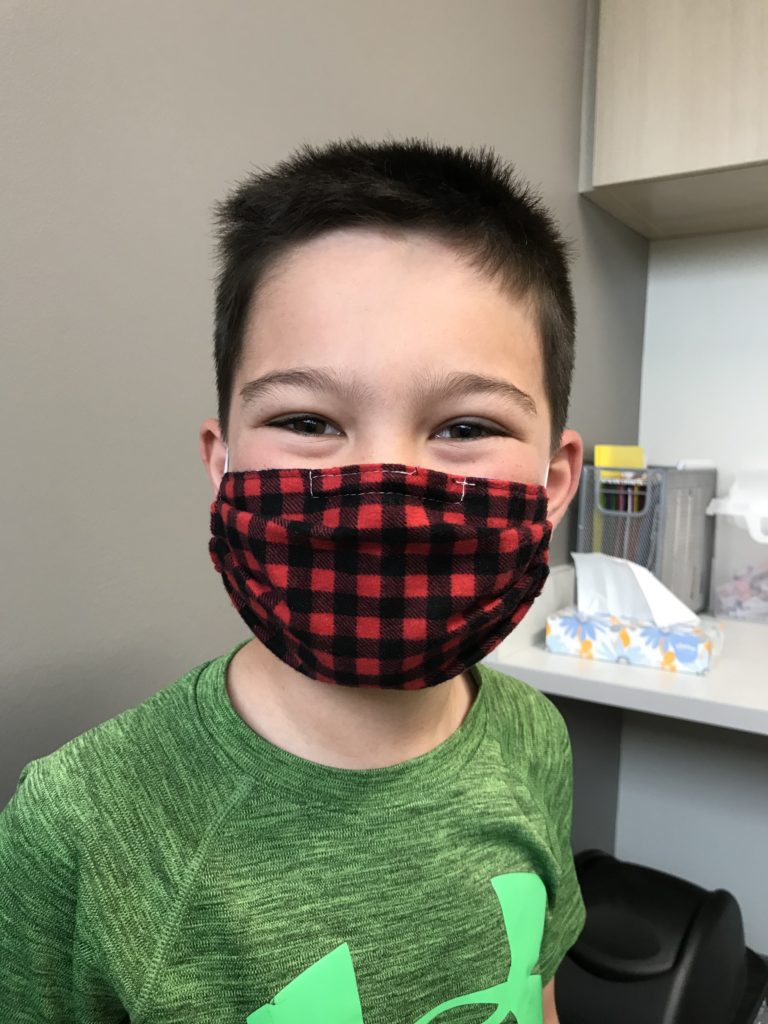
At the doctor’s with jewelry cording elastic and a paper clip nose bridge

Back in May, I took my oldest son (9 years old) to his annual check-up and it was required that both of us had to wear masks.  No problem.  From the time B put on his mask until we were seen and back in the car, one whole hour passed.  But during that time, he was batting at his ears the ENTIRE appointment.  Granted, the only elastic I could get my hands on at that time was jewelry cording.  While the cording fit behind the ears and didn’t push them forward, after awhile they felt like they were cutting into the ears a bit….making them so uncomfortable.  I knew we needed something different for comfort and just knowing masks are here to stay for awhile.

Pattern
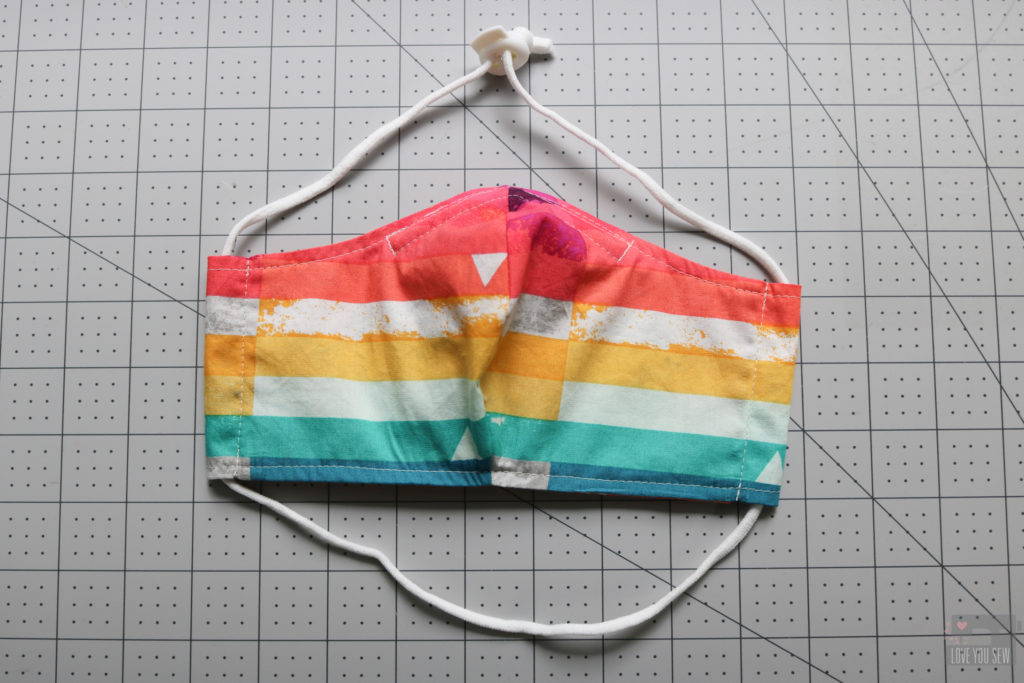
With so many sewists in mask making mode since the beginning of the pandemic, it was not hard to find patterns.  I even have a Pleated Mask (with Ties) Tutorial you can find here.  If you are looking to upcycle or do a project with kids with no sewing, I also have a No Sew T-Shirt Mask Tutorial using hair elastics you can find here.  But for comfort, I was looking for a pattern that I could either tie in the back or use elastic to hold around the head instead of pressure by the ears.  I decided to use the Craft Passion version because (1) It was already drafted for a nice contoured fit around the face and used less fabric which I thought could be cooler? (2) It came in multiple sizes (3) Had instructions for a filter pocket and (4) Came with pattern length adjustments for elastic/tie widths.  You can find the very detailed blog post with videos and even more options here.
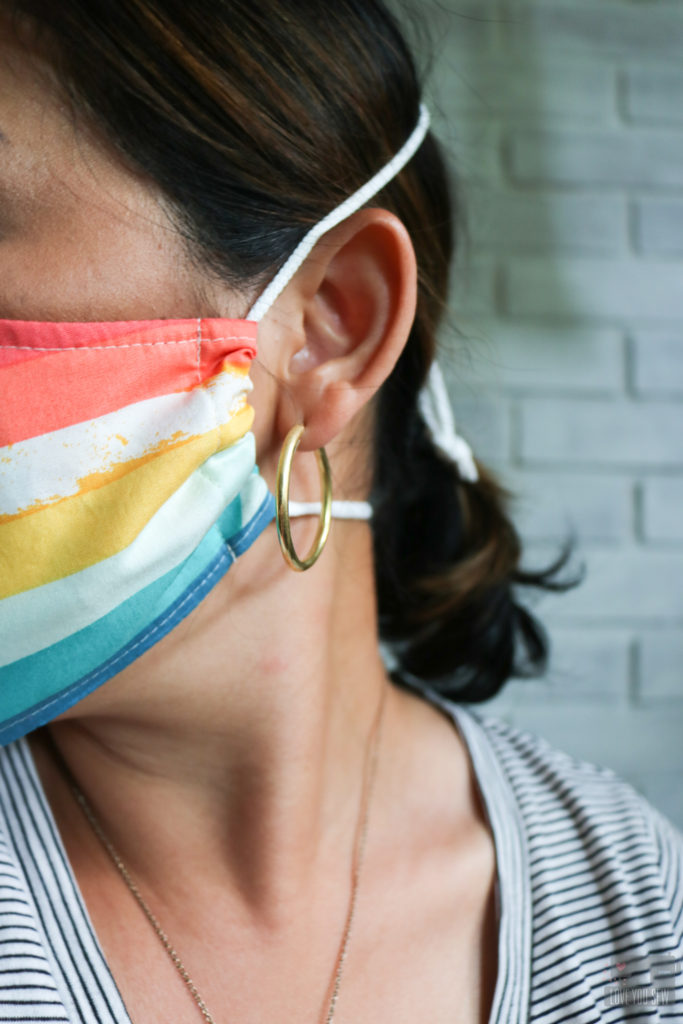
I decided to make the original mask with filter pockets, but used the extended length for wider elastic/ties even though the widest width elastic I would use is 1/4″.  The extra length allows room for the mask to scrunch and fit around the face better.  If it’s more narrow and closer to the stitching and folds (aka bulk) of the fabric, it doesn’t contour as well.

Elastic
Mask with DIY knit jersey “elastic”

With my kids as my target audience, I knew the elastic definitely needed to be changed.  When I was first testing out this pattern, I used knit ties made from cutting 1″ 4-way jersey knit fabric and pulling on each strip until they coiled around.  But I wanted a little bit of a faster (and easier) make since I was sewing for family and friends too.  Luckily, elastic supplies are back in stock and I was SO pleased to find rounded knit elastic that is MUCH softer  than traditional braided elastic and came in various widths.  To the touch, these elastics feel so much softer and do not have that rubber texture.  They are are incredibly more comfortable than the cording I was previously using.
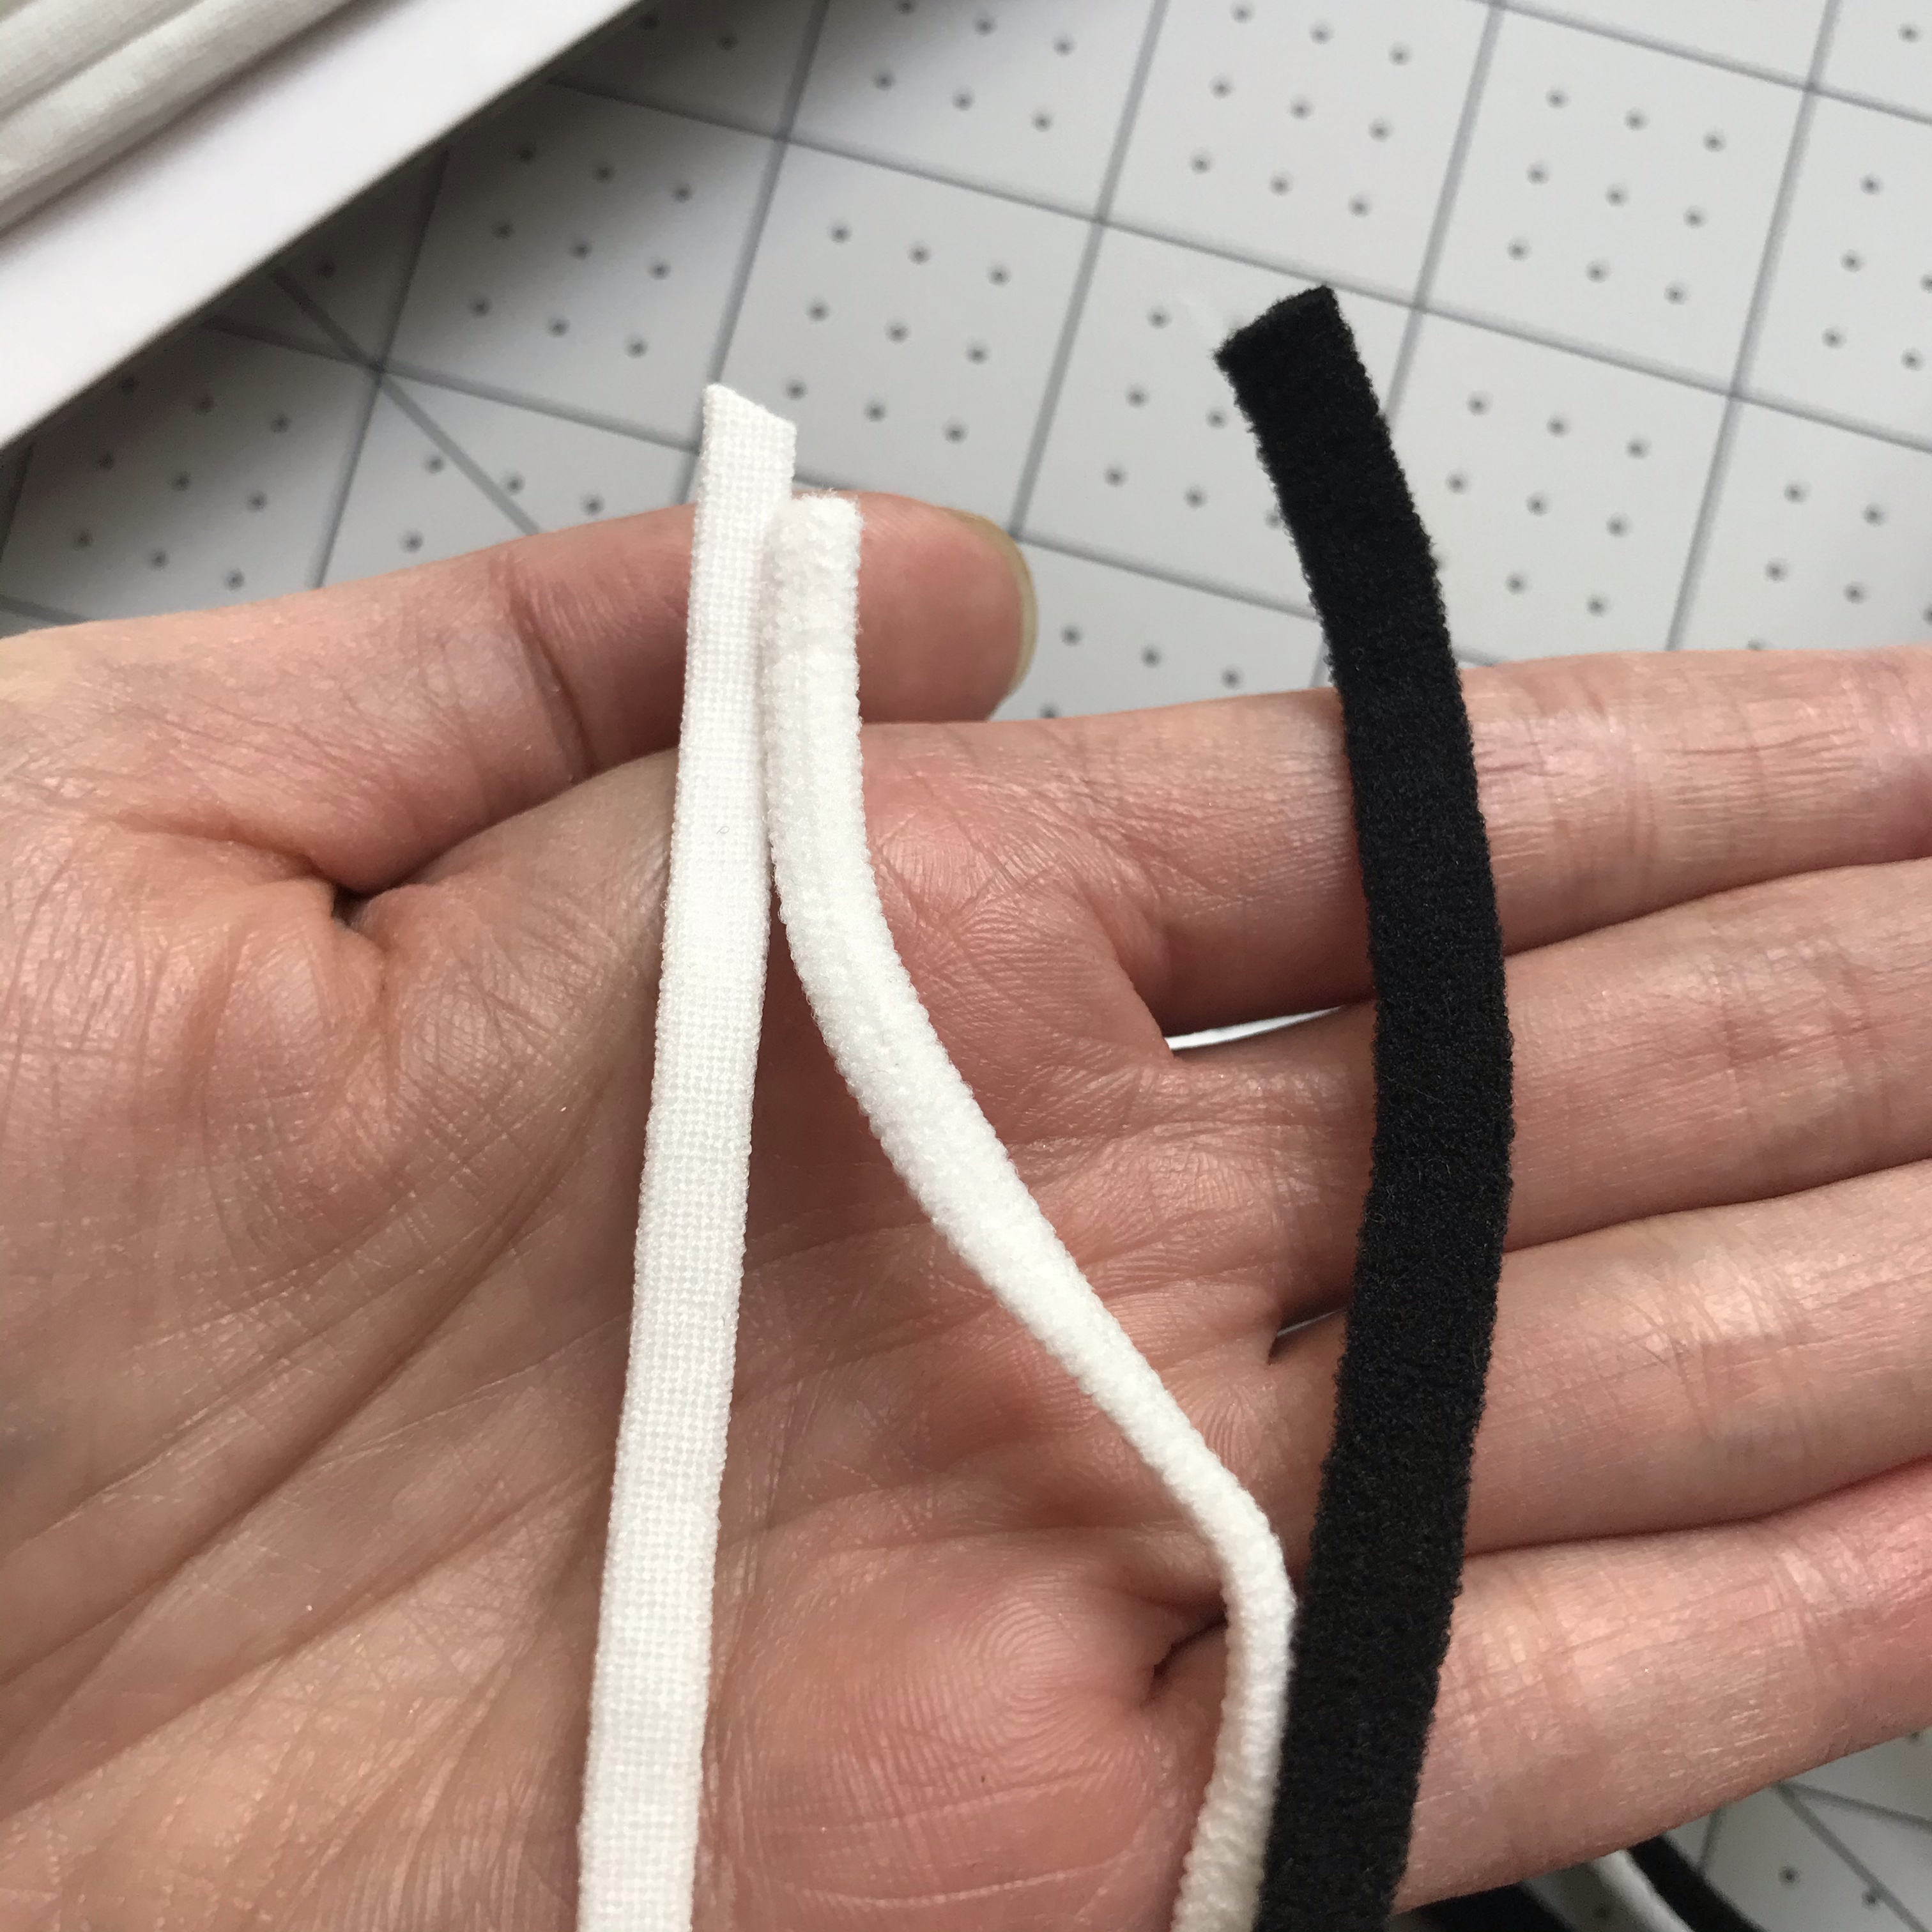
I’ve been purchasing the majority of my elastics off of Amazon and like the flat 4mm width the most, but have had to order from different sellers based on available stock. From left to right (top image) and going top-left clockwise (in bottom image):
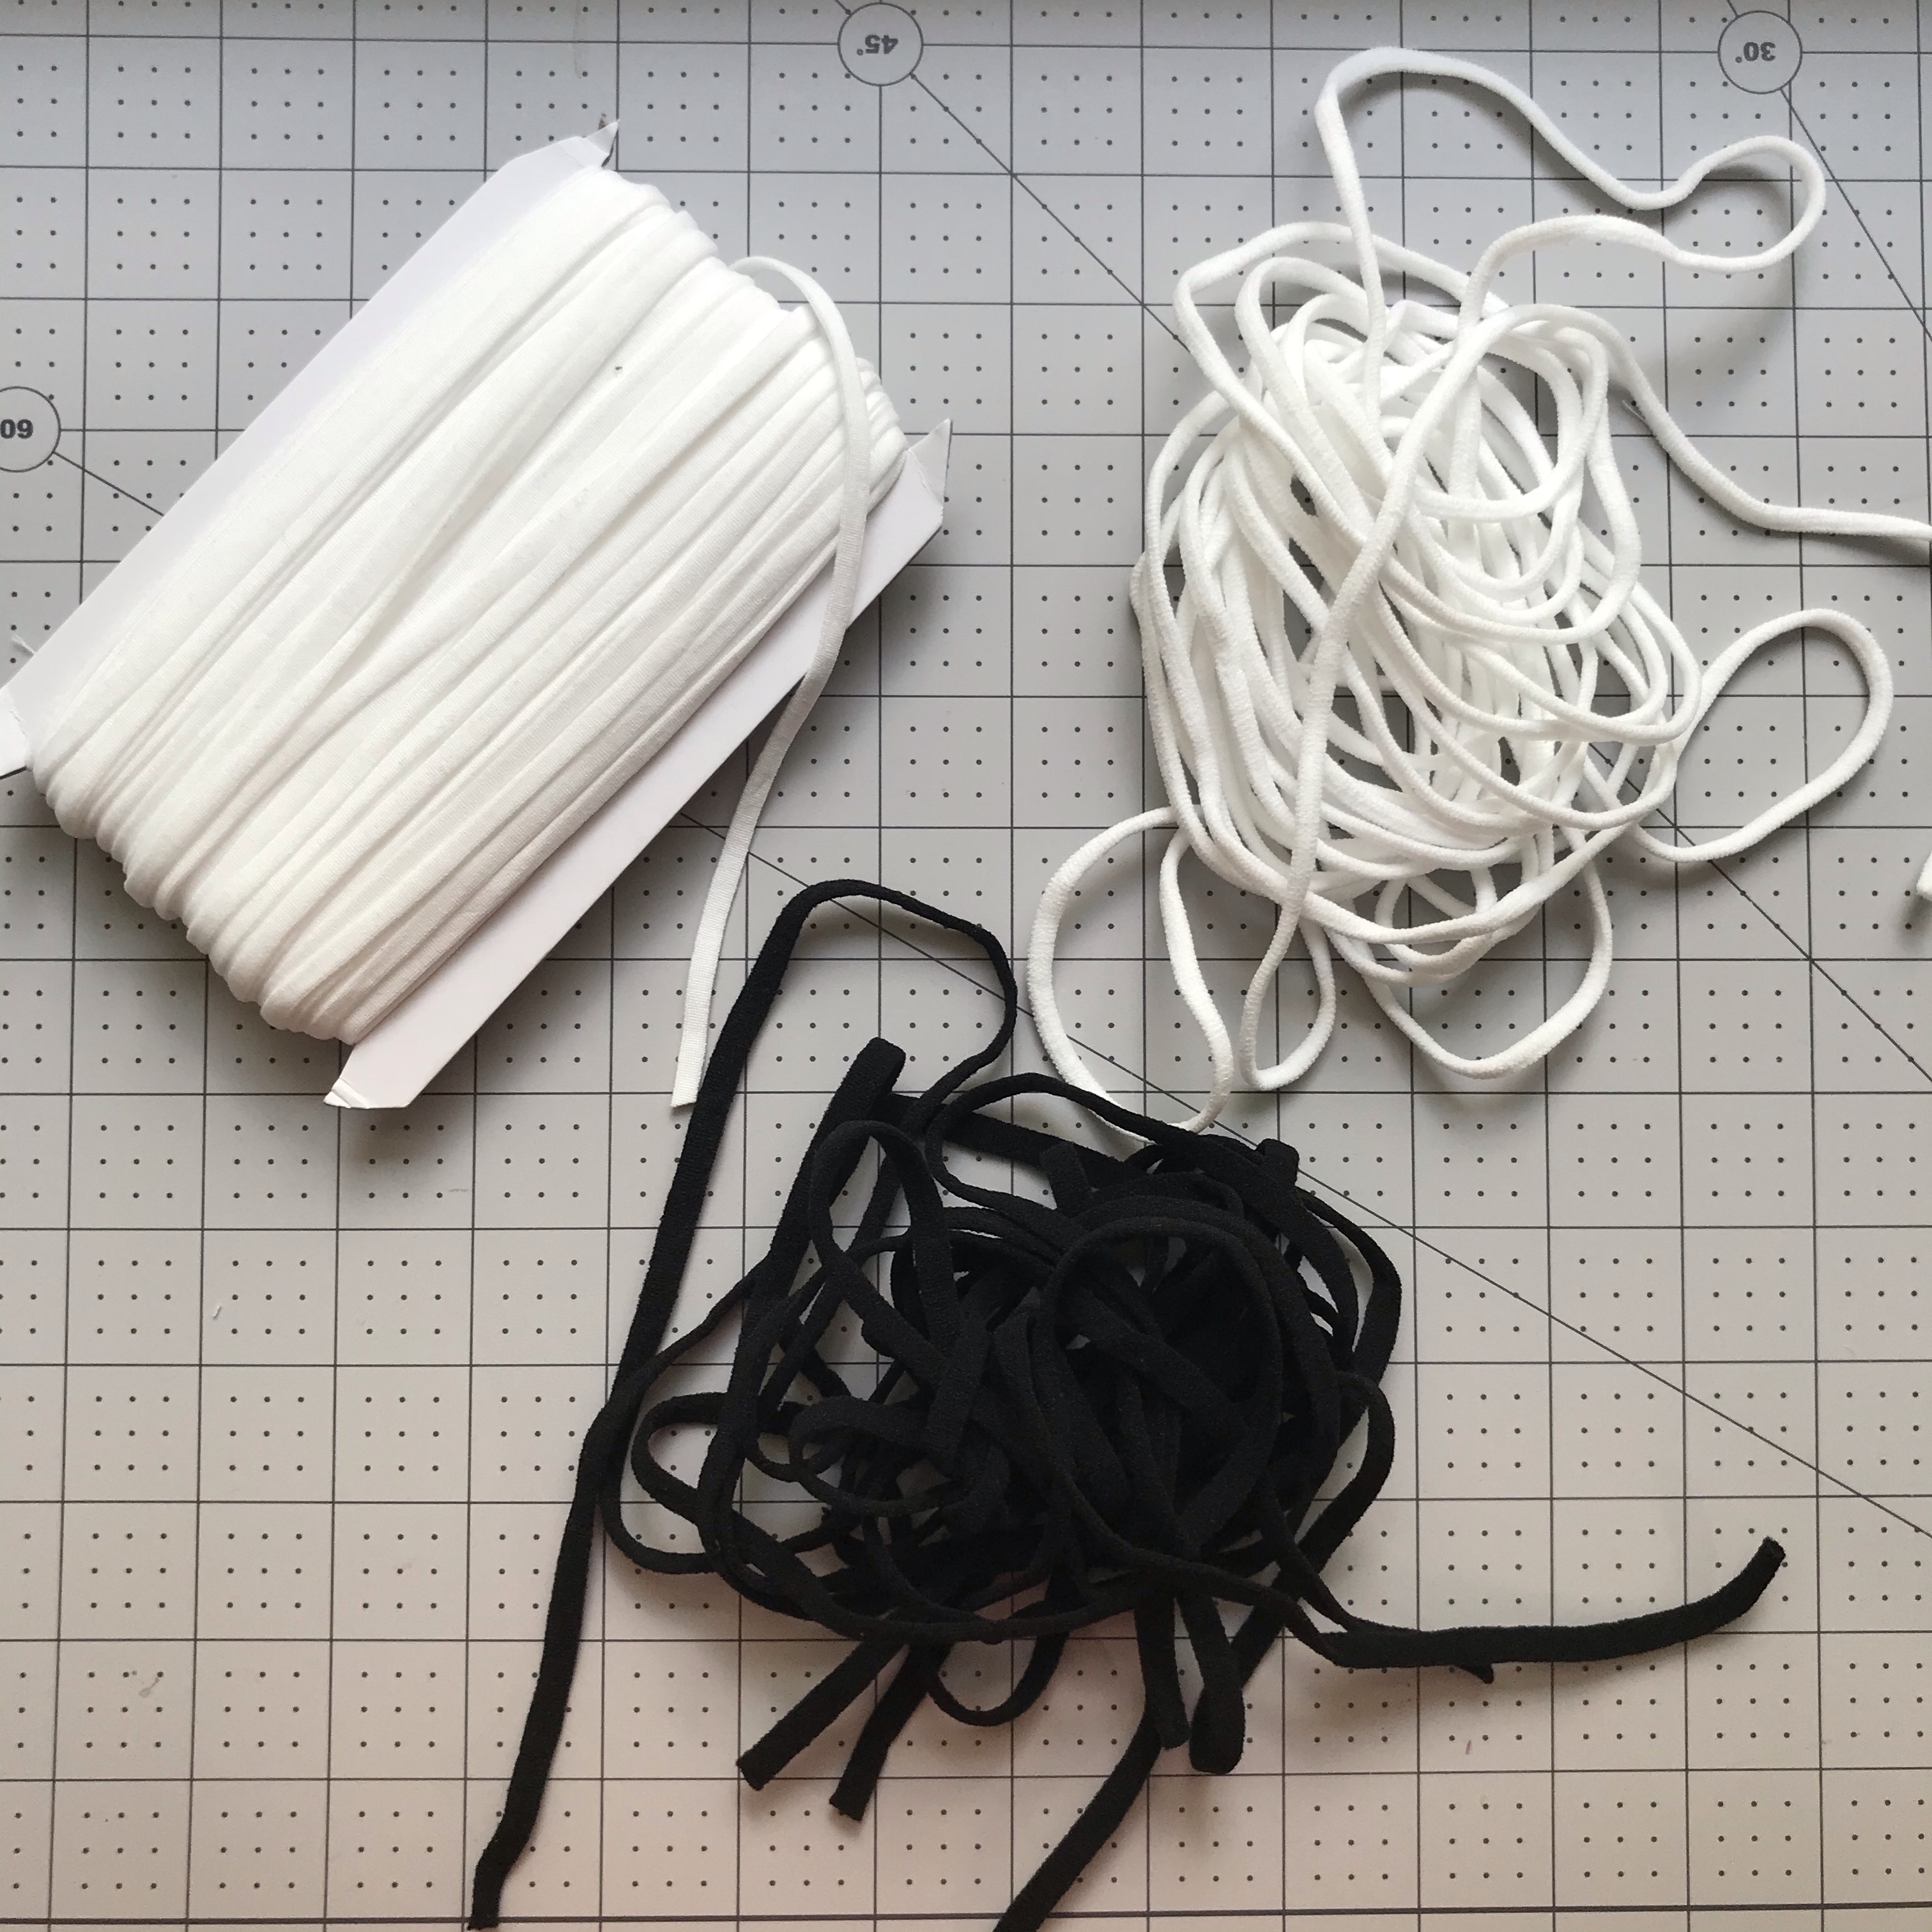
  • White Flat 4mm – Feels like a heavier stocking and has great stretch and recovery.  I got this particular one from Amazon, but have purchased similar product from Salt and Summit Supply.  If you are planning to make a lot of masks to sell or for friends and family, I got a great deal ($15.99) on a large 145 yd spool here.
  • White Rounded 4mm – This one feels more like the inside of a sock and also has good stretch and recovery.  It’s not quite flat, and not completely round, but definitely thicker than the above flat elastic. You can find it here.
  • Black Flat 6mm (1/4″) – The touch of this elastic is like a traditional pair of sheer stockings or like many baby headbands.  It stretches the most out of these three and had good recovery as well.  You can find it here.
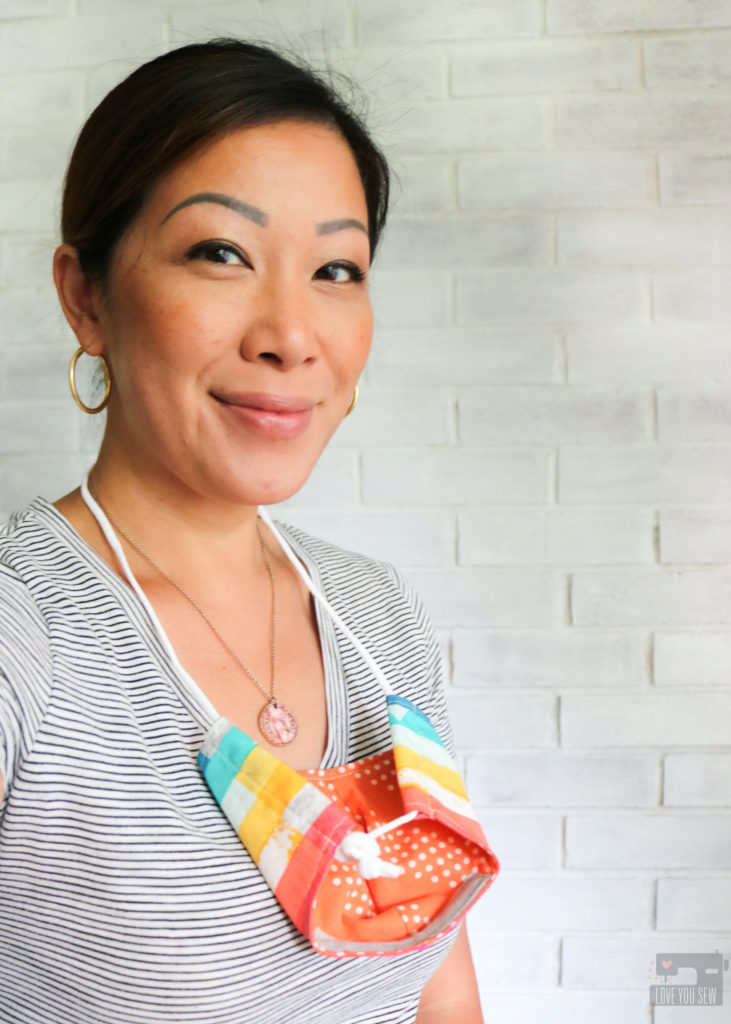
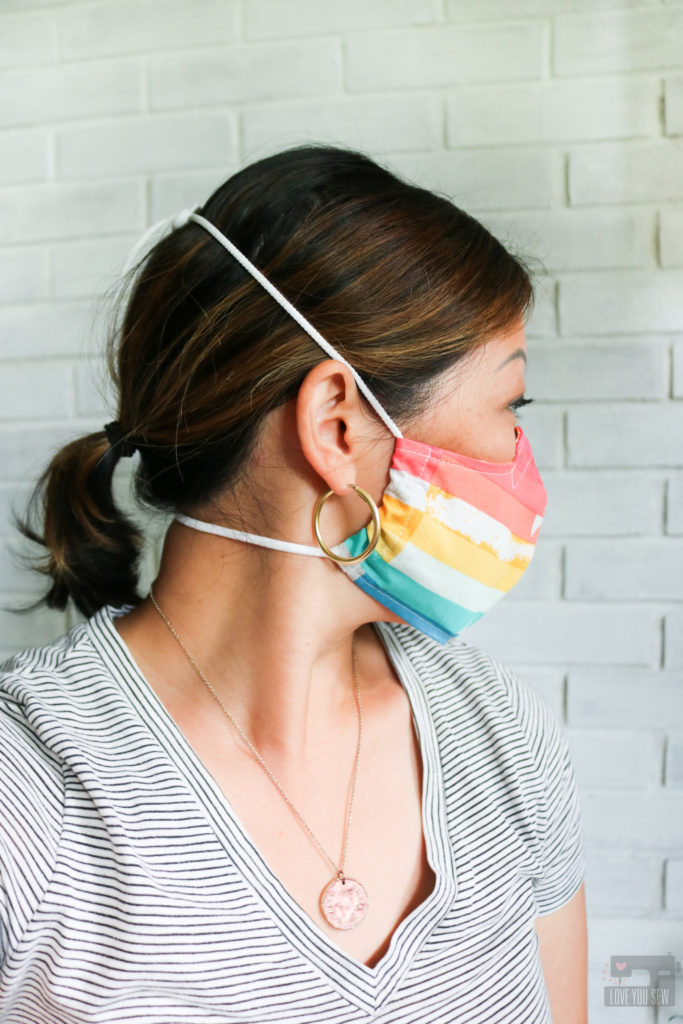
The other great part about having a mask with elastic around the head is that you can pull it down (with washed hands and socially distanced from others) to eat or to grab a breath. The way the mask hangs, the inside doesn’t come in contact with your neck or clothing too!  I imagine that these masks will turn into the new “lost glove,” especially with kids.  So, I love that this style of mask can stay with the person and not be sitting on random surfaces, fall to the floor or stuffed in a pocket. Having the tie or knot on the top of the head is CLUTCH! You just have to grab the knot and pull down. This helps to reduce contact with the actual mask itself.

For each sized mask, I used the following lengths:

  • Men – 36″
  • Women/Teen – 30″
  • Older Kids – 24″
  • Little Kids – 20″

Note:  As with all items that hand around the neck, these can become a chocking hazard. Please make sure kids are monitored by an adult at ALL times while wearing a mask.

Cord Locks
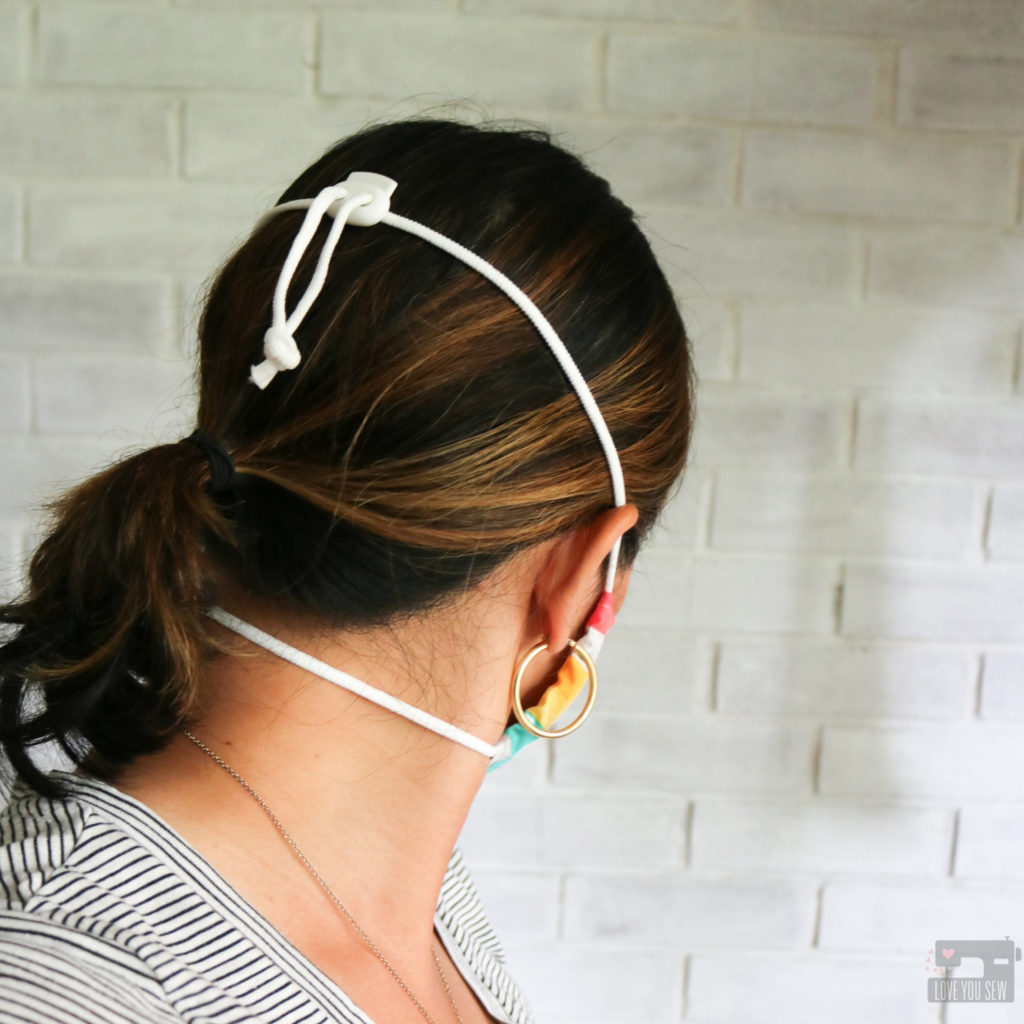
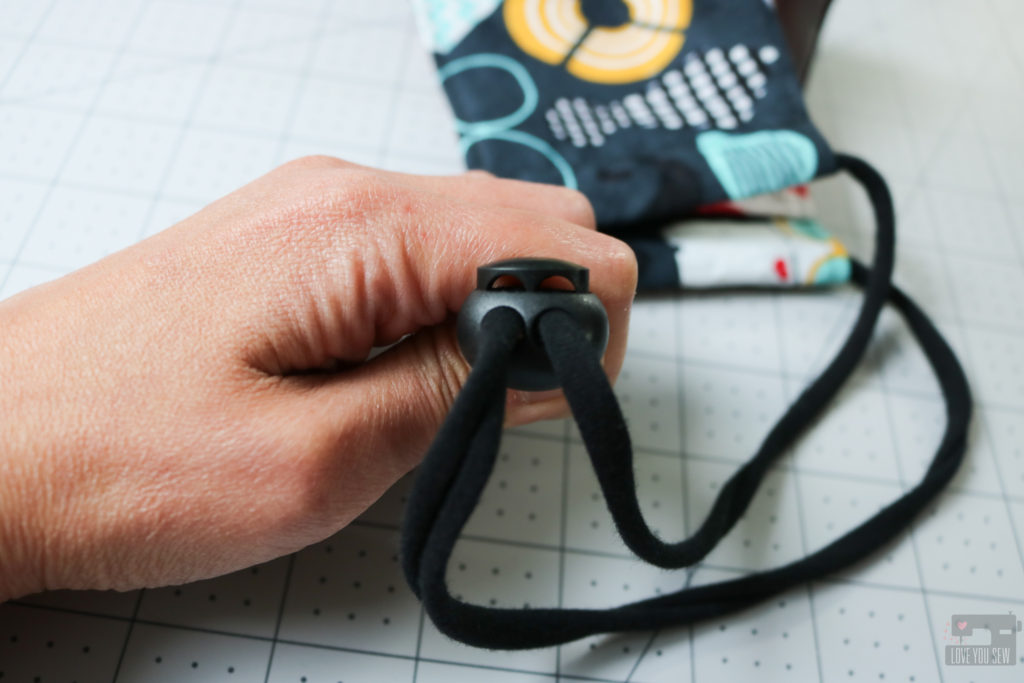
To pull down the mask, the elastic would have to be adjusted and I just couldn’t imagine my kids having to tie their masks….they barely can tie their own shoes well!  So, I thought adding a plastic cord lock made the most sense.  This allows a nice firm fit around the head which keeps the sides of the masks close to the cheeks and it won’t shift if you have to talk while wearing the mask.
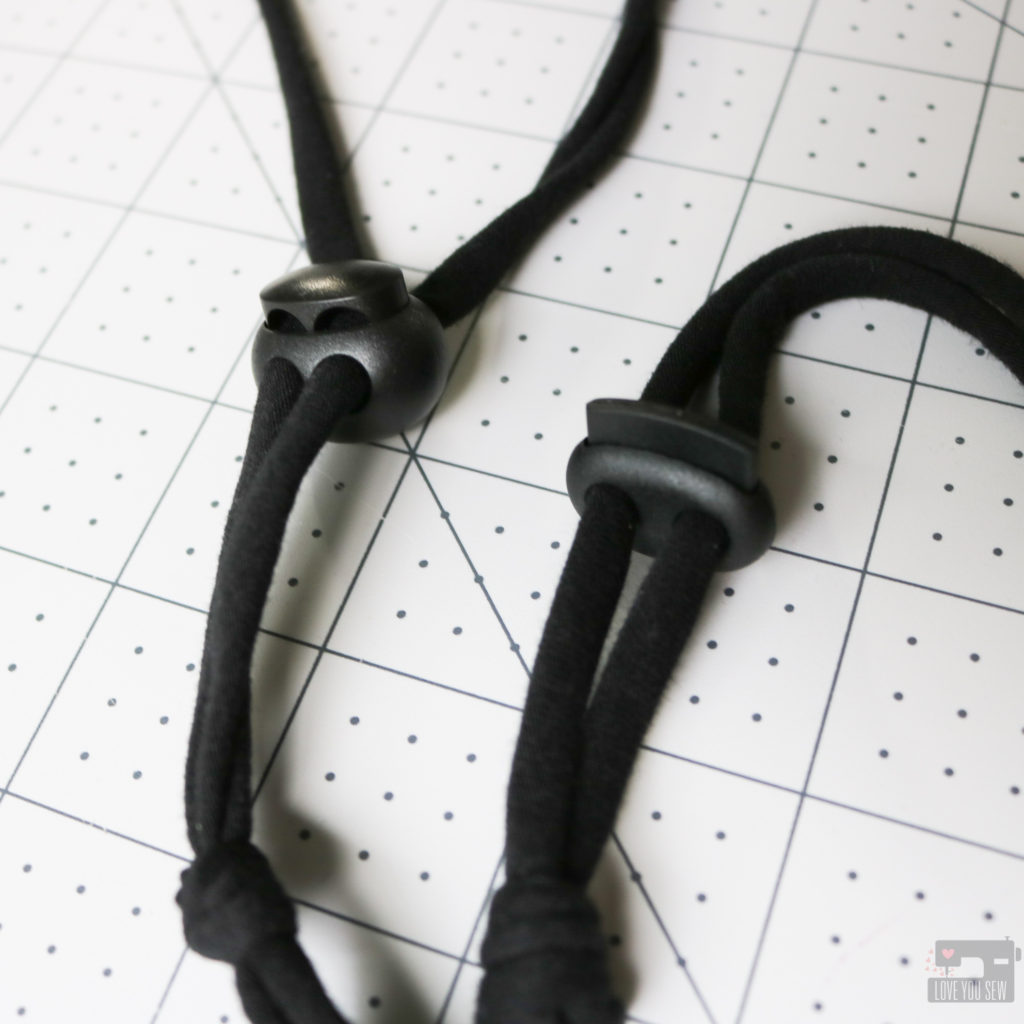
Sphere vs Slim Cord Locks

When I first was looking at locks, I (of course) went to Amazon to find a deal on just a handful of them to try out.  I bought the spherical ones here and while they are strong and give you ample surface area to pinch down on the lock, they were just too bulky for my tastes.  Nothing goes to waste, so I used them on just the men’s masks I was making.  I then found these slimmer locks from Paracord Planet for the best pricing at the time ($21.99/50) with more color choices too.  But just the other week I found the same locks only in black for WAY less ($8.49/50) here!  These are the same quality..if not a little better than the ones from PP.

Nose Bridge
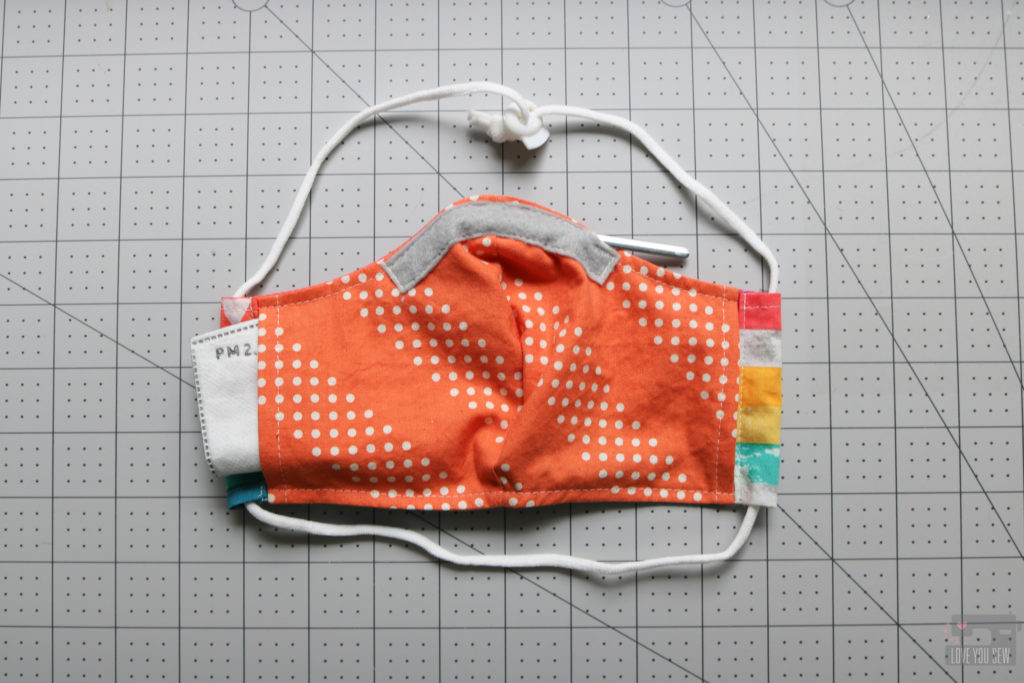
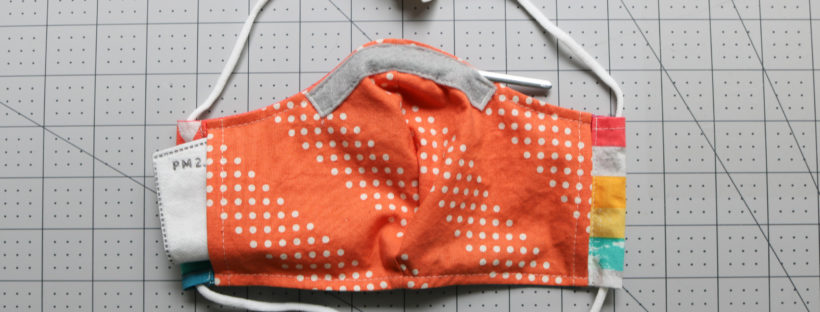
There is some debate among sewists to which side the nose bridge should go…and I choose the inside – call me a rebel!  For my method, I complete the entire mask and sew on a 4″ x 1/2″ piece of acrylic felt, leaving  a 1/2″ opening to add and remove the metal when washing or for replacement purposes.  I back-stitch on both sides of the opening and at the short ends of the felt rectangle for extra security.
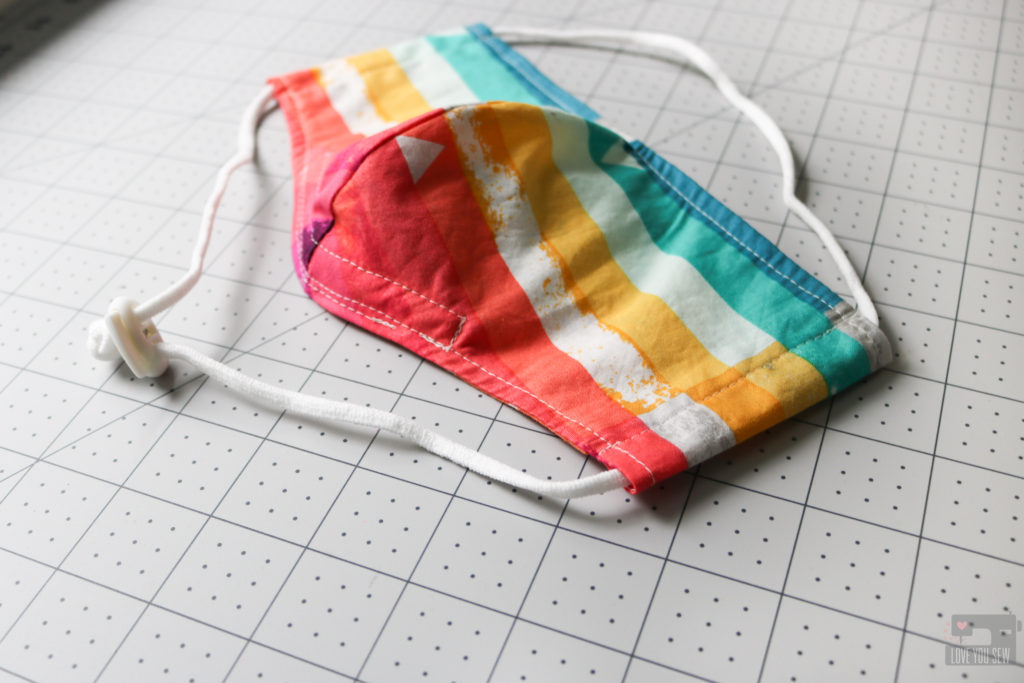
You can use any material to make the nose bridge chamber (ribbon, twill tape, folded fabric, etc.)  Personally, I like the felt for the extra loft and softness on my nose.  I wear glasses just about every single day and definitely have been blinded by fog coming out of the refrigerated produce room in Costco!  The extra loft seems to help catch more of the moisture and I love how you can leave it with a raw-edge…double-win!
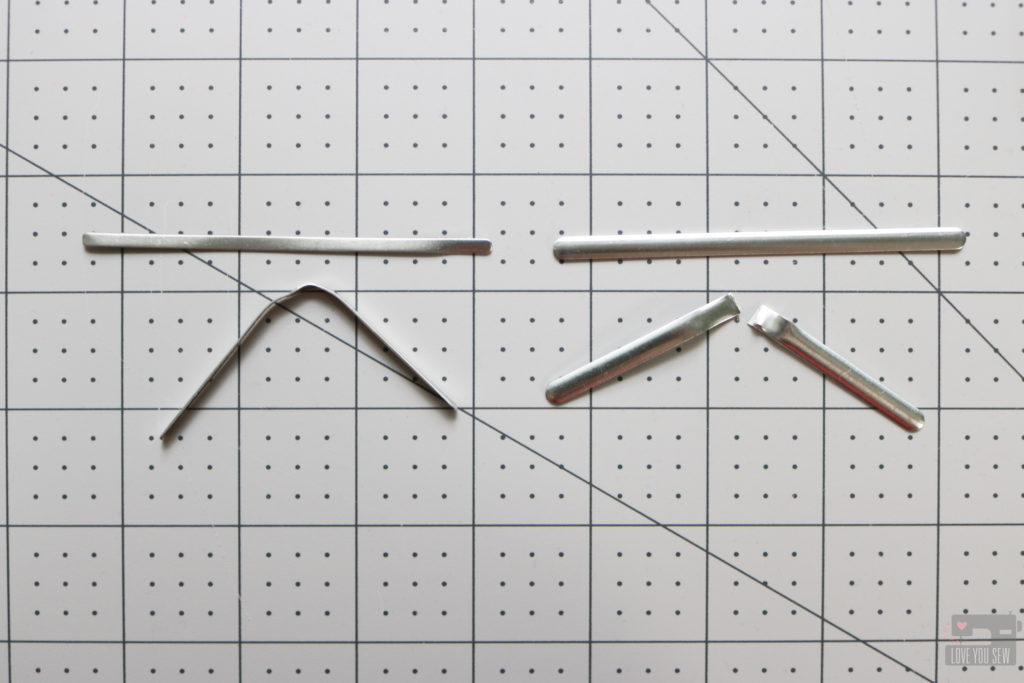
Domesticity vs Amazon

Early on in the pandemic, I was using pipe cleaners and paper clips for nose bridges and they were okay, but I was never truly fog-free.  Then metal strips were slowly coming onto the scene and they are wonderful!  The strength and extra surface area that helps wrap your nose is truly key in making a good seal.  I first bought (50) 3 1/2″ x 1/8″ aluminum strips from Domesticity back in May and they are great!  I tried to bend one bridge back and forth 50+ times and it still hasn’t snapped.  But I’m always on the hunt for a great deal and found 200 of these strips with an adhesive backing for just about the same price.  While these strips are also Aluminum and slightly larger at 3.54″ x 1/5″, they are also slightly thinner and broke after about 38 repeated bends.  Even though I have plenty of extras for back-up, I would definitely switch back to the ones at Domesticity for their strength.

Filters
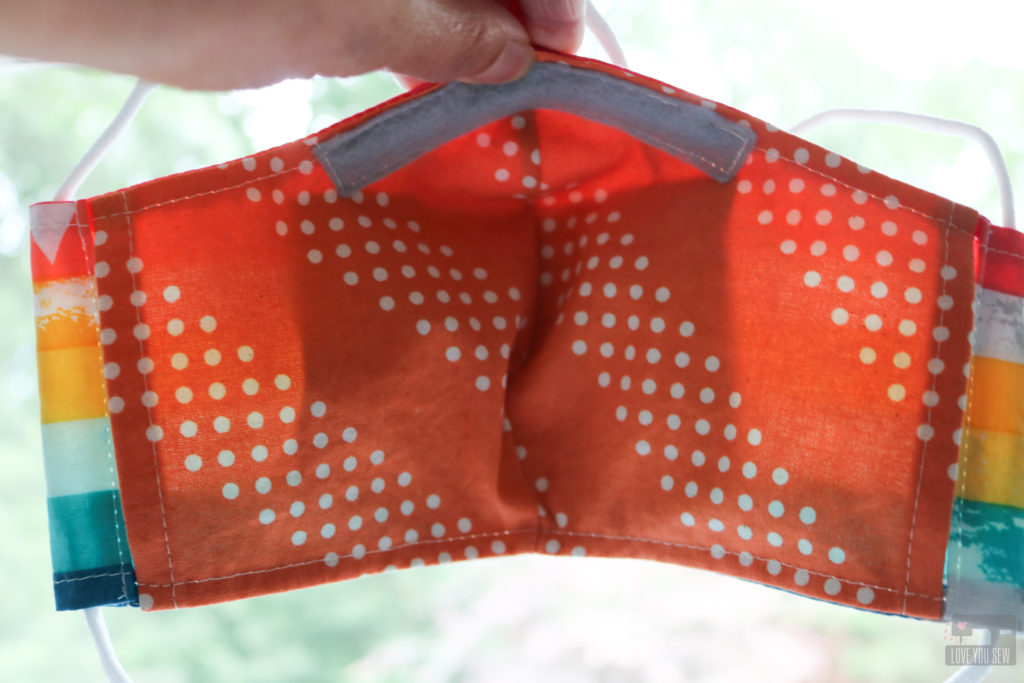
As I mentioned above, I used the Craft Passion mask pattern since it was drafted with a filter pocket feature.  You can purchase mask filters like these, but I caution that they do come from overseas and do not come in sterile single packaging.  I have yet to find a domestic supplier, so if you know of one, please comment below!  You can certainly use paper towels, another layer of fabric or coffee filters for extra protection.  Shown above, you can see how a filter fits inside this mask.

Fabric
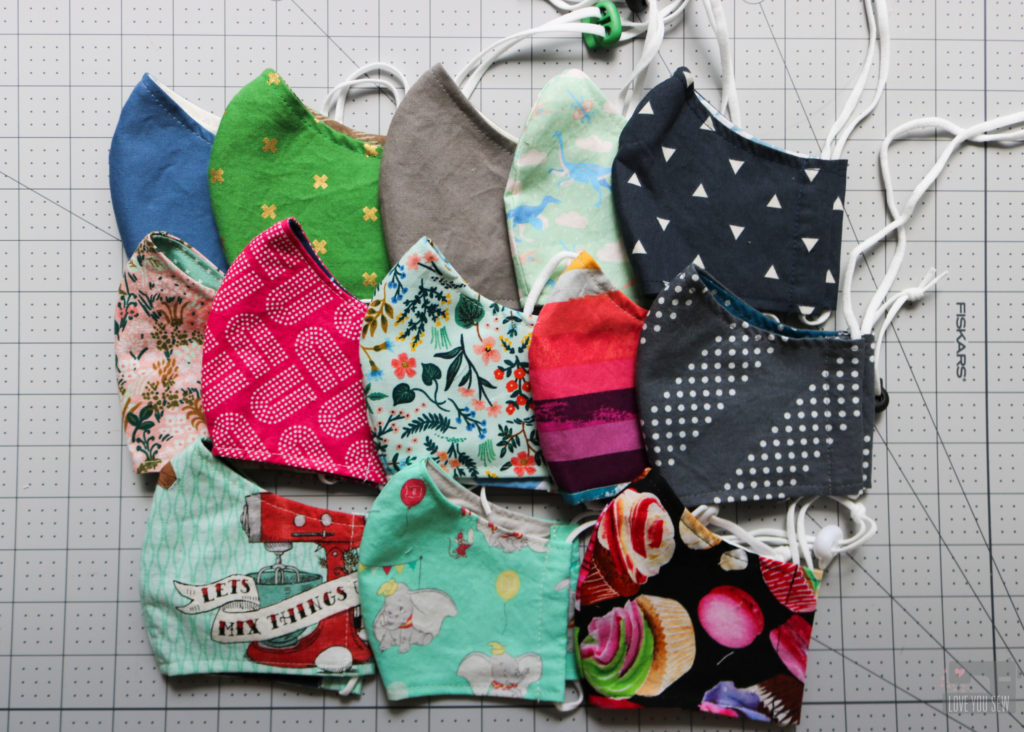
Fortunately, my stash has always included lots of designer quilt cottons from my quilt making days.  I was able to use my stash through the beginning of the pandemic and I’m getting around to supporting small quilt shops as I receive personal requests for masks from friends and family.  Of course, I love Sew to Speak which is local to me and I can pay online for contactless pick-up.  While picking up the nose bridges, I’ve also purchased fabric from Domesticity.  I love Circa Fabric Studio for great clearance prices on designer cottons and recently bought from Hart’s Fabric which has a nice selection.
Final Thoughts

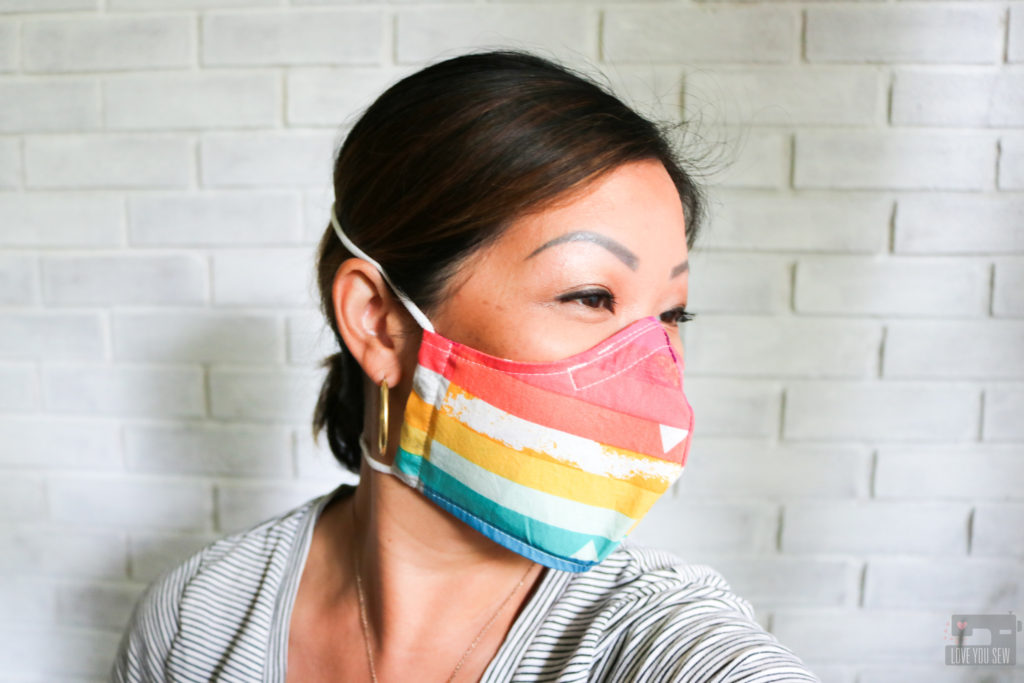
I think this is a great pattern for a mask and fits such a wide variety of faces.  The feedback I’ve received is a combination of the softness of the fabric (designer cotton, baby!) and how nice it is to have pressure relieved from the ears.  The cord-lock is MUCH appreciated by parents and it only took a few learning sessions for my 7 and 9 year olds to put them on and take them off on their own.  Please let me know how any of these supplies worked out for you!

DON’T FORGET TO WEAR A MASK!


Hugs and Stitches!

Cristy


While there are many affiliate links in this post (please read full Disclosures here,) I purchased all of these supplies on my own for my own fabric masks.  I’m sharing the supplies based off of feedback when I shared many of these links on my Instagram account.