Honest Sewing Room Tour – Supply Pegboard

Pegboard Title

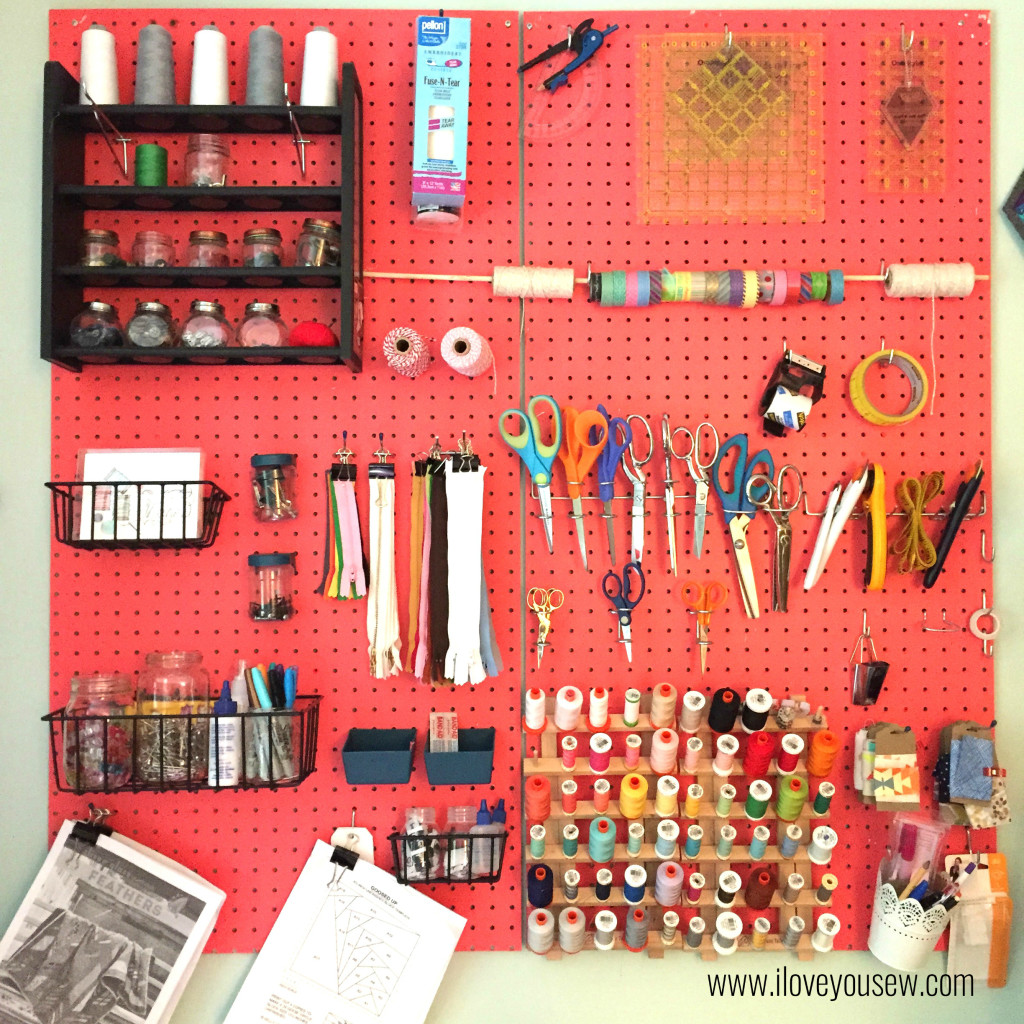
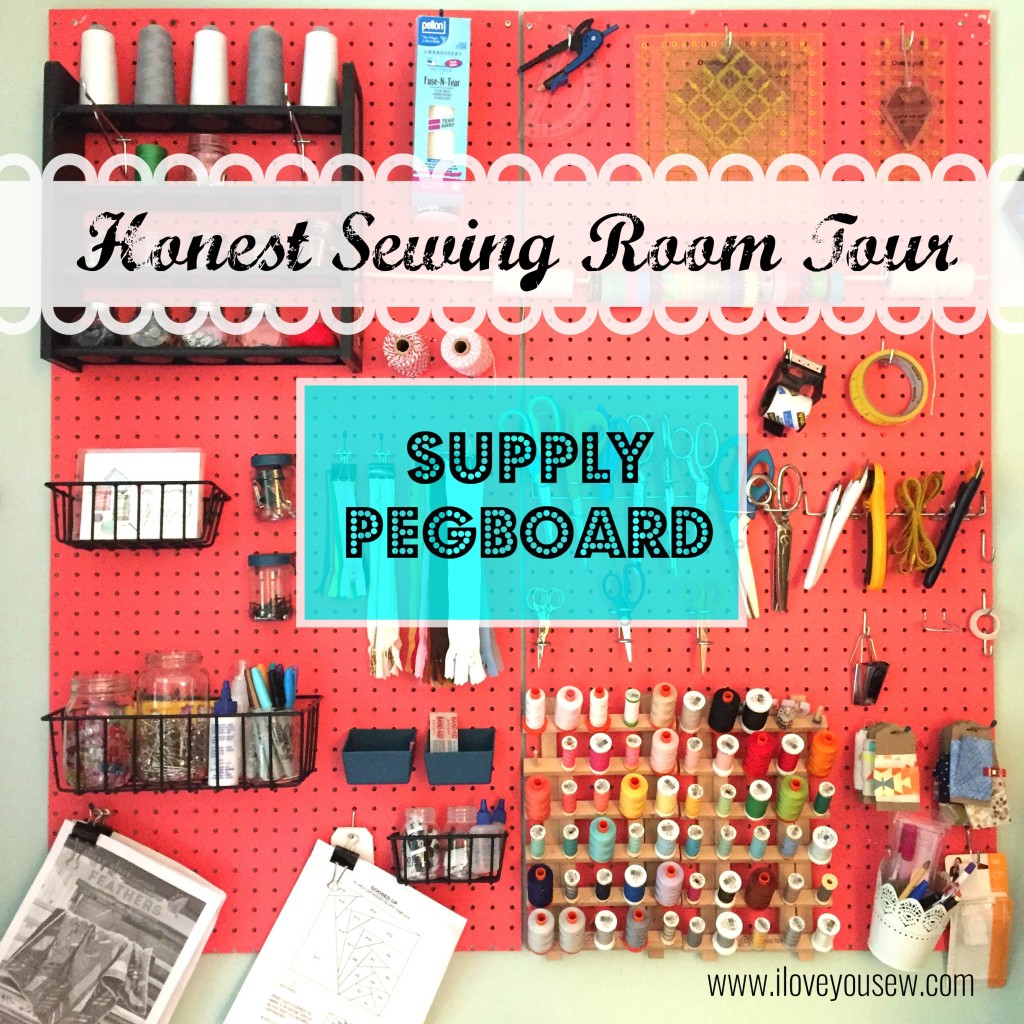
I’m going to give you a sneak peek into my new sewing & crafting room.  It is still a work in progress…I’ll show you sections of it as I go and this post will be all about the Pegboard!  If you have been following me on Instagram @loveyousew_, you’ve already gotten a look but I’ll explain the method behind the madness here 🙂

For the past 5 years, I’ve been sewing down in the basement and I called my space the “Dungeon.”  It’s dark, has poor lighting, and I was sewing with the creepy crawlspace in front of me.  Combine that, with having the water heater to my left, and the rumbling furnace behind me and you can understand why the “Dungeon” tag name was appropriate!

Earlier this year, I moved my boys into the same bedroom.  They were so excited to share the space and I was even more excited to move above ground…with natural light!  After I painted the room and moved some furniture around, the first part of the sewing room to be tackled was the Pegboard.

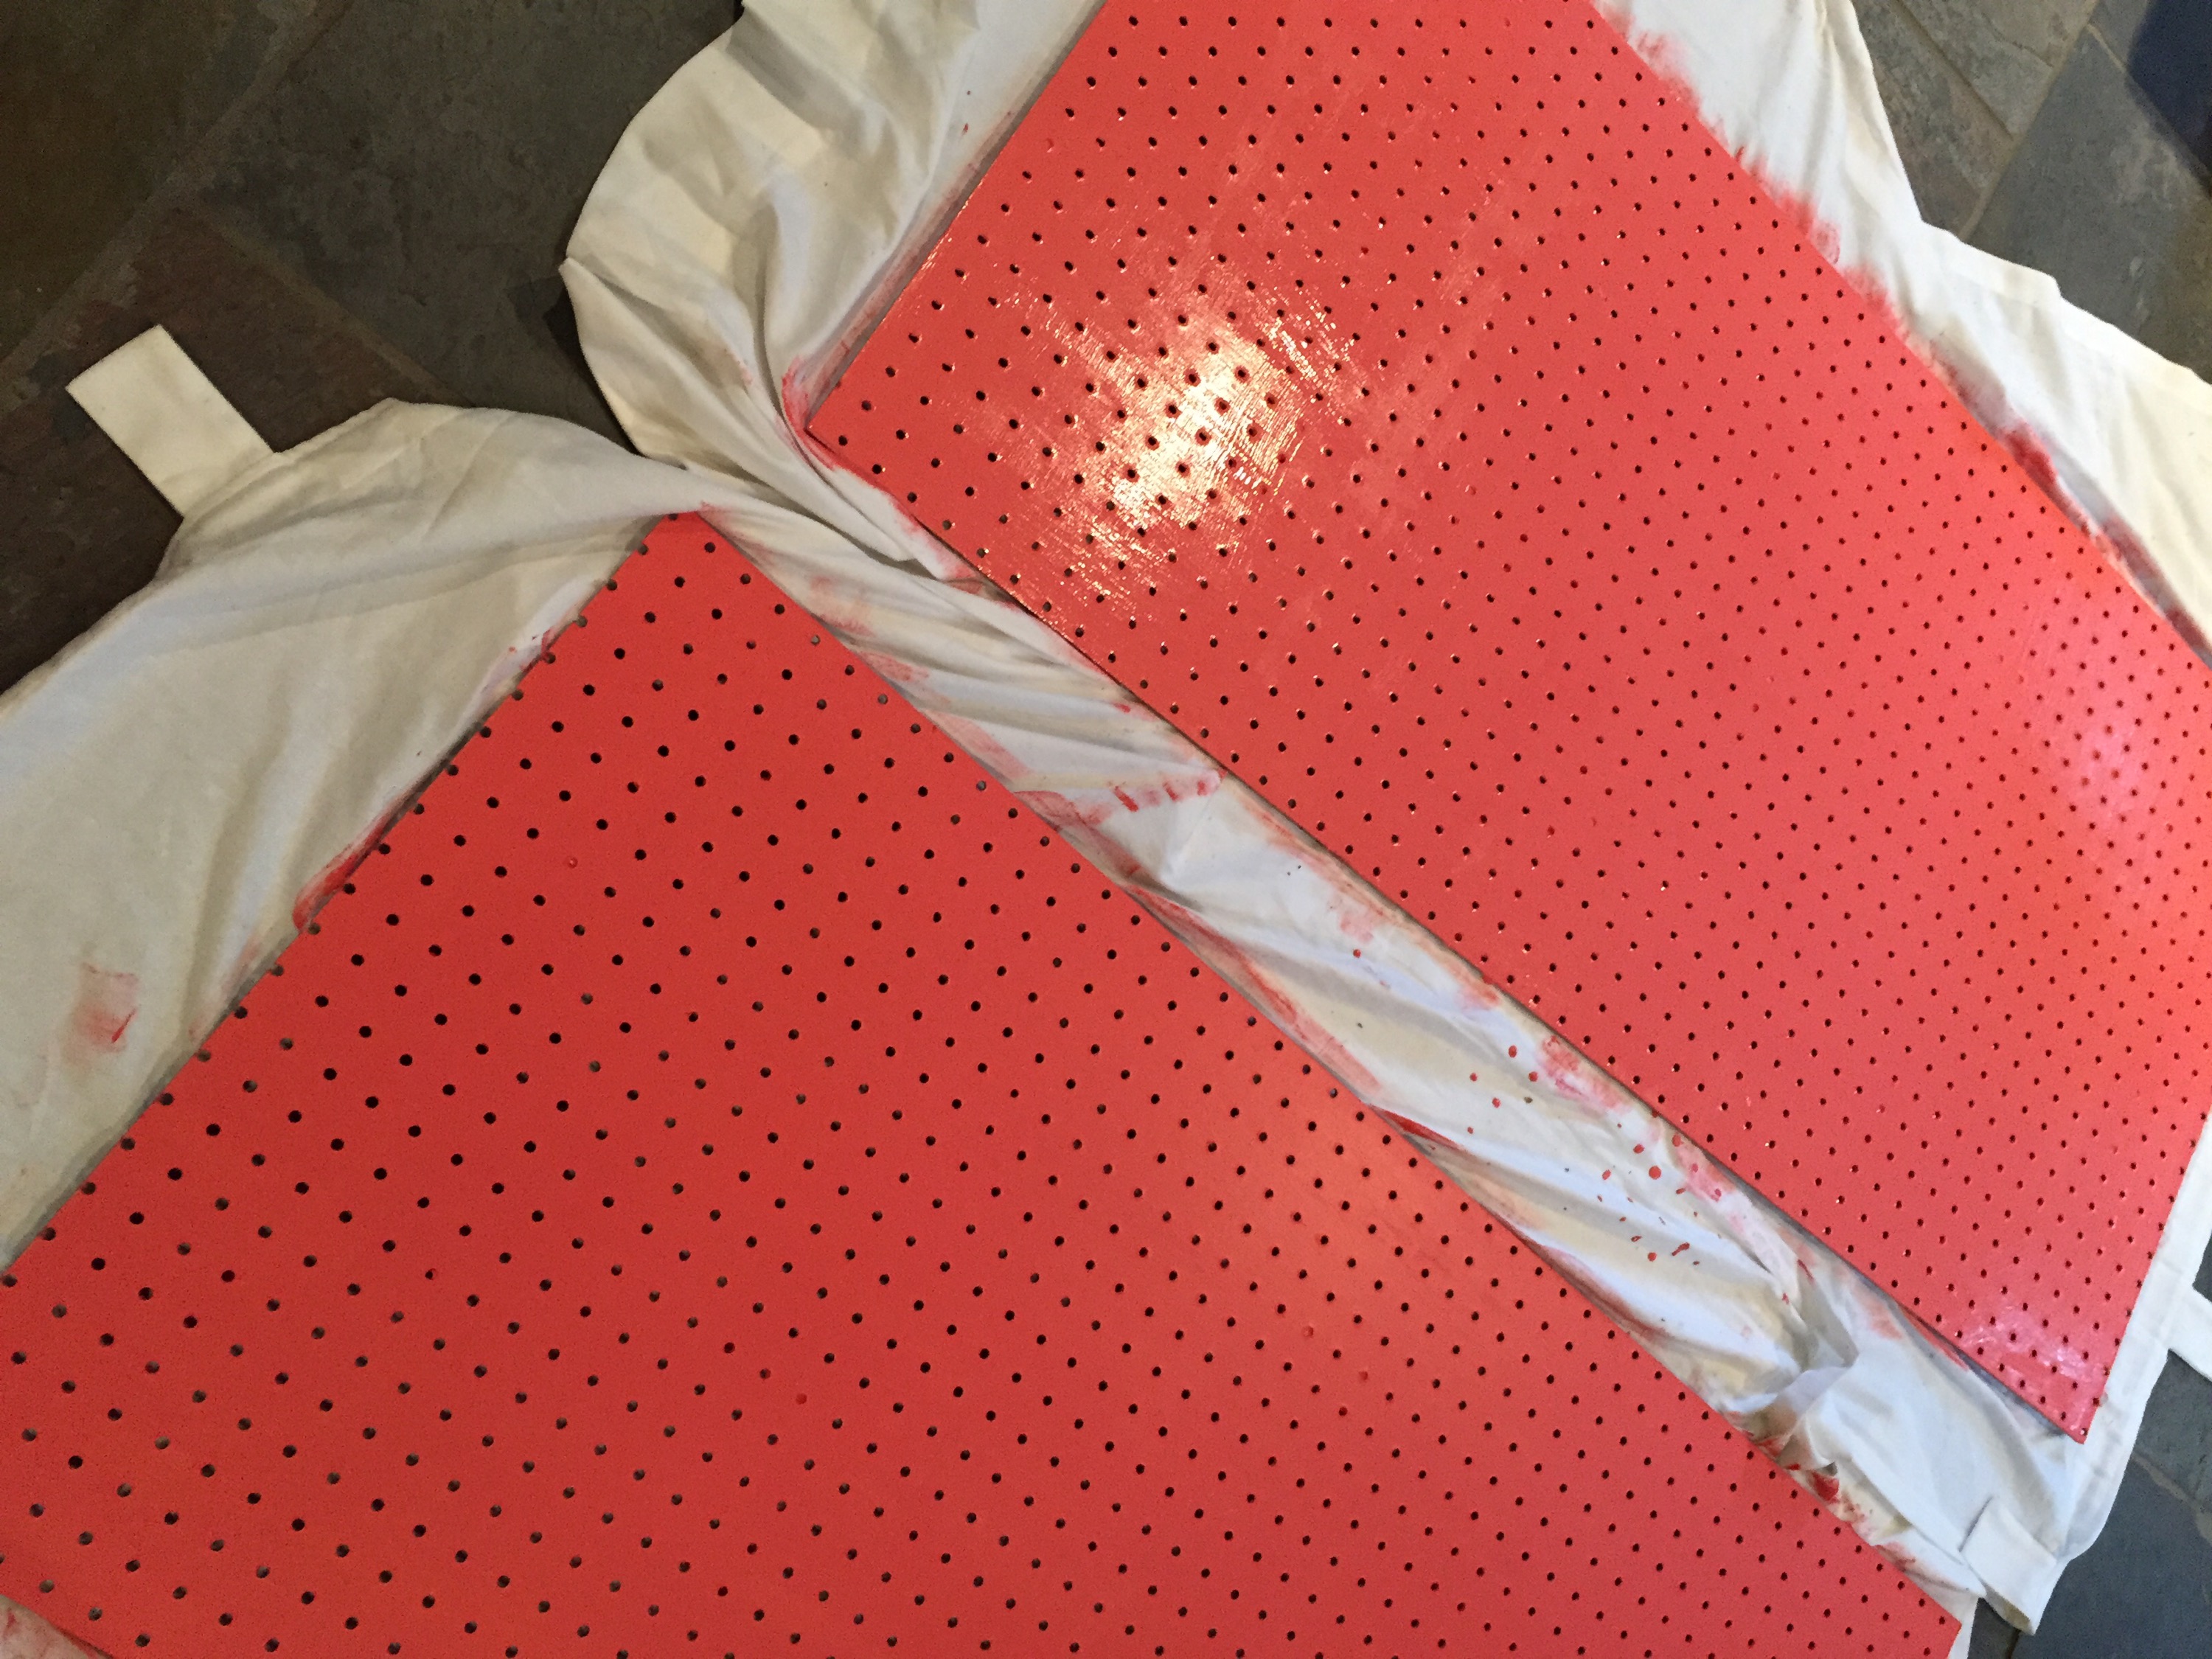
I bought two of these 24″ x 48″ boards from a big box hardware store but you can also find them here.  These were initially painted with acrylic in coral to add a little life down in the dungeon but when I moved them, I freshened up the finish with Valspar household paint in Passion Pink.  I wanted to keep the same color and vibrancy for my special space 🙂

Here are a few reasons why I love the Pegboard:

  • Supplies are accessible – If I’m in the sewing “zone,” I hate to get up and ruffle through a bunch of boxes to find something.  I like to keep my most used supplies right in front of me.
  • Inventory Management –  I can easily keep tabs of what needs to be replenished.  The pegboard keeps me from wasting money by buying items I already have because they were lost in a box!
  • Space-saver – I don’t have a big closet or a lot of floor space, so this also allows me to better utilize the walls for supplies.

Thread Rack

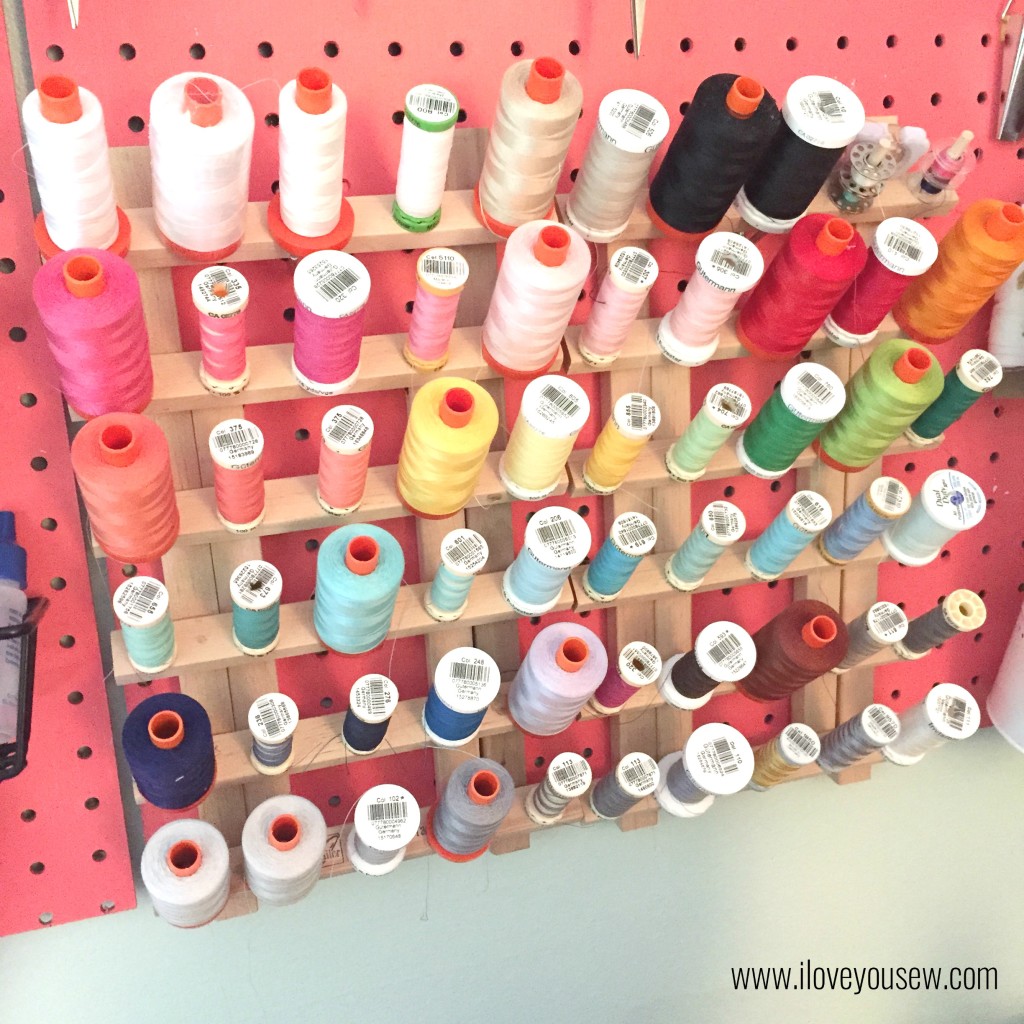
So what do I keep on the board?  Of course, my most used thread!  With the Etsy shop and a lot of side projects, I tend to go through many colors and types of thread in a single session at the machine.  It’s nice to be able to just reach over and grab my next color without missing any momentum.  I keep back-ups of these threads in my supply closet as well.

Baskets and Zippers

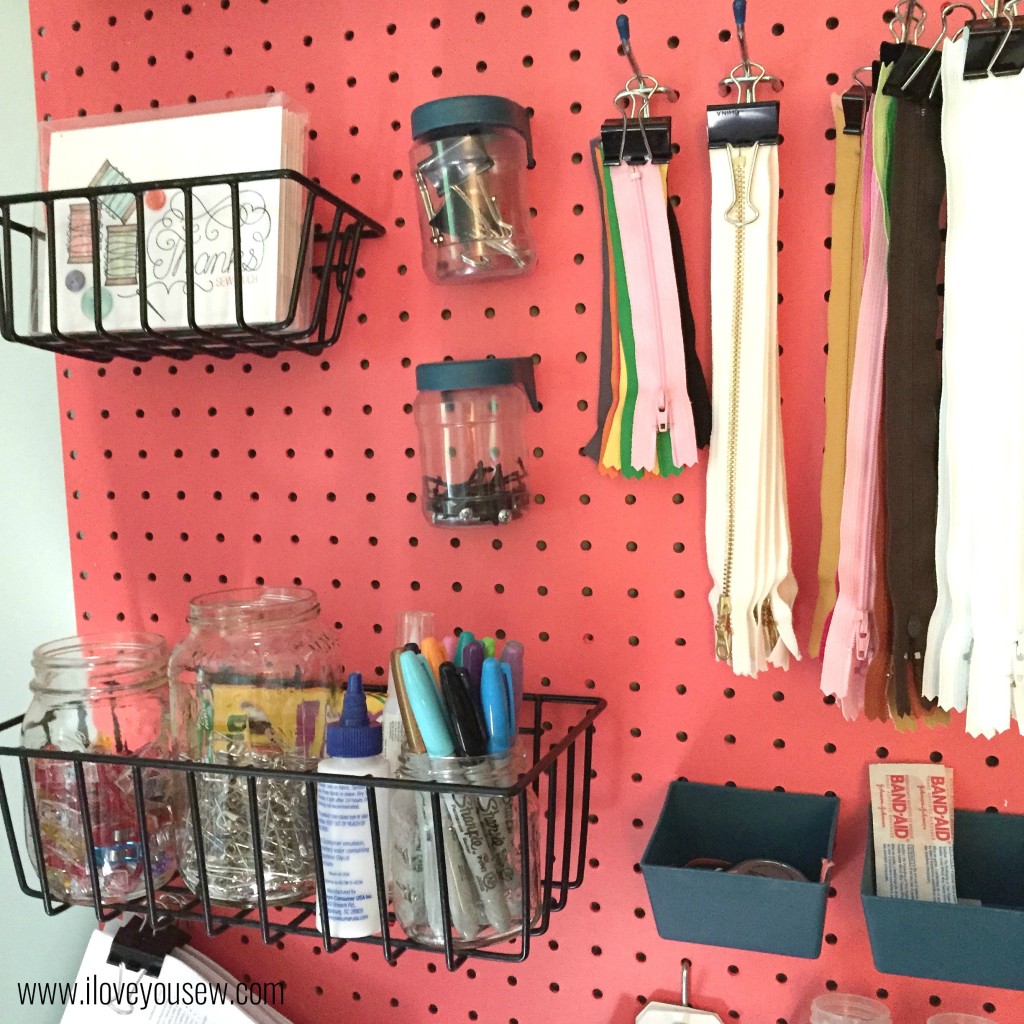
Remember my first Organizational Tips post?  Here are the Mason Jars sitting in a basket ready for use at any time with my Wonder Clips and Quilting Pins.  The Binder Clips are keeping my zippers organized and I can readily pick out the color and size I need for projects.  I have a box of these great handmade cards my brother made me up in the corner.  It’s always nice to have pretty inspiration on the board too!  And last, but not least, I need some Band-Aids around for when I poke myself with needles….we do not need blood on fabric, right?!?

Rulers and Washi Tape

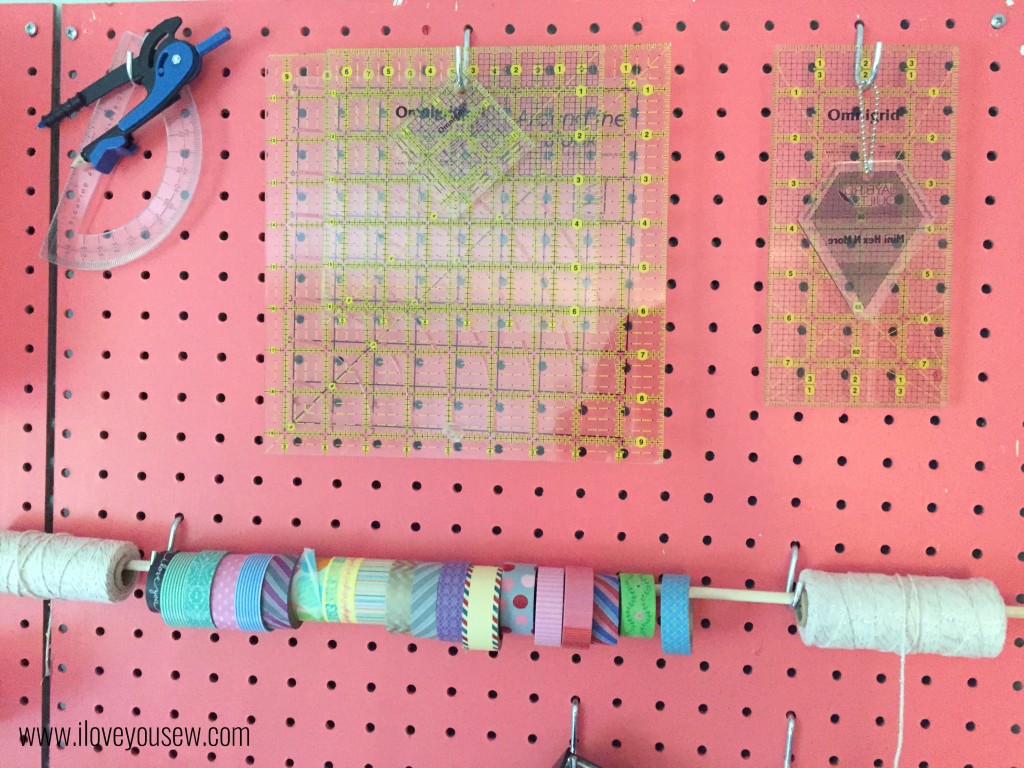
I like to keep these rulers and washi tape up at the top of the Pegboard.  They are quilt specific so I keep them organized but up higher since I don’t use them as often.  The dowel for the tape and twine has been a great help.  I can see all the different rolls I have and grab as much as I need without have to move them off the board! Bonus – I use the dowel at craft shows with some display hooks!

Scissors

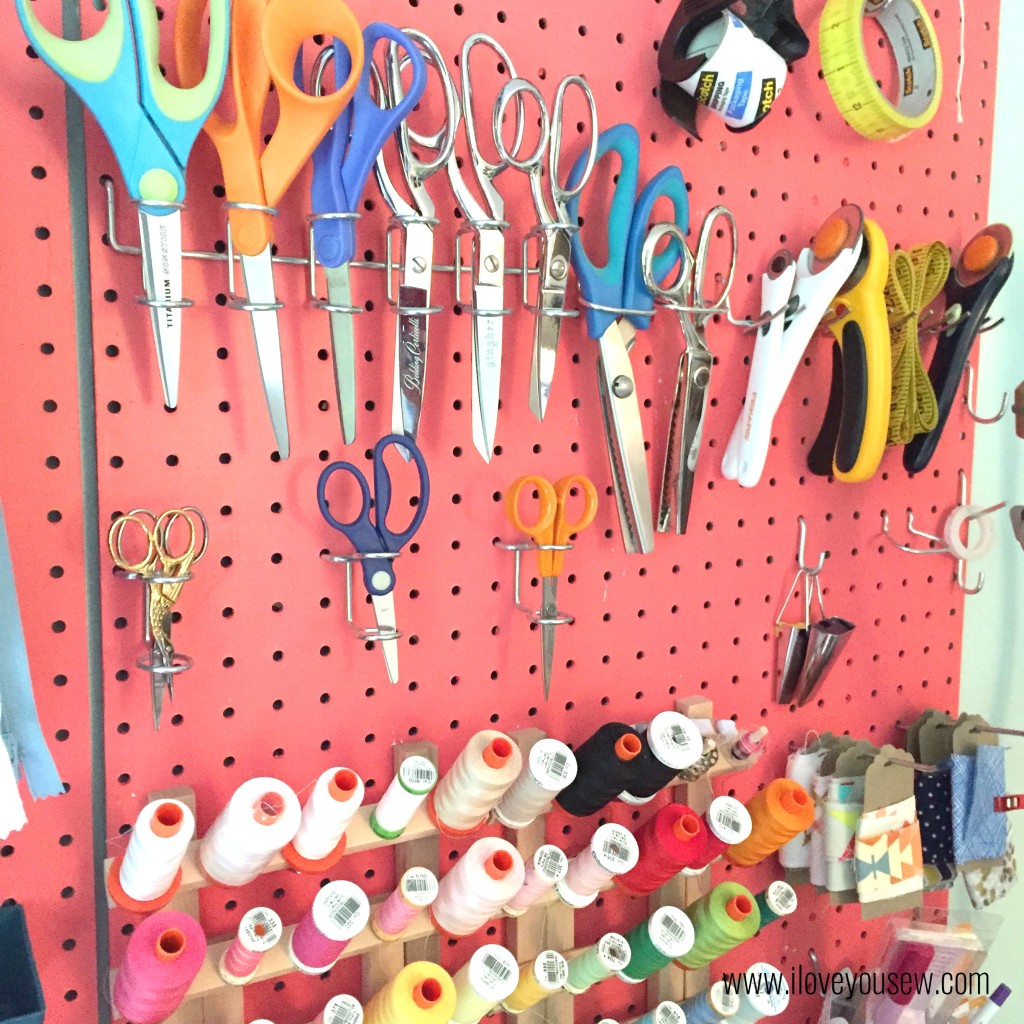
The scissors….I love my scissors and rotary cutters.  I keep a lot around for different purposes.  When I’m deep in projects, they end up all over my sewing room, so I (obviously) need extras 😉  These are all held in a standard Multiple Tool Holder for pegboard.  I used larger tool holders for my Pinking Shears.  As you can see, I have plenty of fabric ones, but I also keep Dollar Store cheapies just for paper crafts or cutting patterns.  My 4-year old even has a safety pair on my board.  Whenever he wants to hang out with me, we work on his scissor skills with scraps of paper.  He gets a kick out of having something in the room that is all his own.  Speaking of safety…with my sewing room being right next to my boys’ room, I need to keep all of these sharp object up and out of their reach.  The pegboard and some education helps give me some peace of mind…

Pegboard Image

I hope you enjoyed the mini-tour.  I’m quite eager to share the rest of my new sewing space with you…but I have a little more work to do before then 😉  If you would like to follow the progress or see more, check out #LYSstudiomigration on IG.


Stitches and Hugs,

Cristy


Note: This post may contain affiliate links. By clicking on them and purchasing products through the links, I receive a small commission. This helps cover the costs of keeping this blog running.
Astrodelic Quilt Hack: Resize to a Mini

AG Mini Complete Title

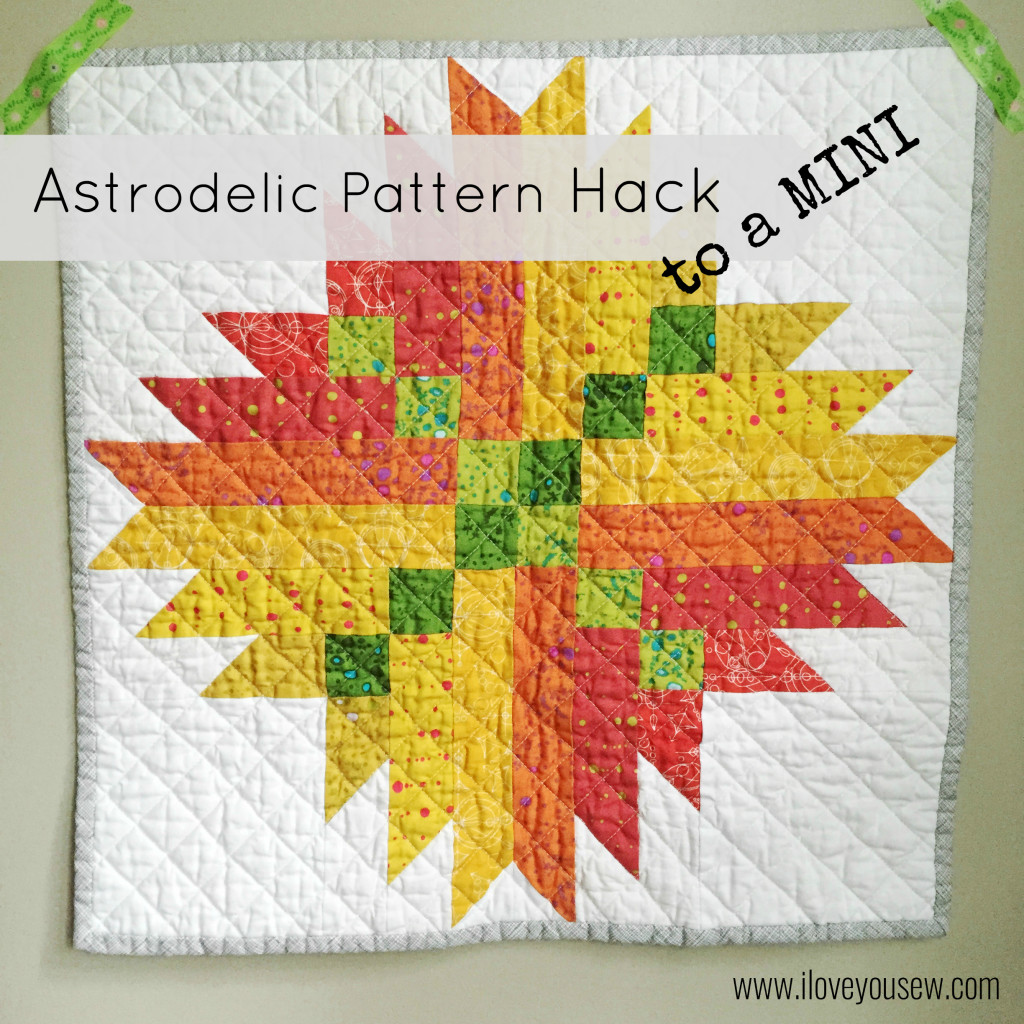
If you have been following my posts, I shared the re-cap of my Instagram based Alison Glass Mini-Quilt Swap experience last week. This week, I’ll share how I hacked and re-sized the Astrodelic Quilt pattern from a 42″ x 42 ” throw to a 21″ x 21″ mini using the amazing 2015 Sunprints line.  Based on the colors selected, I decided to call my mini, “Fireball.”

How did I decide on this size?  Honestly, it seemed like the easiest way to resize to a fourth of original by halving many of the fabric cuts.   The measurements fit within the parameters of the swap and I could follow all of the instructions without having to deviate too far…Simple enough, right???

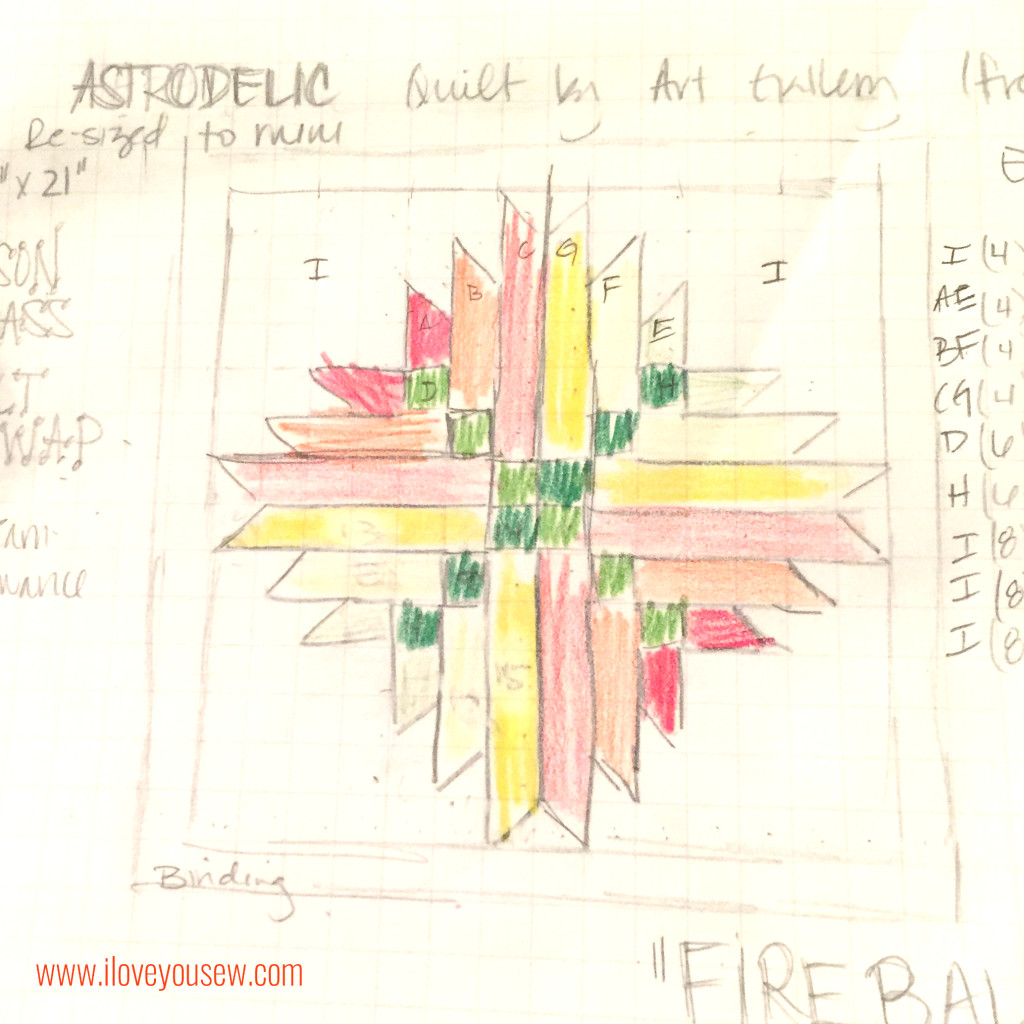
I re-drew the design on good old graph paper and I scaled each block to 1.5″.  This made it easier for me to visualize the changes to the pattern and where I need to adjust for seam allowances.   Plus, counting the blocks is a nice double-check before having to actually cut the fabric 😉  As you can see, my sketch is nothing fancy and not worthy of the refrigerator, but it does give a good picture of my color selection and placement.

FireballSketch

To get started on construction, you will need to download the FREE Astrodelic Quilt Pattern designed by Frances Newcombe for Art Gallery Fabrics. This will provide all of the instructions and I will reference her fabrics as A, B, C, etc.

Cutting Directions:

  • Fabrics A & E:  3.5″ x 2″ [cut 4]
  • Fabrics B & F:  6.5″ x 2″ [cut 4]
  • Fabrics C & G:  9.5″ x 2″ [cut 4]
  • Fabric D:  2″ x 2″ [cut 6]
  • Fabric H:  2″ x 2″ [cut 6]
  • Fabric I:
    • 6.5″ x 6.5″ [cut 4]
    • 5″ x 2″ [cut 8] matches with Fabrics A & E
    • 3.5″ x 2″ [cut 8] matches with Fabrics B & F
    • 2″ x 2″ [cut 8] matches with Fabrics C & G
  • Backing fabric – 24″ x 24″
  • Batting – 22″ x 22 “
  • Binding – 2 1/3 yd

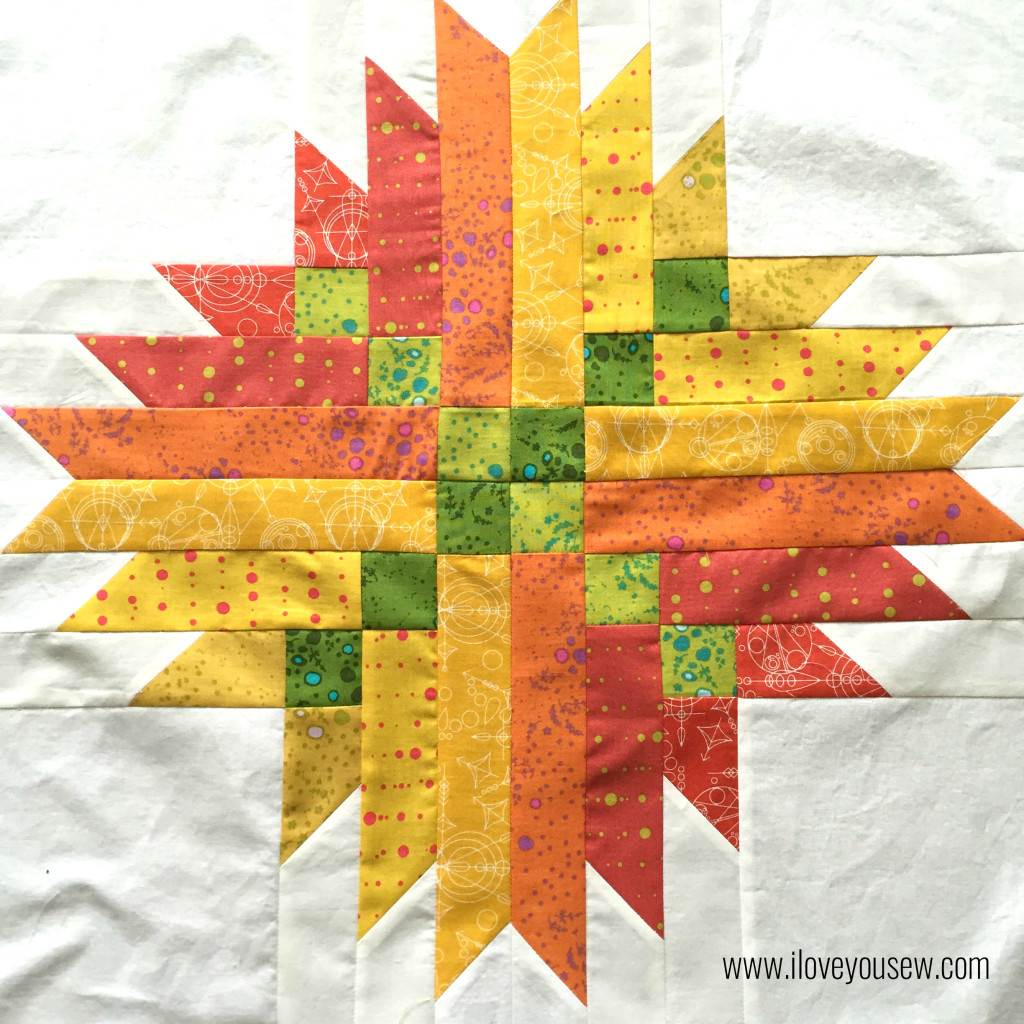
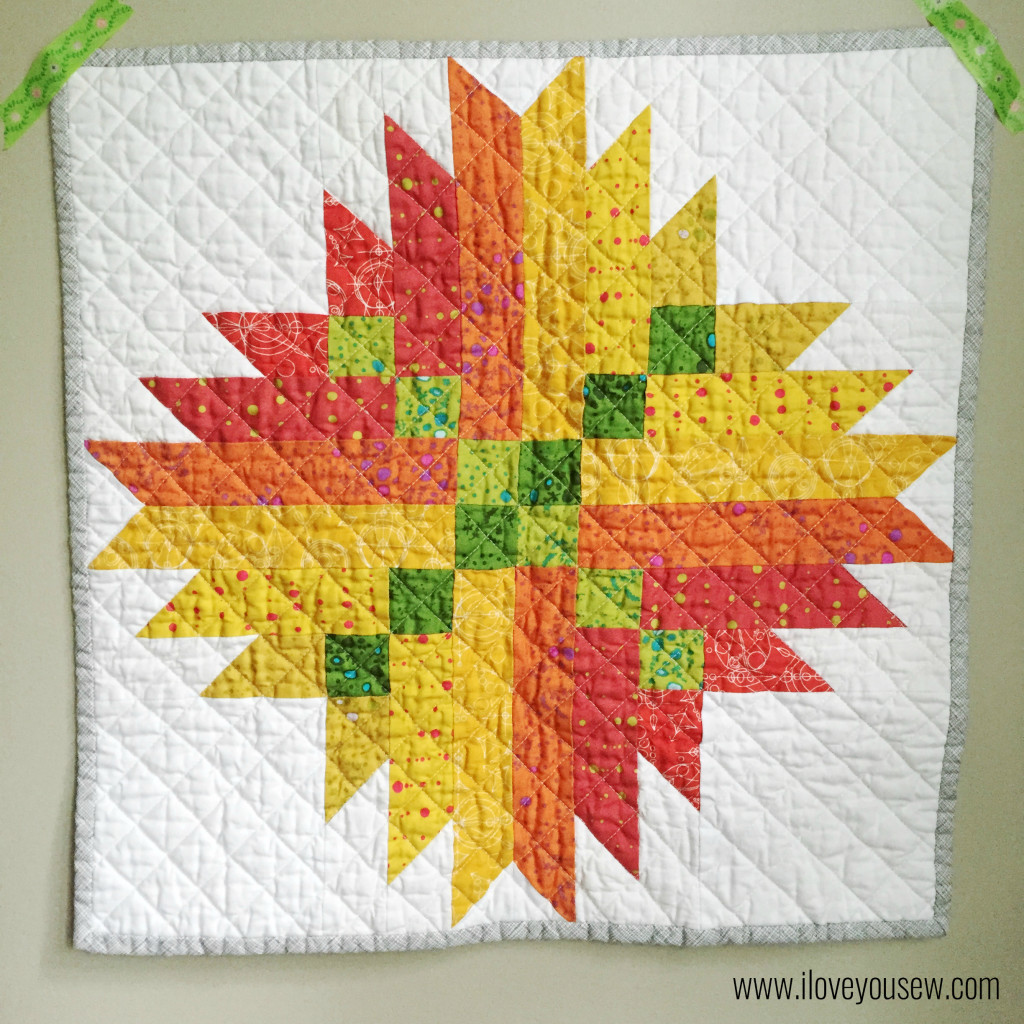
Follow the instructions exactly as directed, making sure you use a 1/4″ seam allowance.  If you don’t quilt much, double-check your seam allowances on scraps.  A mini is not as forgiving on measurement inaccuracies as a larger quilt since your eye is focused on ALL of it at once.  If it’s not perfect, quilting will always help and some good washing for the awesome crinkle will help diffuse the attention as you can see in the title photo.

FireballPieced


I hope you enjoy this hack and use it in your next mini quilt swap!

#AlisonGlassMiniQuiltSwap, #AGTeamSpectrum, #AlisonGlass, #AstrodelicQuilt #LoveYouSew


Happy stitching,

Cristy

IG Alison Glass Mini Quilt Swap Re-Cap

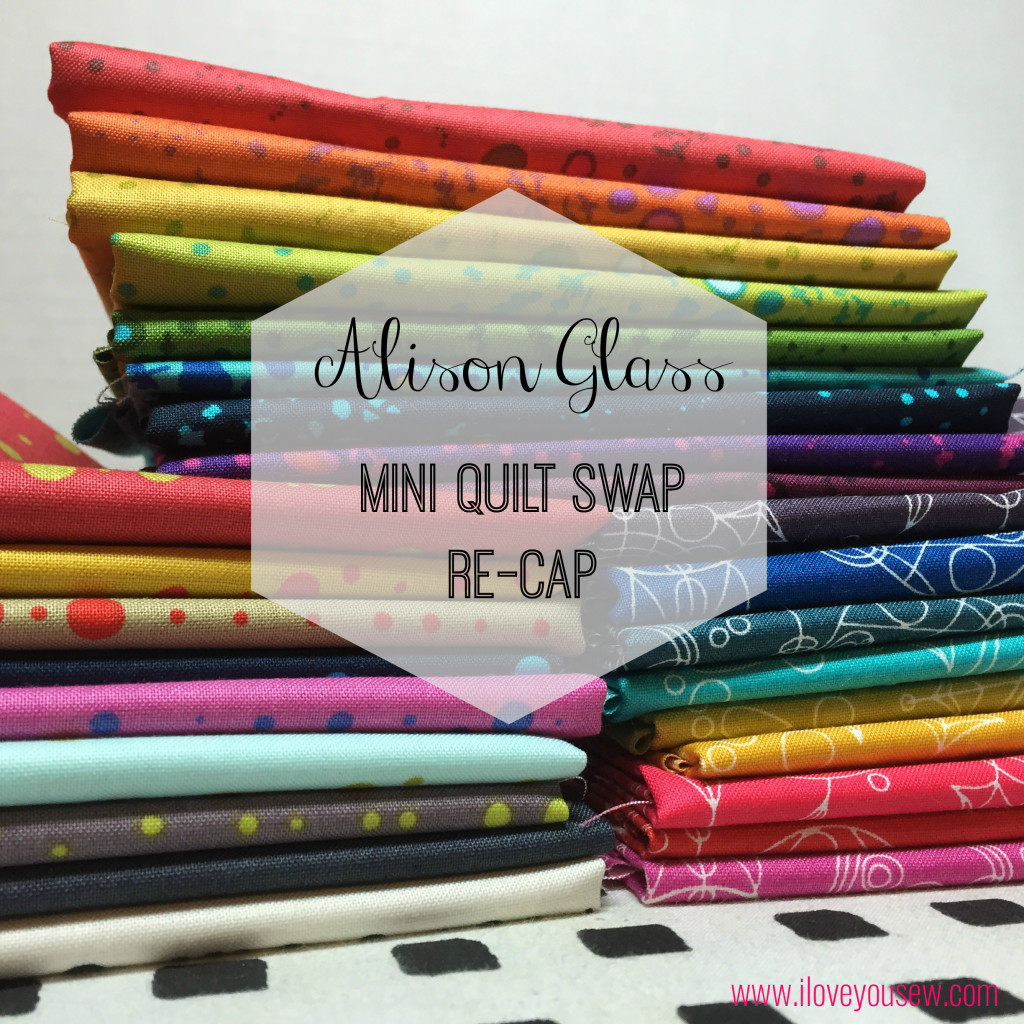
AG Fabric Bundles_Title

Thinking about joining a quilt or craft-related swap?  Do it!!!  I just finished up the Alison Glass Mini Quilt Swap on Instagram (IG) hosted by @ReapWhatIveSewn.  #alisonglassminiquiltswap #agteamspectrum

It was a great experience, not only because I got to play with beautiful fabric by Alison Glass…or the amazing quilt I received…but for making new “friends” with a bunch of quilters I might not have followed if it weren’t for being in this swap.
The main requirement for this swap was to use primarily fabric designed by Alison Glass (AG) (per the swap’s namesake) and to make a miniature quilt that was 13-24″ squared.  I was dying to get all of the 2015 Sunprint fabrics, and this swap made it easier to pull the retail trigger 😉 The intense colors in AG’s fabrics are just pure eye candy.  I love using them in rainbows and they pop against Andover black chambray (one of my stash staples) so beautifully!


My Quilt

The partner I was paired with unfortunately, was not very active on IG…and by not active, I mean practically non-existent.  She posted one picture of when she received her fabric for the swap and that was that.  I know life happens and not everyone checks or posts to their accounts daily or weekly. Completely understood!  But when you sign up for a swap that’s strictly on the IG platform, you wish your partner did participate a little more.  It’s makes the experience a little easier and it’s more fun with the participation 🙂  The only information that I had was the completed registration questionaire. This gave me (1) my partner likes red, yellow, green, orange and (2) she likes modern quilts.  That’s it….what was I going to do???

Luckily, I had the Astrodelic Quilt design fresh in my head from checking out free patterns on Art Gallery’s website.  The palette my partner named was a challenge.  I wanted to make sure I balanced out the red and green so nothing looked “Christmas-y” and that the yellows and oranges would all complement each other.  It was nice to have all of Sunprint 2015 on hand to play around with color!

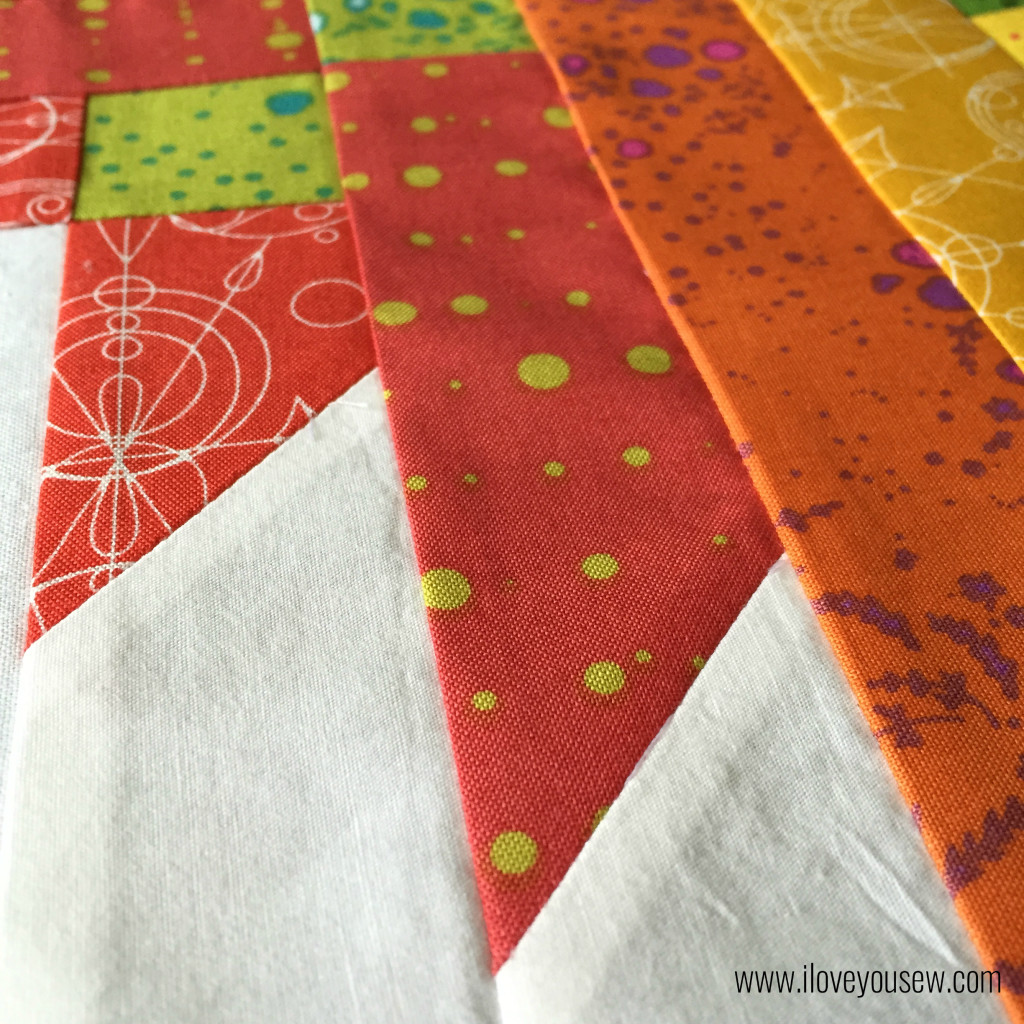
AG Mini Closeup

Kona white is always a safe choice as the background.  With the bright colors selected, I didn’t want anything else to compete with this “Fireball.”  Carolyn Friedlander’s Architextures Crosshatch in Shadow finished as the binding…Again, chosen to not draw away from the design.  As for the quilting, I try to leave mine pretty fuss-free…straight-line is my go-to and I followed the 45* angles created from the piecing.  This mini finished at 20″x 20″…a bit on the larger side, but easier on the quilt math 😉

AG Mini Complete


Extras

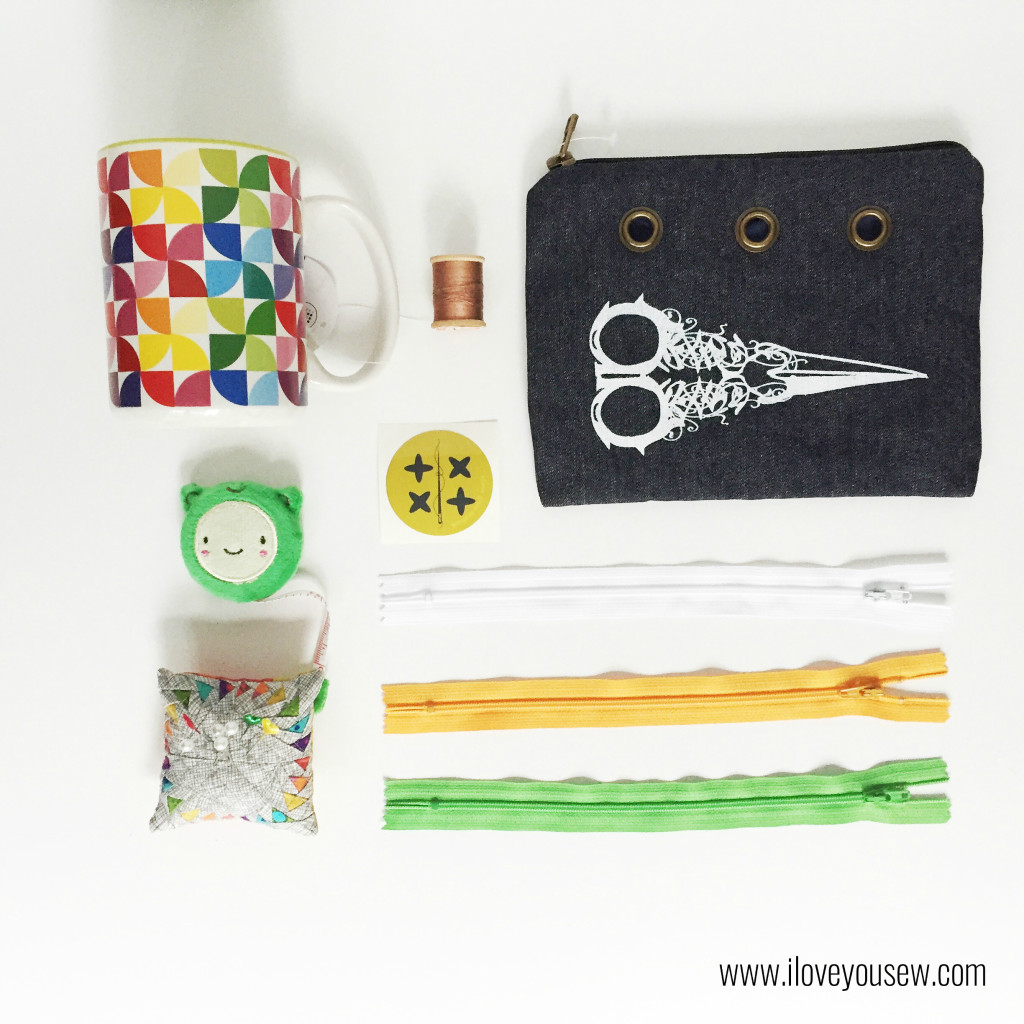
Although not required, it’s always nice to send some extra “love” with your mini.  Since I was getting no indication of likes/dislikes or any personal info off IG, I kept my gifts pretty generic.  The rainbow mug and scissor pouch are from Michael’s.  I included a wooden spool of thread from my vintage collection and a fun little tape measurer.  I ordered Ex Libris directly from AG’s shop, so I got a few stickers (!!!) with my order and included one here.  The pin cushion was a special little gift I made using scraps of Sunprint with Jeli Quilt’s Goosed Up pattern.  Sewing notions are always a good inclusion so I added a few zippers to match the mini as well.  Many swappers include food/candy, but it was scorching hot around the US, so I didn’t want anything to spoil or melt…hence no yummy goodness from me.

AG Swap Extras


Mini Received

So off my package went (yes, it was on time!) and the waiting game began.  It’s fun to watch the other swappers on IG receive their packages and you can slowly mark off who was not your partner.  Luckily, I did not have to wait very long.  My parcel arrived just a few days after I sent mine off.

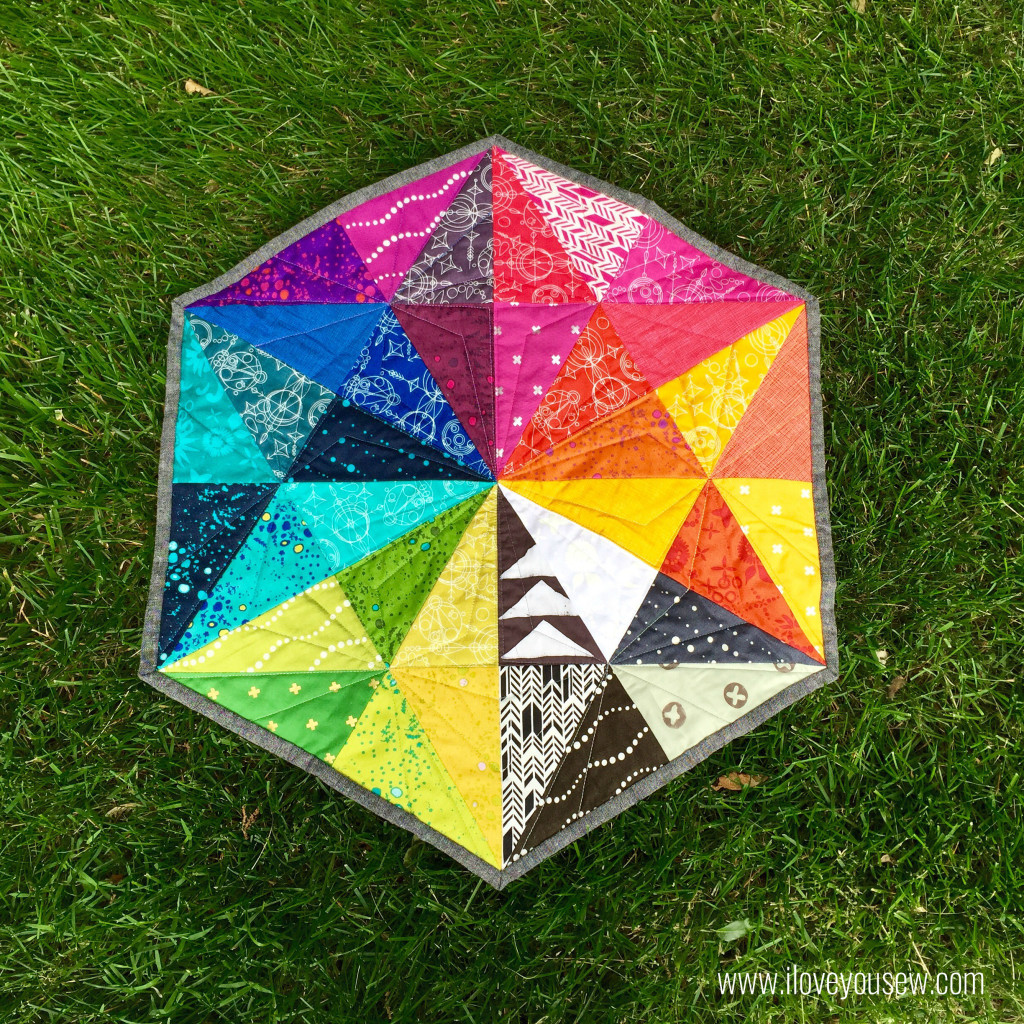
And….it was this gorgeousness!!!  Go ahead…take it all in…..yesssssss………mmmhmmm…..

AG Mini Received

Kitty of the Night Quilter made me this amazing hexagon shaped quilt from Robert Kaufman’s Prismatic Medallion FREE pattern.  I know only because I have downloaded it for my personal Quilting Queue.  But maybe I don’t have to try to make it anymore?!?  The fabric selection was just on-point!  I LOVE IT!!!

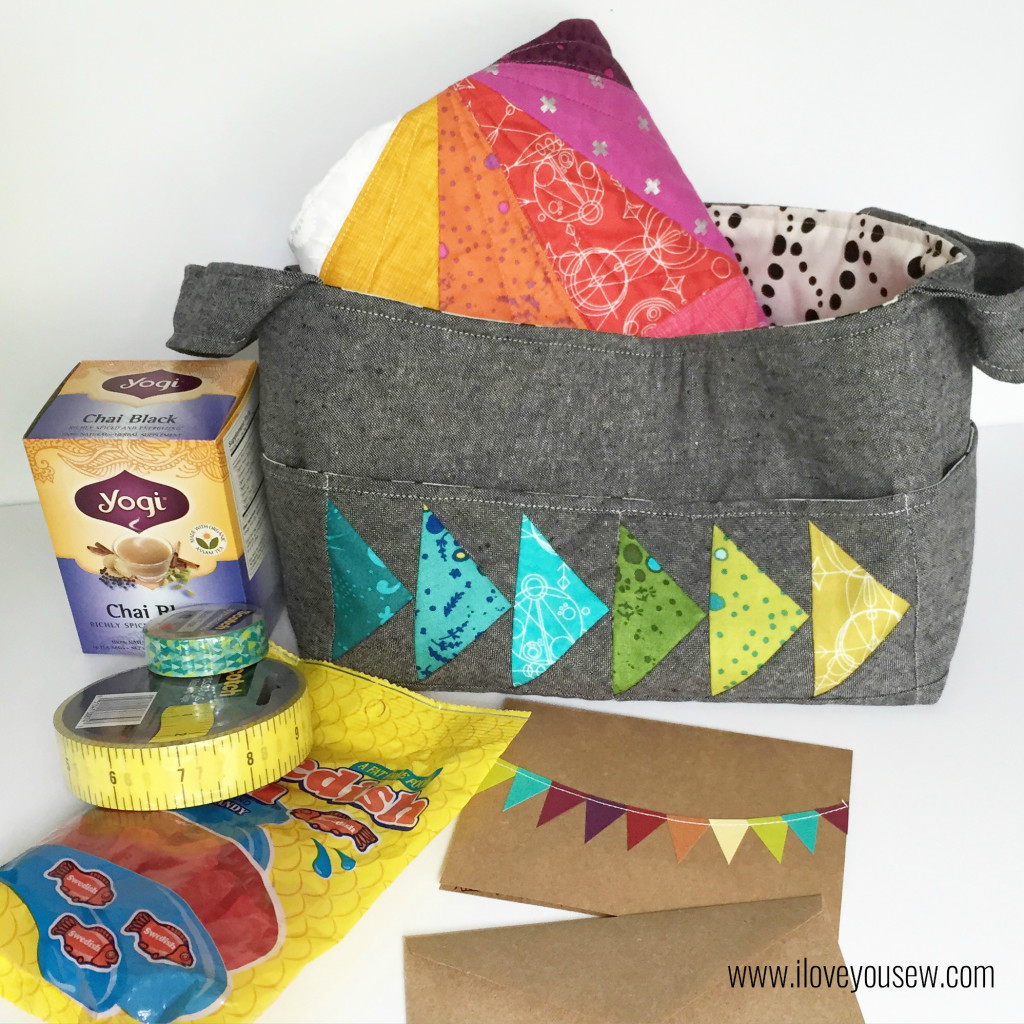
And there’s more!  Remember the Hour Basket from my Sewing Room Organization post?  Here it is with the mini stuck inside.  There was also some small and large washi tape.  I can’t wait to use the measuring tape one on packaging later on down the line!  Kitty also included tea and candy that I love…and how did she know?  She posted questions out to our swap group asking about what we would like in our packages and I just responded…so glad I did!  It’s nice to get a surprise, but also nice to get something you know you will eat or use.  Lesson learned – answer questions from your fellow swap-mates!

AG Swap Received


From sign-up to shipping, the swap was about 5 months.  So if you are thinking of joining a swap, this is an ample amount of time for a mini.  I got my design and quilt top pieced early on…probably within the first two months.  I liked getting it done early just in case something pops up on the personal front (which you know always happens.)  I owed it to my partner to be on time, since I wanted the same for myself.  Good sewing karma pays off…in gorgeous mini’s!!!

Have you participated in any craft or sewing swaps?  I’d love to hear your (positive) experiences.


Hugs and Stitches,

Cristy


Note: This post may contain affiliate links. By clicking on them and purchasing products through the links, I receive a small commission. This helps cover the costs of keeping this blog running.
2015 New Quilt Bloggers – Blog Hop

As I mentioned in an earlier post, I’m a part of a special group of new bloggers who have a passion for quilting! Today marks the 2nd week of our Blog Hop hosted by:

Cheryl @Meadow Mist Designs

Yvonne @Quilting Jetgirl

Stephanie @Late Night Quilter

Terri Ann @Childlike Fascination

All of the New Quilt Bloggers have been divided into “Hives” and my group is called the “New Bees” led by Cheryl.  Below are my fellow hive members on the block this week.  Stop by their blogs and you also get the chance to win some awesome sewing prizes! (Check out the hosts blogs above for more information.)

*Edited to include all weeks of the Blog Hop

Week 1 – Monday June 15th

Ashley @ www.craftyashleyb.com

Gayle @ pedalsewlightly.blogspot.com

Sarah @ http://123quilt.blogspot.com/

Hayley @ Www.moobird.blogspot.com.au

Week 2  – Monday June 22nd

Cristy @ www.iloveyousew.com

Patty @ www.walnutstreetquilts.com

Sarah @ www.goer.org/sarah

Eileen @ eileeninstitches.blogspot.com/

Week 3 – Monday July 13th

Abby @ https://hashtagquilt.wordpress.com/

Shelley @ http://thecarpentersdaughterwhoquilts.com/

Mary @ http://quiltingisinmyblood.com

Week 4 – Monday July 22nd

Kim @ lelandavestudios.com

Cassandra @ http://thenotsodramaticlife.com

Kathryn @ Ourplacequilts.wordpress.com

Colleen @ https://colleenscustomquilting.com/

Deb @ newcreativestate.wordpress.com

Megan @ www.sewstitchingcutequilts.com

>>>

A little about me….I used to work in Finance and Accounting so I love numbers and Excel.  I’m a complete geek when it comes to understanding my sewing costs, margins and of course, profit!  This information helps me tremendously with my shop, craft shows and pricing custom orders for clients. I have plans for a few templates (you know I will share) to help you understand your costs.  Is there anything you would like to see or understand when it comes to pricing your sewing projects?

Fun Fact –  I was named after Cristy Lane, the country singer.  My parents are Chinese-Vietnamese immigrants to the United States.  A sweet woman who helped my family with the assimilation process, thought the song “One Day at a Time” spoke to their journey.  My parents wanted to give me a “Western” name to honor their first American baby, and thus, I received Cristy (without the “H.”)

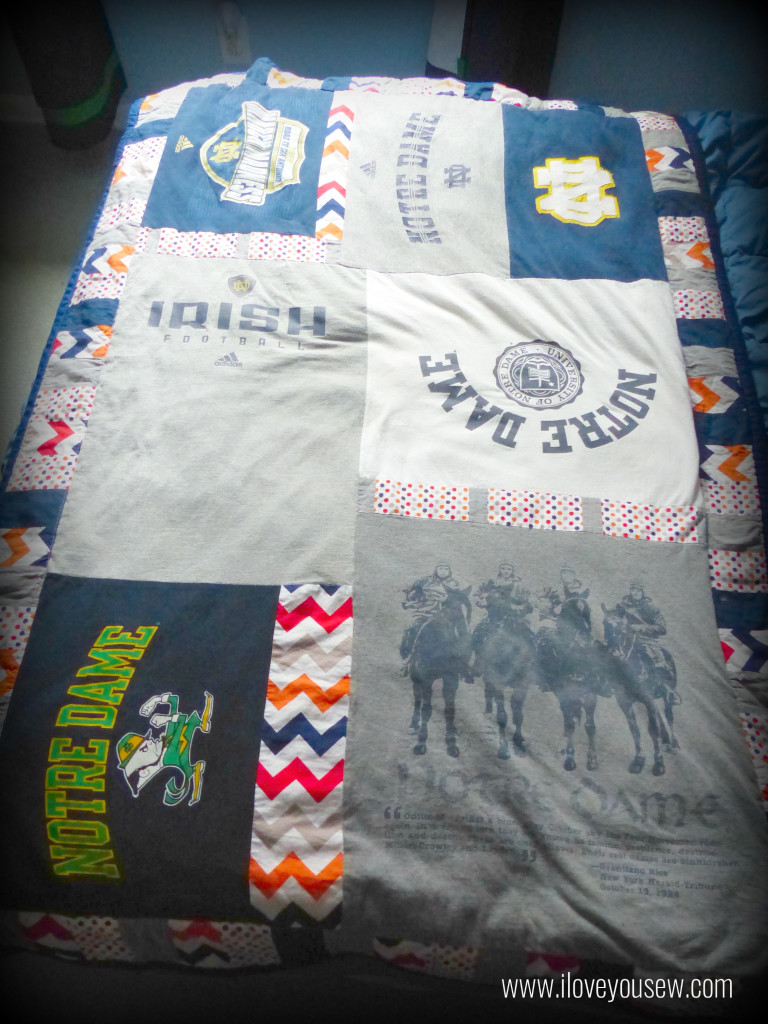
Below is the first quilt I made for my first-born with my husband’s old T-Shirts.  Can you tell it has the most minimal quilting I could do?!?  It’s just about all “stitch-in-the-ditch.”  As you can see, we’re an Irish loving family and it was fun to pull this all together. This quilt by no means is elaborate, but it was for my son…so I can’t help but love it and be reminded of where I started…

Notre Dame T-Shirt Quilt

Admittedly, I love more of my recent work as I’ve improved some skills and increased my fabric stash 😉 Quilted Sunset has the rich deep orange-red-mustard tones I just adore. The Quilted Hoops have been my newest obsession and I can’t get enough of their compact cuteness. Spectrum of Gingham is a rainbow of love and helped my dear friend raise money to fight Cancer.Fave Quilt Mosaic

With all of this quilting and sewing, I’ve found the best advice it to go slow and steady.  It’s so easy to take short-cuts…thinking you don’t need pins or you can just sew at the fastest speed allowed.  But it will pay-off when you don’t have to rip out stitches when your fabrics don’t align or your stitches become noticeably uneven…TRUST ME…

I’ve been sewing heavily for about 5 years, have had my Etsy shop for about 2 years and have participated in about half a dozen craft shows, but am juuust starting with blogging. Without formal teaching (beside junior high Home Ec) I’ve learned a lot of my sewing techniques through other bloggers and wanted to give back to the community through my own experience and spin.

So far, I’ve learned to use my WordPress app as my on-the-go tool to help me capture ideas, make edits and upload pictures.  Since I’m a stay-at-home mom, my family always takes precedence.  I don’t always have time to sit in front of my laptop between life and sewing items from my shop.  The app allows me to work on posts whenever I do have a few minutes…any free time I have is precious!

I hope you enjoyed learning a little more about me 🙂  Don’t forget to visit my fellow 2015 New Quilt Bloggers to get to know them as well!


Happy Stitching,

Cristy

Love You Sew


FREE Walking Geese Needlebook Tutorial

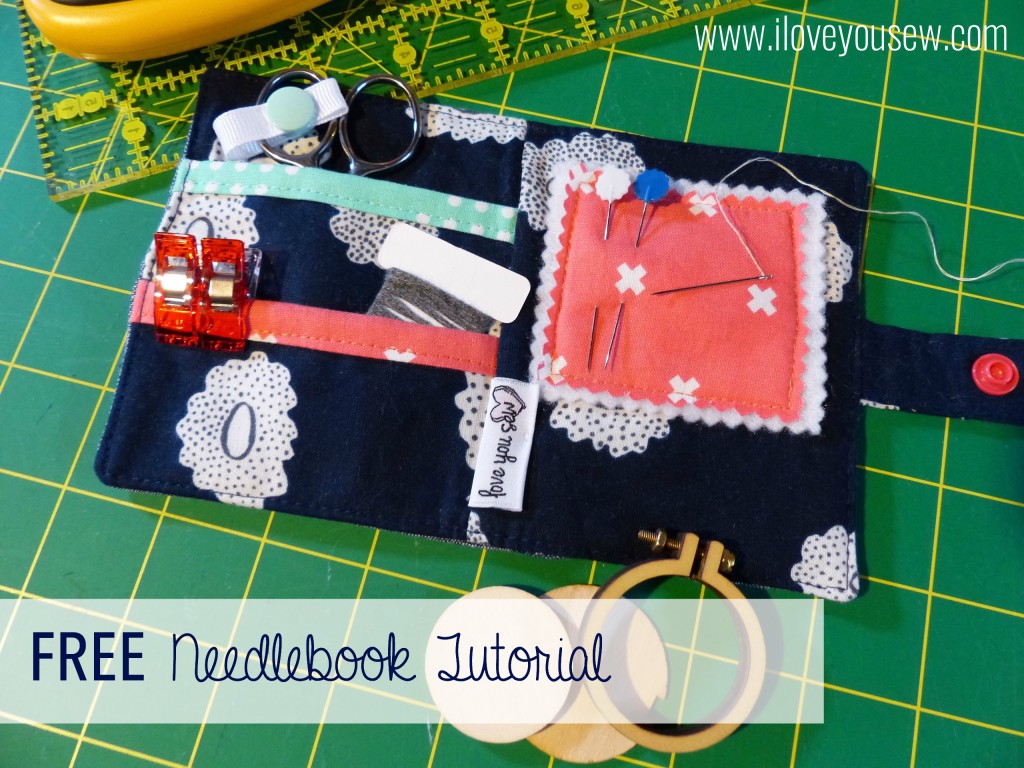
Love You Sew Needlebook Tutorial

I’m new to the world of Swaps.  I’ve seen and followed quite a few through Instagram and finally signed up for a few.  The #IGneedlebookSwap was my second sign-up, but my first which has been sent and received.  After looking at a few online, I wanted to design my own and share it for FREE with you!!!  If you are unfamiliar, these swaps have a theme (in this case, a needle book) and you have to post progress shots on your IG account.  They are usually secret and you have great fun finding out…aka “stalking” your partner’s tastes and preferences.    I like it because you get work on something new and it’s challenging to have some parameters set….including a deadline!

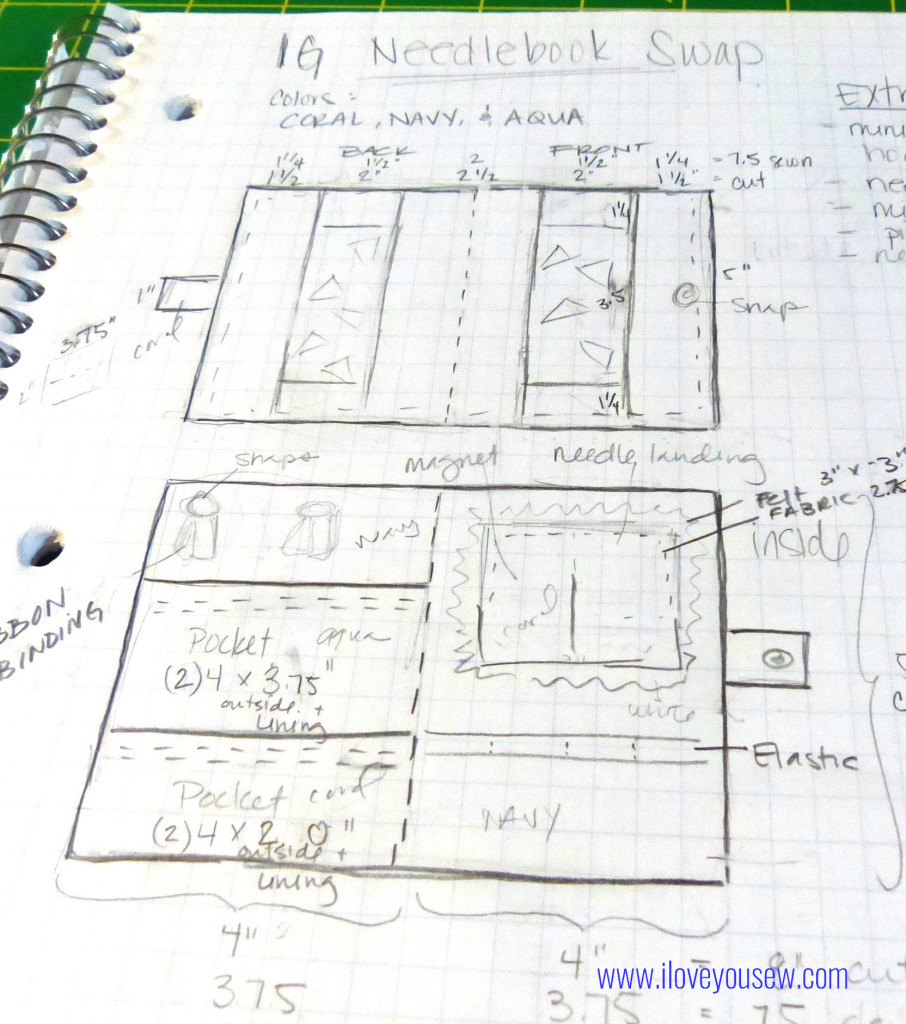
My partner asked for a Needlebook with a pocket to hold a small set of scissors, so I went about designing one myself!  How can I screw up the math on something that finishes at 4.5″ x 7″ (open) and 4.5″ x 3.5″ (closed), right???  My partner also specified using navy, coral and aqua…so I incorporated a design to showcase all of those colors.

Needlebook Sketch

Needlebook Sketch

==========

Material Requirements:

  • Exterior Fabric (shown in Robert Kaufman IndigoChambray)
    • 1.5″ x 5″ rectangles [cut 2]
    • 2″ x 5″ rectangle [cut 1]
    • 1.25 x 2″ rectangle [cut 4]
    • Goosing Borders [sew 2]
  • Interior Fabric (shown in Cotton + SteelHatbox – Navy Desert Flower)
    • 4″ x 5″ [cut 2]
    • 4″ x 7″ [cut 1 for pocket A]
    • 4″ x 4″ [cut 1 for pocket B]
    • 2″ x 3.75″ [cut 1 for snap closure tab]
  • Accent Fabric 1 (shown in Cotton + Steel Dottie in Bluebird)
    • 2.5″ x 4″ [cut 1 for pocket A]
  • Accent Fabric 2 (shown in Cotton + SteelXOXO in Coral)
    • 2.5″ x 4″ [cut 1 for pocket B]
    • 2.75″ x 2.75″ [cut 1 for needle-landing]
  • Felt for needle-landing
    • 3″ x 3″ [cut 1]
  • Batting
    • 5″ x 8″ [cut 1]
  • KAM Snaps [2 sets]
  • 2″ Grosgrain Ribbon
  • 3/4″ Magnet

Use 1/4″ seam allowance unless noted.

==========

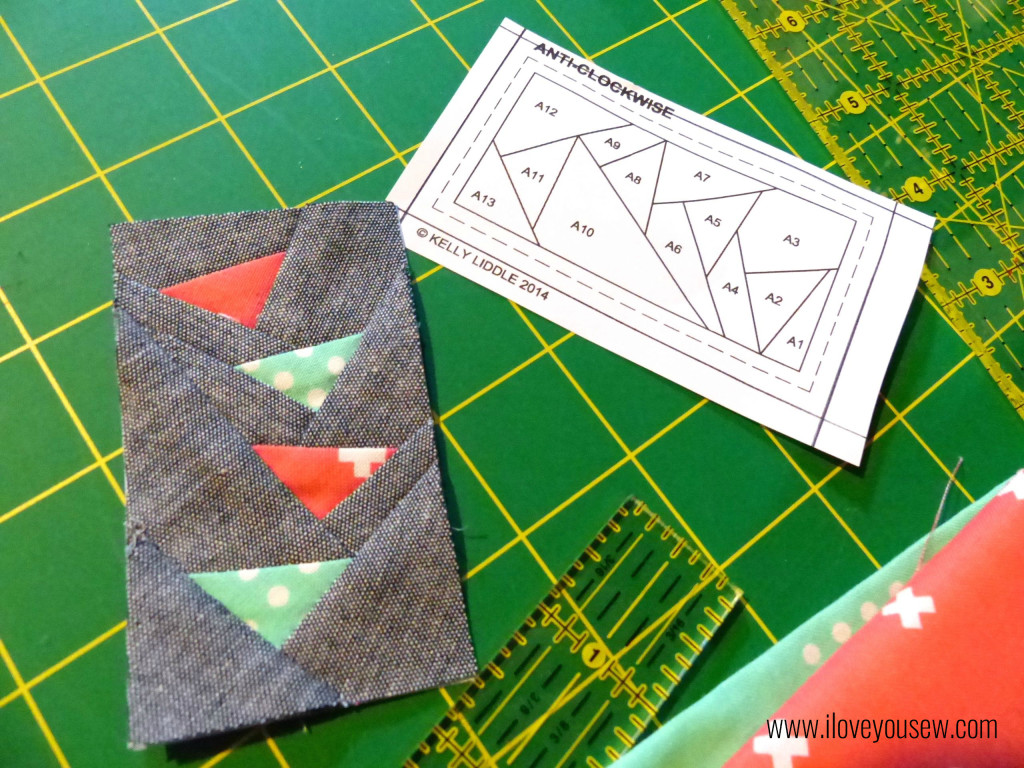
FPP Geese Close-up

FPP Geese Close-up

For the outside of the book, I used Jeli Quilts’s (surprise!) Goosing Borders and shrank the design down to 50%.  The geese are Cotton + Steel basics in Bluebird and Coral.  For the background and borders of the exterior, I used Robert Kaufman’s Chambray in Indigo. I love chambray for a clean sophisticated look and the added texture.  It’s definitely one of my go-to fabrics and always keep some in my stash.

For a nice video on Foundation Paper Piecing (FPP) click here.  I watched this to help me wrap my head around the fabric being sewn as a mirror image.  This technique takes some practice but you will quickly become addicted, like me 🙂 The finished Geese blocks should measure 2″ x 3.5″.  Attach the 1.25″ x 2″ rectangles to the short-sides of each Geese Block.  Then attach the 1.5″ x 5″ blocks to one side of each block.  Use the 2.5″ x 5′ rectangle to attach the Geese blocks together.  Quilt the exterior to the batting and trim 5″ x 7.5″.

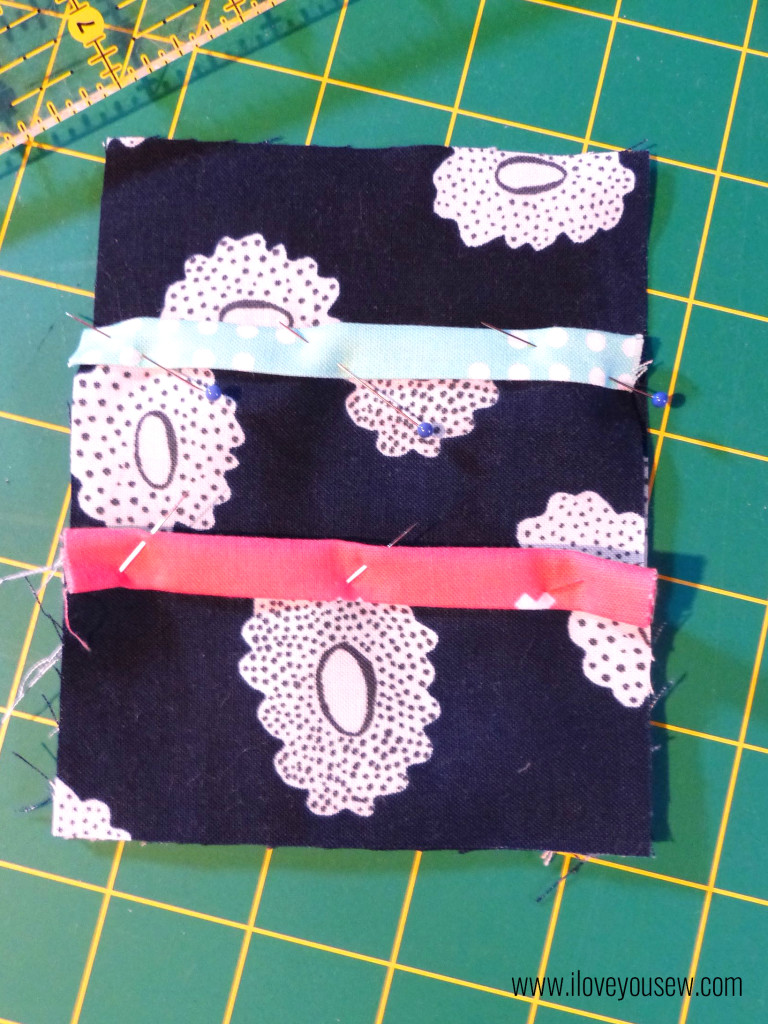
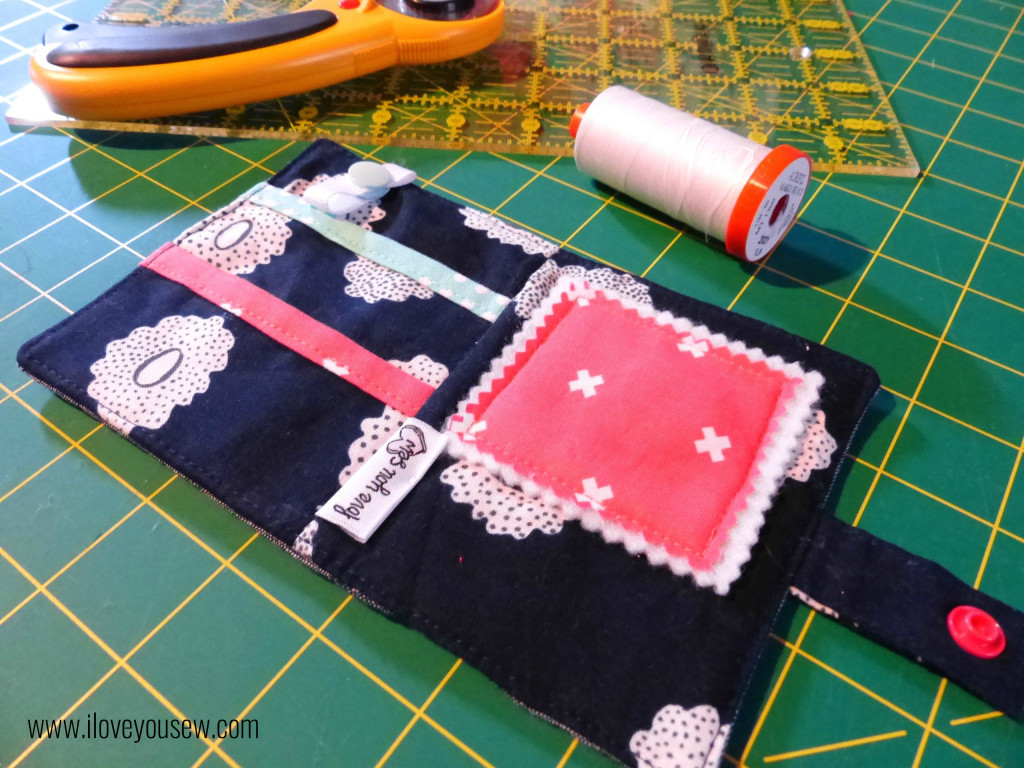
Interior left with Pockets

Interior left with Pockets

On the inside, I chose another Cotton + Steel fabric.  This time, a navy from Hatbox by Alexia Abegg.  I decided to make two pockets – a larger one for scissors and/or a spool of thread or pen.  The smaller pocket could be used to hold floss, clips, or a spare packet of needles.  The binding helps to grip the pockets and adds some visual appeal.

Iron both pockets in half length-wise so [A] is 3.5″ x 4″ and [B} is 2″ x 2″.  Take each piece of binding and machine-bind down just like you would a quilt.  Lay Pocket [B] on top of Pocket [A] on top of 4″ x 5″ interior fabric, matching up corners at the bottom. Pin all in place.

Right above the Pocket [A], I cut a 2″ piece of grosgrain ribbon, sealed the ends, and made a loop to hold the scissor handles in place.  I am a big fan of KAM Snaps and used them with the ribbon as well as with the closure of the entire Needle-book.

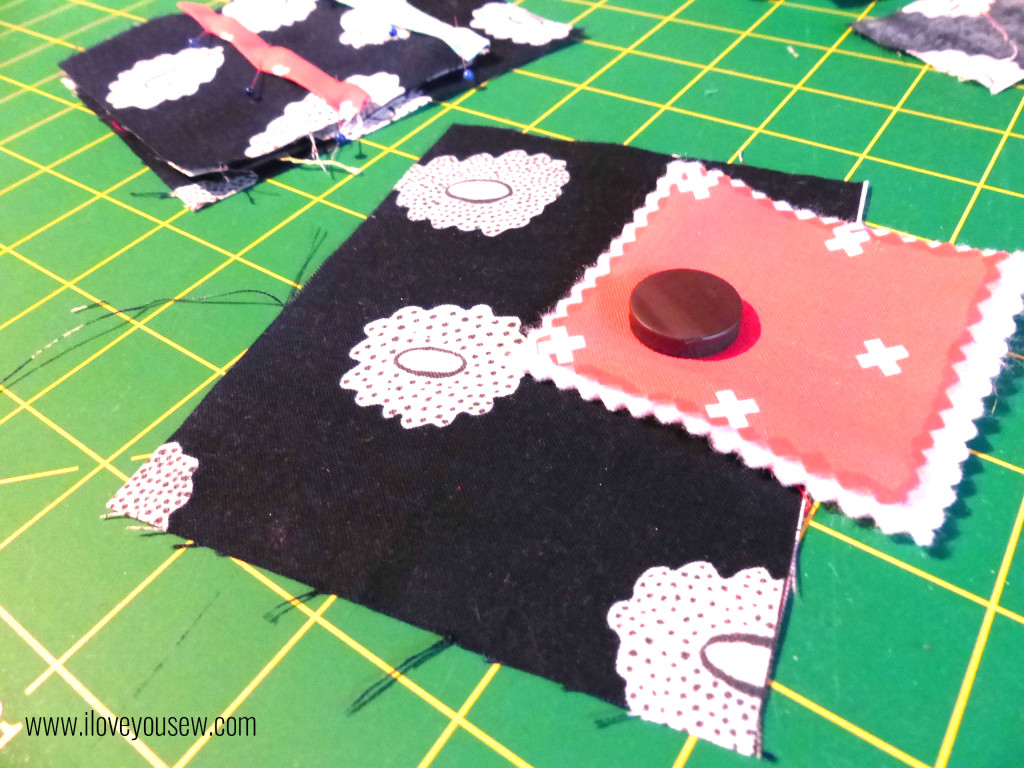
Preparing Needle-landing with built-in Needle-minder

Preparing Needle-landing with built-in Needle-minder

On the right side, there needed to be a needle landing (because it wouldn’t be a needle book, otherwise, right?!?) I just used craft felt and my Gingher serrated scissors to cut out the rectangle.  But I wanted some more color, so I added the same Coral fabric on top as a nice accent.  I sewed 3-sides up with a 1/8″ seam along the Coral and slipped in a small 3/4″ magnet for a built-in needle-minder!  Then I sewed up the last side making sure the magnet was fully enclosed. With right-sides together, sew the two interior panels together to create a center seam.

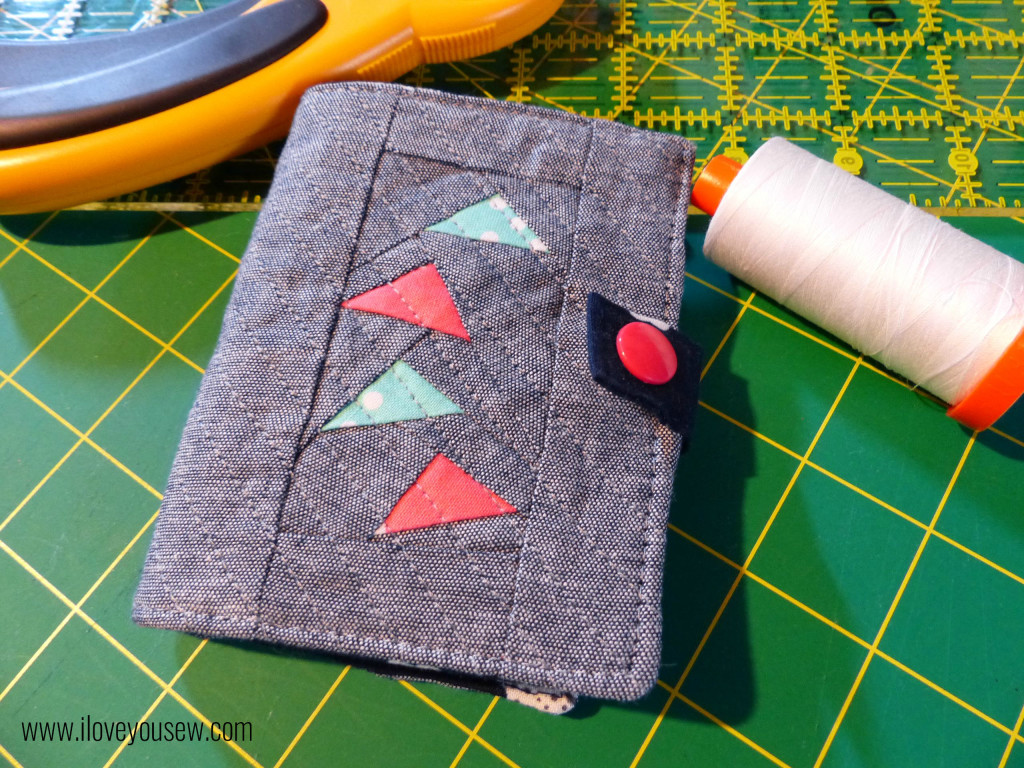
Needlebook Exterior

Needlebook Exterior

To create a tab, press the fabric lengthwise in half then open.  Press each long-side to match the center fold then fold in half, matching up the short-ends.  Top stitch all around to secure.  Attach KAM Snap at this point. Pin the tab half-way on the right interior panel facing in.

On the exterior panel, mark where the tab will meet and attach your other KAM Snap.  With right sides together, sew the Interior and Exterior  panels to each other leaving a 3” opening to turn. Snip corners, turn the Needlebook right-side out and press.  Top-stitch 1/8″ all around the book to close up the opening.  “Stitch in the ditch” along the center inside seam to allow the book to easily fold.

Completed Interior

Completed Interior

And….that’s it 🙂  This was a nice easy sew that you could use as a “Swap Extra”  or a stocking stuffer for a good sewing friend.  If you are not a snap person or do not have any on-hand, you can alternatively use a button and elastic cord closure or long pieces of ribbon to tie it all together.  If you looked closely at my sketch, I was initially going to add some elastic loops under the landing, but decided to omit them to keep this simple…but it’s a great idea if you want to add an additional feature.

Since I’m not a seasoned tutorial author (yet!), please let me know if you have any questions. Don’t forget to share pictures of any completed projects as well!

I’m linked up to Late Night Quilters Tips and Tutorials Tuesday.  Please visit the page to see some more great sewing and blog related pointers!

#WalkingGeeseNeedlebook #IGNeedlebookSwap #LoveYouSew


Hug and Stitches,

Cristy

Love You Sew