Out & About Dress {Pattern Review}

OutandAboutTitle

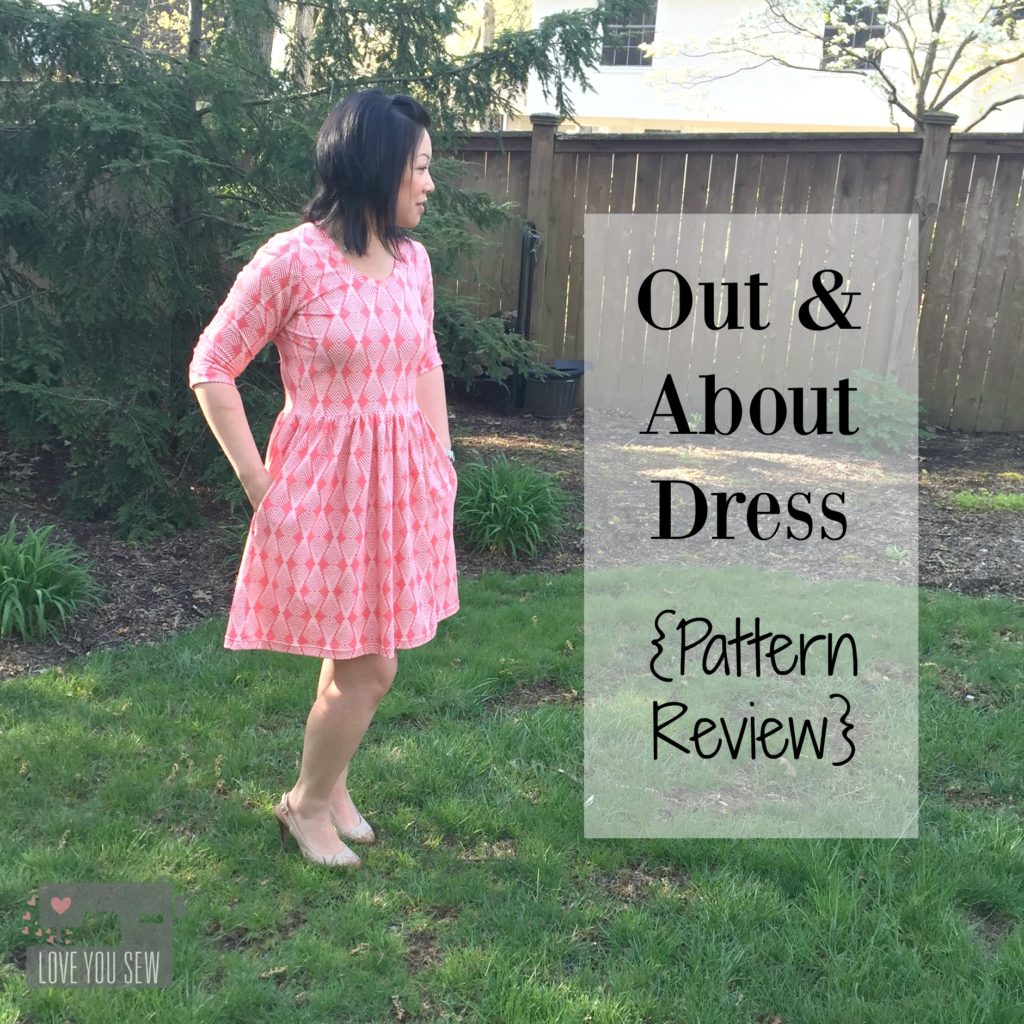
‘Nothing like having some crazy beautiful weather to push me to finally make my Out and About Dress.  (Anyone else getting snow in April, then full sun and 70* the next day?)  I’ve had this pattern since Black Friday when Sew Caroline had a great sale, but like most selfish sewing plans, this was pushed to the side.  Once the weather warmed, I knew I needed to add some more pieces to my me-made wardrobe.

I chose Plumage Poppy knit by Art Gallery Fabrics which is just amazing.  It’s bright, springy and just feels so soft and good too.  Best part is I picked up this from my little quilt shop (LQS) Sew to Speak…on sale!  Doesn’t that always make a project feel even better? 🙂

Garment sewing can be intimidating…especially with knits, so I want to show you how I finished my dress with a bunch of close-up shots.

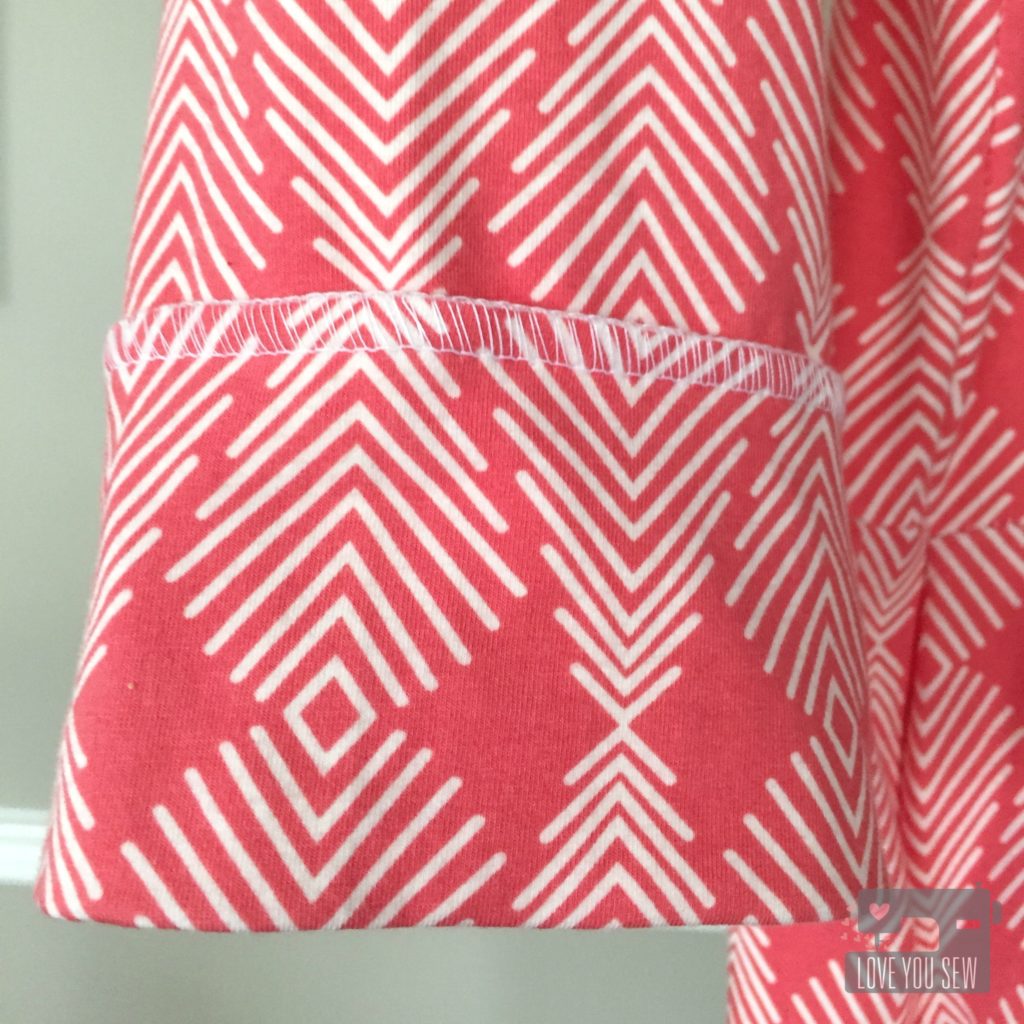
Cuff

I have a serger and it’s a god-send when it comes to knits.  The knife cuts a nice even edge and the overlock stitch helps tie up everything so beautifully.  There is a nice stretch which I chose to use here in the sleeves.  This pic was taken before I tacked the cuffs into place to hide the seams.

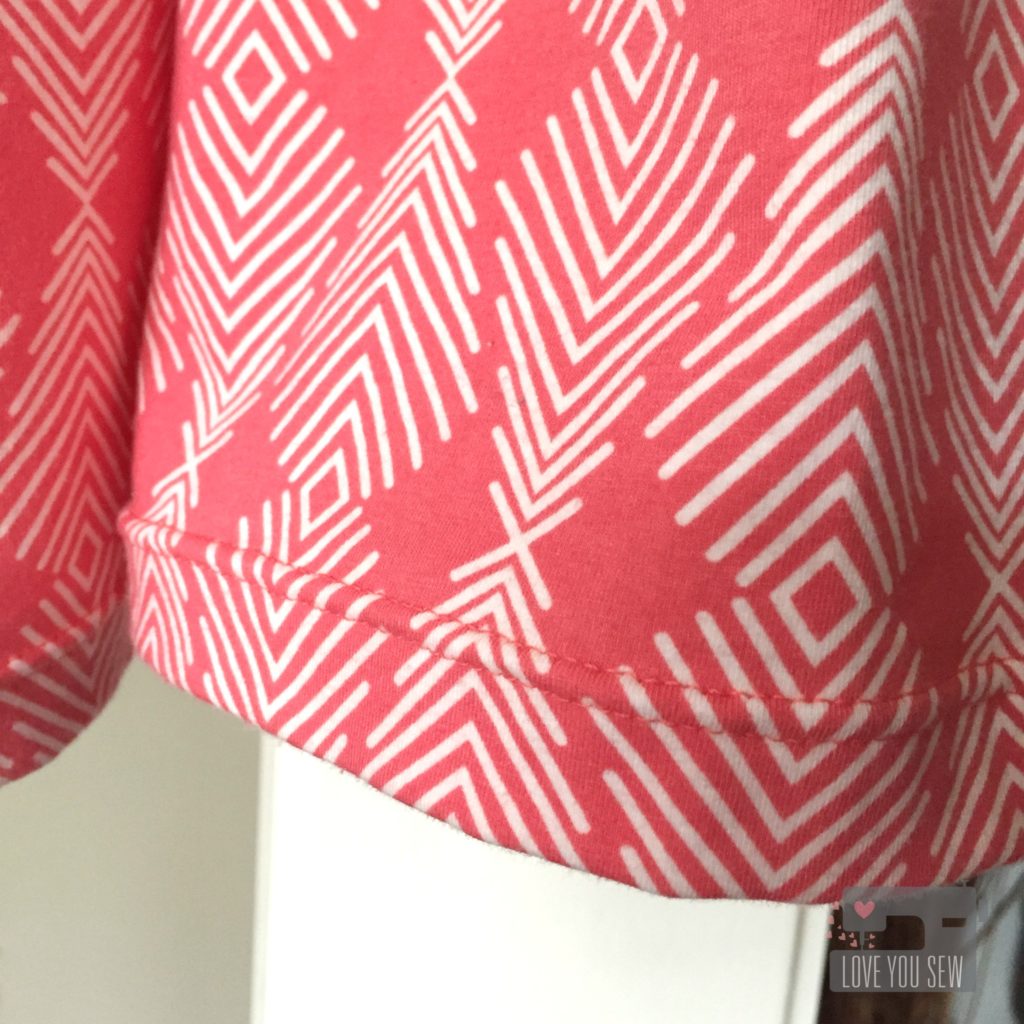
Hem

For the bottom hem, I used a ballpoint double-needle for this professional look. This allows for a decent stretch but not as much as the serging. With this being a loose dress, I am not worried about the stretch in the skirt….I’d rather it just look good! Ha.


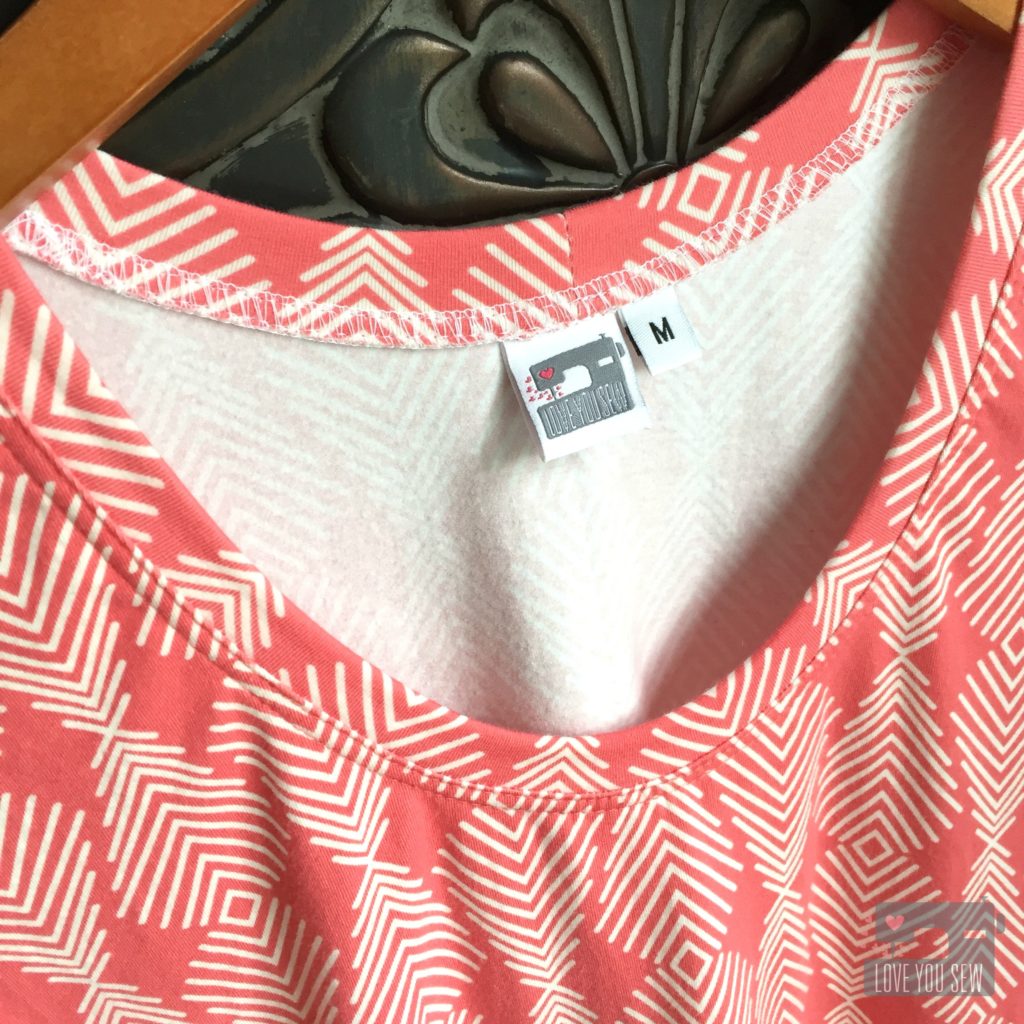
Neckline1

Around the neck, I serged the neckline onto the dress for a clean look on the hanger.  But for that professional look, I added two top-stitch seams while tugging at the knit a little bit.  A coverstitch machine would probably do the same but I don’t have one (It IS on my ultimate wishlist though.)  The size of the head opening is large enough that I’m not concerned with having to really stretch it out, so the top-stitching works.  It’s always good to test your stitches on a scrap piece to see how much stretch you need.

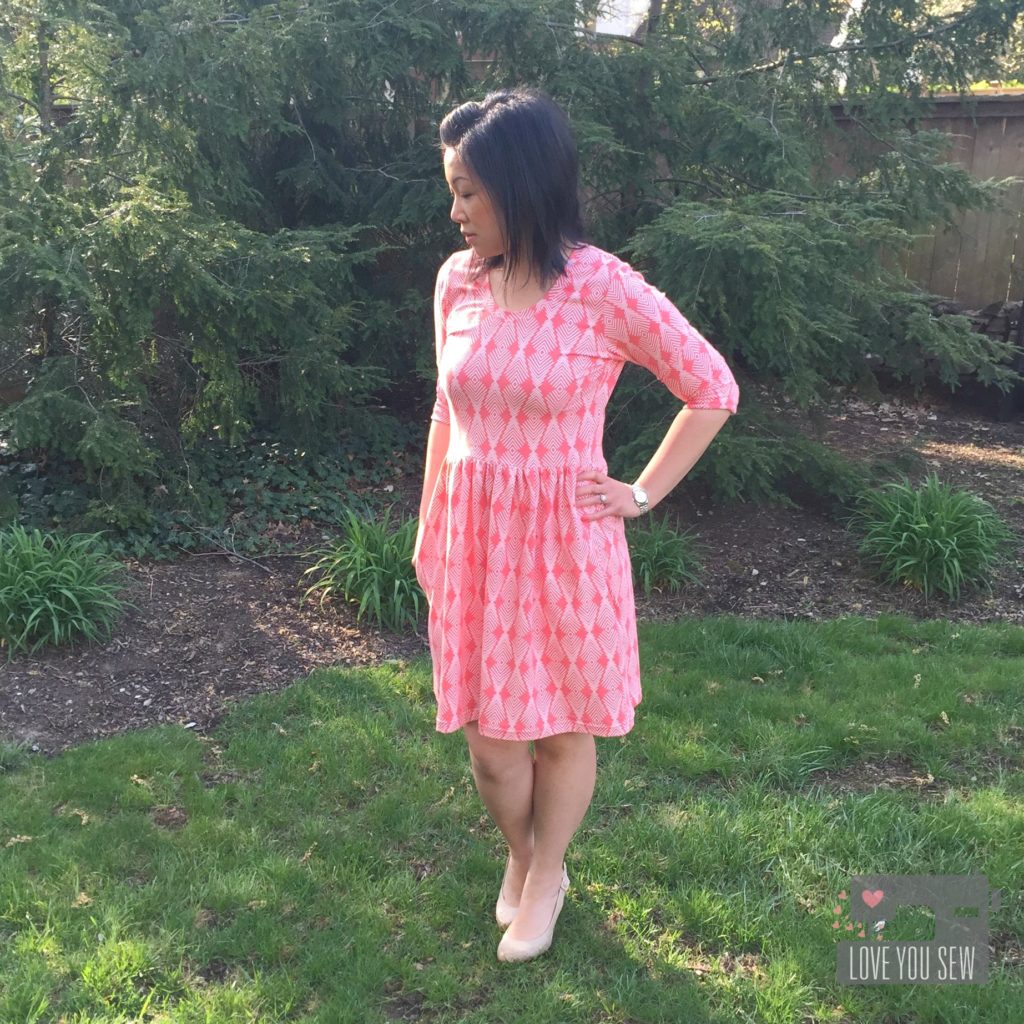
fullprofile

This was more simple sew than anticipated…even with the pockets!  So, I know this won’t be my last Out and About Dress.  It was true to size, but since I’m 5’3″ I took about 4″ off the hem to hit just above the knee.  I may have to attempt a hack for a tank version.  Let’s see how long it will take me to make one!

Have you made anything new for yourself lately?


Happy Stitching,

Cristy
Fundraiser Sewing

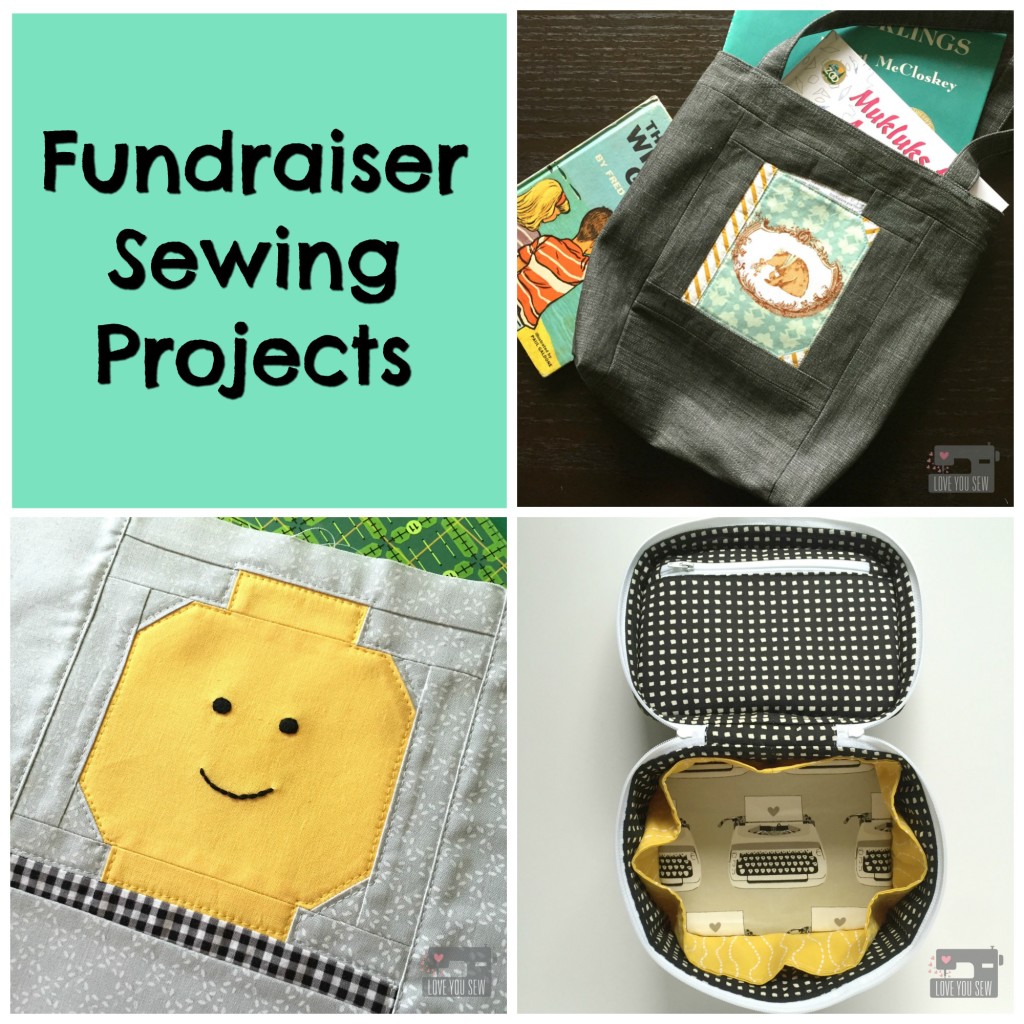
Fundraiser Sewing Projects

Whether you sew for hobby, for business, or for necessity, it’s always nice to sew for a cause.  I’m a stay-at-home-mom who has to continually stretch a buck, so I like to help how I can…and that means through sewing.  These past few weeks have provided me a few opportunities to use these skills to help some great local organizations.

My boys go to the same preschool and the Parent-Teacher Organization (PTO) asked me to contribute a few items for a big auction event.  Of course, I said yes. I love this school and am so happy my boys do too.  Although I know I won’t generate a ton of money, I know every little bit helps. I get to help the PTO and get a little local publicity so it’s win-win for me.

Last year I donated gift certificates to my Etsy shop and this year I decided to make a few items to possibly generate more money once the bidders can touch and feel what they are receiving.  With a GC, there is a finite value, but with custom made, hand-sewn products, there is more more perceived worth…at least I hope!

UA Open Wide Pouch

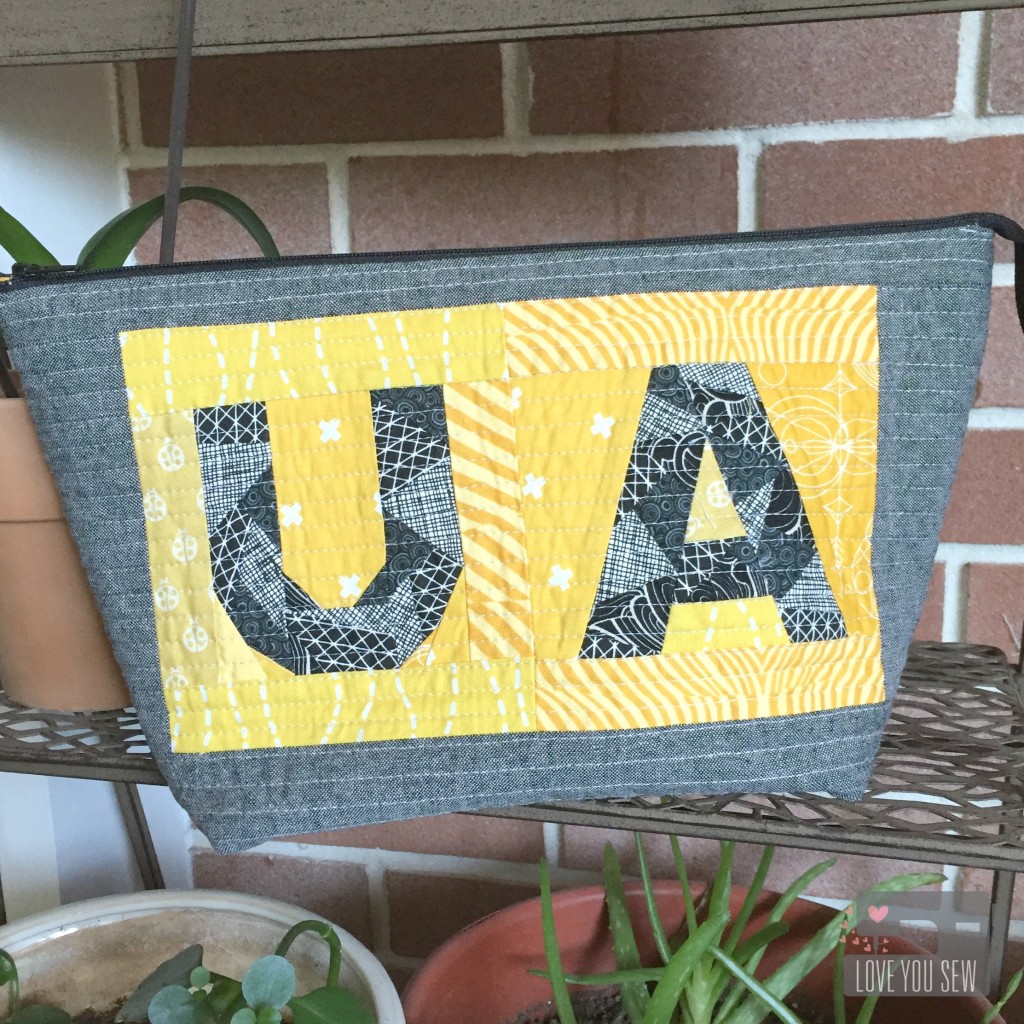
It’s always so hard to choose fabrics for someone, never mind someone you don’t know.  But since this is a school fundraiser, you can’t go wrong with simple patterns in the school colors…so yellow and black it is.  I used Quiet Play’s Geometric letter pattern and Noodlehead’s Wide Open pouch pattern to show some hometown love.

Traincase Outside

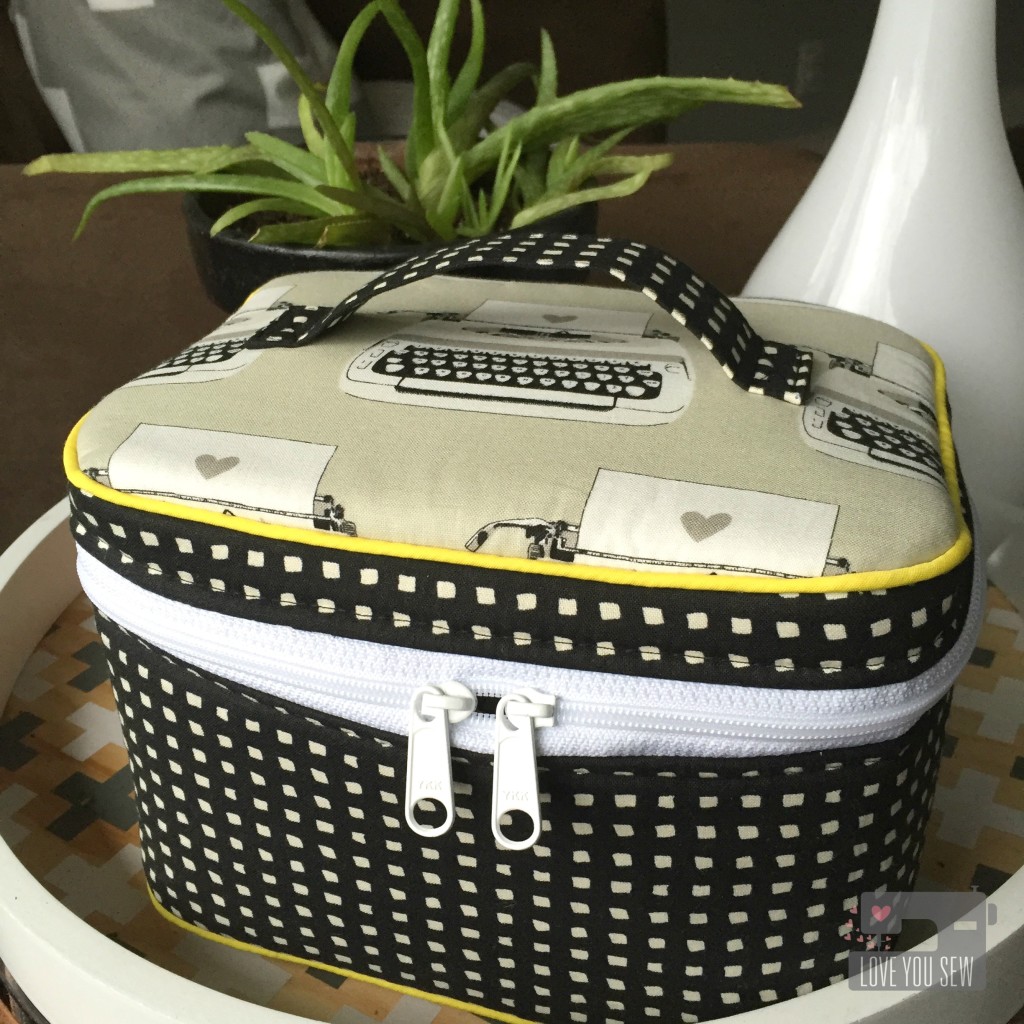
The Crimson and Clover Train Case by Sew Sweetness is one of my favorite patterns. Its so versatile in it’s usage….whether to hold makeup, toys, or other treasures.  I used Cotton and Steel Black and White fabrics with the typewriters being  a play on the school and added little yellow accents.  The shot of yellow piping is definitely my favorite.

Each of my son’s classes is also responsible for putting a large basket together. There is a theme and the point is to have all the families contribute a little something in order to make a sizable basket worth buying. One class has a “Lego” theme and the other has “Books.”

Lego Open Wide Pouch Outside

Instead of just buying a box of Legos, I knew I wanted to sew something to hold all the toys. I’m constantly stepping over Legos in my own house and I made some see-through vinyl drawstring bags to combat the mess.  I thought I would make one for the basket but then after browsing Quiet Play’s Craftsy shop, I saw the Lego man. Hello!

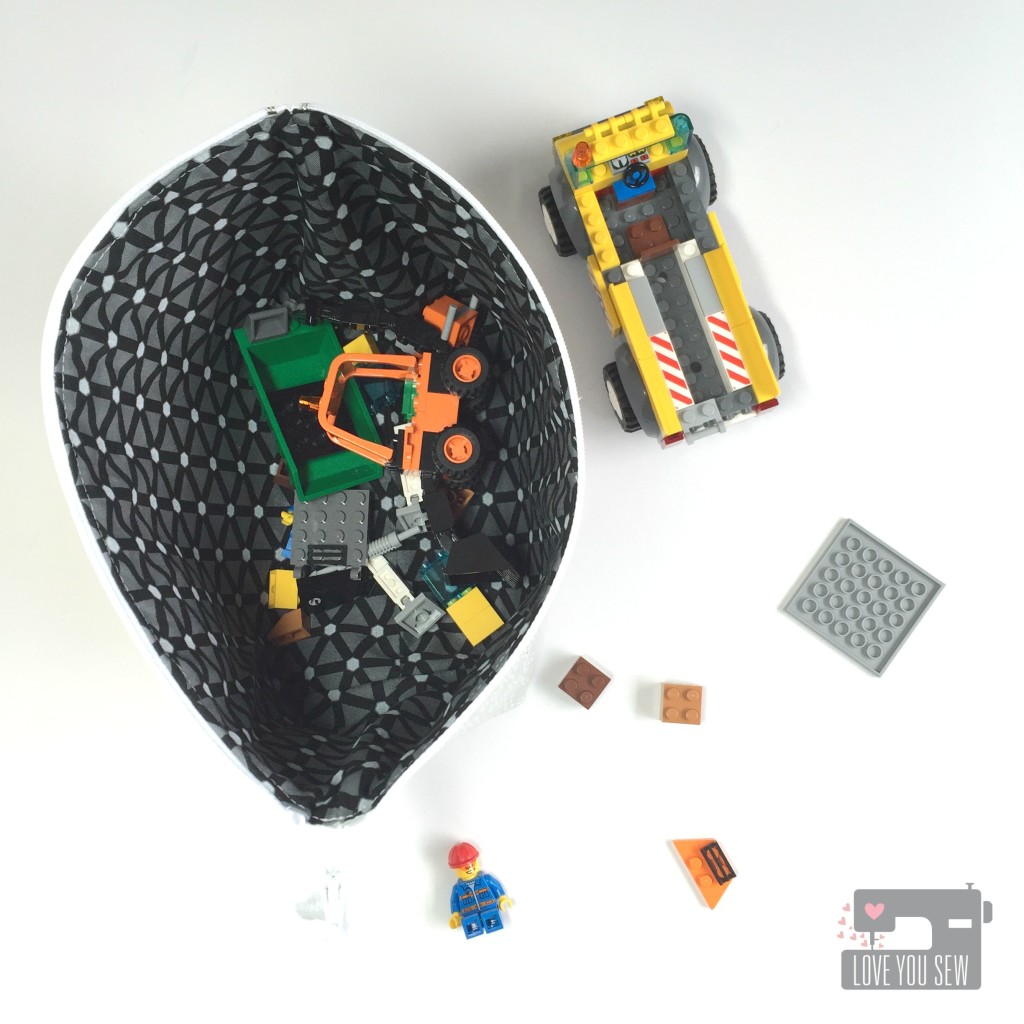
Lego Open Wide Pouch Inside

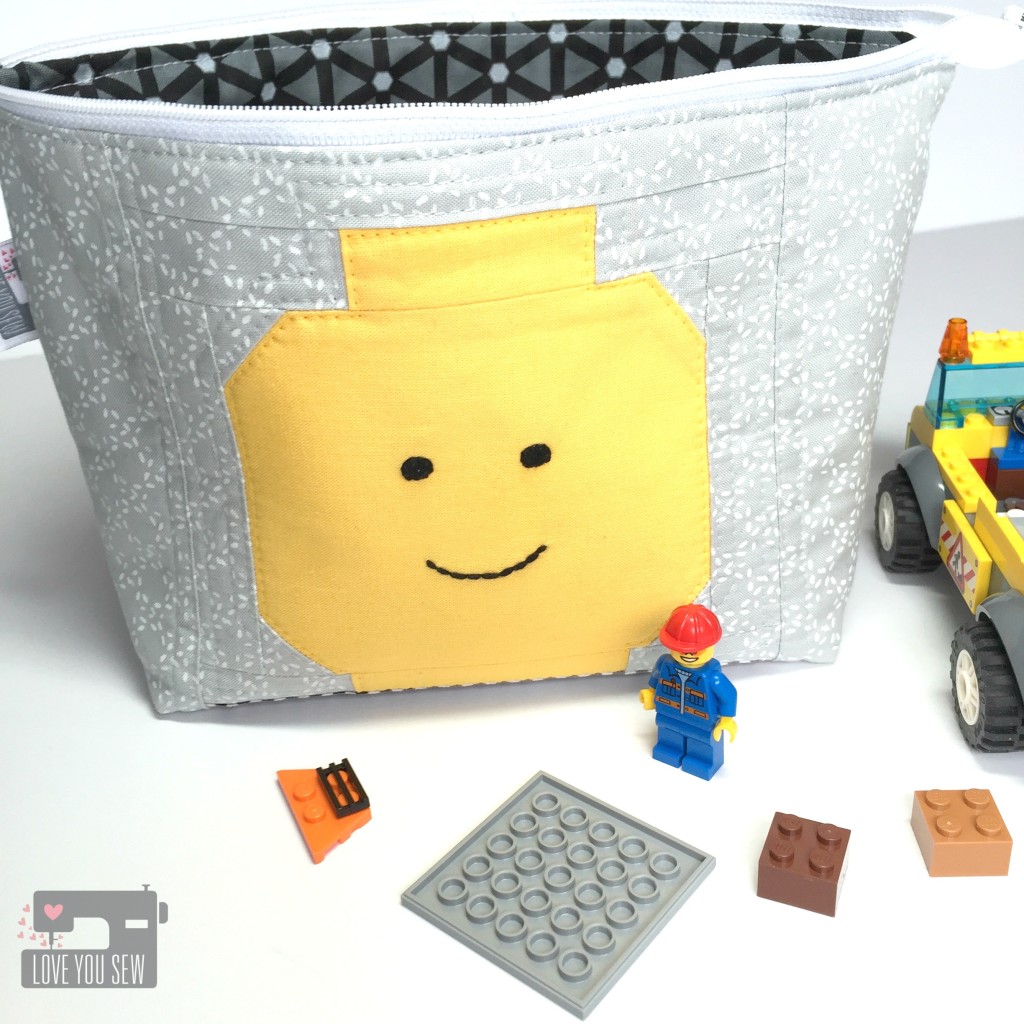
The Lego head pattern is free (yay!) and I used Noodlehead’s Open Wide Pouch again.  It’s design is so perfect for little hands to reach in and out easily.   I added a little embroidery to make the Lego Man’s face and (hopefully) this bag will help keep all of these little pieces off the floor.

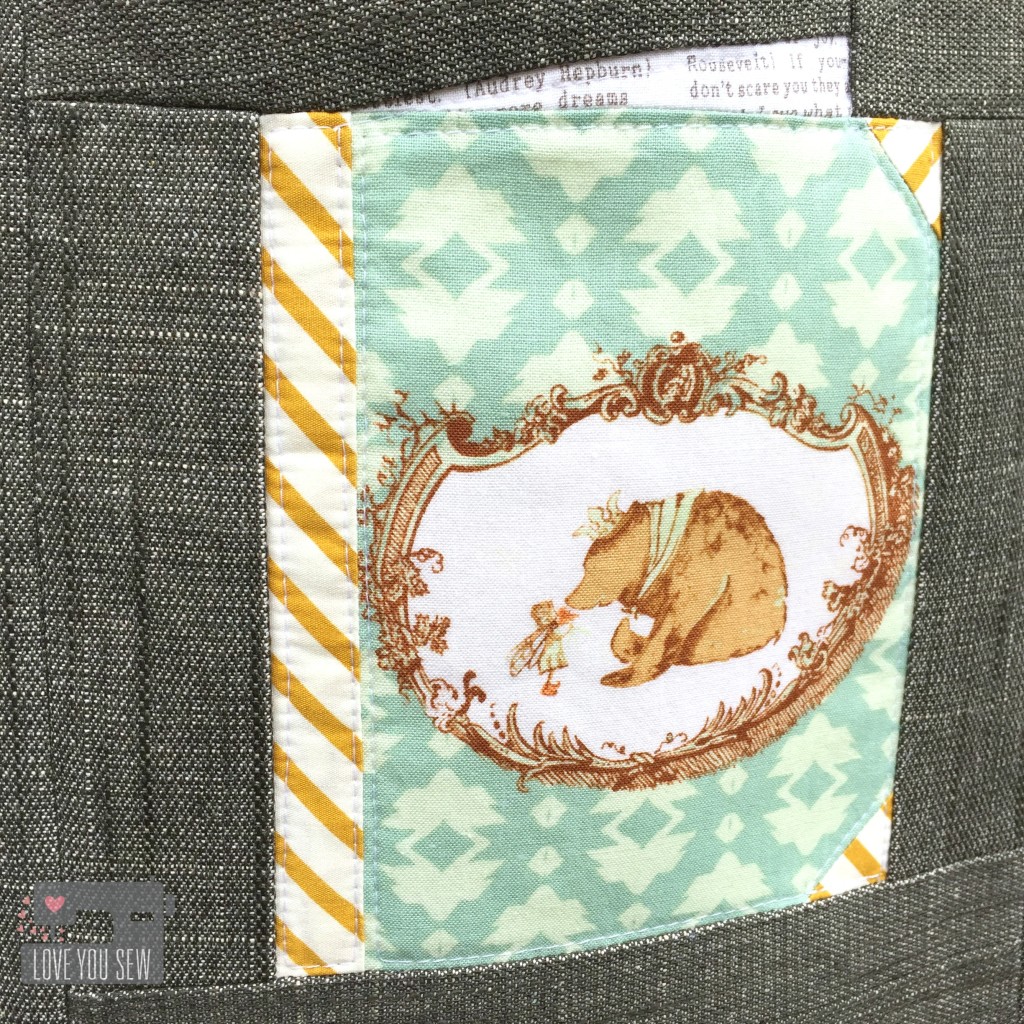
Library Bag Closeup

For the “Books” theme basket, I knew right away I would make a library bag. My boys have cute canvas ones they love to fill up and I figured one of their schoolmates would too.

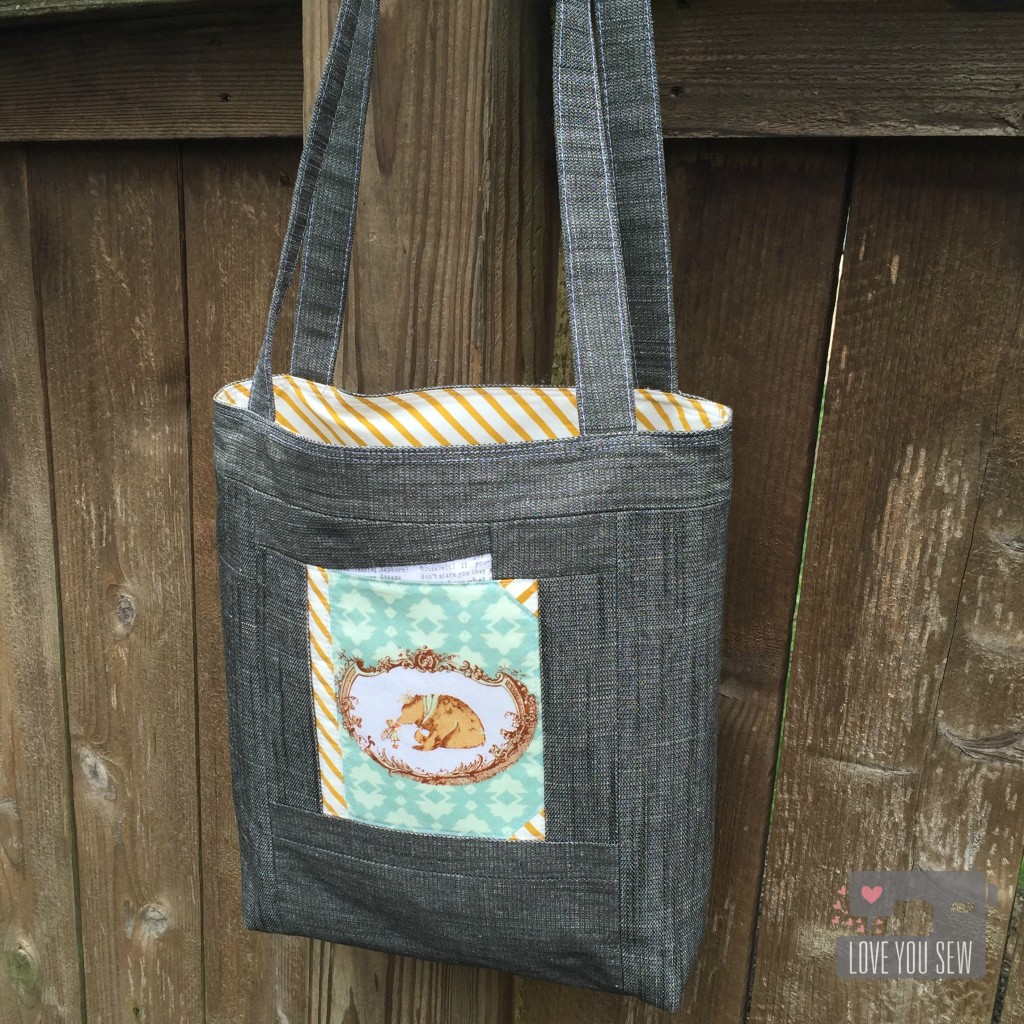
Library Bag

The bag is made with Art Gallery Fabrics Denim Studio so I didn’t need any interfacing to give it structure. I used a very simple tutorial from Skip to my Lou and altered it so I could incorporate this super cute book paper-piece pattern from Patchwork Please! by Ayumi Takahashi.

Besides all these PTO donations, I was asked to contribute some items from my Etsy shop for a Pelatonia fundraiser. This is one of the largest bike races in Columbus and generates millions of dollars…all which toward cancer research.  Some large companies have donated money to cover administrative expenses so that 100% of rider fundraising will go to charity.  How awesome is that?

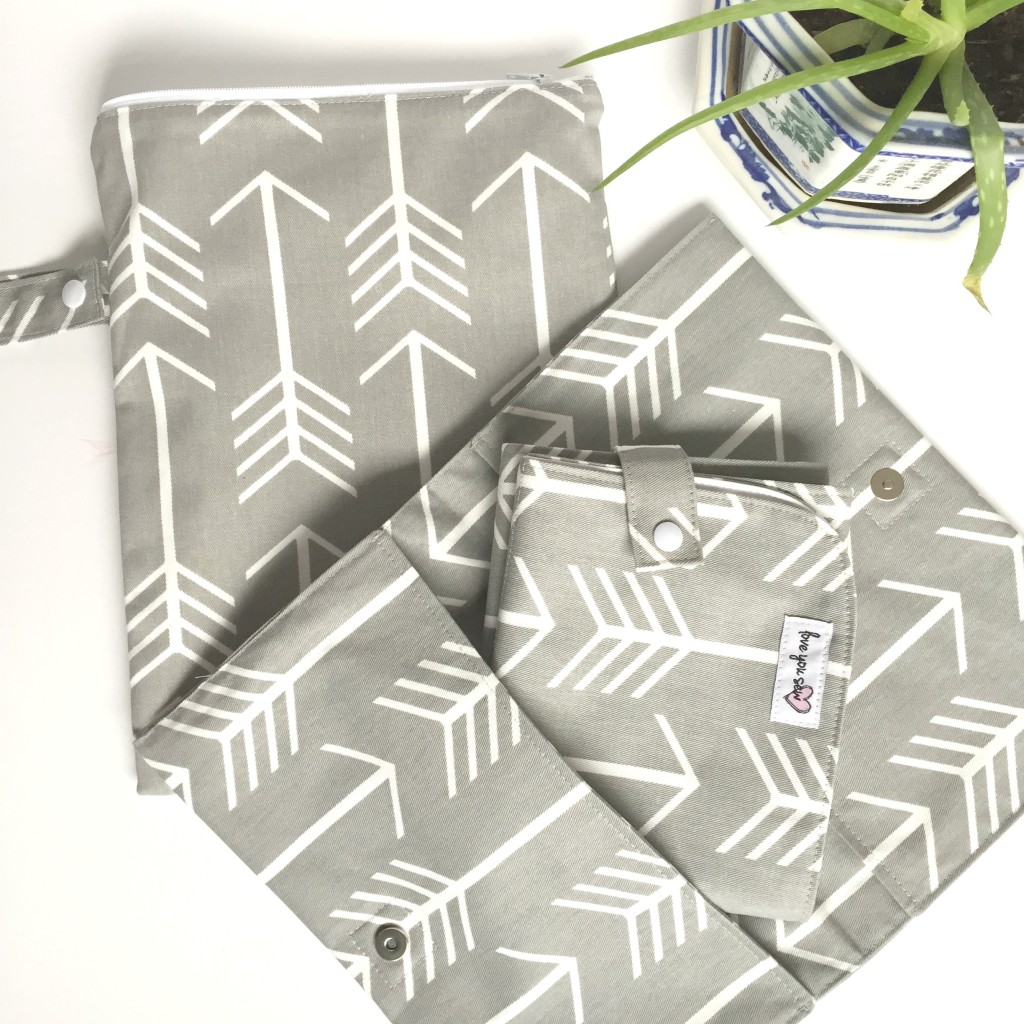
Baby Travel Set

I donated a full set of baby travel items with arrow fabric since the Pelatonia logo is also an arrow. The group I’m assisting is bringing in a whole cross-section of items and I’m crossing my fingers that these pull in lots of money!

Have you donated some sewn items for fundraising?  How did they do?


Happy Stitching,

Cristy


***This post may contain affiliate links which help me on the back end to fund this site.  Compensation is only through your own purchase. 

Sewing Room {Pattern Organization}

Pattern Organization Title

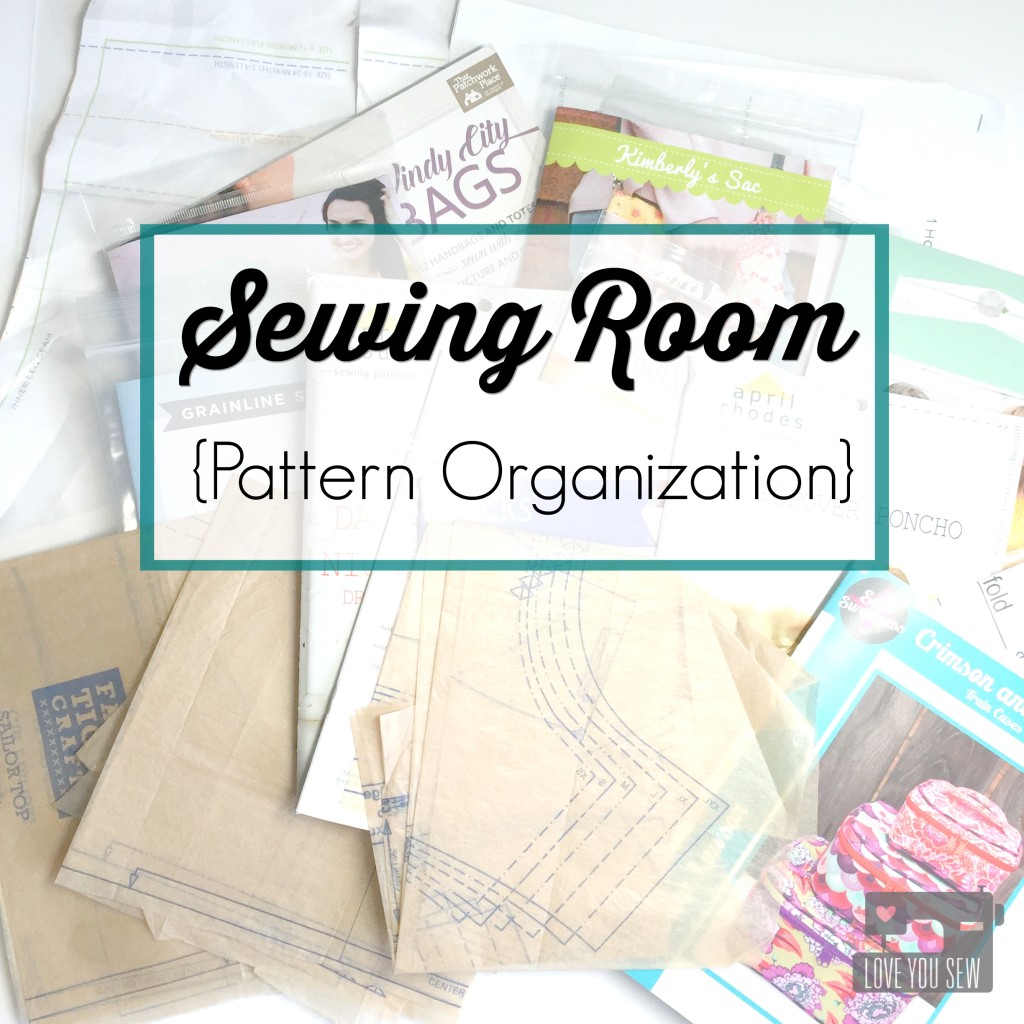
It’s funny when I’m asked what kind of sewist I am.  Quilter? Bag-Maker? Garments?  Well….I tell everyone, “I am all of the above.”  I like to dabble in everything — to challenge myself and I just love being able to make as much as I can with my own hands.  With this variety in my sewing repertoire, comes a TON of patterns!

I have a mix of both digital and paper patterns.  If given the option, I almost always take the full printed pattern.  As much as I love the instant gratification of downloading a digital pattern, the extra taping is a bit annoying and I have more difficulty tracing with printer paper.  I know…it’s nice to always have a back-up of a pattern on my computer, but be rest assured, I always make copies.  I trace garment patterns onto muslins and I create cardstock templates of bag pieces.  Which type of pattern do you prefer?

With all of the patterns and their print-outs…and the traced muslins…and the instructions…how do I organize them all?  As much as I would love a one-size fits all solution, it just doesn’t work for me. I have three different methods of organizing my sewing patterns and maybe one, two, or all three of them may work for you.

Classic Filing Method

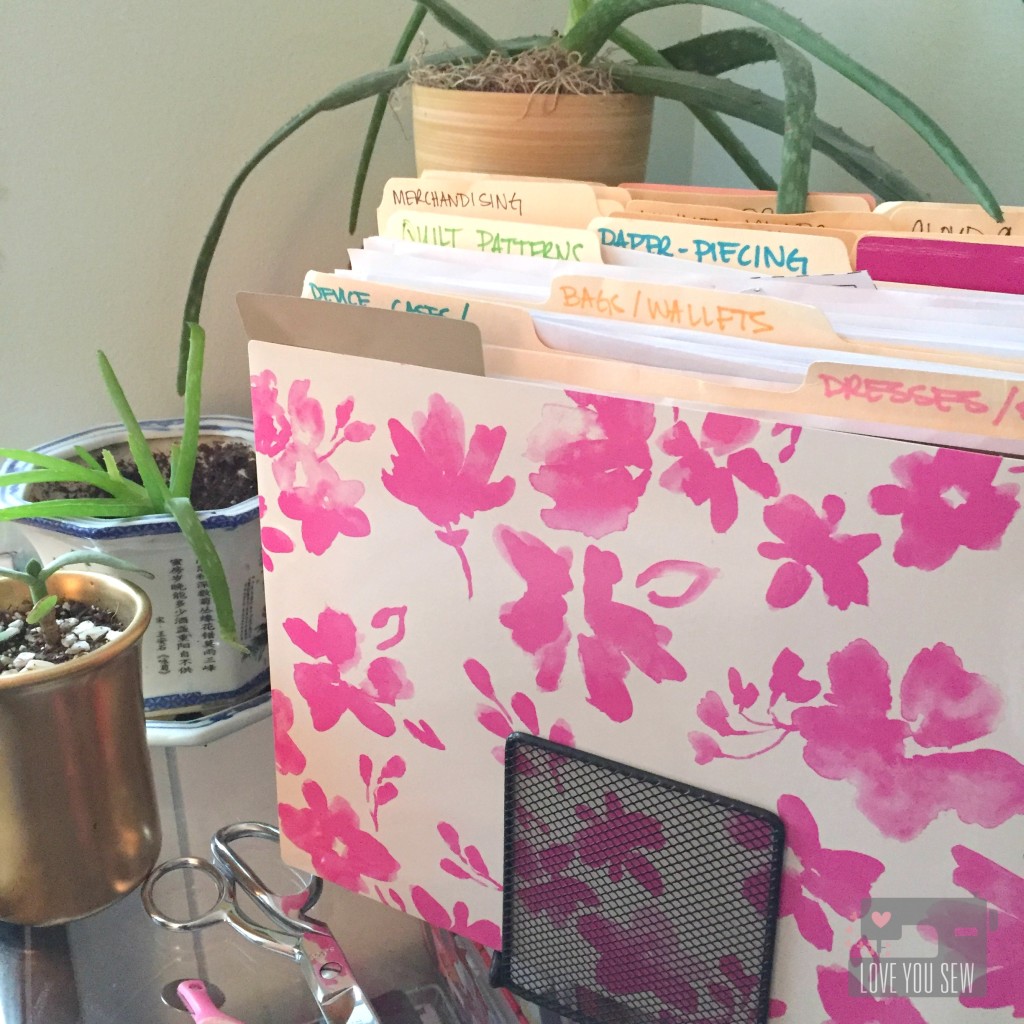
Pattern Organization File Folders

This has place from my former corporate office days.  It also was my first method when started sewing.  Having all the supplies on-hand didn’t hurt either.  I had a stack of file folders, a desktop tiered rack, plastic file boxes and even a metal cabinet.

I use this method to hold my digital patterns and printout of free tutorials on-line.  (Thank you fellow bloggers!)  These are all categorized by my most frequent sews as shown.


Shelf Method

Pattern DVD Storage

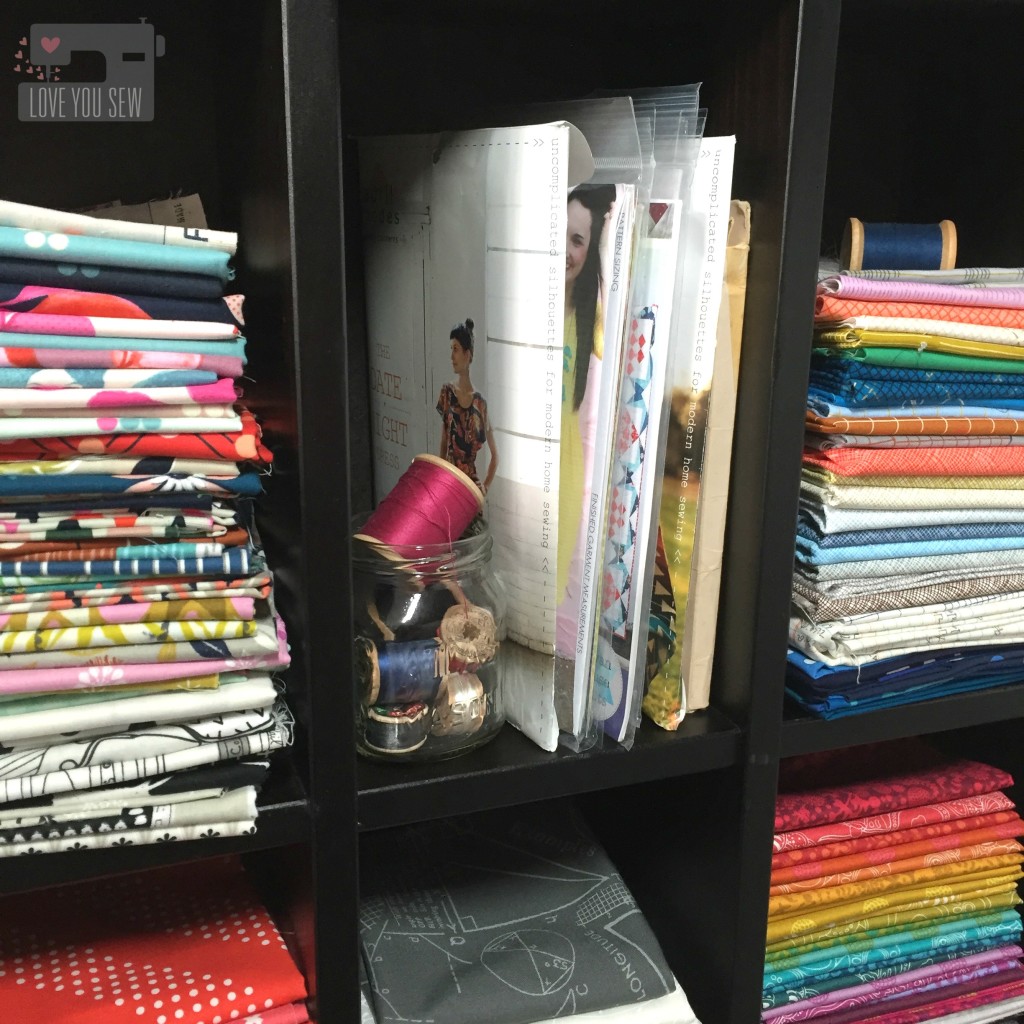
Most physically purchased paper patterns are about 6″ x 10″.  They can easily get lost in regular shelving and other paper storage containers.  For awhile I had mine in cute little wire bins…but the patterns were quickly outgrowing my bins and I couldn’t see them well.

Fortunately, I had a friend who wanted to get rid of a DVD shelf…and it was nice solid piece.  (I bartered a toddler dress for this…score!)  This DVD shelf not only is the perfect size for paper patterns, but it holds fat quarters perfectly.  I love how I can see everything and my patterns are in easy access.


Art Portfolio


Pattern Organization Portfolio Open

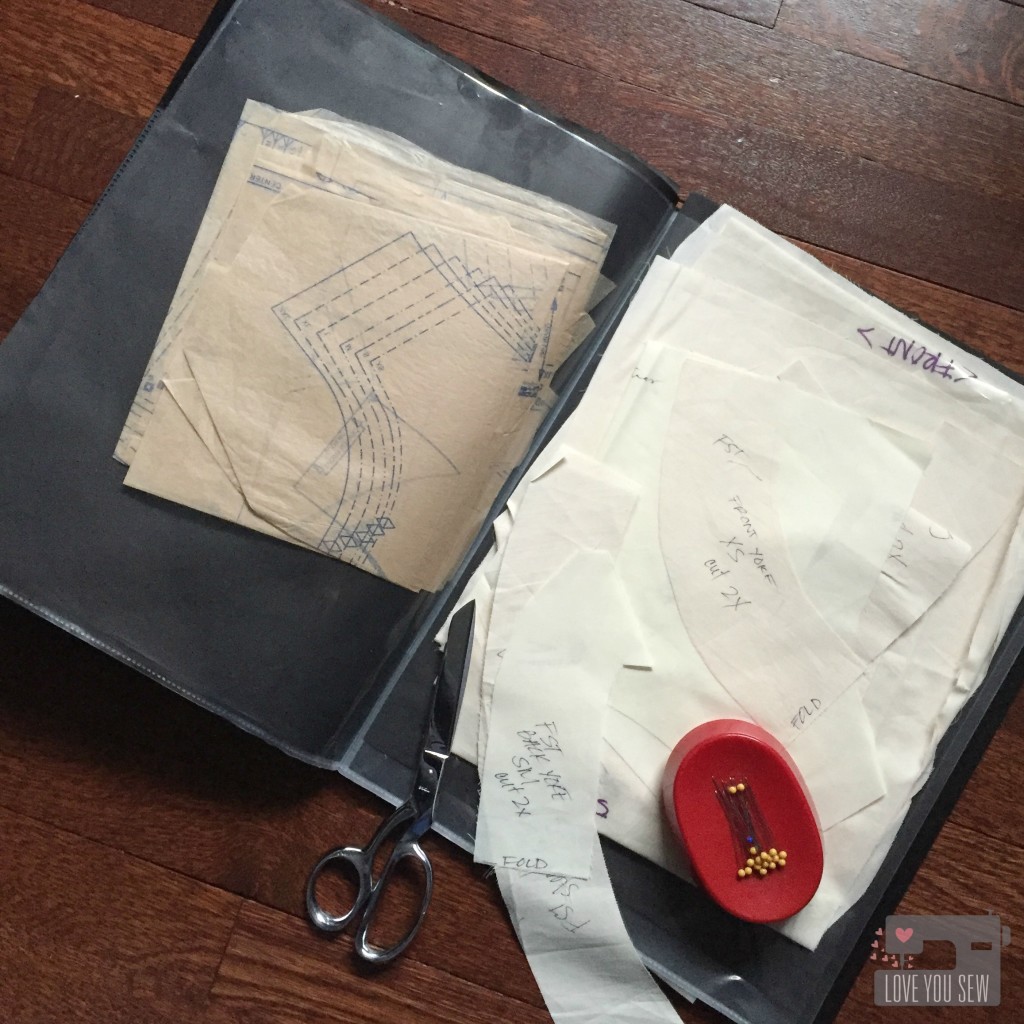
So we tackled, letter-sized patterns and instructions with the file folders and the smaller printed patterns, but what about the big stuff?  For awhile, I folded all the taped pdfs up in those file folders and even used a large binder with those clear plastic sheet protectors, but they didn’t last long.  The patterns were all poking out and the folders got too full too quickly.  I needed something bigger…

When my kids started to bring home arts and crafts from school, I wanted to save all their cute projects.  So I picked up a smaller size art portfolio from my local big box retailer.  I use them to organize each year of school for my guys.  Then….it dawned on me one day that I should use one  for my big paper patterns.

This 11″ x 17″ portfolio size is perfect for my needs.  All of my patterns fit with only one or two folds without needing advanced origami skills to get them back into original form.  I love how it also holds my muslins and the clear pockets allow me to quickly identify what patterns are which.

How do you store all of your patterns?


Have a great week!

Cristy


Mountain View – 2016 Paintbrush Studio New Block Blog Hop

Mountain View Title

Welcome to the 2016 Paintbrush Studio New Block Blog Hop!  During the next three days, you will see a flurry of uniquely designed 12″ x 12″ (finished) quilt blocks.  The best part?  These are all FREE patterns!  For a full list of participants, please visit the host of each day’s hop:

Monday, March 28th – Yvonne @Quilting Jetgirl

Tuesday, March 29th – Cheryl @Meadow Mist Designs

Wednesday, March 30th – Stephanie @Late Night Quilter

Ocean Sunrise Palette

The challenge with this blog hop, was to use at least 3 colors of Painter’s Palette Solids in the Ocean Sunrise bundle.  You can find all the details of the chosen colors here.  Do you use your quilts on the beach or by the water?


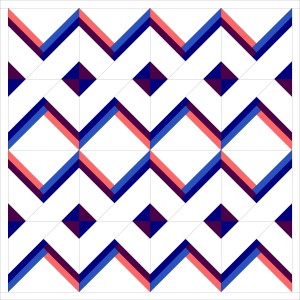
Mountain view Block

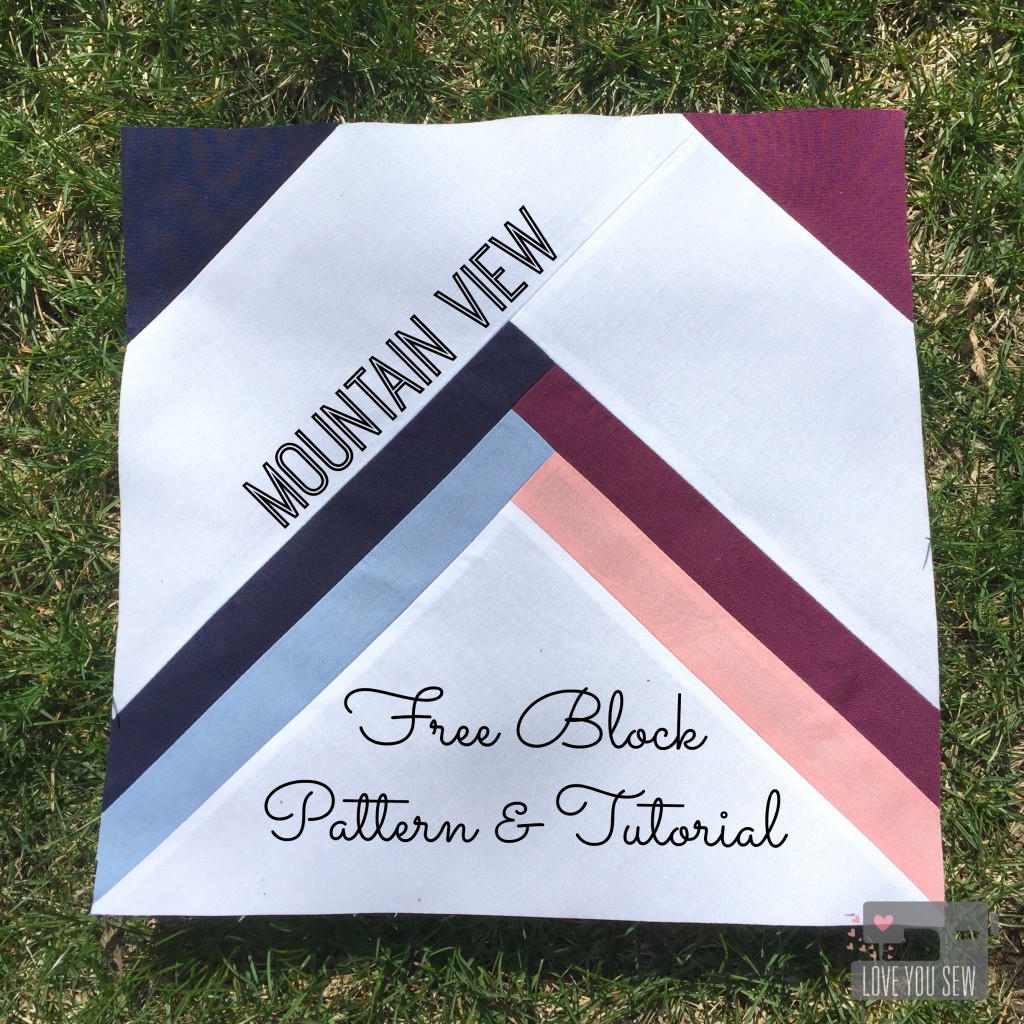
This call to design a new block was indeed a challenge for me.  I usually always have a design idea that’s been brewing in my head.  However, this time I was drawing up blanks.  I played with many ideas until I saw a sun catcher with this similar design.  It really inspired me with it’s simple lines like ones in Log Cabin style quilts.  But this block is set apart by it’s angles and the negative space produces a great chain design.

Mountain View Block Labeled

v2

As with all sewing projects, please read through full instructions before beginning. 

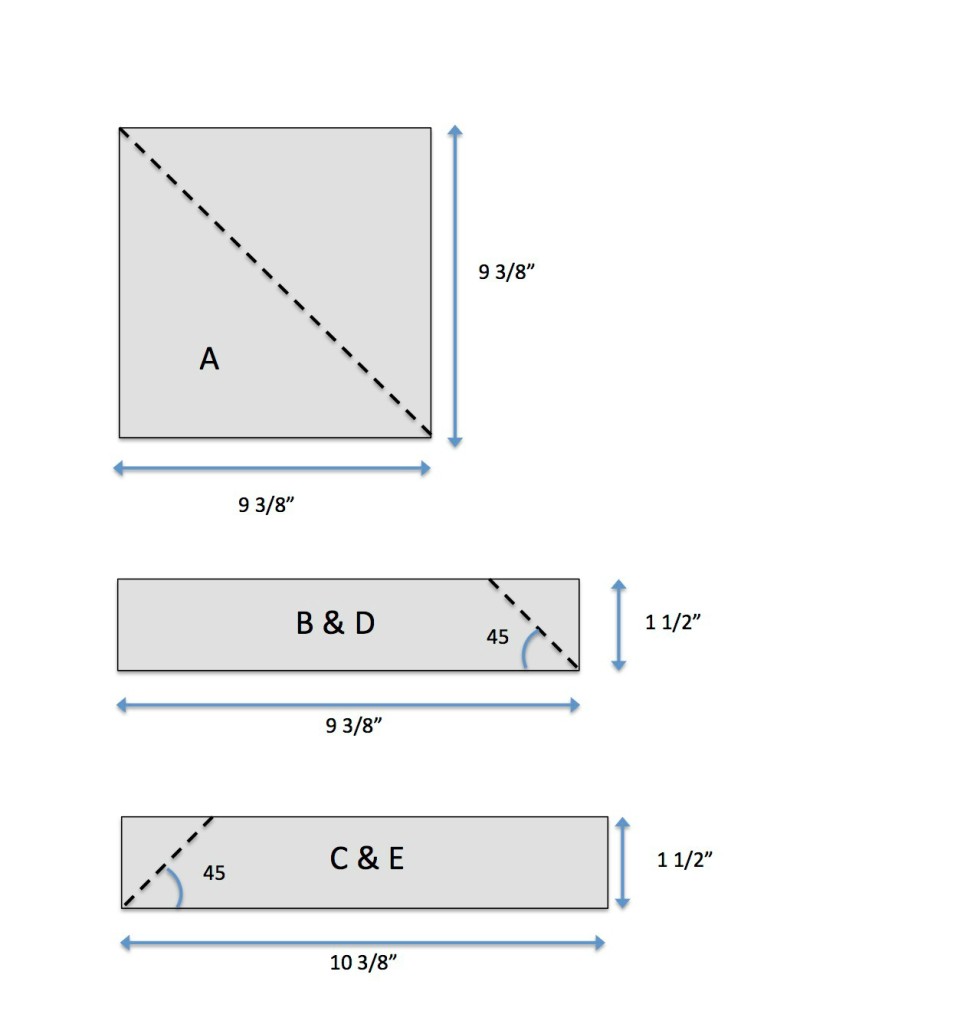
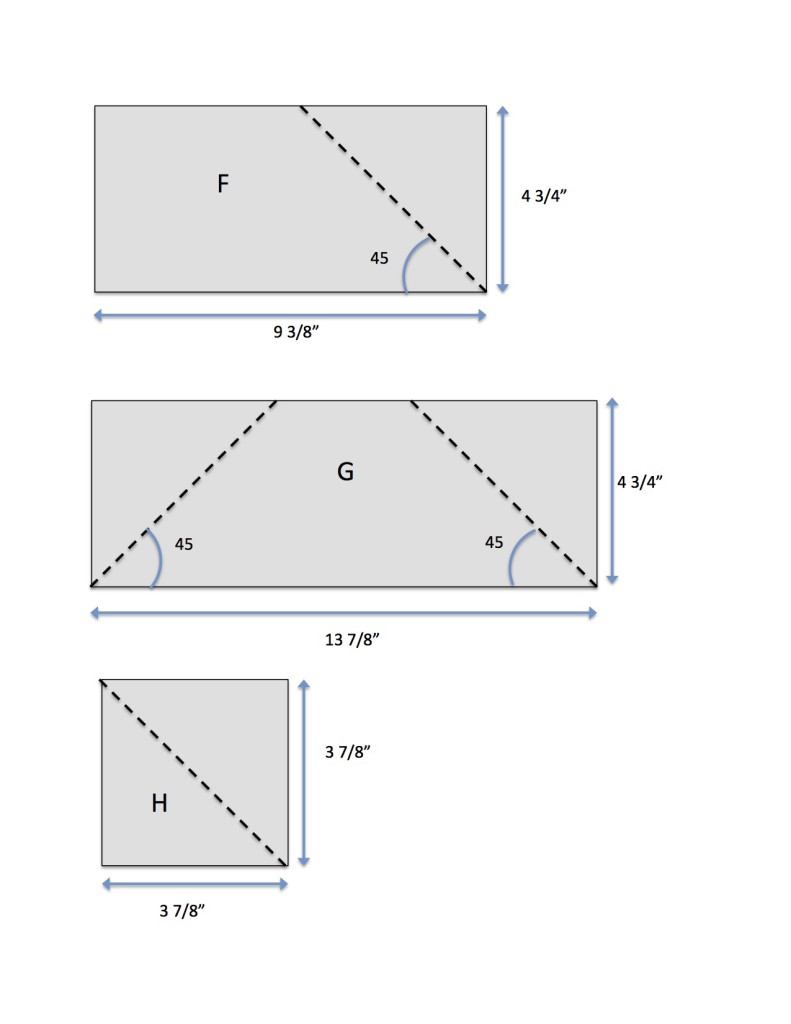
Cutting instructions:

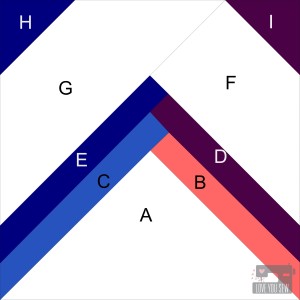
Below are illustrations of every piece of the block.  The dotted line represents where you cut.  A large quilting rule with 45 degree angles is required.  Please see block illustration above for reference.  TIP:  Check and double-check your angle placement on printed fabric before cutting.a


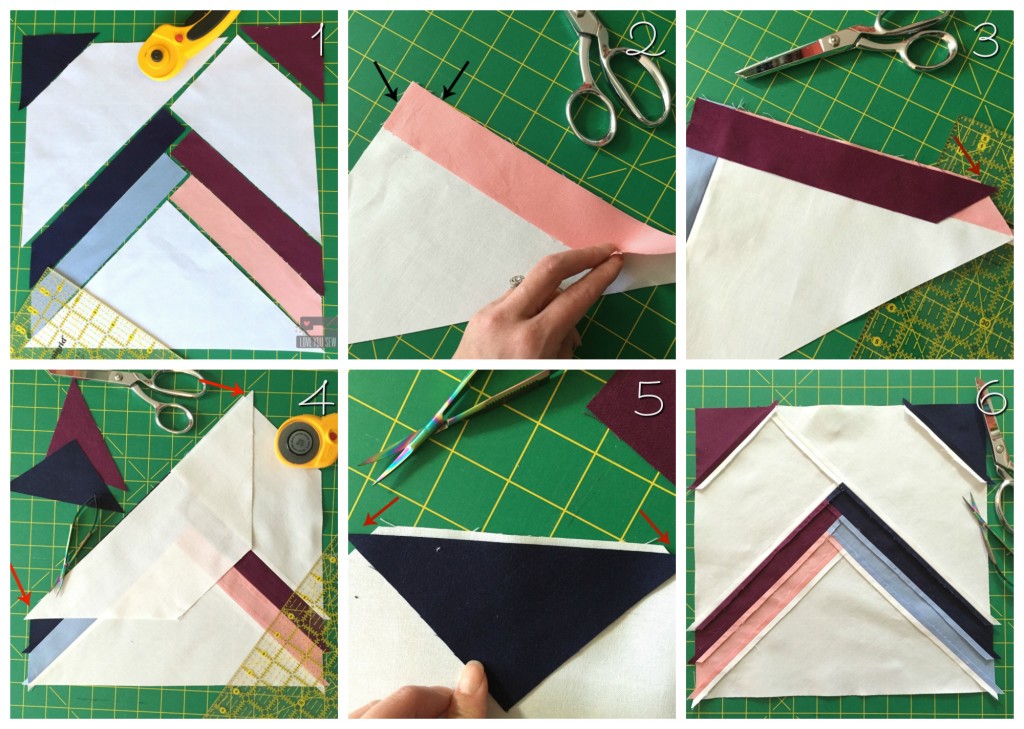
MV cuttingpiecing Instructions

Please note a 1/4″ seam allowance

Mountain View Piecing Collage

  1. Layout the block with your intended fabric placement
  2. Line up the short edge of piece B to piece A right-sides together (RST) and sew down the long side. Repeat for piece C but on the opposite side.
  3. Line up the short edge of piece D to ABC.  You should have a 1/4″ overhang off the block. Repeat for piece E of the opposite side and then add piece F.
  4. Line up the long-side of piece G to ABCDEF.  You will have 1/4″ overhangs on both sides of the trapezoid.
  5. Line up the long-sides of H to each corner.  You will have 1/4″ overhangs on both sides of the triangle.
  6. Make sure to press all seams out as you go and you will have a nice flat back as shown.

Trim the block to 12 1/2″ square.

Additional Quilt variations:

With the play of colors and negative space, there are quite a few different ways you can lay this quilt block.  Here a just a few other ideas.

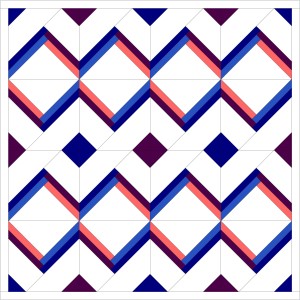
v5

This placement puts the “chain” in the center of the quilt and you can play with the smaller triangle (H) to get solid squares in between.

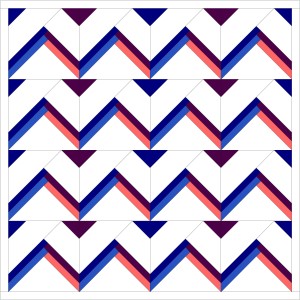
v4

This variation plays with the chevron you can create.  Leave the smaller triangles (H) colored, and you get an arrowhead look or leave them the same color as your background to let the chevron stand on it’s own.


Visit Painter’s Studio’s blog, Inspired by Fabric and/or Quilting Jetgirl (two separate giveaways) to get your chance to win a whole HALF-YARD bundle of Ocean Sunrise!!! {Edit – Giveaway closed}

IMG_4386

 Don’t forget to get additional FREE quilt block designs and tutorial by visiting the following:

Host: Yvonne @Quilting Jetgirl

Jess @Quilty Habit

Silvia @A Stranger View

Cristy @Love You Sew

Kelly @Quilting It Out

Renee @Quilts of a Feather

Bernie @Needle and Foot

Terri Ann @Childlike Fascination

Chelsea @Patch the Giraffe

Mary @Quilting is in my Blood

Diana @Red Delicious Life

Sarah @123 Quilt

Thank you for visiting and I hope you get to try out this block along with all of the others on the 2016 Painter’s Studio New Block Blog Hop!

Happy Stitching,

Cristy


This blog hop was sponsored by Painter’s Studio.  The quilt design, tutorial and all opinions are original and my own.

Kimberly Sac Sew-Along

Kimberly Sac Title

Fat Quarter Shop has another great pattern….and it’s for a bag!  When I was asked to join this sew-along, I could not say “no.”  I love making bags just as much as I do quilting.  With the Kimberly Sac by Fig Tree Studios, you get both!  It is a great cross-body design with some simple patchwork.  I’m so excited to show you my version along with all of Fat Quarter Shops versions found here.

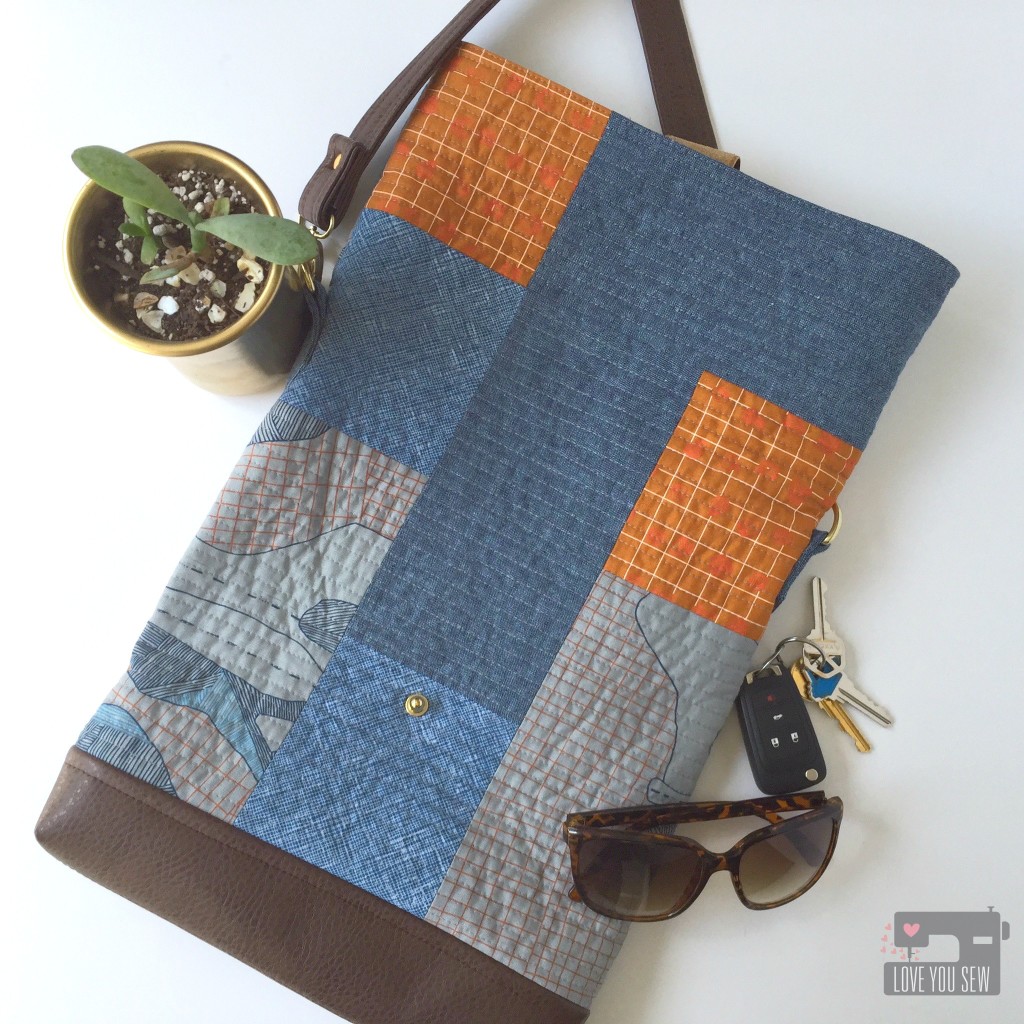
Kimberly Sac Fully Open

I like having different looks and feels to all of my bags.  After making my Indigo Sky Quilt, I fell in love with the Essex Yarn-Dyed Linen in nautical, so I wanted to incorporate it into the Kimberly Sac.  It really helps complement Carolyn Friedlander’s fabrics.  There is a mix of Carkai and Architextures Crosshatch in more earthly tones.

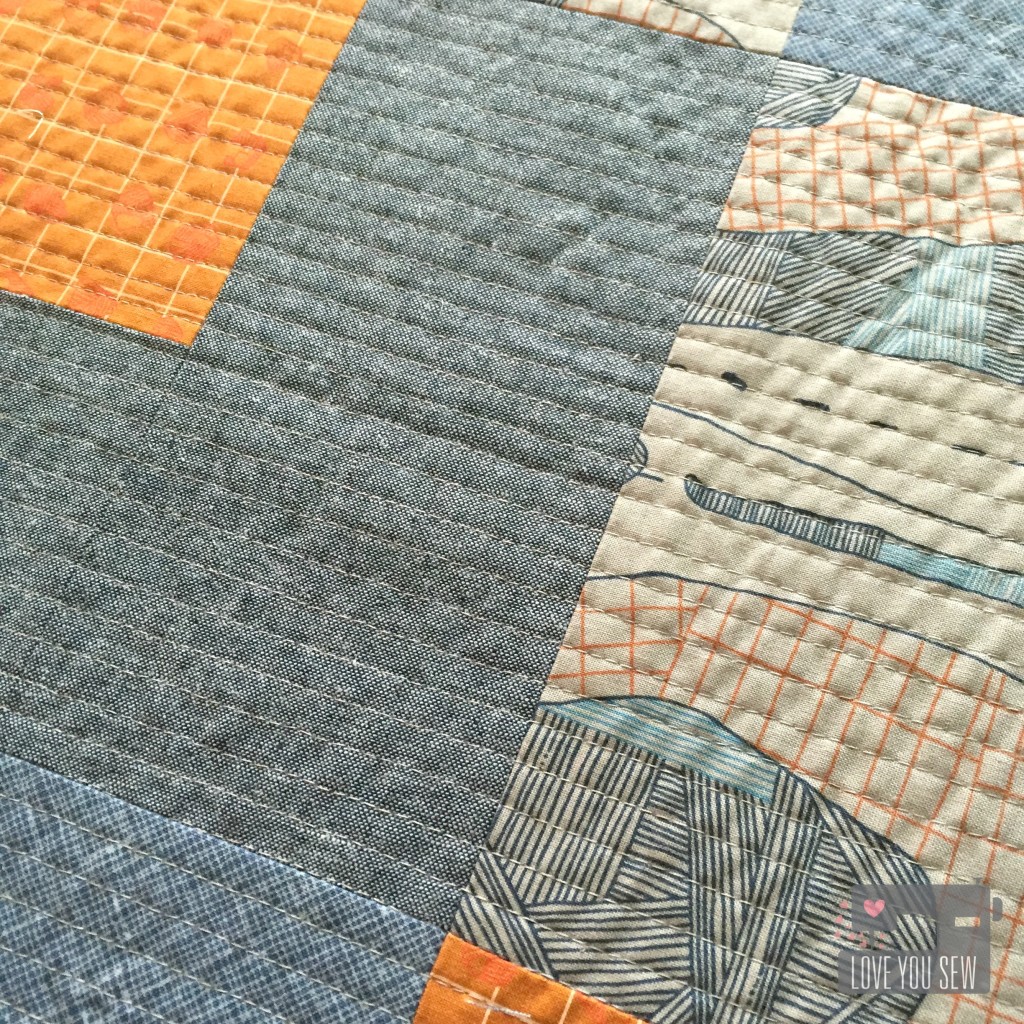
Kimberly Sac Quilting Close Up

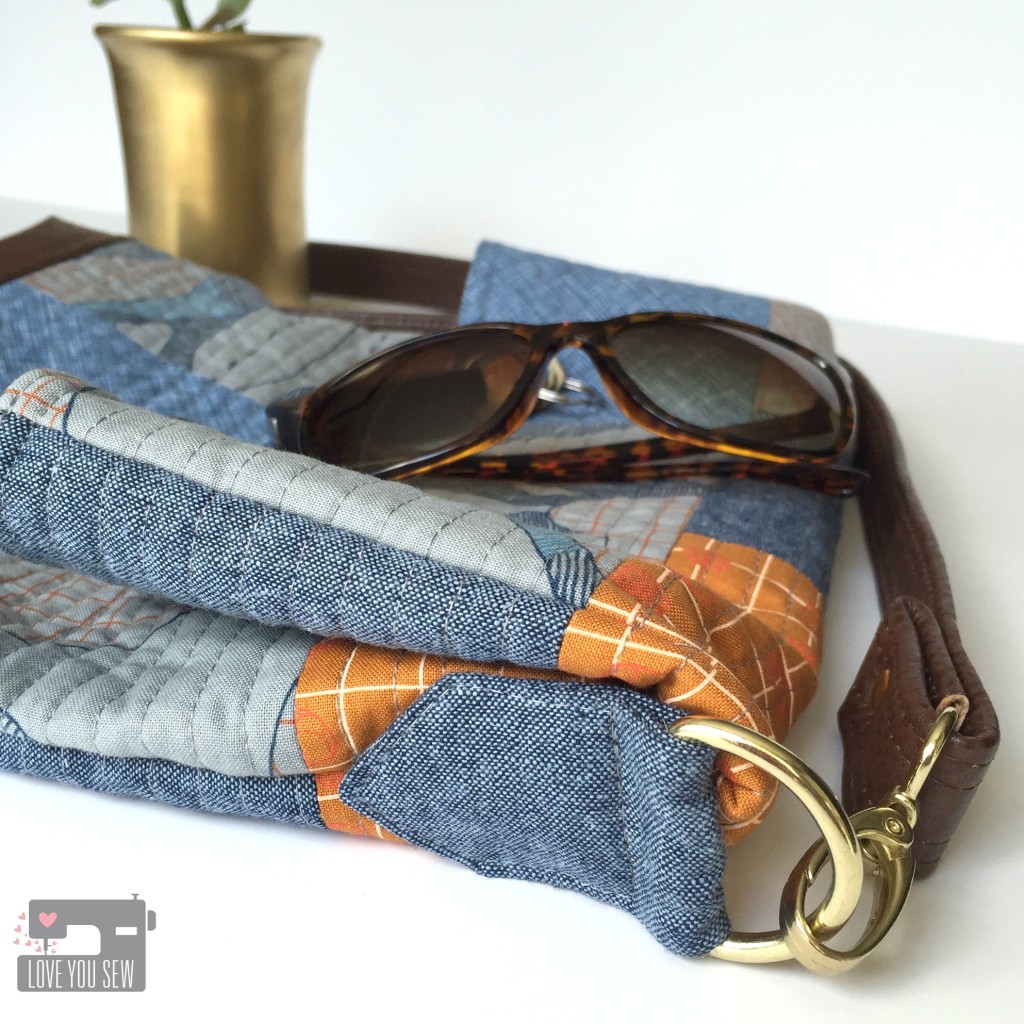
The bag came together very quickly, especially without having to deal with a zipper.  I did use 1/4″ straight-line quilting, but you can opt for a more simple design.  If you decide on more heavier quilting like I did, I would suggest cutting the batting about 1″ larger all around and then trim it back.

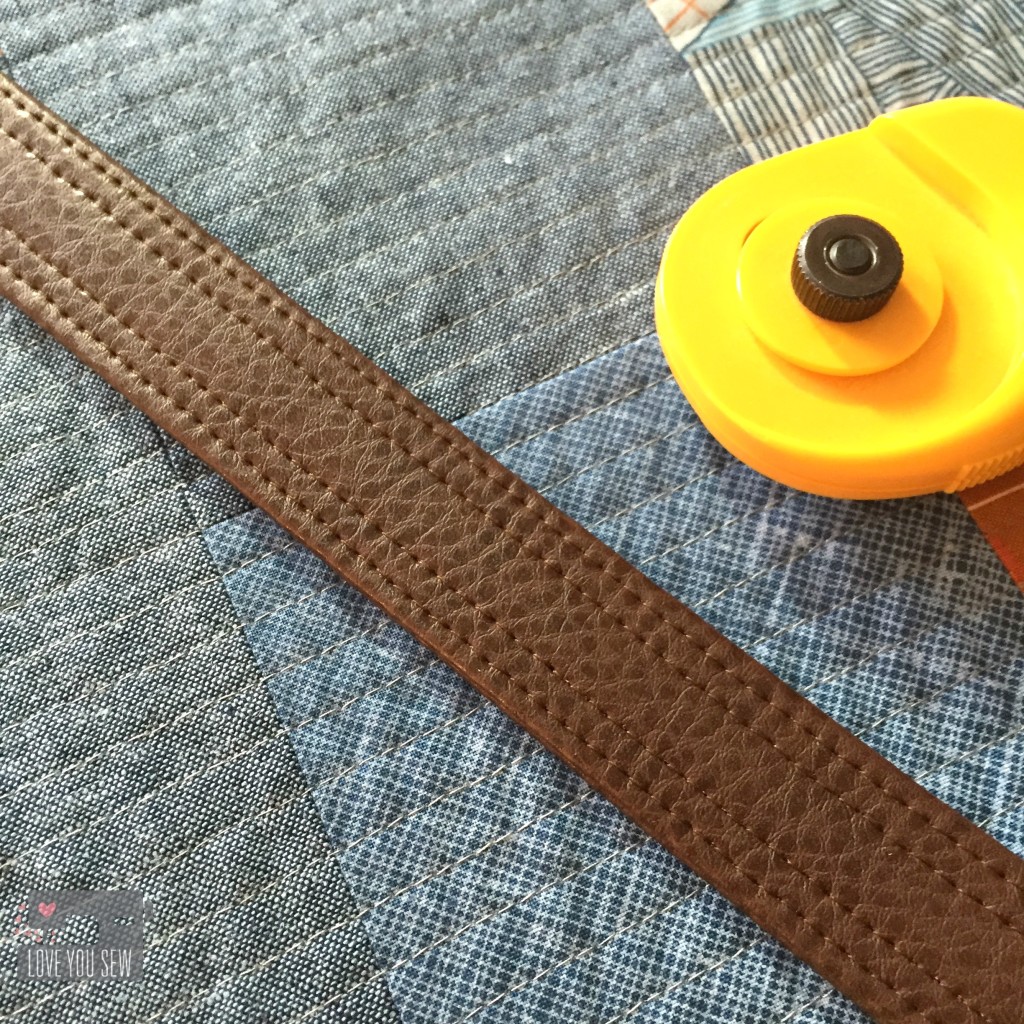
Kimberly Sac Vinyl Strap

One of the most noticeable changes I made was to use vinyl for the straps and bottom of the Kimberly Sac.  The brown vinyl gives any bag an extra level of sophistication and structure.  Make sure to test the vinyl with your machine before committing though!

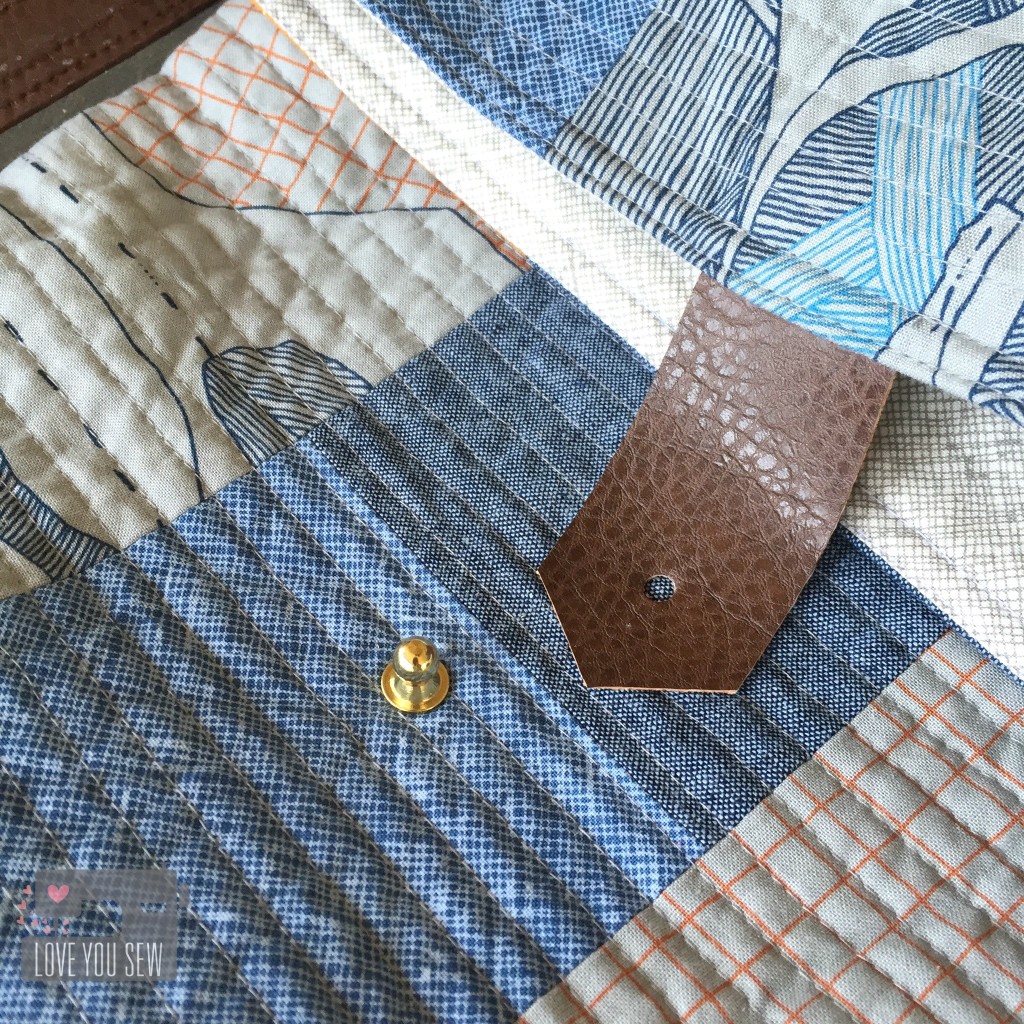
Button Stud Close Up

When I have to break out a hammer on a project, it’s a good day 🙂  I love playing with hardware and saw the opportunity to use this button stud when the pattern called for a traditional sew-on button.  The loop was replaced by a strip of vinyl I hand-punched.  This closure adds a fun edgy detail to the bag.

Kimberly Sac Side Close Up

A tip to keep these tags straight and in place, is to use some Sewline Glue. It allows you to place the pieces on the bag before top-stitching.  With so many layers, pins were distorting the tabs shape, so the glue helps them lay nice and flat for straight stitches.

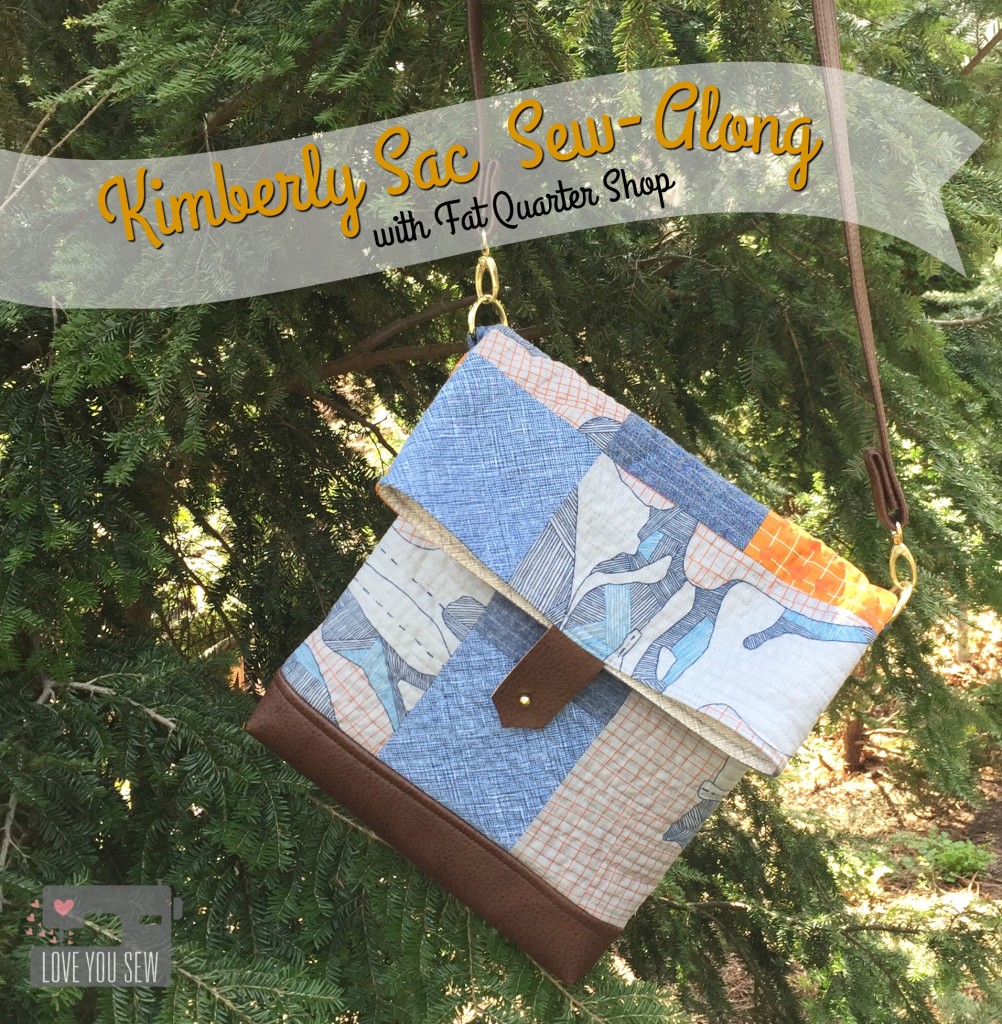
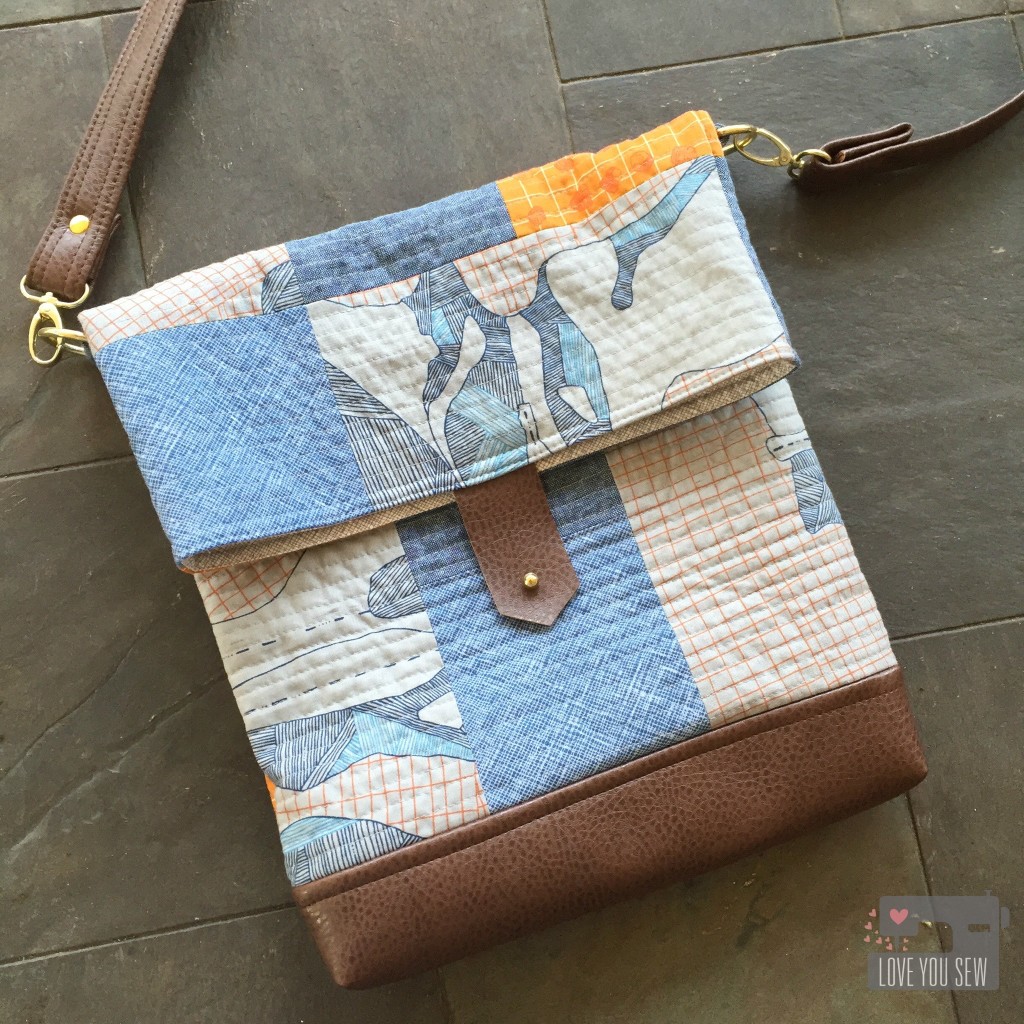
Kimberly Sac Fully Profile

The Kimberly Sac was a nice easy sew and the lack of zippers makes it very beginner friendly!  I love the relaxed slouchy design and who doesn’t love the ease of a cross-body strap?  The Carkai and vinyl make this a great everyday bag for running errands and is large enough to handle everyday life.  What is the strangest thing you have to carry in your purse or bag?

  • Need the Full Kit with hardware and Strawberry Fields Revisited fabric?  You can find it here.
  • If you would like just the pattern, you can find that here.
  • Let’s make all of this even easier by watching full video tutorial with Fat Quarter Shop and Fig Tree Studio.


For more inspiration, visit all my Kimberly Sac Sew-Along  bag-mates below:

Fat Quarter Shop

Emily Ann’s Kloset
Seasoned Homemaker
Jedi Craft Girl
Sharon Holland Designs
Why Not Sew
She Can Quilt
Love You Sew (you are here)
Sweet Little Pretties


Have fun stitchin’!

Cristy
 

As part of the Fat Quartershop Kimberly Sac Sew-Along, I have been compensated for my time and materials.  However, all opinions are all my very own.