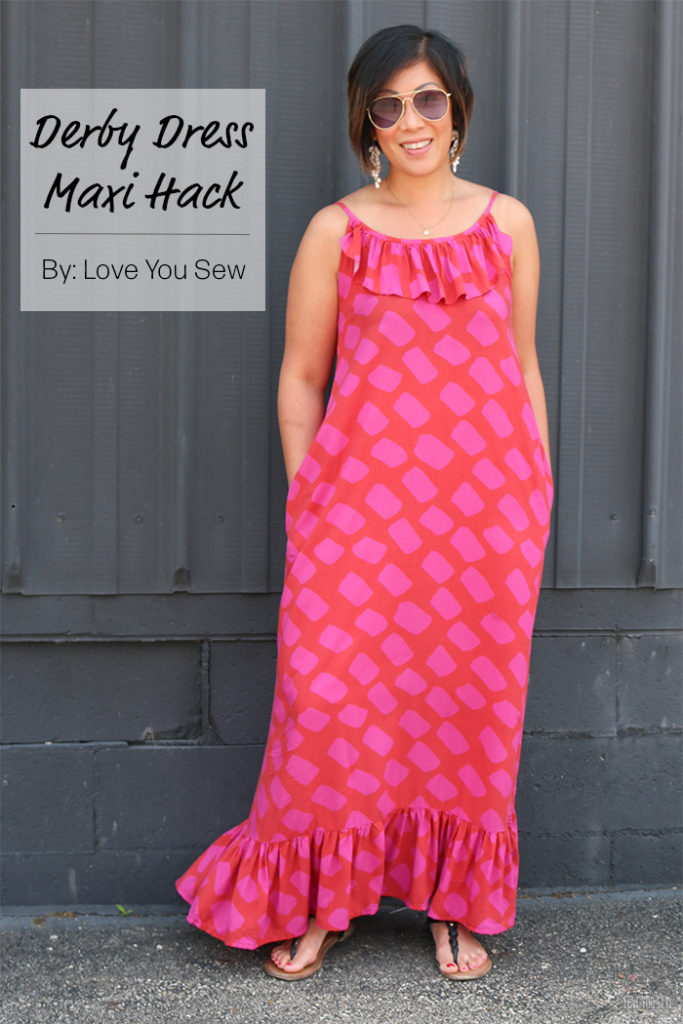
Derby Dress by Love You Sew

Derby Dress: Maxi Hack

Derby Dress Maxi Hack by Love You Sew

I was so excited when D&H Fabrics approached me to collaborate with their exclusive fabric collection with Katie Kortman.  I was asked to make something using one of the three available prints and I knew I would have to make a statement maxi dress using the Dash fabric with the Derby Dress pattern by Christine Haynes.  Katie’s designs are always so colorful and dramatic.  I wanted to make a garment that’s also fun, bold, yet approachable – like the designer, herself!
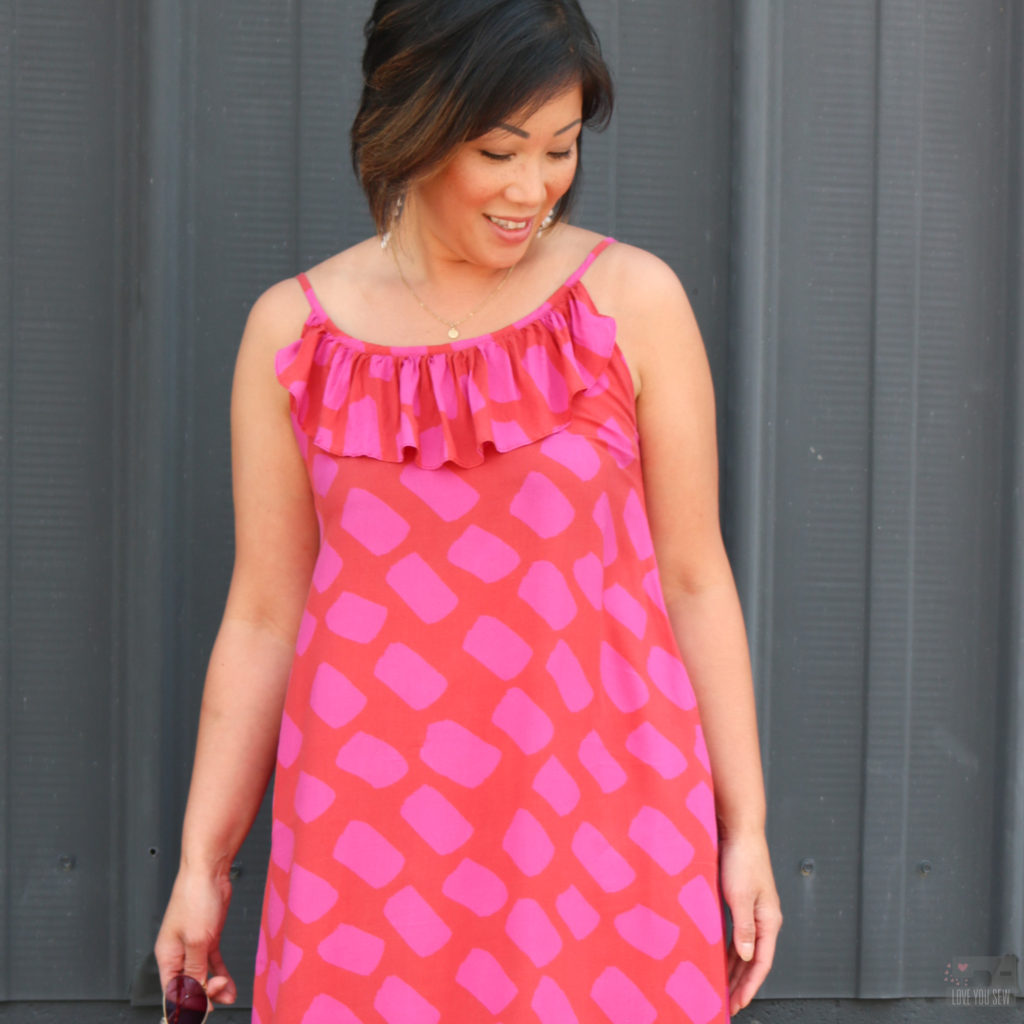
The Derby Dress (aff link) pattern has been in my library for awhile now.  I’m a sucker for the classic feminine styles which Christine has in her patterns.  I made the knee-length version a few years ago with a rayon challis and it’s still on rotation in my closet.  So I knew a full maxi version would get the same wear…if not more!

Fabric
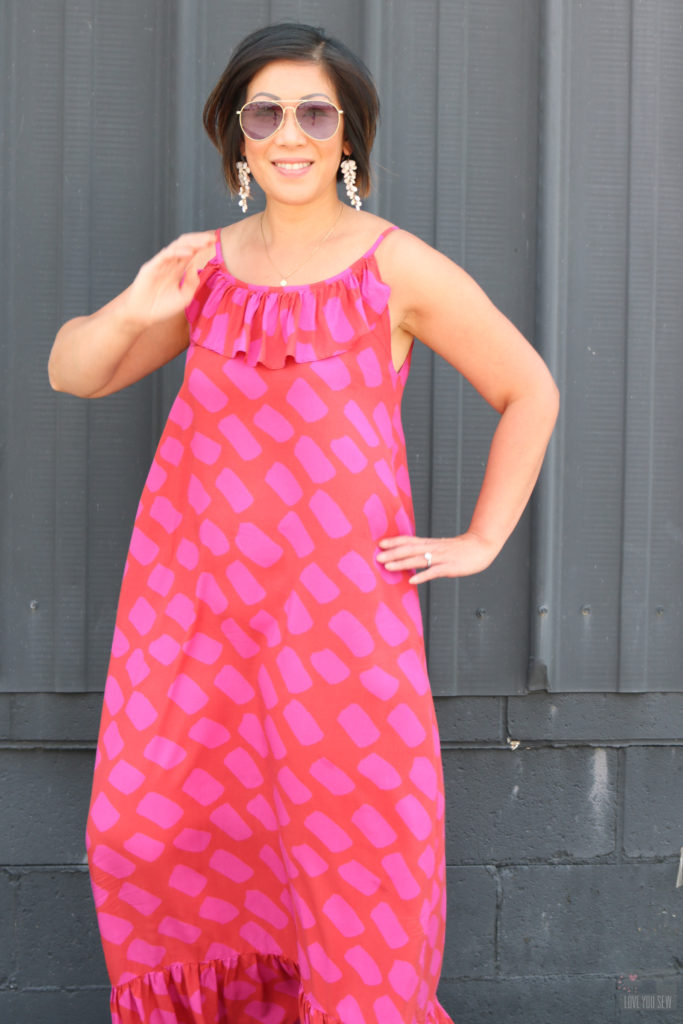
After checking out the available prints at D&H Fabrics, I fell in love with the vibrant pink and red Dash.  There was just something about these analogous colors that pulled me in.  I admit my garment fabric game is a bit neutral (aka boring) so it felt good to step out of my comfort zone a bit…especially for summer!  If you follow Katie on IG, you know she has her own personal movement to get more of us sewists to use fun color combos.  I SO appreciate the extra fun inspiration and color push 😉
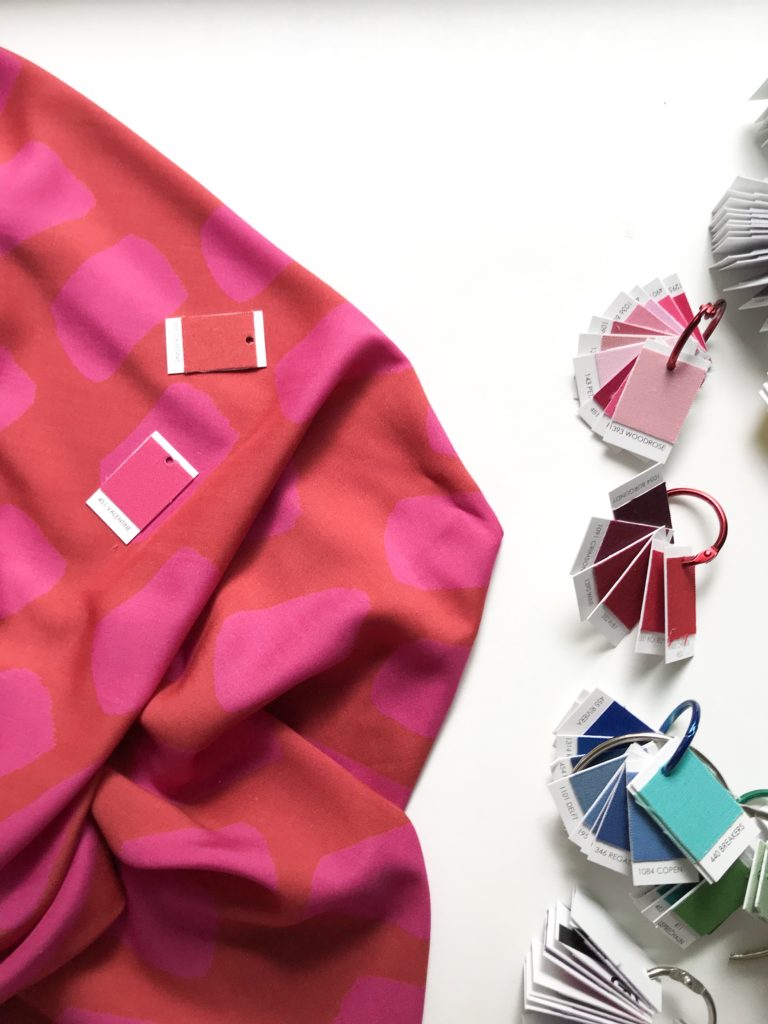
This gorgeous print is made of a 56″ wide lightweight rayon poplin which is incredibly soft with a soft hand and beautiful drape. The tight poplin weave makes the fabric easier to handle than a rayon challis which is much more slippery. With this more delicate fabric, I like to use a smaller universal needle sized 75/11 or 70/10.
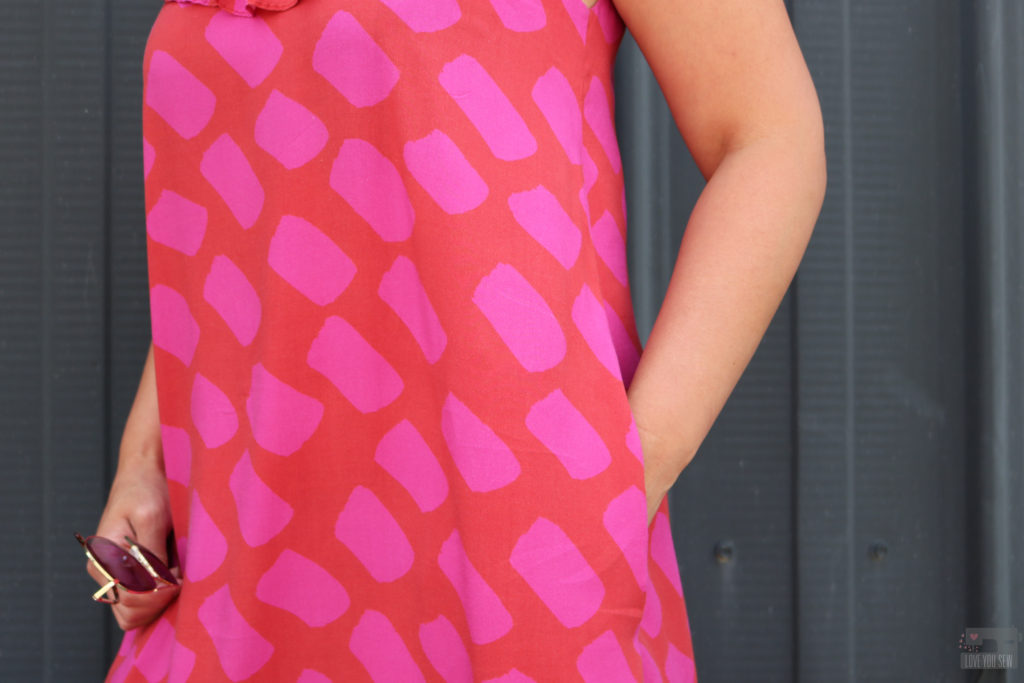
The fabric design is printed directly on a white basecloth and washes very well. Most of these pictures were taken after three washes and yes, even with delicate tumble-dry.  (I wash my handmade garments along with my RTW.)  The colors remain saturated and I even sweat through this for hours in 90* heat.

Pattern & Modifications
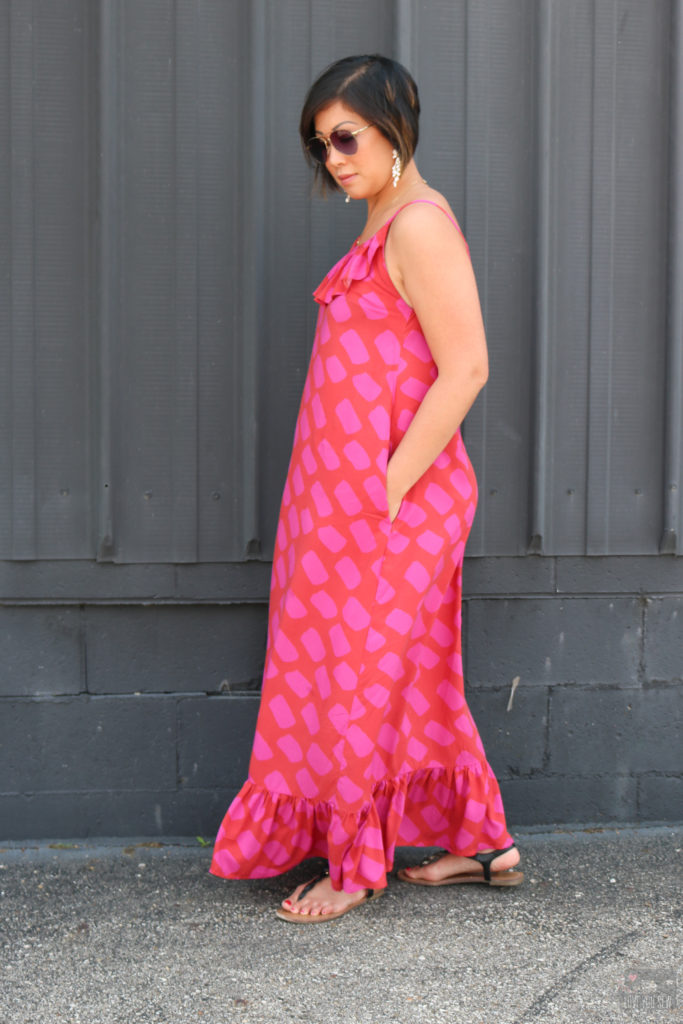
As I mentioned above, I’ve made this Derby Dress by Christine Haynes before and love the flirty ruffle feature — plus it has pockets!  I actually use this pocket pattern as my go-to for any dresses which need an in-seam pocket.  It’s just a nice shape and perfect size for my hands.  I’ve used these pockets on my Sylvie seen here, and my Alix dress found here.
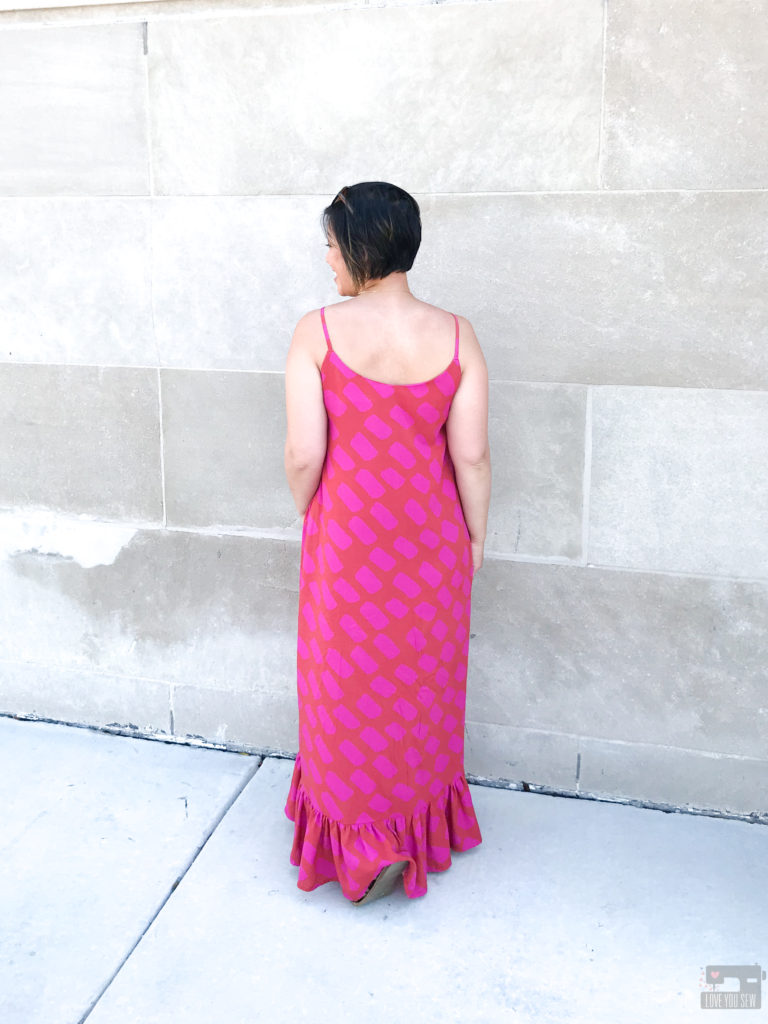
The front of the Derby is drafted with 3 separate panels for princess seams and the back has 4 panels for additional shaping.  This is great for a solid fabric or a busy print, but I didn’t want to disrupt the dashes in this fabric design.  I definitely did not have enough fabric for all of the pattern matching either…nor the time! So, I used a RTW maxi dress from Target (aff link) I have to work out the width and length of the dress.
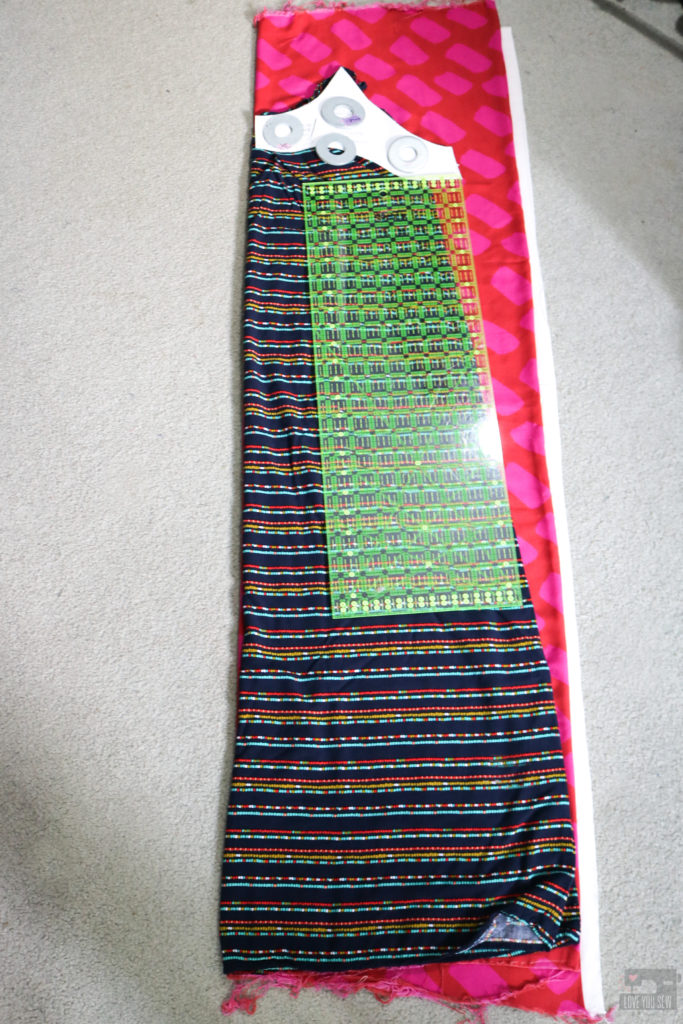
I laid the RTW dress over the fabric on the fold and used the facing of the Derby to cut the top of the dress (of course, adding in seam allowances.)  The Derby uses two different facings for the front and back, but I took the easy route and made my front and back pieces identical since all of the panel seams we eliminated.   I then cut out two of the front facings on their own to match the front and back of the Derby.  The straps were later shortened to account for these changes to the neckline.
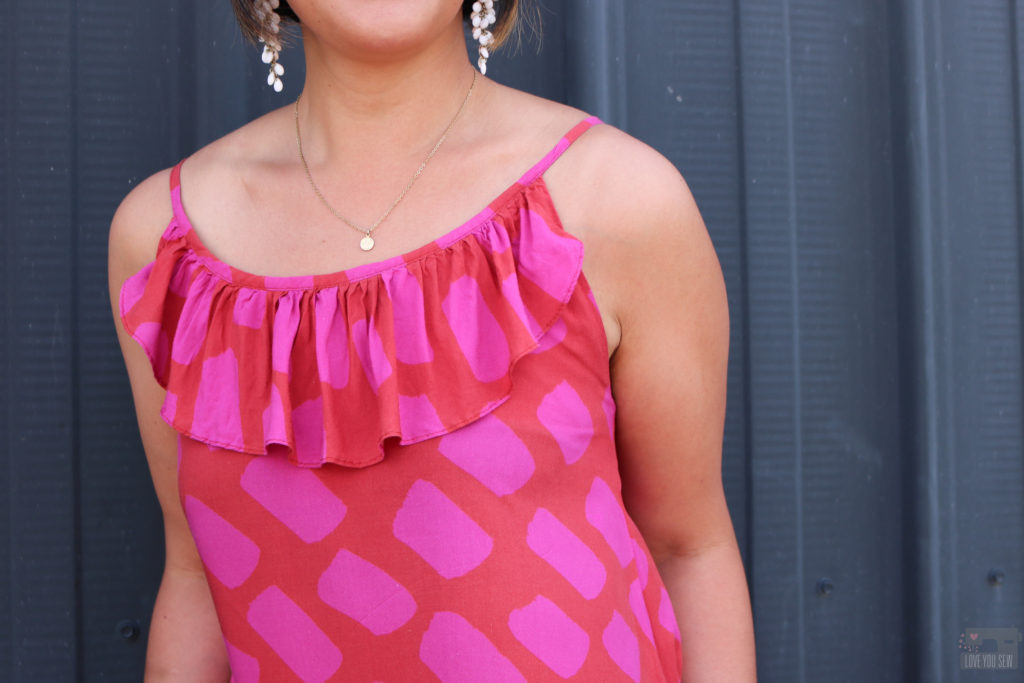
With the dress lengthened out to a maxi, I also extended the length of the neckline ruffle by 1″ to balance the proportion.  I though the ruffle would be cute on the back as well, but it ended up being  a bit “too much.”  Sometimes you have to know when to edit, and the back looks much better with a clean line.  To play with the neck ruffle, I also added a 7 1/4″ (finished) x WOF ruffle to the bottom of the Derby to make it as close to the ground without touching as possible.  It adds to the flirty feel of the dress and adds some extra swing.
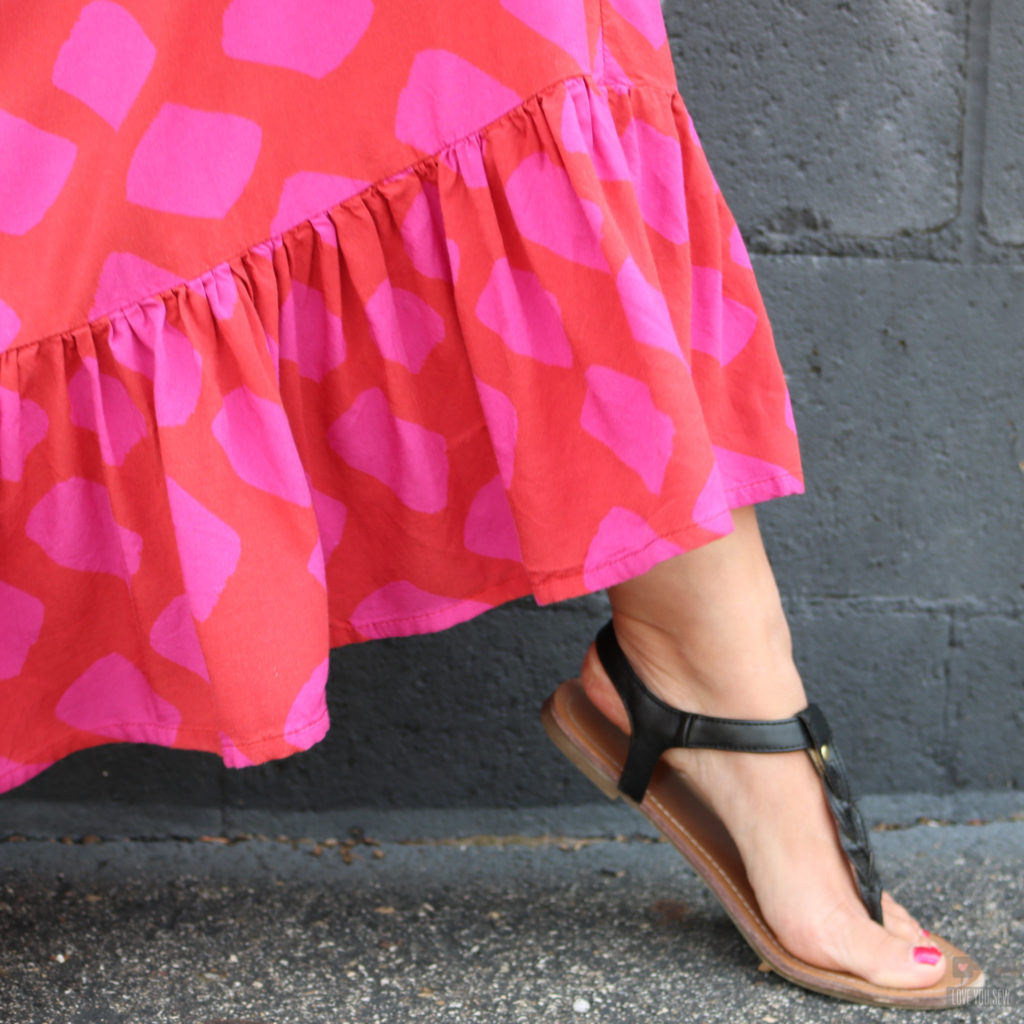
I LOVE how this maxi version of the Derby came out.  The print needed to become a statement dress and I can definitely tell you it turned a lot of heads at the airports!  The lightweight rayon poplin was just perfect with the dress pattern for all the great movement.  It’s the perfect summer dress for travel and pairs beautifully with my vintage denim jacket….so that means I can also extend the season on this make! Yay!!!
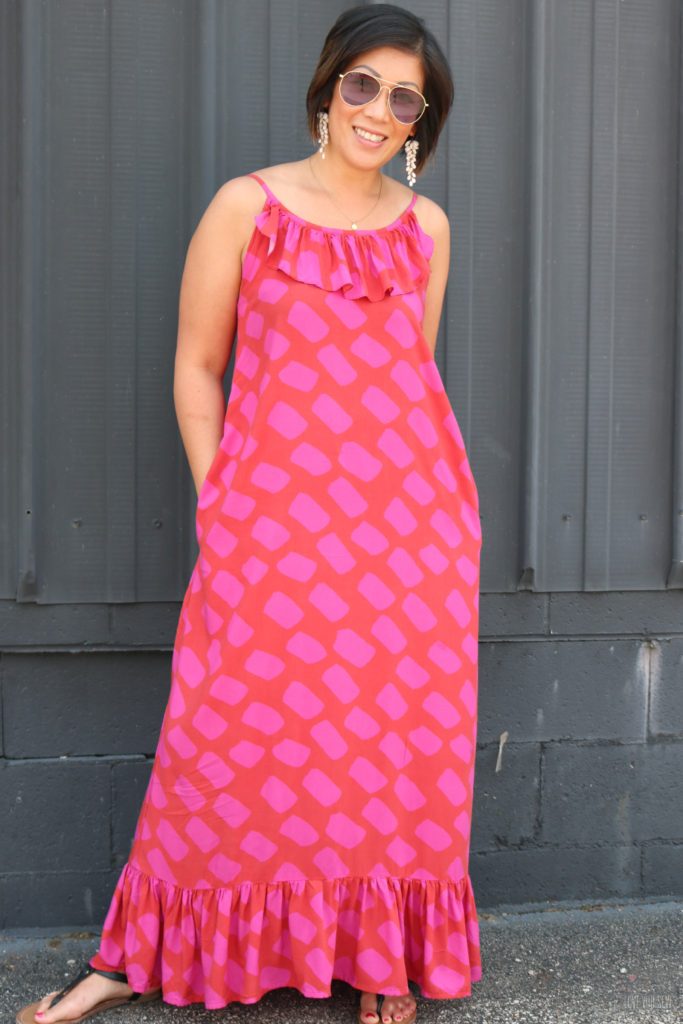
Derby Dress by Love You Sew

Project Summary


Are you a bold and colorful person or usually a bit more reserved and neutral like myself?    I have to admit that stepping out of my usual color scheme was a lot of fun and I’m reaching for this dress a lot more than I thought I would!  Try it out if you haven’t already!!!


Hugs and Stitches,

Cristy


The fabric for my dress was provided by D&H fabrics for advertising but I was not contracted to write a blog post.   As always, I like to share my makes and good fabric finds 🙂  There are affiliate links in this post and you can read up about my disclosures here.
 

Abbey Hacks by Love You Sew

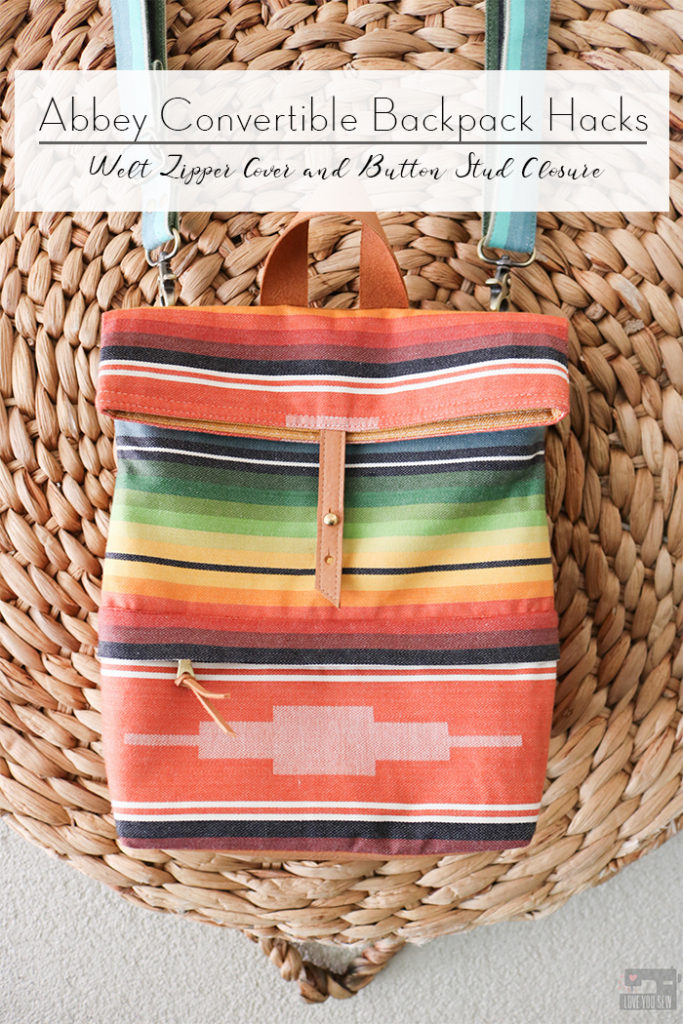
Abbey Convertible Backpack Hacks with Welt Zipper Cover + Button Stud Closure

Abbey Hacks by Love You Sew title

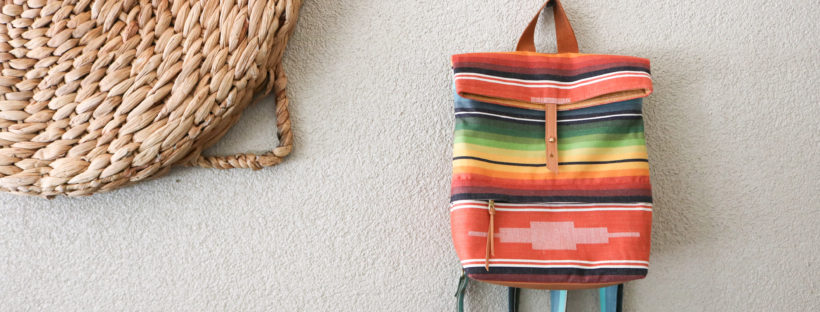
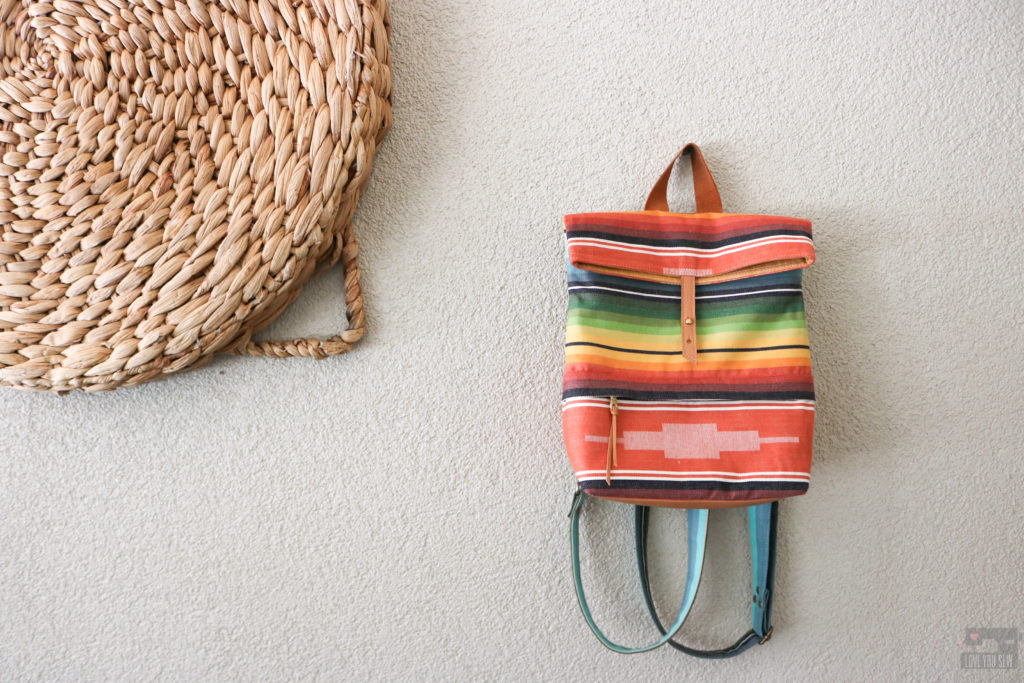
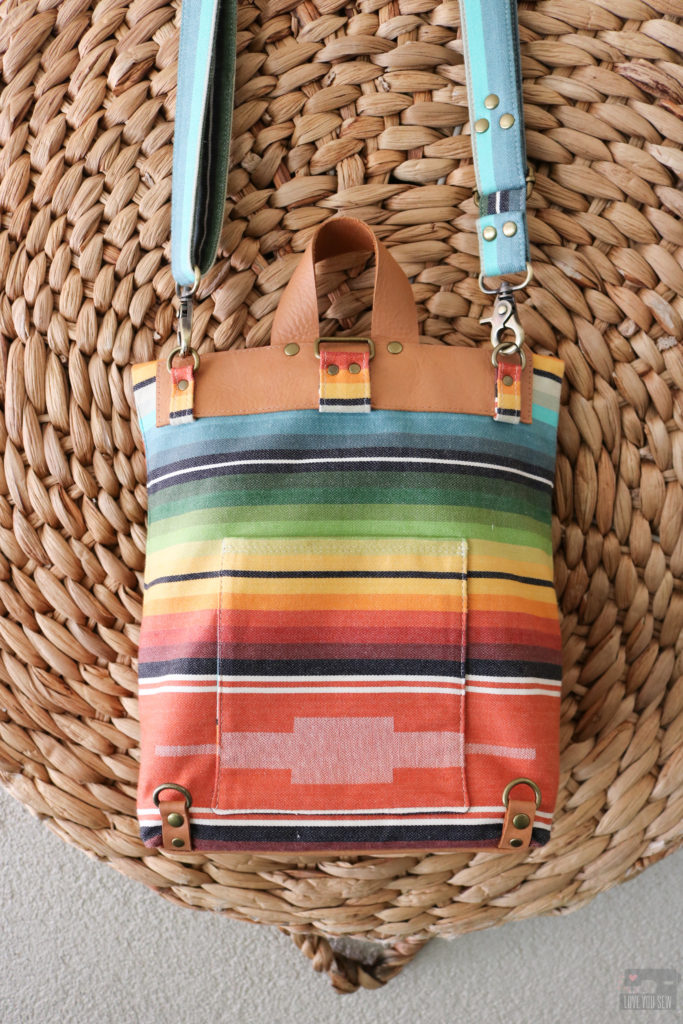
Hacking patterns is just so much fun when you can add more personal details to a project. Today, I’m sharing what I did for the backpack I made for real-life Abbey (the bag’s namesake.)  This post includes a cover for the front zipper, button stud and leather accents, and where I’ve added rivets. The Abbey Convertible Backpack is the latest pattern I’ve published and you can read up more about here, as well as check out all of the incredible tester photos for inspiration.

My Abbey is one of my nieces with a such a kind heart and adventurous spirit.  She is incredibly intelligent and is now a physical therapist in Michigan.  She has always been a straight shooter and that’s why I love her and hope to catch her sometime this summer.  Abbey is quite the outdoors-person and goes backpacking on her own all the time.   This southwestern-insprired woven fabric reminds me of her and all the probable sunsets (and sunrises) she’s seen on her many trips.

Front Zipper Cover

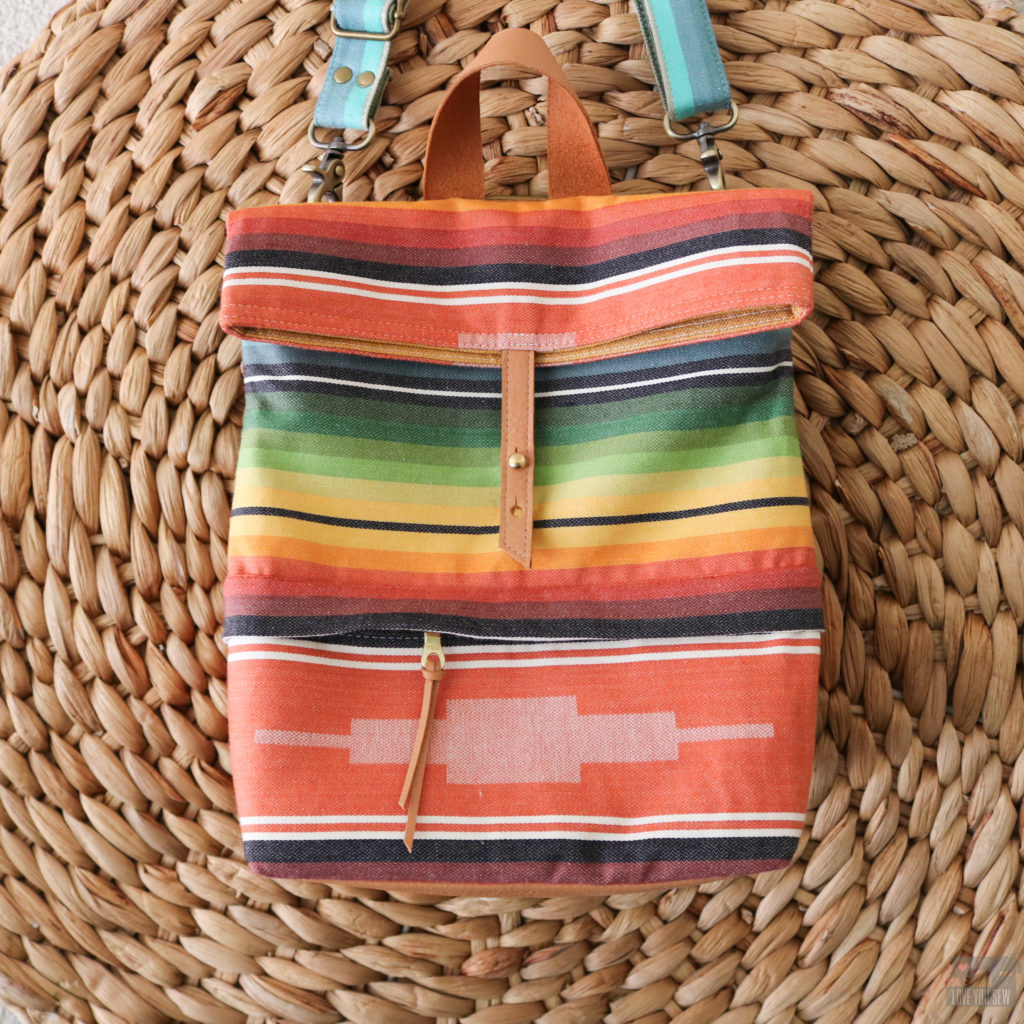
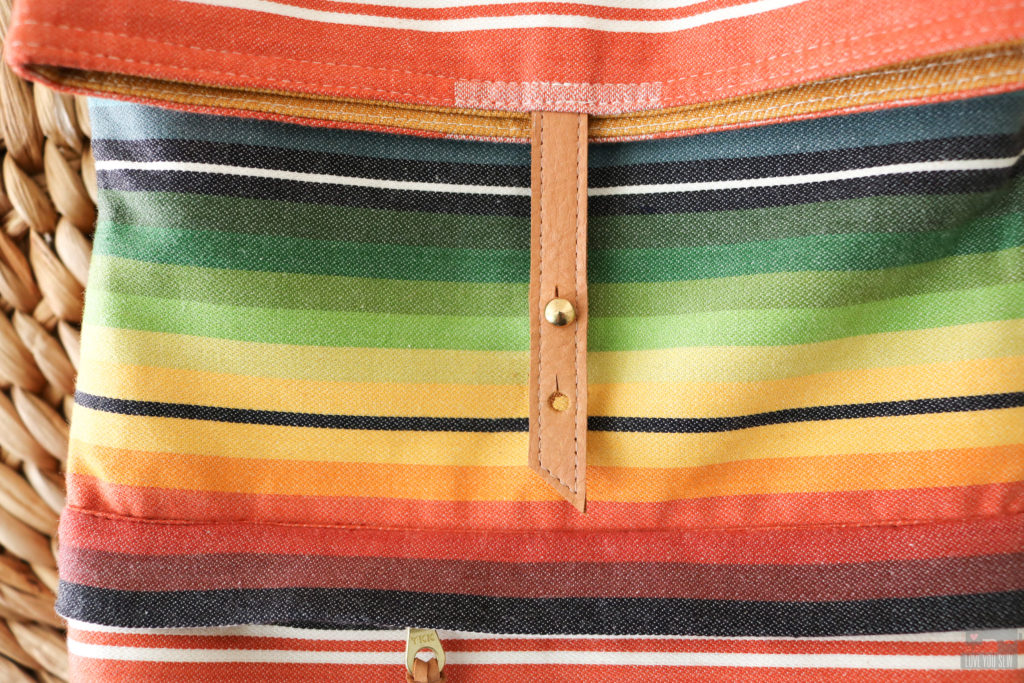
With the bold stripes on this woven fabric, I thought the exposed welt zipper on the original sewing pattern broke up the fabric design too much.  I wanted the stripes to continue all around the bag to show off its beauty and not compete with it.  So, I made a simple cover by creating a tube which runs the length of the bag and is secured right above the zipper opening.

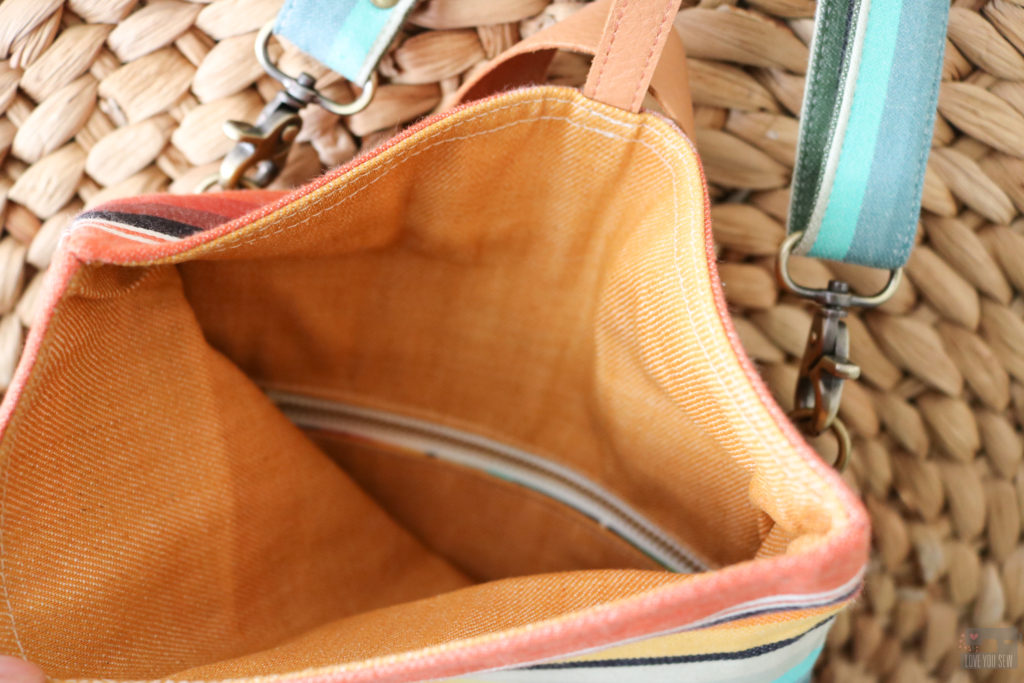
To make the cover, follow all of the steps to complete the welt zipper pocket on the original pattern found here and then:

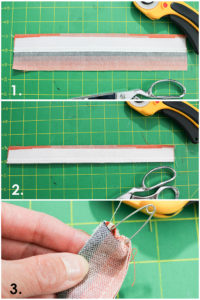
  1. Cut (1) 12″ x 2 1/2″ of Main Fabric and (1) 12″ x 1″ of Woven Interfacing.  Fold the Cover in half length-wise with right sides together.  Place the long edge of the woven interfacing wrong side together against the fold. Fuse the interfacing per manufacturer’s instructions.
  2. Re-fold the Cover with RST and sew 1/4″ seam along the raw long edge creating a tube. Back-stitch well
  3. Use a safety pin and attach it within the seam allowance.  With the safety pin closed, push it through the tube.
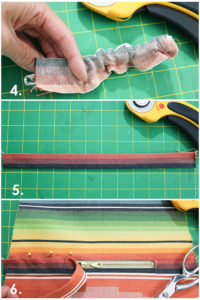
  4. Carefully direct the safety pin through to the other side of the tube pulling the tube right side out.
  5. Press the tube flat with seam at the top.
  6. Line up the Cover with the Welt Zipper opening covering the top-stitching and extend that line all the way out to the sides of the Front Exterior.  Pin the Cover into place.  Carefully top-stitch the cover to the Front Exterior with a 1/16″ seam allowance using a zipper foot and moving the zipper pull out of the way, as needed.  Trim the sides of the cover to match the sides of the Front Exterior.  Sew the rest of the Abbey as instructed.

Rivet Accents

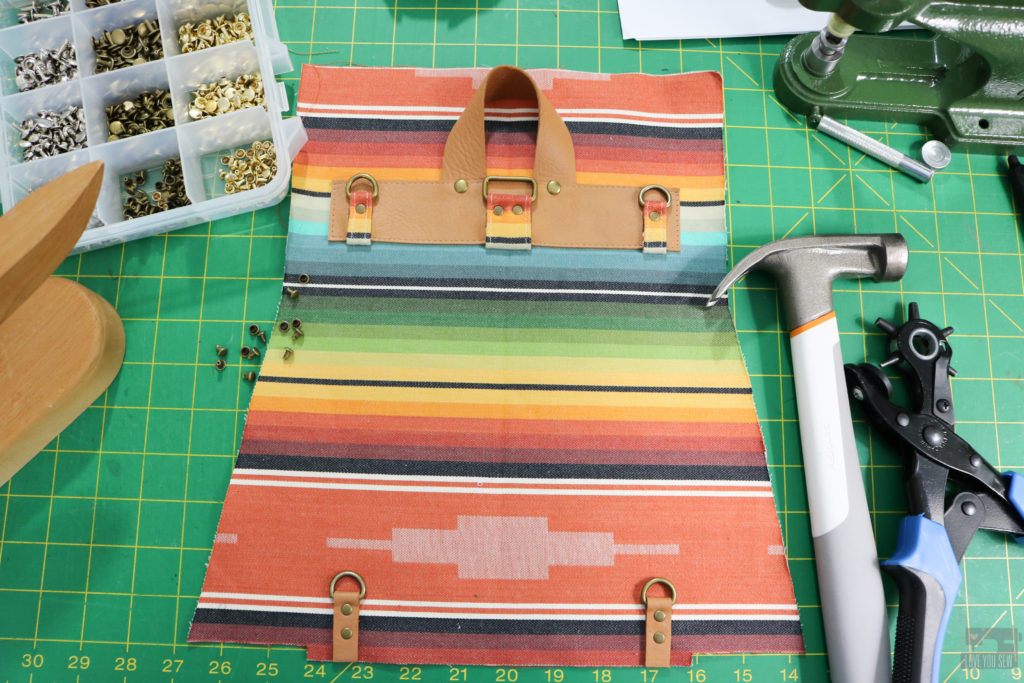
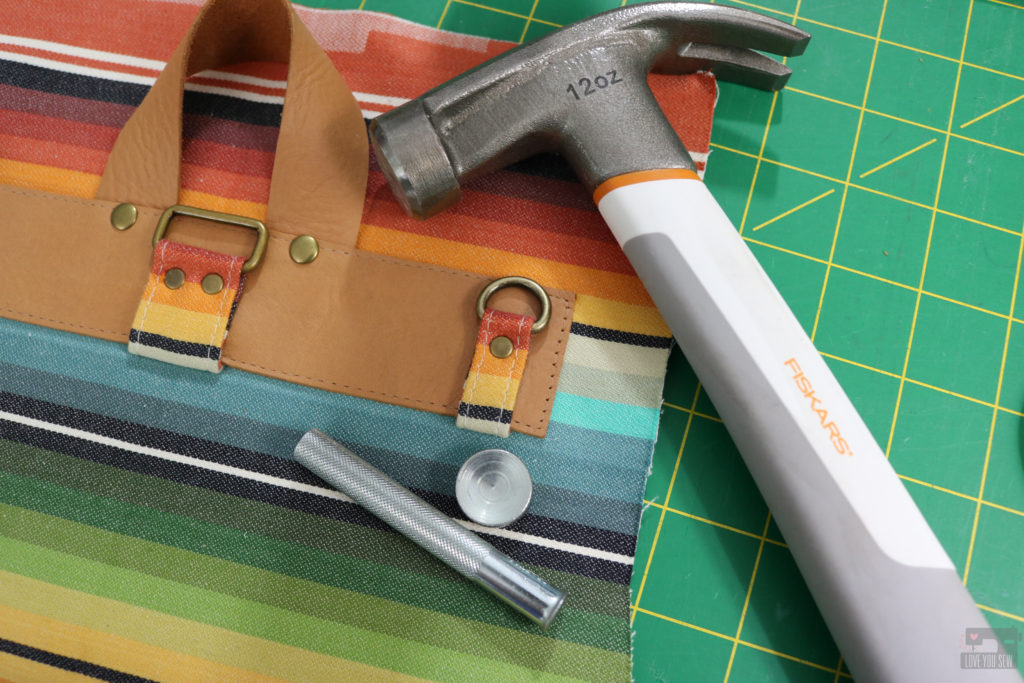
I LOVE adding rivets to my bags.  They give such a professional and polished look which really elevates any handmade accessory.  The best part is they are also functional — allowing me to secure parts (especially thick substrates) of the Abbey together which would otherwise have to be sewn.

Rivets were used in making the strap and also at many of the connection points with all the hardware connectors. You can see how I used two different sized caps to vary the look.  I use a hardware press to install most of my rivets, but when I need to get close up to the rings like here on the Handle Base, I’ll use manual setting tools like this set from Tandy Leather (aff link.)

Leather Closure Tab with Button Stud

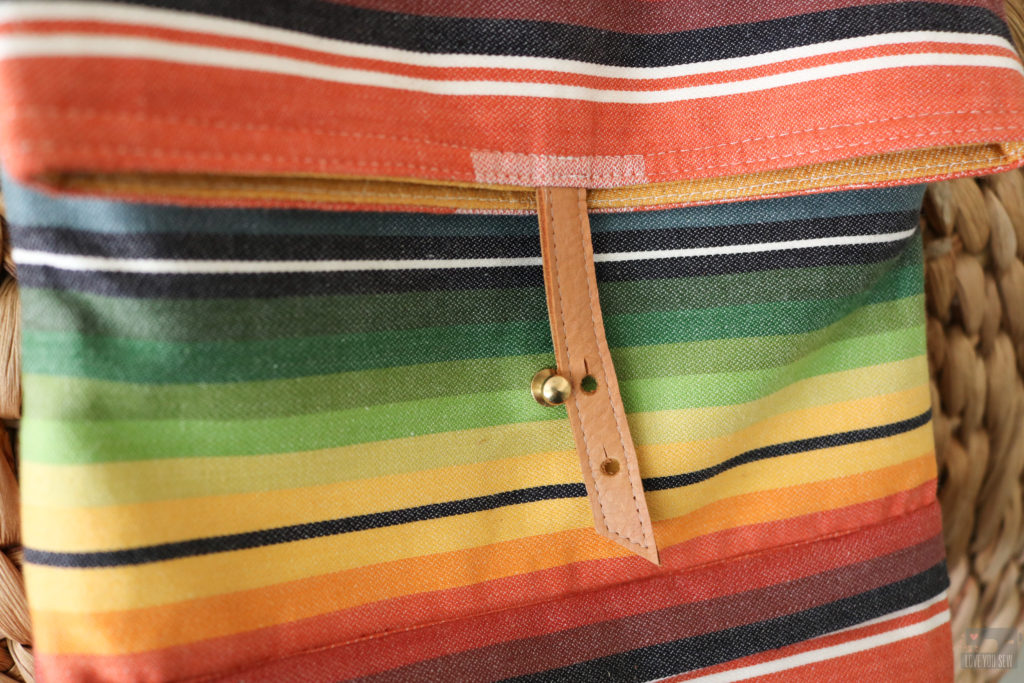
As part of the cutting instructions of the Abbey Convertible Backpack, I also added in finished dimensions if you would like to use leather, vinyl, cork or suede accents, like I did with this bag.  I used leather with the Handle, Handle Base, lower D-Ring Connectors, Bottom and Closure Tab.  However, I did change up the Closure Tab with the addition of a Button Stud.

I used a 8mm brass screw-in Button Stud (aff link) in lieu of the magnetic snap to keep the bag closed.  It was attached it to the Exterior front by punching a hole for the screw (using the same placement as the magnetic snap) and adding a touch of glue inside the stud to hold.  It’s really that easy and a big reason why I love  to use them, just like with my free Kelly Waist Bag Pattern.

For the Closure Tab:

  • Cut (2) 1/2″ x 4 1/4″ pieces of leather and glued them wrong sides together. Cut an angle on one end 3/8″ down for just some visual interest.
  • Top-stitch 1/8″ all around the closure using a walking (or Teflon) foot and leather needle
  • For the button holes, use a 4mm hole punch to cut (2) holes –  1″ and 1 3/4″ from the longest end of the Closure Tab.  Add a 1/8″ vertical cut at the top of each opening.  This allows the Button Stud to fit through the hole, but not to fall out on it’s own with movement and wear.  TIP:  I would recommend adding the holes after the bag is fully assembled so you can check placement.

These are all simple hacks to really change up the look of the Abbey Convertible Backpack and to make it personal.  The leather accents help to add more sophistication to the look as well.  Who can tell this bag is even handmade?!?  I hope Abbey loves her new bag and continues to enjoys her outdoor treks!

Project Summary:


Are you digging the hacks to my bag patterns?   Let me know if there any you would like to see in the comments below.  I will try to make them happen!


Happy Sewing Friends,

Cristy


This post may contain affiliate links for which I may receive a small commission if you would make a purchase.  Any compensation goes directly to running this website and keeping it as ad-free as I can.  Thanks for your support!

Holly Jumpsuit by Love You Sew

Holly Jumpsuit Review

Holly Jumpsuit by Love You Sew

When I sew my own clothes, I like to know they will last for awhile.  So when the jumpsuit and romper trend came out, I was very hesitant to make one.  I wasn’t sure the one-piece look would be right on me.  Oh, and there IS that issue of completely undressing when using the restroom! But alas, after a couple of years seeing so many different versions of a romper, I finally took the plunge with the By Hand London Holly Jumpsuit.

Holly Jumpsuit by Love You Sew

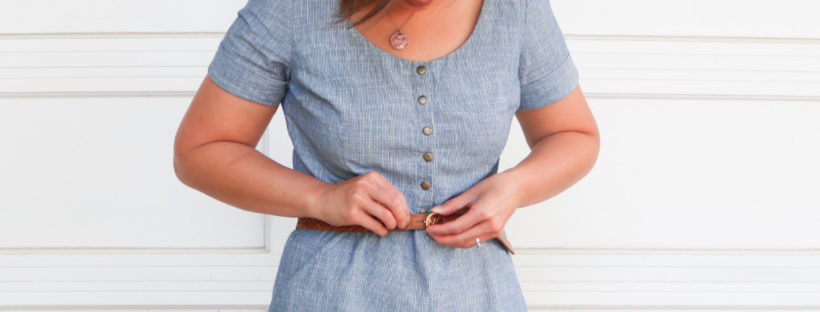
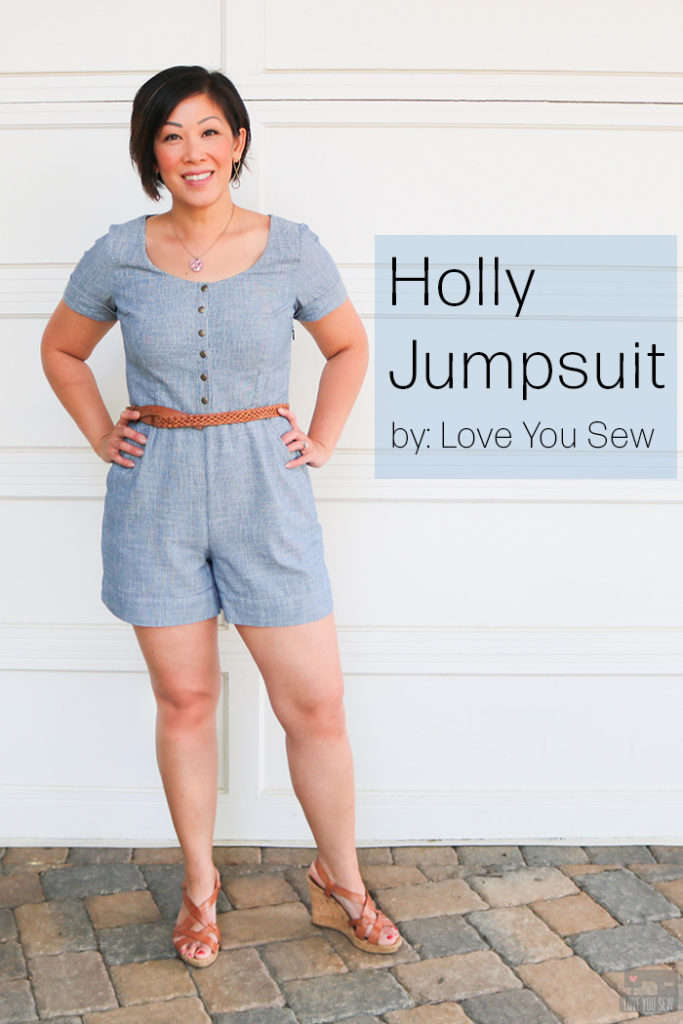
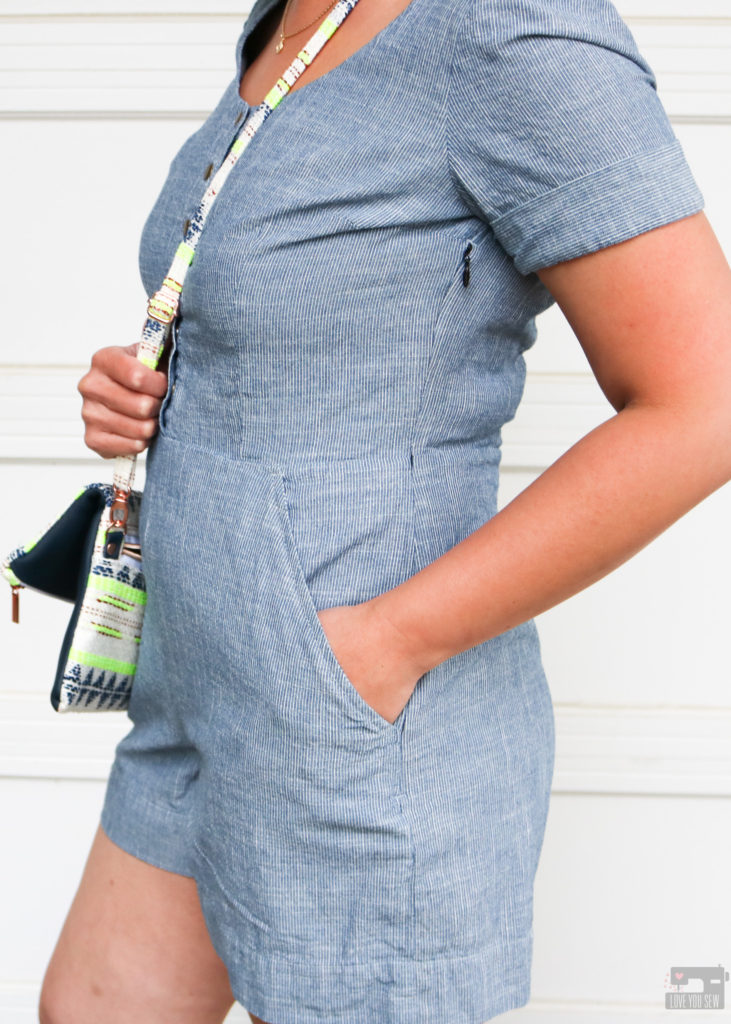
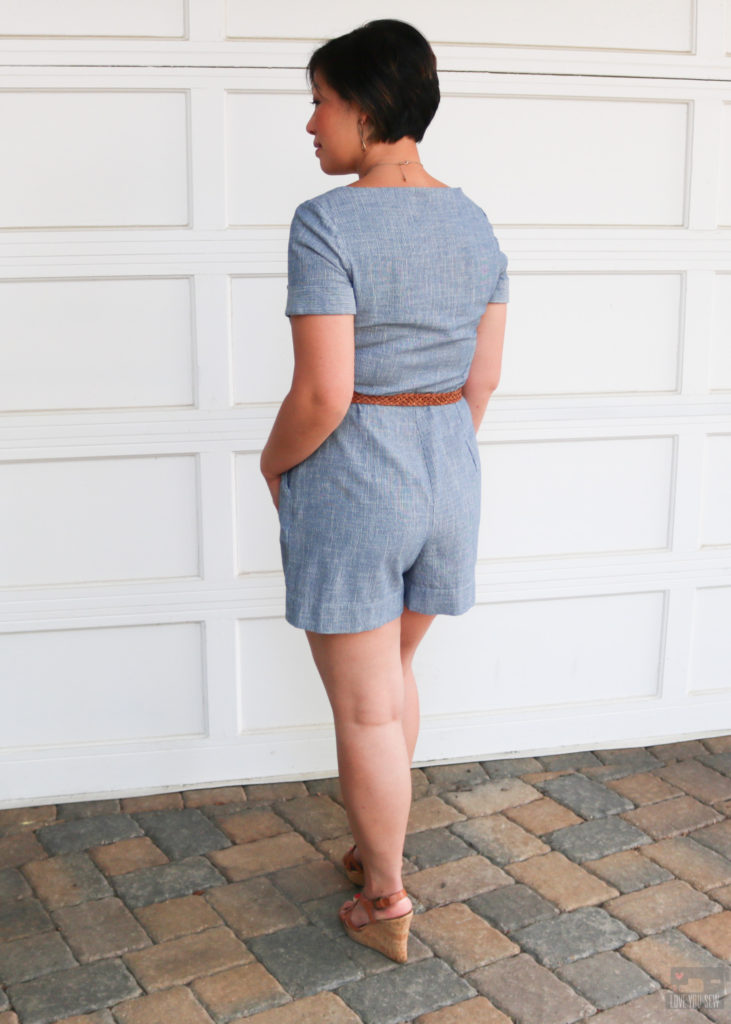
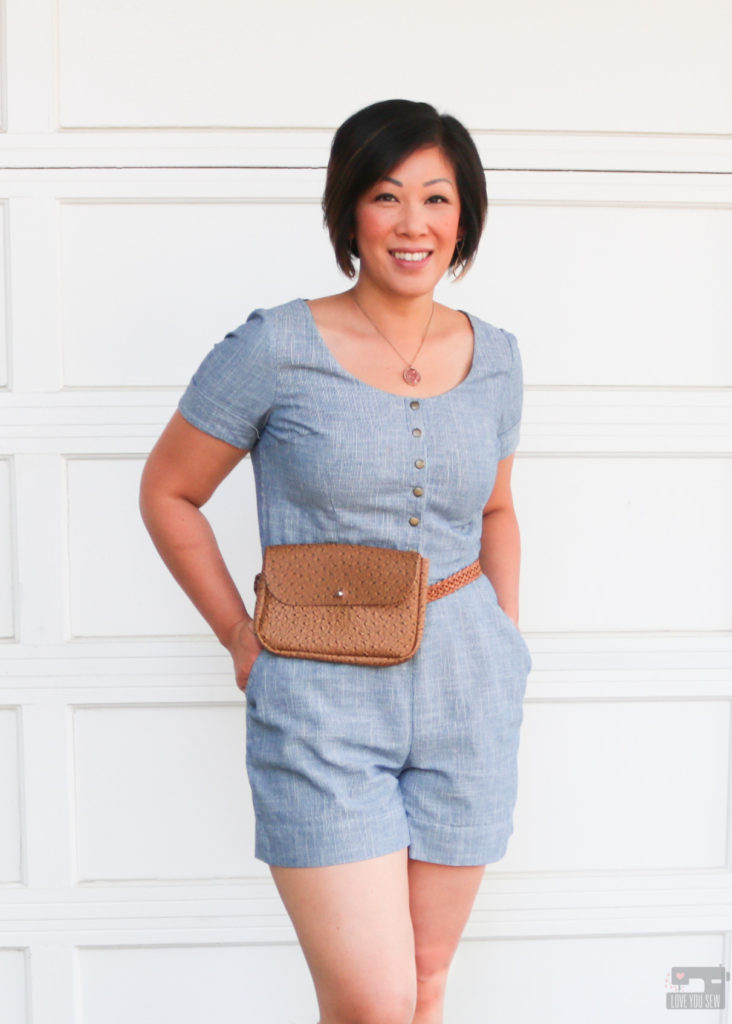
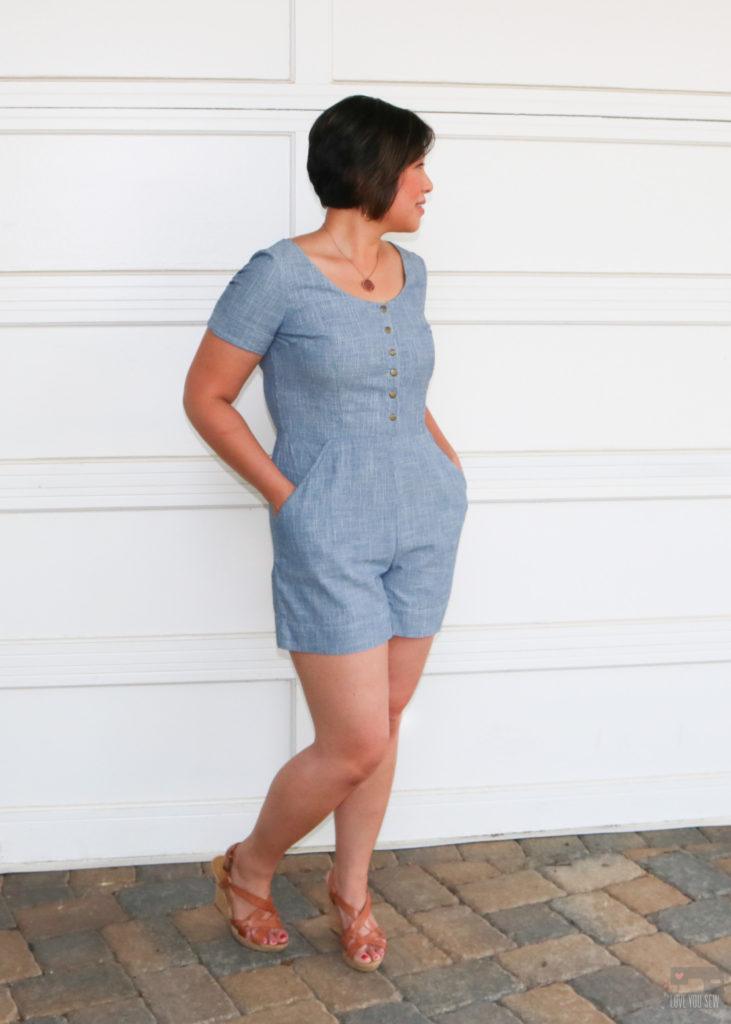
With many of the RTW rompers I’ve seen, they either have a very loose low v-neck wrap (probably for easier bathroom breaks) or the bottoms are way too short for my age bracket.  I fell for the Holly Jumpsuit with the nice open scoop neck (while still being modest,) the tailored waist and the 4″ inseam which is long enough for me, but could be a little too short for all of you  over 5’3″.

Holly Jumpsuit by Love You Sew

I initially bought the Holly Jumpsuit for the trouser view to help make a traditional Vietnamese Áo Dài.  I loved the wide leg, high rise, and the clean waistband which was perfect. However, it’s now been a few years and the Áo Dà has yet to be sewn…I know, I know…it will eventually happen!  However, I have made a pair of culottes using some rayon twill seen above.  These are such a great summer make.

Holly Jumpsuit by Love You Sew

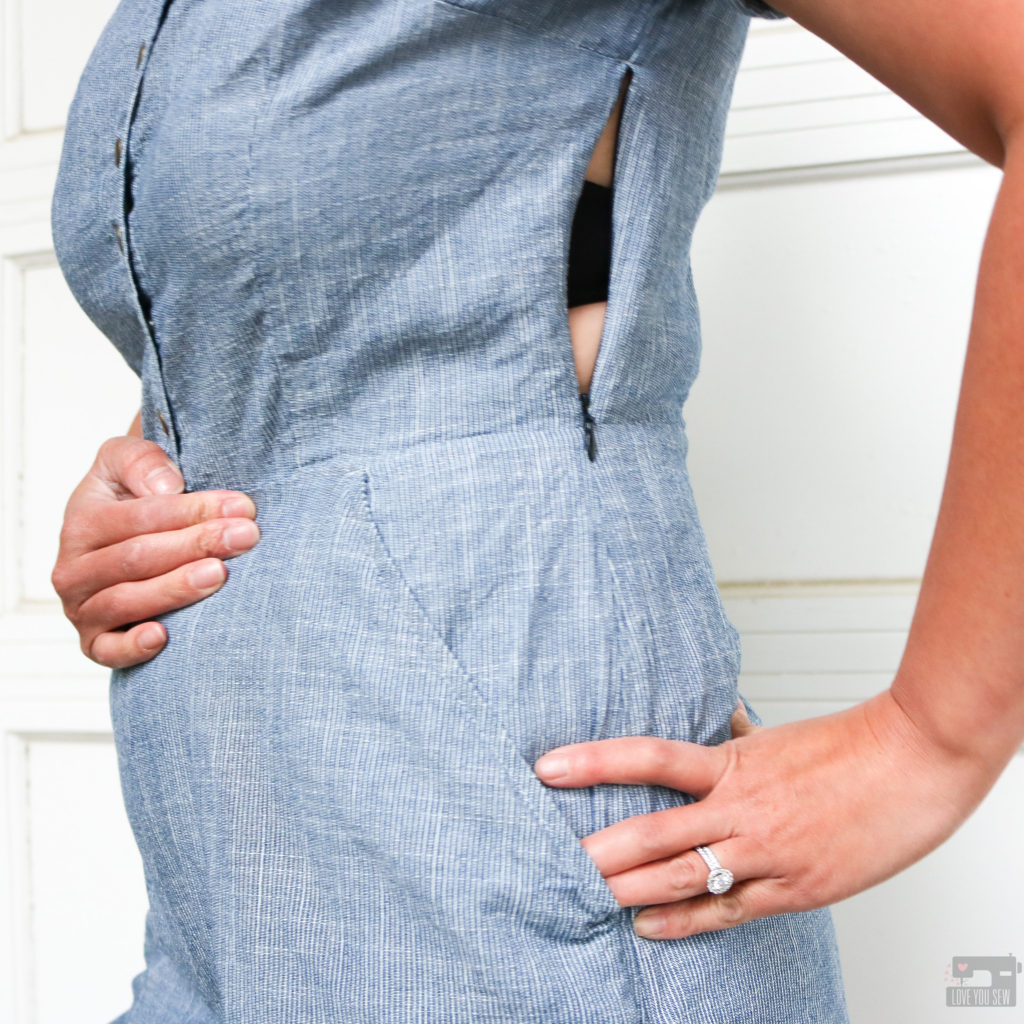
I know what you’re thinking….The big question with all rompers and jumpsuits is always, “How do you pee?”  There is a nice long invisible zipper which extends from the side dart down to the hip.  This allows you to slip the romper on and off in combination with unbuttoning the placket.  I wish I had a blue zipper to match my Holly when I was making this in time for a party, but I went with the only invisible zipper I had on-hand — black.  With the smart placement of the zipper, you can only see the pull when I have my arm up…and it’s still very discreet.

Holly Jumpsuit by Love You Sew

Fabric

When I was looking for fabric, I wanted something light enough to wear during warm weather, but structured enough to hold it’s shape and not wrinkle easily. Since this was my first romper, I also was looking for a simple print that could help camouflage any imperfections.

Holly Jumpsuit by Love You Sew

I was happy to find this great Vintage Chambray Stripes at Imagine Gnats. It’s a classic micro stripe with that railroad-esque feel.  I love the blue and how neutral it is for any occasion.  I can just switch up accessories to give it a different feel.  At 4.5 oz this is still light enough with a soft hand and the 100% cotton content makes it breathable for the summer.

Pattern

Holly Jumpsuit by Love You Sew

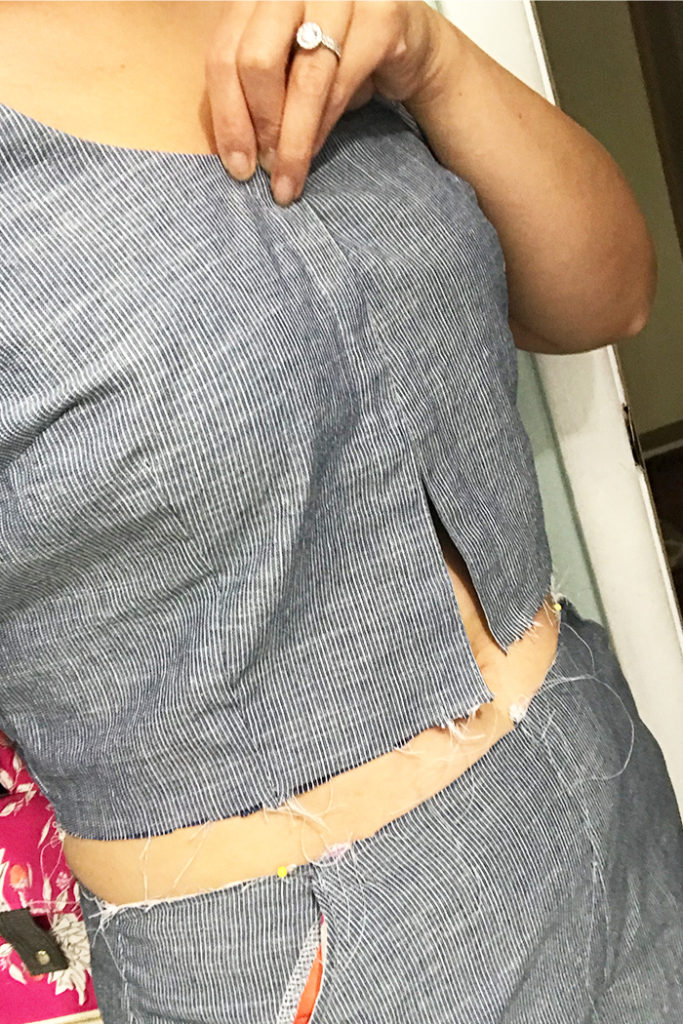
For the romper, I used view A and made a size UK10/US12 for both the bodice and bottoms based on my measurements. Since I already made the culottes, I knew I wouldn’t need any adjustments on the bottoms, but I did forget to take into account that I shortened the rise on them previously.  So, my romper ended up being too short! *Cue head-slap* Fortunately, I had enough fabric (thanks to the extra wide WOF) left to remake the bottoms.  Since there is no fly, it wasn’t too much of a set-back.  I’ll turn the first set with the lower rise into shorts by adding on the waistband found in View C.  Phew!

Holly Jumpsuit by Love You Sew

These are the additional modifications I made to the Holly:

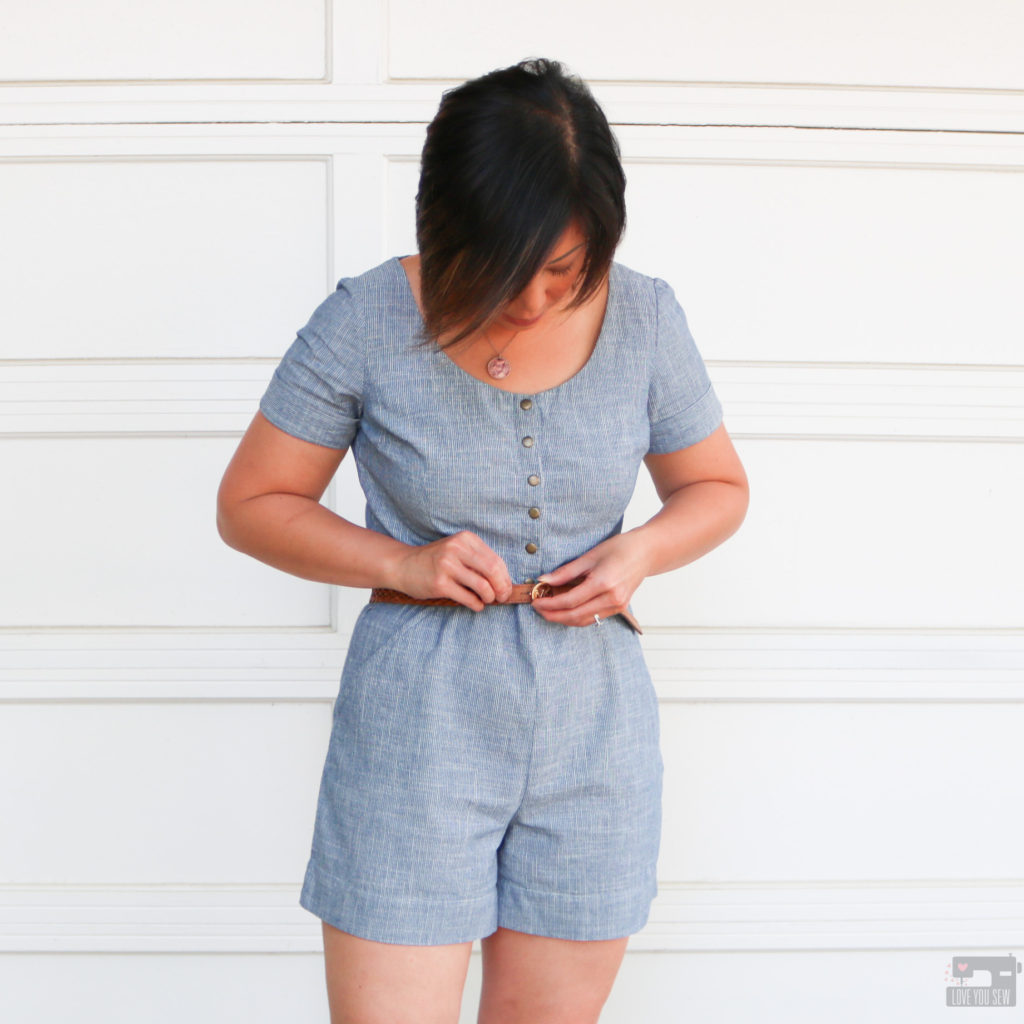
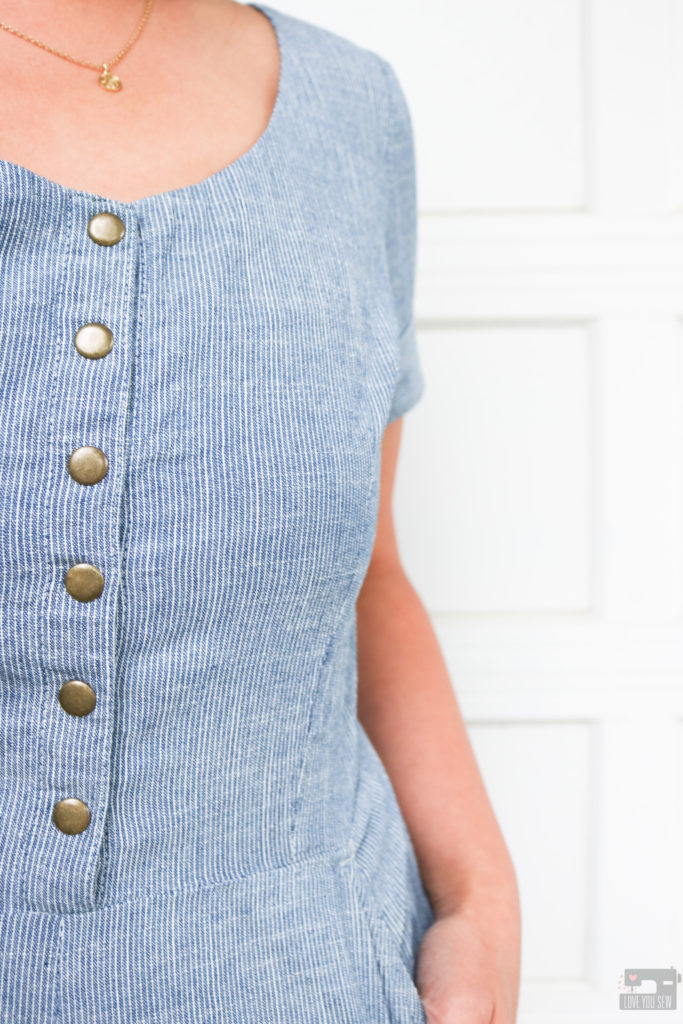
  • Added lightweight woven interfacing in the placket to hold the snaps, but I would add it even if I used buttons for more stability
  • Used metal snaps instead of buttons for faster bathroom breaks 😉
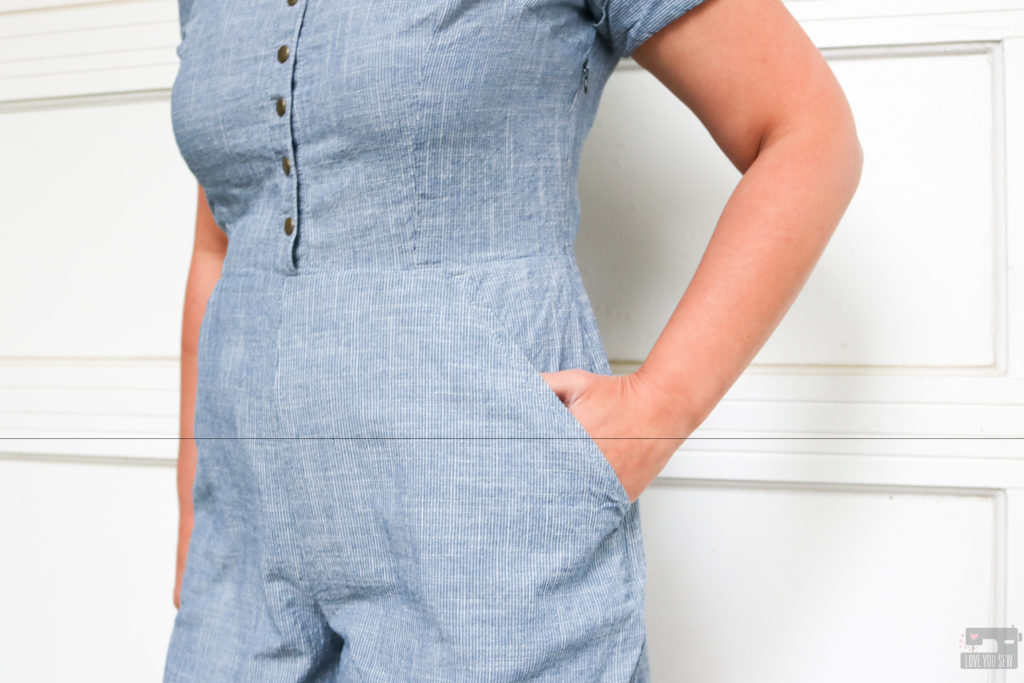
  • Added slash pockets by drafting a pocket and the facing  (the one thing missing with the pattern)
  • Decreased the seam allowance for the sleeve and increased the armscye to match
  • Reduced seam allowance to 3/8″ between the bodice and shorts for more crotch room

Holly Jumpsuit by Love You Sew

When I make this again, I would consider the following modifications:

  • Slight broadback adjustment – There is a little bit of tightness across my shoulder blades.
  • Bicep adjustment for even more ease – After wearing this to an event (with lots of sweating!) I think adding in more arm ease would allow more air flow and an easier time getting the romper off and on.
  • Increase the bodice length by 1/2″ – I’m only 5’3″ but if I raise my arms all the way up, I get some cameltoe, which is surprising. Most patterns are drafted for 5’5″-5’8″ that I’ve seen, and usually I have to shorten the bodice on a pattern.
  • Lower the side darts by ~1/2″ – Everything looked good when I was finished, but after an additional washing, the darts look a little too high.

Holly Jumpsuit by Love You Sew

Final Thoughts:

For my first romper, I am SO pleased with this make. I love the slim fit around the waist and the ample ease around the buttocks and thighs.  This is a great pattern for my fellow pear shapes! But it is certainly still great for other body shapes as well with just simple changes to the darts. This fabric was great for the pattern but I may use a woven with just a little stretch next time and probably won’t need those broadback and bicep adjustments.

Holly Jumpsuit by Love You Sew

Project Summary:

Now that I’m done with my very first romper, I think I’m ready for another.  Do you have any good romper/jumpsuit patterns to recommend?  Let me know in the comments.  I would love to hear your thoughts!


Happy Sewing,

Cristy


This post may contain affiliate links for which I may receive compensation.  This helps keep ads off the blog and helps me to keep this website afloat.  Thank you for your support.

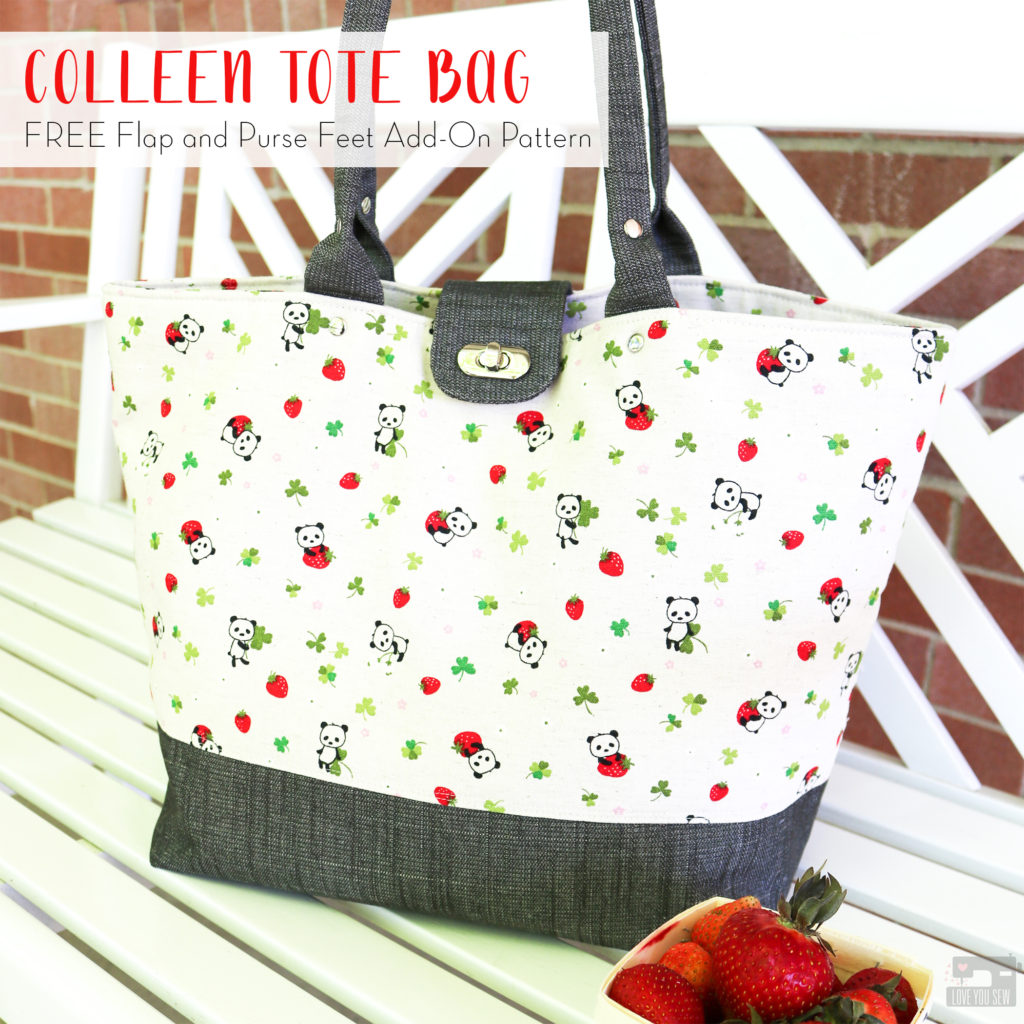
Colleen Tote Bag - Add-On Pattern by Love You Sew

Colleen Tote Bag FREE Flap and Purse Feet Add-On Pattern

Colleen Tote Bag - Add-On Pattern by Love You Sew

I can’t believe a whole year has passed since I released the Colleen Tote Bag sewing pattern!  It’s such a great classic carry-all style for the beginner bag-maker and I’ve been so happy to see all the different versions all over social media with #ColleenToteBag.  With the simple clean lines, this bag comes together quickly and I’ve seen it become quite a popular gift!  Thank you to everyone who has shared their makes with me <3  You can find the Colleen Tote Bag pattern here.
Colleen Tote Bag - Add-On Pattern by Love You Sew

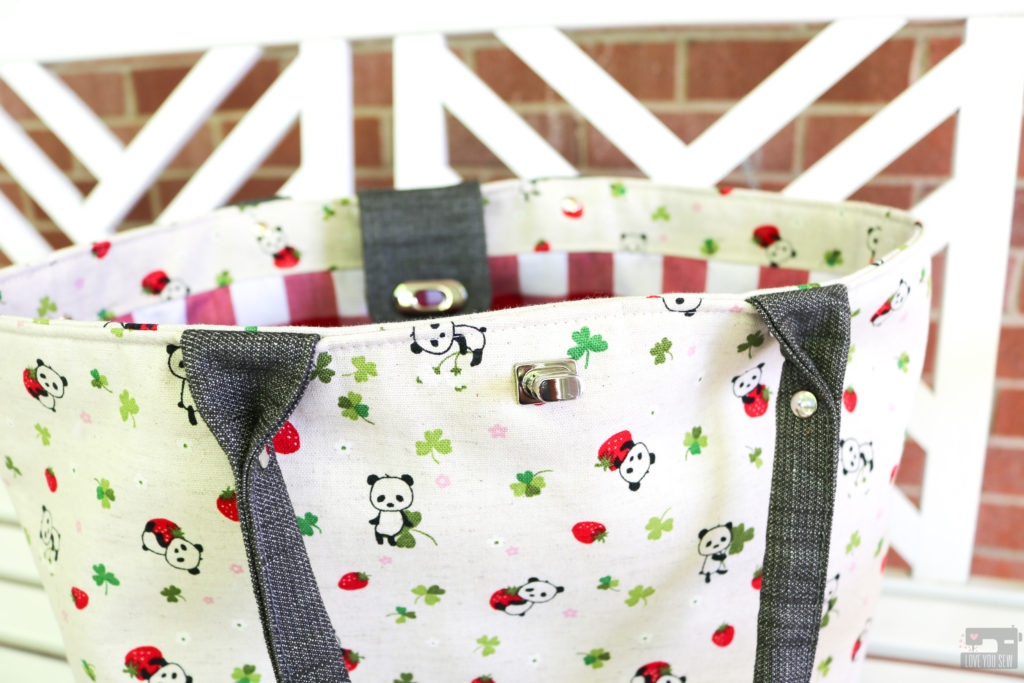
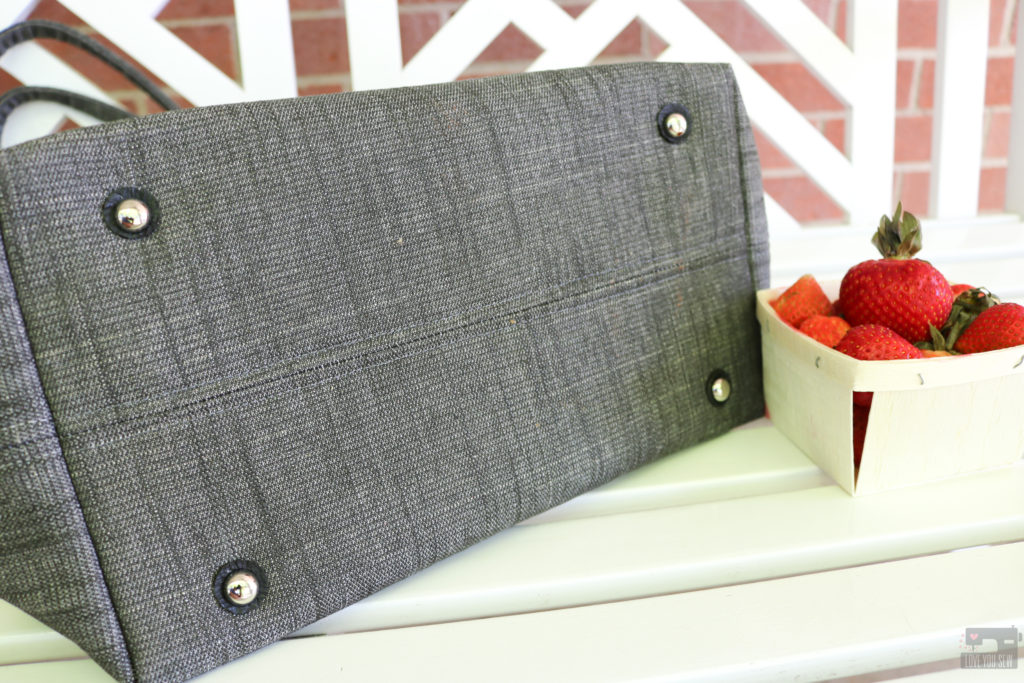
Since you know I love to hack patterns (both with bags and garments) to make uniquely mine,  it should be no surprise that I even hack my own patterns.  You can check out the posh “Shortie” version of the Colleen here with metal ring handles and leather accents.  This time, I added in a purse flap to help keep the contents secure, as well as, adding instructions for purse feet.

Colleen Tote Bag - Add-On Pattern by Love You Sew

I was recently asked to teach a Colleen Tote workshop with the American Sewing Guild – Cape Fear Chapter and they wanted some additional hardware added on to gain some new bag-making techniques.  I thought this flap would be such a great addition to the bag.  On top of learning how to install a turn-lock and purse feet, the guild also learned how to add special details like rivets to take their bags up to the next level.  It was my absolute pleasure to oblige and created the add-on instructions and pattern templates (which you can find at the end of this post.)

Colleen Tote Bag - Add-On Pattern by Love You Sew

While I was making this sample for the class, I rushed a bit and of course, paid the price for it.  (I wanted to bring this tote along to Jeni’s Strawberry Jam which was just the next day.)  Instead of using the purse feet washer to mark my holes, I accidentally grabbed the washer for magnetic snaps and thus, had my holes for the prongs that were too far apart.  Doh!  Luckily, I have a nice little stash of leather and cut out leather circles to use as exterior washers.  I glued them over the wrong holes and then went back to cut the right ones.  Now,  you would never know I made a mistake!  This process has definitely been used a few times to save my projects….maybe it can help some of your’s too.

Colleen Tote Bag - Add-On Pattern by Love You Sew

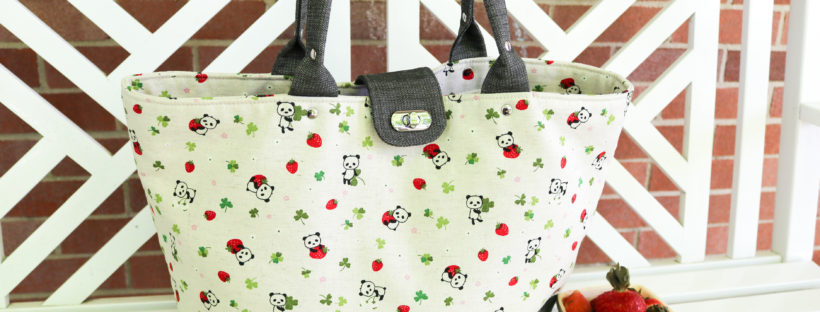
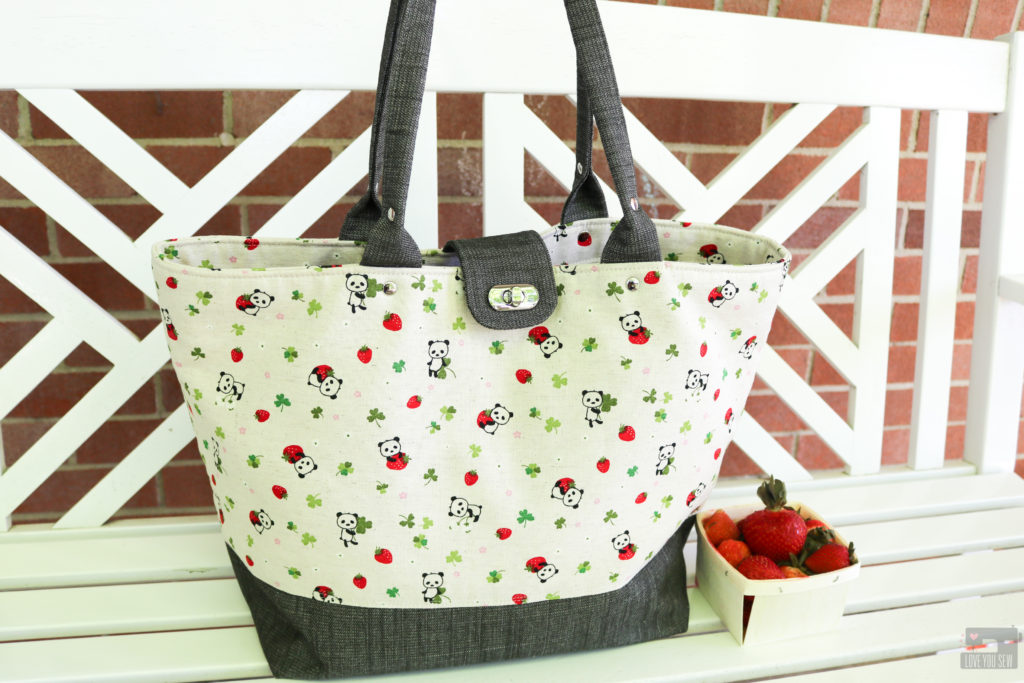
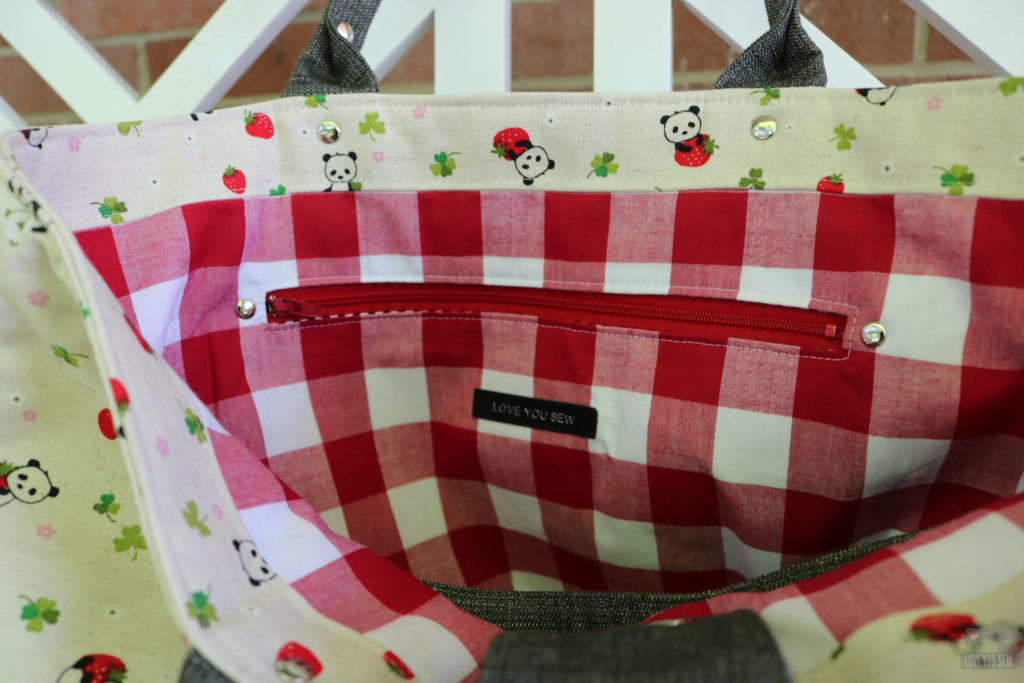
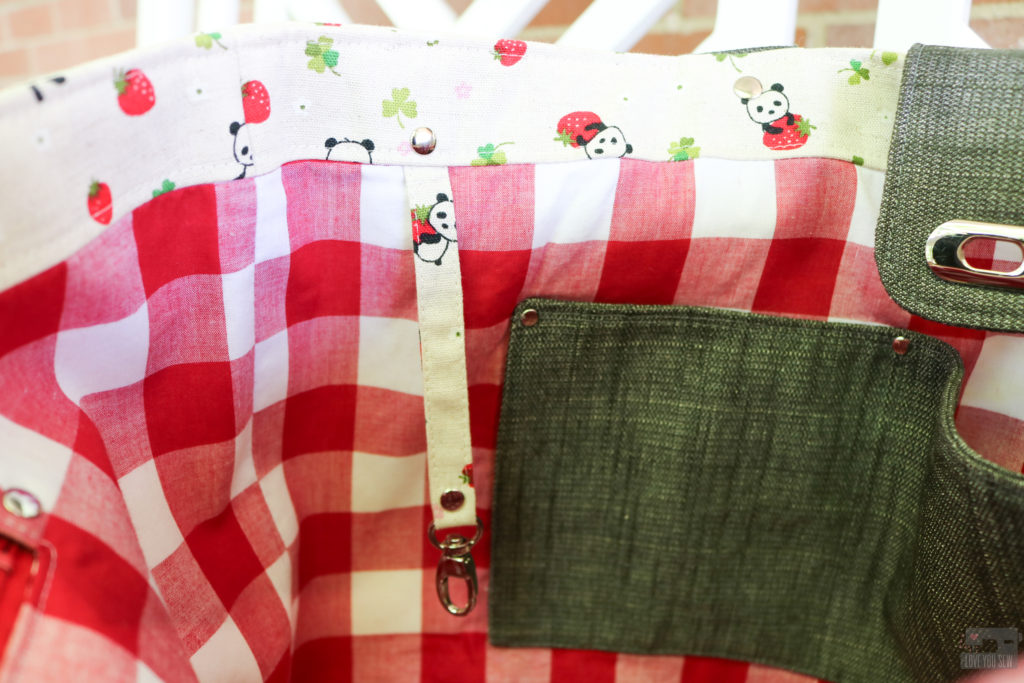
When I was in Austin, TX last year, I grabbed this Japanese canvas from the (now closed) Cloth Pocket.  It’s just the cutest fabric and I’m glad I saved it for this Colleen Tote project.  The pandas are just too cute! The Colleen is definitely a great bag to show off a print, both for small and large scale designs.  For the interior, I used a lightweight shirting from my stash which gives this bag picnic vibes.  The accents are made of Art Gallery Fabrics Textured Denim (aff link) which is nice and heavy — perfect for bag-making.

Colleen Tote Bag - Add-On Pattern by Love You Sew

||  Click here for >> Colleen Tote Add-On Turn Lock and Feet by Love You Sew  ||


Project Summary:

I hope you enjoy the FREE add-ons with your Colleen Tote Bag!


Happy Sewing!

Cristy


Please note this post may contain affiliate links for which I may receive a small compensation if you would make a purchase.  This helps keep my website live and ad-free.  Thank you for your support.


Raspberry Dress by Love You Sew

Raspberry Dress Tester Review

Raspberry Dress by Love You Sew
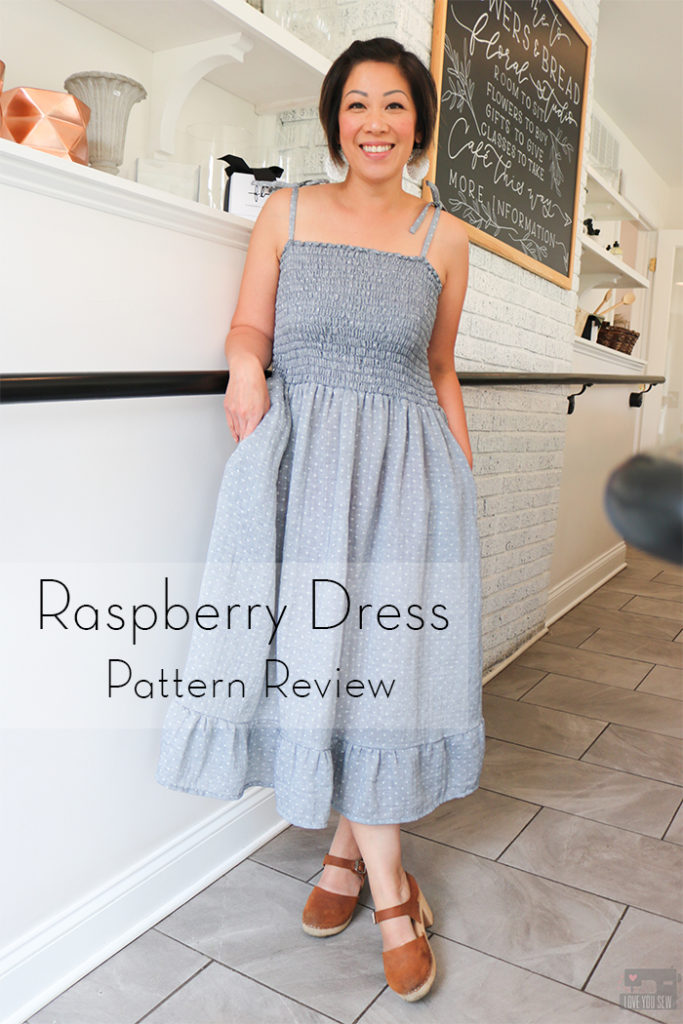
Last month (when I had time and the kids were still in school) I had the opportunity to make one of CocoWawa’s patterns, the Raspberry Dress!  I had never made one of Ana’s patterns and just discovered her IG feed and designs earlier this year.  So, I was very excited when she asked me to try one out…especially to learn this (new to me) shirring technique!

The Raspberry Dress also comes in Jumpsuit and Playsuit views all sharing the same shirred bodice.  There are also three different strap options along with pockets (!!!) to mix and match with the bottoms.  One of the nicest options is that the pattern is available in BOTH English and Spanish!  More of our global sewing community can enjoy this make!!!  You can check out all the different versions and other tester inspiration here on the CocoWawa blog.

Fabric:

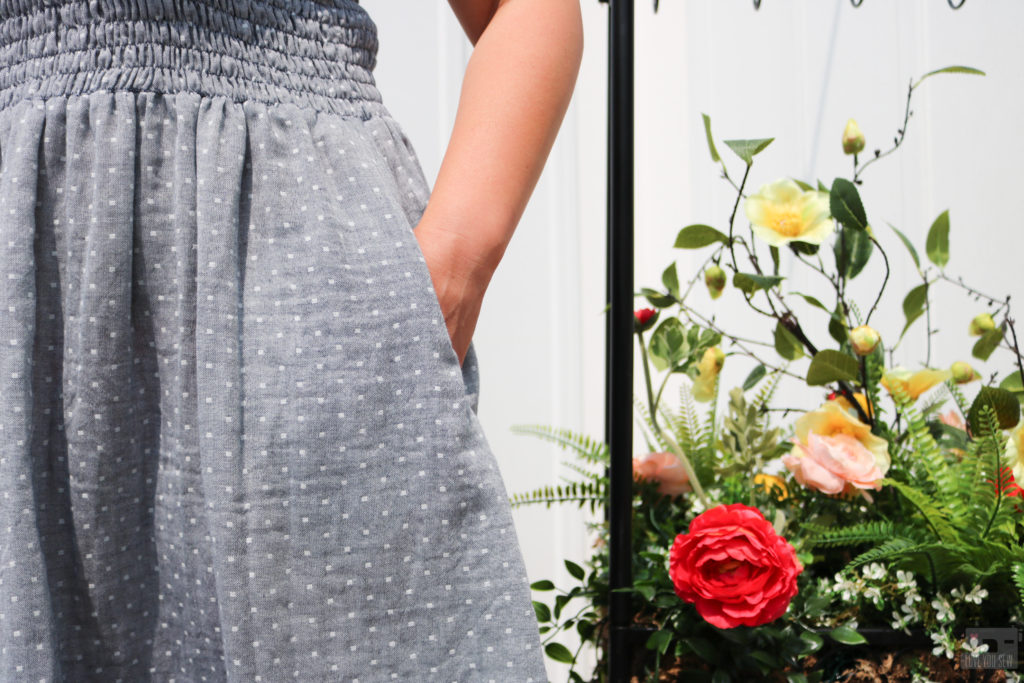
I purchased this Robert Kaufman Chambray double-gauze (affiliate link) years ago (maybe four or five?) for a specific dress, but after hearing so many bad reviews from my friends, I decided to never make it.  So, this fabric has sat on my shelves until I could find the right project to use up all three yards of it…and here it is!

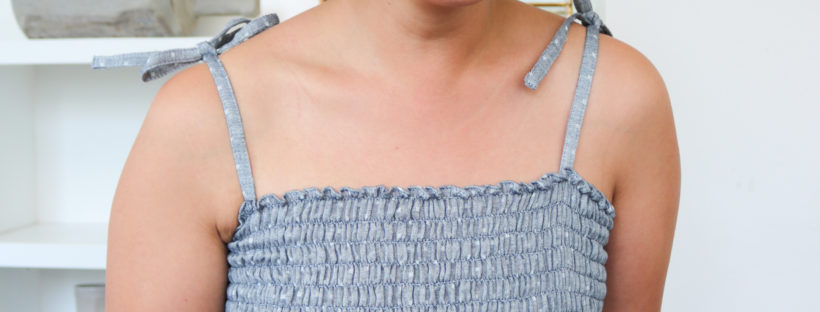
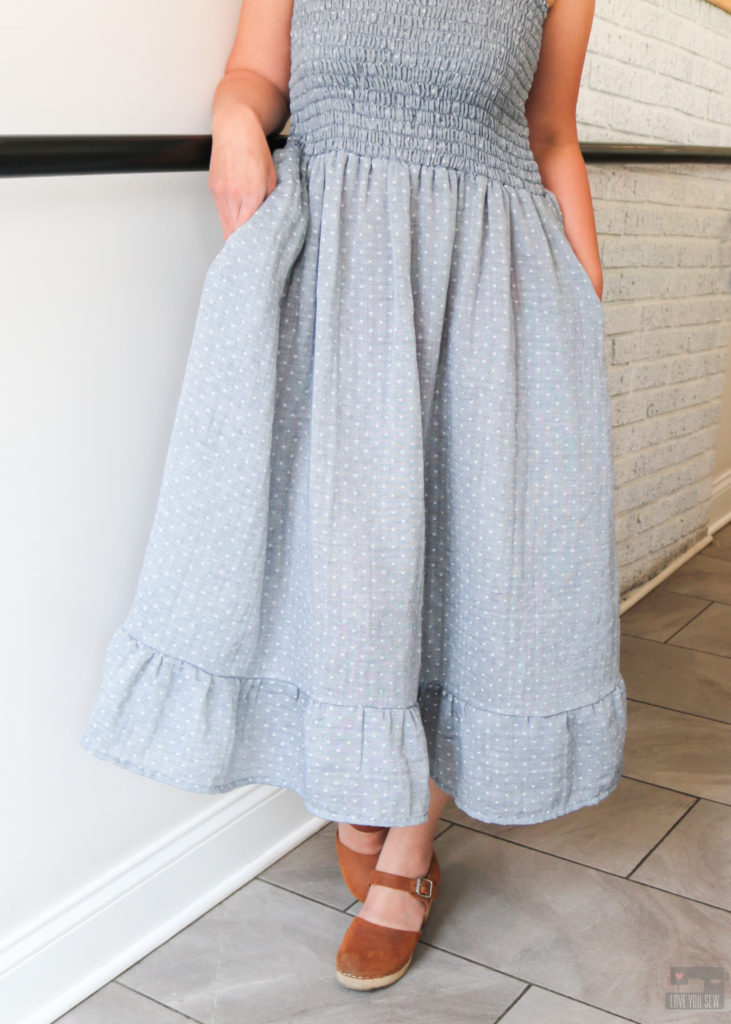
Double-gauze is exactly what its name tells you.  This fabric is made of two separate layers of cotton gauze, known for it’s open weave making it very light and airy.  Double gauze is created when the two layers are joined with little stitches at regular intervals throughout the fabric.  Usually, the conjoining stitches are undetectable from the right side, but in my case,  the stitches created the gorgeous dobby texture.  Double gauze is more opaque with the added layer, yet still has the breathability — perfect for hot weather.  That’s why this fabric was THE perfect choice for the summery Raspberry silhouette.
Shirring:

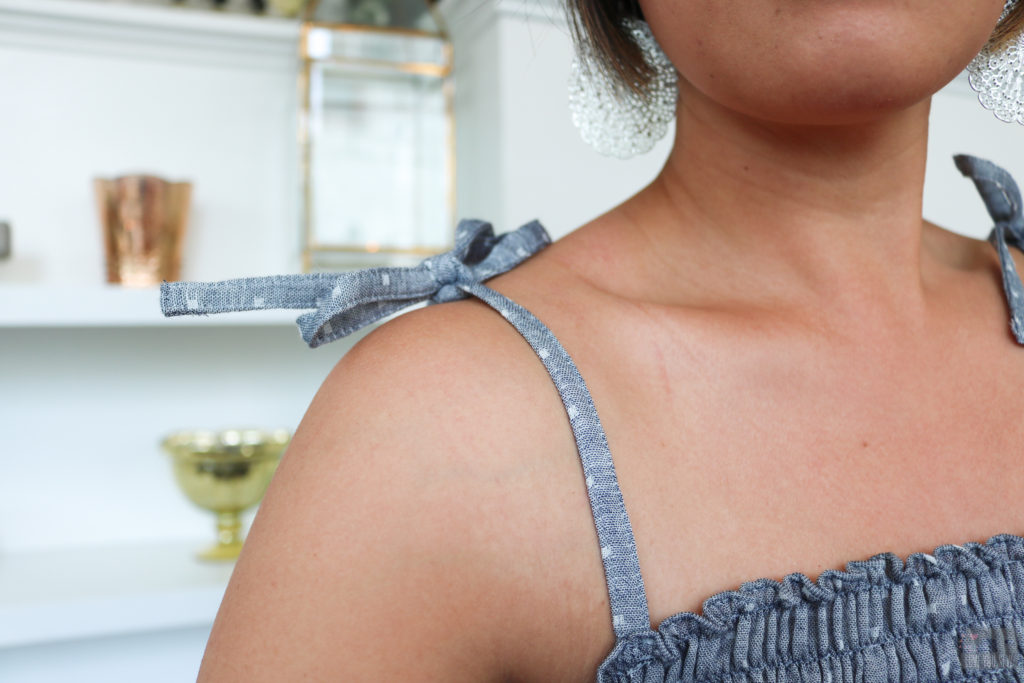
The main feature of this pattern is the shirred bodice.  Essentially, you are sewing in elastic thread to gather woven (non-stretch) fabric to then make it stretchy.  The bodice starts out at twice the width you see and you sew row after row, while gathering the fabric to get it smaller.  I’m so happy Ana provided the actual machine settings for the shirring.  I used a small 70 needle for the delicate double gauze and hand-wound my elastic bobbin thread as instructed.  With the lightweight fabric, the shirring worked on my first try (true shocker!)  I would imagine that heavier fabric would not pull back as much as this double-gauze.
With elastic thread, you can’t back-stitch, which gets a bit tricky. I left long thread tails at the start of each row to tie off, but ended up cutting them off when I overlocked the side seams. To make sure the elastic thread wouldn’t detach with wear, I sewed the side seams twice and shortened my stitch length to about 1.8-2.0mm on the second pass.

Shirring takes time…my tip would be to be patient and take breaks between every two or three rows because my hands had to fully stretch out the fabric to make sure it ran through the machine straight and evenly.  They would cramp up otherwise, holding all of the fabric taut and steady.

Dress Version:

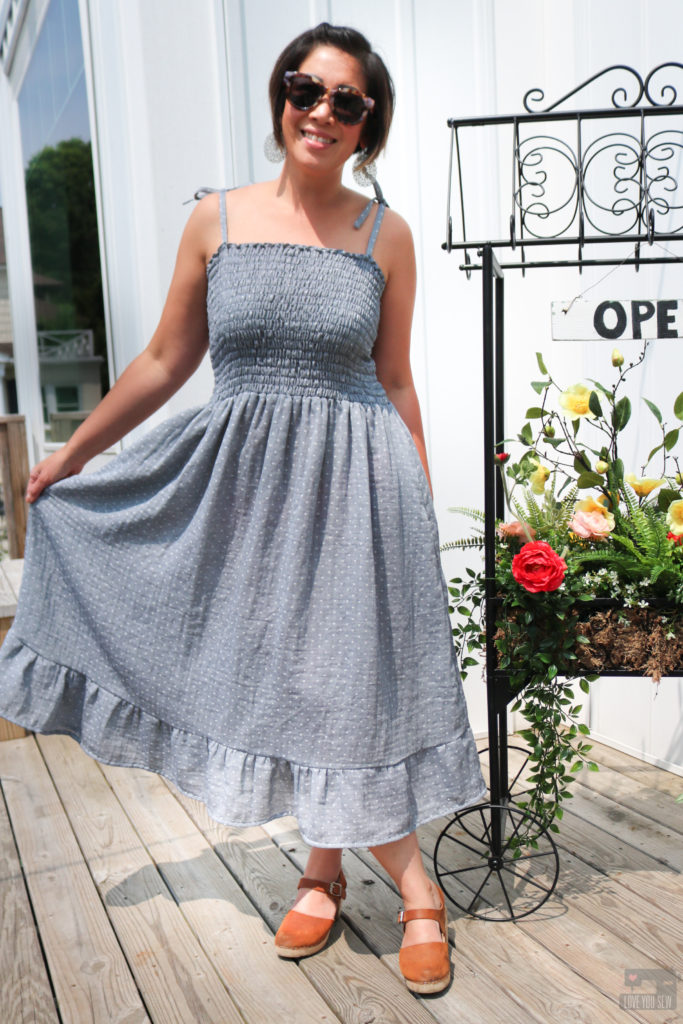
Out of all of the different views of the Raspberry, I knew I would wear the dress the most (I’m still warming up to the jumpsuit game!)  I’ve been looking for more midi to maxi length dresses for this summer and the length worked for my 5’3″ frame.  I chose the simple thin straps to tie off in bows.  With the added ruffle, a simple strap would balance it all out.

Modifications:

  • Sewed a narrow hem at the neckline since I did not want a wide ruffle at the top. I compensated for this and added an extra row of shirring to keep the neckline closer to my body
  • Shortened the bodice by two inches to keep the shirring above my belly button.  (I’m just particular and prefer to not have the fabric rub on my pooch. Lol.)
  • Omitted the skirt elastic entirely since it wasn’t laying flat with my light fabric.  And since I WAS working with light fabric, the shirring could hold the weight of the skirt and not be dragged down.
  • Shortened the skirt by 6″ —  2″ came from the top (since I screwed up while overlocking and accidentally cut into my fabric…whomp…whomp…  Fortunately, I’m petite and didn’t throw off the placement of the in-seam pocket. Phew!) The remaining 4″ came off the bottom.
  • Added a ruffle all around the skirt using the remaining fabric I had – (2) 56″ x 6″ lengths of fabric gathered and sewn to the bottom with a 1/2″ closed hem.

Project Details:

I hope you enjoyed this make and can use some of the tips as I worked through the tester version of the Raspberry Dress!  Please let me know if this helped you in the comments below!


Happy Summer Sewing!

Cristy


As a tester, the pattern was provided to me for feedback.  This blog post was not required as part of the testing process.  All thoughts and opinions are my own (as always.)